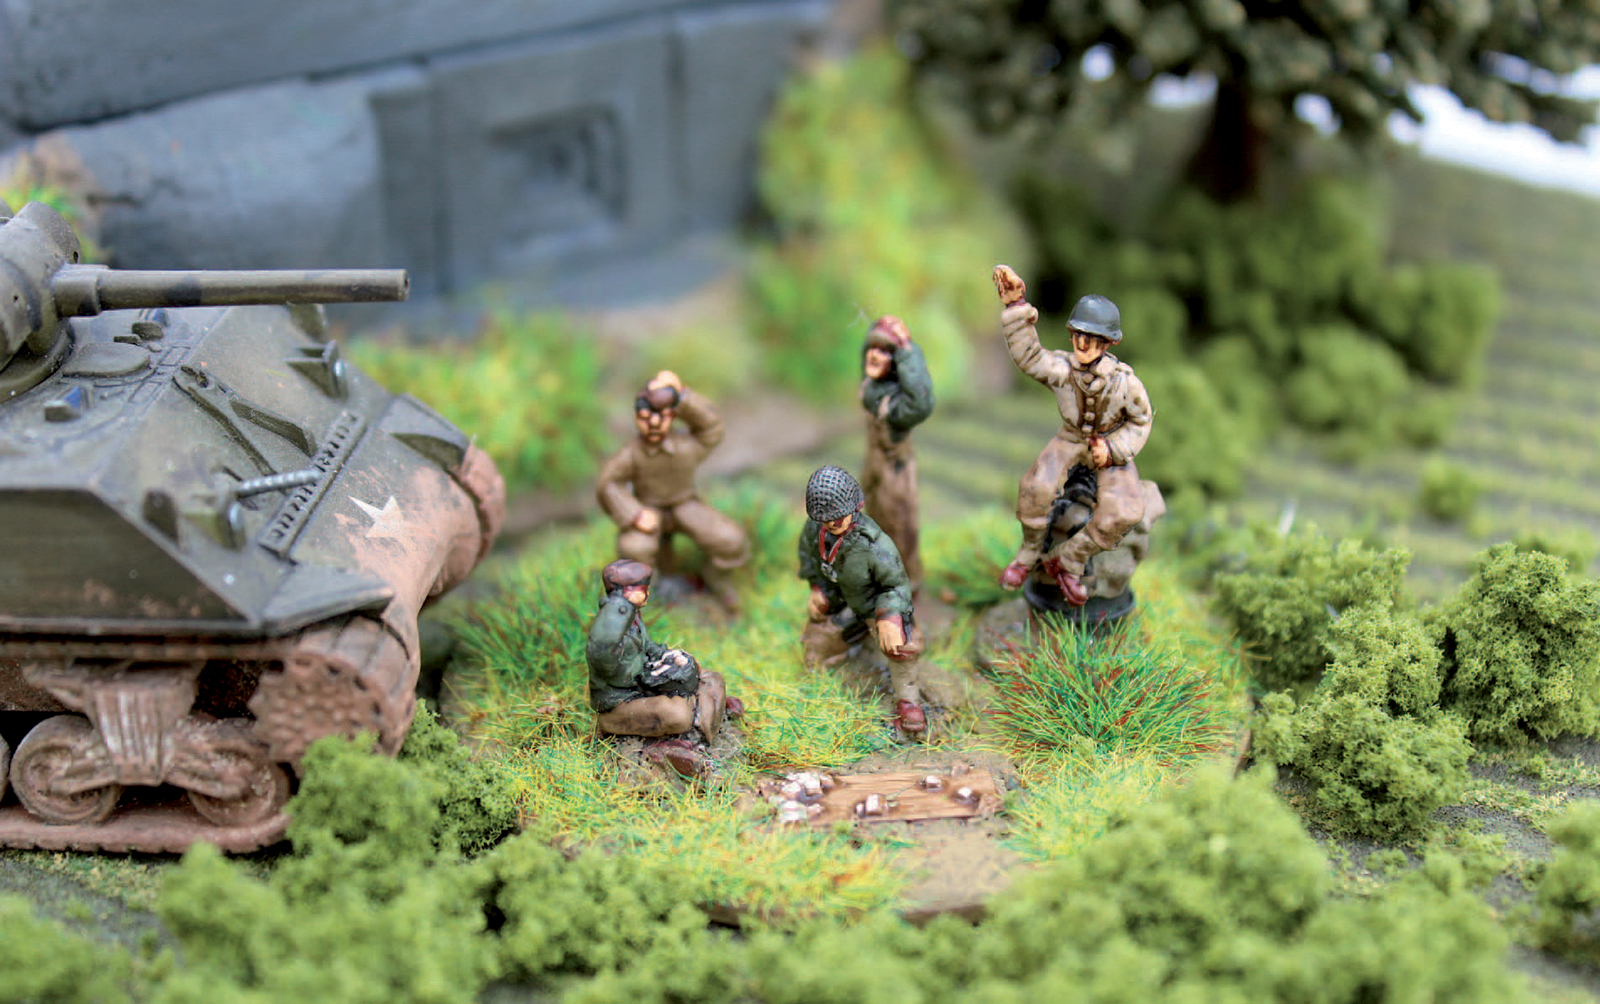
‘To the victor the spoils’: GIs relaxing, Germany, May 1945.
| 7 | The End of the War in Europe, March–May 1945 |
THIS CHAPTER WILL COVER some of the vehicles used in the months leading up to VE Day on 8 May 1945. The uniforms worn by the GIs were the same as those worn in the Ardennes (see Chapter 7). Although only a few M26 Pershing Heavy Tanks were used in combat, the important role they played in the assault on the Ludendorff railway bridge at Remagen in March 1945, when ten Pershings attached to the 2nd Armored Division help secure the last intact bridge over the River Rhine leading into Germany, justifies their inclusion. They were also involved in the battle for Cologne that same month.
Even though only a few months remained until the eventual surrender, the German armies still fought with their usual skill and tenacity in defence of their homeland. The Allied armies faced some of their toughest battles during those final months and experienced some of the highest casualty rates since landing in Normandy in June 1944.
During the last months of WWII the US Army started to receive new vehicles, such as the M26 Pershing. This had been designed in 1942 but production did not start until November 1944, when it was finally decided that there was a real need for a heavier tank armed with an 80mm gun. Previously it had been thought that up-gunning the M4 Sherman with a 76mm gun would be adequate, but when facing the heavier Germans tanks, such as the Tiger and Panther, it was clear that the Sherman was no match for them. It has to be remembered that the M4 Sherman was designed to combat German tanks such as the Panzer III, which was the main German battle tank up to 1943. However, by 1944 the Panzer IV was being used in very large numbers and, while the Sherman could cope with it, its gun was no match for the 7.5cm KWK 40 gun with which the Panzer IV was equipped from 1942. The M4 was up-gunned to the 76mm, but this gun was still no match for the Panther or Tiger. Production of the M26 Pershing finally started in November 1944 and ten were built that month at the Fisher Tank Arsenal. This was increased to thirty in December, seventy in January and 132 in February 1945. This rate of production continued on throughout 1945 and in total more than 2,000 were produced.

‘To the victor the spoils’: GIs relaxing, Germany, May 1945.
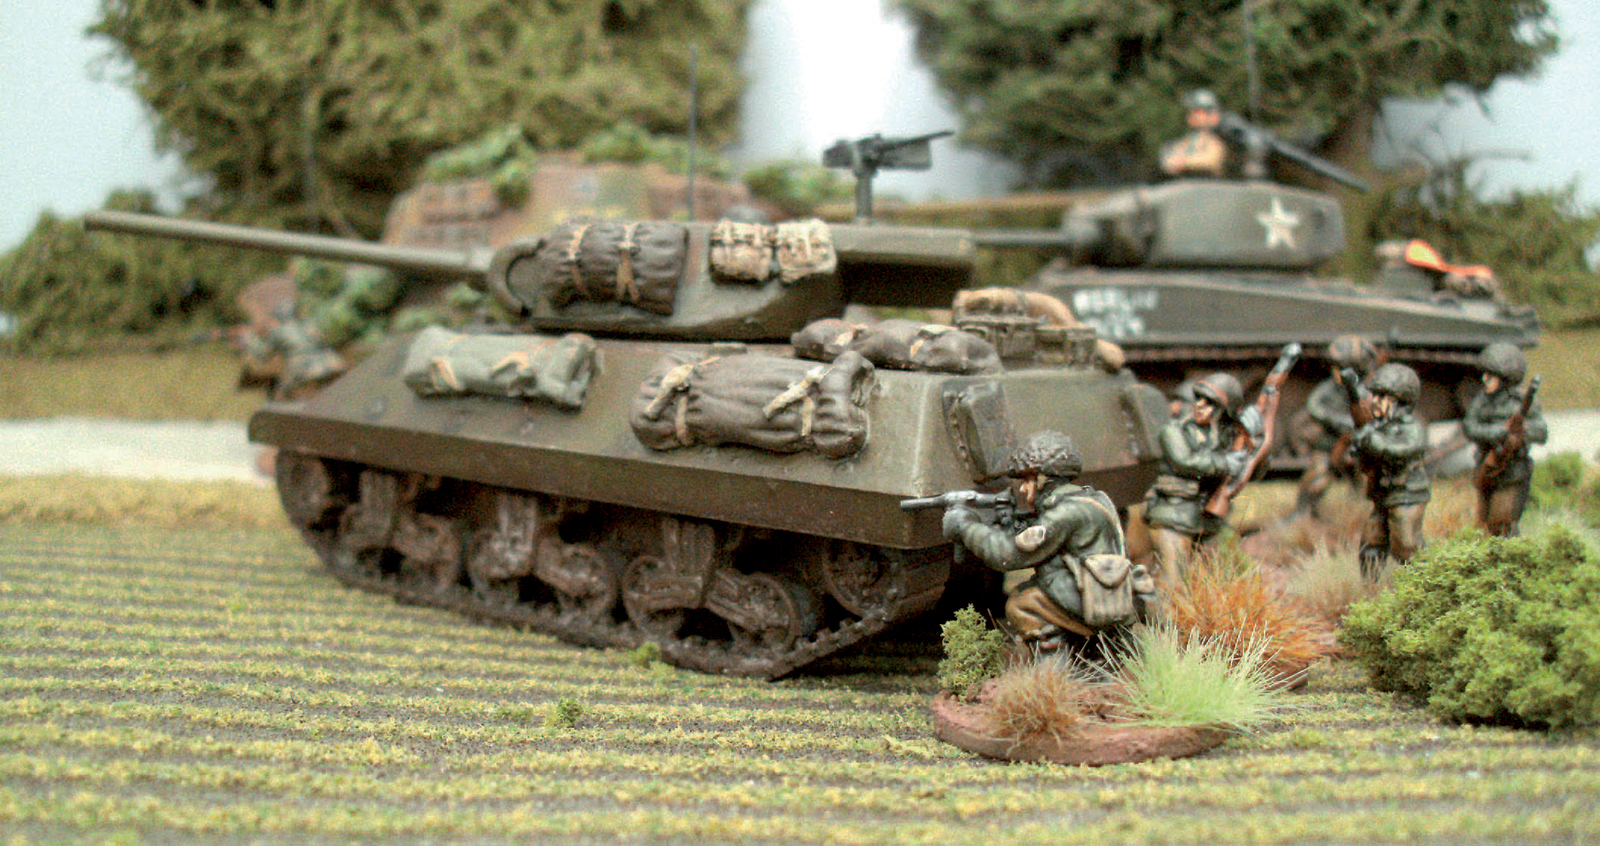
M36 Jackson Tank Destroyer, Germany, spring 1945.
On 22 December 1944 a shipment of twenty vehicles, then designated T26E3, was ordered to be deployed to Europe. These arrived on 20 January 1945 and were the only T26s to see combat. It may seem strange to choose to model a tank that was used in such limited numbers, but there are two good reasons for this: first, because the T26 had been anticipated and wanted by US tank crews for such a long time; and second, the T26 saw action at Remagen and Cologne in two of the best-known skirmishes of the closing months of the war in Europe. It was at Cologne that a T26 belonging to the 3rd Armored Division engaged and destroyed a Panther during one of the most famous tank duels of the war.
The M36 Jackson was the last of the American Tank Destroyers developed during WWII. It was designed in 1943, first saw action in October 1944 and was still in use with the US Army during the Korean War. Some re-engined examples were still serving in the 1990s during the Yugoslavian civil war. The M36 mounted a 90mm M3 gun that was designed to take on and destroy the heavier German tanks such as the Tiger and Panther. American Tank Destroyer doctrine was to mount a large-calibre anti-tank gun on a lightly armoured vehicle, for example the M18, so that it could engage enemy tanks but move out of trouble using its advantage of speed. This was believed to negate the need for heavier tanks and was the main reason the M26 did not start production until November 1944. Nevertheless, the US military produced some fine vehicles, including the M36 Jackson, that performed their role well and accounted for large numbers of German tanks. These last few months of the war in Europe saw the swansong of the American tank destroyer and the advent of the heavy tank, which has continued to evolve into the modern American main battle tanks such as the M1 Abrams.
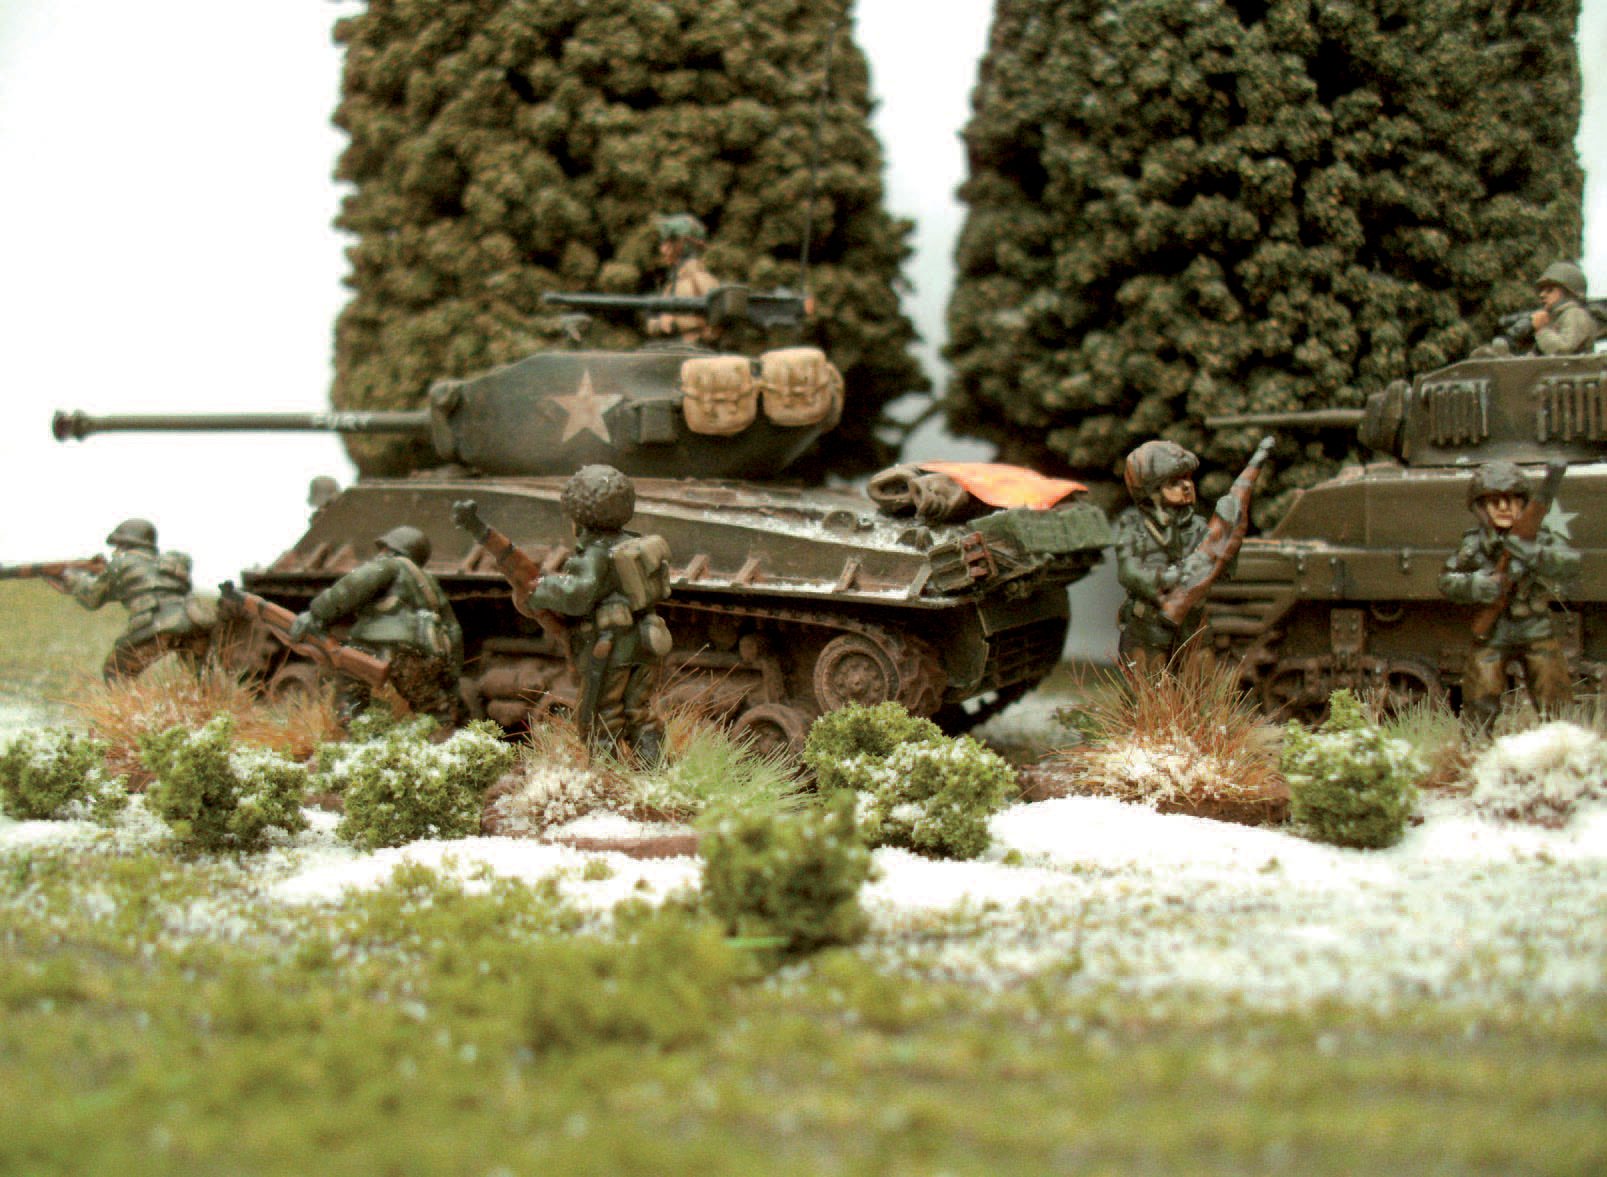
An M4A3E8 Sherman and M5 Stuart support the infantry as they move up during the advance into Germany, early 1945.
The 1:72 scale model by the Chinese firm Trumpeter is a superb kit that requires little work. It includes decals for the T26 mentioned earlier, belonging to the 3rd Armored Division and commanded by Sergeant Robert Early, which took part in a famous duel against a Panther at Cologne in March 1945. The only additional part needed is a new brass barrel obtained from the Polish company RB Model. The track units supplied with this kit are very good but can cause problems for the novice. They are ‘link and length’ tracks and need to be assembled and attached to the model. With larger-scale models these are assembled then placed on the running gear, but with this model it is better to assemble them directly onto the running gear as it makes for a stronger completed item.
Step 1. First take a look at the parts and plans, and put aside those that are not needed immediately. Select the required track and running gear parts and assemble following the instructions supplied with the kit.
When building the running gear it is a good idea to first check how many wheels and other components are needed. As the construction of each set is completed, place the completed sections away from the work area but separately from each other. When the running gear is assembled, make sure all the wheels are straight and that none is crooked or bent. Leave the whole assembly to one side for twenty-four hours to allow the glue to fully cure. There are many small parts in this construction, so it is best to have patience and wait until the glue cures properly and the assembly is solid enough to work with.
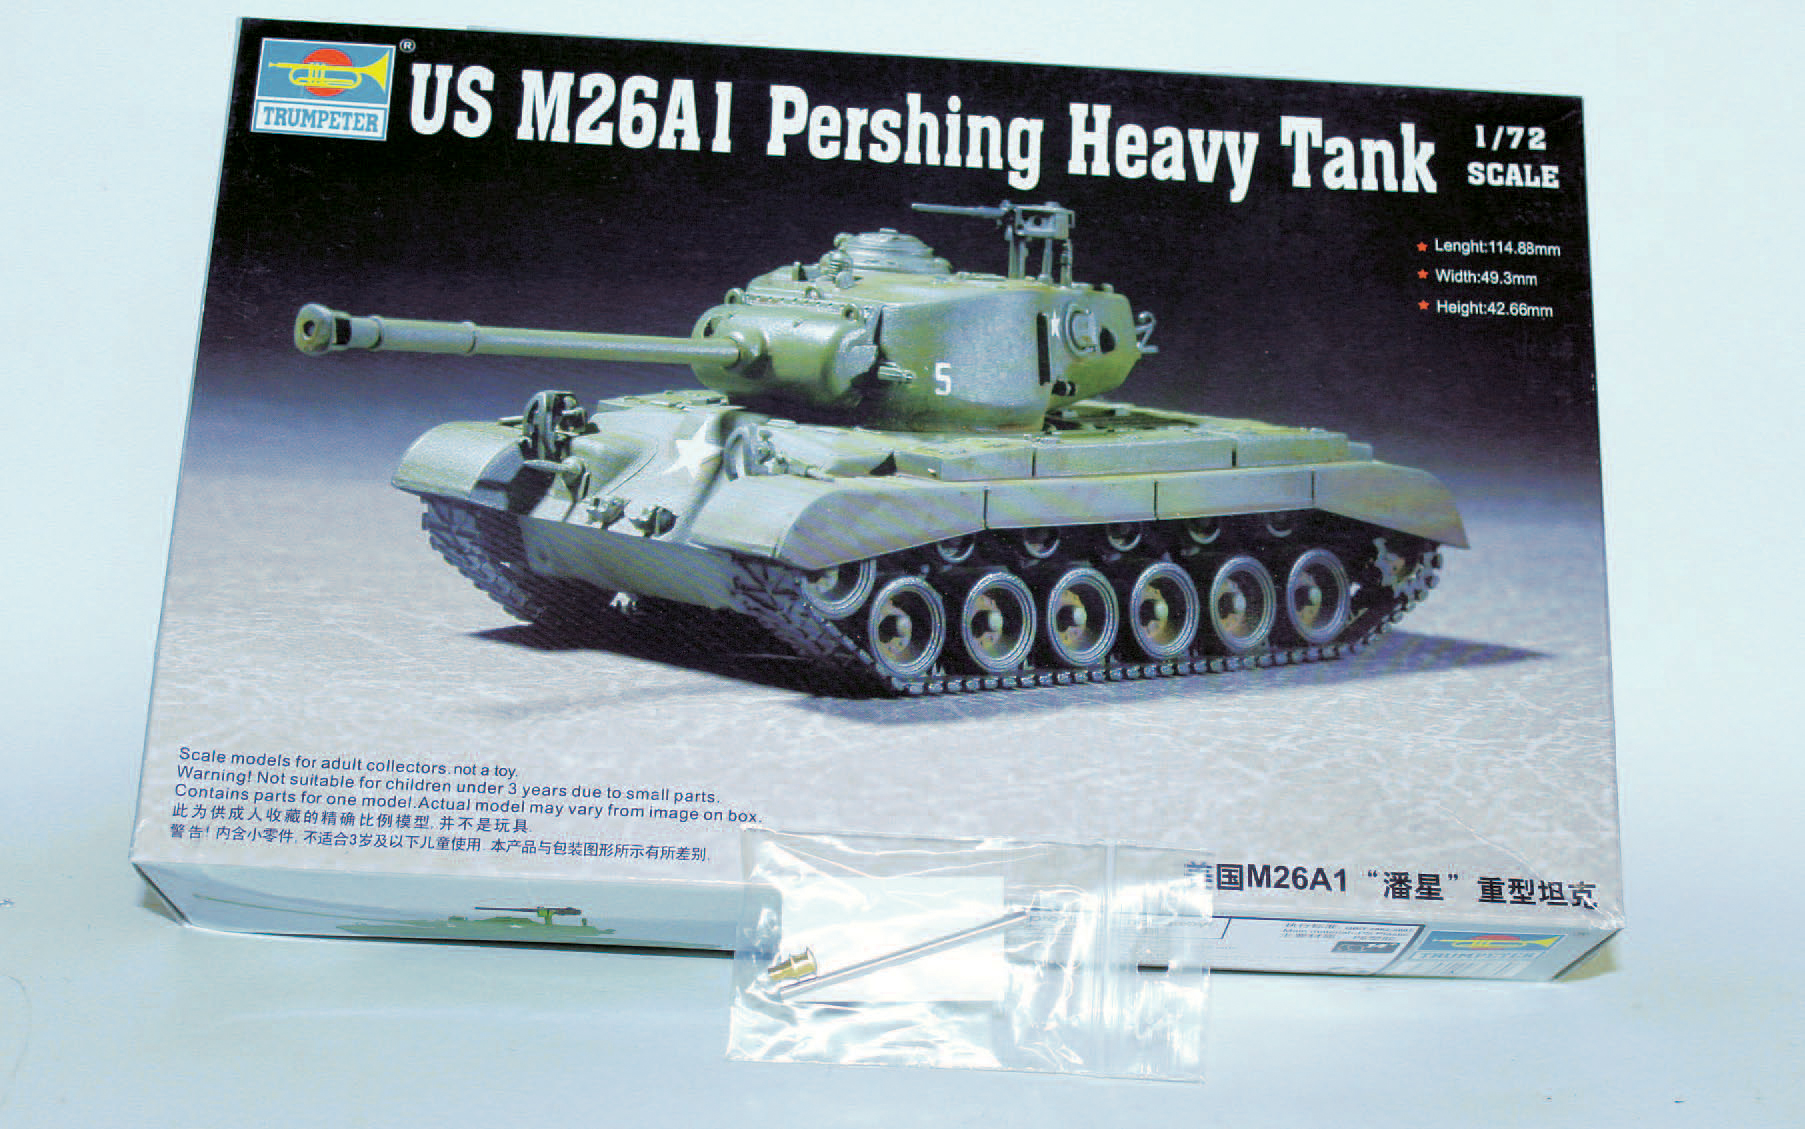
The Trumpeter kit of a T26 Pershing; the new metal barrel is by RB Model.
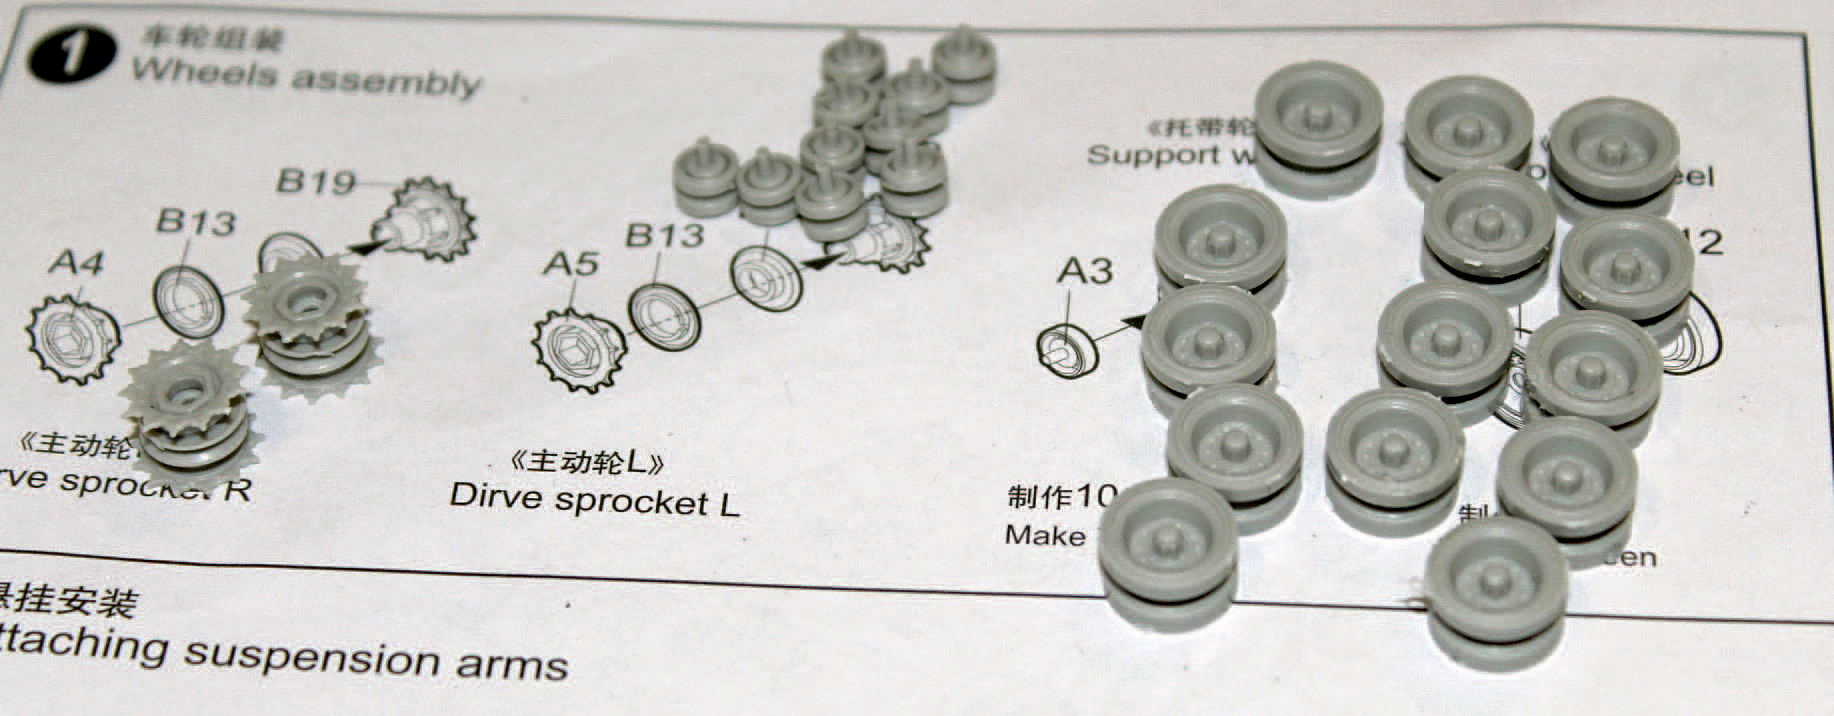
Assembling the required wheels and running gear this way makes sure the numbers are correct and nothing has been misplaced.
Link and length tracks take longer to fit than either vinyl or rubber tracks, but the finished result always looks more realistic.
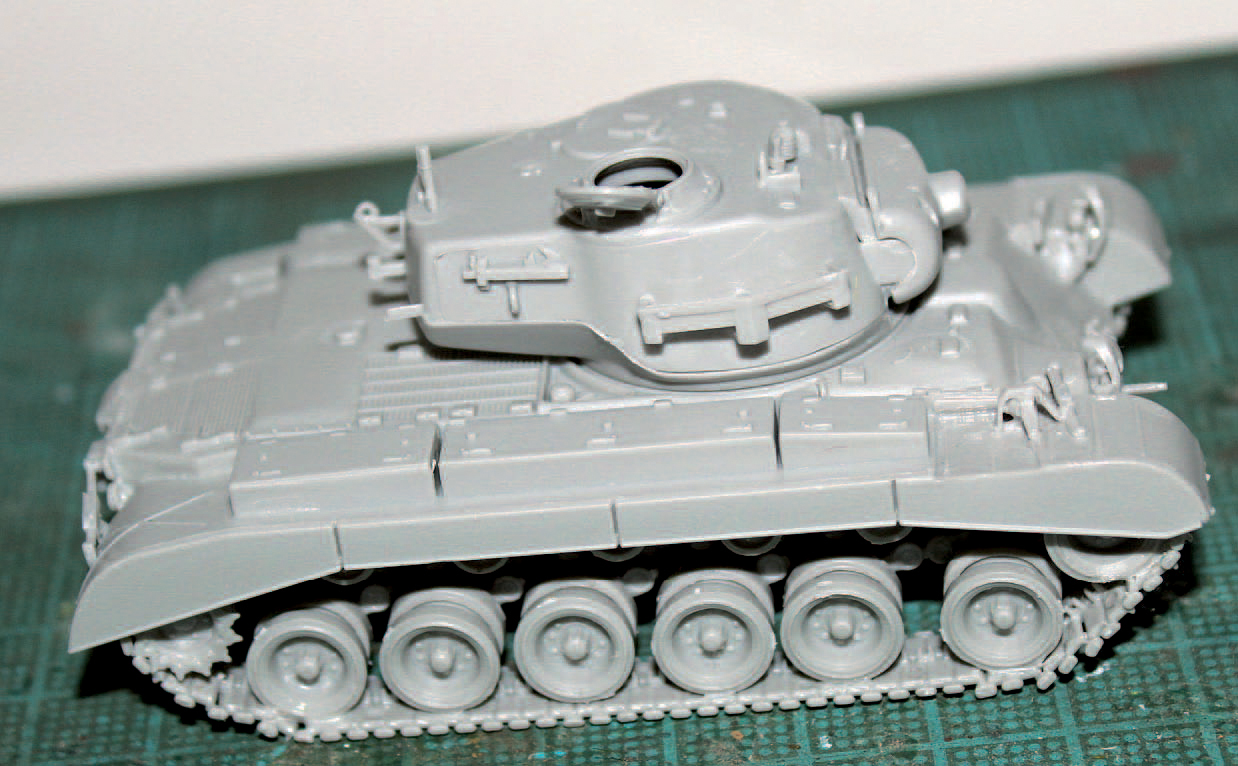
The constructed kit, minus the main gun.
Step 2. The next step is to assemble the tracks. This will take time but the result looks realistic. Liquid cement is the best glue for this job. Start on the drive sprockets by assembling the tracks there, and then add the long pieces of track that run along the idler wheels at the top. Pay careful attention to the number and type of track pieces that are required to go around each drive sprocket. This is very important as this stage will dictate how everything else looks when the model is finished. If an error is made here, the whole track assembly will look uneven. Once the longer upper track piece is correctly in place, add the track pieces to the rear idler wheel, working around this wheel until all the required pieces are used.
Now fit the long lower piece of track: if this fails to meet properly, as it does with the track added to the drive sprocket, check the work as some adjustment may be required, or simply add another piece of track, which should bridge the gap. If the gap is too wide, again recheck the work and make sure that all the parts have been correctly positioned. This process is repeated until both sides are complete. The track should look realistic and level on both the idler wheel and drive sprocket. Then brush some liquid cement over the track, taking care not to use too much. This will ensure there are no dry joints and will secure the pieces in place. Then leave to dry for a few hours.
Step 3. Now build the rest of the kit following the instructions provided. Do not fit the heavy machine gun mounted on the turret roof, as the Pershing at Cologne did not have it and this model will be true to that vehicle. Before fitting the main gun, check for any gaps that may be present between the joins of the two halves of the turret. Any minor gaps can be quickly filled with modelling putty. Because the main gun has not been fitted, there will be more room for filling and sanding. When that is done, fit the barrel. The antennas can then be made from thin wire. Next add stowage, making sure that the turret can still rotate 360 degrees, as stowage should not prevent this.
Step 4. Prime the model and leave to dry for a few hours before airbrushing. Then start by thinning the paint so it can be used in the airbrush. The paint is ‘Olive Drab’ manufactured by the Japanese firm Mr Hobby. This should be thinned with acrylic thinners at a ratio of 50:50. If the paint is too thick, it will not flow through the airbrush freely and the results will be poor. Mix the thinner and paint together thoroughly: place in a jam jar with a lid and shake for two minutes. Then pour the thinned paint into the side cup of the airbrush, taking care not to overfill the cup, filling it halfway so it can be topped up as needed.
When starting to paint the model, do not try to cover the whole model in one coat. It is best to apply thin coats so that they dry quickly and can be recoated. It may take two or three coats to get a good finish. Start by painting the recessed areas, then the bottom, sides and top. The turret is always painted separately. Taking plenty of time at this stage will repay the effort. Once a satisfactory result has been achieved, leave it aside to dry for twentyfour hours. Even though this is acrylic paint, it still needs time to dry properly.
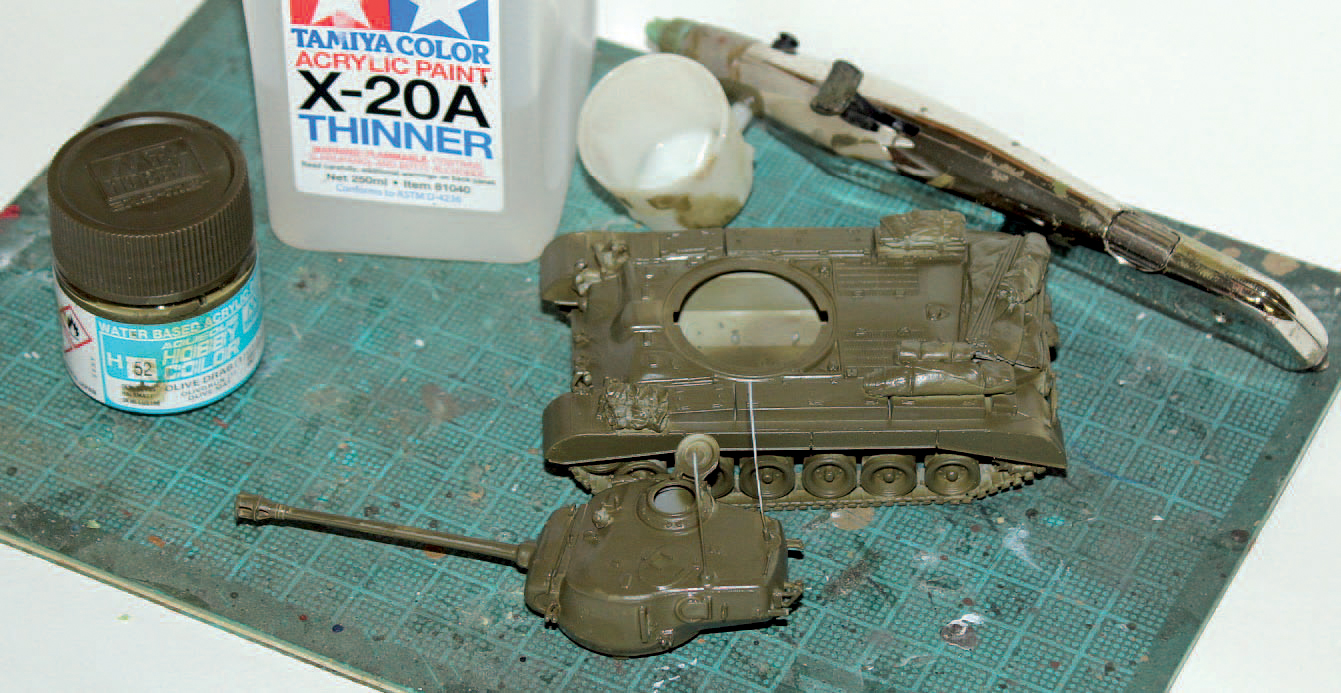
The basic coat has now been applied to the T26 using an airbrush.
Step 5. Now add a few highlights by lightening the original colour with just a little white, and then adding thinner at a ratio of 60 parts thinner to 40 parts paint. Mix by shaking in a jar. Then add this to the cup of the airbrush. Test the paint flow and adjust until it gives a fine line. In the case of the Aztek airbrush, just use the red nozzle. This is the tricky part. Recessed areas should be avoided, so carefully apply a thin layer of paint to the sides of the turret and turret roof, as well as the upper parts of the fenders. This desired effect is to create a feeling of shade, so only paint areas that will catch the light. If done well the difference will not be too obvious as this aspect of painting should not stand out. When allowed to dry for a couple of hours, a subtle gradation from a mild light to a dark effect should be visible.
Step 6. A pin wash is a dark wash that is applied to the recesses as well as the panel lines. This gives an extra illusion of depth to the model. You should now see the highlights starting to stand out. Allow ten minutes for the pin wash to settle and then apply the filter over the entire model using a good quality medium-sized brush. Do not use too much filter, however, as the model should not be flooded. Applying the filter now, and using a good quality brush, will achieve a very natural effect as it will blend into the pin wash, leaving a perfect light to dark effect.
Step 7. The Vallejo wash for green vehicles filter used here dries to a satin finish, so there is no need to apply a gloss coat to the model. Apply any decals required, then paint the tracks and stowage. Keep the colours used for painting the stowage muted because they need to look a natural part of the model and as such should not overpower the overall look.
Step 8. Apply a light coat of matt varnish to protect the model as well as sealing in the decals, then leave until dry. Some modellers like to ‘chip’ their model so that it more accurately represents a vehicle that has seen a fair amount of use, but this is not strictly necessary as the T26 was a new vehicle that had only recently arrived in Europe. A lighter ‘used’ effect can be achieved by applying a little gunmetal to the odd edge here and there. This should not be more than a mere hint, so take care not to overdo this.
For weathering, follow the procedure as outlined for the M4A2 Sherman (see Chapter 2), using MIG 1405 ‘Dark Mud’ and P232 ‘Dry Mud’.
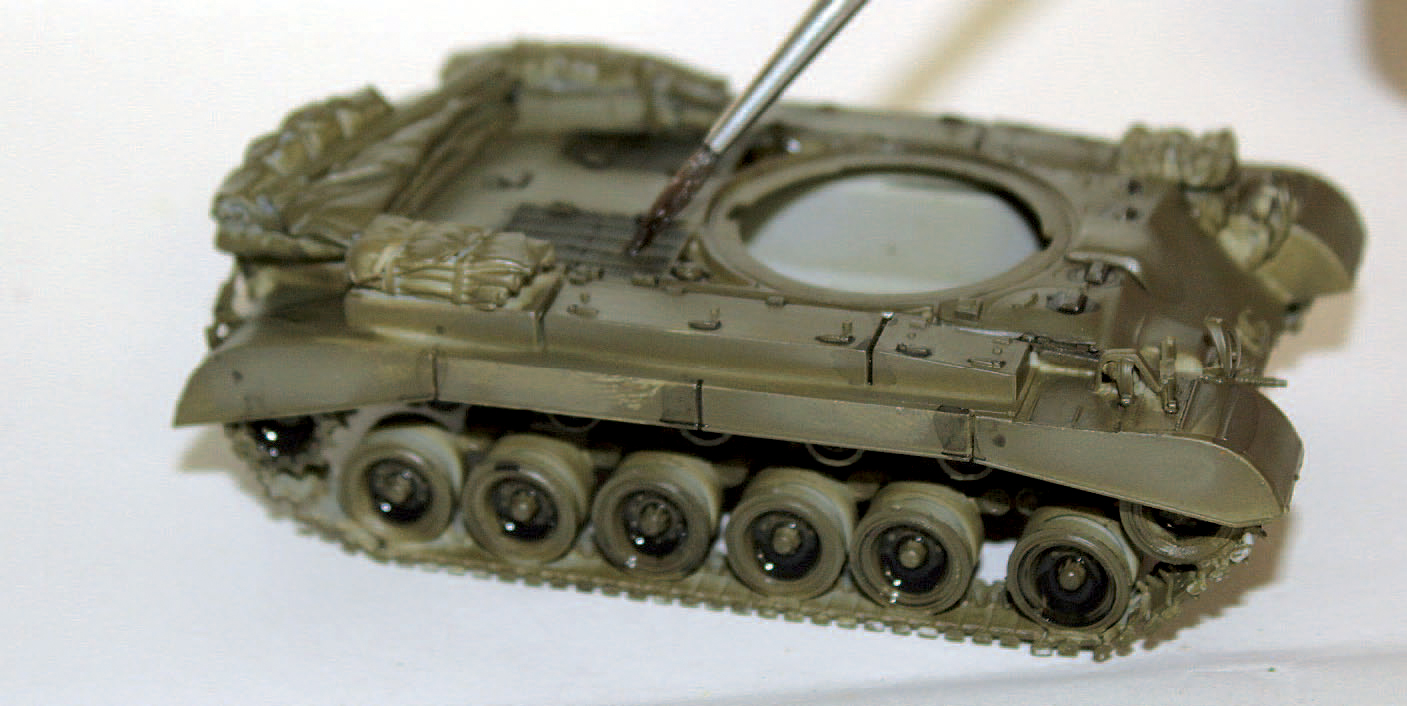
The filter should only be applied to the recessed areas and nowhere else.
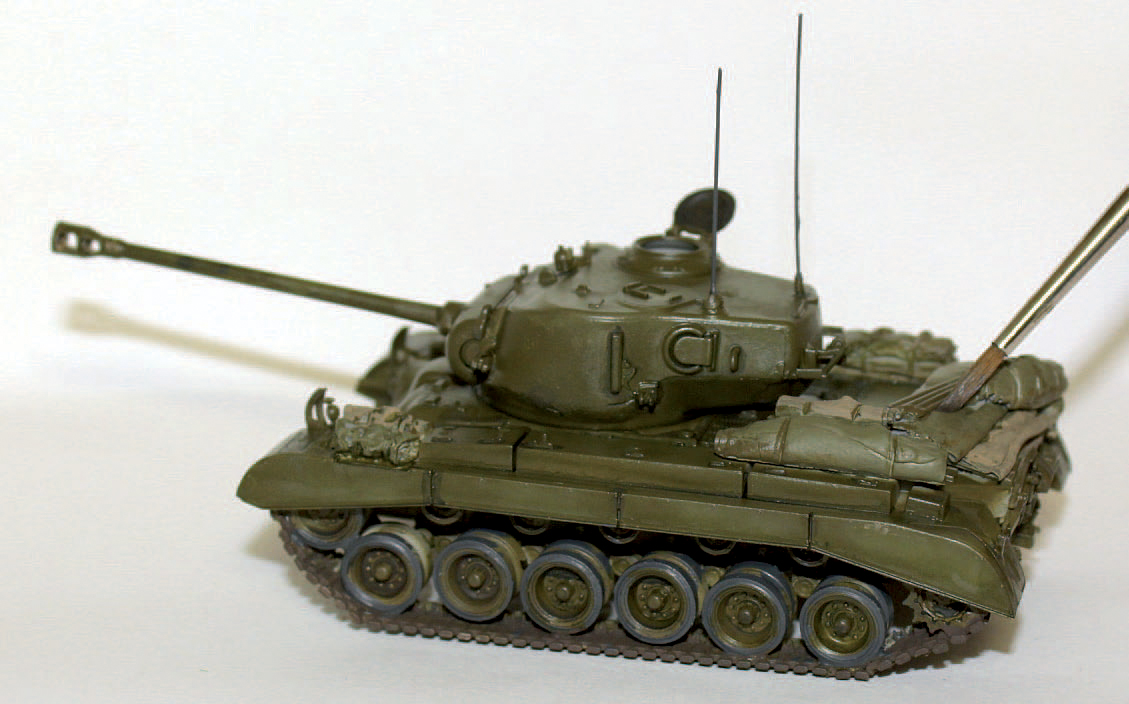
The stowage has now been painted.

When applying decals, use a soft pointed brush as this will help to position them correctly.
If the model is to be used for wargaming it is best to use a plastic kit that will result in a strong and robust model. As most model kits are not really designed for use in wargames, the best choice is one made by Armourfast, which manufactures and sells a range of plastic armour kits designed with the wargamer in mind. They are quick to build but are very basic. As such, they need some customization or modification to bring them up to an acceptable standard.
S&S Models makes a range of aftermarket items designed to customize basic kits and make them look more professional. This model has no interior detail within the turret other than the breach, but it is not difficult to add a crew serving the gun.
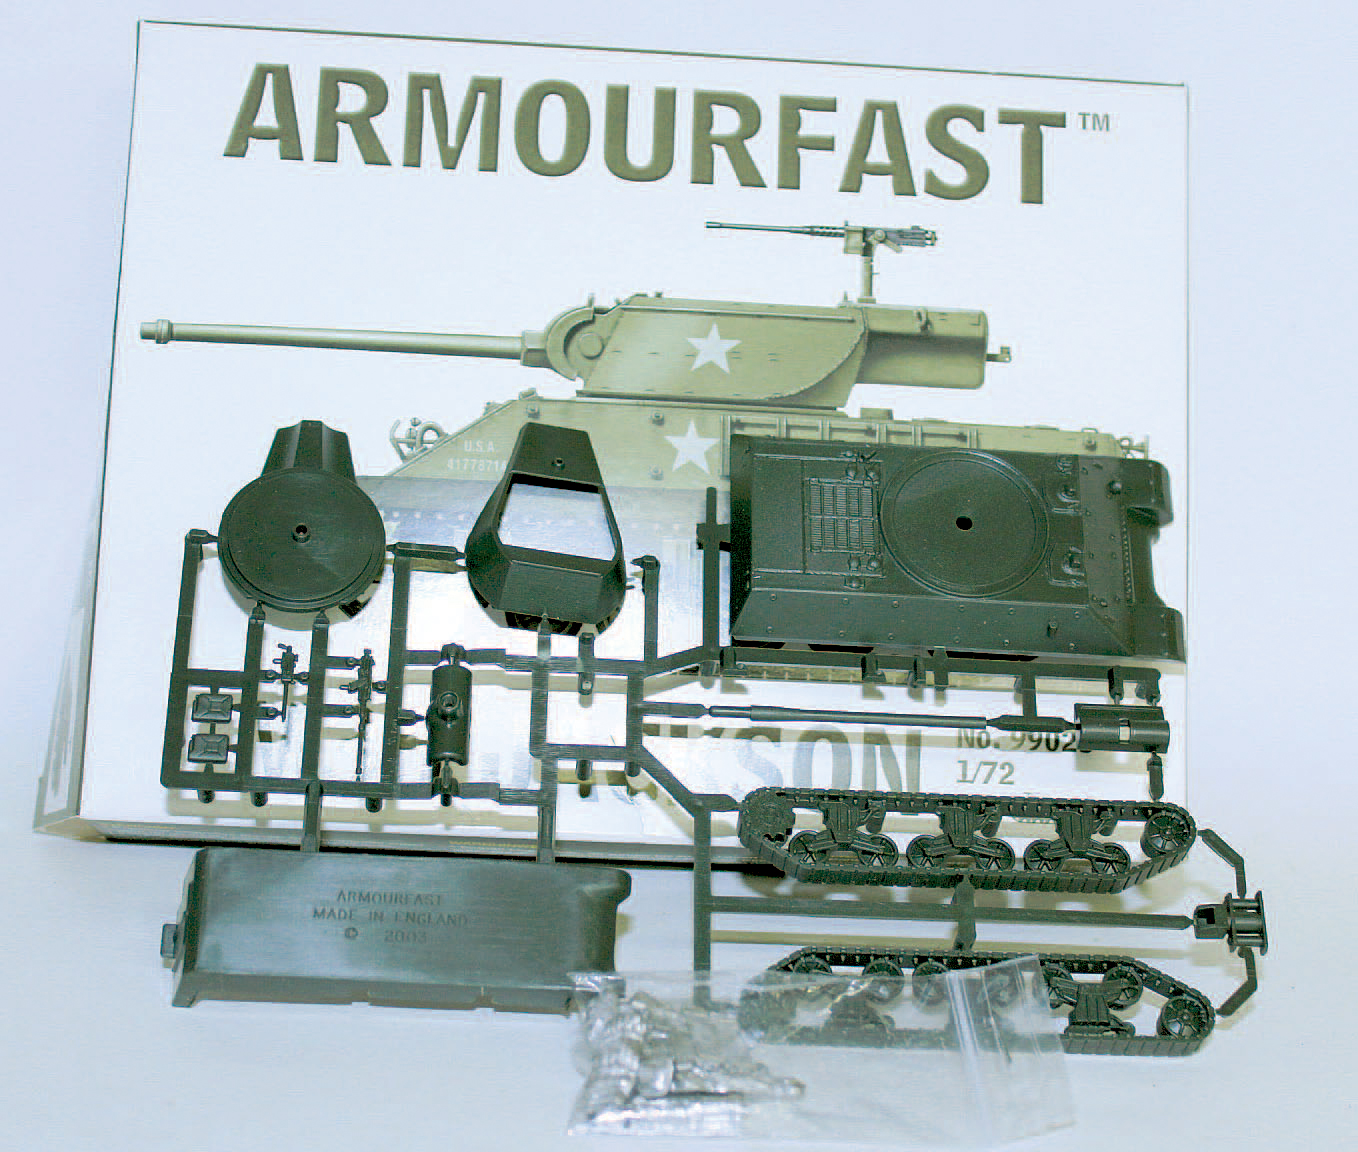
Inside the box there are enough parts to build two basic M36 Jacksons. Also seen here are the S&S parts that will be needed later.
Step 1. Start by assembling the kit, which is very straightforward to do. This provides a blank canvas, so to speak, on which more detail can be added. Drilling out a small portion of the barrel, using a pin vice and a 1mm drill bit, helps add some more realism.
The S&S aftermarket set is designed for the Armourfast M10 Tank Destroyer, but as both models have the same hull and only the turrets differ, most of the accessories can be used on the M36. In this case, stowage is being added to make the model look more realistic: photos from the time show these vehicles covered in stowage and looking like mobile homes, with even bicycles strapped on. These vehicles looked very lived in, which in fact they were, with everything their crews needed to carry out repairs or for cooking and sleeping being within reach.
Step 2. Before painting, clean off any excess glue that mars the paint finish. An AB Miniatures tank destroyer crew can now be added. A grey primer is next applied to provide a neutral base over which the later colours will be painted. The basic overall colour is ‘olive drab’, following the procedure laid down for painting tanks in Chapter 6.

Drill out the barrel to a depth of no more than a few millimetres. This is all that is necessary to create the illusion of a hollow barrel.
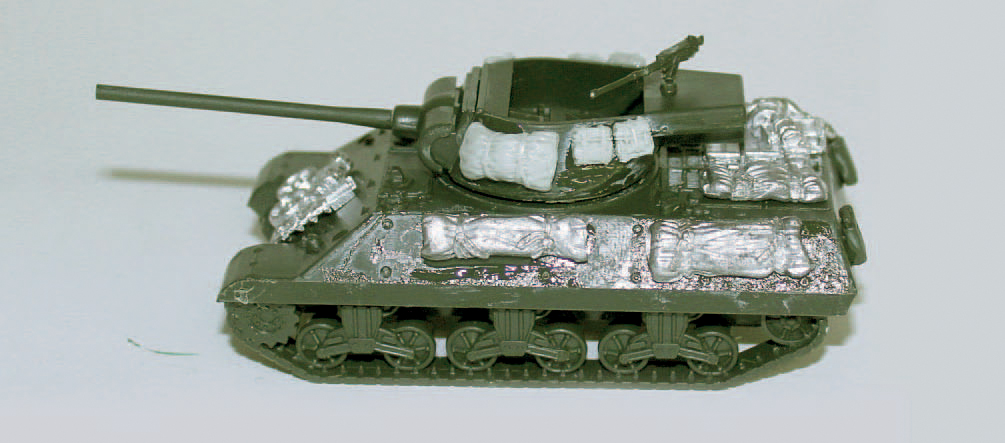
The constructed kit is good, but basic, and this can be improved.

The completed M36, complete with a turret crew. The extra pieces added to the model improve its overall appearance.
The 1:32 scale Airfix multi-pose kit will build an American GI as he would have looked during the advance into Germany in 1945. The uniform worn at this time was warmer and more suited to the winter conditions: the M-1943 Olive Drab jacket, woollen M-1937 trousers and gloves. Herringbone Twill (HBT) trousers were also worn, but the M-1937 trousers were more popular as they were warmer.
The boots were now the M-1943 combat boots, first introduced in November 1943 but only reaching the front-line units in late 1944. They provided better ankle support than the previous ‘roughout’ ankle boot and gaiters and kept out the dirt and weather. This is now the GI that most people are familiar with from war films made from the 1950s to the 1970s.
Several options are available with this set, but the configuration chosen here is for a lieutenant armed with a M1 Carbine. This weapon was widely used by junior officers and was in use throughout WWII, even though it was not a hard-hitting weapon by any means.
Step 1. The assembly is the same as for the American infantryman on Okinawa (see Chapter 2), but for this officer it is necessary to add a few extra parts that come supplied with the set. Unfortunately they are not covered in the instructions and so this is where good references are required. In this case Windrow and Hawkins’s The World War II GI: US Army Uniforms, 1941–45, in Color Photographs was invaluable.
Step 2. To arm the figure, a pistol will be added on the right waist, behind the ammunition pouches, with a bayonet situated next to it. As this figure is of an infantry officer, a backpack will also be added. These officers had to live under the same conditions as their men and so carried the same equipment, apart from a few extra items, such as binoculars and a pistol. At this late stage in the war, officers tended to carry the same weapon as their men and did not wear rank insignia, so that they were a less obvious target for enemy snipers. The M1 carbine was carried by both officers and NCOs, so is a good choice here.
Step 3. This kit does not provide rifle slings or straps from which his binoculars can hang, but these are easily made from paper cut into 1mm strips and attached with superglue. These simple and quick techniques help to add extra detail to any figure.
Step 4. Now prime the figure using grey primer: this colour is best for use on larger figures as it helps to provide a neutral base on which other colours will look their best once dry.
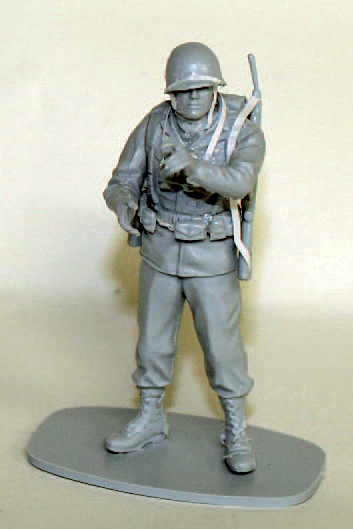
The basic GI model with additions.
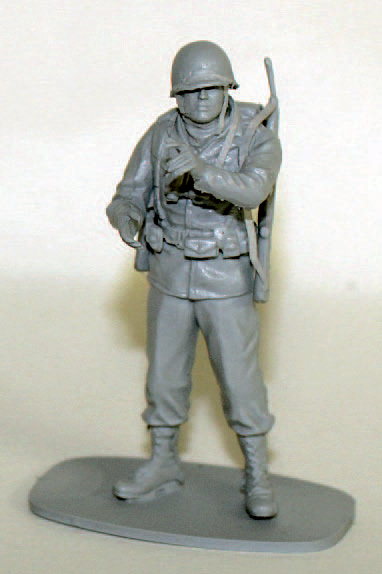
After a coat of grey primer, the figure is ready for painting.
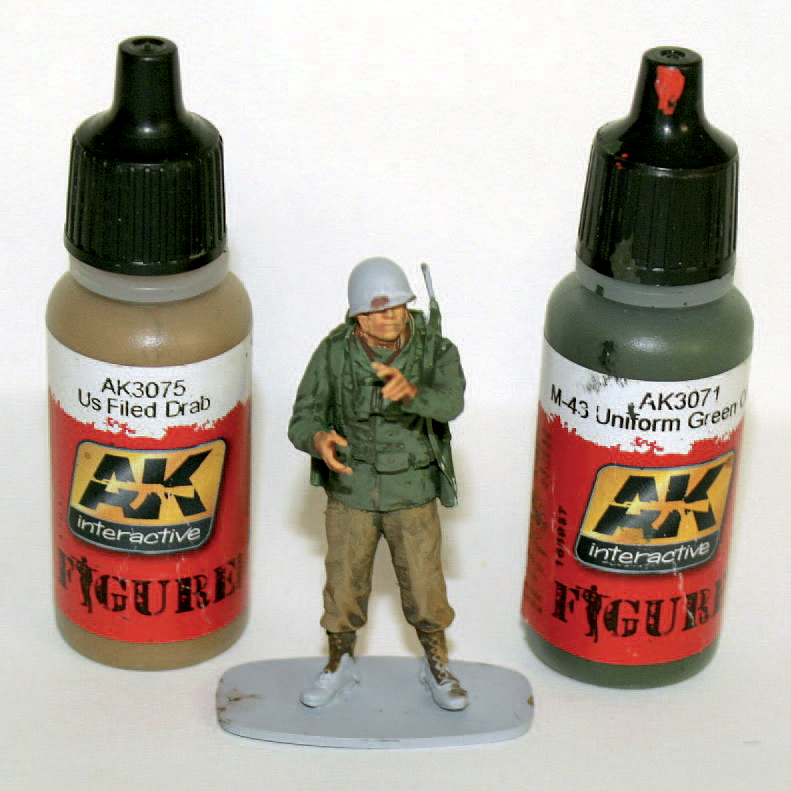
The main colours have been added and a start made on the flesh tones.
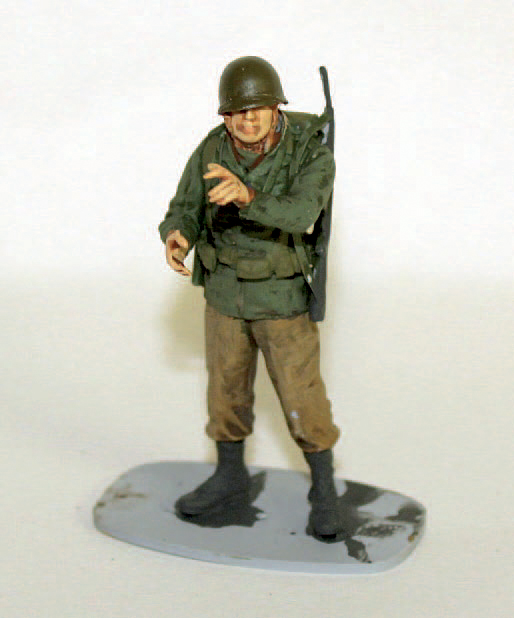
This shows where the colours should be added to form the base for the next step.
Step 5. Now paint the jacket using AK3071 ‘Dark Olive Green/M-43 Uniform Green Olive’ as the base colour and the trousers with AK3075 ‘US Field Drab’. Apply washes of thinned ink – black over the jacket and brown over the trousers – to provide the illusion of depth. Next, paint in the face and hands with Vallejo 955 ‘Flat Flesh’, and when dry wash with flesh wash, which again will provide depth for the later colours.
Step 6. Paint the boots and bayonet dark grey.
Step 7. Now using the original colours, but with the addition of a little Vallejo 819 ‘Iraqi Sand’, highlight both the jacket and trousers. Then use Vallejo 924 ‘Russian Uniform’ to base coat the backpack, webbing and water bottle. Highlight them with Vallejo 821 ‘German Camouflage Beige’. Remember, it is even more important to keep the colours subtle since on large figures, such as these, how you lighten any colour is of paramount importance, and this will help achieve a more pleasing and realistic finish. With this in mind, take plenty of time and work slowly to achieve the desired result.
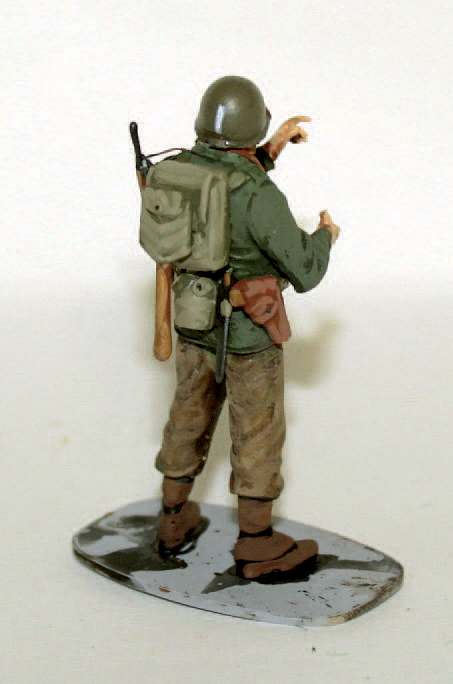
The rear view of the figure after the details have been highlighted.
Step 8. Paint the rifle sling, pistol holster and the binoculars strap with AK3073 ‘Red Brown Leather’. Use this colour also to paint the wooden parts of the rifle and spade handle as it will make a good base colour for the next stage.
Step 9. Lighten the original colour with a little white and use this to highlight the helmet. Then move on to the wooden parts of the figure, painting the rifle and spade handle with Vallejo 311 ‘New Wood’, and then highlight these with a little white added. Go around the webbing and backpack with ‘German Camouflage Beige’. Add a little white and go over them again for an added layer of highlights. Then paint the buttons, the metal parts of the rifle and bayonet scabbard with gunmetal.
Step 10. It is now necessary to paint the rank insignia on the helmet. The US Army used a horizontal white bar on the rear of a helmet to denote an NCO (non-commissioned officer) and a vertical bar for an officer, which enabled them to be recognized from the rear. Rank insignia made of silvered metal were worn on collars, but these tended to catch the light and attract snipers’ attention. Officers often decided to cover them up or not wear them at all on the front line. This made the helmet markings all the more significant. As this is a figure of an officer, a vertical white bar will be added. This is first done with some light grey paint and then going over it with white paint. On the front paint a single small lieutenant bar.
Step 11. All that remains is to apply a wash of thinned-down dark brown over the figure, except for the hands and face. This helps to tie in all the other colours for a more effective look. Following these simple steps will give a figure that accurately represents an officer on the front line of the advance into Germany in early 1945.
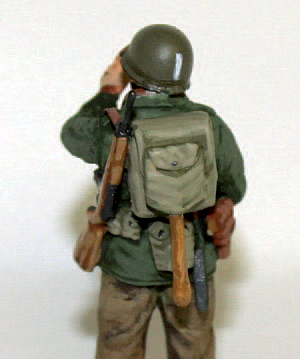
The buttons have all been painted as well as the officer’s bar on the rear of his helmet.
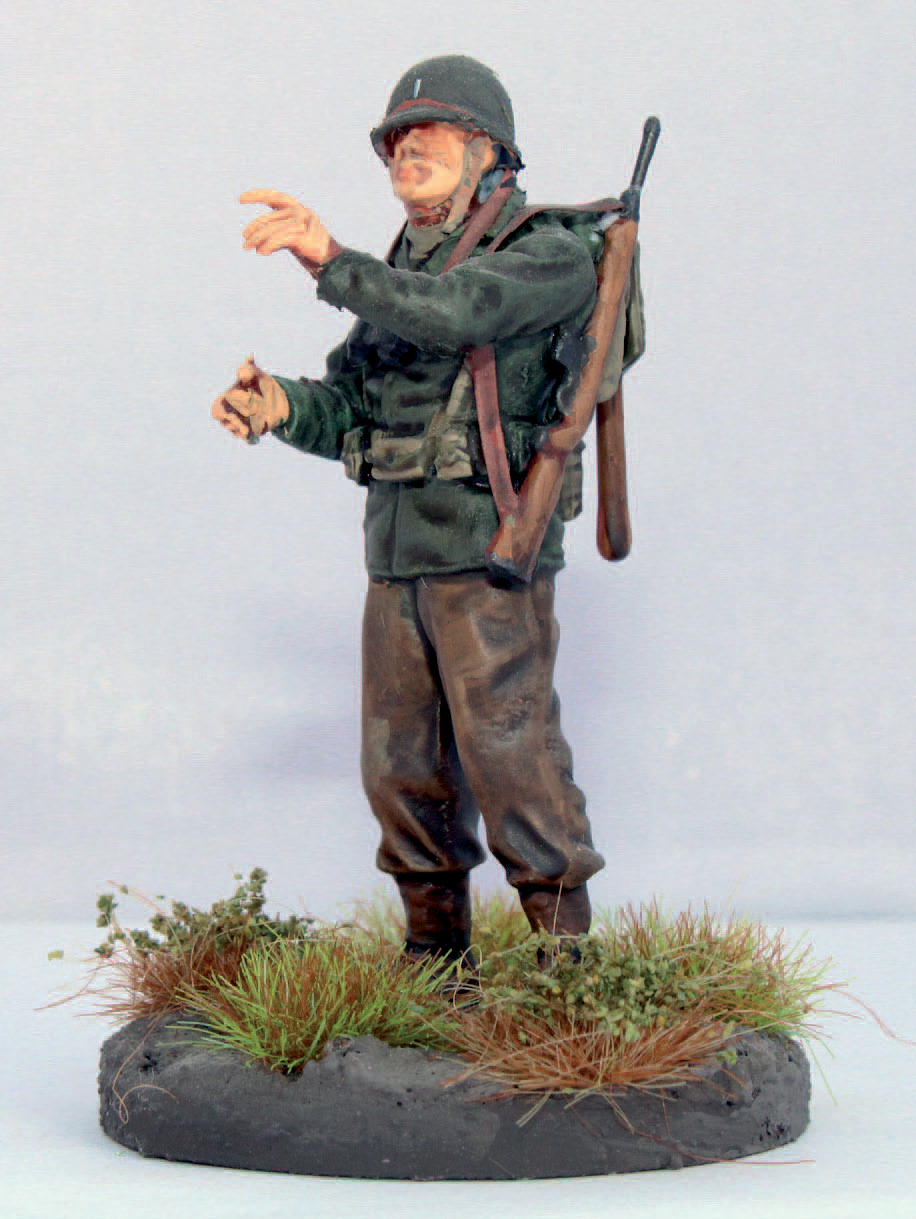
The completed figure.
The M8 armoured car, otherwise known as the ‘Greyhound’, served in cavalry reconnaissance units and filled the gap between the M3 and M5 Stuart, as well as the M3 scout car. The M8 was a six-wheeled scout car armed with a 37mm M6 gun for which it carried some eighty rounds of ammunition. A coaxial .30 calibre Browning was also fitted. When it was found that the M8 needed an anti-aircraft machine gun, a .50 calibre M2 was retro-fitted on a ring mount to the turret on all existing models. The M8 served with the US and British armies, and with the Free French.
The M8 was a fast and rugged vehicle that fulfilled its role perfectly. While not heavily armoured, it could take on lighter German armoured cars. However, it was not a match for the later German Puma armoured car, which mounted a 50mm gun that could easily penetrate the M8’s thin armour (it could could even be penetrated by 20mm guns). Despite this drawback, the speed and agility of this armoured car made it a dangerous adversary during engagements with other reconnaissance vehicles. The crews added sandbags to the floors of their vehicles to help boost the protection offered by the thinner armour on the floor that could easily be penetrated by mines. Reconnaissance units equipped with M8s were the ‘eyes and ears’ of an advance, always in the front and generally the first to encounter enemy units. During withdrawals they would help form a protective screen for other units.
There are not many M8 armoured car kits available at the time of writing: Italeri used to produce one, but this is now hard to find. This is a resin version produced by Hobby Den, which is a simple but serviceable model of an M8 Greyhound.
Step 1. Start by putting the model together. Fortunately this model has only a few parts. Wash the kit with warm soapy water to remove any release agent left over from the moulding process.
Step 2. It is now necessary to add an anti-aircraft machine gun and some stowage. It was common for M8 crews to add plenty of stowage of all types to their vehicles, as they could be out on patrol for a long time and needed to be as self-sufficient as possible.
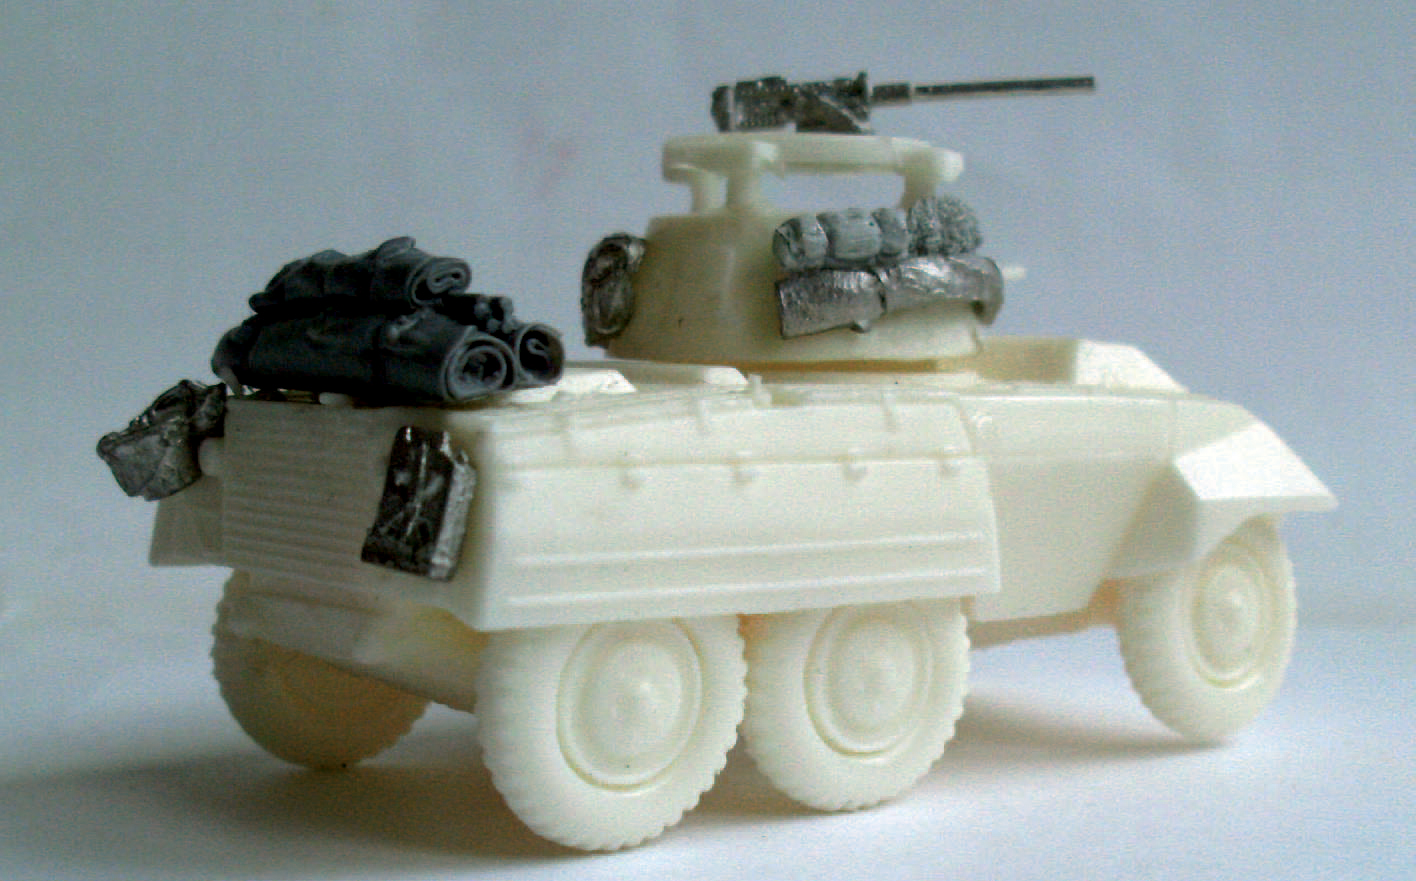
The added stowage is seen here with the .50 calibre anti-aircraft machine gun.
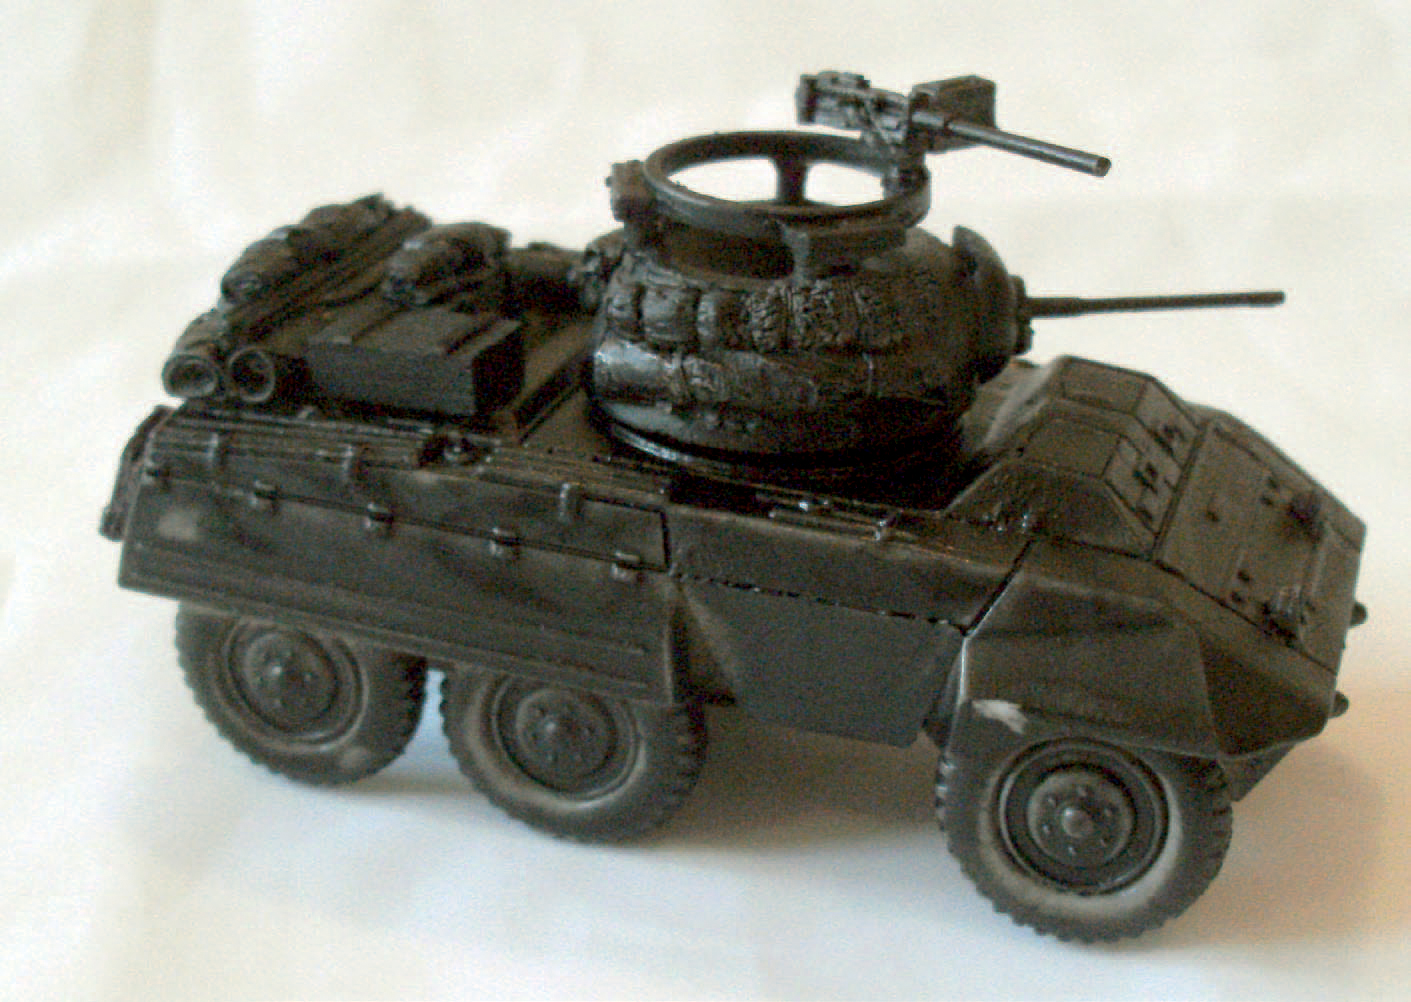
The primed model is now ready to paint.
Step 3. Prime the model in black. Then paint it with olive drab, applying several even coats and allowing them to dry between coats. Now lightly brush over the entire model with the base colour with a little white added, paying attention to the raised areas.
Next apply an enamel pin wash to the panel lines and recesses of the model with a fine brush. This will make the details stand out, adding depth to the model.
Step 4. Once the pin wash has dried, paint the stowage in appropriate colours, such as khaki, light brown and olive green. Then wash over the vehicle with a very transparent, diluted version of the pin wash to tie together the whole paint effect of the stowage and model for a realistic effect. This is a slightly different technique to those already described, but when done with care it does create a pleasing effect.
Step 5. Finally apply the decals and then weather the model using the steps outlined in Chapter 2.
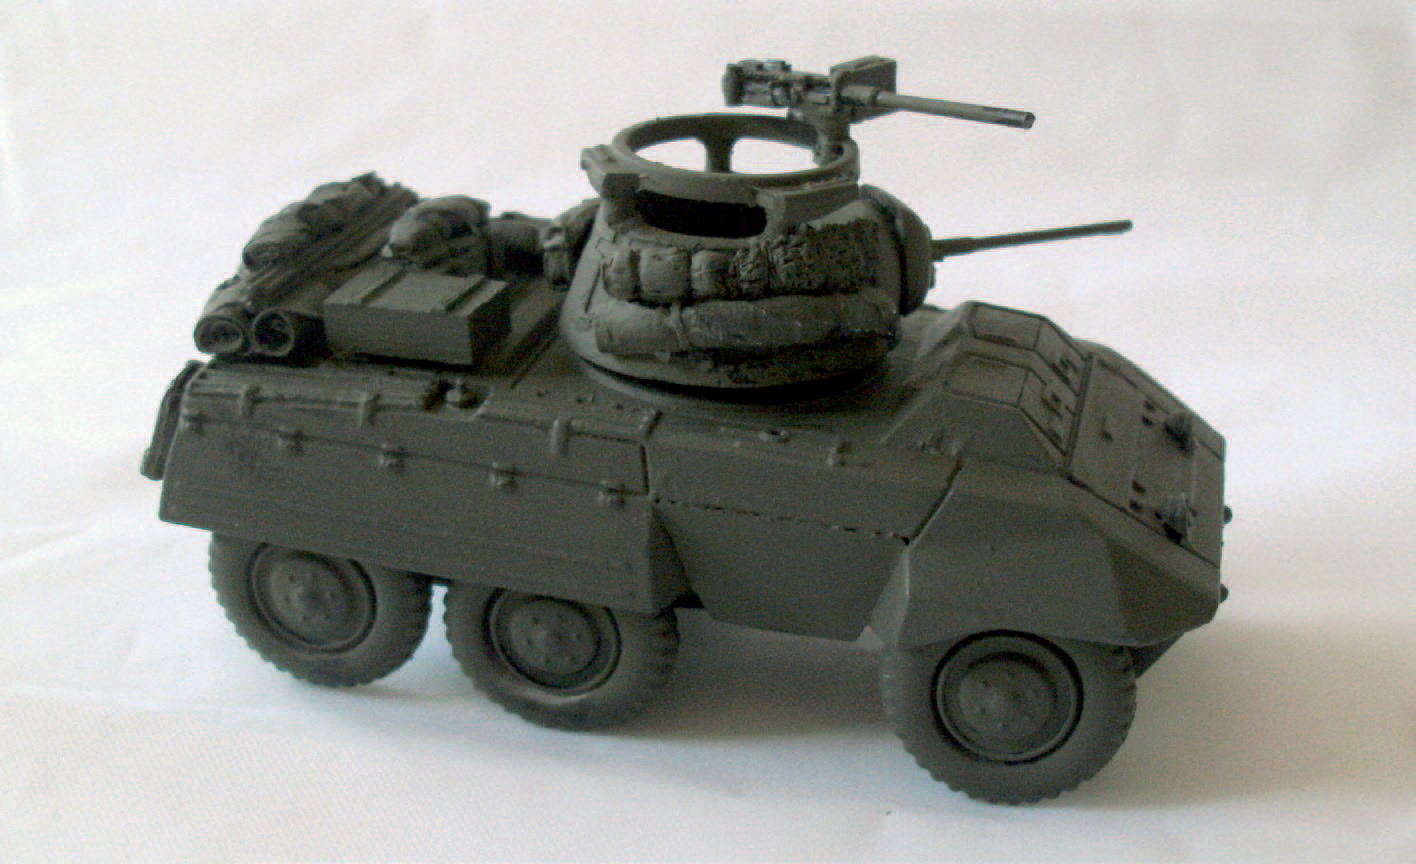
The base colour of Olive Drab has been applied.

Brushing over a lightened version of Olive Drab helps to pick out hidden detail.
The detail on the model is now a little too prominent. Pin wash will help to blend the colours together.
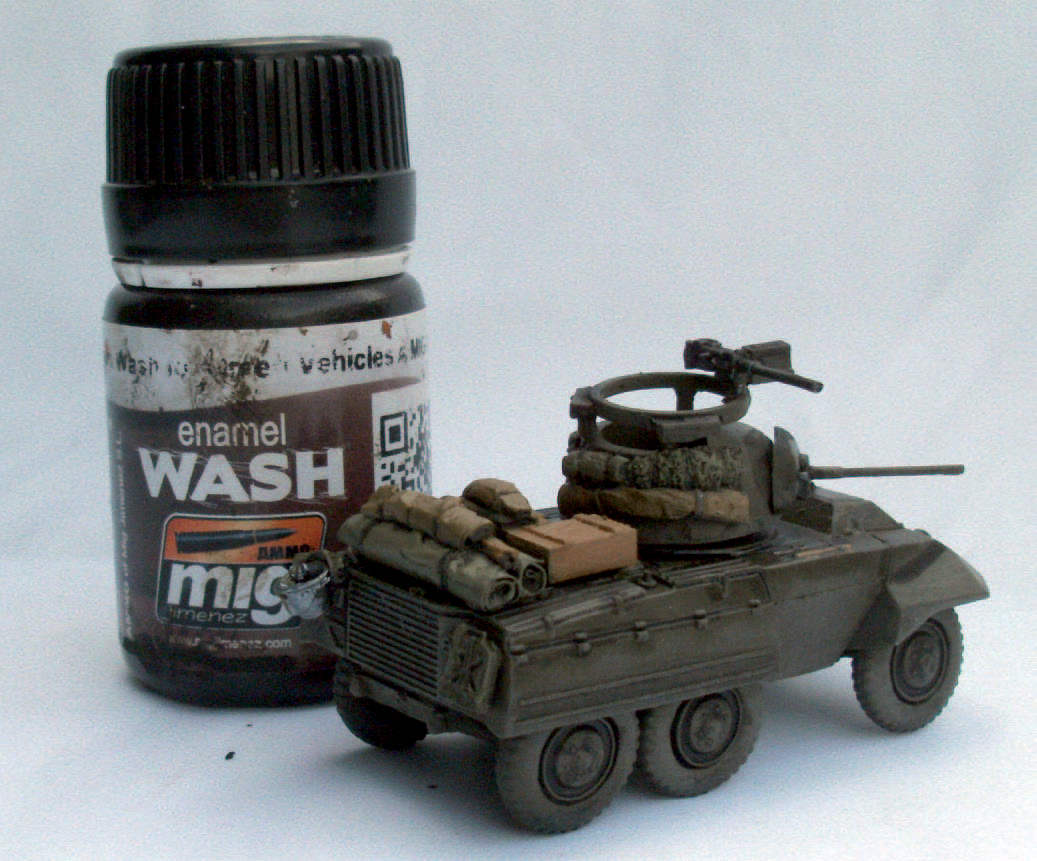
The M8 with all the stowage painted. The next step is to apply a wash.
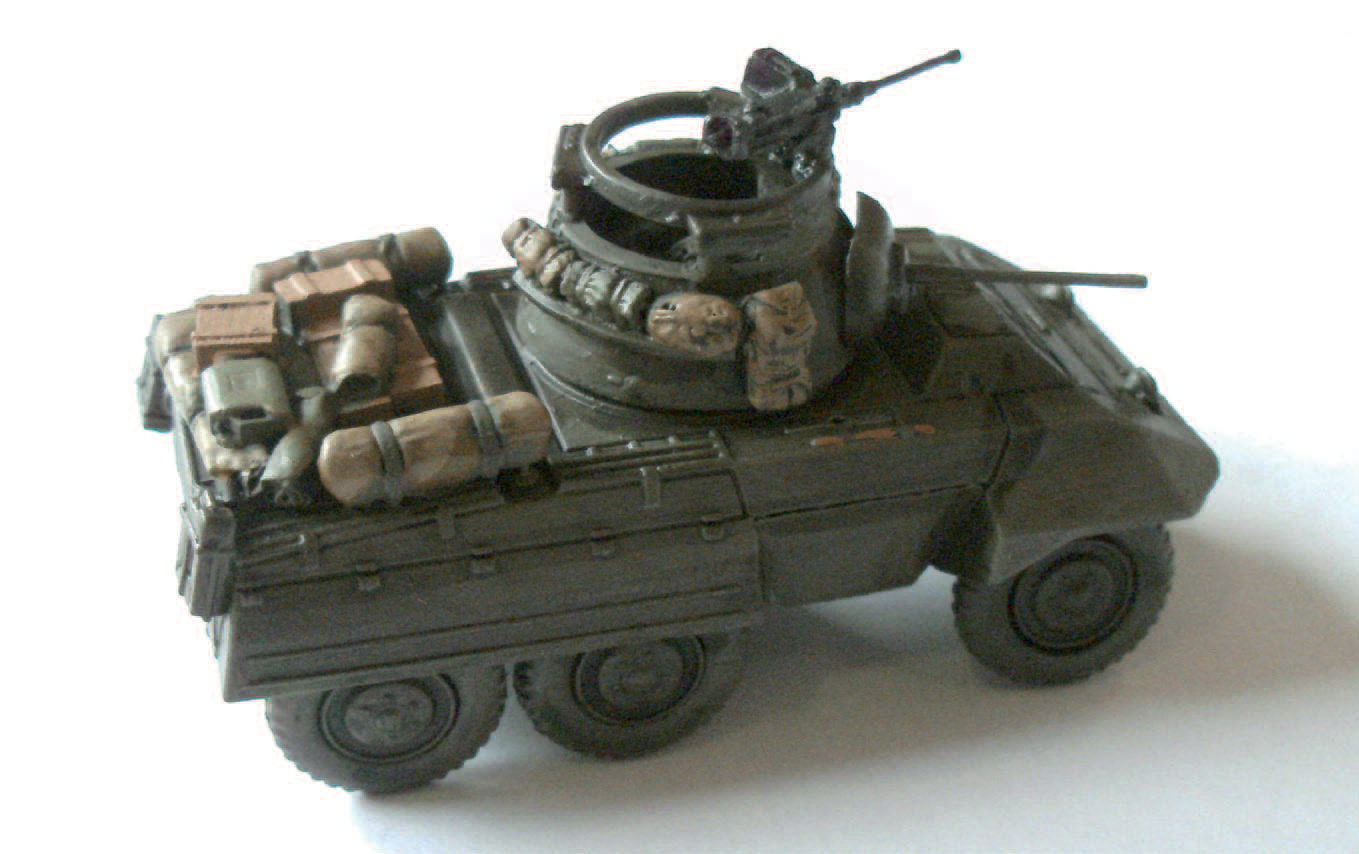
The difference that a wash can make is obvious after it has dried.

Two finished M8s.