SUMMER
Shrimp Burgers with Roasted Garlic–Orange Aioli
A Tribute to Woody (Homemade Ginger Ale Float)
Okonomiyaki
Salvadoran Breakfast Pancakes (aka Quesadillas)
Haricots Verts à la Dijonnaise
Dilled Crunchy Sweet Corn Salad with Buttermilk Dressing
Raspberry Custard Cups
Boozy Watermelon Rosemary Lemonade
Flank Steak on Texas Toast with Chimichurri
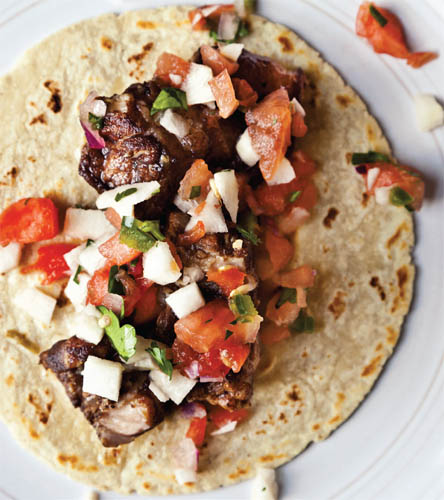
Braised Pork Belly Tacos with Watermelon, Jicama, and Jalapeño Salsa
Corn Salad with Cilantro and Caramelized Onions
State Fair Cream Puffs
Baked Ricotta and Goat Cheese with Candied Tomatoes
Peach Tart
WEEK 39 YOUR BEST USE OF AIOLI
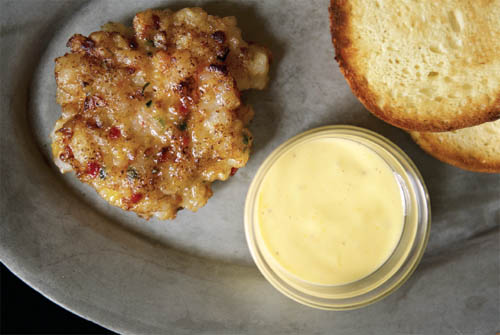
Shrimp Burgers with Roasted Garlic–Orange Aioli
By EmilyC / Serves 4
WHO: EmilyC, a home cook, lives in Arlington, Virginia.
WHAT: Fennel-and-orange-infused shrimp burgers on brioche buns slicked with aioli.
HOW: Can be sautéed in a skillet or grilled.
WHY WE LOVE IT: EmilyC caramelizes the fennel for the burgers. For the aioli, she forgoes the wallop of raw garlic and the more common lemon for the mellow, floral flavors of roasted garlic and orange, and she cleverly uses the aioli not once but twice: to bind the shrimp patties (we used 2 teaspoons, but you may want more) and to spread on the buns.
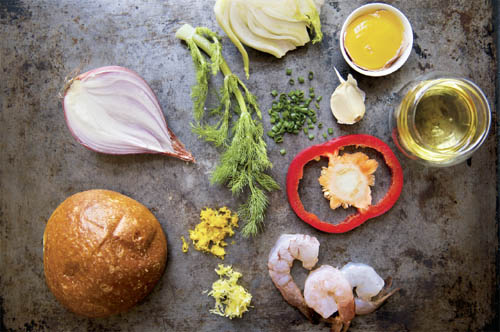
5 tablespoons extra virgin olive oil
¼ cup finely chopped fennel bulb, plus 2 tablespoons finely chopped fennel fronds
¼ cup finely chopped shallots
¼ cup finely chopped red bell pepper
1 tablespoon finely chopped fresh chives
1 tablespoon grated orange zest
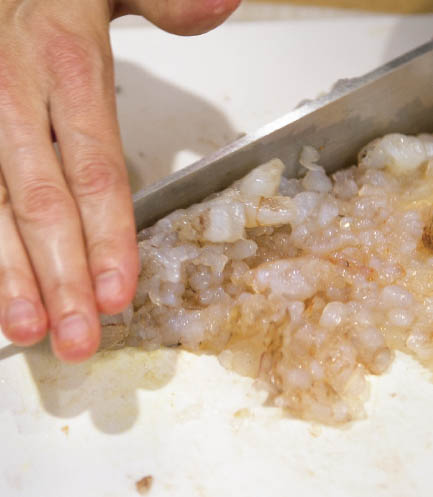
1½ pounds shrimp, peeled, deveined, and finely chopped (by hand)
Kosher salt and freshly ground black pepper
1 to 2 tablespoons Roasted Garlic–Orange Aioli (recipe follows)
4 hamburger or other buns (brioche is nice), toasted
1. In a large sauté pan, heat 2 tablespoons of the olive oil over medium heat. Add the chopped fennel bulb and shallots and cook until they start to caramelize, about 8 minutes. Add the red pepper and cook for about 3 minutes; you want the pepper to soften but retain some texture. Remove from the heat and mix in the fennel fronds, chives, and orange zest.
2. In a large bowl, combine the shrimp with the sautéed vegetable mixture and salt and pepper to taste. Fold in enough aioli, a teaspoon at a time, just to bind the burgers. Form into 4 patties and refrigerate until ready to cook.
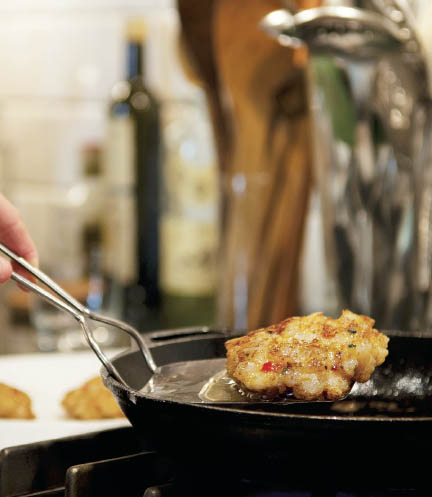
3. Heat the remaining 3 tablespoons olive oil in a large frying pan (cast iron works well) over medium-high heat. Fry the patties until golden and cooked through, about 4 minutes on each side.
4. Spread aioli on both sides of the toasted buns, and assemble the burgers, using your favorite accompaniments, such as big leaves of buttercrunch lettuce.
Roasted Garlic–Orange Aioli
1 head of garlic
½ cup plus 1 tablespoon extra virgin olive oil
2 large egg yolks, at room temperature
½ cup grapeseed or vegetable oil
Kosher salt
2 tablespoons fresh orange juice
1 teaspoon finely grated orange zest
Freshly ground black pepper
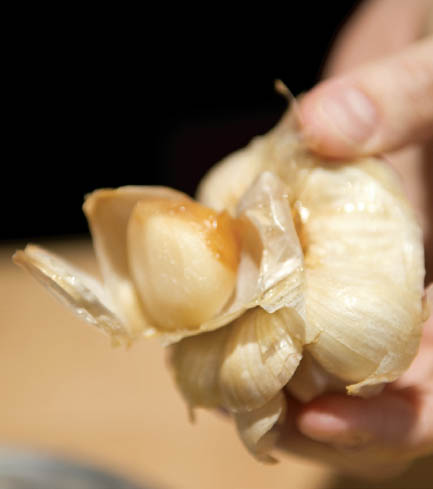
1. Heat the oven to 400°F. Peel away the outer skin of the garlic head and cut off the top ¼ to ½ inch to expose the individual cloves. Drizzle 1 tablespoon of the olive oil over the garlic, wrap it in foil, and roast for 30 to 35 minutes, until the cloves are soft when pressed. Let cool.
2. Squeeze the garlic cloves from their skin. Mash 3 cloves and set aside, reserving the rest for another use.
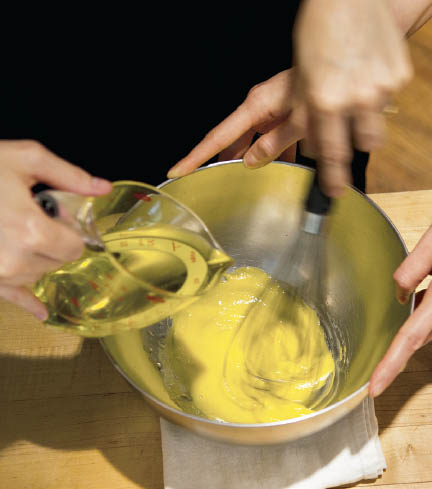
3. In a medium bowl, whisk the egg yolks. Gradually whisk in the remaining ½ cup olive oil, then the grapeseed oil—begin with small drizzles, then whisk in a thin stream until the mayo is very thick. Whisk in a pinch of salt, then the orange juice a little at a time (you may not need the full amount). Whisk in the orange zest and the roasted garlic paste. Season with salt and pepper.
WHAT THE COMMUNITY SAID
BOULANGERE: “Huge success! Like throwing fish to seals. I added 2 eggs to help bind them.”
RHONDA35: “I think they’d be great on little buns as shrimp sliders for an hors d’oeuvre.”
TIPS AND TECHNIQUES
A&M: For the aioli’s flavors to fully develop, we recommend making it the day before and letting it hang out in the fridge overnight, tightly covered. And to make sure the burgers stick together, make sure you chop the shrimp very fine.
WEEK 40 YOUR BEST SODA FOUNTAIN RECIPE
A Tribute to Woody (Homemade Ginger Ale Float)
By inpatskitchen / Serves 2
WHO: inpatskitchen is a retired teacher, paralegal, and seafood retailer. She lives in Troy, Michigan, and blogs at www.inpatskitchen.blogspot.com.
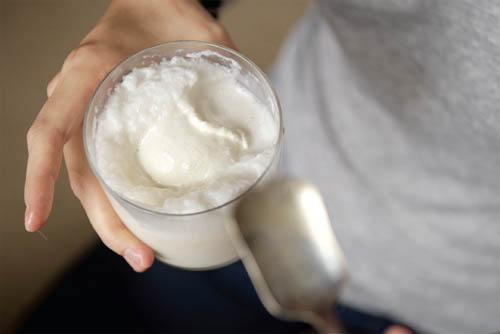
WHAT: A homemade version of Vernor’s Ginger Ale from Michigan, used to make a classic float (or shake).
HOW: For the ginger ale, fresh ginger, vanilla, and light brown sugar are cooked down to an intense syrup.
WHY WE LOVE IT: With not much work, you get a kicky homemade ginger syrup; combined with seltzer, it’s a fitting ode to a proud Michigan soda pop tradition. The syrup is made with a handful of ingredients you probably have socked away in your kitchen—your hot, sticky kitchen: best go make yourself a float.
6 large scoops great-quality vanilla ice cream
½ cup Ginger Syrup (recipe follows)
3 cups seltzer
1. For a shake: Place the ice cream, syrup, and seltzer in a blender and blend until smooth. Pour into 2 tall glasses and grab some straws.
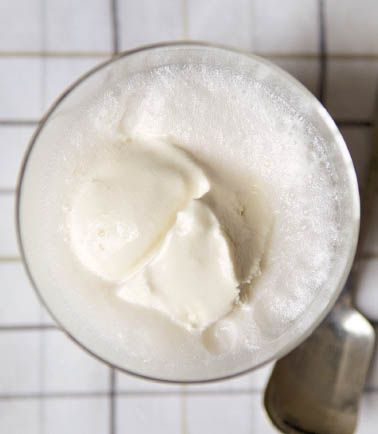
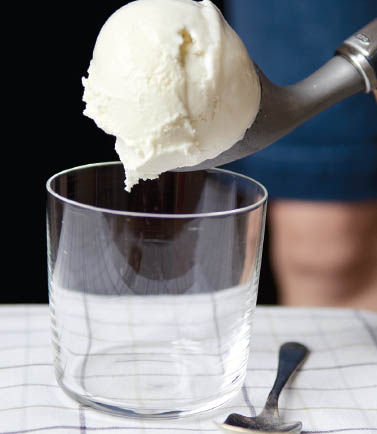
2. For a float: Place 3 scoops of ice cream in each of 2 tall glasses. Mix the syrup with the seltzer and then pour half into each ice-cream-filled glass. Grab the straws and 2 long spoons!
Ginger Syrup
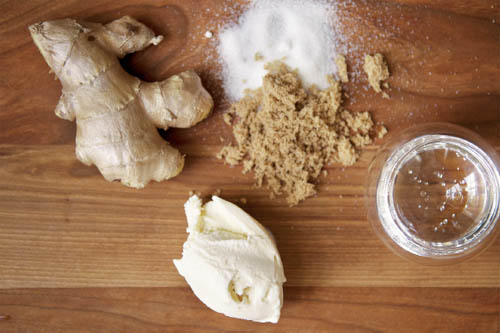
½ cup thinly sliced fresh ginger
½ cup granulated sugar
¼ cup packed light brown sugar
¼ teaspoon vanilla extract
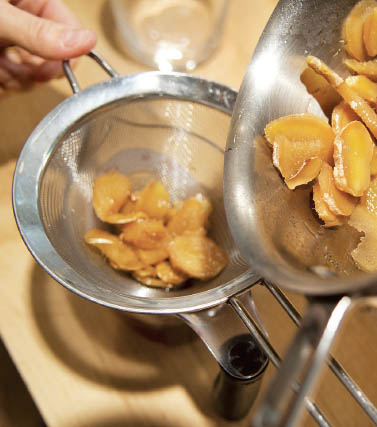
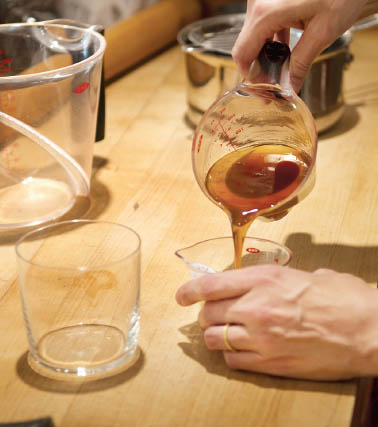
1. Combine the ginger, both sugars, and 1½ cups water in a saucepan and bring to a boil. Simmer for about 15 minutes, or until liquid is reduced to 1 cup. Remove from the heat, stir in the vanilla, and let cool; strain.
WHAT THE COMMUNITY SAID
SUE D: “Tried this recipe about a month ago and have been dreaming of making more ever since. This wonderful recipe is simple, refreshing, and fantastically bright-tasting. I can never again sip commercially made ginger ale—this recipe ended that practice. My experience of making and enjoying this amazing beverage was a satisfying adventure!”
LIZTHECHEF: “Congratulations! We drank Vernor’s when I was a student at Kalamazoo College—great for hangovers. Love your recipe!”
SFMILLER: “Fun recipe that evoked major food memories. Growing up in central Michigan, I put away dozens of Vernor’s floats as a kid. What we called a Boston Cooler was Vernor’s and vanilla ice cream blended like a milk shake—which is darn good too.”
WEEK 41 YOUR BEST STREET FOOD
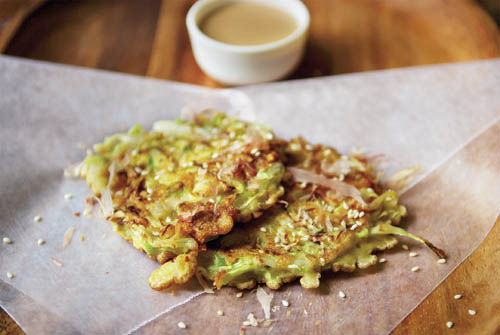
Okonomiyaki
By Midge / Makes roughly 12 pancakes
WHO: Read more about Midge and see her recipe for Burnt Caramel Pudding; see her recipe for Grown-Up Birthday Cake.
WHAT: Eggy and crisp Kyoto-style pancakes are studded with plump morsels of tender shrimp and threaded through with ribbons of cabbage and rings of scallion.
HOW: If you can make pancakes, you can make okonomiyaki.
WHY WE LOVE IT: The savory batter is enriched with a dash of sesame oil and soy sauce, and the accompanying soy-and-Sriracha mayo is a zippy accent. We tore off bite-size pieces of pancake and dunked them in the sauce before gobbling them down.
Sauce
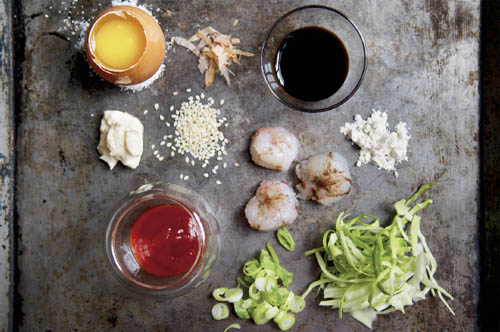
½ cup mayonnaise
2 tablespoons soy sauce
2 teaspoons Sriracha, or to taste
Pancakes
5 large eggs
1 teaspoon soy sauce
1 teaspoon sesame oil
1 teaspoon sea salt
1/3 cup all-purpose flour
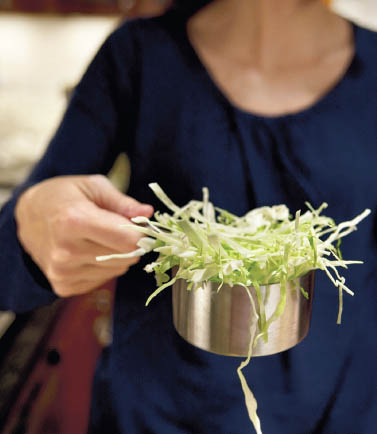
2 cups finely shredded cabbage
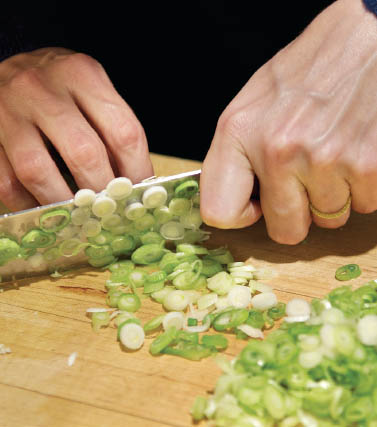
1 bunch scallions, trimmed and chopped
¾ cup raw baby shrimp or chopped larger shrimp
Canola oil for frying
1 to 2 tablespoons sesame seeds, toasted
Bonito flakes (optional)
1. To make the sauce: Whisk the ingredients together and voilà, your sauce. Set aside.
2. To make the pancakes: Heat the oven to 200°F.
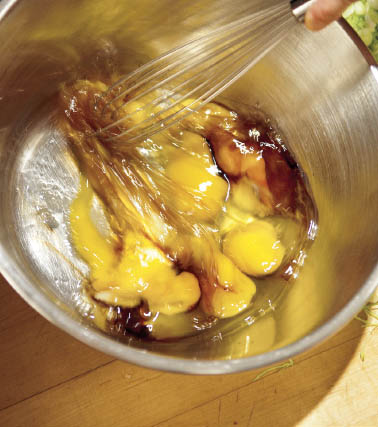
3. In a large bowl, whisk the eggs with the soy sauce, sesame oil, and sea salt. Gradually add the flour, whisking until incorporated. Fold in the cabbage, scallions, and shrimp.
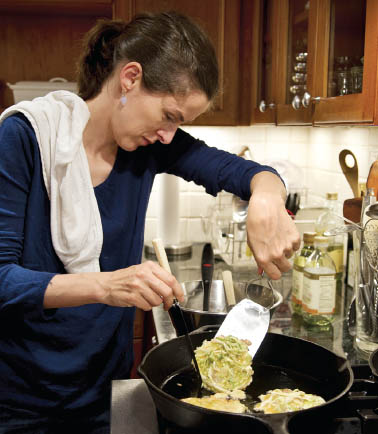
4. Warm a couple of glugs of canola oil in a large skillet (you want a thin film of oil) over medium-high heat until glistening. Ladle the batter into the skillet as you would for regular pancakes; I usually make them about the size of a saucer. Cook for about 3 minutes on each side, or until golden brown. Keep covered in the oven while you make the rest.
5. Scatter the sesame seeds and/or bonito flakes on top of the pancakes and serve with the dipping sauce and a cold pilsner.
WHAT THE COMMUNITY SAID
BABS1652: “We dream about these morsels of marvelousness. Seriously! My family would eat these every day if I made them. We have had them with shrimp and with chicken and with three kinds of cabbage. The only change I made was to use sambal (Indonesian hot sauce) instead of the Sriracha, because that is what I had in the house.”
GINGERROOT: “I used brown rice flour to accommodate my gluten-free husband and the pancakes were perfect. I also threw in some cilantro and shiso.”
TIPS AND TECHNIQUES
RYANBISSOON: “Don’t make the batter too far in advance, as the cabbage will leach a lot of water, making the batter too wet.”
WEEK 42 YOUR BEST GLUTEN-FREE BAKED GOOD
Salvadoran Breakfast Pancakes (aka Quesadillas)
By Sasha (Global Table Adventure) / Makes 18 quesadillas
WHO: Sasha is a mom and food writer living in Tulsa, Oklahoma. She blogs at www.globaltableadventure.com.
WHAT: Salvadoran “quesadillas” with a unique blend of sweet, savory, and tangy flavors and the texture of a fine, delicate corn muffin.
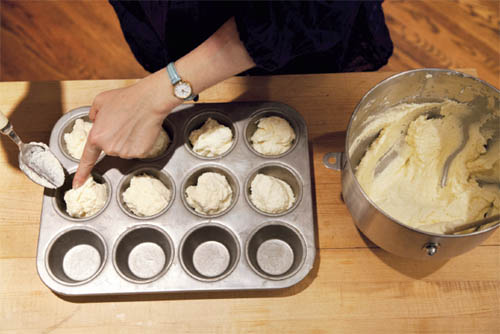
HOW: Mix the batter in just a few minutes and spoon it into muffin tins.
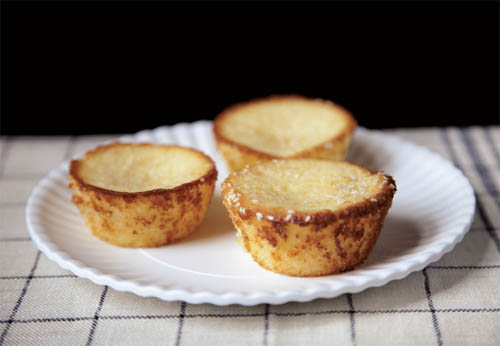
WHY WE LOVE IT: We were instantly won over by these mysterious, ethereal breakfast cakes. Even the uncooked batter, a cloud of sugar, butter, sour cream, and rice flour lightened with egg and perfumed with Parmesan, inspired rhapsodic musings. The edges of the little cakes crisp and brown beautifully, while the centers remain snow white and tender.
1 cup rice flour
1 teaspoon baking powder
Pinch of salt
½ pound (2 sticks) unsalted butter, at room temperature
1 cup sugar
3 large eggs
1 cup sour cream
½ cup grated hard cheese such as cotija or Parmesan
Sesame seeds for sprinkling
1. Heat the oven to 350°F. Grease 18 muffin cups.
2. Whisk together the rice flour, baking powder, and salt.
3. In the bowl of a stand mixer fitted with the paddle attachment, cream the butter with the sugar. Add the eggs one at a time, mixing until fully incorporated. Scrape down the sides as needed. Beat in the sour cream, cheese, and rice flour mixture until a smooth batter forms.
4. Spoon into the greased muffin tins, filling each one four-fifths of the way (this batter does not rise much). Sprinkle on sesame seeds to taste.
5. Bake until nut brown, 15 to 20 minutes. Let cool to room temperature. They taste like a cheesy pound cake; amazing with a cup of coffee in the morning.
WHAT THE COMMUNITY SAID
BORNTOBEWORN: “Made these this morning while at the beach on vacation. They are restaurant-worthy! I forgot to get sesame seeds, so we put some slivered almonds on top.”
SEXYLAMBCHOPX: “I just popped these out of the pan. So rich and moist. I used a mini-muffin pan and it worked out great; exactly enough batter to make 24 mini-muffins.”
TIPS AND TECHNIQUES
A&M: We recommend letting the cakes cool for at least 10 minutes before removing them from the pan—we found they slipped out easily this way.
WEEK 43 YOUR BEST PICNIC DISH
Haricots Verts à la Dijonnaise
By AntoniaJames / Serves 4
WHO: Read more about AntoniaJames and see her recipe for Crispy Spice-Brined Pecans.
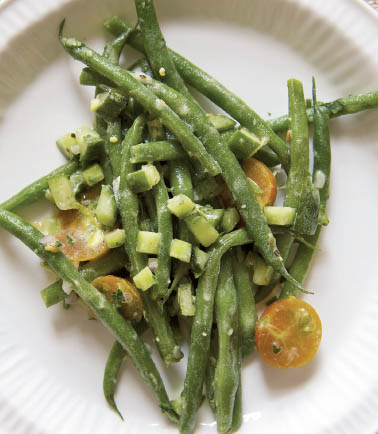
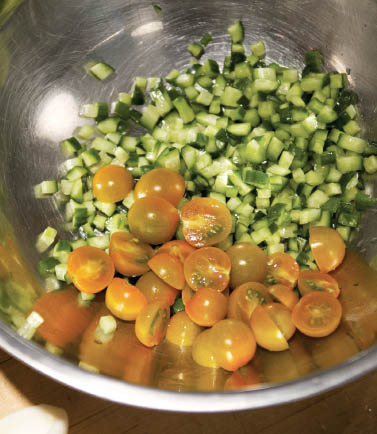
WHAT: The ultimate clean, crisp salad for a picnic (no wilting here), with summer’s best produce—perky haricots verts, sweet cherry tomatoes, and crunchy Persian cucumber—accented by measured doses of anise, honey, and tarragon.
HOW: The dressing is enriched with a hard-boiled egg yolk and roasted garlic, two festive ingredients that make it special but still safe for a sunny day.
WHY WE LOVE IT: As aargersi, who first tested this recipe as a Community Pick, put it: “AntoniaJames is a master at layering flavors so that everything sings together and there is no one, pushy soloist.”
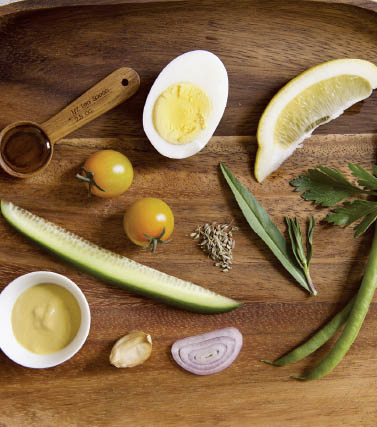
1 tablespoon minced shallot
1 tablespoon tarragon vinegar
2 small Persian or 1 English cucumber, preferably organic
Kosher salt
Yolk of 1 hard-boiled egg
1 teaspoon honey, or more to taste, warmed
½ teaspoon grated lemon zest, or more to taste
1 tablespoon fresh lemon juice
1 teaspoon Dijon mustard
½ teaspoon anise seeds
2 medium roasted garlic cloves (see Shrimp Burgers with Roasted Garlic-Orange Aioli for instructions to roast garlic)
Sea salt
1 tablespoon extra virgin olive oil
1 pound haricots verts (some call them French beans) or green beans
12 to 14 cherry tomatoes, halved
Freshly ground black or white pepper
2 tablespoons finely chopped fresh flat-leaf parsley
1. In a very small dish, combine the shallot and vinegar; set aside.
2. Finely dice the cucumbers (leave the skin on if they are organic, peel them if not). Put them in the bowl in which you plan to make the salad. Sprinkle with salt and set aside.
3. In a small bowl, mash the hard-boiled egg yolk with the back of a small fork. Add the honey, lemon zest, lemon juice, and mustard and beat well to get rid of any lumps of yolk.
4. In a heavy mortar, crush the anise seeds with the roasted garlic and a pinch of salt and grind to a smooth paste. Add to the egg yolk and lemon mixture, then add the olive oil and whisk to combine.
5. Trim the beans and steam or blanch them to the degree of tenderness you like best. Plunge them into a basin of ice water when they’re done to prevent further cooking. Drain and shake off any excess water.
6. Drain the water that has accumulated from the bowl of cucumbers. Add the cherry tomatoes and beans.
7. Drain the vinegar from the shallots into the bowl with the dressing. Mix well and add to the salad, along with the shallots. Gently toss. Taste for salt and add more if necessary. Add pepper to taste. Sprinkle on the parsley. Enjoy!
WHAT THE COMMUNITY SAID
SDEBRANGO: “I just finished making this salad for maybe the fifth or sixth time, and I remembered that I never told you how wonderful it is. I love the vinaigrette and use it on other salads as well. Just had it with steak and it’s just so delicious.”
CHEZSUZANNE: “The only change I might make next time is to toss the beans in the dressing while they’re still warm to allow them to soak up the wonderfulness of the dressing. I can see this with some farro or barley too, for a great vegetarian entree. Really a wonderful recipe, AJ!”
TIPS AND TECHNIQUES
ANTONIAJAMES: “If taking this on a picnic, or making it ahead for a potluck, block party, etc., remember that the acids in the dressing and the cherry tomatoes will discolor the green beans if added too far in advance. So, instead of adding the tomatoes with the cucumbers and beans and then tossing with the dressing, drop the cut tomatoes into a medium jar with the dressing. Put the shallots and vinegar in that jar too, instead of on the salad. In essence, you combine the cucumbers and green beans in one container, and just before you’re ready to serve, toss with the dressing, cherry tomatoes, and shallots.”
WEEK 44 YOUR BEST DISH IN THE RAW
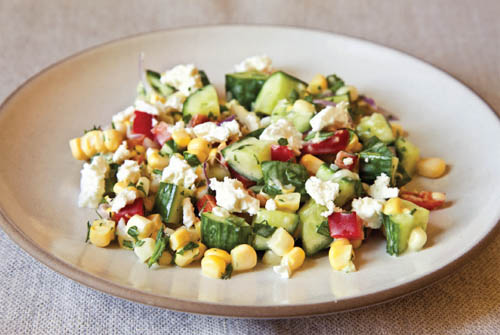
Dilled Crunchy Sweet Corn Salad with Buttermilk Dressing
By creamtea / Serves 6
WHO: creamtea lives in New York City.
WHAT: A thoughtfully composed corn salad with a tart accomplice, buttermilk dressing.
HOW: No cooking! Just chopping and stirring.
WHY WE LOVE IT: The dressing, tangy with buttermilk and yogurt, envelops the crunchy corn, peppers, and cucumbers in a silky cloak. We love the hit of herbs (dill and parsley) and the zip of onion and garlic.
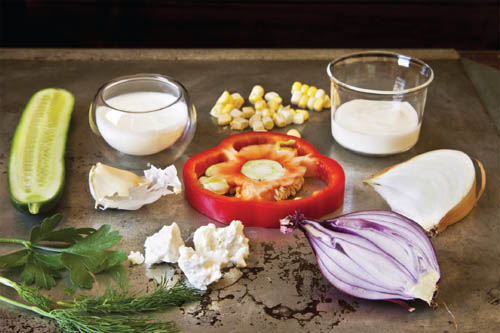
Salad
1 small shallot, halved lengthwise and thinly sliced
Salt
3 ears sweet corn, husked, kernels scraped from the cobs with a sharp knife (about 2¾ cups)
4 Persian or 1 English cucumber, quartered lengthwise and sliced crosswise into ½-inch-wide pieces
1 long red sweet pepper, cored, seeded, and diced
A small handful of dill (about 4 smallish sprigs), minced
¼ cup minced fresh flat-leaf parsley
Crumbled feta cheese, rinsed and drained, for garnish
Dressing
¼ cup buttermilk
2/3 cup yogurt (not Greek-style), stirred
1 tablespoon white wine vinegar
3 tablespoons minced Vidalia or other sweet onion
1 small garlic clove, minced and mashed with a pinch of salt
¼ cup extra virgin olive oil
Salt and freshly ground black pepper
1. To make the salad: Toss the shallot slices with ½ teaspoon salt and allow to sit for about 20 minutes to draw out any harshness. Rinse well and pat dry with a paper towel.
2. In a large bowl, toss the corn kernels lightly to separate them, then add the shallot and the remaining salad ingredients (except for the feta) and toss again to combine.
3. To make the dressing: In a small bowl, combine the buttermilk, yogurt, vinegar, onion, and garlic and whisk together. Add the oil in a slow stream, whisking until incorporated. Season with salt and pepper to taste. Refrigerate until slightly chilled.
4. Serve the salad, garnished with the feta cheese. Pass the dressing separately.
WHAT THE COMMUNITY SAID
MIDGE: “Made this for tonight and loved it. This, vinho verde, and ice cream are the perfect dinner when it’s 102 degrees.”
BLUEJEANGOURMET: “This was perfect last night with pulled pork and ribs! I added some of our backyard tomatoes to the salad, and it was fantastic.”
SYLVIA9000: “This was mad tasty. Loved every kernel of it.”
SAGEGREEN: “I used a thick Mideastern yogurt, which worked very well. The salad is pretty darn good without any dressing too!”
WEEK 45 YOUR BEST RASPBERRIES
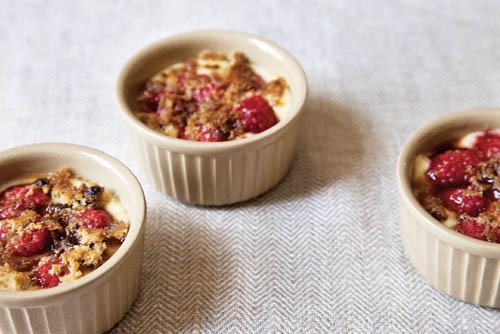
Raspberry Custard Cups
By SLD / Serves 6
WHO: SLD is an investigator who lives in Michigan.
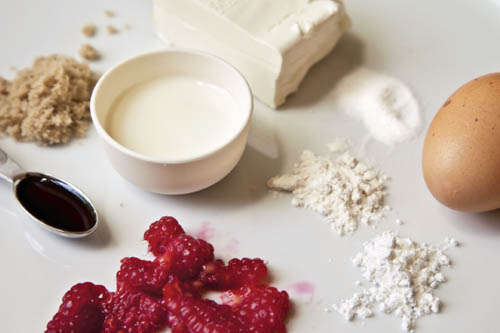
WHAT: The brilliant love child of raspberry cheesecake and crème brûlée.
HOW: You fold tangy cream cheese into an egg-and-flour-enriched custard, which is then studded with plump whole raspberries and covered in a cap of rich brown sugar.
WHY WE LOVE IT: These are so easy you can make them with children. You can eat them with children, or you can serve them to adults and all feel like big, happy children.
1/3 cup sugar
1 large egg
1 tablespoon all-purpose flour
2 teaspoons cornstarch
1 cup whole milk
½ teaspoon vanilla extract
4 ounces cream cheese, cut into small pieces, at room temperature
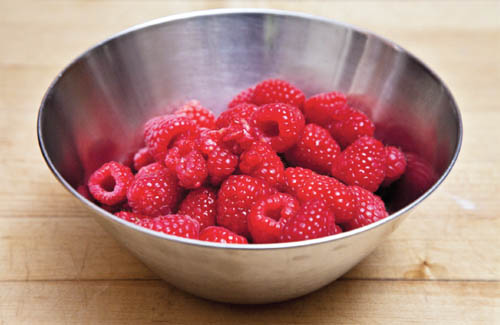
2 cups fresh raspberries
¼ cup lightly packed light brown sugar
1. In a medium saucepan, combine the sugar, egg, flour, and cornstarch. Mix well. Add the milk and vanilla, whisking well. Bring to a boil over medium heat, whisking constantly. Cook, whisking, for 5 to 7 minutes, or until the custard thickens.
2. Pour the custard into a bowl, add the cream cheese, and whisk for 2 minutes, or until the cheese melts. Cover and refrigerate for at least 30 minutes, or until cool.
3. Heat the broiler. Pour the custard into 6 custard cups set on a baking sheet. Press the berries into the custard. Broil 4 inches from the heat for 2 minutes, or until the custard is golden in color.
4. Sprinkle with the brown sugar and set aside for 1 to 2 minutes, or until the sugar melts. Alternatively, if you want to brûlée the sugar, put them back under the broiler briefly. Be sure to watch them carefully, and pull them out when the sugar is bubbly but before it burns.
WHAT THE COMMUNITY SAID
HARDLIKEARMOUR: “These look awesome, and anything that’s the love child of cheesecake and crème brûlée has got to be delicious.”
CONSTANTERRATIC: “After two months, I have to admit that I have made these custard cups three more times (I’m shameless). I omitted the cream cheese and overloaded the cooled custard with pomegranate arils, and I’ve found my go-to dessert for life, haha. Thank you again for a recipe that is so versatile and satisfying!”
FAVABEAN: “I added the juice of half a lemon, and the tartness tempered the sweetness. I also added a pinch or so of cardamom to the mixture, which was lovely.”
TIPS AND TECHNIQUES
A&M: Because both options are already listed in SLD’s recipe, you can simply brûlée the custard and then sprinkle the sugar on top, but we found that popping the ramekins back into the oven for a few minutes gave us that crisp shell we craved. The choice is yours—they’re silky and delicious either way.
WEEK 46 YOUR BEST POOLSIDE COCKTAIL
Boozy Watermelon Rosemary Lemonade

By piccantedolce / Serves 6
WHO: piccantedolce lives in Toronto; she blogs at www.piccantedolce.blogspot.com.
WHAT: A tart pink cocktail that is a burst of summer in a glass.
HOW: Puree watermelon with a rosemary syrup, then add booze.
WHY WE LOVE IT: You don’t strain the watermelon puree, which gives the drink some texture. And we like that piccantedolce calls for gin instead of a more predictable spirit like vodka. We recommend you serve this in Mason jars over plenty of ice.
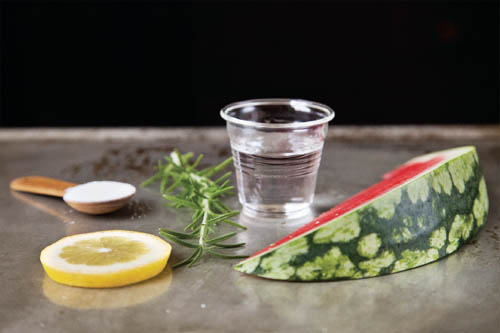
¾ cup sugar
4 fresh rosemary sprigs, plus 6 small sprigs for garnish
1 cup fresh lemon juice
7 cups watermelon cut into 1-inch (seedless) cubes (about ½ medium watermelon)
8 ounces gin
1 lemon, thinly sliced, for garnish
1. Place the sugar and 1 cup water in a small saucepan, add the 4 rosemary sprigs, and cook over medium heat, stirring, until the sugar dissolves. Remove from the heat, cover the saucepan, and let the syrup sit for at least 1 hour to infuse.
2. Put the lemon juice in a blender. Add the watermelon in batches, blending well. Pour in the rosemary simple syrup ¼ cup at a time until the mixture is at your desired sweetness (I use about 1 cup).
3. Pour the mixture into a large pitcher and add 1 cup cold water and the gin. Stir to combine. Serve over ice in jars or glasses, garnished with lemon slices and small rosemary sprigs.
WHAT THE COMMUNITY SAID
BOULANGERE: “The rosemary and gin are a brilliant combination. And I love that you’re generous with the lemon. What a beautiful creation.”
WEEK 47 YOUR BEST FLANK STEAK
Flank Steak on Texas Toast with Chimichurri
By sdebrango / Serves 4
WHO: sdebrango lives in Brooklyn, New York.
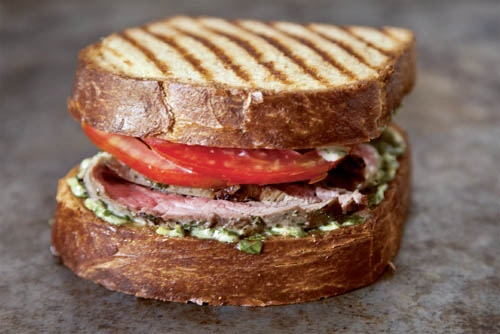
WHAT: A sandwich that is a real two-hander, juicy and garlicky and fragrant.
HOW: You make one big batch of chimichurri, which both marinates the steak and gets swirled in to flavor the quickie aioli.
WHY WE LOVE IT: This steak prep technique—marinate, then dry-brine—made for one of the best steaks we’ve had lately, and the resulting sandwich shines because of it (the ripe tomatoes, buttery Texas toast, and aioli help, too).
Chimichurri
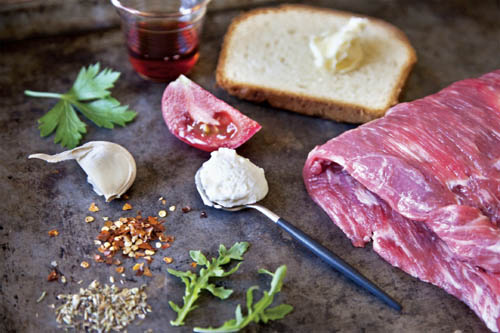
1 cup flat-leaf parsley leaves, finely chopped
½ cup baby arugula, finely chopped
2 garlic cloves, minced
¼ teaspoon dried oregano
¼ teaspoon red pepper flakes
½ cup plus 2 tablespoons extra virgin olive oil
2 tablespoons red wine vinegar
Salt and freshly ground black pepper to taste
Steak and Sandwich
One 1½- to 2-pound flank steak
Salt
1 ripe beefsteak or heirloom tomato
1 brioche Pullman loaf (or, if you prefer, a white Pullman loaf)
¼ cup mayonnaise
Freshly ground black pepper
Softened butter for the bread
1. To make the chimichurri: Place all the ingredients in a bowl and stir to combine.
2. Put the steak in a zip-top plastic bag, add half the chimichurri, seal the bag, and turn and tilt the bag to coat the steak on both sides. Refrigerate for 1 to 2 hours. Cover the rest of the chimichurri and refrigerate.
3. Approximately 45 minutes before you’re planning to cook it, remove the steak from the refrigerator. Scrape off some of the chimichurri, salt the steak, and let it rest.
4. While the steak is resting, prepare the other ingredients: Slice the tomato. Cut the bread into ¾-inch-thick slices. Mix the mayonnaise and the reserved chimichurri together in a bowl.
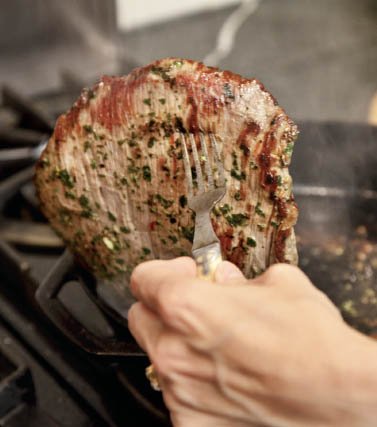
5. When ready to sear the steak, pat it with a paper towel to remove excess moisture. Heat a large heavy skillet over medium-high heat until very hot. Lay the steak in the pan and let it sear without disturbing it. For medium-rare, cook for 3 to 4 minutes on each side. (You may have to adjust the time based on the thickness of the steak.) Remove from the pan, lay on a cutting board, season with pepper, and let rest for 5 to 10 minutes.
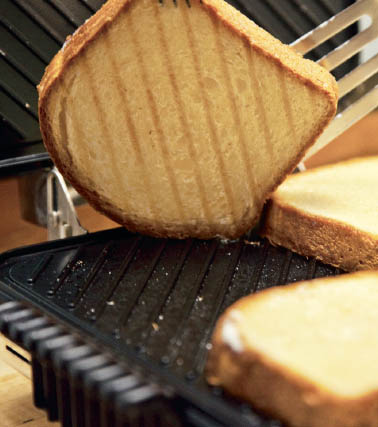
6. While the steak is resting, set a large heavy skillet over medium-high heat (if you have one with ridges, it will make nice grill marks on the bread). Spread butter on both sides of the bread, place in the hot pan, and cook for about one minute per side, until well toasted.
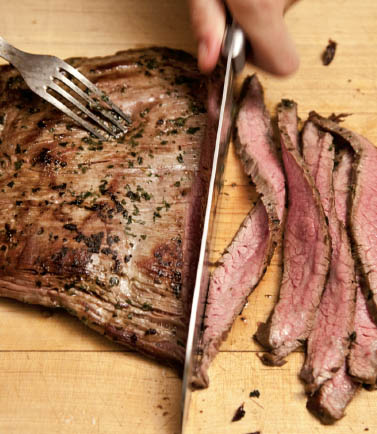
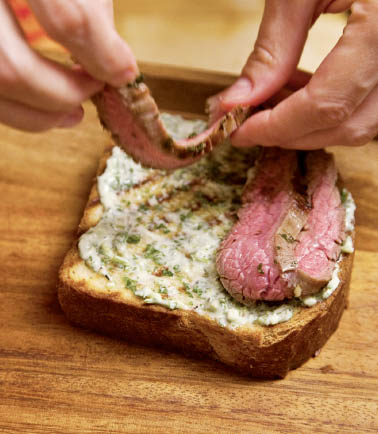
7. When the steak has rested, thinly slice it, cutting across the grain. To put your sandwiches together, spread chimichurri mayonnaise on one side of each slice of bread. Lay the sliced steak on half the slices of bread, add the tomato, put the other slices of bread on top, and enjoy.
WHAT THE COMMUNITY SAID
TEXAS EX: “Absolutely delicious. The bright flavors work perfectly together, and the sandwiches are a snap to prepare. Great recipe!”
BIGBEAR: “As good as anything I tasted in the corner parillas in the Belgrano District of Buenos Aires. That says a lot. Great sandwich, well deserving of the win.”
ZOEMETROUK: “sdebrango, we made the steak on the grill this weekend with Jose Andrés’ wrinkled potatoes. The steak was divine—the chimichurri took it to new heights.”
TIPS AND TECHNIQUES
A&M: In divvying up the chimichurri, we scooped out mostly garlic and herbs to add to the mayo and held back on the oil so it didn’t get too runny, and we were very happy. Very.
WEEK 48 YOUR BEST CHILE PEPPER RECIPE
Braised Pork Belly Tacos with Watermelon, Jicama, and Jalapeño Salsa
By a la Alison / Serves 3 to 4
WHO: a la Alison lives in Philadelphia and works in advertising. She blogs at www.alaalison.com.
WHAT: Braised pork belly takes to warm, sweet allspice broth like a moth to a flame, and zippy watermelon, jicama, and jalapeño salsa is the perfect cool complement.
HOW: You’ll want to plan ahead for the long brine and braise times, but the hands-on time is surprisingly minimal.
WHY WE LOVE IT: The pork emerges from the braising liquid burnished and melting, both spicy and a little sweet (there is minced chile in the braise as well). The crunchy salsa builds on the heat (and the sweet) and provides a great textural contrast. And there’s nothing wrong with forgoing the tortillas, as we started to do at one point—just spoon some of the salsa over the pork belly and dig in.
Tacos
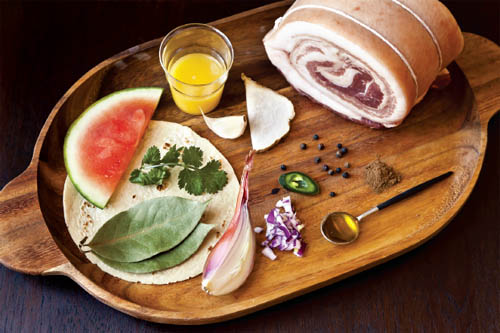
2 pounds pork belly
¾ cup honey
6 bay leaves
½ cup kosher or sea salt
2 tablespoons black peppercorns
3 tablespoons ground allspice
Salt and freshly ground black pepper
1 large shallot, minced
2 garlic cloves, minced
2 tablespoons minced seeded jalapeño
2 cups orange juice
1 cup chicken stock or low-sodium broth
10 to 12 small corn tortillas, warmed for serving
Salsa
3 cups cubed seedless watermelon
Juice of 1½ limes
1 cup diced peeled jicama
¼ cup chopped fresh cilantro
2 tablespoons minced seeded jalapeño
½ large red onion, minced
Salt
1. Rinse the pork and pat it dry.
2. To make the brine: Add 5 cups water, the honey, bay leaves, salt, and peppercorns to a small pot and bring to a boil. Remove the brine from the heat and allow to cool completely.
3. Place the pork in a large bowl and add the brine. Refrigerate for 6 to 7 hours (any more, and the pork will become too salty).
4. Remove the pork from the brine and pat completely dry. Allow to sit at room temperature for 30 minutes before braising. Heat the oven to 325°F.
5. Cut the pork belly into strips roughly 1 inch wide (about 10 strips). Season the strips with the allspice, salt, and pepper.
6. Heat a Dutch oven or other large ovenproof pot over medium heat. Once the pot is hot, add the strips fat side down and thoroughly brown the belly, 10 to 15 minutes. Flip and sear the other side for under a minute. Remove the pork to a paper-towel-lined plate.
7. Pour off most of the fat from the pot, leaving roughly 2 tablespoons. Add the shallot, garlic, and jalapeño to the Dutch oven and sauté in the pork fat for 5 minutes.
8. Return the pork to the pot and add the juice and stock. Bring to a slight simmer, place the lid on the pot, and move to the oven. Braise until the pork is very tender when pierced with a fork; this will take 2 to 3 hours.
9. Meanwhile, make the salsa: Mix all the ingredients together in a bowl and let stand while the pork cooks. This will allow the flavors to mix thoroughly before serving.
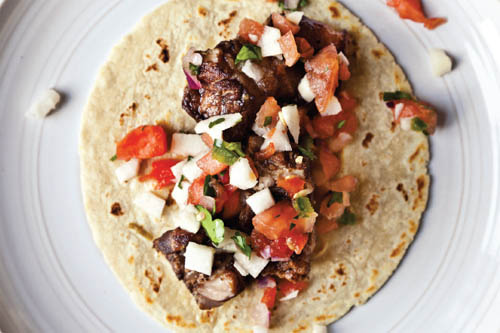
10. Remove the pork belly from the oven. To serve, top each warm tortilla with a strip of pork belly and a spoonful of salsa.
WHAT THE COMMUNITY SAID
MASTER CHEF SASS: “I consider myself to be somewhat of a pork belly enthusiast. And you, ma’am, sure know how to braise yourself a pork belly.”
WEEK 49 YOUR BEST CORN OFF THE COB
Corn Salad with Cilantro and Caramelized Onions
By Ms. T / Serves 6
WHO: Ms. T is a museum-marketing professional in Mill Valley, California. You can read about her cooking on her blog, www.stillsimmering.wordpress.com.
WHAT: Fresh corn meets sweet-and-sour onions.
HOW: Ms. T’s version of this salad includes a technique we’ve never seen before: First she has you cook down red onion in balsamic vinegar and olive oil—and as the onion pieces soften into silky, purple jewels, they simultaneously create a rich, deeply flavored dressing for the salad.
WHY WE LOVE IT: Once you toss the luscious onion mass with crisp pancetta cubes, fresh cilantro, and barely cooked kernels of corn, you’ve got a corn salad that breaks new ground. We couldn’t stop eating it, right from the bowl.
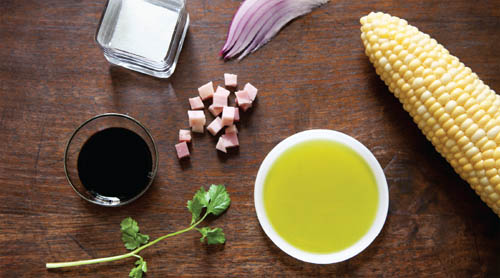
6 ears sweet corn, husked
Six 1/8-inch-thick slices pancetta, diced
¼ cup olive oil, or as needed
1 large red onion, chopped
2 tablespoons balsamic vinegar
2 teaspoons sugar
Salt
¼ cup finely chopped fresh cilantro
Freshly ground black pepper
1. Blanch the corn in a large pot of boiling water for about 3 minutes. Drain the corn and plunge it into a bowl of ice water to stop the cooking, then drain again and let cool completely.
2. Spread the pancetta in a large heavy skillet, set over medium heat, and cook until brown and crisp. Use a slotted spoon to transfer the pancetta to a plate lined with a paper towel.
3. Pour off most of the fat from the skillet, leaving a little goodness (pork fat) in the pan for cooking your onions. Add the oil, onions, vinegar, sugar, and a dash of salt to the pan and cook over medium-low heat for 20 to 25 minutes, stirring frequently, until the onions are caramelized and most of the liquid has evaporated. Remove the pan from the heat.
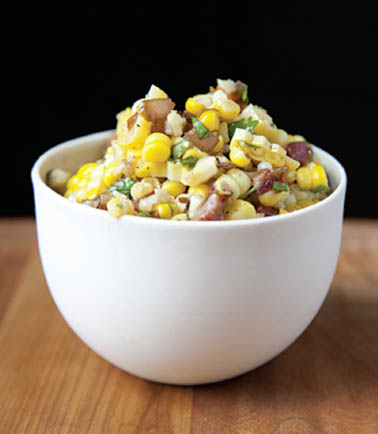
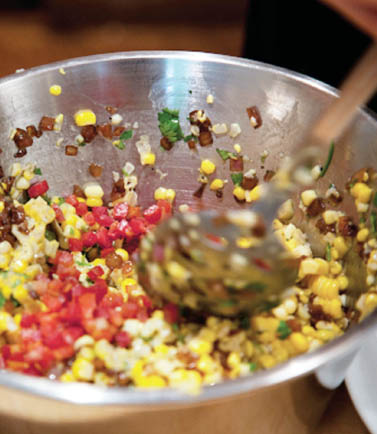
4. Cut the corn kernels off the cobs and place in a large bowl. Add the onion mixture and cilantro and stir to combine. Season with salt and pepper and, if it seems dry, add a little more olive oil. (If you’re making this ahead of time, cover and put it in the fridge. Take the salad out about 30 minutes before serving to take the chill off.)
5. Stir in the crisp pancetta just before serving.
WHAT THE COMMUNITY SAID
ADORRAIN: “Are you kidding me??? This is amazing. Absolutely amazing. Thank you for this perfect August-in-the-Midwest recipe. I can’t wait to bring this to a potluck and be the star.”
TIPS AND TECHNIQUES
ANTONIAJAMES: “Fresh marjoram would be perfect in this if you don’t want to use cilantro. It’s corn’s best friend, though many people don’t realize it. Use just the tiniest amount at first, adding more to taste, especially if you’re picking your marjoram leaves off of a plant that’s been in full sunlight/heat all day; the flavor of raw marjoram can be intense, especially under those circumstances.”
WEEK 50 YOUR BEST FAIR FOOD
State Fair Cream Puffs

By hardlikearmour / Serves 6
WHO: Read more about hardlikearmour and see her Coconut Cajeta and Chocolate Fondue.
WHAT: Easy-to-make cream puffs with a more boozy than chocolaty filling. hardlikearmour adapted her cream puffs recipe from the Wisconsin Bakers Association and her bourbon whipped cream from Rose Levy Beranbaum.
HOW: hardlikearmour cleverly presses the food processor into service to cool down the dough and then incorporate the eggs.
WHY WE LOVE IT: Purists will insist on stirring by hand, but this technique proves the elbow-grease method simply isn’t necessary. She also uses an extra egg white for her puffs, which makes for bigger puffs that don’t end up too gooey inside.
Cream Puffs
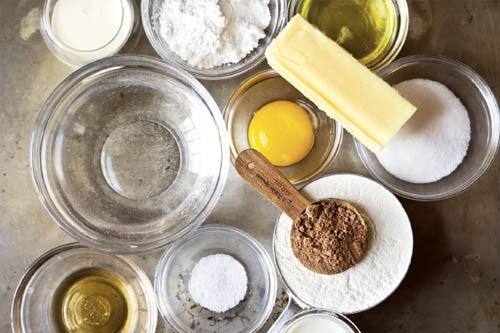
¼ cup whole milk
6 tablespoons unsalted butter, cut into ½-inch cubes
Heaping ¼ teaspoon salt
1 cup all-purpose flour
4 large eggs, 1 separated
Confectioners’ sugar for dusting
Bourbon-Chocolate Whipped Cream
1 cup heavy cream
2 tablespoons Dutch-processed cocoa powder
2 tablespoons plus 2 teaspoons sugar
1 tablespoon bourbon (I used Knob Creek)
1. To make the cream puffs: Heat the oven to 425°F with a rack in the lower third. Spray a baking sheet lightly with cooking spray (to anchor the paper), then line with parchment paper. (Alternatively, use a Silpat mat.)
2. Combine ¾ cup water, the milk, butter, and salt in a heavy 2-quart saucepan and bring to a boil over medium-low heat. (The butter should melt before it boils.)
3. Meanwhile, whisk the flour for about 30 seconds to aerate and break up any clumps. In a 2-cup liquid measure, combine 3 eggs and 1 egg white and mix to blend. In a small bowl, whisk together the remaining yolk and 2 tablespoons water (this will be your egg wash).
4. Once the water has just started to boil, remove the pan from the heat and dump all of the flour in at once. Stir the mixture with a heatproof spatula until the flour is mostly incorporated. Return to the heat and use the spatula to smear the mixture across the bottom of the pan continuously for 3 to 4 minutes. A thin film of flour should build up on the bottom of the pan.
5. Transfer the dough to the bowl of a food processor and process for 15 seconds to cool slightly. With the processor running, add the eggs through the feed tube in a steady stream over about 15 seconds. Stop the processor and scrape down the sides of the bowl. Process for an additional 30 to 40 seconds, until a smooth paste has formed.
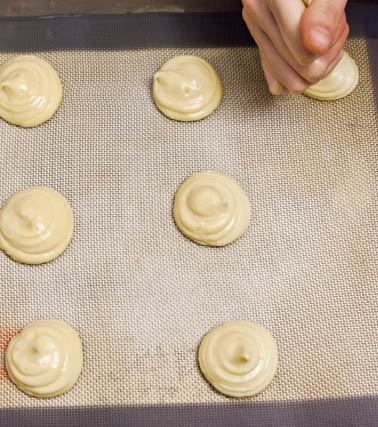
6. Transfer the dough to a gallon plastic bag, seal the bag, and cut a ½- to ¾-inch-long opening in one corner. Pipe the dough into a 2½- to 2¾-inch rounds about 1 inch high onto the lined baking sheet, making sure to leave about 2 inches between puffs. Brush the puffs with the egg wash, using the pastry brush to smooth the tops of the puffs as well as coat the puffs. Take care not to get the egg wash onto the baking sheet, as it will burn.
7. Bake for 10 minutes, then reduce the heat to 375°F and bake for 17 to 20 minutes, until the puffs are a deep golden brown. Turn the oven off.
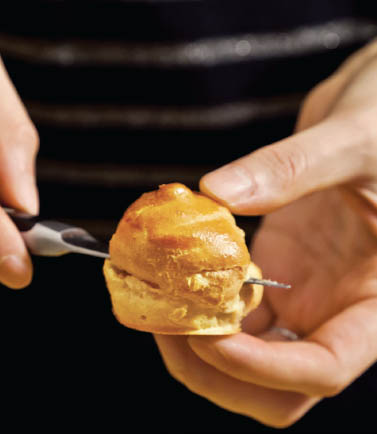
8. Use a paring knife to cut a slit in the side of each puff (where you plan on cutting them in half). Place the tray of puffs back in the oven and use a wooden spoon to crack the door open. Allow the puffs to dry in the oven for 1 hour.
9. Remove the puffs from the oven and cool completely on a rack. (The puffs can be stored in an airtight container at room temperature for a day or two—recrisp for 3 minutes in a 350°F oven before serving.)
10. To make the whipped cream: Combine the cream, cocoa, and sugar in a medium bowl and whisk to combine. Cover and refrigerate for at least 1 hour to allow the cocoa to dissolve.
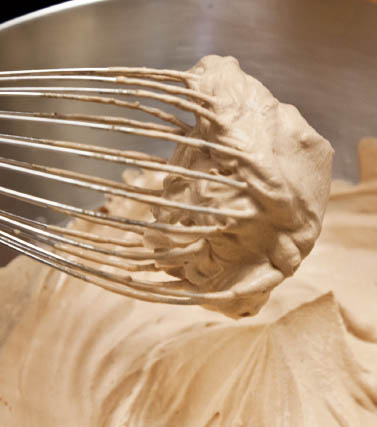
11. Whisk the cream by hand or beat with a hand mixer until stiff peaks form. Whisk in the bourbon.
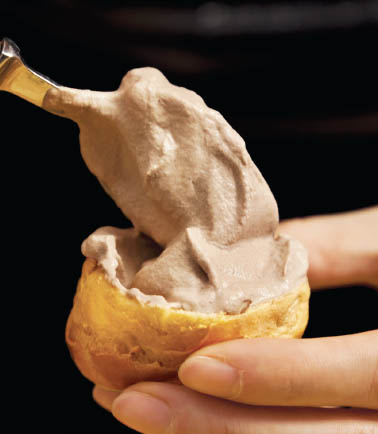
12. To serve, cut the 6 prettiest cream puffs in half. Fill each with about 1/3 cup of the whipped cream, and dust with confectioners’ sugar.
WHAT THE COMMUNITY SAID
H.C.R: “Gorgeous and more boozy than chocolaty? Perfect!”
BLUEKALEROAD: “This is a marvelous recipe. I’m using your bourbon chocolate whipped cream as a filling in a birthday cake.”
TIPS AND TECHNIQUES
HARDLIKEARMOUR: “If you don’t want to use bourbon, whisk in a teaspoon of vanilla extract instead to round out the chocolate flavor.”
WEEK 51 YOUR BEST CHERRY TOMATOES
Baked Ricotta and Goat Cheese with Candied Tomatoes
By TheRunawaySpoon / Serves 8 to 10
WHO: Read more about TheRunawaySpoon and see her recipe for Fig and Blue Cheese Savouries; see her recipe for Pastitsio.
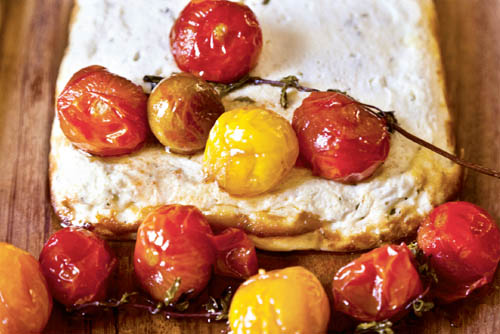
WHAT: A savory cheese cake topped with sweet tomato baubles.
HOW: Mix, drain, and bake your cheese. Blister your tomatoes in a hot pan and spoon them over.
WHY WE LOVE IT: The tomatoes really do taste like candy—the brown sugar and vermouth turn to syrup in the pan and cloak the cherry tomatoes, caramelizing their edges as they pop and start to collapse. Perch a slice of the creamy, salty ricotta and goat cheese cake on a piece of good baguette, then top it with a tomato and some syrup for the perfect bite.
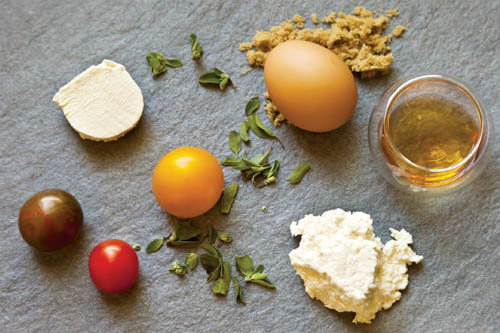
One 15-ounce container whole milk ricotta
4 ounces fresh goat cheese
1 large egg
2 tablespoons fresh marjoram leaves (or other leafy herb of your choice), chopped if the leaves are large
Kosher salt and freshly ground black pepper
Baguette slices or crostini for serving
1 tablespoon olive oil
12 ounces cherry tomatoes
¼ cup sweet (Italian/red) vermouth
¼ cup packed light brown sugar
3 fresh marjoram sprigs (or other leafy herb of your choice)
Sea salt
1. To make the baked cheese: Place the ricotta in a colander lined with cheesecloth and leave to drain for about 30 minutes, gently pressing down with the back of a spoon or rubber spatula occasionally to help extract liquid.
2. Heat the oven to 375°F. Brush the inside of a 2-cup baking dish with olive oil.
3. In the bowl of a stand mixer fitted with the paddle attachment (or by hand with a wooden spoon in a large bowl), beat the ricotta, goat cheese, and egg until smooth. (Taste the goat cheese first—saltier cheeses will require less additional salt.) Beat in the herbs, salt to taste, and a generous amount of pepper.
4. Spoon the cheese mixture into the prepared baking dish. Bake for 40 minutes, or until puffed in the center and browning. Let the cheese cool slightly, then invert it onto a plate.
5. Meanwhile, make the tomatoes: Heat the olive oil in a large skillet over medium heat, then drop in the tomatoes. Cook, stirring frequently, until the skins start to split. Pull the pan off the flame and add the vermouth, then return to the heat. Add the brown sugar and herbs and stir until the sugar is melted. Add a generous pinch of sea salt. Lower the heat and cook gently until the liquid is reduced to a syrupy coating for the tomatoes. The tomatoes will collapse and some may disintegrate—that’s fine, ideal even. You don’t want them watery. Remove from the heat.
6. When ready to serve, spoon the candied tomatoes over the warm baked cheese and serve with sliced baguette or crostini.
WHAT THE COMMUNITY SAID
JAVA&FOAM: “Personally, I believe the tomatoes are the star of this dish. They are out of this world. Anyone who doesn’t like tomatoes will be stunned at how incredible these taste…. Congrats on such an epic contribution to cocktail hour.”
TIPS AND TECHNIQUES
THERUNAWAYSPOON: “The cheese mixture can be prepared a few hours in advance and then baked before serving. It is best served warm, but not right out of the oven. The tomatoes can be prepared ahead, too, and gently reheated before serving.”
WEEK 52 A&M SMACKDOWN—YOUR BEST PEACH PIE OR TART
Peach Tart
By amanda / Serves 8
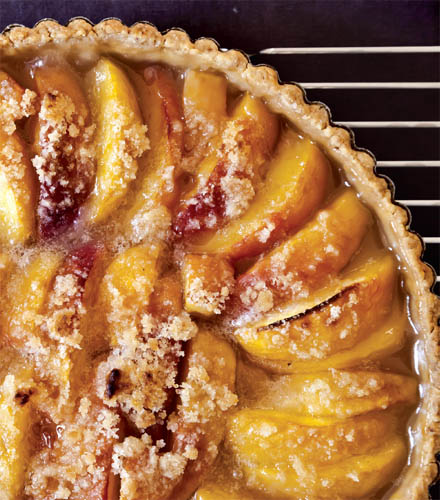
WHAT: Every cook needs a good dessert recipe that can be whipped up anywhere—this peach tart, with its easy press-in crust, is that recipe.
HOW: The dough, made with oil, milk, and almond extract, is pressed into the pan. There is no blind-baking nonsense. You just top the dough with the peaches, then shower them with a sugary, salty crumble and send the tart on its merry way into the oven.
WHY WE LOVE IT: It’s sweet and salty, crisp yet gooey, and quite a looker too.
1½ cups plus 2 tablespoons all-purpose flour, or as needed
¾ teaspoon kosher salt
¾ cup plus 1 teaspoon sugar
¼ cup vegetable or canola oil
¼ cup mild olive oil
2 tablespoons whole milk
½ teaspoon almond extract
2 tablespoons cold unsalted butter
3 to 5 small ripe peaches, pitted and thickly sliced (about ½ inch wide)
1. Heat the oven to 425°F.
2. In a large bowl, stir together 1½ cups of the flour, ½ teaspoon of the salt, and the 1 teaspoon sugar. (Stirring enables the salt and sugar to “sift” the flour, so you don’t need to sift it separately.)
3. In a small bowl, whisk together the oils, milk, and almond extract. Pour this mixture into the flour mixture and mix gently with a fork, just enough to dampen; do not overwork it. Transfer the dough to an 11-inch tart pan with a removable bottom (you can use a smaller one if necessary) and use your hands to pat the dough evenly over the bottom of the pan, pushing it up the sides to the edges. This will work if you pat firmly and confidently, not if you curl your fingertips into the dough. It should be about 1/8 inch thick all around; trim and discard excess dough.
4. In a medium bowl, combine the remaining ¾ cup sugar, 2 tablespoons flour, ¼ teaspoon salt, and the butter. (If your peaches are especially juicy, add 1 tablespoon additional flour.) Using your fingers, pinch the butter into the dry ingredients until crumbly, with a mixture of fine granules and tiny pebbles.
5. Starting at the outside, arrange the peaches in overlapping concentric circles over the dough; fill in the center in whatever pattern makes sense. The peaches should fit snugly. Sprinkle the pebbly butter mixture over the top (it will seem like a lot).
6. Bake for 35 to 45 minutes, until shiny, thick bubbles begin enveloping the fruit, and the crust is slightly brown. Cool on a rack, and serve warm or at room temperature, preferably with generous dollops of whipped cream.
WHAT THE COMMUNITY SAID
ROBIN O’D: “So good and easy! My twelve-year-old made most of the recipe, including pressing the crust into the pan. I love such a forgiving crust!”
FIVEANDSPICE: “This looks wonderful, Amanda! I love the shower of crumble over the top of the tart. A tart and a crisp all in one—what more could a person want?”
MYGARDENERSTABLE: “This is really a chameleon of a recipe, it is so incredibly versatile. I have made it countless times from Amanda’s book over the years, not only with peaches. Today I made it with apples and 1 tablespoon of rum instead of almond extract, and it came out wonderfully.”
TIPS AND TECHNIQUES
AMANDA: “I got the original recipe from my mother, who uses all vegetable oil in the crust. I use half vegetable oil and half olive oil. She neatly peels her peaches. Lazy kin, I do not. Hers is probably better, but you are stuck with mine.”