GRAPHIC
AND BRIGHT

CHANGE UP YOUR INTERIORS WITH A STRIKING PILLOW COVER.
MATERIALS AND EQUIPMENT
✦ Weaving loom
✦ Approximately 33¼yd (30.3m) of cotton warp thread
✦ Sharp scissors
✦ (Bamboo) comb (a fork can be used)
✦ Selection of yarns in super-chunky (bulky), chunky, roving, and large pom-pom trimming: this project uses approximately ½oz (10g) of black chunky (yarn A), 23½in (60cm) of white large pom-pom trimming (yarn B), ½oz (10g) of cream super-chunky (bulky) (yarn C), 39¼in (1m) of white roving (yarn D)
✦ Weaving shuttles
✦ Weaver’s needle
✦ Tapestry needle
✦ Pillow and cover measuring 11½in (29cm) square
✦ Pins
✦ Sewing needle and thread
TECHNIQUES USED
✦ Warping a loom, page 9
✦ Twisted header, page 10
✦ Using the charts, page 11
✦ Tabby weaving, page 13
✦ Multiple warp tabby weaving, page 14
✦ Working with roving, page 16
✦ Incorporating trims, page 19
✦ Weaving in weft ends, page 20
✦ Knotting warp ends, page 21
FINISHED MEASUREMENTS
✦ Panel measures 7⅞in (20cm) square
1 Prepare the loom by warping an area 7¾in (20cm) wide and 21¼in (54cm) long (see page 9). This project uses light-medium gauge warping cotton (see page 7) and a warping area of 50 threads.
2 Cut a length of warping cotton 3 times the length of the weaving area and work a twisted header row (see page 10). Use the comb to position the header so it is straight and parallel to the base section of the loom.
3 Following the chart (see pages 11 and 91) and using yarn A, work in tabby weaving (see page 13) for 20 rows.
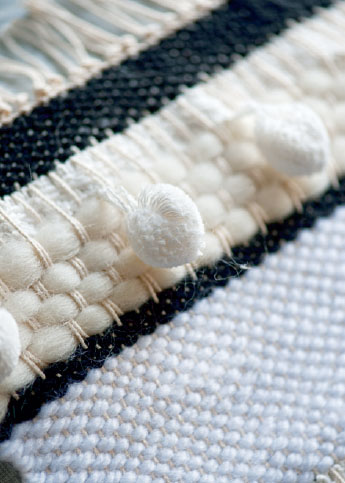
4 With a length of pom-pom trim (yarn B), work 1 row of tabby weaving, easing and adjusting the trim to ensure that the pom-poms protrude on the front of the work. With scissors, trim away the pom-poms on the excess trim on either side of the weaving.
5 With yarn C, working in tabby weaving for 20 rows.
6 With yarn A, work in tabby weaving for 4 rows.
7 With a length of yarn D smoothed flat (see page 16), work 4 rows of multiple warp tabby weaving (see page 14), working over 2 warps and under 2 warps.
8 With a length of pom-pom trim (yarn B), work 1 row of tabby weaving, easing and adjusting the trim to ensure that the pom-poms protrude on the front of the work. With scissors, trim away the pom-poms on the excess trim on either side of the weaving.
9 With yarn A, work in tabby weaving for 10 rows.
10 Cut a length of warping cotton 3 times the length of the weaving area and work a twisted header row. Use the comb to beat this into position at the end of the weaving to secure the last row.
11 Weave in all weft ends (see page 20) neatly on the back of the work.
12 Cut the warps, leaving them as long as possible. Working in pairs, hold 2 warp threads together and tie an overhand knot (see page 21), sliding the knot up to the twisted header to secure it. Continue until all top and bottom warps have been knotted. Trim the warps to create neat 1½in (4cm) tassels.
13 Place the panel centrally on the front of the pillow cover and pin it in place. With the sewing needle and thread, sew the panel to the pillow cover using neat running stitch.
MAKE IT EASY
Trimming away the pom-poms on the excess trim at either side of the weaving makes it easier to weave the ends of the tape in to the back of the work when the piece is finished.
MAKE IT YOURS
A statement panel can be made larger or smaller to accommodate any size pillow; simply add more or fewer threads when warping and work more or fewer rows when creating your design to achieve the correct size panel for your pillow.
SEWING ON THE PANEL
Work with a coordinating thread when sewing the woven panel to the front of the pillow to help keep the stitches discreet.
YARN ALTERNATIVES
Monochrome is a great basic palette for adding a flash of color to; try a fresh lilac for a more feminine touch.
MATERIALS AND EQUIPMENT
✦ Weaving loom
✦ Approximately 32¼yd (29.5m) of cotton warp thread
✦ Sharp scissors
✦ (Bamboo) comb (a fork can be used)
✦ Selection of yarns in worsted weight (Aran) yarns in three monochrome shades: this project uses approximately 1¾oz (50g) of cream (yarn A), 1¾oz (50g) of gray (yarn B), and 1¾oz (50g) of black (yarn C)
✦ Weaving shuttles
✦ Weaver’s needle
✦ Tapestry needle
✦ ⅜in (1cm) dowel for hanging, measuring 15in (38cm) long
✦ Black acrylic paint and artist’s paintbrush
TECHNIQUES USED
✦ Warping a loom, page 9
✦ Twisted header, page 10
✦ Using the charts, page 11
✦ Tabby weaving, page 13
✦ Rya knots, page 18
✦ Weaving in weft ends, page 20
✦ Knotting warp ends, page 21
✦ Weaving in warp ends, page 21
✦ Adding a hanging stick, page 21
FINISHED MEASUREMENTS
✦ 7 ¼ x 13 ¼ in (18.5 x 35cm)
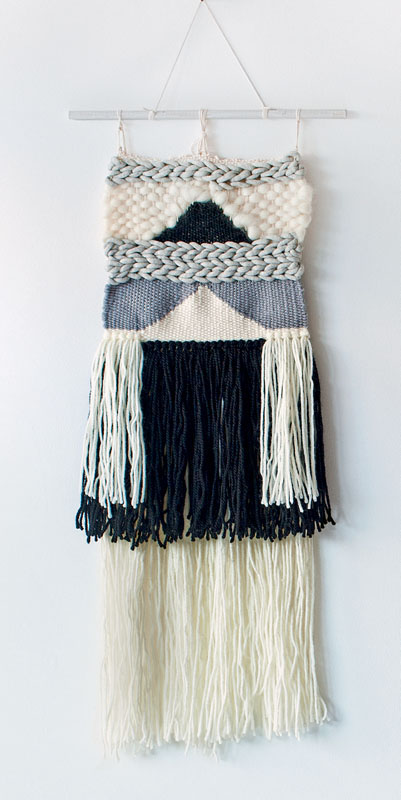
GO BOLD WITH A GRAPHIC DESIGN USING JUST BLACK, WHITE, AND GRAY.
1 Prepare the loom by warping an area 7¼in (18.5cm) wide and 21¼in (54cm) long (see page 9). This project uses light-medium gauge warping cotton (see page 7) and a warping area of 48 threads.
2 Cut a length of warping cotton 3 times the length of the weaving area and work a twisted header row (see page 10). Use the comb to position the header so it is straight and parallel to the base section of the loom.
3 Following the chart (see pages 11 and 95) and using yarn A, work in tabby weaving (see page 13) for 4 rows.
4 Cut 125 lengths of yarn B, each measuring 13⅜in (34cm). Divide them into 24 bundles of 5 strands each. Fold each bundle in half and work 24 equally spaced rya knots (see page 18) across the row.
5 With yarn A, work in tabby weaving for 12 rows. Change to yarn B and work 3 rows of tabby. Return to yarn A and work in tabby weaving for a further 12 rows.
6 Change to yarn C and working over the central 8 warps only, work in tabby weaving for 12 rows.
7 Change to yarn A and fill in the background section on the right-hand and left-hand sides of the loom. Work in tabby weaving, and keep the edges of the colors sharp by not interlacing the woven block and the background where the two sections meet. Continue working until the side sections are aligned with the top of the center section.
8 Change to yarn C and working over the central 24 warps only, work in tabby weaving for 12 rows.
9 Change to yarn A and fill in the background section on the right-hand and left-hand sides of the loom as in Step 7. Continue working until the side sections are aligned with the top of the center section.
10 Using yarn A and working over the central 8 warps only, work in tabby weaving for 12 rows.
11 Change to yarn C and working over the 16 warps on either side of the central block in turn, work in tabby weaving for 12 rows.
MAKE IT YOURS
You can maximize the monochrome theme by working the rya knots in alternate black and white to make a striped fringe.
12 Change to yarn A and fill in the background section on the right-hand and left-hand sides of the loom as in Step 7. Continue working until the side sections are aligned with the top of the center section.
13 Change to yarn C and working over the central 24 warps only, work in tabby weaving for 12 rows. Change to yarn A and fill in the background as in Step 7.
14 Change to yarn C and working over the central 8 warps only, work in tabby weaving for 12 rows. Change to yarn A and fill in the background as in Step 7.
15 Continue working in yarn A in tabby weaving for 12 rows. Change to yarn B and work 3 rows of tabby. Return to yarn A and work in tabby weaving for a further 12 rows.
FINISHING AND MAKING UP
16 Cut a length of warping cotton 3 times the length of the weaving area and work a twisted header row. Use the comb to beat this into position at the end of the weaving to secure the last row.
17 Using a tapestry needle, weave in all weft ends (see page 20) neatly on the back of the work.
18 Cut the warps, leaving them as long as possible. Holding each pair of bottom warp threads in turn, pass one over the other to create a half knot (see page 21), and continue until all the pairs of warp threads have been half-knotted. With a tapestry needle and working with each warp end in turn, weave them neatly and securely into the back of the work and trim away any excess (see page 21).
19 Paint the dowel black with acrylic paint, applying a second coat if needed. Leave to dry.
20 Half knot the top warps in the same way as the bottom ones. Position the dowel above the weaving and overhand knot the warps securely over the dowel (see page 21). Trim the ends short. Make a hanging loop from a short length of warping cotton.
21 Trim the ends of the rya knots neatly to make 6in (15cm) tassels.
YARN ALTERNATIVES
You can add a single flash of color, such as bright red, as an accent in an otherwise monochrome design.
HANGING ROD
Dowel can be trimmed to any length desired for your wall hanging—use a piece of sandpaper to smooth away any roughness on the ends.
TRIMMING TASSELS
Trim all the ends of the rya knots once the whole weaving is complete. Lay the work on a flat surface and smooth the tassels out—a fork can help to do this—before neatly trimming them to equal lengths.
MIXING AND MATCHING A SELECTION OF DIFFERENT MONOCHROME YARNS IS A GREAT WAY TO MAKE A STATEMENT PIECE FOR ANY ROOM.
MATERIALS AND EQUIPMENT
✦ Weaving loom
✦ Approximately 37yd (34m) of cotton warp thread
✦ Sharp scissors
✦ (Bamboo) comb (a fork can be used)
✦ Selection of yarns in worsted weight (Aran), light worsted (double knitting), and super-chunky (bulky): this project uses approximately 1¾oz (50g) of cream worsted weight (Aran) (yarn A), 1¾oz (50g) of black worsted weight (Aran) (yarn B), 1¾oz (50g) of gray light worsted (double knitting) (yarn C), 1¾oz (50g) of gray super-chunky (bulky) (yarn D), and ¾oz (20g) of cream roving (yarn E)
✦ Weaving shuttles
✦ Weaver’s needle
✦ Tapestry needle
✦ ⅜ in (1cm) dowel for hanging, measuring 15in (38cm) long
✦ White acrylic paint and artist’s paintbrush
✦ Warping a loom, page 9
✦ Twisted header, page 10
✦ Using the charts, page 11
✦ Tabby weaving, page 13
✦ Multiple warp tabby weaving, page 14
✦ Shaping in weaving, page 15
✦ Working with roving, page 16
✦ Soumak, page 16
✦ Rya knots, page 18
✦ Weaving in weft ends, page 20
✦ Knotting warp ends, page 21
✦ Weaving in warp ends, page 21
✦ Adding a hanging stick, page 21
FINISHED MEASUREMENTS
✦ 8¼ x 26⅜in (21 x 67cm) including tassels
1 Prepare the loom by warping an area 8⅝in (22cm) wide and 21¼in (54cm) long (see page 9). This project uses light-medium gauge warping cotton (see page 7) and a warping area of 56 threads.
2 Cut a length of warping cotton 3 times the length of the weaving area and work a twisted header row (see page 10). Use the comb to position the header so it is straight and parallel to the base section of the loom.
3 Following the chart (see pages 11 and 99) and using yarn A, work in tabby weaving (see page 13) for 4 rows.
4 Cut 84 lengths of yarn A, each measuring 39¼in (1m). Divide them into 28 bundles of 3 strands each. Fold each bundle in half and work 28 equally spaced rya knots (see page 18) across the row. Once secure, trim the tassels of the rya knots to 17¾in (45cm).
5 With yarn A, work 2 rows in tabby weaving.
6 Cut 84 lengths of yarn B, each measuring 17 in (44cm). Divide them into 28 bundles of 3 strands each. Fold each bundle in half and work 28 equally spaced rya knots across the row. Once secure, trim the tassels of the rya knots to 8in (20cm).
7 With yarn A, work 2 rows in tabby weaving.
8 Cut 30 lengths of yarn A, each measuring 16 in (40cm). Divide them into 10 bundles of 3 strands each. Fold each bundle in half and work 5 rya knots on the 10 warp threads on the left-hand side of the loom. Then work another 5 rya knots on the 10 warp threads on the right-hand side of the loom. Once secure, trim the tassels of the rya knots to 6 in (15cm).
9 With yarn A, work in tabby weaving across the center of the loom to fill the area between the last rya knots, then work a further 4 rows across all the warp threads.
10 Starting from the 11th warp from the left-hand side, with yarn A work tabby across the loom for 36 warps, work over these warps only for 2 rows in tabby. Decrease (see page 15) by 1 warp at the end of each of the next row then work 1 row straight. Continue working by decreasing 1 warp at each end of every alternate row until you have worked 2 rows over the 2 central warps.
11 Change to yarn C and fill in the background section on the right-hand side of the triangle. Work in tabby weaving and on every row interlace (see page 15) the woven triangle and the background where the two sections meet. Repeat to fill in the section on the left-hand side of the triangle. Then after the point of the triangle, work a further 4 rows in tabby in yarn C across all warp threads.
MAKE IT YOURS
You can add a flash of your favorite bright color to the rya tassels to give the piece a pop of color if that suits your room scheme.
YARN ALTERNATIVES
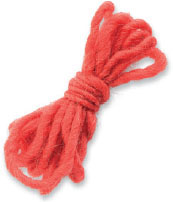
Bright reds or hot oranges can be substituted for the black and gray to turn this monochrome project into a colorful one.
12 Change to yarn D and work a row of double soumak weaving (see page 17), working each knot over 4 warp threads. Repeat to create 3 more rows of soumak.
13 Change to yarn B and starting from the 11th warp from the left-hand side, work tabby across the loom for 36 warps, work over these warps only for 2 rows in tabby. Decrease by 1 warp at the end of each of the next row then work 1 row straight. Continue working by decreasing 1 warp at each end of every alternate row until you have worked 2 rows over the 2 central warps.
14 With a piece of yarn E smoothed flat (see page 16), fill in the background section on the right-hand side of the triangle. Work in multiple warp tabby weaving (see page 14), working over 2 warps and under 2 warps and increasing to follow the line of the shaping of the center triangle. Continue until the left-hand side is filled with tabby. Note that the roving is more voluminous than the worsted (Aran) yarn and will require fewer rows to fill the area. Repeat to fill the background section on the left-hand side of the triangle. Then work 5 rows across all the warp threads.
15 Change to yarn D and work a row of double soumak weaving, working each knot over 4 warp threads. Repeat to create a second row of soumak.
16 With yarn A, work 4 rows in tabby weaving.
FINISHING AND MAKING UP
17 Cut a length of warping cotton 3 times the length of the weaving area and work a twisted header row. Use the comb to beat this into position at the end of the weaving to secure the last row.
18 Weave in all weft ends (see page 20) neatly on the back of the work.
19 Cut the warps, leaving them as long as possible. Working in pairs, hold two warp threads together and tie an overhand knot (see page 21), sliding the knot up to the twisted header to secure it. Continue until all top and bottom warps have been knotted. Trim the bottom warps only to equal lengths to create neat tassels.
20 Paint the dowel black with acrylic paint, applying a second coat if needed. Leave to dry.
21 With the exception of the knotted pair at either end of the top edge of the weaving, and the three knotted pairs of warps in the center, use a tapestry needle to weave the warp ends neatly into the back of the work (see page 21).
22 Position the dowel above the weaving and overhand knot the two end warps securely over the dowel, sliding the knots down tightly (see page 21). Weave the warp ends neatly into the back of the work. Holding the three central warps tighter, overhand knot them over the dowel then weave the warp ends neatly into the back of the work in the same way. Make a hanging loop from a short length of cotton warp thread.
MAKE IT EASY
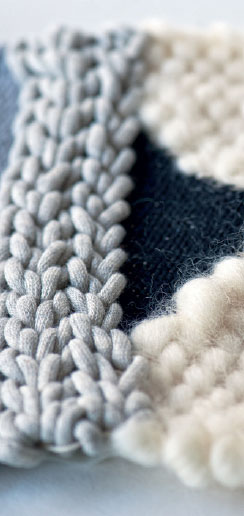
The long tassels of the rya knots can become tangled and get in the way while you work, so keep them tidy by tying them into a neat bundle with a length of off-cut yarn while you complete the make.
CREATIVE HANGING
Painting the dowel is a great way to change up the look of a wall hanging. You can choose an accent color to match a detail in the weaving, or something that is harmonious overall.
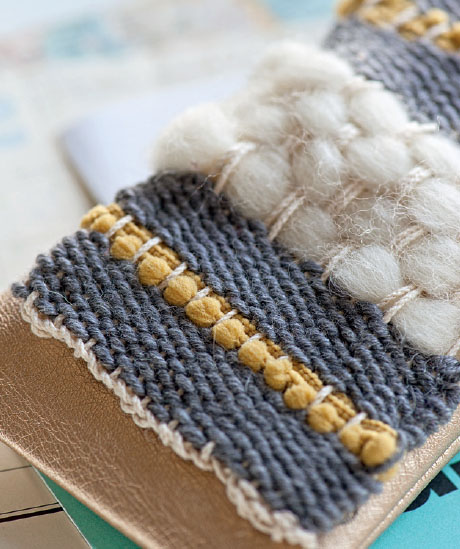
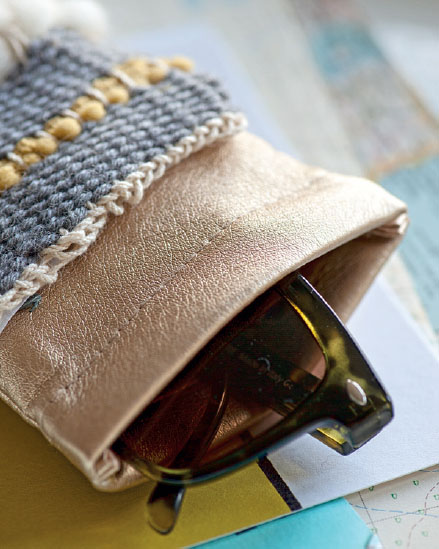
ADD A FLASH OF YOUR OWN STYLE TO A SIMPLE GLASSES POUCH WITH THE ADDITION OF A WOVEN PANEL.
MATERIALS AND EQUIPMENT
✦ Weaving loom
✦ Approximately 13¼yd (12m) of cotton warp thread
✦ Sharp scissors
✦ (Bamboo) comb (a fork can be used)
✦ Selection of yarns in worsted weight (Aran) and roving, and mini pom-pom trimming: this project uses approximately ½ oz (10g) of charcoal gray worsted (Aran) (yarn A), 11 ¾ in (30cm) of mustard yellow mini pom-pom trim (yarn B), 19 ½ in (50cm) of white roving (yarn C)
✦ Weaving shuttles
✦ Weaver’s needle
✦ Tapestry needle
✦ Pins
✦ Sewing needle and thread
✦ Leatherette or faux leather sunglasses case to customize; this one measures 3½ x 7in (9 x 18cm)
TECHNIQUES USED
✦ Warping a loom, page 9
✦ Twisted header, page 10
✦ Using the charts, page 11
✦ Tabby weaving, page 13
✦ Multiple warp tabby weaving, page 14
✦ Working with roving, page 16
✦ Incorporating trims, page 19
✦ Weaving in weft ends, page 20
✦ Knotting warp ends, page 21
✦ Weaving in warp ends, page 21
FINISHED MEASUREMENTS
✦ Panel measures 3¼ x 5in (8 x 12.5cm)
1 Prepare the loom by warping an area 3¼in (8cm) wide and 21¼in (54cm) long (see page 9). This project uses light-medium gauge warping cotton (see page 7) and a warping area of 20 threads.
2 Cut a length of warping cotton 3 times the length of the weaving area and work a twisted header row (see page 10). Use the comb to position the header so it is straight and parallel to the base section of the loom.
3 Following the chart (see pages 11 and 103) and using yarn A, work in tabby weaving (see page 13) for 12 rows.
4 Cut a 6in (15cm) length of pom-pom trim (yarn B) and work 1 row of tabby weaving, easing and adjusting the trim to ensure that the pom-poms protrude on the front of the work (see page 19). With scissors, trim away the pom-poms on the excess trim on either side of the weaving; this will make it easier to weave in the ends of the trim later.
5 With yarn A, work in tabby weaving for 12 rows.
6 With a length of yarn C smoothed flat (see page 16), work 4 rows of multiple warp tabby weaving, working over 2 warps and under 2 warps.
7 With yarn A, work in tabby weaving for 12 rows.
8 Repeat Step 4 to weave 1 row of tabby with yarn B, flipping the trim so that the pom-poms face the opposite way to those in the first row.
9 With yarn A, work in tabby weaving for 12 rows.
YARN ALTERNATIVES
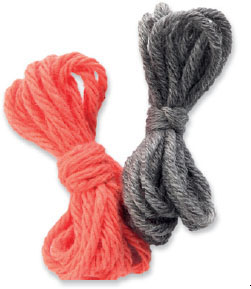
Charcoal gray is a great neutral shade and works well with bolder shades; try teaming it with a vibrant coral color.
10 Cut a length of warping cotton 3 times the length of the weaving area and work a twisted header row. Use the comb to beat this into position at the end of the weaving to secure the last row.
11 Weave in all weft ends (see page 20) neatly on the back of the work.
12 Cut the warps, leaving them as long as possible. Holding each pair of warp threads in turn, pass one over the other to create a half knot (see page 21), and continue until all the pairs of warp threads top and bottom have been half-knotted. With a tapestry needle and working with each warp end in turn, weave them neatly and securely into the back of the work and trim away any excess (see page 21).
13 Position the finished woven panel on the front of the sunglasses case. Once you are happy with the position, use a couple of pins to hold it in place. With a needle and length of coordinating thread, sew the panel to the case using neat running stitch.
MAKE IT YOURS
This is a quick and easy way to customize a purchased glasses case. However, if you are a confident stitcher, you can make your own fabric glasses case and add the woven panel to the surface.
CUSTOMIZING THE DESIGN
As this panel is used to customize a store-bought case, be sure to keep the case nearby as you work so that you can check the dimensions of the panel. Remember you can make the panel wider or narrower by making more or fewer warps when preparing the loom. You can also make the design longer or shorter by working more or fewer rows of weaving.
SEWING ON THE PANEL
To ensure that you don’t stitch through both parts of the case when sewing the panel to the front, slide a piece of cardboard inside the case.
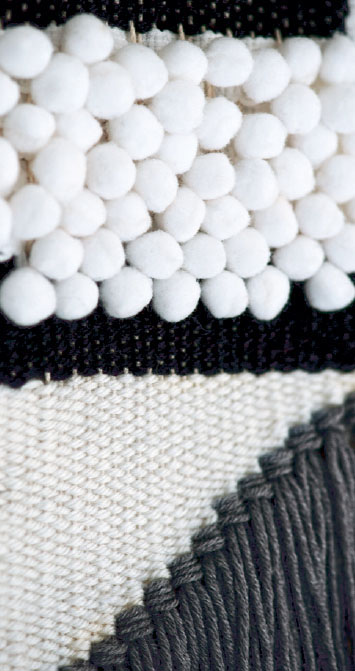
TEAM MINI POM-POM TRIM WITH MONOCHROME YARNS FOR A REALLY STRIKING PIECE OF WALL ART.
MATERIALS AND EQUIPMENT
✦ Weaving loom
✦ Approximately 19½yd (17.8m) of cotton warp thread
✦ Sharp scissors
✦ (Bamboo) comb (a fork can be used)
✦ Selection of yarns in worsted weight (Aran) and pom-pom trimming: this project uses approximately ¾oz (20g) of cream worsted weight (Aran) (yarn A), ¾oz (20g) of black worsted weight (Aran) (yarn B), ¾oz (20g) of gray worsted weight (Aran) (yarn C), and 19½in (50cm) of pom-pom trimming (yarn D)
✦ Weaving shuttles
✦ Weaver’s needle
✦ Tapestry needle
✦ Two pieces of wood for hanging, each measuring 7in (18cm) x ⅜in (0.8cm) x ¾in (1.8cm)
✦ Hot glue gun and glue stick
TECHNIQUES USED
✦ Warping a loom, page 9
✦ Twisted header, page 10
✦ Using the charts, page 11
✦ Tabby weaving, page 13
✦ Shaping in weaving, page 15
✦ Rya knots, page 18
✦ Incorporating trims, page 19
✦ Weaving in weft ends, page 20
✦ Knotting warp ends, page 21
FINISHED MEASUREMENTS
✦ 4¼ x 15¼in (11 x 39cm) including tassels
1 Prepare the loom by warping an area 4¼in (11cm) wide and 21¼in (54cm) long (see page 9). This project uses light-medium gauge warping cotton (see page 7) and a warping area of 28 threads.
2 Cut a length of warping cotton 3 times the length of the weaving area and work a twisted header row (see page 10). Use the comb to position the header so it is straight and parallel to the base section of the loom.
3 Following the chart (see pages 11 and 107) and using yarn A, work in tabby weaving (see page 13) for 4 rows.
4 Cut 56 lengths of yarn B, each measuring 12½in (32cm). Divide them into 14 bundles of 4 strands each. Fold each bundle in half and work 14 equally spaced rya knots (see page 18) across the row. Trim the ends of the tassels straight.
MAKE IT YOURS
For a more glitzy variation on this design, swap the pom-pom trim for a sparkling trim; check out what’s available in your local notions store for more ideas.
5 With yarn A, work in tabby weaving for 12 rows. Then begin decreasing (see page 15) on the left-hand side by 2 warps every four rows. Continue decreasing in this manner until 4 rows are worked over only 4 warps. Then work 1 more row over 4 warps, then 1 row over 2 warps.
6 Cut 56 lengths of yarn C, each measuring 12⅝in (32cm). Divide them into 14 bundles of 4 strands each. Fold each bundle in half and work 1 rya knot at each decrease point along the edge of the weaving. Trim the tassels of the rya knots at an angle in line with the knots.
7 With yarn A, work in tabby weaving on the 2 warps on the left-hand side of the loom (above the lowest rya knot) for 4 rows. Then begin increasing (see page 15) on the right-hand side by 2 warps every 4 rows, following the shape of the weaving on the right-hand side of the loom. Once the weaving is level with the top of the highest rya knot, work a further 3 rows of tabby in yarn A across all the warp threads.
MAKE IT EASY
Trimming away the pom-poms on the excess trim at either side of the weaving makes it easier to weave the ends of the tape into the back of the work when the piece is finished.
USING HOT GLUE
Be careful when using hot glue, not only to avoid burning your fingers with the hot adhesive, but also to ensure that it doesn’t drip onto the surface of the weaving and damage it.
YARN ALTERNATIVES
Brighten up a stark monochrome with a flash of acid yellow, either with a couple of rows of tabby weaving, or a single bright rya knot.

8 With yarn B, work in tabby weaving for 20 rows.
9 With the length of pom-pom trim (yarn D), work 7 rows of tabby weaving, easing and adjusting the trim to ensure that the pom-poms protrude on the front of the work (see page 19). With scissors, trim away the pom-poms on the excess trim on either side of the weaving.
10 With yarn B, work in tabby weaving for 20 rows.
11 With yarn A, work in tabby weaving for 6 rows.
FINISHING AND MAKING UP
12 Cut a length of warping cotton 3 times the length of the weaving area and work a twisted header row. Use the comb to beat this into position at the end of the weaving to secure the last row.
13 Weave in all weft ends (see page 20) neatly on the back of the work.
14 Cut the warps, leaving them as long as possible. Working in pairs, hold 2 bottom warp threads together and tie an overhand knot (see page 21), sliding the knot up to the twisted header to secure it. Continue until all the bottom warps have been knotted. Trim the warps to equal lengths to create neat tassels.
15 Overhand knot the top warps in the same way, but do not trim the threads.
16 Lay a piece of wood flat and lay the top warps over it, so that the twisted header lies against the bottom edge of the wood. Dab a line of hot glue along the lower part of the wood to hold the warps in place. With the exception of the 2 outer warp threads on each side, trim all the threads so that they sit within the width of the piece of wood. Dab another line of glue over the warps and press the other piece of wood down on top, sandwiching the warps and holding them in place. Leave to fully dry. Knot together the ends of the long outer warps to make a hanging loop.

BRIGHTEN YOUR SURROUNDINGS WITH FUN POPS OF COLOR WITH THIS ROVING TEXTURED WALL HANGING.
MATERIALS AND EQUIPMENT
✦ Weaving loom
✦ Approximately 36yd (33m) of cotton warp thread
✦ Sharp scissors
✦ (Bamboo) comb (a fork can be used)
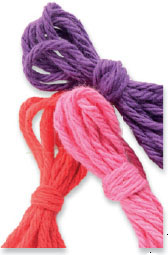
✦ Selection of yarns in worsted weight (Aran) and roving: this project uses approximately 1oz (25g) of cream worsted weight (Aran) (yarn A), ¾ oz (20g) of jade roving (yarn B), ¾ oz (20g) of purple roving (yarn C), ¾ oz (20g) of white roving (yarn D), ¾ oz(20g) of yellow roving (yarn E), ¾ oz (20g) of pink roving (yarn F), ¾ oz (20g) of green roving (yarn G), and ¾ oz (20g) of blue roving (yarn H)
✦ Weaving shuttles
✦ Weaver’s needle
✦ Tapestry needle
✦ Piece of driftwood for hanging, measuring approx 13¾in (35cm) long
✦ 15¾in (40cm) of string for hanging loop
TECHNIQUES USED
✦ Warping a loom, page 9
✦ Twisted header, page 10
✦ Using the charts, page 11
✦ Tabby weaving, page 13
✦ Multiple warp tabby weaving, page 14
✦ Shaping in weaving, page 15
✦ Working with roving, page 16
✦ Soumak, page 16
✦ Weaving in weft ends, page 20
✦ Knotting warp ends, page 21
✦ Adding a hanging stick, page 21
FINISHED MEASUREMENTS
✦ 7½ × 13¾in (19 × 35cm)
1 Prepare the loom by warping an area 7½in (20cm) wide and 21¼in (54cm) long (see page 9). This project uses light-medium gauge warping cotton (see page 7) and a warping area of 50 threads.
2 Cut a length of warping cotton 3 times the length of the weaving area and work a twisted header row (see page 10). Use the comb to position the header so it is straight and parallel to the base section of the loom.
3 Following the chart (see pages 11 and 111) and using yarn A, work in tabby weaving (see page 13) for 4 rows.
4 With a length of yarn B smoothed flat (see page 16), work 1 row of multiple warp tabby weaving, working over 2 warps and under 2 warps (see page 14).
5 With yarn A, work in tabby weaving for 5 rows.
6 With yarn C and starting on the left-hand side of the loom, work a partial row of double soumak weaving (see page 17) over the first 31 warps. Work each soumak knot over 7 warp threads.
7 With yarn A, start to create shaping around the purple roving soumak by working 10 rows of tabby weaving on the first 19 warps on the right-hand side of the loom.
8 With yarn A, work 6 rows of tabby weaving on the first 26 warps on the right-hand side of the loom. Then work 6 rows of tabby on the first 33 warps, then 4 rows of tabby on the first 40 warps.
9 With yarn D and starting on the left-hand side of the loom, work a row of single soumak weaving (see page 16). Work each knot over 5 warps.
10 With yarn E and starting on the right-hand side of the loom, work a partial row of double soumak weaving over the first 38 warps. Work each soumak knot over 7 warp threads.
11 With yarn D and starting on the left-hand side of the loom, work a row of single soumak. Work each knot over 5 warp threads.
12 With yarn A, work in tabby weaving for 6 rows.
13 With a length of yarn D smoothed flat, work 3 rows of multiple warp tabby weaving over the first 36 warps on the right-hand side of the loom, working over 2 warps and under 2 warps.
USING THE YARNS
Allow the roving to remain voluminous by not drawing the fibers too tight when working them through the warps.
MAKE IT YOURS
Why not add in a second piece of driftwood to the warps at the bottom of the weaving to create a banner?
YARN ALTERNATIVES
Play up the color pops with flashes of bright red, pink, and purple in place of the cream tabby.
14 Fill the area to the left of the roving tabby with tabby weaving in yarn A, working until the weaving is level across the loom.
15 With yarn F and starting on the left-hand side of the loom, work a partial row of single soumak weaving over the first 36 warps. Work each soumak knot over 5 warp threads.
16 With a length of yarn D smoothed flat, work 2 rows of multiple warp tabby weaving, working over 2 warps and under 2 warps.
17 With yarn A, work in tabby weaving for 3 rows.
18 With yarn G and starting on the right-hand side of the loom, work a partial row of single soumak weaving over the first 46 warps. Work each soumak knot over 5 warp threads.
19 With yarn A, start to create shaping around the green roving soumak by working 1 row of tabby weaving on the first 4 warps on the left-hand side of the loom.
20 With yarn A, work 3 rows of tabby weaving on the first 7 warps on the left-hand side of the loom. Then work 2 rows of tabby on the first 8 warps, 2 rows of tabby on the first 10 warps, 2 rows of tabby on the first 13 warps, then increase (see page 15) by 1 warp thread on every alternate row until 2 rows are worked over the first 17 warps,
21 With yarn H and starting 8 warps in from the right-hand side of the loom, work a partial row of single soumak weaving over the next 27 warps. Work each soumak knot over 5 warp threads.
22 With yarn D and starting on the right-hand side of the loom, work a row of double soumak weaving over the first 33 warps, working each soumak knot over 5 warp threads. Then complete the row in single soumak weaving, working each knot over 4 warp threads.
23 With yarn A, start to create shaping around the cream roving soumak by working 2 rows of tabby weaving on the first 14 warps on the left-hand side of the loom.
24 With yarn A, begin increasing by 1 warp thread on every alternate row of tabby on the left-hand side of the loom, until 2 rows have been worked over 26 warps. Then increase by 2 warps on every alternate row until 2 rows have been worked over 46 warps.
25 With yarn A, work 6 rows of tabby across all the warp threads.
FINISHING AND MAKING UP
26 Cut a length of warping cotton 3 times the length of the weaving area and work a twisted header row. Use the comb to beat this into position at the end of the weaving to secure the last row.
27 Weave in all weft ends (see page 20) neatly on the back of the work.
28 Cut the warps leaving them as long as possible. Working in pairs, hold 2 bottom warp threads together and tie an overhand knot (see page 21), sliding the knot up to the twisted header to secure it. Continue until all bottom warps have been knotted. Trim the warps to equal lengths to create neat tassels.
29 Working with pairs of the top warps, overhand knot (see page 21) them together at the back of the piece of driftwood (see page 21). Make a hanging loop from a short length of string tied to the driftwood.
FOLLOWING THE CHART
Remember that different weights of yarn and roving will fill different areas on the weaving, so don’t worry if the charted rows look gappy, the finished weaving won’t.
MIXING AND MATCHING BRIGHT COLORS MAKES FOR A DRAMATIC FINISH. THIS WALL HANGING ALSO INCORPORATES A SELECTION OF DIFFERENT YARNS—INCLUDING JERSEY FABRIC YARN—TO CREATE INTEREST AND TEXTURE.
MATERIALS AND EQUIPMENT
✦ Weaving loom
✦ Approximately 30½yd (27.8m) of cotton warp thread
✦ Sharp scissors
✦ (Bamboo) comb (a fork can be used)
✦ Selection of yarns in worsted weight (Aran), super-chunky (bulky), sock-weight, light worsted (double knitting), jersey/fabric yarn, and roving: this project uses approximately 1¾oz (50g) of cream worsted weight (Aran) (yarn A), 5½yd (5m) of cream super-chunky (bulky) (yarn B), 2½yd (2.3m) of hot pink jersey/fabric yarn (yarn C), ¾oz (20g) of orange sock-weight (yarn D), ¾oz (20g) of orange light worsted (double knitting) (yarn E), 1¾oz (50g) of pink super-chunky (bulky) (yarn F), and ¾oz (20g) of white roving (yarn G)
✦ Weaving shuttles
✦ Weaver’s needle
✦ Tapestry needle
✦ ⅜ in (1cm) dowel for hanging, measuring 13in (33cm) long
✦ Approximately 35½in (90cm) of orange cotton yarn for hanging loop
TECHNIQUES USED
✦ Warping a loom, page 9
✦ Twisted header, page 10
✦ Using the charts, page 11
✦ Tabby weaving, page 13
✦ Multiple warp tabby weaving, page 14
✦ Shaping in weaving, page 15
✦ Working with roving, page 16
✦ Rya knots, page 18
✦ Weaving in weft ends, page 20
✦ Knotting warp ends, page 21
✦ Adding a hanging stick, page 21
FINISHED MEASUREMENTS
✦ 7 × 17⅜in (18 × 44cm) including rya tassels
1 Prepare the loom by warping an area 7in (18cm) wide and 21¼in (54cm) long (see page 9). This project uses light-medium gauge warping cotton (see page 7) and a warping area of 46 threads.
2 Cut a length of warping cotton 3 times the length of the weaving area and work a twisted header row (see page 10). Use the comb to position the header so it is straight and parallel to the base section of the loom.
3 Following the chart (see pages 11 and 115) and using yarn A, work in tabby weaving (see page 13) for 4 rows.
4 Cut 16 lengths of yarn B, each measuring 6in (15cm). Working with 1 length at a time and starting on the left-hand side of the loom and working toward the middle, make 8 rya knots (see page 18). Make a further 8 rya knots starting on the right-hand side of the loom and working toward the middle. Cut 18 lengths of yarn A, each measuring 6in (15cm) and divide them into 6 bundles of 3 strands each. Working with 1 bundle at a time, make 3 rya knots next to the existing knots on either side of the loom. Trim all the tassels neatly to the same length. Cut 1 length of yarn C measuring 18in (46cm) and make a single rya knot on the remaining 2 center warps; leave the tassel to hang longer than the cream rya tassels.
5 With yarn A, work in tabby weaving for 11 rows.
6 With yarn D, work in tabby weaving for 10 rows.
7 With yarn E, working from left to right across the loom, begin tabby weaving across 2 warps for 2 rows, then increase (see page 15) by 2 warps every 2 rows until 20 warps are covered.
8 Return to yarn D and fill in the right-hand side of the loom. Work in tabby weaving and on every row interlace (see page 15) the woven triangle and the background where the sections meet. As yarn D is finer than yarn E, you will find that you need to work more rows in D to fill the space neatly. Keep the weaving pressed down by beating it with the comb after each row. Continue working in tabby until the yarn D weaving is level with the last row of yarn E.
9 Return to yarn E and work 14 more rows covering 22 warps. Then begin decreasing (see page 15) by 2 warps every 2 rows until 2 rows of 2 warps have been worked.
CREATIVE YARN
You can make your own jersey or fabric yarn by cutting continuous spiral strips from unwanted T-shirts.
USING THE YARNS
When weaving with roving, allow the fibers to remain fluffy and voluminous to create different effects in the finished piece.
10 With yarn A and working from the 22nd warp from the left, fill in the section around the yarn E tabby weaving with multiple warp tabby weaving, working over 2 warps and under 2 warps (see page 14). At the same time, increase by 2 warps on the left-hand side to follow the yarn E shape. Continue until all but the furthest left 2 warps are worked, then work 3 rows in multiple warp tabby across 20 warp threads.
11 Cut 8 lengths of yarn A, each measuring 6in (15.5cm). Fold the bundle in half and work 1 rya knot on the two furthest left warps, above the yarn E shaping.
12 Draw out a length of yarn G and smooth the fibers to lie flat (see page 16). Work in multiple warp tabby weaving from the right, working over 2 warps and under 2 warps, until the weaving becomes level with the section of yarn A multiple warp tabby on the left-hand side.
13 Change to yarn F and work 15 rows in tabby, then begin decreasing from the left-hand side of the loom. For 2 rows, weave over 22 warps toward the center and weave back to the left edge. Then decrease by 2 warps every 2 rows until 2 rows of 14 warps have been worked. Repeat to create mirror-image shaping on the right-hand side of the loom.
14 Cut 9 lengths of yarn C, each measuring 8in (20cm). Working with one length at a time and starting in the center of the unwoven V shape, make 9 rya knots. Make four knots either side of the center one, one knot at each decrease point. Trim the tassels to emphasize the V shape.
15 Change to yarn A and work in tabby weaving for 5 rows.
FINISHING AND MAKING UP
16 Cut a length of warping cotton 3 times the length of the weaving area and work a twisted header row. Use the comb to beat this into position at the end of the weaving to secure the last row.
17 Weave in all weft ends (see page 20) neatly on the back of the work.
18 Cut the warps, leaving them as long as possible. Working in pairs, hold 2 warp threads together and tie an overhand knot (see page 21), sliding the knot up to the twisted header to secure it. Continue until all top and bottom warps have been knotted.
19 Trim the bottom warps to equal lengths to create neat tassels. Position the dowel above the weaving and overhand knot the top warps securely over the dowel, sliding the knots down (see page 21). Trim the ends.
20 Cut the length of orange cotton yarn into 3 equal parts and neatly braid them together. Tie each end onto the dowel—beyond the edge of the weaving—with a tight knot to make the hanging loop.
MAKE IT YOURS
Jersey or fabric yarns add a really unusual texture to a weaving; try using this yarn in some of the sections in tabby, too.
YARN ALTERNATIVES
Pick a cooler palette of aqua, turquoise, and blue for a light, fresh look.
VOLUMINOUS ROVING IS A FANTASTIC WAY TO ADD A DRAMATIC MOTIF TO A SIMPLE WEAVING. TEAM THIS PANEL WITH A FEW BASIC STITCHING SKILLS AND YOU CAN UPCYCLE A PILLOW COVER FOR A COLORFUL INTERIORS PROJECT.
MATERIALS AND EQUIPMENT
✦ Weaving loom
✦ Approximately 34¼yd (31.25m) of cotton warp thread
✦ Sharp scissors
✦ (Bamboo) comb (a fork can be used)
✦ Selection of yarns in worsted weight (Aran) and roving: this project uses approximately 1¾oz (50g) of cream worsted weight (Aran) (yarn A), 1¾oz (50g) of dark red worsted weight (Aran) (yarn B), and ¾oz (20g) of red roving (yarn C)
✦ Weaving shuttles
✦ Weaver’s needle
✦ Tapestry needle
✦ Pillow and cover measuring 11½in (29cm) square
✦ Pins
✦ Sewing needle and thread
TECHNIQUES USED
✦ Warping a loom, page 9
✦ Twisted header, page 10
✦ Using the charts, page 11
✦ Tabby weaving, page 13
✦ Shaping in weaving, page 15
✦ Working with roving, page 16
✦ Soumak, page 16
✦ Weaving in weft ends, page 20
✦ Knotting warp ends, page 21
FINISHED MEASUREMENTS
✦ Woven panel measures: 8¼ × 7in (21 × 18cm)
1 Prepare the loom by warping an area 8¼in (21cm) wide and 21¼in (54cm) long (see page 9). This project uses light-medium gauge warping cotton (see page 7) and a warping area of 50 threads.
2 Cut a length of warping cotton 3 times the length of the weaving area and work a twisted header row (see page 10). Use the comb to position the header so it is straight and parallel to the base section of the loom.
3 Following the chart (see pages 11 and 119) and using yarn A, work in tabby weaving (see page 13) for 10 rows.
4 Cut 8 long lengths of yarn B. Fold the bundle in half and starting on the left-hand side, work a row of double soumak weaving (see page 17) across the width of the loom, working each soumak knot over 5 warp threads.
5 Change to yarn A and work in tabby weaving for 14 rows. Begin decreasing (see page 15) to create the heart motif in the center of the panel. Work the two sides of the weaving as separate halves and follow the chart until only 12 warps at each side are being woven. Weave the 6 straight rows on the sides of the heart.
6 With yarn C, begin to work in tabby weaving to fill the heart section of the weaving. The roving is more voluminous than the worsted (Aran) yarn, so it will take fewer rows to fill this section than the background weaving on each side of the motif.
7 Once the roving section is parallel with the background weaving, resume working with yarn A and following the chart to create the shaping at the top of the heart motif. To work the dip in the top of the heart, first work up to the top of each lobe, then weave across from one lobe to the other. Then you can weave downward, pressing the rows up against the previous ones with the comb to keep the weaving neat.
8 With yarn C, work in tabby weaving to fill in the upper sections of the heart motif. As before, this will require fewer rows than the background weaving.
9 With yarn A, continue working in tabby weaving across all warp threads for 14 rows.
10 Work another row of double soumak weaving in yarn B in the same way as in Step 4.
11 With yarn A, work in tabby weaving for 10 rows.
FINISHING AND MAKING UP
12 Cut a length of warping cotton 3 times the length of the weaving area and work a twisted header row. Use the comb to beat this into position at the end of the weaving to secure the last row.
13 Weave in all weft ends (see page 20) neatly on the back of the work.
14 Cut the warps, leaving them as long as possible. Working in pairs, hold 2 warp threads together and tie an overhand knot (see page 21), sliding the knot firmly to the twisted header to secure it. Continue until all top and bottom warps have been knotted. Trim the warps to equal lengths to create short tassels.
15 Place the panel centrally on the front of the pillow cover and pin it in place. With the sewing needle and thread, sew the panel to the pillow cover using neat running stitch.
MAKE IT EASY
When creating soumak using multiple lengths of yarn, be sure to work each strand through the warps and avoid tangling up the yarns from each side of the soumak.
USING THE YARNS
It is often easier to weave roving through the warps with your fingers rather than using a shuttle. This also allows you to ease the fibers through to add volume and lots of interesting textures to the surface of the finished piece.
YARN ALTERNATIVES
Make a lighter design by using blush pink and delicate lilac roving and yarns.

TEXTURE AND TASSEL
WALL HANGING
ADD A POP OF BRIGHT COLOR AND BOLD TEXTURE WITH A VARIETY OF YARNS.
MATERIALS AND EQUIPMENT
✦ Weaving loom
✦ Approximately 24½yd (22.3m) of cotton warp thread
✦ Sharp scissors
✦ (Bamboo) comb (a fork can be used)
✦ Variety of yarns in a bright and a neutral color: this project uses approximately 1¾oz (50g) of cream chunky (super chunky) (yarn A), ¾oz (20g) of cream worsted weight (Aran) (yarn B), ¾oz (20g) of pink chunky (super chunky) (yarn C), 1¾oz (50g) of pink light worsted weight (double knitting) (yarn D), and ¾oz (20g) of undyed roving (yarn E)
✦ Weaving shuttles
✦ Weaver’s needle
✦ Tapestry needle
✦ ⅜ in (1cm) dowel for hanging, measuring 10in (25.5cm) long
✦ Fabric paint or dye and artist’s paintbrush
TECHNIQUES USED
✦ Warping a loom, page 9
✦ Twisted header, page 10
✦ Using the charts, page 11
✦ Tabby weaving, page 13
✦ Shaping in weaving, page 15
✦ Working with roving, page 16
✦ Soumak, page 16
✦ Rya knots, page 18
✦ Weaving in weft ends, page 20
✦ Knotting warp ends, page 21
✦ Weaving in warp ends, page 21
✦ Adding a hanging stick, page 21
FINISHED MEASUREMENTS
✦ 7⅞ × 16½ in (20 × 42cm) including tassels
1 Prepare the loom by warping an area 7½in (19cm) wide and 21¼in (54cm) long (see page 9). This project uses light-medium gauge warping cotton (see page 7) and a warping area of 50 threads.
2 Cut a length of warping cotton three times the length of the weaving area and work a twisted header row (see page 10). Use the comb to position the header so it is straight and parallel to the base section of the loom.
3 Following the chart (see pages 11 and 123) and using yarn A, work in tabby weaving (see page 13) for 4 rows.
4 Cut 52 lengths of yarn B, each measuring 17¼in (44cm). Divide them into 13 bundles of 4 strands each. Fold each bundle in half and work a series of equally spaced rya knots (see page 18).
5 With yarn A, work in tabby weaving for 27 rows.
6 Change to yarn C and work a row of double soumak weaving (see page 17) across the width of the loom, working each soumak knot over 4 warp threads.
7 With yarn A, work in tabby weaving for 10 rows. Change to yarn D and work in tabby weaving for 10 rows.
MAKE IT YOURS
Add more sections of bright colors—or even some rya knots—into the work to add more drama to your piece.
8 Change to yarn D to create the diamond shape. Begin working on the center 2 warp threads and increase (see page 15) the tabby weaving by taking in an extra warp thread on each side on every row worked. Continue weaving in this way until there are only 7 unwoven warp threads on either side.
9 Then reverse the process, decreasing (see page 15) the tabby weaving by 1 warp thread on each side on every row worked until the weaving only spans the center 2 warps. Take the weft starting and finishing ends over the visible warp threads in the first and last rows and through to the back to make neat points.
10 Change to yarn C and fill in the background section on the right-hand side of the diamond. Work in tabby weaving and on every row interlace (see page 15) the woven diamond and the background where the two sections meet. Note that the background will take more rows of weaving than were needed to create the diamond because the yarn is thinner. Repeat to fill in the background on the left-hand side of the diamond. Then after the point of the diamond, work in tabby in yarn C across all the warp threads for a further 10 rows.
11 Change to yarn A and work in tabby weaving for 6 rows.
FINISHING AND MAKING UP
12 Cut a length of warping cotton three times the length of the weaving area and work a twisted header row. Use the comb to beat this into position at the end of the weaving to secure the last row.
13 Using a tapestry needle, weave in all weft ends (see page 20) neatly on the back of the work.
14 Cut the warps, leaving them as long as possible. Holding each pair of bottom warp threads in turn, pass one over the other to create a half knot (see page 21), and continue until all the pairs of warp threads have been half-knotted. With a tapestry needle and working with each warp end in turn, weave them neatly and securely into the back of the work and trim away any excess (see page 21).
15 Half knot the top warps in the same way as the bottom ones. Position the dowel above the weaving and overhand knot the warps securely over the dowel (see page 21). Trim the ends short. Make a hanging loop from a short length of warping cotton.
16 Use the fabric paint, or fabric dye and paintbrush, to add a flash of color to the ends of the rya knots. Leave them to dry completely, then trim the ends of the rya knots neatly to make 6in (15cm) tassels.
YARN ALTERNATIVES
Any bright colors will work well in a design like this; substitute the neon pink for bright yellow, bold orange, or even electric blue.

PAINTING YARN
Protect all surfaces and clothing when using fabric paints or dye, and ensure that only the sections of the weaving that you want colored come into contact with the dye.

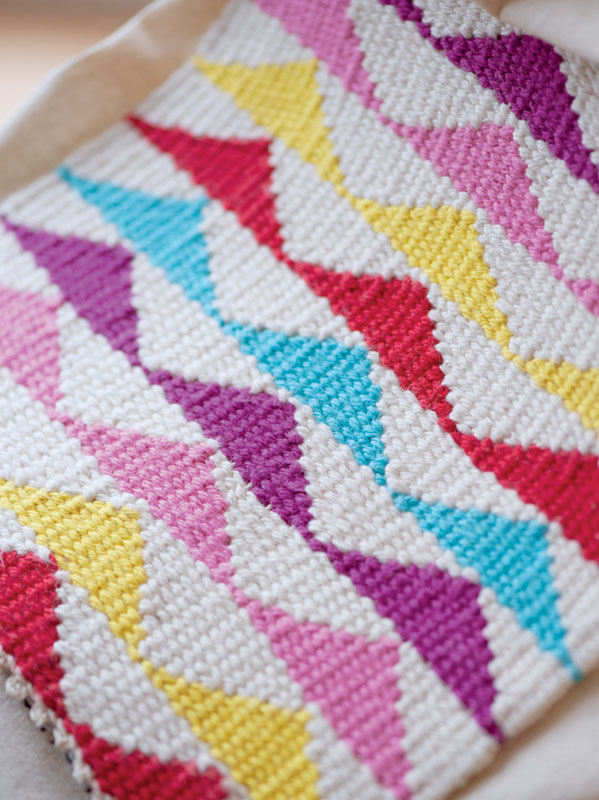
UPCYCLE A SIMPLE CANVAS TOTE BAG WITH A COLORFUL TRIANGLE-MOTIF WOVEN PANEL.
MATERIALS AND EQUIPMENT
✦ Weaving loom
✦ Approximately 37¾yd (34.5m) of cotton warp thread
✦ Sharp scissors
✦ (Bamboo) comb (a fork can be used)
✦ Selection of light worsted (double knitting) cotton yarns: this project uses approximately 1¾oz (50g) of cream (yarn A), approximately 1¾oz (50g) of red (yarn B), approximately 1¾oz (50g) of yellow (yarn C), approximately 1¾oz (50g) of pink (yarn D), approximately 1¾oz (50g) of purple (yarn E), and approximately 1¾oz (50g) of aqua (yarn F)
✦ Weaving shuttles
✦ Weaver’s needle
✦ Tapestry needle
✦ Sewing needle and cream sewing thread
✦ Canvas tote bag
TECHNIQUES USED
✦ Warping a loom, page 9
✦ Twisted header, page 10
✦ Using the charts, page 11
✦ Tabby weaving, page 13
✦ Shaping in weaving, page 15
✦ Weaving in weft ends, page 20
✦ Weaving in warp ends, page 21
FINISHED MEASUREMENTS
✦ The panel measures 8⅝ x 9¾in (22 × 25cm)
1 Prepare the loom by warping an area 8⅝ in (22cm) wide and 21¼in (54cm) long (see page 9). This project uses light-medium gauge warping cotton (see page 7) and a warping area of 54 threads.
2 Cut a length of warping cotton three times the length of the weaving area and work a twisted header row (see page 10). Use the comb to position the header so it is straight and parallel to the base section of the loom.
3 Following the chart (see pages 11 and 126) and using yarn B and in tabby weaving, work the first triangle on the first 18 warps on the left-hand side of the loom. Decrease 1 warp thread on each side (see page 15) with each row worked. Continue decreasing in this way until the weaving spans only the center 2 warps. Take the weft end over the visible warp thread in the last row then through to the back to complete the triangle.
4 Make a second triangle on the next 18 warps, then a third triangle on the final 18 warps to make three triangles in total across the loom.
MAKE IT YOURS
This panel can be scaled up or down to fit onto the front of larger or smaller bags.
FOLLOWING THE DESIGN
These triangles are created by decreasing across the warps; pay attention to the previous row of tabby worked to check where you are in the design.
Ensure that each row of background tabby weaving is beaten down very smoothly; this will help to create neat and even triangle motifs.
Work in shades of one color on a cream background to create a more subtle version of this design.

5 Change to yarn A and fill in the background around the triangles. Work in tabby weaving and on every row interlace (see page 15) the woven triangles and the background where the two sections meet. Then after the point of the triangles, work 1 more row of tabby in yarn A across all the warp threads.
6 Follow Steps 3–5 to create rows of triangles using yarns C, D, E, and F in turn. After weaving each row of triangles, fill in the background with yarn A as in Step 5. Repeat Steps 3–6 again to make a panel with 10 rows of triangles on a cream background.
FINISHING AND MAKING UP
7 Cut a length of warping cotton three times the length of the weaving area and work a twisted header row. Use the comb to beat this into position at the end of the weaving to secure the last row.
8 Using a tapestry needle, weave in all warp and weft ends (see pages 20 and 21) neatly on the back of the work. Hand-sew the panel to the front of a canvas tote bag using the sewing needle, cream thread, and running stitch.
