
The silicone rubber mould to be cast.

The mould pieces are secured on the bench surface ready for casting.
A granite-filled Jesmonite gel coat is applied to the mould surface.
The gel coat is allowed to harden before laminating.
A layer of quadaxial mat saturated with Jesmonite is applied to the gel coat.

A layer of chopped strand and Jesmonite is applied.

With lamination completed on both halves, the mould is assembled, laid on its side and tilted.
A granite-filled mix is poured into the joined mould.
The mould is tilted back and forth to cover the seam internally.
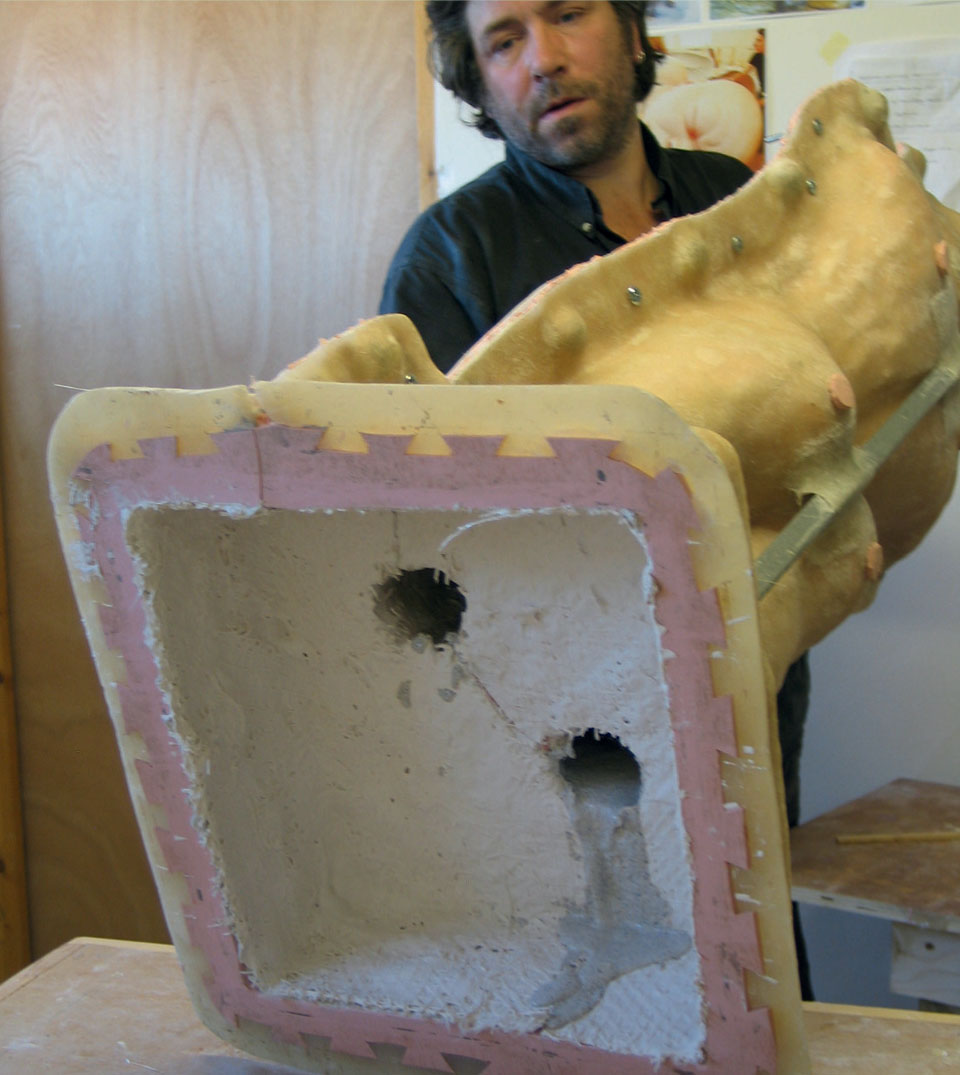
Once the cast is cured the case is removed and the silicone rubber mould is peeled away from the back of the cast.

The front half of the silicone mould is removed from the cast.
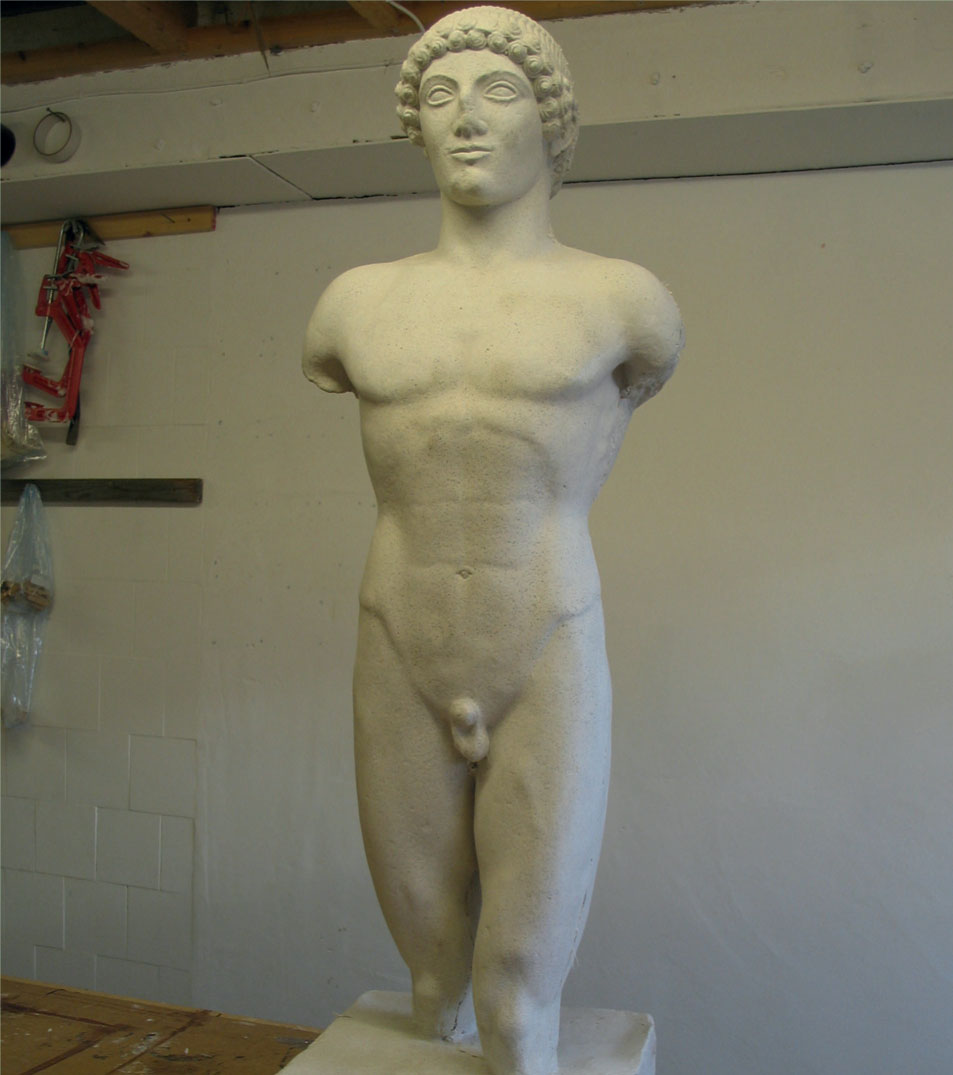
The demoulded cast.
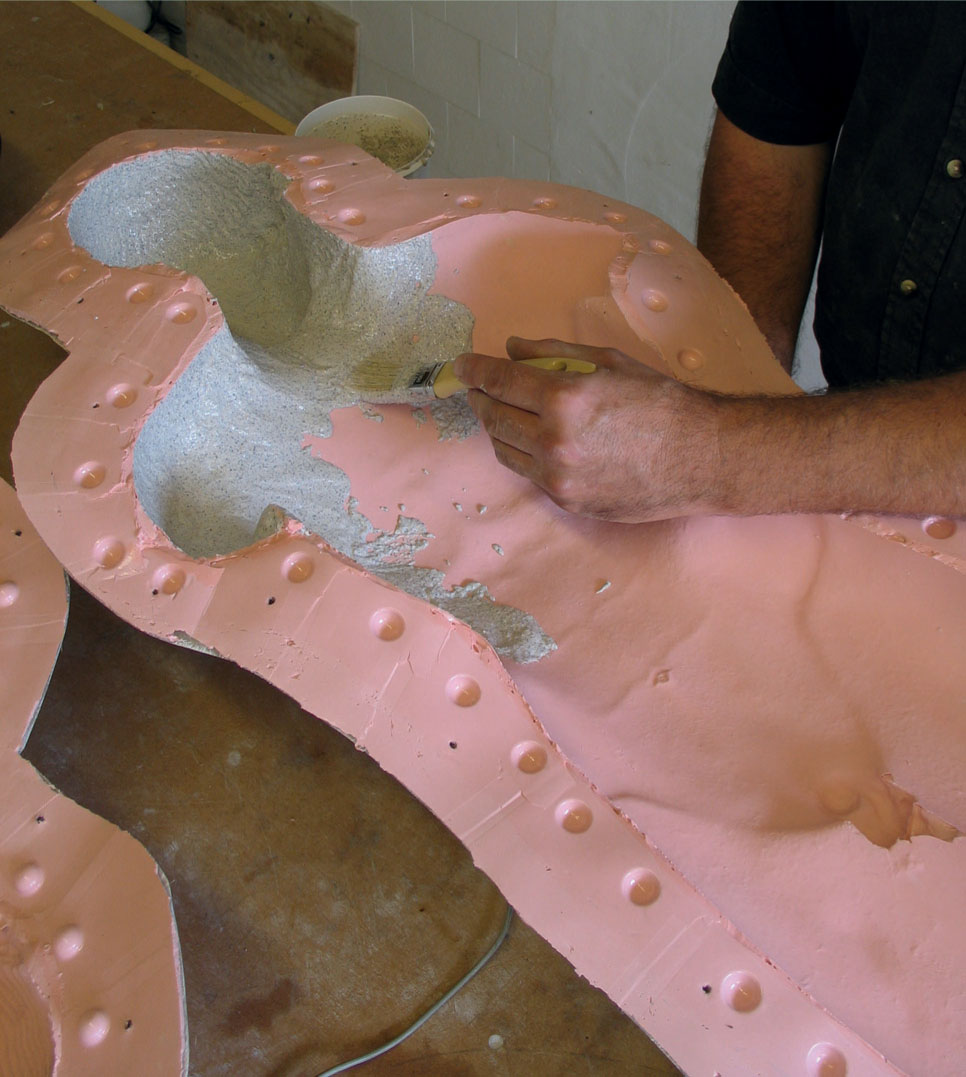
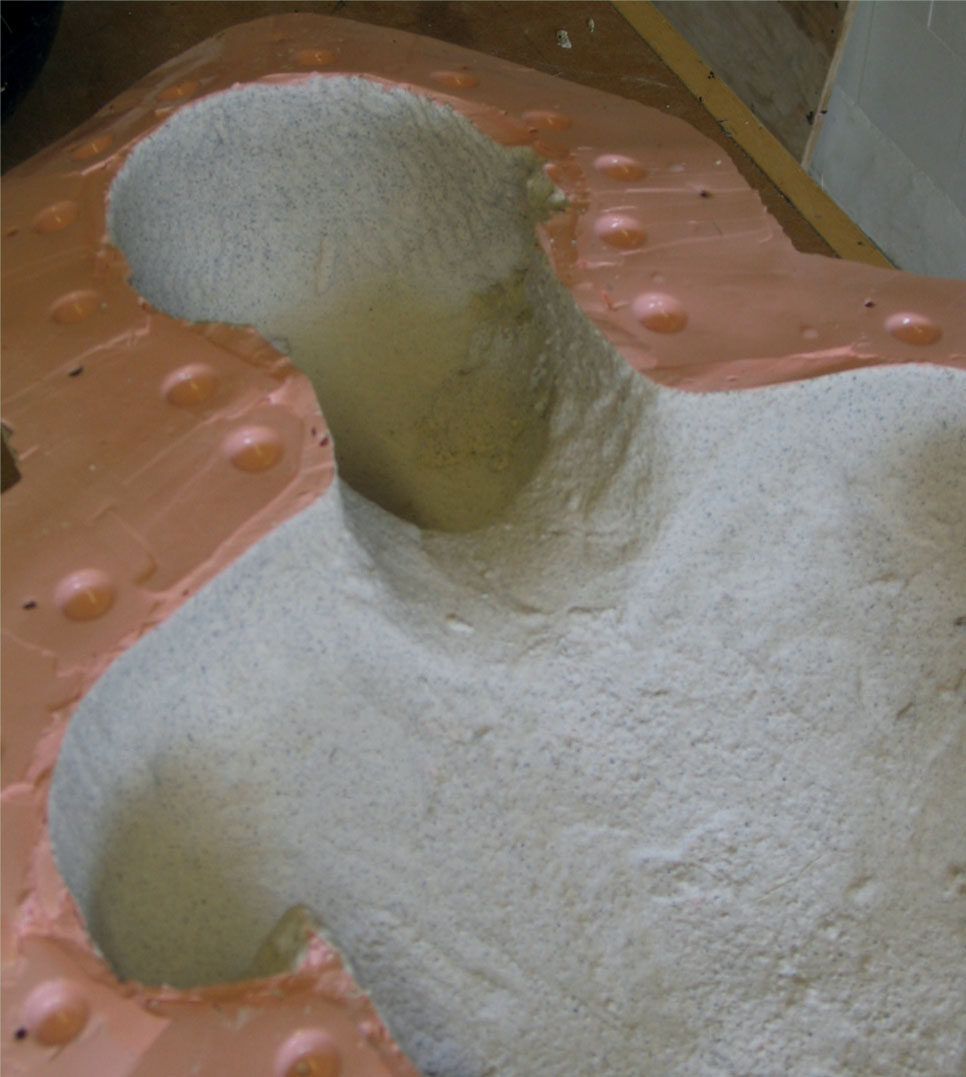
The chopped strand layer
This is a mix of composite mix and fibreglass chopped strand that is applied between layers of quadaxial mat to give the laminate more strength.
1. Chopped strand should be added to a pre-mixed batch of composite mix at a rate of 1–2 per cent by weight of the mix. The consistency should be that of a thick spreadable paste. Use a wooden mixing stick to mix in the chopped strand.
2. Apply with a brush and spread out to a depth of 2–4mm.
3. Use a stick to push the mix into difficult-to-access areas.
4. Methodically work over the entire surface of the first layer of quadaxial mat. On multi-piece moulds work just up to a couple of millimetres below the mould edges.
5. Wipe any excess or splashes off the mould flanges. This is important because otherwise the mould will not go back together accurately.
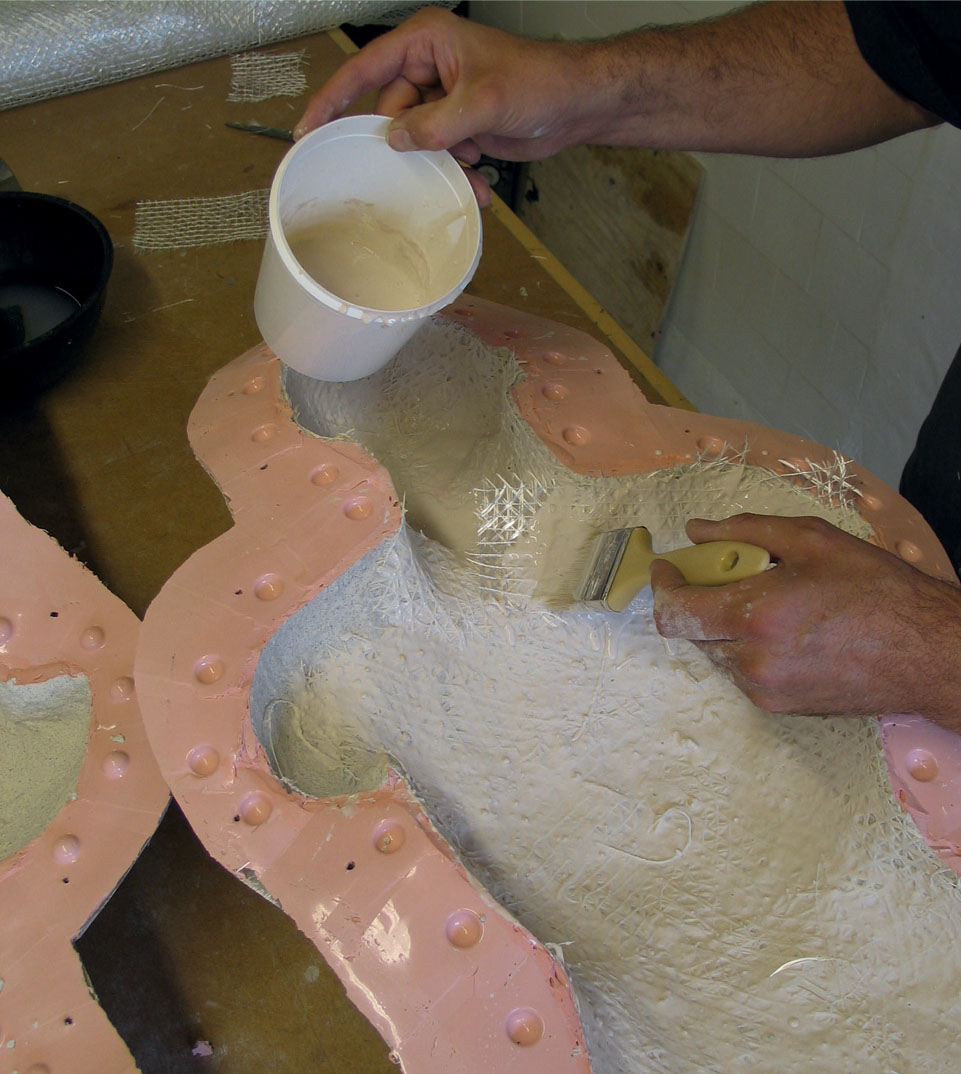
The second layer of quadaxial mat
1. Apply a second layer of quadaxial mat, in the same way as for the first layer, over the layer of chopped strand.
2. Allow to set for at least an hour before joining the cast sections.
The total laminating process will produce a casting 5–6mm thick. At this thickness castings will have a weight of 9–11 kg/m2. Increasing the thickness of the chopped strand layer will produce stronger castings.
CURING AND DRYING
As the composite starts to set an exothermic reaction takes place which produces heat between the initial and final set of approximately 30°C. After approximately one hour the chemical reaction is complete and the casting will have achieved 60 per cent of its total strength.
Full strength will be achieved dependent on drying conditions and the thickness of the casting. Thin sections will dry faster than thicker ones and dry atmospheric conditions will increase the speed of the drying process.
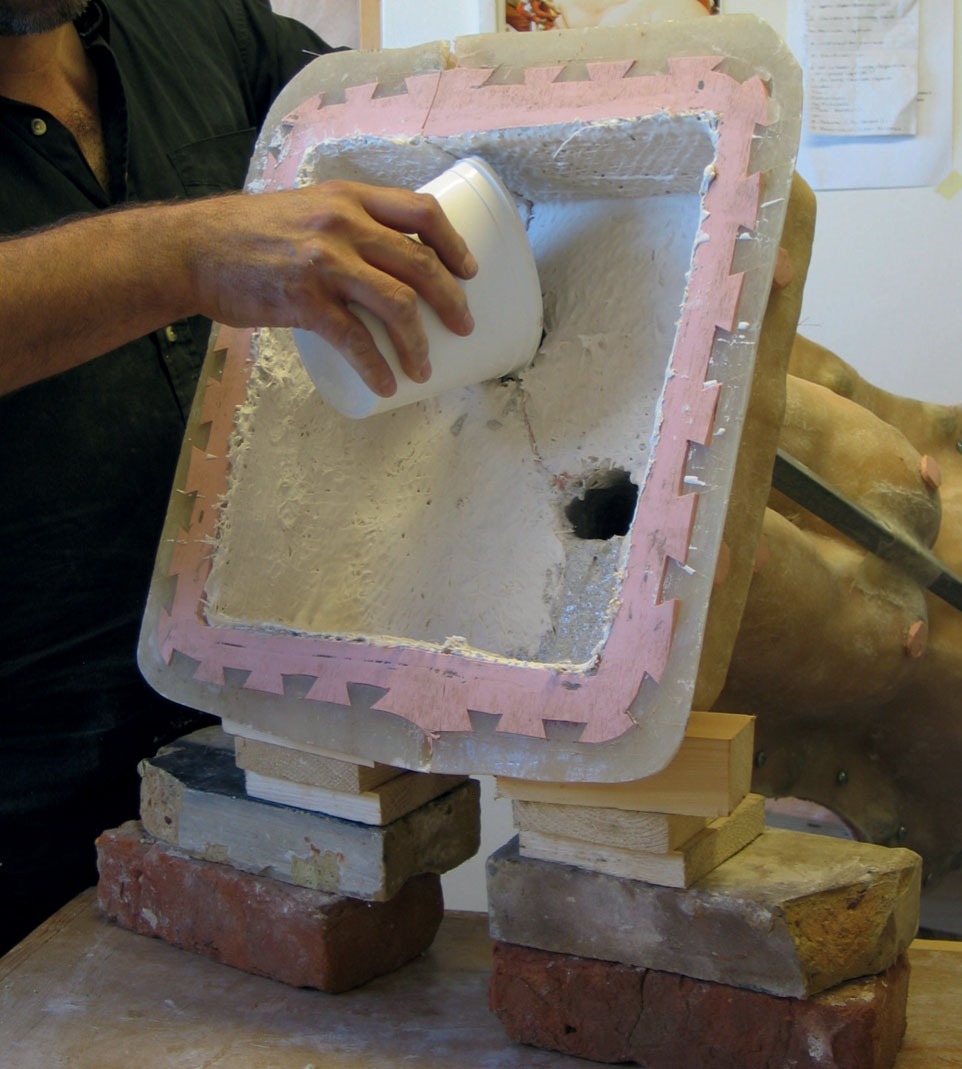
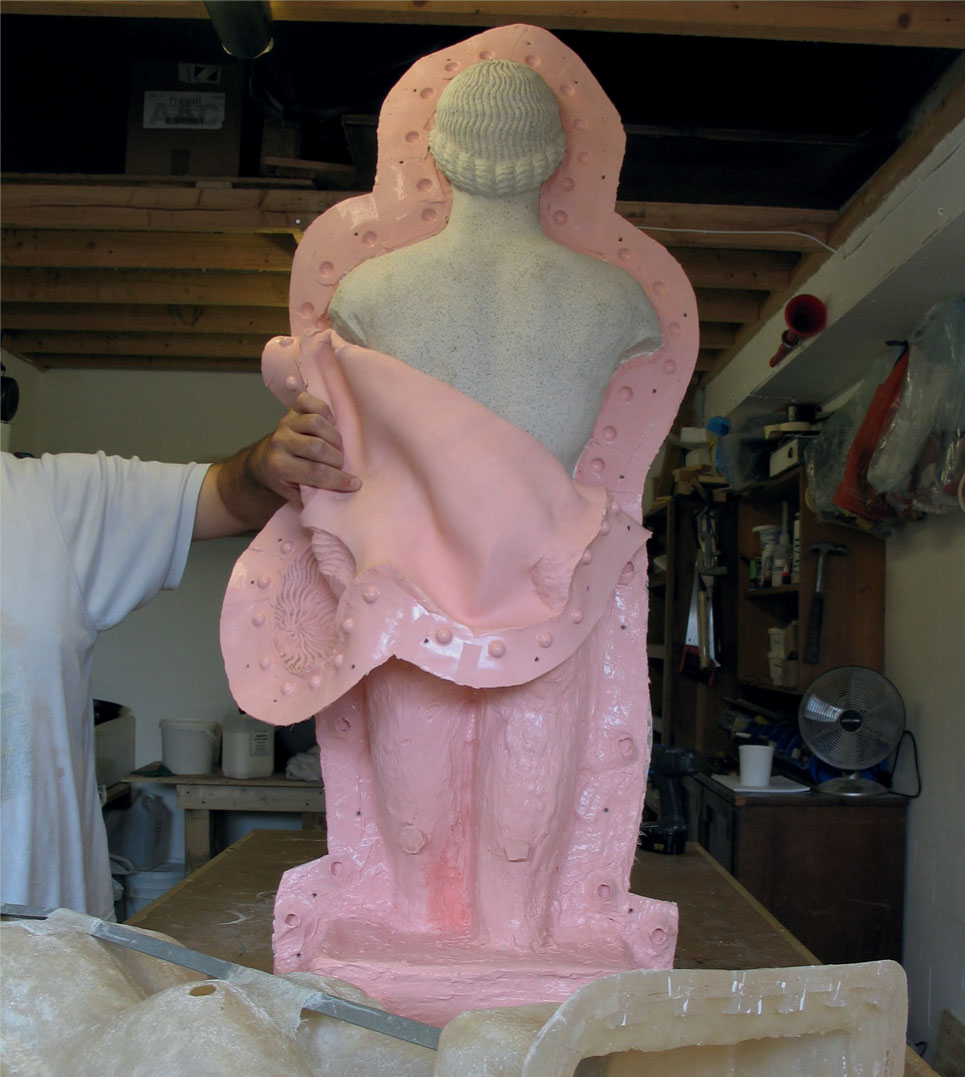
JOINING MOULDS CAST IN SECTIONS
Moulds cast in sections will need to be joined to complete the casting process. A point of access into the mould is required to introduce material to join the cast pieces. Sections can be joined internally with several layers of composite mix, but if possible some laminating material should be applied as well.
1. For this project the mould has been cast in two sections into two mould pieces. The pieces containing the cast sections must be joined securely. Access into the mould in the case of this project is provided through the holes where the legs join the base.
2. A 2:1 mix of composite with granite filler addition is made up and poured into the mould down one side, seam side down.
3. The mould is tilted to allow the mix to run down the mould, internally covering the seam line. Tilt back and forth to cover the seam line as many times as possible until the mix starts to set and stops ‘running’.
4. Repeat this process with new mixes 2 or 3 times to strengthen up the join.
5. If access allows, laminate the seam following the same steps as for the rest of the cast.
6. Multi-piece moulds of more than two pieces should be joined securely sequentially. If the mould is created as a sealed unit around an original with no base, access into the mould can be provided by a pouring hole created in one of the mould pieces. A pouring hole will only allow the joining of sections with a liquid mix of composite. In order to apply some laminate it is possible to leave one mould piece (with a pouring hole) open, allowing hand access into the mould to apply some laminate. This last section can then be secured and joined with a liquid composite mix (see Chapter 13).
7. Allow the cast to cure fully before demoulding.
Demoulding
The techniques for demoulding (removing the finished cast from the mould) will largely depend on what type of mould is being used.
Plaster one-piece Moulds can be tapped or levered out from the inside of the cast using a chisel. Soaking in hot soapy water can help to ease out difficult casts.
Plaster multi-piece Moulds should be eased apart piece by piece. Small moulds can usually be parted using a strong-bladed knife. Larger moulds may require a thin chisel to initially crack the seam until a wooden or plastic wedge can be driven in. On particularly long seams a series of wedges can be gradually driven in sequentially until the seam is parted.
Plaster waste See Chapter 4 of Mouldmaking and Casting for detail on chipping out plaster waste moulds.
Fibreglass As above, although there can be a certain degree of flexibility in a fibreglass mould depending on how thickly it has been made.
Flexible moulds (without a case) Demoulding from flexible moulds without a case involves a combination of flexing and peeling the mould while easing out the cast.
Flexible moulds (with a case) First remove the case (this should be carried out as for plaster one-piece moulds) and then peel the mould away from the cast. It is possible to peel the mould away from the cast with these moulds as they are thinner and more flexible than flexible moulds without a case.
Trimming and Cutting Back
Once the cast has been demoulded any excess cast and seam lines (flashing) can be trimmed back.
1. Initially the extremities of any excess can be broken off carefully by hand or a pair of pliers, but be careful not to break off too much. Then a number of tools can be employed depending on the size of the cast and how much composite is to be removed (for example, chisels, hacksaw blades, surforms, rasps and so on).
2. The initial trim should not be taken right back to the surface of the cast and should only be used to remove bulk excess.
3. Smaller and smaller tools should be used as you get closer to the cast surface (see Chapter 14).
4. Fine files including needle files can be useful to get into difficult-to-access areas of the cast (note that a fine brass or wire brush is useful to clear clogged files).
5. Once excess flashing has been taken back to the surface final cutting back and/or polishing of the entire cast surface can be tackled.
Surface Finishing and Polishing
Casts that have coloured gel coats will usually come out of moulds with a matt surface finish; metal-filled or stone-filled gel coats will be matt and the base material not fully visible. To obtain the full effect from metal and stone and achieve gloss colours, castings will need to be cut back and/ or polished.
Metal-Filled Castings
Freshly demoulded casts will have a fine acrylic film on the surface that needs to be removed to expose the metallic finish. This is achieved by abrasion with wire wool of progressive grades, working from coarse to fine. The cast should be air-dried and hard.
1. Start rubbing with coarse grades of wire wool, working sequentially through to the finer grades.
2. Work methodically over the entire surface of the casting.
3. Replace wool as it clogs to ensure it maintains its abrasive action.
4. Once exposed, metal surfaces can be polished to a high shine or paginated using cold pagination processes.
Note: Stainless steel filled castings should not be abraded. Once demoulded and allowed to air dry a wax polish can be applied to enhance the surface finish.
Polishing
Polishing can be done either mechanically or by hand using specifically designed polishing compounds. Polishing compounds come as either a hard waxy block or as a cream and are applied to the cast surface with lint-free cloth or a mechanically spun polishing mop.
Cloth polishing mops for block compounds and sponge mops for cream compounds can be mounted, using the correct arbour, to a standard electric drill with variable speed control or in a dedicated polishing machine. Polishing machines are bench mounted so this will restrict the size of the cast that can be polished. Electric drills can be used freehand or can be bench mounted securely using a clamping system specific to the machine you are using. Care should be taken when polishing using electric drills as they have no guards and whichever system of polishing is being used goggles should always be worn.
Polishing compounds are a very fine level of abrasive and come in grades of coarseness, like the abrasive papers, which should be used in sequence from coarse to fine methodically over the entire surface of the cast. Compounds usually come in two or three grades and castings should be washed between grades of polish. Cold-cast metal castings (castings with a metal-filled gel coat) can be given a final polish using a proprietary metal polish suitable to the base metal used.
If after polishing through the grades of compound the levels of brightness required have not been achieved it may be necessary to return to the abrasive process to cut back more material and then to repolish.
Stone-Filled Castings
Four different levels of finish can be achieved on stone-surfaced castings.
Smooth acrylic finish The cast should be air dry and waxed with a solvent-thinned wax furniture polish. Allowed the polish to soak into the acrylic film, which enhances the surface finish of the stone.
Exposed stone finish Freshly demoulded cast surfaces should be wetted with water, which is then allowed to soak into and soften the acrylic film. Scrub the surface with a nylon washing-up pad to expose the stone finish. Longer wetting and scrubbing will reveal coarser stone surfaces as required. Acetone can be used to speed up this process (but wear rubber washing-up gloves for this).
Exposed stone finish (smooth ground) Casts should be air dried and hard before abrading the surface with consequential grades (180–240 grit) of wet-and-dry paper, used wet. Rinse the paper as it clogs and replace when worn. Exposed areas can be ground mechanically using adequate dust extraction methods or can be wet ground with air-powered tools.
Exposed stone finish (coarse textured) Sand-blasting systems can provide a range of coarse textures to castings. Castings should be thoroughly air dried and hard before sand blasting.
Sealer
Jesmonite sealer can be applied to all cast surfaces for a number of reasons.
■ If castings are to be sited externally, apply two coats by brush or spray.
■ For internally sited castings Jesmonite sealer can prevent finger marking and give a clear matt finish.
■ Adding pigments and water to sealer produces colour washes.
Special Notes on Jesmonite AC200 and AC730
Jesmonite composites AC200 and AC730 share many of the principal mixing and practical applications of the other Jesmonite composites but there are a few exceptions and additions as follows.
AC200
■ AC200 is used to produce cast blocks of compound that can be carved. These could be remoulded to cast in other materials. To avoid air entrapment thixotropic addition AC200 should be brushed onto the mould surface and then it should be backfilled with standard mix once set. Carving can be carried out immediately after demoulding.
■ Jesmonite sealer can be used to seal AC200 before remoulding.
■ AC200 can be used as a coating compound for foam or polystyrene. After roughly carving foam or polystyrene to shape coat with thixotropic addition AC200 to allow further fine carving to the surface. A final coat of AC100 will provide a durable surface for the finished cast.
■ AC200 is also suitable as an adhesive for polystyrene, styrofoam and polyurethane foam products.
■ AC200 is not suitable for laminating or hollow casting.
AC730
■ Thixotropic additions are not necessary when using AC730 because of the higher powder mix ratios.
■ Adjustments to a mix ratio of 4.5:1 (powder to liquid) will provide a thinner mix but will marginally affect strength.
■ Retarder can be added at 3–6g per kilogram of mix weight to extend the pot life by up to 45 minutes.
■ If using stone fillers in the mix ensure they are specific to AC730.
■ 13mm coarse chopped fibreglass strand should be used in the laminating process.
■ The minimum laminated thickness of castings should be 8mm, weighing 15–16kg/m2.
■ Castings should not exceed temperatures of 35°C while curing to allow for the correct crystal growth to form. Large castings will produce excessive exothermic heat and should be wrapped in damp sacking when curing.
■ Once demoulded, castings should be wrapped in wet sacking and polythene to achieve full strength.
■ Castings develop 80 per cent of their total strength in 24 hours at a temperature of 16–18°C.
■ Castings should be kept at temperatures not exceeding 40°C after the initial cure.
■ Textured finishes can be achieved very effectively with 2 or 3 applications of proprietary brick cleaner.
■ Metal-surfaced castings can be obtained using Flex Metal Gel Coats® in conjunction with AC730; these are available in Bronze, Copper, Brass and Silver Bronze.
■ GRP, plaster and other rigid or porous moulds should not be used with Flex Metal systems.