

When you think of Lightroom, you don’t think of video, right? What’s the first thing you think of? That’s right—light. In a room. Which is why the original working title for Lightroom (11+ years ago when it was still in Beta) was actually “table lamp,” and it was nearly released as TableLamp 1.0, until someone in marketing at Adobe brought up the fact that just because there’s light in a room doesn’t mean the light has to come from a lamp on a table. It could come from a hanging lamp, or one of those lamps attached to the underside of a ceiling fan, or just a light fixture in the center of the ceiling, and well…the whole idea just fell apart. For a brief time (I think it was Beta 6, Build 1.3), they considered naming it “Light that hangs from the bottom of a ceiling fan,” which internally went by the simple acronym “LTHFTBOACF.” That was hard to pronounce, but in print, if you squinted, it looked kinda like “LIFEBOAT,” but the “BOA” part is also a real name (well, a nickname for a boa constrictor), so some folks on the engineering team referred to it internally as LIFESNAKE, although some preferrred the more casual SnakeBoat 1.0, with the upper/lower case treatment with InterCaps. Then, an astute quality control expert at Adobe’s Seattle office (yes, Adobe also has an office in Seattle, acquired with their purchase of Aldus in August 1994) noticed that the first three letters, “LTH,” are, not coincidentally, the Airport Code for Lathrop Wells Airport in Nevada (I am not making this up). So, the Seattle office felt this was a sign, and if it hadn’t been for a dyslexic typographer in Adobe’s package design department, we’d all be using LathropSnakeLampBoat Classic to this very day. True story.
I think you’ll be surprised at all the things you can do with video in Lightroom, and if you don’t mind a few simple workarounds, you can pretty much even make your movies (complete with titles, transitions, music, and audio) and save them in HD format. But, before we get to all that (don’t worry, it’s all amazingly easy), let’s start with the thing we usually need to do first—trimming our video clips.
Step One:
You import a video into Lightroom just like you would a photo, but you’ll know it’s a video because you’ll see a video camera icon in the lower-left corner of its thumbnail when it appears in the Import window (Lightroom supports most major DSLR video formats). Once it’s in Lightroom, you can put it in a collection, add flags, metadata, and so on, and you’ll see the length of the video displayed in the bottom-left corner of its thumbnail (as seen here, where the length of the selected video clip is 11 seconds). You can see a preview of what’s on a video clip by moving your cursor over the thumbnail itself and dragging either left or right to quickly “scrub” through the video.

JUAN ALFONSO
Step Two:
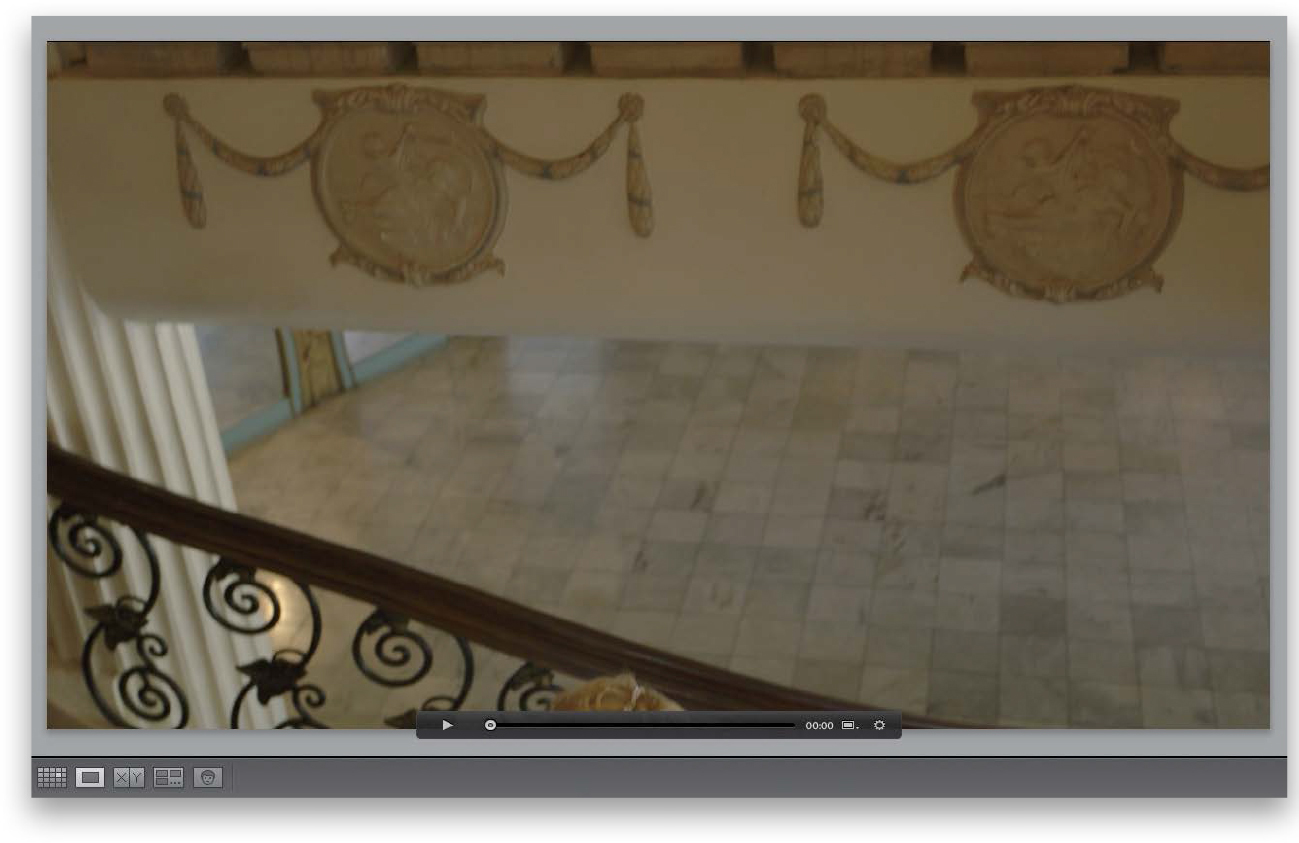
If you want to watch your entire video clip, double-click on it and it opens in Loupe view (as seen here). To play the video, you can click the Play button (duh) in the control bar under the video, or just press the Spacebar on your keyboard to start/stop it. You can also scrub through the video (kind of like manually fast-forwarding or rewinding) by just dragging the playhead in the control bar. When you play the video, it plays both the video and audio, but there’s no volume control for the audio within Lightroom itself, so you’ll have to control the audio volume using your computer’s volume control.

Step Three:
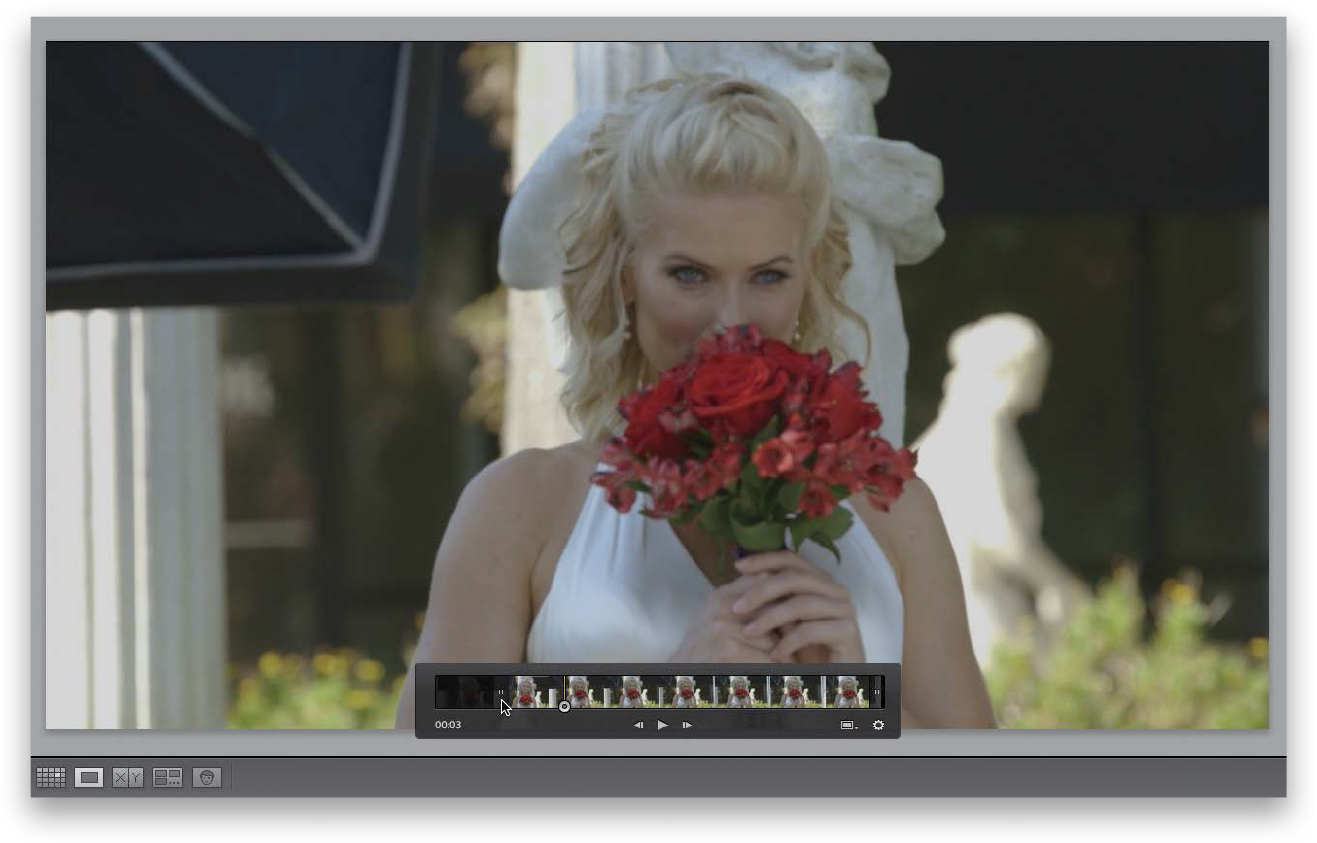
If your video needs to be trimmed down to size (maybe you need to cut off the end a bit, or crop the video so it starts after a few seconds or so), click on the little gear icon on the far-right side of the control bar and the trim controls pop up (seen here). There are two ways to trim: Just click on an end marker handle on either side of the video clip (they look like two little vertical bars) and drag inward to trim your clip (as shown here). The other way to trim is to set Trim Start and Trim End points (which basically means “start here” and “end here”) by hitting the Spacebar to let the video play, then when you reach the point you want your video to actually start, press Shift-I to set the Trim Start point. When you reach the point where you want the rest trimmed away, press Shift-O to set your Trim End point.
Step Four:
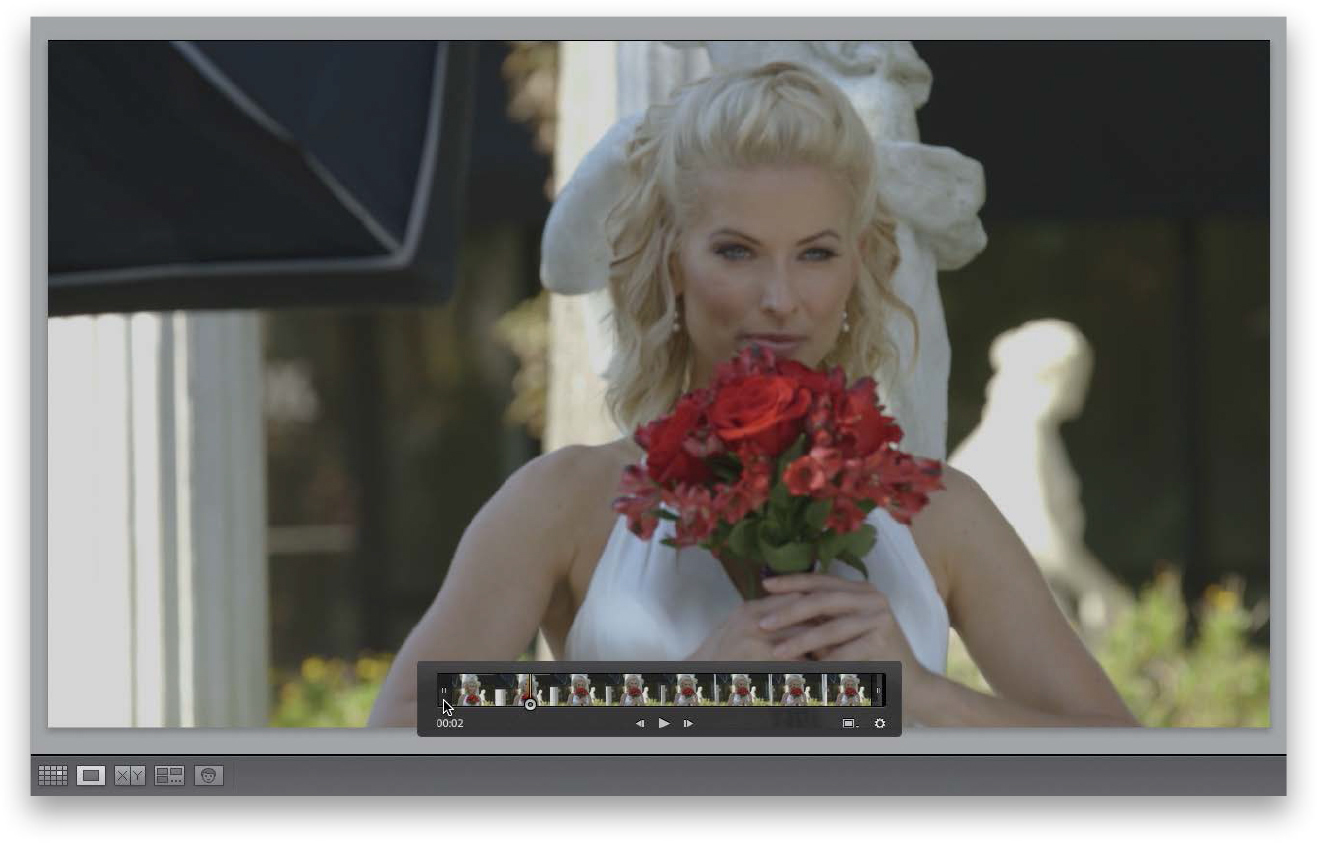
When you trim your clips, it doesn’t permanently trim your video—it’s non-destructive, so the original is always protected. The trimming is applied to a copy when you export the file (more on exporting later), so while that exported video will be trimmed (and what you see in Lightroom will be trimmed, as well), you can always come back to the original video clip anytime and pull those trim handles right back out (as shown here).
Have you ever seen a video (maybe on a blog or on Facebook), and the thumbnail for that video shows them frozen in mid-sentence with their mouth gaping open? Not the most flattering look, right? That’s because the thumbnail is chosen randomly from a frame a few seconds into the video clip. Luckily, in Lightroom, you actually get to choose which individual frame becomes the thumbnail you see when your video clip is in Grid view or down in the Filmstrip.
Step One:
Being able to choose your video thumbnail (called a “poster frame” in video speak) is helpful if you have four or five similar-looking clips—you can choose thumbnails that show which video has which important part in it (but, you don’t just see it here in Lightroom, that thumbnail goes with it when you export it outside of Lightroom, too). To choose your custom thumbnail, first double-click on your video to see it in Loupe view (as seen here), then play the video until you find the part you’d like as your thumbnail, and then stop (hit the Spacebar on your keyboard).
JUAN ALFONSO
Step Two:
Now go down to the control bar, click-and-hold on the little rectangle icon to the left of the Trim Video button, choose Set Poster Frame (as shown here), and now your video clip will have that current image as your thumbnail.

It’s called “grabbing a still,” where you can take any single frame from your video and make it its own separate JPEG image (this will come in really handy a little later in this chapter, so let’s go ahead and learn it now).
Step One:
To pull a single frame out of your video and make a still image from it is pretty much the same technique as setting your thumbnail (from the previous page), with just one small exception. You start by playing your video in Loupe view (double-click on the video thumbnail to enter Loupe view), and then stop the video when you see the frame you want to pull out as a still.

Step Two:
Now go down to the control bar, click-and-hold on the little rectangle icon to the left of the Trim Video button, but this time choose Capture Frame. This creates a second file (a JPEG image file just like any other photo) and puts it to the left of your selected video clip in the Filmstrip (as seen here). By the way, if you haven’t added this video to a collection yet, instead, the JPEG image gets stacked with your video clip and you’ll see a “2” in the upper-left corner of your thumbnail (that’s letting you know you have two images in your stack. To expand the stack and see both the video and the still, click on the stack and press the letter S on your keyboard). Again, you only have to do this if your video wasn’t already in a collection.

If you take a video clip over to Lightroom’s Develop module, it will bring up an alert letting you know “Video is not supported in Develop,” but there’s another way to do simple edits to your entire video clip at once—stuff like converting it to black and white, making it brighter/darker, adding more contrast, and a handful of other simple things like that—all without going to the Develop module.
Step One:
To do this simple style of editing, you’ll need to stay in the Library module, so double-click on the thumbnail you want to edit, so you see it much larger in Loupe view. Now head over to the Quick Develop panel near the top of the right side Panels area. Quick Develop is a simplified version of the Develop module’s Basic panel, but instead of using sliders, it uses one-click buttons to make your adjustments. The weird thing is, you can use Quick Develop to edit your video clip.

Step Two:
For example, if you want to make your entire clip black and white, in the Quick Develop panel’s Saved Preset section, choose Black & White from the Treatment pop-up menu (as shown here). That’s it—your entire clip is now black and white. If you want to make it brighter, click the Exposure single-right-arrow button once to increase the brightness 1/3 of a stop, or click the Exposure double-right-arrow button once to increase it a full stop. Some of the adjustments here will be grayed out, so you can’t do everything you normally could to a photo in Quick Develop, but you can sure do a lot, like add Contrast, or adjust the White Balance Temperature or Tint, or adjust the Whites and Blacks, as well as the Vibrance amount. If you mess up, you can always Undo any button clicks (Command-Z [PC: Ctrl-Z]), or you can click the Reset All button at the bottom of the Quick Develop panel to reset your video clip to how it looked when it was first opened.

While it is true that when you take a video clip over to the Develop module it says “Video is not supported in Develop,” that’s not actually true. It’s more like “Video is not supported in Develop unless you bring a friend (a still photo) along, and then you can edit in the Develop module using a lot more goodies (everything from Curves to Split Toning and more)!” Kinda weird that you can do this workaround, but it’s also kinda cool that you can.
Step One:
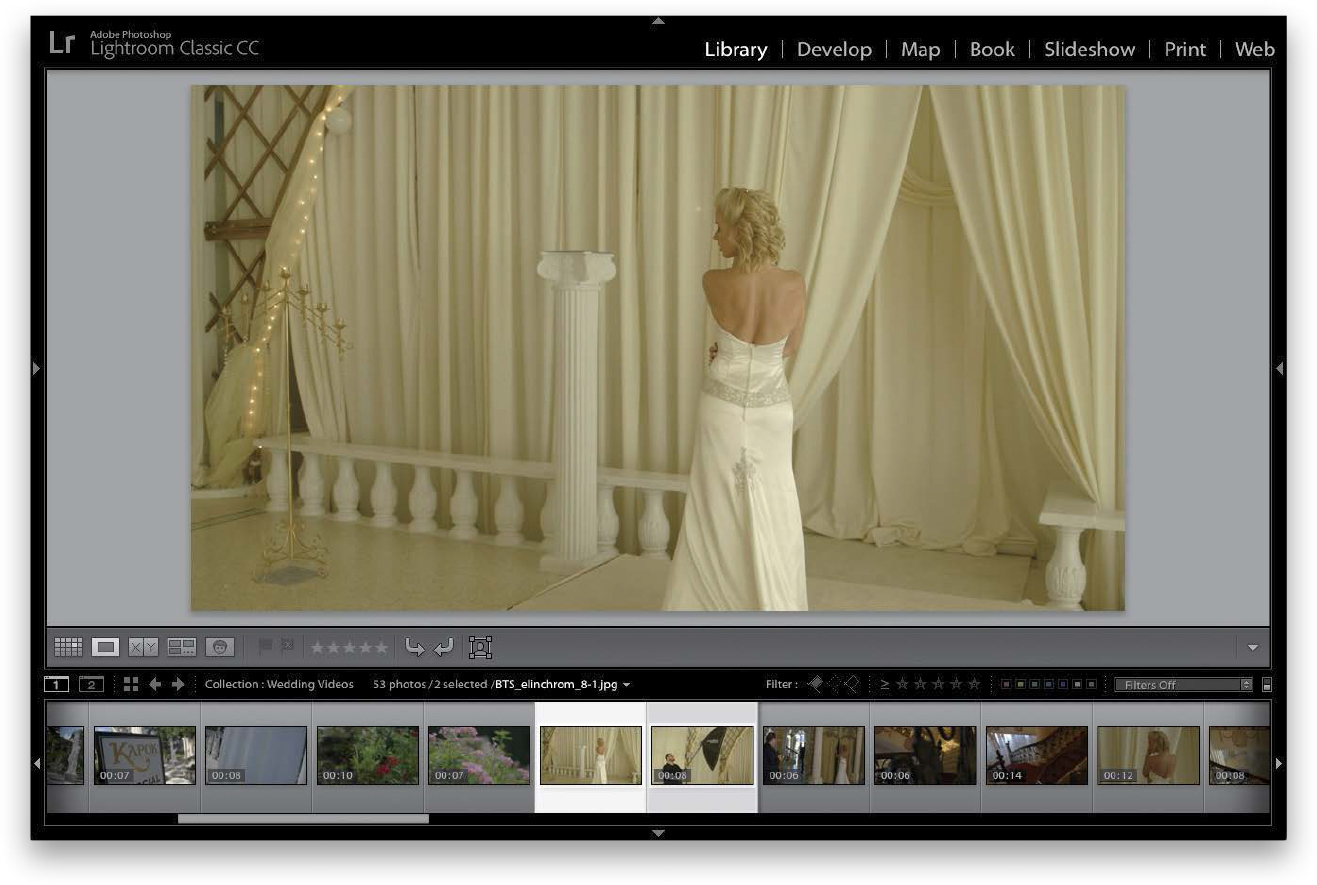
You’ll start this video-editing-in-the-Develop-module workaround by pulling a still photo from your video, so double-click on your clip to enter Loupe view, then play the video and find a frame you want to pull out as a still. Now, go down to the control bar, click-and-hold on the little rectangle icon, and choose Capture Frame. This creates a JPEG file and puts it to the left of your selected video clip in the Filmstrip (if your video is in a collection). Click on the JPEG file first, then press-and-hold the Command (PC: Ctrl) key and click on the video clip (so they’re both selected, as shown here, but the JPEG will look brighter because it’s the “most selected” of the two thumbnails).
Step Two:
Now press D on your keyboard to jump over to the Develop module, and your JPEG image will appear onscreen (since it’s selected—and besides, it can’t display the video clip). At the bottom of the right side Panels area, make sure you see “Auto Sync” (as shown here. If not, flip on the little switch to the left of Sync to turn it on). What Auto Sync does is this: whatever you do to this selected photo, it also does to the other selected photo (but in this case, the second photo isn’t a photo, it’s a video, but for some unknown reason, this still works). Now, whatever effects or changes you apply to that JPEG photo, those same changes are applied to your video clip. Freaky, I know. Let’s give it a try!

Step Three:
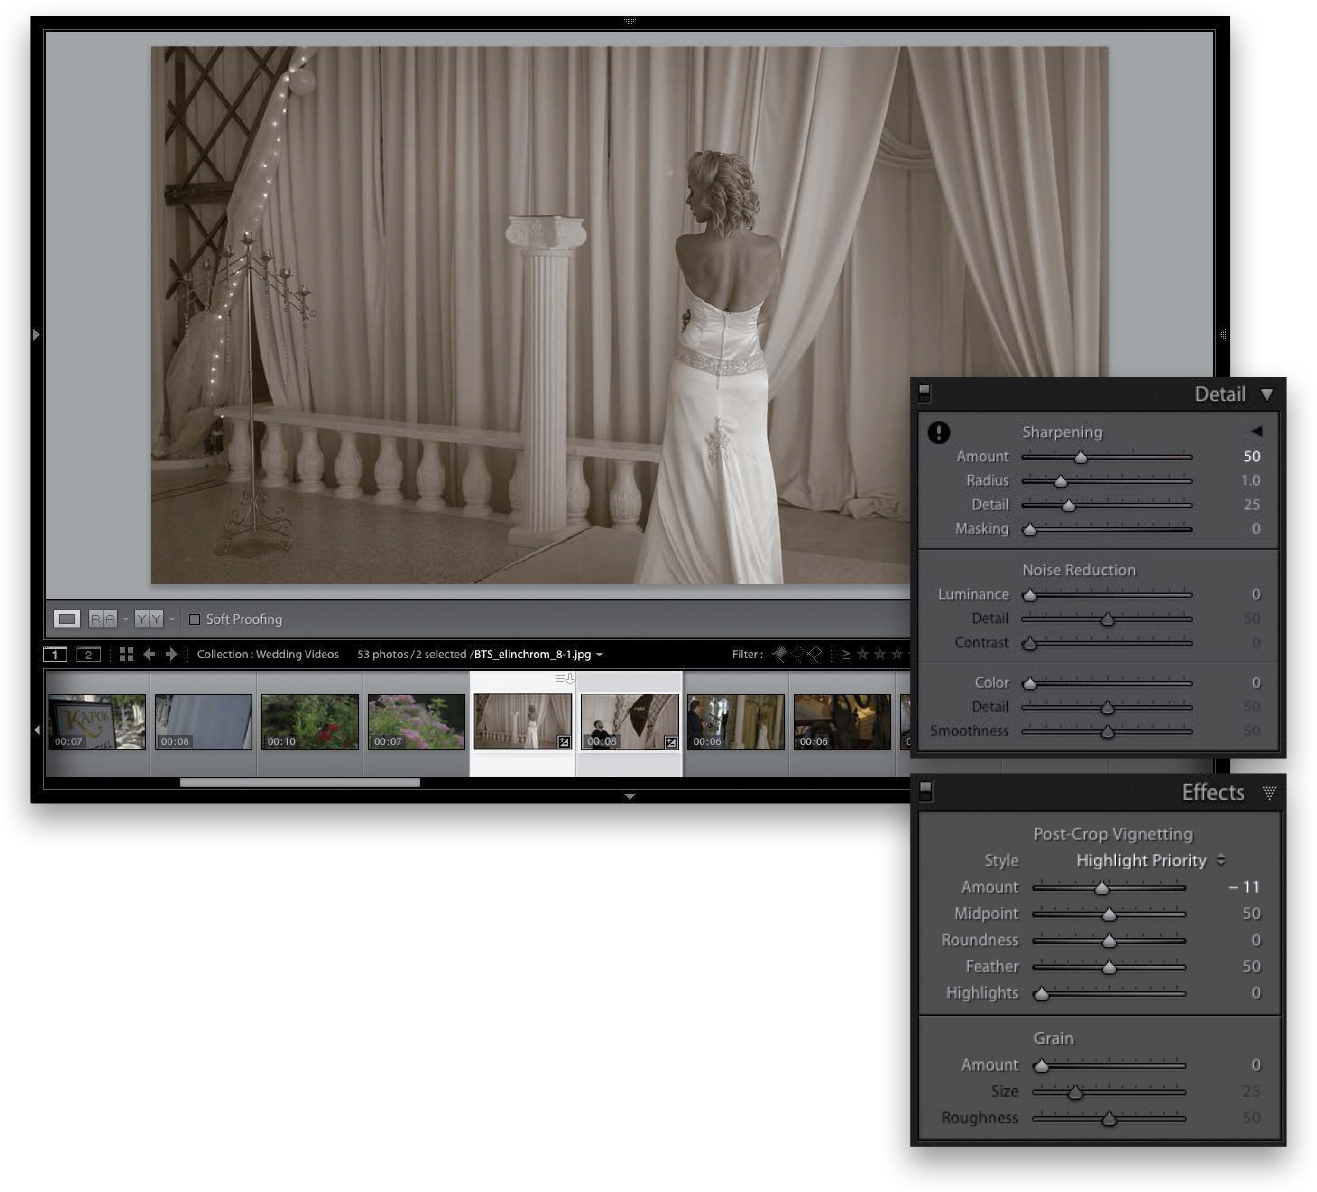
Let’s start by going to the Basic panel and clicking on Black & White in the top right. While we’re here, let’s increase the Contrast amount to +30. Now, scroll down to the Split Toning panel, and let’s apply a duotone effect by dragging the Shadows Saturation slider to around 24 and the Shadows Hue slider to 40 for a brownish tint. Okay, now let’s go to the Tone Curve panel, click once right in the center of the curve (the diagonal line), and drag it a little toward the bottom right (as seen here) to bring down the midtones a bit.

TIP: Using Presets in Quick Develop
If you create a cool look in the Develop module and want to use that exact look later on another video clip, save it as a preset (see Chapter 7). That way you can apply it right in the Library module, from the Saved Preset pop-up menu at the top of the Quick Develop panel.
Step Four:
Next, go to the Detail panel, and in the Sharpening section, increase the Amount to 50, then go down to the Effects panel, to the Post-Crop Vignetting section, and drag the Amount slider to the left to –11, so it adds a subtle amount of darkening all around the edges. Now, did you notice that while we were jumping from panel to panel and making edits like we always do, down in the Filmstrip, the video clip’s thumbnail is updating, too? It’s getting all these same adjustments and effects applied as if it were another still image. How cool is that? Note: There are some things in the Develop module that won’t affect your video (even though they’re not grayed out and it seems like they would). Stuff like profiles, or Clarity, Highlights, and Shadows, or anything in the Lens Corrections panel, and you can’t use the Adjustment Brushes either.
Can you really make a wedding video, or a behind-the-scenes video, or an interview or promo right here in Lightroom, with background music, mixing video clips with stills that are animated with movement and smooth transitions, and opening and closing titles, and the save the whole thing in HD format, all without breaking a sweat? Believe it or not, you can (and it’s way easier than you’d think).
Step One:
The first step is to simply put all your video clips (trim them first, so this doesn’t hold you up later; see page 392) and your final photos (already sharpened, edited, etc.) into a collection. Once they’re all in that collection, put them in the order you want them to appear in your video (I try to use a few photos, then a video clip, then a few more stills, then a video clip, etc., just so there’s not too much of one format). What’s nice is, we’re going to add movement to our stills—a Ken Burns–like pan and zoom—so they blend nicely with the moving video clips. So, get them in the basic order you want them (it’s a collection, so you’ll be able to reorder them later if you need to) by simply dragging-and-dropping them.

Step Two:
Once your images are in order, head up to the taskbar and click on Slideshow to take this collection over to the Slideshow module (that’s what we’re using to make our movie. Don’t worry—it’s better than it sounds). In the Template Browser panel near the top of the left side Panels area, click on Widescreen for your template (it’s a clean, simple template), but then go over to the Options panel in the top of the right side Panels area and turn on the Zoom to Fill Frame checkbox (as seen here), so you don’t have thick black bars at the top and bottom of your slide show…errr…movie. Note: You’ll find a bonus chapter on using the Slideshow module on the book’s companion webpage, mentioned in the book’s introduction.

Step Three:
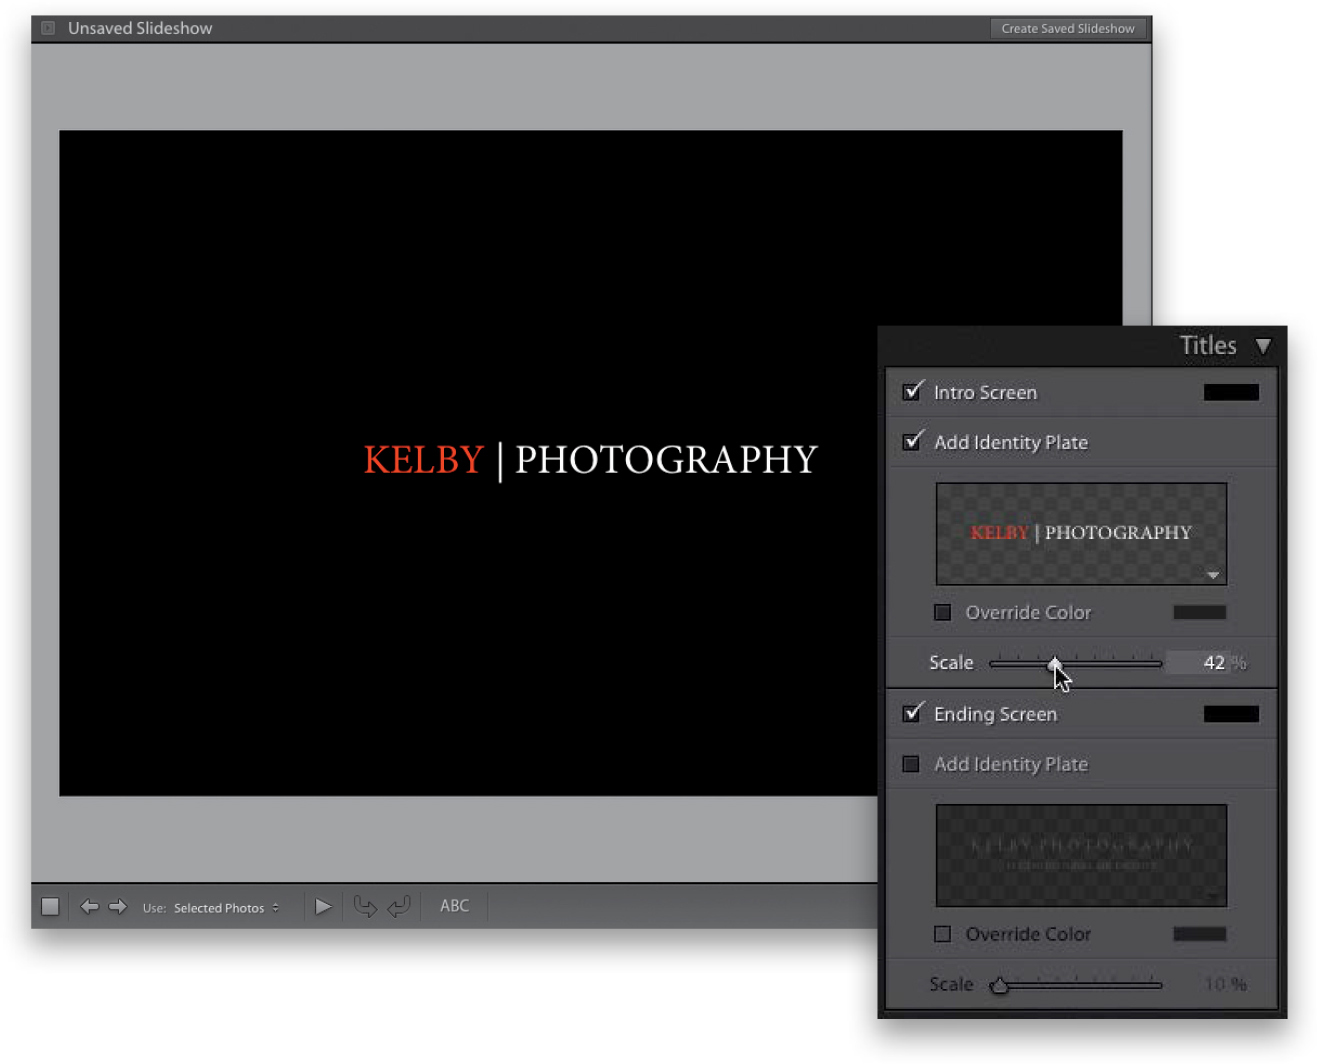
Now head down to the Titles panel and turn on the Intro Screen checkbox. If you want to change the color of your intro screen’s background, click the little color swatch to the right of “Intro Screen” to bring up a color picker where you can choose your new background color (I’ll stick with black here). After just a few seconds, your intro screen will disappear. I have no idea why (it seems kinda crazy to me, but it has always been that way). To see it again, click-and-hold on the little Scale slider nub in the Titles panel and it will stay onscreen until you let go. By default, it will show your name (or whatever you have in your Identity Plate), but you can change that (unless it’s a promo video, of course).
Step Four:
Let’s go ahead and change the name of the text for our title screen (unless, of course, this is a behind-the-scenes video and you want your name there, but we’ll assume it isn’t for now). In the bottom-right corner of the Add Identity Plate preview window, click the arrow, and from the pop-up menu that appears, choose Edit (as shown here). This brings up the Identity Plate Editor, where you can type in your title text, choose your font, size, etc., or you can import a graphic if you want (more on using Identity Plates back in Chapter 4). Once your text is formatted for the opening title, go ahead and do a closing title (right below it), as well, if you like. By the way, you can change the size of your text after the fact, using the Scale slider, and you can also change the text color you chose by turning on the Override Color checkbox and clicking on the color swatch to its right.

Step Five:
Now, let’s choose our background music track. Lightroom is a little fussy when it comes to music formats—it likes them in either the AAC (M4A) or MP3 audio format. If you use iTunes for your music (on a Mac or Windows), it can create an AAC music file for you: click on the song in iTunes, then go under File menu, under Convert, and choose Create AAC Version. This makes a duplicate of your song in the AAC format, and that’s the version you can use in Lightroom. If you don’t use iTunes, you’ll need to convert the song file to an MP3, and luckily, you can find free utilities online to convert your music track, so do that first, or Lightroom won’t let you import the track. Once it’s converted, go to the Music panel, click the + (plus sign) icon, choose your music track, and now the track’s name will appear at the bottom of the Music panel, along with the length of the track.

Step Six:
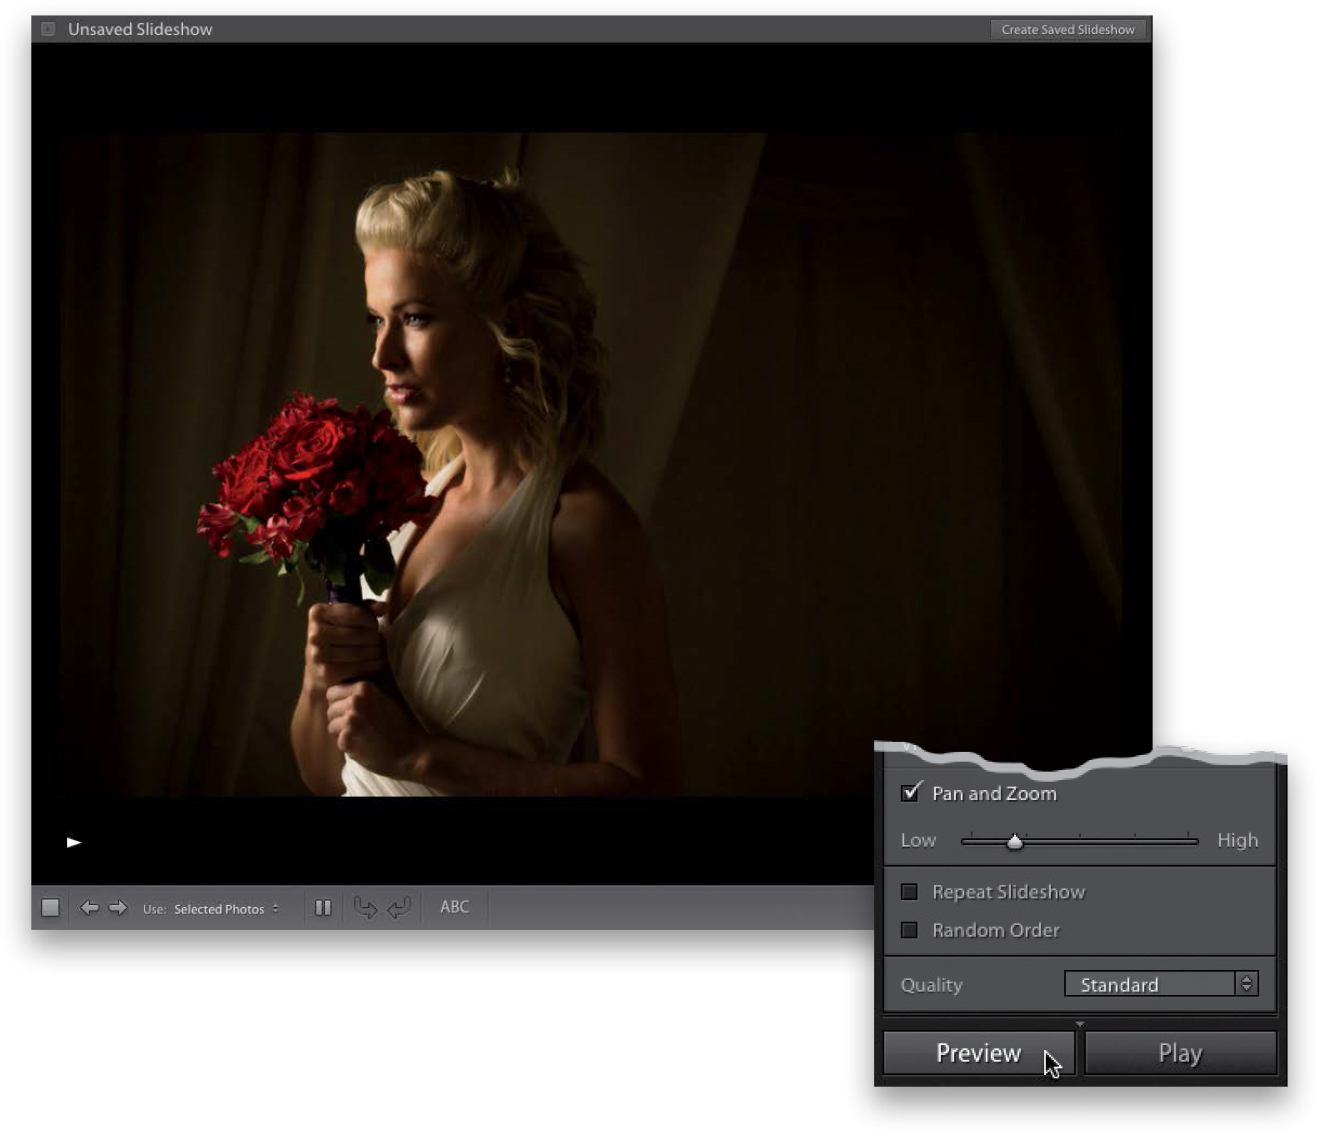
Your last stop is the Playback panel (yes, you’re already almost done with your video). If you want your slide show to fit the exact length of the song you picked, click the Fit to Music button, and it will do all the math for you (how long each slide will stay onscreen and how long the dissolves between them will need to be, so when the song ends, your last photo or video ends right on time). The Audio Balance slider lets you choose to hear all, some, or none of the audio that your camera picked up (it can be kinda weird when you’re mixing still and video and you hear audio just here and there, so I set it all the way over to Music, but it’s your call). Next, I turn on the Pan and Zoom checkbox—this puts your stills in motion (à la the Ken Burns effect)—and the slider lets you choose more subtle movement or a lot of movement. The other checkboxes are kind of obvious, and there’s a Quality pop-up menu, as well. Pretty simple choices here.

Step Seven:
At this point, we’re ready to look at our movie, so hit the Preview button at the bottom of the right side Panels area and it will play a preview of your video in the Preview area. If you want to see the full-screen version, hit the Play button (to the right of the Preview button). So why would you ever hit Preview instead of Play? It’s often smoother and ready to play faster than the full-screen production, so I use Preview just for the sake of time and smoother playbacks, while I’m still in the editing/tweaking phase.
Step Eight:
When you’re happy with how everything sounds and looks, hit Play to render the full-size, full-screen version. If it all looks good, it’s time to export a copy in whichever format you need. So, click the Export Video button at the bottom of the left side Panels area and it brings up the Export Slideshow to Video dialog. At the bottom, there’s a Video Preset pop-up menu where you choose which size/quality to export. For the highest quality (which also means the largest file size), choose 1080p (16:9) (that’s HD quality and size). If you choose each of the four sizes, a description appears right there next to it, so you know which preset is for what. Choose the one that fits how you’re going to share your video and it does the rest. After a few short minutes of rendering, your video is ready to share. That’s really all there is to it (and you didn’t even have to leave Lightroom).

TIP: Posting Directly to Facebook
You can post your video directly to Facebook using Publish Services (see Chapter 9 for more on how to use them, but I thought you’d want to know you can post your video directly from Lightroom).
Step Nine:
Another way to export your video clips is to use the standard Export button when you’re in the Library module (see Chapter 9 to learn all about exporting). When the Export dialog appears, if you scroll down a bit, you’ll see an area dedicated to exporting video (seen here). Since you clicked on your video clip to export it, the Include Video Files checkbox should already be turned on, so all you have to do is make two simple choices: (1) Which video format do you want to save your clip in? I use H.264, as it’s a widely supported format and makes the file size smaller without losing much (if any) visible quality (kind of like JPEG does for image files). But, of course, how much it’s compressed is based on (2) the Quality setting you choose. If you’re going to be sharing this somewhere on the web (YouTube, Animoto, etc.), then you’ll probably want to consider a lower quality than Max (the physical size and fps will appear to the right when you choose a Quality size from the pop-up menu, so you know what each delivers). However, if you’re taking this video over to a dedicated video editing application, that’s when you’d want to choose Max quality.

TIP: Video Preferences
There are only two video preferences and they’re found in the Library View Options (press Command-J [PC: Ctrl-J]), on the Loupe View tab. In the General section, at the bottom, Show Frame Number When Displaying Video Time does just what it says—it adds the frame number beside the time (yawn). The option beneath that, Play HD Video at Draft Quality, is there to make sure the playback of your HD video is smooth if you don’t have a super-fast computer—the lower-resolution draft-quality video takes less power to display the video in real time than the full HD version does.
