The four sides cut to size.
The object of this chapter is to show you how, with the aid of a DIY centre with a wood cutting service, you need no more than a screwdriver and glue – you could even get away without the glue!
I would only recommend this style of baseboard if you really feel that you cannot tackle one of the earlier versions in the book. It is a ‘quick fix’ – something that can be knocked together in a couple of hours with minimal DIY skills.
The board described in this chapter makes maximum use of readily available materials in standard sizes. It is based on 9mm (⅜in) plywood and standard lengths of PSE (Plain Square Edged) softwood.
Plywood of 9mm (⅜in) comes in two sizes: 1,829mm (72in) × 607mm (24½in) and 2,440mm (96in) × 1,220mm (47¼in). Softwood timber with a depth of 94mm (3¾in) and width of 18mm (¾in) comes in 2,400mm (96in) lengths.
An average board needs to be around 1,200mm (48in) long by 605mm (24in) wide. To achieve this in the most economical fashion, the board measurements referred to in this chapter will produce a board that fits on a frame 605mm (24in) wide by 1200mm (48in) long.
• |
Softwood – 94mm (3¾in) × 18mm (¾in); two lengths 1,200mm (48in) long cut from the length of 2,400mm (96in) softwood with one cut. |
• |
Softwood – 94mm (3¾in) × 18mm (¾in); two sides 571mm (22½in) long cut from a further length of softwood will require two cuts. |
• |
Plywood – 9mm (⅜in) is already 607mm (24in) wide and only requires one cut of 1,200mm (47¼in) out of the 2,440mm (96in) by 607mm (24in) sheet – you have enough plywood remaining for a second board or for cutting two 150mm (6in) support squares. |
The four sides cut to size.
Many DIY centres and wood suppliers offer a free cutting service. The total cost will be (April 2014 prices) under £35.
The simple frame uses butt joints. The butt ends of the shorter lengths of wood are joined to the sides of the longer lengths of wood to create an overall width of 607mm (24in).
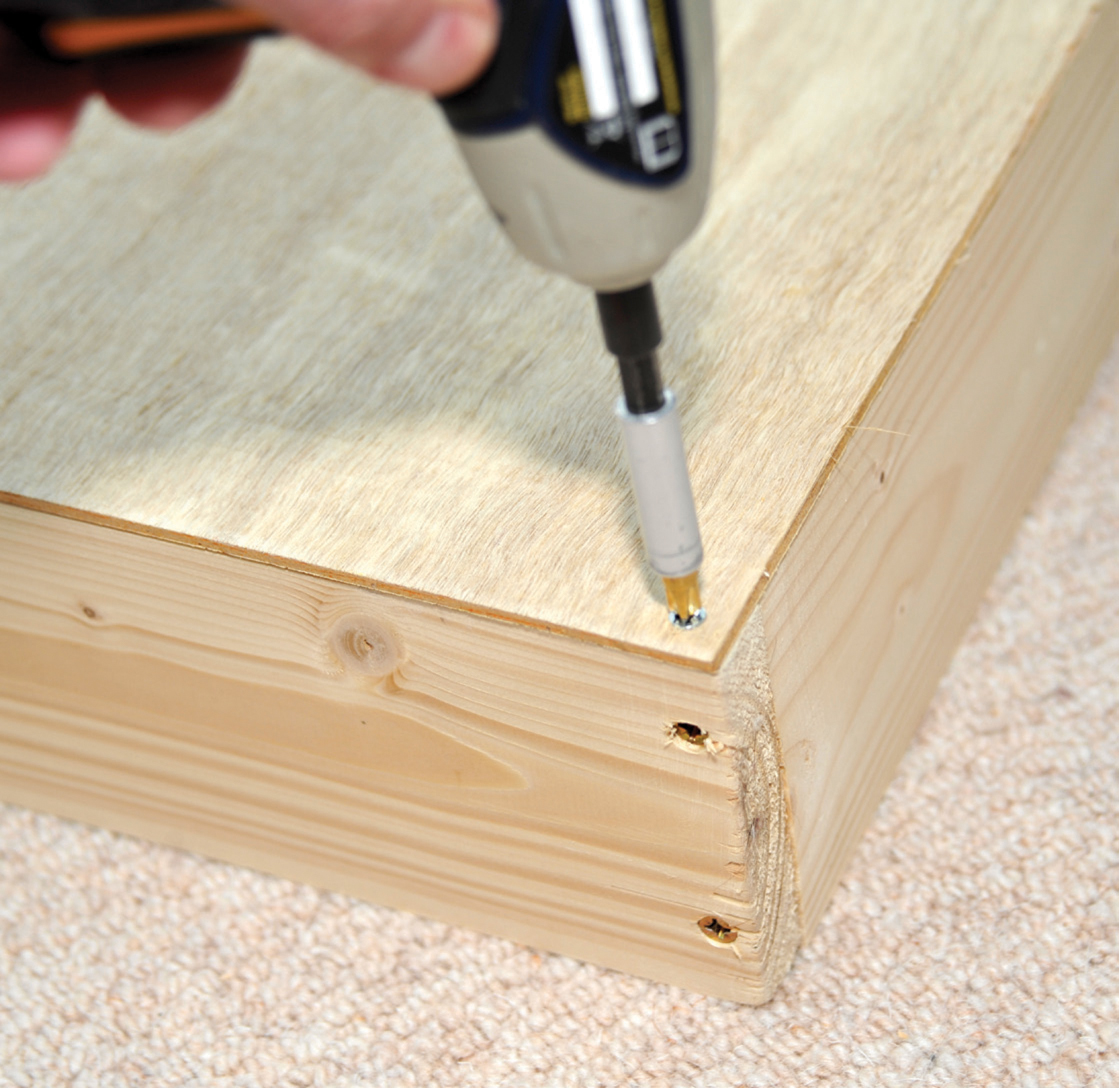
Before you do anything more, lay the top on the floor and place the four pieces of frame in position as though the baseboard was upside down. Check that when fixed, the whole unit will come together and that neither the measuring nor the cutting is incorrect. When you are happy, your next job is to bore two holes, one above the other, in each end of the lengths and use a countersink.
Glue one end of a side, insert 50mm (2in) screws and tighten.
Repeat the process on all the other corners until you end up with an oblong frame 1,200mm (47¼in) by 607mm (24in). Do not wait for this to dry but continue to the next stage. You will need eight screws 50mm (2in) long.

Butt joint.
Two holes and countersink.
Glued end of frame.
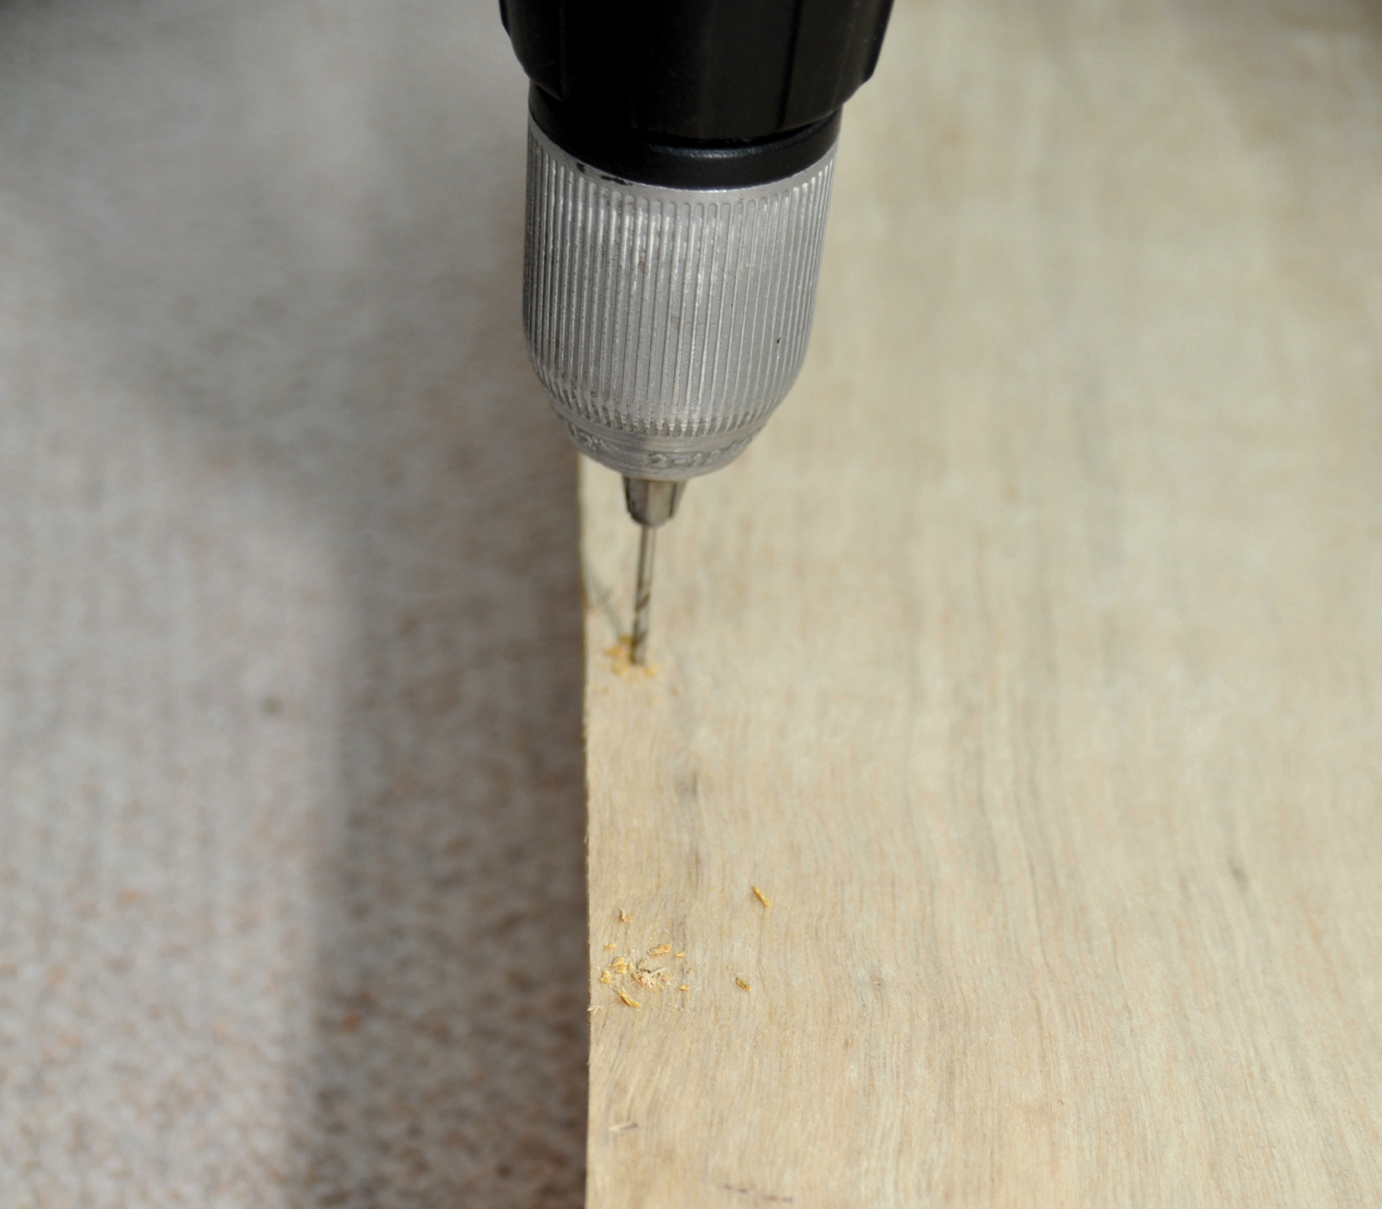
Lay the top in position and again check that it all fits (do not worry if it is not entirely square). Slightly move the board so that it overhangs the frame on two sides and drill a series of pilot holes with a 2mm (1∕20in) or similar drill bit, on both the overhanging sides and also use a countersink on each screw. The holes should be about 100mm (4in) apart. Move the top so that it overhangs on the other two sides and repeat the process. This stops the drill entering the frame and will give better grip if the screw is entering new wood, rather than a pre-drilled hole in the frame.
Make sure you have your screwdriver and enough 20mm (¾in) screws – you will need about thirty. Starting on one corner, line up the top with the corner, and the one side and one long length. Insert a screw in that corner and loosely tighten. At the other end of the longer length make sure that the top is lined up and insert a screw in that corner. Staying on the same side, ensure that the frame is in line with the edge of the baseboard in the centre of the frame and insert a third screw. Tighten all three.
Drilling the board.

Pushing the frame into square.
Move to the opposite side and push the frame into square with a corner and again repeat the process with the other corner and the centre of the long side before tightening the screws.
When you are happy that everything is lined up, correctly insert and tighten up alternate screws right round the board until they are all in place.
Wipe away any excess glue and put the board face up on a hard, flat surface, with paper underneath to catch the glue. Weight the board down and leave until dry.
Your baseboard is now complete apart from sanding down, painting and inserting legs. For sanding and painting, I suggest you follow the instructions in Chapter 9.
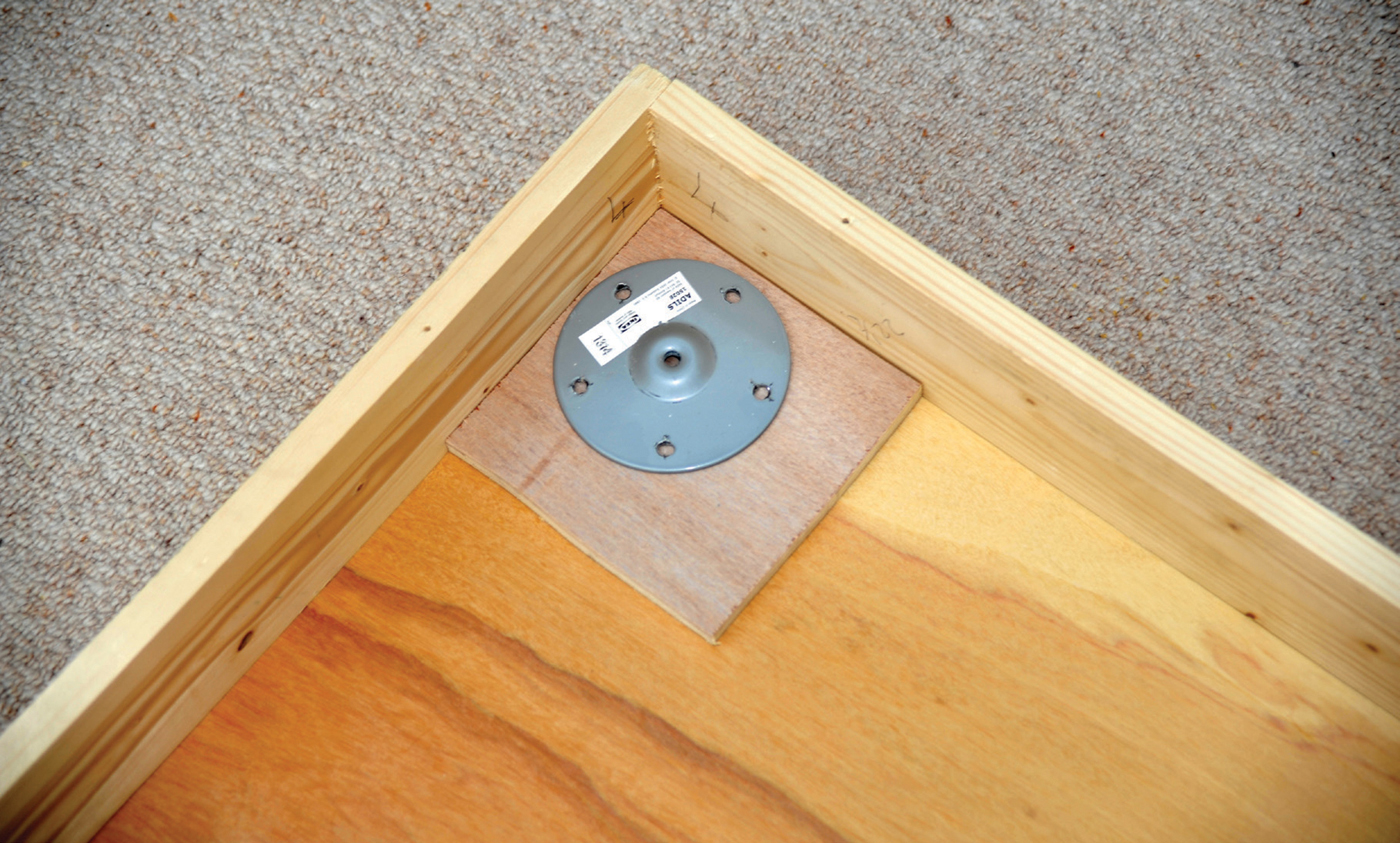
You can, of course, follow the instructions in Chapter 11, but the simplest way is to fit screw-in legs. Legs designed for breakfast bars are readily available from DIY warehouses and can be simply screwed to the underside of the 9mm (⅜in) plywood or, to gain extra strength, you can get your spare ply cut into four 150mm (6in) squares. Glue one side and two edges of these squares and place them in each corner. Using 20mm (¾in) screws, fix the leg plate in the corner. This length of screw will go through the plate and almost through both 9mm (⅜in) layers of plywood. Leave the baseboard upside down until the glue is dry.
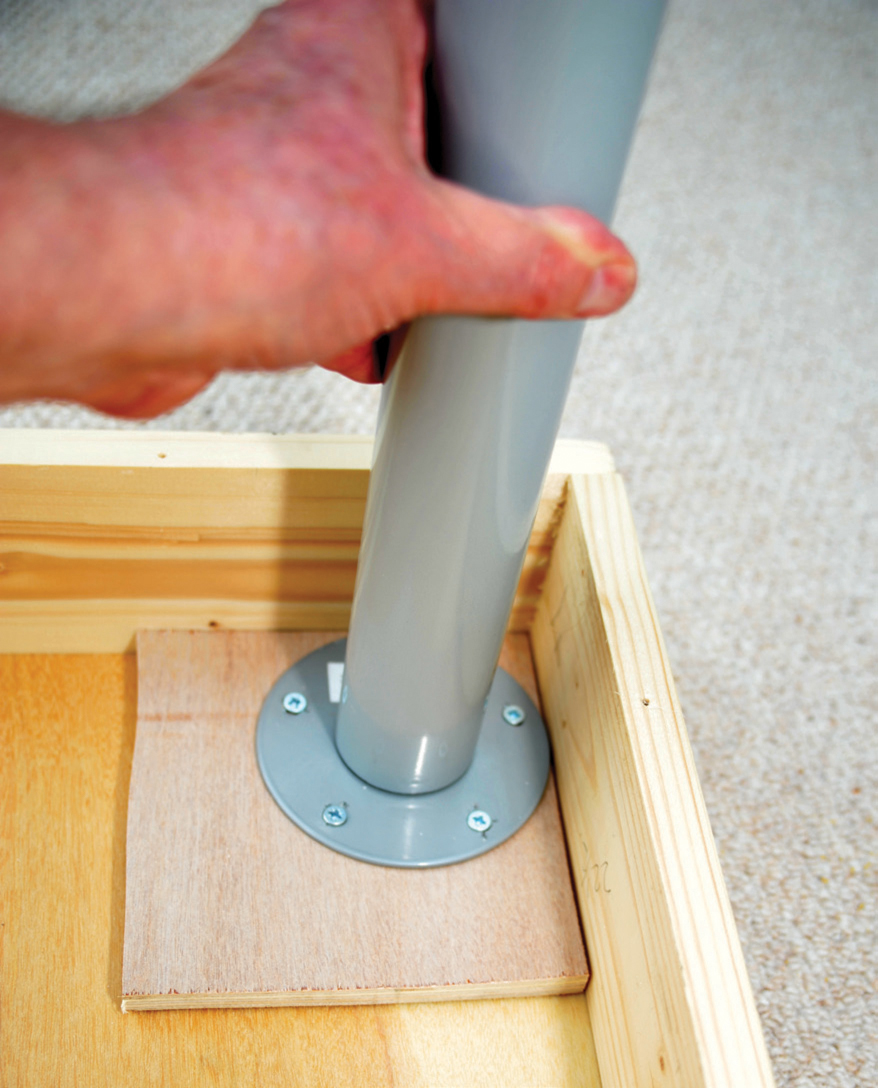
Finally, screw the legs in place.
I can only repeat that the board will be a little heavy and a little chunky, but it will be solid and can be achieved with the minimum of tools and expertise.
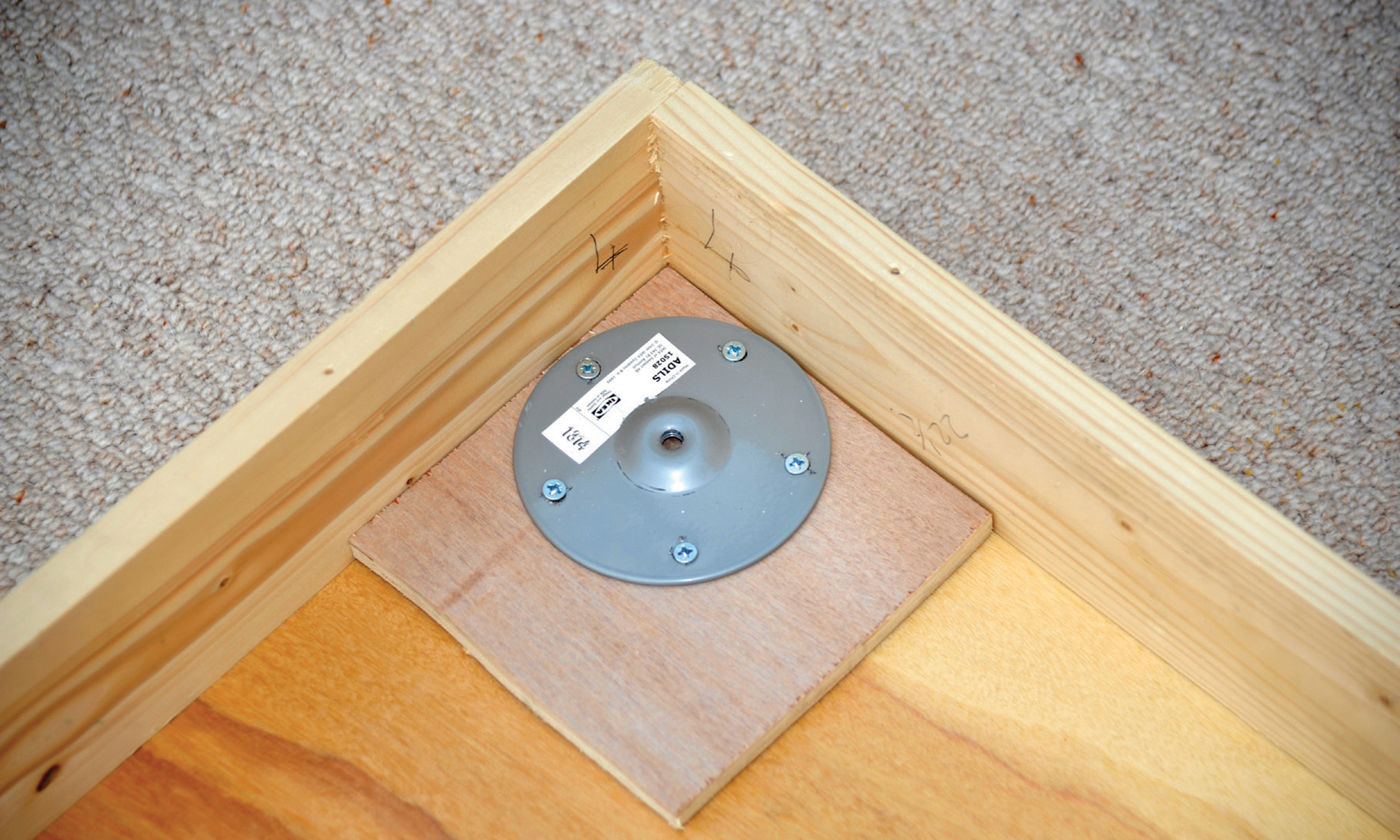
The plate screwed into position.
In previous chapters I have explained how to link boards together using dowels. I have explained how the dowels need to be sunk into the frame using a spade drill. In this chapter, I show a simpler way of getting a flush fit without the use of a spade drill. Fortunately the depth of the base plate of a dowel is almost the same thickness as 3.6mm (¼in) plywood.
If you line up the two baseboard ends and clamp them together, then bore a guide hole as per previous instructions on fitting dowels, you can then screw the dowels directly on to the frame. This will leave them both standing proud of the frame and when joined, there will be a gap. By cutting a narrow strip you can screw and glue a piece of 3.6mm (¼in) plywood above the dowel, level with the top of the baseboard.
To ensure there is an even fit, you also need to add plywood between the two dowels and at either side, otherwise the two end plates will not sit level.
The two baseboards can be clamped together with either bolts drilled through both frame ends or with toggle clamps. The baseboard tops will now provide a level, joined-up bed for the tracks and the boards will be locked together in just the same way as if you had drilled the end frame with a spade drill.

Plywood fixed above dowel but level with baseboard top.
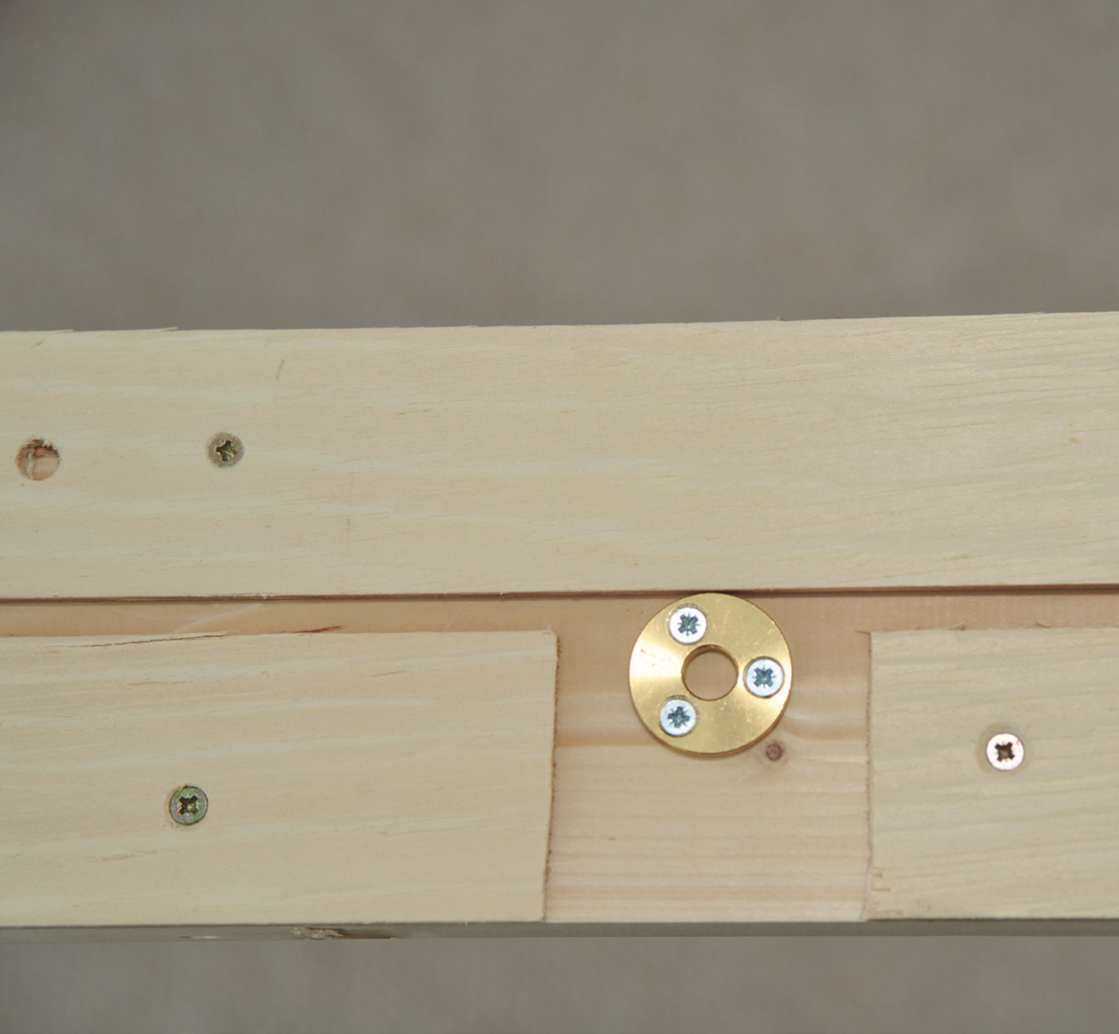
Plywood additionally fitted between the dowels to ensure baseboards clamp together level and accurately.

The finished baseboards forming the base of the new West Wiltshire Model Railway Circle’s ‘N’-gauge layout.