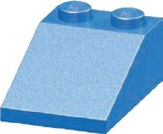
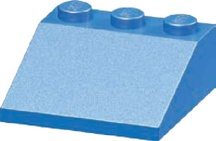
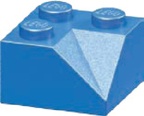
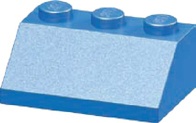
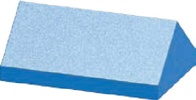
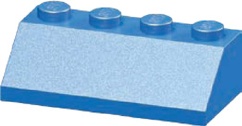
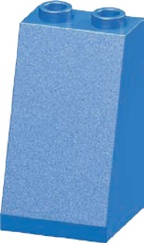
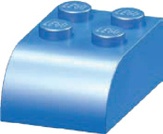
Appendix A. Brickopedia

The LEGO system is made up of thousands of elements. Some are different sizes of the same type of piece (like 2×3 and 2×4 bricks), while others are exactly the same size with different decorations or patterns printed on them.

I’d need an entire book in order to catalog every piece in the system. Instead, this Brickopedia contains a selection of more than 275 elements, from basic bricks, slopes, and plates, to specialized elements, arches, and even decorative elements. The pieces included represent the most common and most reusable elements in the LEGO system, and they are the most likely to be found in your own LEGO collection. In the case of bricks, plates, slopes, and arches, I’ve included nearly every basic element that falls into those categories. In some of the other categories (such as specialized elements and decorative pieces), I’ve included a narrower selection of pieces, focusing on those that offer the most creative possibilities and interaction with other basic parts.

As you’ll see, I’ve categorized the Brickopedia from the perspective of building with LEGO pieces. As a result, I suggest that you do not use it to plan purchases of LEGO pieces because its categories and terminology may not match the ones used by stores or websites. Some of the categories and descriptions are unique to this text. I hope that you’ll find the Brickopedia useful in your attempts to categorize, organize, and, of course, build with the LEGO system of parts.

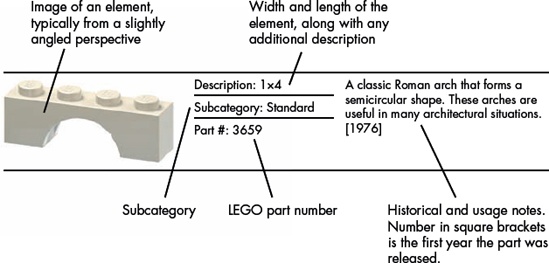
The Brickopedia contains a separate entry for each element. Each entry contains several pieces of information, as shown in Figure A-1.

This information notes why you might have certain pieces in your collection, suggests how to use them, or in some cases, just offers an interesting anecdote about the part.

The category and subcategory names convey the nature of the pieces. Whenever possible, I’ve cataloged similar parts together, like standard and inverted slopes of the same size, to show their relationship. I’ve also divided the LEGO elements into several broad categories. Each category contains subcategories that further refine the way pieces are classified (see Table A-1). Table A-2 through Table A-10 catalog each major category from basic bricks to decorative elements.

Table A-1. LEGO Element Categories and Subcategories

Category

Subcategory

Description

Bricks

Standard

Rectangular sides, same height as a 1×1 brick.

Adapted

Irregular sides/shape or taller than a standard 1×1.

Plates

Standard

Square or rectangular shape, same height as a 1×1 plate.

Adapted

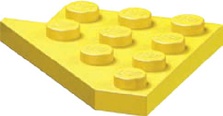
Irregular sides/shape. “Quarter cut” or “diamond cut” describes pieces that can be combined to form a circle or a diamond shape.

Bows

One edge has symmetrical angles cut away, whereas the opposite edge is straight or indented in the center.

Wings

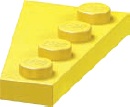
Available in left and right varieties, shaped like airplane wings.

Slopes

Standard

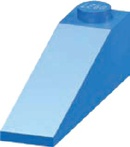
The angled face is usually on the top part of the element.

Inverted

The angled face is usually on the underside of the element.

Corners

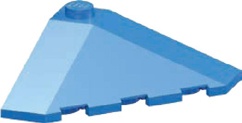
Any slope that can be used to form a corner where two rows of the same type of slope meet at 90 degrees.

Peaks

Two or more angled faces meet at the top of the element. When in place, there are no exposed studs.

Compound

Two or more (flat or curved) angled faces.

Curved

Angled faces that have a curve.

Specialized Elements

Junctions

Elements with studs on their sides or with a portion perpendicular to another part. These pieces allow you to join two or more pieces to make a bend in or change the shape of a model.

Odd Faces

Elements with one or more irregularly shaped, contoured, or textured faces.

Hinges and Turntables

Hinges are bricks or plates that meet at a flexible joint. Turntables allow attached elements to rotate. Both hinges and turntables can add movement to a model.

Pin-Enabled

Bricks or plates with a Technic-style pin attached on the sides, top, or bottom, or elements capable of accepting a pin.

Wheels/Tires

Pieces that add motion to vehicles.

Arches

Standard

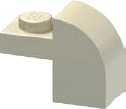
A single piece that creates a complete arch.

Half

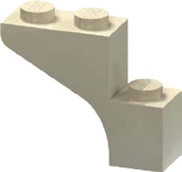
A piece that forms only half of the complete arch. Studs are on top as with the standard variety.

Half Inverted

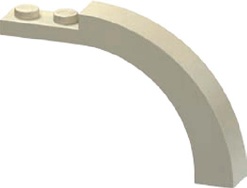
A piece that forms only half of the complete arch. Tubes are on the bottom, and no studs are showing. The arch is on top of the element.

Tiles and Panels

Standard

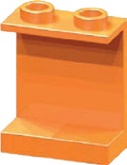
Standard tiles are any flat elements that are the same height as a plate but have no exposed studs. Standard panels are thin elements that can create a division smaller than a full-width brick.

Inverted

Inverted tiles have smooth undersides with no exposed tubes, but they do have studs on top, unlike standard tiles.

Cylinders and Cones

Standard

Standard cylinders are cylindrical elements that resemble a coffee can or a drum. Standard cones are elements shaped like upside-down ice cream cones.

Adapted

An element that is only partially cylindrical or conical. Pairs or groups of this kind of element can be combined to form a complete cylinder or cone.

Baseplates

Standard

Baseplates that are one full brick in height and 8×16 studs or larger.

Waffle

Any thin baseplate with a waffled underside that does not accept studs.

Decorative Elements

Fences, Rails, and Rungs

Latticework or ladder-like elements that can be used as fences, grilles, hand rails, and so on.

Bars, Clips, and Handles

Bars are the diameter of a minifig hand; clips are bricks or plates that can hold them in place. Handle elements have a bar-sized portion attached to an otherwise standard piece.

Foliage

Any element that looks like flowers, trees, shrubs, or other greenery.

Ornamental

Any piece that is purely decorative but isn’t some type of foliage. A flag is perhaps the best example of this type of element.

Doors/ Windows

Pieces that can be used as doors or windows.

Table A-2. The Bricks Category

Part

Specifications

Notes

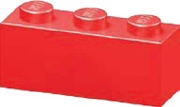
Description: 1×1

This part is the basis of the LEGO system. Measurements and categorization of other parts are based on its 1×1 size. It’s the third most common part. Just don’t step on it barefoot in the dark! [1958]

Subcategory: Standard

Part #: 3005

Description: 1×2

The most common part in the system; used in over 3,000 official sets. Just about everything that you build (mosaics, sculptures, minifig-scale buildings, and so on) will use some of these. [1958]

Subcategory: Standard

Part #: 3004

Description: 1×3

A bit odd because of its uneven number of studs, but don’t overlook 3-stud-long parts like this one. Not every model has an even number of studs. [1969]

Subcategory: Standard

Part #: 3622

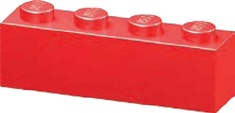
Description: 1×4

Like its half-sized cousin, the 1×2, this part is common and often very useful. On the list of the most common parts, this one shows up at number seven. You probably have lots of these. [1967]

Subcategory: Standard

Part #: 3010

Description: 1×6

A short stretcher-style brick that’s less common than the 1×4. It’s extremely useful for creating large sections of walls for minifig-scale dwellings or for making the walls of macroscale models. [1958]

Subcategory: Standard

Part #: 3009

Description: 1×8

A longer stretcher-style brick that’s less common than the 1×4. Like the 1×6, it is very useful for quickly extending the walls of minifig buildings. [1958]

Subcategory: Standard

Part #: 3008

Description: 1×10

This piece is a relatively new addition to the standard 1×N bricks. It’s not as common as the 1×8. Longer walls become short work with a long brick like this. [1993]

Subcategory: Standard

Part #: 6111

Description: 1×12

The second longest 1×N brick because (as of this writing] there are no 1×14 bricks. The 1×12 is rare in smaller sets. It provides a huge overlap for smaller bricks, resulting in a stronger model. [1993]

Subcategory: Standard

Part #: 6112

Description: 1×16

This piece isn’t usually found in smaller sets, but if you can get some, you’ll probably find them useful as your projects grow more complicated. [1988]

Subcategory: Standard

Part #: 2465

Description: 2×2

The “stubby” is another brick that is sometimes overlooked. Several 2×2s can be tied together with a few larger bricks. It’s the second most common part in the LEGO system. [1958]

Subcategory: Standard

Part #: 3003

Description: 2×3

As with the 1×3, this brick is really useful, especially when you need pieces of unequal length. Two of these equal a 2×6 (obvious, but easy to forget). [1958]

Subcategory: Standard

Part #: 3002

Description: 2×4

The common 2×4 is often the first LEGO brick people envision. Introduced in 1958, it’s a core building element. You can never own too many of these. [1958]

Subcategory: Standard

Part #: 3001

Description: 2×6

A midsized beam often found in assorted tubs and buckets. Despite its common length, it’s interesting to note its late arrival. You might have expected it to have been around from the beginning. [1990]

Subcategory: Standard

Part #: 2456

Description: 2×8

This beam-like brick was first seen in the late 1950s when the stud and tube connection mechanism was first patented. [1958]

Subcategory: Standard

Part #: 3007

Description: 2×10

One of the original elements that helped define the modern LEGO system. Useful for bracing large models or for finishing a wall above windows or doors. [1958]

Subcategory: Standard

Part #: 3006

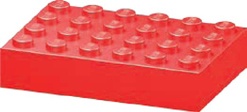
Description: 4×6

First seen in the mid-1990s but more common in sets released after 2000. One of only a handful of standard bricks that are four studs wide. [1995]

Subcategory: Standard

Part #: 2356

Description: 4×10

Introduced the same year as the 4×6 brick. Usually found in assorted tubs and buckets. [1995]

Subcategory: Standard

Part #: 6212

Description: 4×12

Seen occasionally during the early 1980s but not again until the mid-1990s. A relatively uncommon brick. [1981]

Subcategory: Standard

Part #: 4202

Description: 4×18

A long and uncommon brick. Appeared in a few sets in the early 2000s but hasn’t been seen much since. [2000]

Subcategory: Standard

Part #: 30400

Description: 2×2 elbow

A so-called elbow piece. Handy for shoring up the corner of a wall where columns of stacked pieces come together. Although it has the same shape as the 4×4 elbow, it wasn’t seen until the late 1980s. [1987]

Subcategory: Adapted

Part #: 2357

Description: 4×4 elbow

This piece is included as a comparison to the newer, smaller 2×2 elbow. This version has not been seen in regular sets for over 40 years. [1958]

Subcategory: Adapted

Part #: 702

Description: 3×3 diamond cut

I call this diamond cut because if you arrange four of these with their right angles at the center, they form a rough diamond shape. [2001]

Subcategory: Adapted

Part #: 30505

Description: 3×3 zig zag

Depending on which way this piece faces, it can provide texture because of its indented side. The reverse side gives a realistic bevel to a square corner where two walls meet. [1988]

Subcategory: Adapted

Part #: 2462

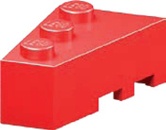
Description: 2×3 left beveled

It’s sometimes useful to look at two elements as a pair of similar pieces, especially when you’re talking about these two beveled elements. Introduced in the mid-1990s, they can be used on cars, planes, spaceships, and so on to help contour the body and make your models look more realistic. Also available in larger sizes as parts #41767 and #41768. [1994]

Subcategory: Adapted

Part #: 6565

Description: 2×3 right beveled

Subcategory: Adapted

Part #: 6564

Description: 2×4 left beveled

Although the 2×3 versions of these pieces were found in sets around 1994, the longer 2×4 versions shown here didn’t arrive until 2002. The longer and shorter types work well together to create subtle shapes and angles. [2002]

Subcategory: Adapted

Part #: 41768

Description: 2×4 right beveled

Subcategory: Adapted

Part #: 41767

Table A-3. The Plates Category

Part

Specifications

Notes

Description: 1×1

The LEGO Group once referred to plates as “slim bricks,” because they’re much shorter than regular bricks. The entire plate is not much bigger than the stud on top of it. It’s one of the smallest elements. [1963]

Subcategory: Standard

Part #: 3024

Description: 1×2

Ranked number five on the list of the most common parts, it’s also one of the most useful parts. [1963]

Subcategory: Standard

Part #: 3023

Description: 1×3

This piece is as useful as the 1×3 standard brick. Pieces with odd numbers of studs are relatively uncommon. [1977]

Subcategory: Standard

Part #: 3623

Description: 1×4

Number nine on the list of most common parts. You can never have enough small bricks or plates. This very common part was not one of the original elements released in 1958. [1975]

Subcategory: Standard

Part #: 3710

Description: 1×6

This may have arrived as early as 1969 but was seen in only one set. It became common around 1977. [1977]

Subcategory: Standard

Part #: 3666

Description: 1×8

Although available earlier than the 1×6, this piece was first seen in the early 1970s, over a decade after the launch of the modern system. I remember it being used as the blades of a helicopter set I had as a kid. [1972]

Subcategory: Standard

Part #: 3460

Description: 1×10

Among the standard plates, this is a less common piece. [1983]

Subcategory: Standard

Part #: 4477

Description: 1×12

If it were any longer, a 1×N plate might be too flexible. This relatively new piece has appeared in a number of larger sets. [2008]

Subcategory: Standard

Part #: 60478

Description: 2×2

The plate version of the 2×2 stubby brick. One of several plates to first appear in the early 1960s. [1963]

Subcategory: Standard

Part #: 3022

Description: 2×3

This piece rounds out the list of basic elements with an odd number of studs on one side. You’ll find it most useful as you build models that require pieces that aren’t an even number of studs long. [1963]

Subcategory: Standard

Part #: 3021

Description: 2×4

This plate version of the venerable 2×4 brick has appeared in over 2,500 different sets. [1963]

Subcategory: Standard

Part #: 3020

Description: 2×6

Like its 2×6 brick counterpart, this plate is used to bridge the gap between elements four studs long (and shorter) and eight studs long (and longer). It can end up in models of all kinds. [1969]

Subcategory: Standard

Part #: 3795

Description: 2×8

In the late 1950s and early 1960s, this plate was available in one of the early parts packs. [1958]

Subcategory: Standard

Part #: 3034

Description: 2×10

What about making a roof with a gentle slope by staggering plates? You can, and when you do, this piece will come in handy for covering lots of area at once. [1977]

Subcategory: Standard

Part #: 3832

Description: 2×12

Like #3832, this piece is great for building plate roofs, among other things. And like the 1×12 standard brick, it’s the second longest element in its category. (There is no 2×14 plate.) [1987]

Subcategory: Standard

Part #: 2445

Description: 2×16

This piece is probably about as long as a piece can be. Anything longer than 2×16 might be too prone to bending and breaking. [1984]

Subcategory: Standard

Part #: 4282

Description: 4×4

Although introduced in 1969, this part was not seen widely until 1973, when it began appearing often in official sets. [1969]

Subcategory: Standard

Part #: 3031

Description: 4×6

Introduced in 1970, this piece was featured in several sets. [1970]

Subcategory: Standard

Part #: 3032

Description: 4×8

The first year of the modern system featured only two large plates: This one and the 6×8. [1958]

Subcategory: Standard

Part #: 3035

Description: 4×10

Nice for building small minifig vehicles. Just attach wheels underneath and build a passenger cab on top. [1969]

Subcategory: Standard

Part #: 3030

Description: 4×12

Use this plate to build things like a long minifig vehicle or a short section of an aircraft wing. It also comes in handy for filling in sections of floors for buildings. [1967]

Subcategory: Standard

Part #: 3029

Description: 6×6

For many years, the 6×6 was the largest of the perfectly square plates. [1978]

Subcategory: Standard

Part #: 3958

Description: 6×8

One of the two large plates featured in sets released in the first full year of the modern system. [1958]

Subcategory: Standard

Part #: 3036

Description: 6×10

The late 1960s and early 1970s brought several welcome additions to the 6×N plate family. This part and the next four parts were released within five years of each other. [1971]

Subcategory: Standard

Part #: 3033

Description: 6×12

One of the 6×N plates released between 1967 and 1975. [1967]

Subcategory: Standard

Part #: 3028

Description: 6×14

Odd that neither a 1×14 brick nor a 2×14 plate exists and yet here is a 6×14 plate. The LEGO system is flexible enough to allow for these little oddities while maintaining its functional side. [1972]

Subcategory: Standard

Part #: 3456

Description: 6×16

Good for building train cars, fire trucks, or even a piece of a roof made from plates attached to hinges. [1967]

Subcategory: Standard

Part #: 3027

Description: 6×24

Transport trucks, train cars, and even airplane wings benefit from this long, wide plate. [1967]

Subcategory: Standard

Part #: 3026

Description: 8×8

The largest of the perfectly square plates. [2001]

Subcategory: Standard

Part #: 41539

Description: 2×2 elbow

Can’t figure out how to tie together two 1×N walls at a corner, or how to connect two stacked sections? This piece may be just what you need. [1987]

Subcategory: Adapted

Part #: 2420

Description: 4×4 elbow

Although this piece is only two studs longer on each side than the 2×2 elbow, it has nine more studs, which give it more surface area and allow it to connect larger sections that meet at a vertical seam. [1991]

Subcategory: Adapted

Part #: 2639

Description: 2×3 hitch

Use this part as a trailer hitch or to connect Technic pins. Its curve matches a 2×2 cylinder or cylinder plate. [1967]

Subcategory: Adapted

Part #: 3176

Description: 3×3 quarter cut

Useful for rounding corners of wings, fenders, or even walls. [1999]

Subcategory: Adapted

Part #: 30357

Description: 4×4 quarter cut

The only one of the three quarter-cut plates that forms a circle when you place four of them with their flat sides together. [2001]

Subcategory: Adapted

Part #: 30565

Description: 6×6 quarter cut

Use this piece to create shapely balconies for minifig apartments or other structures that need a large, rounded corner. [1992]

Subcategory: Adapted

Part #: 6003

Description: 3×3 diamond cut

Four of these placed with their longest sides together form a rough diamond shape. [1988]

Subcategory: Adapted

Part #: 2450

Description: 4×4 diamond cut

This diamond-cut piece can help to define the complex shapes of wings. [2001]

Subcategory: Adapted

Part #: 30503

Description: 6×6 diamond cut

Unlike the other elements in this subcategory, this one has two studs at each of the smallest pointed ends, not one. [1995]

Subcategory: Adapted

Part #: 6106

Description: 8×8 diamond cut

Big pieces can be beautiful. You might use this one to create the wings of a space shuttle. [2001]

Subcategory: Adapted

Part #: 30504

Description: 2×4

Use this piece near the nose of an aircraft model or at the front of a boat. It is a “bow” plate after all. [2005]

Subcategory: Bows

Part #: 51739

Description: 3×4

This part predates the 2×3 wing plates (#43722 and #43723], but it’s essentially the same shape as a pair of them combined. You might use it in the noses of airplanes, helicopters, and so on. [1985]

Subcategory: Bows

Part #: 4859

Description: 4×4

As with #4859, this piece is roughly the same shape as a pair of similarly sized wing plates. Its 2×2 cutout leaves space for a minifig pilot’s seat or another substructure. [2003]

Subcategory: Bows

Part #: 43719

Description: 3×6

This bow plate could be the stern of a small ship or winglets on a small landing craft launched from a larger spaceship. [1987]

Subcategory: Bows

Part #: 2419

Description: 4×6

You might use this bow plate for a ship’s stern or a small deck area jutting out from its side. [1998]

Subcategory: Bows

Part #: 32059

Description: 6×7

This bow plate really looks like the bow of a small boat. [1991]

Subcategory: Bows

Part #: 2625

Description: 4×9

Is this a bow plate or a wing plate? Given that it has no left/right variants, I’ve classified it as bow, though it’s certainly an odd duck with its unusual shape and nine-stud length. [1987]

Subcategory: Bows

Part #: 2413

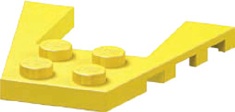
Description: 2×3 left

I consider wing plates to be any plate elements whose sides are all different lengths. Too, wing plates must come in pairs that, when arranged with their two second-to-shortest sides together, form the shape of a pair of airplane wings. [2002]

Subcategory: Wings

Part #: 43723

Description: 2×3 right

Subcategory: Wings

Part #: 43722

Description: 2×4 left

When combined, these two pieces cover just slightly more area than the #43719 bow plate. The drawback to using them as a substitute is that they must be held together tightly by other elements. In contrast, #43719 can be used to hold other elements together. [2001]

Subcategory: Wings

Part #: 41770

Description: 2×4 right

Subcategory: Wings

Part #: 41769

Description: 4×4 left

I like these stubby little wings. Use them to create great wing shapes. [1979]

Subcategory: Wings

Part #: 3936

Description: 4×4 right

Subcategory: Wings

Part #: 3935

Description: 3×6 left

Another variation on the wing plate. [2006]

Subcategory: Wings

Part #: 54384

Description: 3×6 right

Subcategory: Wings

Part #: 54383

Description: 3×8 left

A pair of wing plates seen in several space- and movie-themed LEGO sets. [2005]

Subcategory: Wings

Part #: 50305

Description: 3×8 right

Subcategory: Wings

Part #: 50304

Description: 4×8 left

This pair of wing plates was found in some of the early classic Space sets. They each have the same basic size and shape near the notch as the 4×4s shown above, but they extend out twice as far. [1978]

Subcategory: Wings

Part #: 3933

Description: 4×8 right

Subcategory: Wings

Part #: 3934

Description: 3×12 left

These wing plates were introduced five years after the 6×12 wing plates. [2004]

Subcategory: Wings

Part #: 47397

Description: 3×12 right

Subcategory: Wings

Part #: 47398

Description: 6×12 left

Classic Space sets gave us the original wing plates (#3933 and #3934). Twenty years later, sets based on Star Wars gave rise to what are sure to become classic plates in their own right. The 6×12s shown here are long enough to be the only piece you need to form the entire wing for many minifig-scale ships. [1999]

Subcategory: Wings

Part #: 30355

Description: 6×12 right

Subcategory: Wings

Part #: 30356

Table A-4. The Slopes Category

Part

Specifications

Notes

Description: 4×1 18 degree

This low rise slope offers an alternative angle for roofs for your minifig buildings. [2008]

Subcategory: Standard

Part #: 60477

Description: 4×2 18 degree

One of the newer elements in the slope family also has one of the lowest angles. It matches perfectly with the 4×1 version shown above. Imagine entire roofs made from these slightly angled slopes. [1999]

Subcategory: Standard

Part #: 30363

Description: 4×4 18 degree

This multifaceted slope was used in just a handful of official sets in the mid-2000s. It’s rare, but matched with the other 18-degree slopes, it could be used to create a gorgeous pagoda-style roof. [2004]

Subcategory: Outer Corners

Part #: 43708

Description: 1×1 31 degree

Lovingly known as the “cheese slope,” this is the only element in this category to cover only one stud. It’s useful for subtle shaping in sculptures, or for adding delicate details to the smallest minifig vehicles. This piece has been used in nearly 500 sets. [2004]

Subcategory: Standard

Part #: 54200

Description: 1×2 31 degree

Want extra cheese on your model? How about a 1×2 slope that perfectly matches the angle of #54200? [2009]

Subcategory: Standard

Part #: 85984

Description: 2×2 33 degree

The early 1970s saw a whole new series of sloped pieces raked at 33 degrees. This peak element typically caps off a sloped roof. [1971]

Subcategory: Peaks

Part #: 3300

Description: 2×4 33 degree

The longer of the two 33-degree peaks. (Although the 33-degree slopes are available in odd-numbered widths of one and three studs, the peaks come only in even-numbered lengths.) [1971]

Subcategory: Peaks

Part #: 3299

Description: 3×1 33 degree

It was only in the early 1980s that 33-degree roofs with odd lengths became possible. This element and #4161 greatly enhanced the classic 4-stud-wide roof brick (#3297), allowing you to finally build roofs of odd lengths. [1982]

Subcategory: Standard

Part #: 4286

Description: 3×1 33 degree

Many standard slopes have matching inverted varieties. This slope is a near mirror image of #4286. [1982]

Subcategory: Inverted

Part #: 4287

Description: 3×2 33 degree

Among the first of the 33-degree slopes released in the early 1970s, this slope is commonly referred to as a roof brick. [1971]

Subcategory: Standard

Part #: 3298

Description: 3×2 33 degree

The undersides of boats, pontoons, airplanes, and more all benefit from inverted slopes like this one. Although the 3×1 slope was released in both standard and inverted styles in the same year, the 3×2 standard had to wait eight years for its inverted match. [1979]

Subcategory: Inverted

Part #: 3747

Description: 3×3 33 degree

Use this to build roofs at a 33-degree slant with odd numbers of studs. [1980]

Subcategory: Standard

Part #: 4161

Description: 3×3 33 degree

One of the more graceful slopes. Low-angle, pagoda-style roofs just wouldn’t be complete without this piece. [1980]

Subcategory: Outer Corners

Part #: 3675

Description: 3×4 33 degree

The classic roof brick. [1971]

Subcategory: Standard

Part #: 3297

Description: 2×1 45 degree

Use this slope to cap off fences, castle walls, or the backs of dinosaurs, or make it part of the peak of a standard 45-degree roof. [1976]

Subcategory: Peaks

Part #: 3044

Description: 1×2 45 degree

A perfect companion to #3044 above. Use this to finish the end of a row of peak elements. [1965]

Subcategory: End Peaks

Part #: 3048

Description: 1×2 45 degree

Use this when one peak meets another peak or a portion of sloped roof. The side facing front butts up against a piece like #3043 or against other 45-degree slopes. [1969]

Subcategory: End Peaks

Part #: 3049

Description: 2×1 45 degree

Introduced three years after its inverted counterpart. Now a common element. [1979]

Subcategory: Standard

Part #: 3040

Description: 2×1 45 degree

Use this piece to create subtle inverted detail under the nose of a small airplane or the hip of a miniland figure, or use it to shape a small sculpture. [1976]

Subcategory: Inverted

Part #: 3665

Description: 6×1 45 degree

Similar to the 2×2 version (#4871). The perfect start to a minifig-scale boat. [2005]

Subcategory: Inverted

Part #: 52501

Description: 2×2 45 degree

Use this standard 45-degree peak with #3048 to create a contoured roof. [1965]

Subcategory: Peaks

Part #: 3043

Description: 2×2 45 degree

One of the earliest slopes. Roofs in the late 1950s and early 1960s depended on staggered bricks to form their slope. [1965]

Subcategory: Standard

Part #: 3039

Description: 2×2 45 degree

The inverted match to #3039. Notice that part of the top is open and some of the studs are hollow, like tubes sticking out of a small open box. [1975]

Subcategory: Inverted

Part #: 3660

Description: 4×2 45 degree

Imagine a few of these as the bottom of a minifig boat or the underbelly of a helicopter. [1985]

Subcategory: Inverted

Part #: 4871

Description: 2×2 45 degree

This graceful slope could be considered a compound slope. It’s probably best described as an outer corner because that’s the portion of a roof it will most often become. [1965]

Subcategory: Outer Corners

Part #: 3045

Description: 2×2 45 degree

When two sections of roof meet, join them with a piece like this. There is currently no similar element in any of the other angles. [1965]

Subcategory: Inner Corners

Part #: 3046

Description: 2×2 45 degree

There are many uses for this piece, such as a turret near the top of a castle tower. [1984]

Subcategory: Inverted Outer Corners

Part #: 3676

Description: 2×3 45 degree

You can never have too many elements with odd numbers of studs. [1965]

Subcategory: Standard

Part #: 3038

Description: 2×3 45 degree

An uncommon peak element that’s three studs long. [1965]

Subcategory: Peaks

Part #: 3042

Description: 2×4 45 degree

When building a roof, you’ll need longer slopes like this one to cover the bulk of the surface. [1965]

Subcategory: Standard

Part #: 3037

Description: 2×8 45 degree

This piece comes in really handy when you need a longer slope to stretch across a gap in your roof or something to use as a dormer window. One of the longest slopes available. [1983]

Subcategory: Standard

Part #: 4445

Description: 6×1×5 55 degree

It’s easy to imagine this elegant piece as the tail of a small plane. As of this writing, this is the only 55-degree slope available. [1999]

Subcategory: Standard

Part #: 30249

Description: 2×1×2 65 degree

A perfect complement to the 2×2×2 version, you could use this as the tail of a microscale airplane, or as part of a castle wall. [2008]

Subcategory: Standard

Part #: 60481

Description: 2×2×2 65 degree

Though originally released without a center tube inside, a newer version of this element released in 2003 did include this important feature. This piece is one of only two pieces raked at 65 degrees. [1978]

Subcategory: Standard

Part #: 3678

Description: 2×2×2 75 degree

Not necessarily a dunce cap for square-headed people; you’ll find this steeply peaked element useful for everything from castle towers to Santa hats. Although the other 75-degree slopes are three bricks high, this is only two. [1986]

Subcategory: Peaks

Part #: 3688

Description: 2×1×3 75 degree

Another piece commonly found in castle walls, and the perfect angle for the rear end of a classic fire truck. [1984]

Subcategory: Standard

Part #: 4460

Description: 2×1×3 75 degree

Currently the only 75-degree inverted element. The entire face opposite the sloped side is hollow so that it accepts studs at a 90-degree angle. [1988]

Subcategory: Inverted

Part #: 2449

Description: 2×2×3 75 degree

Perfect for the lower walls of any castle or building that requires a sturdy foundation. [1977]

Subcategory: Standard

Part #: 3684

Description: 2×2×3 75 degree

A perfect match for #3684 and #4460. This piece gives you the angles you need to create a corner. You can even use 75-degree slopes to create a very steep roof, perhaps for a ski chalet. [1978]

Subcategory: Outer Corners

Part #: 3685

Description: 3×1

This part began to appear in sets in the mid-2000s. With no studs on top, it’s extremely useful for rounding out the front of a minifig vehicle. [2005]

Subcategory: Curved

Part #: 50950

Description: 4×1

A sleek, curved slope that can add complex curves and modern lines to your models. Like the 3×1 version, it has no exposed studs. [2008]

Subcategory: Curved

Part #: 61678

Description: 1×3×2

A unique new piece that has yet to find its way into many sets. It perfectly matches the curve of the 1×3×2 half arch piece (#6005) in the Arches category. [2003]

Subcategory: Curved

Part #: 33243

Description: 3×2 bullnose

An element with no equal in shape. Perfect for giving a more subtle rounded edge to buildings or vehicles. [1995]

Subcategory: Curved

Part #: 6215

Description: 2×4 left 45 to 90 degree

These two elements are some of the most interesting ones released in many years. They are unique in that they can act as intermediaries between standard bricks and 45-degree slopes since one end of each is a perfect 90 degrees. Along its four-stud length, that 90 degrees becomes 45 degrees; the sloped end is one full stud wider at the base. [2002]

Subcategory: Curved

Part #: 43721

Description: 2×4 right 45 to 90 degree

Subcategory: Curved

Part #: 43720

Description: 2×6 left

Make spaceships, airplanes, and other flying machines more streamlined with this pair of pieces. Their compound shape—with its curving slope from tip to studs and a matching curved side—provides a sleek and realistic shape for traveling machines. [2002]

Subcategory: Compound

Part #: 41748

Description: 2×6 right

Subcategory: Compound

Part #: 41747

Description: 2×6 left

This pair of elements helps add contours to boats of all sizes, whether as parts of the bow or pontoons. Use these together, side by side, or separated by #500 (the 6×1 curved inverted slope] to create a wider profile. [2002]

Subcategory: Compound Inverted

Part #: 41765

Description: 2×6 right

Subcategory: Compound Inverted

Part #: 41764

Description: 6×1

When you want something more delicate than a flat-sided slope, try these pieces to create a more rounded and smoother angle. [2002]

Subcategory: Curved

Part #: 42022

Description: 6×1

Subcategory: Curved Inverted

Part #: 500

Description: 6×2

Because it exactly matches the slope of #42022, this part is great for nose cones, wings, and other models that require a gentle arc. [2003]

Subcategory: Curved

Part #: 44126

Description: 4×4 original style

Older and boxier than #6069. [1985]

Subcategory: Compound

Part #: 4858

Description: 4×4 new style

Although not an exact replacement for #4858, this piece certainly creates a sportier projection. [1992]

Subcategory: Compound

Part #: 6069

Description: 4×4

Although released at the same time as the #4858 compound slope, this inverted element is a much closer match to the more modern-looking #6069. [1985]

Subcategory: Compound Inverted

Part #: 4855

Table A-5. The Specialized Elements Category

Part

Specifications

Notes

Description: 2×2 macaroni

This is one of the most beloved pieces ever produced, but it’s often difficult or expensive to acquire in large quantities. [1958]

Subcategory: Odd Faces

Part #: 3063

Description: 4×4 macaroni

An excellent companion to the original 2×2 macaroni brick. [2004]

Subcategory: Odd Faces

Part #: 48092

Description: 1×1 with indented stud on one side

The famed headlight brick shown from both front and back. You can attach it to other pieces in various ways. The indented stud on the side can hold transparent 1×1 cylinder plates to create faux headlights, or you could use a row of these to attach a 1×N element horizontally. The opening in the back can accept a single stud of any kind. [1979]

Subcategory: Junctions

Part #: 4070

Description: 1×1 with stud on one side

This piece, long awaited by many builders, takes the usefulness of the headlight brick to another level by moving the side stud flush with the face of the brick. Having these studs on only one side allows this piece to become part of any wall. [2009]

Subcategory: Junctions

Part #: 87087

Description: 1×1 with studs on two sides

Introduced five years before #87087, this piece offers studs on opposite sides to which you can attach other pieces. [2004]

Subcategory: Junctions

Part #: 47905

Description: 1×1 with studs on all sides

This element is sometimes called the hydrant brick. Although its design is amazing, it has one drawback: Often the studs you aren’t using just get in the way. [1985]

Subcategory: Junctions

Part #: 4733

Description: 1×2 with two studs on both sides

This 1×2 brick has six exposed studs upon which to attach other elements. [2005]

Subcategory: Junctions

Part #: 52107

Description: 1×4 with studs on one side

Although maybe not the most elegant part, this piece is one of the most functional. It’s small enough to build into almost any structure, while offering four horizontal studs onto which you can securely attach other pieces. [2000]

Subcategory: Junctions

Part #: 30414

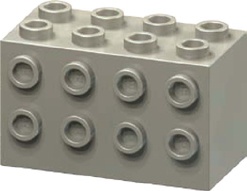
Description: 2×4×2 with studs on two sides

This solid piece can form the core of junction substructures. [1990]

Subcategory: Junctions

Part #: 2434

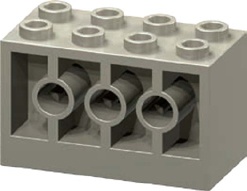
Description: 2×4×2 with tubes on two sides

The industrial look of this 2×4×2 with tubes on two sides earns it the nickname “engine block.” [1992]

Subcategory: Junctions

Part #: 6061

Description: 1×2 single-stud offset plate

This short element allows you to recess parts of a model one-half stud deep, allowing you to add greater subtlety to the shape and feel of your work. [1977]

Subcategory: Junctions

Part #: 3794

Description: 2×2 single-stud offset plate

A really useful piece when building with the offset technique. [2009]

Subcategory: Junctions

Part #: 87580

Description: 1×4 plate with two studs

Is this a plate missing two studs or a tile with two extra studs? The studs are in the standard place, but the smooth portion in the middle is unique. [2011]

Subcategory: Junctions

Part #: 92593

Description: 1×1 to 1×1 bracket

When you need to change directions in a very small space, use this. The hole on top is exactly one stud in diameter, and the area around it is exactly the height of a stud. [2002]

Subcategory: Junctions

Part #: 554

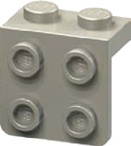
Description: 1×2 to 2×2 bracket

You can easily insert these pieces into a vertical wall, leaving the four-studded side exposed and available for attaching other parts. [2002]

Subcategory: Junctions

Part #: 44728

Description: 2×2 to 2×2 bracket

One of the earliest parts to offer studs perpendicular to its base. This gem showed up in some of the classic Space-themed sets of the late 1970s. [1978]

Subcategory: Junctions

Part #: 3956

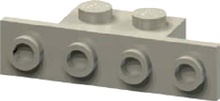
Description: 1×2 to 1×4 bracket

Similar to #44728, except that the four horizontal studs are in one row rather than in two rows of two. You’ll find this useful for attaching an element directly to a vertical wall. [1987]

Subcategory: Junctions

Part #: 2436

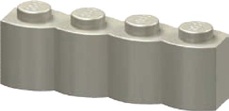
Description: 1×2 log

Odd Face is the name given to this subcategory because the “face” or front surface of these bricks is something other than standard studs or a smooth wall. The log brick is, of course, useful in brown, but grey versions are interesting too. [1996]

Subcategory: Odd Faces

Part #: 30136

Description: 1×4 log

This is the longer version of #30136. As this book goes to press, there isn’t a 1×1 log brick, but you can sometimes substitute a 1×1 cylinder to get a similar effect. [1996]

Subcategory: Odd Faces

Part #: 30137

Description: 1×2 grille

A unique piece in that the oddness of its face is different from front to back. Use these in groups or rows with similar faces exposed, or mix the faces for a great effect. Because both sides are grille-like, you’ll sometimes see these used as grates on the sides of machinery, as roll-up doors on fire trucks, or even as corrugated steel panels. [1986]

Subcategory: Odd Faces

Part #: 2877

Description: 2×1 grille slope

This is a slope, but not in the traditional sense. It’s useful for creating realistic-looking vents and grates on machines and vehicles. [2008]

Subcategory: Odd Faces

Part #: 61409

Description: 1×2 and 1×2 plate

Although technically two pieces, this pair is almost always used together (like for the arms on miniland figures in Chapter 4). [1987/1987]

Subcategory: Hinges

Part #: 2429/2430

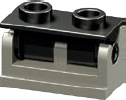
Description: 1×2 and 1×2 brick

Use this pair of parts to create a wall section that swings away from the rest of a building or to create fixed angled sections. [1977/1977]

Subcategory: Hinges

Part #: 3830/3831

Description: 1×2 brick

Use these pieces to allow a spaceship cockpit to move, or angle the studs forward and build it into a stationary wall. Once the studs are exposed, you can use them to attach other elements. [1978/1978]

Subcategory: Hinges

Part #: 3937/3938

Description: 2×2 brick

The bottom portion of this element is the same as the 1×2 hinge brick above. The larger top portion allows you to attach even larger roofs, hoods, or doors that swing. [1978/1991]

Subcategory: Hinges

Part #: 3937/6134

Description: 2×5 plate

This classic piece is sometimes used to attach things like fire truck ladders, but it could just as well be used as the hinge for wings on a bird. [1967]

Subcategory: Hinges

Part #: 3149

Description: 2×2 plate

This piece is a scaled-down version of the larger 4×4 turntable (shown below) but is only one plate high and can hide in many inconspicuous areas of a model. [1977]

Subcategory: Turntables

Part #: 3680

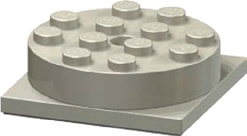
Description: 4×4 brick

This turntable is the “modern” version of a similar element produced in 1963. Earlier versions lacked the square baseplate seen here; they were cylindrical all the way to the bottom. [1977]

Subcategory: Turntables

Part #: 3403

Description: 1×2 channel rail plate

Use this piece to build a substructure that can slide into the 1×4 channel face element (#2653). It’s also available in a 1×8 version. [1997]

Subcategory: Odd Faces

Part #: 32028

Description: 1×2 channel face

This part is sometimes seen as a stacked decorative element. [1981]

Subcategory: Odd Faces

Part #: 4216

Description: 1×4 channel face

This piece can be both decorative and useful for accepting substructures mounted on the #32028 channel rail plates. [1991]

Subcategory: Odd Faces

Part #: 2653

Description: 1×2 pin face with one pin

Say you’ve built a substructure on rail plates and are using the 1×4 channel brick to mount it. Use this brick to lock it in place with 1×2 Technic bricks. [1988]

Subcategory: Pin-Enabled

Part #: 2458

Description: 1×2 pin face with two pins

The pin configuration on this piece matches any two holes on any other Technic brick. Note that its pins are centered under the studs, unlike #2548 above. [2000]

Subcategory: Pin-Enabled

Part #: 30526

Description: 2×2 pin face

Try this piece when you need a pin as a secure part of a solid wall. Build it into a 2×N wall to add a sturdy pin onto which you can attach almost anything. [1985]

Subcategory: Pin-Enabled

Part #: 4730

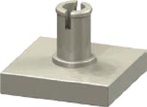
Description: 2×2 pin top

You may not need this piece often, but when you do, you’ll be glad it exists. The same goes for the plate version of this part (#2460). [1995]

Subcategory: Pin-Enabled

Part #: 4729

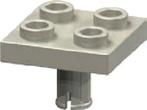
Description: 2×2 pin-top plate

Use this part to mount the rotors for a small helicopter and so much more. You can turn this element on its side and connect its pin to a Technic brick that’s been built into the side of a model. You can then attach other pieces to the bottom of this plate. [1988]

Subcategory: Pin-Enabled

Part #: 2460

Description: 2×2 pin-drop plate

Like the #2460, the #2476 plate also offers some interesting possibilities. For example, two of these plates will fit perfectly side by side when their pins are inserted into a 1×4 Technic beam. [1988]

Subcategory: Pin-Enabled

Part #: 2476

Description: 2×2 single-drop-hole plate

These pieces allow Technic pins or axles to attach below bricks or plates. The #2444 element has only one hole on one side. The #2817 has two holes. [1987/1989]

Subcategory: Pin-Enabled

Part #: 2444

Description: 2×2 double-drop-hole plate

Subcategory: Pin-Enabled

Part #: 2817

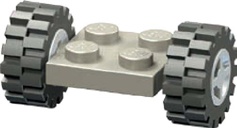
Description: 2×2 plate with small wheels/tires

Even compact models may require motion. This wheel/tire set is mounted on a tiny 2×2 plate with slender pins sticking out of each side. [1985/1986/1985]

Subcategory: Wheels/Tires

Part #: 4600/4624/3641

Description: 2×2 wide plate with slick tires

If you’re creating a microscale street machine, why not include some mean-looking slicks? The plate in this figure sets the wheels out wider than the parts above, which can give your street rod more of a racing look. [1994/1991/1996]

Subcategory: Wheels/Tires

Part #: 6157/6014/30028

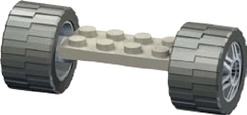
Description: 2×4 wide plate with wheels/tires

If you need wider wheels for a wider vehicle than the 2×2 options above allow, use this piece, which can exchange tires with its brick-sized counterpart (next). [1998/2006/2001]

Subcategory: Wheels/Tires

Part #: 30157/55981/30648

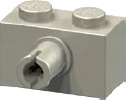
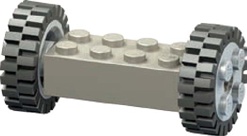
Description: 2×4 brick with medium wheels/tires

The wheels here (with the four studs showing) are sometimes referred to as Freestyle, after the sets they came from. They spin freely on pins jutting out from the sides of the 2×4 brick. [1995/1988/1985]

Subcategory: Wheels/Tires

Part #: 6249/6248/3483

Description: Medium wheels with Technic axle holes

These wheels with Technic axle holes can be used in many ways. Pop some Technic bricks on this axle, and you can mount these wheels on any size car. [1984/1985]

Subcategory: Wheels/Tires

Part #: 3482/3483

Description: Brick separator

Although they’ve been replaced with a streamlined version, there are still lots of the original brick separators around. [1990]

Subcategory: n/a

Part #: 6007

Description: Brick separator

The reengineered brick separator is slimmer than the original. Its thin front edge allows you to remove tiles and offset plates. The feature on top allows you to remove axles from Technic bricks or parts like the 2×2 cylinder (#3941). [2011]

Subcategory: n/a

Part #: 630

Table A-6. The Arches Category

Part

Specifications

Notes

Description:

This piece is perfectly suited for building arched windows into thick castle walls. It’s probably the smallest possible arch piece that can be both practical and elegant. [1976]

Subcategory: Standard

Part #: 4490

Description: 1×4

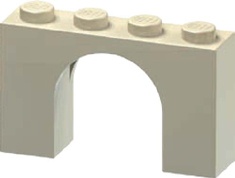
A classic Roman arch that forms a semicircular shape. These arches are useful in many architectural situations. [1976]

Subcategory: Standard

Part #: 3659

Description: 1×4×2

Given its shape, it’s no surprise that this element shows up in a number of medieval-themed sets. [1994]

Subcategory: Standard

Part #: 6182

Description: 1×6

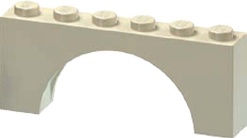
The radius of this arch is much greater than that of the 1×6×2 shown next (#3307). [1972]

Subcategory: Standard

Part #: 3455

Description: 1×6×2

Like the 1×4 arch (#3659), this piece represents a classic Roman shape. A series of these can create a pleasing arcade for any building. [1971]

Subcategory: Standard

Part #: 3307

Description: 1×8×2

Like the 1×6 arch, this piece has a slightly greater radius for the arch shape. [1971]

Subcategory: Standard

Part #: 3308

Description: 2×8×3

This part has appeared in a number of assorted buckets, mostly aimed at younger builders. [1985]

Subcategory: Standard

Part #: 4742

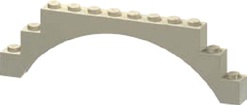
Description: 1×12×3

Now that’s an arch! Impressive in size, this piece adds a grand opening to train tunnels, fire stations, and other structures. [1993]

Subcategory: Standard

Part #: 6108

Description: 1×2

Tuck this compact piece under #6005 (below) to create interesting shapes in matching or complementary colors. [1992]

Subcategory: Half

Part #: 6091

Description: 1×3×2

Part #6091 fits nicely under this arch. By itself, this piece can also be a flying buttress-type arch. [1995]

Subcategory: Half

Part #: 6005

Description: 1×3×2

This graceful little inverted arch is like the faux inverted arches (made from inverted 1×2 slopes) we saw in the train station model in Chapter 3. [2010]

Subcategory: Half Inverted

Part #: 88292

Description: 1×5×4

Used alone, this flying buttress arch starts at a point away from a wall or structure and meets with the top of its half arch. When used in pairs, these pieces become a 1×10×4 arch. [1986]

Subcategory: Half

Part #: 2339

Description: 1×5×4

This half arch is another case where more than a decade separates the release of a standard part (like #2339) and the release of its inverted counterpart. [1997]

Subcategory: Half Inverted

Part #: 30099

Description: 1×6×2

No, it’s not the handle from a LEGO lunchbox, though it could be. It’s an arch with gently curved corners that can be used as a wonderful decorative piece. [1994]

Subcategory: Standard

Part #: 6183

Description: 1×6×3

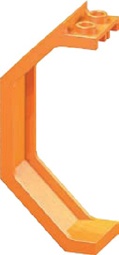
Probably the piece best suited to being a flying buttress, it really extends outward from the top until it reaches the bottom of the half arch. Simply elegant. [1992]

Subcategory: Half

Part #: 6060

Table A-7. The Tiles and Panels Category

Part

Specifications

Notes

Description: 1×1 tile

Although a similar part was released in 1971, this modern version includes a tiny groove around the base, which makes it easier to remove. [1978]

Subcategory: Standard

Part #: 3070B

Description: 1×2 tile

Like the 1×1, this is the second version of this part. The first, without the groove around the bottom, was first seen in 1968. [1977]

Subcategory: Standard

Part #: 3069A

Description: 1×3 tile

2010 saw the introduction of two new tiles to the LEGO system. This 1×3 version was joined by a 2×4 version shown below (#87079). [2010]

Subcategory: Standard

Part #: 63864

Description: 1×4 tile

Run these in series down the middle of a few rows of black tiles to create the lines of a divided road. [1987]

Subcategory: Standard

Part #: 2431

Description: 1×6 tile

A tile like this could become the top edge of the sides of a microscale ship, like the one in Chapter 6. [1995]

Subcategory: Standard

Part #: 6636

Description: 1×8 tile

To make small helicopters look more real, try using these pieces as rotors. [1980]

Subcategory: Standard

Part #: 4162

Description: 2×2 tile

Sidewalks are just one of many uses for standard 2×2 tiles. Mix them with 1×N tiles of different colors to create streets or parking lots. [1976]

Subcategory: Standard

Part #: 3068B

Description: 2×4 tile

When you need to smooth out a lot of surface area, use these elements that cover eight studs apiece. [2010]

Subcategory: Standard

Part #: 87079

Description: 2×2 cylinder

It’s a manhole cover and more! Like many other tiles, this part also has a small groove at its bottom edge, which makes it easier to remove. [1983]

Subcategory: Standard

Part #: 4150

Description: 2×2 cylinder

This isn’t exactly a true inverted plate—it has a curved underside. It’s sometimes called a boat plate, since you can attach these pieces under boats to allow them to skim over carpet or other surfaces. [1991]

Subcategory: Inverted

Part #: 2654

Description: 1×1×1 panel

This piece is great for creating hollowed-out areas along the face of a solid wall. It works well with #4865 shown next. [1995]

Subcategory: Standard

Part #: 6231

Description: 1×2×1 panel

This element could be a tiny little couch, the steps on the sides of vehicles, or tiny accents on a large open space. [1985]

Subcategory: Standard

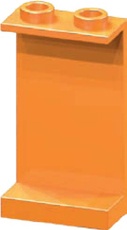
Part #: 4865

Description: 1×4×1 panel

A longer version of #4865 above. [2000]

Subcategory: Standard

Part #: 30413

Description: 1×2×2 panel

Try using these panels on an outside wall to leave room inside the model for moving parts or other substructures. [1997]

Subcategory: Standard

Part #: 4864

Description: 1×2×3 panel

Panels are useful no matter which direction they’re facing. When turned like this piece, they can add an indent to an otherwise dull wall, but when turned 180 degrees, they look solid. [1998]

Subcategory: Standard

Part #: 2362

Description: 3×2×6 panel

Not all panels are flat. Some, like this one, are made up of several thin, flat sides meeting at interesting angles. [1988]

Subcategory: Standard

Part #: 2466

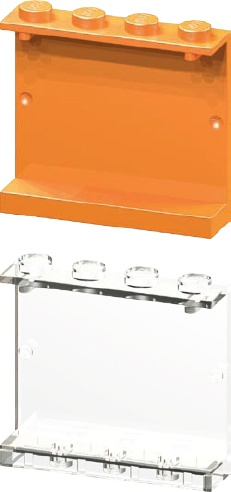
Description: 1×4×3 panel

Many parts are available in transparent colors. This panel is available in several opaque colors, but the clear version (same part number) allows you to use it as a window for a large office building or a minifig structure where you need a lot of light. [1994]

Subcategory: Standard

Part #: 4215A

Table A-8. The Cylinders and Cones Category

Part

Specifications

Notes

Description: 1×1 cylinder plate

This is about the smallest element in the entire system. It’s barely bigger in the middle than the stud on top and it’s hardly bigger at the bottom than a regular tube. Match up transparent red ones with headlight bricks and you’ve got brake lights for a minifig car. [1980]

Subcategory: Standard

Part #: 4073

Description: 2×2 cylinder plate

The keyhole-shaped opening in this piece matches a similar feature found on 2×2 cylinders. [1980]

Subcategory: Standard

Part #: 4032

Description: 4×4 cylinder plate

You can imagine plates like this turned outward as the airlock doors on a space station or turned on edge as the wheels on a chariot. [2008]

Subcategory: Standard

Part #: 60474

Description: 1×1 cone

You might use this piece as the nose cone of a small rocket. The tip is just the right size to fit into the bottom of an identical piece or into the underside of nearly any regular brick or plate. [1985]

Subcategory: Standard

Part #: 4589

Description: 1×1 cylinder

This part is the updated version of one originally released with the earliest parts in 1958, except that the stud is hollow (the original was solid). [1977]

Subcategory: Standard

Part #: 3062B

Description: 2×2×2 cone

This part got a facelift after its original release. This newer version has a hollow stud. [1984]

Subcategory: Standard

Part #: 3942

Description: 2×2 cylinder

This piece looks like a tiny coffee can with studs on top. The hole running vertically through it matches the size of a standard Technic axle. [1978]

Subcategory: Standard

Part #: 3941

Description: 3×3×2 cone

These pieces are sometimes used as engines on a rocket or a space shuttle. [1995]

Subcategory: Standard

Part #: 6233

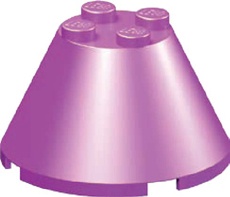
Description: 4×4×2 cone

This lampshade-like piece can be used as the engine of a spaceship or as a transitional piece that joins 4×4 to 2×2 cylinder pieces. [1982]

Subcategory: Standard

Part #: 3943

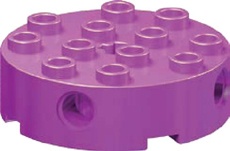
Description: 4×4 cylinder

The holes on the sides of this piece easily accept a Technic pin or axle or the studs from any standard piece. The only problem is that when you stack a bunch of them, they look a bit like a column of Swiss cheese. [1995]

Subcategory: Standard

Part #: 6222

Description: 4×4 quarter-cut cylinder

Two of these pieces together could be used to create a semicircular Romeo and Juliet-style balcony. Four used together could create a round launchpad for a small rocket. [1990]

Subcategory: Adapted

Part #: 2577

Table A-10. The Decorative Elements Category
Part

Specifications

Notes

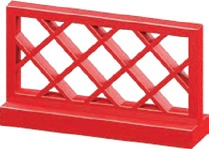
Description: 1×4 lattice

This part could become a small garden fence or the decorative guardrail on a microscale ship. [1976]

Subcategory: Fences, Rails, and Rungs

Part #: 3633

Description: 1×4×2 lattice

This element looks great when built into a wall, as the grate over an air conditioning system, or just as a vent of some kind. [1967]

Subcategory: Fences, Rails, and Rungs

Part #: 3185

Description: 1×2 ladder plate

This tiny ladderlike piece is easy to incorporate into most models since you really only need to find room for the 1×2 plate. The rungs of the element can rest against the side or end of a model to form a ladder or grille. [1980]

Subcategory: Fences, Rails, and Rungs

Part #: 4175

Description: 1×2 grille plate

This piece was re-released in the mid-1990s with a tiny groove around the bottom edge. This groove is handy, as it makes it easier to remove the grille plate from any surface to which it’s been attached. Try mounting it on another piece in a contrasting color—the openings in the grille allow the color of the element below to show through. [1987/1995]

Subcategory: Fences, Rails, and Rungs

Part #: 2412B

Description: 1×6 handrail

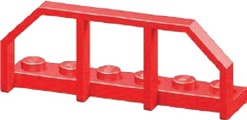
This handsome element is often used on train models but can just as easily be the handrail on a small bridge or a ship’s guardrail. [1996]

Subcategory: Fences, Rails, and Rungs

Part #: 6583

Description: 1×8×2

This piece looks like the fencing you might find in parking lots or the railings along the upper decks of a fancy passenger liner. Of course, it could just be a plain old bicycle rack for a minifig park. [1988]

Subcategory: Fences, Rails, and Rungs

Part #: 2486

Description: 4-brick-high basic bar

Light saber? Baseball bat? Hand rail? Yup, it’s all that and more. The diameter of this bar is exactly the size of a minifig hand, and it’s the right size for any of the following clip elements. [1999]

Subcategory: Bars

Part #: 30374

Description: 4-brick-high basic antenna

How about a self-attaching bar? The round-tipped antenna has a socket at the end that attaches easily to any studded element. The antenna is also the same width (along the main section) as the basic bar shown in the previous entry. [1977]

Subcategory: Bars

Part #: 3957

Description: 1×1 clip plate vertical

Some parts just keep evolving; this part is on its third incarnation. It’s often used to attach handled parts and bars to models. [1979/1987/1993]

Subcategory: Clips

Part #: 4085C

Description: 1×1 clip plate horizontal

Clip plates don’t just have to clip to ordinary bars like #30374. They can also be attached to handled parts such as #2540 or #30236. [1990]

Subcategory: Clips

Part #: 6019

Description: 1×2 clip plate with two clips

Twice as wide as #6019 above, this part gives you more gripping power on a sturdier 1×2 base. [2008]

Subcategory: Clips

Part #: 60470

Description: 1×2 clip plate horizontal

The greater length of this element (compared to #6019 above) makes a stronger connection for a moving panel or swing-away doors. [2009]

Subcategory: Clips

Part #: 63868

Description: 1×1 with studs

This is the modern version of an earlier piece. The rounded part on the side has two stud-sized areas that allow any number of elements to connect to it. The hole through those studs is exactly bar sized. [1980/1988]

Subcategory: Clips

Part #: 4081B

Description: 1×1 with clip top

Need a handrail for a minifig boat or just something decorative along the top of a wall? Grab a pair of these and put them at the ends of the #30374 bar element and you’re all set. [1989]

Subcategory: Clips

Part #: 2555

Description: 1×2 with clip top and single stud

The combination of a clip on top and a single exposed stud makes this an interesting and unique piece. [2011]

Subcategory: Clips

Part #: 92280

Description: 1×1 brick with handle

Some pieces in this category have clips; others, like this one, have a handle attached instead. [1992]

Subcategory: Handles

Part #: 2921

Description: 1×2 plate with handle

This piece can be decorative or functional depending on what you attach to the handle. It takes up only the space of a 1×2 plate, which can make it more useful than the brick version (#30236). [1989]

Subcategory: Handles

Part #: 2540

Description: 1×2 brick with handle

This piece has the same size handle as the #2540 plate. Use rows of this brick to decorate the tops of buildings or even some vehicles. [1999]

Subcategory: Handles

Part #: 30236

Description: 1×2 plate with braced handle

This part is often called the “1×2 tile with handle.” [1987]

Subcategory: Handles

Part #: 2432

Description: 1×2 plate with handle

This piece is like a horizontal version of the 1×2 plate with handle shown above (#2432). Use it for hinging small doors and panels to add functionality to small models. [2004]

Subcategory: Handles

Part #: 48336

Description: 1×2 plate with handle

This part includes a 1-stud-wide handle on its narrow end. [2008]

Subcategory: Handles

Part #: 60478

Description: 1×2 plate with handles

Originally introduced in the late 1970s, this piece was redesigned a few years later (to have a more robust connection between the plate and the handles) and continues to be used in sets today. [1981]

Subcategory: Handles

Part #: 3839B

Description: Bush

Decorative gardens, rustic western settings, and mountainous train layouts all benefit from this spiky little bush element. [1992]

Subcategory: Foliage

Part #: 6064

Description: Fruit tree

When you need an apple orchard or some well-groomed bushes for the sides of a posh minifig mansion, the fruit tree is the answer. [1977]

Subcategory: Foliage

Part #: 3470

Description: Pine tree (small

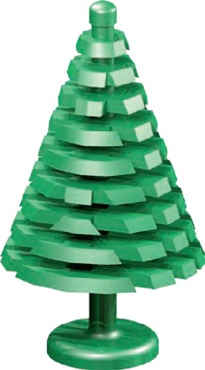
This little pine tree has been seen only in standard green since its introduction more than a quarter century ago. [1976]

Subcategory: Foliage

Part #: 2435

Description: Pine tree (large]

This large pine tree has been manufactured only in green during the last 40 years. Mixing large and small versions together in a scene adds realism and interest. [1973]

Subcategory: Foliage

Part #: 3471

Description: 3×5 stem

Use several of these pieces to create the look of an ivy-covered wall for a library or an older home. [1987]

Subcategory: Foliage

Part #: 2423

Description: Sea grass

Sure, this element can be used as sea grass, but how about making it a cactus or a yet-to-be-discovered creepy munga bush on a planet first explored by a minifig ship of your own design? [1997]

Subcategory: Foliage

Part #: 30093

Description: Basic flag

Castles, carnival rides, and parade floats need colorful flags that look like they’re blowing in the wind. This simple but effective ornamental element is usually placed atop #3957, the four-brick-tall antenna. [1984]

Subcategory: Ornamental

Part #: 4495

Description: Lion head carving

Decorative pieces reached a new level of sophistication and elegance with this lion head. Perfect for classy downtown buildings where minifigs gather to do business. [2000]

Subcategory: Ornamental

Part #: 30274

Description: 1×2×2 window

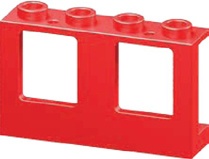
A staple from the beginning, these pieces can be used in groups to create large office windows or alone to add character to even the smallest minifig dwelling. [1958]

Subcategory: Windows

Part #: 7026

Description: 1×4×3 train window

This is the newer version of the train window shown with the original version of the glass insert. This part combo also works well as windows for buses or even spaceships. [1993/1980]

Subcategory: Windows

Part #: 6556/4034

Description: 1×2×2 window

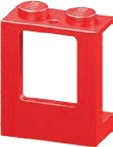
Often called airplane windows, these pieces can also be used in models of trains, fire trucks, ships, helicopters, and so on. They’re useful with or without the glass inserts. [1987]

Subcategory: Windows

Part #: 2377

Description: 1×4×2 windows

Two airplane windows, joined together. As with #2377, this element can find its way into a variety of vehicles. Think of it as a panel with cutouts. [1985]

Subcategory: Windows

Part #: 4863

Description: 1×2×2 ⅔ window

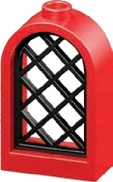
Do the occupants of your castle need light? This beautiful pair of elements will certainly help. Use a 1×4 standard arch over the top of this window to make it look like part of the wall. [1996/1996]

Subcategory: Windows

Part #: 30044/30046

Description: 1×4×3

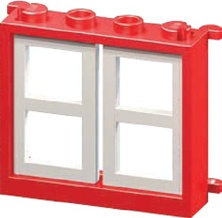
The old reliable 1×4×3 basic window is shown with inserts that look like panes of glass. You can replace the solid panes with ones that are latticed or turn the part around. Add shutters to give it a homier look. [1977]

Subcategory: Windows

Part #: 3853

Description: 1×4×5 four-pane door

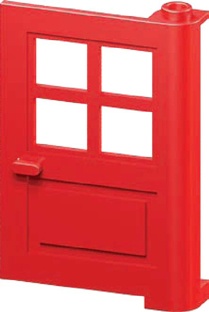
Minifig-scale buildings aren’t much good if your characters can’t get in and out of them. This often-used part is strangely available only in this version, which opens from the left. [1977]

Subcategory: Doors

Part #: 3861

Description: 1×4×5 glass door

This more modern-looking door is available in both left and right varieties. It’s perfect for office buildings, schools, banks, or other urban minifig structures. [1982]

Subcategory: Doors

Part #: 73436