Chapter 9
ISE Portals and Guest Access
Abstract
This chapter will cover guest access with ISE as well as the different types of portals used by ISE. We start with an overview of the portal types, their possible use cases, and a list of pros/cons for each case. From there we’ll move on to configuration examples of each guest portal type and some recommendations for each one. Finally we’ll go over common methods of portal customization and some of the more common guest access scenarios and their matching portal types.
Keywords
guest access
Hotspot
portals
sponsor
Introduction
You’ve got your authentication rules done, and you’ve got your authorization rules laid out and maybe some profiling configured—but how do your users complete all of those steps? Sure a properly configured 802.1x supplicant will take care of it but you are almost always going to have some type of user who isn’t going to reliably have a supplicant configured that you don’t want to need one or that you need to get do more actions with. In those cases some sort of web portal is going to be what solves your problem. Portals in ISE 1.3 and later are all built very similarly and from the same location but each one can offer different configurations and work for different use cases so you will want to match your use up with the proper types in order to provide your users with the best experience.
Portal overview
The portal sections of ISE are located in two places: under the Guest Access mega menu and under the Administration → Device Portal Management; the former obviously can be a little misleading since there are more than just guest portals there. The portals are highly customizable, allowing beginners/basic requirements to use the defaults without many changes being needed but still allowing advanced users the ability to customize almost all aspects of the portals to fit their business needs.1
Going to the “Configure” section of the Guest Access menu you will be shown an overview of the general process used to set up guest access for a network using ISE. It will show you that you need to prepare certificates, identity sources, Simple Mail Transfer Protocol (SMTP), SMS, etc., and then follow those up with types of portals, types of guests, and sponsor settings—all of which is probably a bit daunting to swallow if you just want to get guests onto your network. The truth is basic guest access isn’t that hard to accomplish but highly customized guest access can be. We’ll start with the former and work our way to the latter.
Guest portal types
First thing you see when looking at the guest portals is that out of the box three default portal types are created and preconfigured for you—Hotspot, Self-Registered, and Sponsored. These are the three main types of portals that you will be creating for your guest needs and each one has its own pros/cons:
• Hotspot: This is just an “I accept,” the AUP button.
• Pro: Very simple and quick guest access, no registration required but you can still display them a welcome message and AUP.
• Con: No actual user identity tracking of your guests/who they are. Anyone in range of your wireless network can get on.
• Self-Registered: Lets users create their own accounts.
• Pro: Second simplest way to get on for guests and little to no Helpdesk overhead. Users register themselves based on criteria you set and are then given access.
• Con: There are always bad apples. In our experience lots of guests will correctly fill out the required information but the rest will put fake information in to some effect. Expect to see lots of users named “a a” with emails of a@gmail.com.
• Sponsored: Requires credential to be created for the guest.
• Pro: You will know who your guests are and who approved them. This ensures that only approved guests are on your network.
• Con: Your user’s interaction with the community; they will need to authorize/create users who want access to the network.
All portal configurations start with a similar layout; you have two sections you can work from—Portal Behavior/Flow Settings and Portal Page Customization. The Behavior/Flow Settings let you define how the portal is going to work, the interfaces/ports/certificates it will use, languages, etc. On the right-hand side of the page there is a flow that describes the steps guests can pass through as they gain network access. As you add/remove components you will see this area change to reflect the new login flow; it’s a good way to verify and understand how your changes will impact guests. At the top of the page there is a “Portal Test URL” link that will open up an example of your saved portal configuration that allows you to test the functionality without needing to actually connect to the portal. Some of the simpler portals might not benefit as much from this but when you start adding employee BYOD support, AUPs, and pre/post access banners, it can be helpful to step through everything to make sure it’s working the way you want it too. Each portal also has an option of including a “support information page” that guests can view that will show them information used to diagnose any problems they might run into. You might want to enable this when you first roll out guest access so that it’s easier to iron out any issues you run into.
Moving over to the Portal Customization area, you have control in the UI over the images/color scheme used as well as some prebuilt themes to choose from. This is also where you will customize the text for each page of the guest flow you are working on.2 Choosing a specific page from the left-hand side will bring up all the text areas and let you put in straight text or HTML for each area. The right-hand side of the page will display a constantly updating view of what the page looks like on a phone-form factor mobile device giving you instant feedback to your changes. There is also the option to make some quick settings changes without needing to switch back to the Behavior/Flow Settings area. Right at the top of the preview, select Settings and you will see a listing of settings that apply for that page you are working on, another quick way to make changes if you need to. Lastly, as with the Behavior/Flow page, there is a link at the top to launch a test of the portal if you want to see how the complete product looks.
Hotspot Portal
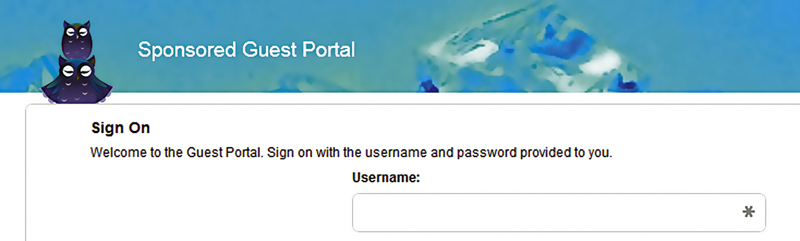
The Hotspot portal is the simplest of all three types, which makes sense since the type of access is simple. OOTB there is a basic AUP configured and guests only need to accept or decline it. Clicking the portal test link should give you something like this.
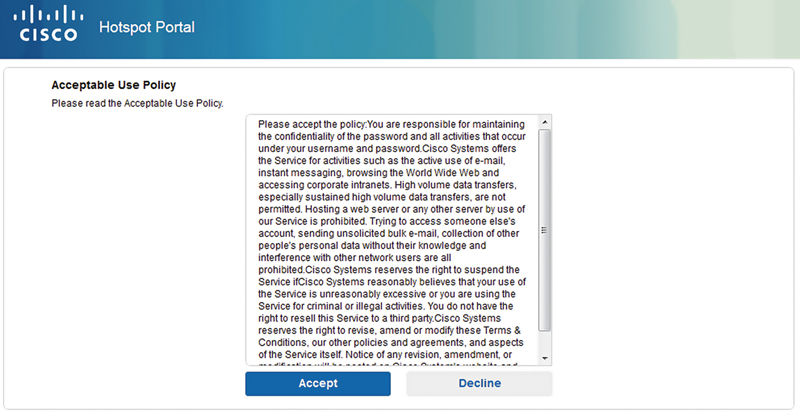
Should you use this the way it is, the only change you really need to make is edit the AUP so that it no longer says “Cisco Systems” (unless, you know, you are Cisco—hey guys!) and instead is your company name. If you have a standard AUP, you can put it here as well. In terms of configuration there isn’t much you can select here other than requiring an access code and requiring that guests scroll to the end of the AUP. The latter might be required by your legal team but it’s good to enable anyway so that clicking the Accept button isn’t just an automatic option.
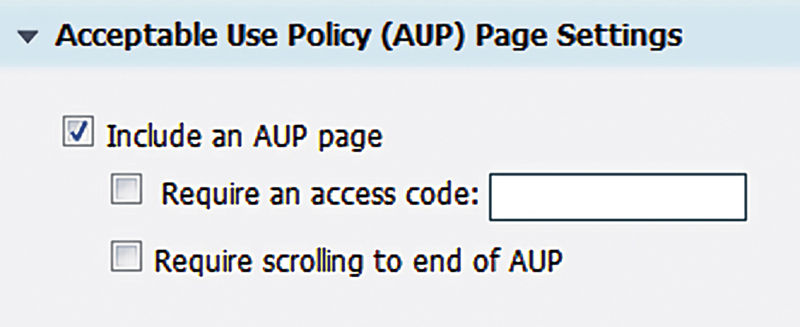
The access code option lets you specify a code that users have to put in to gain access, preventing someone from sitting in a parking lot or just driving by from using your network. You can have the code printed out inside meeting rooms or your employees could give it out to guests. It can offer a little bit of protection to a typically “open” type of guest access.
Self-Registered Portal
We touched on this a little bit before but let’s dive a bit deeper into it. Self-Registered lets your guests get onto the network themselves without putting any additional work onto your employees to help them get an account setup. Guests are prompted for some basic info—first, last, email, phone, company, reason for visit, who they are visiting, and any custom fields you create—and once they submit that info a username/password is generated for them automatically. Any of the fields can be marked as required so if you want first/last/email to be required because everyone will have those but don’t want company to be required because you have individual guests, you can do that. Well, unless you have a minimum number of guests and they are very trustworthy, there will be people who fake the registration information to create an account. Now that may not be a big deal to you but it also could be something that completely throws this method out the window in terms of viability.
Option wise, the Self-Registration portal has a lot more options than Hotspot does. Starting out on the Behavior/Flow Settings page we can see that not only is the flow much more complicated (it’s actually the most complex portal flow because of the registration part) but we’re also going to start seeing references to employees using this portal. If you are purely doing guest access, then you can ignore these options. Like the Hotspot you have the option of requiring an access code when guests log in but you also have the option of using a registration code when guests create their accounts—you could even turn both of them on. Considering the use case though the registration code is probably more lined up with how guests will use the portal. You can have multiple AUPs as well, one for login and another during registration which can come in handy if you want to remind guests about who should be getting accounts as well as what they can/can’t do. Splitting up the AUPs can make them easier to read and might make it less likely people will just skip through them but we all know that will still happen.
During account creation besides the normal options, guests will be able to pick a SMS provider where their credentials can be sent after successfully signing up. This is more helpful when dealing with a pure sponsor setup but it can be helpful here as well, sending the credentials to another place to make it easier for guests to remember and it can provide fidelity as to who the guest is. Until ISE 1.3 the only option was integration with an outside service to send the messages to guests but with 1.3 we can now send emails to HTTP gateways that providers offer—for free. Most major providers (AT&T™, Verizon™, Sprint™, T-Mobile™) offer these gateways and are built into ISE but you can easily add more if you have providers in your area that you want to support.
We have some options here to filter emails used during registration but using these will be not that common. The email addresses used during registration aren’t actually verified at all so you could say you want only well-known webmail providers such as Yahoo™ or Gmail™; then someone just has to pick fakeemail24592@gmail.com to be able to register with that address. Blacklisting would have a similar effect where emails @baddomain9713.com aren’t permitted but someone could just use somethingcleverise@gmail.com and register.
The recommended option rather than whitelisting/blacklisting, abet one that introduces some lag time from sign-up to availability, is to require that guests that self-register get approved by either a designated group of people or the person that the guest claims they are visiting. Both give some verification that someone is who they say they are or at least that they have (seemingly) correctly filled out the form. The group approach might be less likely to approve “bad” info that a person approving access for their friend would allow through but on the flip side the group could take time to respond where the person being visited by the guest is more likely to be with them and can quickly approve the guest account.
There are two features here that we want to call out specifically because unless you have an extremely specific reason, you should probably not enable them—Guest Device Compliance and VLAN DHCP Release. Device compliance enables posture assessment for guest devices and is generally not something you will normally want to make your guests do. Guest access is typically limited anyway (internet only in most cases, sometimes less) and while it makes sense to ensure machines attaching to your network are properly secured it results in a difficult flow for guest to go through. If you are concerned about the machines your guests are connecting with, it is probably easier to use one or more path isolation techniques (guest anchor WLCs, virtual routing and forwarding (VRFs), multipoint Generic Routing Encapsulation (mGRE), multiprotocol label switching (MPLS) VPN, etc.) and then not worry about the state of the machines. VLAN Release implies that your guests would be required to move between VLANs during their access and like your normal clients that is a nondesirable configuration. Using the normal ISE functionality of dACLs and URL redirects is a much better option. Further, you’re going to rely on a guest client to cooperate in the DHCP release/renew action and that simply isn’t possible.
Moving over to the customization side of the portal settings we see a lot of the same things we saw in the Hotspot portal. The left-hand side lists the different pages that can be customized while the center will show you the different text areas that can be customized to fit your needs. The only areas that are different from the hotpot portal are the Notification sections; under the Settings header of the right-side preview you can send test emails/SMS and preview the printed credentials. Instead of repeatedly registering test accounts you can see what your guests will see for notifications right from the portal where you are customizing them.
The customization area also includes a WYSIWYG editor3 when applicable to the areas you are editing, that is, you won’t see it for titles or labels but you would see it for the content they refer to.
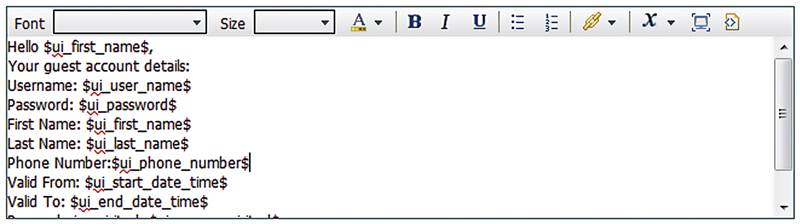
The editor has all the standard features in it such as font, size, color, lists, and links but the one important button to take note of it is the variables one (x, third in from the right). Clicking this will let you select variables from a substantial list that contains nearly anything you could want to put into your portal. Most important is that the variables you insert need to be relevant to the area you use them; if you use the “Client Provisioning Install Agent Minutes” in the Sponsor page login, then you aren’t going to get anything but the variable string name on your login page.
Sponsored Guest Portal
This is going to be a short description because the last portal type is almost the same configuration wise as the self-registered guest. The only differences here are that the guest flow is simpler because there is no registration taking place and less customization sections.
Guest types
During creation of guests you have the ability to pick a type of guest account that will be created. OOTB you have three options to pick from—Daily, Weekly, and Contractor. The names give away the difference between each one and that’s how long the account is good for: 5 days for the Daily type, 14 days for the Weekly type, and 365 days for a Contractor.
Besides the maximum time an account is valid each account type also lets you customize other options such as time of day limits, maximum number of logins, maximum number of devices, account expiration notification, and the sponsor groups that are allowed to create each account type.
One of the more interesting options here is the “Allow Guests to Bypass Guest Portal” option. ISE users prior to 1.3 will remember an “Activated Guest” type that would let users authenticate using 802.1x to the corporate SSID without needing to go through the web portal, a handy feature for long-lived guests. That feature is implemented in this portal bypass option. If you use this option, make sure that your AuthZ rules are correctly configured to match guests coming in using PEAP or they could match rules you wouldn’t want them too.
Sponsor setup
For use cases with sponsors either approving self-registered guests or creating accounts directly for guests, the sponsor area will be taking care of that. Sponsor functions are broken down into two areas, portals and groups. The sponsor portal is where users will go to perform their designated actions while the groups define the access they have within the portal(s). We’ll go into this in detail because there are some gotcha’s when it comes to how sponsor permissions and access line up; an incorrect setting can have you chasing your tail if you don’t know where to look.
It’s also worth noting that you can have multiple sponsor portals if you want. If your company has multiple departments that want different branding and/or different guest permissions, you could accomplish that this way.
Sponsor Groups
Before we configure the portal for sponsors we need to create/configure the sponsor groups so that ISE knows what permissions to give them when they log in. OOTB ISE creates three groups for us:
• All Accounts
• Group Accounts
• Own Accounts
As the names imply, by default the only differentiation in the default groups is who can see what. “All Accounts” is typically given to administrators or Helpdesk personnel since they would need to assist guests that had been created by other sponsors as well as themselves. “Group Accounts” could be used if you have front office people creating accounts and you want them to all be able to assist guests even if someone has gone home for the day but you also don’t want to have to wait for/bother the Helpdesk. Lastly, the “Own Accounts” group would be where your typical sponsors go; they are able to log in and perform sponsor functions only to the accounts they have created themselves but obviously still have the Helpdesk to back them up if the guests need it.
Out of the box ISE also creates three local groups whose names match the sponsor groups so that you can easily just add local users to these groups and get your users access to the default sponsor functions. The downside to this is that it works only if you are using local users plus you would really want to tie this to something like AD so that your users don’t have to deal with another password.
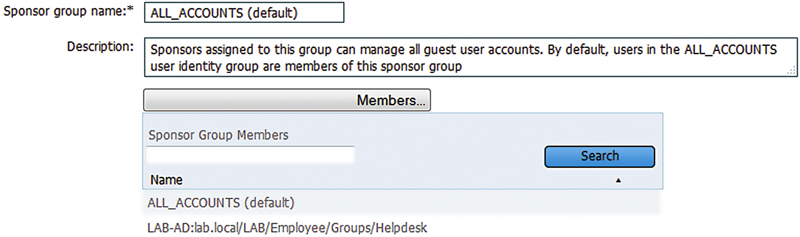
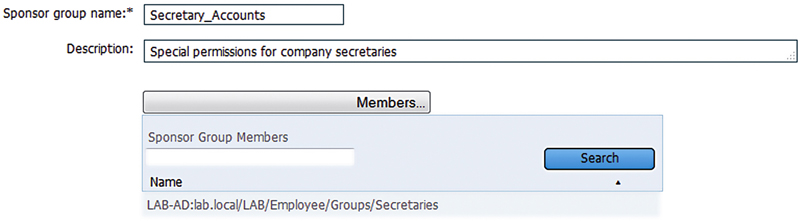
In the above figure we can see that we’ve added a custom group (our example Helpdesk) to the ALL_ACCOUNTS sponsor group. Clicking the “Members…” button will bring up a list of compatible groups, including those from external identity sources that can be used.4
Once we grant access to our sponsors, we’ll want to determine the types of accounts they can create. The guest types we looked at earlier get assigned to the sponsor groups and permit sponsors to create those types of groups. You may want your normal sponsors that are part of the OWN_ACCOUNTS and GROUP_ACCOUNTS groups to only be able to create “Daily” users but the ALL_ACCOUNTS should be able to create all account types. Or maybe ALL_ACCOUNTS can create only Daily and Weekly accounts and you create another special group that is allowed to create the year-long validity Contractor accounts. You can configure guest locations as well, although this is mainly an accounting feature if you aren’t writing specific AuthZ rules for guests in different locations. If you have a single campus and unified guest access, then the location won’t matter.
The last part of the sponsor group setup is the configuration of what the sponsors can actually do once they have logged in. All sponsors can create single accounts so that isn’t an option but the ability to import guests from a CSV file5 or generate random guest accounts is something you can grant to your sponsors if it’s something they will need to do.
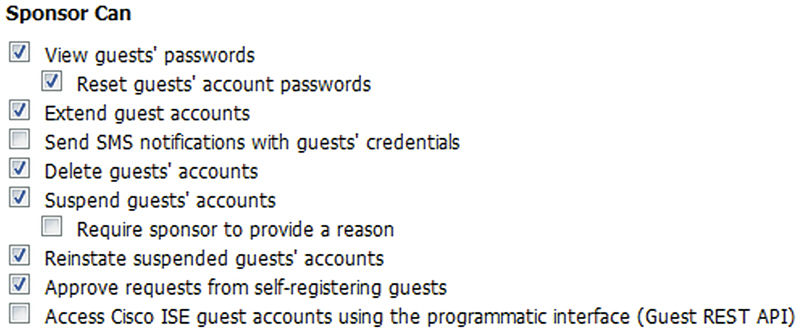
You can control if sponsors have access to a guest’s credentials, if they can send SMS notifications, deleting/suspending/extending accounts and even REST API access. In most situations you are probably going to want to check off all the boxes except for the last one. If you are using the REST API for guest account tasks, you should create a separate sponsor group and assign just that API user/group, which ensures your external application works but you also don’t expose more than you need too. You might want to watch the SMS feature as well. If you have configured ISE to use the carrier-provided gateways, then you don’t have to really worry about unknown charges, although they might block you for abuse if you have someone creating thousands of guest accounts in bulk. If you set up a service like Click-a-Tell where you have purchased a fixed number of SMS messages, you may not want sponsors to waste those notifications if they don’t need to and if not you can disable that feature for them.
Device portals
Guest portals are used to mainly manage and deal with users with a little bit of device registration sprinkled in. On the other hand, device portals focus on use cases where devices are what you will be dealing with such as blacklisted devices, BYOD, and MDM. These portals and their configuration (if any) are the same as the guest versions with the only difference being that they are very basic, even more so than the Hotspot portal. Customizations revolve mainly around theming, ensuring all portals have a similar feel to them, and any wording that is used. Since most of the functionality has already been covered in the guest portal area we won’t dive too deep but here is a quick description of the five device portals you could make use of within ISE:
• Blacklist: The most basic device portal, users see this when the device they use has been marked as lost/stolen by the owner or an administrator.
• BYOD: Seen by users registering a personal device for use on the company network. Chapter 13 covers this in more detail.
• Client Provisioning: Portal seen by users when posture is required and NAC or AnyConnect needs to be installed.
• MDM: Portal used to onboard devices into the company MDM platform, covered in more detail in Chapter 12.
• My Devices: This portal lets users manage the devices they have registered or add new ones.
Global guest settings
There are some settings for guests that can’t be configured per type or per portal and those settings are contained in Guest Access → Settings. Here we have settings for usernames, passwords, purge policies, custom fields, etc. The only option listed here that takes you somewhere else is the SMS Gateway settings which take you into the System Settings area.
The first setting covers how often guest accounts are purged from ISE and when that purge occurs. If you hear a muffled cheer, that is anyone who has used ISE prior to 1.3 and had to deal with manually deleting guest accounts or letting them just accrue forever. There are no settings that define how long an expired account will stay around, how often the task runs to remove those expired accounts. That means that if you use the default period of 15 days, then it’s possible an account could be expired and still be around for 15 days; likewise, an account could expire and then be immediately deleted if this purge task runs right afterwards. Neither of those cases are generally an issue but if they are it might be helpful to set up the schedule to purge accounts over the weekend or whenever you might have less requirement to reactivate an account. There is also a setting here to purge cached portal information for AD/LDAP users.
The next option is for custom fields which are where you would set up any additional information you want guests to fill out before they can gain network access. You can select the data type for the field as well, allowing some basic verification of the data being entered (if it’s a date, phone number, email). Even though you can provide a “tip” to users for the field, be cautious when using this feature as it can lead to frustration if your guests aren’t reading the directions provided. Simple use cases work well with Self-Registration but more complicated fields should probably be reserved for sponsor-type guests.
Guest Email Settings let you define if notifications go out to guests and if so who they are sent from. Notifications by default would be an email containing their username, password, and start/end time but if you enabled the expiration notifications in a guest type then these settings apply as well. You can either send notifications from a specified email address or have notifications be sent with the “from” address being the person who sponsored the guest account. This simple setting actually has a big gotcha and it’s applicable to one other notification as well (CCing a sponsor when sending guest credentials): Unless you are using locally created sponsors ISE will not know what the email address should be and will always send from the default email address or in the case of CCing the sponsor the sponsor won’t get any email. Please reference the administration section for more information about creating users.
The Guest Locations and SSID section might be the most confusing section of the global settings because looking at it initially you would think that it defines the locations that guests can use their credentials and which SSIDs they can use. The reality is that these settings are basically cosmetic and will probably play little role in your guest process. The location option is there to make it easier for you and your sponsors to map a proper time zone so that any time-based restrictions set on a guest type will work correctly for the location the guest currently is at. The SSID is a cosmetic feature that is shown in a notification that goes to the guest (print/email/SMS) so that if you have multiple SSIDs, and maybe they aren’t obvious, there is something to help your guests connect. Now technically guest time zone information can be used in AuthZ rules as a condition but we haven’t found a good case for it to be used for typical environments. Should you want to use either of these features, remember SSIDs that can be selected by sponsors are configured in the sponsor portal settings and the locations that can be picked are configured under the sponsor groups.
Guest Username/Password policy sections do exactly what their name implies: configure what valid guest usernames and passwords are. The username policies let you select either using the format of “firstname.lastname” or the guests’ email address as their username. Unless you decide not to require an email address it’s highly recommended to set the username of the guest as their email address. Assuming the email address is correct, it is almost a guaranteed unique value that the guest already easily knows. That may seem like a silly thing to suggest but when using “firstname.lastname” and running into users with the same names ISE will start appending incrementing numbers to the end of the username but guests tend to not always look at the username completely. Instead of logging in with “jon.snow001” they will try to log in with “jon.snow”; the credential given to them won’t work; they will lock out their IP/account and they will complain they can’t get online. Picking good password requirements can be equally important; a common issue is that when passwords are sent to guests, some of the characters can start to look the same: l1O0i|all have the possibility to make it more difficult to log in if they get used in a guest’s password. The solution to that would be to use customized alphabets that remove those characters so that when ISE generates the password it won’t contain anything that’s hard to read. These include the characters 0 and O or 1 and l and I.
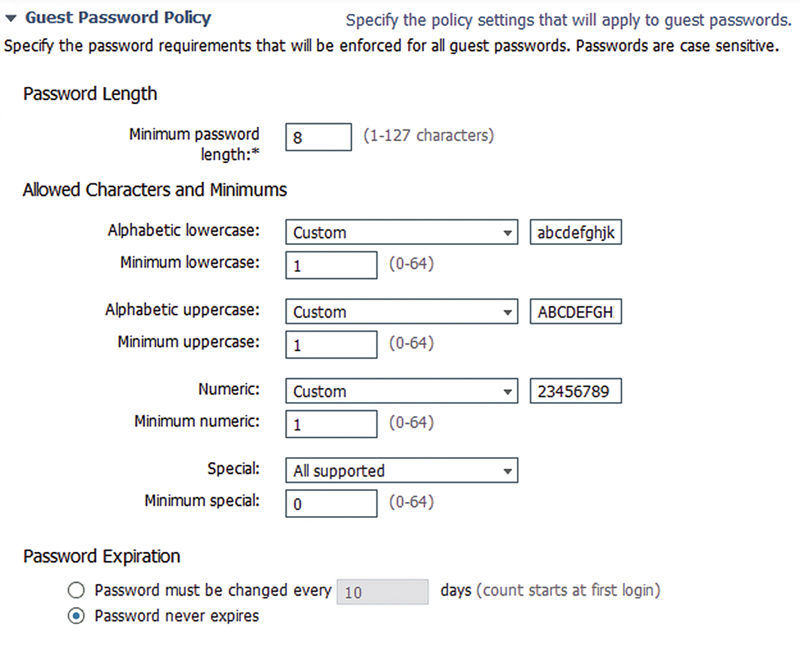
However, if you do customize the allowed characters, you need to ensure that you don’t check off any of the password expiration/change on first login options. Guests would then have to also not use a password that contains any of those characters you removed and your guests won’t understand why the password they use everywhere else doesn’t work on your network. If you want guests to rotate or set their own passwords, it’s a better option to shorten the random passwords that are generated initially so that it’s easier to log in and then the guest will set their own password.
Making portal modifications
When talking about portal modifications, one of the main reasons for going beyond just the typical settings is that a company wants to make guest portals more “seamless” with other sites guests could see/have seen. Perhaps you even want to expand the languages that are shipped with ISE so that you can better support a more diverse group of guests—happier guests are happier customers after all.
We touched briefly on customization before but it warrants a closer look since it will probably be one of the more desired/requested changes. We’ll use the default self-service portal as our example here so let’s take a look at what’s there by default.
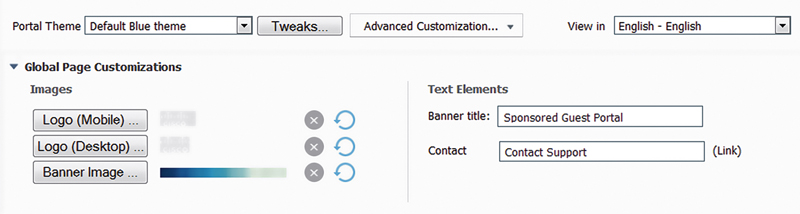
The default theme is called “Default Blue theme” but there are three other provided ones that you can pick from if you think they look better or closer to what you want—Default Olive, Default Fresh Blue, and Default High Contrast. The latter gives you a color scheme that makes it easier for anyone with trouble seeing to view the page on their laptop/mobile device.6
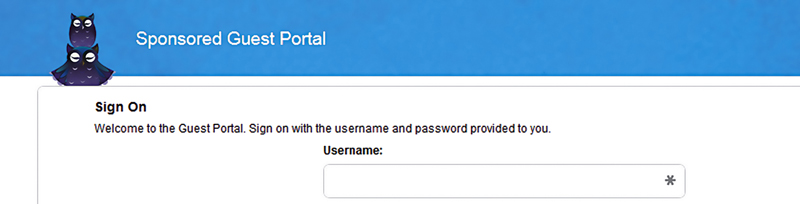
Image wise you can customize the mobile/desktop page logos that show in the upper left corner as well as the banner that spans the top of the page or even delete both by clicking the “X” next to them if you don’t want the images there at all. Images you do upload will be automatically scaled to the size ISE requires and you can’t pick how that is done so take that into account when choosing images; you may have to edit the images a little before uploading to get them to look the way you want. Take the following two images for example; the first shows the use of a new logo and banner but the banner was resized in such a way that we only got the blue top while the second shows how using a slightly cropped version of that image results in the display of the “ice”-like background.
Other page values can be changed from the “Tweaks” button next to where you pick the theme. Options here let you adjust the banner color, banner text color, page background color, and page text color; there is however a catch to them. While using a banner image the banner color choice isn’t actually used and the page text color impacts only the footer text which isn’t there by default but can be entered into the Footer Elements text box. The center portion of the page will, unless using the default high contrast theme, always use a white background with black text and if you want to change that you need to use the tools mentioned previously in this chapter to edit an exported copy of the theme and then import your changes.
Language additions/updates/removals can be handled two ways, the easy way and the hard way. The hard way is to change the language that you are viewing the customization page in and then go to each area of the portal and change the language to what you want it to be. This is really useful only for tiny edits for one or two languages, for example, if you are going to worry only about the English sections, then this might be a bit more feasible but doing that for 15 languages isn’t very practical. The easy way is to export the entire Language File, make your edits/additions in bulk, and then reimport the file.
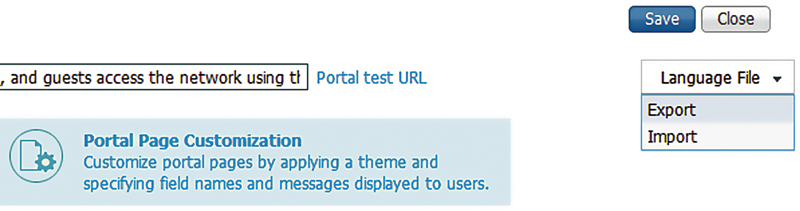
When exported, the files come down in a ZIP file that contains each language’s .properties file with the relevant text in each one. If large changes are being made, the whole ZIP can be sent off to a company for translation and then you can import it when they send it back to you without having to worry about error-prone manual methods.
Chances are you will make use of more than one portal type as your network evolves or if you want to have multiple “types” of guests. Perhaps you have a Hotspot or Self-Registered guest network that gives people basic or low-performance internet access so they can quickly get on if needed but a Sponsored portal for guests that need more liberal internet access. This method gives you the best of both worlds; the majority of guests will be able to quickly get on and access their resources but those that need elevated access get verified by a sponsor first.
Scenarios
We’ve gone over the descriptions of the different portals and their most popular settings but let’s look at some specific scenarios that you might run into during your ISE deployment. We’ll cover a simple Hotspot portal configuration with an access code, configurations of a sponsor portal, and finally the AuthZ rules that support the guest portal.
Hotspot Portal
For this scenario we’re going to start with a fresh Hotspot portal but the default OOTB one will work too if you haven’t made any changes:
1. To create that portal go to Guest Access → Configure → Guest Portals → click “Create” → Select “Hotspot Guest Portal” and then click “Continue….”
2. Name your new portal and add a description of what the portal will do/be used for.

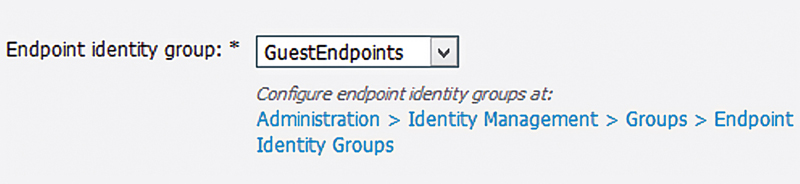
3. Specify which identity group you’d like guest endpoints added to. After they accept the AUP, their MAC address will be added to a group that may be referenced in the AuthZ ruleset. The default is “GuestEndpoints” but in the case where you have multiple portals different endpoint identity groups may be used.
4. Leave everything under the “Portal Settings” section the way it is.
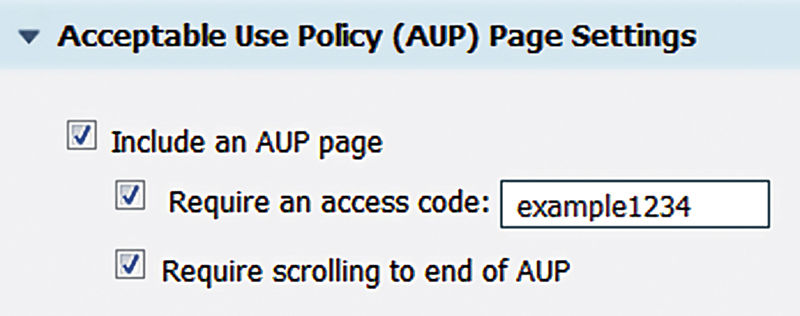
5. Under “Acceptable Use Policy (AUP) Page Settings” check off “Require an access code” and input whatever you want your code to be. The code can contain letters, numbers, and symbols. Also check off “Require scrolling to end of AUP” to be sure your users read the whole thing.
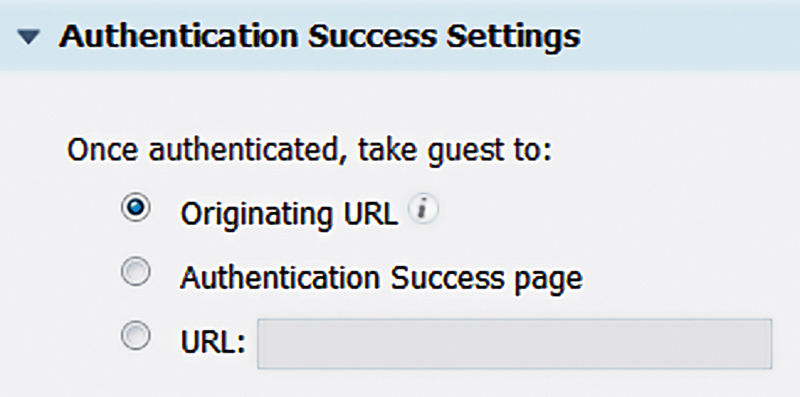
6. For “Authentication Success Settings” you have a couple of options; the ideal one is shown. Sending the user to their originating URL keeps the process the guest is going through nice and clean but it requires a supported device running Cisco IOS 15.2(2)E. Googling for “Web Authentication Redirection to Original URL” should get you the supported device list. If you can’t support this, then the other two options are used equally, sending the guest to a generic success page or sending them to a designated URL like the company webpage. For most places we would recommend going the “Authentication Success Page” route for simplicity.
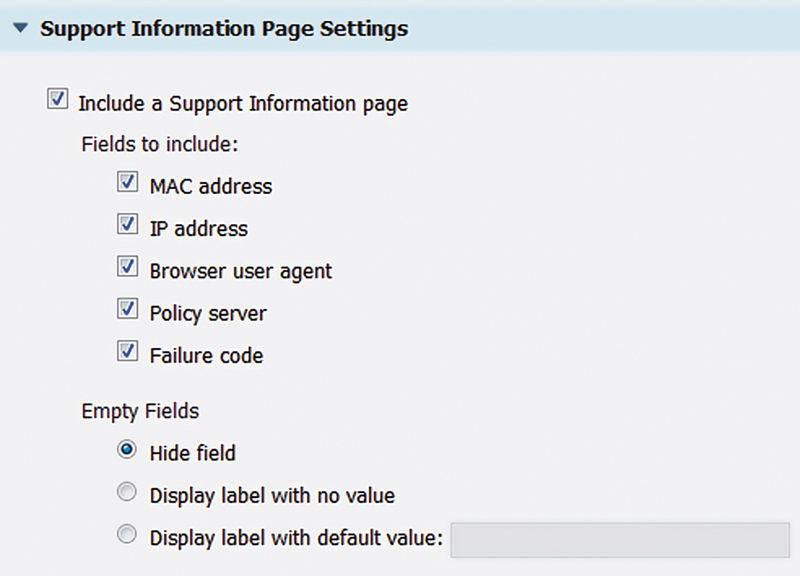
7. We’ll enable the Support Information Page to assist guests in gathering information that can assist the Helpdesk in getting them online. Hiding the empty fields also keeps the page clean and simple, no need to complicate information here.
8. We’ve finished the portal settings but we still need to customize some of the other aspects of the portal to meet our needs. Head over to the “Portal Page Customization” section and replace the default AUP in the “AUP Text” area with one provided by your company or write something generic to go in its place.
9. Finally, save the portal configuration and then click the “Portal Test URL” link at the top of the page to see the final outcome. You should be greeted by something similar to what is shown here.
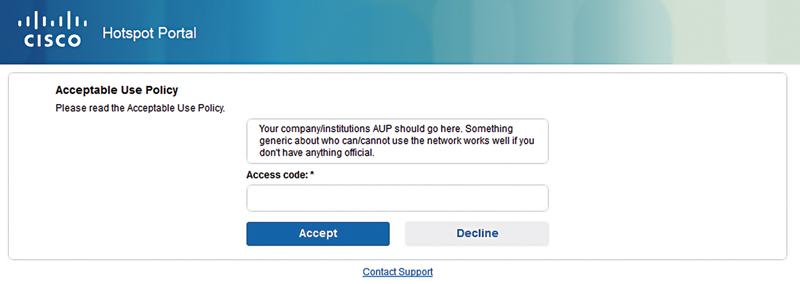
We now have a working Hotspot guest portal in nine easy steps! If you close out of the portal page and back to the list of Guest portals, you will see our new portal but it will have “Authorization setup required” listed under it and a yellow triangle. ISE knows that there are now AuthZ rules that point guests at this Hotspot so it warns you that more setup steps are needed. Since it’s the next step, let’s do that right now.
Guest Portal AuthZ Rules
Other than assuming we already have a portal configured, the only other assumption for this example is that you have a basic authorization framework created which contains a redirect ACL on your WLC(s). Check Chapter 6 for a good example if you need one.
First, we’re going to want to configure our AuthZ result that will tell ISE to direct users matching a condition we define to the Hotspot portal we configured.
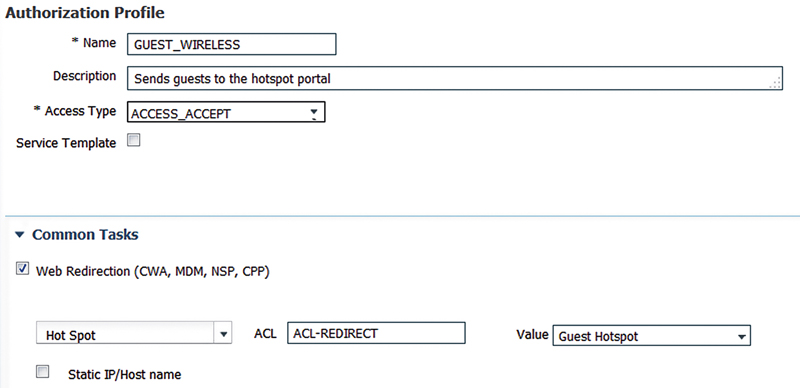
This result is very simple; the only thing to note is that the web redirection type has a special “Hot Spot” value which is different than the normal “Centralized Web Auth” we would use for Self-Register or Sponsored portals. No other value is required in the result.
Next we’ll configure the AuthZ rules themselves that will support guests getting redirected to the Hotspot and then after agreeing being granted normal guest access. This will happen with two rules like those seen here.

Since rules are processed in a top-down manner we have to build the rules in a way that can look a little bit backwards but makes sense once we step through. Both rules make use of the Airspace-Wlan-Id attribute, which in this case is 7 and maps to a dedicated guest SSID we’ve created. Since that SSID will only ever be used for guest access it’s ok that we’re using it like this. The other attribute checked is the Endpoint Identity Group which we set in the Hotspot guest portal configuration. Our traffic flow is going to look something like the following:
1. User connects to “guest” SSID whose Wlan-Id is 7.7
2. User matches the second rule by default and ISE sends the GUEST_WIRELESS results to the WLC.
3. Guest is shown the Hotspot portal, enters the access code, accepts the AUP, and is granted access. Authenticating device’s MAC is also added to the GuestEndpoint group.
4. ISE sends a CoA to the WLC and the client starts the authorization process again.
5. This time because the guest has successfully gone through the Hotspot their devices’ MAC is in the GuestEndpoint identity group and matches the first rule.
6. ISE sends the “PermitAccess” results to the WLC and the client is granted network access.
The rules defined in the previous image would also work for other types of guest portals; you would only need to adjust the AuthZ results so that it was correct and the same process continues to work.
Configuring Sponsors
Since sponsors, if you are using them, will be critical to guest access we’ll want to ensure that the correct people have access and that it’s easy for them to get access. Our assumptions here are that you are using AD for authentication, have AD groups already configured for your users and that they have already been brought into ISE via the External Identity Source area so they can be used. Our example will be similar to some of the examples used previously in this chapter so we’ll be setting up access for three groups of people: Helpdesk personnel, Secretaries, and general employees.
We’ll start with assigning our AD groups to sponsor groups; we’ll utilize two of default groups that ISE has OOTB but we’re going to create one more for the Secretaries because they are a unique case. Start in Guest Access → Configure → Sponsor Groups, create a new group, and assign the relevant AD group as a member.
Our use case for this group is that they will be responsible for guests or groups that are coming to visit the organization. Schedules could rotate during the day so we want anyone who is in the front area/other location to be able to assist guests. Large groups may come in as well and so we want to be able to generate a batch of accounts with a unique prefix so we can identify the group as well as get them access quickly without having to create numerous individual accounts. In order to accomplish this the new group is going to be given the following permissions:
• Create “Daily” users
• Can select any supported location
• Sponsor can:
• Create multiple guest accounts to be assigned to any guests (random)
• Allow sponsor to specify a username prefix
• Limit to batch of 30
• Sponsor can manage:
• Account created by members of this sponsor group
• Sponsor can:
• Do everything but use the guest REST API
Next we’ll take our other two AD groups and assign them to the proper existing sponsor groups. Helpdesk will be placed into the ALL_ACCOUNTS group and general employees will be placed into the OWN_ACCOUNTS group. For the most part the default group’s settings are fine but we’ll want to adjust a couple of things to prevent possible abuse and make our guests a little bit happier:
• All groups:
• Enable “Send SMS notifications with guest’ credentials.”
• Enable “Require sponsor to provide a reason” under the “Suspend guests’ account” option.
• OWN_ACCOUNTS:
• Ensure only the “Daily” guest type is permitted for creation.
• Disable “Multiple guest accounts assigned to specific guests.”
• Disable “Multiple guest accounts to be assigned to any guests.”
• Prevent accounts from being created with start dates more than 30 days in the future.
Now that our groups are created we’ll configure the portal so that our sponsor can log in and create/manage guest accounts. Switch to the “Sponsor Portals” area and open the default portal. Enter the FQDN that sponsors will use to connect to the portal, something like “sponsor.example.com” and let your DNS administrator know that FQDN should be a CNAME to your PSN(s) A records.8 You’ll also want to ensure that the certificate you’re using for portals has the portal FQDN as either the CN or SAN or use a wildcard certificate for your portals.
The default ISS is fine but you may want to adjust it to fit your own needs; similarly you can leave the SSID section blank unless you want to create and add one. The only other change we’ll make to the settings is to require scrolling to the end of the AUP, ensuring that our sponsors can’t say they didn’t “see” an important section of it.
Moving over to the Customization tab select “Acceptable Use Policy” under the “Portal Access” section and put in the AUP that is used by your company or edit the existing one so that it has your company name instead of “Cisco Systems.” Under the “Create Accounts” section in “Guest Types” select the “Settings” tab above the preview window and check off “Hide guest type if only one is available to sponsor”; that keeps unneeded information off the page for our OWN_ACCOUNT sponsors. In the “Create Account for Known Guests” section go to the preview area settings and check off:
• Required fields:
• First name
• Last name
• Email address
We want to require those basic fields because everyone visiting should have them and the SMS providers selected are the major US ones and provide free SMS SMTP gateways for us to use. If you are somewhere else or are using another SMS Gateway service such as Click-a-Tell, then select that instead. Finally let’s customize the Email and Print notifications to include the SMS provider in them. Right after the phone number line in each area insert the line “SMS Provider:$ui_sms_provider$”.
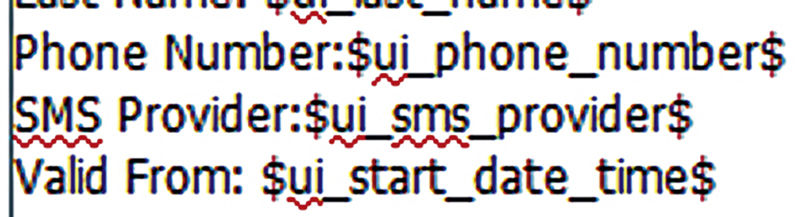
Add others as well if you like, using the variable button in the WYSIWIG editor. The SMS provider is a quick example of how we can add something and give our users a little bit more information about their account. It can also be helpful if you are doing SMS notifications and someone doesn’t get one, quickly looking at an email or printed guest info will tell you if maybe the wrong provider was selected.
That should be all you need to get started. From here your sponsors given access via your AD groups will be able to log in to this portal and create guest accounts for people who need them.