Building
Previous chapters have provided information that will help you design your pond. By now you have gone through a planning process and know where you are going to put the pond, and you have made drawings to show its size and shape. This chapter will discuss the practical aspects of construction. It is almost time to start digging.
Before you start digging, it is critical to check for utility lines such as electric, gas, telecommunications, and water. Most communities provide an inspection of your property, usually free, and make sure there are no buried services where you will be digging. If utility lines are found near the planned site, you may have to change the location. If you don’t want to do that, talk to the utility company and see if they are able to move the line.
The next step is to check that the site is level. Because water is always level, ponds need an edge at the same height all the way around, or the water will run out on the low side. Don’t try to eyeball the level of the ground because people are not very good at seeing a small slope—you have to measure it.
Take a two-by-four board that is about ten feet long and make sure it is straight. Longer is better, but a very long board becomes hard to handle unless you have help. Mark a point at approximately the middle of the pond. You don’t have to be too accurate. Set one end of the board at this point, and lay it on the ground on the two-inch wide part. Place a spirit level on top and raise the low end until the board is level. Use a tape measure to determine the height between the bottom of the board and the ground, as shown in figure 14. If your pond is wider than the length of this board, move it to the end of the first measurement, and repeat the process. In this way, you can use a ten-foot board and measure the slope over a long distance.
Measure the slope over the entire pond area. If the slope over the whole pond area is not more than about six inches per ten feet, don’t worry about the slope. You can easily correct a small slope after excavating. If the slope is more than six inches, take a step back and do some more design work.
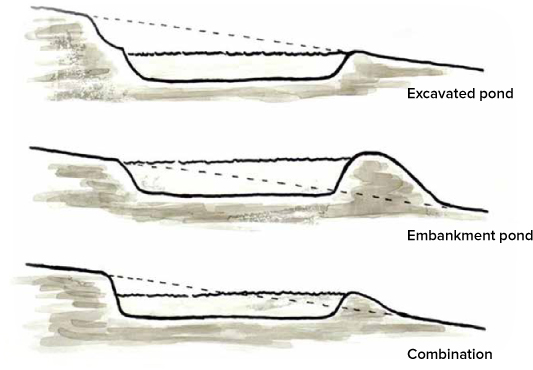
There are several ways to deal with a larger slope. You can solve the problem by choosing a different location that is flatter. You can also plan to raise the low end of the ground so that you end up with a level area. Remember that you will have lots of extra soil to deal with as you dig the pit and using it to solve a slope problem eliminates or at least reduces the problem of disposing of it.
Raising one end by one or two feet is easily done, but if you need to go any higher, it is crucial to construct the embankment wall correctly to support the water. Building such dams is discussed more fully in the chapter on large-scale ponds.
Another alternative to correct a slope is to lower the high end. This might be the best solution if the edge of the pond is being built into a hill, as shown in figure 6. You can carve out part of the hill so that the previous high spot is now level with the low spot. This solution does require more digging, but from a structural point of view, it makes for stronger side walls since the soil is not disturbed. The hill side should be leveled to a spot at least two feet past the edge of the pond so that any erosion on the hill will not empty into the pond.
Review your design and plan to solve any slope problem before you start digging. The final pond will need to be level all around the edge.
The type of soil can influence the construction method you use. Is a pond liner required? Lots of people want to build a pond without a liner since it is less expensive. If your soil has a high clay content, the clay holds the water in place and you might not need a liner.
If you want to consider building the pond without a liner, dig a hole to a depth equal to the final pond. The best place to do this is in the middle of the future pond. Fill the hole with water and wait to see what happens. It will probably run away, so fill it again. If on the second fill the water does not run away, you might be able to skip the liner.
Ponds that don’t use a liner will always seep some water into the surrounding soil. A high clay content in your soil will reduce the amount of such seepage. Natural ponds without a liner usually have a water source that fills them to overcome the seepage. I will discuss more about such earth-lined ponds in the chapter on large-scale ponds. The rest of this chapter will assume you are using a liner.
Soil type also affects the shape of the pond walls. Sandy soil is not very stable, and as you dig in it, the sides of the hole will tend to collapse. This soil requires sides that have a very gradual slope to prevent them from collapsing. In clay soil, which does not have this problem, the sides of your pond can be much more vertical.
How much slope is enough? That is really hard to answer because it depends on the soil type and every soil is different. In my soil, which is about 40 percent clay, I can dig almost vertical sides with no collapse, even when the pit sits empty for two years. You need to use a slope that allows the side of the pond to stay in place all on its own.
A simple way to determine the amount of clay in soil is by adding some soil to water and watching it settle. A video describing this method is listed in the References section.
A preformed pond is a plastic shell that has been molded into the shape of a pond. One advantage of using this type of pond is that the installation is easier. A disadvantage is that, being limited to the available shapes, you can’t design the pond the way you want. Although ponds do have planting shelves, many don’t have enough to make a natural pond work properly.
Set the preformed pond in its final location, open side up, and orient it the way you want. Lay a board across the top of the pond and use a spirit level to make sure it is sitting level. If not, add some bits of wood or soil underneath to make it level. Then take a plumb and mark the edge of the pond on the ground. Take some wooden stakes or landscapers’ paint and mark a line that is 12 inches beyond the edge of the pond.
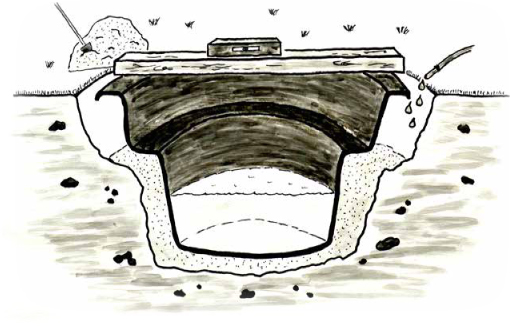
Dig out the pond edge by following the marked line. Continue digging a hole in the shape of the pond, making sure that any shelves remain in the pit. The bottom should be dug six inches deeper than the final level of the installed pond. Place the pond form into the hole from time to time to make sure the pit is dug correctly. Once finished, you should have six-inch gap between the soil and the pond on all sides, below planting shelves, and below the bottom of the pond. This will be filled with sand to make a good fit between the soil and the pond.
Add builders’ sand to the lowest point of the pit and pack it down with a tamper or a two-by-four board until the pond sits on this sand layer and is at the right height. Then repeat the process for any horizontal shelves in the mold.
Place the pond into the pit and check that the edge is level in all directions. If it is not, take the pond back out and adjust the sand layers until it is level. Don’t rush this step of the process. You might need to take the pond out a half dozen times to get it right.
Once the pond is level and positioned correctly, start filling it with water. As it rises in the pond, add sand around the outside. If you can reach the area, compact the sand with a 2-by-4, but don’t over-compact. You don’t want to push sand under the pond and raise it up. You also don’t want to push in the sides of the pond, although the rising water should prevent this from happening. Pour water around the outside of the pond into the fresh sand to help compact it.
Slowly work your way up the side of the pond, adding some water inside, some sand outside, and some water outside. Keep an eye on the spirit level to make sure the pond does not shift. If it does, you will need to start over. Continue this process until the sand is right up to the rim of the pond.
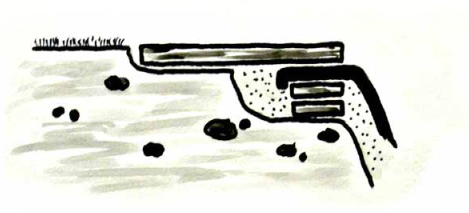
The edge of the preformed pond is not very strong. If you have an area where you will be walking right up to the edge, reinforce this by placing flat stones or bricks under the pond to provide extra support, as shown in figure 18. These can then be covered with other material to hide the edge on the pond.
Flexible pond liners are available in a number of different materials including plastics and rubber. Some people even use cheap vapor barrier plastic, normally used to seal your home, but don’t do it. Building a pond is a lot of work, and the last thing you want is to redo it because you got a hole in some cheaper material.
The best material for the job and the only one I would recommend is 45 mil EPDM rubber.
Although available in several thicknesses, 45 mil is the standard for ponds. The rubber is also used for sealing industrial roofs and may be cheaper when bought at a roofing supply company, but this rubber is not guaranteed to be “fish safe.” Is there really a difference between the EPDM sold for roofing and the one sold for ponds? I don’t know, but why take a chance to save a few cents?
Buy your liner from a dealer who specializes in ponds. Most nurseries sell pond liners, and there are a numerous online sources as well. When comparing prices, be aware that pond liners are very heavy and shipping can add significantly to the cost of online shopping. Nurseries usually have a spring sale on liners when the demand is high and another sale in fall to get rid of leftover stock.
A rubber liner weighs about 0.3 pounds per square foot. A pond that is 10-by-20-by-4 feet will require a liner that is 600 square feet, which weighs 180 pounds. Liners are available in widths of 10, 15, 20, 25, 30, 40, and 50 feet and lengths of 50 and 100 feet. The length is usually cut to your specifications—you don’t need to buy 50 feet. Local nurseries generally carry only a few of these widths and will cut to length. Larger online sources can supply any of the sizes listed and will also cut to length.
Any size of pond can be lined with a rubber liner. It can be cut fairly easily with a knife and joined together to fit very large ponds. Liners are available in standard widths, so it is cost-effective to design your pond to match available sizes. If you design your pond so that it needs an 11-foot liner, you will have to buy one that is 15 feet wide and waste much of your liner. At about $1 per square foot, this can add up quickly.
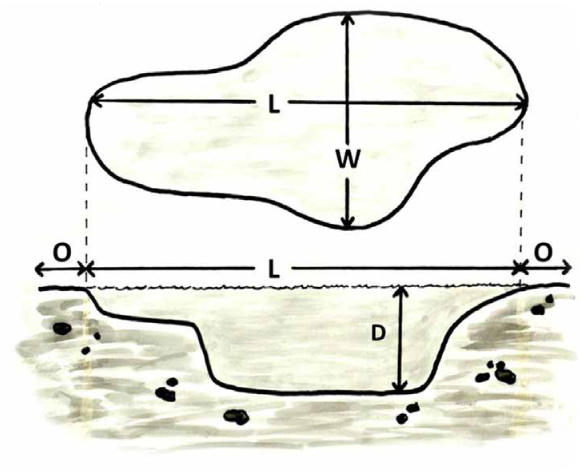
How much liner do you need? It is fairly easy to calculate by following these steps. Measure the width (W) of the pond at its widest part and the length (L) at the longest point. Figure 19 shows you how to measure an irregular-shaped pond.
Measure the depth (D) of the pond from the top of the soil to the deepest part of the pit. Ignore planting shelves. The liner needs to go above the waterline and over the edge of the pond, so you need to measure the soil height, not the water height.
Decide on how much overhang you want. This is the extra liner that goes over the top edge of the pond. For small ponds that are less than 30-by-30 feet, a one-foot overhang on each side is sufficient. For larger ponds, add a two-foot overhang.
Calculate the size of the required liner as follows:
Width of liner = Width (W) + 2 times the Overhang (O) +
2 times the Depth (D)
Length of liner = Length (L) + 2 times the Overhang (O) +
2 times the Depth (D)
There are two fundamental ways to dig the hole, by hand or with machinery. Digging by hand simply requires a good spade, a wheelbarrow, and a good back. It can be a lot of work, but it will allow you to carefully sculpt the shelves as needed.
An excavator can dig a 40-foot pond in an hour or two, which makes this option very attractive. But there are some things to consider before going this route. It can be expensive. The machine you select needs to be able to get to the pond location. In some cases, there may not be enough room between the houses. Removing part of a fence might make this work.
The soil that is removed from the hole still has to be dealt with. An excavator is efficient at digging the hole, but it is slow for moving the soil to the front of the house. A bobcat is better at moving soil, but they are not as good for digging. You might need two different machines to get the job done.
Is it better to rent the machines and do it yourself or hire someone? You can certainly rent the machines for the day, and they are not difficult to use. You will be slow at first, but after an hour or two, you will get the hang of it. It is also a lot of fun if you have never done this before. However, you will probably find that hiring someone with the machines will cost the same as renting the machines, and they will get the job done faster.
The machine can only dig part of the hole. It is not accurate enough to delicately cut out the planting shelves and slope the sides properly. The fine-tuning is best done manually with a shovel.
The first step in digging the hole is to remove the sod, weeds, and topsoil. Remove this top layer to a point that is several feet past the planned edge of the pond to make it easier to work on the pond. Don’t discard topsoil or mix it with the lower levels of soil because this valuable resource can be used later to landscape the surrounding area or elsewhere around the garden.
The next step is to level the site so that the edge of the pond is level to about six inches. Don’t worry about being too exact, since you will be able to adjust this later in the building process.
A pool created on sloped land will need to have the soil from the high point moved to the low point. The soil being added to any low point must be compacted as you go, so it does not shift or settle later. Move six inches of soil and compact it with a tamper or with the excavator. For a large area, you can rent a motorized tamper. Once the soil is compact, repeat the process with another six inches of soil.
When the site is level, mark out the perimeter of the pond with landscapers’ paint or simply insert some pegs every two feet or so. This does not have to be too precise.
Digging the hole for the pond is similar to carving a piece of wood. You take off larger pieces first and then slowly remove more wood to add the fine details. If you take too much off, the carving is ruined because you can’t put the wood back. The same applies to a pond. Dig slowly to get a basic shape and then fine-tune things. Be careful not to remove soil that is needed. You want to use the existing compacted soil to form the hole. Putting loose soil back along the sides or to add a planting shelf does not work for most soil. It is just not stable enough.
After marking the outline of the pond, take your design and divide it into horizontal layers. The first layer will probably be the top planting shelves. These will be about eight inches or so below grade. Dig the pond to this level. The edges for this level can be fairly steep since they will be covered with rock eventually. If you are making a beach area, use a more gradual slope.
When the first level is complete, outline the next, which might be the lower planting shelves for the water lilies. Dig out this level, making sure to slope the sides so that the walls are stable. It is a good idea for now to leave them sloped more than you want. You can always increase the slope later but you can’t decrease it easily.
If your plan includes some steps to allow you to enter the pond, carve them in at the right spot out of compact native soil so they hold their shape.
Continue digging out the hole one level at a time.
Figure 20 shows the finished dug hole. The soil here dries into very hard clumps, making it difficult to get a smooth finish. However, it contains virtually no rocks, which makes digging easier, provided the soil is moist. The sides of the pond have a very gradual slope that made it easy to dig with an excavator. My pond was dug mostly by hand, and I used much steeper sides. Both methods will work.
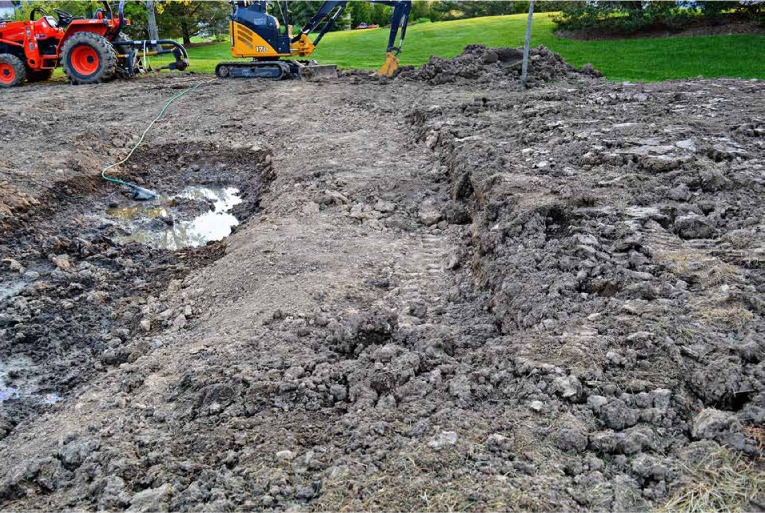
FIGURE 20
A pond that has been dug out. Notice the large planting shelf in the middle of the picture.
Rocks can be a big problem as you dig the hole. When you encounter a rock, you’ll have to decide what to do about it. If it is in the middle of the pond, just remove it. You will need a lot of rocks of all sizes to finish the pond, so separate them from the soil as you dig and create a pile near the pond.
When you encounter rocks near the wall of the pond, you need to be more careful. Small ones can be removed. Removing larger ones may cause the wall to collapse, making the pond bigger than you want or making the slope of the wall unstable. Deciding if you should remove a rock depends on its size and the stability of the soil. The wall does not have to be absolutely flat. Round rocks that stick out a bit are not a problem since they are easily covered with the liner. It is usually best to remove rocks that have a sharp edge.
When I had almost finished hand digging my first pond, I encountered a huge rock at the bottom. It was too big to lift out, and the sides were too steep to roll it out. While I was thinking of renting a sledgehammer, the solution popped into my head: I dug deeper beside the rock and rolled it into the hole. It is still at the bottom of the pond.
Don’t dig the hole larger than the liner you plan to use; keep measuring as you dig. If it gets too big, the easiest way to fix the problem is to add some soil to the bottom of the hole, but that reduces your depth.
Here is an easy way to measure the hole. Cut a string to the length of the pond liner and another to the width. Take the string for the width and lay it on the soil following the contour of the hole at the widest part of the pond. You should have excess string sticking out at both ends, representing the overhang. Repeat this with the string for the length.
The hole you have dug should now look just like the shape of the final pond. You have finished any final adjustments, and the pond size is correct. The next step is to prepare the hole for the liner.
Go over all of the soil that will come in contact with the liner and cut off all tree roots. Large roots should be cut flush with a saw; for small one, use a wire side cutter or hand pruner. Ensure that no sharp edges stick out. If possible, cut them just below soil level. Then remove all sharp stones from inside the pond.
If you are adding a bridge or dock with footings in the water, make sure the soil under them is well compacted to prevent any future settling. Take extra care to compact the area and add extra soil if needed to raise it to the level of the rest of the pond floor. The method for building the footings is described later in this chapter.
The next step is to put a protective layer all over the soil, including the side walls, creating an underlayment to prevent any punctures to the liner from below. Companies selling pond liners will also sell a protective fabric material for this purpose. In my experience, this material is very thin and does not give me much confidence that it will protect the liner from a sharp stone. Some pond books recommend using sand, which works quite well on flat surfaces, but it is useless for covering the sides of the pond. Some people recommend newspaper—I’m not sure why. Will newspaper stop a sharp rock?
I prefer to use old carpet. Most of the carpet produced in North America is synthetic plastic that lasts a long time under a liner. After ten years, the carpet under my waterfall looks as good as new. Although any synthetic carpet will do, some are easier to work with than others. Low pile carpet is easier to work with than high plush and will provide just as good a protection. Carpet is fairly easy to cut by turning it over and cutting the back layer with a utility knife. Some cut cleaner than others, so try and find ones that cut well, so you don’t become frustrated with all of the loose threads sticking out.
If your friends or family are not replacing their carpet, visit a dealer. They need to discard the old carpet removed from installations and are only too happy to give it to you instead of paying dumping fees. One dealer in my area puts it a dumpster, and you can help yourself. Make sure you remove old staples and nails.
Carpet is fairly stiff and thick, which makes it hard to line a round pond. It works best to cut the carpet into strips and then lay them overlapped, plush side up or down; it does not really matter. Use wider strips in straight sections and narrow strips around curves. It is easier to lay the carpet than to put the instructions into words. Your goal is to cover all of the soil under the liner. Overlap the joints by several inches so that no bare soil shows.
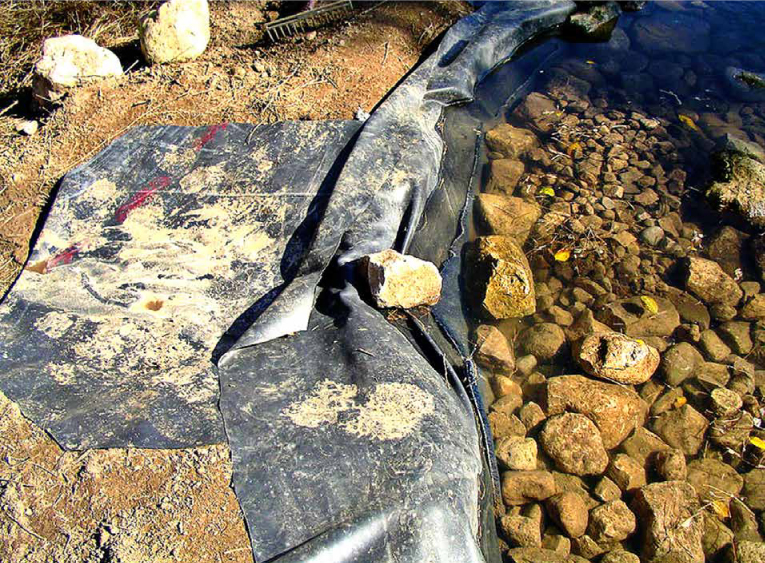
Laying the carpet on the vertical walls can be tricky if the slope is very steep. The best approach is to cut long strips that will cover all of the way from the edge of the pond to the bottom of the pond. Then hold these in place with rocks along the top edge. These rocks will not be in the way as you position the liner and start filling the pond. Once the liner is in place and has water in the bottom, remove the rocks and the carpet will stay in place.
At this point, your neighbors will think you are a little crazy. Just tell them that carpet in the backyard is the new in thing in garden design.
Installing the pond liner may seem like a daunting task, but it is easier than you think if you follow some simple suggestions. Rubber gets stiff when it is cold, so lay it out flat on the grass so that the sun can warm it, which makes it much easier to work with.
The liner is quite tough, and it takes quite a bit of force to puncture it, but you don’t want to take any chances. Whenever you walk on it, either remove your shoes or wear soft-sole ones. It is really hard to step on a sharp stone wearing only socks.
The liner is quite heavy, which makes it hard to get into place. A wheelbarrow is great for moving it to the edge of the pond. Then roll it into the pit, making sure not to disturb the underlayment. There is no up or down side on the liner, so put into place either way. Once it is in the bottom of the hole, position the center of the liner in the right spot. If it is too far to one side, you will have too much liner on one side and not enough on the other. This is one reason why you added the extra overhang to your measurements. Unroll the liner and lay it loosely in place. Try to get it as flat as possible on the bottom and sides. Don’t worry about folds at this point. Your only goal is to position the center of the liner in the right spot.
For large liners, it is easier to work in one direction at a time. Roll out the width and get it positioned correctly. Then repeat the process for the length. Because of the weight, you might have to roll part of it up again to facilitate moving. While you are getting the liner centered in the pond, check the edges. There should be a one-or two-foot overhang, depending on your design. You should actually see more than this, since the liner will settle as the water pulls it into the pond. If you don’t have enough liner around the edge, now is the time to correct the problem.
There are several ways to fix a liner that is too short. You can add more soil into the bottom of the hole. This needs to be done beneath the underlayment. Every inch of soil added will add two inches along the top—one inch on each side. You can also lower the edge of the pond. Another option is to bring in the sides of the top edge, reducing the circumference of the pond. This only works where you have planting shelves.
Docks and bridges can be built so that none of the supports are in the water, as shown in figures 10, 11, and 28. If you don’t have footings in the water, you can skip this section.
FIGURE 22
Footings for the bridge shown in figure 13.
Footings in the water can provide extra support, but they need to be added at this point in the project. They are made from large flat material placed over the liner. The supporting posts sit on these footings. You can create the footings using poured concrete, but this is more work than is normally required. A simpler option is to use flat patio stones. The 2-by-2-foot squares provide a large surface area to distribute the extra weight and are easy to move around.
Locate the position for the footings and add two layers of underlayment on top of the liner. These can be an inch or two bigger than the patio stones. Then place the patio stones on top of the underlayment. This will prevent any punctures in the liner from the stones.
If more height is required, stack several patio stones or place bricks on top of the patio stone. This same setup can be used to add raised shelves for water lilies or create a permanent island in the middle of the pond. The key is to add puncture protection between the footings and the liner.
When you are certain that the center of the liner is in the right position, and all footings are in place, start adding water. It is much easier to stretch the liner and make folds with water in the pond. There are two reasons for this. First, the weight of the water holds the liner in place. Even a small amount allows you to pull fairly hard on the liner without fear of moving the bottom of it out of place. Second, as water fills the pond, it stretches and settles the liner tight against the underlayment. This stretching will change any folds placed high above the waterline. You will find that it is easier to make most folds at or near the waterline. Once the fold is made, the water pressure holds it in place.
As water fills the pond, pull the liner tight to remove any wrinkles. If you get to a point where you can’t get the wrinkle out, add a fold. Folds need to be made in any area where the pond is round. Making the folds is much like wrapping a Christmas present. Tuck in the excess rubber, so that you create neat folds that lie flat against the side of the pond. When done correctly, you will see the fold, but it will not stick up into the water. Try to add as few folds as possible to give a neat flat look to the pond. One larger fold is better than two small ones, but don’t follow this rule religiously. Some people recommend gluing the folds so they are closed to organic matter. That is not necessary, and it is a lot of extra work.
If your plan involves moving water from a stream or waterfall, it is advisable to make the folds so that they point away from the moving water. In this way, the moving water keeps the folds closed instead of pushing water under them and opening them.
The folds will look ugly as you are making them because they are very visible. In two months, they will be covered with microbes and hardly noticeable. You just have to have faith that they will disappear.
There are two types of planting shelves. One is a lower planting shelf that holds pots for deep-water plants like water lilies. These are not very heavy and are not likely to poke holes in the liner. These shelves do not need further protection. In a shallow pond, you may not have this shelf because the water lilies can sit right on the bottom.
The other type of shelf is the main planting area around the perimeter of the pond. They will be covered with rocks, and if you step on the rocks while placing or maintaining the plants, you could poke a hole in the liner. For this reason, I strongly suggest that you add extra protection to these areas.
The best way to protect the liner from stones sitting on it is to add an overlayment, which can be the same material as the underlayment. I prefer to place carpet on top of the liner anywhere you will be adding stones on top of the liner. All of this overlayment will be covered with stones.
Follow the exact same procedure for the overlayment as for the underlayment. Work in smaller strips and overlap pieces after most of the pond liner folds are in place, but before the water level reaches the planting shelves. You won’t be able to change the folds after the carpet is in place.
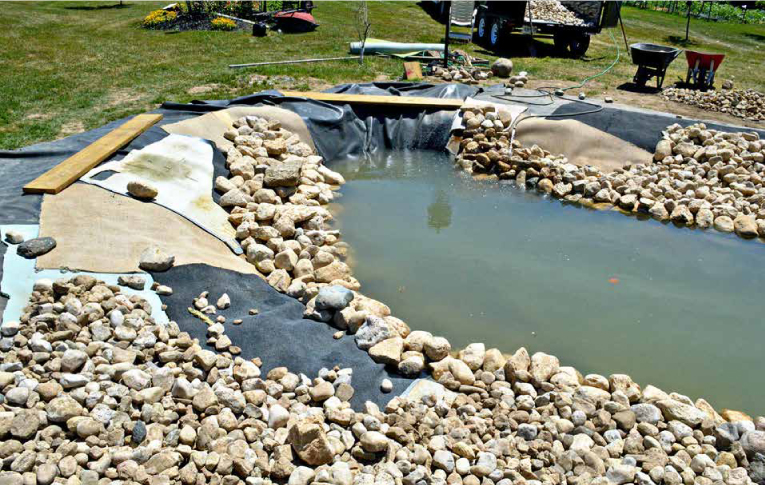
The pond shown in figure 23 is mostly finished. Water is being added, the overlayment is in place, and most of the stones are in place. You will notice that the liner at the top center of the picture is not protected with overlayment. This area will not require stones because the finished pond (figure 28) will have a dock covering this part of the liner.
Once the overlayment is in place, you can start placing stones on the planting shelf. Figure 24 is a cross-section of a pond showing the arrangement of stones for the shelf on the left and the beach area on the right.
Start by making a ring of large stones along the inner edge of the shelf. You want to select ones with flat bottoms and a fair amount of weight so that they will not roll into the bottom of the pond. For aesthetic reasons, vary their size; otherwise it will look like a ring of stones that is not very natural. As the water level goes down in summer, a few of the larger ones will pop up above the water level, while most will still be submerged. It is quite acceptable to have a few that sit above the water level even when the pond is full.
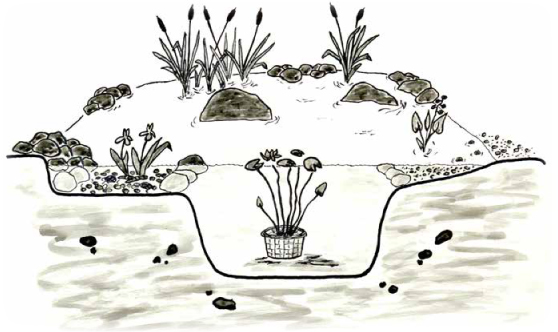
FIGURE 24
Cross-section of a pond showing the planting shelves on the left and the beach area on the right.
Incorporate some larger display rocks that sit on either the beach area or a planting shelf, so that most are above the waterline. These serve no useful purpose except to make the pond look much more natural. If you add more than one, make sure to vary their size and shape. Too many will take up too much planting space, and they’ll look unnatural. Figure 24 shows two such rocks. Let your creative juices flow for this job.
If your planting shelves are very wide, you might also want to add some flat rocks right in the planting area to provide places to stand while maintaining the plants. Keep in mind that every stepping stone reduces the space for plants in the pond, and you want as many plants as possible.
The next job is to put a ring of larger rocks around the outer edge of the planting shelf to give you a stable base for laying the stones that will hide the edge of the pond. In the finished pond, plants will hide most of these stones. The stones need to be big enough to support the rocks above them, but otherwise they can be any size or shape. It is a good place to use up your ugly rocks.
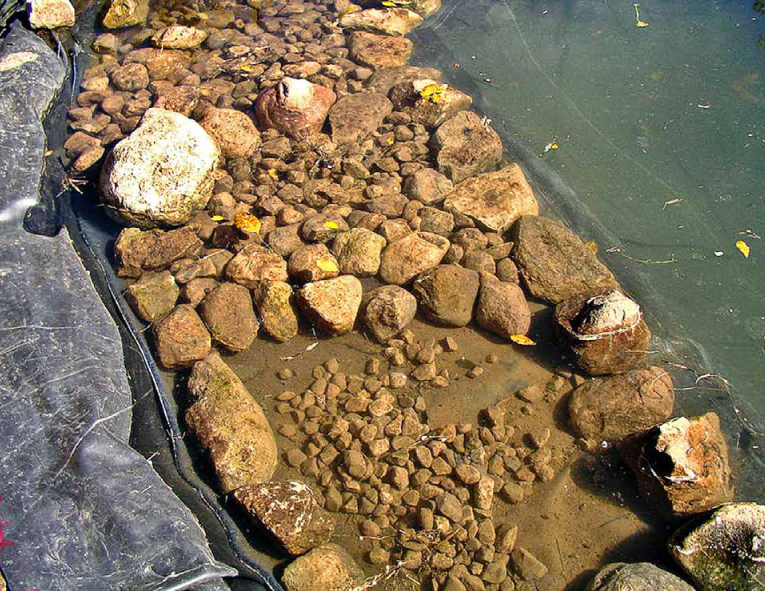
You have now created the inside and outside edge of the planting shelf, which is clearly visible in figure 25 as two rows of large rocks. It is time to fill the space between these rocks with small stones. A few have already been added in figure 25. These stones will give plants something to attach their roots to and provide a lot of surface area for microbes to live. You won’t see them in the finished pond, so don’t worry about their look or shape. Smaller is better since small ones provide a larger total surface area. I like to repurpose all of the small stones I rake out of my various gardens. Add them to a depth of at least two inches. Make sure you do not go as high as the stones on the inner edge of the shelf, or else they will fall into the bottom of the pond. The top part of figure 25 shows a planting shelf with all of the rocks in place.
As water fills the pond, it will be very easy for you to see how level your pond edge is. If it looks as if water will overflow at one spot, then you need to fix this low point. Either add soil under the underlayment to raise the low spot, or take soil away from the high spots. As water fills the pond, just keep walking around it and increase or decrease the height of problem areas.
As you level the pond, take notice of the amount of liner that is sticking up and over the edge. You want some liner above the final high waterline. If it is a bit short, you will need to decrease the height of the edge around the whole pond. If there is too much liner, you can decide to cut off the excess or raise the height of the pond.
A spillway should be added to control the flow of excess water. As you are leveling the edge and adding more water, start putting the spillway in place.
The spillway is a section of the pond where the edge is lower than every other point. It should be at least two feet wide; four feet is better for a larger pond. The low spot of the spillway should be four inches below the top edge of the pond.
Remove the soil from under the underlayment so that the level of the spillway is at the correct height. The water level of the pond will never go higher than the height of the spillway. It should slope away from the pond and extend several feet from the edge. It is critical that any water running along it can’t run under the pond liner.
Cover the spillway with some excess liner, which you can cut from the surplus overhang at round sections of the pond. Underlayment and overlayment are not needed here, since a few punctures will not cause a problem. Make sure that the liner of the spillway is tucked under the liner of the pond, as shown in figure 26.
In most cases, water will not be flowing into the pond, and you will just fill it using a garden hose. However, if the land surrounding the pond is higher than the edge, you can use it to provide water to top it up. If the pond is near the house, you can direct water from downspouts into the pond. In both cases, you need to figure out how to get the water flowing into the pond using an inflow, which is the reverse of a spillway. Use excess pond liner to direct water into the pond. Landscape the area so that the incoming water flows into a small creek that is lined and sloped to direct the water into the pond. The flowing water should not wash soil into the pond. An important difference between a spillway and an inflow is that the inflow liner should be laid on top of the pond liner, not under it for the spillway. This will ensure that water does not run under the pond liner.
With the pond now level and mostly filled with water, you will see pond liner all the way around the edge of the pond. The next step is to cover it as completely as possible. The pond liner is UV light resistant, but over time, sunlight will weaken it. Cover the liner very well so that no sunlight can reach it. This will also make the pond look more natural.
The trick to hiding the liner is to add the stones slowly, one at a time, positioning each one to fit tightly to the ones around it. It is a giant jigsaw puzzle where no stone seems to fit well. I like to pick up several stones and keep trying them until they fit well. Start with larger stones about the size of a cantaloupe, and then add smaller stones to fill any gaps. The pond will look more natural if you use a variety of different sized stones. When they are all in place, the pond will look very artificial with a ring of clean stones all the way around. Don’t worry about this look. Most of the edge will eventually be covered with plants.
Several different materials can provide beach area. If the beach will be used by swimmers, use sand, which is easy to walk on, although it is so fine that it tends to run away to the deep part of the pond. A better option if you are not going to walk on the beach is to use small stones that are one to two inches in diameter. They look just as good, stay in place better, and animals can still use the beach. Add a few flatter stones showing just above the waterline to provide a drinking spot for birds.
The stones in the beach area are held in place by a ring of rocks on the inner shelf, similar to the planting shelves. Figure 24 shows the detail of these rocks.
The spillway and inflow also need stones to cover the liner. At the edge of the pond, they should be large enough to hide the liner, but not so large that they prevent the movement of water. Place smaller stones farther away from the pond.
One of your last jobs is cut off the excess liner with a large pair of scissors. Never do the final cut until the pond is completely full of water and the edge has been leveled. Both of these tasks will change the amount of liner that you can cut off. Leave enough to overhang the edge of the pond by at least 6 inches (12 inches is safer) because soil settles and this excess amount will allow you to easily fix any problems around the edge. Then cover the remaining liner with either stones or soil.
Figure 28 shows a friend’s pond that was used as a demonstration pond for this chapter. All of the rock work is complete. The overhanging dock has been added, and the area around the pond has been landscaped. Many more plants still need to be added. Right now it has that spanking clean new look, but it will look more and more natural each year.
Congratulations, the hard work is done. It is now time to add fish and plants, which are discussed in the next two chapters.
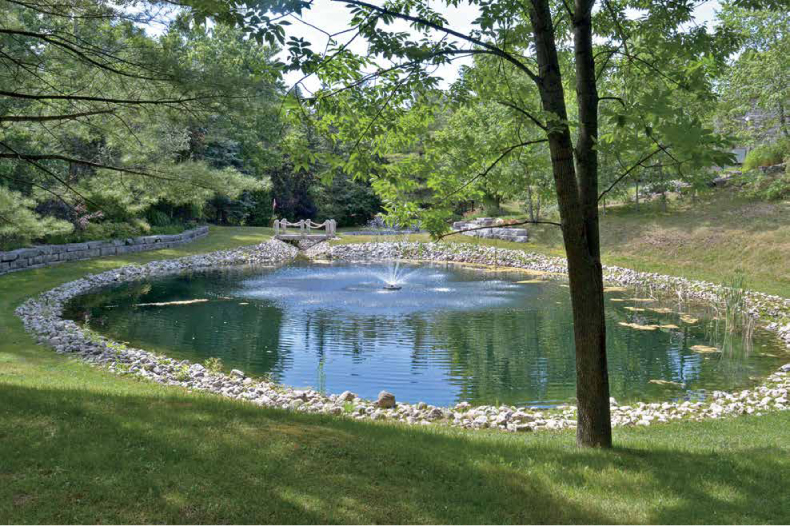
Display pond at a nursery.
Credit: David Pagan Butler, Organic Pools, by permission.
Natural swimming pool designed by Organic Pools.

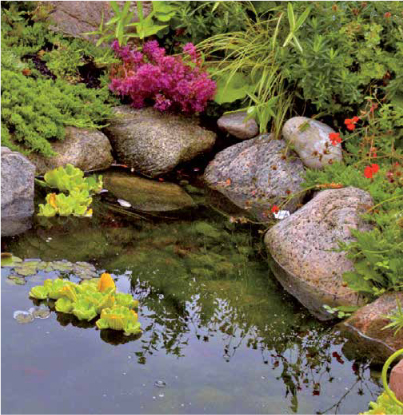
New pond ready for planting.
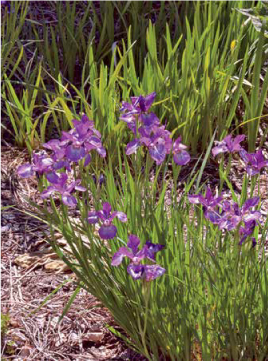
Siberian iris.
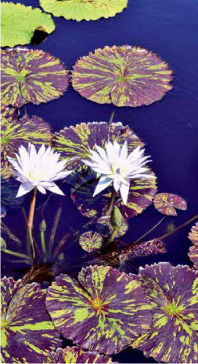
Tropical waterlily.
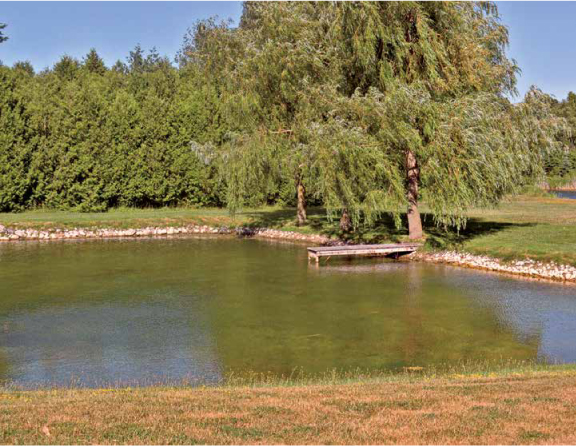
Large pond used for swimming and raising trout.
Lined pond.
A dock provides easy access to the pond.
Finished pond.

Hardy waterlily.
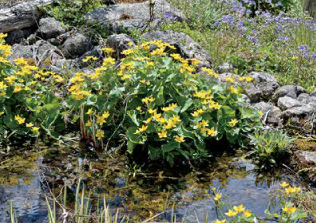
Marsh marigold.

Tropical waterlily.

Author’s hilltop pond and oriental teahouse.
Pond built into a small hill.

InAweofGod’sCreation, creative common license
Pickerel weed.
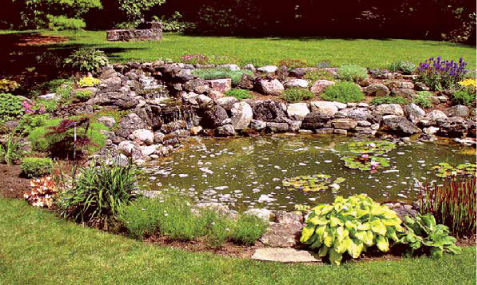
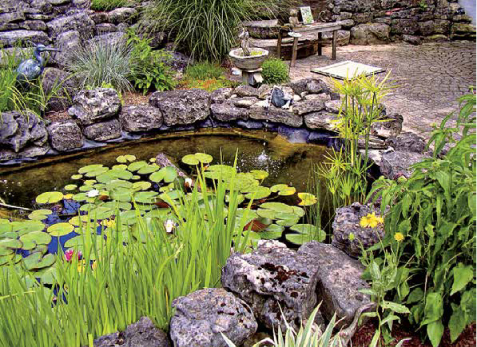
Formal pond.
Pond built using native stones.

Credit: Forest and Kim Starr, under creative common license, photo was modified.
Umbrella palm.
A bridge provides good viewing points for wildlife.
Farm ponds can be used for irrigation and watering livestock.
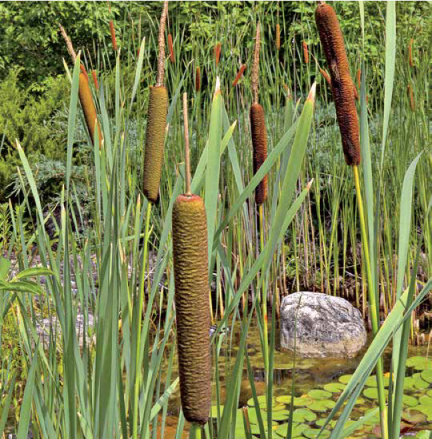
Cattail.
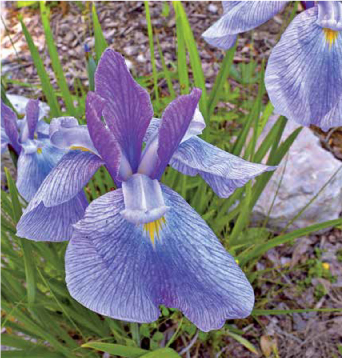
Japanese Iris.