
GEOMETRY
LEARN ABOUT SHAPES

Geometry is the study of shapes. There are a lot of different ways a shape can be. It can be flat (like a circle or a square) with two dimensions—length and width. It can be solid (like a block or a ball) with three dimensions—length, width, and height. A shape can be made from lines connected at corners (mathematicians call these edges and vertices; we’ll learn more about those in chapter 9), or it can be made up of curves. A shape can have different numbers of edges and corners, or a different arrangement of curves from another shape. A shape can have different sizes.
In this chapter we’ll make different types of shapes. Learning to recognize and make different kinds of shapes—to see what makes them similar and different—is a great way to start thinking about geometry and to see how we are surrounded by mathematical objects in our daily lives.
Think About It
Imagine a triangle—it’s a flat shape that you can draw on a piece of paper. Can you think of different ways you could build up a triangle into a solid object? What could those different shapes look like? How many can you think of?
LAB 1
PRISMS
Any flat shape can be made into a prism. In this lab, we’ll use toothpicks and gumdrops to create three-dimensional triangular prisms. If you mess up a gumdrop, eat it to hide the evidence!
Materials
 Toothpicks
 Gumdrops
MAKE A TRIANGULAR PRISM
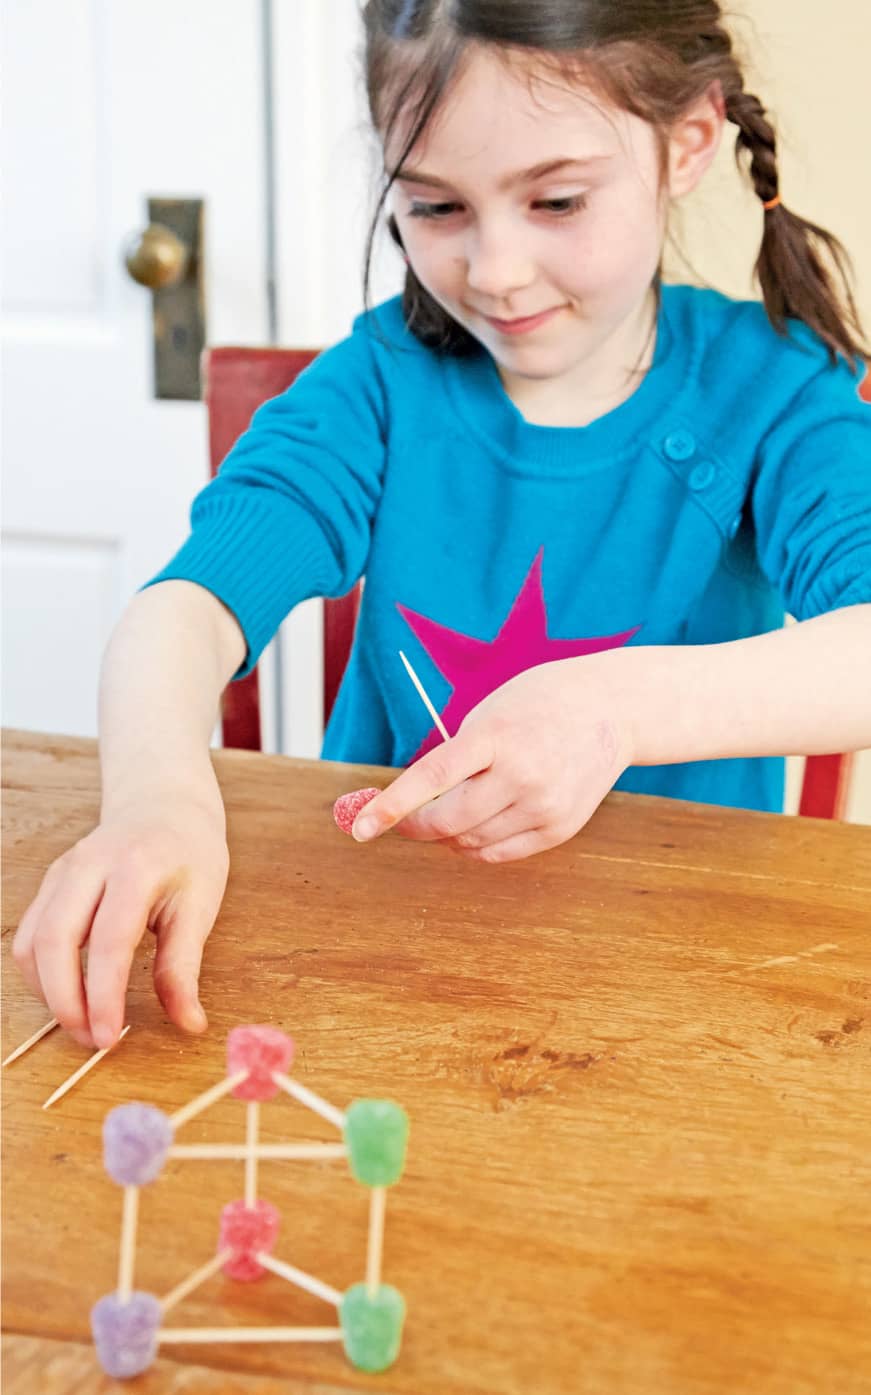
1. Make a triangle with three toothpicks and three gumdrops. To make it sturdy, push the toothpicks almost all the way through the gumdrops. Then make an identical triangle. These shapes will be strongest if you put the toothpicks into the gumdrops at the correct angle and don’t reposition the toothpicks. With practice, you’ll get better at putting the toothpicks in at the angle you want (fig. 1).
2. Take one of the triangles and lay it flat. Stick a toothpick vertically (up and down) in each gumdrop (fig. 2). What shape do you notice that the points of these three toothpicks make in the air?
3. Carefully position your second triangle on top of the three toothpicks from step 2 and connect the shapes into a triangular prism (fig. 3).
4. A prism is an oblique prism if the top and bottom are not directly over each other when sitting flat on the bottom. Try making an oblique triangular prism (fig. 4).
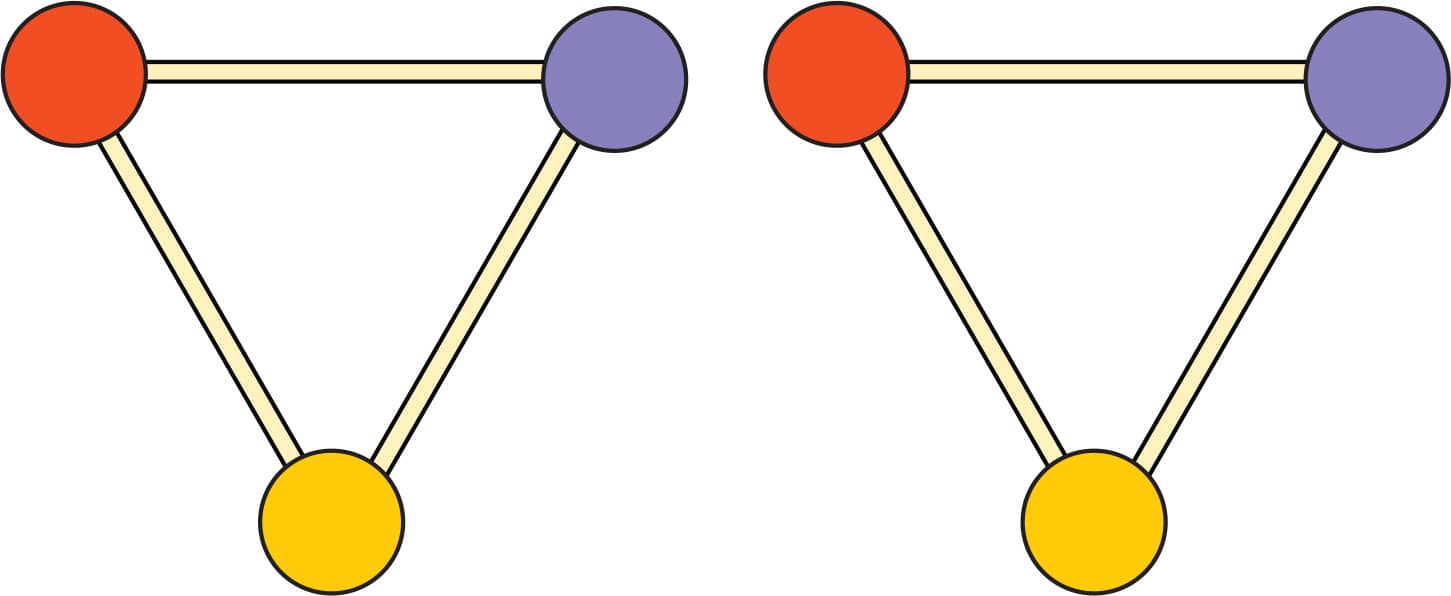
FIG. 1: Make two identical triangles.

FIG. 2: Lay one of the triangles flat and stick a toothpick in each gumdrop.
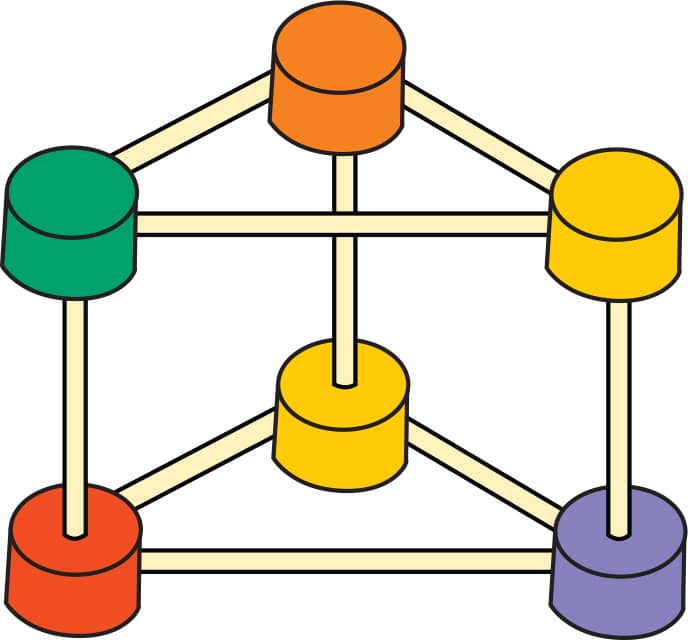
FIG. 3: Place the second triangle on top to form a triangular prism.
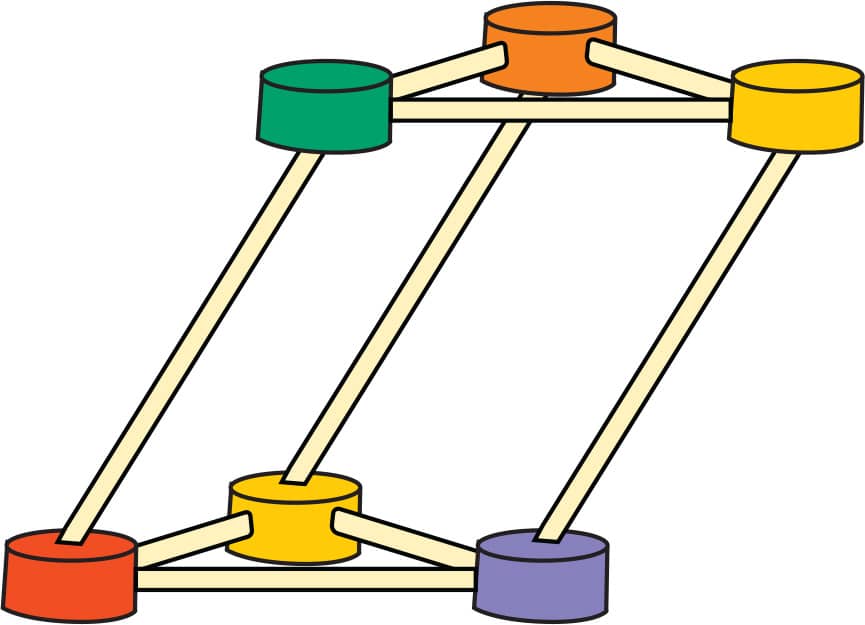
FIG. 4: Try making an oblique triangular prism.
LAB 2
PYRAMIDS
Turn gumdrops and toothpicks into pyramids of all shapes and sizes!
Materials
 Toothpicks
 Gumdrops
 Extra-long toothpicks, small baking skewers, or dry spaghetti or fettuccini noodles
MAKE A PYRAMID
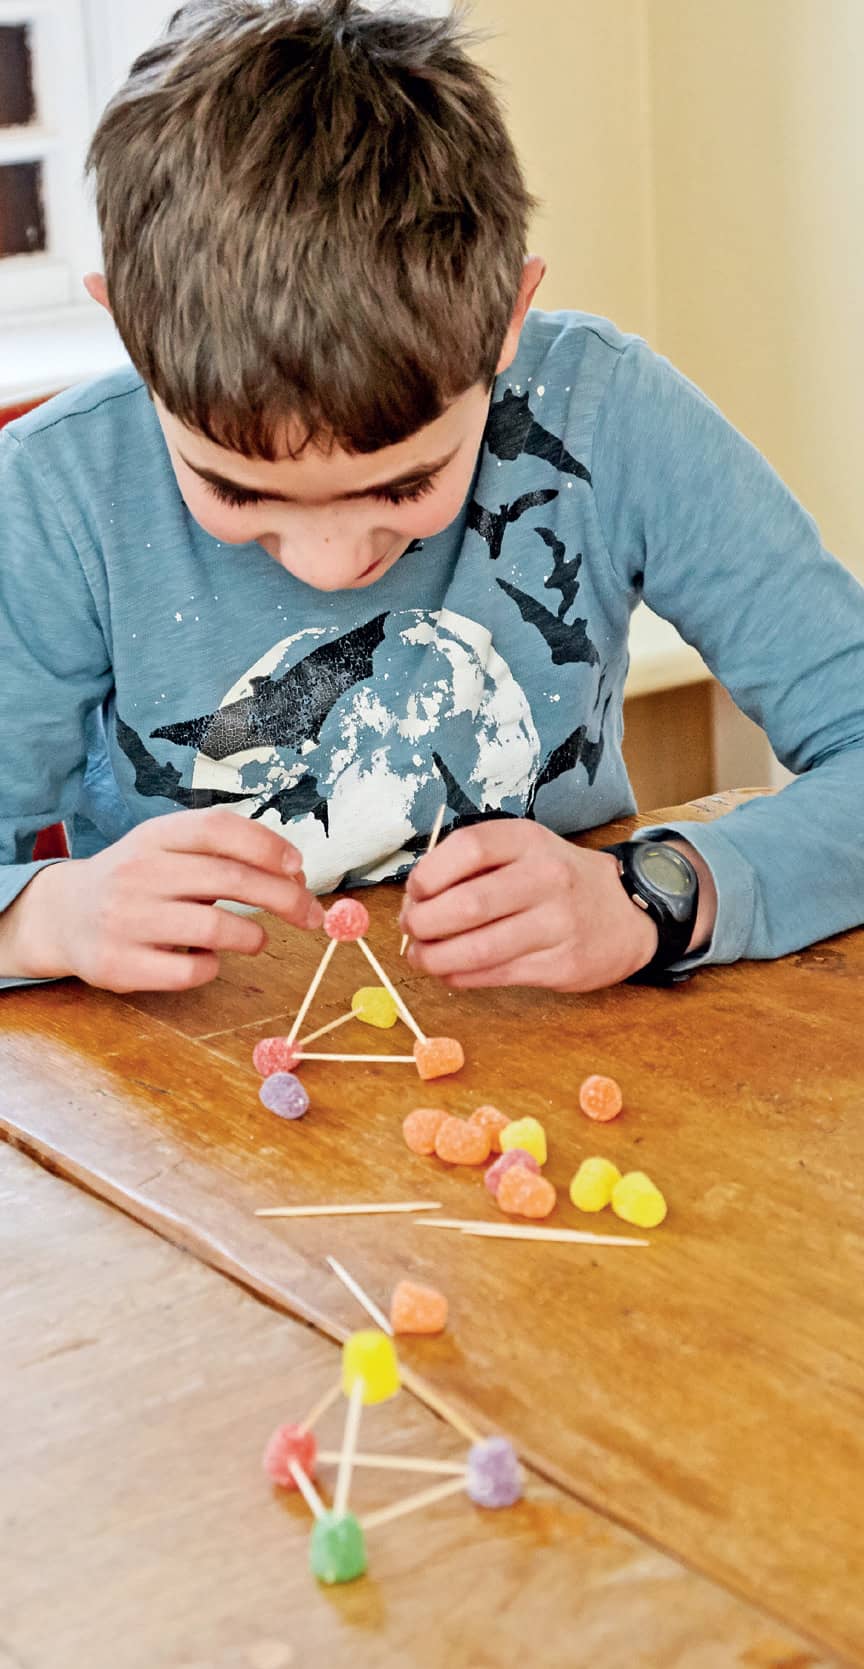
1. Make a flat square using toothpicks and gumdrops (fig. 1).
2. From each gumdrop, aim a toothpick upward at an angle so that they will all meet at a center point (fig. 2).
3. Connect all the points with a single gumdrop. This is a “square pyramid,” the same shape as the Egyptian pyramids (fig. 3)!
4. Now that you know how to make a pyramid, try making more with different base shapes, like a triangular pyramid or a pentagonal (five-sided base) pyramid (fig. 4).
5. Using any base shape you want, make an oblique pyramid (it should look like it is leaning). The length of the sides going to the apex (top) of the pyramid will all be different, so don’t use toothpicks; make the lengths you need by breaking the skewers or noodles (fig. 5).
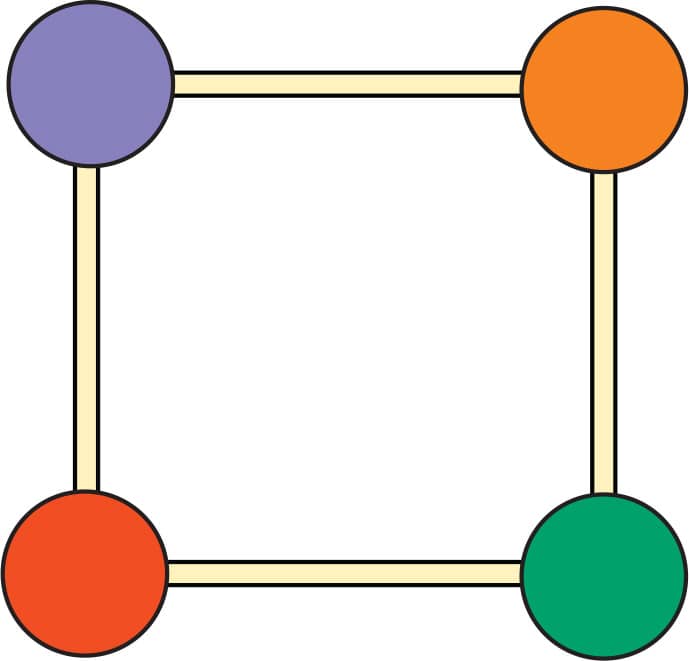
FIG. 1: Make a flat square.
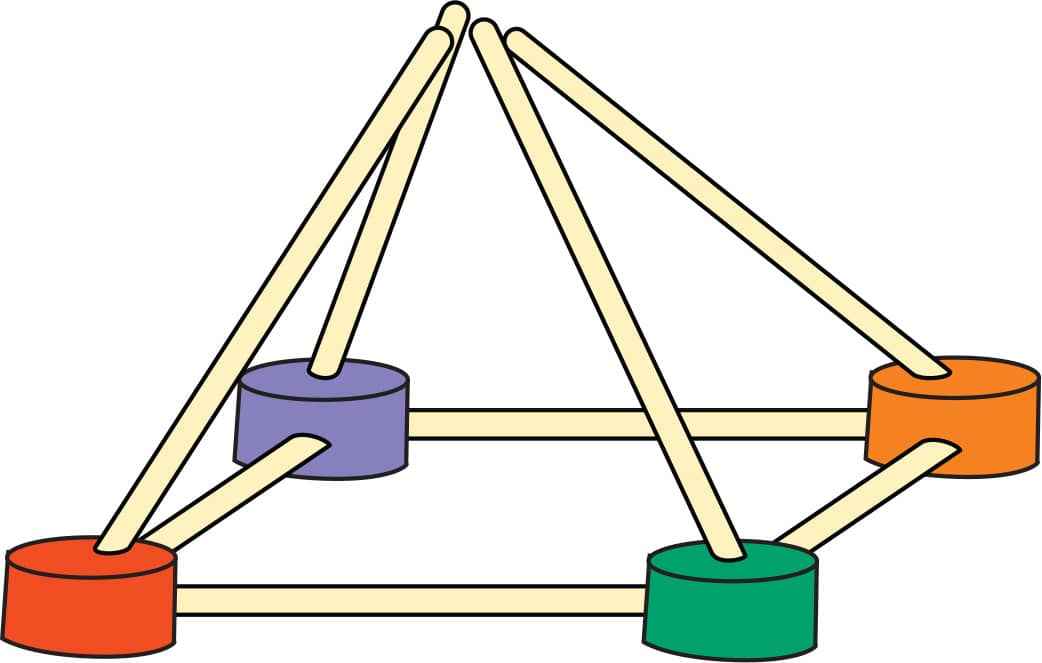
FIG. 2: Aim a toothpick upward from each gumdrop so they meet in the center.
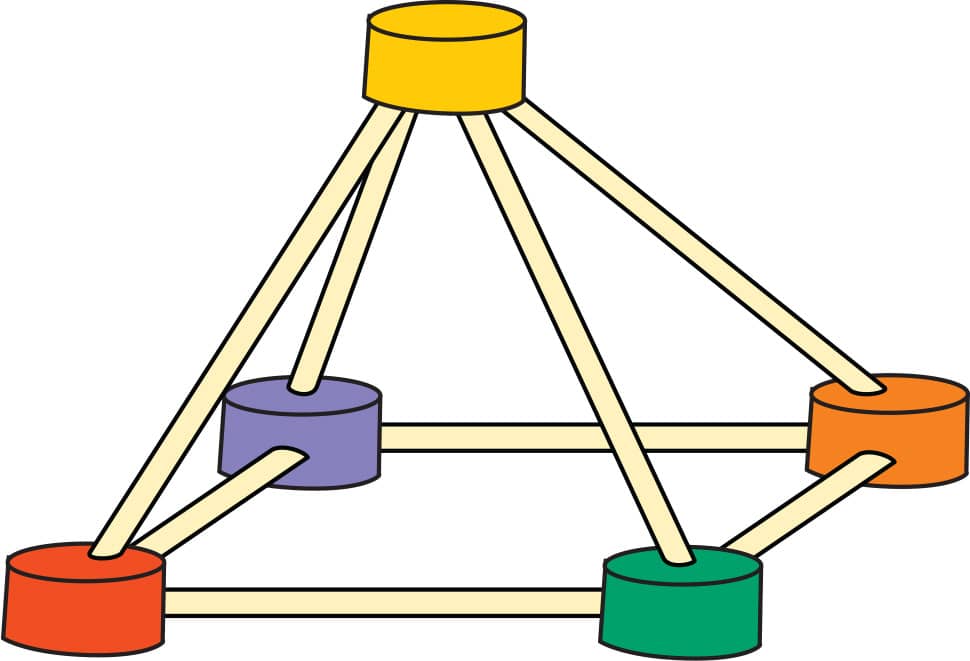
FIG. 3: Connect all the toothpicks with a single gumdrop.

FIG. 4: Try a different base shape.
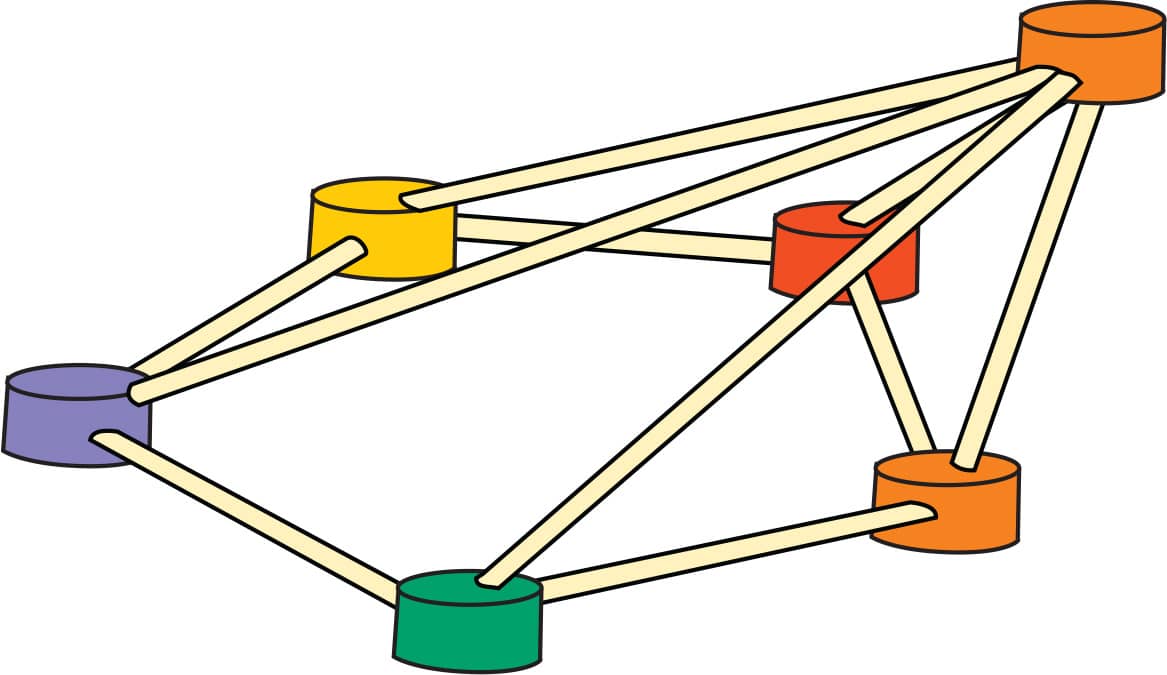
FIG. 5: Using any base shape you want, make an oblique pyramid.
LAB 3
ANTIPRISMS
A PRISM has the same top and bottom shape, connected by rectangles or parallelograms. An ANTIPRISM also has the top and bottom shape the same, connected with triangles instead!
Materials
 Toothpicks
 Gumdrops
MAKE AN ANTIPRISM
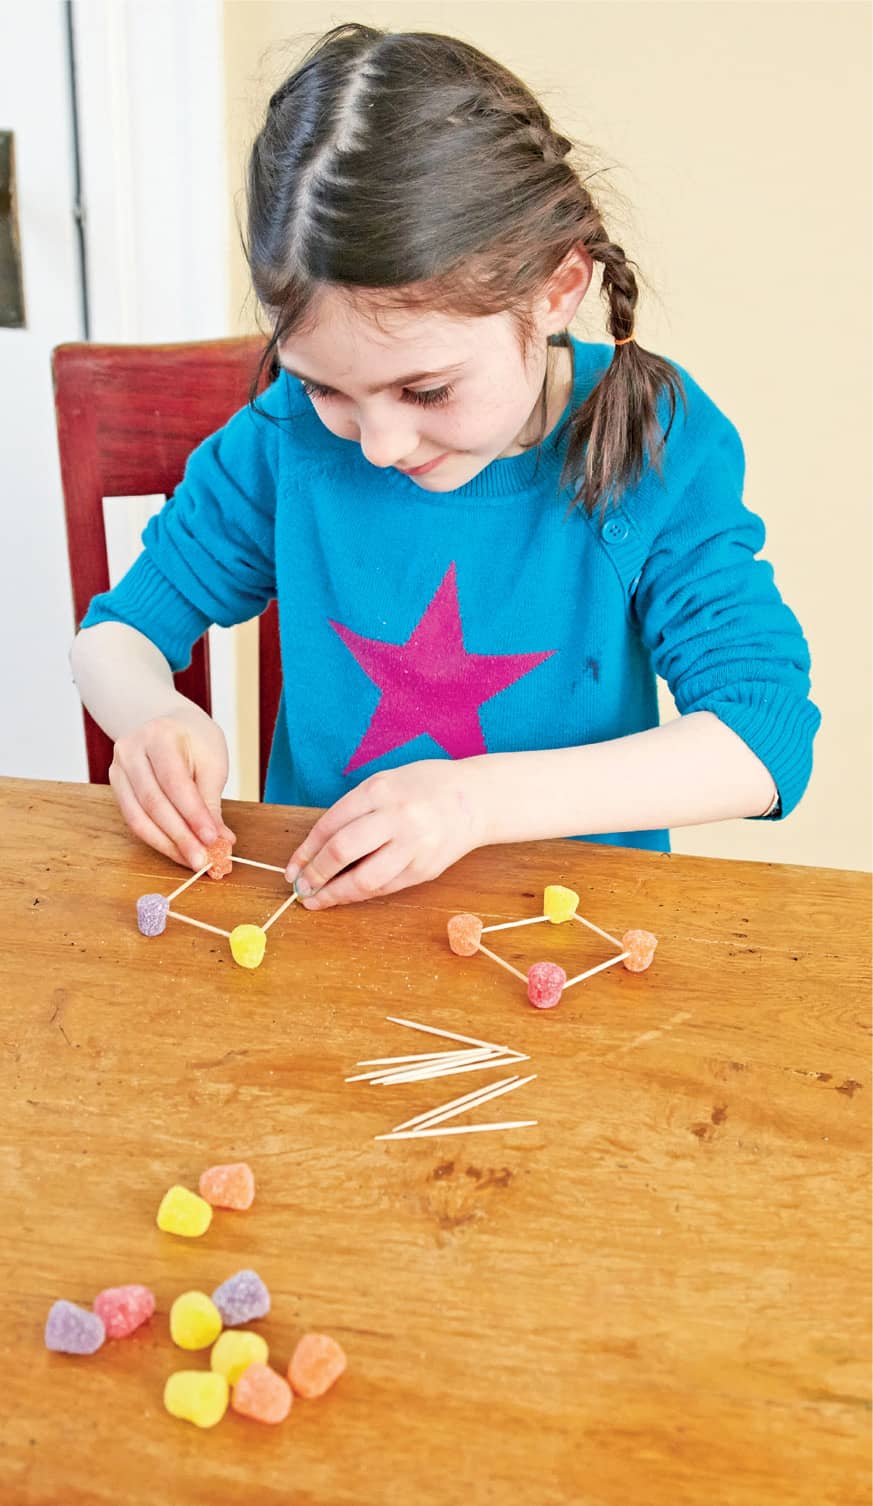
1. Make two squares out of toothpicks and gumdrops (fig. 1).
2. Hold the top square over the bottom one, then rotate it so that the corner of the top square juts out over the middle of the edge of the bottom square (fig. 2).
3. We are going to make a triangle out of the corner of the top square and the edge of the bottom square. Connect this triangle with toothpicks (fig. 3).
4. Moving around the shape, continue making triangles that connect the corner of one square to the edge above (or below) the other square (fig. 4).
5. When you’ve completed the band of triangles to connect the two shapes, you’ve made an antiprism—a shape with an identical top and bottom, with all the side faces being triangles. It should look like a twisted prism (fig. 5).
6. Try making a pentagonal antiprism and a triangular antiprism (fig. 6). The triangular antiprism will be a challenge. Keep both—we’re going to use them in Lab 4.
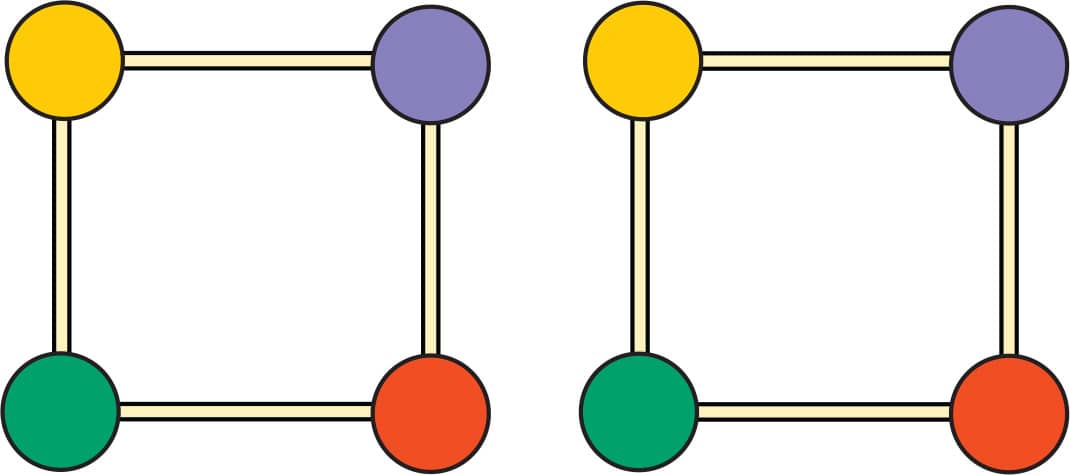
FIG. 1: Make two squares.
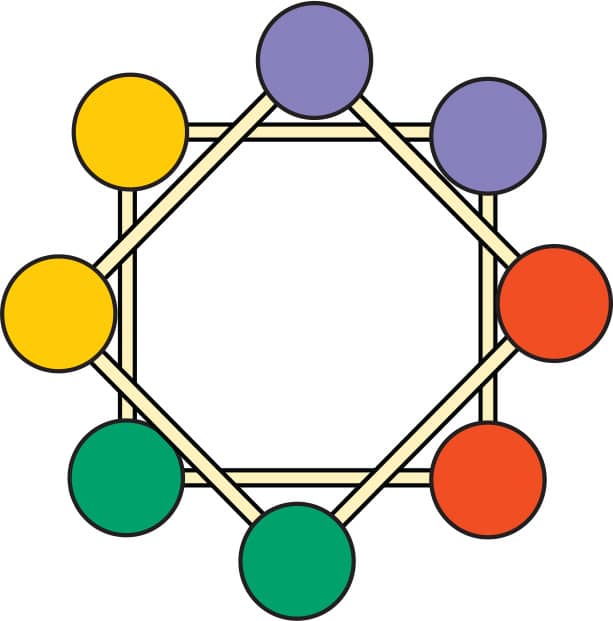
FIG. 2: Hold the top square over the bottom one, then rotate it.

FIG. 3: Make a triangle out of the corner of the top square and the edge of the bottom square, and then connect this triangle with toothpicks.
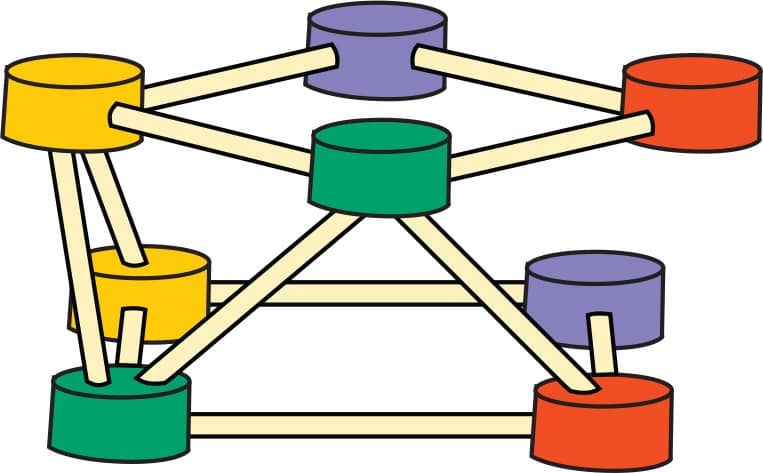
FIG. 4: Continue making triangles that connect the corner of one square to the edge above (or below) the other square.
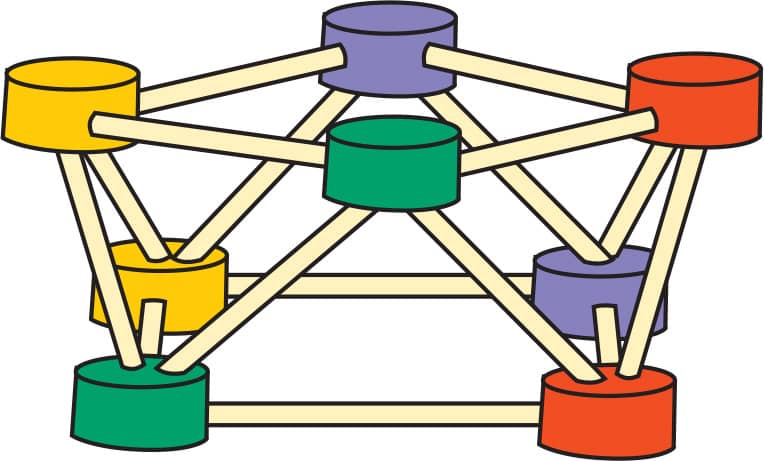
FIG. 5: You’ve made an antiprism.
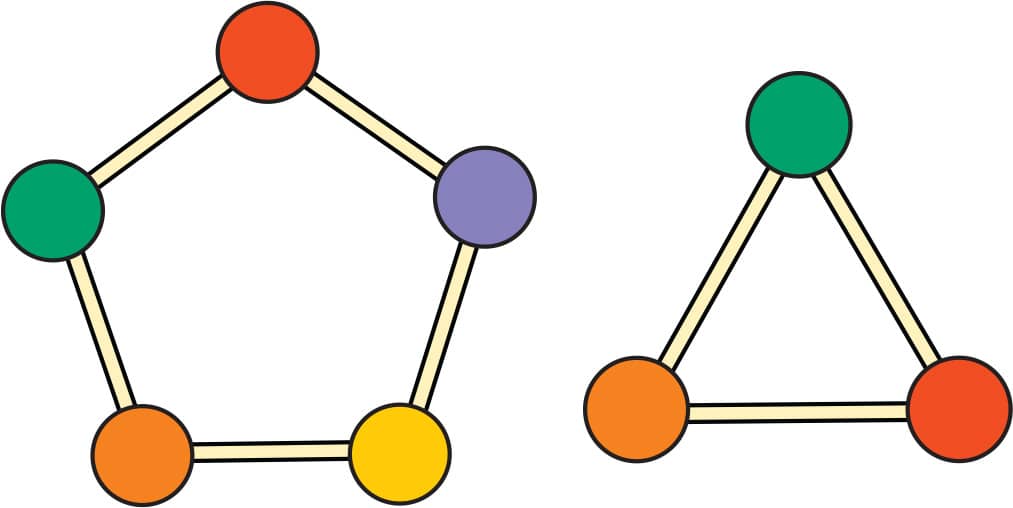
FIG. 6: Get ready for Lab 4 by making a pentagonal antiprism (starting with a pentagon) and a triangular antiprism (starting with a triangle).
LAB 4
PLATONIC SOLIDS
Just about any shape can be made into a prism or pyramid, but there are only five Platonic solids.
Materials
 Toothpicks
 Gumdrops
ACTIVITY 1: MAKE A TETRAHEDRON
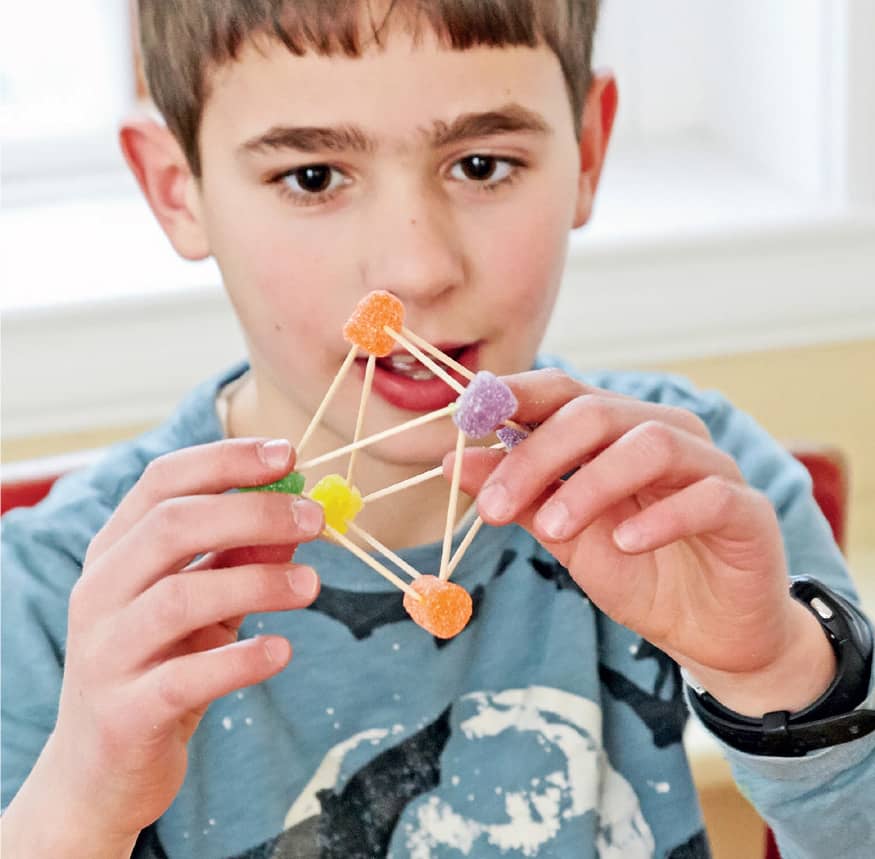
1. Make a triangle from toothpicks and gumdrops (fig. 1).
2. Attach toothpicks to each gumdrop aimed upward toward a center point. Connect the toothpicks with a gumdrop (fig. 2).
3. Verify that all the sides have the exact same shape. Count the number of toothpicks attached to each gumdrop. Each vertex (corner) should have the same number of toothpicks attached.
This is a tetrahedron! In addition to being a Platonic solid, it is an example of another type of shape from this chapter. What else could this shape be called?
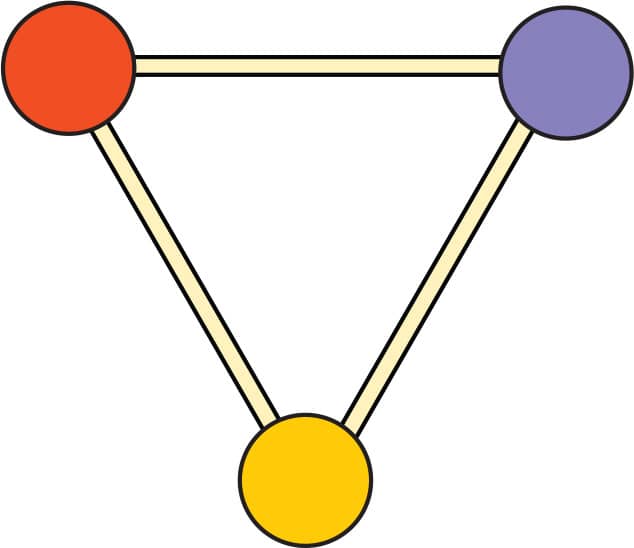
FIG. 1: Make a triangle.
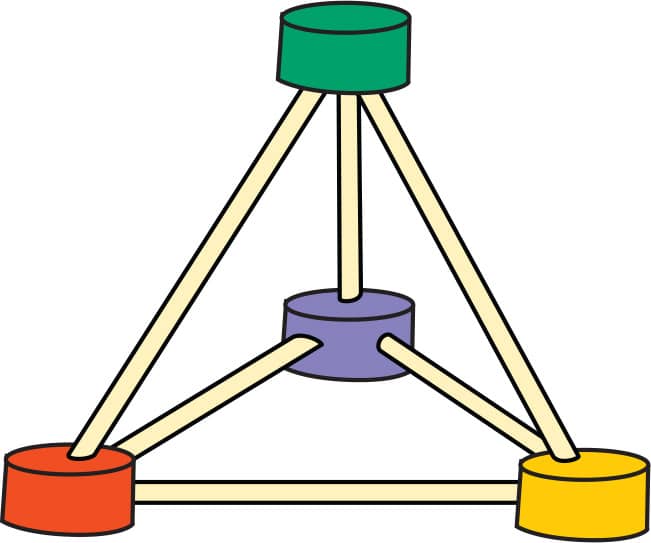
FIG. 2: Connect a single gumdrop above the base.
ACTIVITY 2: MAKE A CUBE
1. Make a square from toothpicks and gumdrops (fig. 1).
2. At each gumdrop vertex, add another toothpick pointing straight up, and put a gumdrop on it (fig. 2).
3. Connect the top gumdrops with toothpicks (fig. 3).
This is a cube! In addition to being a Platonic solid, the cube is an example of another type of shape from this chapter. What else could this shape be called?
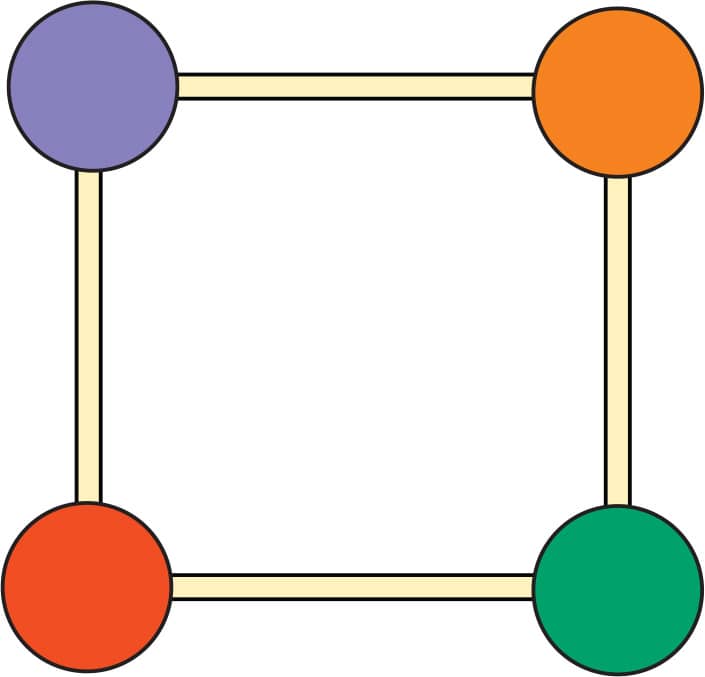
FIG. 1: Make a square.
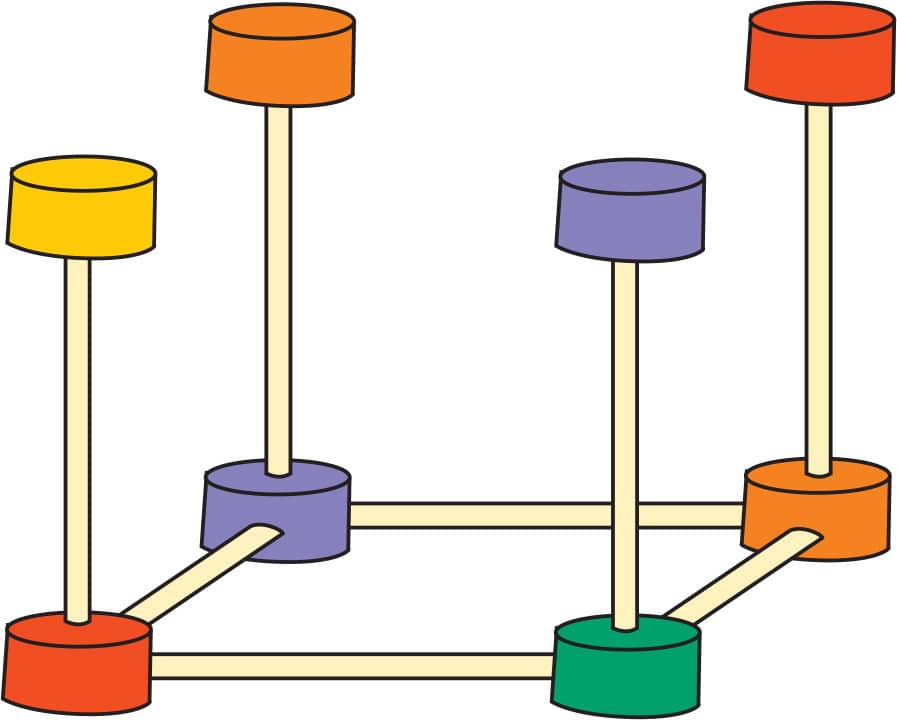
FIG. 2: At each gumdrop vertex, add another toothpick pointing straight up, and put a gumdrop on it.
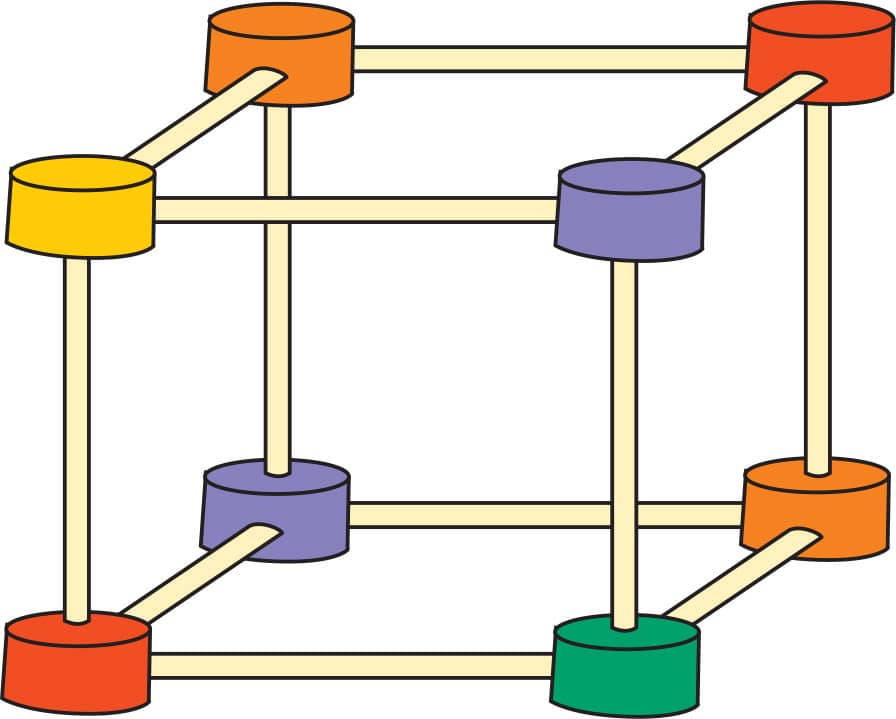
FIG. 3: Connect the top gumdrops with toothpicks.
ACTIVITY 3: MAKE AN OCTAHEDRON
1. Make a square from toothpicks and gumdrops (fig. 1).
2. Make your square into a pyramid by attaching toothpicks pointing up at an angle so that all of the toothpicks come together at a single point. Connect all the toothpicks with a single gumdrop (fig. 2)!
3. Turn the pyramid upside down and make another pyramid pointing the other way (fig. 3).
This is an octahedron! Like the tetrahedron, all of the sides are triangles. Can you find some ways in which the octahedron is different from the tetrahedron?
Compare the octahedron you built to the triangular antiprism that you built in Lab 3, step 6. What do you notice?

FIG. 1: Make a square.
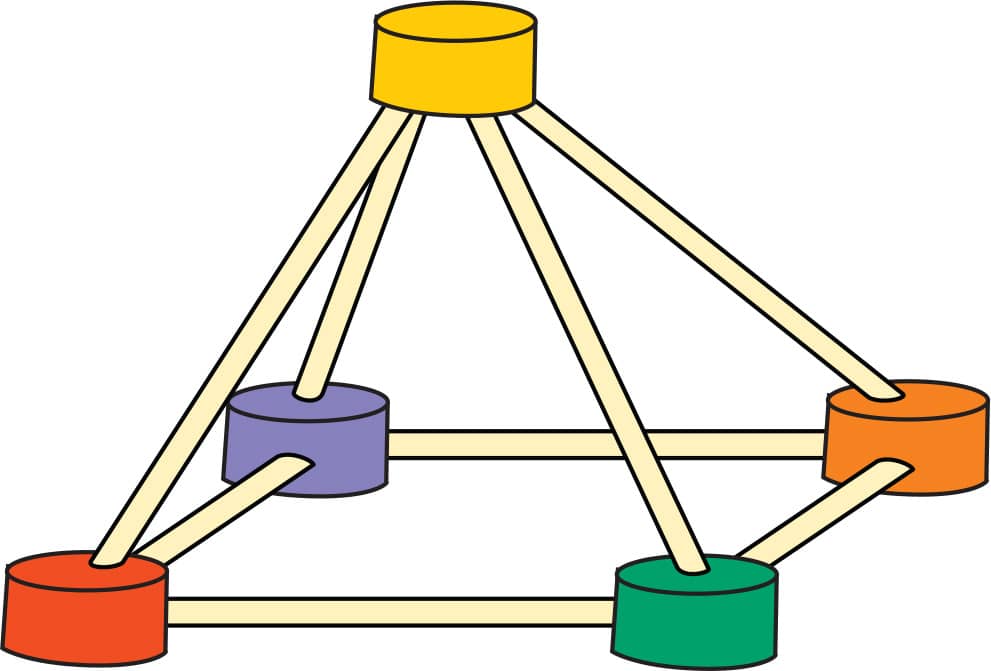
FIG. 2: Make a square pyramid.
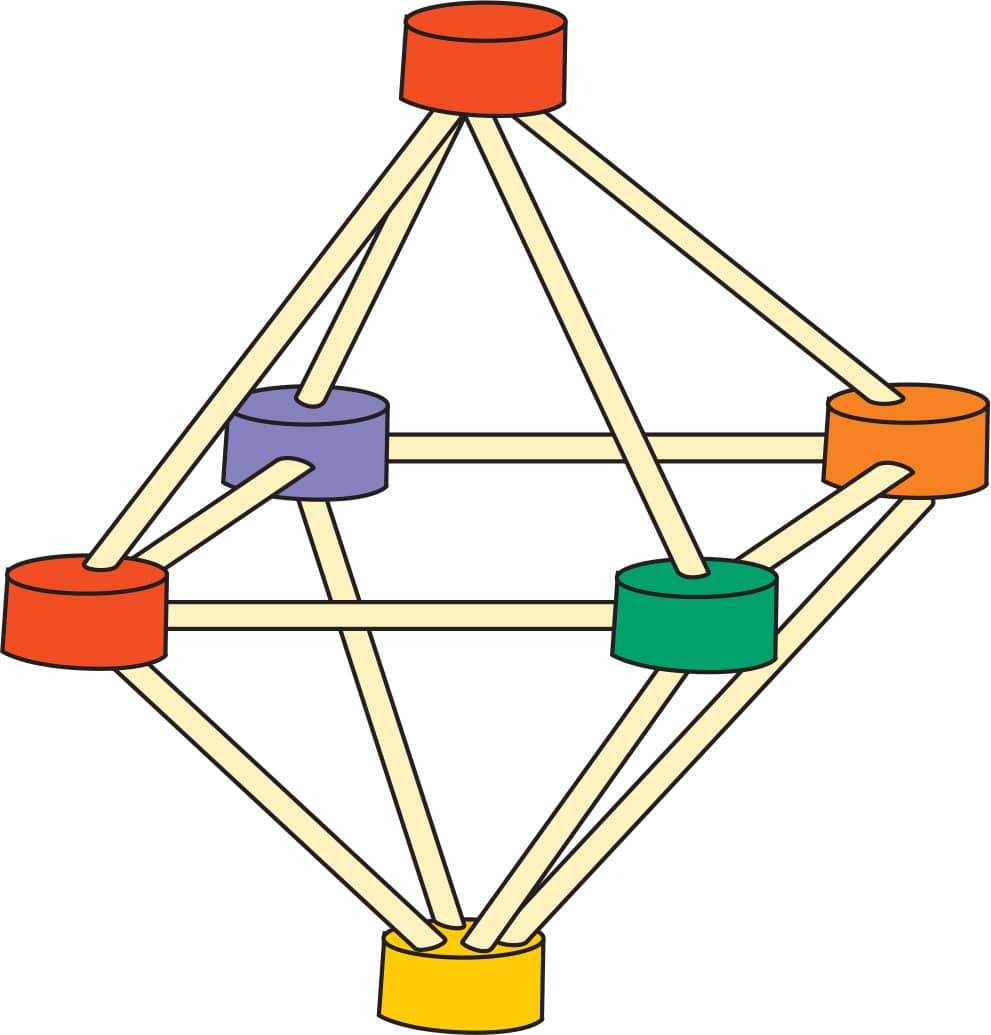
FIG. 3: Turn the pyramid upside down and make another pyramid pointing the other way.
ACTIVITY 4: CHALLENGE! MAKE A DODECAHEDRON
The dodecahedron has twelve sides, all of which are pentagons (five-sided shapes). It is the hardest Platonic solid to build, which makes it really fun! Don’t expect to make a good-looking dodecahedron on your first try—practice makes perfect.
1. Make a pentagon from toothpicks and gumdrops. It should look like the template in fig. 1.
2. Attach a second pentagon to the first pentagon. A good way to start is to hold the pentagon from step 1 at an angle to the pentagon template (fig. 1)—that will show you where to attach the next toothpicks and gumdrops (fig. 2).
3. Attach a third pentagon to what you built in step 2 (fig. 3). Hold your shape so that the edges of your two shapes match two of the sides of the pentagon template. Use the template as a guide to add the next toothpicks and gumdrops.
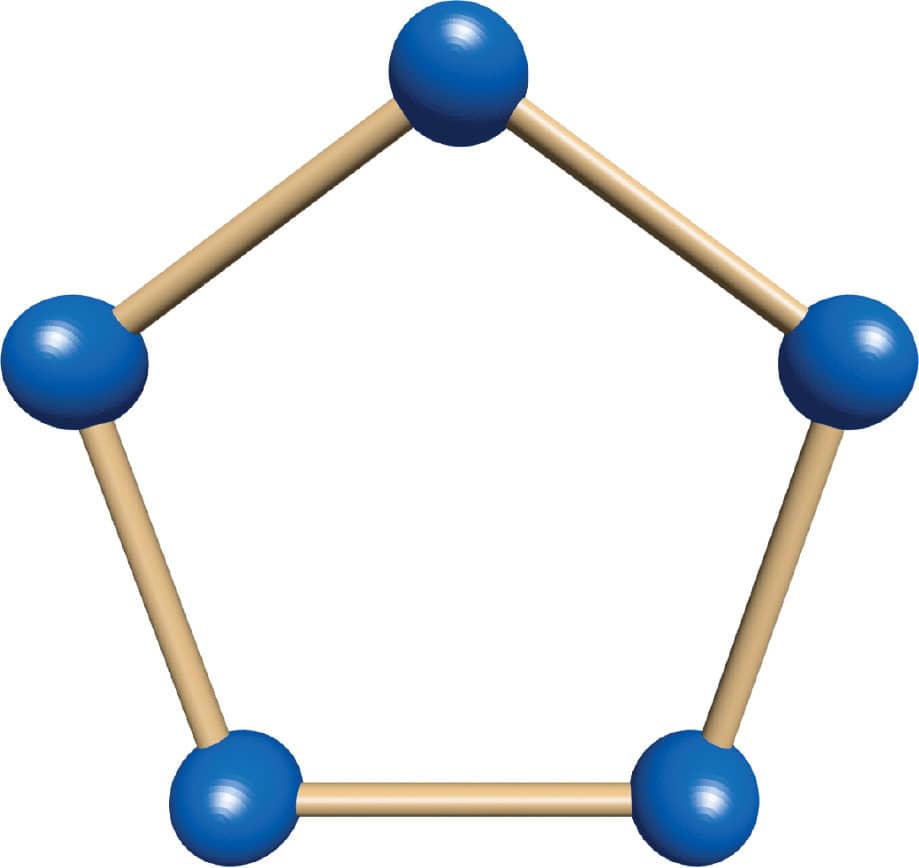
FIG. 1: Pentagon template.
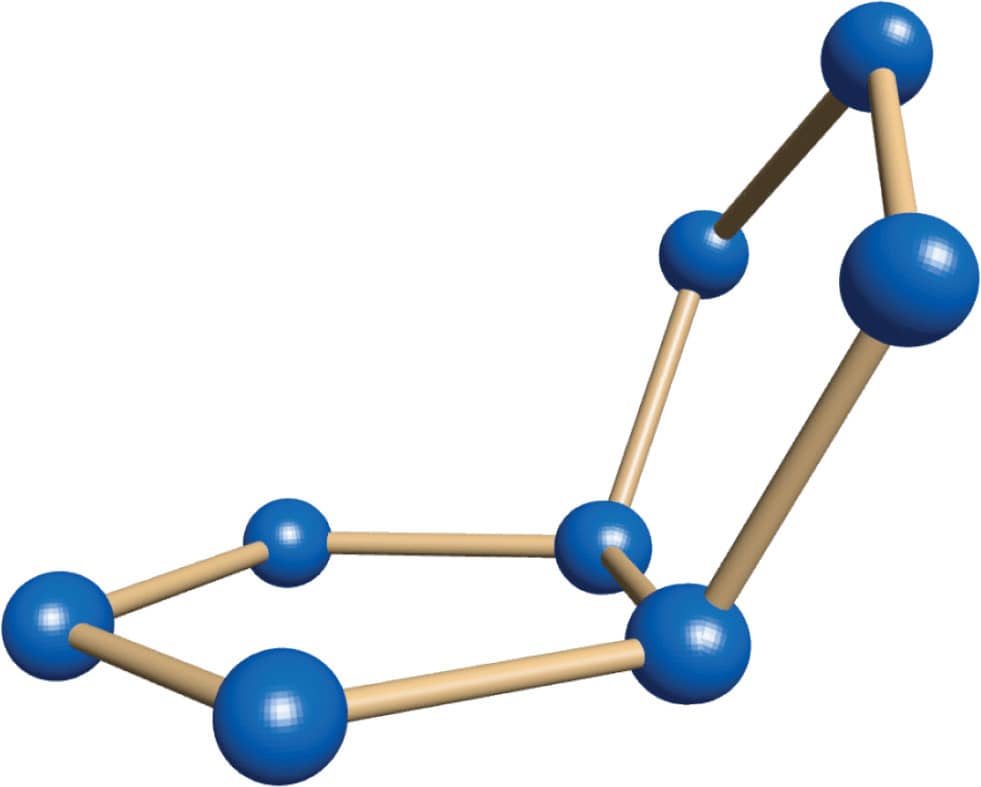
FIG. 2: Attach a second pentagon to the first pentagon.
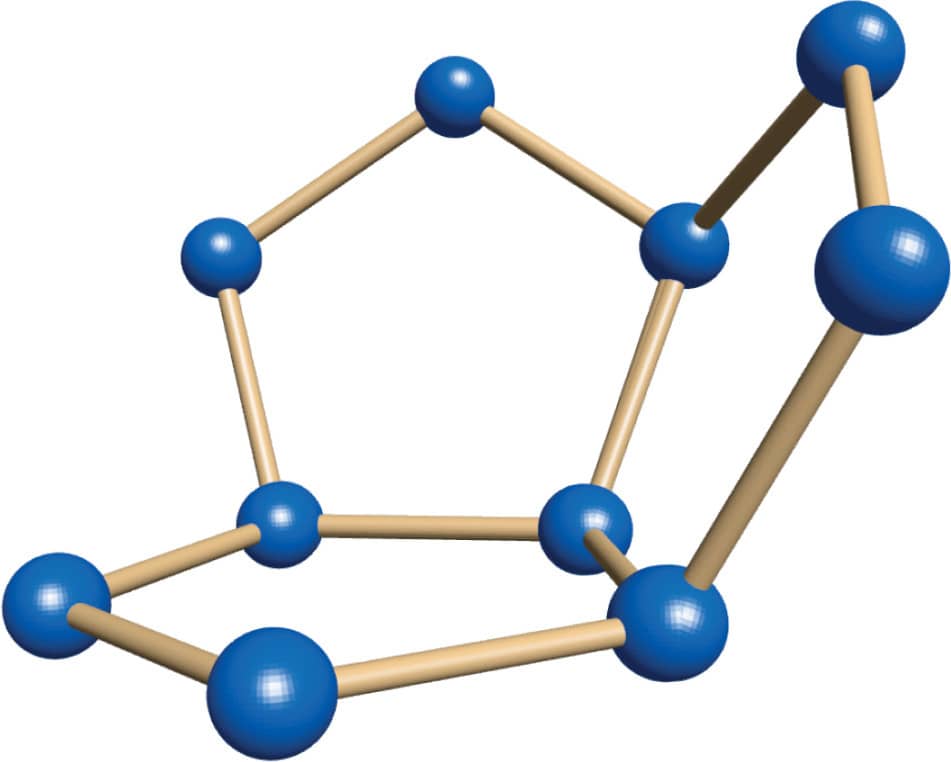
FIG. 3: Attach a third pentagon.
4. You’ve added pentagons to two of the edges of your original pentagon. Keep going around the original pentagon, adding more pentagons as you did in step 3, until you have a bowl shape made from five pentagons (fig. 4). This is the first half of the dodecahedron, but you’re more than halfway done!
5. Add five toothpicks to the edge of the bowl at each pentagon’s highest point so they angle in slightly (fig. 5).
6. Make another pentagon with toothpicks and gumdrops. Attach it to the sticking-up toothpicks from your bowl (fig. 6).
Congratulations on making a dodecahedron!
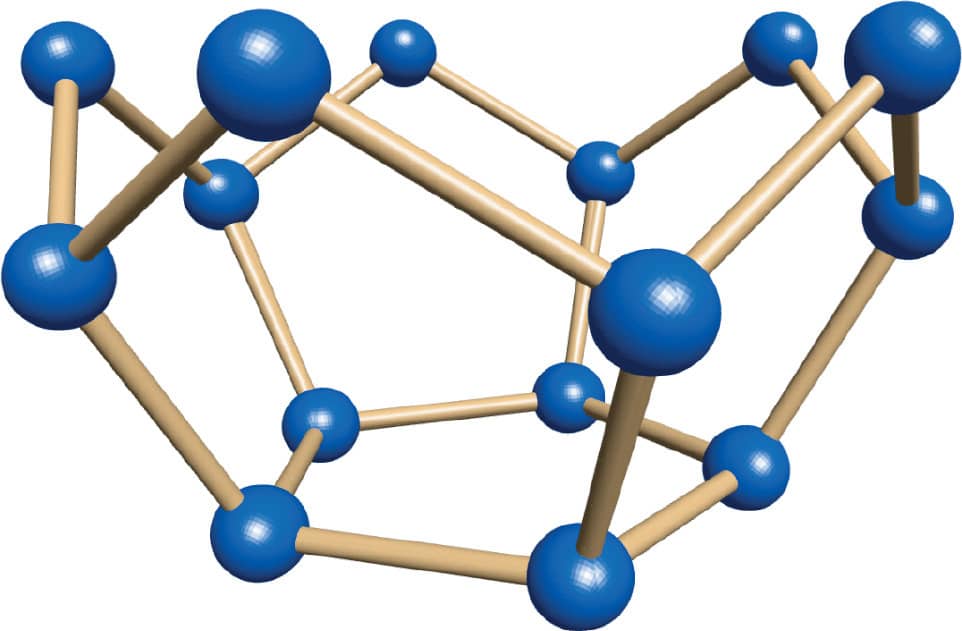
FIG. 4: Keep going around the original pentagon, adding more pentagons as you did in step 3, until you have a bowl shape.
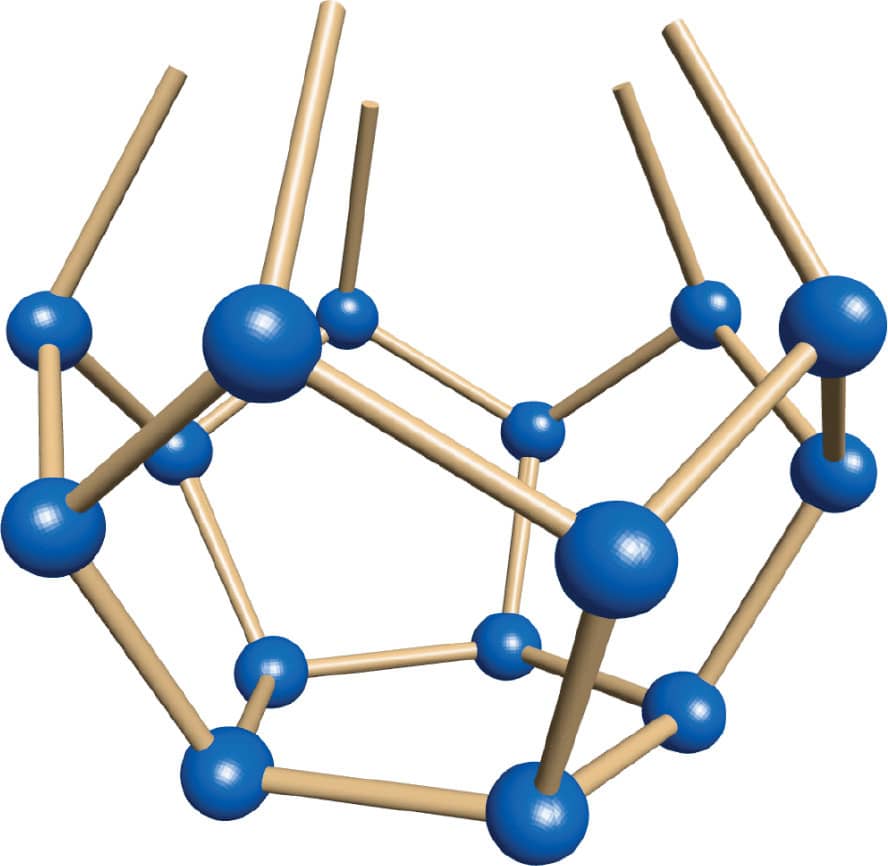
FIG. 5: Add a toothpick to each of the bowl’s five highest points.
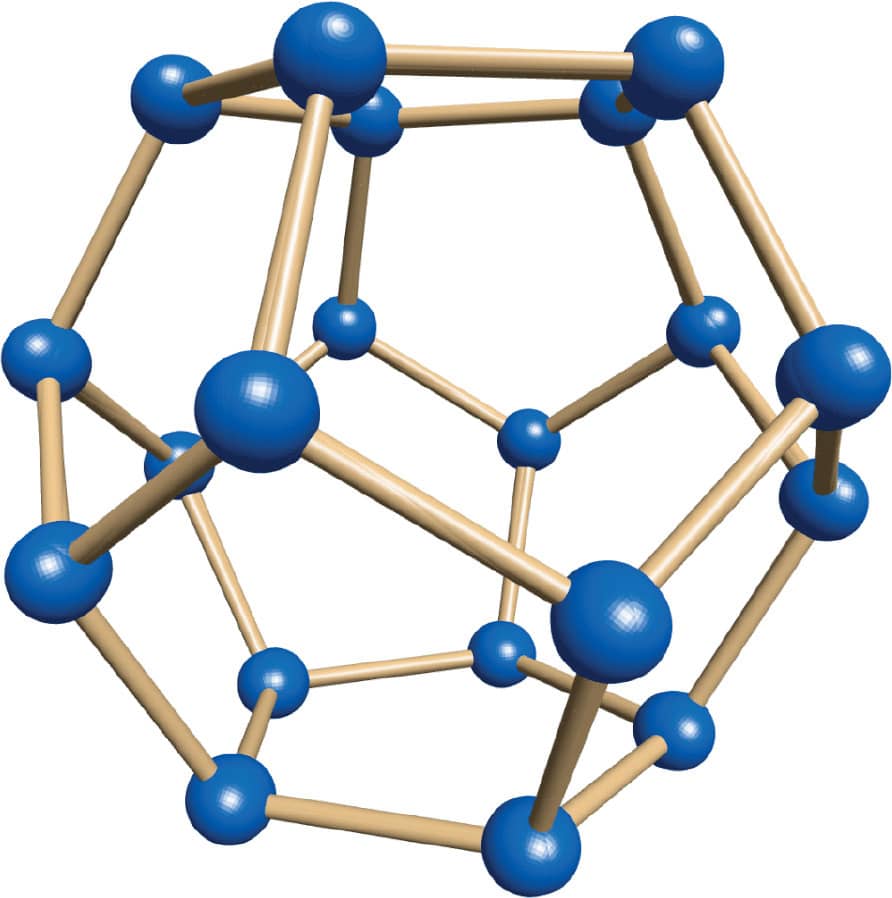
FIG. 6: Connect a pentagon to the top of the bowl.
ACTIVITY 5: CHALLENGE! MAKE AN ICOSAHEDRON

The final Platonic solid is the icosahedron. It has twenty sides, all of which are triangles. To make one, first make a pentagonal antiprism, like you did in step 6 of Lab 3 (fig. 1). This will be the central ring of the icosahedron. Next, add a pyramid to the top of the ring (fig. 2). Then turn the whole shape over and add another pyramid to the other side (fig. 3).
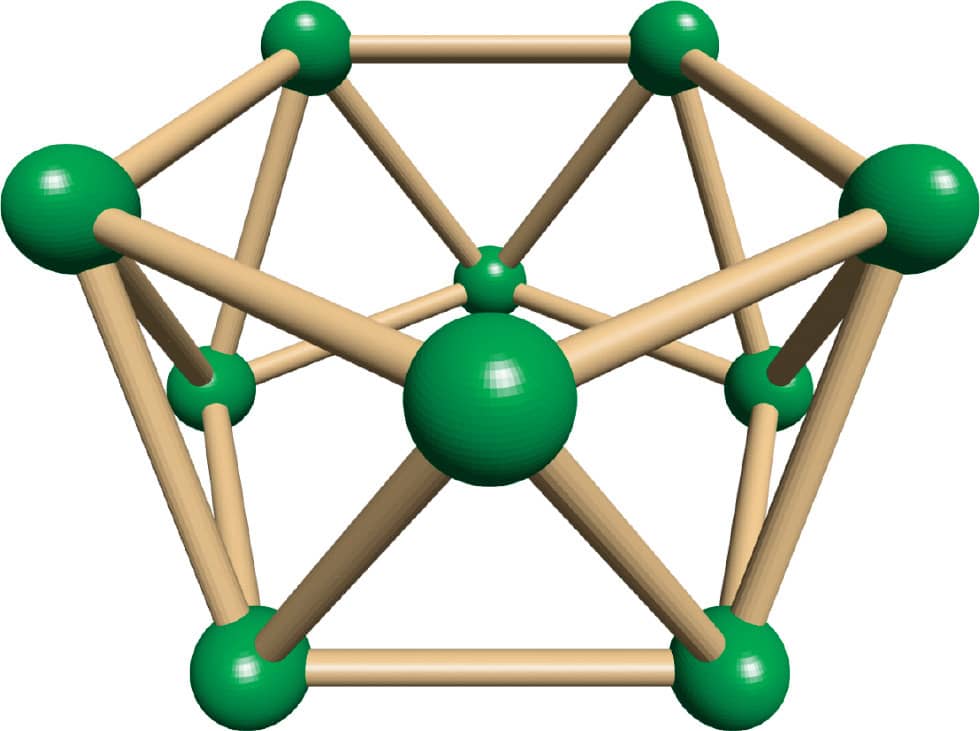
FIG. 1: Make a pentagonal antiprism.
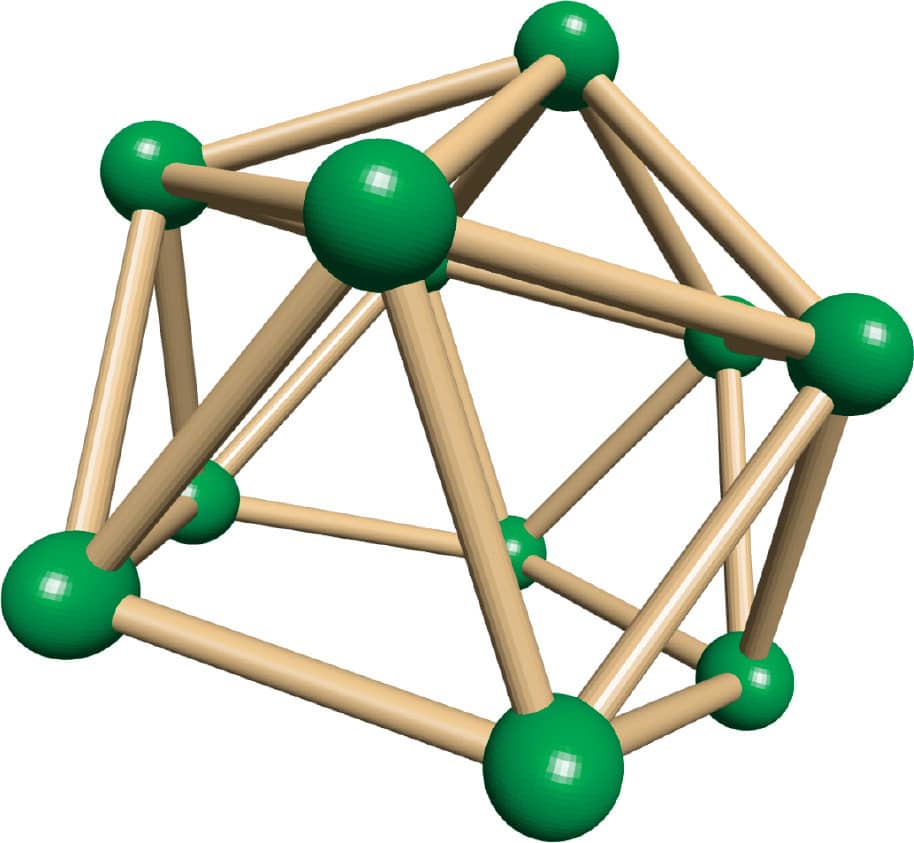
FIG. 2: Add a pyramid to the top.

FIG. 3: Turn the whole shape over and add another pyramid to the other side.
LAB 5
PERFECT CIRCLES
It’s difficult to draw perfect shapes freehand, so people have learned to use tools to help them. Using string, tape, and a pencil, we can draw a perfect circle!
Materials
 Heavy string (about 10 inches [25 cm] long)
 Scissors (to cut string)
 Pencil or marker
 Paper
Paper
 Tape
Tape
DRAW A CIRCLE
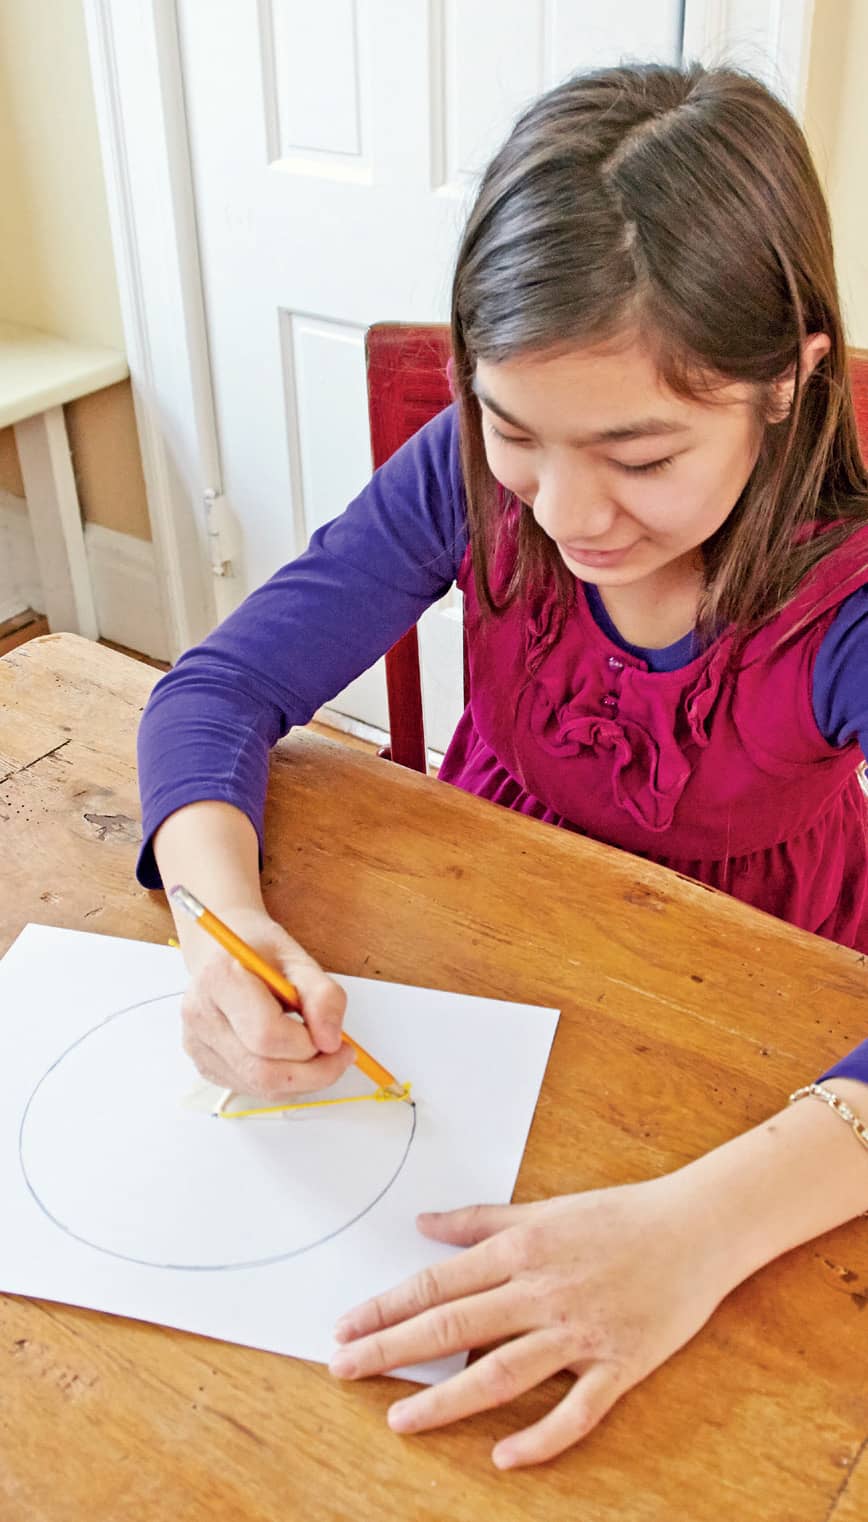
1. Use the string to tie a loose knot around the pencil, so that the string can slip down and the pencil can freely rotate. As you draw, only the very tip of your pencil should be inside this loop (fig. 1).
2. Mark the center of your piece of paper. Tape the free end of your string to that spot, with the edge of your tape touching it (fig. 2).
3. Draw your circle by moving the pencil as far around as you can, always keeping the string taut. If your pencil is going off your paper, make the string shorter (fig. 3).
4. Practice drawing circles of different sizes by changing the length of your string. Follow the tips on the next page until you can draw perfect circles every time! You can try drawing circles with different colored markers to make a whole rainbow of circles.
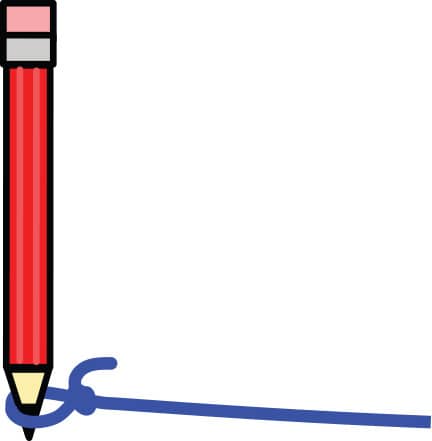
FIG. 1: Attach the string to the pencil.

FIG. 2: Tape the free end of your string to the center of your paper.
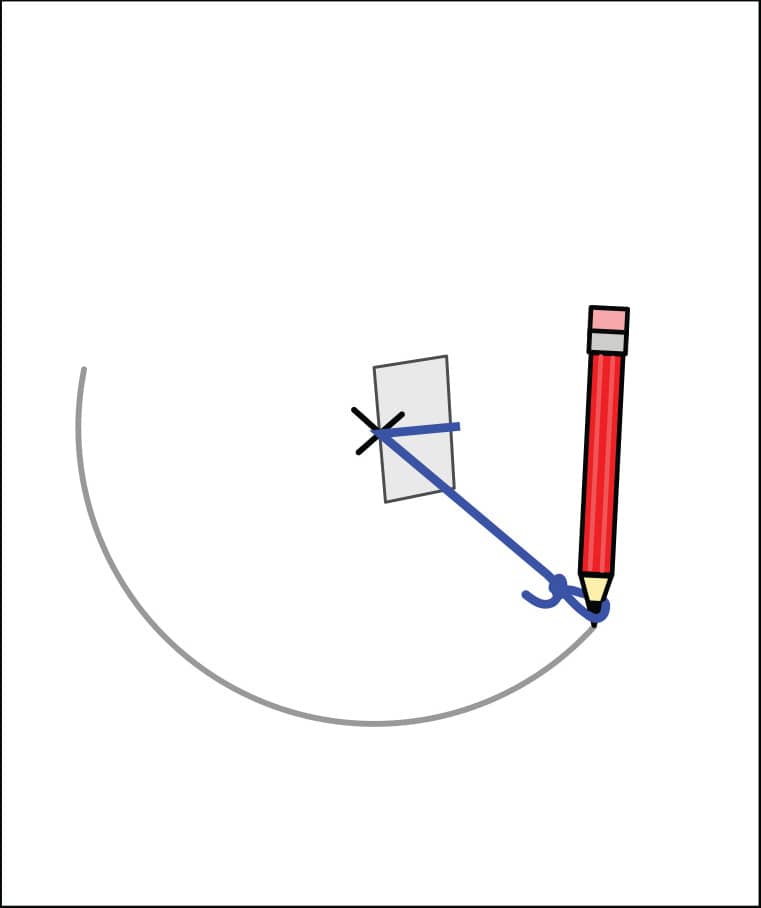
FIG. 3: Draw a circle.
LAB 6
TRY A TRIANGLE
Using string, a ruler, a pencil, and some tape, you can construct a perfect equilateral triangle.
Materials
 Paper
Paper
 Straightedge or ruler
 Pencil or marker for drawing
 Pen or marker to mark the string length
 String (about 10 inches [25 cm] long)
 Scissors (to cut string)
 Tape
Tape
DRAW A TRIANGLE

1. Draw one side of the triangle using the straightedge. Mark the ends of the line (fig. 1).
2. Attach the string to the pencil like you did when you drew the circles in Lab 5 (fig. 2). If your string is still attached from Lab 5, you’re all set to go! If you know how to use a compass, you can use one instead of your string.
3. Mark your string with your pen so that the length between your mark and your pencil is the same as the length of the side of the triangle in step 1 (fig. 3).
4. Tape the string to one end of your triangle’s line, and draw an arc about where you think the third point of your triangle should go (fig. 4).
5. Tape the string to the other end of your triangle’s line, and draw another arc about where you think the third point of your triangle should go (fig. 5).
6. The point where the two arcs intersect (cross) is the third point of your triangle! Use a straightedge to connect it to both marked ends of your first side to complete the triangle (fig. 6).
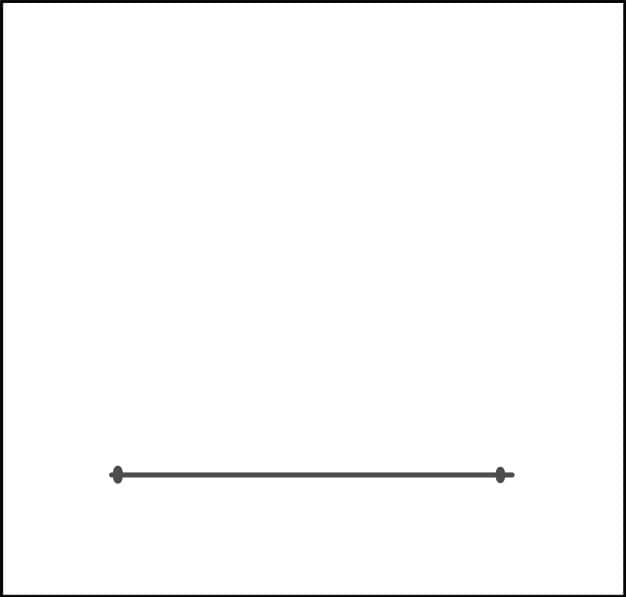
FIG. 1: Draw one side of the triangle.
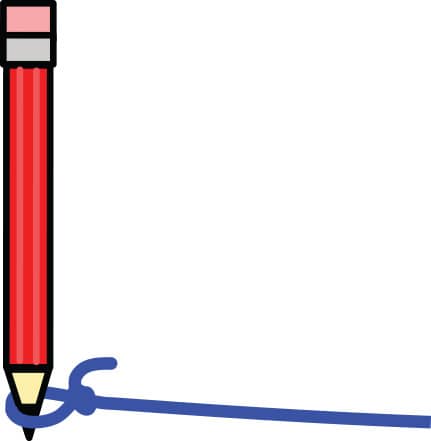
FIG. 2: Attach the string to the pencil.
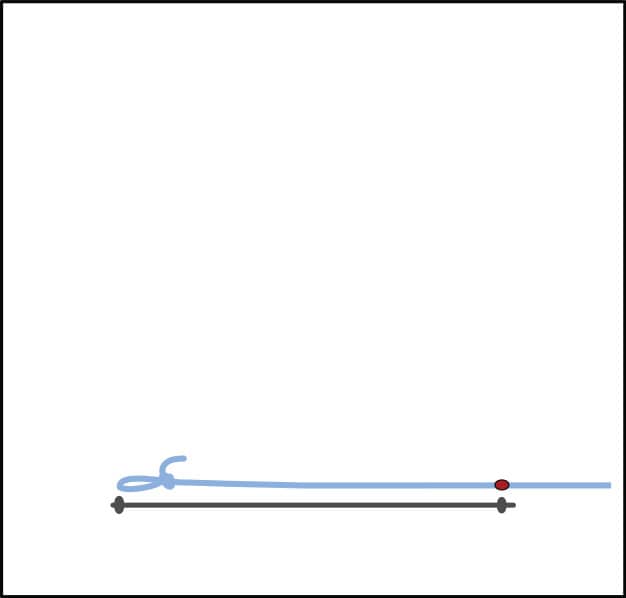
FIG. 3: Mark the string with your pen.
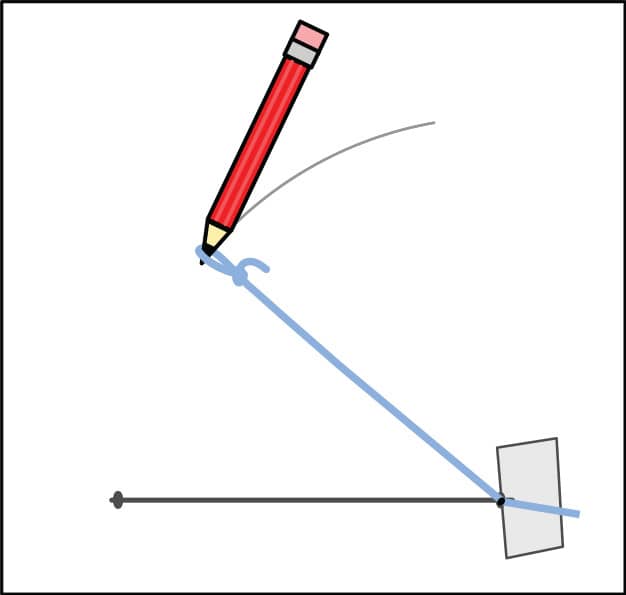
FIG. 4: Tape the string to one end of the line, and draw an arc.
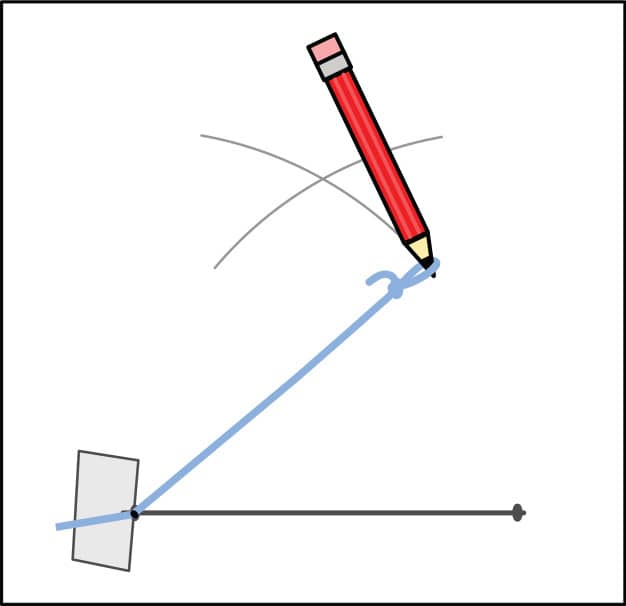
FIG. 5: Tape the string to the other end of the line, and draw another arc.

FIG. 6: Connect the point where the two arcs intersect to both marked ends of your first side.
LAB 7
EXACT ELLIPSES
We can also use string and pencil to draw special ovals called ELLIPSES. These are more challenging to draw than a circle, so be patient and try several times until you get the hang of it.
Materials
 Paper
Paper
 Pencil or marker
 String (about 10 inches [25 cm] long)
 Scissors (to cut string)
 Tape
Tape
DRAW AN ELLIPSE

1. Mark two points a few inches or centimeters apart in the middle of your paper. Tape your string to the points so that the string has some slack (fig. 1). For best results, arrange the tape exactly as shown.
2. To draw an ellipse, place your pencil against the string so that the string is taut, and lightly start drawing the shape (fig. 2).
3. As you move around the ellipse, the string may twist. If the string twists around the pencil or the tape, that will make it shorter, and your ellipse won’t be perfect. As needed, remove the pencil and reinsert it against the string to minimize twisting. Keep drawing in small segments until your ellipse is complete (fig. 3).
4. Change the shape of the ellipse (fig. 4). Ellipses come in lots of flavors, from very round to very oval. Try drawing ellipses starting with the focus points closer together or farther apart. Did the shape get rounder or flatter? What happens if the distance between the focus points is the same as the length of the string?
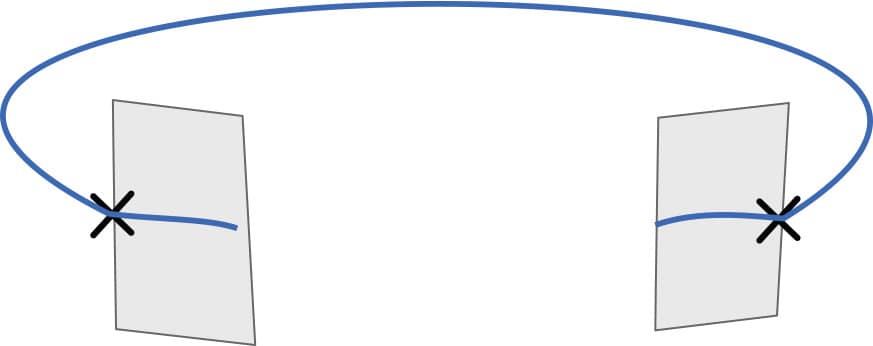
FIG. 1: Mark two points a few inches apart. Tape your string to the points.

FIG. 2: Grasp your pencil so the string is taut and lightly draw the ellipse.
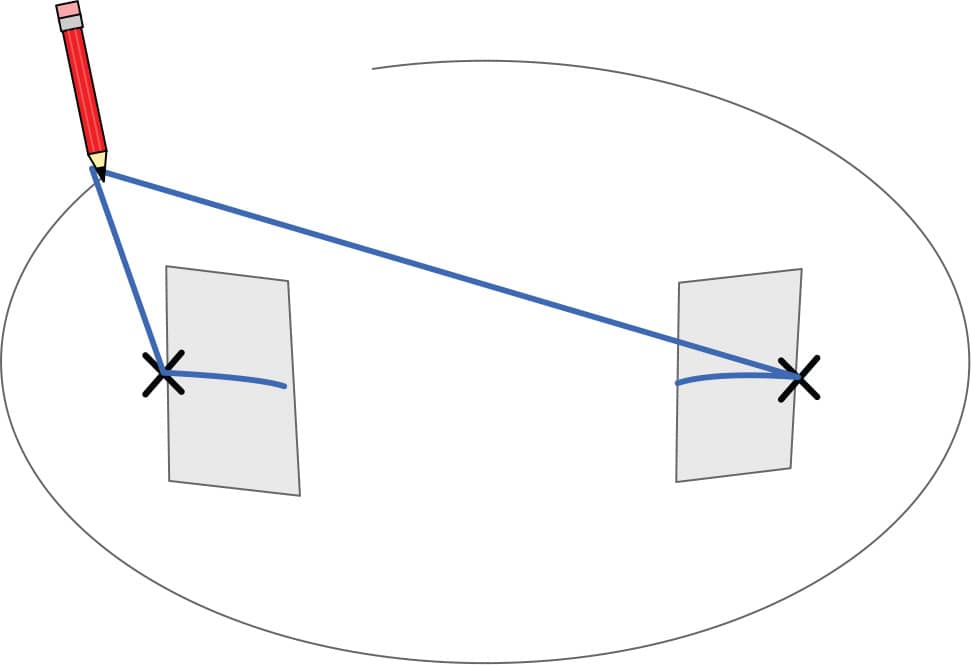
FIG. 3: Keep drawing in small segments until your ellipse is complete.
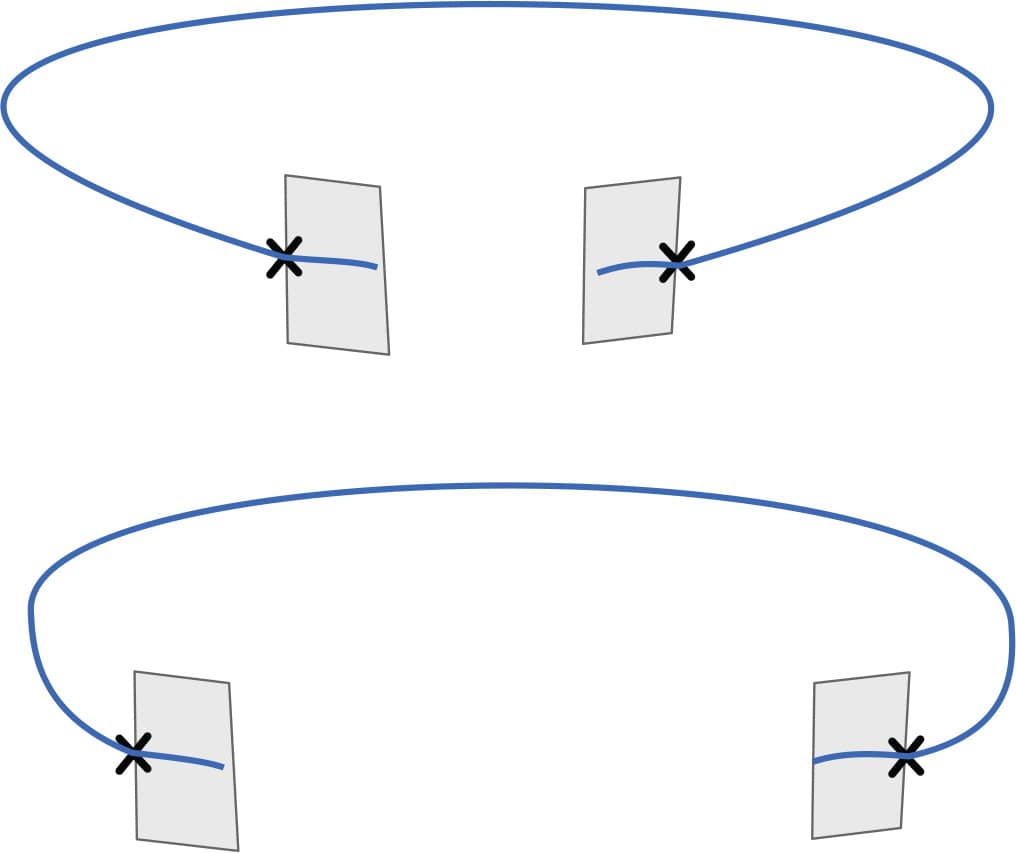
FIG. 4: Change the shape of the ellipse by adjusting the distance between the focus points.
LAB 8
DRAW GIANT CIRCLES AND ELLIPSES
Sometimes bigger is better! We can use the same string techniques (and some friends) to draw giant circles and ellipses outside using sidewalk chalk. Make sure you have permission to draw on the sidewalk or driveway before you begin!
Materials
 Sidewalk chalk
 Three broomsticks
 Packing tape, duct tape, or lots of masking tape
 Sturdy string, twine, or rope, at least 3 feet (92 cm) long for a circle, or 5 feet (1.5 m) for an ellipse
 Scissors (to cut the string)
 Two people for a giant circle, three for a giant ellipse
ACTIVITY 1: MAKE A GIANT CIRCLE
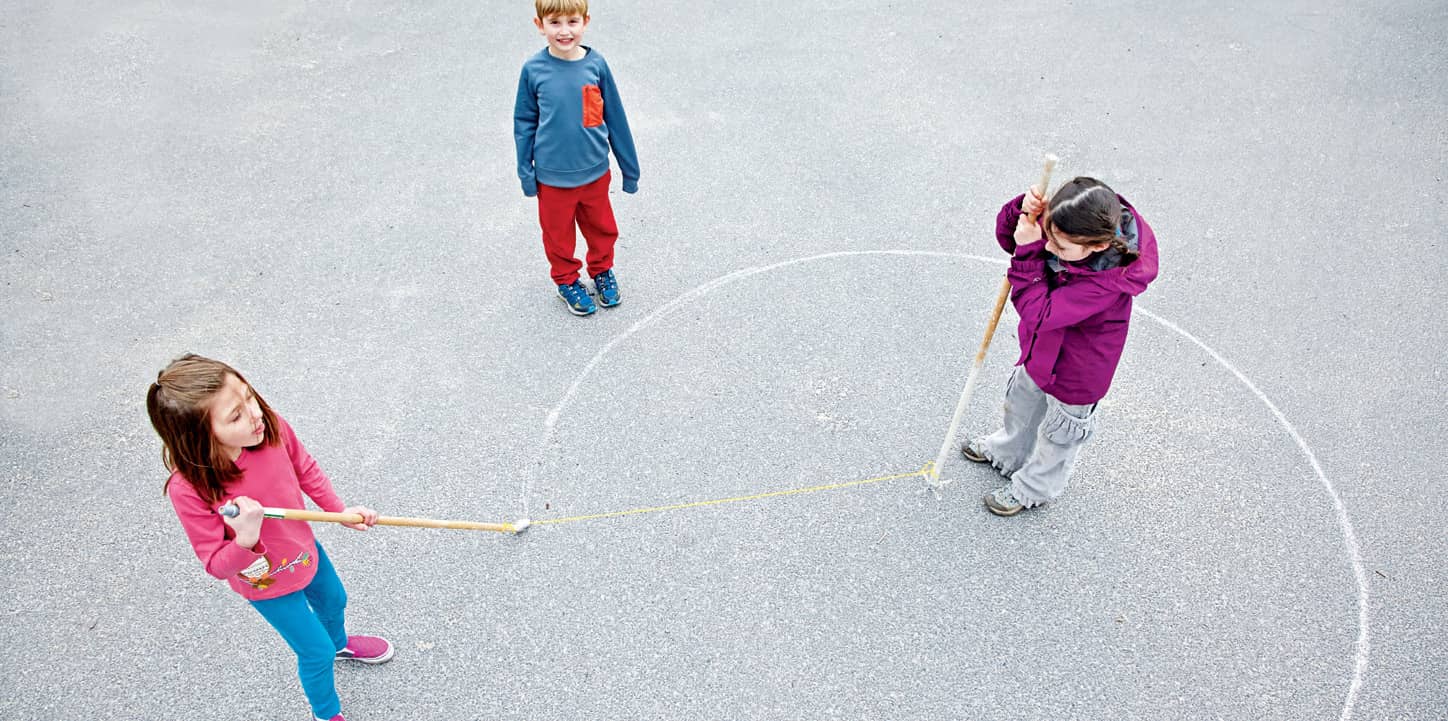
1. Make a giant “pencil” by attaching the chalk to the side of one end of a broomstick using tape. Make sure it is sturdy! You don’t want your chalk to fall off (fig. 1).
2. Tie a loop at each end of your string. The loops should be large enough so that you can slip the broomsticks and your giant “pencil” inside easily (fig. 2).
3. Mark the center of your giant circle with chalk. (X marks the spot!) Have one person stand at the center with a broomstick and slip one loop of your string over the broomstick (fig. 3). That person’s job is to keep the broomstick always right over the center mark, and to stay out of the way of the string!
4. The second person should slip the other loop over the end of the giant “pencil.” Then, keeping the string taut at all times, he or she will walk around the person in the middle, drawing at the same time (fig. 4). He or she must keep the string taut without pulling the center off the mark, while avoiding being tangled up in the string.

FIG. 1: Tape the chalk to the side of one end of a broomstick.

FIG. 2: Tie a loop at each end of your string.
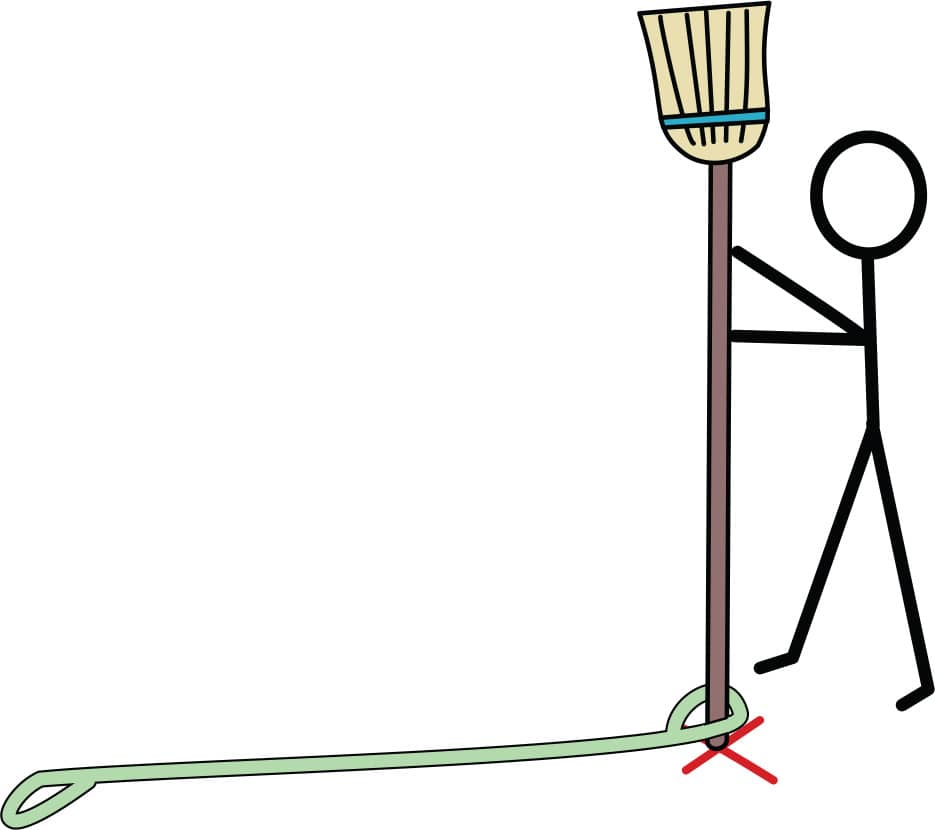
FIG. 3: Mark the center of your giant circle with chalk and have one person stand with a broomstick at the X.
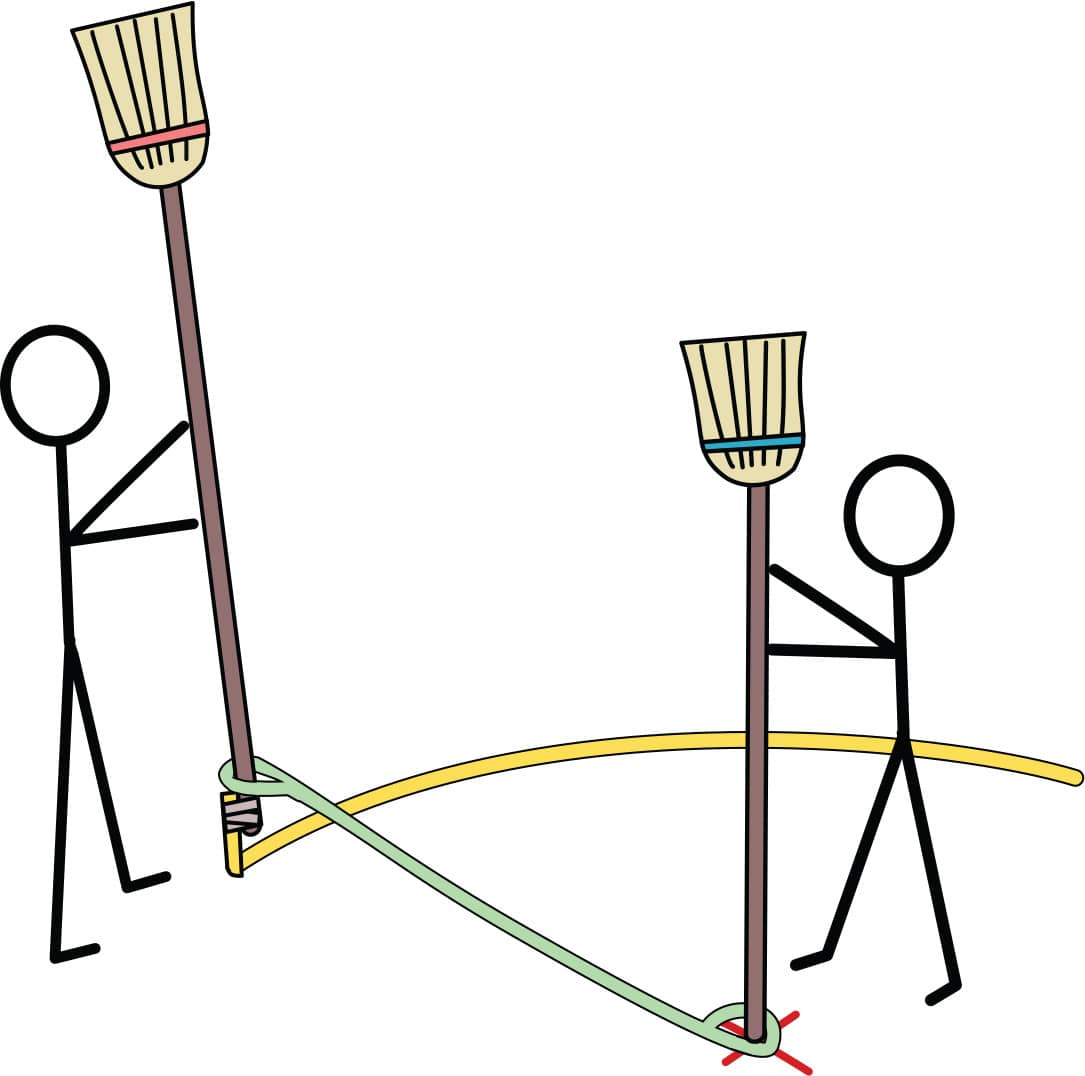
FIG. 4: Keeping the string taut, walk in a circle, drawing as you go.
ACTIVITY 2: CHALLENGE! MAKE A GIANT ELLIPSE
This one is hard! Can you (and two friends) do it?
1. Mark two points on the ground that are closer together than the length of your string.
2. Slip the ends of the looped string over the plain broomsticks (not your giant pencil). You’ll need two people to hold them—one for each broomstick. Put the broomsticks on top of the marks you drew in step 1 (fig. 1).
3. The third person will draw the ellipse with the giant pencil. This is best done in several short sections instead of one continuous curve; everyone is going to be dodging string and broomsticks! Just do one little piece of the ellipse at a time (fig. 2).
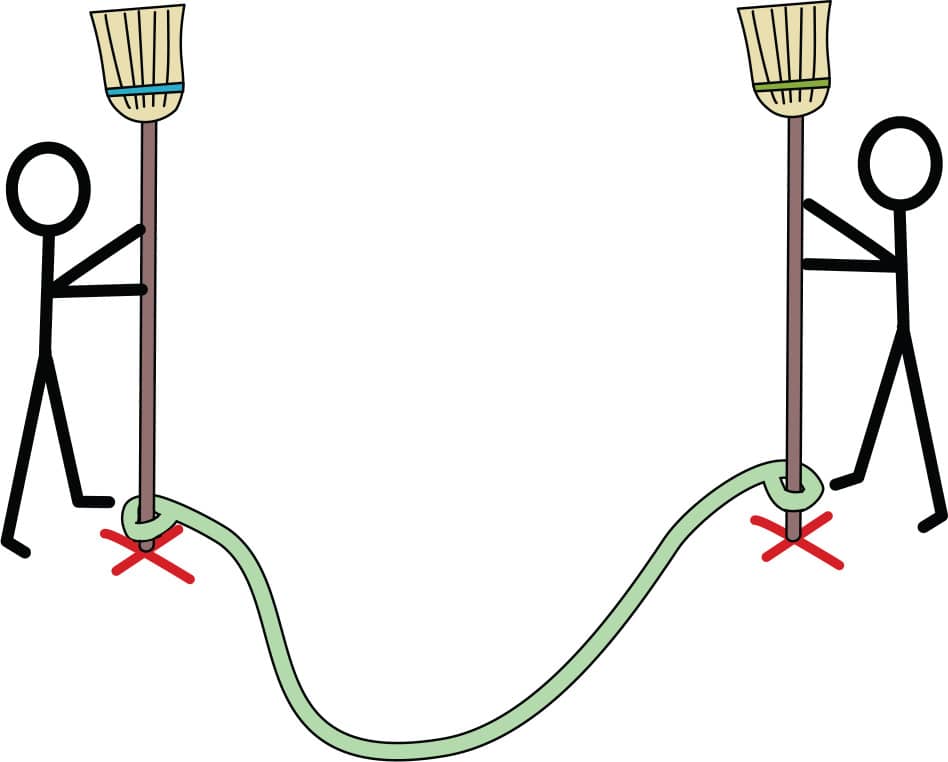
FIG. 1: Slip the ends of the looped string over the broomsticks and put them over the marks you drew in step 1.

FIG. 2: Draw the ellipse with the giant pencil, one section at a time.
