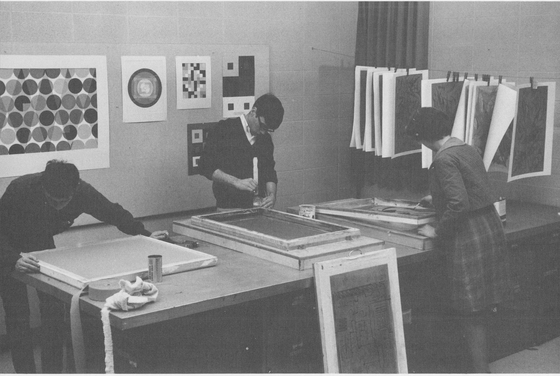
Fig. 4-1. These wooden printing frames are in various stages of use. The young man on the left is putting the finishing touches on a frame he is making, in the center ink is being mixed for a print in progress, and at right the serigrapher is painting a resist on the screen.
4. PRODUCING A SERIGRAPH STEP BY STEP
While the screen printing process can be used by a child with the most elementary means, the basic printing frame and other materials needed by the artist a few years older than Johnny are more difficult to construct and use. Let us now follow, step by step, the production of two different wooden printing frames and the printing of a five-color print using three different stencil resists. If you are producing your first print, it might be wise to limit yourself to one color until you get the feel of the process.
Two Wooden Printing Frames
A simple butt-joint frame. Cut four pieces of lumber. For a small frame, 1- by 2-inch clear pine can be used; for larger frames use 2- by 2-inch lumber. Edges should be cut precisely square and the width of the long pieces should be marked on the ends of the small pieces to make the assembly job more accurate (Fig. 4-2). The size of the frame will depend on the size of the print you wish to produce. Inside measurements should be 3 inches wider and 6 inches longer than the desired print size.
Construct the wooden frame (Fig. 4-3) with a simple butt joint, nailing the ends together with 3- to 4-inch finishing nails. Be very careful because, when assembled, the frame must lie flat on the printing table surface. Use glue in the joints if desired, and attach a metal angle iron on the top side of each corner to strengthen the joints of larger frames (Fig. 4-4).
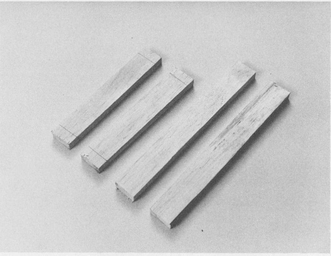
Fig. 4-2. Lumber is cut to size for a frame made with a butt joint and the width of the long pieces is marked on the ends of the short pieces.
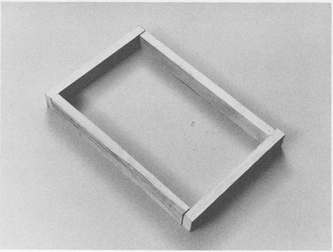
Fig. 4-3. The butt-joint frame is ready for nailing.
Stretch a piece of silk-screen silk over the underside of the wooden frame with a staple gun (Fig. 4-5), or small tacks if a stapler is not available. Organdy will work if the frame is to be used only a few times. Nylon should be put on frames to be used with a photo stencil. Start at the center of each side and work from left to right and from one side to the other. Finish the two opposite sides before you start on the remaining two sides. Stretch the cloth as tightly as possible, virtually to the point of tearing it. Keep the weave pattern parallel to the sides of the frame. The tension should be as uniform as you can make it.
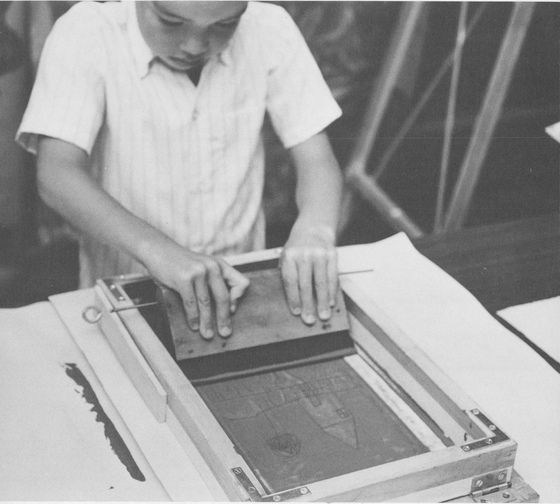
Fig. 4-4. Angle irons are screwed over each butt joint to strengthen the frame at the corners.
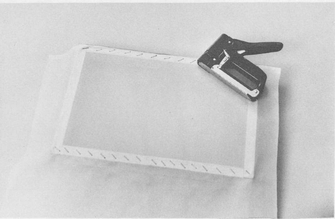
Fig. 4-5. A staple gun is used to fasten the screen fabric to the frame.
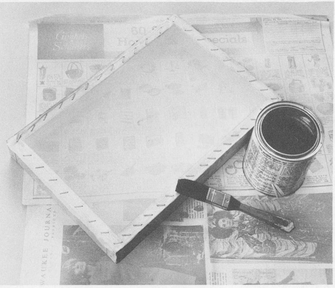
Fig. 4-6. Lacquer or shellac painted on the screen where it contacts the wood ensures a secure bond.
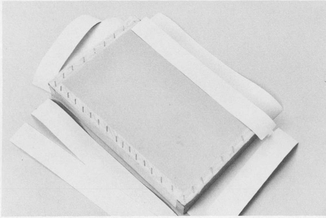
Fig. 4-7. The outside of the frame should be sealed with masking or gummed tape.
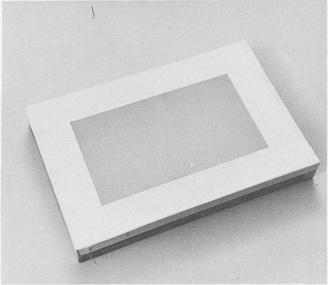
Fig. 4-8. For a good seal the tape is extended down over the outside of the frame.
Brush clear finishing lacquer or shellac on the cloth where it comes in contact with the wooden edge of the frame (Fig. 4-6). This ensures an even, secure adhesion of the cloth and helps to prevent leaking. Allow the lacquer or shellac to dry before the next step.
Seal the outside edges of the frame with at least two strips of gummed or masking tape around all four sides (Fig. 4-7). Extend the tape over the cloth about 1 inch and extend it down the side of the frame about 1 inch (Fig. 4-8).
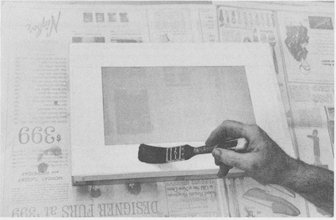
Fig. 4-9. The tape and the outside of the frame need at least one coat of lacquer or shellac for protection.
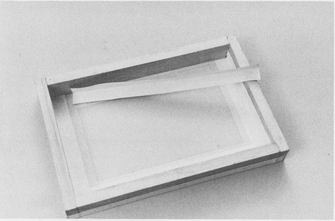
Fig. 4-10. The inside of the frame must also be sealed with tape.
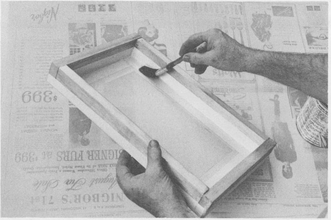
Fig. 4-11. The inside of the frame and the tape also should be protected with at least one coat of lacquer or shellac.
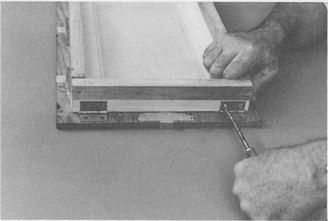
Fig. 4-12. A drop-pin hinge is used to attach the frame to its base.
With clear finishing lacquer or shellac, brush the tape and the outside of the frame with at least one coat (Fig. 4-9). Although not necessary, two coats are even better. Be careful not to get any lacquer or shellac on the open mesh of the cloth.
Seal the inside of the printing frame with at least one strip of gummed or masking tape (Fig. 4-10). Again extend the tape about 1 inch over the cloth and a similar distance up the side of the frame. Be sure the tape adheres evenly, since humps will make printing more difficult. Also be very careful to see that the tape comes up tight into the corners.
Now brush clear finishing lacquer or shellac over the tape on the inside of the frame (Fig. 4-11). One coat will suffice, but two would be better. Again be very careful not to get any of the lacquer or shellac on the open mesh of the cloth. Taping and sealing with lacquer or shellac prevent paint leakage during the printing process. The frame is now ready to be fastened to the printing board.
Using two drop-pin hinges with small screws, attach the frame to a very flat, smooth piece of plywood or to Masonite (Figs. 4-12 and 4-13). The printing board should extend beyond the outside edges of the frame by an inch or more on all sides. The center pin of a drop-pin hinge can be pushed out, making it possible to remove the frame from the printing board to change stencils and clean the frame between the printing of each color.
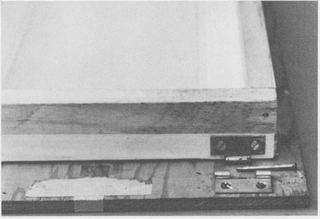
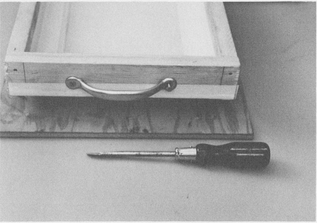
Fig. 4-14. An ordinary screen-door handle on the opposite end of the frame from the hinges facilitates raising the screen.
With small screws, fasten an inexpensive screen-door handle (Fig. 4-14) to the outside edge of the printing frame on the opposite end from the hinges.
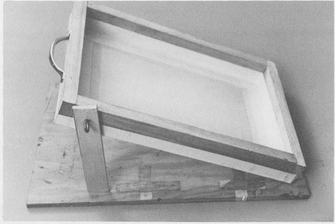
Fig. 4-15. A wooden leg makes a good prop for the screen when it must be raised for any period of time.
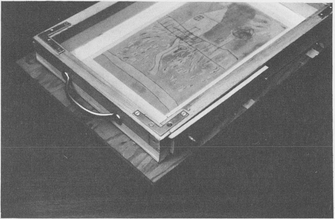
Fig. 4-16. The frame is completely assembled and ready for printing.
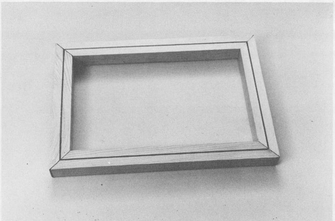
Fig. 4-17. The pieces of frame lumber are assembled and glued at the corners.
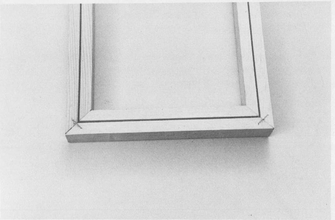
Fig. 4-18. The joints of the frame are secured with corrugated fasteners after being glued.
Fasten a short length of wood to one side of the printing frame (Fig. 4-15). First, drill a hole in one end of the piece of wood, then insert a large screw eye through this hole and screw it into one side of the frame near the handle end until the piece of wood is tight. The screw eye allows you to tighten or loosen the piece of wood, which serves to prop the screen up off the printing paper when desired. The frame is now finished and ready for printing (Fig. 4-16).
A grooved frame with mitered corners. The lengths desired for the frame should be cut and mitered at each end and a groove 1/8 inch wide and 3/8 inch deep cut in the center of the underside of each of the four pieces of wood. The printer can do this himself in a home workshop if he has the skill. Some lumber companies will do it for a small charge. Prepared and precut pieces of wood can be purchased from many screen-process supply houses.
On a flat, solid surface place the four pieces of wood together to form the frame (Fig. 4-17). Use glue at the joints.
Hammer a corrugated fastener across the diagonal cut of each corner miter on one side (Fig. 4-18), then turn the frame over and repeat the process in the four corners on the other side. Be very careful that the wood does not split. Make absolutely sure that the fasteners on the side of the frame that contains the groove are flush with the surface of the wood. This will be the printing side of the frame, and nothing must protrude from it. It is desirable to strengthen each of the corners with long finishing nails pounded in from the ends. On very large frames, attach metal corner braces on the side away from the groove for added strength (see Fig. 4-4). When assembled, the frame must lie absolutely flat on the printing surface.
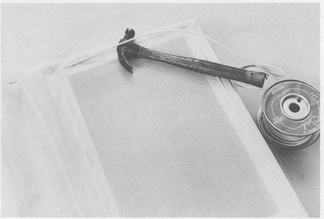
Fig. 4-19. The screen fabric is stretched over the frame and lightly fixed in place by the cord, which is hammered into the groove at intervals around the frame.
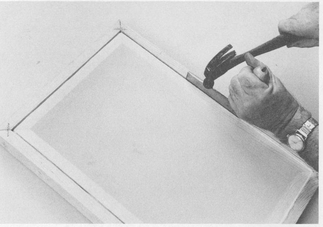
Fig. 4-20. Proper screen tension is achieved by pounding the cord deeper into the groove.
Place the screen fabric (organdy for frames used only once; silk if desired; nylon for frames used with photographic stencils) over the grooved side of the frame. Fix the fabric in place temporarily by pounding a cord (about the thickness of venetian-blind cord) with a hammer into the groove every 2 inches or so all the way around (Fig. 4-19). Work from one side to the other to keep the fabric stretched as evenly as possible. Screen-process supply companies sell 100-foot rolls of cord especially designed for this purpose.
With a hammer and a blunt piece of metal no thicker than 1/8 inch, or a large screwdriver, carefully force the cord down into the groove. This will tighten the fabric to a very high tension (Fig. 4-20). Screen-process supply companies sell a tool especially designed for this step. If you make many frames, it will be useful to own one.
Now seal the frame with tape and lacquer, and fasten it to the printing board as described in Chapter 3.
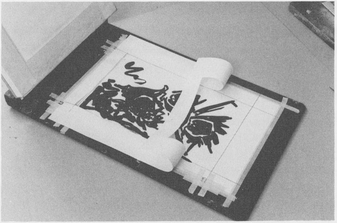
Fig. 4-21. The first paper stencil—in this case for a solid background color—is cut after it is traced from the prepared sketch and taped in place on the printing board as a guide.
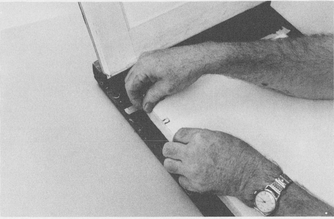
Fig. 4-22. Metal keying tabs position paper more accurately than paper tabs.
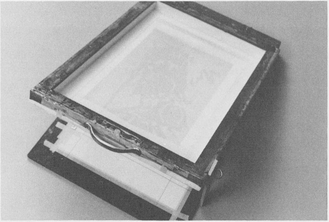
Fig. 4-23. The stencil for the first color is lightly taped to the printing frame in position for printing.
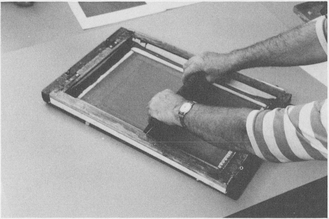
Fig. 4-24. A rubber squeegee is a more satisfactory tool than a cardboard squeegee.
Printing a Five-Color Serigraph Using Three Different Resists to Produce the Final Print
Colors one, two, and three—paper stencils. These are made and used in exactly the same manner as the paper stencils in Chapter 3. The prepared sketch is taped in place on the printing board and the first paper stencil is traced and cut (Fig. 4-21). The masking tape keying tabs described in Chapter 3 can be used here to make sure that the printing paper is always placed on the printing board in the proper place. But metal tabs (Fig. 4-22) are more accurate and convenient. Position the first stencil (Fig. 4-23) and tape it to the frame ready for printing (see Chapter 3, Step 16).
Now place some screen-process paint in one end of the frame and pull it from one side of the frame to the other with a rubber squeegee (Fig. 4-24). Then pick up the excess ink with the squeegee and return it to the far end of the frame. Try to keep all of the paint on one side of the rubber blade of the squeegee to get a clean, even color. The print can be changed slightly by varying the pressure used on the squeegee. The squeegee should be held at about a 60-degree angle for best results.
When all of the prints of the edition have the first color printed on them, scoop up the excess paint with a rubber spatula (Fig. 4-25) and return it to the paint can for future use. Cover the paint with a thin coating of turpentine or paint thinner and seal the open can end with clear plastic (see Chapter 3, Step 18). Clean the frame very thoroughly with turpentine or paint thinner.
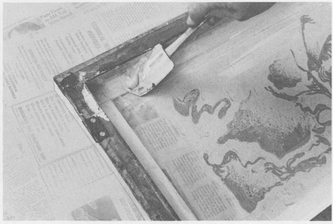
Fig. 4-25. A rubber spatula is excellent for scraping paint off the squeegee and the frame.

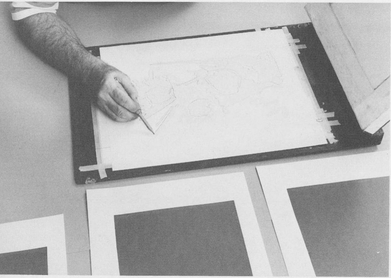
Fig. 4-26. The stencil for the second color is traced, cut, and printed.
Repeat these instructions for the second (Fig. 4-26) and third colors.
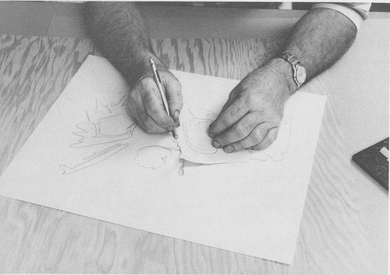
Color four—lacquer-film stencil. For the fourth color, you can obtain from screen-process supply companies specially prepared lacquer-film stencils and a scooper cutter, which are used for very hard, sharply defined color areas and reasonably fine lines. The lacquer stencil consists of two layers of material: a lower support layer of heavy, transparent wax paper under a very thin coat of lightly tinted lacquer. The scooper cutter is a special kind of stencil knife with a small sharp loop of metal that does the cutting. It is excellent for getting a sketchy line in a lacquer-film stencil (Scooper cutters are available in three different sizes; see Fig. 4-27).
Place the lacquer film over the original sketch for the print and, using a scooper cutter, cut any fine lines in the lacquer film (Fig. 4-28). Areas that are to print solid with hard edges are now cut out with a very sharp stencil knife. It pays to keep one knife blade to use exclusively for this step. There should be as little pressure on the blade as possible. It is important to cut only the thin top layer of colored lacquer, not the wax paper (see Fig. 4-29); in fact, do not even bend the wax paper. Too much pressure may not cut through the wax paper, but it may be just enough to bend the paper, which will cause difficulties when it comes to adhering the lacquer film to the screen. Bent wax paper will prevent the cut edges of the lacquer film from properly contacting the screen.
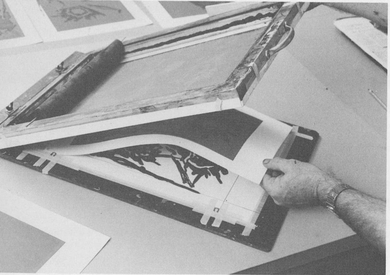
Fig. 4-27. Besides the ordinary single-blade stencil cutter (left), three sizes of scooper cutters are used to cut lacquer film.
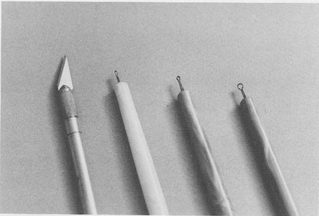
Fig. 4-28. Scooper cutters make fine lines in lacquer-film stencils, while stencil cutters are used for cutting out solid areas.
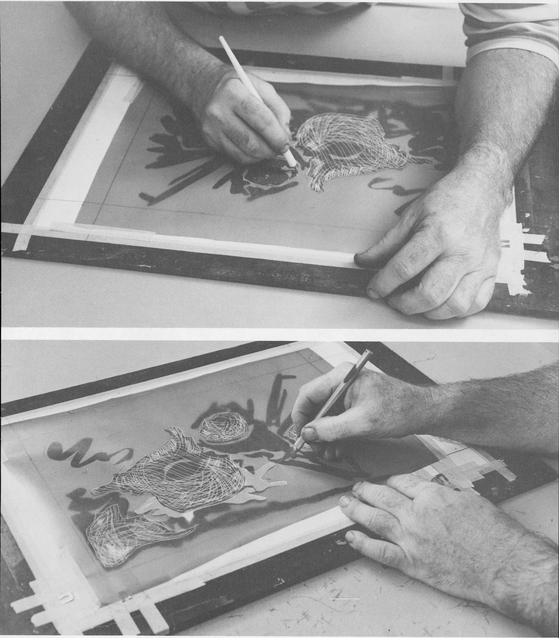
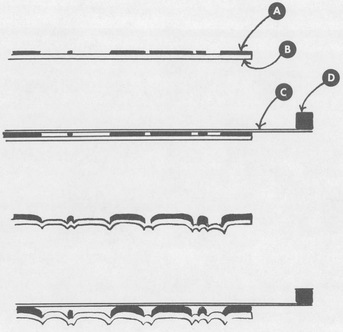
Fig. 4-29. The top two parts. of the drawing show the results of proper pressure on the knife in cutting a lacquer-film stencil. A is the lacquer film that remains after cutting, and B is the protective wax-paper backing. In the second cross section the screen fabric (C) has been adhered to the film with lacquer solvent; note the perfectly flat contact between the two. D is the wooden edge of the printing frame. The bottom two parts show what happens when the pressure on the cutting knife is too heavy. The knife has bent the wax-paper backing at the edge of each area of film so that when the screen fabric (the flat part in the bottom cross section) is adhered the bent wax paper prevents the edges of the lacquer film from making contact with it.
Outline a solid area with a light touch of your sharp stencil knife, then pick up an edge of the area and carefully peel it off the wax paper (Fig. 4-30). As the stencil progresses, you can see the design develop because the light color in the lacquer film contrasts with the white of the wax paper.
Adhering a cut lacquer-film stencil to the screen fabric takes the most skill in this process. Because the film of lacquer is very thin, it is easy to use too much lacquer thinner or film adherent and dissolve the stencil completely. Work cautiously at first.
After you cut the stencil, position it in the proper place under the printing frame over the sketch (which was fastened in place on the printing board before the first color was printed). The lacquer side is in contact with the fabric mesh, and the wax paper side is down. There are two parts to this step that must follow each other very quickly. First, rub a small rag, rather heavily saturated with lacquer thinner (or film adherent), lightly and for only a few seconds over a small section of the screen fabric on the inside of the printing frame, wetting both the fabric and the lacquer film underneath (Fig. 4-31). Immediately press a large, dry rag quickly on the dampened area to soak up the excess lacquer thinner and to force the softened lacquer film into the mesh of the fabric (Fig. 4-32). Do not rub any more than you need. As soon as the film takes on a darker and duller tone, that part has adhered; leave it alone, and go on to the next small area, and the next, until the entire film has an even darker, duller tone indicating that it has all adhered.
After the film and screen have dried for at least twenty minutes, carefully separate the heavy wax paper from the lacquer film at one end with a dull knife. Grasp the wax paper firmly with both hands and slowly peel it off the lacquer (Fig. 4-33). Watch very closely. Occasionally a portion of the lacquer film may not have adhered properly but if caught in time can be loosened carefully with a knife edge. When the wax paper is removed, closely inspect the stencil against the light. If there are loose edges, adhere them by rubbing them quickly and carefully with a small rag slightly dampened with lacquer thinner or adherent. While doing this, place the screen silk on a pad of absorbent newspaper. Small holes or damage can be repaired with a fine brush and clear lacquer. If the lacquer film does not completely cover the fabric of the stencil frame, and there is no need that it should, the open areas of the fabric can be sealed by scraping clear lacquer over them with a small piece of cardboard. When making repairs with lacquer, be sure that the silk fabric is not resting on any surface or it will stick.
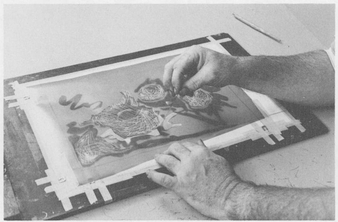
Fig. 4-30. The parts of film peeled off make up the design to be printed.
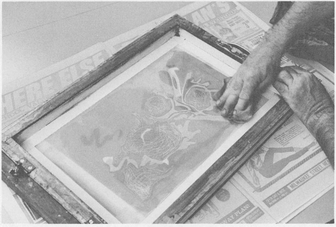
Fig. 4-31. One secret to adhering lacquer film is to work quickly, using a rag heavily saturated with solvent.
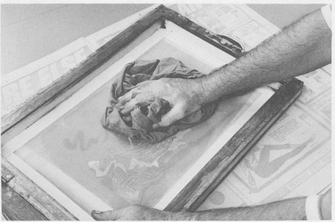
Fig. 4-32. Excess solvent must be picked up quickly with a dry cloth and a minimum of rubbing.
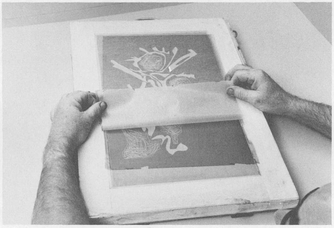
Fig. 4-33. Care must be used in peeling the wax paper off the dried lacquer film.
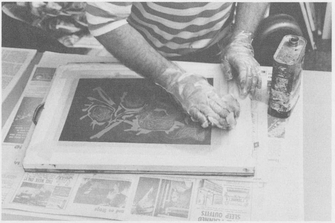
Fig. 4-34. Plastic gloves are a good protection against lacquer solvent, which is used to remove lacquer film from the screen.
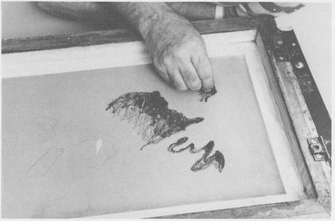
Fig. 4-35. Textures and color shading can be reproduced with a lithographic crayon.
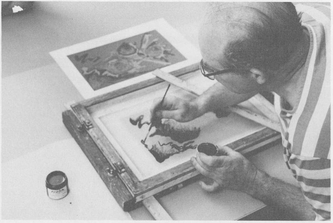
Fig. 4-36. Lithographic tusche is applied with a brush to those areas that are to print solid.
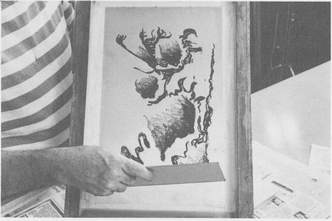
Fig. 4-37. The screen should be held at a sharp angle while the glue mixture is being applied.
In the same manner you printed the other three colors, print the fourth color on each paper in your edition. When finished, clean the frame thoroughly again. After the paint is cleaned from the printing frame, the lacquer film can be taken off the fabric with a rag soaked in lacquer thinner (Fig. 4-34). Apply the lacquer thinner liberally on both sides of the screen and place the fabric on a pad of old newspapers. This will soak up a good deal of the old lacquer. If you used clear lacquer to protect the tapes on your printing frame, you will now have to repaint the frame with clear lacquer to keep it protected. If you used clear shellac, the lacquer thinner will not dissolve it.
Color five—a glue and lithographic tusche stencil. Lay the screen mesh over the original sketch and indicate or trace with pencil those areas on which you want to use the lithographic crayon. Then, if you want a rough texture or a shaded color, place the screen mesh on the back, textured surface of a piece of Masonite (other textured surfaces can be used). Crayon in the indicated areas with a soft greasy lithographic crayon. Press quite hard. If you look at Fig. 4-35 closely, you will see the texture of the Masonite back repeated in the crayon texture on the screen. Then, using liquid lithographic tusche and a brush, paint heavier solid areas and lines on the screen (Fig. 4-36).
Mix a solution of 40 per cent hide glue (similar to LePage’s), 50 per cent water, 8 per cent white vinegar, and 2 per cent glycerin. Hold one end of the frame up at a rather steep angle. Pour a quantity of this glue and water mixture at the lower edge inside the screen. With a stiff piece of cardboard wide enough to cover your stencil, scrape the solution quickly and smoothly up to the top of the inside of the screen (Fig. 4-37). Turn the cardboard scraper around and quickly scrape the excess back down to the lower edge of the inside of the frame. Drain off the excess into the mixing jar and allow the screen to dry. The glue does not adhere to the tusche or crayon. Repeat the gluing step to fill up the small air bubbles left after the first coating and to give you a glue coat that will hold up better in the printing process. Allow the second glue coat to dry.
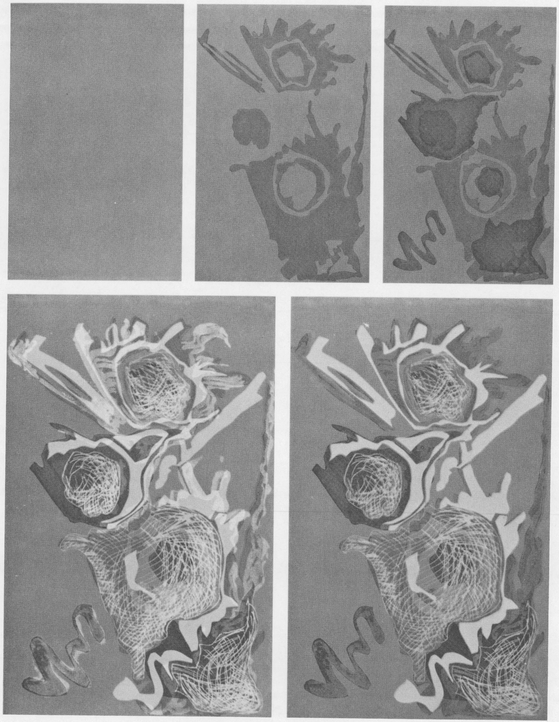
Fig. 4-41. (Reproduced in full color between pages 16 and 17.) This progression shows what the serigraph looks like after each of the five colors has been added.
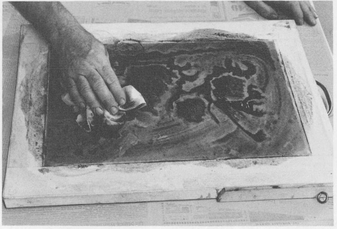
Fig. 4-38. Paint thinner or turpentine is used to clean the crayon and tusche from the screen.
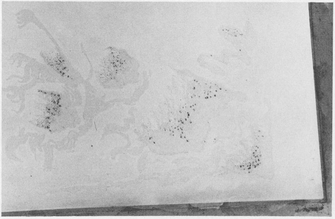
Fig. 4-39. The screen is ready for printing. Small black dots of crayon and tusche remain, which is desirable for the print being made, but these can be removed by more careful cleaning if you wish.
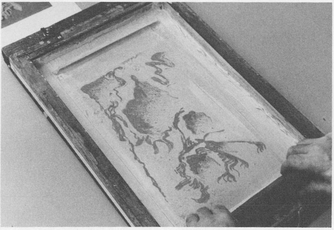
Fig. 4-40. The fifth color is being printed with the tusche and glue resist.
When the second glue coat has dried, place the screen on old newspapers with the underside up. Using a rag and paint thinner or turpentine, loosen and remove as much of the lithographic crayon and tusche as you can (Fig. 4-38). Turn the screen over on the newspapers and continue cleaning. Repeat this process working first on one side and then the other until as much of the lithographic crayon and tusche is removed as suits your purposes. You can get it all out by holding the screen upright and scrubbing it with soaked rags simultaneously on both sides. In Fig. 4-39 a bit of the crayon and tusche (the black spots) was left in to break up the somewhat regular texture of the back of the Masonite.
Now you can print the fifth color (Fig. 4-40).