Eating for Vitality
Cultivating Collaboration With All of Nature
You are what you eat. Most often, people interpret that phrase as meaning you are as physically healthy as the food you put into your body. Research is emerging that paints a more holistic picture about health and food. Studies indicate that the food we eat also affects our mental and emotional well-being. Food impacts how we see and behave in the world, begging the question: Are we what we eat?
Every one of us has an individual responsibility for our own vitality, yet nourishment is a collaborative act that extends far beyond human life. Every time we sit down to a meal, we are reminded of our dependence upon the earth. Food is vital for all of life, not just humans, and our vitality is interlinked.
Striving to eat primarily local, seasonal, plant-based, organic foods (and to waste far less of them by using, not discarding, the peels, skins, and seeds, and by preserving foods to extend their season), is about resilience and regeneration for us and the life on which we depend in a climate that is rapidly changing. Redeveloping our food system calls on all of us to be our most collaborative and creative selves. Eating for collective vitality as a nature-related practice nurtures the mental and emotional well-being we derive from heightening our identity as a part of our environment, which in turn begins to shift our habits toward more eco-friendly behavior.
By eating more locally produced food, your ties are strengthened to the place where you live, beyond what you see on your plate. As your awareness grows, it becomes difficult not to connect weather patterns and animal and insect life to the foods available in your market. Through eating, you become more oriented toward the life around you.
If what is on our plates changes with the seasons of our local communities, we strengthen this effect as we let our bodies and minds shift in tune with life around us. The more we tap into the importance of all elements of our ecosystem, the more we begin to understand the value of biodiversity. Our expectation that we can have whatever food we want to have at our fingertips year-round has a huge impact on biodiversity loss. Intensively produced monocrops (for example, avocados or bananas) require deforestation in the name of dedicating land to the production of one species at the expense of most others. Considering the interdependence of life in an ecosystem, this inherently limits long-term resilience.
The United Nations Food and Agricultural Organization (FAO) reports that genetically uniform monocrop practices have led to a 75 percent loss of plant genetic diversity worldwide. Today, 75 percent of our food is generated from 12 crops and five animal species. Opening our eyes to what surrounds us, in the way our ancient ancestors explored what is edible, and expanding our palate to support local biodiversity stimulates wonder and creativity, and it serves us regeneratively.
The Invisible Life upon Which Your Vitality Depends
A single tablespoon of fertile soil can hold more life forms than there are humans on the earth. The overwhelming majority of our diet grows in soil. Many people aim to eat more organic and biodynamic food, wanting to digest fewer chemicals. The fewer chemicals we pour on the soil, the healthier all the life in this ecosystem will be, too. Soil is a finite resource, meaning it takes longer than a human lifetime to regenerate degraded soil. Considering that the UN FAO reports that more than 30 percent of the world’s fertile soil has been degraded and that caring for it through regenerative farming techniques (which also promote biodiversity) can increase overall yields of food for humans, prioritizing eating organic and biodynamic food is a choice that fosters holistic vitality.
Learning New Habits
Anyone who has tried to lose weight knows that changing how you eat is no easy task. Our eating habits are deeply embedded in our routines, fueled by cultural meaning and lifestyle. Wanting to make change is step one. Translating desire into action takes a plan, patience, and compassion. Change requires reflection on what motivates your behavior, changing your motivation story as you set new intent, building new knowledge to reinforce your new story, and ritualistically taking part in new activities so that you can translate your thoughts into new habits that stay with you. You won’t shed pounds overnight, and you won’t begin to feel the benefits of a nature-related practice overnight. Repeat practice is what leads to progress.
The first step in building a nature-relatedness practice with food is learning how to eat for vitality. Eating for vitality starts by reconsidering the holistic nature of nourishment. Making “healthy” food choices that harm the environment on which all life depends does not serve vitality. Approaching meals as an opportunity to deepen your understanding of how your vitality depends on life beyond the human realm is the starting point for your nature-related practice with food.

◁ Flatbread
Archaeobotanists have discovered that flatbread is a staple of human vitality that predates the agricultural revolution. As early as 14,400 years ago, nomadic hunter-gatherers were making flatbread. Imagine foraging for wild cereals, dehusking them, grinding them with stones, mixing them with water, kneading dough, and baking it on hot stones over an open fire. Without romanticizing the labor, I like to consider how connected to the full cycle of nature those humans must have felt preparing and eating this simple flatbread.
Makes
4
Ingredients
21/2 cups all-purpose flour, plus extra for dusting
1/2 teaspoon salt
1/4 cup olive oil
3/4 cup oat milk
1/2–1 tablespoon vegetable oil, for cooking
Method
1. Combine the flour, salt, oil, and oat milk in a bowl to make a soft dough. Sprinkle the work surface with flour, turn out the dough, and knead for a few minutes until it is smooth. Add another teaspoon or two of flour if it is too sticky.
2. Wrap the dough in a dish towel and let it rest in the refrigerator for about 30 minutes.
3. Dust the work surface with flour again. Cut your dough into four even pieces, roll into balls, then roll out into thin rounds (about 1/4 inch thick).
4. Spread the oil evenly across a nonstick skillet and put it over medium heat. Place one flatbread in the pan. It will puff up on one side; when it does, flip it and cook the other side. If it puffs up too much, pat it gently to break the air bubble. You are looking for golden brown spots on both sides. Keep flipping until you are happy. Use your fingers as well as a spatula for the process. It should take about 2 minutes to cook each flatbread.
5. Stack the cooked bread on a plate as you make the rest and keep a dish towel on hand to cover the bread and trap in the heat.
Tip You can make flatbread in advance and freeze them. Make sure they are completely cool and pat them with paper towels to be sure the surface is dry. Stack them in a freezerproof container, layered with parchment paper, and put them into the freezer. When you want to use some, remove them from the freezer to thaw. Preheat the oven to 300°F, then add a drop or two of water to each flatbread and put into the oven for about 10 minutes to warm.
Labneh
Cheese was discovered, not invented. Legend has it that an Arab traveler packed milk for a long, hot journey and discovered that as the milk jostled, it was transformed. Instead of drinking milk, he dined on a rudimentary cottage cheese, a salty liquid and perhaps, many questions. As you make this labneh, pause to marvel at the complexity of collaboration of the different forms of life required to make foods that we deem to be simple.
Serves
6
Ingredients
11/2 cups Greek-style yogurt
1/2 teaspoon lemon juice
1/4 cup olive oil
2 tablespoons zaatar or paprika
Pinch of sea salt
Equipment
12-inch square piece of cheesecloth
Kitchen string
Method
1. Mix together the yogurt, lemon juice, and salt.
2. Lay a piece of cheesecloth on top of a bowl. Now place your yogurt mixture in the middle of the cloth. Pull the sides together and tie with a length of string. Gently squeeze the little cheese ball to form an egglike shape.
3. Hang the bundle in your refrigerator. I use a piece of tape and a pickle jar to hold it in place. Place a bowl underneath your bundle to catch the dripping whey. Let stand for 24 hours.
4. Remove from the refrigerator, unwrap your labneh, and put it onto a serving plate. Drizzle with olive oil, sprinkle with zaatar or paprika to add some color, and serve.
Tzatziki
Tzatziki shines when it is served as the cool sidekick to feistier characters. The good life isn’t just about the shouting from the rooftop moments, it’s about balancing the big stuff with joy found in everyday moments. That’s tzatziki, the cream to complement the extremes. And, on a practical note, you can make it if you find you have leftover Greek yogurt from making labneh.
Serves
4
Ingredients
1/2 cucumber, washed and scrubbed
1 cup Greek-style yogurt (or use nondairy yogurt, if you prefer)
1 tablespoon olive oil
1 garlic clove, finely chopped
A handful each of fresh dill and mint leaves, plus extra for serving
Juice of 1/2 lemon
Zest of 1 preserved lemon (optional)
Pinch of salt
Method
1. Cut the cucumber in half lengthwise, then use a spoon to scoop out the seeds. Chop the flesh into small dice, as you would dice an onion. Roll the dice in a dish towel and gently press to remove excess moisture before adding to a bowl.
2. Mix in the yogurt, then add the oil and garlic and mix. Finely chop the dill and mint. Add it to the mix with your lemon juice and preserved lemon zest (optional) and give it one last stir.
3. Transfer to a serving bowl and decorate with herbs before serving alongside something spicy, such as shakshuka.
Fava Bean Falafel
Fava beans have been part of our diet for at least 6,000 years. I use them to make falafel, another staple dish of the Middle East and a common street food. These are delicious wrapped in flatbread and served with salad and tahini.
Serves
2 as a main or 4 as a side
Ingredients
11/2 cups whole dried fava beans
2 tablespoons baking soda, plus an extra 1/2 teaspoon
Handful each of parsley and cilantro, leaves and stems
1 small onion, finely chopped
2 garlic cloves
11/2 teaspoons all-purpose flour
1 teaspoon ground cumin
1/2 teaspoon chili powder
1 teaspoon salt
Juice of 1 lemon
Canola oil, for frying
Method
1. Put the dried beans with 2 tablespoons of baking soda into cold water to soak for 24 hours. Halfway through the soaking time, peel off their skins and split the beans.
2. Drain and rinse the beans. Pulse the herbs, onion, garlic, the 1/2 teaspoon of baking soda, flour, cumin, chili powder, salt, and half the lemon juice in a food processor until it has a pesto-like consistency. Add the beans and the remaining lemon juice and process until the mixture becomes a coarse paste.
3. Let the mixture rest for 30 minutes to let the flavor settle. Shape into golf ball-size falafels.
4. Put a large skillet onto the stove and pour in enough canola oil to cover the falafels (about 1 inch deep). Warm the oil over high heat until bubbles form around a wooden spoon inserted into the oil. Add the falafels (you may need to work in batches) and fry them for 4–5 minutes, until crisp and cooked through, turning to brown on all sides.
5. Scoop out the falafels with a slotted spoon and place on a plate lined with an old dish towel to absorb the excess oil. Serve warm with tabbouleh on the side, some tahini or hummus for dipping, and flatbread.
Tip There’s no need to discard the oil. Let it cool, strain off any pieces of falafel, and pour into a bottle for the next time you make falafels. The same oil can be used up to four times.
Tahini
Growing in drought-prone regions of the world we think of as the cradle of civilization, the resilient sesame is intent on spreading life. Its ripening seeds swell in the pod until eventually it bursts. Open sesame: Food is shared and more sesame is produced. Fittingly, just as sesame was a building block of cultivation and the world of food as we know it, tahini is the basis of many recipes here—a reminder that our vitality is interwoven with life that has gone before.
Makes
About 2/3 cup
Ingredients
1 cup sesame seeds
3–5 tablespoons canola oil or olive oil
Pinch of salt
Method
1. Add the sesame seeds to a dry skillet over medium heat, tossing until they begin to release their aroma. Hulled seeds have had their coats removed, unhulled are darker in color, a little more bitter tasting, and produce a slightly coarser paste. Experiment to learn which you prefer.
2. Transfer the toasted seeds to a baking sheet to cool. Place them in a food processor and process for 1 minute to produce a crumbly paste. Add 3 tablespoons of olive oil and a pinch of salt. Process for another 3 minutes. Add more oil and process again for a more liquid tahini.
3. Use your tahini as a stand-alone dip, pour it on roasted veg, or use it as an ingredient in the recipes that follow. It keeps in a jar in the refrigerator for about a month. If it separates, just stir it.
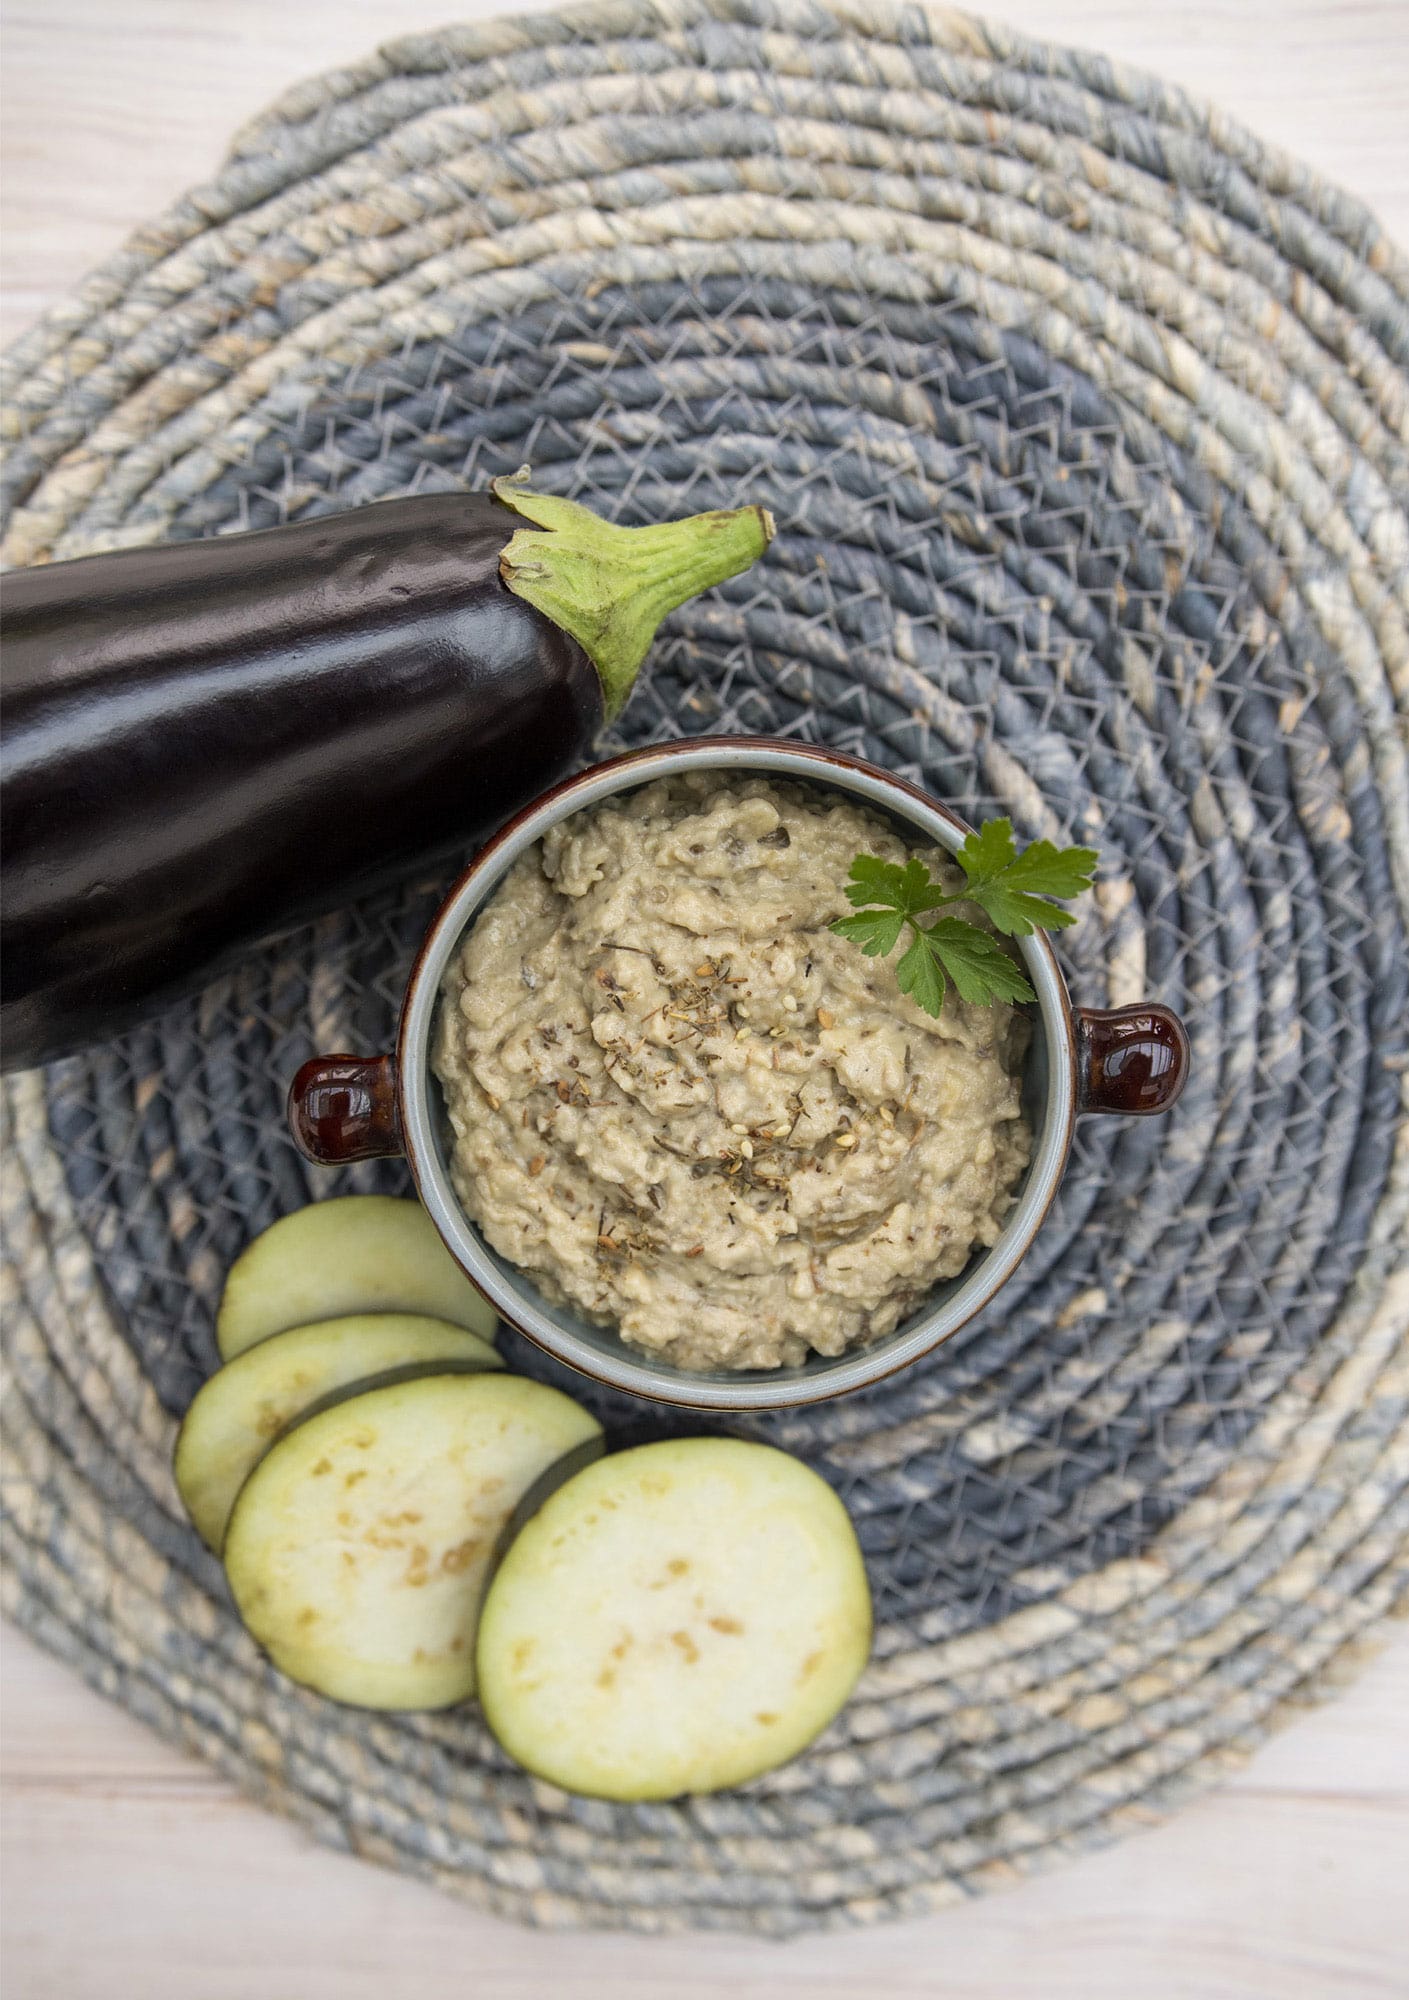
◁ Smoky Baba ghanoush
When the eggplant first made its way, via Sicily, to mainland Italy, people were suspicious of this new gleaming, purple-skinned vegetable and named it mela insana, “apple of insanity,” thinking anyone daring enough to eat it would surely go mad. Fortunately, the eggplant (melanzana in Italian) proved its worth and is now an essential ingredient in several Sicilian signature dishes.
Makes
About 2/3 cup
Ingredients
2 eggplants
1 teaspoon paprika, preferably smoked
1 teaspoon ground cumin
2 tablespoons olive oil
2 garlic cloves
1 heaping teaspoon zaatar (optional)
1 tablespoon tahini, preferably homemade
Juice of 2 lemons
Pinch of salt
Method
1. Preheat the broiler to medium.
2. Cut the eggplants in half lengthwise and score the surface, making crisscross cuts about one-third of the way through the flesh. Place them cut side up on a small baking sheet.
3. Mix together the paprika, cumin, and olive oil. Brush the mixture over the eggplants (or use the back of a spoon). Put the baking sheet under the broiler until the eggplants are soft and the juices start to run. Watch carefully: Don’t let the tops become too brown—you want the flesh to be gooey inside—so cover if need be.
4. Remove the eggplants and set aside to cool for 15 minutes. Scoop the eggplant flesh from the skins and put it into the food processor along with the garlic, zaatar, and tahini, and process. Add the lemon juice, a pinch or two of salt, and process again. Check and adjust the flavor and consistency to your preference.
Hummus
I like to picture our ancestors making this same dish alfresco, using a mortar and pestle to pound their chickpeas to a paste. Even using a food processor, the principle is exactly the same. I tend to make my hummus a little on the dry side, with less fat. That means, instead of using all of the tahini to make this recipe, I have some left over to drizzle on roasted vegetables.
Serves
6
Ingredients
2 cups dried chickpeas
1 vegetable bouillon cube
2 bay leaves
Pinch of baking soda
5 garlic cloves
2/3 cup tahini
Juice of 2 lemons
5–6 tablespoons olive oil
Pinch of salt
Zaatar or paprika, to serve
Method
1. Put the chickpeas into a bowl, cover with cold water, and rehydrate for 24 hours. Rehydrated beans look smaller than canned ones, which sit in liquid for months so they are bloated—I find them less flavorful than rehydrated ones.
2. Drain and rinse your chickpeas. Transfer them to a large saucepan with the bouillon cube, bay leaves, baking soda, and garlic. Add enough water to cover the chickpeas, bring to a boil, and let them simmer for 40 minutes. Using a slotted spoon, skim off any skins that have risen to the surface. Drain the chickpeas, discarding the bay leaves and garlic. Let cool, then remove the skins from the chickpeas and put them into a food processor. Add the tahini, lemon juice, 4 tablespoons of olive oil and 2 tablespoons of cold water. Process. Check the consistency and taste: Is it what YOU like? If yes, then voilà! If not, add more oil and/or a tablespoon of cold water until you have the consistency and flavor you prefer.
3. To serve, swirl a heaping tablespoonful onto a small plate, drizzle with olive oil, and dust with zaatar or paprika.
Variation: Roasted Carrot Hummus
Variety is the spice of life! Creatively adapt this recipe using what is to be found in your refrigerator or pantry.
Method
1. Follow the recipe for hummus and, while the chickpeas are simmering, preheat the oven to 400°F.
2. Scrub, peel, and slice 6 carrots into sticks. Transfer to a roasting pan. Mix 1 tablespoon ground cumin with 2 tablespoons olive oil and pour over the carrots. Roast for 20 minutes, or until soft. Remove and cool.
3. Continue with the recipe, adding the cooled carrots to the processed hummus and process again to combine. Check the consistency as before.
Variation: Lima Bean and Rosemary Hummus
Cooking to promote biodiversity means trying alternatives, such as lima beans instead of chickpeas, in your hummus.
Method
1. Follow the recipe for hummus but use 2 cups of dried lima beans in place of chickpeas. While your beans are simmering, preheat the oven to 425°F. Slice a head of garlic to expose the cloves. Drizzle 1 teaspoon of olive oil on the garlic and roast in the oven for 30–40 minutes, until the flesh is completely soft.
2. Continue with the recipe, adding the garlic and 2 tablespoons of dried rosemary to the food processor before processing. Check the consistency as before.
3. Sprinkle with dried rosemary in place of the paprika or zaatar.
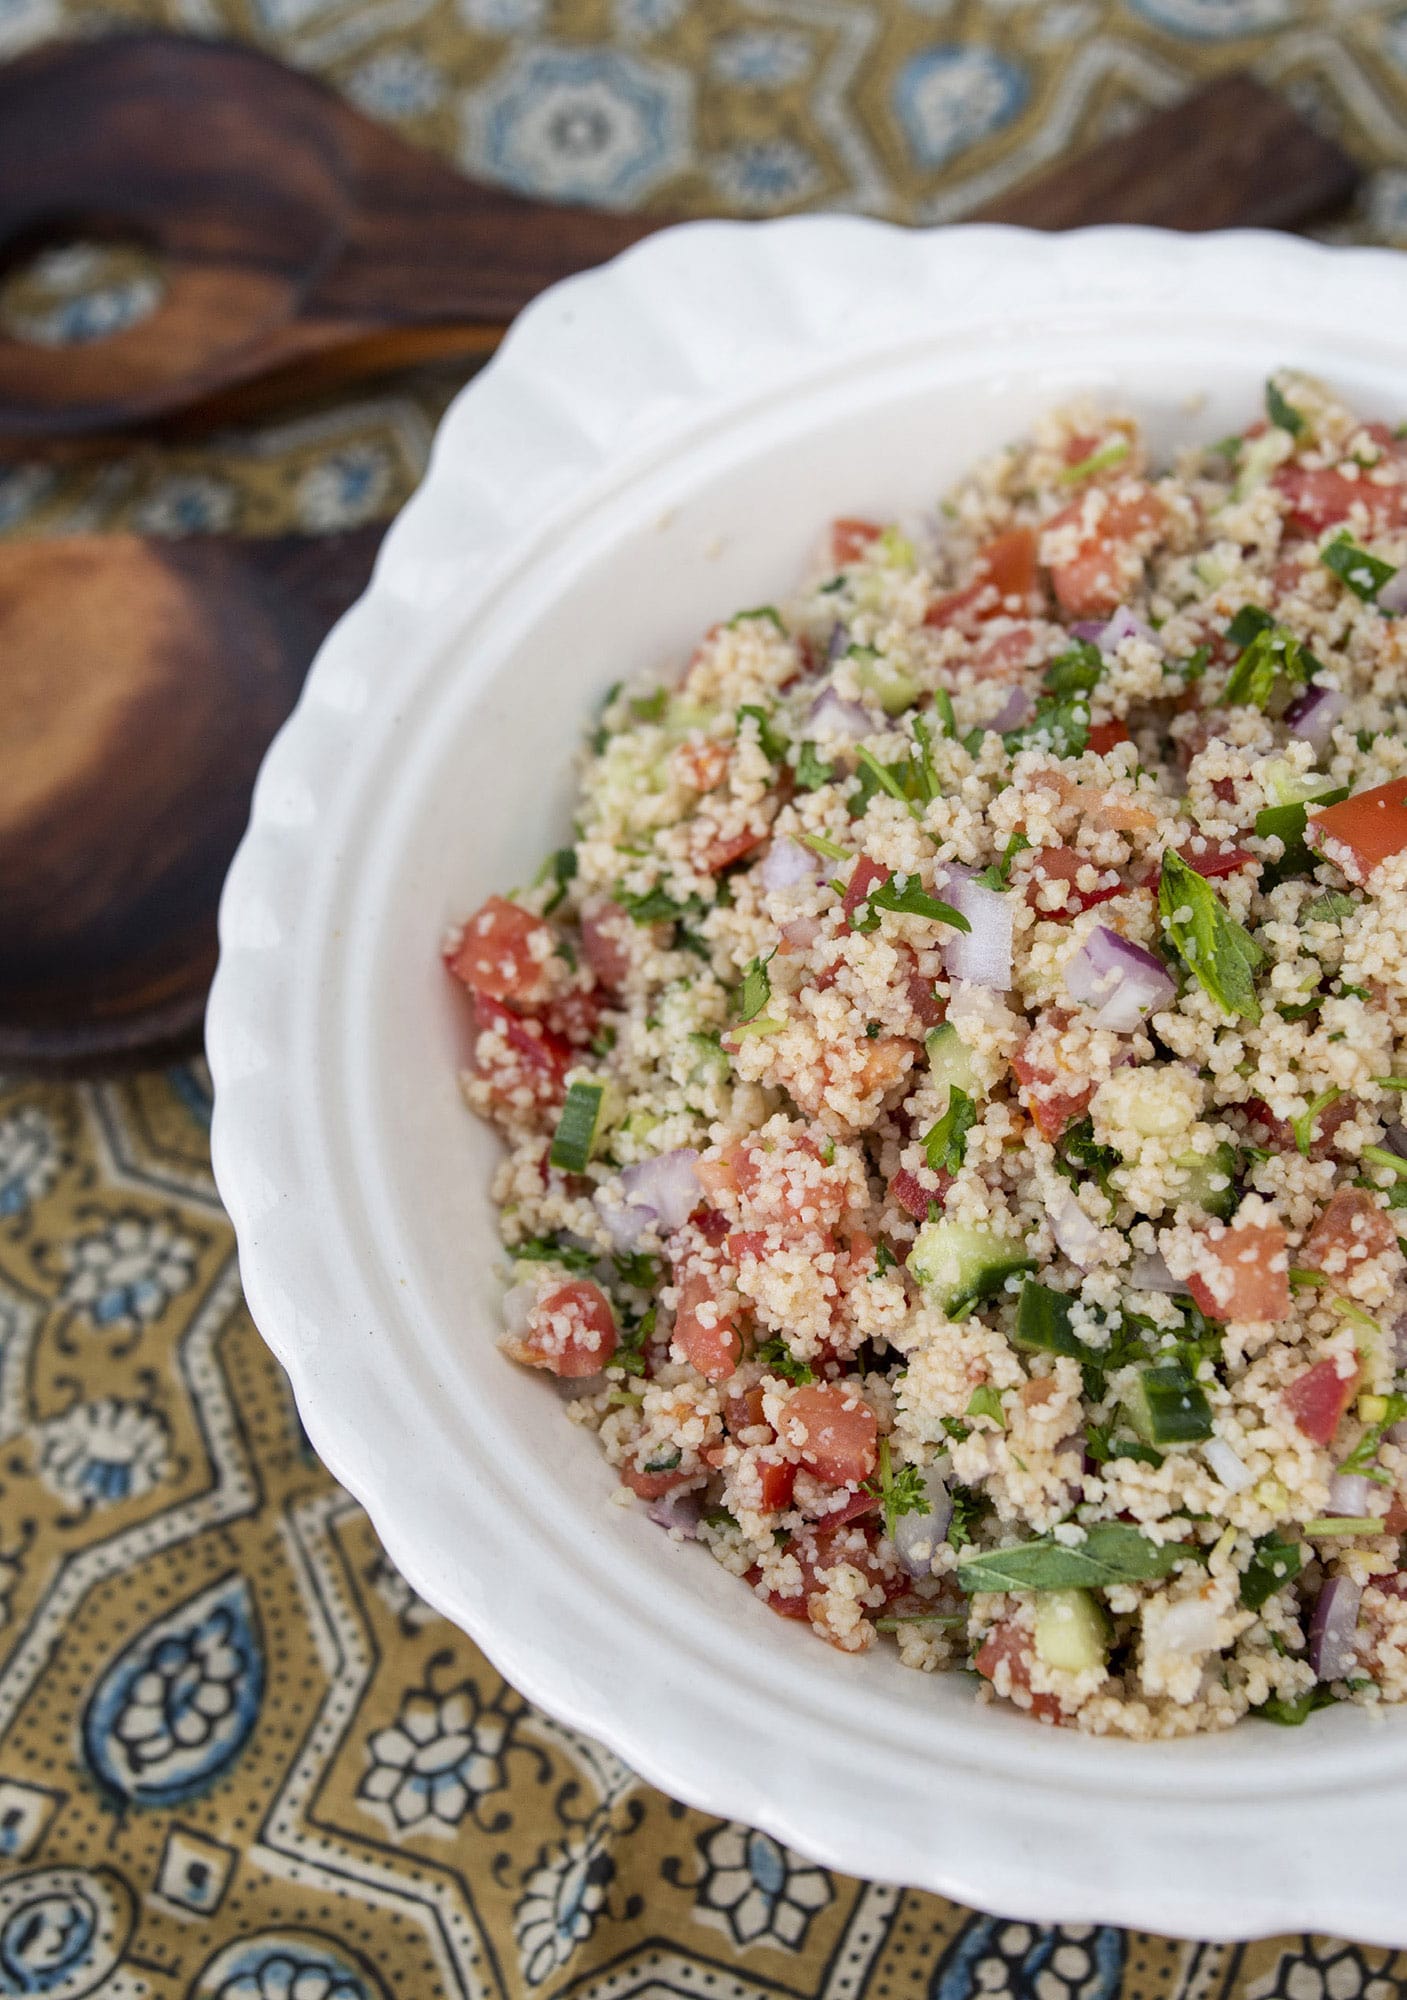
◁ Tabbouleh
Herbs are underappreciated. What would eating experiences be without their subtle flavor and cheerful splash of color? Tabbouleh is all about the herbs. In the Levant, this simple dish is traditionally served as part of a mezze, its fresh flavors sharpened with lemon juice. You can achieve the same acid zing using a locally produced apple cider vinegar.
Serves
6
Ingredients
2/3 cup bulgur wheat
1/2 vegetable bouillon cube
4 tomatoes
1 cucumber
1 red onion
3 handfuls of parsley leaves
1 handful of mint leaves
3–6 tablespoons apple cider vinegar
1/4 cup olive oil
Salt
Method
1. Rinse the bulgur wheat, then cover in boiling water, adding the half bouillon cube for extra flavor. Let stand for 15 minutes, then drain and put the bulgur into the refrigerator to cool.
2. Chop all the vegetables into small pieces. Don’t bother peeling the cucumber, because the peels hold in the water and keep your salad fresher. Along the same lines, drain the excess juice from your tomatoes.
3. Put the chopped vegetables, herbs, and chilled bulgur into a serving bowl. Add the vinegar, tasting as you do so, the olive oil, and salt and mix. Keep in the refrigerator until ready to serve—the crisper the salad the more the herb flavors zing.
Maple-drizzled Roast Butternut Squash
For me, fall is not complete without eating squash, which includes melons, cucumbers, and gourds. Squash were eaten by camels and horses that spread seeds as they roamed. Eventually, humans in Central America began to cultivate squash. As summer transitions into fall, butternut squash, brought to you by the collaboration of many forms of life, deserves a place at the table.
Serves
6
Ingredients
1–2 tablespoons olive oil
1 medium butternut squash, scrubbed clean
1 red onion, halved, then cut lengthwise into long thin strips
3 garlic cloves, minced
1 tablespoon minced fresh ginger
Handful of pitted, chopped dates
2 tablespoons zaatar
1 tablespoon maple syrup (or honey)
Salt and pepper
Parsley or cilantro sprigs, to garnish
Method
1. Preheat the oven to 400°F and oil a large baking sheet.
2. Cut the butternut squash at the bottom of its “neck” (because this is a slow-roasted squash, there is no need to peel it). Use a spoon to scoop the seeds and fibers from the “bowl” of the squash. Now chop your flesh into medium-size chunks.
3. Transfer the squash and onion to the baking sheet, drizzle with a tablespoon of oil, and season with salt and pepper. Stir to coat. Evenly space the vegetables and roast for 20 minutes, stirring occasionally. Add the garlic, ginger, dates, and zaatar and roast for another 10 minutes. Remove from the oven and pile into a serving bowl. Drizzle the maple syrup over the top and garnish with parsley or cilantro before serving.
Shakshuka with Sweet Potatoes and Brussels Sprouts
Many cultures observe periods of abstinence from eating to instill gratitude for abundance that is easily taken for granted. We all have a small fast period while we sleep at night. Breakfast is a daily moment to consider the value of food and the life on which we are interdependent. Shakshuka is traditionally a breakfast food. Serve it family style and celebrate nourishment made collaboratively, served communally. Any leftover filling makes a delicious lunch.
Serves
4
Ingredients
1 tablespoon olive oil
1 teaspoon ground cumin
1 teaspoon ground paprika
1/4 teaspoon ground cinnamon
1 large red onion, thinly sliced
2 tablespoons ginger juice (or use ginger beer)
4 medium sweet potatoes (about 11/2 pounds), peeled and cubed
1 pound Brussels sprouts, trimmed and quartered if large
1/4 cup broth made with 1/2 vegetable bouillon cube
1 (141/2-ounce) can of diced tomatoes
4 eggs
Salt and pepper
Torn cilantro or parsley leaves, to serve
Method
1. Preheat the oven to 400°F.
2. Heat the oil in an 11–12 inch ovenproof skillet over medium-low heat. Add the cumin, paprika, and cinnamon. Let the spices sizzle in the oil for 30 seconds before adding the sliced onion and ginger juice and cook down for about 8 minutes, until the onion has softened.
3. Add the sweet potatoes, sprouts, broth, and tomatoes. Cover the pan with a lid and cook over medium–low heat for 30–40 minutes, until the vegetables are soft, stirring occasionally.
4. Using the back of a spoon, make a well in the tomato mixture, crack an egg, and pour it into the well. Repeat with the other eggs. You may want to add a pinch of salt to each one.
5. Transfer the skillet to the oven and bake for 7–10 minutes, depending on how firm you like your yolks. When the eggs are baked, add a dash of pepper and some herbs. Bring the skillet to the table and serve hot.
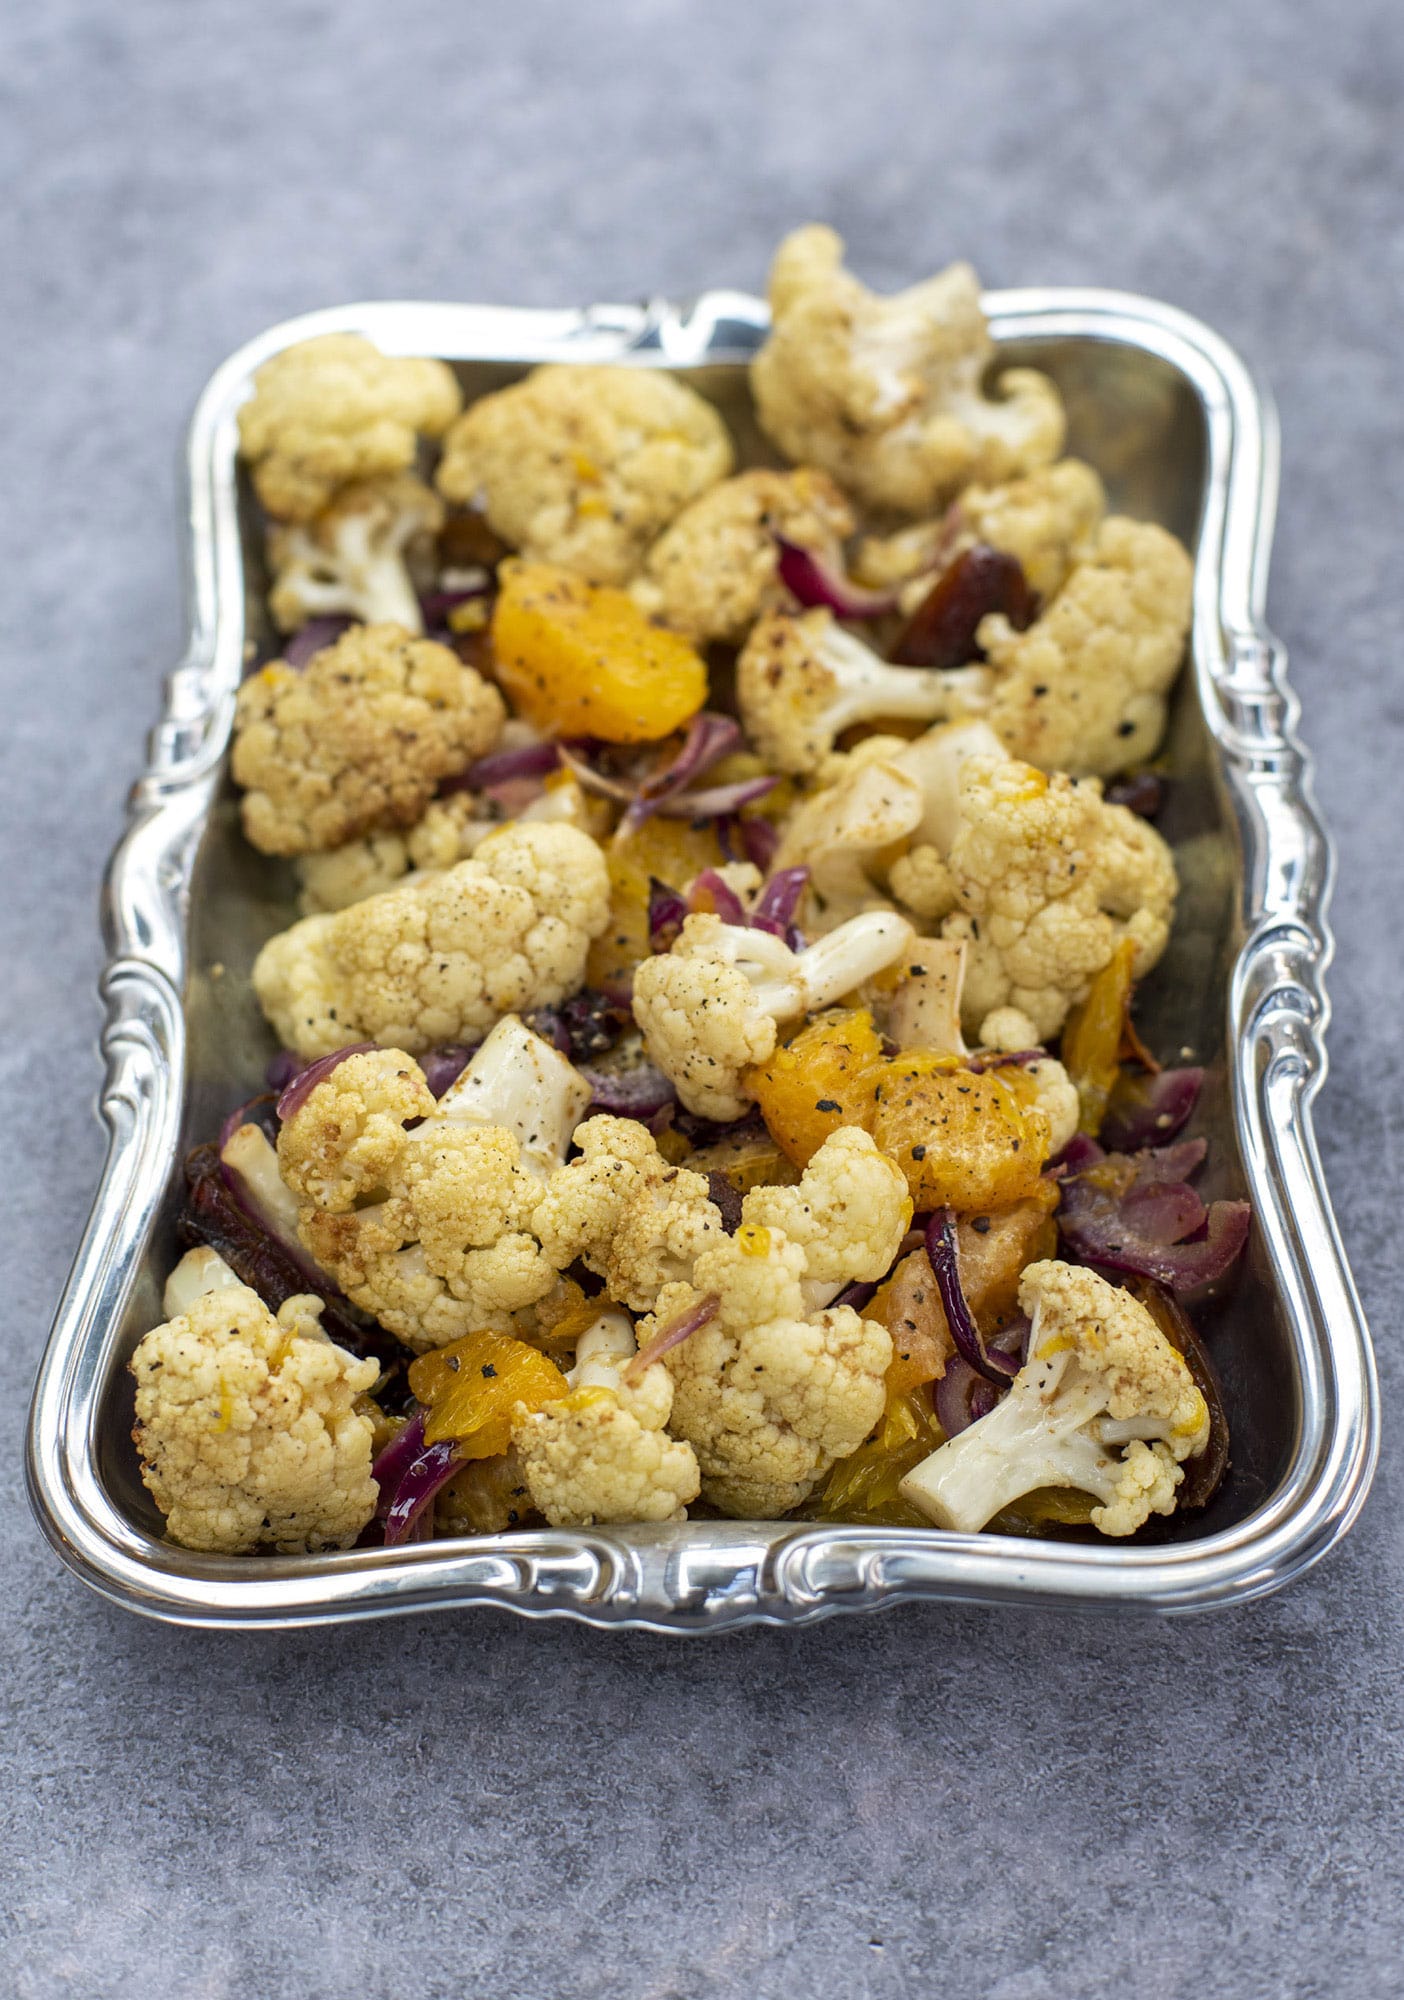
◁ Orange-roasted Cauliflower with Dates
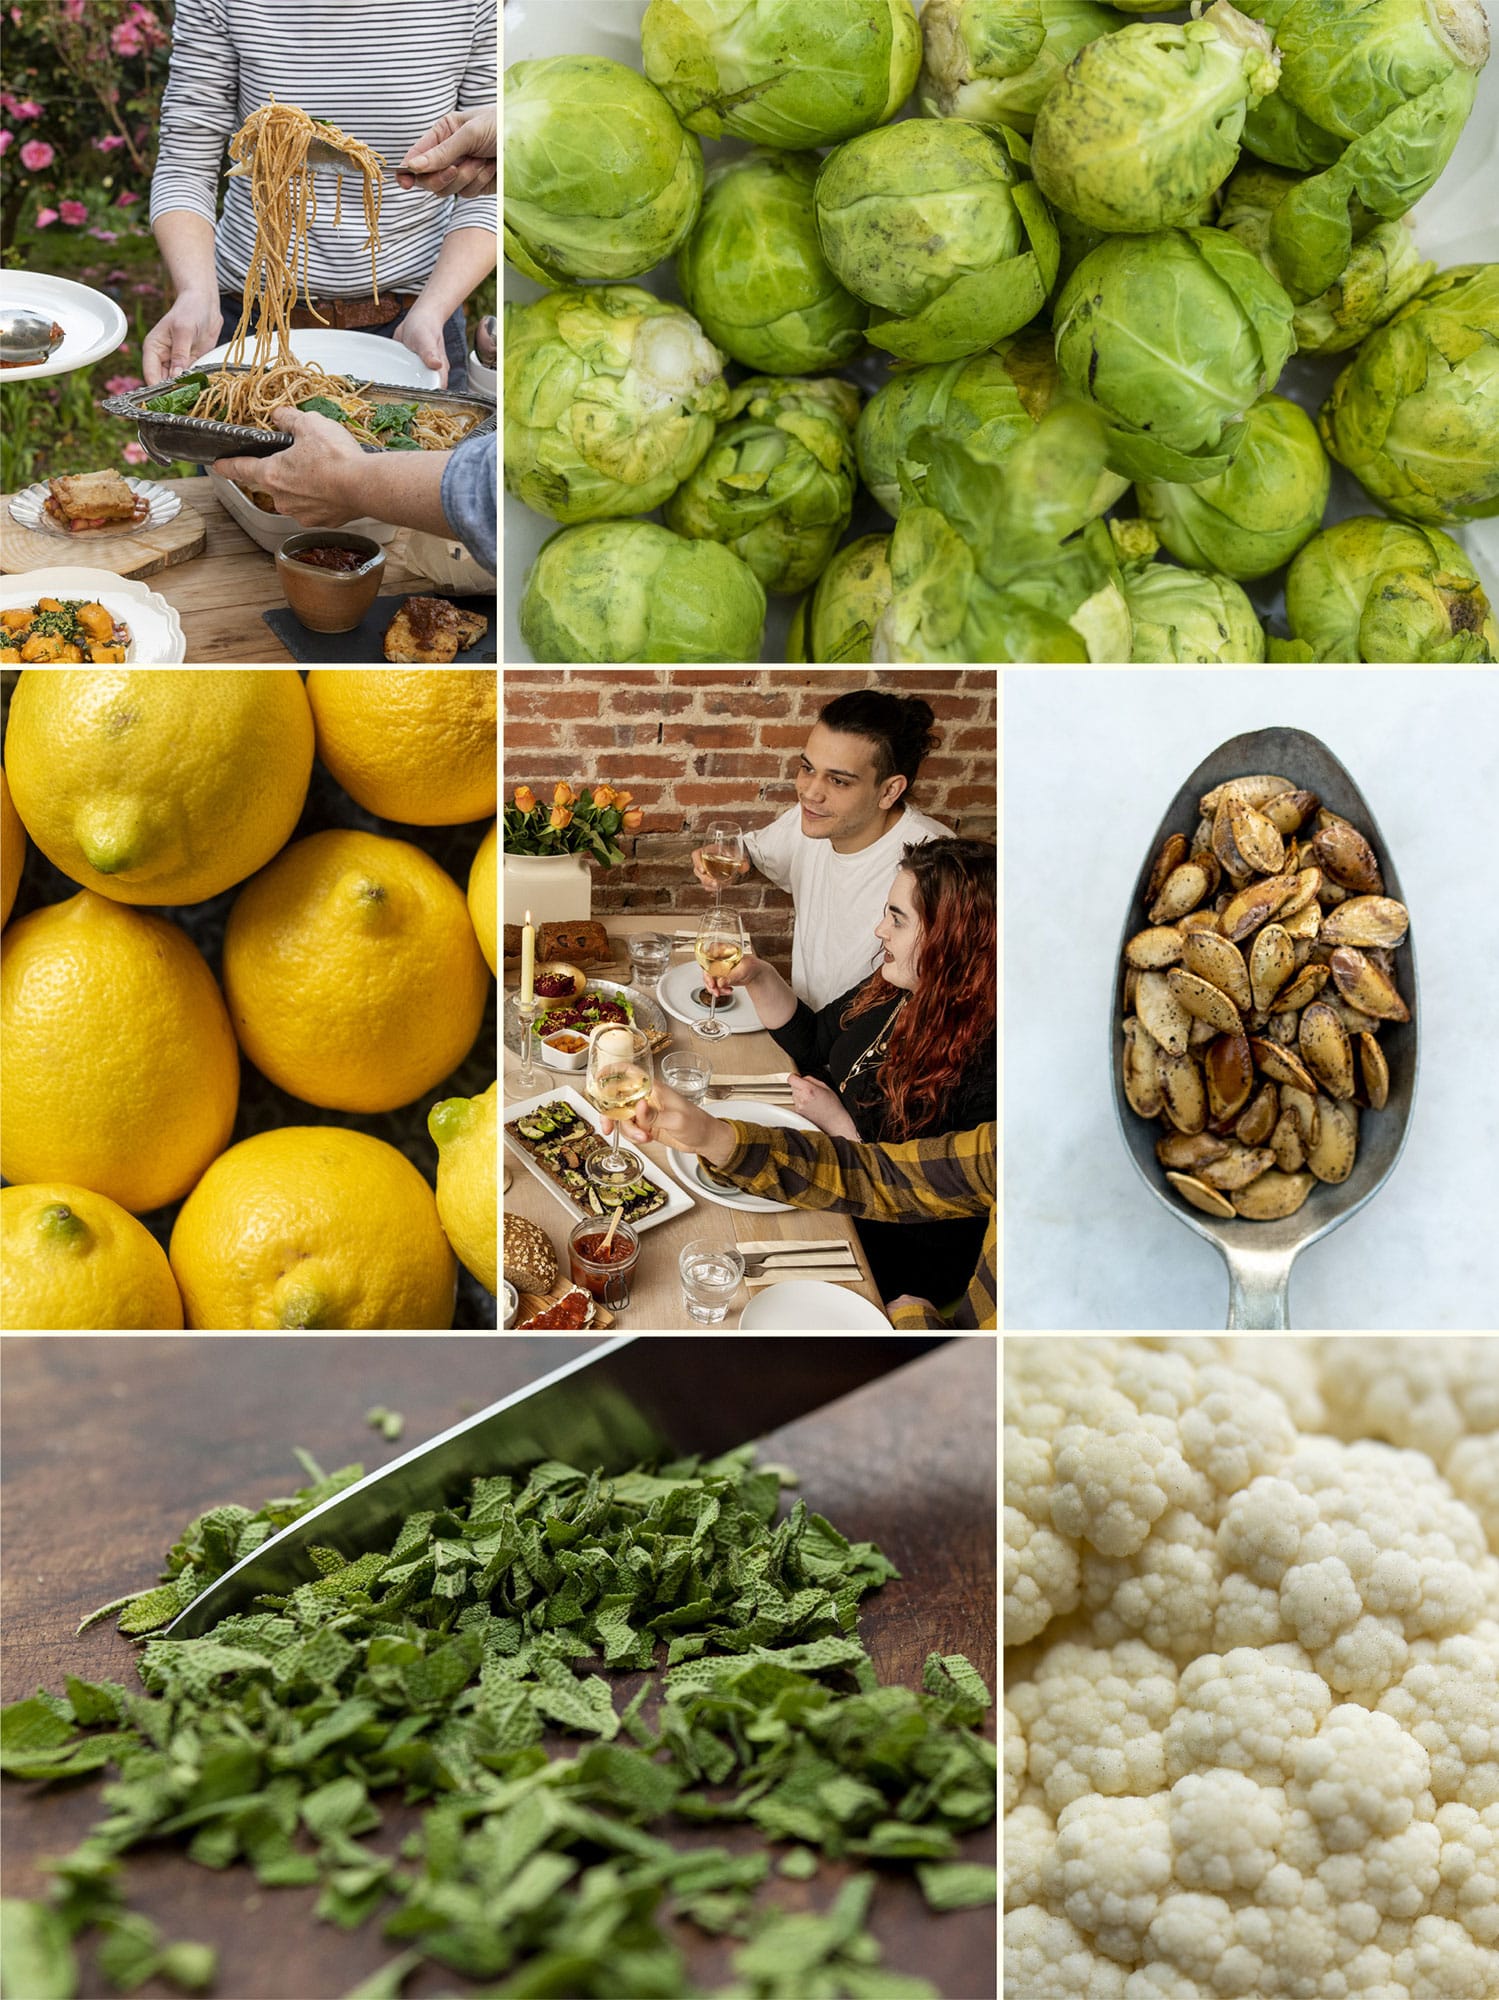
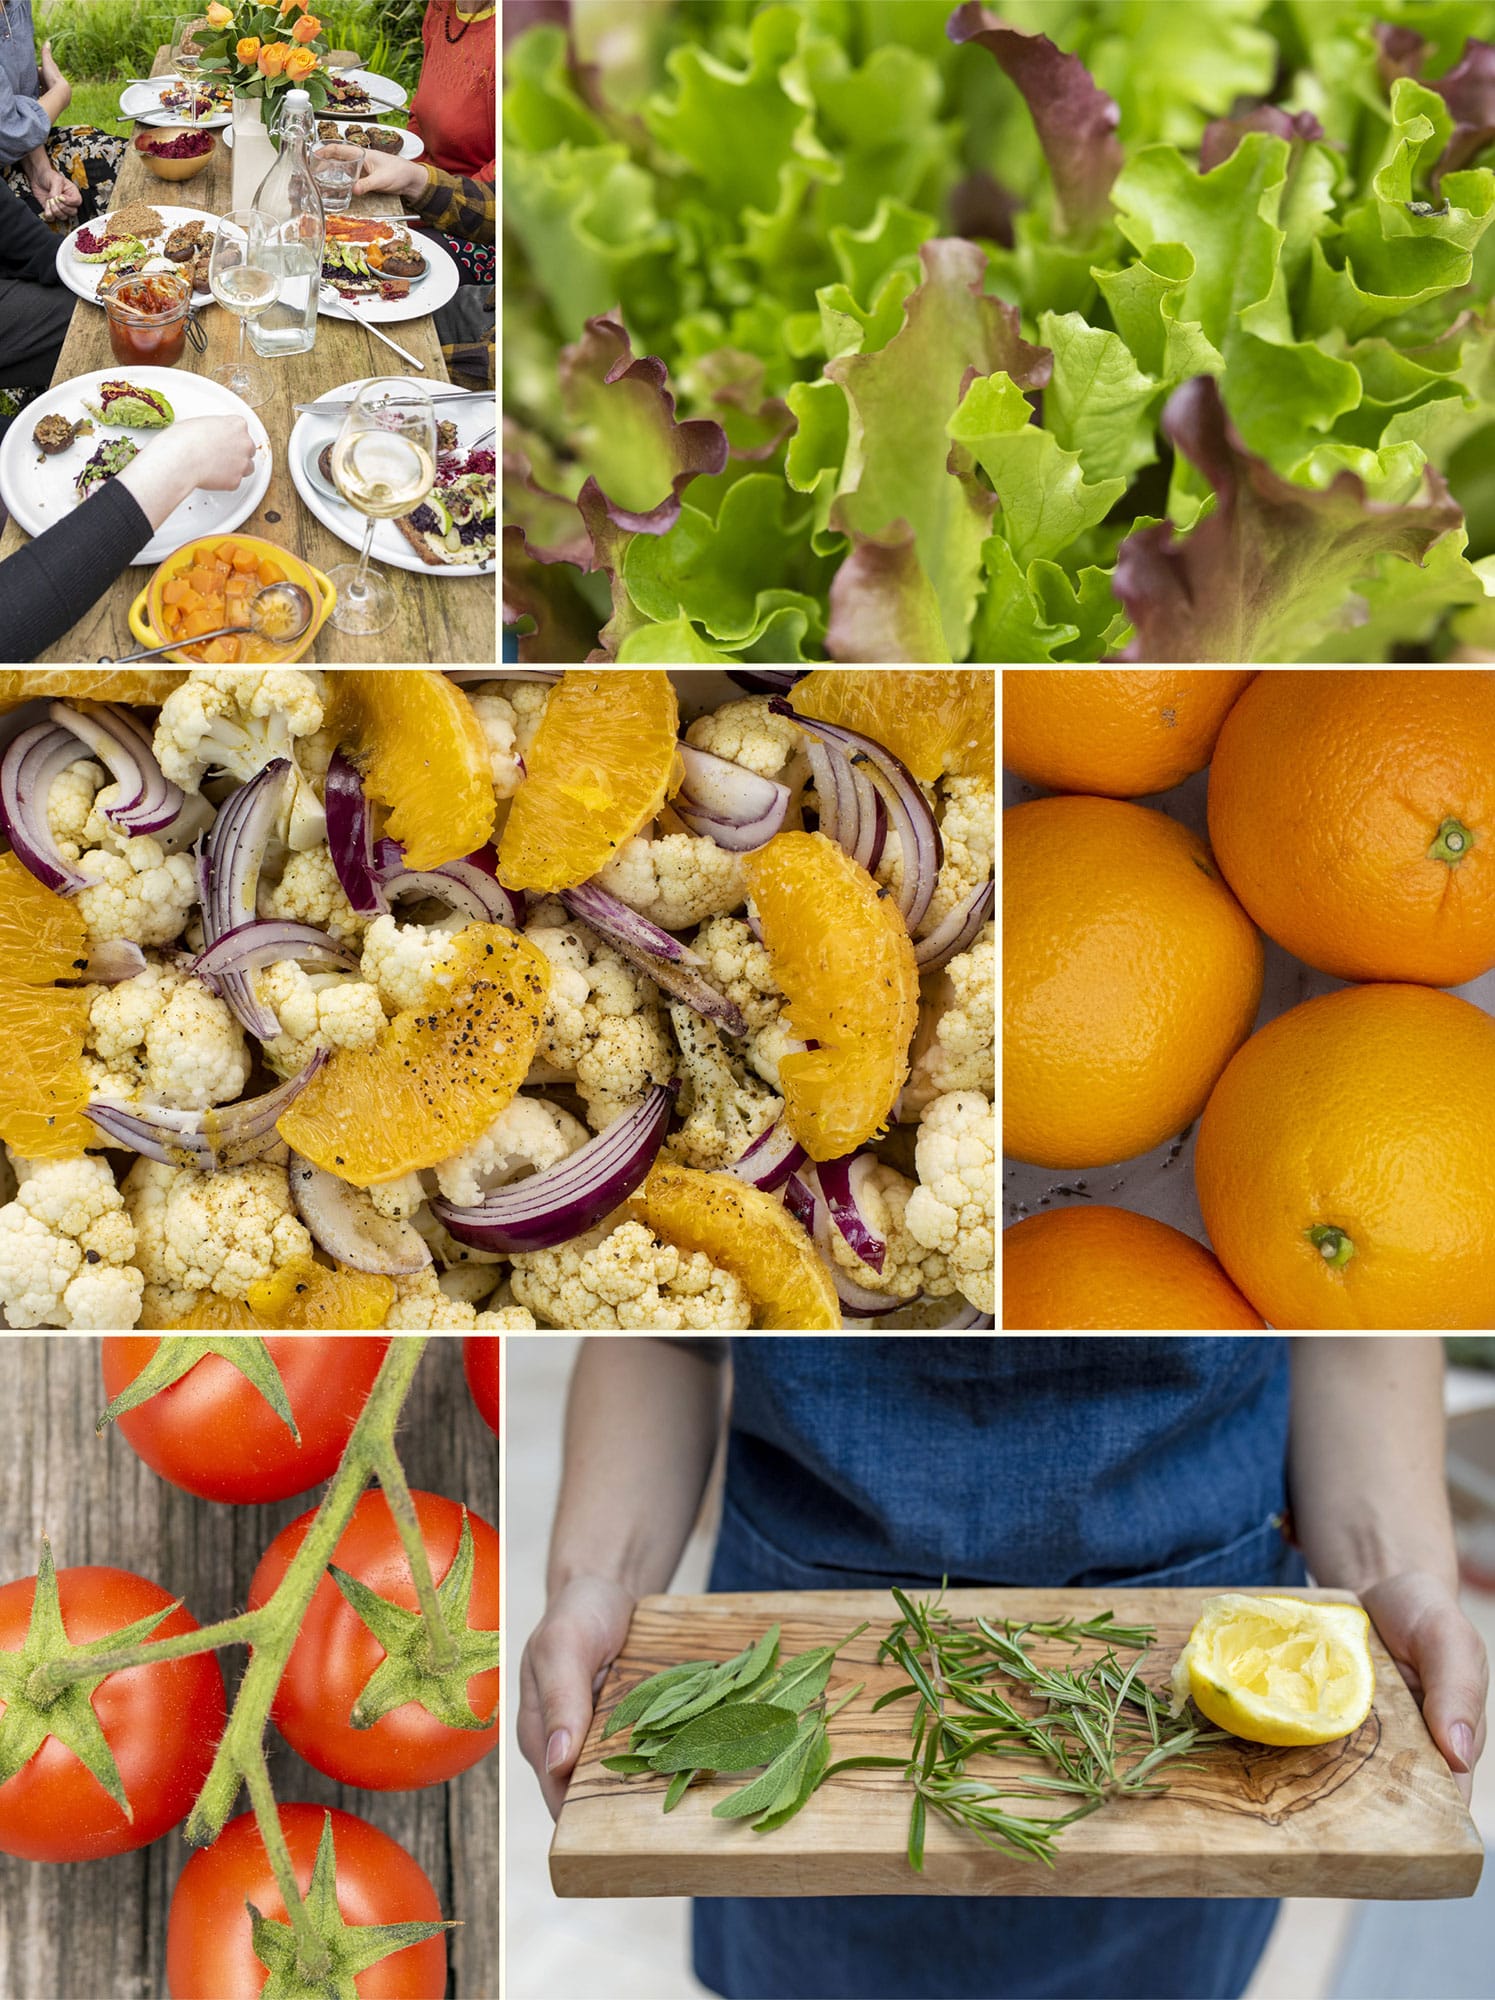
Mark Twain wrote in his 1894 novel Pudd’nhead Wilson: “Training is everything. The peach was once a bitter almond; cauliflower is nothing but cabbage with a college education.” Oh, to live in a time when vegetables were so valued that Twain chose to use them as an analogy for the human condition! Here is a roasted cauliflower dish, inspired by Twain, with which to play with vitality.
Serves
4
Ingredients
1 cauliflower, cut into individual florets
1/2 red onion, cut lengthwise into long thin slices
5 tablespoons olive oil
2 tablespoons ginger juice (or use orange juice)
1 orange, peeled and sectioned
1/2 teaspoon ground cumin
1/2 teaspoon ground cardamom
1/2 cup pitted dates
Salt and pepper
Method
1. Preheat the oven to 400°F.
2. Put the cauliflower and onion into a baking dish and mix with the oil, ginger juice, orange, and spices. Roast for 10 minutes. Remove from the oven, add the dates, and cook for another 5 minutes. Remove from the oven, stir to coat, transfer to a serving dish and season with salt and pepper before serving.
Ritual
Preserved Lemons
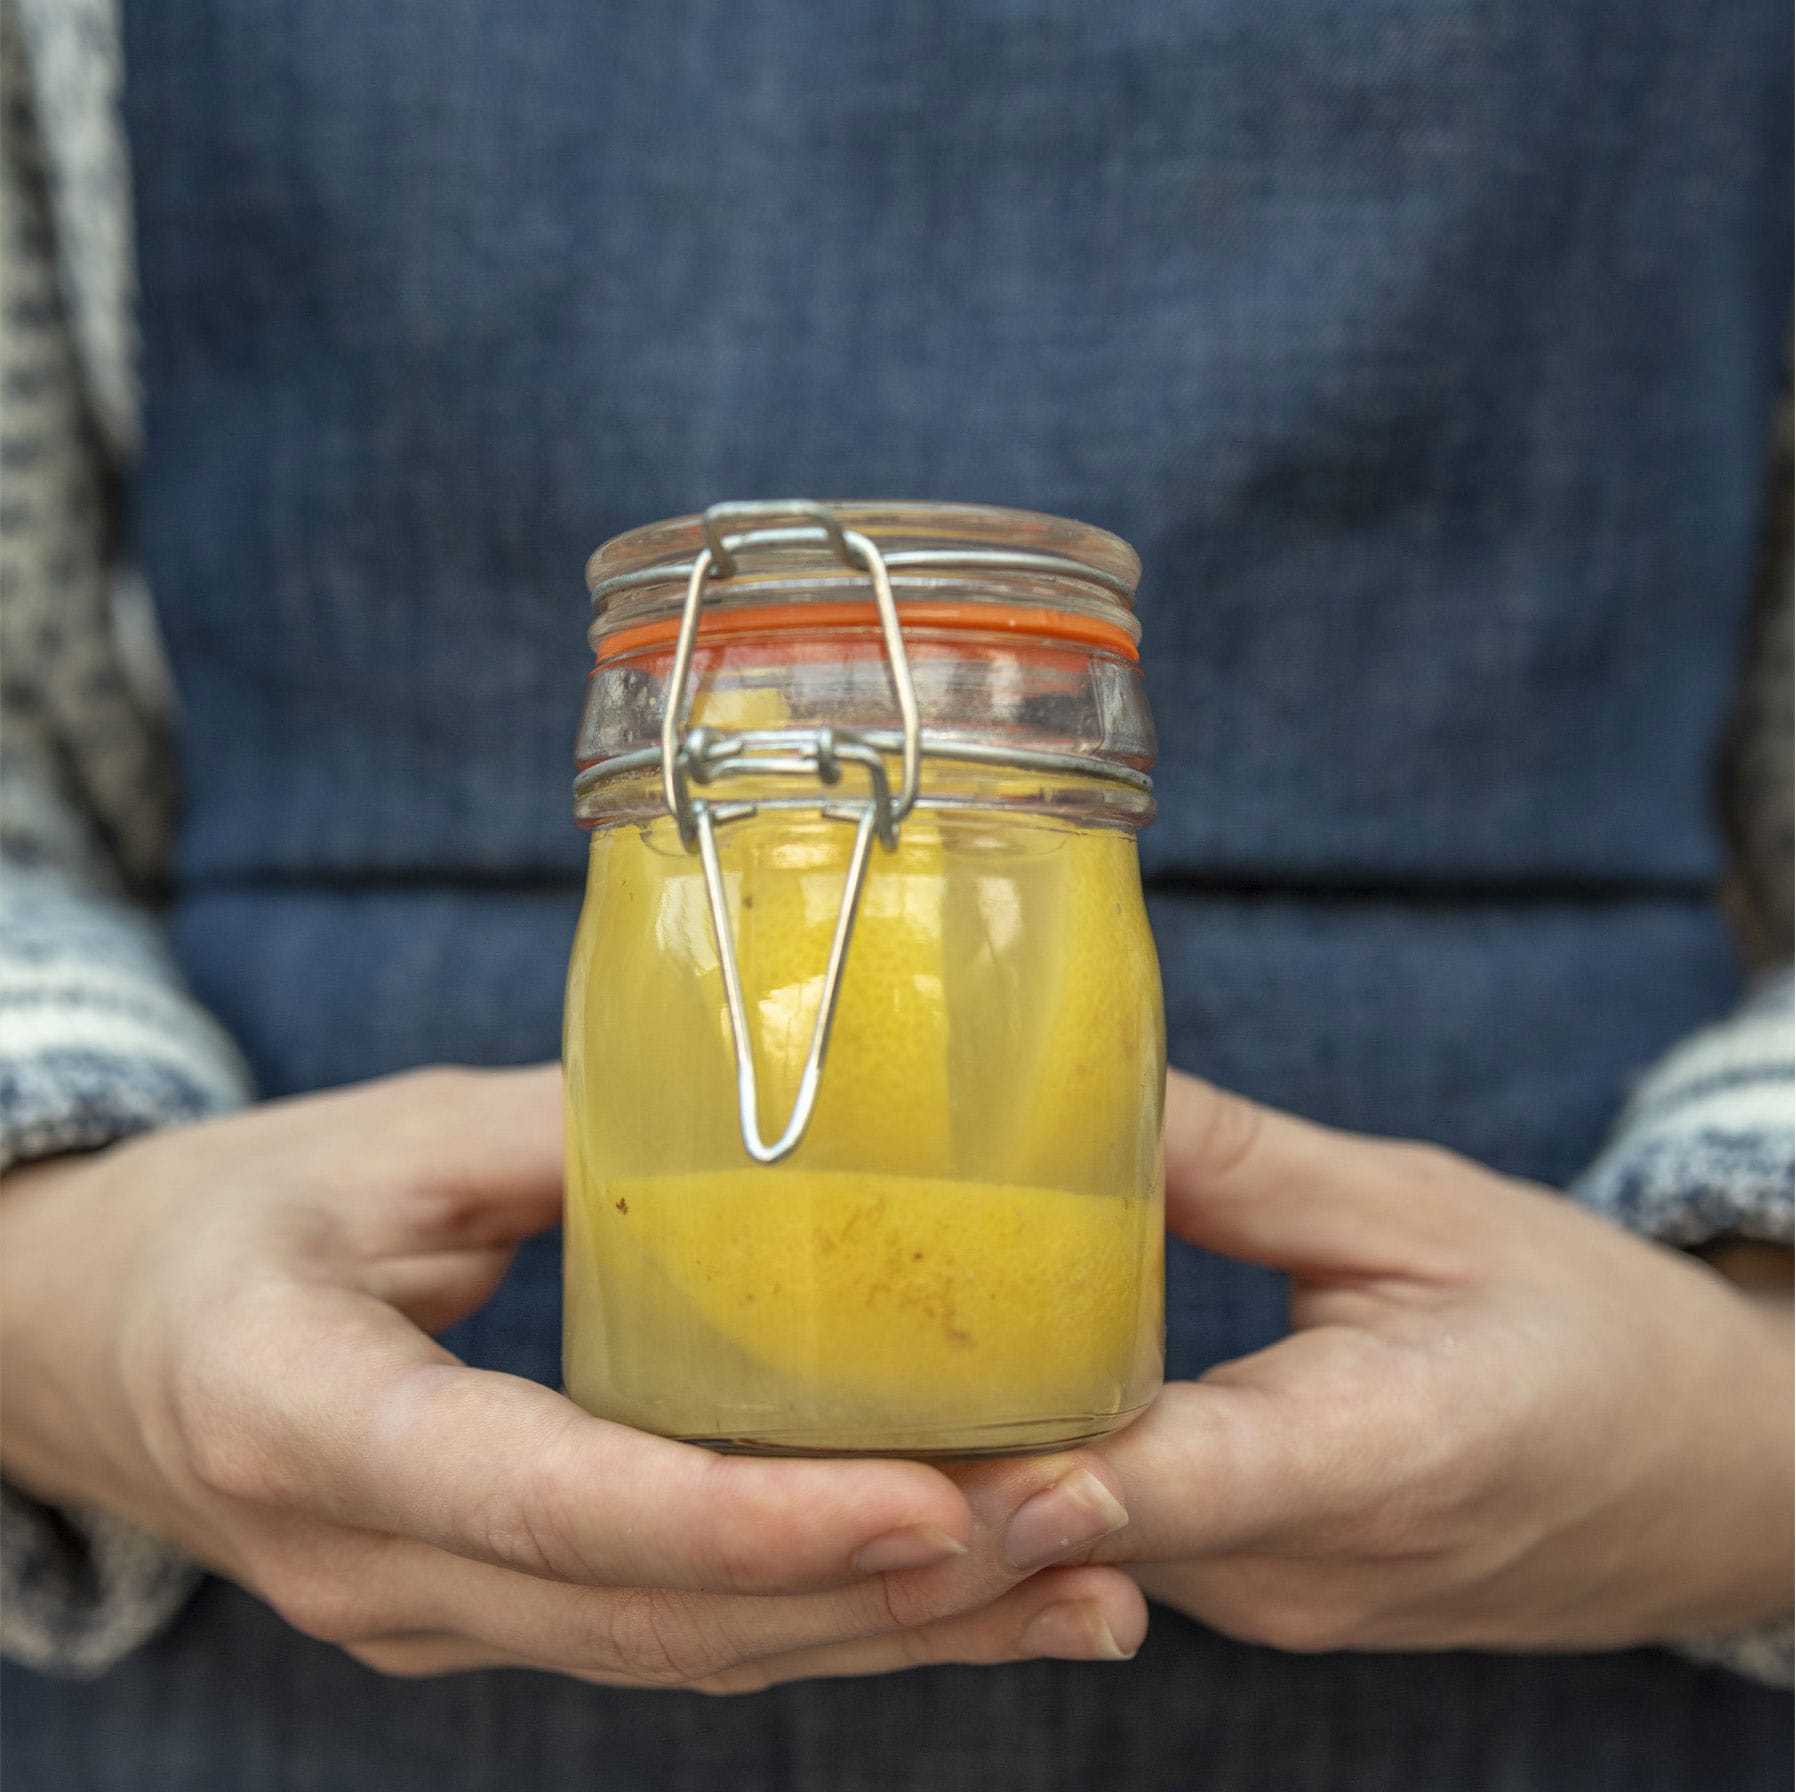
Before the food system became industrialized, communities would gather together to preserve food. To carry on this communal tradition, throughout the harvest season, I like to make preserves with friends, sometimes as a game at a dinner party. Preserved lemons, a food staple in the cradle of civilization, are simple to make and represent a way for you to share your nature-relatedness practice with others—a particularly apt thing to do when eating for collective vitality!
Makes
When making these with a group, I use small screw-top jars and allow for 2 lemons per person
Ingredients
Salt (I use a kosher or large-grain sea salt)
Lemons
Method
1. Preheat the oven to 275°F. Sterilize the jars and their lids using the method shown here.
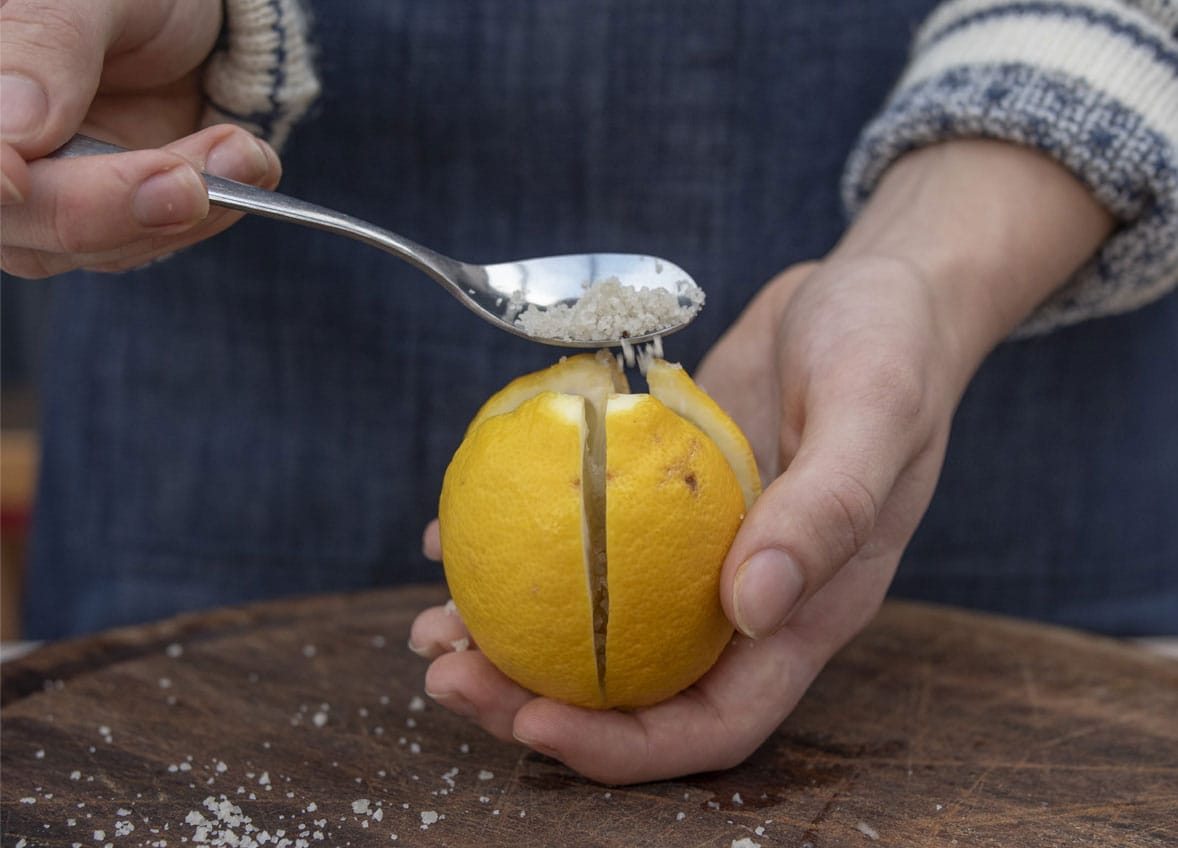
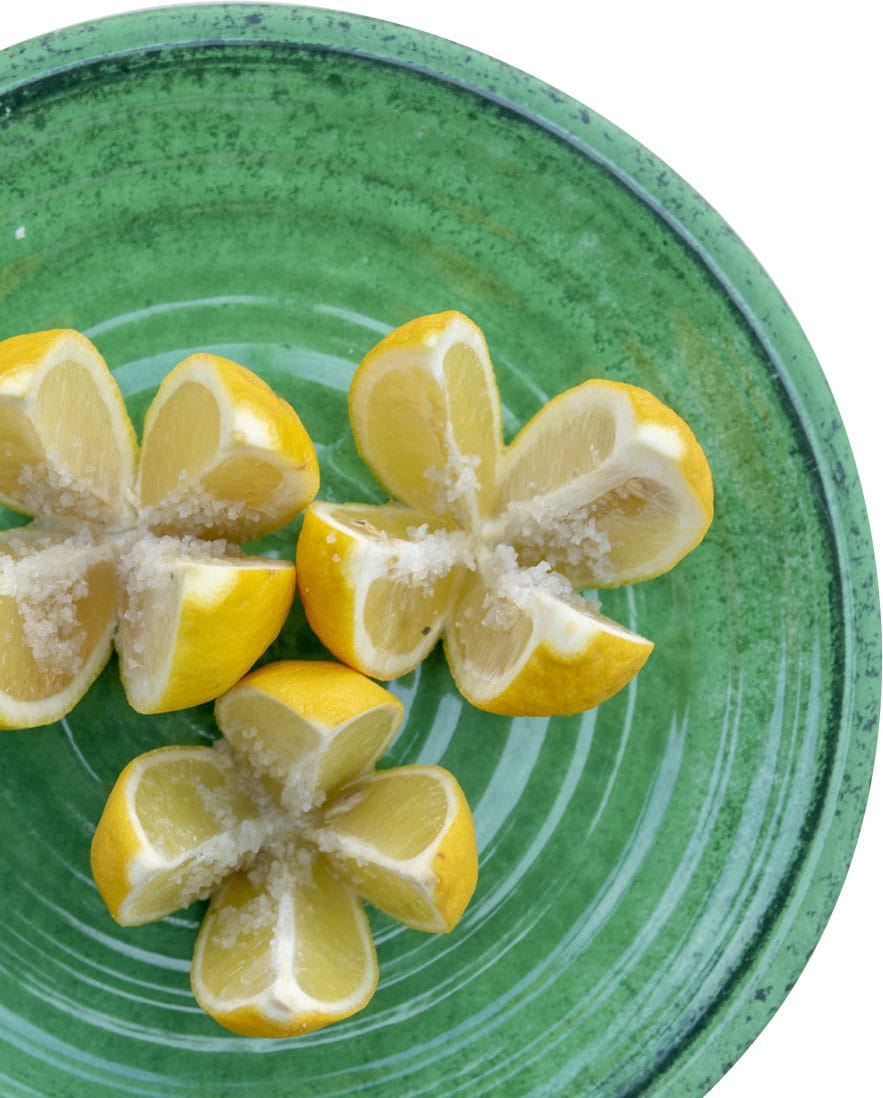
2. Cover the bottom of your jar with a thin layer of salt. Cut your lemon in quarters, either cutting right through or leaving them attached at the bottom. Put a generous pinch of salt on the flesh of each one. Take your first lemon and mush the cut and salted flesh side into the bottom of the jar. You want its juices to run; the lemon juice and salt make the salt solution that will preserve the rinds. Pile the remaining lemon quarters tightly on top of one another. The juices of all the lemons should cover the last piece you insert. If not, dissolve a tablespoon of salt in 1 cup of water and pour enough into the jar to cover.
3. Seal tightly and put the jars into a cool dark place for a month before using. Turn your jar upside down periodically so the salt doesn’t settle in the bottom. Once opened, store in the refrigerator, where they will last for six months.
4. To use: Take your whole or a quarter lemon and rinse it under cold water to remove the salty liquid (sometimes called brine). Scrape out the flesh, discarding any seeds, and chop the peel. I like to add the flesh to Middle Eastern tagines and stews.
◁ Preserved Lemon Spaghetti
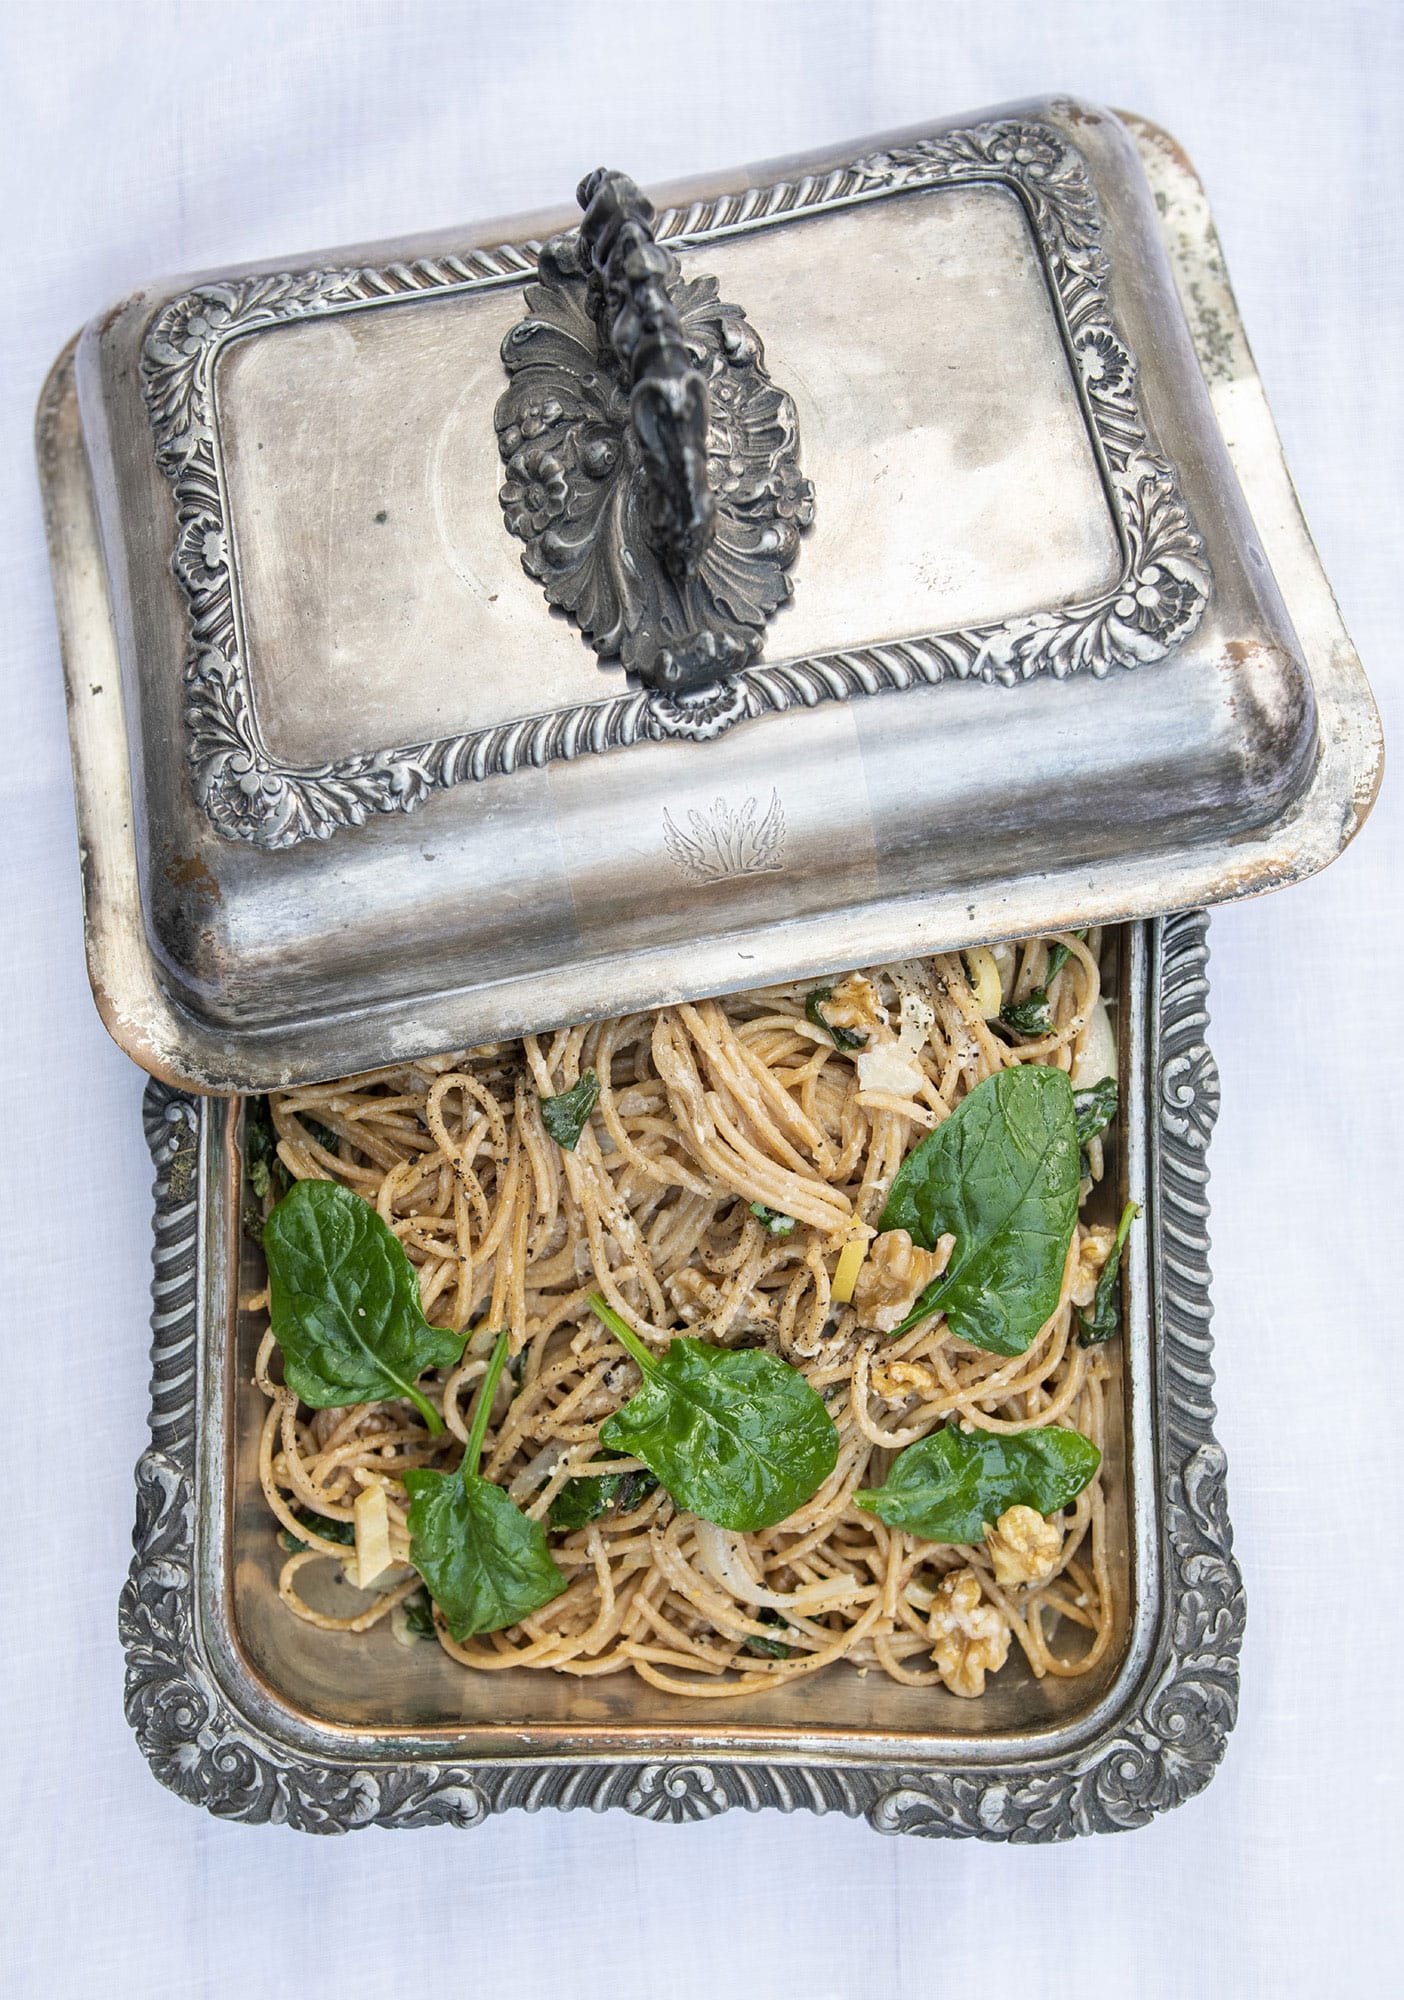
This simple dish makes a bold statement. It is impossible to bring a forkful of pasta drizzled in preserved vitality to your lips and not feel a zest for life. This takes moments to make; once mastered, you have a meal in 20 minutes or less. It is a great go-to for a night when you need a pick-me-up, particularly if you’re feeling somewhat run down by the urban jungle, because it tastes like eating sunshine.
Serves
4
Ingredients
1 pound spaghetti (I prefer whole wheat)
1 tablespoon olive oil
1 onion, sliced
2 garlic cloves, chopped
4 handfuls of fresh spinach (reserve a few leaves as garnish)
1 handful of walnuts
2 preserved lemon quarters, thinly sliced
Salt and pepper
For the sauce
Juice of 4 lemons (you need 1/2 cup)
1/2 cup olive oil
1 teaspoon Dijon mustard
1/2 cup grated vegetarian hard cheese
Method
1. Bring a large saucepan of salted water to a boil. Add the spaghetti and cook following the package directions.
2. Meanwhile, pour the olive oil into a large skillet and warm over low heat. Add the onion and garlic and cook until translucent.
3. For the sauce, mix the lemon juice, olive oil, Dijon mustard, and cheese in a separate bowl.
4. Add the spinach to the onions and garlic and cook until it softens. Add the walnuts just to warm, stirring so they don’t burn.
5. Drain the spaghetti, return it to the pan, and mix in the walnuts, spinach, onions, and garlic. Pour over the lemon sauce, add the preserved lemon, season to taste, and mix once again.
Oven-baked Preserved Lemon Potatoes
What I like most about cooking with preserved lemons is how the punch they add to simple dishes is the kick that reminds me of the extraordinary nature of our everyday foods. Take the potato. There are more than 4,000 varieties of potatoes, all containing more potassium than a banana and plenty of vitamins C and B. Potatoes nourish your body and soul—if you let them.
Serves
4
Ingredients
4 medium potatoes, thinly sliced
1 medium onion, chopped
2 tablespoons olive oil
1 heaping tablespoon zaatar
Peel from 3 preserved lemon quarters, chopped
Pinch of salt
Method
1. Preheat the oven to 400°F.
2. Put the potatoes and onion onto a baking sheet and toss with the oil, zaatar, and salt.
3. Roast for 15 minutes, then toss the vegetables and return to the oven for 10 minutes to make sure all sides are roasted.
4. Remove from the oven, add the lemon peel, and season before serving.
Pucker-up Preserved Lemon Salad
This is a simple dressing that adds some citrusy summer delight to every winter salad. I like to add a little warmth to my salads, particularly in winter. So, this recipe mixes both warm and cold veg. If you are serving the salad on its own, add an egg or a couple of slices of cheese to make a satisfying meal.
Serves
2 as a main, 4 as a side
Ingredients
2 heads romaine lettuce, chopped
1 tablespoon olive oil
1/2 onion, chopped
2 portobello mushrooms, wiped, peeled, and sliced
Pinch of chili powder or flakes
Handful of roasted pumpkin seeds (shown here)
For the dressing
8 teaspoons apple cider vinegar
4 teaspoons extra virgin olive oil
1 teaspoon Dijon mustard
2 garlic cloves, minced
Peel from 3 preserved lemon quarters, thinly sliced
2 teaspoons dried basil
Salt
Method
1. Start by making the dressing. Put the vinegar, oil, and mustard into a bowl and whisk. Stir in the garlic, lemon peel, basil, and a pinch of salt. I let the dressing stand for up to 30 minutes before serving to let the flavors develop.
2. Meanwhile, put the lettuce in a salad bowl. Heat the oil in a pan and sauté the onions until they are translucent before adding the mushrooms and chili powder or flakes. Cook for about 4 minutes, flipping the mushrooms to brown on both sides. Add the warm vegetables to your salad bowl, add the pumpkin seeds and the dressing, and toss before serving.
◁ Apple Cake Lasagne
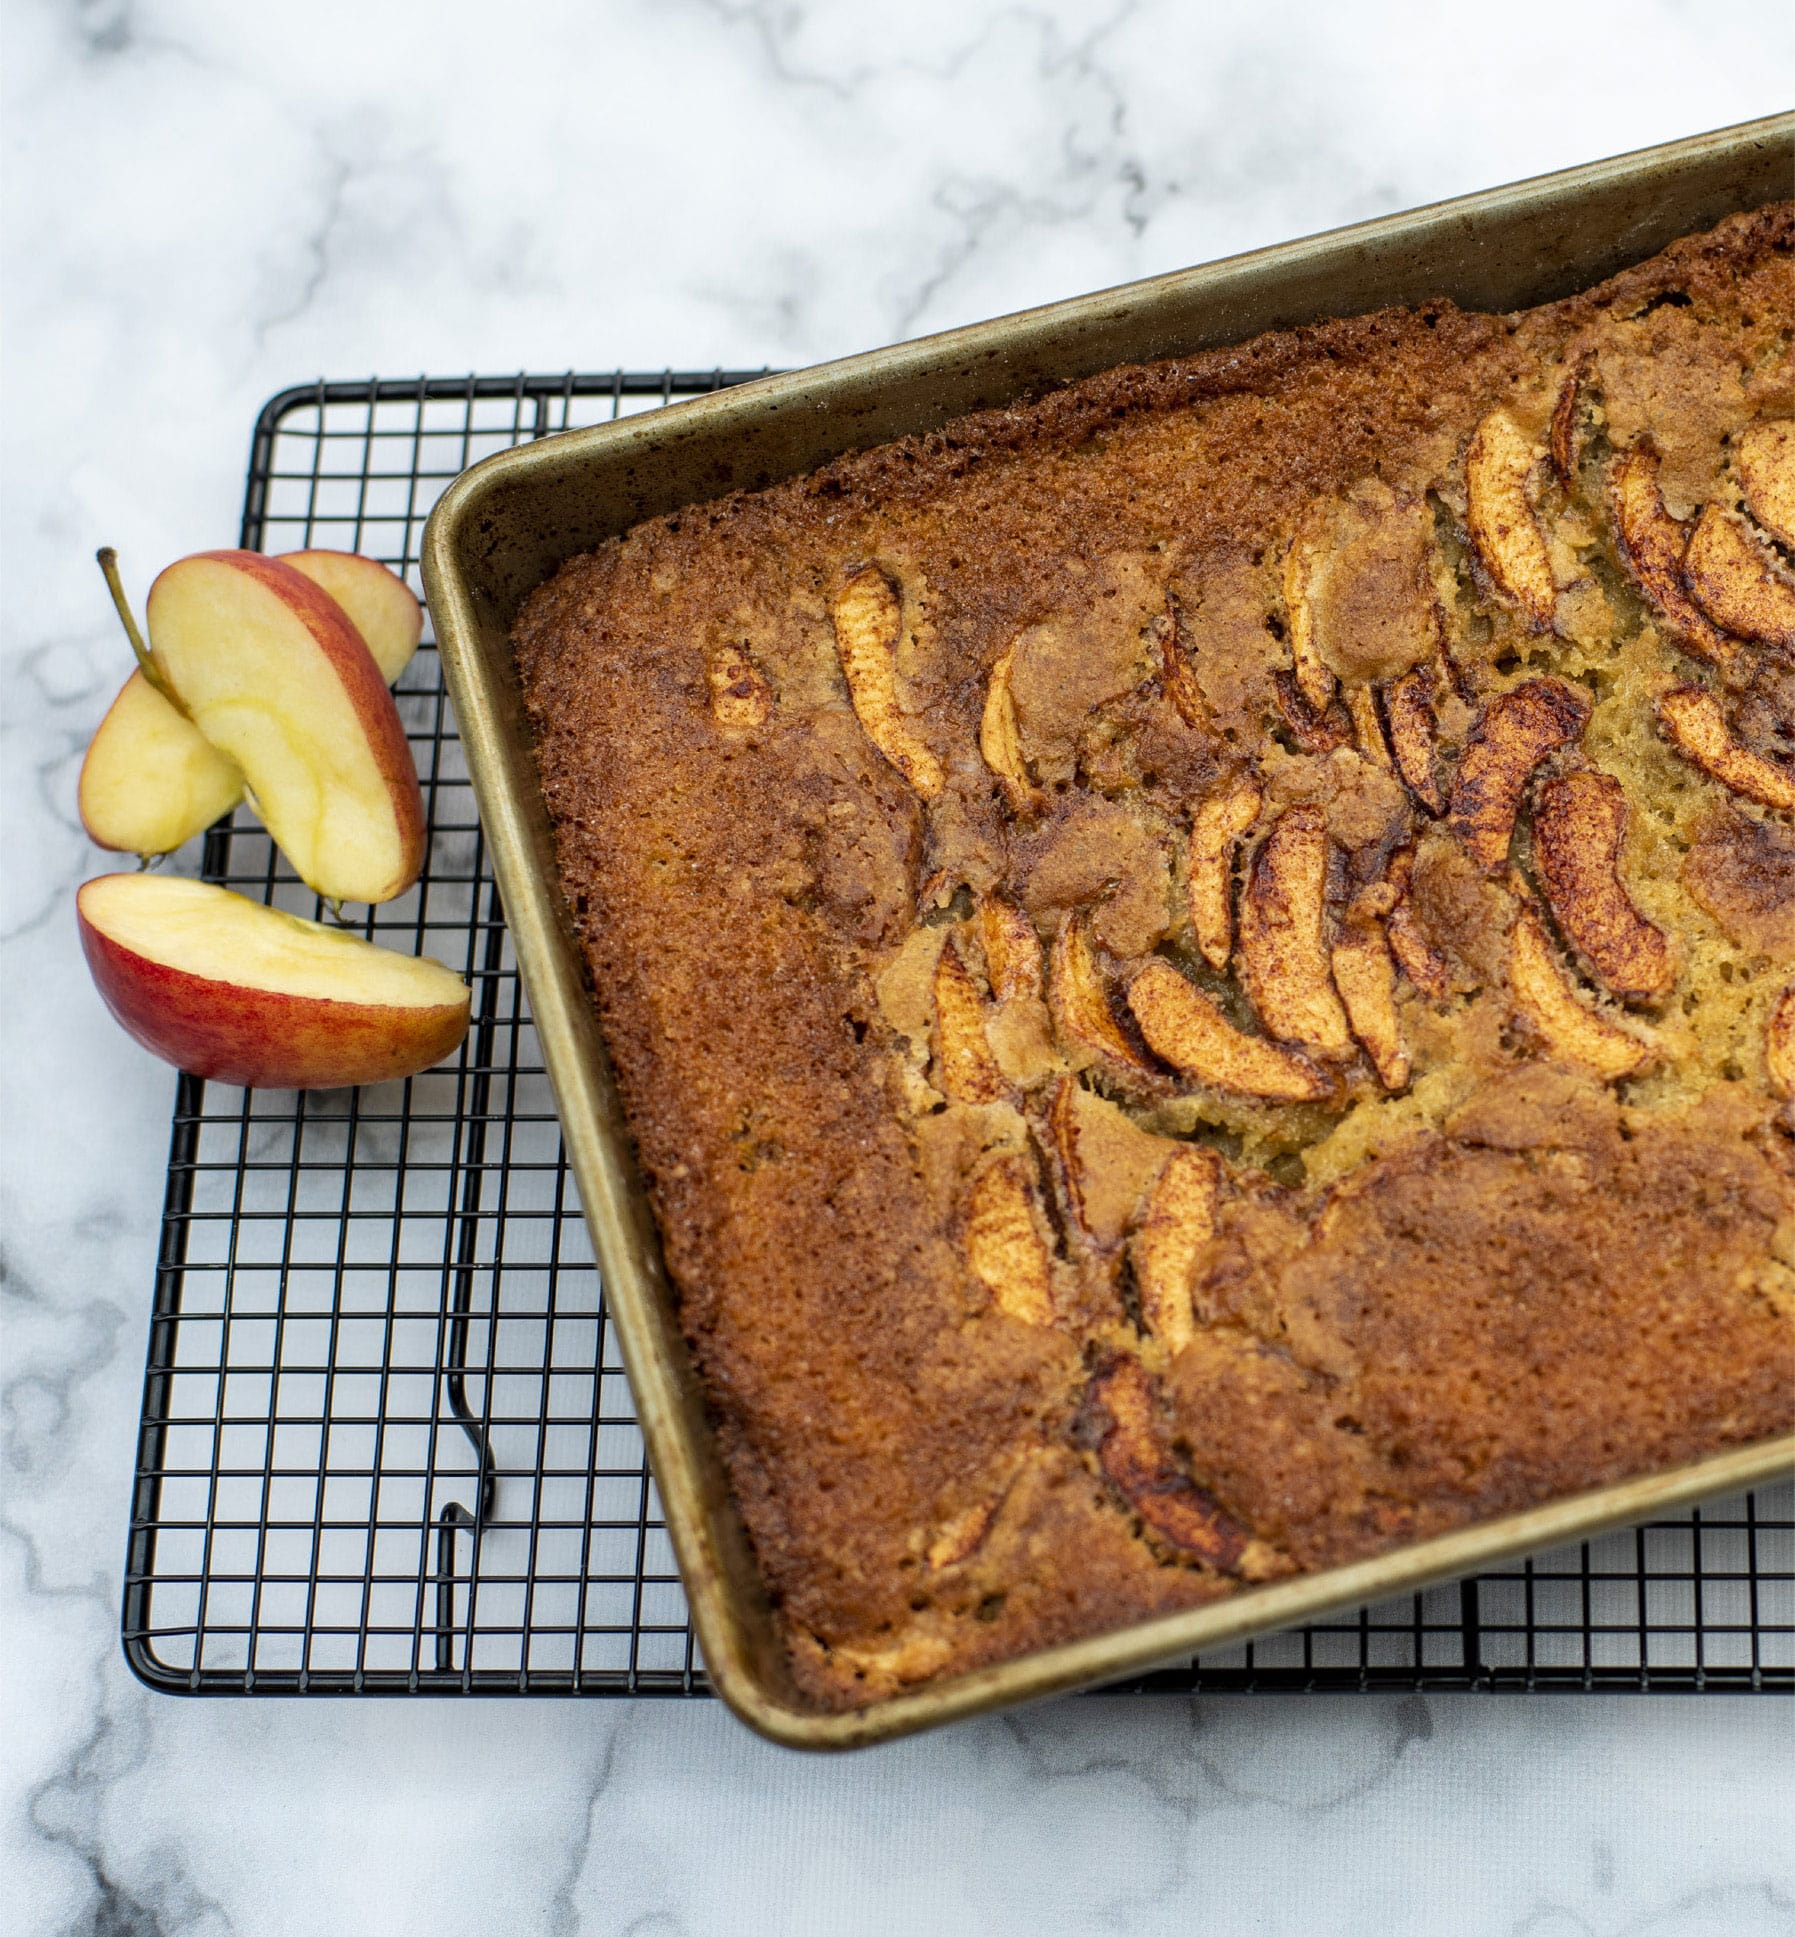
If you had a tasty snack and decide to plant a seed from your apple in the yard, be warned: If it grows into a tree, it will produce an altogether different-tasting apple. In order to plant an orchard of Empire, Fuji, or Pippin, a branch of one of those trees must be grafted onto another to produce similar fruit. Thousands of apple varieties that we humans like to eat (and many more that we don’t) grow in Asia, Africa, Europe, Oceania, and the Americas, resulting from millennia of layers of human and natural history. Something to consider as you layer this apple cake lasagne.
Serves
8–10
Ingredients
6 small apples
11/2 teaspoons cinnamon
1/4 cup sugar
For the cake
11/3 cups canola oil, plus extra for greasing
2 cups all-purpose flour, plus extra for dusting
1/2 teaspoon salt
2 teaspoons baking powder
1/4 teaspoon baking soda
2 cups sugar
1 tablespoon pure vanilla extract
3 extra-large eggs
1/4 cup oat milk
Method
1. Preheat the oven to 350°F and grease a 13 x 9 x 2 inch cake pan with a little oil, then dust with flour.
2. Peel, core, and slice the apples, thinly but not too fine. Save the peel to make apple powder (see here and follow the method). Mix the apples with the cinnamon and sugar and set them aside so that the sugar draws out some of the juice from the apples.
3. Combine the flour, salt, baking powder, baking soda, and sugar in a large bowl. I usually opt for unbleached, local, and organic “white” flour, which in practice is more like whole wheat. This makes the cake more wholesome and denser.
4. Beat together the canola oil, vanilla, eggs, and milk in a separate bowl. Slowly combine the dry and wet ingredients and beat together until there are as few lumps as possible.
5. Pour half the batter into the cake pan, then layer it with half the apple slices. Spread the remaining batter on top, then layer with the rest of your apple slices. Pour any juices from your apples over your cake. Transfer the pan to the oven and bake for about 45 minutes. Check your cake after 45 minutes and return it to the oven at 5-minute intervals until a toothpick inserted in the center comes out clean.
6. Cut into squares and serve. Any leftovers are just as good—if not better—the following day.