11.12 Power Save Start Time
Menu Position MENU --> 2 --> Pwr save Start Time
What it Does Controls how long before the camera shuts itself off
Recommended Setting “1 minute”
The camera automatically shuts itself off if none of its buttons have been pressed for a certain number of minutes (as determined by “Power Saving Start Time” setting) and if there is nothing detected by the IR sensor near the EVF. This parameter can be set to anywhere between 1 minute and 30 minutes.
TIP 1: When the camera is hooked up to a TV, or is being powered by the USB port, this parameter is ignored and the camera stays on indefinitely. TIP 2: If you are uploading your pictures to your home computer via Wi-Fi, or are doing so via an Eye-Fi card inserted (Section 11.7), the Power Save setting will be ignored until all of the pictures have finished downloading. |
Menu Position MENU --> 2 --> NTSC / PAL Selector
What it Does Selects which of the two popular video standards to use (these tend to be country-specific)
Recommended Setting NTSC (because that’s the standard in the U.S. where I live)
This feature allows you to select between either PAL or NTSC video modes. The one you choose depends upon the standards used in the country you live in. When you change the video format using this function, the camera reformats the card (I don't know why) and then reboots so it can take effect. So be sure to copy all the pictures off your memory card before invoking this feature!
VERY STRANGE: When you switch modes, the camera warns you that the memory card needs to be reformatted. When going from PAL to NTSC this is exactly what happens; however when going from NTSC to PAL, the camera warns you that a reformat needs to happen but doesn't actually reformat the card UNTIL YOU TRY TO SHOOT A MOVIE. Then it will insist on reformatting the card. So the behavior is slightly different depending on which mode you're switching to. IMPORTANT TIP: All of this NTSC and PAL stuff are all ANALOG TV standards – if you’re playing back on an HDTV or a computer, these differences shouldn’t matter, as all modern equipment can deal with the various frame rates. (At least in most cases. I hooked up one of my European cameras to two HDTVs – one worked just fine (they were both Samsung) and the other gave the error “Mode not supported”; whereas my US version worked beautifully on both.) |
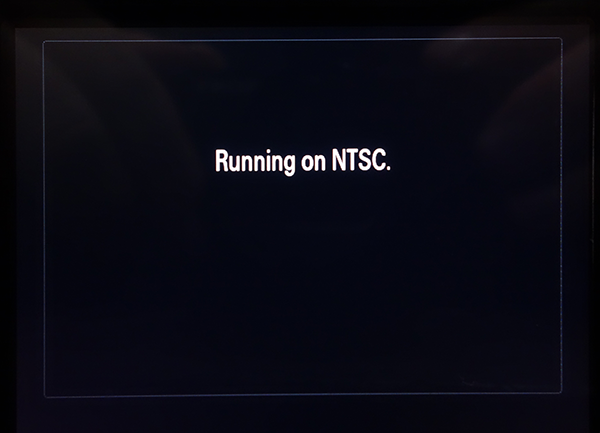
TIP: If you have a camera that defaults to one standard (such as PAL) and you change this setting to NTSC, the camera will give you a “Running on NTSC” warning each and every time it turns on or wakes up from sleep mode. And it will only go away a second or two after pressing the shutter release button halfway. Annoying, an no, there’s no way to get rid of it!! 
|
Menu Position MENU --> 3 --> Cleaning Mode
What it Does Vigorously shakes the sensor in order to loosen (and hopefully shake off) any dust particles that might be clinging to the surface
Recommended Setting n/a
This feature gives the sensor a gentle ultrasonic vibration to shake off some dust. It’s almost impossible to see or hear, but that’s what’s happening.

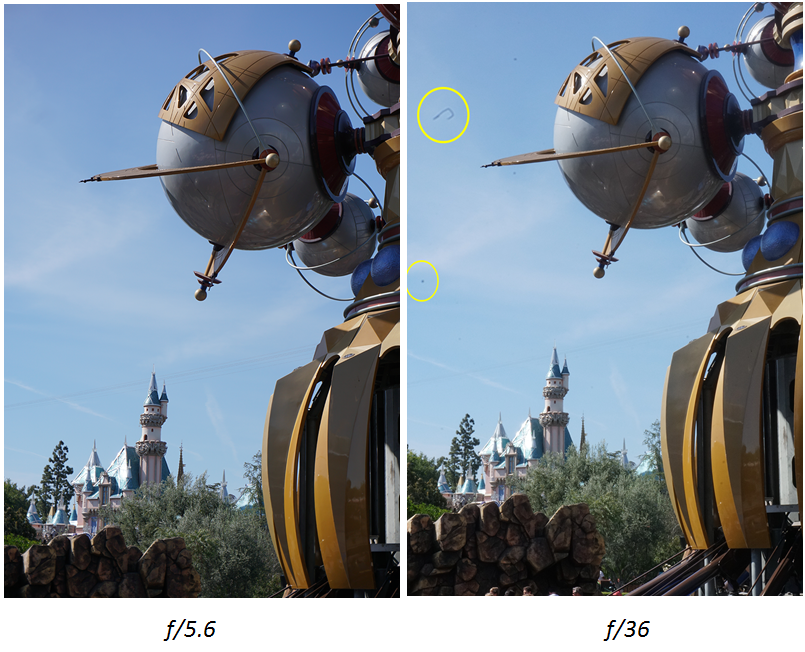
Figure 11-4: You won't necessarily see that your sensor has dust unless you shoot at small f/stops. |
|
One wonders why you need this feature anyway, since like most mirrorless cameras the sensor is embarrassingly easy to clean. Just take off the lens, orient the camera so the sensor is facing down, and give it a blast of compressed air. If you have anything more stubborn than that then I recommend a product called LensPen™.
Generally you won't see dust that's on your sensor unless you're shooting at small f/stops (Figure 11-4). So it's entirely possible you may have dust and not know it without specifically testing for it. Shoot a white surface at a small f/stop and look carefully.
Cleaning the sensor is actually no different than cleaning the front surface of a lens. In fact, you can pretty much use the same cleaning materials on both. The front of the sensor has a coated layer of glass in front of it so you don’t have to be too afraid of this essential maintenance task.
Menu Position MENU --> 3 --> Demo Mode
What it Does Continuously plays a video when the camera is sitting on a retail shelf
Recommended Setting Off
This feature was designed to make the camera more appealing to consumers as it sits unloved on a retail shelf. The following set of conditions is required in order for this to work:
- MENU --> Camera 2 --> (Movie) File Format --> AVCHD
- MENU --> Playback 1 --> View Mode --> AVCHD View
- Record a movie.
- MENU --> Playback 2 --> Protect and protect the AVCHD movie file with the earliest time stamp. (refer to Section 10.8 for how to do so).
- Power the camera via an AC Adapter as described in Section 11.22.
- MENU --> Toolbox 3 --> Demo mode
- Sit back and watch!
Truth be told, I can’t seem to get it to not be grey. Doesn’t concern me. I’m not a retailer. And it’s highly likely you’re not one either. :-)
Menu Position MENU -->  3 --> TC/UB Settings
What it Does Controls various settings of the time code embedded in video files
Recommended Setting n/a
Constraints XAVC S and AVCHD only. Must be in Movie mode in order to change most parameters.
Time Codes have many purposes in the world of post-production, but the main reason to have them in a camera is to enable the easy synchronization of footage shot with multiple cameras at a live event. It is an invisible code – not actually part of the video image – that is written within the file in an industry-standard way. (It is formally known as “SMPTE Time Code”, SMPTE being an acronym for the Society of Motion Picture and Television Engineers.) High-end video editors such as Adobe Premier, Final Cut Pro, and Sony Vegas know how to import and read this info. When it all works, all of the tracks line themselves up on the timeline effortlessly when imported, even if they had been started and stopped many times during the live event. That’s a huge timesaver in post-production.
Traditionally, professional cameras would all be tethered to an external time-code generator so they would all be synchronized and to prevent drift; regretfully there is no such ability to accept an external sync signal with this camera. The best workaround is for many people to “type in” a starting point in the TC Preset field, and for the entire camera crew to hit the center button at the same time to synchronize everything. I talk about how to do this in this section.
Let’s talk more about each of the options in this menu:
TC/UB Display Setting
This specifies not what gets recorded onto the Time Code track, but what shows in the display when a video clip is played back.
- Counter – Simply displays an elapsed time counter (H:MM:SS) in the Time Code Field, always starting at zero.
- TC - Time Code, referring to the SMPTE time code described above. The format is HH:MM:SS:00 (the last two digits always show zero when played back on the camera)
- U-bit – This one is hard to describe, but I can save you some time – NOBODY uses this anymore. 40 years ago the video standards committee thought it might be useful to have 4 fixed alphanumeric characters (A-Z, 0-9 plus punctuation) that are recorded in the video file along with the SMPTE time code. It was designed in an era when LEDs were red, computer keyboards made a klacking sound, and David Lee Roth was still in Van Halen. The original idea was that it provided a “thumbprint” on the video track – if each camera had its own personal identifier (= Userbit), then if something looked wrong in editing you’d be able to trace it back to which camera was causing the problem.
Internally, an ASCII character is represented by 8 bits, and 40 years ago, it was very common to enter ASCII characters not as 1's and 0's, but as two hexadecimal characters (you know, base 16 -- instead of 0-9, a hexadecimal digit goes from 0-F). So using an ASCII table such as the kind shown below, you could represent the letters "WNBC" using the hexadecimal letters 57 4E 42 43. And that's what you would enter in MENU -->  3 --> TC/UB Settings --> UB Preset. And on many professional video monitors of the day, the letters “WNBC” would display on the editor’s screen when enabled.

In order for this to play back as a Userbit, though, the clip has to be recorded with MENU -->  3 --> TC/UB settings --> 2 --> UB Time Record set to Off (which in my mind is labeled completely backwards).
TIP 1: According to an obscure Sony website, their RMT-845 Wireless Remote Commander has the capability to reset the timecode via IR. You can also use the RMT-VP1K remote control to zero out this counter. TIP 2: True professional camcorders have the ability to accept an external SMTE Time Code signal so that multiple cameras are synchronized and there is no drift. This camera can’t accept a timecode signal; however if you really want to Jam Sync your time code to multiple cameras, there's a third-party product called LockIt Buddy which injects a signal into your microphone jack and records the timecode onto one of your two audio channels. Hey, it's an option and pretty affordable at $155 USD: http://www.lockitbuddy.com |


