14. Sponge Painting 14. Sponge Painting
Sponge painting produces a soft, mottled effect and is one of the easiest techniques to master.
The look of sponge painting is determined by the number of paint colors applied, the sequence in which they are applied, and the distance between the sponge impressions. The sponge used is crucial. You can use a natural sea sponge, which will produce small, condensed marks, or sculpt a synthetic sponge to create a larger, more defined pattern.
Semigloss, satin, and flat latex paints all are appropriate for sponge painting. For a translucent finish, you can use a paint glaze consisting of paint, paint conditioner, and water (see Sponging Glaze below).
Before starting your project, select the sponge and paint colors, and practice on a piece of mat board or a scrap of drywall until you’re satisfied with the effect.
Tools & Materials 
Paintbrushes and rollers for base coat
Roller tray
Large synthetic sponge
Latex paint for base coat
Latex paint in two colors, one light and one dark
Latex paint conditioner (optional)
Sponging Glaze
Mix together the following ingredients:
1 part latex or craft acrylic paint
1 part latex paint conditioner
1 part water
 How to Sponge Paint
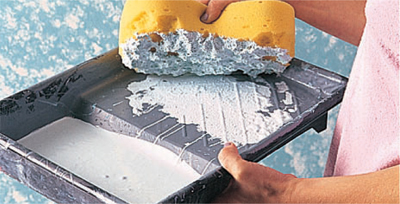
Apply a coat of the base color, and let it dry completely.

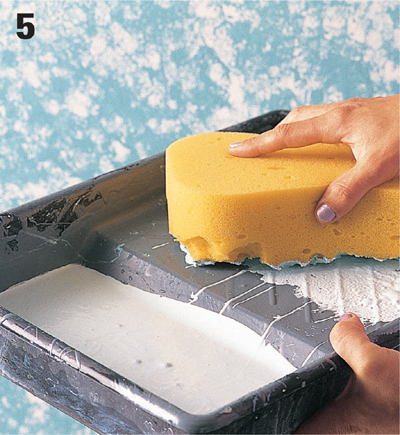
Tear out small chunks from the surface and around the edges of one side of the sponge. Make sure the entire surface is pitted with holes of various depths. Dampen the sponge and squeeze out as much of the water as possible.
Pour some of the darker color into a roller tray, and press the pitted surface of the sponge into the paint. Pat the sponge onto a paper towel to remove the excess paint, and then use it to dab paint onto the wall. (Use a small chunk of the sponge to sponge paint into the corners.)
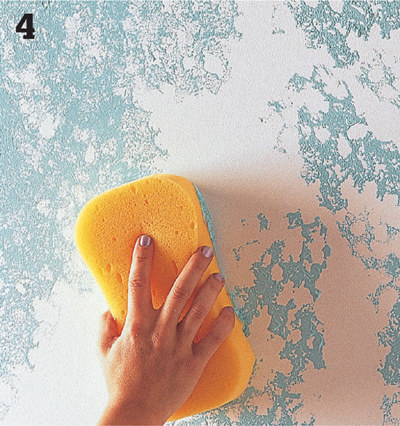
Working quickly, keep sponging until the surface is filled with sponged paint, but the base coat is still visible. (This layer will look fairly stark, but the next layer will soften it.) Let the paint dry. Wash out the paint tray and the sponge.
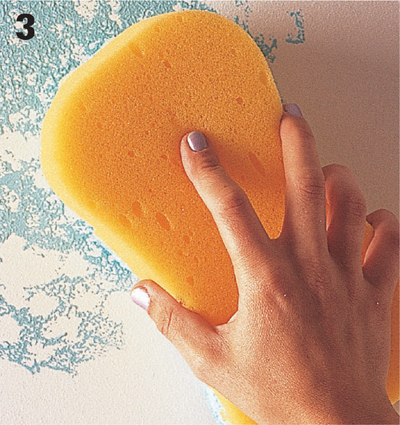
Dampen the sponge again. Pour the lighter color into the paint tray, and press the sponge into it. Remove the excess paint on a paper towel.

Sponge the lighter color evenly over the wall. Cover the area, but don’t completely cover the base coat or the first color. Use a small chunk of the sponge to apply the lighter color in the corners and at the edges of the wall. Stand back from the wall and evaluate the effect. Sponge more paint where necessary to even out the variations.
Sponging Tip 
For best results, try to keep a consistent amount of paint on the sponge.
How to Sponge Paint Stripes, Borders, or Panels
Apply sponge paint as described on pages 36 through 38, and let the paint dry. Tape off stripes (see page 33).
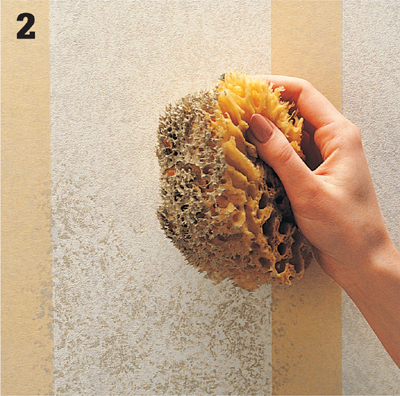
Apply an additional color to the unmasked areas. Blot or feather the paint, as desired. When the paint is dry, carefully remove the masking tape.
Sponging Variations
To achieve a harmonious look, use related colors for sponge painting, such as two warm colors or two cool colors.
For a bolder and more unexpected look, sponge paint with a combination of warm and cool colors.
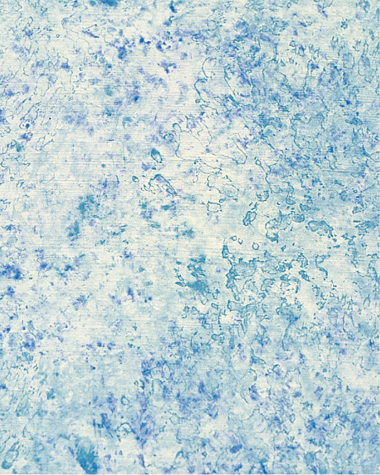
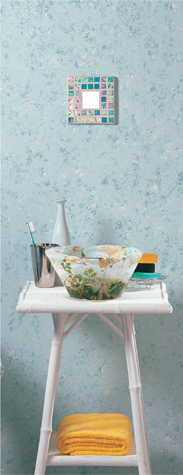
Cool colors, like green and blue, blend together for a tranquil effect.
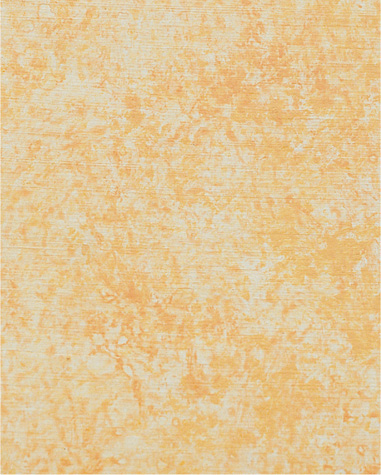
Warm colors, like yellow and orange, blend together for an exciting effect.
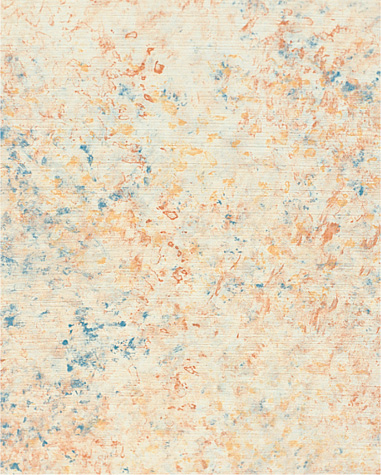
Warm and cool colors, like yellow and blue, combine boldly, but sponge painting softens the effect.