
Photo 1: The headstock, tail stock and rest on this lathe have been blocked up to increase its swing. This makes it possible to turn discs up to 12" in diameter.
Most of the furniture and building parts made in a lathe are turned between centers. Remember, this type of work is also called spindle-turning. The term accurately describes such parts as legs and balusters, which are spindles. However, occasionally you have to make a project that requires you to turn disc-shaped parts. Included in this chapter are two examples. The first is the top of a stool. The second is the top of a candle stand. These two pieces have been selected because each uses one of the two processes for turning disc-shaped parts. (Chapter 16 also explores ways to turn some disc-shaped architectural parts.)
Before attempting these processes be forewarned: Your lathe may not have the capacity to be used for either process. The lathe requirements are described below.
The stool top is turned between centers, just as are the legs and stretchers. However the blank is very different in shape from those used in spindle-turning. Instead of using a long and slender turning square ripped from the edge of a plank, begin with a slab of wood cut from the end of a piece of lumber. The blank used for the stool top began as a piece of 2"-thick plank, 14" square.
Because you are turning a part for a piece of furniture, the species of wood used may depend on the species you are using for the rest of the project. For example, if the other parts are mahogany, which you want to cover with a natural finish, you will probably want to make the top of mahogany as well. However, in the event you are planning to paint the project, you only have to be concerned with the wood’s working properties.
Normally, Windsor chair seats are made of pine or some other soft wood. However, pine is too soft to turn cleanly. I instead use walnut for the top.
The size of the plank you begin with is, of course, dependent on the job, but is also determined by your lathe’s capacity (see Chapter 1), specifically, its swing – twice the distance between the lathe’s centers and the bed. Its swing is the maximum diameter you can turn. In other words, a lathe that measures 6" from center to bed has a 12" swing. You could not turn a 14" stool top on a lathe with that capacity.
On many lathes, the amount of swing available for turning disc-shaped parts is greatly increased by a gap in the bed, located just under the drive center. This gap will increase the swing by several inches. Another way to increase the swing is to block up (or elevate) the head and tail stock, as was done to the lathe shown in Photo 1.
Photo 1: The headstock, tail stock and rest on this lathe have been blocked up to increase its swing. This makes it possible to turn discs up to 12" in diameter.
Before chucking up the blank for the stool top, take a pair of dividers and trace a circle that is slightly larger than the finished diameter (but not greater than the lathe’s swing) (Photo 2). Cut out the circle using a band saw or a bow saw. If you do not have either one, cut off the corners as close to the circumference as possible (Photo 3).

Photo 2: Trace out the size disc you are going to turn with a pair of dividers, and saw out the circle.
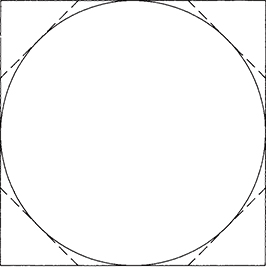
Photo 3: If you don’t have either a band saw or a bow saw, make your blank close to round by cutting off the corners like this.
Chuck up the blank by pushing the drive center into the center mark made by the divider leg. If you like, remove the drive center and tap it in place with a mallet. Mount the blank and the center in the lathe, and push the tail stock into place. Tighten the tail center so that the blank is securely gripped on both sides (Photo 4).

Photo 4: Place the drive center’s point on the mark left by the stationary divider leg. Tighten the tail stock to grip the roughly rounded blank.
Move the rest into position. You will have to slide the rest bracket close to the headstock and pull it towards you as far as it will come. It is possible that the rest will not pull out as far as the edge of the blank. This creates another constraint on the diameter size of the disc that you are turning. If you have this problem, try placing the rest so that it is cater-cornered against the bed (Photo 5). If you do this, you can add an inch or so on the maximum diameter of disc the rest will accommodate.

Photo 5: Your rest’s capacity may not be as great as the lathe's swing. If it isn’t, you can add an extra inch or two by cocking the rest in relation to the bed.
Set the lathe to the slowest possible speed. Remember, the farther the distance a point is from the center, the faster it is moving. Therefore, if your blank is 7" in radius (14" in diameter), its edge is spinning much faster than the lathe center and will strike against the tool with greater force than will a typical turning square. Also, the amount of vibration caused by the blank’s eccentricity increases with the length of the radius.
Before turning on the lathe, spin the blank by hand to be sure that it will clear the rest and bed. Then, start the lathe and true the blank by trimming its outside edge (Photo 6). Instead of using a roughing gouge for this work, I use a 1⁄2" spindle gouge.

Photo 6: Spin the rough blank by hand to make sure that it clears the rest. Then smooth the blank’s outside edge.
The blank will quickly become perfectly round and, as this happens, the vibration will decrease equally fast. Still, the disc will not turn smoothly, for while its outside edge is a perfect circle, the two surfaces are not spinning in a single plane.
To correct this, shut off the lathe and adjust the rest. You need to turn it 90° to the bed, so place it across the disc’s top face (the surface closest to the tail stock). On the finished part, this surface will be the top. Push the rest as close to the blank’s top surface as possible, placing the end of the rest as close to the center as possible without having the two come into contact. (The rest only has to extend across half the blank’s diameter in order for you to be able to cut the entire face).
Spin the blank to be sure that it clears the rest and that the rest clears the center. Turn on the lathe and, with a spindle gouge, joint the spinning surface (Photo 7). Begin on the outside edge, as this is the point on the radius where the disc is most eccentric. As you joint this surface, the disc will spin even more smoothly. Of course, you will not be able to joint the entire surface because the center is in the way. If you shut off the lathe and examine the part, it is obvious that a protruding boss will remain when you take the stool top out of the lathe. It can be removed later.

Photo 7: Move the rest and joint the tail-stock side of the blank – the side that will be the completed top’s upper surface. Start jointing at the outer edge of the disc, as that is where it is most eccentric.
To shape the other face (the top’s lower surface), move the rest to the other side, the one closest to the head-stock. Once again the rest should be as close to the disc’s surface as possible and its end must not be in contact with the center. Spin the disc by hand to be sure.
Joint the bottom surface as you did the upper (Photo 8). Any remaining vibration should now disappear. At this point, you have a perfect disc – its outside edge is a circle, and its two surfaces are perfectly parallel with each other. The lower surface too will have a boss that can be removed later.

Photo 8: Move the rest and joint the headstock side.
However, the completed stool top is dished, not flat. Do this shaping next, also using a spindle gouge. The gouge will cut best if it is rolled on its side, the same way as is done when you are spindle-turning (Photo 9). Dish as deeply as you like. You may even have to readjust the rest if the distance between it and the disc’s surface becomes too great. You will increase the height of the boss projecting from the surface where the center makes contact.

Photo 9: Move the rest a third time and dish-out the top with a spindle gouge.
You now have a stool top with a perfectly jointed bottom and a dished top. The next step is to contour the edge. Return the rest to its first position, and use a gouge to round the upper corner of the stool top. Remember the back of the sitter’s legs will be in contact with this edge. If it is left square and sharp, it might damage clothing or even cut off circulation. Blend the curved edge into the dished surface.
The stool top looks best if its lower edge is chamfered. The chamfering draws the edge’s lower corner back out of the line of sight, eliminating the visual reference point that tells the viewer’s eye how thick the top is. This technique makes the top appear much thinner while in reality it is thick enough to create strong, long-lasting joints where the legs are attached. Do the chamfering with the gouge as well (Photo 10).

Photo 10: Return the rest to the first position and contour the edge.
If you wish, you can also decorate the edge with some simple details such as one or two beads. These are made with a skew, but by scraping with the toe rather than a rolling cut with the heel.
Take the stool top out of the lathe and secure it to the top of your workbench. One way is to use the tail vise and bench dogs to secure the stool top.
Remove the bottom protrusion first, as the top cannot sit flat on its bottom. It can be removed with a sharp bench plane (Photo 11). Turn the top on its now perfectly flat bottom and, with a fish-tail carving gouge, remove the boss. Sand the area smooth, so no evidence of it remains (Photo 12).

Photo 11: Grip the top between your workbench dogs and plane away drive center boss.

Photo 12: Invert the top and remove the tail-center boss with a fish-tail carving gouge. Sand it smooth.
The candle-stand top is much thinner than the stool top, but can still be turned the same way if your lathe has sufficient swing. However, another technique has been used for the one shown in this chapter. This process is known as faceplate turning. To use this process, you first have to own a faceplate.
A faceplate is a flat metal disc with several holes drilled through it. At the center is a raised hollow boss that is internally threaded with the same thread as is on the outside surface of the headstock spindle (Photo 13). This allows the faceplate to be mounted onto the spindle. (Before buying a face plate, make sure that it will fit your lathe.) The boss also has hexagonal sides, so you can grip it with a wrench and tighten it onto the spindle. The threads are right hand, which means that the faceplate screws onto the spindle in the direction opposite the lathe’s rotation. Thus, the force of the wood against the cutting tool tightens the face plate.

Photo 13: A faceplate mounts on the headstock spindle and allows you to turn discs without using the tail stock.
On many lathes, the headstock spindle is threaded on both ends. This means that one end is on the opposite side from the bed. If you need to turn a disc with a diameter greater than the lathe’s swing, mount the faceplate on this end. This process is referred to as turning outboard.
To turn outboard, your lathe will need a special outboard rest. If it is not so equipped, you can have one fabricated (assuming the amount of outboard turning you need to do justifies the effort). Inboard turning is done on the end of the spindle that overhangs the bed, using the regular rest.
Faceplates come in different diameters ranging from 3" to 6". The narrow ones are used to turn small pieces, while the wider ones are for larger work. The faceplate is pierced by several countersunk holes, through which screws are passed to secure the work. Some faceplates have elongated slots rather than holes. These slots allow you to adjust the placement of the screws according to the size of the block of wood you are turning.
Of course, mounting a faceplate with screws means that there will be screw holes in the bottom of the completed part. This is not a problem on the top of a candle stand, as the top is secured to the pedestal with a cleat that completely hides the holes. Another way of dealing with screws is discussed below.
There is another problem when you use screws to mount a faceplate. The greater the piece’s diameter, the more securely the screws need to be attached to the wood. This means that it is best to use longer screws with wider pieces. However, a piece like the candle stand top is very thin, and when you are dishing the top, your lathe tool may very well run into the screws. This will not only damage the tool, but when you extract the screws they will leave holes that completely pierce the top. This is not acceptable in a piece of furniture.
The way to prevent this from happening is to glue a shim block to the blank. The glue holds the blank to the shim, while the screws hold the shim to the faceplate (Photo 14). The shim can be as thick as the screws are long (or even thicker), thus eliminating the problems of holes that extend either all the way through the turned part or just into its bottom.

Photo 14: To avoid screw holes in the bottom of the finished part, glue a shim block to the blank and attach the faceplate to this shim.
You can use just about any glue you want to fasten the shim to the blank. However, be sure to allow it to cure as long as the manufacturer recommends. You do not want the disc to fly off the faceplate because you were impatient. Bowl turners speed up the process by using “instant super” cyanoacrylate glue (sold under the brand name Hot Stuff) that dries immediately and creates a strong, sure bond. However, these glues are much more expensive than the white and yellow glues that can be bought at any hardware (or even grocery) store.
Before gluing the shim, joint the blank’s rear surface, the one secured to the faceplate, with a jointer, thickness planer or a handplane. If you use a jointer or thickness planer, handplane the bottom anyway. This will remove the chatter marks left by the machine. This surface will remain on the finished part (unless you have a problem with eccentricity, as discussed below), and such machine marks are inappropriate in fine woodworking, even on an unseen surface.
If you are gluing on a shim, make sure that its mating surface is also jointed. The two perfectly flat surfaces will create a dependable glue bond.
Make sure that the shim is centered on the blank. If it is not, the blank’s outer edge will be very eccentric, and when rounding it, you will cut away some of its diameter. Also, the amount of eccentricity could exceed your lathe’s capacity, making it impossible to turn the part at all without sawing away additional width.
The stand’s top is turned in very much the same way as that for the stool. Begin by truing the blank’s edge. If the blank and the shim each have parallel surfaces, the blank should be spinning smoothly in a single plane. If there is any eccentricity, joint the bottom (headstock) surface with a gouge.
If the bottom is eccentric, so is the top. Joint this surface as well before beginning the recessing and contouring. Rough out the recessed area with a gouge in basically the same way as was done with the stool top. However, there is one important difference: The top of the stool is dished. It is a long, concave curve. The top of the stand, although recessed from the rim, is otherwise flat (Photo 15).

Photo 15: The surface of the stool top is dished. It is a long, gentle curve. The top of the stand is recessed, but otherwise flat with a moulded rim.
Note that the rim is moulded, and like similar details on a spindle turning, is set off from the flat surface by a fillet. Use the point of a skew to lay out this fillet and to sever the wood fibres that run through it into the dished area. Using the skew’s pointed nose, form the fillet (Photo 16).

Photo 16: Form the rim fillet with a skew.
A bowl turner would do the next step with a heavy tool with a square edge, called a straight scraper. However, since you are more likely to own a skew than a straight scraper, I will explain how to do the process using this tool.
Lay the skew on the flat side of its blade, rather than on the edge. Hold the cutting edge parallel to the surface of the spinning part, and raise its handle so that the tool is at a scraping angle. Using the skew as a scraper, use it to level and flatten the surface within the moulded edge. As you pass it back and forth, its straight edge will act in the same manner as the smooth plane you use to smooth boards on the bench (Photo 17). It will find and level any unevenness. Several passes may be necessary to trim all the high spots and eliminate any low spots.

Photo 17: A skew will joint the dished-out area by eliminating any high spots.
As explained in Chapter 6, this sort of low-angle scraping causes a lot of heat and will quickly dull the cutting edge. However, this process is not something you will do often, and the skew’s edge can be quickly restored by honing.
Finally, move the rest so that you can once again work on the part’s underside. Using a gouge, contour the edge’s lower corner. This step serves the same purpose as it did on the stool top. It pulls the corner back out of the line of sight so that it is no longer a visual reference point that indicates to the viewer precisely how thick the top is.
Both these processes for turning discs – the between-centers and faceplate techniques – can be used for many more purposes than just the two examples given in this chapter. The technique you choose to use for any of your projects is a function of your lathe’s capacity, its fixtures, for example, whether the headstock spindle is threaded, and your preference (Photos 18–20).

Photo 18: Examples of turned discs. The wheel on the spinning wheel shown here is a turned disc.

Photo 19: Fireplace bellows.

Photo 20: The shelves on a dumbwaiter.