Chapter 5
Communicating via E-mail
OS X comes with the Apple Mail application that you can use to exchange e-mail messages. After you type your account details into Mail, you can send e-mail to friends, family, colleagues, and even total strangers almost anywhere in the world.
Receive and Read E-mail Messages
Create a Mailbox for Saving Messages
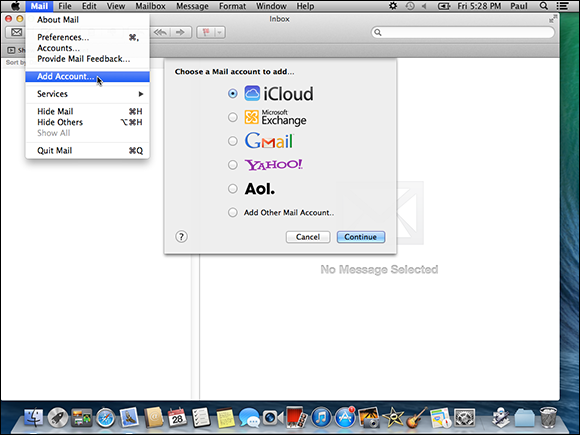
Add an E-mail Account
To send and receive e-mail messages, you must add your e-mail account to the Mail application. Your account is usually a POP (Post Office Protocol) account supplied by your Internet service provider, which should have sent you the account details. You can also use services such as Hotmail and Gmail to set up a web-based e-mail account, which enables you to send and receive messages from any computer. If you have an Apple ID, an account for use on the Apple iCloud service (www.icloud.com), you can also set up Mail with your Apple account details.
Add an E-mail Account
Get Started Adding an Account
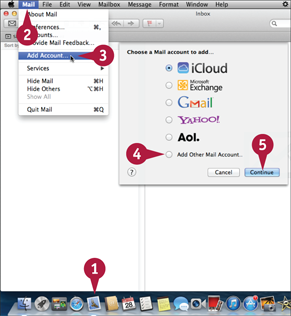
 In the Dock, click the Mail icon (
 ).
).
 Click Mail.
 Click Add Account.
Note: If you are just starting Mail and the Welcome to Mail dialog is on-screen, you can skip steps 2 and 3.
 Click the type of account you are adding (
 changes to
  ).
).
 Click Continue.
Add an Apple Account

Type your Apple account address.
Type your Apple account password.
Click Sign In.
Mail signs in to your Apple account.
Note: Mail prompts you to choose which services you want to use with iCloud. See Chapter 14 to learn more.
Click Add Account (not shown).
Mail adds your Apple account.
Add a POP Account
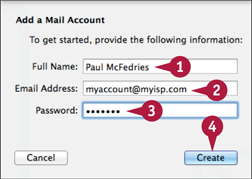
Type your name.
Type your POP account address.
Type your POP account password
Click Create.
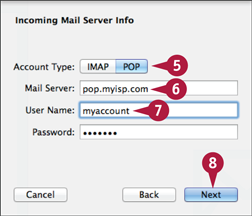
Click POP.
 Type the address of the account’s incoming mail server.
 Edit the User Name text as required.
 Click Next.

 Type the address of the outgoing mail server, which is sometimes called the SMTP server.
 Type the outgoing mail server username and password, if required by your ISP.
 Click Create.
Note: If you see a Verify Certificate dialog, click Connect.
 Click Create (not shown).
TIP
My e-mail account requires me to use a nonstandard outgoing mail port. How do I set this up?
In the menu bar, click Mail.
Click Preferences.
Click Accounts.
In the Outgoing Mail Server (SMTP) list, click  and then click Edit SMTP Server List.
Click the outgoing mail server.
Click Advanced.
Click Use custom port ( changes to ).
Type the nonstandard port number.
Click OK.
Click  .
.
Click Save.
Send an E-mail Message
If you know the recipient’s e-mail address, you can send a message to that address. An e-mail address is a set of characters that uniquely identifies the location of an Internet mailbox. Each address takes the form username@domain, where username is the name of the person’s account with the ISP or with an organization; and domain is the Internet name of the company that provides the person’s account. When you send a message, it travels through your ISP’s outgoing mail server, which routes the messages to the recipient’s incoming mail server, which then stores the message in the recipient’s mailbox.
Send an E-mail Message

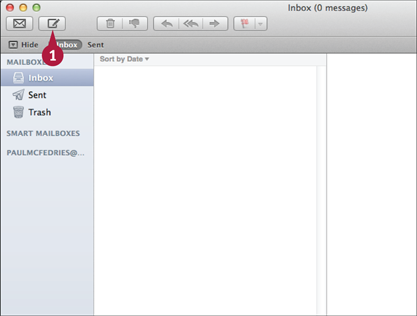
Click New Message ( ).
).
Note: You can also start a new message by pressing  +
+ .
.
A message window appears.
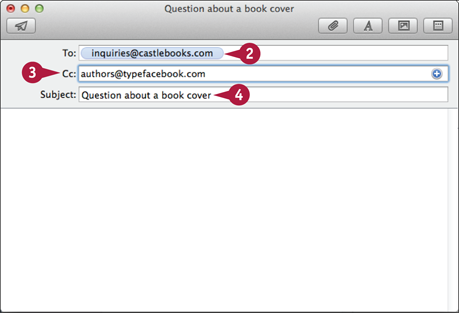
Type the e-mail address of the person to whom you are sending the message in the To field box.
Type the e-mail address of the person to whom you are sending a copy of the message in the Cc field.
Note: You can add multiple e-mail addresses in both the To line and the Cc line by separating each address with a comma (,).
Type a brief description of the message in the Subject field.

Type the message.
A To change the message font, click Fonts ( ) to display the Font panel.
B To change the overall look of the message, click Show Stationery ( ) and then click a theme.
Note: Many people use e-mail programs that cannot process text formatting. Unless you are sure your recipient’s program supports formatting, it is best to send plain-text messages. To do this, click Format and then click Make Plain Text.

Click Send ( ).
).
Mail sends your message.
Note: Mail stores a copy of your message in the Sent folder.
TIP
How can I compose a large number of messages offline?
You can compose your messages offline by following these steps:
While disconnected from the Internet, click the Mail icon () in the Dock to start Mail.
To ensure you are working offline, click Mailbox. If the Take All Accounts Offline command is enabled, click that command.
Compose and send the message. Each time you click Send (), your message is stored temporarily in the Outbox folder.
When you are done, connect to the Internet.
After a few moments, Mail automatically sends all the messages in the Outbox folder.
Add a File Attachment
If you have a file you want to send to another person, you can attach it to an e-mail message. A typical message is fine for short notes, but you may have something more complex to communicate, such as budget numbers or a slide show, or some form of media that you want to share, such as an image.
These more complex types of data come in a separate file — such as a spreadsheet, presentation file, or picture file — so you need to send that file to your recipient. You do this by attaching the file to an e-mail message.
Add a File Attachment
Click New Message ().
A message window appears.

Fill in the recipients, subject, and message text as described in the previous section.
Press  two or three times to move the cursor a few lines below your message.
Click Attach ( ).
).
A file selection dialog appears.

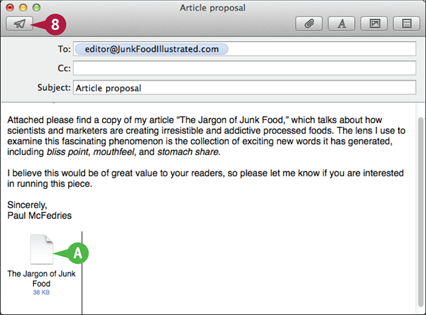
Click the file you want to attach.
Click Choose File.
A Mail attaches the file to the message.
Note: Another way to attach a file to a message is to click and drag the file from Finder and drop it inside the message.
Repeat steps 4 to 6 to attach additional files to the message.
Click Send ().
Mail sends your message.
Add a Signature
A signature is a small amount of text that appears at the bottom of an e-mail message. Instead of typing this information manually, you can save the signature in your Mail preferences. When you compose a new message, reply to a message, or forward a message, you can click a button to have Mail add the signature to your outgoing message.
Signatures usually contain personal contact information, such as your phone numbers, business address, and e-mail and website addresses. Mail supports multiple signatures, which is useful if you use multiple accounts or for different purposes such as business and personal.
Add a Signature
Create a Signature

Click Mail.
Click Preferences.
The Mail preferences appear.
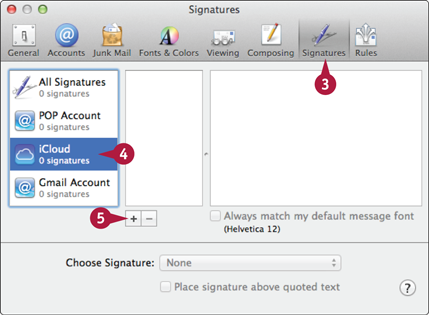
Click Signatures.
Click the account for which you want to use the signature.
Click Create a signature ( ).
).
Mail adds a new signature.
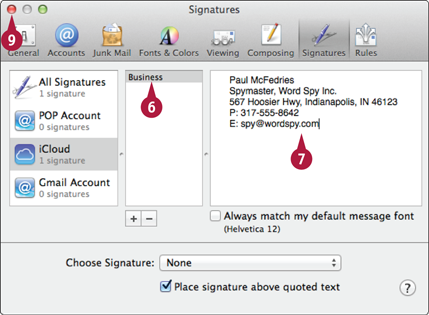
Type a name for the signature.
Type the signature text.
Repeat steps 4 to 7 to add other signatures, if required.
Note: You can add as many signatures as you want. For example, you may want to have one signature for business use and another for personal use.
Click .
Insert the Signature
Click New Message () to start a new message.
Note: To start a new message, see the section Send an E-mail Message.
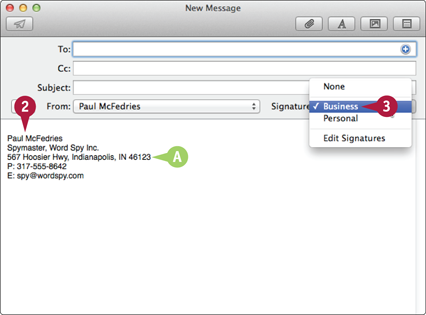
In the message text area, move the insertion point to the location where you want the signature to appear.
Click the Signature and then click the signature you want to insert.
A The signature appears in the message.
TIP
When I have multiple signatures, how can I choose which signature Mail adds automatically?
Follow steps 1 to 4 to display the signature preferences and choose an account.
Click and then click the signature you want to insert automatically into each message.
A If you prefer to add a signature manually, click None instead of a signature.
Click .
Receive and Read E-mail Messages
When another person sends you an e-mail, that message ends up in your account mailbox on the incoming mail server maintained by your ISP or e-mail provider. Therefore, you must connect to the incoming mail server to retrieve and read messages sent to you. You can do this using Mail, which takes care of the details behind the scenes. By default, Mail automatically checks for new messages while you are online, but you can also check for new messages at any time.
Receive and Read E-mail Messages
Receive E-mail Messages

Click Get Mail ( ).
).
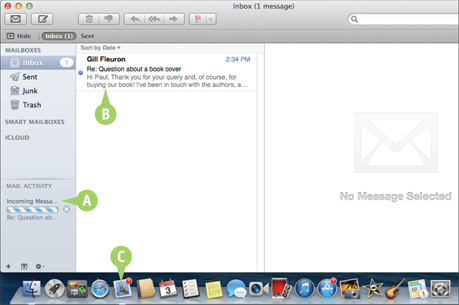
A The Mail Activity area lets you know if you have any incoming messages.
B If you have new messages, they appear in your Inbox folder with a blue dot in this column.
C The icon in the Dock shows the number of unread messages in the Inbox folder.
Read a Message
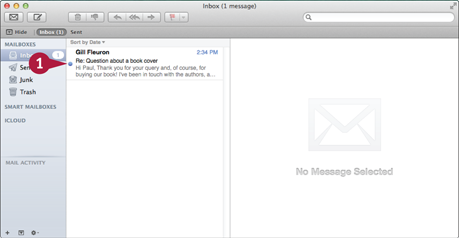
Click the message.
Mail displays the message text in the preview pane.
Read the message text in the preview pane.
Note: If you want to open the message in its own window, double-click the message.
TIP
Can I change how often Mail automatically checks for messages?
Yes, by following these steps:
Click Mail.
Click Preferences.
The Mail preferences appear.
Click the General tab.
Click the Check for new messages and then click the time interval that you want Mail to use when checking for new messages automatically.
If you do not want Mail to check for messages automatically, click Manually instead.
Click .
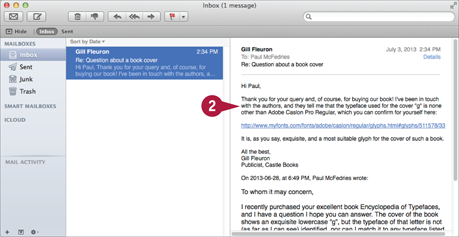
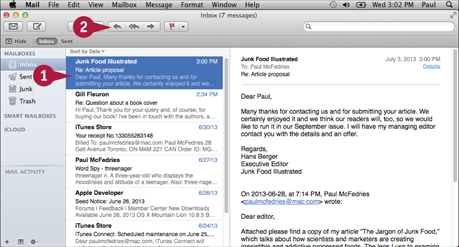
Reply to a Message
When a message you receive requires a response — whether it is answering a question, supplying information, or providing comments — you can reply to that message. Most replies go only to the person who sent the original message. However, it is also possible to send the reply to all the people who were included in the original message’s To and Cc lines. Mail includes the text of the original message in the reply, but you should edit the original message text to include only enough of the original message to put your reply into context.
Reply to a Message
Click the message to which you want to reply.
Click the reply type you want to use.
Click Reply ( ) to respond only to the person who sent the message.
Click Reply All ( ) to respond to all the addresses in the message’s From, To, and Cc lines.
A message window appears.
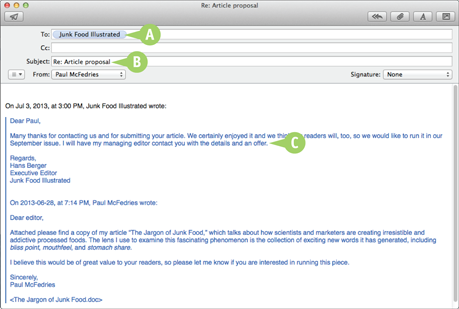
A Mail automatically inserts the recipient addresses.
B Mail also inserts the subject line, preceded by Re:.
C Mail includes the original message text at the bottom of the reply.
Edit the original message to include only the text that is relevant to your reply.

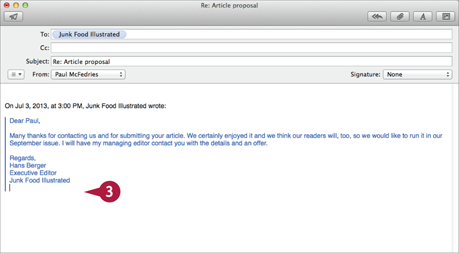
Click the area above the original message text and type your reply.
Click Send ().
Mail sends your reply.
Note: Mail stores a copy of your reply in the Sent folder.
TIP
I received a message inadvertently. Is there a way that I can pass it along to the correct recipient?
Yes. Mail comes with a feature that enables you to pass along inadvertent messages to the correct recipient. Click the message that you received inadvertently, click Message, and then click Redirect (or press  ++
++ ). Type the recipient’s address and then click Send. Replies to this message will be sent to the original sender, not to you.
Forward a Message
If a message has information relevant to or that concerns another person, you can forward a copy of the message to that person. You can also include your own comments in the forward.
In the body of the forward, Mail includes the original message’s addresses, date, and subject line. Below this information Mail also includes the text of the original message. In most cases, you will leave the entire message intact so your recipient can see it. However, if only part of the message is relevant to the recipient, you should edit the original message accordingly.
Forward a Message
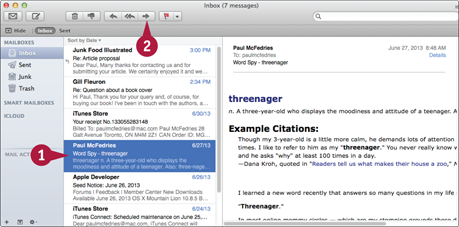
Click the message that you want to forward.
Click Forward ( ).
).
Note: You can also press ++ .
.
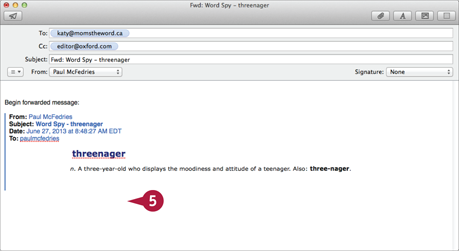
A message window appears.

A Mail inserts the subject line, preceded by Fwd:.
B The original message’s addressees (To and From), date, subject, and text are included at the top of the forward.
Type the e-mail address of the person to whom you are forwarding the message.
To send a copy of the forward to another person, type that person’s e-mail address in the Cc line.
Edit the original message to include only the text that is relevant to your forward.
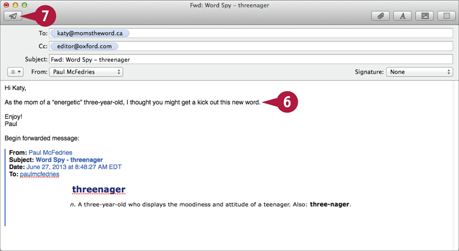
Click the area above the original message text and type your comments.
Click Send ().
Mail sends your forward.
Note: Mail stores a copy of your forward in the Sent folder.
Note: You can forward someone a copy of the actual message instead of just a copy of the message text. Click the message, click Message, and then click Forward As Attachment. Mail creates a new message and includes the original message as an attachment.
TIP
Mail always formats my replies as rich text, even when the original message is plain text. How can I fix this problem?
You can configure Mail to always reply using the same format as the original message. Follow these steps:
Click Mail.
Click Preferences.
The Mail preferences appear.
Click the Composing tab.
Click the Use the same message format as the original message check box ( changes to
  ).
).
Click Close ().
Open and Save an Attachment
If you receive a message that has a file attached, you can open the attachment to view the contents of the file. However, although some attachments only require a quick viewing, other attachments may contain information that you want to keep. In this case, you should save these files to your Mac’s hard drive so that you can open them later without having to launch Mail.
Be careful when dealing with attached files. Computer viruses are often transmitted by e-mail attachments.
Open and Save an Attachment
Open an Attachment

Click the message that has the attachment, as indicated by the Attachment symbol ( ).
).
A An icon appears for each message attachment.
Double-click the attachment you want to open.
The file opens in the associated application.
Save an Attachment

Click the message that has the attachment, as indicated by the Attachment symbol ().
Right-click the attachment you want to save.
Click Save Attachment.
Mail prompts you to save the file.
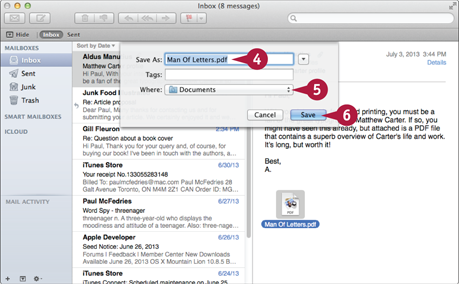
Click in the Save As text box and edit the filename, if desired.
Click the arrows () and select the folder into which you want the file saved.
Click Save.
Create a Mailbox for Saving Messages
After you have used Mail for a while, you may find that you have many messages in your Inbox. To keep the Inbox uncluttered, you can create new mailboxes and then move messages from the Inbox to the new mailboxes.
You should use each mailbox you create to save related messages. For example, you could create separate mailboxes for people you correspond with regularly, projects you are working on, different work departments, and so on.
Create a Mailbox for Saving Messages
Create a Mailbox
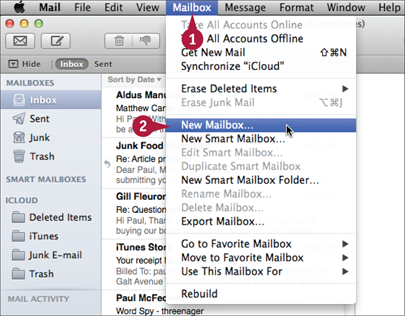
Click Mailbox.
Click New Mailbox.
The New Mailbox dialog appears.

Click the Location and then click where you want the mailbox located.
Type the name of the new mailbox.
Click OK.
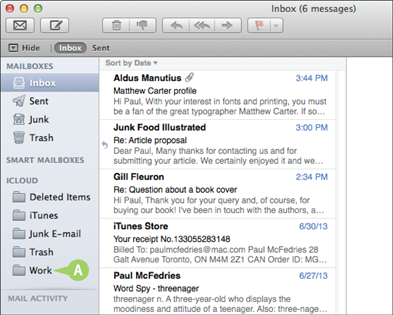
A The new mailbox appears in the Mailbox list.
Move a Message to Another Mailbox
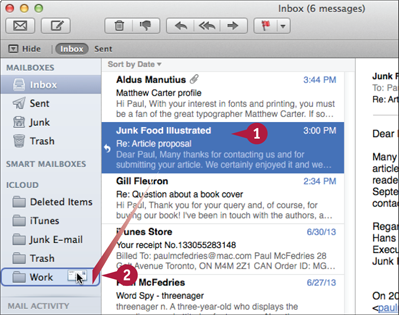
Position the mouse  over the message you want to move.
Click and drag the message and drop it on the mailbox to which you want to move it.
Mail moves the message.
TIPs
How do I rename a mailbox?
Right-click the mailbox and then click Rename Mailbox. Type the new name and then press . Note that Mail does not allow you to rename any of the built-in mailboxes, including Inbox, Drafts, and Trash.
How do I delete a mailbox?
Right-click the mailbox and then click Delete. When Mail asks you to confirm the deletion, click Delete. Note that Mail does not allow you to delete any of the built-in mailboxes, including Inbox, Drafts, and Trash. Remember, too, that when you delete a mailbox, you also delete any messages stored in that mailbox.