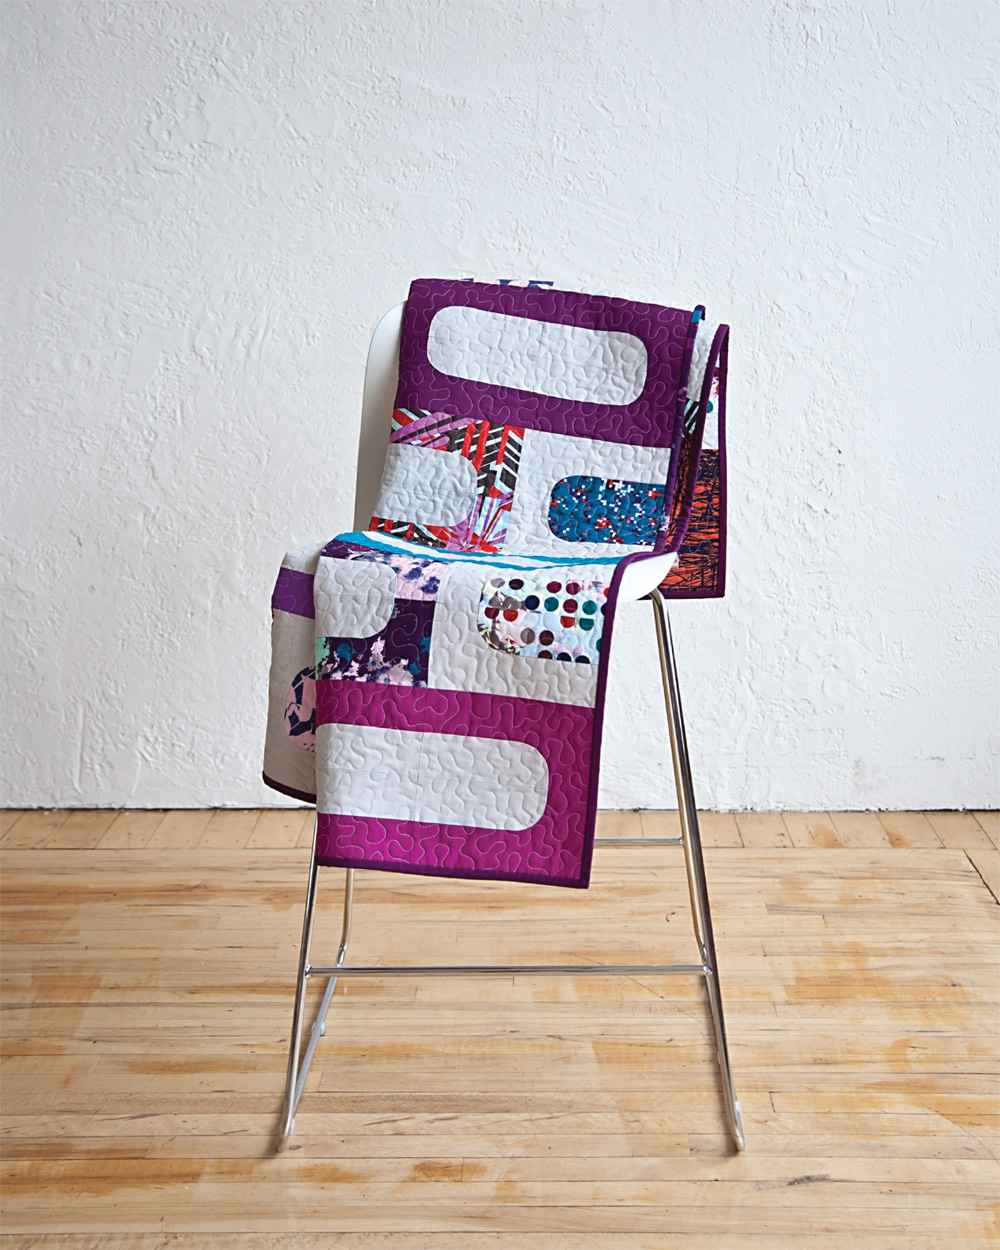
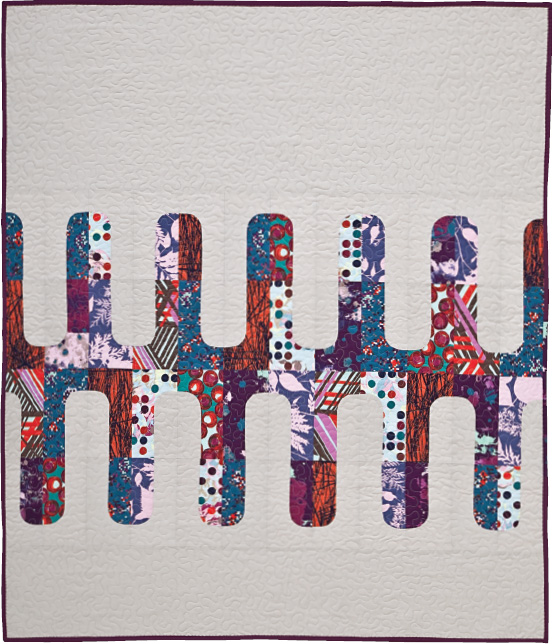
Finished block: 8″ × 16″ Finished quilt: 48″ × 56″ Made and machine quilted by Elizabeth Hartman
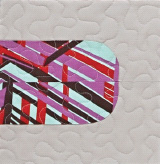
The blocks in this quilt are similar in concept to the traditional Drunkard’s Path pattern. I’ve just stretched the block to create a longer capsule shape instead of a circle. The elongated shape reminds me of cinder blocks, so I staggered the blocks and varied the background solids to resemble masonry. On the quilt back, which is arranged a bit differently, the blocks create a dramatic secondary pattern.
Sewing curves like these takes a little maneuvering, but it’s totally doable. Take your time and don’t hesitate to remove seams and start over until you get it right.
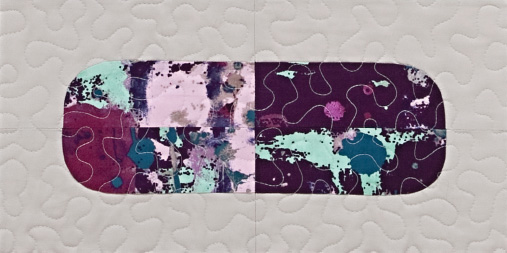
The simple shapes in this pattern are perfect for showing off exciting prints, so I started with seven bold multicolor ones. I then chose seven solid fabrics in bright jewel tones to match the prints and a light gray solid for my neutral background.
Refer to Fabric and Design Vocabulary (page 120) for more about fabric selection.
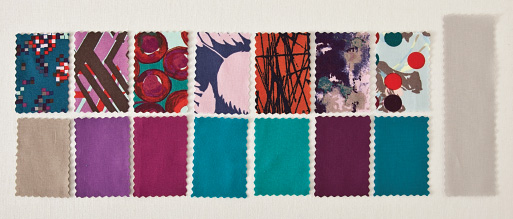
My fabric choices for Happy Hour
Yardages are based on fabric that is at least 40″ wide, unless otherwise noted.
½ yard each of 7 different print fabrics
¼ yard each of 7 coordinating bright solid fabrics
4½ yards neutral background solid fabric
½ yard binding fabric
52″ × 60″ batting
Translucent template plastic
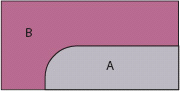
Use translucent template plastic and the patterns at the back of the book (patterns are available to print from http://tinyurl.com/10865-patterns.) to make templates for A and B. Refer to Making Templates (page 124) and Cutting Template Shapes (page 129).
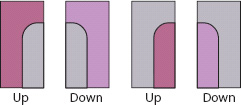
The capsule shapes at the centers of the blocks are created with pieces cut in the template shapes and pieces cut in the mirror image of those shapes. The cutting instructions tell you which pieces should be cut with the templates facing right side up (up) and which pieces should be cut in mirror image, with the templates facing down (down).
PRINT FABRICS:
From each print fabric, cut:
• 2 strips 4½″ × width of fabric; subcut into 8 Template B pieces, 4 up and 4 down
• 2 strips 2½″ × width of fabric; subcut into 8 Template A pieces, 4 up and 4 down
BRIGHT SOLID FABRICS:
From each bright solid fabric, cut:
• 1 strip 4½″ × width of fabric; subcut into 4 Template B pieces, 2 up and 2 down
BACKGROUND FABRIC:
Cut:
• 14 strips 4½″ × width of fabric; subcut into 56 Template B pieces, 28 up and 28 down
• 14 strips 2½″ × width of fabric; subcut into 84 Template A pieces, 42 up and 42 down
• Trim the remaining background fabric to measure 56½″ for the quilt back; subcut into:
1 piece 12½″ × 56½″
1 piece 20½″ × 56½″
BINDING FABRIC:
• Cut 6 strips 2½″ × width of fabric.
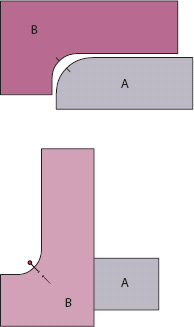
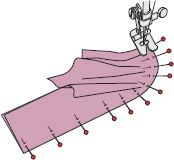
1. Start with 1 print piece B and 1 background solid piece A. With right sides together, match the marks at the center of the curves and pin in place.
2. Match and pin the ends of the pieces together, with piece B on top. Continue adding pins, easing the curves so all the raw edges align and the pieces are secured with pins. (Figure A)

3. Keeping piece B on top, carefully sew around the curve, using a ¼″ seam allowance and removing the pins as you go. The concave piece won’t lie flat, but that’s fine. Just remember to turn the pieces ever so slightly as you go and try to avoid inadvertently sewing in pleats. Stop and readjust midcurve as necessary. (Figure B)
4. Make a few  ″ clips around the curve and press the seam toward piece A.
tips
• If you normally use a ¼″ patchwork foot with an attached guide on your sewing machine, you may want to switch back to a standard foot while piecing the curved seams on these blocks. With so much going on in a small space, having that extra little piece of metal out of the way can be helpful.
• When working with other bias-cut pieces, such as triangles and diamonds, we typically try to avoid stretching or warping the edges. However, when piecing curves, being able to manipulate the bias-cut edges is actually a huge help. Feel free to pull and prod to get the curve just right.
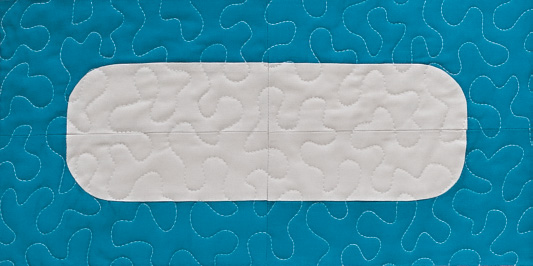
5. Square up the curved unit to 4½″ × 8½″. (Figure C)
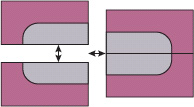
6. Repeat Steps 1–5 with the same fabric to make a total of 2 identical and 2 mirror-image units (2 up and 2 down). (Figures D and E)

Down block component

Up block component
7. Sew each pair of mirror-image units together, matching the seams, to create a half-block that has a “U” shape. Sew the 2 halves together to complete the block. (Figure F)

Print block
8. Repeat Steps 1–7 to make 1 block from each print fabric (7 blocks total).
Repeat Print Blocks, Steps 1–7 (pages 100–102), to sew 28 bright solid B pieces and 28 background solid A pieces into 7 bright blocks.
Bright block
tip
Although it’s easy to identify the mirror-image pieces of the print fabrics, the pieces you cut from the bright solid fabrics may be nearly impossible to tell apart, because the color may be the same on both sides of the fabric. If you can’t tell the difference, don’t worry about trying to keep track of the right and wrong side of every cut piece. Just make sure that you’re sewing an equal number of mirror-image units from each fabric.
1. Repeat Print Blocks, Steps 1–7 (pages 100–102), to sew 28 background solid B pieces and 28 print A pieces into 28 curved units (14 up and 14 down).
2. Sew 4 sets of matching units to make 4 background blocks.
3. Sew the remaining curved units into 3 pairs of identical half-blocks (6 total half-blocks). Set aside the remaining A and B units for the quilt back.
Background block
Half-block
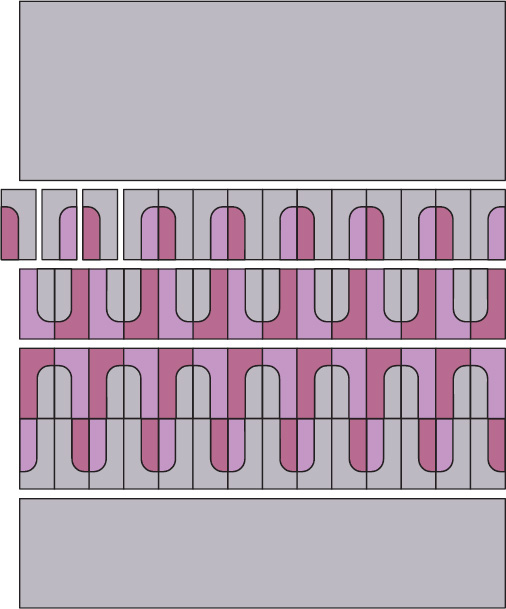
Follow the quilt top assembly diagram to arrange the finished blocks and half-blocks in 7 rows. Sew the blocks in each row together; then sew the rows together to finish the quilt top.
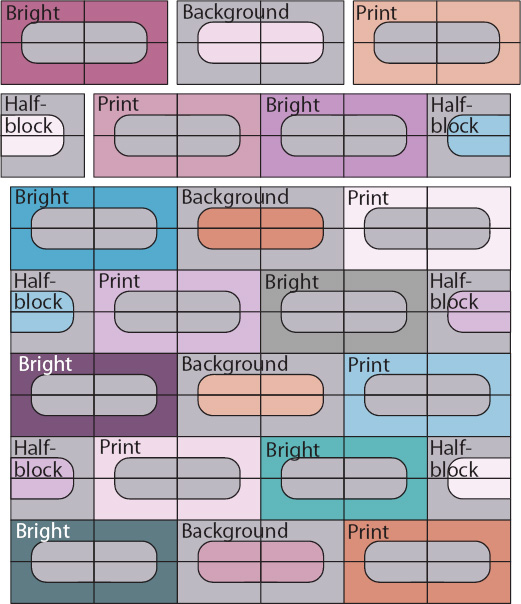
Quilt top assembly diagram
1. Use the 28 remaining print B pieces and the 28 remaining background solid A pieces to make 28 curved units, 14 up and 14 down.
2. Use the 28 remaining background solid B pieces and the 28 remaining print A pieces to make 28 more curved units, 14 up and 14 down.
Block units for quilt back
3. Arrange the units in 4 rows of 14 according to the quilt back assembly diagram; sew each row together. Sew the rows and the solid quilt back panels together as indicated to finish the quilt back.
Quilt back assembly diagram
Refer to Construction Basics (pages 132–141) for details on sandwiching, quilting, and binding your project.
Make the block units from a variety of fabric scraps. To substitute scraps for the print and solid yardage called for in the pattern, you’ll need 56 pieces cut from Template A and 84 scrap pieces cut from Template B.

The simple graphic shape of this block is a wonderful complement to bold-colored solid fabrics.