
No matter which papermaking process you use, artistic and decorative methods can take you far beyond plain white or colored sheets.
With the techniques in this chapter, you will explore many materials, styles, and moods. Experiment with different options and let your imagination run free. When you find one that strikes your fancy, go with it!
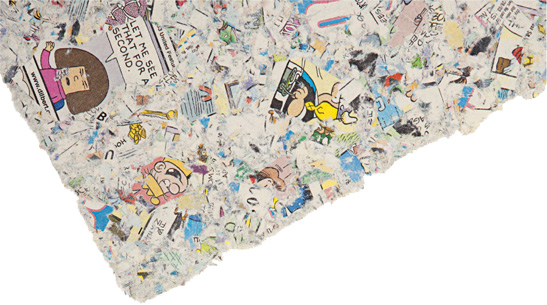
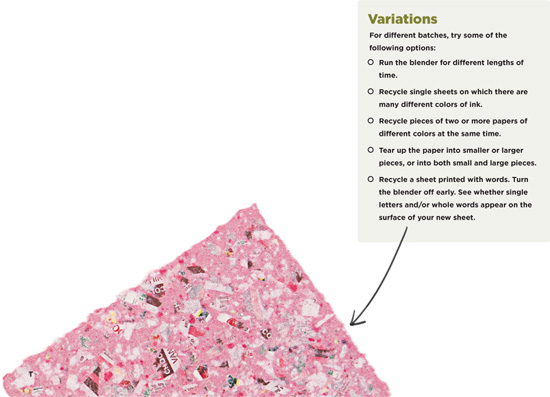
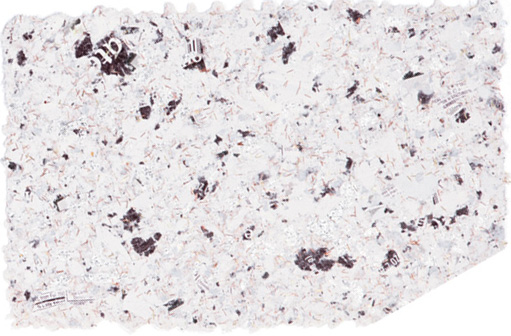
Run long enough, a blender full of pulp will reduce paper to individual fibers. When the blender is turned off before all the paper comes apart, though, there can be many small paper “chunks” in the resulting pulp. If the paper being recycled is from sheets of several different colors, or of a single sheet on which there were many different ink colors, the chunks could be multicolored.
When a sheet is formed with this kind of pulp, the many individual fibers sink to the screen while the colored chunks tend to float to the surface. This can result in surfaces that are very interesting and pretty. So, by simply experimenting with when to turn off the blender and with what paper or papers to recycle, hundreds of different decorative and artistic sheets can be made.
Step 1. Get paper napkins of three or four different colors.
Step 2. Tear up enough napkins to make a single new sheet (enough to cover an area about 7″ square).
Step 3. Put the torn-up napkin pieces into water in a blender.
Step 4. Run the blender only 4 seconds.
Step 5. Make a sheet of paper, using whatever technique you prefer (see chapter 3).
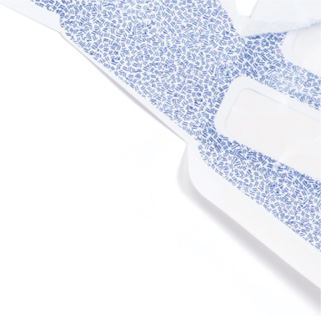
The mottled surface technique can make impressive handmade papers and greeting cards, but they can be difficult, or impossible, to write on. The writing gets lost in the mottling. To fix this problem, use a turkey baster to lay a smaller, even layer of solid white or colored pulp on a second screen and then pulp layer (see page 78) it onto the mottled surface. This provides a writing patch. It can be made in different shapes.
Frequently Asked Questions
Q: How do I put seeds in paper? Will they grow?
A: Seeds can be added to pulp for papermaking. Add them after blending the pulp and before forming sheets. (See the project on page 194.) Large, flat seeds are easiest to embed. Whether planted paper will bloom and grow depends on many factors, including seed quality, paper thickness, and planting conditions, but brief exposure to water during paper making will not cause germination.
A seed consultant suggests that most hardy seeds are good candidates for making plantable paper. He recommends cosmos, marigold, calendula, poppies, and cornflower seeds. In his opinion, it is safe to iron dry sheets with these embedded seeds. Seed paper covered with a thin layer of dirt, plus warmth, water, and sunshine will, hopefully, bring on sprouts.
Anything that is thin, flat, and flexible can be locked onto the surface of a sheet of handmade paper by the top layers of fibers. Even the thinnest sheet of paper is made up of numerous layers of small papermaking fibers. Suitable materials can be put down into the last of the water as the fibers descend toward the papermaking screen. The final fibers will attach the material into the sheet’s surface. A few experiments will show you what works and what doesn’t.
For this technique, you want the pulp to drain slowly, to allow time for the added elements to embed. For best results, recycle paper that results in a slower draining pulp, or add more water. The deeper the water in the hand mold, the longer it will take to drain. Also, use a bit more pulp, because surface embedment works better on a somewhat thicker sheet (think greeting card thickness).
Step 1. Prepare pulp by running paper in a blender. Run the blender until few or no chunks of paper are left.
Step 2. Select something to embed. This could be leaves or other bits of nature, ribbon, fabric scraps, or your favorite character cut from the Sunday comics. Dip the item into one of the containers of pulp. This will make it wet and possibly deposit some papermaking fibers on its edges. Set it nearby in some manner that it can be quickly and easily picked up.
Step 3. Start the papermaking process by pouring pulp into the mold. Immediately grab the cutout. As the last water and fibers descend toward the screen, firmly push the cutout below the surface of the still-draining water and onto the fibers already lying on the screen. The remaining fibers should descend and tie the embedded item into the sheet’s surface.
Step 4. Continue the papermaking process as usual (see chapter 3).
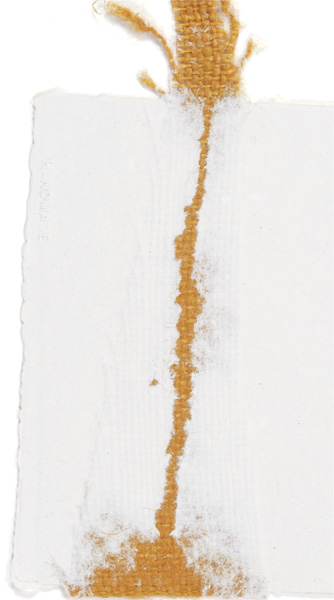
An embedded strip of burlap creates a stream connecting two lakes, or maybe just adds a burst of texture.
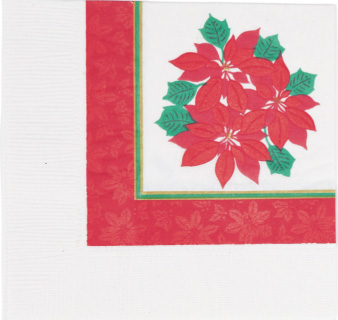
If you can pronounce it, you can do it! Anyone can transform an art napkin into a beautiful art card or sheet. Here’s how it’s done.
1. Cut an interesting art image from a napkin. Peel the image to a single-ply piece. (This can be a little tricky, but it’s definitely do-able.)
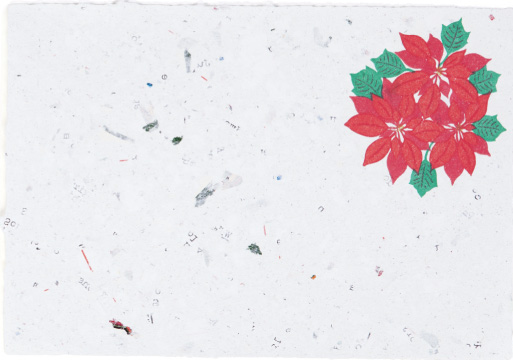
2. Put the rest of the napkin into your blender and recycle it into pulp. Add other fiber if you wish, but it’s not necessary; the resulting sheet will be stronger than the typical napkin. Form a sheet. Take the wet sheet from the mold.
3. Pick up the cutout by hand or with tweezers and carefully place it where you want it on the surface of the wet sheet. (If the paper is to become a card, place it on the right-hand side to allow for a center fold.) This takes care and maybe a little practice. If you can hold onto the cutout at opposite ends and drop the center down first, you can let the rest of the cutout roll down onto the surface.
4. When the cutout is down, you will see the water rapidly absorb it into the sheet’s surface. Subsequently press and dry the sheet as usual (see pages 54–55).
You can achieve some truly beautiful results by adding selections from nature into your papermaking. Let fall leaves fall into your handmade paper projects! The paper will be unique; no other card or sheet will ever have that leaf. If the leaf is from one of your trees, it has within it whatever work, effort, and time you have put into the tree’s care, or simply your appreciation for the tree beauty. The paper you make can be used for all types of projects from home décor to greeting cards.
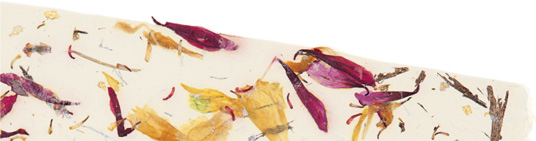
If the paper is dried under pressure, leaves can be taken from your lawn directly to your papermaking area and used without any preparation. I also like the effect of placing leaves between pages of big books for a week or so; most leaves respond beautifully to this or any other extended pressing. This method also works for embedding flower petals onto your paper. Here are some tips that have proven successful. Add them to your own good ideas.
 Cut stems or flower heads as soon after blooming as possible. The more petals are exposed to the sun, the less pigment they’ll retain in handmade paper.
The best time to harvest flowers is in the morning after dew disappears.
Press leaves and petals in an old phone book or flower press to embed flat. To save whole flower heads, hang stems in bunches upside down in a dry, cool place, or on a rack where air can circulate.
To save an entire vase bouquet: After prime blooming is past, do not replenish water. Let the bouquet dry right in the vase. This can take weeks to months, depending on local climate.
When flowers are completely dry, store pressed flowers on labeled pages in sheet protectors in a binder. Store dried flower heads in labeled brown paper bags.
Record the flower name (if you know it!), where you found it, and what month it bloomed (for instance, mid-July). Then, if you find something you really like, you can look for it again next year.
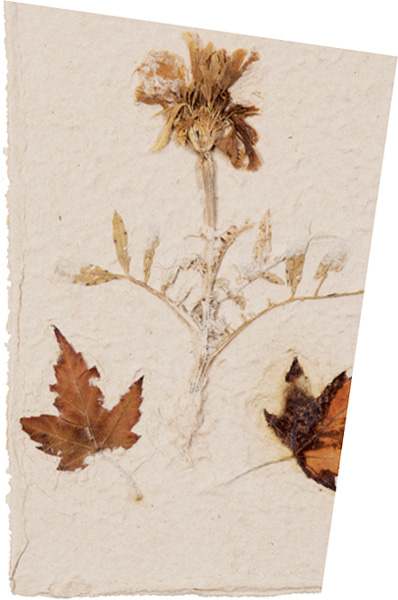
Leaves and garden foliage are as striking in handmade paper as they were in lawn and garden.
Q: What are the best flowers to use for papermaking?
A: Actually, any flowers can be used, but some petals bleed color. Roses are an example. Many flowers fade over time. Consider parts that are sufficiently small or formed in such a way that they can be successfully embedded. Ferns are quite dependable. Flowers likely to retain color are coral bells, pink and blue larkspur, bachelor buttons, red or purple bee balm (monarda), marigolds, sunflowers, angel wings (from potpourri), and most any color of statice.
Botanical Difficulties
Botanicals frequently float to the top and thus evade becoming tied down to the sheet's surface. While pulp is draining, carefully push the botanical beneath the surface of undrained pulp. Be careful not to push so hard that fibers already on the screen are disturbed, which could seriously or fatally flaw the sheet.
Some botanicals leach out plant elements during sheet drying, creating a corona of stainlike color in the dried sheet. This can be attractive or unattractive. It sometimes seems the less time the botanical is wet, the less the corona. For such foliage, drying with an iron would be best. With some foliage, soaking ahead of time seems to help. Some foliage seems to leach hardly at all. Consequently, it’s difficult to generalize. Making test sheets can be helpful. Dry one sheet slowly under pressure and a second sheet with an iron. Soak some of the same foliage in advance to see whether presoaking helps. Again, personal experience and observation are your best teachers. May nature be kind to all of us.
Let’s admit it, tissue as an “in use” product just isn't all that glamorous. It doesn’t appear in majestic frames hanging on the walls of upscale classic art museums. All in all, it’s just sort of a ho-hum item, like “Pass me a tissue, I’ve got to sneeze.” But, in hand papermaking, tissue paper is an exciting way to add bright colors. I thought I had exhausted the possibilities with napkins, but working with tissue has really set my creative juices buzzing. Use tissue in the same way as for napkinization (see page 65), and let the fun begin!

The point of Earth Day is to do good to, and for, the environment. One part of this is to limit stuffing junk into the Earth through landfills. As a symbol of limiting landfills, and to honor your Earth, make a “street sheet.”
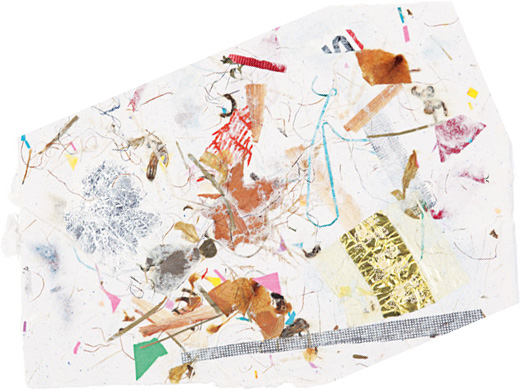
A street sheet gathers up odds and ends that would normally be discarded and keeps them out of the Earth by putting them into a sheet of paper. What might be found in a street sheet? Some of mine show ribbons, gum/candy wrappers, threads, window screen bits, grass clippings, flower stems, and what looks like an old shoestring.
Making a street sheet is just like embedding botanicals in paper (see page 66), but instead of adding botanicals to pulp in the deckle or vat, you add street items. This year, observe Earth Day by making a street sheet, or at least recycle some landfill-bound paper into a beautiful new handmade sheet.
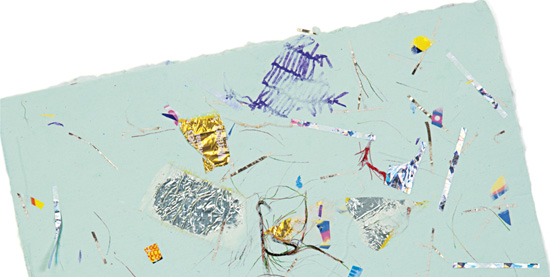
On Earth Day, what you find on the street goes into your sheet.
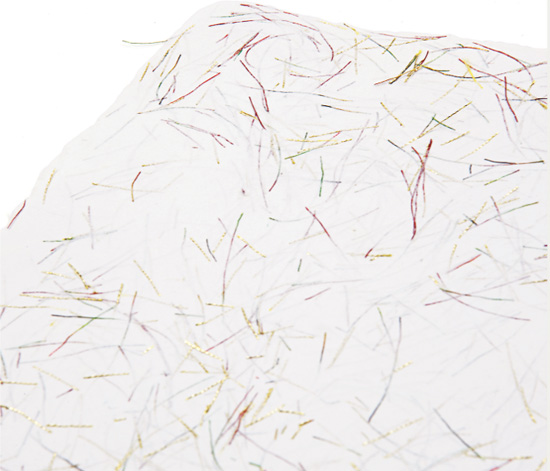
A sheet of paper is made up of little individual fibers. A variety of things can be mixed with the fibers and made a part of the sheet. These nonfiber additions, like colorful threads, can make the sheet beautiful and distinctive. But do not add too much nonfiber material, or the papermaking fiber’s ability to keep the sheet together will be destroyed.
Materials can be added to the fibers in the blender when paper is being recycled into pulp. If you want to maintain the shape of something, such as leaves, keep them out of the blender or they will shred into small bits and pieces. It’s best not to add string or threads in the blender. They tend to wrap around the blender blades. Experience will show the best time to add specific materials.
When you make this sheet, add materials for embedment after the source paper has been run in a blender.
Step 1. Run paper in a blender to make pulp.
Step 2. Pour the pulp into containers and add many short and longer pieces of different-colored threads to each container. (Threads show up nicely; fabric will work as long as the pieces aren’t too big or thick.) Stir the threads into the pulp.
Step 3. Form a new sheet of paper using your papermaking method of choice (see chapter 3). With the pour method, as you pour the pulp into the mold, threads and other materials tend to migrate toward the sides. Watch for this and use something like a plastic kitchen scraper to move the threads into the body of the paper.
More Experiments
For different batches, try some of the following options:
Place one or two dried leaves of trees or flowers into the blender with the paper to be recycled. If you have tree leaves, use the stems also. Green leaves can be used, but often this results in a greenish tinge around the foliage pieces in the final sheet. But you might like that effect!
To combine threads, ribbon lengths, leaves, and grass in a sheet, first put leaves and grass into the blender with paper to be recycled. Then add the threads and ribbons to the pulp when it is in containers just before pouring. Ribbon and thread tend to float; they might need to be pushed down below the surface of the draining water in order to be made secure in the new sheet.
Try glitter. Add it either in the blender and/or in the containers just before pouring (for more about glitter, see page 76).
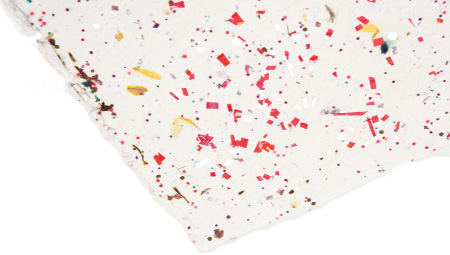
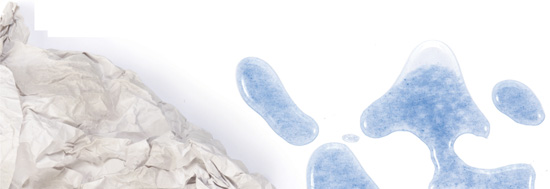
There is something about the word “confetti” that excites the mind. Can you put confetti, with all of its innate fun-and-frolic connotation, on the surface of your handmade paper? Yes, but keep in mind a prime personality trait of confetti; bits tend to fly away when the dried sheet is handled. In most instances, though, this tendency is not so serious as to cause one to totally ignore all the fun a confetti sheet can provide.
So give it a try. Add the confetti bits to the pulp after blending. For best results, rock the hand mold as the pulp is draining to encourage the pulp to wash over the confetti bits and hold them to the paper.