CHAPTER 2
ALCHEMY FOR THE BODY
In addition to using the honeycomb as a food source, ancient humans learned that the gifts bees provide could also be used externally for wellness. Before the advent of modern medicine, honey was the healing potion of choice. It was used for all sorts of ailments, from ulcers to burns and sores. Honey was the glue for making herbal pastes and ointments. The ancients also realized that beeswax could be used to create healing salves and aromatic unguents. Propolis was recognized early on for its antiseptic qualities. Egyptians used propolis in mummification, and later, Greek and Roman soldiers carried propolis on the battlefield to limit infection. Even pollen plays a role by rejuvenating skin and hair.
With the advent of modern medicine, humans drifted away from the more traditional healing methods in favor of lab-produced antibiotics. Recently, doctors and scientists have rediscovered what the ancients knew: that there is great potential in all the gifts the bees provide.

INGREDIENT PROPERTIES
While all bee-related products may seem to do the same things, it is important to understand that they are interconnected: Beeswax contains pollen and honey, honey contains propolis, propolis contains beeswax, and so on.
HONEY
Honey is a humectant, which means it hydrates the skin by retaining moisture. Honey is also a natural source of alpha hydroxy acids, which encourage exfoliation of dead skin cells, refines pores, and smoothes skin. Aging skin loses its ability to retain moisture, so honey can help restore youthful-looking skin.

BEESWAX
Beeswax is a wonderful addition to all sorts of skin care products. In addition to smelling wonderful, it acts as a protective barrier, retaining moisture in the skin and reducing dryness. Not only does beeswax protect the skin, it also allows the skin to breathe and doesn’t clog pores. It is a humectant, attracting moisture and keeping the skin hydrated. Beeswax also has anti-inflammatory properties, which encourages wound healing. It is also a good source of Vitamin A, which helps to support cell renewal.

PROPOLIS
Propolis is loaded with vitamins, minerals, phenolic acids, and flavonoids, which means it is packed with antioxidants and nutrients, which ensure that skin remains clear, firm, resilient, and healthy.

POLLEN
Although pollen contains a whole range of awesome ingredients, it’s the zinc, vitamins C and E, and the omega fatty acids that are the workhorses for skin care. The zinc acts as an antioxidant that helps slow the aging of the skin. Vitamins C and E protect the skin from damaging UV rays, and omega fatty acids, mostly omega-3 and omega-6, are useful for controlling acne.
SOAP-MAKING EQUIPMENT
Soap molds can be as simple as a lined cardboard box, as complicated as an ornate silicone mold, or anything in between. The recipes in this book are sized for a regular bread loaf pan (I like silicone, which doesn’t need to be lined), which yields approximately 8 to 10 bars of soap.
DISPOSABLE PAPER PLATE OR BOWL
For measuring the dry lye, I like to use a disposable paper plate or bowl. This makes cleanup easy. Lye crystals can have quite a bit of static electricity and the individual beads can escape. Take care when measuring and give all the surfaces a quick wipe down when the lye is in water.
THERMOMETER
Especially for novice soap makers, it is helpful to know the temperature of the oils and lye water. For this, I like to use an infrared temperature gun. It is noncontact, so it can easily be used to measure both oils and lye water without fear of mixing. It also can be constructed out of whatever material the manufacturer decides because it will not come in contact with lye water. An immersion thermometer can also be used; however, make sure that all the parts that will be submerged in the lye solution are made of a material that is okay to use with lye, such as stainless steel. Also, the thermometer should have a measurable temperature range that includes the suggested temperature of the oils and lye water.
IMMERSION BLENDER
For mixing the lye with the oils, I like to use an immersion blender. They can be purchased at a big box store relatively cheaply and they help to ensure that the soap batter is mixed properly. The immersion blender has a high shear blade that combines the soap quickly, easily, and reliably. A hand whisk or spoon can also be used, but it will take quite a bit longer.
MOLDS
Soap-making equipment has only a couple requirements. First off, if using metal, use ONLY stainless steel. The lye will react with other metals. Secondly, never use glass to mix the lye. Over time, minute cracks and scrapes can end up in the glass and the glass will shatter, potentially spilling hot caustic lye water all over. I prefer to keep all the equipment I use for soap making, such as stainless steel bowls and immersion blender, strictly for soap making.
STAINLESS STEEL STOCK POTS OR PLASTIC BUCKETS
For mixing the soap, I like stainless steel stock pots or plastic buckets. A small flat-bottomed mop bucket works really well, since it is durable enough to withstand some warmer temperatures and is not too tall, allowing the soap maker to easily use an immersion blender or whisk. It also has a handle, which is useful for transferring the soap batter to the mold.
SOAP MAKING BASICS
Soap is one of life’s basics. Soap has been around since time immemorial, and we all need soap to get us clean. While the actual origin of soap is unclear, people have been combining alkaline salt and fats to create soap in one form or another for the past 5,000 years. The Sumerians created a slurry made by combining animal and vegetable fats with ashes and boiling it. Later, ancient Egyptians wrote about soap recipes that called for mixtures of fats and alkaline salts. The Romans were using bar soap in their baths by 200 CE. What we have now, that they may not have had then, is soap that is reliably gentle on the skin and consistent from one batch to the next. Today, we know about the chemical reaction that takes place to create soap and how to create lye in a lab so that it is of a known purity, ensuring results that can be easily predicted and duplicated. We also have modern tools such as digital scales and immersion blenders that help with the task, but the essential process has not changed in ages.
What is this chemical reaction that happens that creates soap? The chemical process is called saponification and at its most basic, it is the following equation:

FAT
Fat in this equation is anything that will react with the lye to create soap. Oil and butters make up the majority of this category, but beeswax falls into this category as well, as a small percentage of beeswax will saponify when introduced to lye.
Each oil has a Saponification Ratio value, also known as the SAP value, which is the amount of lye needed to convert that oil into soap. Eeach oil has a different value, so it is important to be thoughtful about oil substitutions; don’t substitute one oil for another without recalculating the amount of lye needed to make the conversion.
LYE
Chemically, lye is either sodium hydroxide or potassium hydroxide, depending on whether a bar soap or liquid soap is desired. Without lye, there is no soap. Lye is required for the chemical reaction. If the soap recipe was calculated correctly, there is no lye left in the final product. All the lye will have been converted to a salt.
CREATING A SOAP RECIPE
Because different oils have different SAP values, they require different amounts of lye. Although it is possible to calculate the amount of lye needed for a particular oil by hand, I recommend using an online lye calculator. I suggest running every recipe through a lye calculator because the recipe could have inadvertent errors such as transposed numbers or incorrect units. It is also a good idea to have a paper copy of the recipe so you can check off materials as you add them and include notes on scent or color. Using the lye calculator also allows for resizing a recipe to fit a particular mold. There are free web-based lye calculators that will calculate the needed lye and allow the end user to print out the recipe. Some calculators have predictive values for hardness and lather that are useful when creating recipes from scratch or tweaking recipes to fit the materials on hand. See appendix C, “Lye Calculations” for the method for calculating the lye quantity by hand.
USING MORE THAN ONE OIL
Although it is possible to make a soap using just one oil, there are reasons that most soap makers utilize more than one. Each oil has a different breakdown of essential fatty acids that will bring different properties to the soap. Coconut oil is high in lauric acid and as a result will yield a soap bar that makes loads of bubbles, will dissolve quickly, and is very cleansing (but may be too harsh for most people if used in high proportion). Olive oil, on the other hand, which is loaded with oleic acid, makes a soap that has more of a creamy lather (it almost feels slimy if not properly aged), is super gentle on the skin, and once fully cured, is hard enough to brick a house. Most of the other oils will fall somewhere in between coconut oil and olive oil. I have included profiles for all the oils I use in this book along with a couple more that might make nice substitutions in appendix D, “Body Care Ingredient Guide.”
ADDING BEESWAX AND HONEY
Making soap with honey and beeswax is a great way to utilize some of the gifts from the hive. Since honey is a humectant, it adds a touch of moisturizer to the bar and the sugars in the honey improve the lather.
I consider using honey in soap to be a slightly advanced technique. Although incorporating honey into the batch is not difficult, the honey will cause the batch to heat up a bit more than usual. Here’s where experience comes into play; having a sense of the different phases a basic soap batch goes through is really helpful. To use honey in soap, I suggest using about a tablespoon (20 g) of honey per pound (455 g) of oil used in the soap recipe.
Beeswax helps to make the soap emollient and makes a hard bar that lasts longer in the shower. The most common mistake is using too much honey and beeswax, which can lead to a frustrating mess. Use too much honey and the batch can heat up too quickly, possibly causing the mixture to overflow its mold. Too much beeswax and the bar can develop a rubbery and gummy texture. I like to keep my beeswax quantities at 2 percent or less of my oils. Moderation is key.
Beeswax is definitely a more advanced technique. The main reason for this is that beeswax has a melting temperature of at least 145°F (63°C), while most soaps are made at a temperature that is quite a bit cooler, around 100°F (38°C). The oils and lye need to be combined at a higher temperature to ensure that the beeswax remains in liquid form. The higher temperatures will make the soap saponify more quickly, increasing the chances of a failed batch.
Beeswax is not an oil, so not all of the wax will react with the lye. Beeswax contains about 50 percent unsaponifiables. Unsaponifiables are the substances in beeswax that do not react with the lye. The unsaponifiables may be substances that help decrease the trace time in recipes using beeswax, but are also probably the substances that make beeswax nice for the skin.
EASY
BAR SOAP WITH HONEY 
For the novice soap makers, I suggest first making this recipe without the honey. It is fine to simply leave it out. Learn the process and the phases of soap making first and then try making the recipe with honey.
BEFORE BEGINNING
The first thing I like to do when I make soap is to gather all my ingredients together and put them on my table in the order in which they will be used in the recipe. I do this for two reasons. First, I can check to make sure that I have enough of all my ingredients to actually make the soap. It’s better to realize that there is no castor oil before making soap, rather than right in the middle of soap making. Second, I can grab the oils in order and check them off on my printed recipe. It helps to ensure that I measure out the correct amounts.
PREPARE THE LYE SOLUTION
1. After gathering the ingredients, make the lye solution, as it will need time to cool. Measure the lye into a disposable paper bowl and set aside.
2. Then, weigh the correct amount of distilled water, reserving 4 ounces (120 ml) in a small container to mix with the honey (if using). Pour the water into the container for the lye. Then, add the dry lye crystals to the water.
Stir until all the lye is completely dissolved. There will be some fumes as the lye dissolves.
The lye mixture will get quite hot, so take precautions and make sure to work on a surface that is heat resistant. Set this mixture aside to cool.
3. If using honey, add the honey to the reserved 4 ounces (120 ml) of water and stir to incorporate. Microwave on high for a couple seconds at a time, if needed, to completely dissolve the honey. Add the honey mixture to the cooled lye mixture. When combined, the mixture will change color and the solution will heat up.
PREPARE THE OILS AND THE MOLD
1. Melt all the solid oils in a heatproof container either on the stove or in the microwave. Once melted, pour the oils into the mixing container. Add the liquid oils and stir to mix.
2. Prepare the mold. If you are lining the mold with freezer paper, do that now. Always make sure that the mold is ready to go before doing any mixing.
3. Check the temperatures of the lye and the oils. Ideally, both should be around 100°F (38°C). If not, warm or cool to temperature.
MAKE THE SOAP

1. Pour the lye/honey water into the oils. With the immersion blender, mix the lye and oils. Notice how it changes from transparent to milky. Keep mixing until it gets to a stage called trace. Trace means that when the immersion blender is pulled out of the soap, it leaves a visible trail in the top of the soap. I like to take my soap to a medium to heavy trace, which is almost the consistency of a soft pudding.
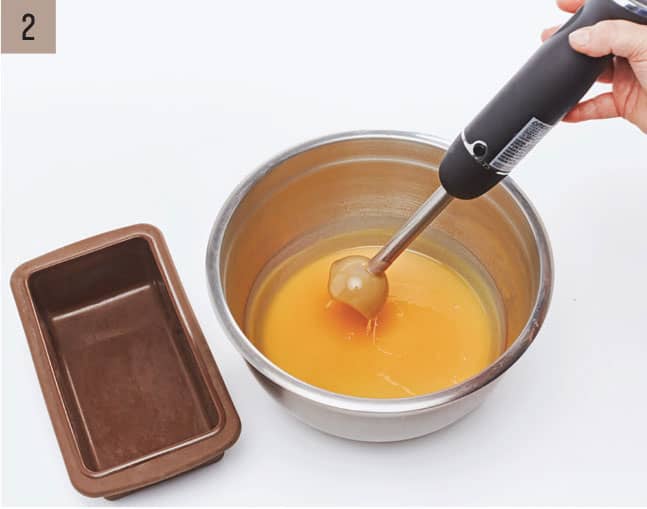
2. For novice soapmakers, I recommend not adding any color or scent. When you’ve made soap a few times and the recipe has become more familiar, this would be the time to add those ingredients. Depending on the temperature of the oil and lye and the speed of the immersion blender, the actual mixing portion should not take that long, maybe five to ten minutes.
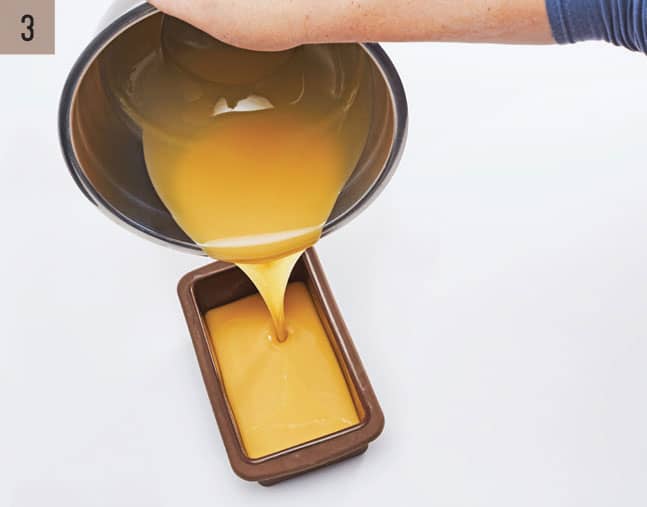
3. Pour the soap batter into the prepared mold. Scrape out the soap pot and tap the soap mold on the counter a couple times to make sure there are no air pockets. If needed, smooth out the top with the spatula. Cover the mold with a piece of cardboard to hold in some of the heat.
4. Allow the soap to sit for several hours. Since soap making is an exothermic chemical reaction, the soap will heat up in the next couple hours and transform from what looks like a nice, creamy soap into something resembling petroleum jelly and it will be HOT. That is what is called the gel phase. While it’s not completely necessary for a batch of soap to go through gel, I think it makes for a better, more consistent, end product.
5. After about 24 hours, the soap should be cool, relatively hard, and ready to unmold and slice. If it still seems a bit soft, leave it in the mold a bit longer and try again after another day or so. Once it seems hard enough, cut the soap into individual bars, keeping in mind that there is still quite a bit of water in the soap that will evaporate over time, which will cause the bar to shrink a bit. Lay out a sheet of freezer paper in an out-of-the-way spot and set the cut bars on the paper, leaving a bit of air space between them. Allow to dry and cure for about 4 weeks.
MODERATE
BAR SOAP WITH BEESWAX AND HONEY 
Once the basic recipe has been conquered, it is time to add beeswax.
1. Gather the materials together and place them on the table in the order in which they will be used in the recipe.
2. Weigh the lye and the water separately, reserving 4 ounces (120 ml) of water to mix with the honey.
3. Add the dry lye crystals to the water. Stir until all the lye is completely dissolved. There will be some fumes as the lye dissolves.
The lye mixture will get quite hot, so take precautions and make sure to work on a surface that is heat resistant. Set this mixture aside to cool.
4. Add the honey to the reserved water and stir to dissolve. If needed, warm the mixture in the microwave for a couple seconds at a time to make the honey dissolve completely. Set aside.
5. If necessary, prepare the soap mold by lining it with freezer paper and keep it close by.
6. Melt all the solid oils and beeswax in a heatproof container either on the stove or in the microwave. Once melted, add the liquid oils and stir to mix. Check to make sure that everything is still melted and nothing has resolidified. If it has, pop it into the microwave until everything is liquid.
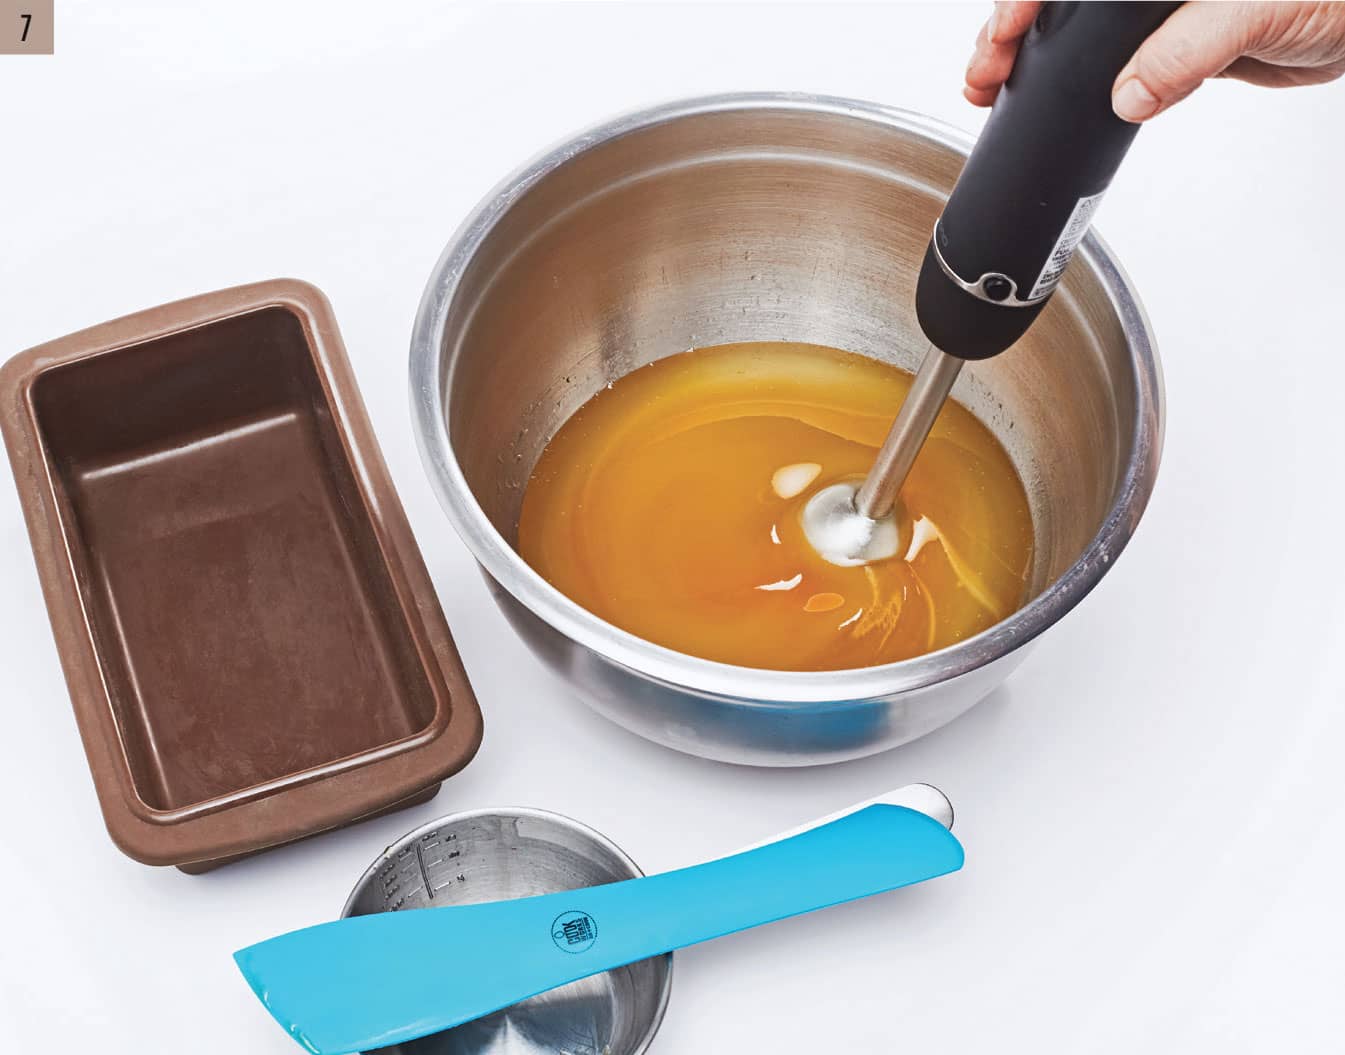
7. Pour the oils into the mixing container and stir to ensure it is all mixed. Check the temperature of both the lye and the oils. To prevent the beeswax from hardening, the oils will need to be a bit hotter, ideally between 110°F and 120°F (43°C and 49°C). The lye should be right around that temperature as well. Add the reserved honey water to the lye water. It will probably turn colors; mine usually turns some sort of pinkish hue. That’s normal.
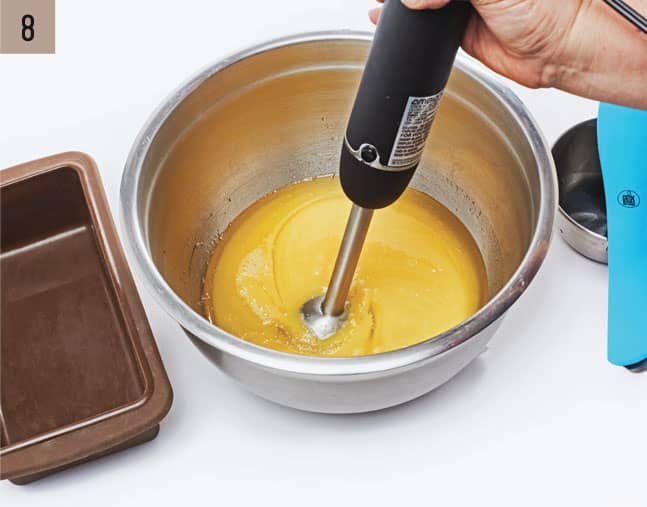
8. Pour the lye/honey water into the oils, using the immersion blender to combine. Once it is emulsified, but not yet at trace, add the fragrance, if desired. Keep mixing until it gets to the trace phase.
For this soap, I usually mix until it is a light to medium trace. Once trace is achieved, work quickly to get the soap into the mold, in case it begins to solidify.
9. Pour the soap batter into the prepared mold. Scrape the soap pot and tap the soap mold on the counter a couple times to make sure there are no air pockets. Smooth out the top and cover the mold with a piece of cardboard to hold in some of the heat.
10. After about 24 hours, the soap should be cool, relatively hard, and ready to unmold and slice. If it still seems a bit soft, leave it in the mold a bit longer and let sit for another day or so. Once it seems hard enough, cut the soap into individual bars. Lay out a sheet of freezer paper in an out-of-the-way spot and set the cut bars on the paper, leaving a bit of air space between them. Allow to dry and cure for about 4 weeks, rotating the bars occasionally so that all sides dry evenly.
ADVANCED
LIQUID SOAP WITH HONEY 
In some respects, making liquid soap is similar to making bar soap, while in other respects, it is totally different. The process of changing fats into soap using a caustic solution is the same, but the actual caustic solution used is different. While liquid soap requires potassium hydroxide (also known as potash), bar soap is made with sodium hydroxide (also known as lye or caustic soda). Technically, they are both salts; however, the salt crystals in bar soap made with sodium hydroxide are crystalized enough to yield an opaque-looking soap. Liquid soap made with potassium hydroxide, on the other hand, doesn’t crystalize in the same way and the soap looks more transparent.
When it comes to adding honey to liquid soap, it would seem that simply adding honey to the diluent (usually water) would be the best way to go, but I worry that honey that has not gone through the saponification process might leave the end product susceptible to microbial growth. For this reason, I add my honey before saponification is complete.
I used to make liquid soap the same way I made hot process bar soap, but then I learned about using the glycerin method of liquid soap making. Although the soap doesn’t seem to have as long a shelf life as the soap made more traditionally, it is much easier and more foolproof to make. Be aware that the process generates a lot of heat, so I suggest using a metal immersion blender, as a plastic model may warp from the heat.
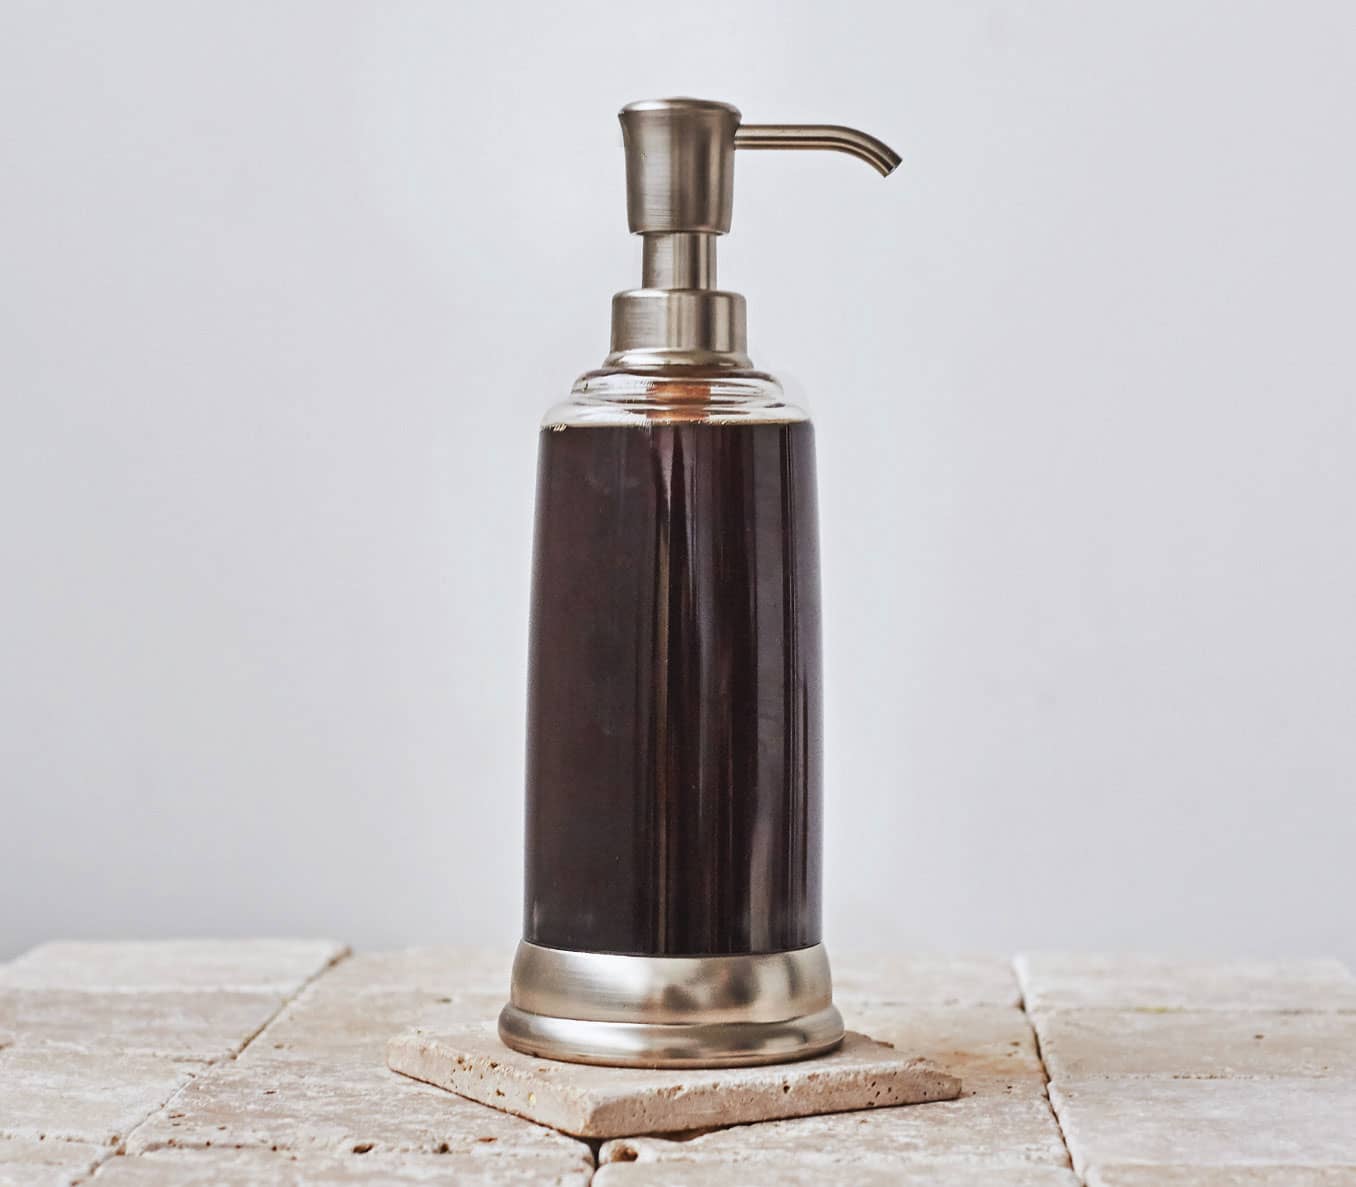
1. Weigh the oils, add them to the crockpot, and warm them on low heat until completely liquid.
2. Weigh the glycerin and add to a medium stainless steel pan.
3. Weigh the potash and add to the paper bowl. Combine the potash with the glycerin in the stainless steel pan.
4. Heat the glycerin-potash mixture on the stove over low heat until the potash has completely dissolved. This may take a while, since the potassium hydroxide doesn’t dissolve easily in glycerin. If a few stubborn pieces of potash remain undissolved, strain them from the mixture before adding it to the oils.

5. Add the potash mixture to the oils in the slow cooker (the temperature doesn’t matter). Use the immersion blender to combine. Add the honey and continue mixing until tiny bubbles float to the surface. This usually doesn’t take too long, maybe 5 to 10 minutes. Stop mixing, turn off the slow cooker, and cover with the lid. Leave undisturbed overnight.
6. Check the mixture the following day. The paste will be dark, but should look translucent and be quite stiff. It should be fully saponified, but a test dilution will confirm this. To test the soap, weigh out an ounce (28 g) of the soap paste and dilute it with an ounce or two (28 to 60 ml) of distilled water. It may take a while for the paste to dissolve in water, but it will do so on its own with enough time and enough water. Leave the test dilution to sit for a day and come back to it. It should look completely dissolved and without any oil/water separation. If the test passes, the rest of the paste can be diluted.
Once the minimum dilution rate is reached and the soap has a pleasant consistency, apply that dilution rate to the rest of the paste. I like the dilution rate noted in this recipe, but everyone has different preferences.
LIP BALM 

The first thing I made once I had my own beeswax was lip balm. Balms may be easy body care products to make, but honestly, they can be the source of a lot of frustration—too hard, too soft, feels waxy, feels oily. I encourage experimentation. Everyone’s tastes are different.
A lip balm in a tube needs to be stiff enough to hold its shape, should not melt if kept in a pants pocket, and when applied to lips, it should glide on easily. Pour that same lip balm into a tin, and it will probably be too stiff to be picked up with the finger and applied to the lips. I prefer lip balm in tubes and the following recipe is one of my favorites. I call it basic, but it is anything but—this is an awesome lip balm.
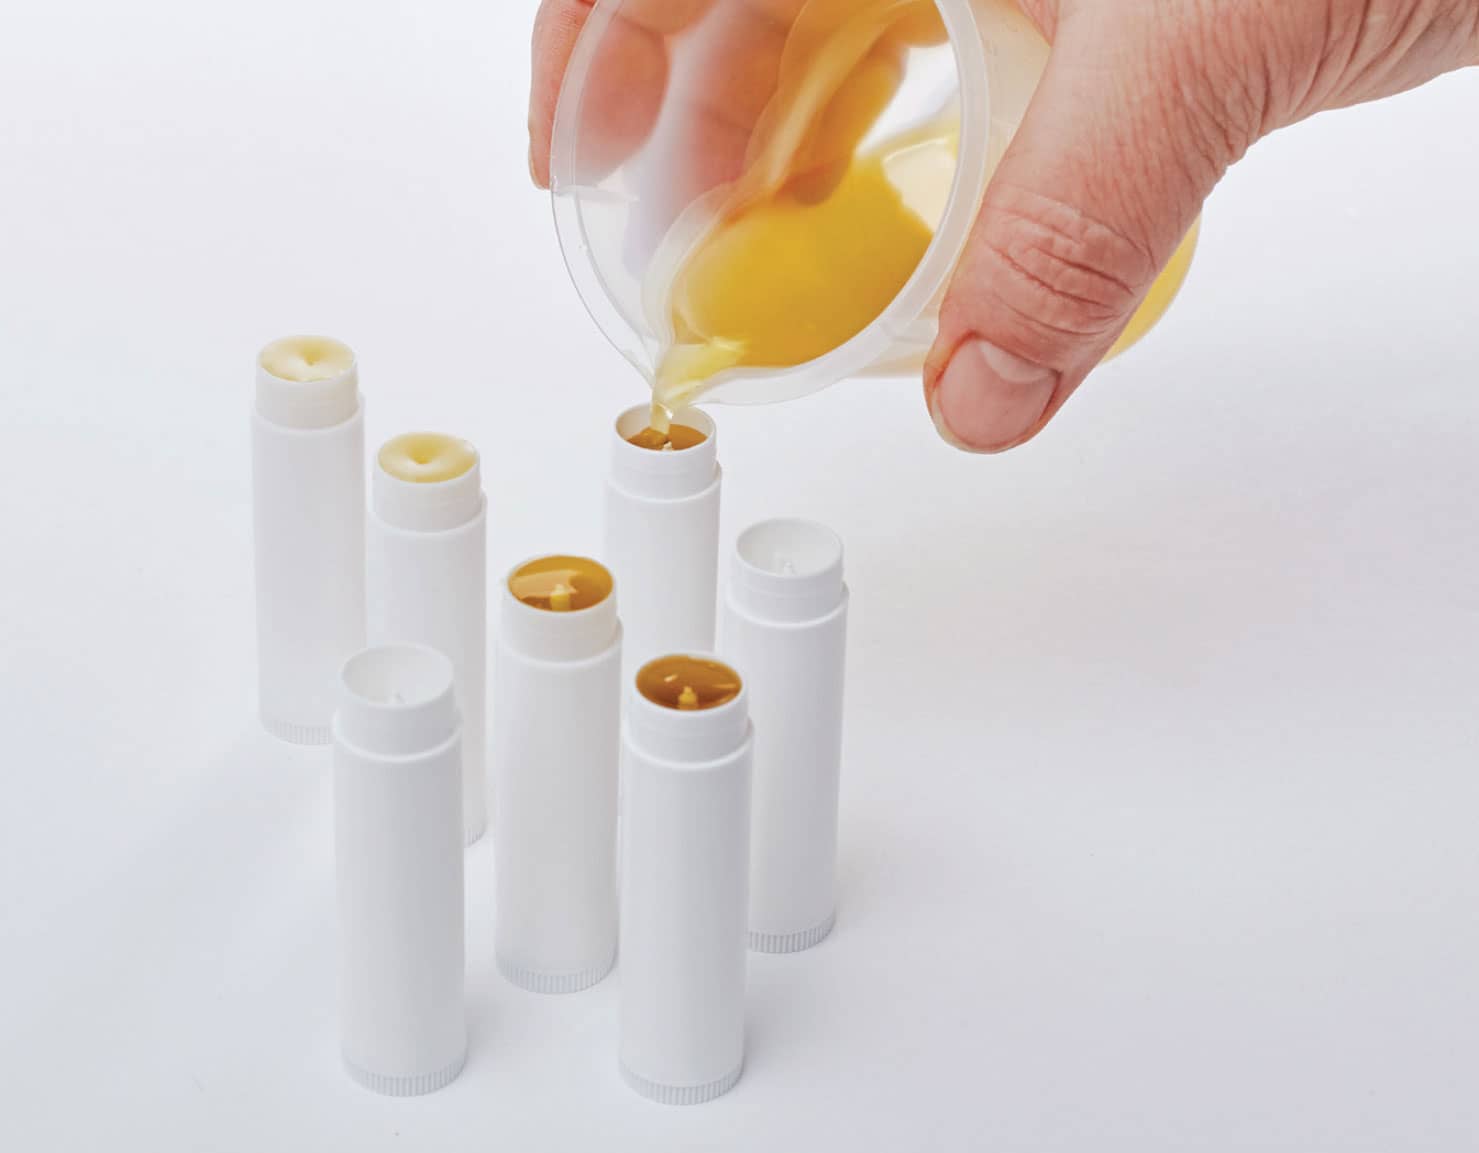
1. Coarsely chop the beeswax or use beeswax pastilles. Weigh the beeswax, oils, and lanolin and place them directly into the top of a double boiler or heatproof bowl. Gently heat until the beeswax and oils have melted.
2. Remove the melted mixture from the double boiler and add the essential oils and Vitamin E oil. While it is still hot, pour the mixture into the lip balm containers. Allow to cool completely before placing the caps onto the lip balm containers. This recipe makes approximately 6 ounces (170 g) of lip balm, enough to fill 36 lip balm tubes (0.15 ounce, or 4 g, each).
EASY
FACE CLEANSING GRAINS 
Cleansing grains are not a new idea. Asian women have been using ground rice in their beauty regimen for centuries. They can be used to clean and exfoliate, removing dead skin cells, unclogging pores, and improving skin tone. Store the grains as a powder in a small jar or shaker-top bottle. When ready to use, mix single portions with a wetting agent such as water or honey.
The recipe can be tweaked easily to customize the cleanser for different skin types. I have included some suggestions in the “Additions and Substitutions” sidebar. When making the powder, I grind the larger, more dense ingredients first on their own and then again with all other ingredients added. The flax meal creates a gel when hydrated that helps bind the mixture, making it easier to spread across the skin.
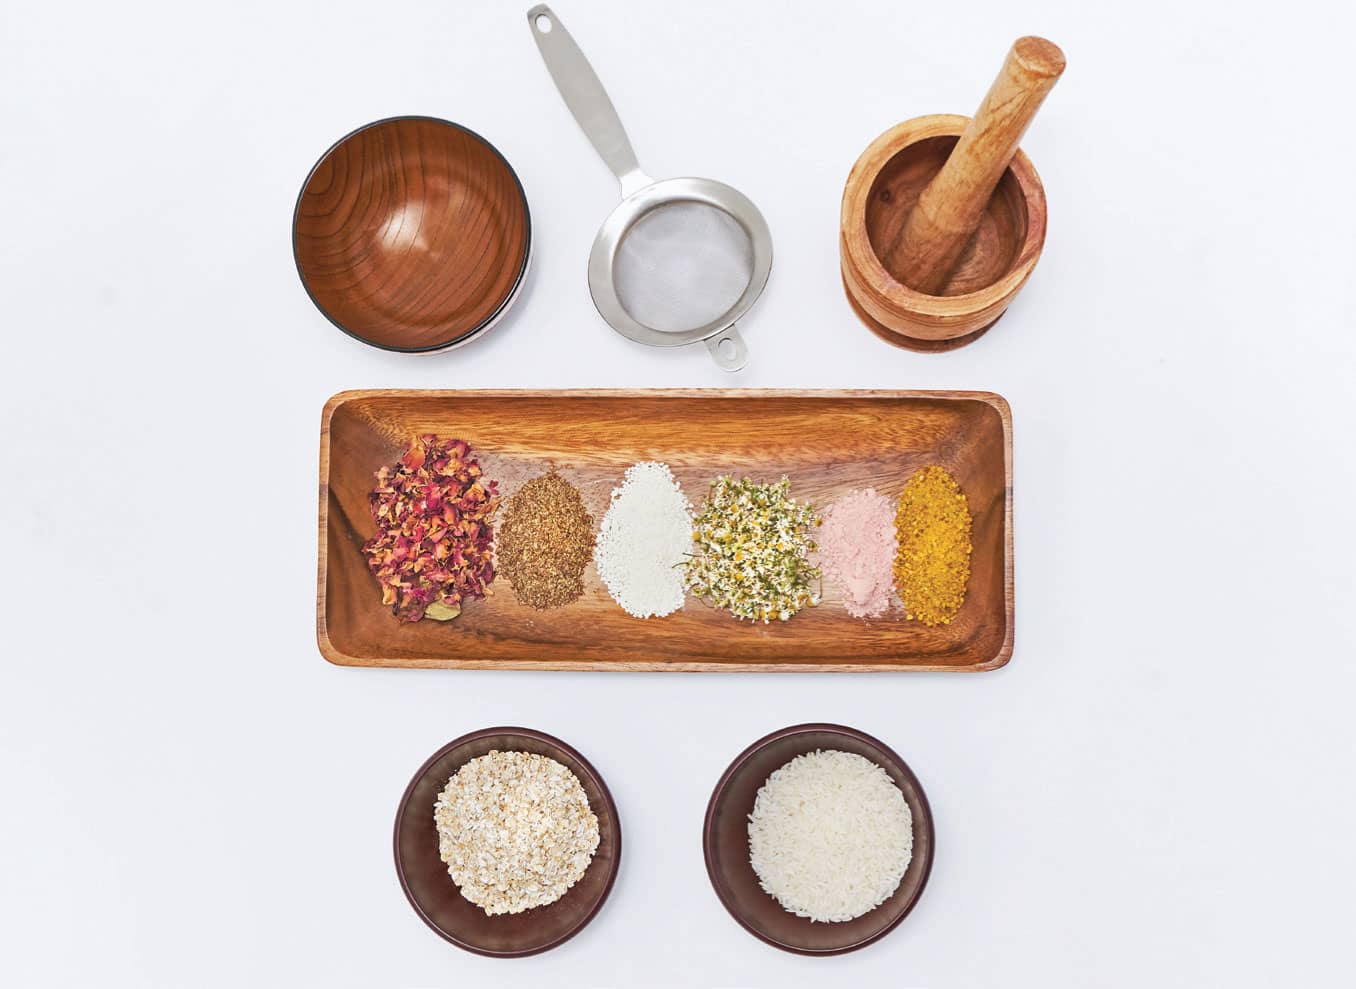

1. Grind the rice, oats, pollen, and botanicals (optional) to a powder (in batches if needed). Place the sieve over the mixing bowl and pour the powder through the sieve. Grind any remaining large chunks or discard them.
2. Add the remaining ingredients to the bowl and mix well. Grind the entire batch one more time, pour the finished powder into a jar, and cover with a tight-fitting lid.
3. To use, spoon approximately 1/2 to 1 teaspoon of powder into a small bowl. Add just enough water to turn the mixture into a light paste. Wet your face and apply the paste in circular motion, taking care not to scrub too hard. Rinse off right away or leave on as a mask for a few minutes before rinsing.
EASY
HONEY GLYCERIN CLEANSER AND MASK: TWO METHODS 
Honey can be used as a daily cleanser by itself, but it is also the perfect vehicle for adding a few more skin-loving ingredients. I have included a basic recipe and an intermediate recipe for those who feel up to the challenge.

BASIC RECIPE
1. Combine the honey, glycerin, and liquid soap in a small bowl or measuring cup. Mix well.
2. Add the essential oils.
3. Pour into an 8-ounce (235 ml) bottle and cap.
INTERMEDIATE RECIPE
This recipe is my go-to recipe. It is a bit more involved and requires the use of a preservative, but it contains additional ingredients that are wonderful for the face. It also utilizes liquid soap paste (recipe shown here), which can be diluted with various hydrosols, making the cleanser easy to customize for various skin types.
1. Dilute the liquid soap paste with the hydrosol. This may take a while, so I usually do this in a container that can be covered and set aside overnight. By the following day, the liquid soap paste should be fully dissolved.
2. Add the rest of the ingredients and mix well.
3. Pour into an 8-ounce (235 ml) bottle and cap.
EASY
SOLID LOTION BARS 
Solid lotion bars are an anhydrous blend of butters, oils, and waxes, not emulsified products that contain a large percentage of water. This blend yields a bar that can be easily handled without making a mess, but melts easily on contact to soothe and create an emollient barrier. Although butters such as shea butter and cocoa butter are wonderful for the skin, they do not directly moisturize the skin. The moisture needs to come from other sources, such as the dampness that remains after hand washing. These butters work with the beeswax to create an occlusive barrier to help seal in that moisture. The fatty acids that are contained in the various butters also help to nourish the skin.
Solid lotions, much like lip balms, are very simple in theory, but it can take a while to achieve just the right combination of butters, oils, and wax to match personal preference and regional weather conditions. A person in the tropics, for example, may want something completely different than someone in the Arctic. Experimentation is key. My aim when making a solid lotion bar is to find a balance between emolliency and skin feel. Let’s face it, solid lotion bars will leave skin feeling greasier than a lotion, as there is no water to cut the greasy feeling. But with a good recipe, that greasiness can be significantly reduced.
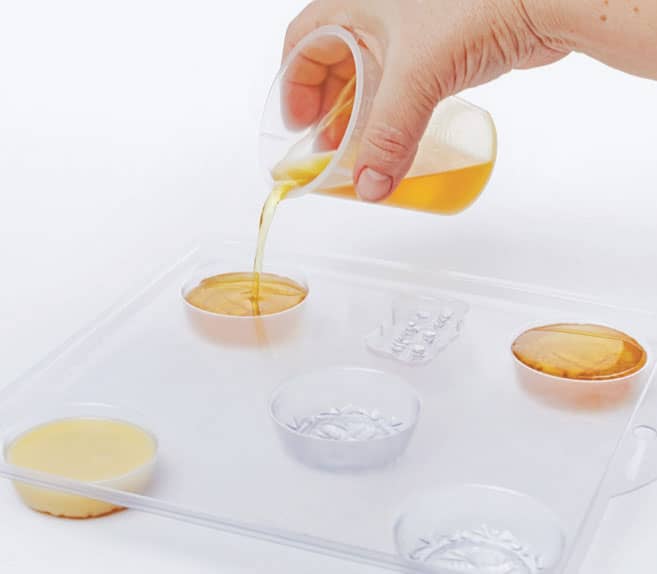
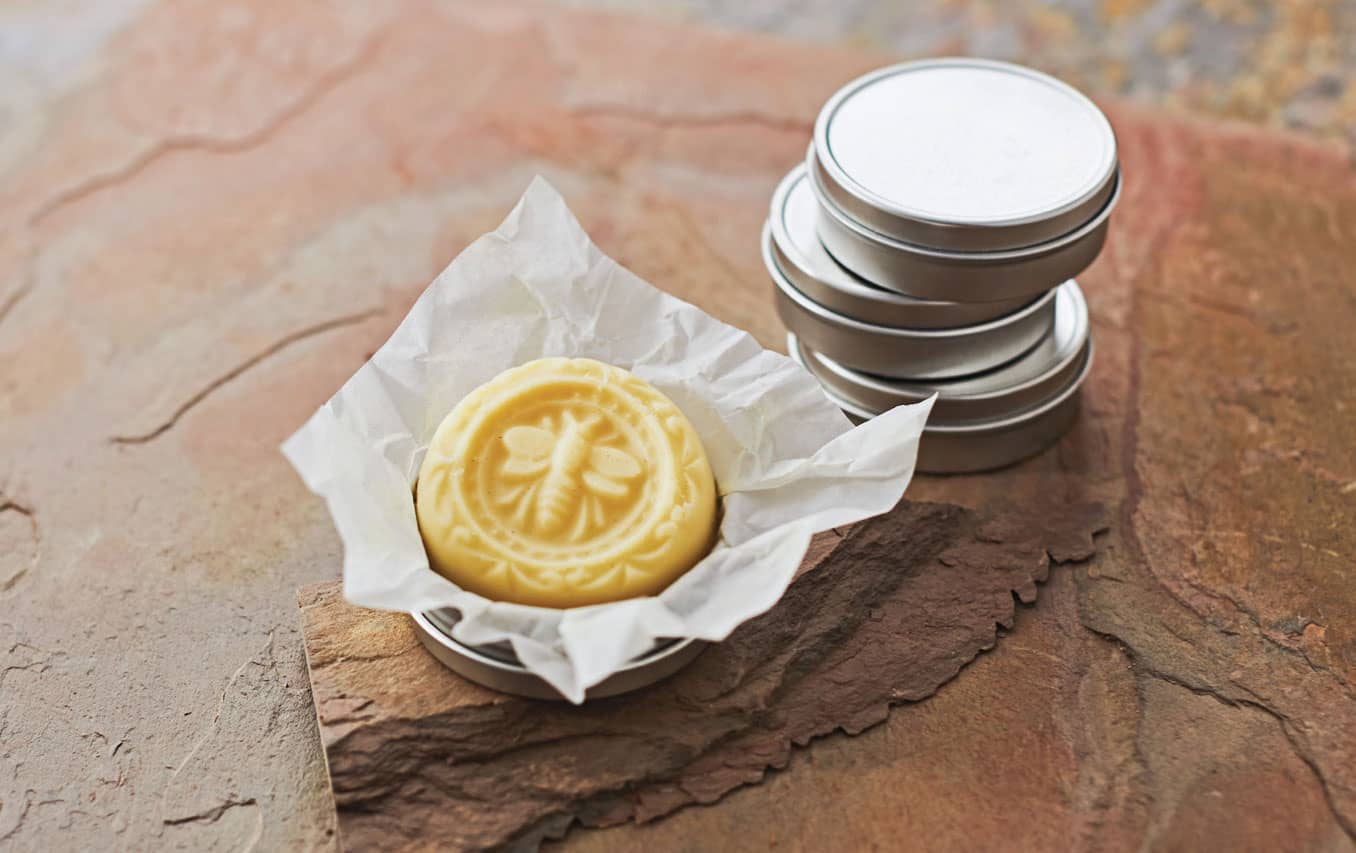
1. Melt the beeswax, coconut oil, sweet almond oil, and jojoba together in a double boiler on low to medium heat until the beeswax is completely liquefied.
2. Add the cocoa butter and mango butter, warm until liquefied, and then remove from the heat.
3. Slowly add small pieces of shea butter to the mixture and allow it to melt.
4. After the shea butter has melted into the mixture, add the Vitamin E oil, ROE, and scent and pour into the molds.
MODERATE
WHIPPED SHEA BODY BUTTER 
A body butter is a lusciously thick combination of carrier oils, butters, and sometimes wax. The body butter is formulated to provide intense, long-lasting moisturization for your skin. The beeswax gives it staying power and provides an occlusive layer to keep moisture in the skin. It is best applied after a bath or shower.

1. Melt the shea butter in a double boiler. Add the almond oil, coconut oil, and beeswax. Once everything is melted, transfer the mixture to a medium size stainless steel mixing bowl and use a hand mixer or wire whisk to mix thoroughly. Set the bowl in an ice bath to quickly cool the mixture, stirring with a whisk or blender until the mixture is opaque, yet still somewhat fluid. Set in the freezer for a half hour or so.
2. Remove the body butter from the freezer and beat with the hand mixer to homogenize. Add the scent, if desired, and continue to whip until it reaches a fluffy consistency.
3. Spoon into 5 jars (4 ounces, or 120 ml, each) and cover with tight-fitting lids.
EASY
HAIR POMADE 
Hair pomade is a balm that is formulated to give hair some control and to add moisture. The added clay leaves hair looking natural, not greasy.

1. Melt the beeswax, castor oil, and lanolin in a double boiler over very low heat.
2. Remove from the heat and add the almond oil and bentonite clay, stirring well. Add scent, if desired.
3. Pour into 5 tins (1 ounce, or 28 ml, each or equivalent).
EASY
BEARD BALM 
Beard balm is a leave-in conditioner that moisturizes, conditions, softens and helps style your beard. The shea butter softens and moisturizes, the sweet almond oil conditions, and the beeswax acts as a protectant by sealing in moisture.

1. Melt the beeswax, shea butter, almond oil, and olive oil in the top of a double boiler.
2. Once everything is liquid, remove from heat and add essential oils, if desired. Stir well.
3. Pour into 2 tins (2 ounces, or 60 ml, each or equivalent).
EASY
HERBAL SALVE 
Herbal salves are healing ointments that are used for various skin conditions. Generally, they are made from herb-infused oils and beeswax and sometimes essential oils. Herbs for the oil infusions are selected depending on what the desired outcome is—to heal, soothe, relax, cool, and so on. They can be combined to treat chapped hands, wounds, mild burns, bites, stings, rashes, and inflammation.
What kind of oil to use depends a bit on the salve being made and on personal preference. Olive oil is commonly used for salves. It’s great for the skin, has a reasonably long shelf life, is readily available, and has a relatively neutral smell. Other oils that work well include grapeseed, sweet almond, and jojoba.

MAKE THE OIL INFUSION
To make an herbal salve, the first step is to create the oil infusion. This is an inexact science—a handful of this and pinch of that. I like to write my herbal infusion recipes in parts. One part can be any unit of measurement—for example, a handful, a cup, a quarter cup, and so on.
1. Measure out all the herbs and add them to a glass jar.
2. Then, pour oil over the herbs until they are completely covered. Set the jar aside for 2 to 3 weeks to infuse.
3. When I think of it, I like to take my jar and gently invert it a couple times to “fluff” the herbs and make sure they don’t form a clump at the bottom. This is less of a problem with coarse herbs, but for finer or powdered herbs, this is a must. The actual oil yield is also an inexact science. The herbs will absorb some oil and there will be general loss due to oils that stay trapped between the herb material. So, if 3 cups (700 ml) of oil went into the jar, perhaps only 21/2 cups (570 ml) will be strained out. Once the herbs have infused the carrier oil with all their goodness, it’s time to strain the oil and make the salve.
MAKE THE SALVE
1. Heat the infused oil and beeswax in a double boiler until the beeswax is completely melted. Take care not to overheat the oil or you may risk it breaking down.
2. Once the mixture is completely melted, remove from heat and add the Vitamin E oil and essential oils, if desired.
3. Stir to mix well and pour into prepared containers. If using plastic jars, let the mixture cool before pouring into the jars, as they can warp with too much heat.
MODERATE
PROPOLIS SALVE 
Propolis salve is a different animal from an herbal salve. Propolis doesn’t easily dissolve into oil, so it requires a couple steps to make the salve work. I have seen recipes that call for grinding up propolis and adding the powder to an oil/beeswax mixture. For me, the problem with this approach is twofold. First, my propolis contains a lot of “other stuff,” mostly beeswax. Perhaps our bees aren’t as “careful” as they should be, but I suspect other beekeepers may have the same problem. Simply grinding up our hive scrapings would probably not be as useful nor as beneficial as straight propolis.
Second, the act of grinding the propolis to a powder generates heat. Even if the propolis starts out frozen, it won’t remain frozen through the grinding process. Even if grinding were possible, mixing a powder with a salve will still add an unpleasant grittiness.
I have a better solution, although it requires some time. The first step is to make a propolis tincture.
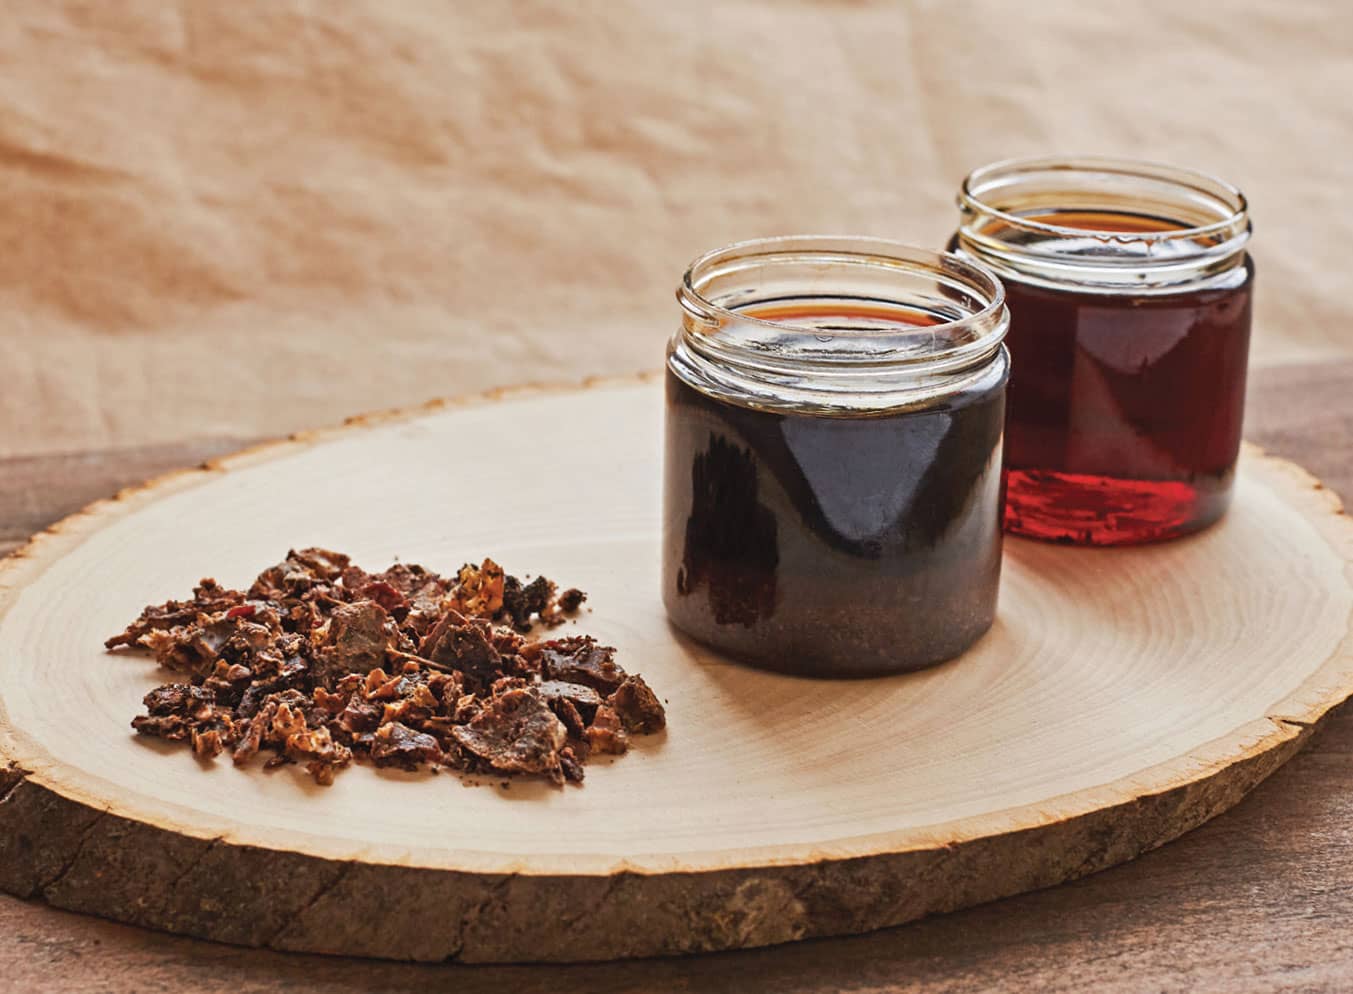
PREPARE THE PROPOLIS TINCTURE
1. Add raw propolis to a large plastic container with a tight-fitting lid.
2. Pour in enough grain alcohol to completely submerge the propolis and cover with the lid.
3. Set it aside and shake it occasionally to mix and break apart chunks.
4. After 1 week or more, strain the liquid through a coffee filter into a glass jar.
PREPARE THE PROPOLIS OIL
1. Take the filtered propolis tincture and add an equal amount of castor oil.
2. Stir it to incorporate and leave the lid off the container to allow the alcohol to evaporate. I usually allow about 2 weeks for the alcohol to dissipate, stirring occasionally. The oil should be a clear, dark yellow/amber color. All the propolis should still be suspended in the castor oil.
MAKE THE SALVE
1. Heat the beeswax with the olive, almond, and grapeseed oils in a double boiler until the beeswax is completely melted.
2. Remove from the heat and add the Vitamin E oil and the propolis castor oil. Stir to mix well.
3. Pour into 3 tins (1 ounce, or 28 ml, each).
MODERATE
OLIVE AND HONEY LOTION 
Learning to make lotions and creams with honey and beeswax was a complicated journey for me. The honey was no problem because it is only a humectant in lotion and not a critical part of the emulsification system. However, the beeswax was problematic. In the beginning, I was resolute in trying to make things work with beeswax. Beeswax by itself is not an emulsifier, but it can be used together with borax (sodium tetraborate) as an emulsifying system. I was able to achieve one single batch of lotion that stayed emulsified, but all the rest either never came together as an emulsified product or they separated within hours. Upon further research, I learned that it is a very difficult product to make successfully using the tools readily available to a home crafter. Commercial operations use fancy homogenizers to mix the materials at very specific temperatures to achieve a product that looks and feels good and is stable, meaning it will not separate over time.
Making lotions and creams are more advanced projects. With balms and salves, end products can be melted and adjusted until a suitable result is achieved and there is no risk of bacterial contamination because they contain no water. Lotions and creams, on the other hand, require more precision. The ingredients are broken up into phases that are heated and combined separately before the phases are combined to make the lotion. Temperature and precise weighing of ingredients is critical to success, as is proper protocol for ensuring sterility throughout the process.
Begin by sterilizing all equipment that will touch the lotion or cream (bowls, spatulas, immersion blender, and so forth) with boiling water or alcohol. I usually use a mix of both. I heat up a pot of tap water to boiling and rinse my bowls and utensils with the boiling hot water and set aside to cool. Then, once I have all my lotion-making ingredients assembled, I give all the equipment a quick wipe-down with isopropyl alcohol (approximately 91 percent alcohol). The alcohol evaporates quickly, leaving a clean, sterile surface.
This is my favorite year-round lotion. It works well from head to toe. It is also a great starting point for creating other lotion recipes. By substituting some of the oils in Phase B, this basic recipe can be modified for specific areas, such as using borage or meadowfoam oils for a face lotion.

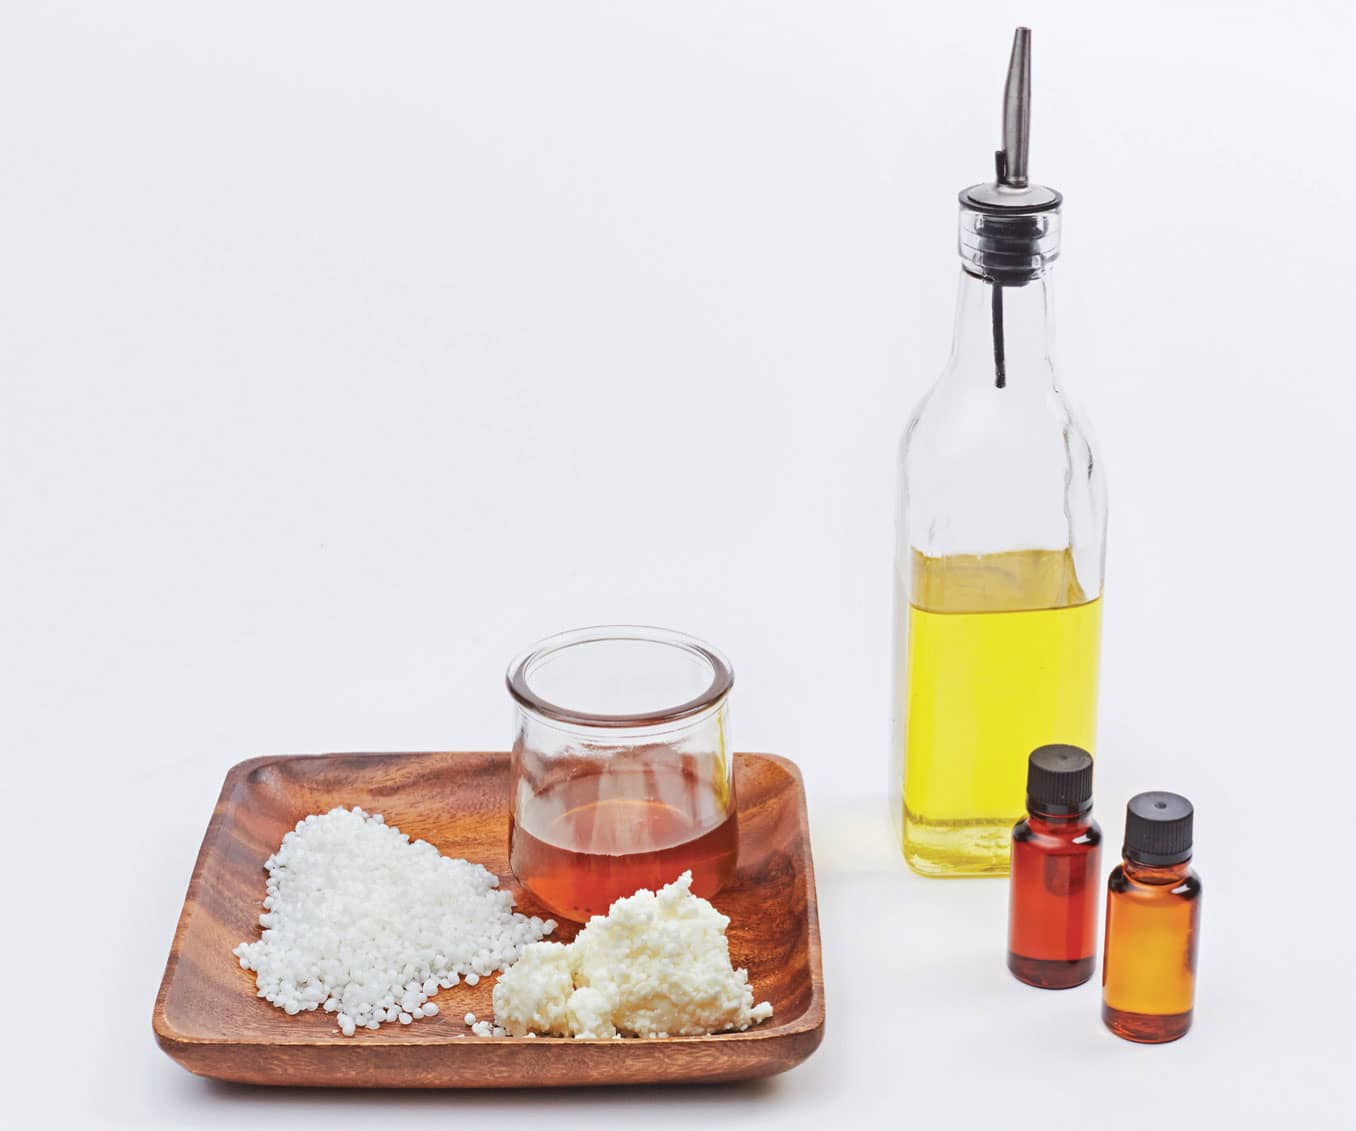
1. Sterilize all equipment that will come in contact with the lotion ingredients.
2. In separate pans, heat and hold the ingredients for Phase A and Phase B to a temperature of 158°F (70°C); maintain the temperature for 20 minutes.
3. Pour Phase B into Phase A and combine, using an immersion blender on high.
4. Set the container in an ice-water bath to cool it down quickly, continuing to use the blender on high.
5. When the mixture reaches a temperature of 104°F (40°C), add Phase C. Ingredients for Phase C can be premixed or added separately to the lotion. Continue mixing on low until Phase C has been thoroughly incorporated, taking care not to add any air.
6. Pour into 4 bottles (4 ounces, or 120 ml, each).
ADVANCED
BEESWAX CREAM 
In my journey to use beeswax in my emulsified lotions and creams, I finally landed on a compromise. I would utilize beeswax as a thickener, rather than relying on the beeswax to help with the emulsification system. The following recipe is a good starting point and makes a great all-around body cream with a nice skin feel that absorbs quickly and doesn’t feel too greasy. For more specialized lotions, oils and butters in Phase B can be swapped out to make a cream that achieves a particular end result. If the same consistency is desired, try to keep the percentage of butters the same and the percentage of oils the same. Do not change the proportion of emulsifier to oils and wax.


1. Sterilize all equipment that will come in contact with the cream.
2. In separate containers, heat and hold Phase A and Phase B at 158°F (70°C) for 20 minutes. Pour Phase B into Phase A and combine, using an immersion blender on high.
3. Place the container in an ice-water bath to cool the mixture down quickly, continuing to use the blender on high.
4. When the mixture reaches 104°F (40°C), add Phase C. Phase C items can be added separately to the cream or premixed and added all at once. Continue mixing on low until Phase C has been thoroughly incorporated, taking care not to add any air.
5. Pour into 4 jars (4 ounces, or 120 ml, each).
EASY
PROPOLIS TOOTHPASTE 
One of the things that propolis does well is counteracting elements that cause tooth decay. Tooth decay is caused by bacteria that convert to acids when sugar is present. Propolis is known for inhibiting the growth of this bacteria.

1. Heat the coconut oil in a microwave using a microwave-safe container or in small pot on the stove until melted.
2. Combine the baking soda, clay, myrrh, and stevia powder in a small mixing bowl.
3. Pour the melted coconut oil into the bowl and mix well. Add the tinctures and essential oil and combine. Stir until the coconut oil cools, forming a nice thick paste.
4. Spoon into 2 jars (2 ounces, or 60 ml, each).
5. To use, scoop out a small amount of paste and apply to a toothbrush.
MODERATE
HONEY PROPOLIS LOZENGES 
Although I don’t get sick very often, when I do, it hits me like a Mack truck. If I have a cough, I go looking for the cough drops and usually find they have been eaten. Stuck in the house with no relief, I have learned to make my own lozenges. I am calling these lozenges, instead of cough drops, because besides honey, they are loaded with herbs, which can be tweaked to personal preference, availability, and need. Propolis’s mild analgesic effect is a welcome relief for sore throats.
It is possible to spoon these out onto a silicone-lined baking sheet, but I prefer to use candy/chocolate molds for this. The mixture is fluid enough that it pours easily from the pot and spreads on its own to fill the molds.

1. First, make an herbal decoction by adding all the herbs and water to a pot and bringing it to a boil. Reduce the heat, cover, and simmer for 30 to 45 minutes. Remove the lid and continue simmering to reduce the volume to 1 cup (235 ml) of liquid. Strain.
2. Add the honey and the tincture to the herbal decoction and cook on medium heat. Stir often and keep a watchful eye on it. Cook until it reaches the hard-crack stage (300°F, or 150°C).
3. Add the essential oils just as the syrup reaches 300°F (150°C).
4. Pour into candy molds or drop by the spoonful onto the silicone-lined baking sheet.
5. Once the drops have cooled, immediately dust them with something that will keep them from sticking together. Marshmallow root powder is great for this, but even tapioca starch would work.
6. Roll them in the powder, wrap them in wax paper, and store in an airtight jar. Best enjoyed within 2 months.