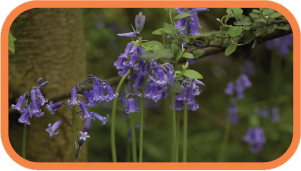
In the herb layer, plants may seem a little stunted compared to the towering woodland giants above them. But the ‘herb’ layer of woodland is, in fact, very important. It’s a fuzzy layer of the woodland that sometimes blurs into the understorey. But if it wasn’t there, much of the spirit of woodland would be missed, such as the great floral spectaculars of bluebells, wild garlic and wood anemone.
Many of the butterflies that decorate the calm air of woodland glades and clearings are fed by the grasses and the other succulent plants that form the herb layer when the butterflies are caterpillars.
This layer is most obvious in the places where the greatest amount of sunlight hits the ground: such as woodland edges, rides, along paths and in clearings. Here the Sun’s energy allows a variety of plants to grow and if you are looking for insects and flowers, this is the best place to start.
Because light is the limiting factor on the woodland floor, many plants that live in broadleaved woodlands (those whose leaves drop off in winter) have a life cycle that is tuned into the seasons. This is why plants such as bluebells and wild garlic put on such a big show in the early part of the year. This is practically the only time in the year they get any light before the trees’ leaves unfurl and snatch their sun away.

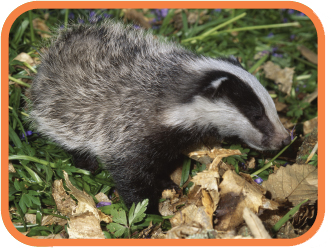
Badgers live below the forest floor in their setts during the day. But evidence of their nocturnal routines can often be seen as well-worn paths through the herb layer.
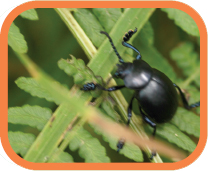
You can find the bloody nose beetle on the edge of woodland paths, basking in the sun. These little chaps spend all their time in the herb layer.
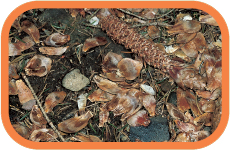
In woods without the dense herb layer, you loose the diversity of animals on the floor itself. But this does allow you to see evidence of the activities of other animals clearly: in this case, some squirrel nibbled cones.
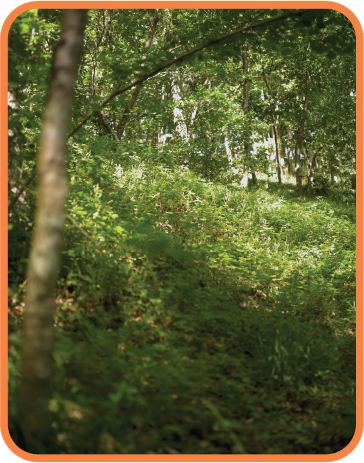
Where the sunlight can reach the woodland floor, such as where a tree has fallen, a great lush carpet of plant life can thrive.
One way that scientists measure and record plants is by using something called a transect. This is simply a line or a piece of string stretched from one place to another. It might not sound that exciting, but a transect can tell you an awful lot, especially if you stretch it across a path, clearing or woodland ride. Make sure you choose one that isn’t busy, otherwise people, dogs and horses will keep getting tangled up. They will then get cross with you and you won’t learn anything apart from a few new curses!

If nothing else, by making a transect you will start to get to know your flowering plants well, and that in itself is very satisfying. Take along a good field guide and have a go at identifying what you come across. If you cannot identify any plants while you are there, you could always pop a few leaves of the plant that is causing you an identification problem in a plastic bag, label it and try again at home later. You may even want to record your findings permanently by ‘pressing’ leaves and flowers and keeping a journal of your findings (see page 14).
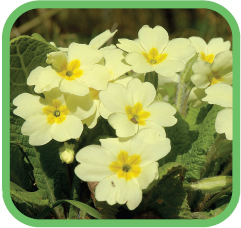
Fab fact
Stare into the golden eyes of enough primrose flowers in the spring and you may notice some look a little different to others. What you are seeing is two types of flower layout: pin-eyed and thrum-eyed (‘thrum’ is an old English word for frayed string). The pin is the sticky part of a flower called a stigma, which is the female part that sticks up in the middle. The thrum-eyed flowers are the males and the bit that looks frayed is the multi-pointed, pollen-carrying male part of the flower.
YOU WILL NEED
> 2 poles (bamboo, sticks or pegs)
> long length of string
> spirit level
> measuring stick/tape
> numerous lengths of short string (depending on the length of the transect line)
> graph paper
> pencil
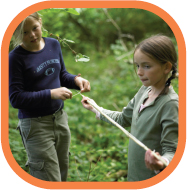
1 To set up your transect line, stretch your length of string between two poles at either end of the survey line. Make sure the string is above the highest vegetation and use the spirit level to check it is level.
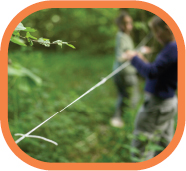
2 To make things a little easier, mark or tie at every 1m a short length of string. On the graph paper, mark the length of your transect line, and each 1m interval. This will be the horizontal axis, showing how far along the line each plant is.

3 Record the height of your end poles. On your graph, the height will be the ends of your vertical axis. At the end of the project this will show the heights of the plants in between.
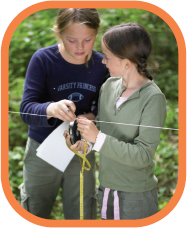
4 Work your way along the line, measuring at each marked interval the distance between the string and the tips of every plant. Record this together with the species of each plant if possible.
Take it further
* Once you have recorded on your paper the heights of all these plants, you will start to get an interesting profile. The plants’ height and growth vary depending upon where they grow in relation to the tree canopy above. Could this have something to do with available light?
* Look at the species found in different places. Do you think some are better suited to grow in the shade than others? Maybe some of these plants do not like being disturbed. If you are on a footpath that is used a lot, maybe some plants simply do not like getting walked all over!
Just how good are you at sneaking up on things without them sensing you? Well, this art is called field craft and it is one of the most useful skills you can have as a naturalist. If you see yourself as a bit of a master in the skills of moving with stealth, then there are a few fun ways to test yourself. The first is in the form of a game.

The object is to make an obstacle course that is as noisy as possible. Try doing this in your local woodland. Find a patch with lots of dead twigs or leaves, or make your own course in your garden. You can use rustly paper, crisp packets, dry twigs or leaves.
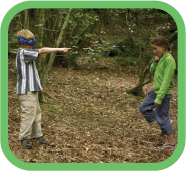
1 With the help of a few mates, select a ‘rabbit’. This is the person who has to use their ears. Stand your rabbit at one end of your rustle zone, facing away from you and wearing a blindfold.
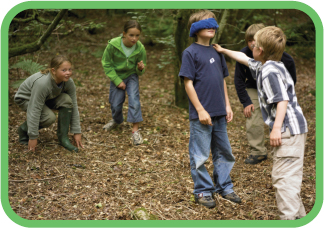
2 Now take it in turns to try to stalk towards your friend, without him hearing your movements. Your aim is to approach so close you can touch the ‘rabbit’ without him hearing you. You have three lives and lose one every time the rabbit hears you and points directly at where you are standing.
Take it further
You can make up the rules, too, such as adding obstacles to climb over or under to make things really difficult, or you can try going barefoot or with shoes on. See how you get on.
Now, this isn’t the end of your master class at field craft. The biggest test of all is a real animal, and you do not get anything more nervous than a real ‘rabbit’. They have a very sensitive and famous pair of ears and they are very untrusting. You do not get to be a successful rabbit in any other way!
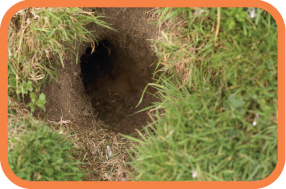
1 Find a hedgerow or field corner that seems to have more than its fair share of rabbit activity. You know the sort of place – where the grass is close cropped and there are plenty of scrapes and burrows.
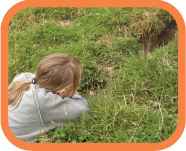
2 You don’t have to dress down for the occasion but I like to wear clothes that are not too bright. Then all you have to do is get down on your belly and slowly crawl towards the rabbits, using a ‘frog leg’ motion.
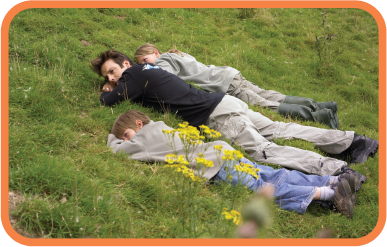
3 If they all bolt for cover, do not give up, but use the opportunity to move in as close as you dare and lie still. Soon the rabbits will come out again and resume feeding. In this way, it is possible to have wild rabbits grazing within a whisker’s length of your own nose – but only if you are really good at keeping still!
‘Slowly, quietly, into the breeze’ is the most basic mantra for a naturalist, and it is a skill that can be used and applied in any habitat, anywhere in the world. What this doesn’t take into account, however, is the ‘outline’ or shape of the naturalist. You need to use as much of the natural cover as possible and that means playing hide and seek!
Keep low and hidden, or at least make sure your silhouette is not seen. You can be as quiet as you like, wearing the very latest in camouflage gear, but if you break the horizon, the animals will see you, smell you, and be off like a shot!
One of the most useful things you can do, especially if you want to spend some time observing a creature, is to build a hide. Now this can be done in many ways. One of my favourite hides as a child was a large cardboard box. It allowed me to get really close to rabbits, and then to the bird table in my garden, and eventually it enabled me to watch a fox hunting rabbits and a buzzard feeding on a dead sheep! Get a box that is large enough for you to fit comfortably inside. Take some scissors and cut out viewing slots, one on each of the four faces is best, as then you do not have any blind spots. If you want to sit in it in the rain, coat it with water-based varnish or even PVA glue to prolong its life for a couple of months. If you don’t want to sit in a box for hours, see opposite.


The simplest and most portable hide is to buy a sheet of scrim (that’s the netting with the green and brown bits of plastic attached to it). The army uses it and you can get it quite cheaply from an army surplus store. Throw this stuff over you or peg it up in the bushes to form an instant hideout. Or you can build one out of natural materials in the area, bending branches and tying ferns and other vegetation to it to camouflage yourself.
YOU WILL NEED
> 8 bamboo canes
> string
> scissors
> large piece of scrim
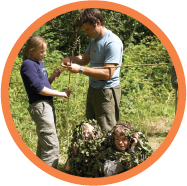
1 Stick two of the bamboo canes in the ground, about 1 metre apart. Push them in far enough so that they stay put.
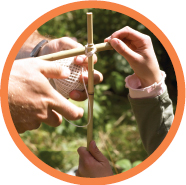
2 Take a third cane and tie it with string so that it joins together the two standing canes. Tie them together as near to the top as possible.
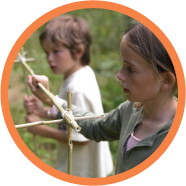
3 Push two more canes into the ground a metre behind the first two and continue to join the remaining canes around the top to form a kind of empty cube.
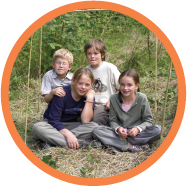
4 Stand back and admire your work. But it’s not much of a hide like this – it’s definitely missing something.
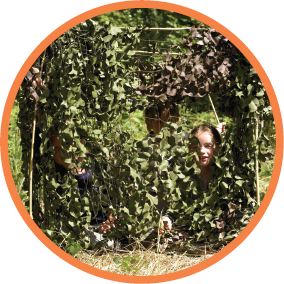
5 Throw the scrim over the top so that it covers all four sides. Climb inside and keep watch.
You may think that to see a badger in the wild is to be part of some exclusive club; maybe you need to be in possession of some rare skills or expertise, only attainable after years of practice. But the reality is that anyone can get to see one of our largest and most interesting mammals and it doesn’t require much in the way of specialist kit either. A little knowledge and know-how is all that is required and you are about to get that, so read on!
The first thing is preparation. Where are they? Well, this requires a little bit of map work and local knowledge as well as some information about their habitats and habits. They live in small, family-based communities called clans, and clan life is based around a collection of holes, burrows and chambers called a sett. Badgers are addicted to digging – even if there are only a couple of individuals in a clan and they live in a huge sett with many entrances and plenty of space, they still keep? making more! Nobody really knows why, but this compulsive behaviour makes them easier to track down than many other animals.

Then get the lie of the land. Go and have a look during daylight hours. What you are searching for are large holes that almost always have a large spoil heap of soil piled up outside – the refuse created by all that digging. There are also usually many holes. If the sett is an active one, it will look like it. There will be freshly dug soil, flattened paths and vegetation and footprints. Oh yes, and mud on nearby trees where they have rubbed and wiped themselves clean.
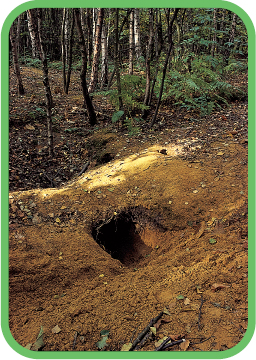
Badgers like to dig in loose soil and they often choose to dig into a slope. Also, because they are shy, they prefer to be in a woodland setting but one that is not too far away from fields and pasture where they will get their favourite food – earthworms.
Take my advice
Be sure not to disturb the place when you visit. It is actually against the law to do so. Tread carefully and spend as little time as possible there.
While you are there, get a feel for the best places to sit and watch. Big trees are good to lean against; you may even be able to climb one. But pay attention to the direction of the wind. Imagine it blowing from different directions and bear in mind you will need to sit with the wind in your face so that the badgers will not smell you.
Return an hour or so before it gets dark. Make your approach slowly and quietly as sometimes the badgers in quiet areas can be active above ground in daylight hours, particularly in the summer months. Take a few unsalted peanuts with you. Badgers love them and if you scatter them around and about, it may just persuade them to hang around for a little longer, before they go out on their nocturnal worming forays.
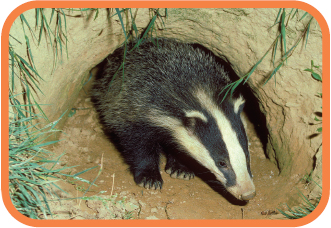
When a badger first emerges, be exceptionally quiet – even control your breathing. One false move and you will have them ducking back down underground.
Take it further
* You may now be wondering how you see these animals when it’s dark. In the summer, there will probably still be some light in the sky to see them by, but if you want to shed a little more light on the subject, the best thing to do is to get your hands on a powerful torch and a piece of red cellophane. This casts a red light and badgers, like most other nocturnal animals, cannot see red light, so you can watch them without disturbance.
* In the summer, you will have a chance of seeing cubs playing above ground. They are much bolder and a lot of fun to watch – but don’t laugh or you’ll send them back home.
We have so far talked about seeds, nuts and berries, but what about conifers or pine trees, as they are otherwise known? Well, the seeds of these are packaged into neat little devices that we all know as cones. Cones are beautiful, simple and functional little seed ‘shakers’.
Pine trees do not rely on an agent like a bird or a mammal to do the distributing of the future generations for them. Instead, they rely on the wind to scatter them. To see what I mean, collect some pine cones that are closed and sealed and take them home to hang up in a warm, dry place. Watch what happens as the cones dry out. The scales that make up the cone’s body start to open and as they do this, the insides are exposed: the seeds.
So if there is good dry weather, it is perfect for making seeds that will blow around and not get stuck to things. But that isn’t enough. A few of those seeds will fall out, as you may see if you place a piece of white paper below the cones and give them a shake. Just like a salt pot, the cones give up many of their papery scales, each a ‘wing’ for the tiny little seed. In the wild, this makes total sense. Seeds not only need dry weather to blow around, they also need a breeze and the cone will not release its seeds until it is buffeted about a bit.
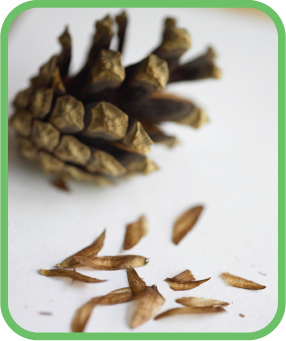
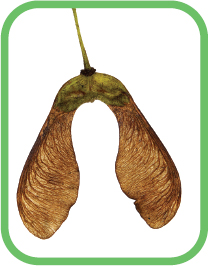
Sycamore keys (left) and cone seeds (far left) are lightweight and designed to twirl or fly in the breeze so they can travel away from ‘home’.
Look for the ‘keys’ or helicopter seeds of maple, sycamore and ash. They are called helicopters for a good reason. Pick some and throw them up in the air. They are designed to rotate, slowing their fall, as the longer it takes to fall, the further away from the mother tree the seeds will travel. This is a good idea if the seeds want to get away from the shadow of the mother tree and also avoid competition with the roots of mum for water and minerals.
When out in your woodland, look out for other trees that shoot the breeze in a similar way. In the spring, willows and sallows produce white fluffy seeds that can sometimes blow around in such numbers it can look like a late snow storm!

These hazel catkins are the male part of the tree’s flowers. Crumple them between your fingers and look at what they are made of – neat little stacks of winged seeds.
If you look carefully enough at a mushroom or toadstool, you can usually identify most species easily enough by the colour, texture and shape of the cap. But have you yet had a peak at what’s going on underneath? It is here that the millions of spores are produced from structures that are not only very beautiful, but also can be characteristic of the species of fungus. To explore further, follow the steps opposite. Here is a great blend of art and appreciation of nature combined with the science of getting to know your fungus even more intimately.
Look again at the surface under the mushroom. It is made up of either gills or pores and when dry, this surface will shed their living dust: the spores (see also page 62).
What you will see if you have been successful with your project is the pattern of the gills or pores made up by the millions of microscopic spores that have lain exactly where they have fallen. Before long the pattern will get disrupted as they blow around, so if you wish to keep your spore print, spray it with fixative (available from all good art suppliers). If this is hard to get hold of, a can of hairspray will be just as good.
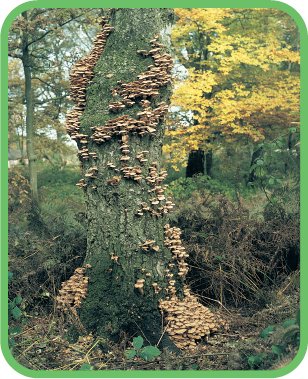
This tree is in the process of being digested from the insides out by honey fungus. Most of its life, though, you would hardly know if was there as it lives in the soil and wood of its victims.
Fab Facts
* Hidden from the naked eye, the underground threads of just a little clump of the common honey fungus could stretch for over 15 hectares, weigh 100 tonnes and be 1,500 years old.
* To get a glimpse of the secret world of fungi, peel up an old dead leaf, lift a piece of bark or dig with your fingers into the leaf litter and you will find yellow to white threads spreading like veins – these are the usually unseen parts of a fungus.
YOU WILL NEED
> some fungus
> sharp knife
> card
> bowl
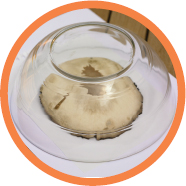
1 Take the sharp knife and cut through the stem of the fungus, flush with the underside of its cap. Do this very gently and so as not to damage any of the spore structures. Turn the cap over so the sporing surface is face down on a piece of card. Cover with a bowl to stop the air blowing the spores around.
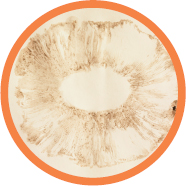
2 Leave for a day or so before lifting the bowl and the fungus off the paper. What do you see? A lovely imprint of the fungus’s gills.
Take it further
* So if the mushroom or toadstool is the fungus equivalent of a seed head, then I where is the rest of it? For the most part it is right below your feet. If you were able to put on special x-ray specs that allow you to see through things and pick up only fungi, then you would be in for a shock. It is only where the threads weave together and pop up to I the surface of the forest floor or tree bark that we actually see the fungus that we are familiar with.
* Still wearing your x-ray specs, look down and every dead leaf and rotting branch would be a dense mass, like a huge, thick cobweb of tentacles, each one slowly digesting the dead stuff of both animals and plants.
* Look up and the network of threads of other species will be spreading through some of the living tissues of the trees.