PERFECTING YOUR CRAFT
While making your own vinegar is very easy—requiring far fewer tools and steps than brewing beer or cider—there are ways to produce an even better product. This section breaks down a few complicated concepts into simple processes, from pasteurizing and clarifying batches to testing pH and acidity.
PASTEURIZATION
Pasteurizing is simply the process of heating the vinegar to 150°F in a nonreactive pot for 30 minutes, which kills any bacteria, molds, or yeasts, including acetobacter. The result is a shelf-stable product that you can store for an extended period of time. The vinegar is no longer “alive” and will not grow a mother—so it’s ideal for bottling and gifting to someone who might be put off by the gelatinous mass. You can strain your vinegar through cheesecloth for more clarity before pasteurizing. However, I find that pasteurization weakens the flavors of the vinegar and decreases the healthful benefits of the fermentation. Since the bacteria needs oxygen to grow, you can instead just fill a clean bottle almost to the top and leave very little headspace. There won’t be enough oxygen for the bacteria to thrive, leaving you with full-flavored and full-strength vinegar without heating or pasteurization. Your vinegar may grow a tiny mother in the bottle; this is often what you see in raw commercial vinegar where the mother has sunk to the bottom leaving sediment in the bottle.
ACHIEVING CLARITY
In some cases, depending largely on the chemical and mineral content of your starting product, your finished vinegar may still be cloudy. While I don’t care about clarity, because it doesn’t affect the flavor of vinegar, you may want a clearer vinegar when bottling for gifts.
To clarify your vinegar, there are a few steps you can take. I start with pouring or siphoning off the vinegar from anything that has fallen to the bottom of the barrel or jar where I’m fermenting. You will likely have sediment that has collected in the bottom; this is great for starting your next batch or giving to friends who want to join in on your acid trip. Cold helps clarity, and storing your vinegar in the fridge can help “cold crash” any sediments out of solution. Wait a few days and you’ll be able to pour the clear vinegar off the sediment. You can also pour your vinegar through a coffee filter to remove any suspended mother or sediment. (It’s a good idea to pour some boiling water through the filter first to sanitize it.)
DETERMINING PH AND ACIDITY
The pH (power of hydrogen) scale measures the concentration of hydrogen ions in a liquid to determine the relative acidity or alkalinity of a substance. The scale ranges from 0 to 14, with 7 being neutral (the pH of water is usually close to 7). The lower the pH level (i.e., anything below 7), the more acidic the ingredient; the higher the pH (i.e., above 7), the more basic or alkaline it is. Commercial distilled white vinegar (this page) has a pH of 2.4 and 5 percent acidity, which means there are five parts acetic acid to ninety-five parts water.
In comparison, Coca-Cola has a pH of 2.53. A good rule of thumb is that the more tart and sour a vinegar tastes, the lower the pH and the higher the acid content. A pH test kit is a good and inexpensive investment for the home vinegar maker, as it will allow you to analyze and compare your ferments with one another. This is especially important if you’re intent on processing pickled vegetable made with your homemade vinegar in a hot water bath—though I don’t recommend it (store-bought vinegar is safest; for more information on canning, see this page). The higher acidity also leads to more flavorful pickles.
Depending on the type of alcohol you use to make vinegar, you might end up with more than just acetic acid. Some of the common acids present in wine and cider include tartaric, citric, malic, lactic, ascorbic, and succinic. So while we can test the pH and get a proper measure of the acidity levels, you cannot be sure that the vinegar is purely acidic acid.
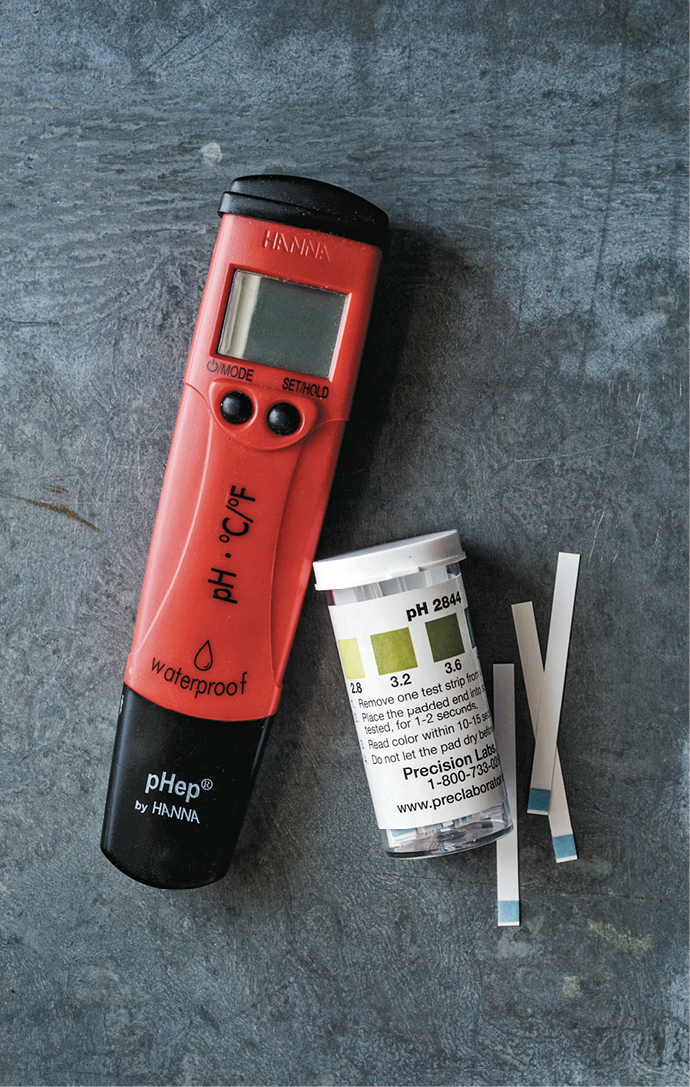
To test pH, you will need pH test papers or a pH meter (see Resources, this page). The papers are cheap and not very accurate, but they will tell you the whole unit of the closest pH range. A pH meter will read to the hundredth place of pH, but it costs between $50 and $100 and requires calibration for best accuracy.
TESTING ACIDITY
To test for acid content, you will need an acid titration kit (see Resources, this page) like the ones sold for wine making; they cost about $20. You will need to adjust your method, as the instructions contained will be for testing a much smaller percentage of acid in wine (usually 0.3 to 0.75 percent). Your titration kit should include the following:
- 20-milliliter syringe
- 150-milliliter testing cup
- 15-milliliter dropper bottle of indicator solution
- 100 milliliters of base liquid
Follow these instructions for testing the acid level in your vinegar:
1.Use the syringe to place 2 milliliters of vinegar in the testing cup. Add 20 milliliters of water and 3 drops of the indicator solution, and stir to combine.
2.Fill the syringe with 10 milliliters of the base liquid. Add the base, 1 milliliter at a time, until the liquid turns pink. Once the liquid has turned pink, note how much of the base you added to get the reaction (for example, if you have 4 milliliters left in the syringe, then you used 6 milliliters of base).
3.Multiply the number of milliliters of base you added by 0.6; the result is the percentage of acid in your vinegar. So in this example, you would multiple 6 by 0.6 to get 3.6, or 3.6 percent acetic acid, which would taste tart like vinegar and be great for drinking or cooking with, but not acidic enough for canning.
ALCOHOL FERMENTATION
You can, of course, first produce your own wine, beer, or cider for making vinegar. If you’re starting from scratch with the ultimate goal of vinegar, you can undertake a simultaneous fermentation. To do so, add the juice (for wine) or wort (for beer) to your vessel and sprinkle yeast over it. Add your mother and let the mixture sit, covered with a tea towel to prevent fruit flies. The yeast will convert the sugar into alcohol, and the acetobacter bacteria will convert the alcohol into acetic acid. Any juice containing sugar can be treated this way, such as apple cider or grape juice.
Use champagne yeast (see this page) for the best results, as that will yield a very dry product without adding any yeast flavors. Most 5-gram packets of yeast are meant to convert 5 gallons of sugary liquid into an alcoholic beverage, so you’ll need to adjust your yeast amount according to your quantity of base liquid.
AGING VINEGAR
To mellow the flavors of your vinegar, you can age it in the bottle or in a sealed crock or barrel for a year or more (no need to pasteurize it in order to do so). In some cases, aging vinegar will add oxidation, which adds depth of flavor as with port or sherry, and can smooth the acid kick. If you make a large batch of vinegar, set aside a bottle in the back of your pantry for a few years and taste it every few months to see how it changes over time. In China, Japan, and Korea it is not uncommon to find vinegars that age a minimum of three, five, or even seven years even before being bottled.