
Vinegar might be the most common ingredient in our pantries, but many of us don’t know how to make use of this incredible acidic liquid. Sure, we mix it into salad dressings, and many folks have replaced their cleaning supplies with the distilled white stuff, but failing that, it hasn’t yet found a place in our everyday cooking. Until now. When you have access to really good vinegar, you unlock flavor possibilities for cocktails, dinners, and even desserts. But you may not find great quality vinegars in your regular grocery store. For decades, bottled industrial acids have duped us into thinking we’re buying malt or red wine vinegar. The liquid is brown or red, but it tastes nothing like beer or wine.
To have good-quality vinegar on hand, you just might have to make it yourself. But good news: it takes only three ingredients (including air), no special tools, and a little hands-off time. Use the best ingredients you can find—a locally made craft beer, in-season fruits and vegetables, wine that you would serve at the table—and you’ll end up with a product so good you’ll want to sip it straight. It’s much easier to brew than beer or kombucha, and has many more uses. In the process, you’ll save money, recycle potential waste, and completely change your cooking. Pour off a little from your master batch and give it to friends. You’ll impress the hell out of them.
This book will walk you through the entire process of making vinegar, from start to sour finish. You’ll learn all about the vinegar mother (this page), what kinds of vinegars are easiest to make at home (this page), and which ones you should just buy (this page). You will also find fifty fantastic ways to make and enjoy vinegar, whether you’re working with homemade or store-bought. Some of these are obvious uses (pickles, this page) and others are more unexpected (Mint Vinegar Julep, this page, or Vinegar Pie, this page). Many of the recipes call for specific types of vinegar; however, you should feel free to experiment and explore. If a recipe specifies apple cider vinegar and all you have is red wine vinegar, give it a shot—by no means are these recipes completely prescriptive. Play around with whatever you have on hand.
MY ACID TRIP
I first caught the fermentation bug in the mid-1990s while a student at Hampshire College in Amherst, Massachusetts. Since beer was illegal for me to buy, but the ingredients to make it weren’t, I learned to brew my own. When I moved to Brooklyn after college, I set out to continue my fermentation experiments. There was a problem though: New York City had no easily accessible home-brew stores, and I couldn’t get packages delivered to my apartment. Once I realized that packets of dry yeast would fit through the mail slot, I ordered dry wine and champagne yeast and began fermenting cider I’d pick up at the Union Square Greenmarket.
Then in 2005, while preparing to bottle a five-gallon batch of cider, I discovered homemade vinegar. When I was almost finished bottling, I realized I hadn’t saved enough empty bottles for the whole five gallons. I did, however, have a gallon jug, and I remembered that a bottle of organic white wine vinegar in my pantry had grown this odd-looking round raft at the top of the liquid—a vinegar “mother.” I’d read a little about how vinegar was made, and so I filled the jug with the rest of the cider, plopped in the mother from the donor jar, and left the open jug in a corner of my dark boiler room for a few months. When I remembered to check on it, I found that the cider had turned to vinegar—and it was delicious. In fact, it tasted better than the cider I had started with.
Motivated to try my hand at making other vinegars, I begged my friends at the Brooklyn Brewery for five gallons of just-finished beer to make my own malt vinegar. Real vinegar made from good beer was a revelation. Unlike most of the commercial malt varieties, which are made from malted barley or corn and get their color from caramel, my malt vinegar was complex, earthy, toasty, malty and tangy. It mimicked the flavors of the original brew—and was a perfect accompaniment for everything from seltzer to fries. I’ve been experimenting making other vinegars ever since (spruce, fruit, wine, foraged berries, melon, and more), and now more than ten years and dozens of vinegars later, I still get a thrill from a finished batch. You start with something so seemingly normal and, through what feels like culinary alchemy, it turns into a delicious and satisfying ingredient.
THE SOUR PROCESS
Vinegar is the next naturally occurring step in the fermentation process after you make beverages like beer and wine. When the alcohol in these delicious drinks comes into contact with a microorganism called acetobacter and there’s oxygen present, the bacteria consume the ethanol and produce acetic acid, which is the sour component in vinegar. It may sound complicated, but it’s a very easy process. Even better, acetobacters are found just about anywhere in the environment. They collect and prosper in places where ethanol naturally occurs, such as when wild yeasts colonize the nectar in flowers or the skins of rotting fruits and begin fermenting the sugars into alcohol.
Though the word vinegar derives from the French for “sour wine,” vinegar can be made from much more than wine. Fruit Vinegar uses a traditional method that’s especially popular in warm climates, and it’s a great way to turn your scraps into something sublime. Alongside the classic wine vinegars, you’ll find unusual ones made from sorghum, persimmon, tomato, maple syrup, ramps, grapefruit, or honey. If people can eat it or drink it and it has sugar, then it can be made into vinegar. The key ingredient you need to make great vinegar is a sugary or alcoholic base. But remember that acetobacters need more than just the ethanol to make the conversion of alcohol into acetic acid; other minerals and nutrients are required. The carbohydrates, sugars, tannins, and nutrients in wine and beer help the bacteria thrive. Darker beers, red wines, meads, and ciders, which have more nutrients and tannins, tend to make better vinegars more easily and stand up to the variances present in home fermentation. More subtle white wine and sake usually work well, too, but they may require some tweaking and experimentation to get your fermentations exactly right.
THE MOTHER
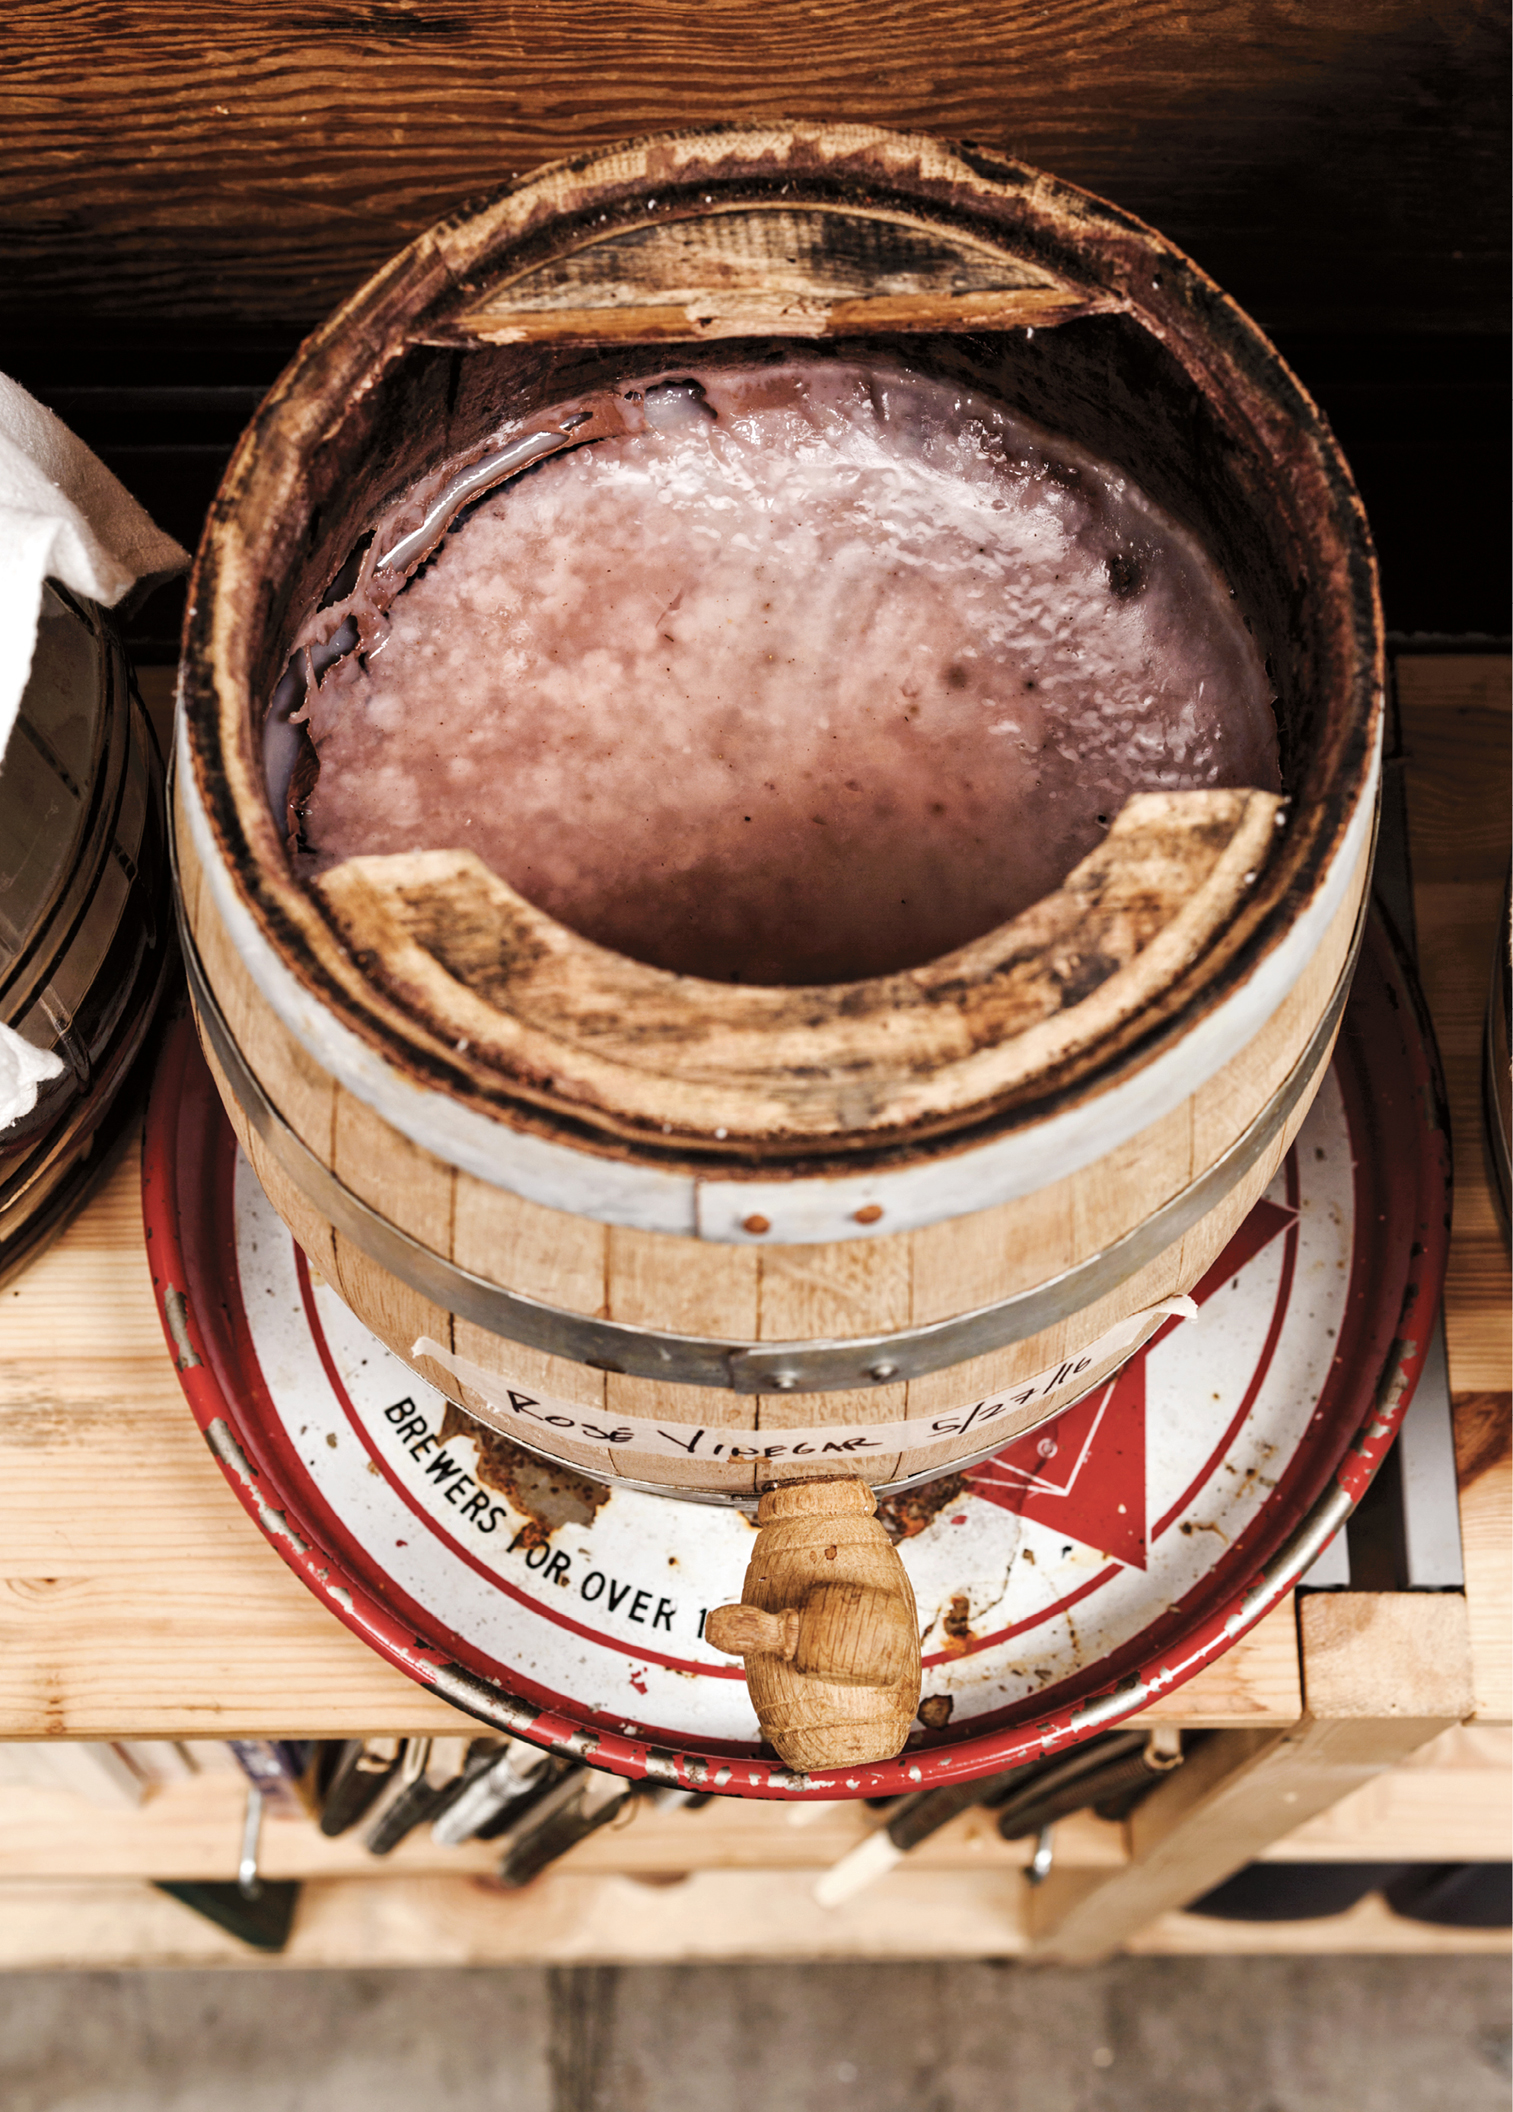
Just as our mothers are often the most important people in our lives, the same can be said for vinegar making. What we call the vinegar mother is a collection of slimy cellulose that forms at the intersection of the base liquid and the air. It’s a by-product of the bacteria converting the alcohol into acetic acid—and a good thing! Think of it as a visual cue that the conversion of the main ingredient into “live” vinegar is actually happening. In most cases, your homemade vinegar will develop a sizable mother, which only increases as you start making larger batches. A five-gallon batch will often yield two-plus pounds of mother.
Keep your mother healthy; you don’t want her to drown. She should float on top and be uniform thickness and rubbery to the touch. Over time she may have babies that grow on top as she starts to sink. When that happens, you’ll want to pull out any mother that sinks and either start a new batch of vinegar or give a piece of it to your friends as a starter.
Mother will continue to grow on healthy vinegar; if you leave a jar long enough, the vinegar will evaporate leaving a jar full of mother and her babies—and they’ll just keep growing. So it’s important to pour off and bottle your vinegar for use once it’s completely acidified.
Whether you’re sampling your own homemade vinegar or are in the market for a quality bottle, you’ll want to know what to look for when taste testing. (Wine vinegars can cost $40 a liter or more at the store; for the price of one decent bottle of wine you can make more than a liter of top-notch vinegar for under $15.) Quality vinegar should taste bright, with the acid clear on your tongue and in the back of your throat, especially with stronger vinegars. Because acid can burn you, don’t take a shot of vinegar without first tasting a small sip to see how it feels. The smell and flavor should be reminiscent of the vinegar’s base—sherry vinegar should taste like sherry, red wine vinegar like red wine, et cetera. Try a blind tasting of a base product and then its vinegar counterpart. See if you can pair them up. If it’s good quality, it should be an easy match.
Much like drinking a fine wine or craft beer, focus on being open to the act of tasting, allowing your brain to work on what your nose and tongue are taking in from the vinegar. Take a tiny sip, and let it sit on the front of your tongue while you breathe in to aerate it. This will give you the full flavor and acid of the vinegar. As it settles on your tongue, notice the flavors; a good vinegar will taste lively and more flavorful than just a strong hit of acid. Let your mind consider what you’d use it on, or if this one is right for the dish you’re working on tonight.
If you’re tasting a whole range of vinegars to compare and discuss, take a sugar cube, dip it in the vinegar, and suck the vinegar from the cube. I find that this helps you identify the flavor of the base, because your tongue isn’t bombarded by the acid in the presence of sugar. If you’re into scientific recording and note taking, keep a small book and write down notes on your own vinegars as well as others that you taste.
DISTILLED WHITE VINEGAR
If what you’re after is just a clear acid for pickling or cleaning, then buying cheap store-bought distilled white vinegar is for you. Manufactured in giant acetators, distilled to clear purity, and then watered down, this industrial acid is edible and food safe. (Acetators are large pieces of equipment that control the temperature and oxygen levels while mixing the vinegar to convert it from alcohol into vinegar as fast as possible; the vinegar is then distilled to remove any impurities and watered down to a standard 5 percent acidity.) Whereas the acidity and pH (power of hydrogen) of homemade vinegar may vary from one batch to the next (more on this on this page), store-bought distilled vinegar is the same every time, so you can be sure your pickles are safely canned.
Here are some ideas for using up that gallon:
1 Pickle something (see this page).
2 Impress your kids with a volcano: Place a jar on the ground outside and add a ¼ cup of baking soda in the jar. Add 10 drops of red food coloring. Pour in 1 cup of vinegar and watch the lava erupt!
3 Wash your fruit with a 1:1 vinegar-to-water solution to make it last longer and remove wax and other residue.
4 Use the same mix to clean your floor, sink, and tub.
5 A 50:50 vinegar-to-water solution or full-strength vinegar will keep ants away; simply spray it where you see them.
6 Neutralize pet odors and accidents by spraying the area with a 50:50 vinegar-to-water solution after drying or soaking up as much as possible.
7 Bring a spray bottle of vinegar to the beach in case of jellyfish stings and to relieve minor sunburn.
Even though we consume some form of vinegar every day (in the condiments, dressings, and pickles we eat), vinegar by itself is still an underappreciated ingredient that can transform your cooking and your eating. In many cases, the punch of the acid plays off the richness of the dish, adding a level of complexity and lightness to heavy foods such as organ meats and thick sauces. It can also serve as a clean note that finishes braised greens or pushes almost any soup (like My Onion Soup) from mediocre to delicious. As an experiment, sprinkle vinegar on dishes you normally wouldn’t. Not in a we-just-won-the-World-Series-champagne kind of way, but deliberately enough to taste it with the food. Try your scrambled eggs with a little vinegar. Taste your cooked rice plain, and then put some vinegar on it. Take a bite of your sautéed kale, then finish it with some vinegar. You’ll notice such a difference in the dish that I wouldn’t be surprised if you started enjoying it on everything.
Cast iron, wood, steel, and aluminum can react with the acid in vinegar and leech off flavors into your food, which is why many of the recipes in this book call for using nonreactive cookware or bowls. Feel free to use enameled, stainless steel, ceramic, or glass, depending on the recipe and your preference. It is worth noting that, historically, people cooked with vinegar in cast iron all the time because it was their only option, so if your cast-iron skillet or Dutch oven is well seasoned, go ahead and use it, just make sure to remove the food to a platter or bowl when it’s done cooking to minimize any reaction.
DRINK IN THE RAW
The vinegar you make at home is a living liquid. The bacteria producing the acetic acid are constantly eating, living, and reproducing. If you’re looking for the most probiotic of vinegars to consume for health, then you have to make your own, as it will have lots of trace minerals, enzymes, and other compounds that won’t be present in large-scale commercially produced vinegar, especially distilled. Making your own is the only true way to ensure that what you’re consuming is, in fact, alive.
While there are many natural vinegars on the market that are unpasteurized, this does not mean that acetobacters are living in the bottle. At some point, the living bacteria count in the bottle will fall as they die off from lack of oxygen. While vinegar never really goes bad (it’s its own preservative), you will still see “best by” or “use by” dates on commercially produced bottles. Keep in mind that the closer you are to that date, the longer the vinegar has been in the bottle and therefore has less living bacteria. The taste will change over time as well, and you may want to explore aging batches of your own vinegar to taste the changes.
Researchers believe that the amino acids present in live vinegar are related to its medicinal qualities. These amino acids help reduce lactic-acid buildup in the blood, which has been correlated to fatigue, irritability, stiffness, and soreness. “Old-timers” in many cultures take a daily tonic of vinegar, often sweetened with honey, maple syrup, or another traditional sugar, to help stay healthy. Vinegar helps keep hypertension in check and regulates blood sugar and body pH. Though it’s not a quick fix or cure-all, I try to drink an ounce of live vinegar every morning in a glass of seltzer. I find it refreshing and delicious.
Vinegar can be used on the skin to regulate the acidity and clean away dead cells as well as keep away bacteria, fungus, and microbes. Washing your face and hair in a solution of ½ cup of vinegar diluted in 4 cups of water will help clear makeup, hair-care products, and other residue and limit dandruff and peeling skin. Vinegar can also be used to treat acne and acts as a natural astringent to balance oily or dry skin.
There’s science to suggest that the bacterial makeup of our own bodies relates to our levels of happiness and stress, which can contribute to preventing (or causing) cancer. While you may not be able to pinpoint any direct effects of consuming raw vinegar on a daily basis, I can tell you that consuming something you’ve made yourself will contribute to your sense of accomplishment, happiness, and self-sufficiency.
BEFORE YOU START
Vinegar is simple to make at home, and the final result will be unlike anything you can buy. While the process is easy to master, with these tools and troubleshooting tips, your first batch will be successful.
TOOLS TO HAVE ON HAND
You probably already have the basic supplies for making vinegar in your kitchen. The more you get into vinegar making, the more you might want to invest in a better vessel (see Resources, this page) or pH testing supplies (see Resources, this page). But for now you’ll just need these:
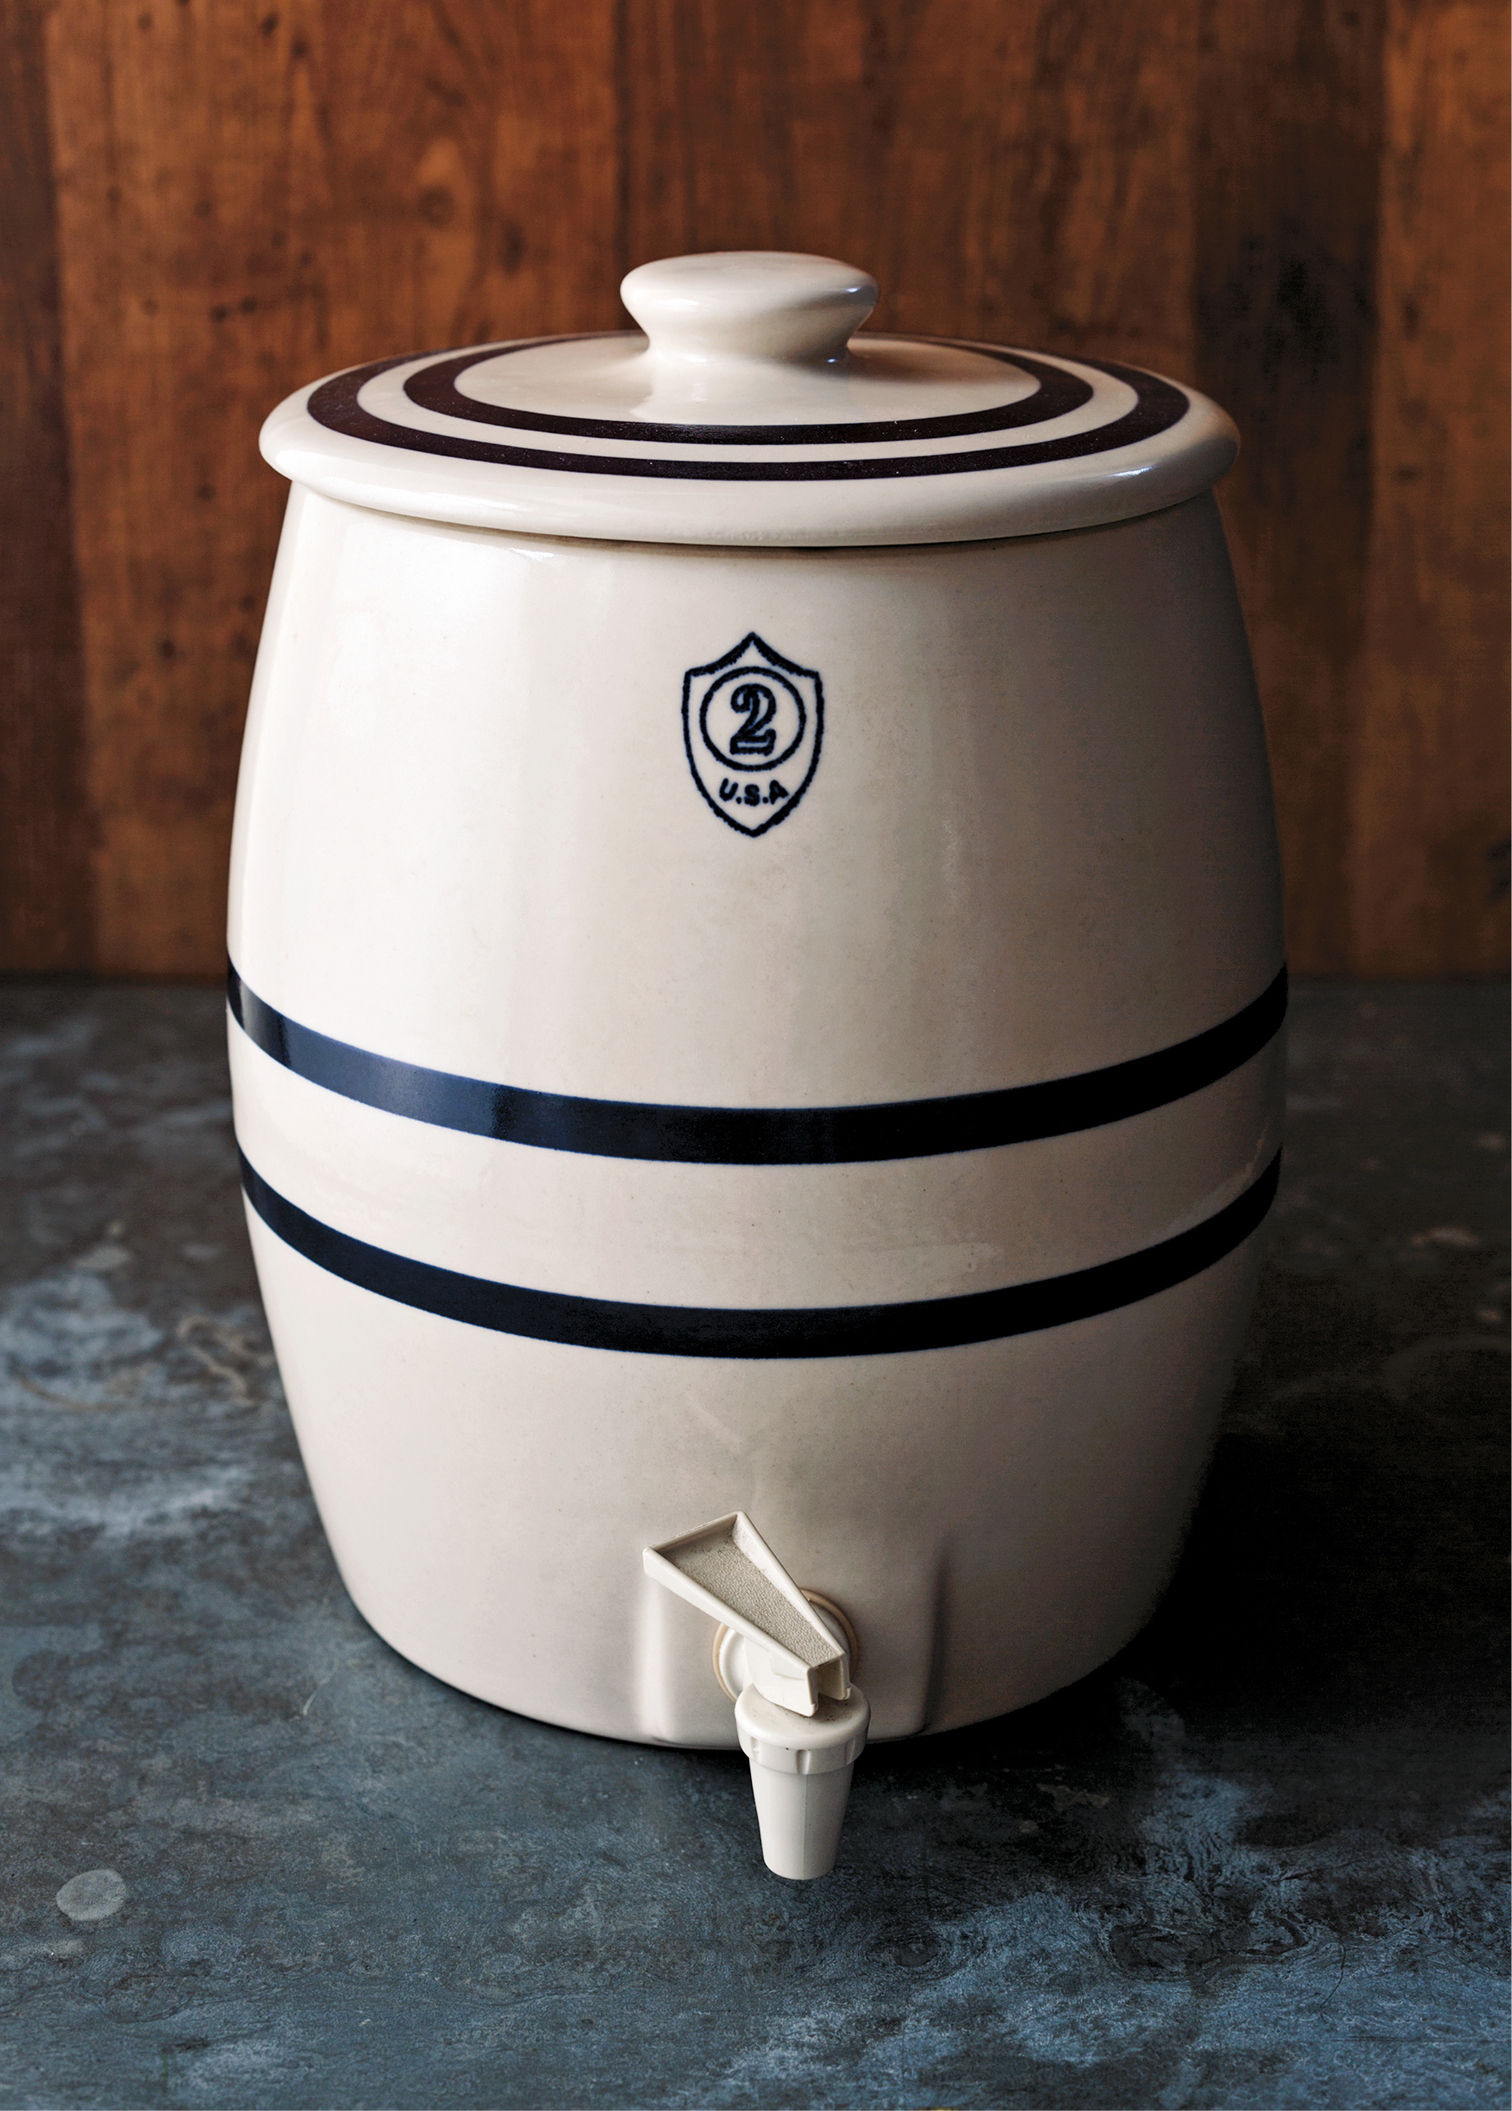
- A vessel to hold liquid during fermentation: glass, wood, stoneware, even food-safe plastic. Those glass lemonade dispensers with a spigot near the bottom are perfect for drawing off finished vinegar.
- Cheesecloth or a cotton tea towel to cover the opening of the vessel.
THE WINE THIEF

I love using a wine thief for sampling vinegar. This optional, handy tool allows you to pull out a little vinegar without disturbing the mother.
BARREL CARE
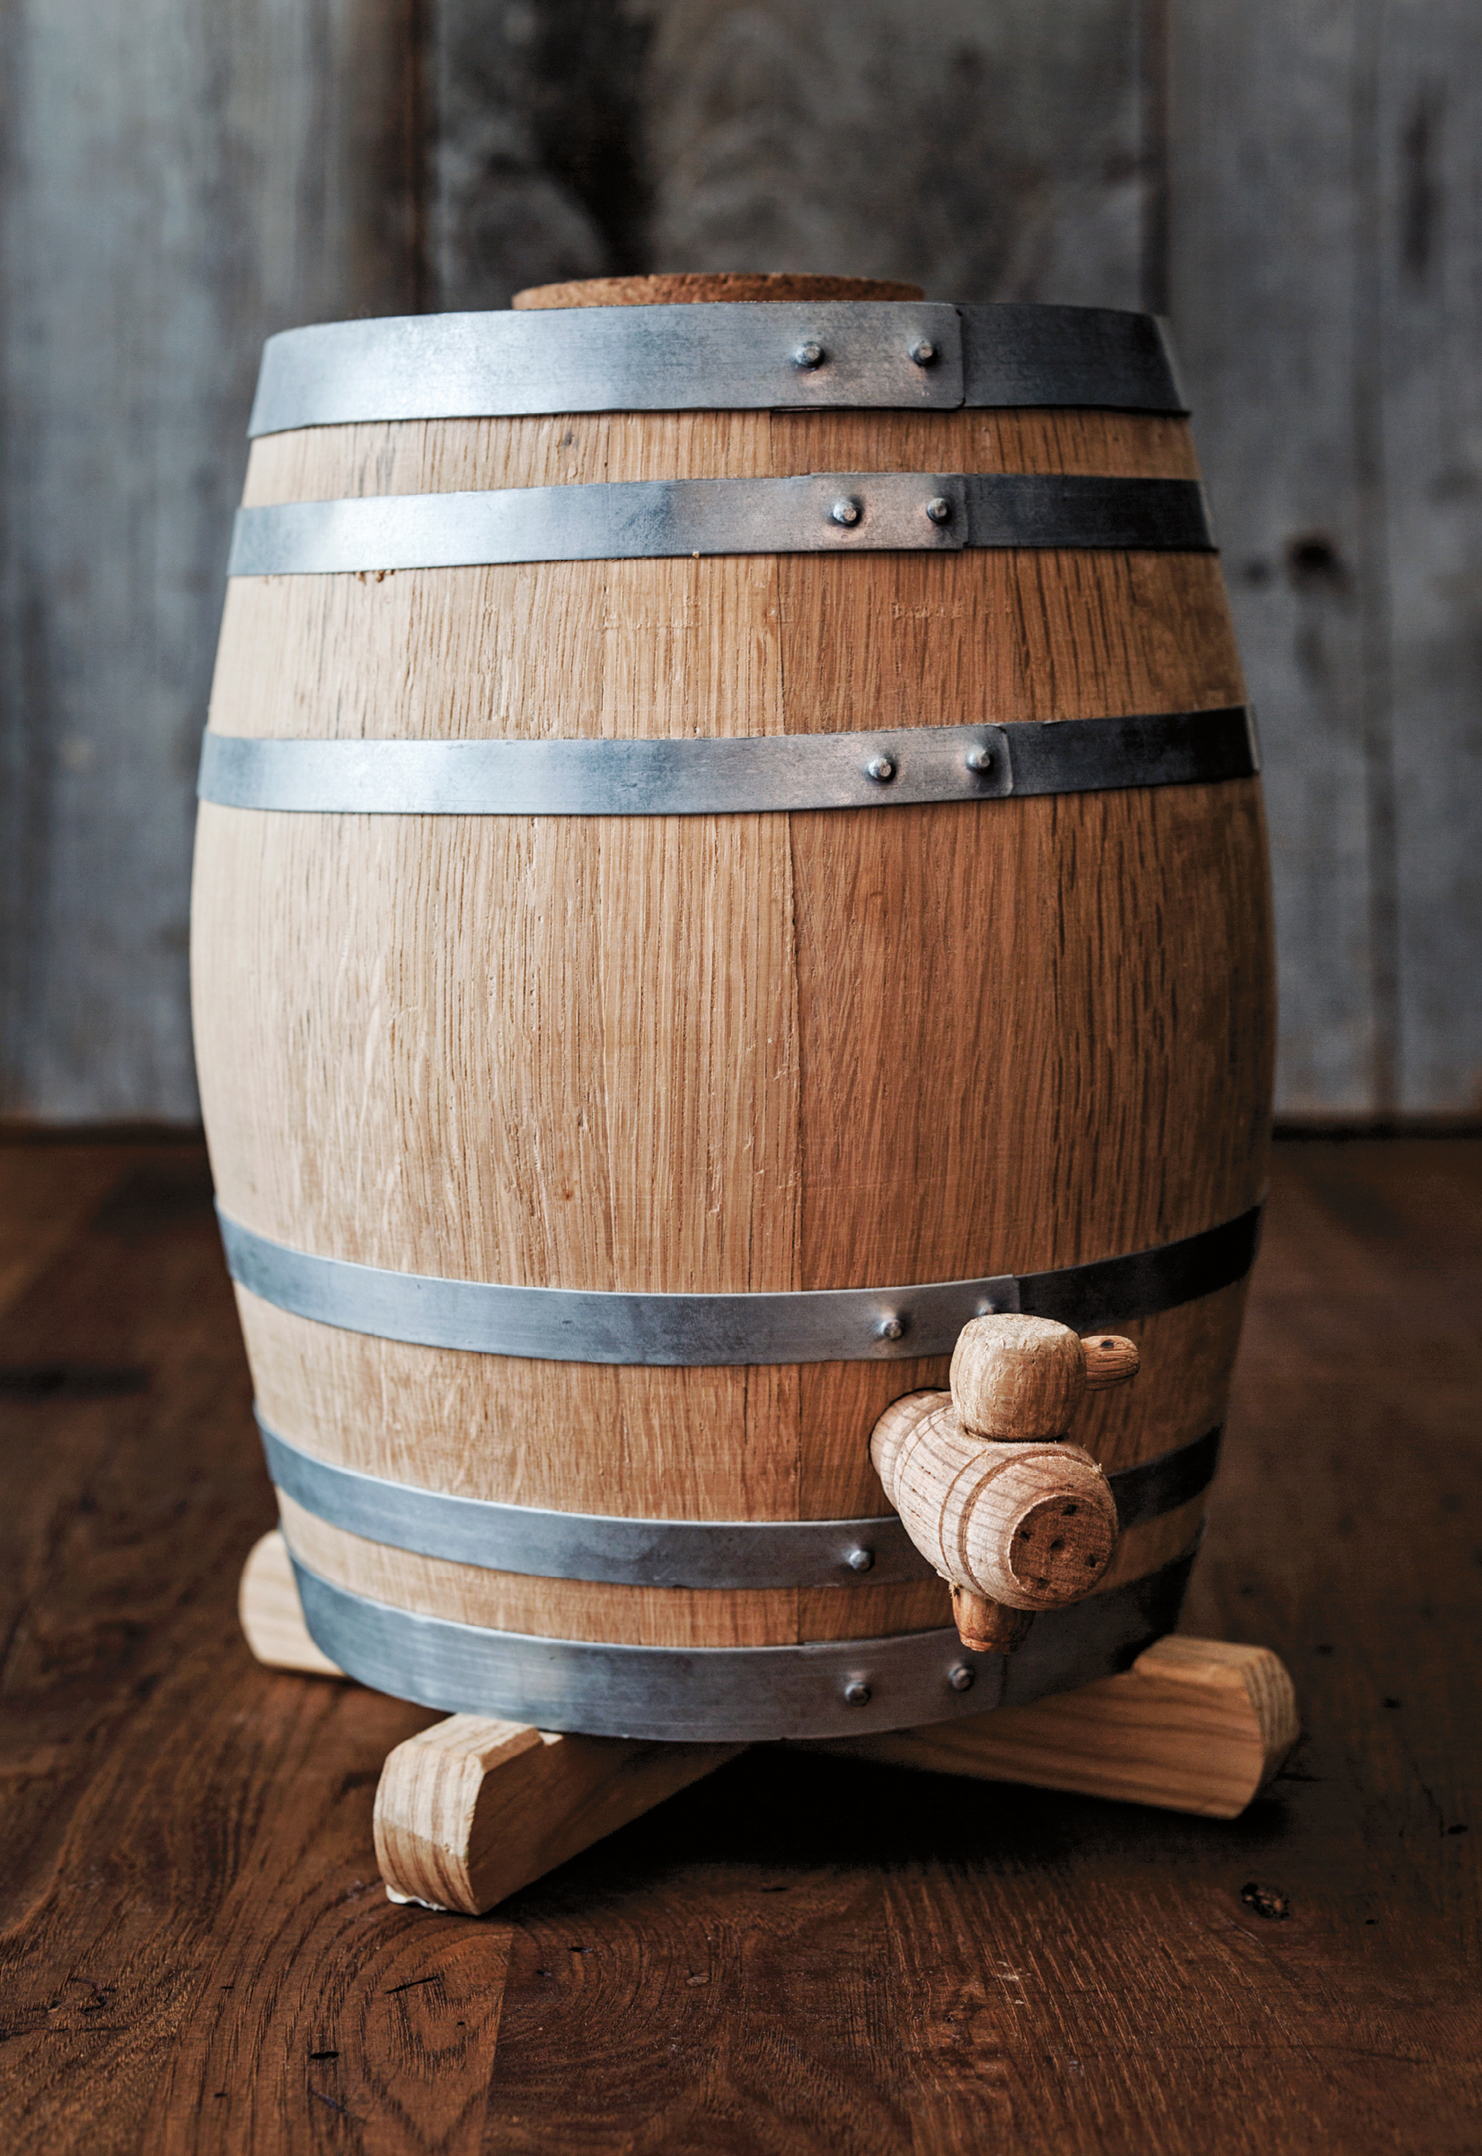
Stemming from the wine-making tradition, oak barrels were the obvious vessel of choice for aging and making vinegar in Europe (see Orléans Method); after aging a wine, the barrels are often discarded. So what better way to reuse them than to make vinegar? Now you’ll find smaller oak barrels sold especially for vinegar brewing—some of them sit on their side and some are upright, but each has a spigot at the bottom for drawing off your finished product.
When you get your oak barrel you’ll need to prep it before starting your vinegar. Simply fill the barrel with water and let the wood soak and swell. The swelling should seal any leaks in about twenty-four hours. Remove the water and begin the process for making the Small Batch Vinegar or Never-Ending Vinegar.
If you’re brewing a single batch of vinegar, once you’ve bottled the vinegar, you can rinse the barrel out to remove any extra sediment and start your next batch of vinegar. There’s no need to add any additional mother, as the acetobacters are now living in the wood of the barrel. Don’t use a vinegar barrel to age wine, spirits, or beer—once you put the bacteria in there you can’t really get them out.
To store your barrel for a prolonged period of time, fill it completely with water mixed with 1 teaspoon of citric acid and 1½ teaspoons of potassium metabisulfite (you can find both at home-brewing stores) for every gallon of barrel volume. Stored this way, the barrel should keep indefinitely. When you’re ready to use the barrel again, rinse it well and add additional mother to the recipe.
Washing and drying is usually all you need to do for tools and vessels made of hard materials like metal and glass, whereas permeable things like wood barrels need to be treated a little differently (see this page). While you don’t need to use sanitizer like you do with beer brewing, working in a clean environment will help you succeed every time you make vinegar and prevent batches from spoiling.
When you have a batch that goes bad, try to figure out where you went wrong.
• Was the fermentation vessel not cleaned properly?
Residue left over from something that was previously in the vessel can infect your vinegar batch with off flavors or even mold. Never use a barrel or bucket that has been used to hold nonfood items.
• Was the vinegar stored in too warm a space? Or too cold?
Heat over 100°F or below 60°F will cause the acetobacters to go dormant. Try to store your brewing vinegar in a dark place that’s around 70–95°F.
• Do you notice too many fruit flies?
A few fruit flies is to be expected, but sometimes they’ll breed like crazy and you’ll have a barrel full of them. While not harmful it is off-putting. You can strain the vinegar through a sieve or cheesecloth, clean the vessel, and keep it going, or you can throw it out and start over.
• Are there vinegar eels?
Vinegar eels, called Turbatrix aceti, are tiny nematode worms about 1/16 of an inch long that live and feed on the vinegar mother. You will sometimes find them in raw vinegar. They are harmless and can be strained out with a sieve or cheesecloth; you can also pasteurize your finished vinegar (see this page) to kill them.
• Was the original wine corked?
Corked wine is wine that has gone bad in the bottle. It will smell like wet cardboard and taste thin. While people often confuse this with a wine “going to vinegar” given the lack of oxygen and the alcohol content of the wine, the chances of wine spontaneously turning to vinegar in the bottle is very unlikely. Make sure you taste the wine before beginning your vinegar process.
• Is your wood barrel giving the vinegar an off-flavor?
The wood in your brand-new oak barrel will leech a little into your vinegar. While it’s possible for your vinegar to become “over oaked,” with time and extended use the wood flavors of a barrel will mellow. If you’re not happy with the finished vinegar, you may want to start over with a new batch until your barrel becomes seasoned.
• Did the vinegar develop a yeast infection?
Yeasts are in the air and if one takes hold of your vinegar it can grow on top of the liquid and have a bread-like smell. I’ve had a few cases of a yeast called kahm growing in my vinegar, which looks like a white veil that turns into a thick wrinkled mass with a waxy texture. Skim off any visible yeast, so that your acetobacters can take over. You can add some finished vinegar to lower the pH of your batch and make the environment inhospitable to the yeast.
• Is there mold?
If you see green, black, or white hairy mold on your vinegar or mother skim it off. If it comes back then you should throw out the batch and start over. Because it needs oxygen to thrive, it will grow only on the surface and can’t grow in liquid.
• Is there too much or too little alcohol?
If you use any base with an alcohol content above 9 percent it will be difficult for the acetobacters to thrive and prosper. Use anything below 3 percent and they won’t have enough food to survive. Choose a base with an ABV (alcohol by volume) between 4 percent and 7 percent and they’ll be just right.
Every batch of homemade vinegar can turn out differently, which is what makes home brewing so interesting. As a home fermenter, I don’t care about making the same batch every time, but if you’re so inclined, keep a notebook to track your vinegar experiments. You may even want to save a small bottle from each batch, so you can have vertical tastings of your own vintages.