
MASTER
VINEGARS,
INFUSIONS,
AND SHRUBS
This chapter outlines the basics of vinegar making and is a great place to start if you’re interested in creating your own. Any of the infusions and the shrubs (fruit- and vinegar-based sugar syrups also known as drinking vinegars) included are delicious in cocktails as well as in food and shouldn’t be limited to one use or the other. If you’ve got a hankering for making vinegar out of unusual ingredients (cider with port, pear juice with bourbon), then by all means give it a shot. At worst you’ll watch a ferment fail before you throw out about a liter of liquid and move on to the next one. At best you’ll make a sublime vinegar to share with your friends and enjoy on your food. If you don’t have the time or patience to make your own, any of the recipes on beginning on this page can always be made with store-bought vinegar (buy the best that you can find).
SMALL BATCH VINEGAR
MAKES ABOUT 1½ QUARTS
There are two ways to make vinegar; both are delicious but involve slightly different timelines. If you want to brew and bottle a single batch from your favorite wine, beer, cider, or sake so that the vinegar will have the characteristics of that single base, then follow this recipe. If what you’re after is something more flexible that you can continue to add to and have available for use at any time—and you don’t care about it having a specific flavor profile—then start your vinegar in a vessel with a spigot and refer to the Never-Ending Vinegar method on this page.
1 (750ml) bottle of good wine (red, white, or rosé), or an equivalent amount of beer, hard cider, or sake (see Variations)
½ cup vinegar mother or live raw vinegar
- Open the wine and taste it to make sure the bottle is good and not corked (corked wine smells like wet cardboard and tastes thin). Pour the bottle into a half-gallon jar with a wide mouth, seal the jar, and shake well to aerate the wine and get the wine ready for acetic fermentation.
- Add water until the jar is three-fourths full (any drinking water is fine; see Tip). Add the mother, cover the mouth of the jar with cheesecloth or fabric, and seal it with a rubber band to keep out pests. Leave the jar in a dark corner at room temperature for 3 to 4 weeks, checking regularly to see that a mother is growing on the surface and things look mold-free. There is no need to ever shake or stir the mixture after step 1; you don’t want to disturb the mother or she’ll sink. Give it a sniff; you should start to smell vinegar!
- After 2 months, taste the vinegar for acidity and bask in the delicious work the millions of bacteria have done for you. Strain out the mother and bottle the vinegar, reserving the mother for another use. Start using the vinegar immediately, or age the vinegar for a year or more to mellow the flavors (see this page).
- Begin a new batch with your mother, or give some of it away as a starter.
NOTE: It may take more or less time for your vinegar to completely convert from alcohol. Differences in local humidity and temperature, as well as the exact nutrients in the wine you choose to start with, will all affect your timeline. Taste the vinegar every week or so to better understand the progress.
If your starting fermented product has an ABV of 8 percent or lower (like hard cider or beer), you will not need to add water to it. Just throw it and the mother into the jar and begin. For a higher-alcohol wine or sake, you can add a 1:1 ratio of water to wine—just make sure you choose the right-sized vessel for fermentation to allow for the extra water.
RED WINE VINEGAR This is the staple in any vinegar lover’s arsenal. There are lots of industrially produced red wine vinegars that taste acidic and look like they used to be red wine, but they pale in comparison to what you can make at home. This is why red wine vinegar is a great place to start your home fermentations, as your homemade stuff will blow away almost anything you can buy.
WHITE WINE VINEGAR A great go-to for herb infusions, this variety is often harder to turn into vinegar at home than red. The lack of tannins seems to affect the bacteria’s ability to convert the alcohol and thrive. I’ve had about a 50 percent success rate with making white wine vinegar at home. The flavor of the finished product will be subtler than red, and its clean brightness is welcome in everything from cocktails to soup.
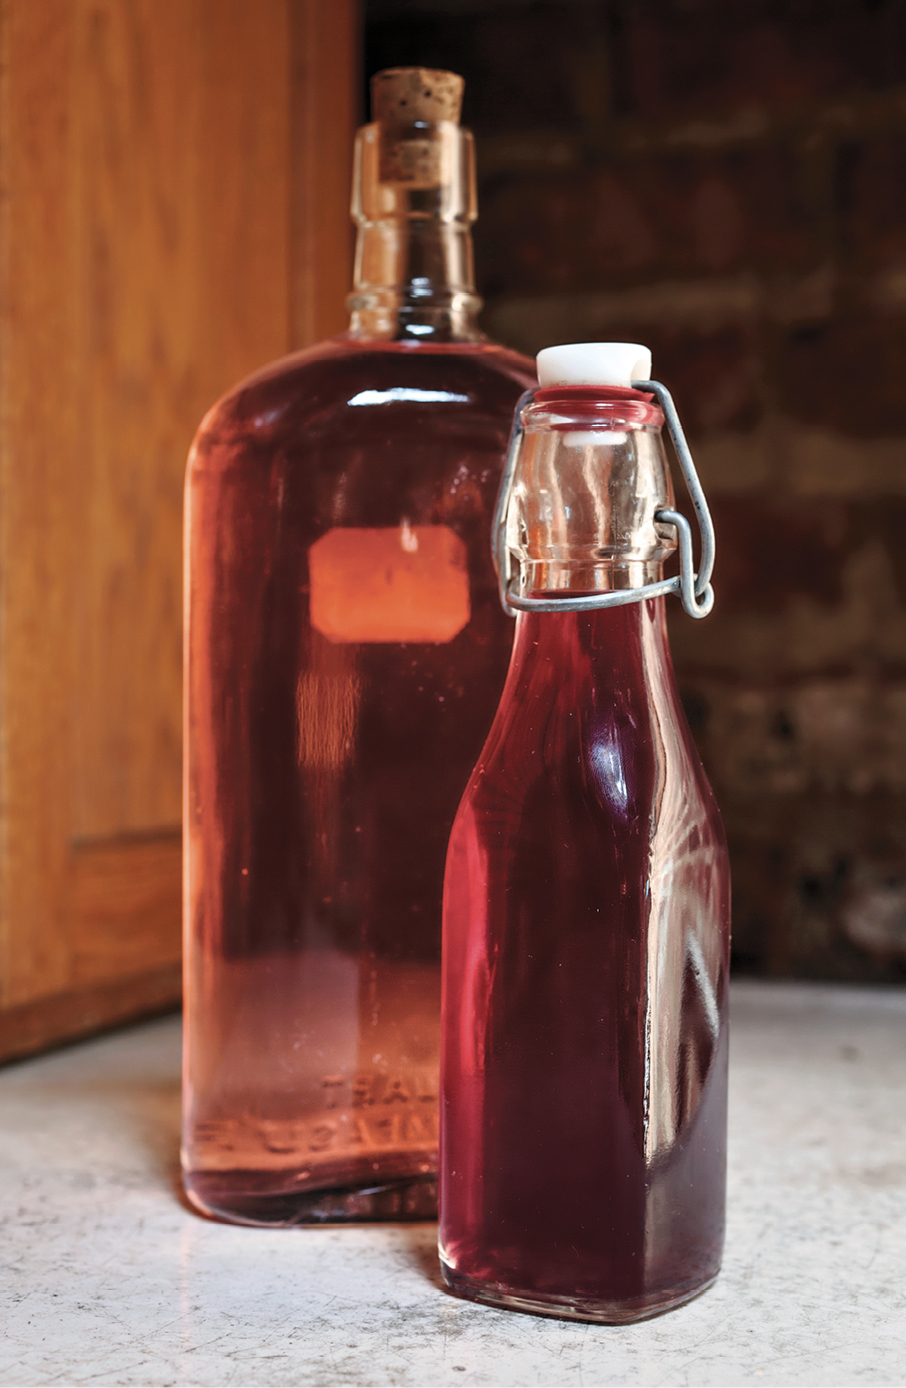
ROSÉ VINEGAR Rosé wine yields very light pink vinegar that looks beautiful in the bottle. With more tannins than white wine (from skin contact during fermentation), it should present few problems in converting to acid.
APPLE CIDER VINEGAR When you set out to make cider vinegar, you need to decide whether you want to make it from fresh juice or already fermented hard cider. If you live in an area known for its apples and have access to good-quality fresh pressed apple cider, or can get good apples to press yourself and you’re into home brewing, then I highly recommend researching and fermenting your own hard cider first and then converting it to vinegar, or going for a simultaneous fermentation (see this page). Otherwise buy the best hard cider you can and proceed; however, note that the lower alcohol in hard cider eliminates the need to water it down, so add your mother and hard cider, skip the water, and vinegar is in your future.
MALT (BEER) VINEGAR Here’s vinegar that will really up your game, and it’s quite possibly the easiest to make. Sometimes called alegar (ale vinegar), malt vinegar is most often associated with the British Isles as the chief dressing for fish-and-chips (see Fish and Latkes). Commercially, malt vinegar is most often made from things that aren’t really beer (usually no hops and not really brewed), and once you make your own, you’ll be floored by the delicious results. The best malt vinegar begins with a medium to dark beer that you like; light pilsners and lagers are somewhat bland to drink and will yield blander vinegar. I like a brown ale, porter, or anything that’s not super hoppy. Since most beers are under 9 percent alcohol by volume (ABV) and full of nutrients and tannins, they’re perfect for making vinegar without needing dilution.
RICE (SAKE) VINEGAR There are many rice “wines” in the marketplace (though sake is really a brewed product more akin to beer than wine, we call it wine in the United States because its ABV tends to be more like wine or even higher—in the 16 to 17 percent range). As with everything else, start with a sake you like to drink. This will likely be the lightest vinegar you can make, both in color and flavor, as most rice wines tend to have a very light and subtle flavor.
If you’re too impatient to wait for your finished vinegar, you can speed up the process by aerating, or adding air to your vinegar. By providing more surface area and frequent contact between the liquid and the air, you actively feed the mother or acetobacter, allowing the acetic acid conversion to happen more quickly. I’ve come across people experimenting with all kinds of methods—from using fish tank air pumps, to oxygen bottles, to slow moving agitators that can cut down the timeline to 10 or so days.
NEVER-ENDING VINEGAR

This method benefits from an oak vinegar barrel or ceramic jug with a spigot (see this page or this page). This is the type of home production you might encounter in a kitchen in the South of France or at an Italian nonna’s house. In this version you add the last few ounces of wine from the previous evening’s bottle directly to the cask with a little water, skim off the mother once in a while so the spigot doesn’t get clogged, and decant the vinegar every month or so into a bottle for use. This is a grand mixture of all the wines you drink—white, red, and rosé included—and you also can add beer, sherry, port, hard cider, or any alcoholic beverage. The result is more of a farmhouse mixture and an economical way to turn those last drops of anything into something amazing. One benefit here is that the bacteria should be very healthy and convert the alcohol rather quickly since you keep feeding them similar to a sourdough starter. Note that every time you draw off some vinegar, it will be different from the previous time. So if you’re a stickler for the consistency of taste, follow the Small Batch Vinegar recipe.
1 quart of Small Batch Vinegar or store-bought raw vinegar
Leftover wine, beer, sherry, hard cider, or port
- Once your vinegar finishes brewing, add it to a 1 to 2-gallon barrel or crock with a spigot if you haven’t already.
- Draw off the finished vinegar as needed and start regularly feeding the bacteria in the vessel with fresh wine, beer, sake—whatever. Add water as needed (see Tip). Every few months, remove the mass of the mother that forms so it doesn’t overwhelm the barrel. Save the mother for another batch, give some away, or just toss it out. You’ll have plenty more in the near future.
- Let your taste buds be your guide when you draw off vinegar for use. If it doesn’t taste acidic enough, then pour the vinegar back in the barrel and taste it again in a week or two.
STORING VINEGAR AND THE MOTHER
As long as you keep your bottle of homemade vinegar well sealed, out of sunlight, and away from heat, it should last for months or even years. Discard it if you notice an off-flavor or bad smell when you open it. Store any leftover mother in a tightly closed jar or container in the fridge until you’re ready to give it away or add it to your next batch.
ORLÉANS METHOD
The Orléans method—named for the city in France where vinegar was first commercialized in the fourteenth century—is a traditional style of vinegar making using oak barrels turned on their sides. Holes are drilled into the barrels to promote airflow, and the barrels are filled halfway with diluted wine. Muslin covers the barrels to prevent pests, and the wine is left to ferment and mature until it reaches the proper acidity, anywhere from four to eighteen months. About three-fourths of the finished live vinegar is then drawn off, leaving the remainder in the barrel, which is refilled with more diluted wine. This process is essentially the same one we follow now in most home vinegar making; while you can choose to make vinegar in a crock, jar, jug, bottle, or barrel, the basic process is the same: we’re taking wine or other alcohol and leaving it to turn into vinegar by exposure to air in a contained environment.
TWO VINEGARS TO BUY, NOT MAKE
SHERRY VINEGAR. Unless you live in Spain, have access to a solera, and have twelve years to wait, you’ll ultimately be disappointed with what you make at home. The solera is a series of rows of barrels used in sherry making, where the wine (or vinegar) is moved from one row down to the next as it ferments and ages; by the time it reaches the end of the bottom row, it’s sherry vinegar. The controls and the history of sherry and sherry vinegar make it one of the best and most reliable to buy, and the experts really do it right. You can add sherry to your Never-Ending Vinegar for a great flavor variation, and buy some good sherry vinegar to keep in your pantry and get to the cooking part of this book.
BALSAMIC VINEGAR. Balsamic was really the first “gourmet” vinegar on the market when gourmet foods began to catch on in the 1970s in the United States. Putting balsamic vinegar and olive oil on the table became the benchmark of any dinner party host’s worldliness. As such they were also soon overtaken by commodity imposters, and you can now find cheap so-called balsamic in the grocery store alongside cheap maybe-not-really-olive oil. Good-quality balsamic vinegar is nuanced, sweet, tangy, and viscous. Like sherry vinegar, unless you’ve got years, a large space, and deep pockets, making the real thing at home is not worth doing. Instead, support the great work of the fine folks in Reggio Emilia and Modena.
HONEY VINEGAR
MAKES ABOUT 2 QUARTS
Honey is one of the most natural sugars and has so many nuanced flavors. Converting that to an acidic ingredient works for various culinary applications—in vinaigrettes and as a general table condiment are my favorites, and I know this one will find its way into drinks and sweets as soon as you make it. The grapefruit called for here adds needed nutrients and counteracts the antimicrobial effects of the honey, allowing the yeast to ferment the sugars into alcohol.
2 pounds honey (see Tip)
½ grapefruit, flesh and skin cut into strips
¼ teaspoon (2.5g) champagne yeast (see Tip)
¼ cup homemade apple cider vinegar, or store-bought
- Add the honey to a stockpot with ½ gallon of water. Bring to a simmer over medium heat, stirring until the honey dissolves.
- Squeeze the juice from the grapefruit slices into the pot, then add the flesh and skin. Remove the pot from the heat.
- Let the liquid cool to room temperature, then strain it into a gallon jug or jar. Add the champagne yeast and the vinegar. Cover the jar with cheesecloth and seal with a rubber band. Leave the jar in a dark corner for 3 to 4 weeks, checking regularly to see that a mother is growing on the surface and things look mold-free.
- Check the vinegar after 4 weeks by tasting it for acidity (the mixture may take up to 3 months to fully convert to vinegar). Strain out the mother and bottle the vinegar, reserving the mother for another use. Start using the vinegar immediately, or age the vinegar for a year or more to mellow the flavors.
- Begin a new batch with your mother, or give some of it away as a starter.
TIP
Champagne yeast comes in a 5-gram packet, which is enough to make 5 gallons of wine. You can find champagne yeast at any home brewing supply store or online.
FRUIT VINEGAR

MAKES ABOUT 1 PINT
Many cultures have a long history of making fruit vinegars, including strawberry, blueberry, fig, persimmon, and pear. Pineapple is one of the most common vinegars in both Mexico and Central America, as well as in Southeast Asia. This recipe is easily scalable: just double or triple the ingredients. You can also make vinegar with just fruit scraps (peels and cores), but know that the flavor will be different if you’re not using the flesh.
1 pound fresh fruit or fruit scraps (the peels, flesh, and/or cores), cut into small pieces
⅓ cup sugar
½ cup live unpasteurized vinegar, such as homemade red wine vinegar or apple cider vinegar, or store-bought
- To a ½ gallon mason jar, add the fruit and sugar. Add water to cover the fruit and pour in the starter vinegar. Cover the mouth of the vessel with cheesecloth and secure with a rubber band.
- Stir the mixture once a day for the first week, at which point the natural yeasts on the skins of the fruit will start to ferment the sugars into alcohol. Let the fruit ferment for another week, stirring occasionally. It should be bubbling lightly as the yeast ferments the sugars into ethanol and releases carbon dioxide.
- Remove the cheesecloth, strain out and discard the solids, and add the liquid back to the jar to ferment into vinegar. Cover again with the cheesecloth.
- Check the vinegar after 4 weeks (it may take up to 3 months to fully convert), taste the vinegar for acidity. Strain out the mother and bottle the vinegar, reserving the mother for another use. Start using the vinegar immediately, or age the vinegar for a year or more to mellow the flavors.
- Begin a new batch with your mother, or give some of it away as a starter.
TIP
You can make this recipe with many other flavoring agents as well; I’ve used both spruce tips and cantaloupe skins. Use the same proportions: ⅓ cup sugar to 4 cups of your product, and water to cover. If your fermentation doesn’t start after 3 days, add champagne yeast (see this page).
INFUSED VINEGARS
Adding flavorful ingredients to homemade or store-bought vinegars creates a simple infusion that punches up the flavor, and makes for more interesting salad dressings or mayonnaise. Infused vinegars also make great gifts. All of the following recipes assume 1 pint (2 cups) of vinegar for the infusion, but you can scale them as necessary for larger amounts. If you are making an infusion to give away, note that including a sprig of fresh herb in the bottle may look nice at first, but eventually the colors of the herb will fade and look rather wan, so if you’re gifting any of these infusions, you’re better off opting for an interesting bottle to give a visual boost instead of the sprig in the bottle. Infused vinegars will keep for months at room temperature. The flavors may fade over time, but they will never spoil.
SHISO VINEGAR
MAKES 1 PINT
1 pint homemade apple cider vinegar, or store-bought
¼ cup packed fresh green shiso leaves (about 20; see Tip), measured and cut into chiffonade
- In a small nonreactive saucepan over medium heat, heat the vinegar to just below a simmer (about 160°F). Add the shiso to a clean pint-sized mason jar with a tight-fitting lid, and then pour in the warm vinegar. Screw on the lid and store at room temperature for up to a month.
- When the flavor is to your liking, strain out and discard the solids and transfer the vinegar to a clean narrow-mouth glass bottle with a cork or lid for storage and use. The vinegar will keep tightly sealed at room temperature for up to 6 months.
TIP
Green shiso, also called perilla, is an herb that is similar to basil. It can be found at most Asian grocery stores.
TARRAGON AND BLACK PEPPER VINEGAR
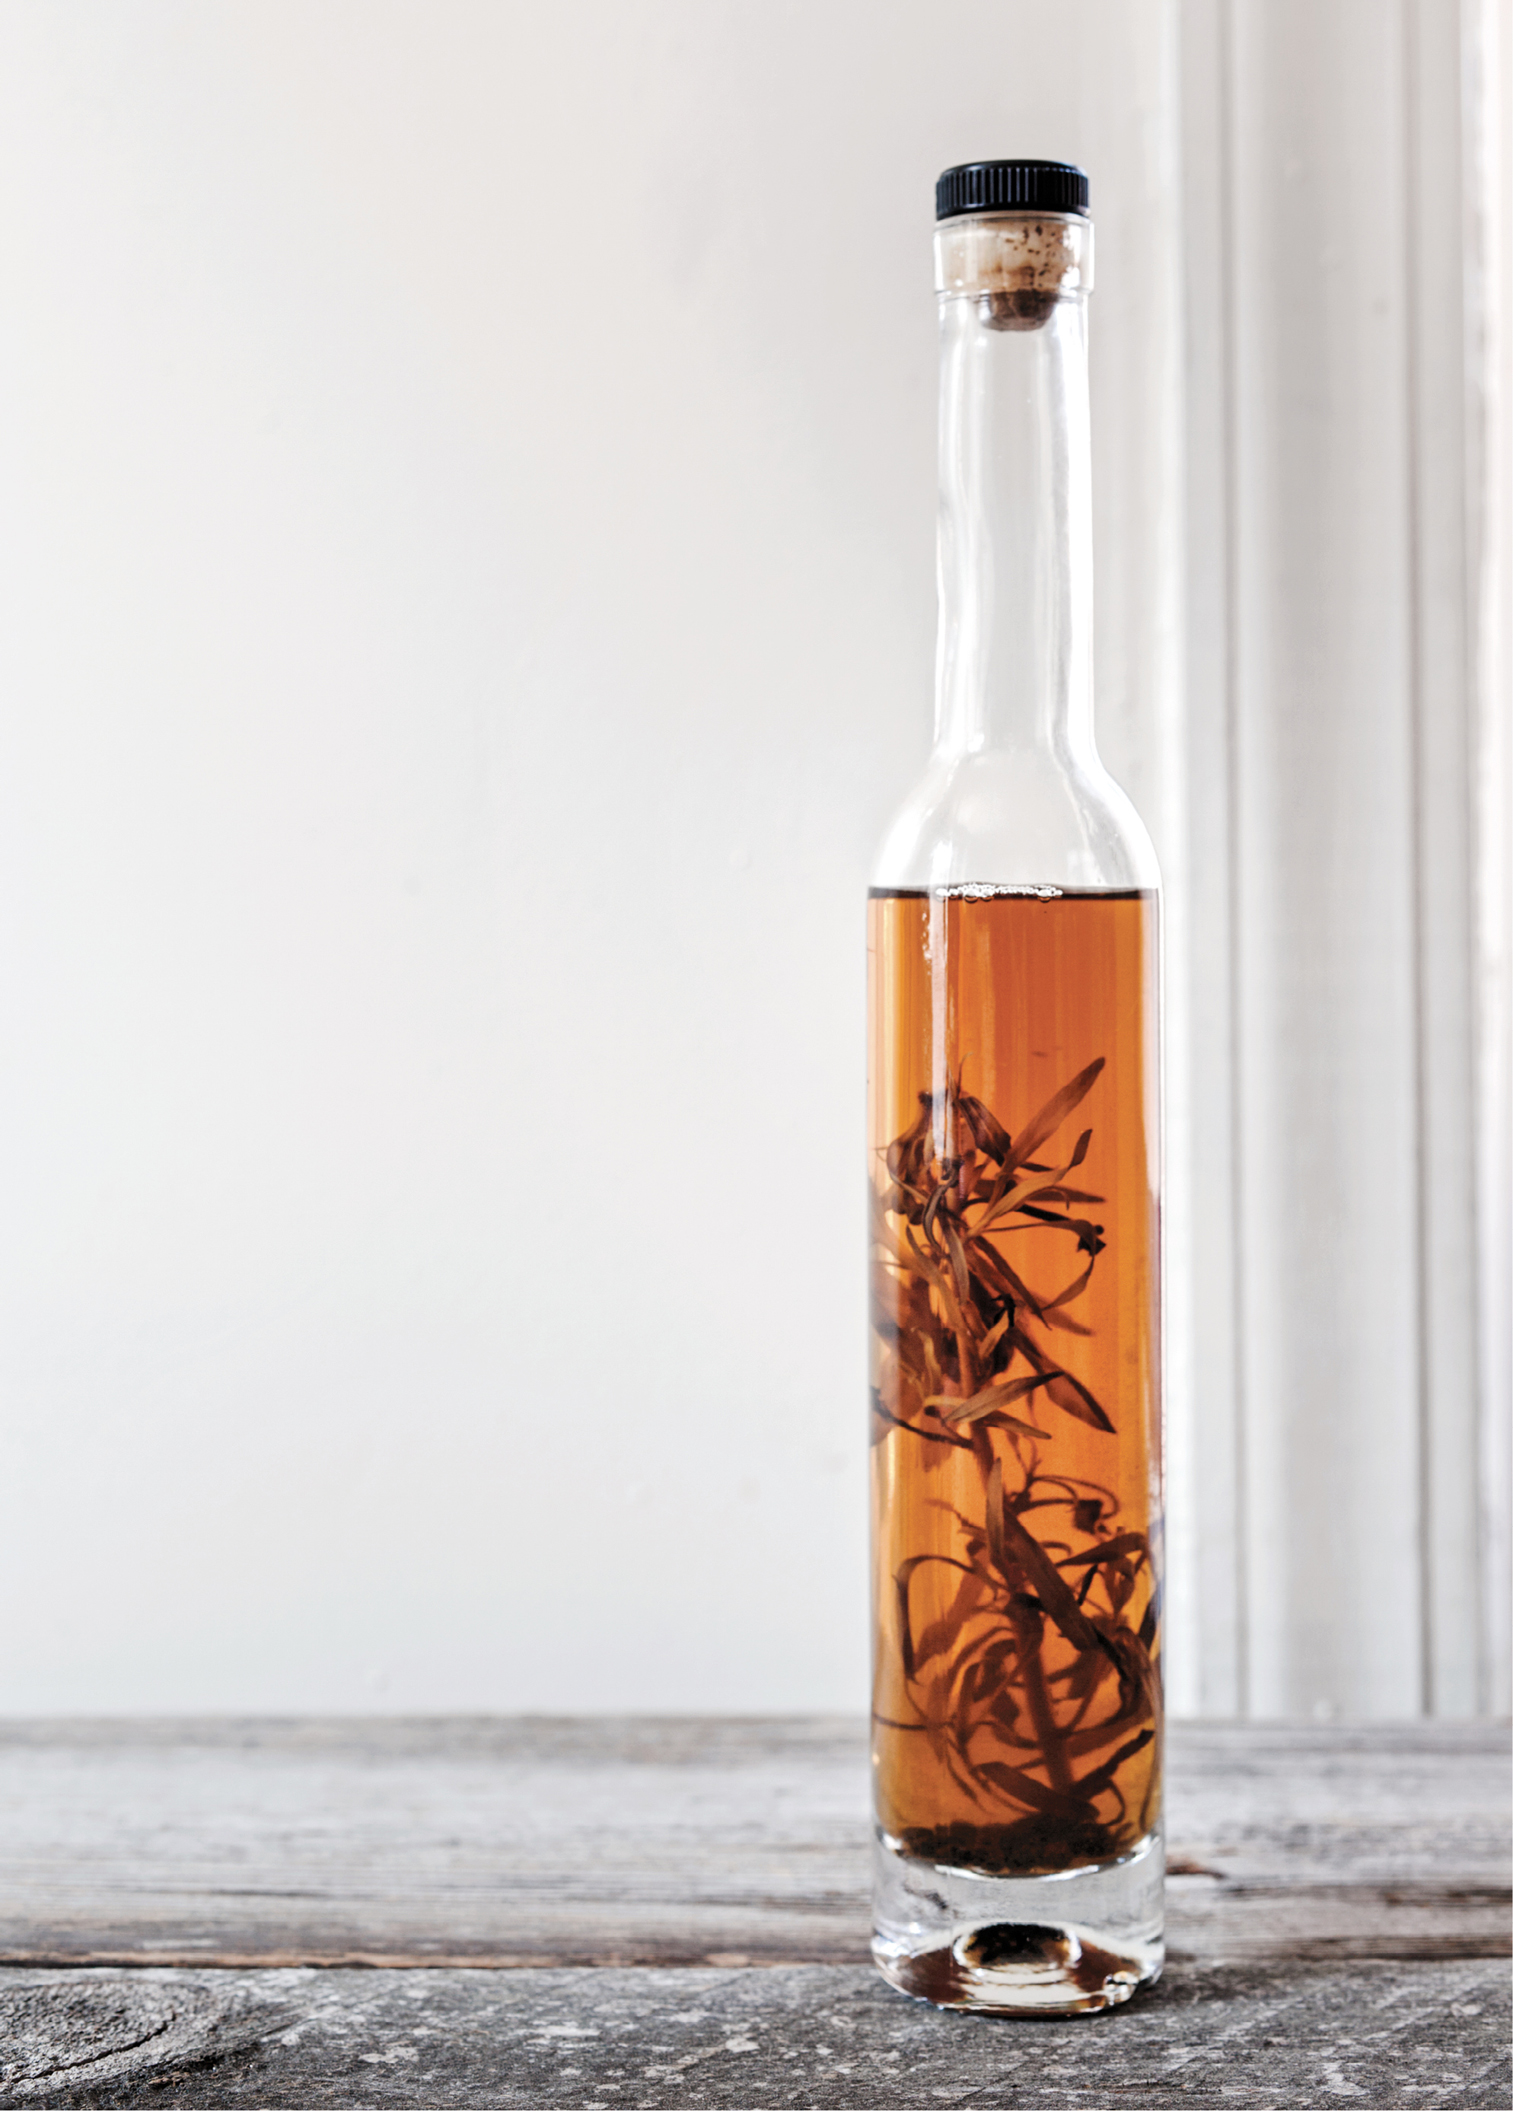
MAKES 1 PINT
1 pint homemade white wine vinegar, or store-bought
2 (8-inch) tarragon sprigs
12 whole black peppercorns
2 allspice berries
- In a small nonreactive saucepan over medium heat, heat the vinegar to just below a simmer (about 160°F). Add the tarragon, peppercorns, and allspice to a clean pint-sized mason jar with a tight-fitting lid, then pour in the warm vinegar. Screw on the lid and store at room temperature for up to 1 month.
- When the flavor is to your liking, strain out and discard the solids and transfer the vinegar to a clean narrow-mouth glass bottle with a cork or lid for storage and use. The vinegar will keep tightly sealed at room temperature for up to 6 months.
HOT PEPPER VINEGAR
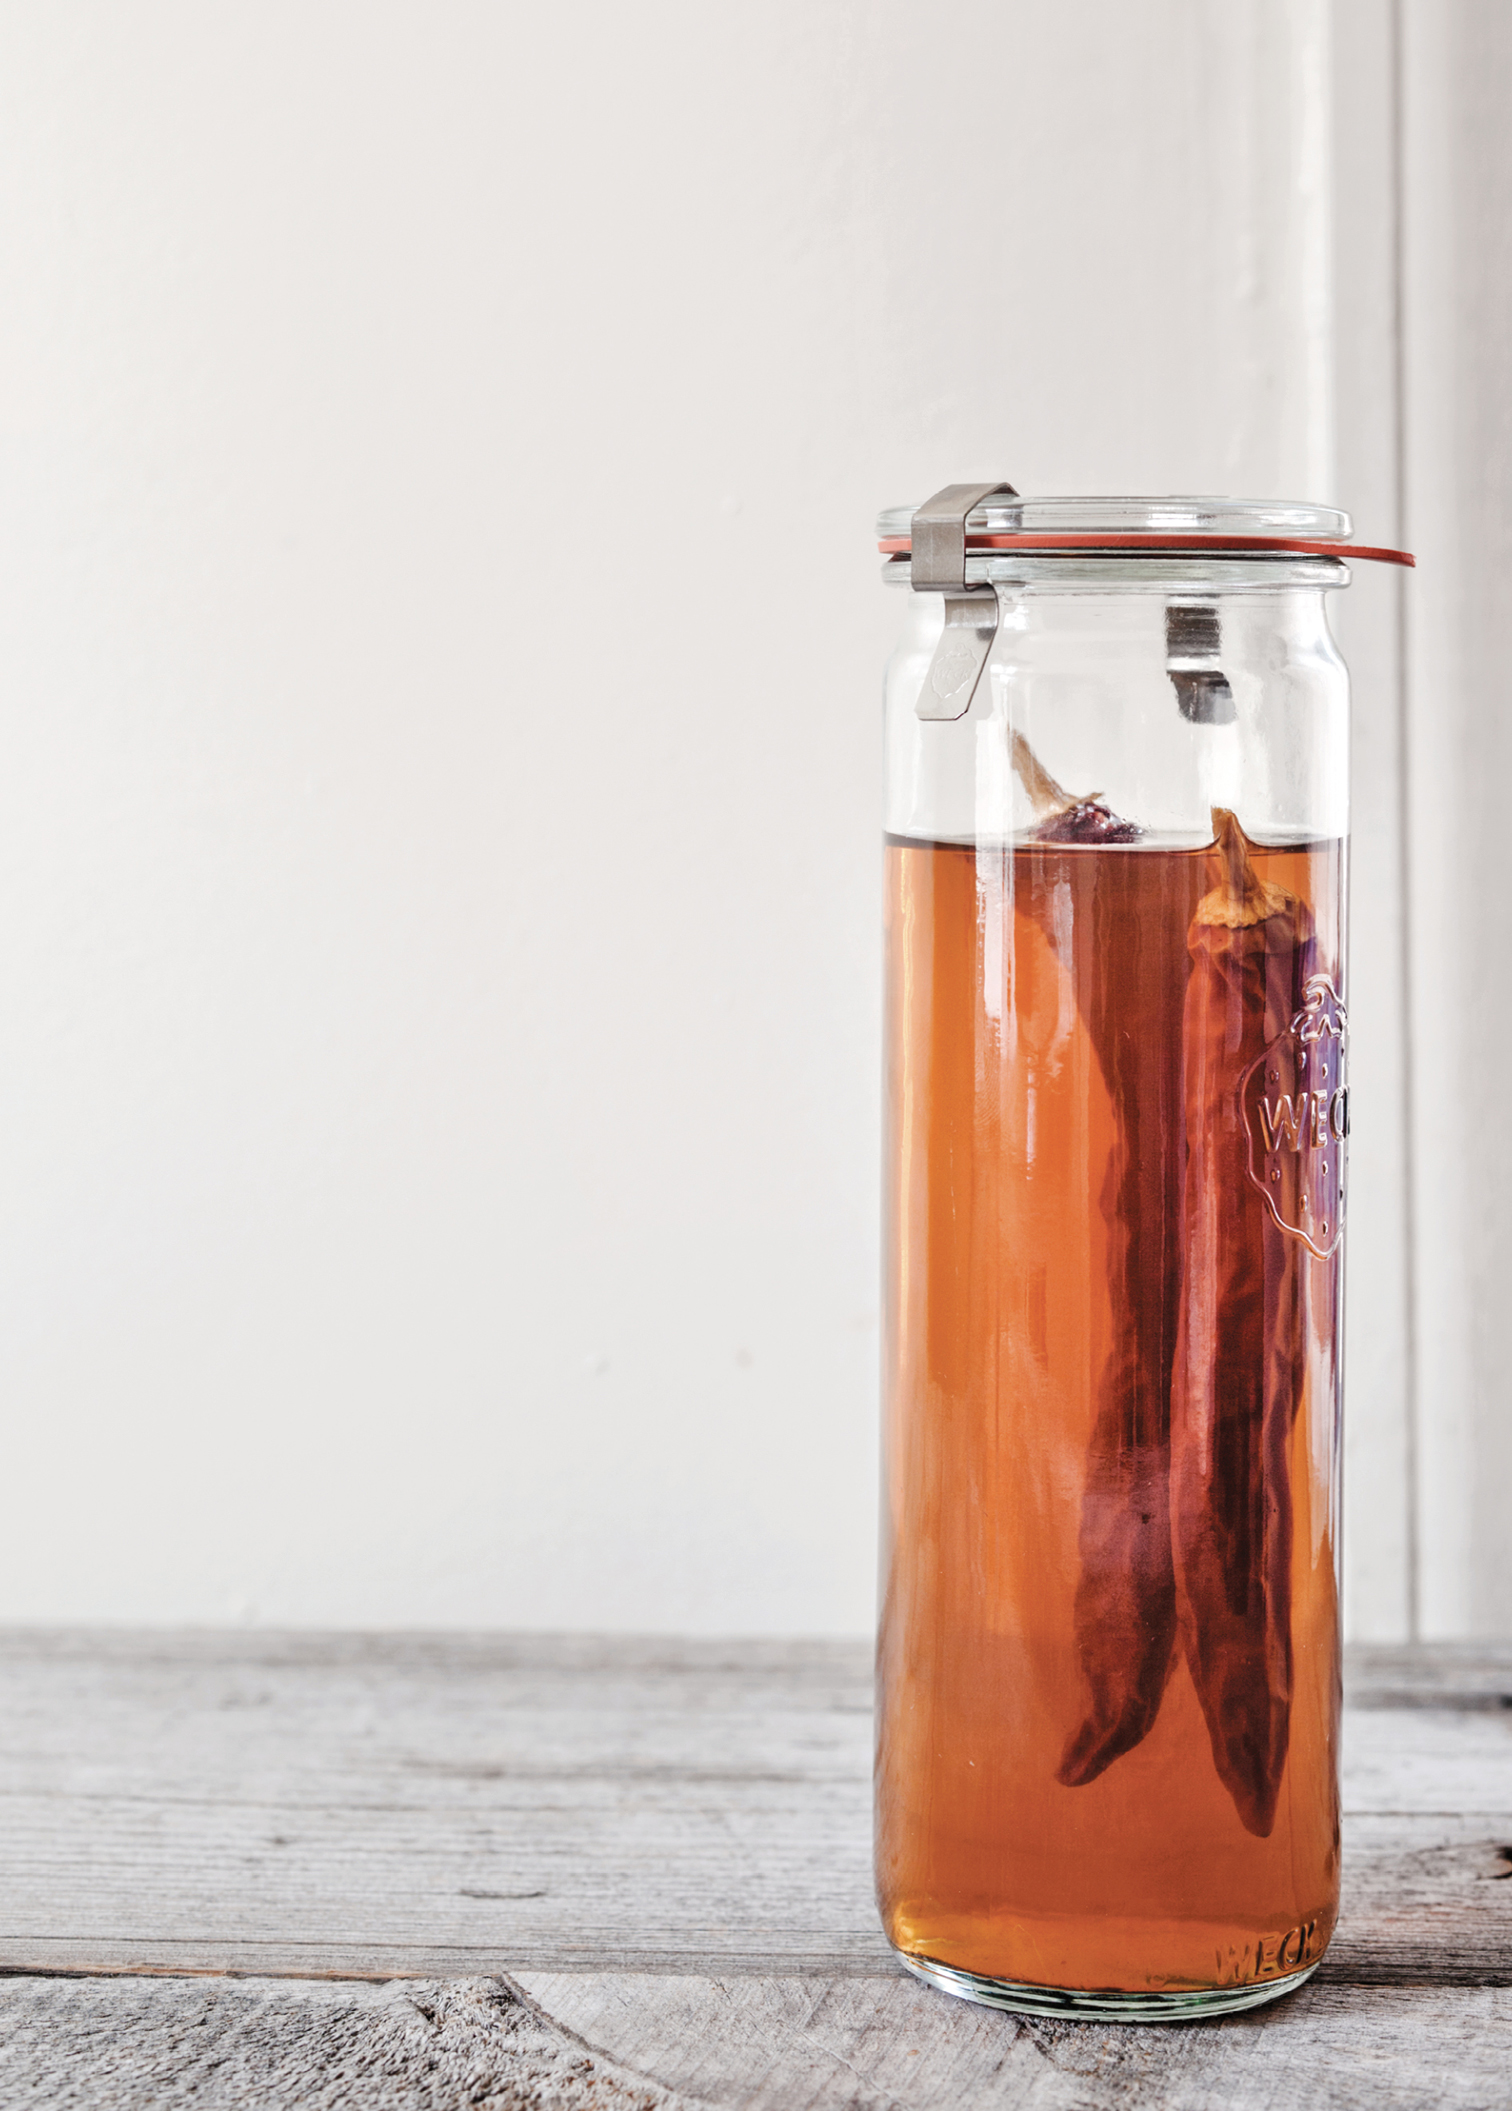
MAKES 1 PINT
1 pint homemade white wine vinegar or apple cider vinegar, or store-bought
3 to 8 dried peppers of your choice (I prefer Calabrian; see Tip)
- In a small nonreactive saucepan over medium heat, heat the vinegar to just below a simmer (about 160°F). Place the peppers in a clean pint-sized mason jar with a tight-fitting lid, then pour in the warm vinegar (there’s no need to shake the mixture). Screw on the lid and store at room temperature.
- The flavor will develop over the first few weeks. When the flavor is to your liking, you can strain the vinegar into a clean narrow-mouth glass bottle with a cork or lid for storage and use. The vinegar will keep tightly sealed at room temperature for up to 6 months.
TIP: The heat of this infusion really depends on the peppers you’re using. You can always thin it out with more vinegar if you find it too spicy. Use the pickled peppers in soup or chili.
EARL GREY VINEGAR
MAKES 1 PINT
1 pint homemade red wine vinegar, or store-bought
2 Earl Grey tea bags or 2 teaspoons loose Earl Grey tea leaves
- In a small nonreactive saucepan over medium heat, heat the vinegar just below boiling (about 200°F). Place the tea in a medium nonreactive bowl and pour the warm vinegar over it.
- Infuse for 5 minutes and strain out the solids, discard, and pour the vinegar into a clean narrow-mouth glass bottle with a cork or lid for storage and use. The vinegar will keep tightly sealed at room temperature for up to 6 months.
GREEN TEA VINEGAR
MAKES 1 PINT
1 pint homemade white wine vinegar, or store-bought
2 tablespoons high-quality sencha green tea leaves
- In a small nonreactive saucepan over medium heat, heat the vinegar to just below boiling (about 200°F). Place the tea in a medium nonreactive bowl and pour the warm vinegar over it. Let the vinegar infuse for 5 minutes.
- Strain out the tea leaves, which are now pickled, and save them for adding to a rice or grain bowl (see Tip). Pour the vinegar into a clean narrow-mouth glass bottle with a cork or lid for storage and use. The vinegar will keep tightly sealed at room temperature for up to 6 months.
TIP: Use this infusion in place of the dashi vinegar in the Sumeshi (Sushi Rice) Bowl or the Seaweed Salad for a vegan option.
GETTING HIGH ON ACID
So far, I haven’t found a way to infuse cannabis directly into vinegar. If all you’re after is just the flavor, and not the other benefits of the cannabis, you can substitute raw cannabis for shiso in the recipe on this page. Cannabinoids are fat or alcohol soluble, not acid soluble, and you have to heat the cannabis first (240°F for 15 minutes should do the trick) to activate. For an easy edible, you can make cannabis-infused olive oil and then use it in a vinaigrette (this page), or you could make a tincture with high-proof alcohol and add that to your vinegars.
DASHI VINEGAR
MAKES 1 PINT
2 cups store-bought distilled white vinegar or homemade rice (sake) vinegar, or store-bought
1 ounce shredded kombu
½ cup packed bonito flakes
- In a small nonreactive saucepan, combine the vinegar and kombu and bring to a simmer over medium heat. Simmer the kombu for 3 minutes, then strain it out. For the best flavor, do not boil the kombu.
- Remove the saucepan from the heat and stir in the bonito flakes. Let stand for 2 minutes and strain the vinegar into a clean narrow-mouth glass bottle with a cork or lid for storage and use; discard the bonito flakes. The vinegar will keep tightly sealed at room temperature for up to 6 months.
LEMON ZEST AND BASIL VINEGAR
MAKES 1 PINT
1 pint homemade white wine vinegar, or store-bought
Zest of 1 lemon, cut in ¼- to ½-inch-wide strips (see Tips)
6 basil leaves
- In a small nonreactive saucepan over medium heat, heat the vinegar to just below boiling (about 200°F). Place the lemon zest and basil in a pint-sized mason jar and pour in the hot vinegar. Let cool; cover and infuse overnight at room temperature.
- Strain out and discard the solids and pour the vinegar into a clean narrow-mouth glass bottle with a cork or lid for storage and use. The vinegar will keep tightly sealed at room temperature for up to 6 months.
TIPS: Try to avoid using the bitter white pith of the lemon peel.
You can also make a shrub or drinking vinegar out of this infusion—a splash of shrub is much more refreshing in water than just a squeeze of lemon. Just add 1 cup of sugar to the vinegar and simmer to dissolve the sugar.
CHIVE BLOSSOM VINEGAR
MAKES 1 PINT
12 chive blossoms, or more as desired
1 pint store-bought distilled white vinegar or homemade white wine vinegar, or store-bought
- Place the chive blossoms in a clean pint-sized mason jar with a tight-fitting lid and pour the vinegar over them. Cover and let the jar stand at room temperature for 5 days.
- Strain out the blossoms, which are now pickled, and save them for tossing in salads or sautéing with greens. Pour the bright pink vinegar into a clean narrow-mouth glass bottle with a cork or lid for storage and use. The vinegar will keep tightly sealed in the refrigerator for up to 6 months.
VANILLA VINEGAR
MAKES 1 PINT
1 vanilla bean (see Tip)
1 pint homemade apple cider vinegar or red wine vinegar, or store-bought
- Slice the bean lengthwise and place it and the vinegar in a clean pint-sized mason jar with a tight-fitting lid. Shake daily for at least 2 weeks, though it’s even better after 4 weeks.
- Remove the bean, scrape out the seeds, and return them to the jar. Pour the vinegar into a clean narrow-mouth glass bottle with a cork or lid for storage and use. The vinegar will keep tightly sealed in the refrigerator for up to 6 months.
TIP: Make sure you choose a vanilla bean that is still supple; you don’t want something that has dried out to the point of breaking when you bend it because the flavor will be diminished and it will be harder to infuse.
CINNAMON APPLE CIDER SHRUB

MAKES ABOUT 1½ PINTS
This recipe for a fruit-based sugar syrup utilizes both the unfermented sweet cider and the product of the fermentation for a really tart, warm-spiced shrub. Rum is the best thing to mix with this, or make a refreshing spritzer with 2 ounces of shrub, a few ounces of Lillet, and a splash of seltzer.
2 cups fresh apple cider (the fresher, the better)
½ cup sugar
1½ cups homemade apple cider vinegar, or store-bought
1 (3-inch) cinnamon stick
½ teaspoon ground ginger
¼ teaspoon freshly grated nutmeg
- In a small nonreactive saucepan, mix the cider with the sugar and vinegar. Stir in the cinnamon stick, ginger, and nutmeg.
- Heat to a simmer over medium heat and then pour the entire mixture into a clean quart-sized mason jar with a tight-fitting lid, seal the jar, and refrigerate for 3 days.
- Strain out the solids, discard, and use the shrub immediately. It will keep tightly sealed in the refrigerator for up to 6 months.
BLUEBERRY SHRUB
MAKES ABOUT 1½ PINTS
Antioxidants, summer breezes, and lip stains…this shrub yields an awesome color and packs a punch of goodness into your glass. I love stirring this shrub into lemonade and/or vodka. You can use frozen blueberries instead of fresh. Use sherry vinegar, which adds complexity to the blueberry. Sophisticated and bittersweet, this is more like amaro, the Italian herbal liqueur, than a soda.
2 cups fresh or frozen blueberries (there is no need to thaw them if you’re using frozen)
1 cup sugar
2 cups store-bought sherry vinegar
½ teaspoon freshly grated nutmeg
- Place the berries and the sugar in a clean quart-sized mason jar with a tight-fitting lid and use a wooden spoon to crush the berries and macerate the flavors. Let the closed jar sit for 4 hours at room temperature.
- In a small nonreactive saucepan over medium heat, heat the vinegar to just below boiling (about 200°F), then pour it over the blueberries and sugar. Add the nutmeg, seal the jar, and refrigerate overnight or up to 3 days.
- Strain out the skins, discard, and use the shrub immediately. It will keep tightly sealed in the refrigerator for up to 6 months.
TIP
While you can just add a dash of vinegar or shrub to straight alcohol to make a quick cocktail, consider using them as substitutes in your favorite recipes for classic cocktails: Use shrubs instead of juice, and vinegars or infusions in place of bitters or citrus. It’s much easier to stock your home bar with one or two vinegars than multiple varieties of citrus and juice.
CRANBERRY SHRUB
MAKES ABOUT 1½ PINTS
This shrub is very tart and best made from fresh or frozen whole cranberries. You can substitute unsweetened cranberry juice instead—if you can find it. (The major brand varieties of juice almost always contain sugar and other preservatives.) I like to keep the sugar to a minimum in this one, but you can always dial it up. Add a little to your family cranberry sauce recipe at Thanksgiving; it’s also a nice addition to a hot toddy.
4 cups whole cranberries (thawed if frozen) or 2 cups unsweetened cranberry juice
½ cup packed light brown sugar
1½ cups homemade apple cider vinegar, or store-bought
1 star anise
2 allspice berries
2 whole cloves
- In a blender or food processor, pulse the cranberries until well chopped. (If you’re using juice, skip this step.)
- In a small nonreactive saucepan, combine the puree, sugar, vinegar, star anise, allspice, and cloves. Heat over medium heat to just below boiling (about 200°F) to blend the flavors.
- Pour the mixture into a clean quart-sized mason jar with a tight-fitting lid, seal the jar, and refrigerate for 3 days.
- Strain out the solids, discard, and use the shrub immediately. It will keep tightly sealed in the refrigerator for up to 6 months.
STRAWBERRY RHUBARB SHRUB
MAKES ABOUT 1 PINT
This recipe reminds me of my mother, whose favorite pie was strawberry rhubarb. This shrub is a little different because you have to cook the rhubarb and strawberries (like you’re making jam) before adding the vinegar and letting it rest. Serve with gin, seltzer, and a dash of bitters for a cocktail that tastes like spring in a glass.
1 cup hulled, sliced strawberries
1 cup rhubarb cut into ½-inch pieces
1 teaspoon kosher salt
1 cup sugar
1½ cups homemade white wine vinegar, or store-bought
- In a small nonreactive saucepan, mix the strawberries and rhubarb with the salt and sugar. Cook the mixture over medium heat, stirring frequently, until the fruit breaks down, about 5 minutes.
- Add the vinegar, stir, and remove from the heat. Pour the mixture into a clean quart-sized mason jar with a tight-fitting lid, seal the jar, and refrigerate overnight.
- Strain out the solids and use the shrub immediately. (The solids make a great sweet-tart addition to a bowl of granola and yogurt.) The shrub will keep tightly sealed in the refrigerator for up to 6 months.
CARROT GINGER SHRUB
MAKES ABOUT 1 PINT
This one is delicious added to a Bloody Mary; one ounce per cocktail will do the trick. It also makes a great brunch kir royale–style cocktail with prosecco or champagne.
1 cup unsweetened fresh carrot juice
1 cup sugar
2 tablespoons grated fresh ginger
1 cup homemade apple cider vinegar, or store-bought
- In a medium nonreactive saucepan, combine the carrot juice and sugar. Heat over medium heat, bringing the liquid to a simmer to dissolve the sugar and reduce the liquid by a third, about 15 minutes. Remove from heat.
- Add the ginger and vinegar, stir, and pour the mixture into a clean quart-sized mason jar with a tight-fitting lid, seal the jar, and refrigerate for 3 days.
- Strain out and discard the ginger and use the shrub immediately. The shrub will keep tightly sealed in the refrigerator for up to 6 months. Shake before using.
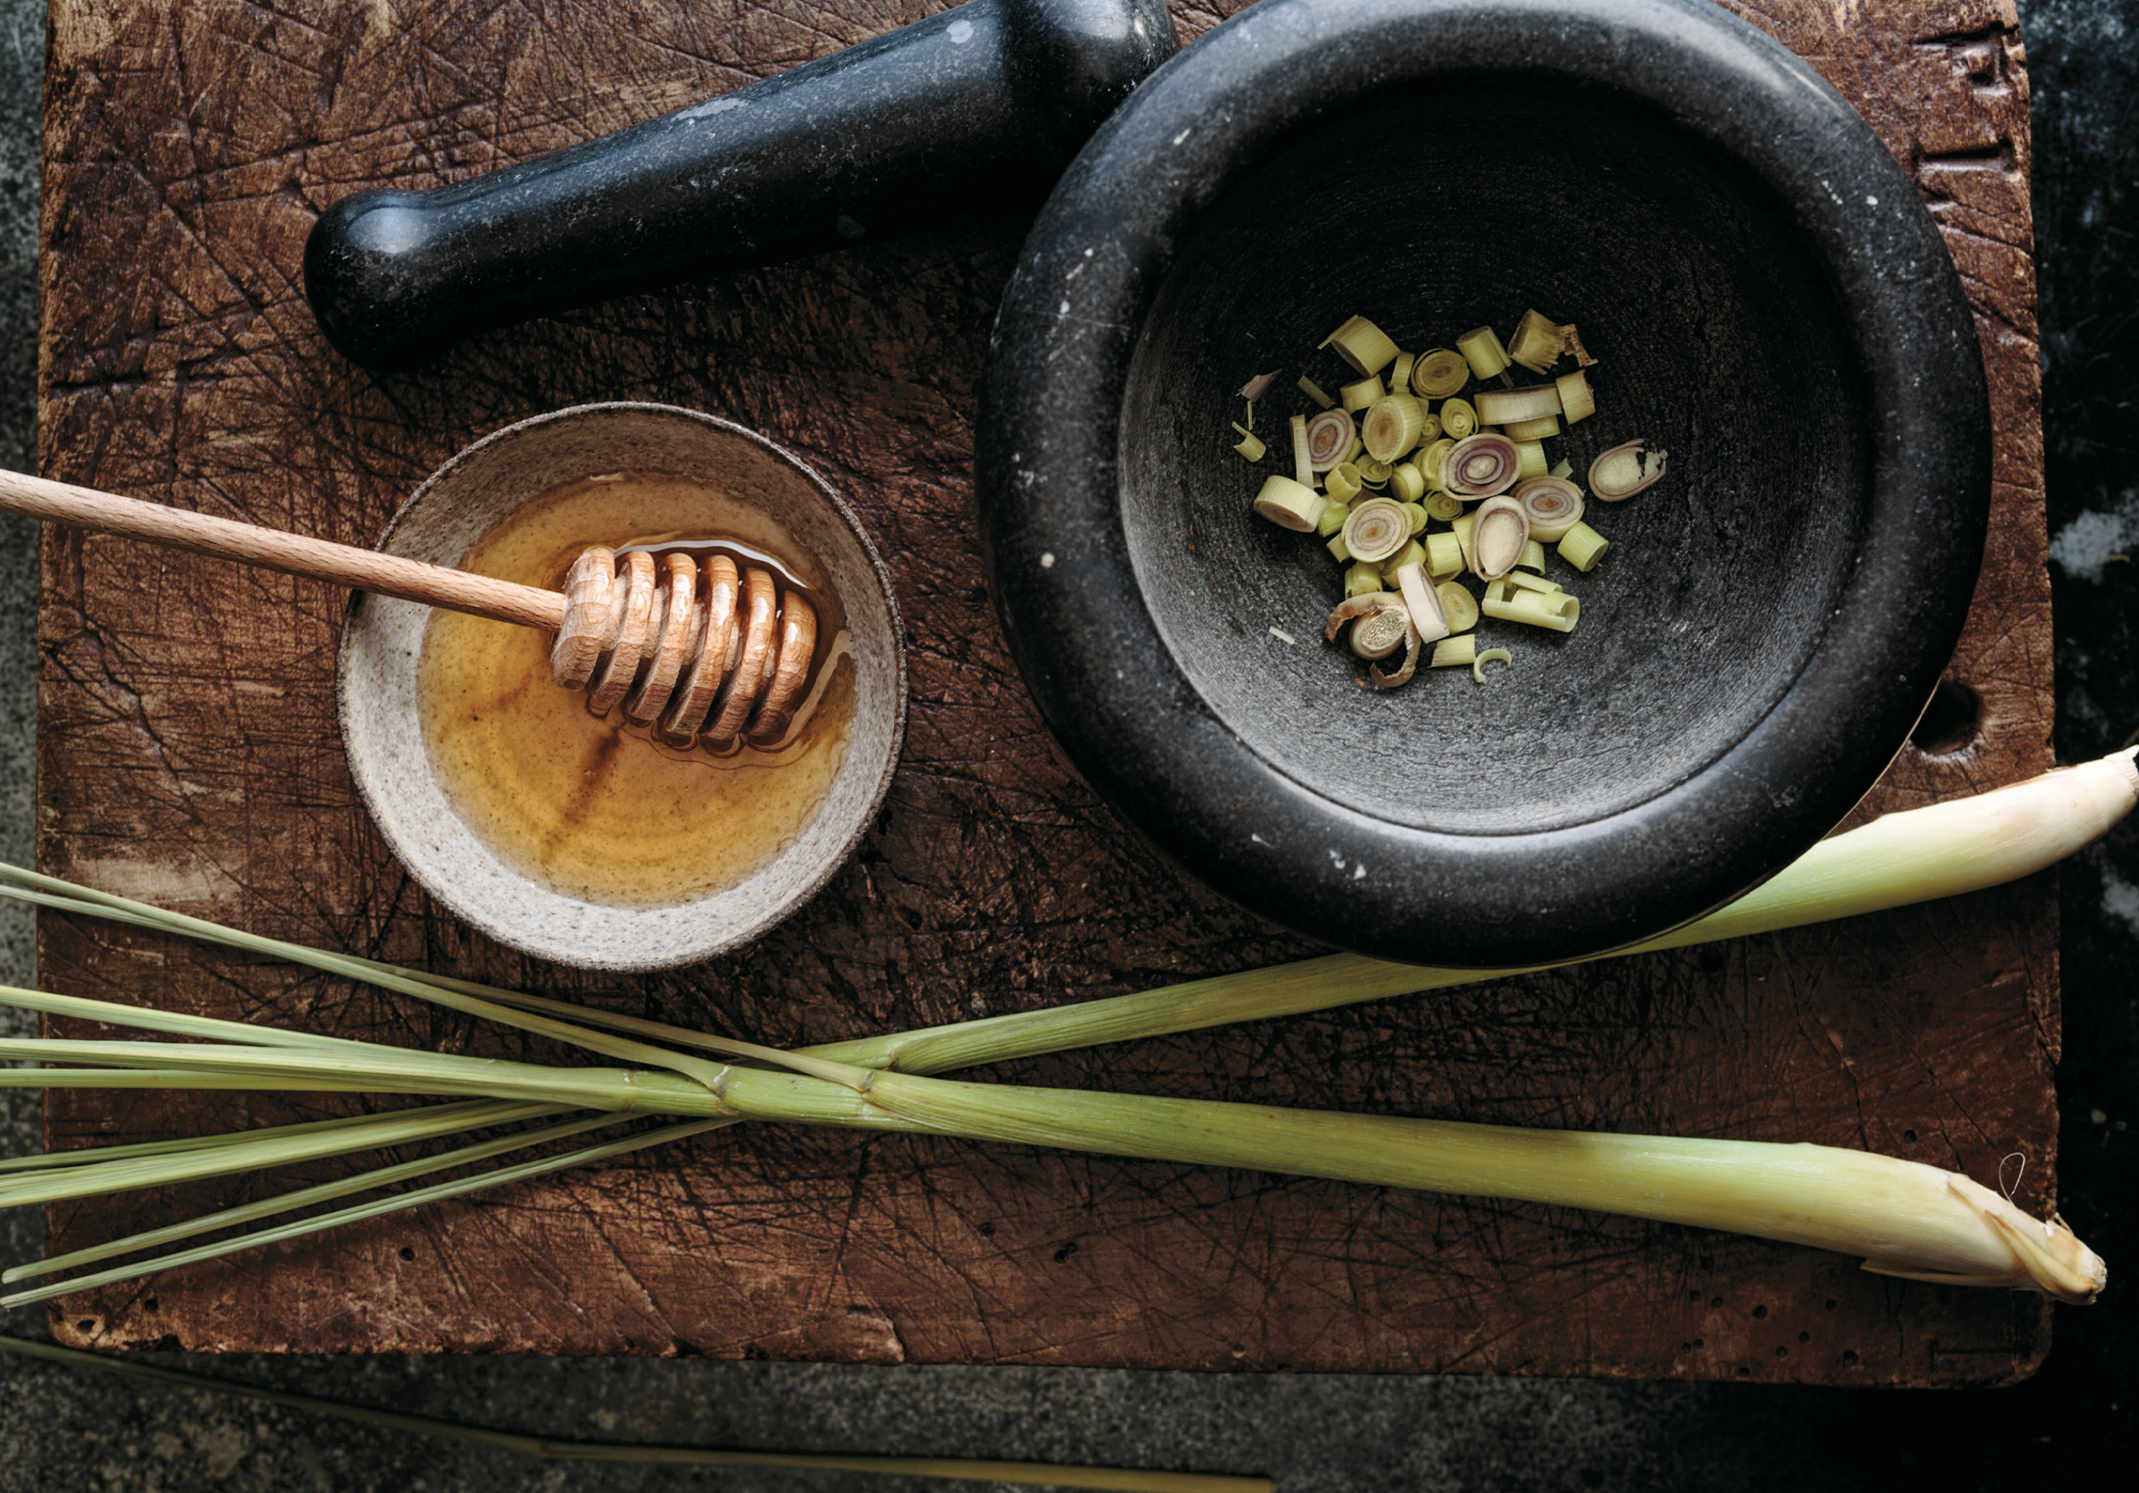
LEMONGRASS HONEY SHRUB
MAKES ABOUT 1 PINT
Brush this on grilled pork or add to vodka and seltzer for a boost on a hot August afternoon. Start this shrub at least a week before you want it—the lemongrass needs some time to sit in the fridge before you even add the vinegar.
½ cup thinly sliced lemongrass (white parts only; see Tip)
½ cup honey
1½ cups store-bought distilled white vinegar or homemade rice (sake) vinegar, or store-bought
- Using the back of a knife or a mortar and pestle, bruise the lemongrass to release its flavors. Place it and the honey in a clean quart-sized mason jar with a tight-fitting lid, seal the jar, and refrigerate for 3 to 4 days.
- In a small nonreactive saucepan over medium heat, heat the vinegar to a simmer (190°F) and pour it over the lemongrass-honey mixture. Return the jar to the refrigerator to infuse for at least 48 hours or up to 2 weeks.
- Strain out and discard the solids. Use the shrub immediately. It will keep tightly sealed in the refrigerator for up to 6 months.
TIP
To prepare lemongrass, peel away the dried stringy outer leaves and use the lighter and fresher inside stalk. (Save the dried parts and put them in tea.) Lemongrass grows well indoors; I keep a small plant in my living room.
MINT SHRUB
MAKES ABOUT 1 PINT
This is the base for the Mint Vinegar Julep, but add it to iced tea for an extra kick. Mint is so delicate that you don’t need to cook it in order to capture the flavor, which is why you don’t heat the vinegar in this shrub. The hot water will dissolve the sugar.
½ cup packed fresh mint leaves
½ cup sugar
½ cup hot (but not boiling) water
2 cups homemade apple cider vinegar, or store-bought
- Place the mint and sugar in a clean quart-sized mason jar with a tight-fitting lid and muddle the mixture with a wooden spoon to bruise the leaves.
- Add the hot water to dissolve the sugar, then fill the jar with the vinegar. Seal the jar and infuse the shrub in the refrigerator overnight or for up to 48 hours.
- Strain out and discard the solids. Use the shrub immediately. It will keep tightly sealed in the refrigerator for up to 2 months.
ROSEMARY MAPLE SHRUB
MAKES ABOUT 1½ PINTS
This base is great for a soda that’s best enjoyed with a view of fields (preferably the Italian hillside) or the ocean on a crisp fall day. Just mix 1 ounce of shrub with 10 ounces of seltzer and garnish with lemon. Stir in bourbon for a warming effect.
⅓ cup fresh rosemary leaves
1 tablespoon sugar
¾ cup good-quality maple syrup
2 cups homemade apple cider vinegar, or store-bought
- Place the rosemary and sugar in a clean quart-sized mason jar with a tight-fitting lid. Muddle the rosemary and sugar with a wooden spoon to bruise the leaves and release the oils. Pour the maple syrup over the leaves, seal the jar, and infuse it in the refrigerator for 2 days.
- Heat the apple cider vinegar in a nonreactive saucepan over medium heat to just below a boil (200°F) and add it to the jar.
- Return the jar to the refrigerator to infuse for a week. Give it a good shake when you notice it in the fridge while you’re looking for a midnight snack.
- Strain out and discard the solids. Use the shrub immediately. It will keep tightly sealed in the refrigerator for up to 3 months.