I feel bad for chocolate, and a lot of times I feel sorry for people who are obsessed with it. Maybe it’s because I am not that crazy about it. What can I say? I’m a fruit guy. “Death by chocolate,” or whatever the common saying is . . . that just sounds terrible.
It’s an intense and complex process to get from cacao bean to ready-to-eat chocolate. It involves fermenting and traveling and roasting and grinding and on and on. I have never thought of dessert making as an art. A craft, for sure. But an art? That’s going too far. Manipulating and tempering chocolate into different forms and shapes, that is an art. No denying that. But at that point the chocolate’s flavor has already been set. That part is not going to change. Chocolatiers are artists and their medium is the chocolate. Few pastry chefs are on that level.
In her brilliant book The Last Course, Claudia Fleming created the most iconic chocolate dessert of them all: a chocolate and caramel tart with flakes of sea salt on top. There was a point in the early 2000s when every dessert menu in the world included a cribbed variation of her dish. That’s because it is utter genius. The salt tempered the sweetness of the chocolate ganache on top and made the chocolate taste more like chocolate. In working with chocolate, I aim toward that end. We all do, or should. (It’s her fault if nobody ever quite reaches it.)
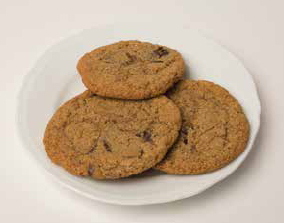
FAKE HEALTHY CHOCOLATE CHIP COOKIES WITH LOTS OF SALT
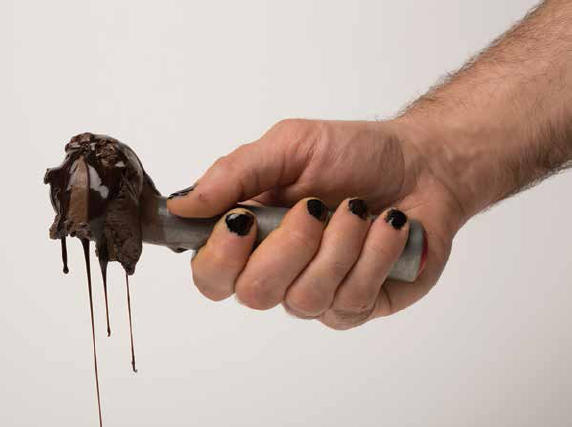
Chocolate needs salt. Like George needed Weezy, like Joey needed Dee Dee, like Stanley needed Christiane, like Axl needed Slash. They complete each other. They can’t get anything done without the other. Chocolate without salt, well, you shouldn’t bother.
Once we made a batch of these cookies for a family meal and they were scarfed by the staff with the vigor of a pack of violent mountain lions chomping on a lost hiker in Big Sur. It was animalistic, raw, hilarious. And it was all about the salt. Kosher salt in this case. It feels good between your fingertips—granular, exfoliating. Chocolate’s best friend.
This recipe is not that far removed from the one on the back of that bag of chocolate chips at your local supermarket. It’s just got the salt boosted to 11. And you are not using those goddamn chips. You are getting some good chocolate, OK? Good lord, promise me that. Lastly, these cookies have a bunch of whole wheat flour, too, which might lead you to believe that they are good for you. They’re not.
Yield: 24 cookies
Whole wheat flour 3½ cups (420 grams)
All-purpose flour ¾ cup (95 grams)
Baking powder 1½ teaspoons (7 grams)
Baking soda 1 teaspoon (4 grams)
Salt 2¼ teaspoons (9 grams)
Unsalted butter 1 cup, or 2 sticks (220 grams)
Granulated sugar 1 cup (200 grams)
Dark brown sugar 1 cup (220 grams), packed
Eggs 2 (110 grams)
Pure vanilla extract 2 teaspoons (8 grams)
Bittersweet chocolate, very best quality, chopped 1¼ cups (225 grams)
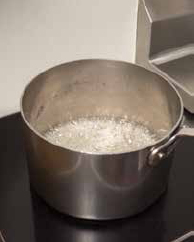
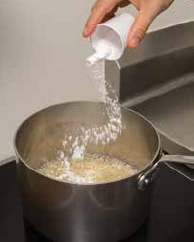
1. Preheat the oven to 375°F.
2. In a small bowl, combine the whole wheat flour, all-purpose flour, baking powder, baking soda, and salt.
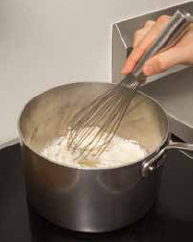
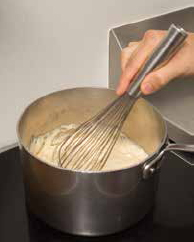
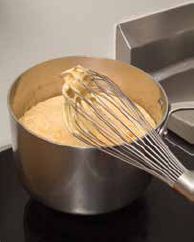
3. In the bowl of a stand mixer, with the paddle attachment, combine the butter, granulated sugar, brown sugar, and vanilla at medium speed until creamy. Add the eggs, one at a time, beating in the first thoroughly before adding the second. Gradually add in the flour mixture. Stir in the chocolate.
4. On an ungreased baking sheet, portion out the cookie dough with a tablespoon leaving ¼ inch in between the cookies. Bake for 9 to 11 minutes, or until golden brown.
To serve: Encourage your loved ones to eat these warm, directly off the baking sheet. (But if the cookies do cool, you’ll be fine—just transfer them to a cooling rack after they’ve set a couple minutes.)
“I’m a future primitive, and I skates to live”
—Bones Brigade’s Future Primitive
Like everyone, I have iconic things from my youth that are difficult to explain to people who didn’t experience them for themselves. In the mid-eighties skateboarding had serious outlaw cachet, and although I was the worst skater to ever grace the planet, I fell in love with the iconography and culture. I pored over each issue of Thrasher magazine, soaking up every word, advertisement, and photograph. It was easy for a teenager from the suburbs of Baltimore to idolize professional skateboarders: They were my age and most of them were also suburban kids. Only they had escaped. There is a scene in Future Primitive where Tony Hawk, Lance Mountain, and Mike McGill are all sitting around a sink using their hands to do tricks with a finger-size skateboard. They look simultaneously bored and excited. To me, that is growing up in the suburbs.
Skateboarding led me to punk rock, and I quickly abandoned skating for drumming. I wasn’t very good at that either, but I could fake it pretty well. I was never that nihilistic variety of punk kid. I’ve still never done a drug harder than weed, and I was always far away from the pit (slam dancing seems so macho and jocky, the offensive suburban stuff that I got into punk to avoid). So when the vegetarian siren called (via Millions of Dead Cops, Conflict, and Beefeater records), I jumped on board with enthusiasm.
Eventually, I found The New Farm Vegetarian Cookbook. Nearly every punk kid I’d meet on tour had a ratty-looking copy of the book in his or her kitchen. The front book jacket illustrates in a very seventies Free to Be You and Me pictorial style all the foodstuffs that a suburban kid wanted. There was a burger, a sad-looking burrito, a slice of cheesecake, an ice cream cone. The book is packed with unappetizing black-and-white photos of soybean ephemera and hairy hippie folk and their offspring, everyone obviously reeking of hummus and denim. The cookbook was the work of an “intentional community” (What does that even mean? That’s so cool!) in rural Tennessee who were living off the grid and making their own food. They were future primitives. Raising little bearded babies.
My friend Christian had a signature recipe from the book: a vegan chocolate tofu pie filling that he’d pour into a store-bought Keebler piecrust (coincidentally, vegan) and top with semisweet chocolate chips. It was absolutely his thing. If you made one, his feelings would be hurt and you’d be in for it, à la Larry David: I see you made the chocolate tofu thing, eh? Niiiiiice. Cool, cool. When, uh . . . when did you learn how to make that, huh?
It was a tofu and chocolate pudding, really. Melt the chocolate and blend it with silken tofu in your mom’s three-setting Osterizer: easy. The chocolate resets in the fridge and turns into a sliceable pudding straight from a diner dessert case. We all found it horribly impressive.
When I first arrived at Del Posto, Ladner said he wanted to devise a completely vegan tasting menu. At the time, I don’t think he cared much about vegans or vegan food, but at heart the man is a student of hospitality and his guests were beginning to ask for it regularly. Best to have things ready for them.
Of course, I used the New Farm chocolate tofu pudding for the first Del Posto vegan dessert. Of course I did. And it worked perfectly. Rather than pour it into a crust, I smeared it on a plate, free-form, fine-dining style. The tofu-chocolate synergy firms up quite nicely, and even without a ramekin or mold to contain it, it allows you to torch the top like a crème brûlée and it keeps its shape. So you get that astonishingly satisfying super-thin crunch of burned sugar. Which plays very well with the bitterness and sweetness of the chocolate.
I always do a wavy smear, like a skateboard ramp—a ramp primed for any future primitive with a toy finger board who happens to stumble in.
Yield: 2 servings
Silken tofu one 1-pound container (453 grams)
Salt ¼ teaspoon (1 gram)
Pure vanilla extract 1 teaspoon (4 grams)
Dark brown sugar 2 tablespoons (25 grams)
Bittersweet chocolate, very best quality, chopped 2 cups (264 grams)
Granulated sugar for sprinkling
Croutons (here) for serving (optional)
1. In a blender, combine the tofu, salt, vanilla, and brown sugar and blend until smooth.
2. In a medium microwavable bowl, melt the chocolate in the microwave in 20-second intervals until it is completely smooth. Take care not to burn the chocolate. (If you don’t have a microwave, use a double boiler.)
3. Add the melted chocolate to the tofu mixture and blend until fully incorporated. Pour the brûlée into ramekins and set in your refrigerator for about 1 hour.
To serve: Smear an irregular chocolate pudding wave onto a plate and sprinkle with granulated sugar. Using a propane torch, melt the sugar into a crackly crust as you would for crème brûlée. Garnish with croutons if you want. Alternately, just eat this as a pudding.
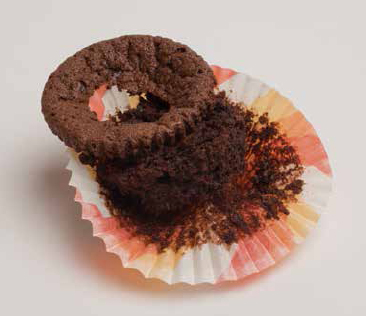
Molten chocolate cake is an outstanding but justifiably maligned dessert. It doesn’t have to, but most of the time it completely sucks. In a busy restaurant, it’s rare you’ll be served a fresh-baked version. More often than not, you’ll get an hours- or even days-old specimen. Chefs think the MCC is corny, a cop-out, aiming for the lowest common denominator. But customers love it. You have to serve it straight out of the oven for it to transcend its cornball status.
For the opening menu at Orsone in Friuli, Italy, my team and I brought the cake out of retirement. We did it intentionally wrong, without the creamy core: Sorry, folks, it’s baked through. It’s also not intact. It’s a fudgy lump with a crisp cookie hat. It looks like a cupcake with the top sabered off. I once did a short stint at a Ritz-Carlton and I can hear my French pastry chef bosses there bellowing in broken English: “Eet separated, eez wrong! Make eet again! Will you be a shoemaker your whole life? Make eet nice or make eet twice.” It’s better this way, François.
Yield: 6 cupcake-size cakes
Bittersweet chocolate, very best quality, chopped ½ cup (130 grams)
High-quality unsweetened cocoa powder 2½ tablespoons (14 grams)
Powdered sugar 2½ tablespoons (14 grams)
Salt 2¼ teaspoons (9 grams)
Granulated sugar (⅔ cup plus ¼ cup (120 grams plus 43 grams)
Unsalted butter ⅓ cup, or ⅔ stick (80 grams)
Eggs 3, separated
Bread Crumbs (here) 1 cup (70 grams)
Olive Oil Gelato (here) 1 scoop
1. Preheat the oven to 350°F. Spray the insides of a 6-cup cupcake tin with nonstick cooking spray and set aside.
2. In a medium microwavable bowl, melt the chocolate in the microwave in 30-second intervals, stirring in between to ensure that the chocolate doesn’t scorch. (If you don’t have a microwave, use a double boiler.) Set aside to cool.
3. In the bowl of a stand mixer, using the paddle attachment, combine the cocoa powder, powdered sugar, and salt at medium speed. Add ⅔ cup of the granulated sugar and the butter. The batter will look very grainy. Add the egg yolks and continue mixing until the batter is creamy and well incorporated, about 5 minutes.
4. Transfer the batter to a medium bowl and, with a rubber spatula, mix in the cooled chocolate. Set aside until ready to use. Clean the bowl and whip attachment of the stand mixer.
5. In the clean bowl of the stand mixer, using the whip attachment, combine the egg whites and the remaining ¼ cup sugar on medium speed until you have stiff, shiny peaks.
6. Sacrifice a scoop of meringue to the batter and, using a rubber spatula, incorporate well. This will lighten the batter up and prepare it for the remaining egg whites. Gently fold in the remaining egg whites.
7. Fill the cupcake cups two-thirds of the way with batter. Bake for 11 minutes. The cake will look like a soufflé; the top will be thin and crunchy, and the inside will be soft, moist, and collapsed.
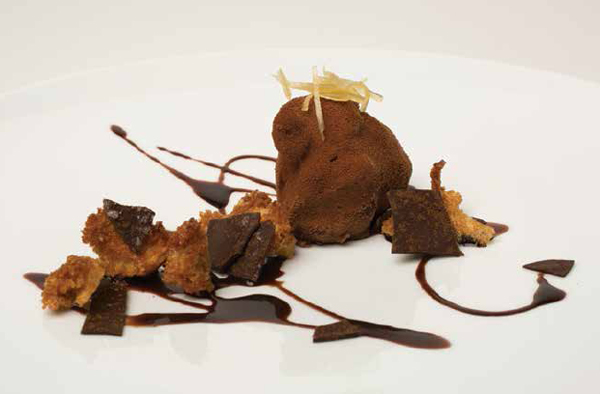
To serve: Separate the cookie-like top from the fudgy moist center. Roll the fudgy bottom in the bread crumbs. Put the cookie back on the bread crumb–covered bottom and serve with a scoop of olive oil gelato.
See here.
See here.

Born: Saturday, April 11
Occupation: Pastry chef and co-owner, The North Fork Table & Inn and The North Fork Food Truck
Status: Committed
Notable Quote: “You want me to count that clusterfuck?”
Shoe size: 7
Lunch food: I don’t eat lunch.
Beverage: Vodka and grapefruit
I Heart NY: More than anywhere I’ve ever been
First time: Makes the greatest impression
Accomplishments: Finishing the NYC marathon
Ambition/future plan: Continue makin’ tasty eats
Brad Kintzer is the chocolate maker behind TCHO, among my favorite brands of chocolate in the world. Having studied as a botanist before becoming a chocolatier, he knows more about the production of the stuff than anyone.
CIOCCOLATA, SCHOKOLADE, COKOLADA, CHOCOLAT, CHOCOLATE by Brad Kintzer
Although chocolate eclipses nearly every other food and drink in global appeal, we know embarrassingly little about it. The fact is today our depth of understanding of how to control the quality of chocolate is decades behind other well-researched foods and drinks, such as wine, beer, and cheese. The level of our collective ignorance is dizzying.
Rather than focusing on what makes chocolate good (and what makes it better), laboratory and social scientists have historically been interested in figuring out what it is about this beloved foodstuff that short-circuits people’s emotional control systems. (They tend also to ignore the horrific conditions under which it is usually produced.) A few inadequately comprehensive theories still prevail:
Chocolate is a deep-rooted comfort food. Its distinctive aromas and flavors teleport us back to the deep recesses of our earliest memories of chocolate.
Chocolate is romantic neuroscience. Buried in every bite are complex cocktails of naturally occurring psychotropic chemicals, including phenethylamine, or PEA, the same chemical that surges when we fall in love.
Chocolate is sensual. The fat used in making chocolate—cocoa butter—has immensely unique melting properties that allow the silky, slow delivery of cocoa’s +/-800 kaleidoscopic flavor notes.
Chocolate saves. Some say our bodies subconsciously crave the staggeringly high quantities of heart-healthy polyphenols and other micronutrients that can be found in darker chocolates.
Chocolate is a happy amphetamine (see here). Society’s growing dependence on sugar, the most common bedfellow of cocoa, plays a massive role in our relationship with chocolate.
Scientists concede that all these factors, along with several others, contribute to our understanding of—and obsession with—chocolate. But none of them help us unlock the ingredient’s secret powers. Fortunately, the approach for getting to the bottom of pivotal questions regarding chocolate is already established: We need only follow the examples set by producers of wine, beer, and cheese to get real answers about how to understand and make better chocolate.
Wine, for example, has long had its genetic varietals meticulously mapped out and they are readily available for farmers to plant. Winemakers can search geographic overlays of latitude, soil nutrient composition, temperature, sun exposure, and other variables of their specific planting site, then order up the clones or root stock that they know will grow best and yield the best fruit.
By contrast, the genetic taxonomy of cacao is only slowly being sorted out. (For the uninitiated, cacao refers to the bean as it grows on the cacao tree. Cocoa, on the other hand, is the ingredient created after the cacao bean has been processed.) New varietals were recently discovered and categorized in cacao’s native Amazon basin and Central America. Who knows what flavors, yields, and other contributions to the world of chocolate these and other undiscovered varietals can and will make? It is likely they will be enormous.
Winemakers also have the luxury of being able to scroll through designer yeast and microbial cocktail catalogs for precise and repeatable fermentation results. Fermentation of cacao, like wine, is the key to unlocking the complexity and balance of flavor. But cocoa’s fermentation mechanism, how it drives flavor, is just beginning to be fully understood. Most of the world’s cocoa fermentation is done by making simple cocoa piles that are then covered by banana leaves and left to sit—worlds away from the thousands of glycol-cooled fermentation tanks throughout the pristine wine-making region of Napa Valley.
One of the principal hurdles to improving chocolate quality and innovation is that cocoa, unlike grapes, is typically grown thousands of miles away from where it is made into its finished form. There is a massive disconnect between those who are growing cocoa (Southern Hemisphere) and those who are buying it and making chocolate (mostly in the Northern Hemisphere). Closing these huge geographic, technological, cultural, and socioeconomic (another essay entirely) gaps is the key to a lot of future chocolate innovation and quality improvement.
Most people are shocked to learn that many cacao farmers have never tasted any form of chocolate. One unique and rare way of clearing cultural and quality hurdles is by teaching cacao farmers how to make and critically taste their own chocolate made from their own cocoa. It is always a mind-altering experience when cacao farmers learn the process through hands-on training: When they begin connecting the dots, seeing how what they do on the farm level directly impacts the cocoa quality and how that quality is directly linked to price premiums, they become exponentially more driven toward delivering it. They are eager to learn how to improve their cocoa, and this kind of change can yield only good things for chocolate lovers.
Led by millions of loyal buyers, fine chocolate is only now undergoing its own age of enlightenment.
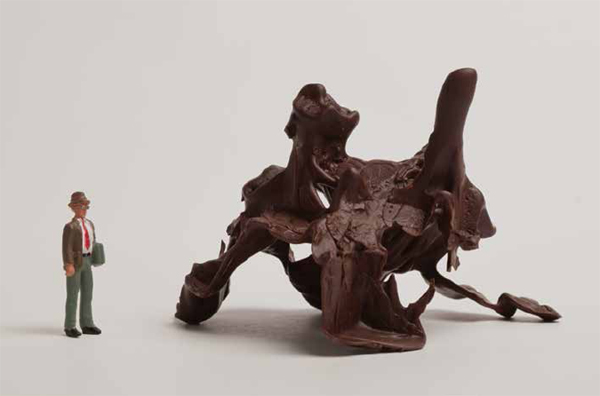
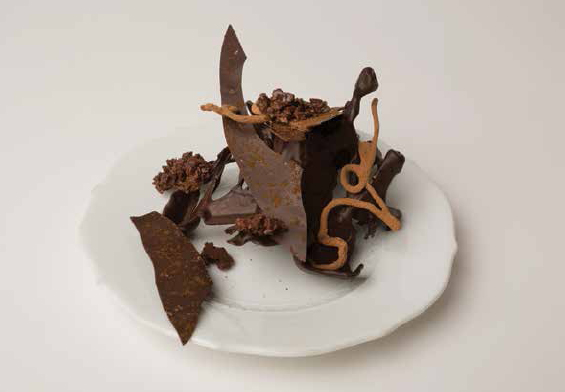
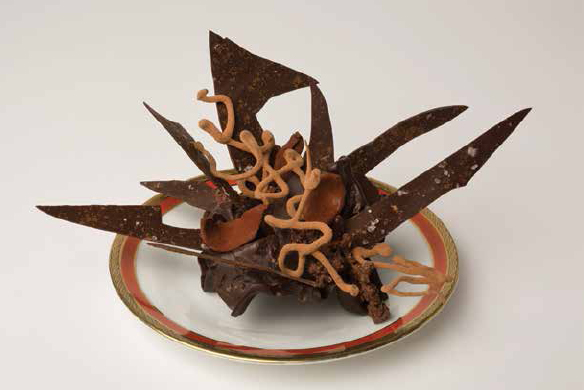
I was not the first person to pour tempered chocolate into ice to create a “tree.” I wasn’t even the second or third. Maybe eighty-eighth or something. It’s like that old Saturday Night Live skit where Steve Martin goes to heaven and asks Saint Peter to reveal the one fact that will shock him more than any other, and Saint Peter says, “Oh, I can’t tell you. You couldn’t handle it.” So Steve asks, “OK, what about the eighty-eighth?”
“Professional wrestling is real.”
On a busy weekend at Del Posto, we plow through a ton of these trees. We ornament them with a few different kinds of chocolate candies and whisk them out to tables celebrating weddings, anniversaries, birthdays. Or maybe to a table that didn’t like their lamb, or had to wait to be seated. Chocolate trees exist to punctuate or save the night.
But chocolate trees are also huge pains in the ass. They’re difficult to construct and annoying to transport. They’re messy to eat, too—which I actually love. Chef Cesare Casella once deliberately flipped one over at his table, raining chocolate everywhere, and then proceeded to punch the lopsided base, smashing it into pure chaos all over the linen. It was hilarious.
Building them during dinner service is a tightrope affair. Each one is unique and you have to find the right nooks and crevices in which to stuff the candies and shards to make the tree look alive. In the past I’ve had cooks who built really bad trees that had zero personality—trees with a bunch of chocolate junk just leaning against it. One fellow in particular built trees that literally looked stoned and exhausted. This drives me insane. It’s the one thing that sends me running around the kitchen like a psychopath: Make it look alive! Make it look scary! Make it look like it’s jumping off a cliff!
Dead.
Alive.
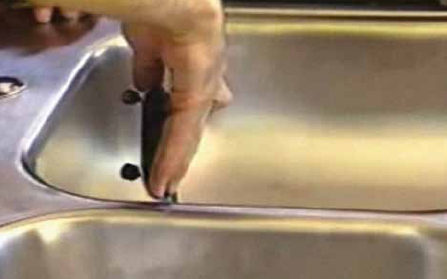
Roger Rodriguez, a former sous-chef and chocolatier, used to be in charge of pouring kilo upon kilo of chocolate into ice to keep our trees in stock. On Sunday mornings (Roger’s Monday), he’d arrive refreshed from a relaxing Friday and Saturday off and often say, “How many fucking trees did you guys sell last night?! It’s straight up deforestation in here.”
Yield: However many weird-size trees you decide to make
Chocolate, very best quality, chopped into small pieces 3½ cups (450 grams)
Big bowl of irregularly crushed ice chunks
1. In a microwavable bowl, zap 3 cups of the chocolate in the microwave in 30-second intervals, being careful not to burn the chocolate. If you burn it, believe me, you will know—it’ll smell really bad. (If you don’t have a microwave, use a double boiler.) Bring it up to 120°F and then add the remaining ½ cup chocolate. The addition of the chopped chocolate will cool down the microwaved mixture. Let it come down to 81°F.
2. Reheat the chocolate in the microwave gently in 5-second spurts to bring it back up to 85°F. At this point your chocolate will be in temper and you can pour it over the ice, making sure to drizzle it into the crevices. Working quickly, make free-form shapes inside the cracked ice. The chocolate will set as soon as it hits the ice.
3. Allow the chocolate to rest in the ice for 15 minutes. Gently remove it, using a paring knife to pick out any remaining pieces of ice. Allow the chocolate to drain upside down until completely dry. Store, tightly wrapped in plastic, in a cool, dry area, for up to two weeks.
To serve: We put all sorts of other weird and complicated chocolate pieces and candies in ours and there are no real rules (see above). Decorate yours however you’d like.
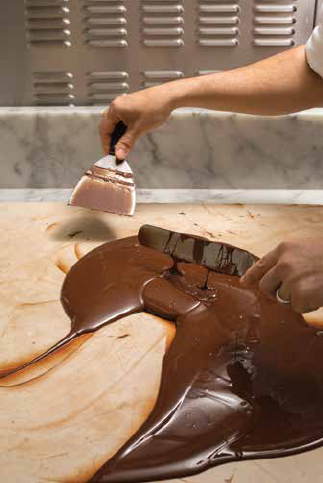
Roger tempering the chocolate sans microwave.
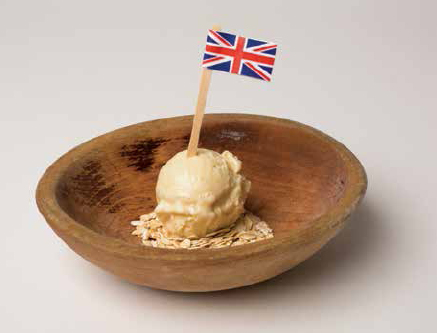
This is not chocolate gelato for a ten-year-old’s birthday party. Unless you hate the kid. In that case make him a sundae with this.
I can tell you that my Strawberry Gelato (here) is all gloss and rainbows and newborn puppies stumbling around on the beach on the best summer day. But this stuff is dark and bitter, brooding, a gelato that resides in the Norwegian forest wearing matte-finish corpse paint, black fading into gray. That’s why it’s in this section, far away from those other, friendly gelatos.
Caramelizing the sugar has two effects: It helps the gelato stay stretchy and smooth and it makes the gelato taste less sweet (which is a bit odd because we are adding sugar). I toss in two types of cocoa powder to make it feel a little chalky—the way a Fudgsicle tastes a little chalky. Except this is the mean Rosemary’s Baby Fudgsicle made by the weird neighbors.
Yield: 1½ quarts
Water ½ cup (118 grams)
Sugar 1 cup (200 grams)
Whole milk 1 quart (1,000 grams)
Heavy cream 6 tablespoons (100 grams)
Milk chocolate 6 tablespoons (50 grams)
Bittersweet chocolate, very best quality, chopped 1 cup (125 grams)
Dextrose 1 tablespoon (25 grams)
Low-fat milk powder ⅓ cup (25 grams)
Light cocoa powder ¼ cup (25 grams)
Dark cocoa powder 5 tablespoons (38 grams)
Salt to taste
1. In a small saucepan over medium-high heat, combine the water and sugar, stir until dissolved, then leave the sugar alone and allow it to darken in color (caramelize). When the sides of the pan become dark, swirl the caramel to mix it in—do not stick any type of utensil in it or you will probably ruin the process.
2. Whisk the milk and cream into the caramel. (This stuff is hot. There will be steam. Be super careful.) When the milk and cream are incorporated into the caramel, bring the mixture to a boil, or wait until the caramel is melted, about 2 minutes.
3. In a large bowl, prepare an ice bath.
4. In another large bowl, combine the milk chocolate and dark chocolate and pour in the hot milk–caramel infusion. The chocolate will melt very quickly. Allow the mixture to sit for a few minutes and the hot caramel will do the work for you.
5. Add the milk powder, light cocoa powder, dark cocoa powder, and salt, and combine using an immersion blender.
6. Set the bowl in the ice bath. Let the mixture cool, cover the bowl with plastic wrap, and refrigerate for at least 3 hours. If you have time, place the mixture in an airtight container and refrigerate overnight.
7. Spin the gelato in an ice cream machine according to the manufacturer’s instructions. Or use the dry-ice method in your stand mixer (see here).
This coating is so simple and so perfect I find myself trying to build recipes around it. The cocoa butter makes it like Magic Shell, hardening the instant it hits something frozen.
Yield: 3 cups
Bittersweet chocolate, very best quality, chopped 2 cups (250 grams)
Unsweetened chocolate, 100%, very best quality, chopped ⅓ cup (50 grams)
Cocoa butter 1⅓ cups (300 grams)
Extra-virgin olive oil 1 tablespoon (15 grams)
Salt to taste
In a large microwavable bowl, melt the chocolate and cocoa butter in the microwave in 30-second intervals, making sure it doesn’t burn. (If you don’t have a microwave, use a double boiler.) Whisk in the olive oil and salt.
To serve: This is used with Tartufo al Caffè (here), Bastoncino (here), and Free-Form Caramelized Chocolate Truffles (here). If you’d like, create your own uses for it.
Sloane Crosley is the author of I Was Told There’d Be Cake, which came out in 2008, the year I started at Del Posto. It’s a funny book of essays that I’ve read eight times. Sloane and I are on the board of directors for the Housing Works bookstore in SoHo, and we’re always the two who somehow get out of every board meeting with a poor excuse like “I’m moving that day” or “I have band practice.” She is currently writing a novel.
Taste buds look like ball sacks. They really do. Bud sacks. And your mouth is just covered in them.
The sweet ones are right up front, in the tongue’s luxury box seats. So now when someone says they have an amazing story or a factoid that was “on the tip of my tongue,” you can go ahead and assume they’re thinking of something or someone pleasant. I shouldn’t know anything about taste buds. I shouldn’t know how they work or what they look like. You, a total stranger, should be able to trick me into believing that all taste buds are shaped like Elvis’s profile. Alas, I have seen too much.
I became entranced with taste buds during freshman year of college, when I attended an Intro to Chemistry lecture. (Let the record show that after being formally “introduced,” chemistry and I instantly started seeing other people.) In trying to educate a bunch of would-be bohemian liberal-arts students about chemical bonds, the professor told us a story about a guy he knew who had developed a chemical compound for an artificial sweetener. Apparently, the team of chemists behind this now-famous sweetener made it too perfect. The flavinoids or enzymes or what have you imitated brilliantly the compound that we all know as sugar. Too brilliantly. More brilliantly than nature intended.
As early trials for this sugar in drag began, the artificial sweetener was dosed onto the taste receptors of a group of volunteer schlubs. (Who signs up to eat fake sugar? What personal life events had to be canceled in favor of sucking chemicals off a Popsicle stick? Come to think of it, that doesn’t sound so bad.) The volunteers apparently got more than they bargained for. Instead of simply recognizing the delightful presence of “sweet” and moving on, the sweetener locked into their taste buds. These people had the taste of sugar lodged on their tongues for weeks. Weeks of tasting nothing but sugar.
Years after my Intro to Chemistry class, the “miracle fruit” (a berry) became trendy for temporarily altering the taste of everything consumed in its wake. There were Wall Street Journal and New York Times articles on the subject. You say you want to turn “making lemons into lemonade” from an expression to a reality? The miracle fruit is the way to go. It’s the real deal, despite the silly name. But unlike with the artificial sweetener, the effects are short-lived. They pass quickly, and then you’re back to being you. Your tongue is your tongue. Eggplant tastes like eggplant again.
When the miracle fruit became popular, I remembered the volunteers who taste tested the too-perfect sweetener. I remembered the sympathy I felt for them. What would happen to me if day after day I tasted nothing but sweetness? Would I start punching people at random? Would I rip mustard greens from the ground and gnaw at them psychotically, roots and all? How long before I started eating paprika and rocks for breakfast? I don’t know.
What I do know is that I love sugar. I love the time it spends with me when I consume it. I love that it generally leaves me wanting more. Whatever’s going on with my tongue, I have “sweet teeth” lining both sides. I love sugar so much that even knowing what I know, I still wouldn’t mind trying the faulty sweetener. Especially if it were presented as a “would you rather” scenario. Would you rather be condemned to weeks of tasting bitter, sour, or sweet? Or, God help us all, “earthy”?
Maybe the correct answer—the austere answer—is bitter. Maybe that’s the key to maintaining sanity under these hypothetical conditions. But I don’t fantasize about bitter. Bitter didn’t send me to the college library to look up taste bud diagrams. Rather, I fantasize about a meal of sweets, about a steak made of chocolate ganache with lavender marshmallow grizzle and a salad of caramel strings drizzled in honey and garnished with whipped cream and cookie dough that crumbles over onto a helping of mashed key lime pie and poached pears that dissolve on the tongue. Suck on that, bud sacks.
FREE-FORM CARAMELIZED CHOCOLATE TRUFFLES

Pastry chefs spend a lot of time thinking about chocolate. I don’t. In the food pyramid of my mind, chocolate is the smallest quadrant. I love it, but in reasonable portions, kind of like the thrash band Slayer. I can usually get only halfway through Reign in Blood before I’m like, “OK, OK, I get it. Next.” And that record is only twenty-nine minutes long.
When I started at Del Posto, I had planned on putting some fancy molded chocolates on the cookie plate. This meant acquiring polycarbonate molds, which are expensive and hard to keep clean (chocolate is greasy!). Plus tempering chocolate is a scientific skill that requires exacting attention and lots of boring stirring—not my favorite thing to do. But when chocolate is perfectly tempered, it sets and has a very pleasing snap—if spread on acetate or molded in polycarbonate plastic, it takes on the shiny surface of the mold. It is what is known as good chocolate work, and accomplishing it is a badge of honor for most every pastry chef in the world. Some of us don’t get that badge.
When I approached Ladner with my perfectly tempered chocolate bonbons, he glanced at them deadpan and flicked one into his mouth. Without looking up from his phone, he said, “Fuck, it’s sweet. And can you make it less shiny? Looks fucking industrial,” and then went back to some very serious business on his mobile device. This was a huge relief. I had made only ten tiny pieces and it had taken all morning. I possess neither the skill nor the desire to make that kind of chocolate work into a daily routine.
I remembered a free-form chocolate truffle recipe from one of the River Café cookbooks that was rustic, totally don’t-give-a-shit Italian, and completely beautiful. I combined that aesthetic with a caramel ganache recipe I had and I was done. These are the least shiny chocolate candies in New York City, for sure.
Yield: At least 24 truffles
Heavy cream 1½ cups (357 grams)
Bittersweet chocolate, very best quality, chopped 3 cups (940 grams)
Unsalted butter ¼ cup, or ½ stick (57 grams)
Salt to taste
Natural unsweetened cocoa powder 1 cup (86 grams)
1. Place a large heavy saucepan over high heat for 20 seconds. Add the sugar. It should start smoking and caramelizing immediately. Swirl the pan to avoid hot spots until the caramel is almost black. (But not quite! Your smoke alarm might go off, but it’s OK.) Remove the sugar from the heat and add the cream. Be careful: It will bubble up violently.
2. Return the mixture to low heat and cook, stirring constantly, until you have a caramel sauce, about 2 minutes.
3. In a medium bowl, combine the chopped chocolate and the warm caramel and emulsify using an immersion blender. Add the butter and blend until shiny. Go easy: You can overmix it at this point. Add the salt, stir, pour the mixture into an airtight plastic container, and refrigerate for at least 4 hours, preferably overnight.
4. Use your finger to pull out irregular shapes and toss the truffles in the cocoa powder.
To serve: Serve immediately or store in a sealed container for up to 1 week.

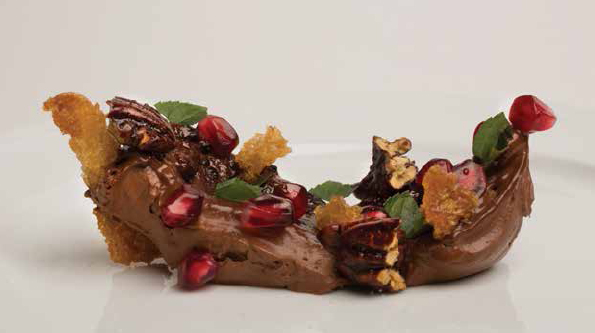
A tartufo dessert is traditionally a ball of hazelnut gelato stuffed with syrupy dark amarena cherries and coated in chocolate. It is meant to mimic a black truffle, but it’s a bit too perfect. A truffle is bumpy and awkward, with divots and holes. In comparison, a typical tartufo seems mass produced.
I hate doing things the perfect way, so I set out to make a tartufo that actually looked like a truffle. Lidia Bastianich, another of my bosses, had been gently encouraging me to put a coffee dessert on the menu, and so far I had been shooting blanks. This was my opportunity.
I wanted to make a semifreddo (an Italian frozen mousse) flavored with ground coffee beans. I’ve never been an avid coffee drinker—the stuff actually makes every part of my body, from my brain to my heart to my joints, feel insane. So I did what any new employee would do. I asked the chef.
Before Del Posto, Ladner was the chef and menu mastermind at Lupa, Manhattan’s phenomenal West Village restaurant where I had my first tartufo. An encyclopedia of all things Lazio—the Italian region where Rome resides—he began telling me about Sant’ Eustachio Il Caffè, in the heart of the city, right around the corner from the Pantheon. The Pantheon as a structure is crazy. I was bummed to find that it’s now a church. It’s a pagan monolith, un-churchlike in every way. In any case, Sant’ Eustachio is Ladner’s favorite joint in Rome to grab an espresso and he waxed poetically about the baristas and how their stations are guarded carefully by pieces of cardboard so snoopy customers can’t witness their cup work. He spoke slowly and methodically, describing in detail Sant’ Eustachio’s otherworldly crema, the frothy head on espresso. I don’t give a shit about coffee lore, but I was completely rapt. Ladner has enviable storytelling talents.
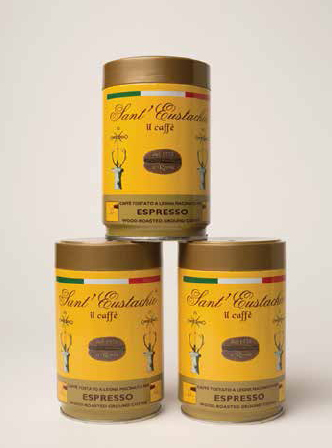
We ordered some Sant’ Eustachio beans in from Rome to flavor our semifreddo. It pleased the conceptual quadrant of my brain to no end. The semifreddo was excellent. We poked and prodded the frozen base quickly, making a massively irregular shape rather than a perfect globe. We dipped it into a Magic Shell–like chocolate and set the tartufo, just like a real truffle. It was fun, and there were no molds in sight. My inner Italian grandma beamed.
A few years later, when I finally got to visit Rome, I went sightseeing at the Pantheon at the crack of dawn, well before the mobs of tourists descended. It was quiet and peaceful. I sought out Sant’ Eustachio through the pretzeled streets, found the counter, and drank a supremely frothy espresso. I was psyched. I walked across the street, bought a map, and returned to Sant’ Eustachio to study it. I sat on one of the empty patio chairs for a half second to figure out the route to Campo dè Fiori. The barista came outside, pointed at me, and told me with a very efficient Italian-style hand motion and violent twisting of his lips to get the fuck out . . . now.
(Note: These take 2 days, owing to freezing times.)
Yield: 15 to 20 tartufos
STEEPED COFFEE CREAM
Espresso, absolute best quality, ground ¾ cup (83 grams)
Salt to taste
Zest from ½ lemon
Heavy cream 1⅓ cups (333 grams)
1. In a small saucepan over medium heat, combine the coffee, salt, lemon zest, and cream and bring to a boil, whisking occasionally. When the mixture starts to boil, remove it from the heat.
2. Let the coffee cream cool to room temperature on the countertop, then transfer it to an airtight container and refrigerate overnight.
TARTUFO MOUSSE
Steeped coffee cream, strained (above)
Heavy cream 1⅓ cups (333 grams)
Egg whites 6 (166 grams)
Sugar ⅔ cup plus 1⅔ cups (133 grams plus 325 grams)
Egg yolks 11 (200 grams)
Chocolate Coating (here)
1. Get a baking sheet into your freezer somehow and let it get good and cold.
2. In the bowl of a stand mixer, using the whip attachment, combine the steeped coffee cream, heavy cream, egg whites, and ⅔ cup of the sugar at medium speed until you have stiff peaks. Transfer the mixture to a separate bowl, cover with plastic wrap, and refrigerate until needed. Rinse out the bowl and the whip attachment.
3. In the bowl of the stand mixer, using the whip attachment, combine the egg yolks and the remaining 1⅔ cups sugar at medium speed until the egg yolks are pale and shiny. Fold the yolks into the coffee whipped cream with a rubber spatula, cover with plastic wrap, and freeze overnight.
4. Wearing latex gloves, grab a big scoop of the frozen coffee mousse and mold it with your hands into a free-form lump, about 1½ inches around. Place it on the frozen baking sheet in your empty freezer, and continue until all the mousse is formed. Freeze for 1 hour. Dip each tartufo in the chocolate coating, reserving the rest for serving, and freeze overnight.
CURED LEMON
Lemon 1
Sugar 8 teaspoons (33 grams)
Salt 1 teaspoon (4 grams)
1. Spray a baking sheet with nonstick cooking spray, attach a piece of parchment to it, and place it in the freezer.
2. Trim the ends off the lemon and cut it in half lengthwise. With the sharpest knife you have, cut the thinnest pieces of lemon flesh you can, like slices of prosciutto.
3. In a medium bowl, combine the sliced lemon, sugar, and salt and coat with your fingers. These will store for 1 day.
FOR SERVING
Croutons (here)
To serve: Put some of the reserved chocolate coating on a plate and top with a tartufo. Add some croutons and a couple irregular slivers of cured lemon on top. Eat straight away.

See here.
BAND TOUR FOOD DIARY: SKULL KONTROL

Zzzzz Skull Kontrol, 2000
By the time I joined Skull Kontrol, I’d started drinking alcohol, and our tour in 1998 was my first as a non-teetotaler. I have to admit, it changed the whole dynamic. In the past, with Young Pioneers, for example, if we played at a bar (a rarity), we would all give our drink tickets to Marty, the bass player. The night always ended with Marty blacked out in a fetal position in the back of the van.
On one tour, Skull Kontrol did the entire country in two and a half weeks. That’s beyond fast. By the time we had arrived in a new town, we were more concerned with beer than food—at that pace, it’s not really possible to be food vigilant. Our guitarist, Andy, was obsessed with Taco Bell, so we ate there a lot. At least Taco Bells are easy to identify from the highway, so it wasn’t especially time-consuming. We had a thousand Veggie Delite sandwiches from Subway, in Colorado, say, or Wyoming. To this day the yeast-and-soured-pickle smell of Subway inspires in me both nostalgia and nausea. We became expert navigators of Flying J truck stops near the truck driver showers and the convenience store auto-parts sections, neither of which was known for having stellar produce. It all sounds negative, but it wasn’t at all. With Skull Kontrol, there was also a marked increase in the number of females attending the shows. It had everything to do with Kim Thompson, our radical bass player. Understandably, these ladies would storm the stage after shows to talk to her; she’s still the best.
One morning, as we sat in our sleeping bags eating spaghetti pomodoro on his living room floor, Corey Rusk, of Touch and Go Records, asked if he could put out a Skull Kontrol record. The details were discussed as I admired his professional-style kitchen (lots of stainless-steel surfaces). It was 1998 and I’d still never stepped foot in a professional kitchen. We eventually did two records with Corey, but the band was already winding down.
It was in this era that I’d started wearing a threadbare Joy Division shirt inside out. Don’t ask. I have no recollection of why. It was 1998.
After our final show, in the summer of 1999, we drove straight from Chicago home to DC. It was during an intense summer heatwave, and it was sixteen hours of no fun and lots of gummy bears, pretzels, and Dr Peppers from the gas station. We arrived back in DC and went straight to the Raven Bar and Grill, our favorite Mount Pleasant spot. There was no grill. They didn’t serve food. Which sums up Skull Kontrol’s relationship to food nicely.
A few months after Skull Kontrol split up, in September 1999, I got my first real kitchen job at Galileo in Washington, DC. Arriving at my interview in a suit, carrying a faked résumé with content that would have been of no use for anyone (I said I worked at the University of Maryland food co-op making tofu and sprouted bean sandwiches), I talked my way into the job. Laurie Alleman-Weber, the pastry chef at the time, took a massive leap of faith and I signed on to work for seven bucks an hour. I was twenty-seven years old. It was technically my first real job. I finally had an occupation.
Walking into the Galileo kitchen, I knew instantly that I was going to be a cook for the rest of my life. It was as if a higher force tapped me on the shoulder and said, “Fuck it, man. Here you are.” My initials are BOH—in restaurant terminology “back of house,” where the kitchen staff resides. Back then I had no business being in a fine-dining kitchen. But I took the job as performance art. I never spoke to anyone in the kitchen about playing in a band. The cooks and chefs were of the old school variety, and I was a painfully quiet and shy weirdo, there to learn the ways of the fine-dining kitchen. And at the time, unless I had been in Pearl Jam or Alice in Chains (or some other cookie-cutter hair outfit), none of the staff would have given a shit anyway. (Continued here.)
This goes in the cookie box at Del Posto. If it is even the slightest bit humid outside, it won’t work. (Don’t try.) I learned to make this in Los Angeles, at Campanile, where during family meal the entire kitchen left for a smoke break, even the dishwashers (dishwashers are usually way too smart to be smokers). It was weird. That was the first time in my career where the smokers outnumbered the nonsmokers. The perfectly airy chunk of honeycomb has a slightly smoky quality, like a campfire—and maybe, to me at least, the alley behind Campanile at 4:30 p.m.
Yield: 1 big blob of honeycomb, about a baking sheet’s worth
Sugar 1½ cups (300 grams)
Water ¼ cup (60 grams)
Corn syrup ½ cup (82 grams)
Baking soda 1 tablespoon (13 grams)
Bittersweet chocolate, very best quality, chopped 1½ cups (200 grams)
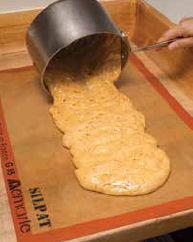
1. Line a baking sheet with a Silpat and set aside.
2. In a medium deep-sided saucepan over medium-low heat, mix the sugar, water, and corn syrup, making sure there’s no sugar on the sides of the pot (otherwise it will crystallize). Cook until it reaches a light caramel, tan but not brown, about 15 minutes.
3. Whisk in the baking soda for 1 second. The caramel will bubble up to the top of the pan. Remove from the heat and, in a single motion, pour the bubbling caramel mixture onto the prepared baking sheet. The bubbles create the aerated, textured interior of the honeycomb. Let it cool completely, undisturbed. If you touch it or even look at it for too long, it will collapse and be ruined.
4. Using a paring knife, break the honeycomb into as many irregular chunks as you can while maintaining the airy, holed structure. There will be a lot left over—throw it out or eat it.
5. In a small microwavable bowl, melt the chocolate in the microwave in 30-second intervals, stirring in between so it doesn’t scorch. (If you don’t have a microwave, use a double boiler.)
6. Using a fork, gently dip the chunks of honeycomb into the chocolate to coat and return them to the baking sheet to cool. Store in an airtight container in the freezer for up to one week. The honeycombs will last for only 1 day at room temperature before they start to crack. After 2 days, they’ll stop being crunchy, so eat them in a day if you aren’t freezing them.
To serve: There’s not all that much you can do to present this. It is its own beautiful thing. Put it on a plate and share.

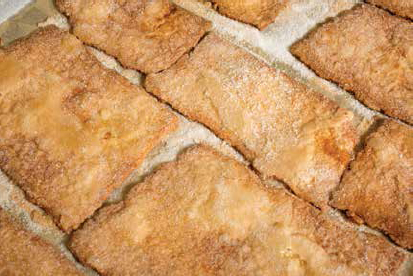
Torta Caprese is an Italian brownie, named for the island of Capri, and this is a very traditional version. It’s easy as hell, but like everything else in this book, it requires really nice chocolate. It relies on walnuts and the superpowers of egg whites for structural support.
Torta Caprese is also naturally 100 percent gluten free, making it perfect for Passover or for that friend who is not eating gluten for whatever very real or totally imagined reason.
Yield: One baking sheet of brownies
Bittersweet chocolate, very best quality, chopped 1½ cups (200 grams)
Walnuts, chopped 1¾ cups (200 grams)
Sugar ¾ cup plus ¼ cup (150 grams plus 50 grams)
Salt 2 teaspoons (8 grams)
Unsalted butter ⅔ cup, or 1⅓ sticks (155 grams), melted
Eggs 4, separated
1. Preheat the oven to 325°F.
2. In a food processor, pulse together the chocolate, walnuts, ¾ cup of the sugar, and the salt until you have chunks of chocolate and walnut that are not huge but not totally obliterated either. You don’t want a paste. Avoid that.
3. Transfer the chocolate mixture to a large mixing bowl. Add the butter and mix well with a rubber spatula. Add the egg yolks and stir to combine. Set this chocolate mixture aside.
4. In the bowl of a stand mixer, using the whip attachment, beat the egg whites on medium speed, slowly adding the remaining ¼ cup sugar and beating continuously until the whites have a meringue-like texture. Do not overwhip.
5. Fold the whites gently into the chocolate mixture and pour the batter onto a baking sheet. Bake until golden, 20 to 25 minutes, or until a toothpick inserted into the center comes out clean.
6. Let the cake cool in the pan and cut it into chunks. This also freezes beautifully, and will last for up to 2 months. Just thaw and serve.