“I drink milk, I drink milk, I drink milk, I drink milk, and I don’t care what people say”—“I Drink Milk,” Teen Idles, 1980
I grew up surrounded by vegan and vegetarian propaganda. In the late 1980s and through the 1990s, vegetarianism was an unavoidable by-product of punk rock. I’d taken to it eagerly. And then eventually it turned into sort of vegetarian, which is where my diet resides these days.
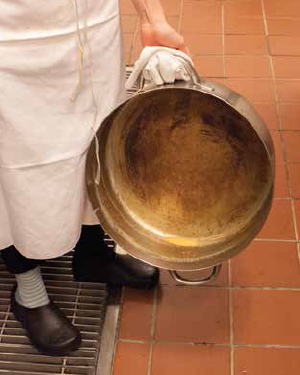
Milk is delicious, and milk aged is cheese. As Mario Batali is fond of saying, “Cheese is milk made immortal.”
I was allergic to the stuff as a kid. I grew out of it and had my first real helping at a preteen pizza party at a Baltimore Blast indoor soccer game. I’ve still never had an actual glass of milk, Christoph Waltz style, but now I’m completely obsessed with the stuff. I had better be. As a pastry chef, I traffic in dairy.
I suggest you start a relationship with a dairy farmer. You’ll be able to find one at your local greenmarket. Buy her cream, her milk. It will be more expensive, but you are going to use dairy sparingly anyway, so that won’t be an issue. Get good, weird cheeses from your local monger. I guarantee the folks who run your neighborhood shop are fanatical cheese nerds and will let you sample lots of stuff. I’m not trying to turn you into an elitist with the little boutique food shops, or torch your kid’s tuition fund in the process. Really, I’m not. Just get the good stuff and cherish it.
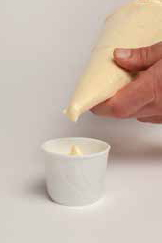
Don’t eat too much of this. It’s meant to be the filling for something small, like a doughnut (see here) or a cream puff. It’s really just a vanilla pudding, but it’s the richest vanilla pudding you have ever had. Even as the filling for a regular-size éclair you’re going to feel pretty clobbered and in need of a nap if you eat the entire thing. Naps are good, though. I have no problem with naps. If you plan to smoke pot and do some cooking, make something else. Don’t make this. You will eat it all and wake up angry and in pain.
Yield: 1 quart
Whole milk 2⅔ cups (650 grams)
Vanilla bean 1, scraped
Egg yolks 7 (126 grams)
Cornstarch ⅓ cup (40 grams)
Sugar ¾ cup (150 grams)
Unsalted butter 3 tablespoons (42 grams)
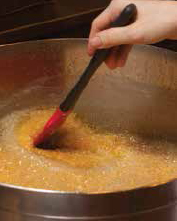
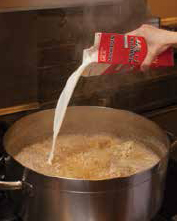
1. In a medium saucepan over medium heat combine the milk and vanilla bean scrapings and bring to a boil.
2. In a small bowl, whisk together the egg yolks, cornstarch, and sugar.
3. Add a little of the warmed milk to the egg mixture to temper. Add the rest of the egg mixture to the milk mixture and return to a full boil for at least 2 minutes, to cook out the cornstarch flavor.
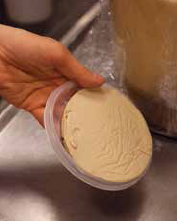
4. In the bowl of a stand mixer using the paddle attachment, combine the cream mixture and butter on medium speed. When the bottom of the mixer bowl is cool to the touch, the cream is done. Store in an airtight container for up to 1 week in the fridge.

For the opening of the new Bastianich restaurant Orsone in Fruili, I had a real piece-of-shit gelato machine. As someone who puts ice cream on nearly every dish, I was crippled by this thing, which was one part stoned fat kid and two parts giant middle finger. It worked, but only when it wanted to, and then only with a massive chip on its shoulder.
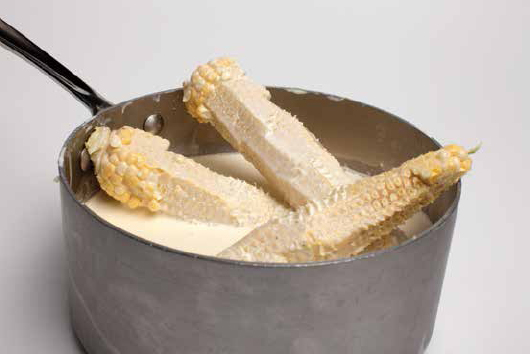
My deputy Annie and I made flavored whipped creams rather than deal with that goddamn Carpigiani Quartetto machine (the name rankles my neck hairs still). It was summer, and we had amazing Italian apricots and not-so-hot Italian corn on the cob. For all the polenta consumed in Northern Italy, you would think you could find nice fresh corn. I found only weird, starchy garbage.
We placed the apricot pits on a dish towel and cracked them with a frying pan: It’s not a fast method, but it’s really fun, ominous, and gratifying. We extracted the bitter almond inside and used it to make a whipped cream. Excellent. It has a strong marzipan flavor, with a slight burn on the back end that feels illicit. We named it “pit cream” because all the official terms for what we were doing were French and boring. Hey, Annie, your pit cream doesn’t taste enough like nuts. We were working eighteen-hour days, and the low-hanging-fruit comedy lobes of our brains were perpetually engorged.
The corn was inedible. It tasted like corn, but the kernels refused to break down as you chewed. So we stripped the cobs and soaked them in cream to make a corn stock. The cobs looked like chicken bones or chicken necks floating in the pot. But they infused the liquid with a beautiful corn flavor: a perfect match for blackberries.
On the second day we were open for service, an American tourist at the bar requested an Irish coffee. We had only the corn cream ready and whipped, so we went with that. The bartender didn’t return with a complaint, so I gather it worked out just fine. Not that I recommend using it in Irish coffees, or drinking Irish coffees at all.
CORN CREAM
Yield: 1½ cups
Heavy cream 2 cups (500 grams)
Corn cob 1, stripped of kernels
Powdered sugar ¼ cup (30 grams)
Salt to taste
1. In a medium saucepan over low heat, warm the cream. Add the corn cob, bring to a boil, and remove from the heat. Let the milk infuse on your countertop for 1 hour.
2. Strain the mixture through a chinois or fine-mesh strainer into a clean bowl and refrigerate until chilled, about 1 hour. Meantime, place an empty mixing bowl in the freezer until it is very cold.
3. Transfer the cold corn cream to the cold mixing bowl, add the powdered sugar and salt, and whisk until fluffy.
PIT CREAM
Yield: 1½ cups
Apricot pit nuts about 12
Heavy cream 2 cups (500 grams)
Powdered sugar ¼ cup (30 grams)
Salt to taste
1. Fold the apricot pits in a sturdy kitchen towel and whack with a frying pan to break them open. Inside the pit there is a nut that looks kind of like an almond. It has a soft white flesh. Remove the flesh parts and discard the exteriors until you have ¼ cup (50 grams). This is a labor of love. (Don’t eat these kernels, by the way. They are poisonous.)
2. In a medium saucepan over low heat, warm the cream, add the pit nuts, and bring to a boil. Remove the mixture from the heat and let the pit nuts infuse the cream on your countertop for 2 hours.
3. Strain the mixture through a chinois or fine-mesh strainer into a clean bowl and refrigerate until chilled, about 1 hour. Meantime, place an empty mixing bowl in the freezer until it is very cold.
4. Transfer the cold pit cream to the cold mixing bowl, add the powdered sugar and salt, and whisk until fluffy.
To serve: Use either the pit cream or the corn cream with the Polenta Shortcake with Blackberry Compote (here)

Del Posto is an extraordinary place to work. I bow and kiss the metal grates of the employee entrance ramp before every shift. All restaurants have something unique about them—usually it’s some variety of dysfunction. But Del Posto stands out as unique in one outrageous way. Instead of having a single visionary chef on board, Del Posto has three: chefs Mark Ladner, Mario Batali, and Lidia Bastianich. To say nothing of the force that is Joe Bastianich, the dude who makes sure we have a roof. I tell my staff often that our bosses are the four most important and influential people in the United States in terms of pushing Italian food forward—probably even the world. They are all fully, unapologetically Italian in every possible way, which means that inherently they’ll have different visions from time to time, if not minute to minute (it’s an excitable culture, as you’ve probably heard). It’s my job to make sure each of those visions is taken into consideration to produce a unified whole when it’s my turn.
Take zabaglione. It’s easy to make: very simple, very Italian. You need to finesse it, but it’ll always be a straightforward pleasure that screams Italia! It has a beautiful whiff of Marsala.
Mario digs it fluffy and puffy, whisked vigorously and gently simultaneously (not easy) so the result is a whipped cream–like cloud, airy and voluptuous. Lidia likes it almost completely without air, creamy, like an anglaise or hollandaise. Pourable. Her version is equally sexy, made with a rubber spatula in a calculated figure-eight motion with your wrist. It requires mother-like patience.
Both zabagliones are great. I’m not going to argue with either of them. It’s like, what’s better: Black Flag or the Misfits?
Yield: About 2 cups
Egg yolks 6 (108 grams)
Marsala ¼ cup (59 grams)
Sugar ¼ cup (50 grams)
Salt to taste
1. In a medium saucepan, bring 3 cups of water to a simmer over medium-low heat.
2. In a medium heat-safe bowl, whisk together the egg yolks, Marsala, sugar, and salt. Place the bowl on top of the simmering water and whisk gently until you have a ribbony, frothy mixture. Keep moving the bowl around as you whisk. You don’t want scrambled eggs. You want an unset custard.
1. In a medium saucepan, bring several cups of water to a simmer over medium-low heat.
2. In a medium heat-safe bowl, whisk together the egg yolks, Marsala, sugar, and salt. Put your whisk down. Grab a rubber spatula.
3. Place the bowl on top of the simmering water and stir the yolks in a figure-eight motion with the spatula until you have a creamy, mayonnaiselike sauce. Keep moving the bowl around as you stir. You still don’t want scrambled eggs.

Lidia Style.
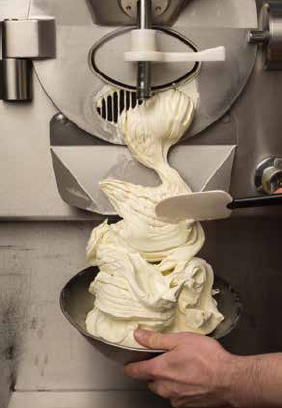
It is impossible to make restaurant-perfect gelato at home. In the same way you can’t make a pizza in your home oven that competes with the ones made inside your favorite pizza joint’s 900-degree wood-burning oven. It’s a hardware issue.
Still, gelato is at least several hundred years old. Fancy machines didn’t invent it. The art of the technique will come in more subtle ways, and with time and patience. It will always be tricky coaxing ingredients into a beautiful gelato, but that’s exactly why we want to make gelato. Make sure everything is very cold when you churn. Hell, if you’re using a “freeze the chamber” machine, clear everything out, run an extension cord, and stick the machine in the freezer.
This is where you’ll begin for most all of your gelatos. Flavoring gelatos can be tricky, so I’ve also put together several recipe modifications to illustrate the techniques I use most often.
Yield: 1½ quarts
Egg yolks 5 (90 grams)
Whole milk 2 cups (500 grams)
Heavy cream ⅓ cup (75 grams)
Condensed milk ¼ cup (80 grams)
Nonfat milk powder ¼ cup (25 grams)
Dextrose 2 tablespoons (25 grams)
Sugar ⅓ cup (75 grams)
Honey 1 tablespoon (20 grams)
Salt to taste
1. In a large bowl, prepare an ice bath.
2. In a medium deep-sided bowl, using a rubber spatula, stir the egg yolks until they are a cohesive liquid. Do not use a whisk!
3. Add the whole milk, cream, condensed milk, milk powder, dextrose, sugar, honey, and salt, and combine using an immersion blender for about 1 minute.
4. Set the bowl in the ice bath. Let the mixture cool, cover the bowl with plastic wrap, and refrigerate for at least 3 hours. If you have time, place the mixture in an airtight container and refrigerate overnight.
5. Spin the gelato in an ice cream machine according to the manufacturer’s instructions. Or use the dry-ice method in your stand mixer (see here).
MINT GELATO/PARSLEY GELATO/BASIL GELATO
Yield: 1½ quarts
Fresh herb of choice 1 bunch chopped
Whole milk 2 cups (500 grams)
Egg yolks 5 (90 grams)
Heavy cream ⅓ cup (75 grams)
Condensed milk ¼ cup (80 grams)
Nonfat milk powder ¼ cup (25 grams)
Dextrose 2 tablespoons (25 grams)
Sugar ⅓ cup (75 grams)
Honey 1 tablespoon (20 grams)
Salt to taste
1. In a medium saucepan over high heat, bring 3 cups of water to a boil. Blanch the herbs in the water for 45 seconds, take them out, and put them in a bowl of ice water. Drain the herbs.
2. In a medium deep-sided bowl, add the drained herbs and 1 cup of the whole milk and puree using an immersion blender. Strain the puree through a chamois and set it aside.
3. In a large bowl, prepare an ice bath.
4. In a medium deep-sided bowl, using a rubber spatula, stir the egg yolks until they are a cohesive liquid. Do not use a whisk!
5. Add the cream, condensed milk, milk powder, dextrose, sugar, honey, salt, herb puree, and remaining 1 cup whole milk, and combine using an immersion blender for about 1 minute.
6. Set the bowl in the ice bath. Let the mixture cool, cover the bowl with plastic wrap, and refrigerate for at least 3 hours. If you have time, place the mixture in an airtight container and refrigerate overnight.
7. Spin the gelato in an ice cream machine according to the manufacturer’s instructions. Or use the dry-ice method in your stand mixer (see below).
Let’s talk briefly about the dry-ice method not made famous by the genius Heston Blumenthal. (We all should have made this famous by now.) It is the method I would use if I didn’t have professional-grade equipment available to me and wanted high-quality gelato.
Dry ice is not the exclusive domain of twitchy TV hazmat chefs. I’ve tried every gelato method and the dry-ice technique is pound for pound the best. It’s uncomplicated. It’s cheap. It’s quick. Getting dry ice might be a hassle, but everything’s at least a little hassle unless you love doing it. I promise you’ll love this. You’ve also already added dry ice to your shopping list to make Ladner’s Philadelphia Bellini (here). Here it is:
Buy the dry ice, in pellets if you can. Don’t touch it, and Jesus Christ, don’t let your child touch it. Put a few cups of dry ice (4 or 5 golf ball–size chunks if you can’t get pellets) in the middle of a kitchen towel and fold the towel over several times. Smash the dry ice with a heavy pot until it is a powder (no chunks larger than a Grape-Nut). Measure out 1 cup of powdered dry ice. Add this to your gelato mix inside your stand mixer, spin for 2 minutes with the paddle attachment, and put the gelato in a prechilled airtight container in the freezer overnight.
Yield: 1½ quarts
Fresh sage leaves 2 cups (64 grams)
Whole milk 2 cups (500 grams)
Egg yolks 5 (90 grams)
Heavy cream ⅓ cup (75 grams)
Condensed milk ¼ cup (80 grams)
Nonfat milk powder ¼ cup (25 grams)
Dextrose 2 tablespoons (25 grams)
Sugar ⅓ cup (75 grams)
Honey 1 tablespoon (20 grams)
Salt to taste
1. In a medium saucepan over high heat, bring 3 cups of water to a boil. Blanch the sage in the water for 45 seconds, take it out, and put it in a bowl of ice water. Drain the sage and place it in a medium bowl.
2. In a medium saucepan over medium heat, bring the whole milk to a simmer, pour it over the sage, and let it steep to however sage-heavy you want your gelato to taste—2 to 3 minutes. Strain the mixture through a chinois or fine-mesh strainer and let the sage milk come to room temperature.
3. In a large bowl, prepare an ice bath.
4. In a medium deep-sided bowl, using a rubber spatula, stir the egg yolks until they are a cohesive liquid. Do not use a whisk!
5. Add the cream, condensed milk, milk powder, dextrose, sugar, honey, salt, and the sage milk, and combine using an immersion blender for about 1 minute.
6. Set the bowl in the ice bath. Let the mixture cool, cover the bowl with plastic wrap, and refrigerate for at least 3 hours. If you have time, place the mixture in an airtight container and refrigerate overnight.
7. Spin the gelato in an ice cream machine according to the manufacturer’s instructions. Or use the dry-ice method in your stand mixer (see here).

Yield: 1½ quarts
Whole milk 2 cups (500 grams)
Active dry yeast ⅛ cup plus 1 tablespoon (36 grams)
Sugar ⅓ cup (75 grams), plus a pinch for the yeast
Egg yolks 5 (90 grams)
Heavy cream ⅓ cup (75 grams)
Condensed milk ¼ cup (80 grams)
Nonfat milk powder ¼ cup (25 grams)
Dextrose 2 tablespoons (25 grams)
Honey 1 tablespoon (20 grams)
Salt to taste
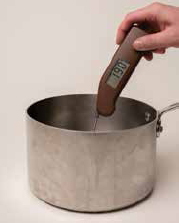
1. In a medium saucepan over medium-low heat, warm the milk to 100°F. (You definitely need to use a thermometer.) Whisk in the yeast and the pinch of sugar and remove from the heat. Allow the yeast to bloom in the warm milk for about 20 minutes, or until it gets frothy.
2. Return the yeast mixture to the stove over high heat and bring to a boil to kill the fermentation of the yeast. Strain through a chinois or fine-mesh strainer and set aside.
3. In a large bowl, prepare an ice bath.
4. In a medium deep-sided bowl, using a rubber spatula, stir the egg yolks until they are a cohesive liquid. Do not use a whisk!
5. Add the sugar, cream, condensed milk, milk powder, dextrose, honey, salt and yeast mixture and combine using an immersion blender for about 1 minute.
6. Set the bowl in the ice bath. Let the mixture cool, cover the bowl with plastic wrap, and refrigerate for at least 3 hours. If you have time, place the mixture in an airtight container and refrigerate overnight.
7. Spin the gelato in an ice cream machine according to the manufacturer’s instructions. Or use the dry-ice method in your stand mixer (see here).
Yield: 1½ quarts
Hulled strawberries 3 cups (400 grams)
Sugar 2 tablespoons (25 grams)
Juice of 1 lemon
Salt to taste
Egg yolks 5 (90 grams)
Whole milk 2 cups (500 grams)
Heavy cream ⅓ cup (75 grams)
Condensed milk ¼ cup (80 grams)
Milk powder ¼ cup (25 grams)
Dextrose 2 tablespoons (25 grams)
Sugar ⅓ cup (75 grams)
Honey 1 tablespoon (20 grams)
1. In a medium deep-sided bowl, combine the strawberries, sugar, lemon juice, and a small pinch of salt and let the berries break down, or macerate, for at least 30 minutes.
2. Puree the macerated strawberries using an immersion blender and strain through a chinois or fine-mesh strainer. Add 2 tablespoons of the pulp and seeds back into the strained puree and set aside.
3. In a large bowl, prepare an ice bath.
4. In a medium deep-sided bowl, using a rubber spatula, stir the egg yolks until they are a cohesive liquid. Do not use a whisk!
5. Add the whole milk, cream, condensed milk, milk powder, dextrose, sugar, honey, and strawberry puree, and combine using an immersion blender for about 1 minute.
6. Set the bowl in the ice bath. Let the mixture cool, cover the bowl with plastic wrap, and refrigerate for at least 3 hours. If you have time, place the mixture in an airtight container and refrigerate overnight.
7. Spin the gelato in an ice cream machine according to the manufacturer’s instructions. Or use the dry-ice method in your stand mixer (see here).
Yield: 2 quarts
Ricotta (Calabra brand is preferred and widely available) 6 cups (1,500 grams)
Simple syrup (see here) 3 cups (1,000 grams)
Honey ½ cup (170 grams)
Salt to taste
1. In a large bowl, prepare an ice bath.
2. In a medium deep-sided bowl, combine the ricotta, simple syrup, honey, and salt using an immersion blender for about 1 minute.
3. Set the bowl in the ice bath. Let the mixture cool, cover the bowl with plastic wrap, and refrigerate for at least 3 hours. If you have time, place the mixture in an airtight container and refrigerate overnight.
4. Spin the gelato in an ice cream machine according to the manufacturer’s instructions. Or use the dry-ice method in your stand mixer (see here).
This is chocolate-laced ricotta gelato. You’ll notice that I turn to it often.
Yield: 2 quarts
Bittersweet chocolate, very best quality, chopped ½ cup (156 grams)
Ricotta Gelato (above)
1. Place a large metal bowl in the freezer.
2. In a small microwavable bowl, melt the chocolate in the microwave in 30-second intervals, stirring in between to ensure that the chocolate doesn’t scorch. (If you don’t have a microwave, use a double boiler.) Set aside.
3. Transfer the ricotta gelato to the frozen bowl and, using a spoon, drizzle the chocolate over it in an irregular pattern. Fold the gelato over onto itself—don’t be gentle—and continue until you’ve run out of chocolate and there are shards of chocolate mixed throughout.
To serve: This is used with Eggplant and Chocolate (here), but can, in fact, be served a thousand ways.
I served this dish to Fergus and Margot Henderson, the awesome husband-wife chef duo from London, when they were dining at Del Posto. I figured oatmeal gelato was the most British thing on the menu then (I was thinking UK and porridge. You know, they eat loads of porridge in England, don’t they? And drink hot tea?) and I was excited to present it. At the time, I knew all about Fergus, but nothing about Margot. When I went to the table, I shook Fergus’s hand furiously and smiled. “Oh man, it’s so cool to meet you, I’m such a big fan. This is oatmeal-infused gela—” I hadn’t finished when Margot let out a loud harrumph. She held out her hand. Ashamed, I shook it. I learned that oatmeal gelato ain’t especially British. More important, I learned that you do not accidentally disrespect Margot Henderson. She will have your ass.
Yield: 1½ quarts
Old fashioned oats 4 cups (205 grams)
Whole milk 2 cups (500 grams)
Egg yolks 5 (90 grams)
Heavy cream ⅓ cup (75 grams)
Condensed milk ¼ cup (80 grams)
Nonfat milk powder ¼ cup (25 grams)
Dextrose 2 tablespoons (25 grams)
Sugar ⅓ cup (75 grams)
Honey 1 tablespoon (20 grams)
Salt to taste
1. Preheat the oven to 350°F. Line a baking sheet with parchment.
2. Spread the oats across the baking sheet evenly and toast until they are very dark but not burned, stirring occasionally to prevent scorching, about 10 minutes.
3. In a medium saucepan over medium-low heat, bring the whole milk to a simmer and then remove from the heat.
4. Add 2 cups of the toasted oats to the milk and steep for only 5 minutes.
5. Strain through a chinois or fine-mesh strainer, discard the oats, and return the milk to the saucepan. Reheat the milk to a simmer. Remove from the heat and add the remaining 2 cups oats and infuse a second time, again for only 5 minutes. Strain through a chinois or fine-mesh strainer, discard the oats, and let the oat milk chill for two hours.
6. In a large bowl, prepare an ice bath.
7. In a medium deep-sided bowl, using a rubber spatula, stir the egg yolks until they are a cohesive liquid. Do not use a whisk!
8. Add the cream, condensed milk, milk powder, dextrose, sugar, honey, salt, and oat milk, and combine using an immersion blender for about 1 minute.
9. Set the bowl in the ice bath. Let the mixture cool, cover the bowl with plastic wrap, and refrigerate for at least 3 hours. If you have time, place the mixture in an airtight container and refrigerate overnight.
10. Spin the gelato in an ice cream machine according to the manufacturer’s instructions. Or use the dry-ice method in your stand mixer (see here).

Yield: 1½ quarts
Raw cashews 4 cups (570 grams)
Whole milk 2 cups (500 grams)
Egg yolks 5 (90 grams)
Heavy cream ⅓ cup (75 grams)
Condensed milk ¼ cup (80 grams)
Nonfat milk powder ¼ cup (25 grams)
Dextrose 2 tablespoons (25 grams)
Sugar ⅓ cup (75 grams)
Honey 1 tablespoon (20 grams)
Salt to taste
1. Preheat the oven to 350°F.
2. On a baking sheet, spread the cashews out in a single layer and toast until very dark, checking on them after 20 minutes. You really want these cashews to toast, basically until they look burned, but they’re not.
3. In a medium saucepan over medium heat, bring the whole milk to a simmer.
4. In a medium heat-safe airtight container, add all but a handful of the hot cashews and pour in the hot milk. Let the nut-milk mixture cool, cover, and then store overnight in the fridge to infuse milk with molto cashew flavor.
5. In a large bowl, prepare an ice bath.
6. Strain the milk through a chinois or fine-mesh strainer and discard the nuts.
7. In a medium deep-sided bowl, using a rubber spatula, stir the egg yolks until they are a cohesive liquid. Do not use a whisk!
8. Add the cream, condensed milk, milk powder, dextrose, sugar, honey, salt, and cashew milk, and combine using an immersion blender for about 1 minute.
9. Set the bowl in the ice bath. Let the mixture cool, cover the bowl with plastic wrap, and refrigerate for at least 3 hours. If you have time, place the mixture in an airtight container and refrigerate overnight.
10. Roughly chop the reserved toasted cashews, add to the chilled mixture, and spin the gelato in an ice cream machine according to the manufacturer’s instructions. Or use the dry-ice method in your stand mixer (see here).
Yield: 1½ quarts
Egg yolks 5 (90 grams)
Whole milk 2 cups (500 grams)
Heavy cream ⅓ cup (75 grams)
Condensed milk ¼ cup (80 grams)
Nonfat milk powder ¼ cup (25 grams)
Dextrose 2 tablespoons (25 grams)
Sugar ⅓ cup (75 grams)
Honey 1 tablespoon (20 grams)
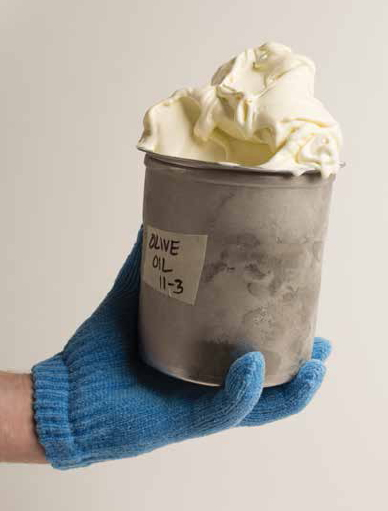
Extra-virgin olive oil ½ cup (93 grams)
Salt to taste
1. In a large bowl, prepare an ice bath.
2. In a medium deep-sided bowl, using a rubber spatula, stir the egg yolks until they are a cohesive liquid. Do not use a whisk!
3. Add the whole milk, cream, condensed milk, milk powder, dextrose, sugar, honey, olive oil, and salt, and combine using an immersion blender for about 1 minute. You want to give this a larger dose of salt than normal: It will bring out the olive oiliness of the olive oil.
4. Set the bowl in the ice bath. Let the mixture cool, cover the bowl with plastic wrap, and refrigerate for at least 3 hours. If you have time, place the mixture in an airtight container and refrigerate overnight.
5. Spin the gelato in an ice cream machine according to the manufacturer’s instructions. Or use the dry-ice method in your stand mixer (see here).
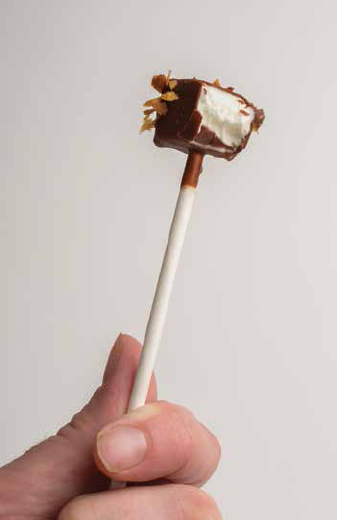
Piero, the suave, stressed-out maître d’ at Del Posto—I need that table back, please, Bello. Please, I need it, dio cane—came up with the name for these. Bastoncino translates into “stick.” You don’t have to put these desserts on lollipop sticks, but they’re pretty cute and you can find the sticks easily (you can buy them at any craft store). These are olive oil gelato lollipops that are dipped in chocolate and then rolled in salted and olive oil–fried bread crumbs. Early on I had doubts that the frozen bread crumbs would work. But they are so good, and they stay very crunchy. Someone once told me they reminded him of a Choco Taco from Taco Bell, which I did not take as an insult in any way.
Yield: Lots of little lollipops
Olive Oil Gelato (here)
Chocolate Coating (here)
Bread Crumbs (here)
1. Place two parchment-lined baking sheets (any size) in your freezer overnight.
2. Using a spoon, scoop free-form ice cream balls onto your frozen baking sheets, working as quickly as possible. Stick a lollipop stick into each one. Return the sheets to the freezer for 30 minutes.
3. Have your chocolate coating ready at room temperature and still fluid. Place the bread crumbs in a wide shallow bowl.
4. Dip each ice cream ball fully into the chocolate, and while the chocolate is still setting, dip the ball into the bread crumbs. Place the chocolate-covered balls back onto the frozen baking sheets and into the freezer to set again.
To serve: Go for it.
Nicholas Coleman knows a lot about olive oil. He is an olive oil expert. I use a lot of extra-virgin olive oil, and sometimes Nick wanders into DP and we drink different oils and talk. He has perfectly groomed facial hair, goes by “Nicky Oils.” He works in New York City at Eataly, a food emporium owned by the Bastianiches and Mario Batali. He strong-armed his way into the job. He strong-armed Mario Batali and Joe Bastianich. I cannot explain how insane that is.
ON REGIONAL ITALIAN OLIVE OILS by Nicholas Coleman
Class A extra-virgin olive oil is, after salt, the most fundamental ingredient in the culinary world. It is the king of the Italian pantry and the backbone of the Mediterranean diet. Few foods are as versatile or as useful to the home or professional cook. Olive oil pairs well with vegetables, beans, bread, pizza, pasta, cheese, soup, salad, seafood, meat, poultry, and yes, dessert.
A wide variety of boutique Italian-grown, single-estate oils has enriched the olive oil market over the past few years. How best to pair these oils with the appropriate cuisines and courses requires an understanding of their individual virtues.
Oils vary greatly in character from country to country and region to region—there are, in fact, often distinct differences evident within the same olive grove from one season to the next. Like wine, all olive oils are not created equal. Key determinants include the age and health of the trees, the olive cultivars, the timing of the harvest, the soil, the growing season weather patterns, the altitude, how quickly the olives are brought from tree to mill, and, most important, as with wine making, the skill and diligence of the grove’s caretaker.
Italy, generally, can be divided into three olive oil production zones: northern, central, and southern. Each region has its own distinctive flavor profile.
Due to the region’s typically late harvest, oils produced in Northern Italy tend to be buttery, mellow, and delicate, with soft undertones of sweet almonds or toasted pine nuts. These oils generally finish with a slight nip of black pepper and pair best with dishes in which the oil’s flavor is intended to subsume, not overpower, the other ingredients, making them ideal for finishing basil pesto, eggs, or raw fish.
Central Italy produces oils that tend to have strong aromas of freshly cut grass and bitter herbs, ending with a pungent, lingering black pepper finish that slowly trails off in the back of the throat. The cause of this intense peppery sensation—considered an attribute of high-quality olive oil—is oleocanthal, a natural phenolic compound that has both anti-inflammatory and antioxidant properties. This style of oil is best utilized where the intent is for the oil to cut through and brighten up the dish, pairing well with red meat, cannellini beans, or a simple tomato soup.
Oils produced in Southern Italy, where primarily green olives are harvested early, tend to be fruity and vibrant, with hints of green apple skin or green tomato vine, ending with a robust, peppery finish. These oils will be quite assertive when used as a finishing oil and can add to the food a pleasing fruity, zesty element. These oils pair well with grilled seafood, Caprese salad, or eggplant caponata.
A variety of approaches can be applied to pairing oil with a specific dish. One is to consider how the food is prepared: Is it raw? Baked? Grilled? Fried? Each method produces a different food “weight” that better corresponds with an oil’s particular intensity. For example, a grassier, more robust oil would be a better choice for a seasoned grilled steak than for a raw preparation, such as steak tartare.
It is also helpful to think regionally. If, for example, the goal is to re-create an authentic Tuscan dish, then the most accurate result will be achieved using a high-quality Tuscan oil. If the goal is to re-create a Sicilian dish, use Sicilian oil.
When choosing oil, the three most important pieces of information to look for on the label are the harvest date, olive cultivars, and the region from which it originates.
Unlike many wine varieties, olive oil does not improve with age, so freshness is a key quality component. Check the date. In addition, different olives will have varying organoleptic properties (taste, color, aroma, feel, etc.), and knowing the cultivars of which the oil is composed is crucial. There is a saying: “What grows together goes together.” Be sure the olives from which the oil in the bottle is produced come not only from one country, but from a specific, localized region within that country.
Most important, when choosing oil, be sure to smell and then taste it—on its own, independent of other foods—so that you can experience and then analyze its viscosity and flavor profile. This will trigger ideas about what it pairs best with. There are no firm rules here. It is very personal. With eyes closed, listen to your palate.
Finally, no single oil can solve all your culinary conundrums. Have a variety of oils on hand. At minimum, one each of the three above-mentioned types, indicated by region: a delicate finishing oil that won’t overpower basic flavors, one robust finishing oil to cut through stronger food, and one more affordable (but clean-tasting) extra-virgin olive oil for cooking.
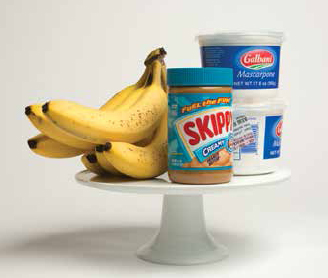
PEANUT BUTTER MASCARPONE WITH BEJEWELED BANANAS
I have never served this at Del Posto. Ladner despises bananas. But it is absolutely a killer at home, or at a restaurant where the chef won’t murder you for using bananas.
You have to use Skippy or Jif for this. The recipe is engineered for their massive sugar content. Let’s face it: Peanut butter, in the best American sense, is a dessert. How it ever became a bagged-lunch mainstay is ridiculous. It’s the Nutella of the USA.
Cheap, mass-produced peanut butter mixed with elegant, imported Italian mascarpone cheese is wrong in every way. Somehow it works. I blast the bananas in the broiler until they look like deformed jewels, top them with salty and sweet croutons, and serve in a very small portion. It’s Fat Elvis goes to the Veneto.
Yield: 4 servings
Mascarpone 1 cup (225 grams)
Peanut butter 1 cup (258 grams)
Salt 1 teaspoon (4 grams)
Bananas 2, cut into ½-inch slices
Turbinado sugar 2 tablespoons plus 1 tablespoon (50 grams plus 25 grams)
Croutons (here)
1. Preheat the oven to 500°F.
2. In a medium bowl, mix together the mascarpone, peanut butter, and salt, being careful not to overmix—the mascarpone will split. You’ll know if it does, because it will look gross.
3. On an unlined baking sheet, space out the bananas evenly, sprinkle with 2 tablespoons of the sugar, and place under the broiler until the sugar is bubbly and the bananas lose their shape, about 1 minute, maybe less.
To serve: Surround a scoop of the peanut butter cream with the bananas, top with the remaining tablespoon sugar, and finish with some croutons.
Oh man, gelatin: It is creepy stuff, for sure. It’s made out of animal bones, sometimes pigs, sometimes fish. So it’s not even vegetarian, which makes Jell-O sort of evil to me. There are other plant-based hydrocolloids that do similar gelling duties, but there is always something off about them. They lack the melt-in-your-mouth quality gelatin provides. And it makes sense, I guess, since gelatin is gunk from a once-living animal that melts at body temperature.
Don’t get me wrong, I have a long-standing relationship with Haribo gummi bears, which are one of the greatest foods on the planet and gelatin achieving its ideal. But for Christ’s sake, why do so many pastry chefs use so much gelatin? They rely on the stuff. They worship it! Is it all about control? I prefer being slightly out of control. I like food that struggles to support its own structure. Messy stuff, awkward stuff. That’s my version of Italian.
So I broke up with panna cotta a few years ago.
Some dessert menus in NYC are basically all panna cotta, just with gussied-up nomenclature. But here’s the thing: If it’s a gelatin-stabilized mousse or crème or custard or cremeux or whatever, then it is panna cotta.
Ladner has no real beef with panna cotta. (He did, however, warn me against pairing a panna cotta with a sorbet: Are you kidding me? It makes no sense texturally!) After all, a panna cotta flavored with nothing is the most Italian thing in the world. Celebrate the cream! The cow! This fucking cow! It is so beautiful! Look what it gives us! (Adam Nathanson, the guitarist from Born Against and Young Pioneers, once said to me, “You ever looked at a cow’s face close up? Cows are cool, man.”)
But the epidemic of flavored panna cottas was killing me: mango, passion fruit, strawberry, buttermilk, crème fraîche, “vanilla bean.” It was an irresponsible reliance on gelatin—way too much gelatin. It’s all bouncy, unnatural textures. Gels. The only gels I want to eat are made by Wylie Dufresne. So panna cotta and I, we split up. Said our good-byes. Collected our belongings from each other’s apartments, erased our numbers from speed dial, and walked away.
Then a couple years later, I had a panna cotta at Franny’s, a fantastic, honest restaurant in Brooklyn. Its panna cotta is molded in a cup but plated as a freestanding thing. The panna cotta is set with the bare minimum of gelatin and it bells out on the plate, shapeless. A blob. Like Pizza the Hut from Spaceballs. It comes drizzled with aged balsamic vinegar and, goddamn, it is a thing of beauty: simple, jiggly, super sexy, very Italian. Food meant for eating. I mopped the plate.
So I went crawling back to panna cotta. It was in April. A spring romance. We hung out in the park and watched the sun come up. We walked around New York City in the rain and planned a trip to Easter Island together. Wouldn’t that be rad? Have you ever been there? Me neither! Dude! We gotta do it! These days you will find panna cotta on the menu at Del Posto year-round.
I started the band Oldest with Mick Barr in 2009 as a two-person project. Mick’s guitar playing is complicated, and I play drums like a caveman. Our songs take months of rehearsing before they’re ready to be recorded. With C.R.A.S.H., my other current band, the songs can be written and played live within hours. Brown butter panna cotta is like an Oldest song.
My sous-chef Kim Janusz is 100 percent responsible for this technique and recipe. It’s her thing. I watch in awe when she makes it. It is by far the most complicated recipe in this book. But then Scotty, another cook at Del Posto, made this recipe in the tiny, generator-powered kitchen of a beach house in Maine. He said it came out perfectly, and he did it with the added handicap of having his one-year-old son strapped to his chest during the process. So give it a shot.
Day 1
Unsalted butter ½ pound, or 2 sticks (226 grams)
Heavy cream 2 cups (476 grams)
Salt ½ teaspoon (2 grams)
Whole milk, cold 2 cups (488 grams)
1. In a large pot over high heat, combine the butter, cream, and salt. The mixture will boil up and then drop. Once it goes down, begin stirring it constantly with a heat-resistant spatula. It will thicken and then break—stir it constantly, otherwise it will “butterscorch.” (“Breaking” is the milk solids separating from the fat.) When the solids have turned dark brown, your pot is smoking, your fire alarm is screaming, and the neighbors have alerted the authorities, it is ready.
2. Remove the mixture from the heat and add the cold milk . . . carefully.
3. Into a heat-resistant container, pour the brown butter milk and let it cool on your countertop. Don’t touch it. Walk away. Once the milk is cooled, cover it tightly and refrigerate overnight. (Seriously, don’t touch it.)
Day 2
Remove the brown butter milk from the fridge. If you did this right, there will be a thick layer of fat over the top of the milk. Run your knife around this fat and then lift it right off. Beneath the fat is the infused milk with its solids. It should be golden in color.
NOW YOU’LL NEED
Unflavored gelatin 4 sheets
Heavy cream 2⅓ cups (562 grams)
Light brown sugar ½ cup (100 grams), packed
Salt to taste
1. In a medium bowl filled with ice water, add the gelatin and let it bloom, 3 to 5 minutes. Wring the water from the gelatin and place it in a bowl.
2. In a medium saucepan over medium heat, warm the skimmed brown butter milk, the cream, and brown sugar. Do not let it come to a boil. Add the gelatin and cook until it is melted.
3. Strain this mixture through a fine-mesh strainer back into the original bowl, pressing it through the strainer with a spatula to get out all the flavor in the milk solids. Cover tightly and refrigerate overnight.
Day 3 (I Know!)
1. Remove the final layer of fat off the top of the milk. Under this is your delicious, perfect, really fat-free panna cotta.
2. Using a double boiler, melt the perfect, delicious panna cotta down again and then portion it into your containers of choice.
3. Cover tightly and refrigerate until the panna cotta is set, at least 3 hours, but preferably overnight.
To serve: Serve your hard-won brown brown butter panna cotta with whatever acidic fruits are seasonally available and shards of the Pasta Frolla (here). Add a touch of Maldon salt and a drizzle of good olive oil and you are done. Serve immediately, savor success.
Yield: About 3 cups
Unflavored gelatin 4 sheets
Whole milk 1 cup (250 grams)
Heavy cream 2½ cups (600 grams)
Sugar ¾ cup (145 grams)
Salt a pinch
1. In a medium bowl filled with ice water, add the gelatin and let it bloom, 3 to 5 minutes.
2. In a small saucepan over medium heat, warm the milk, cream, sugar and salt, stirring occasionally until the sugar dissolves completely.
3. Squeeze the water out of the gelatin and add it to the cream mixture, stirring gently until it dissolves. Remove the mixture from the heat and let it cool slightly. Portion the mixture into containers of your choice.
4. Cover tightly and refrigerate until the panna cotta is set, at least 3 hours, but preferably overnight.
To serve: As simply as possible.


HAND-PULLED STRACCIATELLA WITH STRAWBERRY QUICK JAM AND CROUTONS

I try to mention strawberry shortcake as often as possible. I hope you share my deep appreciation for this classic. The following variation on strawberry shortcake will confuse your friends, because it feels like a salad. And I get no greater thrill than when someone says of one of my dishes, “You know what, man? I don’t know what to even call this . . . Is it a dessert? Is it a salad? I really don’t know. It’s just like, um, a thing.”
I use Caputo Brothers mozzarella curd. It has a lovely and slight tang that recalls genuine burrata from Campania and can be found at online retailers. But I know of fancy restaurants in NYC that use Polly-O curd and people still flip out. Everyone goes nuts over freshly made mozzarella.
Yield: Serves 8
Caputo Brothers Mozzarella curd, thawed one 1-pound container (453 grams)
Water a kettle’s worth, heated to 190°F
Salt large pinches
Heavy cream 1 quart (952 grams)
Strawberry Quick Jam (here)
Fresh strawberries, cut up, for serving (optional)
Croutons (here)
Freshly ground black pepper to taste
Extra-virgin olive oil to taste
1. Into a large heat-safe bowl, dump out the mozzarella curd and cover with the hot water. Liberally season with 3 large pinches of salt and let the curd sit for a minute to soften.
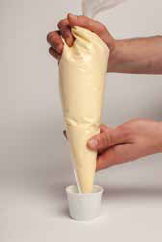
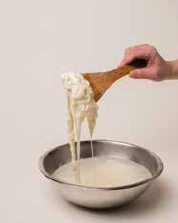
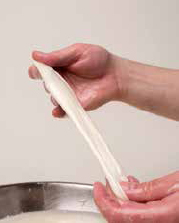
2. You need to stretch the cheese. Lift out of the water and let it drip and stretch slowly back into the bowl. With a wooden spoon, hold the curd down as you pull pieces out and over the edge of the bowl, using the spoon to drag it back into the water. Do this over and over, lifting and dropping and stretching. You want a curd that is smooth, but not completely without bubbles—one you can pull apart into stringy cheese.
3. In a medium bowl containing the cream, add the cheese strings and season with salt to taste.
To serve: Place some strands of stracciatella in a shallow bowl and top with a few blobs of strawberry jam. Add some cut up fresh strawberries if you have them. Top with a few croutons, a pinch of pepper, a drizzle of olive oil, and a sprinkle of salt.


By far one of the easiest recipes in this book, cream cheese crust, despite the goofy-sounding name, is a powerhouse, a superhero. It is an integral component in the Eggplant and Chocolate (here), and works for all varieties of baked fruit tarts. It puffs slightly but remains crunchy, and it requires about 1,000 percent less effort than a batch of classic puff pastry, which for me rarely if ever delivers on the effort-to-result space-time continuum.
I use Philadelphia brand cream cheese because I prefer its texture and think it tastes better than the generic stuff. Plus I am a sucker for iconic packaging, and that silver cardboard box just screams, “I will fuck up the bad guys.” And even though there is not a single NYC deli or bagel place that uses Philadelphia cream cheese, this recipe feels like New York to me. It is versatile, resilient, full of character, cocky, smirking, and a total sweetheart.
Yield: One baking sheet of dough
Unsalted butter ⅓ cup, or ⅔ stick (85 grams), softened
Cream cheese ½ cup (113 grams), softened
Egg yolk 1 (18 grams)
All-purpose flour 1½ cups (188 grams)
Salt ½ teaspoon (2 grams)
Almond spread (here)
Turbinado sugar as needed
1. Preheat the oven to 450°F.
2. In the bowl of a stand mixer, using the paddle attachment, combine the butter and cream cheese on medium speed. Add the egg yolk and mix to incorporate. Add the flour and salt and mix until the dough just comes together.
3. Pat the mixture into a ball, put it in a bowl, and refrigerate for 30 minutes.
4. Between two sheets of parchment, roll the dough out to ¼-inch thickness. Refrigerate for another 30 minutes.
5. Rip the dough into irregular shapes, like Africa or Brazil but not Tennessee or Argentina. Smear a thin layer of almond spread onto each dough shape, top with your topping of choice, and bake until golden and slightly charred around the edges, about 8 minutes.
To serve: This is used with the Eggplant and Chocolate, but it works well as a universal pie or tart crust.

Cali Thornhill-DeWitt is a Los Angeles–based artist. More than twenty years ago he lived in the neighborhood where Del Posto currently resides. He has a Born Against tattoo that spans both wrists.
THE WEST SIDE OF LOWER MANHATTAN BEFORE DEL POSTO by Cali Thornhill-Dewitt
When I moved to the corner of Ninth Avenue and 14th Street in 1991, just around a bleak Manhattan corner from where Del Posto now sits, the neighborhood was a different animal. The Meat Market, as it was known then, was mostly a ghost town. During the day, guys in large trucks from all over the city came to buy meat in bulk on behalf of restaurants. Once night fell, the area was overrun with transvestite prostitutes, crack dealers, and cast outs from a world-famous S&M dungeon called The Vault. Everywhere there were trash cans full of animal parts dyed blue to deter the local homeless. It was a cinematic dead zone, a zombie thrill under every pile of garbage.
Being new to town and with little to no financial resources, moving my life into a meat locker seemed like a pretty good option. It didn’t resemble a meat locker—it was a meat locker. There were no windows, but there was a huge refrigerator door and a drain in the center of the room for liquid runoff. A few large leftover hooks hung from the ceiling, and it came prefurnished with an ancient butcher block that was stained deep from decades of use. It was attached to a welder’s shop, and the welder and I shared a kitchen and bathroom.
One night I was outside haggling with a young gentleman over the price of his crack rocks. He handed me a suspicious little packet that I tore into and checked for authenticity. He was poking me in the stomach and mumbling muted threats as I discovered he had just handed me some dried-up ragweed. As I launched into an outraged diatribe demanding my money back, I noticed that thing he’d been jabbing into my stomach was a .45 automatic.
So he got my eight dollars or whatever my bullshit life savings was at that moment. But it was clear he was freaked out by my aggressive teenage death-wish vibe, and that gives me some satisfaction still.
I lived in the meat locker with my “girlfriend,” a pro at relieving lonely middle-aged men of their money. She was young and beautiful and the most manipulative person I have ever met. One evening, we were in our usual position: no money, no food, no drugs. She decided to walk across the street to The Vault and see what, if any, opportunities existed. Thirty minutes or so later, she was back with three leather dykes, who had agreed to instruct her in the correct way to whip someone. That someone was me.
So there I was, a naked teen (I had boxers on when they started but those rascals quickly whipped them to my ankles), up against the wall of my live-in meat locker being thrashed by three strangers—three strangers who were at that same moment getting their bags rifled through. I cannot remember exactly how the night ended, but we were richer after they’d left than we were when they came. This was not an uncommon night in the meat locker. The Meat Market may have appeared deserted and ominous, but it was also an end-of-the-world playground for perverts and creeps.
For a good three to four months I was very, very itchy in that meat locker. Thinking back, it began almost as soon as we moved in—itchy and often covered in mysterious rashes. I told friends living elsewhere that NYC was an itchy town. Eventually, I went to a free clinic, where the doctor looked at me from several feet away and said, “You have scabies. And measles.”
A little more than twenty years later, I was sitting in Del Posto, a block or so from my former meat locker. I ate a hundred-layer lasagna. I was presented with an apricot sorbet that took something like six weeks to prepare. I was eating a meal that had all my pleasure centers on high alert. My bloodstream was flooding with dopamine. I was eating the best meal of my life so far, and I would talk about it for months to come.
For reasons probably inexplicable to most, I miss the danger that used to exist in what is no longer the Meat Market but the Meatpacking District. It was like living in an unbelievable cartoon then, and was probably far weirder before I ever got there. Now it’s a place where you can drop thousands at Diane Von Furstenberg and Alexander McQueen, and walk the High Line in complete safety, day or night. Where there are blocks-long lines of rich young socialites at midnight on a Tuesday, waiting to get into a club, while time marches forward and the past becomes unrecognizable.
Two of my idols are chefs Gabrielle Hamilton of Prune, in New York City, and Nancy Silverton of Pizzeria Mozza, in Los Angeles.
Many years ago I moved my ass three thousand miles to California to work for Nancy at her restaurant Campanile, earning next to nothing, just to learn her food. Many of the recipes in this book are rip-offs masquerading as homage. She is a genius. Gabrielle, too. She just rules. She can cook me a branzino garnished with a blanket of raw parsley, get me to eat grilled cow tongue, or write an essay that makes me question my very existence. She is a true multitalent, a hyphenate, like John Waters or Galileo or Dave Grohl.
This sauce is inspired by both chefs equally.
I read once that Gabrielle is a big fan of Coca-Cola, which struck me as being among the best things I’d ever heard. Coke doesn’t get a whole lot of love in the food world. But really, is there anything more refreshing than an ice-cold can of Coke? It’s engineered by science to be just that!
“This is it.”
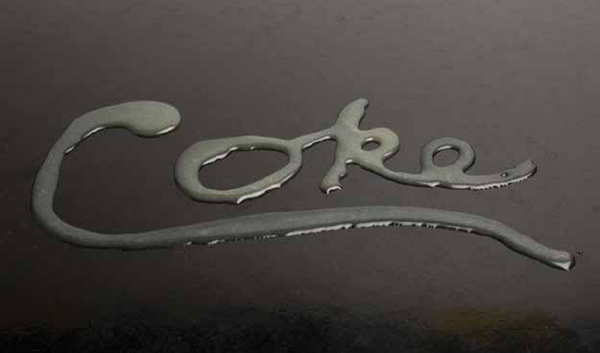
When I worked at Campanile in the mid-2000s, I learned a dessert sauce that was so revolutionary to me that more than a decade later I still use it regularly. It is a champagne vinegar caramel sauce, with the vinegar taking the place of the cream in what would otherwise be a traditional caramel. It’s wildly refreshing. It is both caramel and acid, sticky and tart. Ideal when you need a jolt of acid on a dessert plate.
When we make it at the restaurant, we label it “Cham Vin,” even though we use white wine vinegar, because that’s the variation I learned from Nancy. Further complicating things, I call it Coca-Cola sauce because it completely captures the essence of drinking a Coke. Not surprisingly, the recipe suffers a bit of an identity crisis, like a nickname that over time evolves into something with no correlation to its real name. My former roommates Adam and Alyssa had a dog named Loretta, who we eventually began calling “Mozzarella,” until finally her name was just “Cheese.”
If you look on the back of a can of Coca-Cola, the main flavorings are caramel and acid. I know glass-bottled Coca-Cola is the pet of the food illuminati, but I’m not into it. Coke in a bottle, Mexican, plastic, or otherwise, lacks the hypercarbonation of the perfect canned variety. And please, do not ever talk to me about Diet Coke. It is the absolute fakest, most vile-tasting swill on the planet. If you don’t want sugar, then drink fucking water. A few years ago when I saw that one of my favorite chefs did a series of Diet Coke commercials, my heart sank into my shoes. I am the last person on earth to cry “sell-out!” because I have recently realized that there is no such thing, and I wholly approve of and applaud Andrew W.K. doing those absurd KitKat commercials. It’s just that Diet Coke is reprehensibly gross.
In Naples you eat pizza and drink Coke. When my friend Cali, who doesn’t drink, came to Del Posto, the bartender paired his serving of Ladner’s hundred-layer lasagna with a glass of Coca-Cola on crushed ice. It was a perfect pairing. El Bulli’s Ferran Adrià once said of the American love of the sweet-and-savory combination: “A burger with ketchup and a Coca-Cola is your national treasure.” Coke is it, man. Coke is it. Here is the sauce.
Yield: 1 quart
Sugar 4 cups (800 grams)
Water ½ cup (118 grams)
White wine vinegar 1 pint (478 grams)
Unsalted butter 1 cup, or 2 sticks (227 grams)
Salt 1 teaspoon (4 grams)
Juice from 1 lemon
1. In a heavy saucepan over medium-low heat, combine the sugar and water until it is the consistency of wet sand and is a slightly blond caramel in color. Be sure there is no residual sugar on the sides of the pan.
2. Remove from the heat and add the vinegar. The sugar will bubble and seize. Return to low heat for a few minutes longer, until all the sugar remelts. Whisk in the butter and add the salt and lemon juice.
4. Allow the sauce to cool to room temperature.
To serve: This works well with both the Polenta Crêpes (here) and the Buckwheat Crespelle (here). Or just pour it on some ice cream.

See here.
Gabrielle Hamilton (Chef-Owner, Prune, NYC)

Born: Early morning
Occupation: Member of the society of the hypervigilant
Status: Soberly optimistic
Notable quote: “This is not our last supper.”
Shoe size: It’s the footprint that matters.
Lunch food: Buttered toast
Beverage: Negroni
I Heart NY: Except when I’m driving
First time: Better than expected
Accomplishments: Regular brushing and flossing
Ambition future plan: To keep Prune alive and relevant long enough that my sons can have jobs as busboys!
CANNOLO STILE LIBERO: THE FREE-FORM CANNOLI
Everyone loves a good cannoli—or at least the idea of a good cannoli. But lucking onto a good one is extremely rare, like finding a first pressing of the Misfits’ “Cough/Cool” 7-inch, or a Shamrock Shake at McDonald’s. Most Italian bakeries have shitty cannoli. There, I said it. Taking one for the team here: The majority of cannoli are greasy, thick-skinned, and filled with corrosively sweet ricotta paste. One bite and you are done.
A good chunk of the Italian nationals who work or have worked at Del Posto come as front-of-house employees: captains, back waiters, sommeliers, bartenders. Rarely do we get Italian cooks. Together they represent the different regions of Italy: Sicily (Denis, the hilarious class clown), Calabria (Piero, the ur-maitre d’ whose coif reveals the weather outside), Tuscany (Allesandro, the arrogant prick I love to hate), Lazio (Andrea, “I’m not Italian, I’m Roman. I have history, fuck these jerks”), Lombardia (Elisabetta, always smirking in a charming way), Friuli (Sbrizzo, the teddy bear with a bad attitude), and of course Long Island (Russo, loves golf, wife-beater undershirts, and hockey). They all have a bone to pick with one another.
When I ask them for Italian language advice for menu descriptions, it’s a regionally linguistic free-for-all. Denis claims that anything north of Naples is a total backwater. Daniel, from the North, claims that Denis is a stupid southern hick all hopped up on garlic and almonds. Russo wonders if anyone caught last night’s game at the Nassau Coliseum. It gets heated.
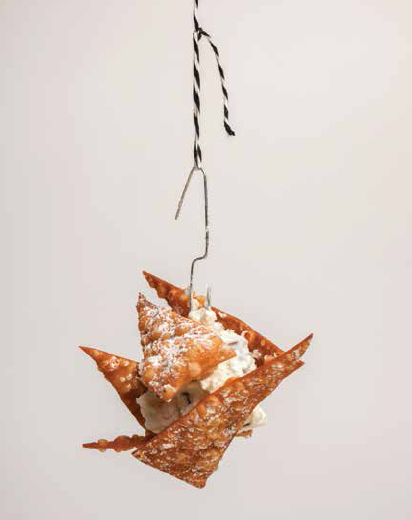
I love the idea of a great cannoli, too. But when I set out to make Del Posto’s version, I was quickly sucked into trying to deconstruct it. Sbrizzo, in a lightbulb moment, dubbed it cannolo stile libero: the free-form cannoli. I already had a ricotta stracciatella gelato, so that was going to be the filling. I rolled the cannoli dough out really thin, like a pasta dough (in fact, use a pasta machine if you have one), so it would cook bubbly and crisp, but would still barely be there. We cut the cannoli dough into tortilla chip–like shards, fried them, and pushed them onto an irregular blob of the gelato. In the iconic words of Mario Batali on just about every episode of Molto Mario: “Take it to the plate.”
Yield: 5 servings of cannoli “chips”
All-purpose flour 1½ cups (187 grams)
Sugar 2 tablespoons (25 grams)
Salt ¼ teaspoon (1 gram)
Extra-virgin olive oil 2 tablespoons (27 grams)
Red wine vinegar 1 teaspoon (5 grams)
Red wine ½ cup (117 grams)
Peanut oil for frying 1 quart (864 grams)
Ricotta Stracciatella (here)
Powdered sugar for dusting
1. In a food processor, combine the flour, sugar, and salt and pulse to incorporate.
2. In a bowl with a spout, whisk together the olive oil, vinegar, and red wine. With the food processor still running, slowly add the wine mixture to the flour mixture, checking to make sure they are incorporating. Once the dough comes together and begins to circle around the food processor blade, it is ready.
3. Turn the dough out onto a floured surface and knead it for about 2 minutes, or until you have a smooth ball. Wrap it in plastic wrap and refrigerate overnight.
4. In a deep-sided saucepan over high heat, bring the peanut oil to 350°F. Line two baking sheets with parchment and set aside.
5. Cut the dough into quarters and run each quarter through a pasta machine to get it as thin as possible, dusting liberally with flour as you go and storing the rolled dough on the reserved baking sheets. Cut the sheets of dough into small chips, about the size of Tostitos. Deep-fry until golden and blistered, 4 to 5 minutes.
6. Transfer to a paper towel–lined cooling rack to cool. These will keep in an airtight container for up to 5 days.
To serve: Adorn a scoop of ricotta stracciatella with some cannoli chips and dust with powdered sugar. Serve right away.
BAND TOUR FOOD DIARY: OLDEST/C.R.A.S.H.
By 2009, I was dying to play drums again. I’d also been slightly busy with a move to New York and getting a job at a little joint called Del Posto. I started Oldest (as in nothing older) with Mick Barr around this time. It was our no-pressure band. Just recording, no live shows. At the time of this writing, we still have not played a live show. A good chunk of our practices and recording have put us in the Woodhaven neighborhood in Queens. Our snack of choice varies: the Dunkin’ Donuts waffle egg and cheese sandwich (Mick: Hey, it’s new!), Sal’s Pizza on Jamaica Avenue (so old school it feels and tastes like 1975), and the Thai place that got shut down by the NYC DOH (bummer). Lots of Bustelo coffee for Mick and supermarket-brand seltzer water for me.
I formed C.R.A.S.H. in 2011. It’s a fun project—loud, ridiculous—that yet again has me flying back and forth between the East and West Coasts to practice and play shows. C.R.A.S.H., well, we don’t take ourselves too seriously. I once organized a show for us at what used to be Lung Shan restaurant in San Francisco. We played with the doors open, out onto the street, at 3 p.m. on a Sunday afternoon—to nobody. We played two more shows later that same day and people came to watch, but they were nowhere near as fun.
One weekend in LA in November 2013, we played two shows. One was in a Dumpster cage downtown with the doors shut, so the crowd was forced to stand on benches outside and look down in at us. The second was a guerrilla show in the seating area of our favorite Iranian ice cream shop, Mashti Malone’s, in West Hollywood. It was busy, and as we played customers queued up with their fingers plugging their ears and bought clone cones anyway. We made zero dollars that weekend.
We have one vegan member and the rest of us will eat anything. I force these guys to go to expensive bakeries when we play San Francisco, and we had a band meeting once at Pizzeria Mozza in LA. But for the most part we just eat lots of tacos. It’s Los Angeles. It doesn’t make a lot of sense to do otherwise. Our entire set takes thirteen minutes.
Tiramisù is a classic Italian dessert that isn’t classic in any way. Some say it’s been around since the late 1960s, and others say it was first made in the 1980s. The subject is as laden with conspiracy theories as a Bob Dylan biography or the Stanley Kubrick NASA footage.
Tiramisù translates to “pick-me-up.” And it is so true: espresso, sugar, a little booze, cheese. Best served in a small portion. At Del Posto we sometimes do a version that is only slightly larger than a shot glass. “Impossibly small” we call it on the menu. Although we pride ourselves on hospitality, giving our guests whatever they want, we refuse second servings. “Can I have another?” Nope. That’s all you need.
Here is the easiest and most delicious version of tiramisù I have eaten (and I have eaten thousands). Good, freshly brewed espresso is key, so even if you have to go to some lame corporate coffee store to get some, you should. Same goes for the cheese: Get the best imported Italian mascarpone you can find (I prefer Galbani). Don’t worry that it is sloppy—if you’re able to serve a perfectly sliced piece of tiramisù, it’s probably gross. You should need to spoon it. If you don’t want to make the sponge cake, buy quality imported savioardi at the same Italian market where you got the mascarpone. No one will know. Cool?
Yield: About 3 cups
TIRAMISÙ CREAM
Mascarpone 2 cups (450 grams)
Sugar ½ cup (100 grams)
Egg yolks 4 (72 grams)
Heavy cream 2 tablespoons (30 grams)
Dark rum 2 tablespoons (28 grams)
Salt to taste
In the bowl of a stand mixer, using the whip attachment, combine the mascarpone, sugar, egg yolks, cream, rum, and salt on slow speed, gradually increasing the speed as the mixture becomes stable. Whip until you have a very fluffy cream, but don’t overwhip. Mascarpone curdles and separates with heavy agitation.
TIRAMISÙ SPONGE CAKE

Home made sponge cake or store-bought Savoiardi ladyfingers.
Eggs 9 separated
Sugar 2 cups (400 grams)
Water ¼ cup (59 grams)
All-purpose flour 1 cup (125 grams)
Cornstarch ½ cup (64 grams)
Salt to taste
1. Preheat the oven to 375°F. Line two baking sheets with parchment and set aside.
2. In the bowl of a stand mixer, using the whip attachment, combine the egg whites on slow speed. Slowly add 1 cup of the sugar, gradually increasing the speed to create a stable meringue. Scoop the mixture into a separate bowl and refrigerate until ready to use.
3. In the still-messy bowl, add the egg yolks, water, and the remaining 1 cup sugar and whip on high speed until you have a fluffy, ribbony mixture.
4. In a large but shallow mixing bowl, add the egg yolk mixture and the reserved egg white mixture and combine gently using a rubber spatula. Be nice. Streaks are fine. The more you manipulate this, the less fluffy it will be later.
5. Sift together the flour, cornstarch, and salt and gently combine them with the eggs until you can’t see any flour. Using a large spatula, distribute the batter onto the two baking sheets very gently. Don’t get all speed metal and go crazy smearing the batter everywhere. Think Barry White.
6. Bake for 7 to 10 minutes, until the tops of the cakes are golden brown and still soft to the touch. Let the cakes cool completely in the pans.
FOR ASSEMBLY
Espresso, freshly brewed, cooled 3 cups
Natural unsweetened cocoa powder, very best quality, to finish
To serve: In a fancy shallow serving dish, spread a thin layer of the tiramisù cream. Add a layer of cake. Using a plastic squirt bottle, soak the cake completely with the cooled espresso. Add another layer of tiramisù cream, another layer of cake, more espresso. Don’t be stingy with the espresso, OK? Finish with a last layer of cream. Spoon a few tablespoons of cocoa powder into a double layer of cheesecloth, pull it into a fist-size ball, and gently shake the cocoa onto the finished tiramisù until fully blanketed. Serve immediately, or hold in the refrigerator for no longer than 8 hours.


“A boiled can of sweetened condensed milk is like sex in a tin.”—Chef April Bloomfield, 2008
Explosions are not cool. I don’t get my rocks off from fireworks. I couldn’t care less, and (no kidding) July Fourth is my birthday. My friend Speck throws an Independence Day party every year at her apartment in Brooklyn Heights. I usually stay inside and go through her records while everyone else crams onto the balcony to watch the fireworks. This annoys Speck immensely. I tell her I slept through the application process for the let’s-blow-shit-up gene. Not interested.
The label on a can of Eagle Brand Sweetened Condensed Milk says in very clear writing: DO NOT BOIL THIS CAN. It’s there for a reason. Canned sweetened condensed milk is an explosive in negligent hands.
We used to make dulce de leche at Del Posto by boiling big number 10 cans of Eagle Brand milk in a huge stockpot. Dulce de leche is an amplified caramel sauce. It’s sexy, gooey, absolutely delicious.
Once, Dulce (that was her name; I’m not making this up) dropped a can in a huge pot, covered it with water, cranked the flame to high, and went downstairs to tackle some prep work. Cooking the contents of the can into dulce de leche takes a long while and requires that you constantly replace the water that evaporates.
It was an early Saturday morning. The first shift of cooks wasn’t due for several hours. Dulce forgot about the milk.
The number 10 can bobbed along for a bit before all the water completely evaporated. The flame, still maxed, turned the stockpot black, and then an ominous electric pink. I didn’t witness this, but Ladner did. He was in the kitchen early that morning, preparing to teach a rare Saturday-morning cooking class. I was asleep (see I Sleep Through Cooking Classes, below).
The first thing Ladner did when he arrived was get two giant pasta boilers rolling. A few feet away, Dulce’s science experiment was throbbing and groaning impatiently on the pastry line. Ladner didn’t notice.
But at some point he must have smelled the burning metal. Beside him was in effect a pipe bomb, not all that far from exploding molten caramelized milk and shrapnel everywhere.
In an act of MacGyver/head chef brilliance, he pulled the pot gently off the heat. He slowly, terrifyingly, poured some of his boiling pasta water over the engorged can. He told me later that the pot was almost soft to the touch. Even though he was adding fast-boiling water, the can hissed and sputtered.
Had the can exploded, it would have destroyed that part of the kitchen and maimed anyone nearby. The mess of dripping black caramel would have been impossible to clean. A disaster.
So, please: Buy premade dulce de leche at the supermarket. That’s what I do. It’s just like boiling it yourself. It really is. It’s in a can or jar. It is sold at the Western Beef near Del Posto, so there is a good chance your local store will have it, too. It’s the same exact thing. Only it’s made in the safe environs of a commercial facility.
No explosions. They freak me out. Please. Not interested.
I SLEEP THROUGH COOKING CLASSES
A few days after Del Posto was awarded four stars in The New York Times, I was scheduled to teach a cooking class to ten paying guests as part of a food festival. I was a no-show. I slept through it.
It is a fireable offense at any other restaurant, and it should have been at Del Posto. I awoke to eighty-three missed phone calls and a text message history that grew increasingly desperate before dropping off entirely. I wear that day as a cloak of shame. Now, if I have to be anywhere before 9 a.m. (the airport, a doctor’s appointment, a Department of Health test), I stay up all night. I have no choice. I cannot relive that. I’m shuddering even typing this.
As the founder of La Brea Bakery in Los Angeles, the opening pastry chef at Spago, the mastermind behind the desserts at Campanile, and the pizza crust genius of Mozza, Nancy Silverton has shaped how Americans look at flour, water, salt, and yeast in a way very few, if any, others have. That artisanal loaf of bread at the Vons or Safeway near your house? Nancy is responsible for that. I often refer to her as the Ian MacKaye of bread. Her influence is everywhere, and the people who know, they just know.
When Nancy opened Pizzeria Mozza in 2006, I had just moved back to Washington, DC, after serving two years in LA. My first year in LA was spent laboring over minute-long Wrangler Brutes songs and paying the bills with terrible jobs. During year two, I worked under Nancy and her sergeant at arms at Campanile, pastry chef Dahlia. The experience permanently altered my approach to food. The menu changed every day based on the seasonal availability of fruit, and we used top-quality everything. We had a bible of Nancy’s desserts, and we rotated them constantly. Presentation was a distant second to flavor. Plates were often messy, and maybe some sauces ran a bit. Nothing was overworked or unnatural looking, and we plated everything with our hands. Tweezers would have been booed off the stage.
The signature dessert at Pizzeria Mozza is a butterscotch budino—a pudding, basically, topped with chewy and salty caramel and slightly sour whipped crème fraîche for acid balance. Those neon-gold hard candies your grandfather has in a jar on his coffee table are all most people know of butterscotch. But this was real, simple butterscotch, in a pudding that relied on actual butterscotch made from scratch. It was revolutionary.
I’d already moved to New York when the dish debuted. I hadn’t tasted it. But it didn’t matter. I knew what it was by what I’d read and heard about it. It’s especially easy to know with Nancy. I had to steal it.
My first few attempts were miserable failures. I didn’t have the recipe, so I tried to channel Nancy and Dahlia. Shitty. Did they use cornstarch on the stove top? Was it a baked, egg-set custard? Nope. Too runny, not butterscotch-y enough. Just plain boring. Then the Los Angeles Times published the actual recipe. Fucking yes!
I still couldn’t do it. I have a hard time following recipes. So I did my own thing (though still completely thieved), and it worked. It’s been on our menu for five years. Thanks, Nancy!
BUTTERSCOTCH MASCARPONE SEMIFREDDO WITH MILK JAM AND SBRISOLONA
The butterscotch is straightforward: dark brown sugar, butter, vanilla, salt, a little booze. As I whip some eggs, I gently fold in the butterscotch, creating a flavored zabaglione. Instead of combining this with a straight whipped cream, as you would to make a simple semifreddo, I mix mascarpone with some cream—but carefully. Mascarpone is trouble if overworked. So we have our two foamy things: Fold the butterscotch zabaglione into the whipped mascarpone and freeze. The result is homey, very Italian, and a little bit funny. The other components are not as confusing as they sound, either. Plus you get to use instant polenta again in the sbrisolana.
Yield: 8 cup-size portions
BUTTERSCOTCH MASCARPONE SEMIFREDDO
Mascarpone 1½ cups (125 grams)
Heavy cream 1½ cups (90 grams)
Dark brown sugar ⅔ cup (141 grams), packed
Browned butter 2 tablespoons (28 grams)
Light rum 2 tablespoons (28 grams)
Vanilla bean ½, scraped
Salt to taste
Egg yolks 8 (144 grams)
Dulce de leche for serving
Sbrisolona (here)
Fresh fruit for serving
1. In the bowl of a stand mixer, using the whip attachment, combine the mascarpone and cream at medium speed. Transfer the mixture to another bowl and refrigerate. Clean the bowl and whip attachment of the stand mixer.
2. In a small saucepan over medium heat, combine the brown sugar, rum, vanilla bean scrapings, and salt and bring to a boil, stirring occasionally, until you have a thick butterscotch. When the sugar mixture is dark and smells just about burned, remove it from the heat and set aside.
3. In the clean bowl of the stand mixer, using the whip attachment, beat the egg yolks on medium speed. Add the browned sugar mixture and whip until the bottom of the mixer bowl is cool to the touch. Fold in the mascarpone mixture gently.
4. Pour this semifreddo batter into a freezer-safe container and chill overnight in the freezer. This will keep in your freezer forever if stored properly.
DULCE “MILK JAM”
We’re not doing the condensed-milk can trick, remember? (You will most likely die.—Sous-Chef Kim) (This is not a joke.—Brooks)
Buy a can or jar of dulce de leche from the store. Call it milk jam.
To serve: Smear milk jam on a plate, add a spoonful of sbrisolona, and spoon about 1 cup of the semifreddo on top. Garnish with sharp, acidic fruits, cut to your liking: cherries, blood oranges, tangerines, plums, or peaches.
In most fancy restaurants there is a distinct tension between the savory side of the kitchen and the dessert station. Line cooks often think of the pastry people as three-fifths of a cook: effete, overly sensitive, possessing no knife-sharpening skills. Pastry cooks see the line cooks as knuckleheads lacking finesse who reek of testosterone and raw meat. At Del Posto there is very little of that attitude. Ladner would never allow it.
At Komi, in DC, I worked alone, producing and plating every dessert. An army of one. Then I hired Brallan (pronounced Brian) and he helped me make doughnut dough and lollipops. One of the signature savory courses at Komi was a hot mascarpone-stuffed date throttled with olive oil and sea salt. Holy Jesus, it was delicious. It was our enemy.
When it came time for me to present desserts to a table, guests would often say, “May I just have another stuffed date as my dessert?” Tensions rose, guns were drawn, lips curled into scowls. But only for me, of course. The line cooks doled out high fives and applauded victoriously every time. So years later, when I needed a new item for the cookie box at Del Posto, I had no problem co-opting the date as a dessert. Give the people what they want, you know?
My variation involves labneh, a strained yogurt. Instead of serving the dates whole, I cut them into a cross-section so they look like a Goetze’s caramel cream candy.
Yield: 3 servings
Dates 6
Labneh 1½ cups (430 grams)
Salt to taste
Fresh lemon juice to taste
Freshly ground black pepper to taste
Extra-virgin olive oil for serving
Coarse sea salt for serving
1. In a medium saucepan over high heat, bring a pot of water to a boil. Add the dates and cook for 10 seconds to loosen the skin. Remove the skin from the dates using a paring knife. Remove the pits from the dates using a pair of pliers. Don’t damage the flesh.
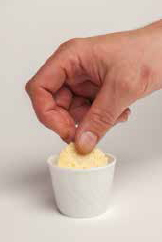
2. In a small bowl, mix together the labneh, salt, lemon juice, and pepper. Place the mixture into an ordinary piping bag and fill the cavity of the date. (You can even snip the corner off a Ziploc bag and use that as your piping tool.)
3. Line the dates in a single layer on a plate and refrigerate until the filling is firm, about 1 hour.
4. Preheat the oven to 400°F. Line a baking sheet with parchment and set aside.
5. Slice each date lengthwise into 3 pieces and place on the prepared baking sheet. Bake until the dates caramelize, about 1 minute.
To serve: Drench the dates in olive oil and coarse sea salt and serve as fast as you can.
See here.
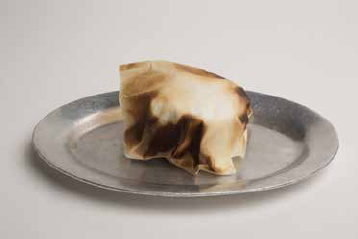
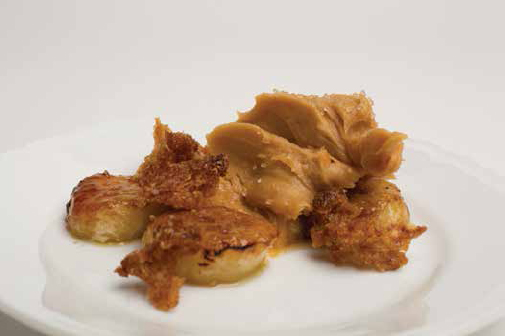
S’MORES: WARM LA TUR WITH CHARRED BREAD AND CHOCOLATE–OLIVE OIL SAUCE
Campfire time! This is it. The last recipe. Grab the kindling.
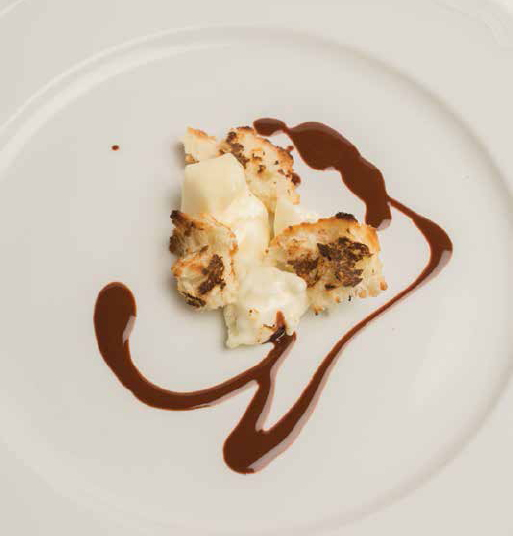
This dish is the bastardization of fondue, a cheese course, and s’mores (all’Italiana). It’s a fun and interactive dish meant to be served family style. The La Tur, a sheep-goat-cow cheese from Piemonte, is soft and kind of barnyard-y. The bread and blackened paper deliver a dreamy charcoal-like flavor. The chocolate–olive oil sauce is not nearly as sweet as you may think and balances perfectly with the bread and cheese. It’s an unexpected, conversational element. At Del Posto, we serve this as the cheese course on our tasting menu. It seems obvious, but remind your guests that they shouldn’t eat the charred paper. It is neither fun nor delicious.
Wheel of La Tur cheese 1
Loaf of rustic country bread 1
Chocolate Sauce (here) to taste
1. Preheat the broiler to 500°F.
2. Wrap the cheese in parchment, like a birthday present, and place it in an ovenproof baking dish, seamside down (you are serving in this dish, so pick something handsome). Allow the cheese to sit at room temperature for 2 hours, or until very gooey.
3. Tear the bread into small chunks, being careful not to crush the insides as you tear it. On a grill pan over high heat, grill the bread on both sides until quite charred, longer on the crust side. (Alternatively, you can toss the chunks with a small amount of olive oil and toast them in a 375°F oven until golden brown.)
4. Place the parchment-covered cheese under the broiler, just long enough for the paper to blacken, about 10 seconds.
5. Using scissors, cut the paper top off the cheese and tear it into a jagged formation, leaving the excess burned paper attached and exposing the warmed and slightly molten cheese.
To serve: Place the baking dish on a large platter and surround the cheese with the charred bread pieces. Drizzle the warm chocolate sauce around the plate and on the cheese. Serve immediately.