Chapter 26. Bringing It All Together
Now that you’ve reached the end of your journey into learning the hows, whys, and wherefores of dynamic web programming, I want to leave you with a real example that you can sink your teeth into. In fact, it’s a collection of examples, because I’ve put together a simple social networking project comprising all the main features you’d expect from such a site.
Across the various files, there are examples of MySQL table creation and database access, CSS style sheets, file inclusion, session control, DOM access, Ajax calls, event and error handling, file uploading, image manipulation, the HTML5 canvas, and a whole lot more.
Each example file is complete and self-contained, yet works with all the others to build a fully working social networking site, even including a style sheet you can modify to completely change the look and feel of the project. Being small and light, the end product is particularly usable on mobile platforms such as a smartphone or tablet, but will run equally well on a full-size desktop computer.
I leave it up to you to take any pieces of code you think you can use and expand on them for your own purposes. Perhaps you may even wish to build on these files to create a social networking site of your own.
Designing a Social Networking Site
Before writing any code, I sat down and came up with several things that I decided were essential to such a site. These included the following:
-
A sign-up process
-
A login form
-
A logout facility
-
Session control
-
User profiles with uploaded thumbnails
-
A member directory
-
Adding members as friends
-
Public and private messaging between members
-
How to style the project
I decided to name the project Robin’s Nest, but you have to modify only one line of code (in functions.php) to change this to a name of your choice.
On the Website
All the examples in this chapter can be found on the companion website located at http://lpmj.net. You can also download the examples from there to your computer by clicking the Download Examples link. This will download an archive file called examples.zip, which you should extract to a suitable location on your computer.
Of particular interest to this chapter, within the zip file you’ll find there’s a folder called robinsnest, in which all the following examples have been saved with the correct filenames required by this sample application. So you can easily copy them all to your web development folder to try them out.
functions.php
Let’s jump right into the project, starting with Example 26-1, functions.php, the include file of the main functions. This file contains a little more than just the functions, though, because I have added the database login details here instead of using yet another separate file. So the first half-dozen lines of code define the host, database name, username, and password of the database to use.
It doesn’t matter what you call the database, as long as it already exists (see Chapter 8 for instructions on how to create a new database). Also make sure to correctly assign a MySQL username and password to $dbuser and $dbpass. With correct values, the subsequent two lines will open a connection to MySQL and select the database. The last of the initial instructions sets the name of the social networking site by assigning the value Robin's Nest to the variable $appname. If you want to change the name, this is the place to do so.
The Functions
The project uses five main functions:
createTable- Checks whether a table already exists and, if not, creates it
queryMysql- Issues a query to MySQL, outputting an error message if it fails
destroySession- Destroys a PHP session and clears its data to log users out
sanitizeString- Removes potentially malicious code or tags from user input
showProfile- Displays a user’s image and “about me” message if he has one
All of these should be obvious in their action to you by now, with the possible exception of showProfile, which looks for an image of the name user.jpg (where user is the username of the current user), and if it finds it, displays it. It also displays any “about me” text the user may have saved.
I have ensured that error handling is in place for all the functions that need it, so that they can catch any typographical or other errors you may introduce, and generate error messages. However, if you use any of this code on a production server, you will probably want to provide your own error-handling routines to make the code more user-friendly.
So type Example 26-1 and save it as functions.php (or download it from the companion website), and you’ll be ready to move on to the next section.
Example 26-1. functions.php
<?php
  $dbhost  = 'localhost';    // Unlikely to require changing
  $dbname  = 'robinsnest';   // Modify these...
  $dbuser  = 'robinsnest';   // ...variables according
  $dbpass  = 'rnpassword';   // ...to your installation
  $appname = "Robin's Nest"; // ...and preference

  $connection = new mysqli($dbhost, $dbuser, $dbpass, $dbname);
  if ($connection->connect_error) die($connection->connect_error);

  function createTable($name, $query)
  {
    queryMysql("CREATE TABLE IF NOT EXISTS $name($query)");
    echo "Table '$name' created or already exists.<br>";
  }

  function queryMysql($query)
  {
    global $connection;
    $result = $connection->query($query);
    if (!$result) die($connection->error);
    return $result;
  }

  function destroySession()
  {
    $_SESSION=array();

    if (session_id() != "" || isset($_COOKIE[session_name()]))
      setcookie(session_name(), '', time()-2592000, '/');

    session_destroy();
  }

  function sanitizeString($var)
  {
    global $connection;
    $var = strip_tags($var);
    $var = htmlentities($var);
    $var = stripslashes($var);
    return $connection->real_escape_string($var);
  }

  function showProfile($user)
  {
    if (file_exists("$user.jpg"))
      echo "<img src='$user.jpg' style='float:left;'>";

    $result = queryMysql("SELECT * FROM profiles WHERE user='$user'");

    if ($result->num_rows)
    {
      $row = $result->fetch_array(MYSQLI_ASSOC);
      echo stripslashes($row['text']) . "<br style='clear:left;'><br>";
    }
  }
?>
Note
If you read a previous edition of this book, in which these examples used the old mysql extension, you should note that in order to reference the MySQL database using mysqli, you must apply the global keyword in the queryMysql and sanitizeString functions, to allow them to use the value in $connection.
header.php
For uniformity, each page of the project needs to have access to the same set of features. Therefore, I placed these things in Example 26-2, header.php. This is the file that is actually included by the other files and it includes functions.php. This means that only a single require_once is needed in each file.
header.php starts by calling the function session_start. As you’ll recall from Chapter 12, this sets up a session that will remember certain values we want stored across different PHP files.
With the session started, the program then checks whether the session variable user is currently assigned a value. If so, a user has logged in and the variable $loggedin is set to TRUE.
After the main setup code in which a style sheet is loaded, a canvas element is created for the logo, and a div is also created. The file javascript.js (see Example 26-14, later on) is loaded to pull in the O, S, and C functions; these would normally be in the OSC.js file, but to keep the number of files down I’ve added them to the JavaScript used to create the logo.
Using the value of $loggedin, an if block displays one of two sets of menus. The non-logged-in set simply offers options of Home, Sign up, and Log in, whereas the logged-in version offers full access to the project’s features. Additionally, if a user is logged in, his or her username is appended in brackets to the page title and placed after the main heading. We can freely refer to $user wherever we want to put in the name, because if the user is not logged in, that variable is empty and will have no effect on the output.
The styling applied to this file is in the file styles.css (Example 26-13, detailed at the end of this chapter) and includes creating a wide heading with a colored background, and turning the links in the lists to rounded buttons.
Example 26-2. header.php
<?php
session_start();
echo "<!DOCTYPE html>\n<html><head>";
require_once 'functions.php';
$userstr = ' (Guest)';
if (isset($_SESSION['user']))
{
$user = $_SESSION['user'];
$loggedin = TRUE;
$userstr = " ($user)";
}
else $loggedin = FALSE;
echo "<title>$appname$userstr</title><link rel='stylesheet' " .
"href='styles.css' type='text/css'>" .
"</head><body><center><canvas id='logo' width='624' " .
"height='96'>$appname</canvas></center>" .
"<div class='appname'>$appname$userstr</div>" .
"<script src='javascript.js'></script>";
if ($loggedin)
echo "<br ><ul class='menu'>" .
"<li><a href='members.php?view=$user'>Home</a></li>" .
"<li><a href='members.php'>Members</a></li>" .
"<li><a href='friends.php'>Friends</a></li>" .
"<li><a href='messages.php'>Messages</a></li>" .
"<li><a href='profile.php'>Edit Profile</a></li>" .
"<li><a href='logout.php'>Log out</a></li></ul><br>";
else
echo ("<br><ul class='menu'>" .
"<li><a href='index.php'>Home</a></li>" .
"<li><a href='signup.php'>Sign up</a></li>" .
"<li><a href='login.php'>Log in</a></li></ul><br>" .
"<span class='info'>⇒ You must be logged in to " .
"view this page.</span><br><br>");
?>
Note
Using the <br> tag, as in the preceding example, is a quick and dirty way of creating spacing in page layout. In this instance it works well, but generally you will probably want to use CSS margins to fine-tune the spacing around elements.
setup.php
With the pair of included files written, it’s now time to set up the MySQL tables they will use. We do this with Example 26-3, setup.php, which you should type and load into your browser before calling up any other files; otherwise, you’ll get numerous MySQL errors.
The tables created are short and sweet, and have the following names and columns:
-
members: usernameuser(indexed), passwordpass -
messages: IDid(indexed), authorauth(indexed), recipientrecip, message typepm, messagemessage -
friends: usernameuser(indexed), friend’s usernamefriend -
profiles: usernameuser(indexed), “about me”text
Because the function createTable first checks whether a table already exists, this program can be safely called multiple times without generating any errors.
It is very likely that you will need to add many more columns to these tables if you choose to expand on this project. If so, you may need to issue a MySQL DROP TABLE command before re-creating a table.
Example 26-3. setup.php
<!DOCTYPE html>
<html>
  <head>
    <title>Setting up database</title>
  </head>
  <body>

    <h3>Setting up...</h3>

<?php
  require_once 'functions.php';

  createTable('members',
              'user VARCHAR(16),
              pass VARCHAR(16),
              INDEX(user(6))');

  createTable('messages',
              'id INT UNSIGNED AUTO_INCREMENT PRIMARY KEY,
              auth VARCHAR(16),
              recip VARCHAR(16),
              pm CHAR(1),
              time INT UNSIGNED,
              message VARCHAR(4096),
              INDEX(auth(6)),
              INDEX(recip(6))');

  createTable('friends',
              'user VARCHAR(16),
              friend VARCHAR(16),
              INDEX(user(6)),
              INDEX(friend(6))');

  createTable('profiles',
              'user VARCHAR(16),
              text VARCHAR(4096),
              INDEX(user(6))');
?>

    <br>...done.
  </body>
</html>
Warning
For this example to work, you must first ensure that you have already created the database specified in the variable $dbname in Example 26-1, and also have granted access to it by the user given the name in $dbuser, with the password in $dbpass.
index.php
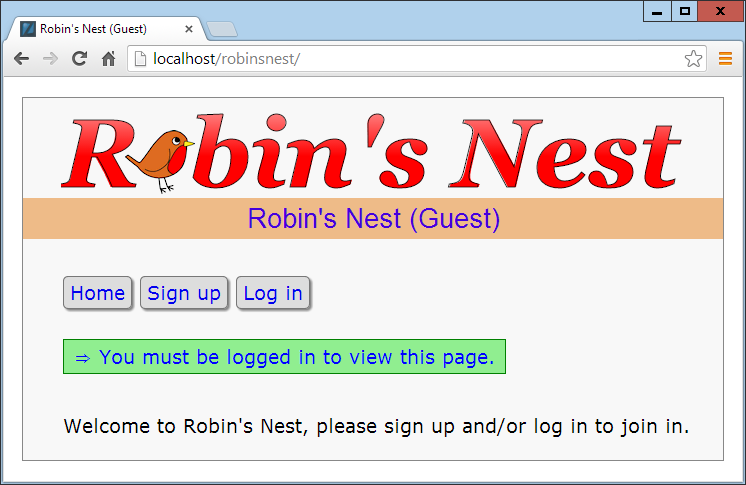
This file is a trivial file but necessary nonetheless to give the project a home page. All it does is display a simple welcome message. In a finished application, this would be where you sell the virtues of your site to encourage sign-ups.
Incidentally, seeing as all the MySQL tables have been created and the include files saved, you can now load Example 26-4, index.php, into your browser to get your first peek at the new application. It should look like Figure 26-1.
Example 26-4. index.php
<?php
  require_once 'header.php';

  echo "<br><span class='main'>Welcome to $appname,";

  if ($loggedin) echo " $user, you are logged in.";
  else           echo ' please sign up and/or log in to join in.';
?>

    </span><br><br>
  </body>
</html>
signup.php
Now we need a module to enable users to join the new network, and that’s Example 26-5, signup.php. This is a slightly longer program, but you’ve seen all its parts before.
Let’s start by looking at the end block of HTML. This is a simple form that allows a username and password to be entered. But note the use of the empty span given the id of 'info'. This will be the destination of the Ajax call in this program that checks whether a desired username is available. See Chapter 18 for a complete description of how this works.
Checking for Username Availability
Now go back to the program start and you’ll see a block of JavaScript that starts with the function checkUser. This is called by the JavaScript onBlur event when focus is removed from the username field of the form. First it sets the contents of the span I mentioned (with the id of info) to an empty string, which clears it in case it previously had a value.
Next a request is made to the program checkuser.php, which reports whether the username user is available. The returned result of the Ajax call, a friendly message, is then placed in the info span.
After the JavaScript section comes some PHP code that you should recognize from the Chapter 16 discussion of form validation. This section also uses the sanitizeString function to remove potentially malicious characters before looking up the username in the database and, if it’s not already taken, inserting the new username $user and password $pass.
Logging In
Upon successfully signing up, the user is then prompted to log in. A more fluid response at this point might be to automatically log in a newly created user, but, as I don’t want to overly complicate the code, I have kept the sign-up and login modules separate from each other. You can easily implement this if you want to, however.
This file uses the CSS class fieldname to arrange the form fields, aligning them neatly under each other in columns. When loaded into a browser (and in conjunction with checkuser.php, shown later), this program will look like Figure 26-2, where you can see that the Ajax call has identified that the username Robin is available. If you would like the password field to show only asterisks, change its type from text to password.
Example 26-5. signup.php
<?php
require_once 'header.php';
echo <<<_END
<script>
function checkUser(user)
{
if (user.value == '')
{
O('info').innerHTML = ''
return
}
params = "user=" + user.value
request = new ajaxRequest()
request.open("POST", "checkuser.php", true)
request.setRequestHeader("Content-type",
"application/x-www-form-urlencoded")
request.setRequestHeader("Content-length", params.length)
request.setRequestHeader("Connection", "close")
request.onreadystatechange = function()
{
if (this.readyState == 4)
if (this.status == 200)
if (this.responseText != null)
O('info').innerHTML = this.responseText
}
request.send(params)
}
function ajaxRequest()
{
try { var request = new XMLHttpRequest() }
catch(e1) {
try { request = new ActiveXObject("Msxml2.XMLHTTP") }
catch(e2) {
try { request = new ActiveXObject("Microsoft.XMLHTTP") }
catch(e3) {
request = false
} } }
return request
}
</script>
<div class='main'><h3>Please enter your details to sign up</h3>
_END;
$error = $user = $pass = "";
if (isset($_SESSION['user'])) destroySession();
if (isset($_POST['user']))
{
$user = sanitizeString($_POST['user']);
$pass = sanitizeString($_POST['pass']);
if ($user == "" || $pass == "")
$error = "Not all fields were entered<br><br>";
else
{
$result = queryMysql("SELECT * FROM members WHERE user='$user'");
if ($result->num_rows)
$error = "That username already exists<br><br>";
else
{
queryMysql("INSERT INTO members VALUES('$user', '$pass')");
die("<h4>Account created</h4>Please Log in.<br><br>");
}
}
}
echo <<<_END
<form method='post' action='signup.php'>$error
<span class='fieldname'>Username</span>
<input type='text' maxlength='16' name='user' value='$user'
onBlur='checkUser(this)'><span id='info'></span><br>
<span class='fieldname'>Password</span>
<input type='text' maxlength='16' name='pass'
value='$pass'><br>
_END;
?>
<span class='fieldname'> </span>
<input type='submit' value='Sign up'>
</form></div><br>
</body>
</html>
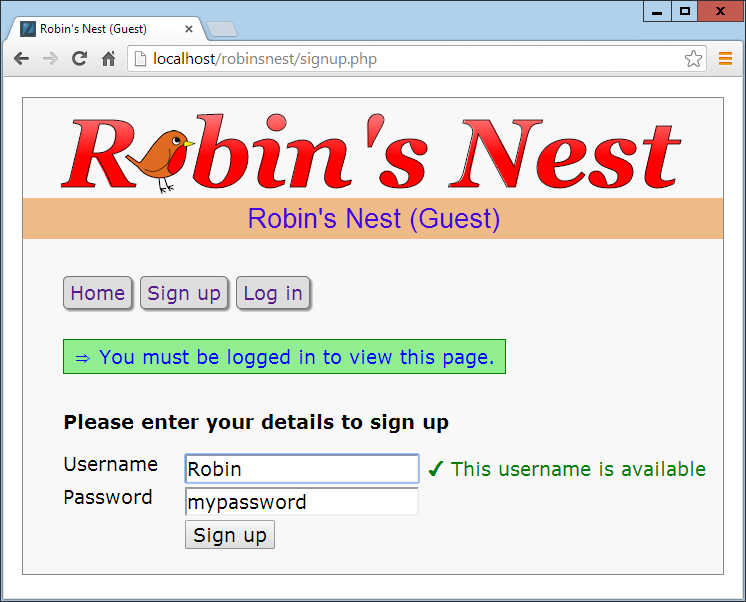
Figure 26-2. The sign-up page
Warning
On a production server, I wouldn’t recommend storing user passwords in the clear as I’ve done here (for reasons of space and simplicity). Instead, you should salt them and store them as one-way hash strings. See Chapter 13 for more details on how to do this.
checkuser.php
To go with signup.php, here’s Example 26-6, checkuser.php, which looks up a username in the database and returns a string indicating whether it has already been taken. Because it relies on the functions sanitizeString and queryMysql, the program first includes the file functions.php.
Then, if the $_POST variable user has a value, the function looks it up in the database and, depending on whether it exists as a username, outputs either “Sorry, this username is taken” or “This username is available.” Just checking the function mysql_num_rows against the result is sufficient for this, as it will return 0 for not found, or 1 if it is found.
The HTML entities ✘ and ✔ are also used to preface the string with either a cross or a checkmark.
Example 26-6. checkuser.php
<?php
require_once 'functions.php';
if (isset($_POST['user']))
{
$user = sanitizeString($_POST['user']);
$result = queryMysql("SELECT * FROM members WHERE user='$user'");
if ($result->num_rows)
echo "<span class='taken'> ✘ " .
"This username is taken</span>";
else
echo "<span class='available'> ✔ " .
"This username is available</span>";
}
?>
login.php
With users now able to sign up to the site, Example 26-7, login.php, provides the code needed to let them log in. Like the sign-up page, it features a simple HTML form and some basic error checking, as well as using sanitizeString before querying the MySQL database.
The main thing to note here is that, upon successful verification of the username and password, the session variables user and pass are given the username and password values. As long as the current session remains active, these variables will be accessible by all the programs in the project, allowing them to automatically provide access to logged-in users.
You may be interested in the use of the die function upon successfully logging in. This is there because it combines an echo and an exit command in one, thus saving a line of code. For styling, this (and most of the files) applies the class main to indent the content from the left-hand edge.
When you call this program up in your browser, it should look like Figure 26-3. Note how the input type of password has been used here to mask the password with asterisks to prevent it from being viewed by anyone looking over the user’s shoulder.
Example 26-7. login.php
<?php
require_once 'header.php';
echo "<div class='main'><h3>Please enter your details to log in</h3>";
$error = $user = $pass = "";
if (isset($_POST['user']))
{
$user = sanitizeString($_POST['user']);
$pass = sanitizeString($_POST['pass']);
if ($user == "" || $pass == "")
$error = "Not all fields were entered<br>";
else
{
$result = queryMySQL("SELECT user,pass FROM members
WHERE user='$user' AND pass='$pass'");
if ($result->num_rows == 0)
{
$error = "<span class='error'>Username/Password
invalid</span><br><br>";
}
else
{
$_SESSION['user'] = $user;
$_SESSION['pass'] = $pass;
die("You are now logged in. Please <a href='members.php?view=$user'>" .
"click here</a> to continue.<br><br>");
}
}
}
echo <<<_END
<form method='post' action='login.php'>$error
<span class='fieldname'>Username</span><input type='text'
maxlength='16' name='user' value='$user'><br>
<span class='fieldname'>Password</span><input type='password'
maxlength='16' name='pass' value='$pass'>
_END;
?>
<br>
<span class='fieldname'> </span>
<input type='submit' value='Login'>
</form><br></div>
</body>
</html>
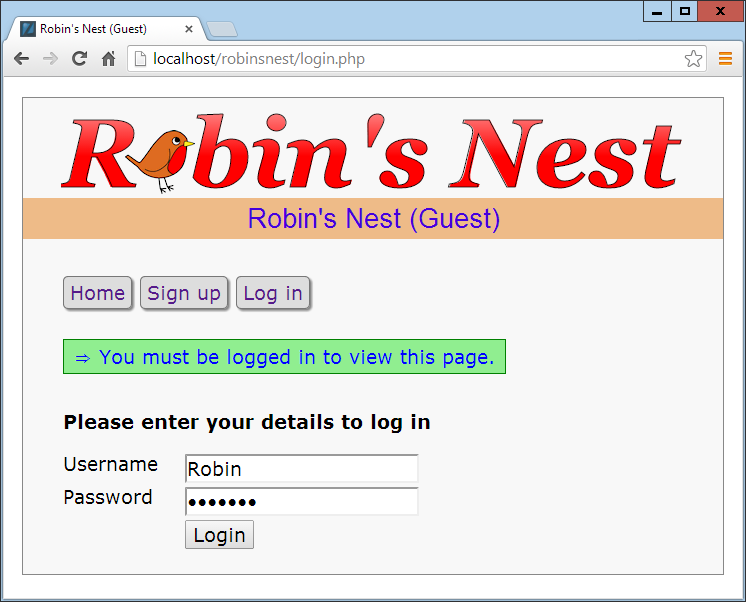
Figure 26-3. The login page
profile.php
One of the first things that new users may want to do after signing up and logging in is to create a profile, which can be done via Example 26-8, profile.php. I think you’ll find some interesting code here, such as routines to upload, resize, and sharpen images.
Let’s start by looking at the main HTML at the end of the code. This is like the forms you’ve just seen, but this time it has the parameter enctype='multipart/form-data'. This allows us to send more than one type of data at a time, enabling the posting of an image as well as some text. There’s also an input type of file, which creates a Browse button that a user can press to select a file to be uploaded.
When the form is submitted, the code at the start of the program is executed. The first thing it does is ensure that a user is logged in before allowing program execution to proceed. Only then is the page heading displayed.
Adding the “About Me” Text
Then the Post variable text is checked to see whether some text was posted to the program. If so, it is sanitized and all long whitespace sequences (including returns and line feeds) are replaced with a single space. This function incorporates a double security check, ensuring that the user actually exists in the database and that no attempted hacking can succeed before inserting this text into the database, where it will become the user’s “about me” details.
If no text was posted, the database is queried to see whether any text already exists in order to prepopulate the textarea for the user to edit it.
Adding a Profile Image
Next we move on to the section where the $_FILES system variable is checked to see whether an image has been uploaded. If so, a string variable called $saveto is created, based on the user’s username followed by the extension .jpg. For example, user Jill will cause $saveto to have the value Jill.jpg. This is the file where the uploaded image will be saved for use in the user’s profile.
Following this, the uploaded image type is examined and is accepted only if it is a jpeg, png, or gif image. Upon success, the variable $src is populated with the uploaded image using one of the imagecreatefrom functions according to the image type uploaded. The image is now in a raw format that PHP can process. If the image is not of an allowed type, the flag $typeok is set to FALSE, preventing the final section of image upload code from being processed.
Processing the Image
First, we store the image’s dimensions in $w and $h using the following statement, which is a quick way of assigning values from an array to separate variables:
list($w, $h) = getimagesize($saveto);
Then, using the value of $max (which is set to 100), we calculate new dimensions that will result in a new image of the same ratio, but with no dimension greater than 100 pixels. This results in giving the variables $tw and $th the new values needed. If you want smaller or larger thumbnails, simply change the value of $max accordingly.
Next, the function imagecreatetruecolor is called to create a new, blank canvas $tw wide and $th high in $tmp. Then imagecopyresampled is called to resample the image from $src, to the new $tmp. Sometimes resampling images can result in a slightly blurred copy, so the next piece of code uses the imageconvolution function to sharpen the image up a bit.
Finally, the image is saved as a jpeg file in the location defined by the variable $saveto, after which we remove both the original and the resized image canvases from memory using the imagedestroy function, returning the memory that was used.
Displaying the Current Profile
Last but not least, so that the user can see what the current profile looks like before editing it, the showProfile function from functions.php is called prior to outputting the form HTML. If no profile exists yet, nothing will be displayed.
When a profile image is displayed, CSS is applied to it to provide a border, shadow, and a margin to its right—to separate the profile text from the image. The result of loading Example 26-8 into a browser is shown in Figure 26-4, where you can see that the textarea has been prepopulated with the “about me” text.
Example 26-8. profile.php
<?php
  require_once 'header.php';

  if (!$loggedin) die();

  echo "<div class='main'><h3>Your Profile</h3>";

  $result = queryMysql("SELECT * FROM profiles WHERE user='$user'");

  if (isset($_POST['text']))
  {
    $text = sanitizeString($_POST['text']);
    $text = preg_replace('/\s\s+/', ' ', $text);

    if ($result->num_rows)
         queryMysql("UPDATE profiles SET text='$text' where user='$user'");
    else queryMysql("INSERT INTO profiles VALUES('$user', '$text')");
  }
  else
  {
    if ($result->num_rows)
    {
      $row  = $result->fetch_array(MYSQLI_ASSOC);
      $text = stripslashes($row['text']);
    }
    else $text = "";
  }

  $text = stripslashes(preg_replace('/\s\s+/', ' ', $text));

  if (isset($_FILES['image']['name']))
  {
    $saveto = "$user.jpg";
    move_uploaded_file($_FILES['image']['tmp_name'], $saveto);
    $typeok = TRUE;

    switch($_FILES['image']['type'])
    {
      case "image/gif":   $src = imagecreatefromgif($saveto); break;
      case "image/jpeg":  // Both regular and progressive jpegs
      case "image/pjpeg": $src = imagecreatefromjpeg($saveto); break;
      case "image/png":   $src = imagecreatefrompng($saveto); break;
      default:            $typeok = FALSE; break;
    }

    if ($typeok)
    {
      list($w, $h) = getimagesize($saveto);

      $max = 100;
      $tw  = $w;
      $th  = $h;

      if ($w > $h && $max < $w)
      {
        $th = $max / $w * $h;
        $tw = $max;
      }
      elseif ($h > $w && $max < $h)
      {
        $tw = $max / $h * $w;
        $th = $max;
      }
      elseif ($max < $w)
      {
        $tw = $th = $max;
      }

      $tmp = imagecreatetruecolor($tw, $th);
      imagecopyresampled($tmp, $src, 0, 0, 0, 0, $tw, $th, $w, $h);
      imageconvolution($tmp, array(array(-1, -1, -1),
        array(-1, 16, -1), array(-1, -1, -1)), 8, 0);
      imagejpeg($tmp, $saveto);
      imagedestroy($tmp);
      imagedestroy($src);
    }
  }

  showProfile($user);

  echo <<<_END
    <form method='post' action='profile.php' enctype='multipart/form-data'>
    <h3>Enter or edit your details and/or upload an image</h3>
    <textarea name='text' cols='50' rows='3'>$text</textarea><br>
_END;
?>

    Image: <input type='file' name='image' size='14'>
    <input type='submit' value='Save Profile'>
    </form></div><br>
  </body>
</html>
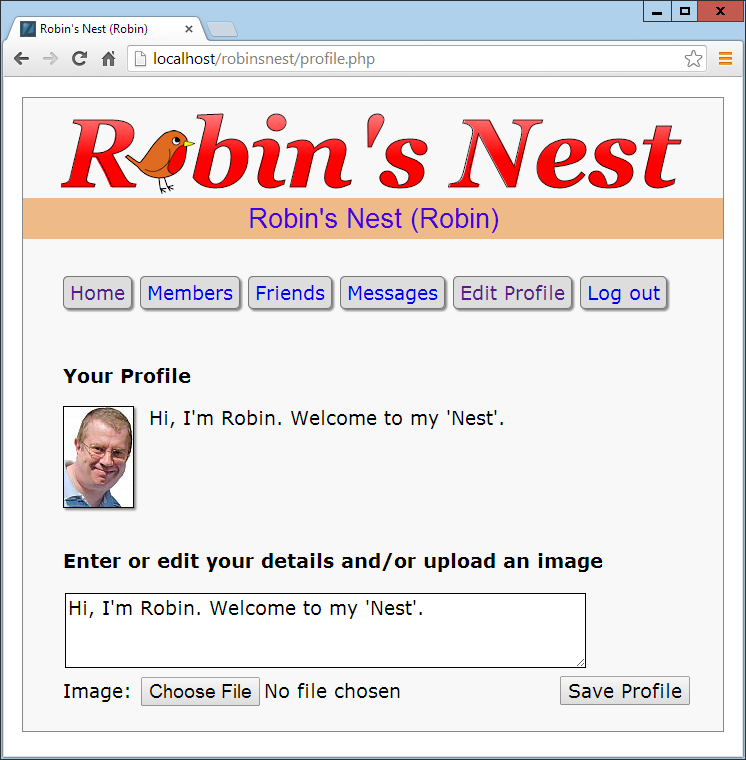
Figure 26-4. Editing a user profile
members.php
Using Example 26-9, members.php, your users will be able to find other members and choose to add them as friends (or drop them if they are already friends). This program has two modes. The first lists all members and their relationships to you, and the second shows a user’s profile.
Viewing a User’s Profile
The code for the latter mode comes first, where a test is made for the Get variable view. If it exists, a user wants to view someone’s profile, so the program does that using the showProfile function, along with providing a couple of links to the user’s friends and messages.
Adding and Dropping Friends
After that, the two Get variables, add and remove, are tested. If one or the other has a value, it will be the username of a user to either add or drop as a friend. We achieve this by looking up the user in the MySQL friends table and either inserting a friend username or removing it from the table.
And, of course, every posted variable is first passed through sanitizeString to ensure that it is safe to use with MySQL.
Listing All Members
The final section of code issues a SQL query to list all usernames. The code places the number returned in the variable $num before outputting the page heading.
A for loop then iterates through each and every member, fetching their details and then looking them up in the friends table to see if they are either being followed by or a follower of the user. If someone is both a follower and a followee, she is classed as a mutual friend.
The variable $t1 is nonzero when the user is following another member, and $t2 is nonzero when another member is following the user. Depending on these values, text is displayed after each username, showing the relationship (if any) to the current user.
Icons are also displayed to show the relationships. A double pointing arrow means that the users are mutual friends. A left-pointing arrow indicates the user is following another member. And a right-pointing arrow indicates that another member is following the user.
Finally, depending on whether the user is following another member, a link is provided to either add or drop that member as a friend.
When you call Example 26-9 up in a browser, it will look like Figure 26-5. See how the user is invited to “follow” a nonfollowing member, but if the member is already following the user, a “recip” link to reciprocate the friendship is offered. In the case of a user already following another member, the user can select “drop” to end the following.
Example 26-9. members.php
<?php
require_once 'header.php';
if (!$loggedin) die();
echo "<div class='main'>";
if (isset($_GET['view']))
{
$view = sanitizeString($_GET['view']);
if ($view == $user) $name = "Your";
else $name = "$view's";
echo "<h3>$name Profile</h3>";
showProfile($view);
echo "<a class='button' href='messages.php?view=$view'>" .
"View $name messages</a><br><br>";
die("</div></body></html>");
}
if (isset($_GET['add']))
{
$add = sanitizeString($_GET['add']);
$result = queryMysql("SELECT * FROM friends WHERE user='$add'
AND friend='$user'");
if (!$result->num_rows)
queryMysql("INSERT INTO friends VALUES ('$add', '$user')");
}
elseif (isset($_GET['remove']))
{
$remove = sanitizeString($_GET['remove']);
queryMysql("DELETE FROM friends WHERE user='$remove' AND friend='$user'");
}
$result = queryMysql("SELECT user FROM members ORDER BY user");
$num = $result->num_rows;
echo "<h3>Other Members</h3><ul>";
for ($j = 0 ; $j < $num ; ++$j)
{
$row = $result->fetch_array(MYSQLI_ASSOC);
if ($row['user'] == $user) continue;
echo "<li><a href='members.php?view=" .
$row['user'] . "'>" . $row['user'] . "</a>";
$follow = "follow";
$result1 = queryMysql("SELECT * FROM friends WHERE
user='" . $row['user'] . "' AND friend='$user'");
$t1 = $result1->num_rows;
$result1 = queryMysql("SELECT * FROM friends WHERE
user='$user' AND friend='" . $row['user'] . "'");
$t2 = $result1->num_rows;
if (($t1 + $t2) > 1) echo " ↔ is a mutual friend";
elseif ($t1) echo " ← you are following";
elseif ($t2) { echo " → is following you";
$follow = "recip"; }
if (!$t1) echo " [<a href='members.php?add=" .
$row['user'] . "'>$follow</a>]";
else echo " [<a href='members.php?remove=" .
$row['user'] . "'>drop</a>]";
}
?>
</ul></div>
</body>
</html>
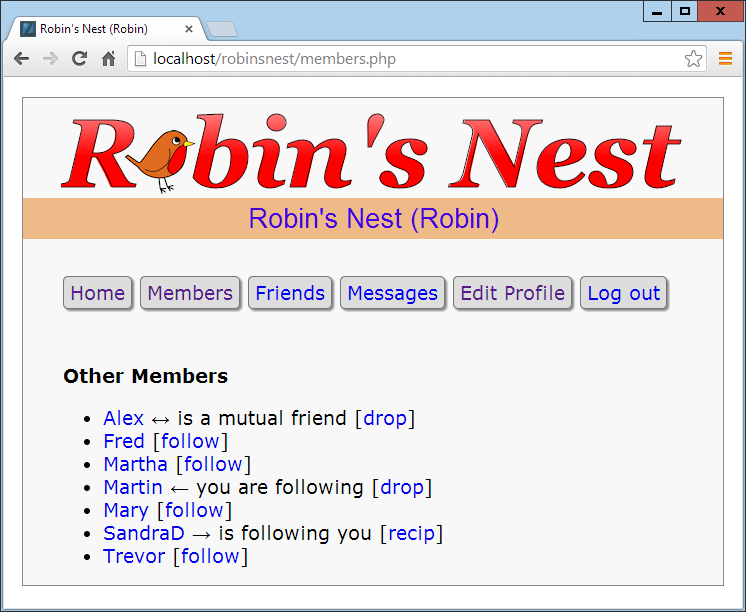
Figure 26-5. Using the members module
Note
On a production server, there could be thousands or even hundreds of thousands of users, so you would probably substantially modify this program to include searching the “about me” text, support paging of the output a screen at a time, and so on.
friends.php
The module that shows a user’s friends and followers is Example 26-10, friends.php. This interrogates the friends table just like the members.php program, but only for a single user. It then shows all of that user’s mutual friends and followers along with the people he is following.
All the followers are saved into an array called $followers, and all the people being followed are placed in an array called $following. Then a neat piece of code is used to extract all those who are both following and followed by the user, like this:
$mutual = array_intersect($followers, $following);
The array_intersect function extracts all members common to both arrays and returns a new array containing only those people. This array is then stored in $mutual. Now it’s possible to use the array_diff function for each of the $followers and $following arrays to keep only those people who are not mutual friends, like this:
$followers = array_diff($followers, $mutual);
$following = array_diff($following, $mutual);
This results in the array $mutual containing only mutual friends, $followers containing only followers (and no mutual friends), and $following containing only people being followed (and no mutual friends).
Now that we’re armed with these arrays, it’s a simple matter to separately display each category of members, as can be seen in Figure 26-6. The PHP sizeof function returns the number of elements in an array; here I use it just to trigger code when the size is nonzero (that is, friends of that type exist). Note how, by using the variables $name1, $name2, and $name3 in the relevant places, the code can tell when you’re looking at your own friends list, using the words Your and You are, instead of simply displaying the username. The commented line can be uncommented if you wish to display the user’s profile information on this screen.
Example 26-10. friends.php
<?php
  require_once 'header.php';

  if (!$loggedin) die();

  if (isset($_GET['view'])) $view = sanitizeString($_GET['view']);
  else                      $view = $user;

  if ($view == $user)
  {
    $name1 = $name2 = "Your";
    $name3 =          "You are";
  }
  else
  {
    $name1 = "<a href='members.php?view=$view'>$view</a>'s";
    $name2 = "$view's";
    $name3 = "$view is";
  }

  echo "<div class='main'>";

  // Uncomment this line if you wish the user's profile to show here
  // showProfile($view);

  $followers = array();
  $following = array();

  $result = queryMysql("SELECT * FROM friends WHERE user='$view'");
  $num    = $result->num_rows;

  for ($j = 0 ; $j < $num ; ++$j)
  {
    $row           = $result->fetch_array(MYSQLI_ASSOC);
    $followers[$j] = $row['friend'];
  }

  $result = queryMysql("SELECT * FROM friends WHERE friend='$view'");
  $num    = $result->num_rows;

  for ($j = 0 ; $j < $num ; ++$j)
  {
      $row           = $result->fetch_array(MYSQLI_ASSOC);
      $following[$j] = $row['user'];
  }

  $mutual    = array_intersect($followers, $following);
  $followers = array_diff($followers, $mutual);
  $following = array_diff($following, $mutual);
  $friends   = FALSE;

  if (sizeof($mutual))
  {
    echo "<span class='subhead'>$name2 mutual friends</span><ul>";
    foreach($mutual as $friend)
      echo "<li><a href='members.php?view=$friend'>$friend</a>";
    echo "</ul>";
    $friends = TRUE;
  }

  if (sizeof($followers))
  {
    echo "<span class='subhead'>$name2 followers</span><ul>";
    foreach($followers as $friend)
      echo "<li><a href='members.php?view=$friend'>$friend</a>";
    echo "</ul>";
    $friends = TRUE;
  }

  if (sizeof($following))
  {
    echo "<span class='subhead'>$name3 following</span><ul>";
    foreach($following as $friend)
      echo "<li><a href='members.php?view=$friend'>$friend</a>";
    echo "</ul>";
    $friends = TRUE;
  }

  if (!$friends) echo "<br>You don't have any friends yet.<br><br>";

  echo "<a class='button' href='messages.php?view=$view'>" .
       "View $name2 messages</a>";
?>

    </div><br>
  </body>
</html>
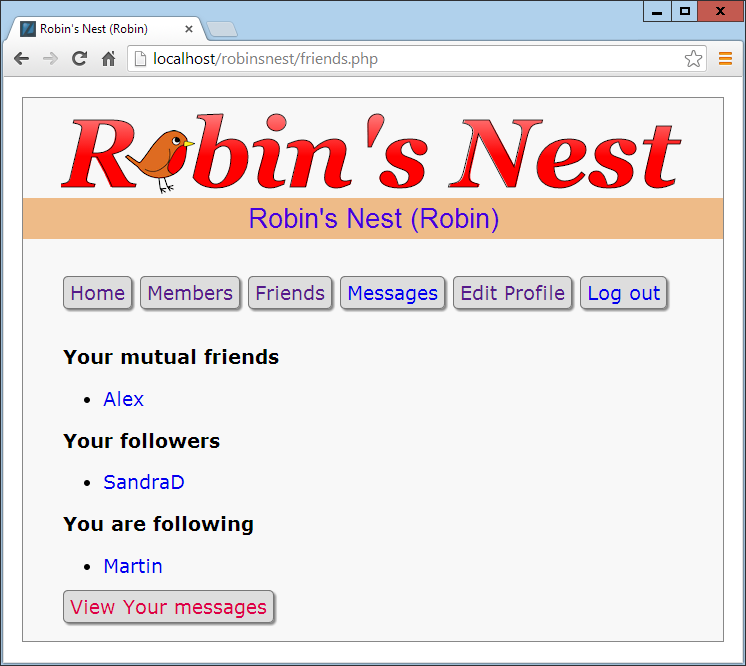
Figure 26-6. Displaying a user’s friends and followers
messages.php
The last of the main modules is Example 26-11, messages.php. The program starts by checking whether a message has been posted in variable text. If so, it is inserted into the messages table. At the same time, the value of pm is also stored. This indicates whether a message is private or public. A 0 represents a public message, and 1 is private.
Next, the user’s profile and a form for entering a message are displayed, along with radio buttons to choose between a private or public message. After this, all the messages are shown, depending on whether they are private or public. If they are public, all users can see them, but private messages are visible only to the sender and recipient. This is all handled by a couple of queries to the MySQL database. Additionally, when a message is private, it is introduced by the word whispered and shown in italic.
Finally, the program displays a couple of links to refresh the messages (in case another user has posted one in the meantime) and to view the user’s friends. The trick using the variables $name1 and $name2 is again used so that when you view your own profile, the word Your is displayed instead of the username.
You can see the result of viewing this program with a browser in Figure 26-7. Note how users viewing their own messages are provided with links to erase any they don’t want.
Example 26-11. messages.php
<?php
require_once 'header.php';
if (!$loggedin) die();
if (isset($_GET['view'])) $view = sanitizeString($_GET['view']);
else $view = $user;
if (isset($_POST['text']))
{
$text = sanitizeString($_POST['text']);
if ($text != "")
{
$pm = substr(sanitizeString($_POST['pm']),0,1);
$time = time();
queryMysql("INSERT INTO messages VALUES(NULL, '$user',
'$view', '$pm', $time, '$text')");
}
}
if ($view != "")
{
if ($view == $user) $name1 = $name2 = "Your";
else
{
$name1 = "<a href='members.php?view=$view'>$view</a>'s";
$name2 = "$view's";
}
echo "<div class='main'><h3>$name1 Messages</h3>";
showProfile($view);
echo <<<_END
<form method='post' action='messages.php?view=$view'>
Type here to leave a message:<br>
<textarea name='text' cols='40' rows='3'></textarea><br>
Public<input type='radio' name='pm' value='0' checked='checked'>
Private<input type='radio' name='pm' value='1'>
<input type='submit' value='Post Message'></form><br>
_END;
if (isset($_GET['erase']))
{
$erase = sanitizeString($_GET['erase']);
queryMysql("DELETE FROM messages WHERE id=$erase AND recip='$user'");
}
$query = "SELECT * FROM messages WHERE recip='$view' ORDER BY time DESC";
$result = queryMysql($query);
$num = $result->num_rows;
for ($j = 0 ; $j < $num ; ++$j)
{
$row = $result->fetch_array(MYSQLI_ASSOC);
if ($row['pm'] == 0 || $row['auth'] == $user || $row['recip'] == $user)
{
echo date('M jS \'y g:ia:', $row['time']);
echo " <a href='messages.php?view=" . $row['auth'] . "'>" .
$row['auth']. "</a> ";
if ($row['pm'] == 0)
echo "wrote: "" . $row['message'] . "" ";
else
echo "whispered: <span class='whisper'>"" .
$row['message'] . ""</span> ";
if ($row['recip'] == $user)
echo "[<a href='messages.php?view=$view" .
"&erase=" . $row['id'] . "'>erase</a>]";
echo "<br>";
}
}
}
if (!$num) echo "<br><span class='info'>No messages yet</span><br><br>";
echo "<br><a class='button' href='messages.php?view=$view'>Refresh messages</a>";
?>
</div><br>
</body>
</html>
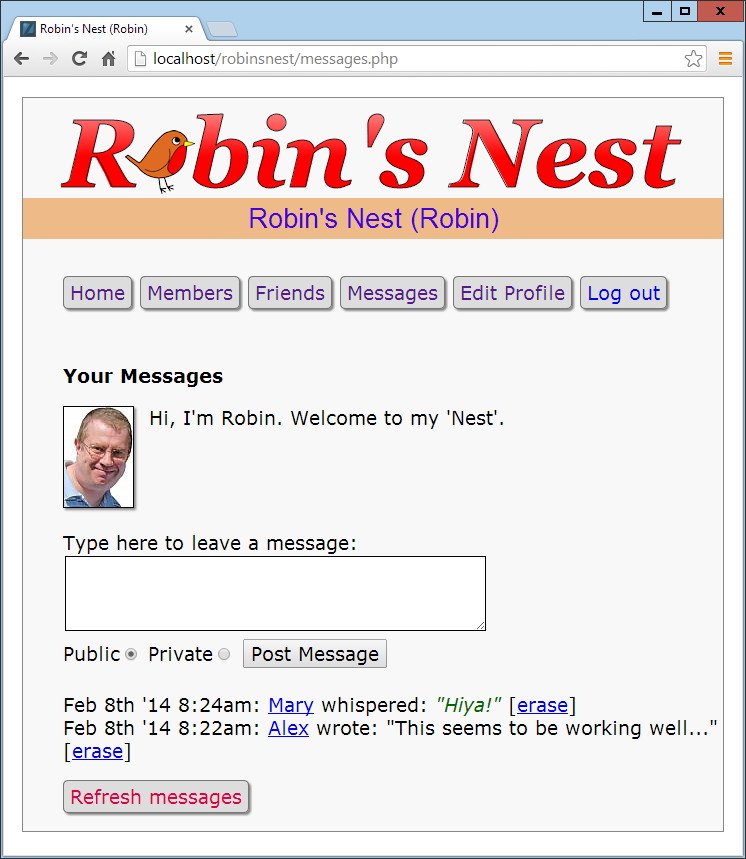
Figure 26-7. The messaging module
logout.php
The final ingredient in our social networking recipe is Example 26-12, logout.php, the logout page that closes a session and deletes any associated data and cookies. The result of calling up this program is shown in Figure 26-8, where the user is now asked to click a link that will take her to the un-logged-in home page and remove the logged-in links from the top of the screen. Of course, you could write a JavaScript or PHP redirect to do this (probably a good idea if you wish to keep logout looking clean).
Example 26-12. logout.php
<?php
  require_once 'header.php';

  if (isset($_SESSION['user']))
  {
    destroySession();
    echo "<div class='main'>You have been logged out. Please " .
         "<a href='index.php'>click here</a> to refresh the screen.";
  }
  else echo "<div class='main'><br>" .
            "You cannot log out because you are not logged in";
?>

    <br><br></div>
  </body>
</html>
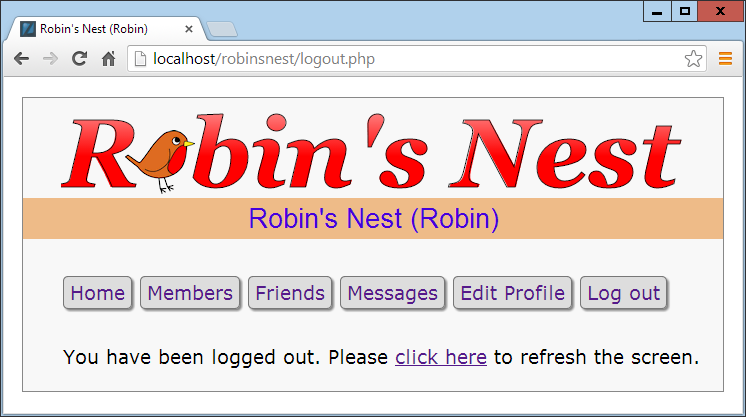
Figure 26-8. The logout page
styles.css
The style sheet used for this project is shown in Example 26-13. There are a number of sets of declarations, as follows:
*- Sets the default font family and size for the project using the universal selector.
body- Sets the width of the project window, centers it horizontally, specifies a background color, and gives it a border.
html- Sets the background color of the HTML section.
img- Gives all images a border, shadow, and a righthand margin.
li aand.button- Remove underlines from hyperlinks in all
<a>tags that are within a<li>element, and all elements employing thebuttonclass. li a:hoverand.button:hover- Sets the color in which
<li>elements and thebuttonclass should display text when hovered over. .appname- Sets the properties for the heading (which uses the
appnameclass), including centering, background and text colors, the font family and size, and the padding. .fieldname- Sets the width of elements using the
fieldnameclass by first floating them. .main- This class applies an indent to elements that use it.
.info- This class is used for displaying important information. It sets a background and foreground text color, applies a border and padding, and indents elements that employ it.
.menu liand.button- These declarations ensure that all
<li>elements and thebuttonclass display inline, have padding applied, and include a border, a background and foreground text color, a right margin, rounded borders, and a shadow—resulting in a button effect. .subhead- Emphasizes sections of text.
.taken,.available,.error, and.whisper- These declarations set the colors and font styles to be used for displaying different types of information.
#logo- These rules style the logo text as a fallback in case a non-HTML5 browser is in use and the canvas logo doesn’t get created.
Example 26-13. styles.css
* {
  font-family:verdana,sans-serif;
  font-size  :14pt;
}

body {
  width     :700px;
  margin    :20px auto;
  background:#f8f8f8;
  border    :1px solid #888;
}

html {
  background:#fff
}

img {
  border            :1px solid black;
  margin-right      :15px;
  -moz-box-shadow   :2px 2px 2px #888;
  -webkit-box-shadow:2px 2px 2px #888;
  box-shadow        :2px 2px 2px #888;
}

li a, .button {
  text-decoration:none;
}

li a:hover, .button:hover {
  color:green;
}

.appname {
  text-align :center;
  background :#eb8;
  color      :#40d;
  font-family:helvetica;
  font-size  :20pt;
  padding    :4px;
}

.fieldname {
  float:left;
  width:120px;
}

.main {
  margin-left:40px;
}

.info {
  background :lightgreen;
  color      :blue;
  border     :1px solid green;
  padding    :5px 10px;
  margin-left:40px;
}

.menu li, .button {
  display           :inline;
  padding           :4px 6px;
  border            :1px solid #777;
  background        :#ddd;
  color             :#d04;
  margin-right      :8px;
  border-radius     :5px;
  -moz-box-shadow   :2px 2px 2px #888;
  -webkit-box-shadow:2px 2px 2px #888;
  box-shadow        :2px 2px 2px #888;
}

.subhead {
  font-weight:bold;
}

.taken, .error {
  color:red;
}

.available {
  color:green;
}

.whisper {
  font-style:italic;
  color     :#006600;
}

#logo {
  font-family:Georgia;
  font-weight:bold;
  font-style :italic;
  font-size  :97px;
}
javascript.js
Finally, there’s the JavaScript file (see Example 26-14), which contains the O, S, and C functions used throughout this book, along with some code to draw the logo for the site using an HTML5 canvas, as explained in Chapter 23.
Example 26-14. javascript.js
canvas               = O('logo')
context              = canvas.getContext('2d')
context.font         = 'bold italic 97px Georgia'
context.textBaseline = 'top'
image                = new Image()
image.src            = 'robin.gif'

image.onload = function()
{
  gradient = context.createLinearGradient(0, 0, 0, 89)
  gradient.addColorStop(0.00, '#faa')
  gradient.addColorStop(0.66, '#f00')
  context.fillStyle = gradient
  context.fillText(  "R  bin's Nest", 0, 0)
  context.strokeText("R  bin's Nest", 0, 0)
  context.drawImage(image, 64, 32)
}

function O(obj)
{
  if (typeof obj == 'object') return obj
  else return document.getElementById(obj)
}

function S(obj)
{
  return O(obj).style
}

function C(name)
{
  var elements = document.getElementsByTagName('*')
  var objects  = []

  for (var i = 0 ; i < elements.length ; ++i)
    if (elements[i].className == name)
      objects.push(elements[i])

  return objects
}
And that, as they say, is that. If you write anything based on this code or any other examples in this book, or have gained in any other way from it, then I am glad to have been of help and thank you for reading this book.
But before you go and try out your newly learned skills on the Web at large, please browse through the appendixes that follow, as there’s a lot of additional information there you should find useful.