Painting is generally more difficult than drawing because, in addition to strokes and values, you must also consider color and its many aspects—saturation, hue, paint mixing, color schemes, etc. BY following the projects in this chapter step by step, you will get ideas for how to approach color and develop your paintings. The focus of this chapter will be on the painting aspect; however, as in Chapter 2, you will have the option of finishing the paintings with a few digital tweaks.

Toothbrush
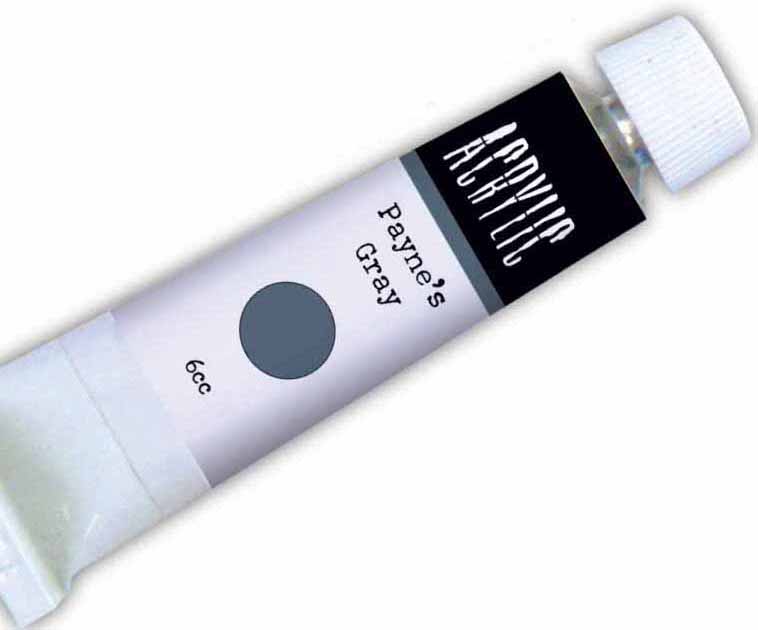
Acrylic paints

Drawing pencil

Paint palette
Acrylic is a fast-drying paint that can be diluted with water, but it becomes water-resistant when dry. You can apply acrylic in thin, diluted layers, or apply it in thick, impasto strokes. Oil paint, however, is not water-soluble, so you will need to purchase turpentine to thin the paint and clean your brushes. Note that only one project calls for oil paints (see page 84), and these can easily be substituted with acrylic paints.
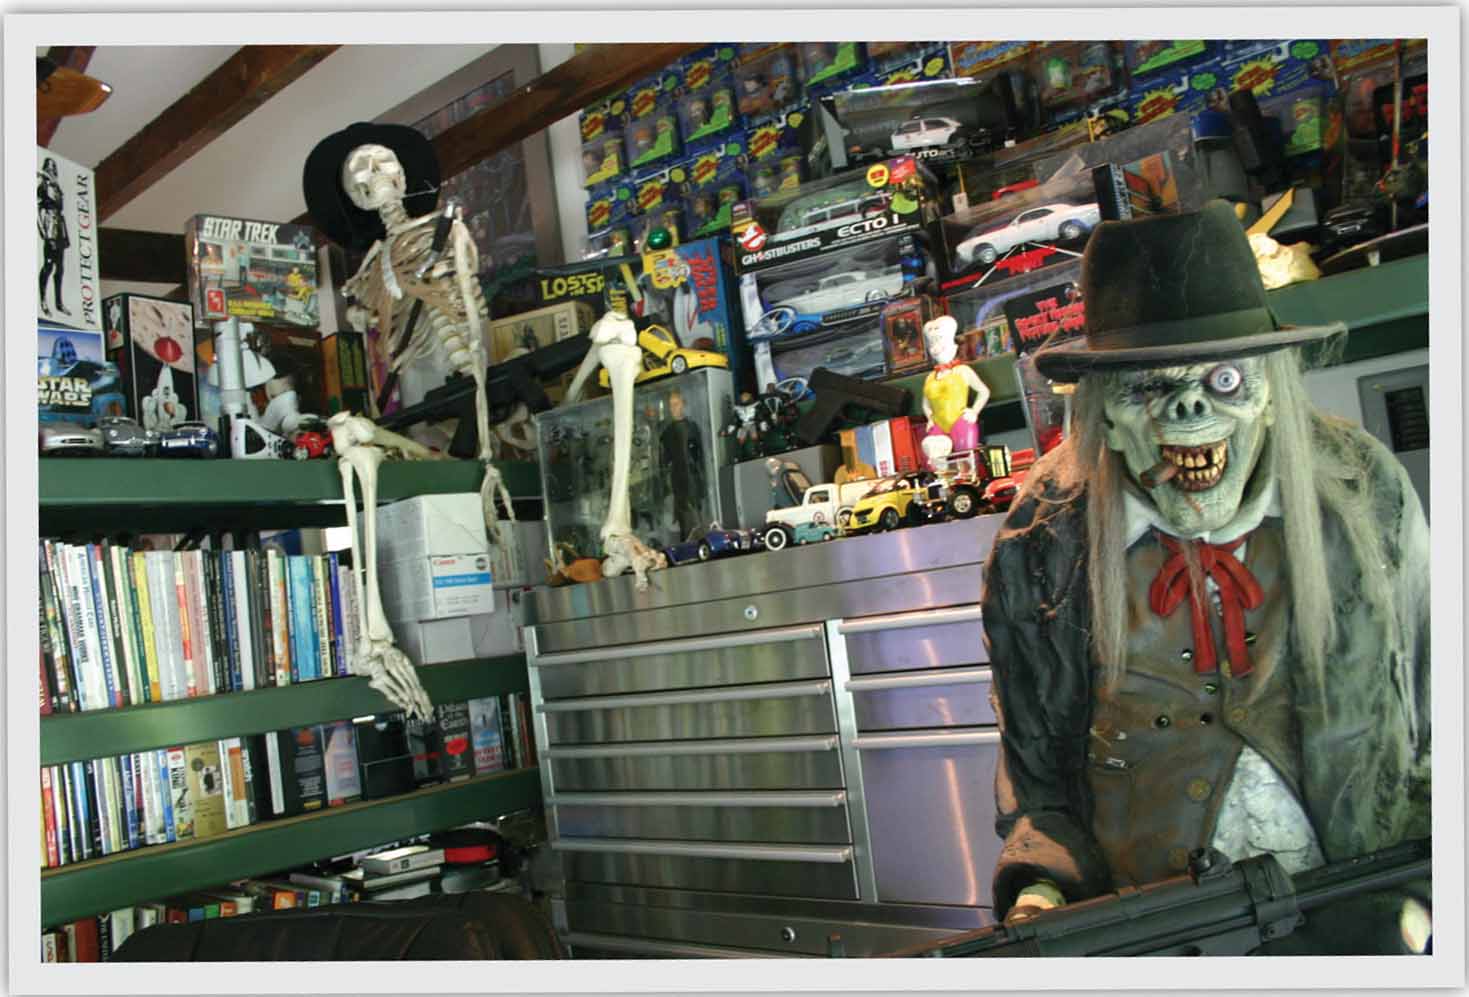
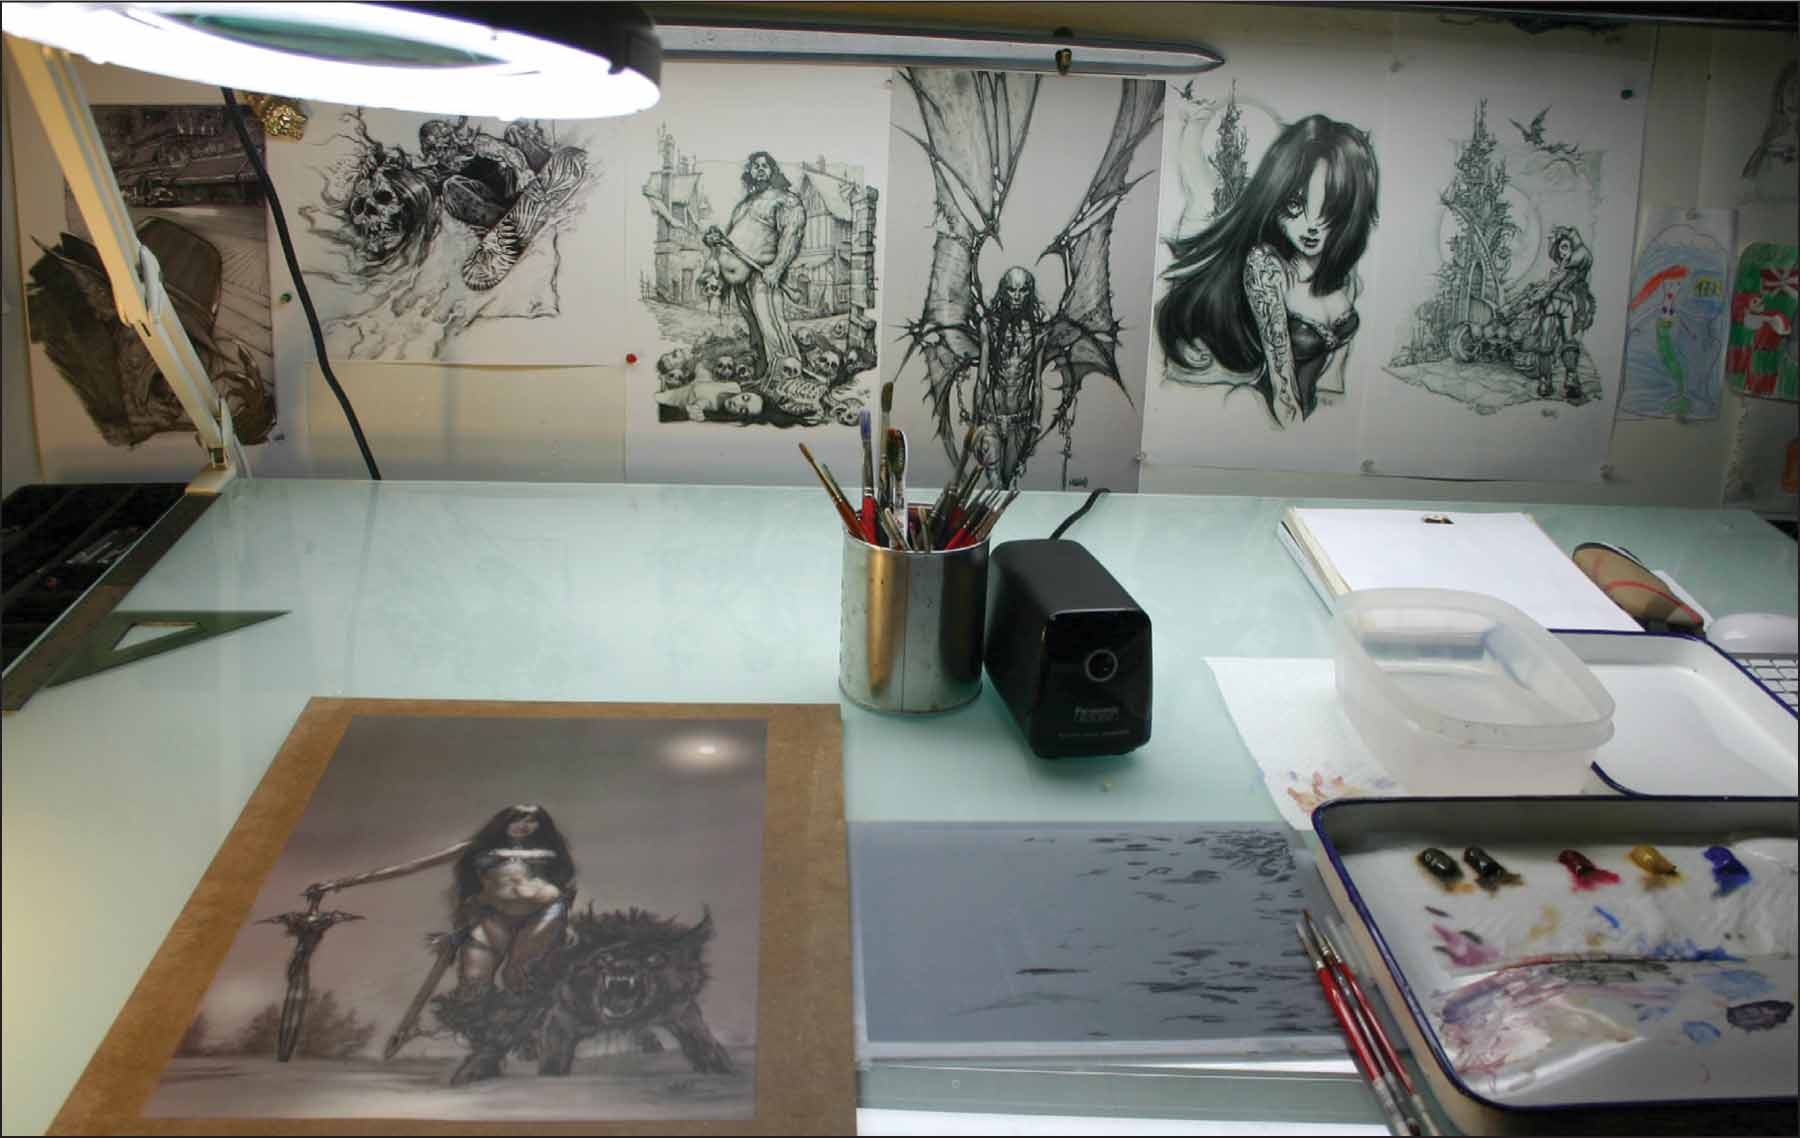
Finding Inspiration
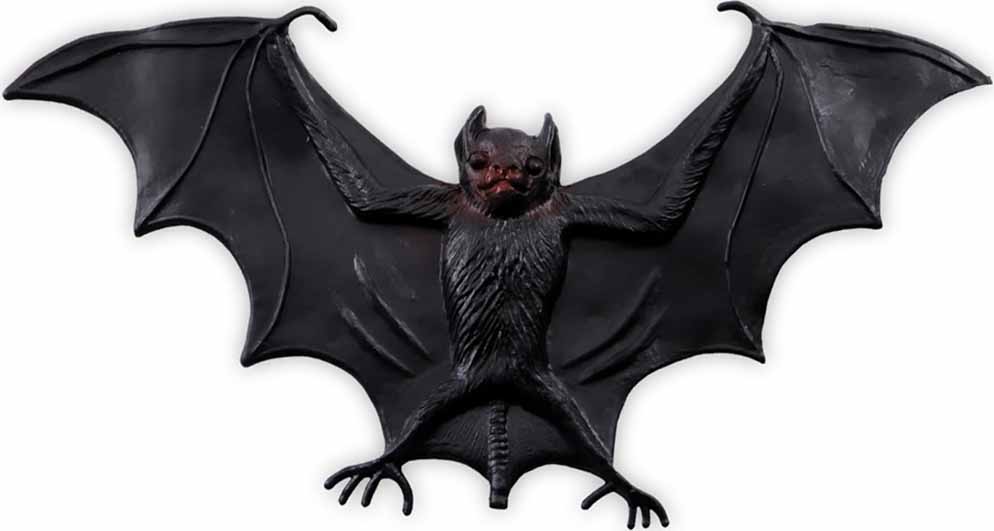
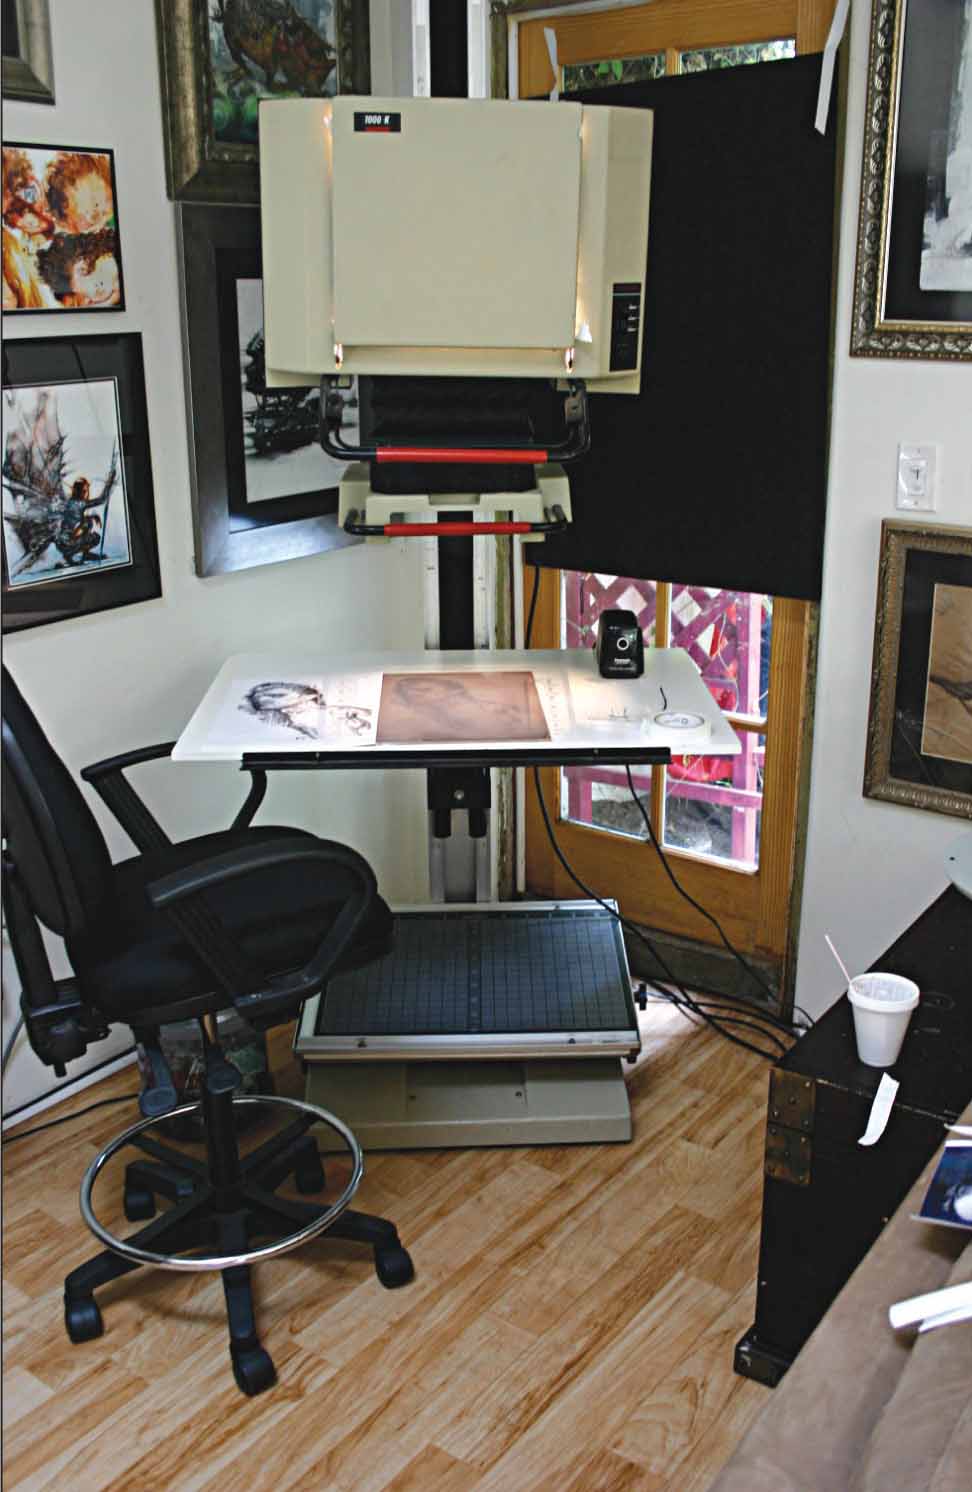
While learning how to draw and paint vampires, it’s a good idea to surround yourself with plenty of visual stimulation. An entire corner of my studio is devoted to reference books and props.
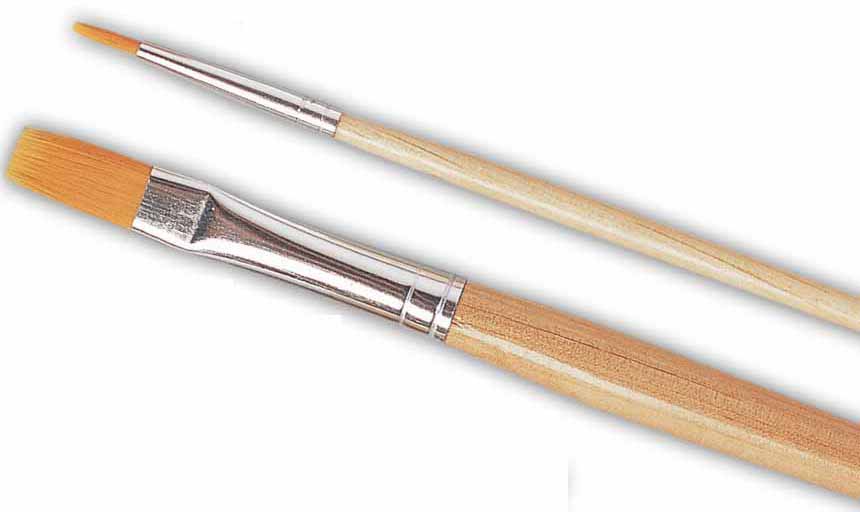
Paintbrushes
When using acrylics, we recommend synthetic hair paintbrushes; however, when using oil paint, we recommend bristle brushes. For the projects in this book, you’ll want a variety of sizes, from size 00 (a very small, fine-tip brush) to size 6 (medium). Also consider gathering a variety of bristle shapes. Round brushes have bristles that taper to a point, allowing for a range of stroke sizes. Flat brushes have bristles that are pinched into a squared tip. The flat edge produces thick, uniform lines. In addition to these acrylic brushes, you’ll also want a house painting brush—a large paintbrush with coarse bristles. These brushes are perfect for quickly covering the canvas with large washes of color. If you own an airbrush, use this when recommended in the projects, as it produces incredibly soft, realistic gradations that are more difficult to achieve with paintbrushes.
Paintbrushes
Painting Surfaces
You can use acrylic paint on practically any surface, as long as it’s not greasy or waxy. However, it’s best to paint on either canvas or illustration board coated with a white gesso (a coating used to create an ideal painting surface). When using oils, linen canvas (also coated in gesso) is ideal. Remember that the brighter (or whiter) your painting surface, the more luminous your colors will turn out!
Colored Pencils
Colored pencils aren’t just for drawing; they are great tools for adding details to a painting. Working directly over acrylic paint, you can add highlights, intensify shadows, create strands of hair, and more. It’s important to purchase the best colored pencils you can afford; higher-quality pencils are softer and have more pigment, giving you smoother, easier coverage.
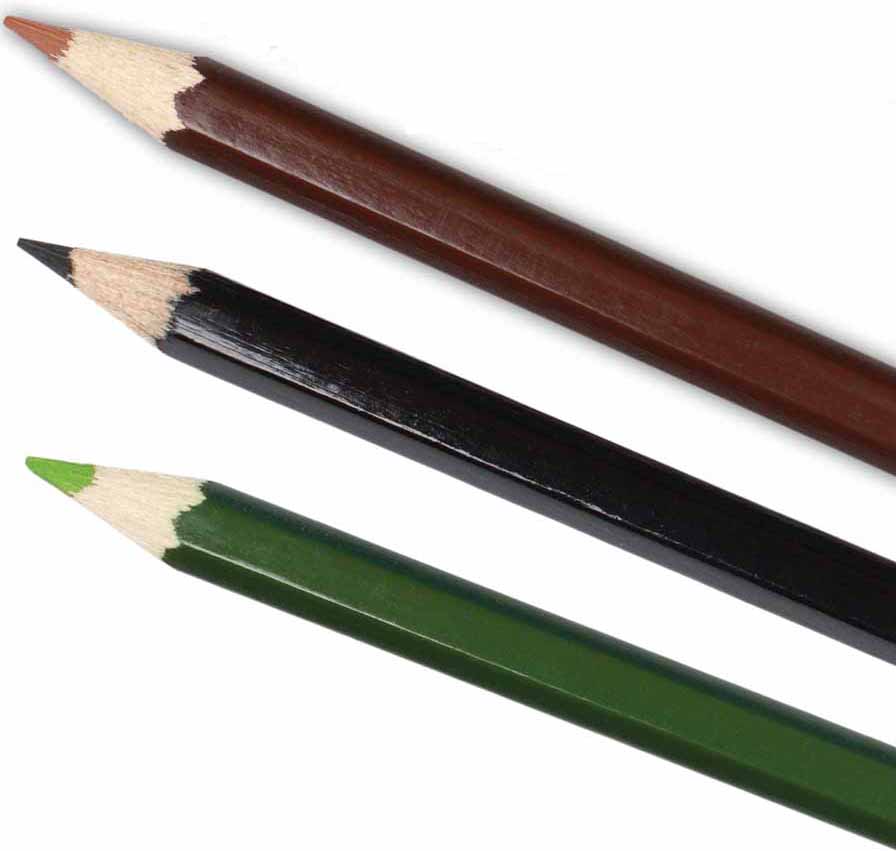
Colored pencils
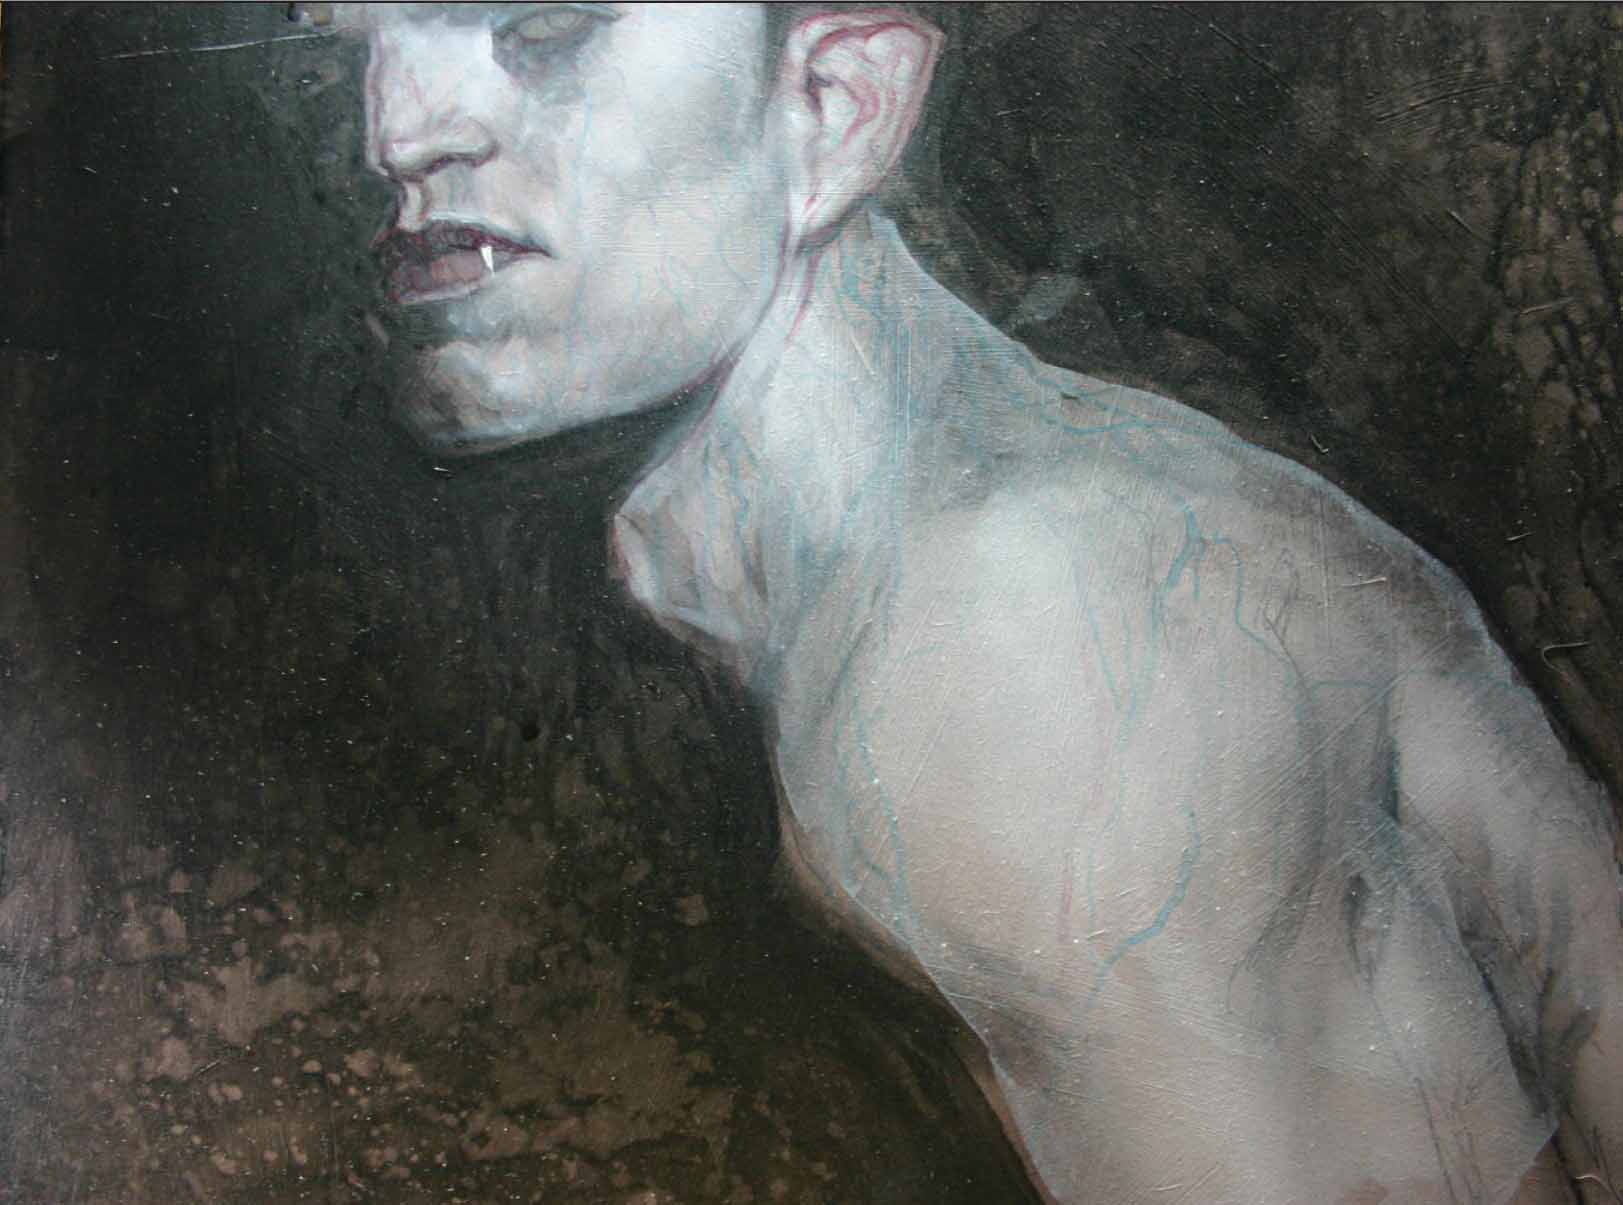
Imagine an almost ageless vampire from Eastern Europe lurking in the shadows of a Romanian café. This stylish patron of the undead has remained on top of modern fashion, and he’s so cool that you almost wonder if he’s a rock star. Then you catch a sinister gleam in his eyes, and you realize that the bright red stain around his mouth isn’t a brand of punk lipstick. It’s blood.
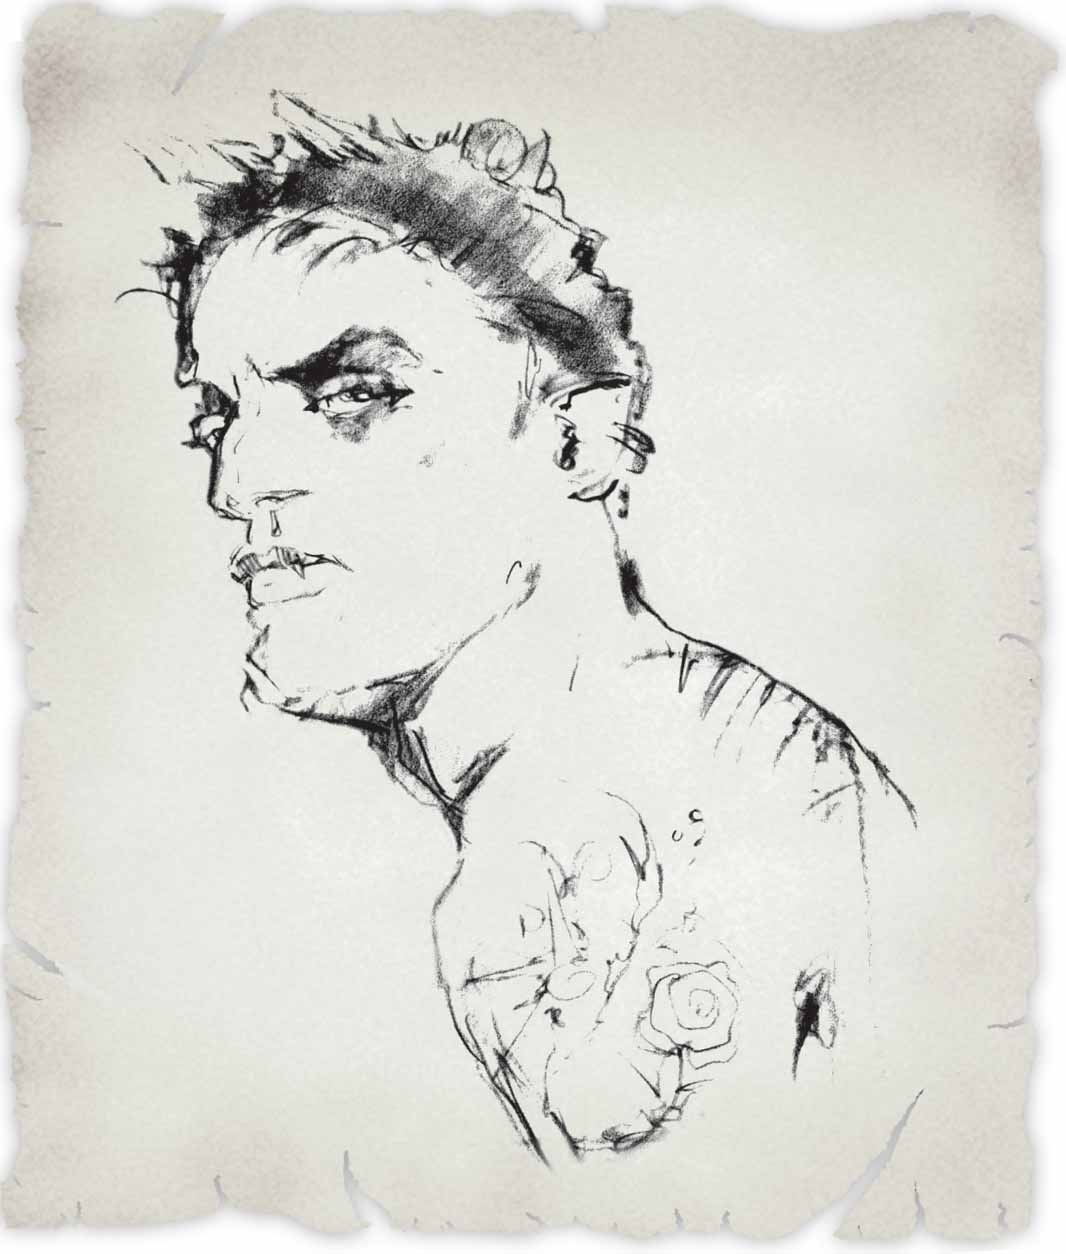
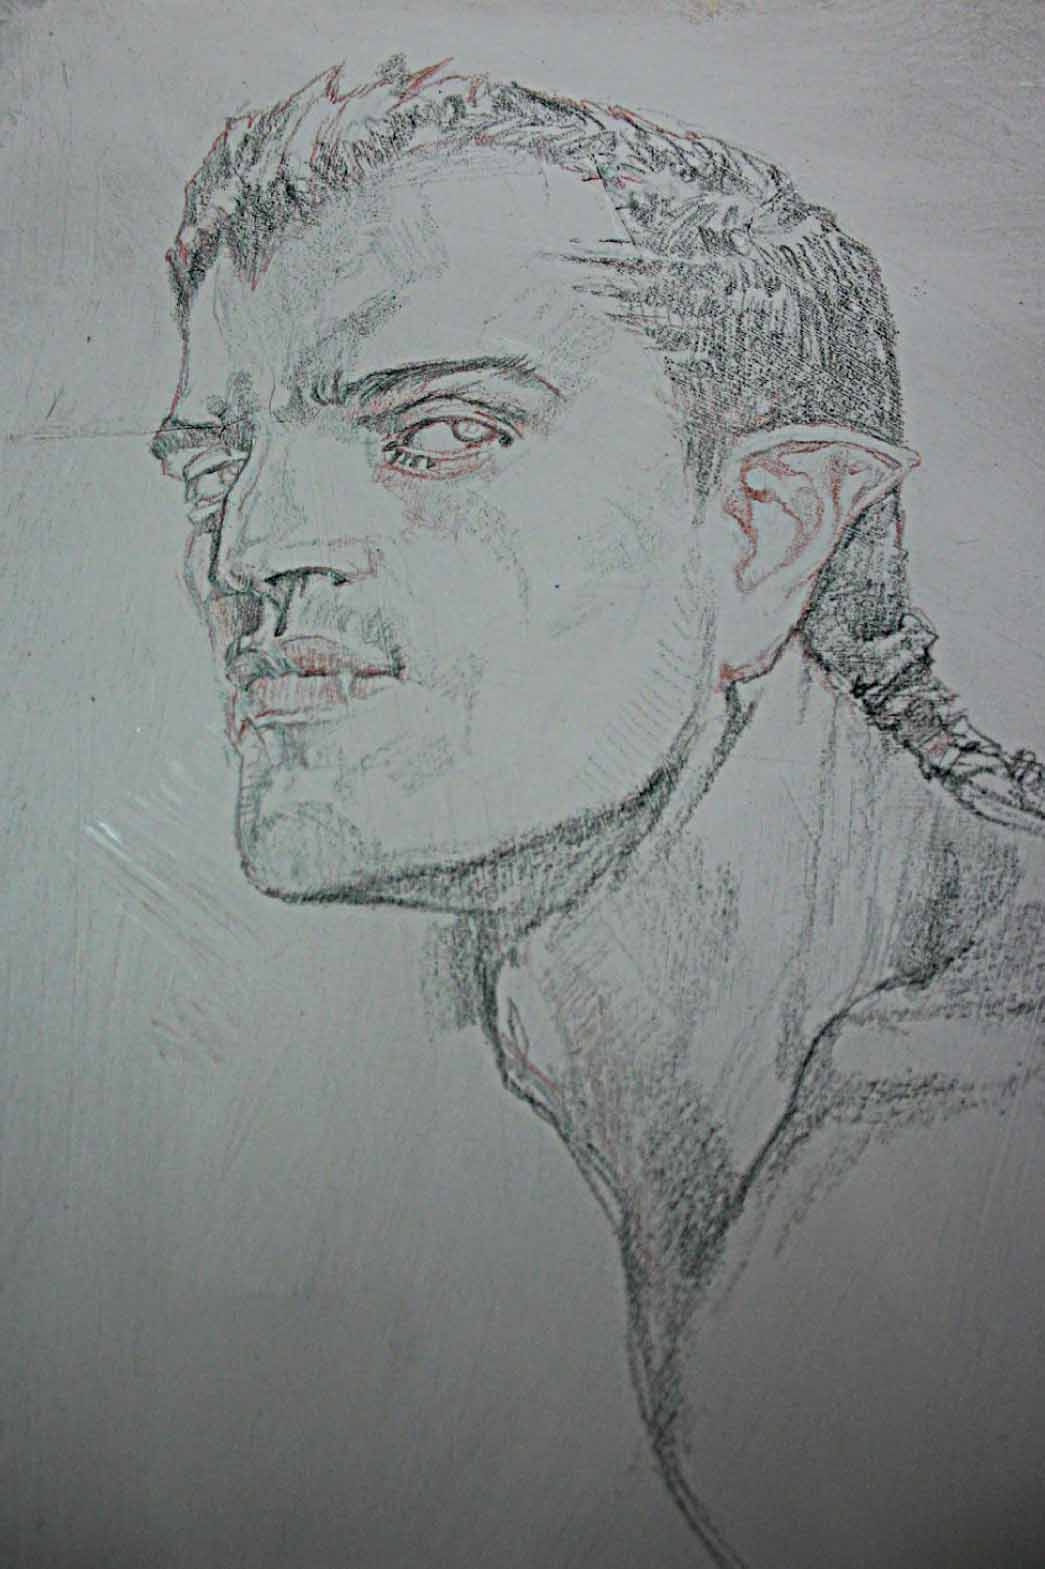
Step One Every project begins with a sketch or a series of sketches. Here you can see the sketch that was the inspiration for this project.
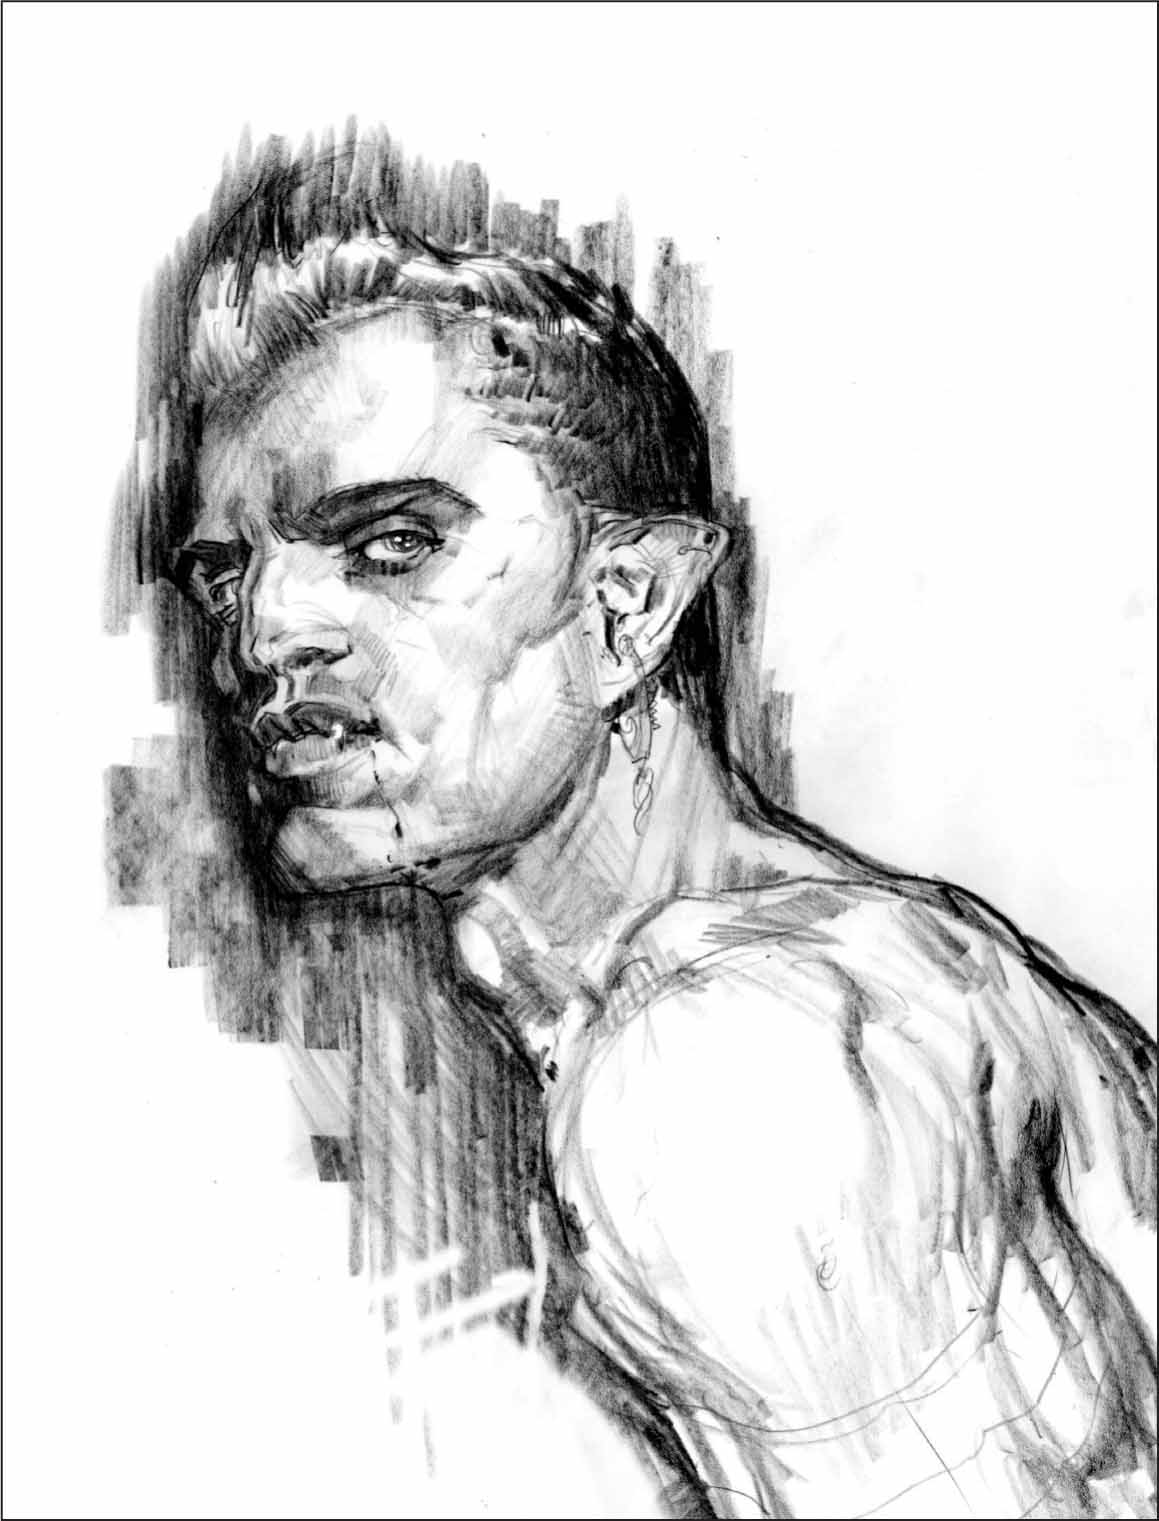
Step Two Begin this project by first creating the drawing, using a sharp black colored pencil on vellum paper. The paper is a bit expensive, but this combination of pencil and paper will give your drawing an unbeatable creamy finish that you won’t get with anything else. To convey strength and confidence in this character, take the side of your pencil and make quick graphic strokes to chisel out his features. (You can transfer this sketch; see “Transferring a Drawing” on page 25.)
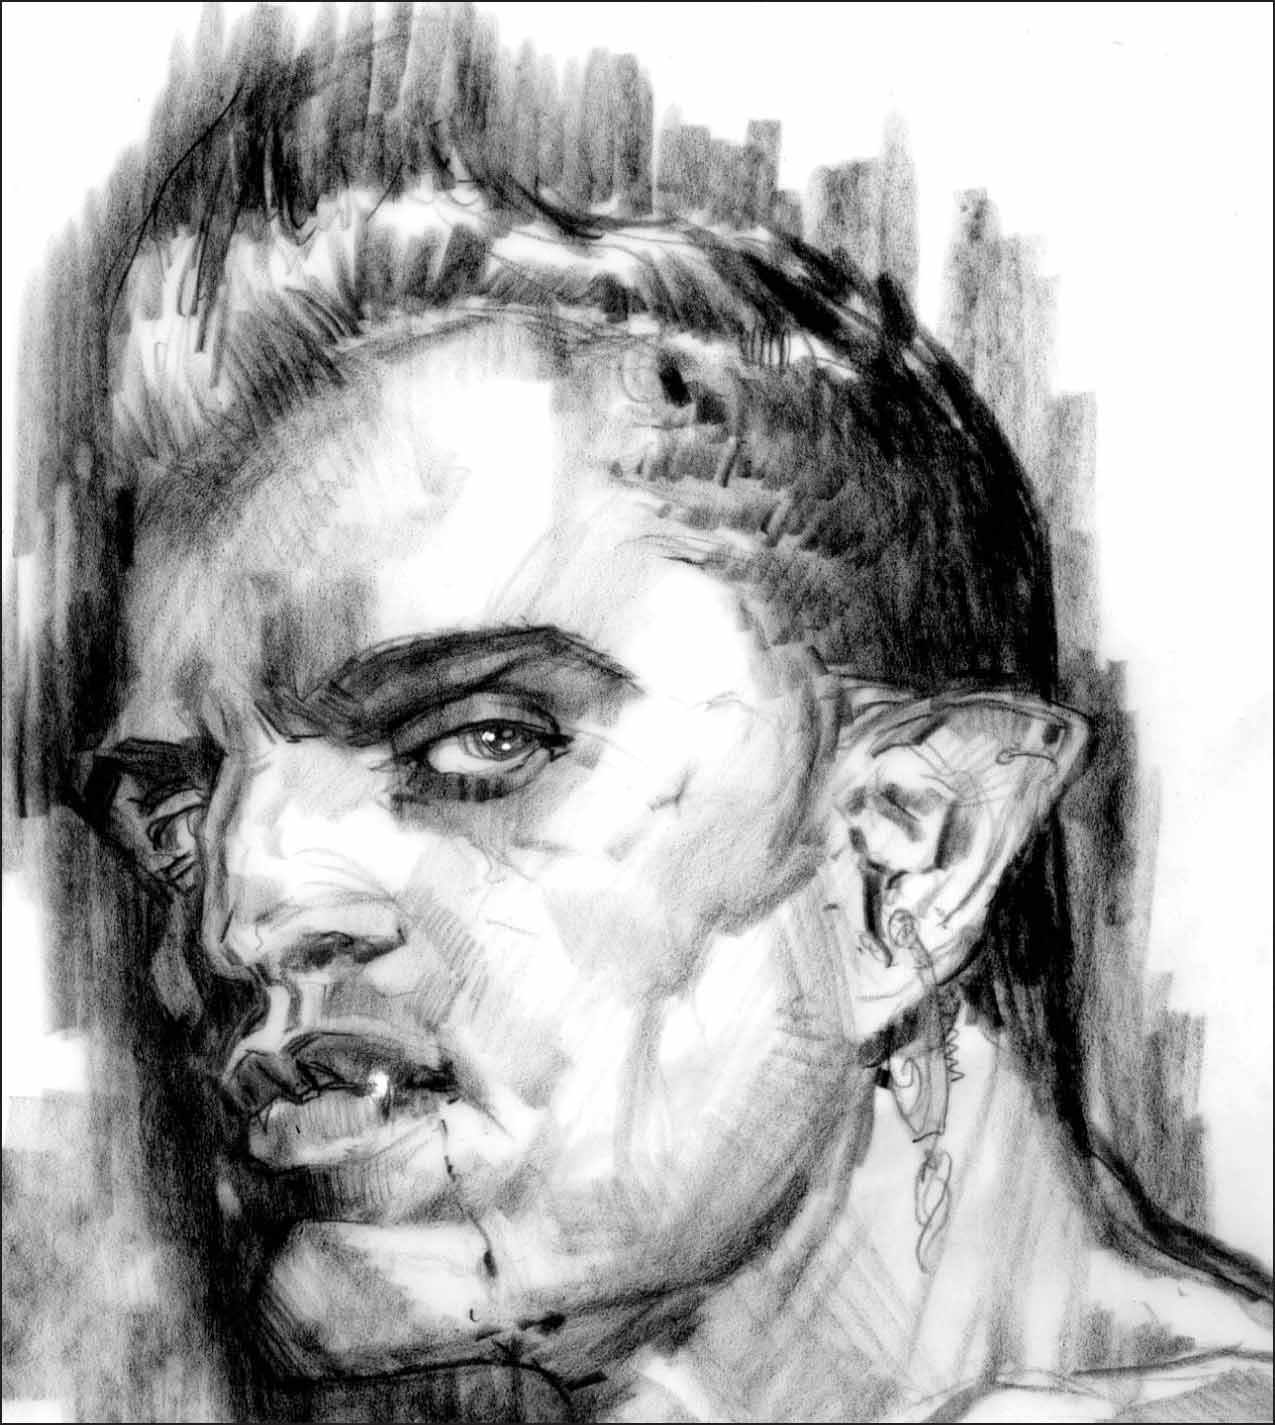
Step Three We want to make sure that this European vampire has all the masculine attributes that a terrifying male hunter would possess, but include hints of femininity as well. To achieve this, shade the eyelids and give him thick lips. Also, give him an edgy haircut and earrings to show that, although this vampire is several hundred years old, he still stays on top of modern fashion. Before you begin the painting process, make sure you are satisfied with the drawing so that you can use it as a reference point. Note: Keep male catalogues and magazines nearby for reference when inventing this type of character.
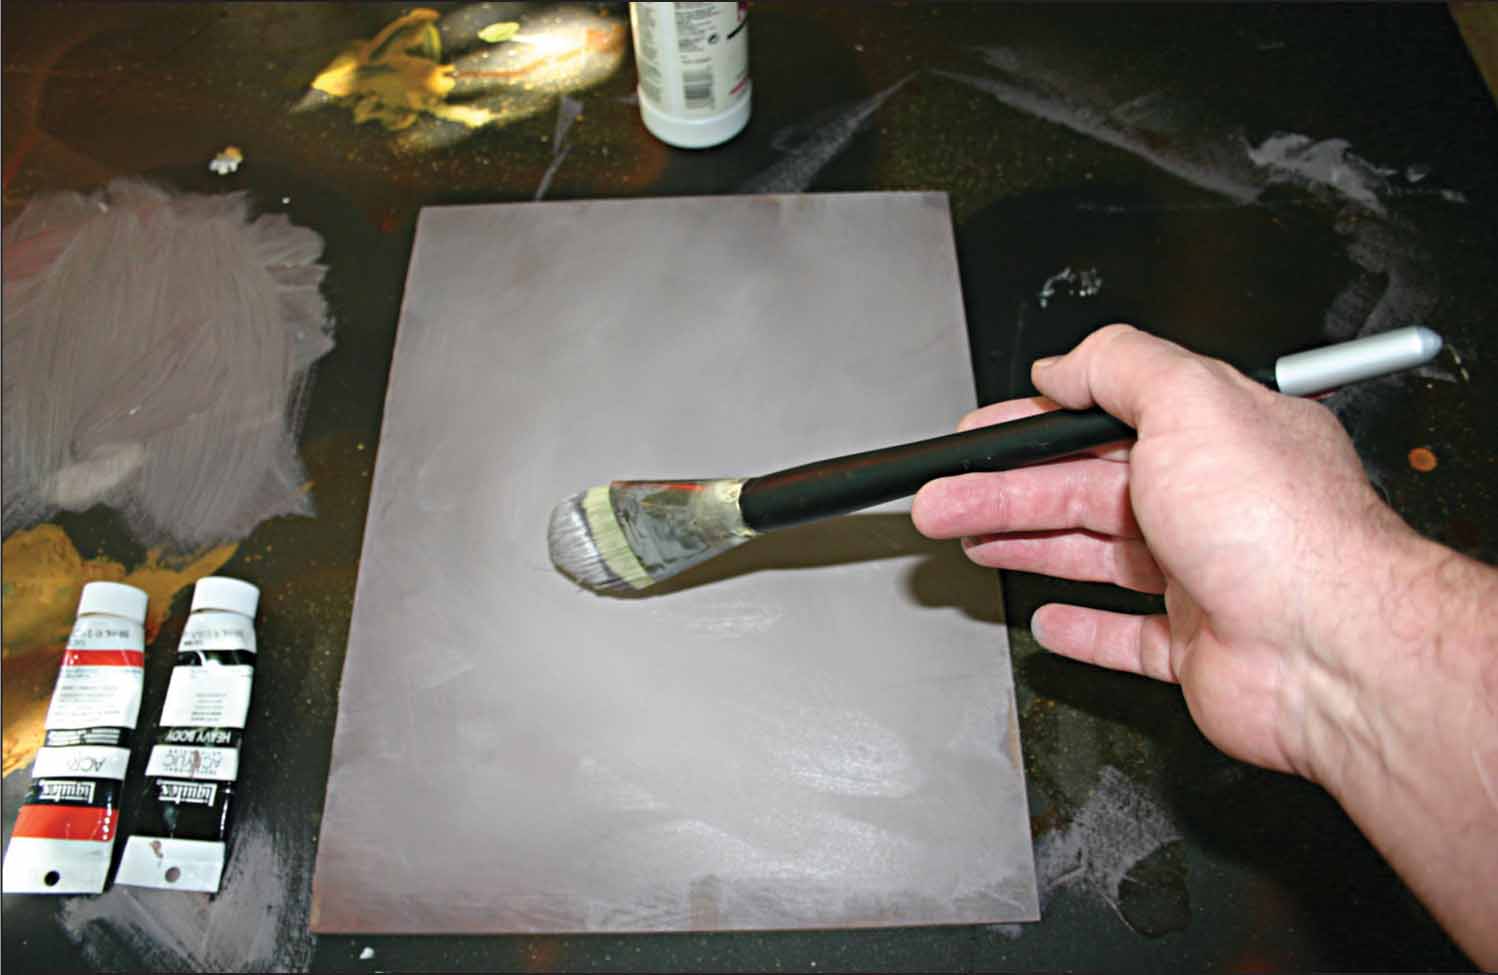
Step Four Now, on to the prep work for the painting. Lay your masonite board—chosen because of because of its durable and inflexible quality—on a disposable work surface. Mix together some white gesso, naphthol red light, Mars black, and water; then use a large brush to create a warm gray base color for the painting. This immediately sets the tone and mood for the character.
Step Five Once the board is dry, we will project the drawing onto it. Use a black colored pencil for this stage as well. Again, keep it extremely sharp. You might even want to keep a trusty pencil sharpener on the desk corner as a reminder.
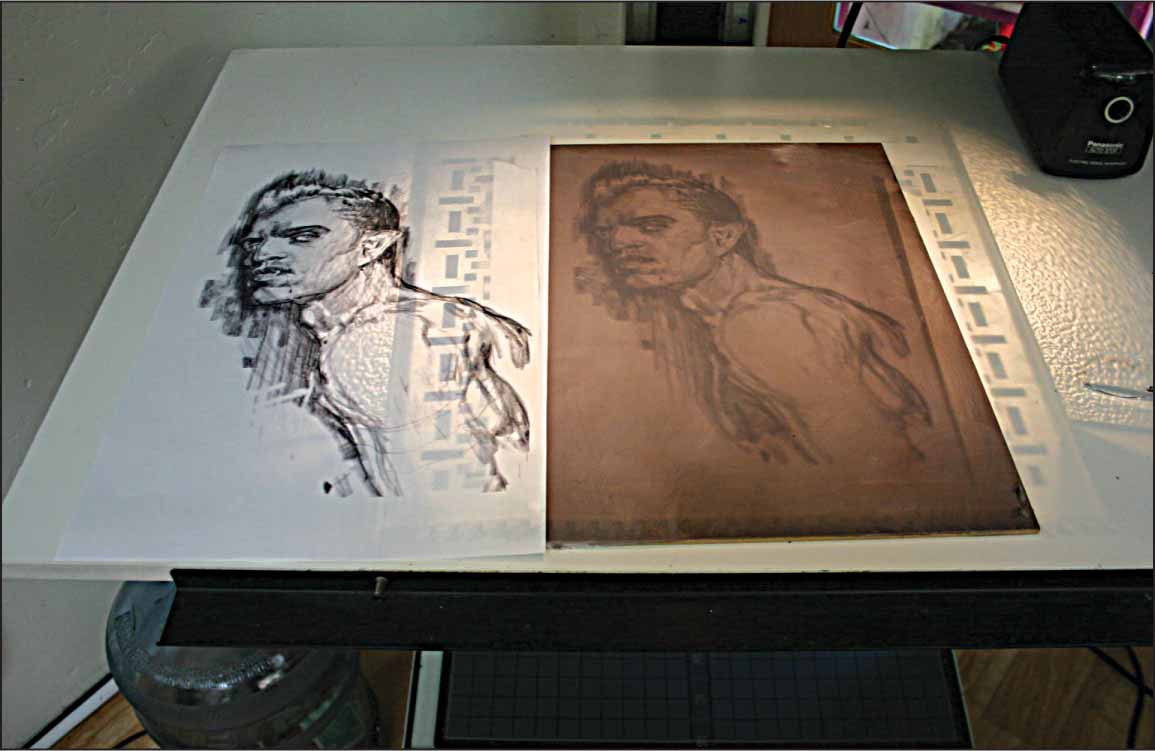
Step Six On the other side of the masonite board, keep a copy of your original drawing that you are going to project. This is done so that throughout the projecting process, you can stop from time to time and refer back to it.
Step Seven Now the drawing has been projected onto the primed masonite board. Remember when we suggested that you keep a copy of the original drawing beside the board? Even with this precaution taken, the jaw line and mouth of the vampire came out quite differently from the original. This could have been caused by distortion of the old projector or by my own judgment. In this case, I felt confident enough to proceed and decided to change it accordingly as I began to paint.
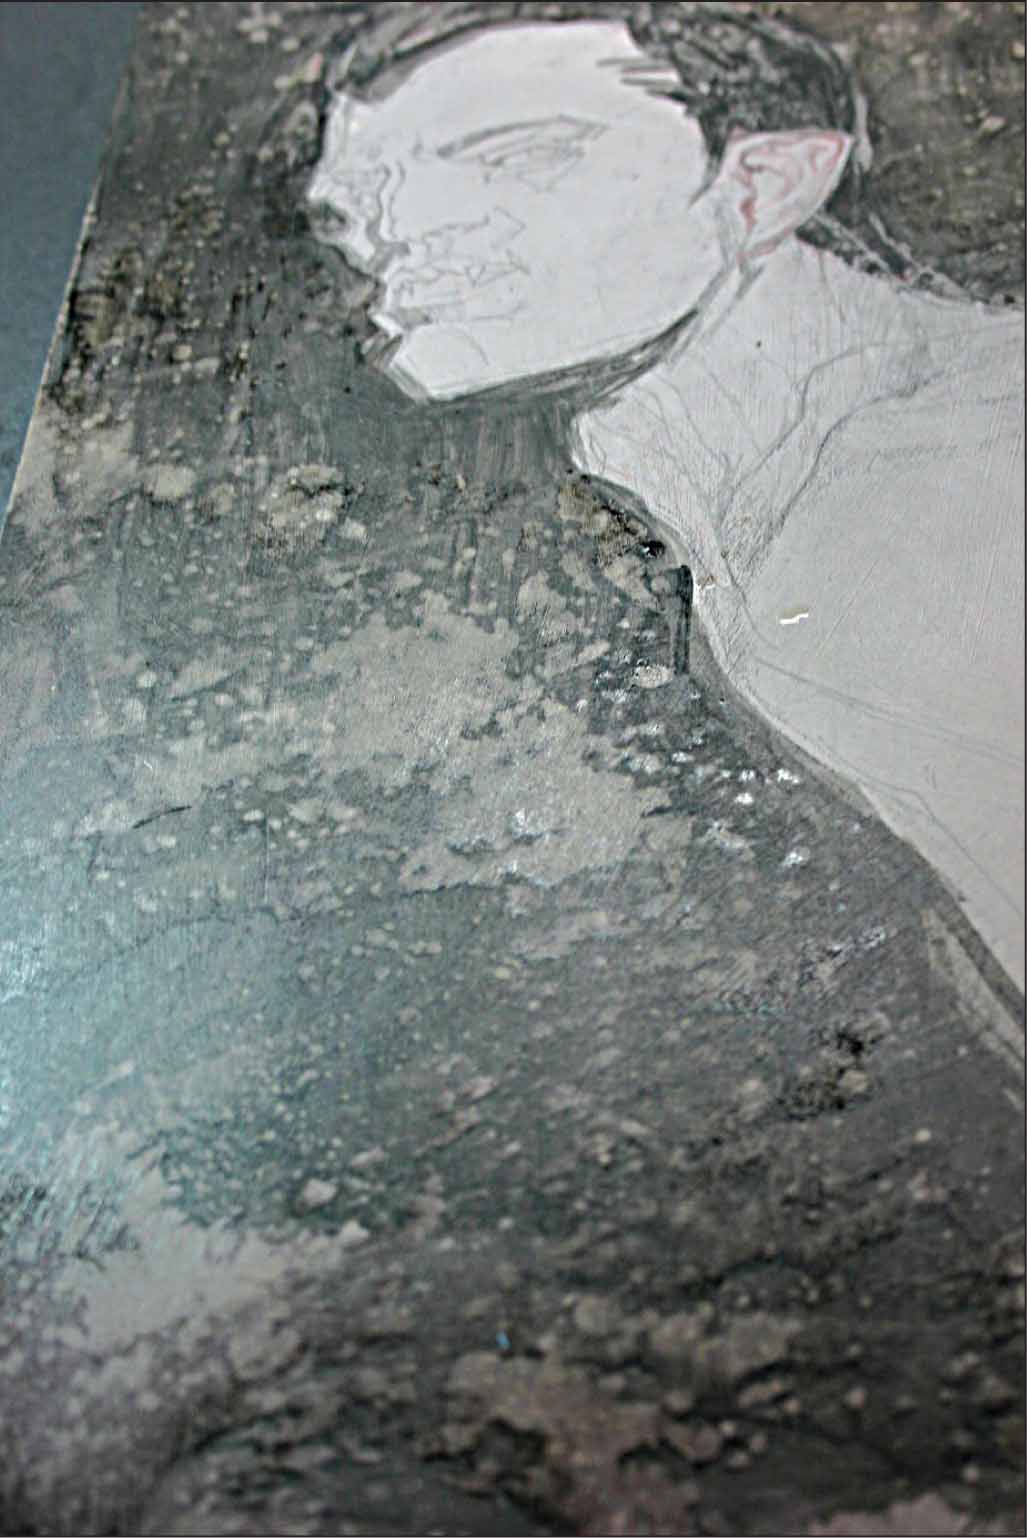
Step Eight With a big brush, mix together some Mars black and water. Then proceed to lay in the darker value for the background. This will make the vampire appear as if he’s emerging from the shadows. Next, using pure Mars black, begin painting his hair. Keep layering the background color. Play around with the brushstrokes by drying your brush and sweeping it across the board to create attractive designs. For the big splotches, take a dry paper towel and blot different areas. Then, taking an old toothbrush, dip it into some water and splatter it all over the background for some interesting textures.
Step Nine Now, we’ll begin to define the musculature and anatomy of the vampire. If you have an airbrush, fill it with some burnt umber. Then, with one hand, take an index card and hold it about an inch above the area you are working on. Use your other hand to begin airbrushing. This quickly creates chiseled edges for the muscles and soft transitional values at the same time. For example, look at the shadow side of the face. If you don’t have an airbrush, build up thin layers of paint, softening edges for a gradated look. Next, for the veins, use a little bit of cerulean blue hue mixed with a good amount of water and start to lightly paint it in with a fine-tip brush. Then, create a mixture of white gesso and a little burnt umber. Use this to layer or airbrush a pale skin tone over the whole figure.
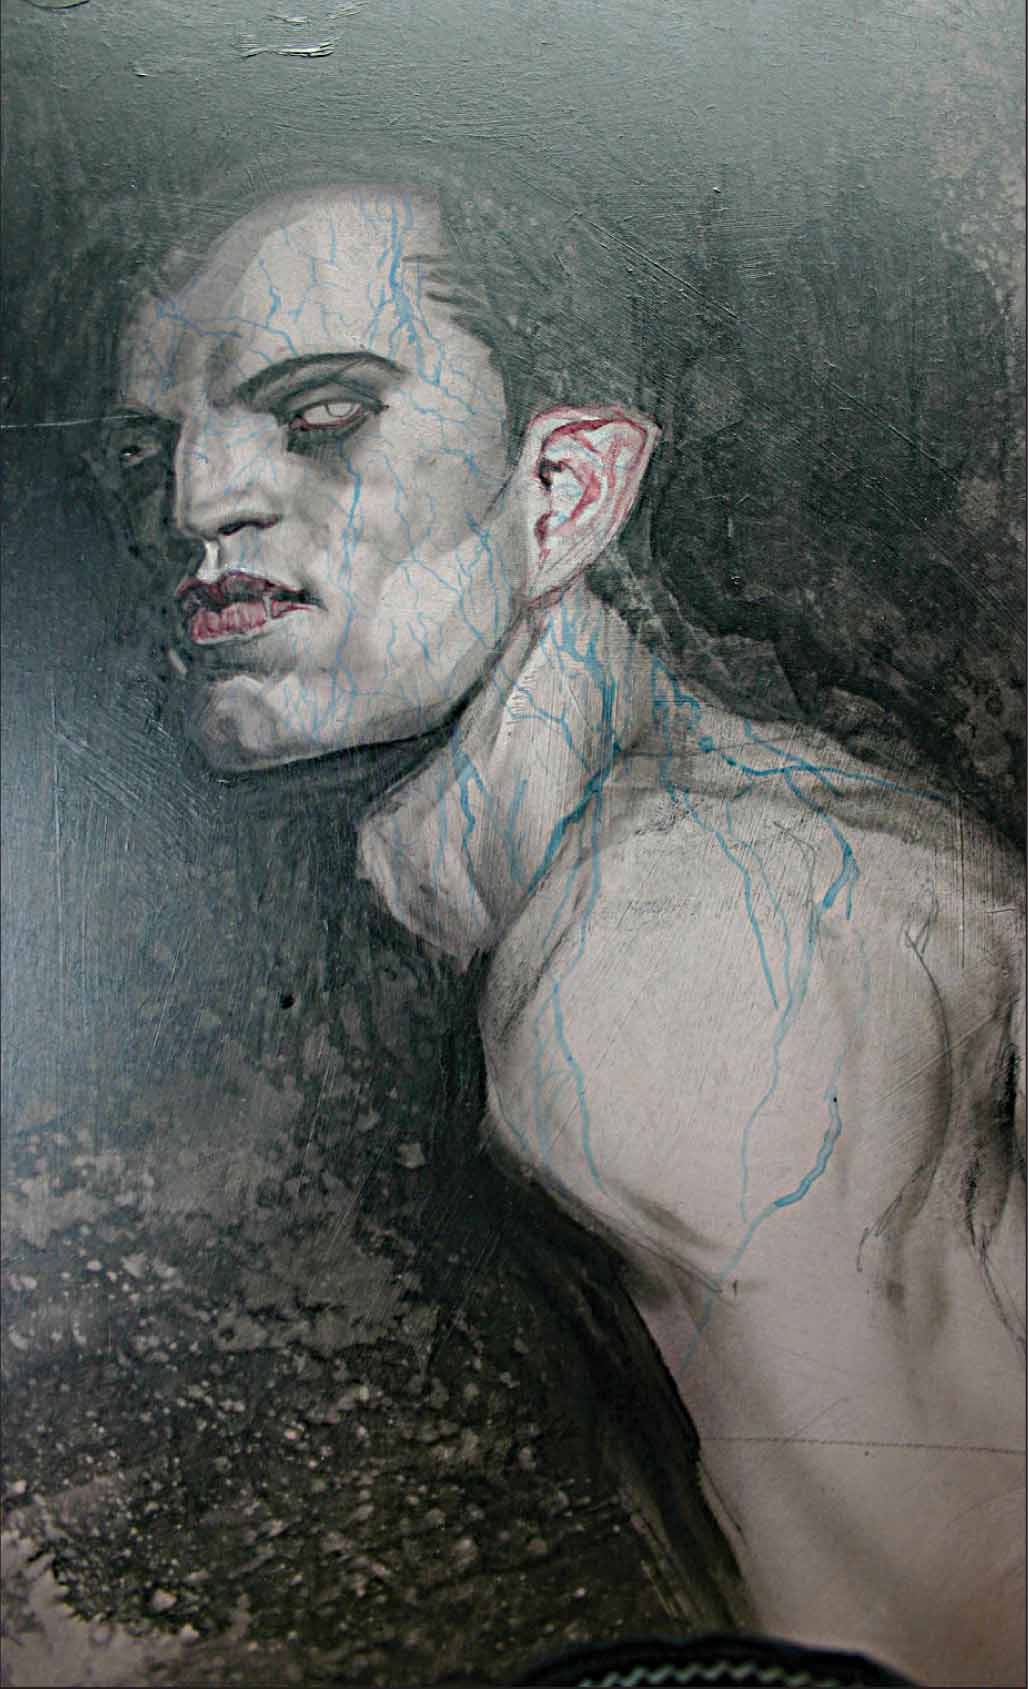
Step Ten For the face, we will begin by laying in the approximate colors that we want for the features. Using the index card technique, start to define the vampire’s eyes with a mixture of Mars black and burnt umber. Next, use a fine brush to paint in his lips with a cool red. It looks like he’s wearing lipstick, but it’s just there to remind you of the blood stains to come. Now flush out the face a bit more. Take a small brush—about a size #2—and mix some white gesso, cadmium red light, and water. Use this to soften the edges around the eyes, nose, mouth, and ears, adding just a hint of warmth to his face. Of course, at this point you’ll also paint in his bright white fang.
Step Eleven Next, add another layer of white gesso and cerulean blue to the face and body using an airbrush or thin layers of paint. When this dries, paint in the veins again and repeat the process. This layering process creates a soft, pale, translucent quality for our undead hunk who, unfortunately, hasn’t been able to get a proper tan for the last couple of centuries.
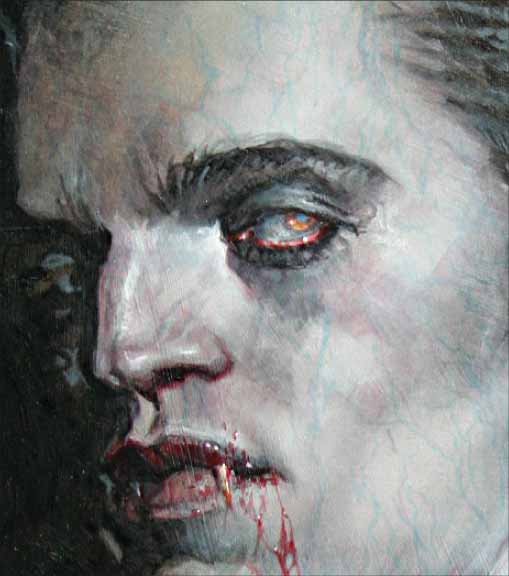
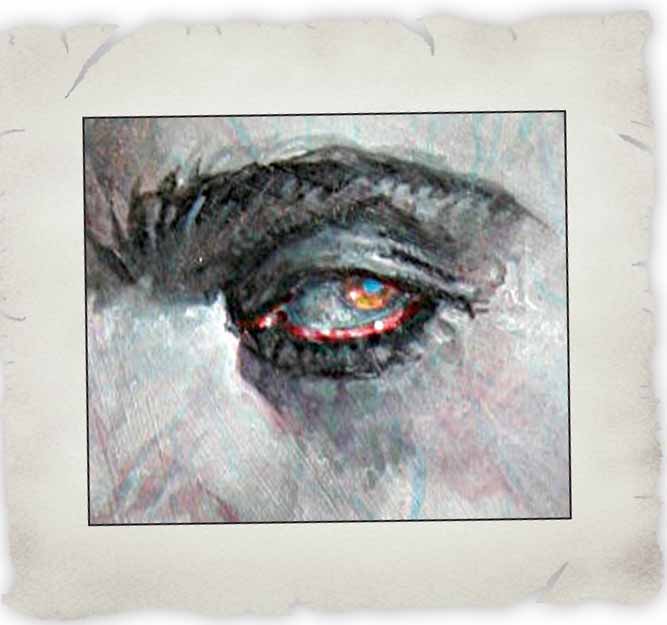
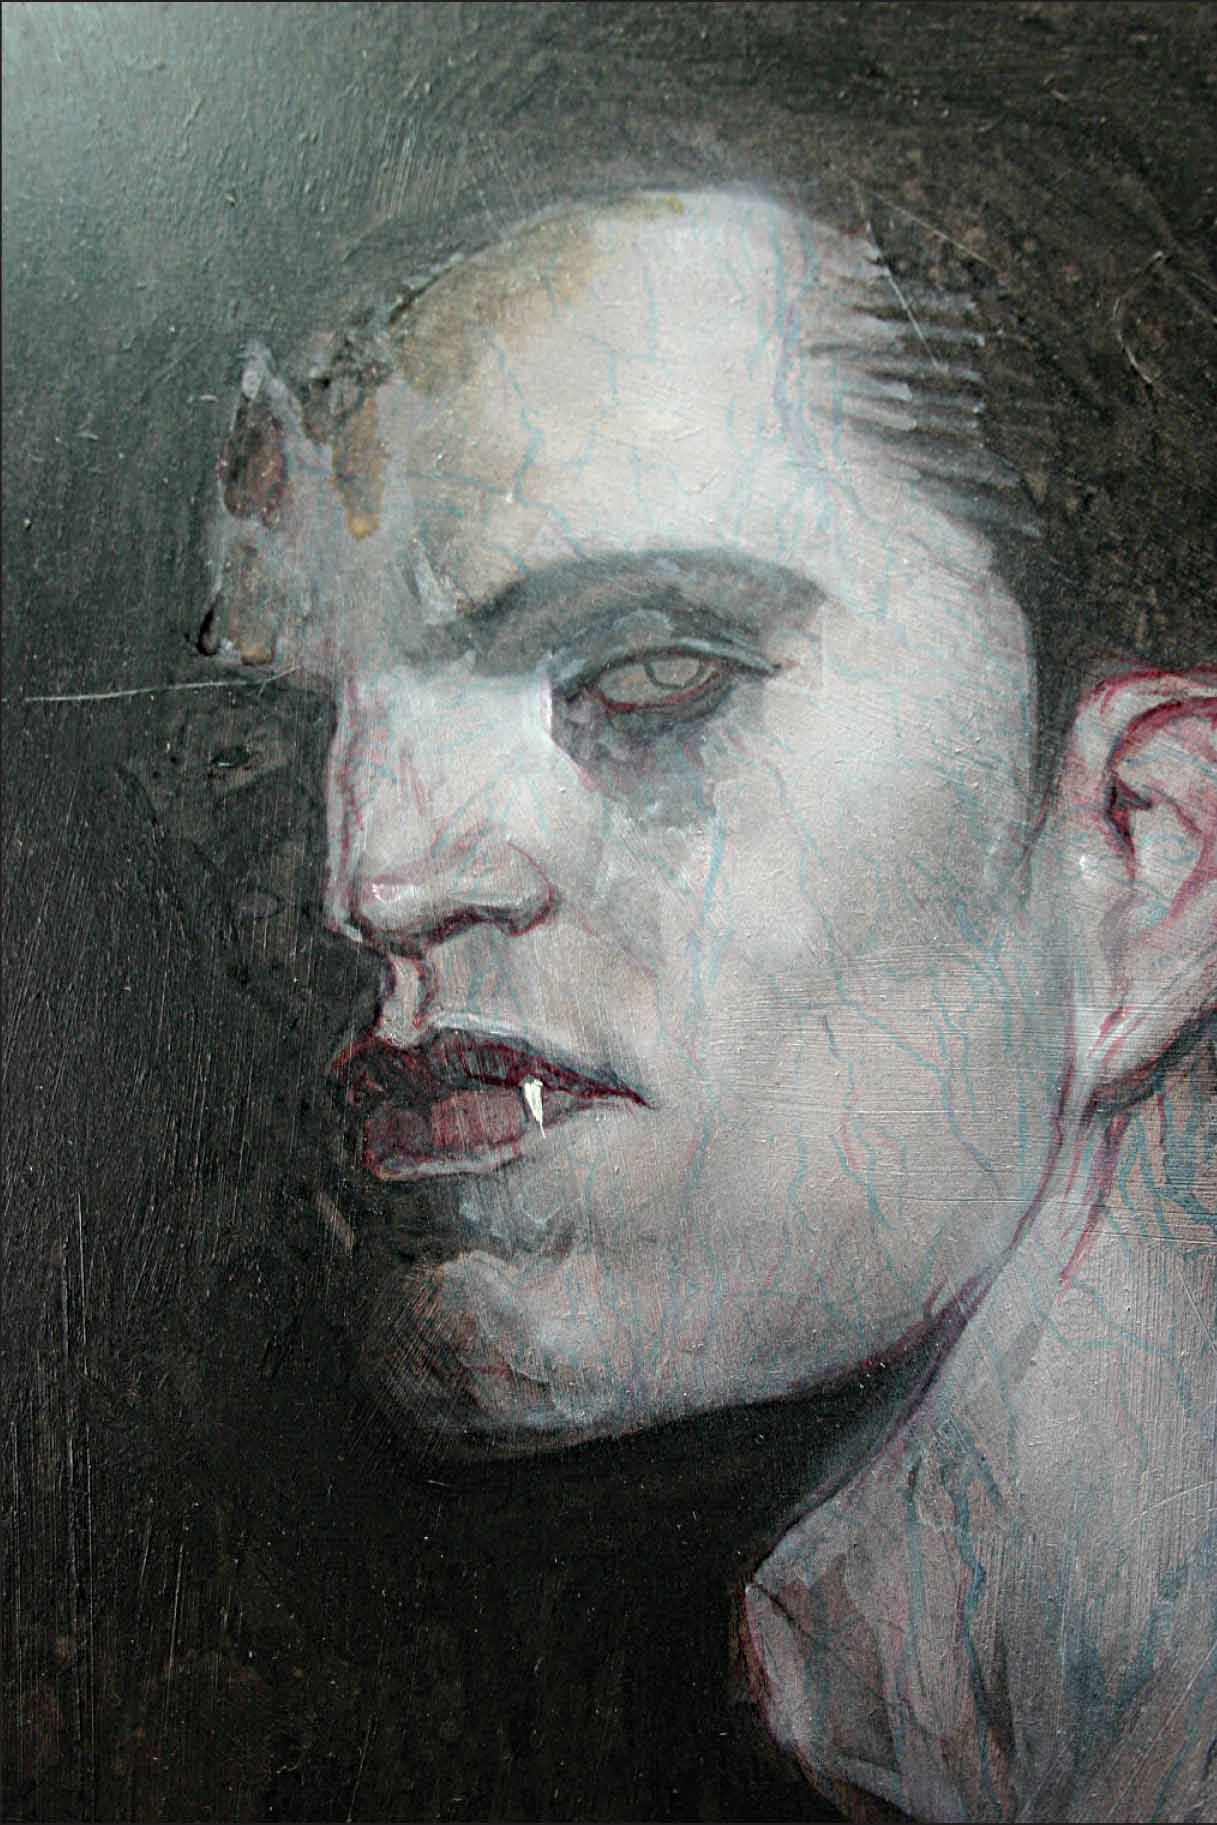
Step Twelve We’re going to work on the face again, adding some of the more terrifying elements to his features, such as the blood splatter around his mouth and the crimson around his eyes. Using a fine-tip brush, paint some stringy patterns along the side of his chin with diluted cadmium red deep hue. Keep in mind that you need to design the shapes of the trickling blood; keep it attractive so it won’t look like an afterthought. For his eyes, begin to experiment with the “look.” Mix a little cadmium red deep hue and titanium white. Use this to outline the pupils and the outer rim. Then, with a fine-tip brush, add some highlights for a moist and eerie glow.
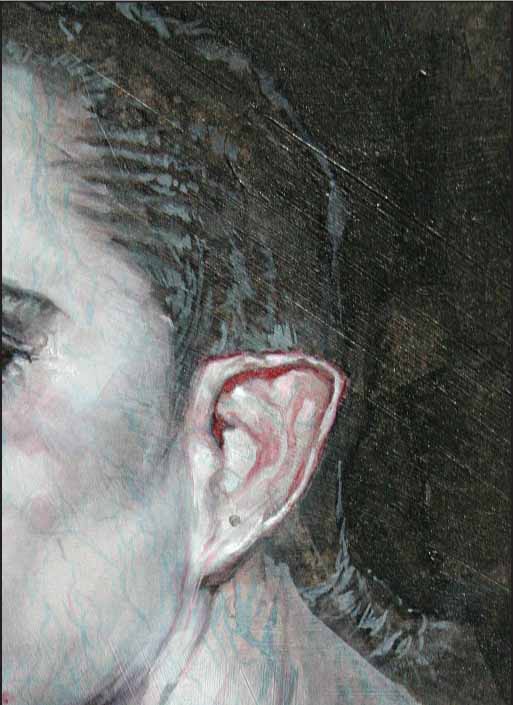

Step Thirteen Since this vampire is a centenarian, we should show that he’s experienced quite a few fashion trends. One way to express this is through his hair. Keep the existing background colors and textures for his hair, and just bring in some cool gray-blue strands and highlights to show the style. We want to give him an underground, punk look, while at the same time, the elaborate braid indicates an older history. Also, we’ll make the ear slightly pointed. Give his ear blood-red shadows by mixing a bit of cadmium red deep hue and phthalocyanine blue. Keep it uncomplicated, but maintain a play of warm pinks and cool blues.
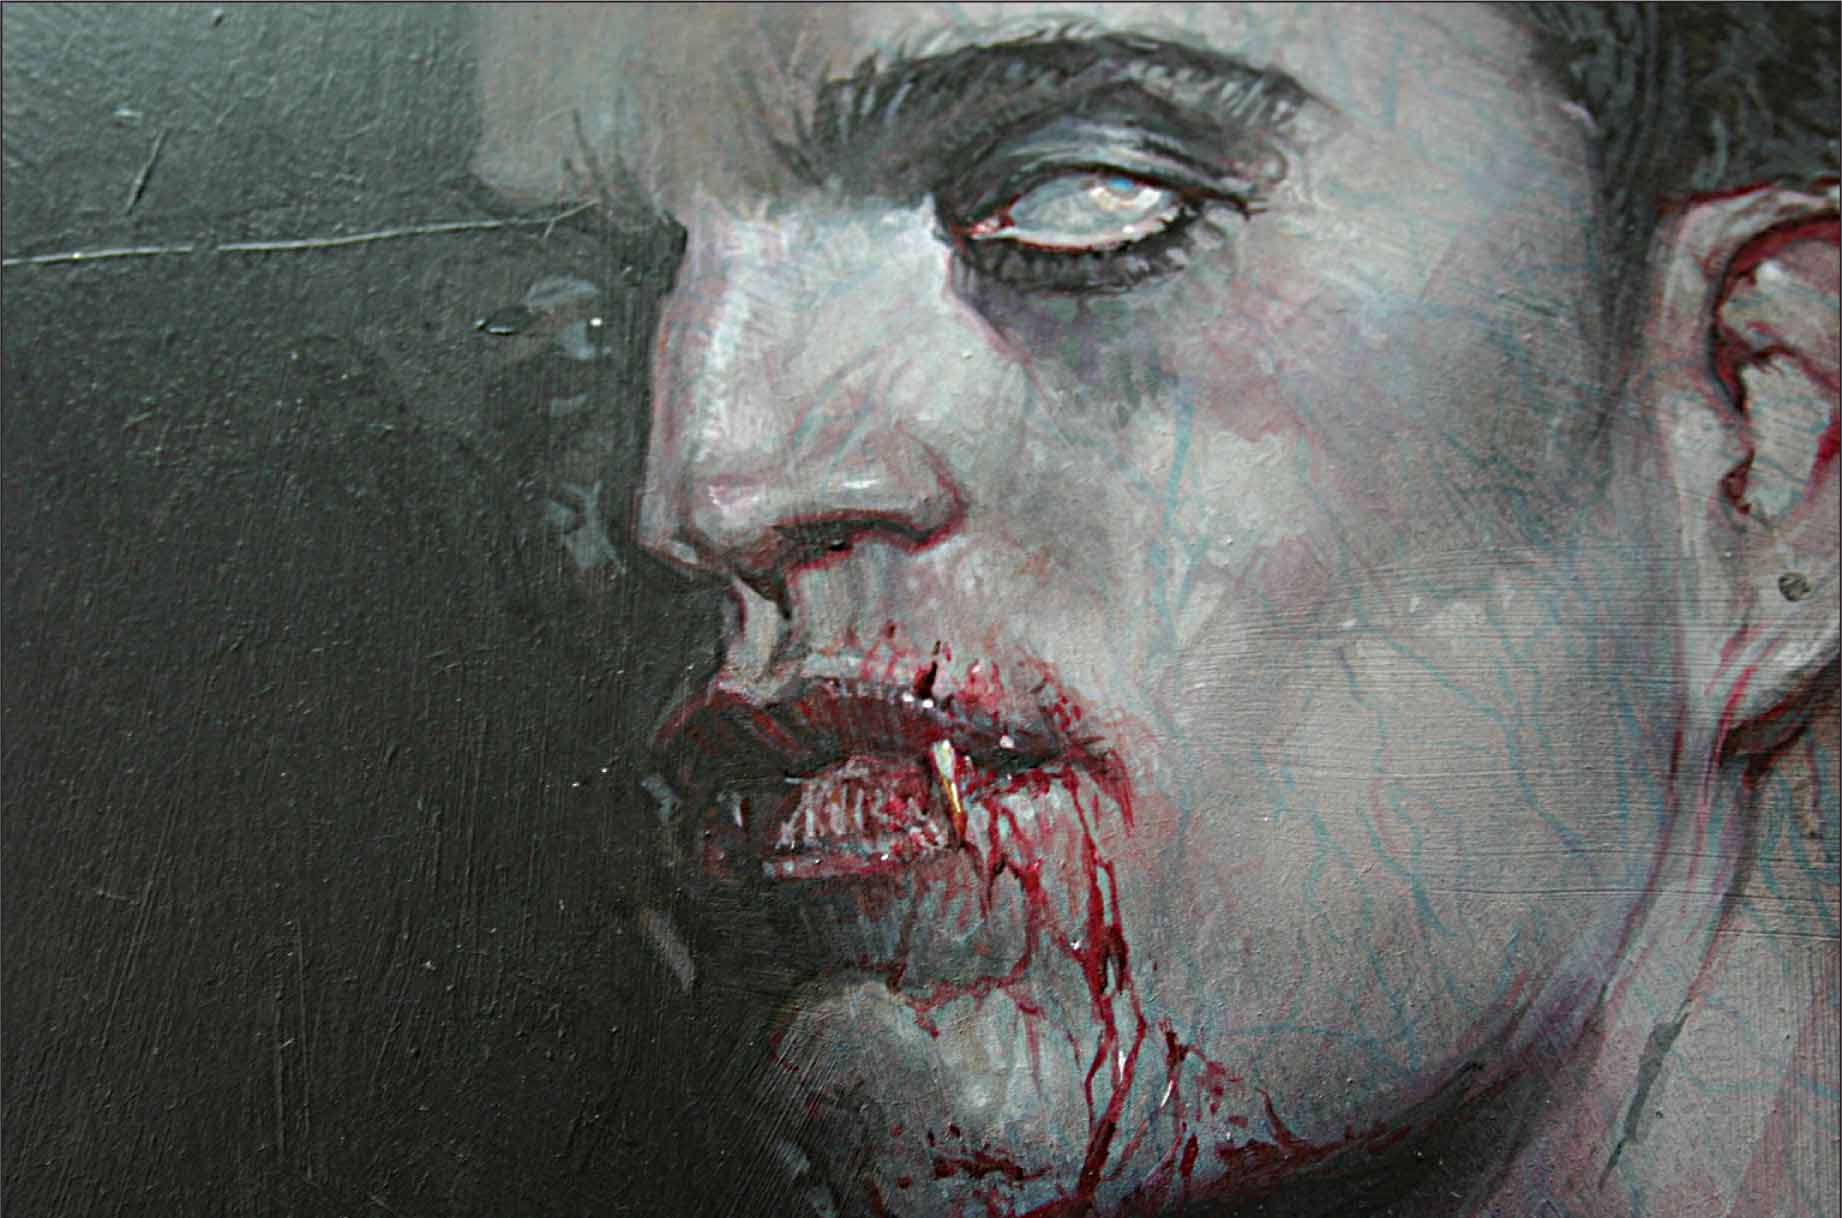
Step Fourteen In this step, layer thin white over the reddish undercolor of the iris for a milkier, creamier effect. Start chiseling and refining his features around the mouth and cheekbone by designing light vein patterns and cool shadows. Also, make him look even bloodier with some wet splattering above the lips and chin. This makes him look as if he’s just had a “feeding.”
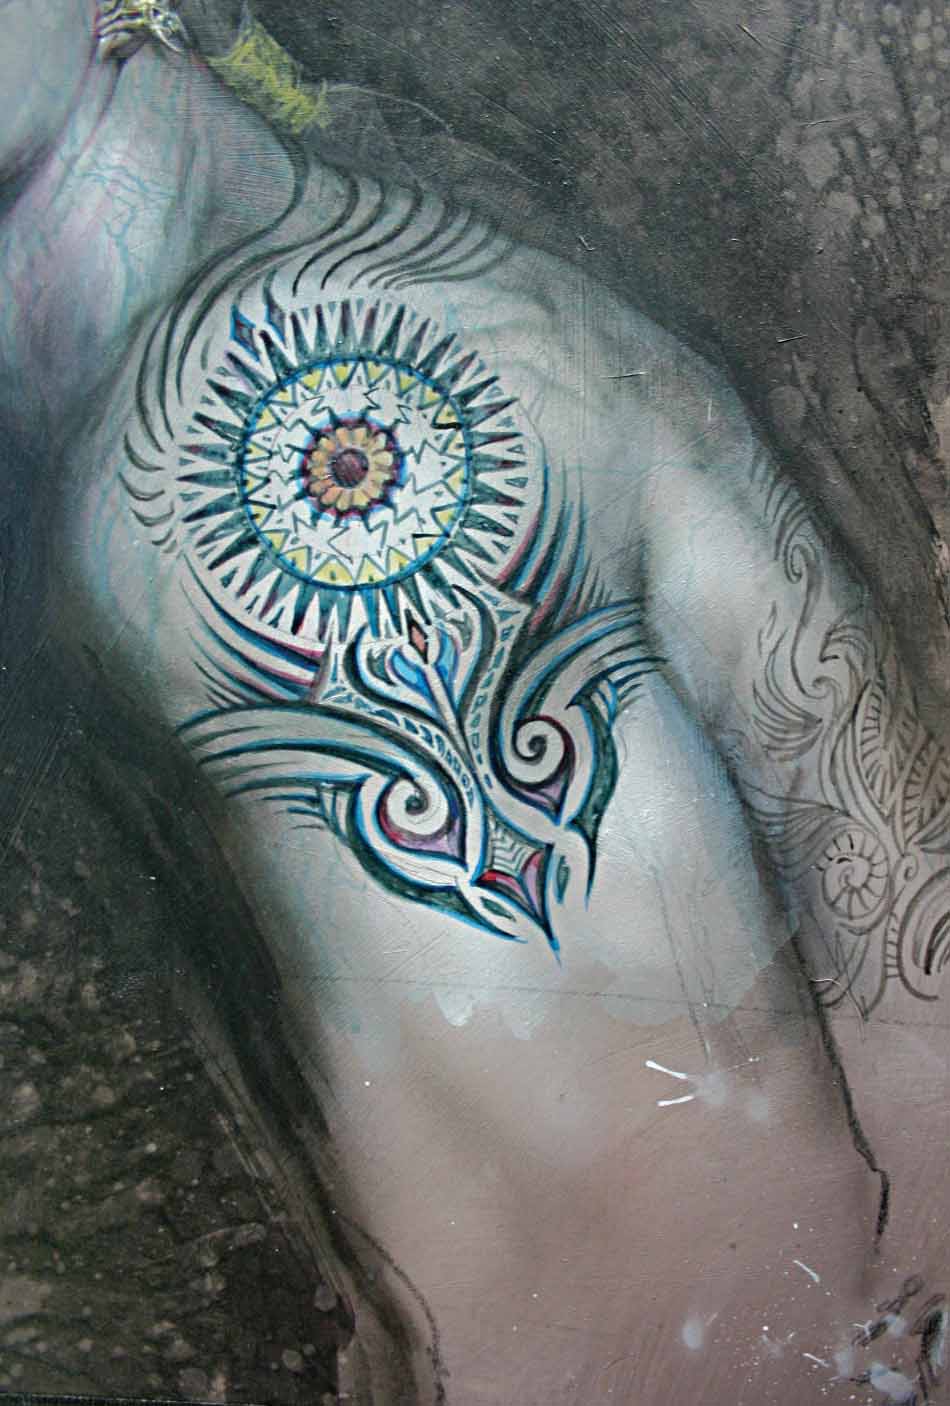
Step Fifteen Use a sharp black colored pencil to begin the tattoo on the vampire’s arm and back. When designing a large tattoo on a character’s body, you must keep in mind the anatomy underneath and make the lines wrap over the structure accordingly. This will help to create a tattoo that is both attractive and believable. Make your shapes interact with one another and remember to vary the line quality.
Step Sixteen When you are finished drawing the tattoos, take a small fine-tip brush and begin to paint your designs.
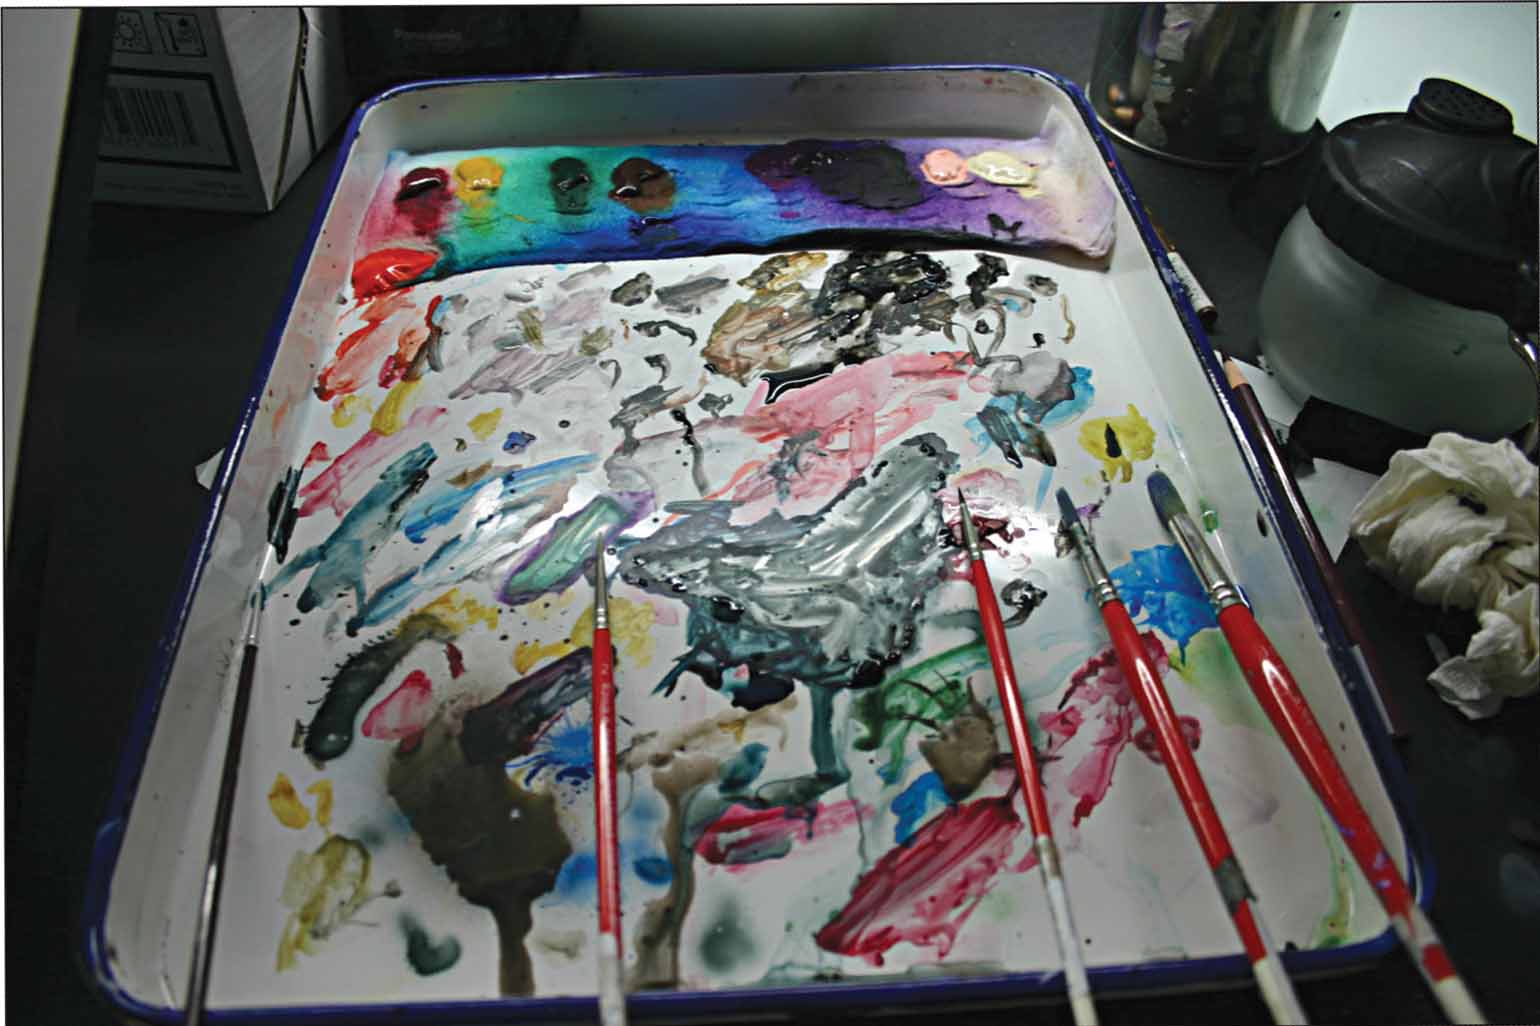
Here you can see the palette of colors used for the tattoo. You want the colors to be muted yet saturated at the same time. To achieve this, stick with subdued yellows, magentas, and turquoise.
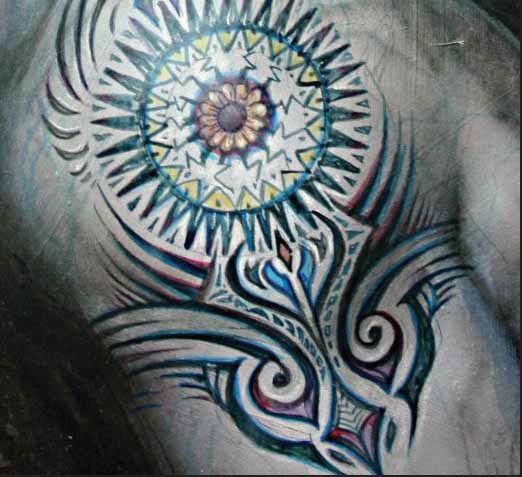
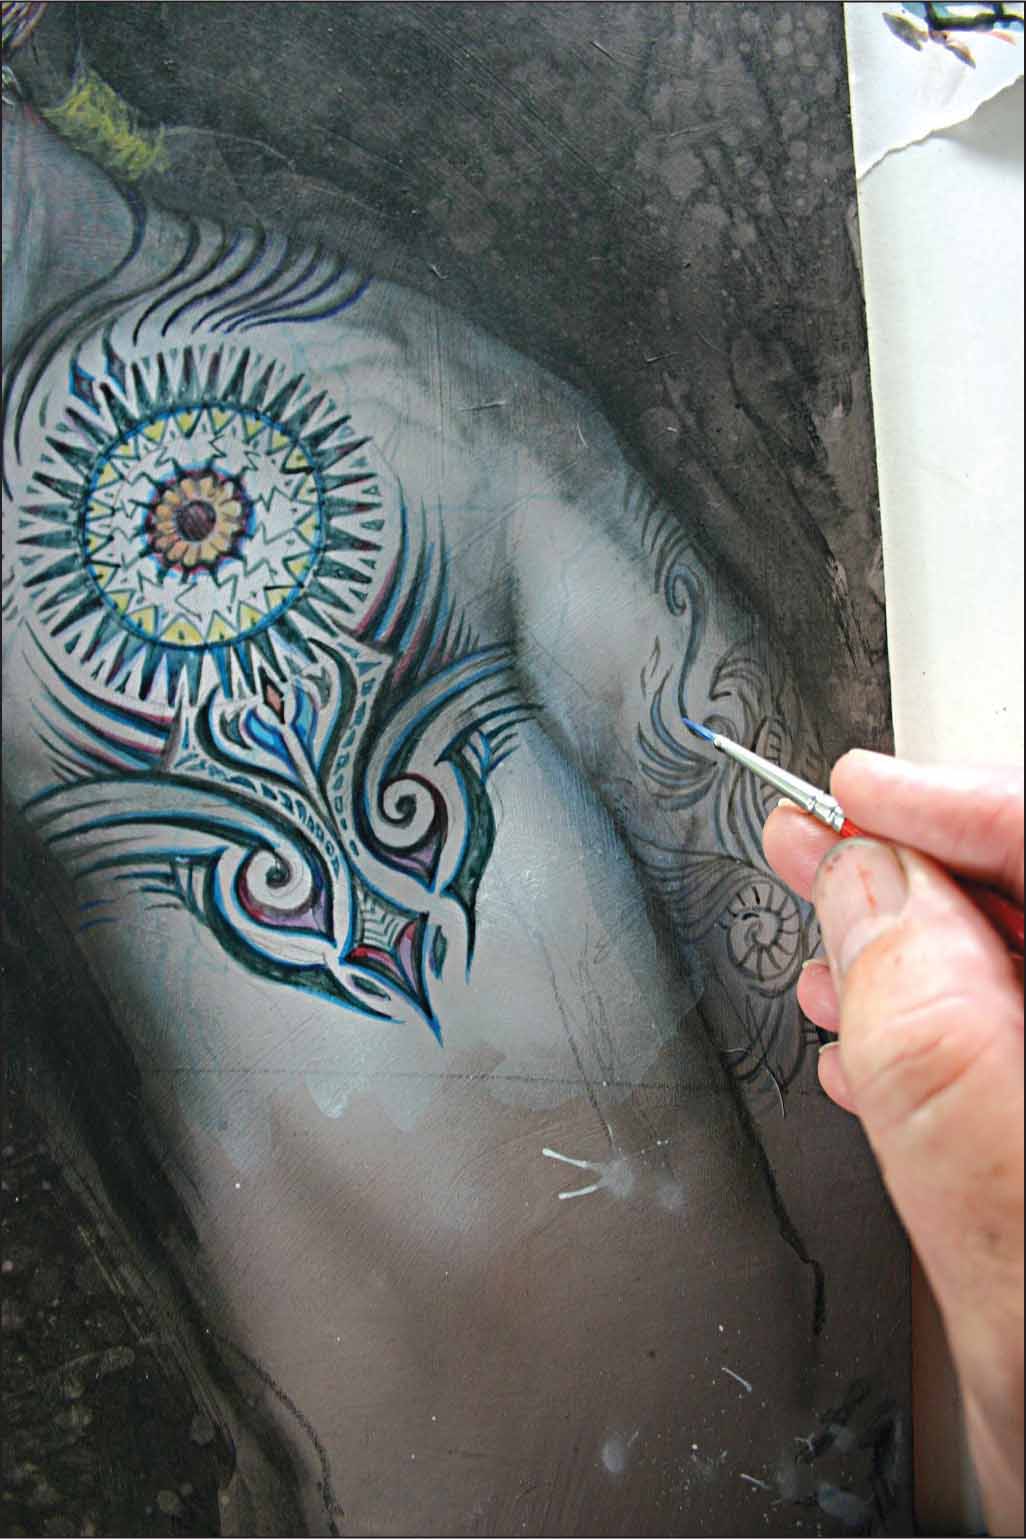
Step Seventeen Outline all the shapes with a darker value to accent the graphic quality of tattoos. For this design, symmetry is extremely important. You want the tattoos to appear as if they have evolved and expanded over decades of exposure to different cultures.
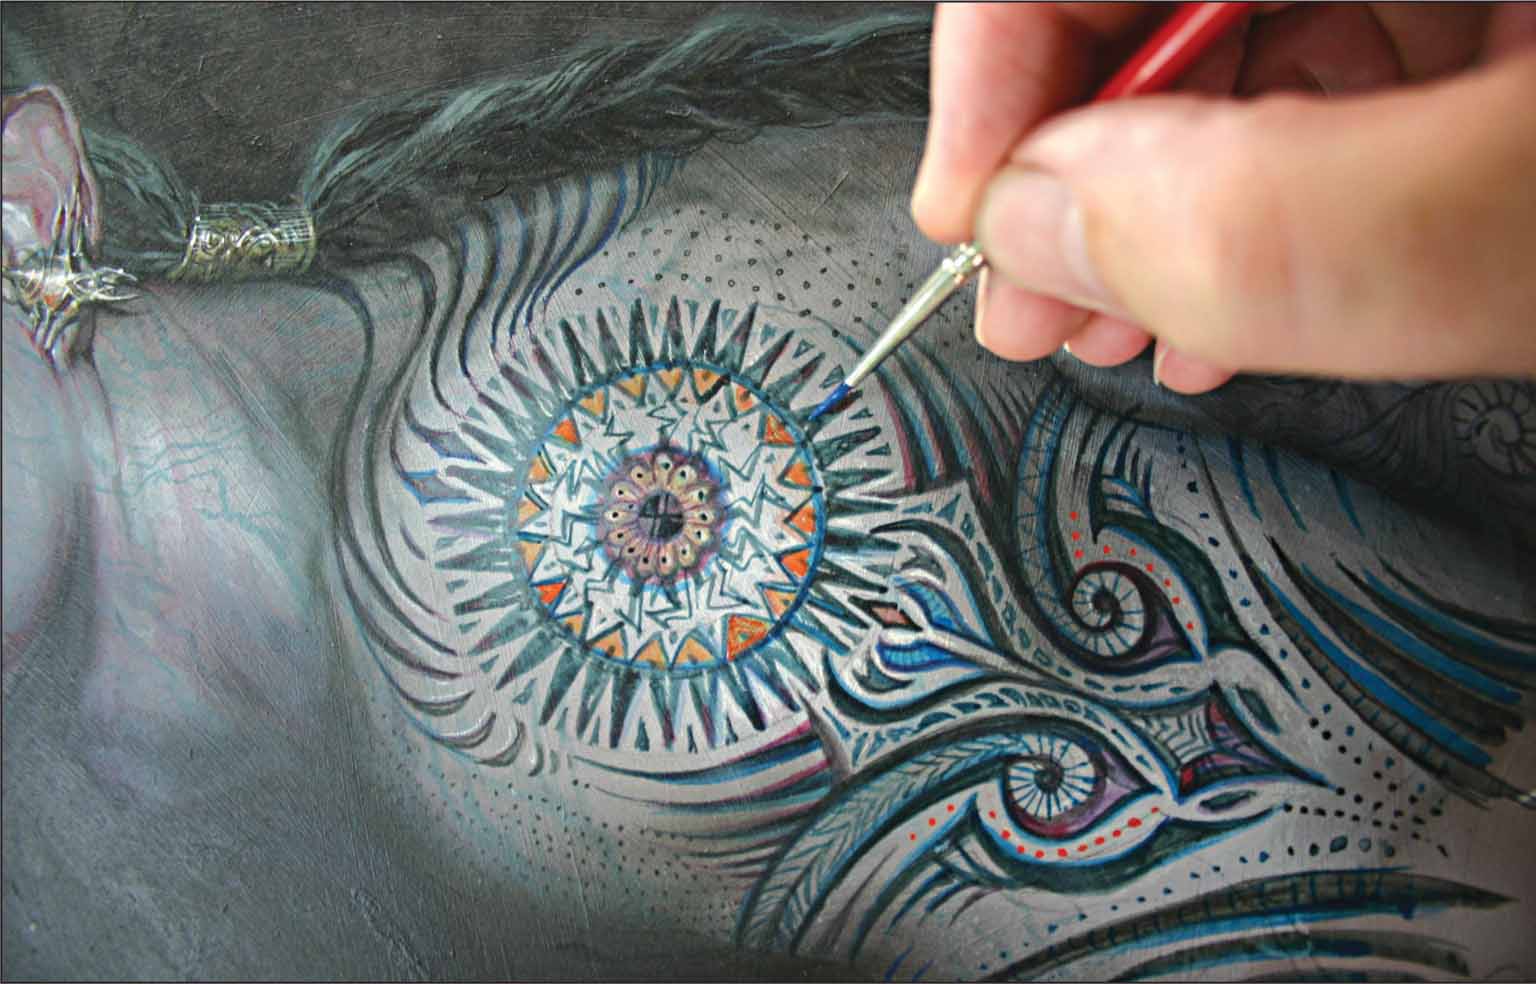
Step Eighteen Tilt the illustration so your hand can naturally follow the lines of your design. Add more details such as dots weaving in and out of the design, and line patterns at the bottom. Make sure that these lines accentuate the musculature of his arm.
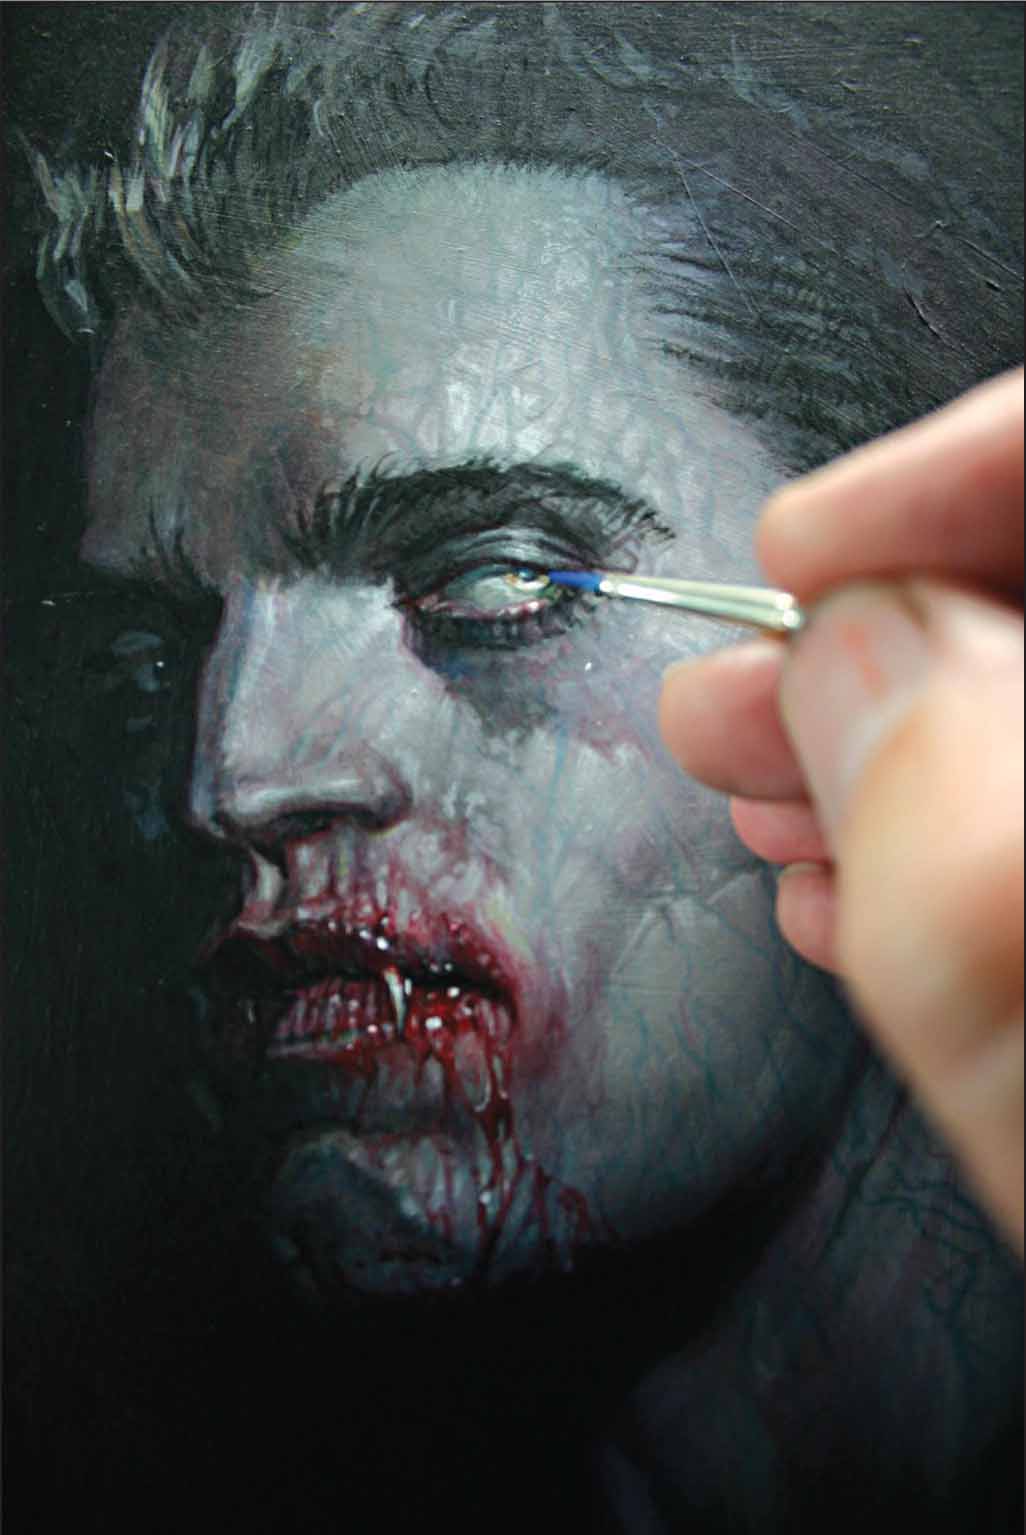
Step Nineteen Next, fill in his dark pupil and darken the shadows over the whites of his eyes. Finish the pupil with a dot of blue. Then add more creepy veins all along his face as if the recent “feeding” has made them almost burst from underneath his skin.
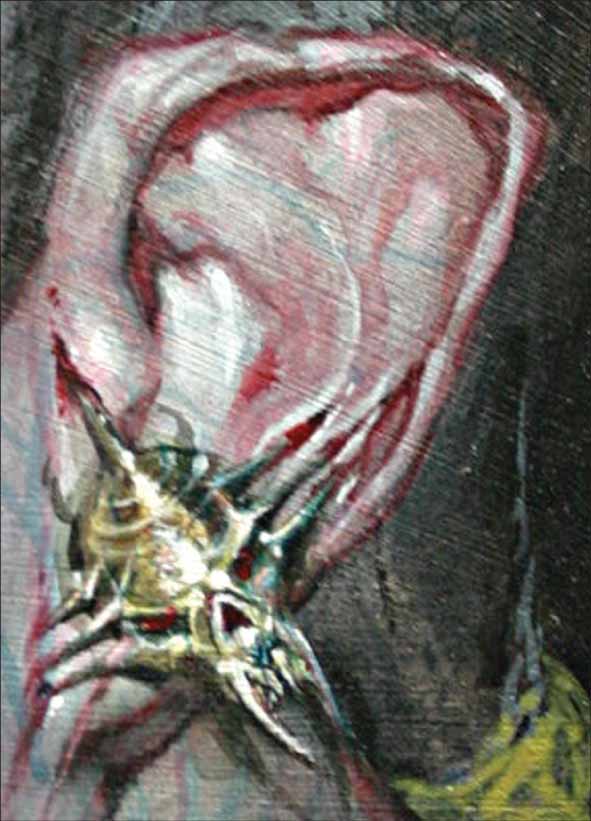
Step Twenty Add a gold skull earring as an accessory. Begin by sketching right over the illustration with a black colored pencil. Keep all the edges of the earring sharp; paint some diluted cadmium red deep hue around it. Then, with a little portrait pink and titanium white, brush in thin strips of skin color over the piercing to show the savagery of the handiwork. Paint a little turquoise around the gold to unite it with the coolness of the vampire and, also, to show that this earring is an ancient relic.
Step Twenty-One Now, on to his hair. We’re going to create an ornate gold band for his braid. Quickly lay in a gold tone using a mixture of Turner’s yellow and a little phthalocyanine blue. Make sure your brushstrokes follow the form of the hair. Then, paint a highlight down the middle, allowing the values to drop off at the edges.
Step Twenty-Two In this step, we finish off the exotic hair band with a little bit of orange and some bright highlights that indicate the intricate engraving.

Step Twenty-Three The braid is quite simple to do. Just indicate it by using a small brush and paint some highlights along the edges, recreating the silhouette of a braid. When painting his hair, be sure to stroke in the direction of hair growth.

Step Twenty-Four We’re going to make the vampire a bit more human-like by defining his iris with warm colors, but still keeping it pale. Make sure that the shadow under the upper lid is the appropriate value so his eye doesn’t look flat.
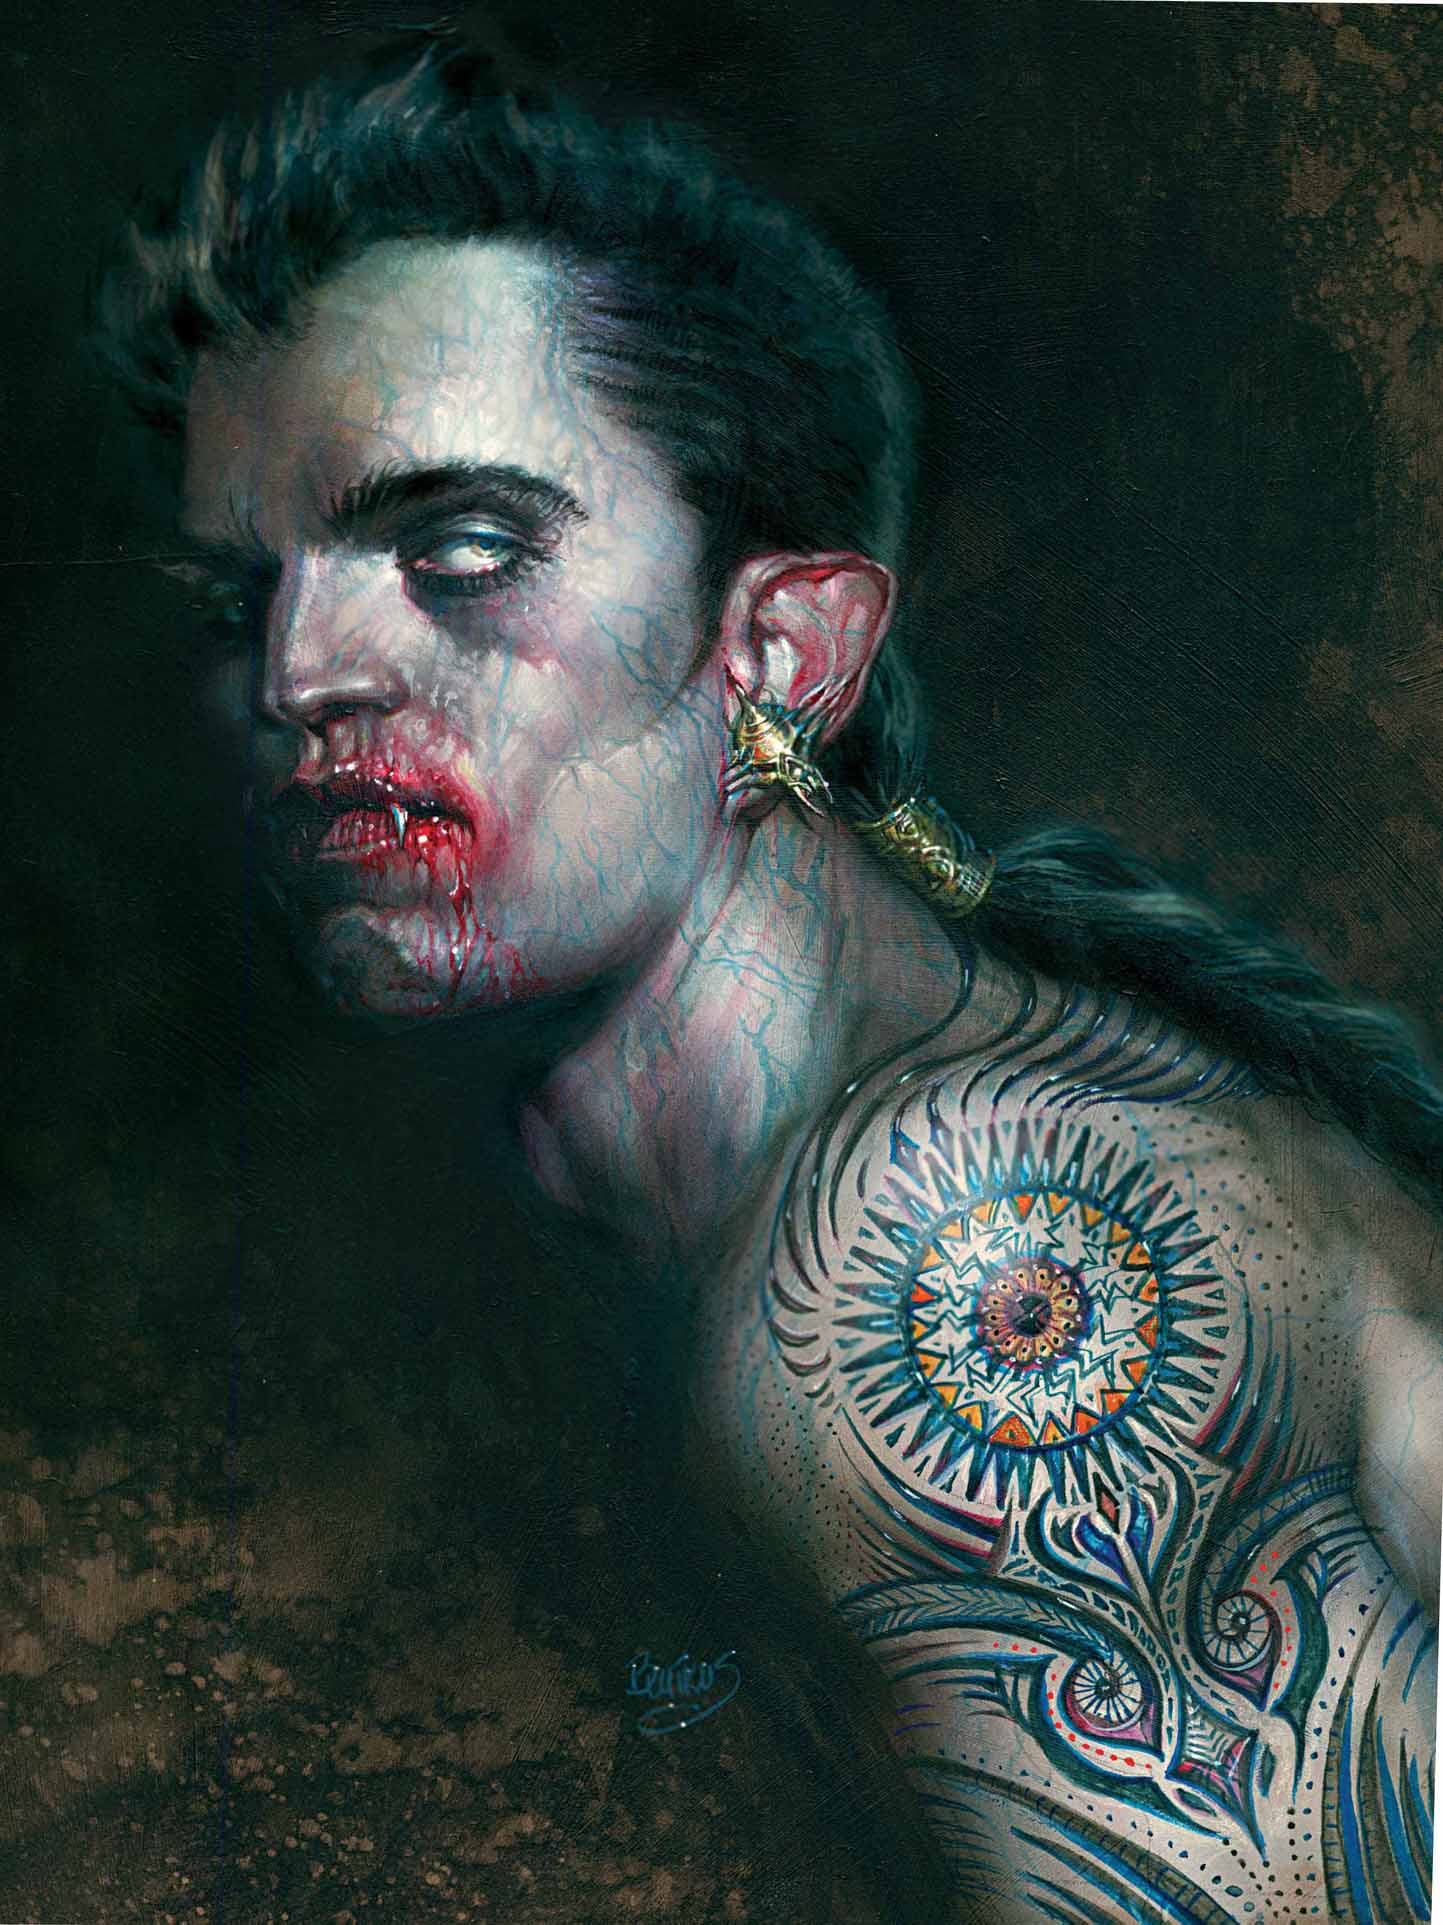
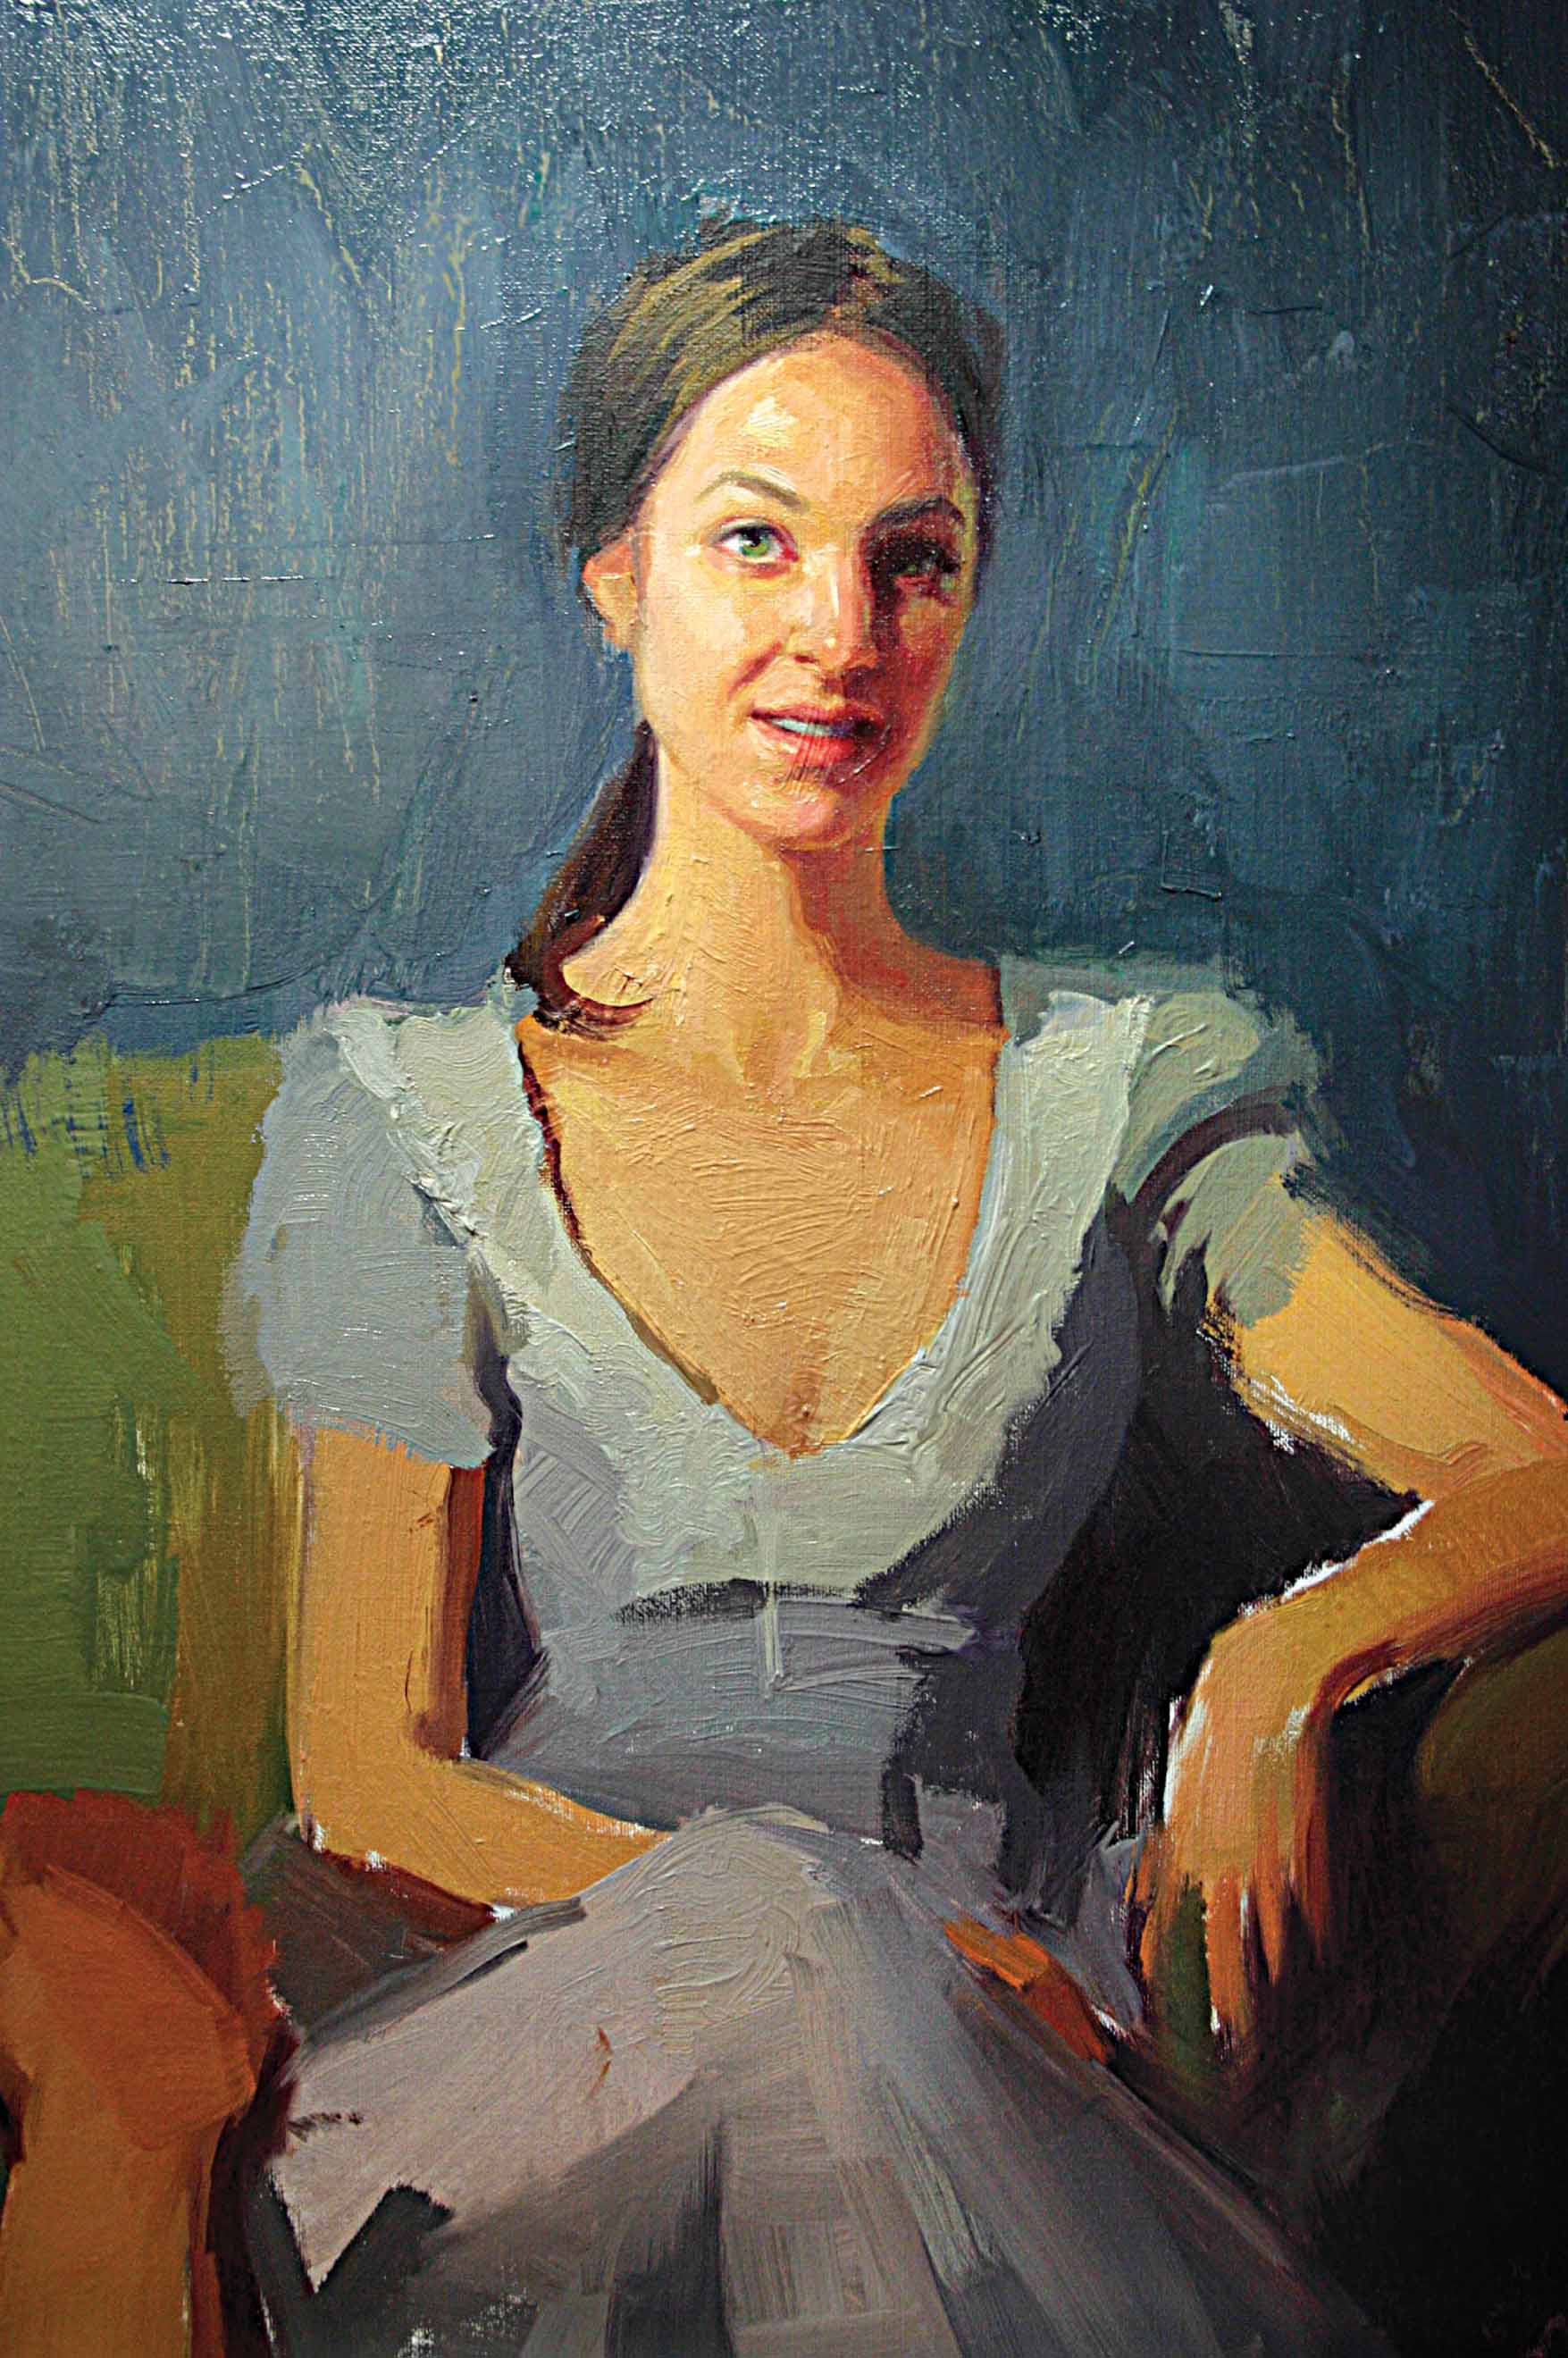
Step Twenty-Five Here we see the completed painting of our vampire.
What do you do if you’re walking down a dark alley in Romania or Transylvania and suddenly find yourself face-to-face with a vampire? The best idea is to just turn around and run. But if that option isn’t available, you might want to consider some of the suggestions below. Of course, since the vampire legends differ around the world, your necessary accoutrements will need to differ as well. So, we recommend that you go into that alley like Van Helsing—prepared for survival.
The European Vampire
1. Fill your pockets with garlic; the more, the better.
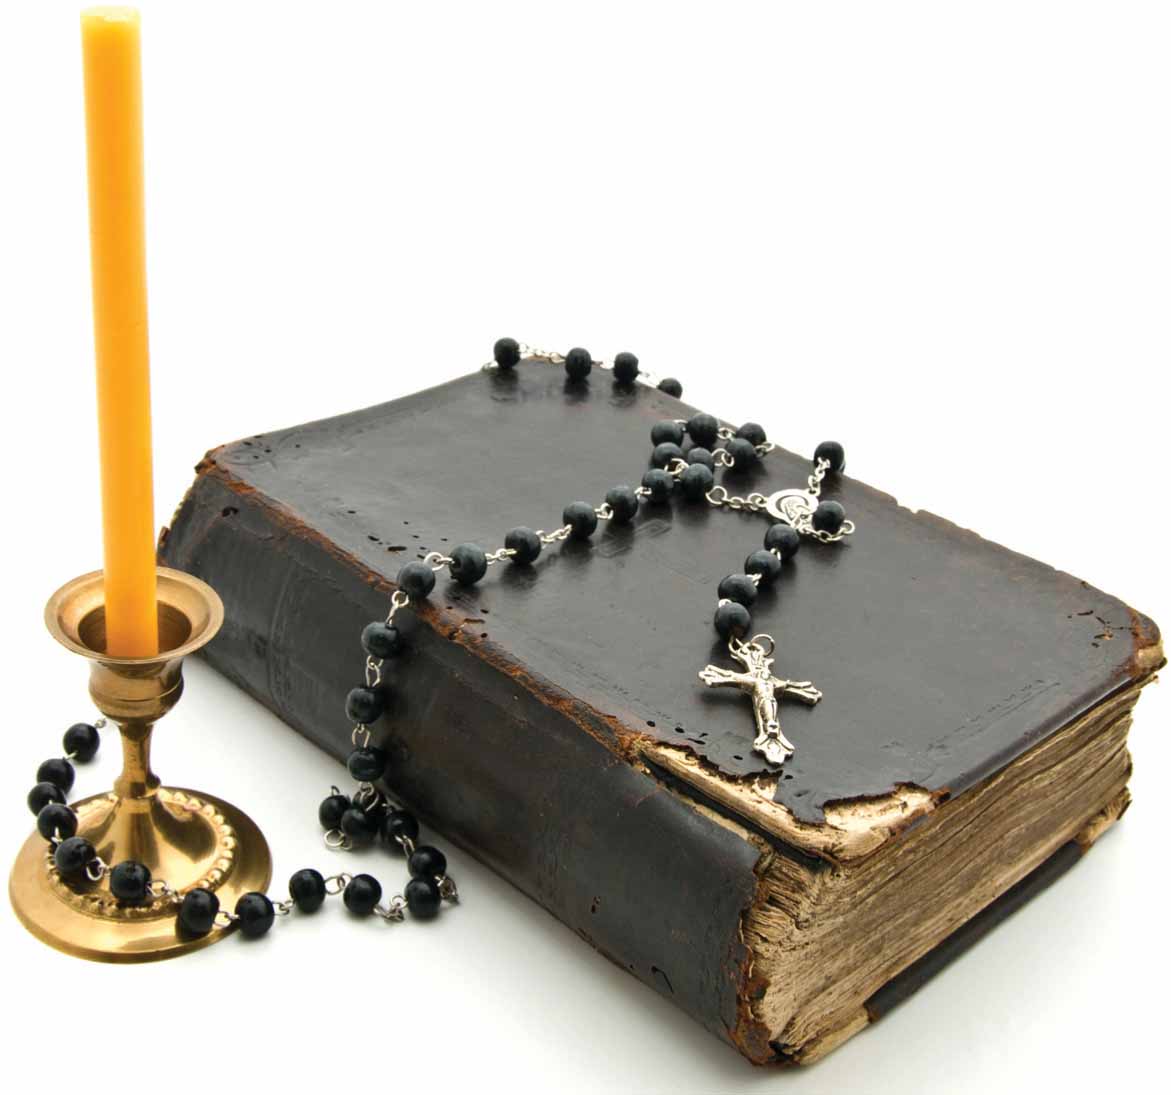
2. Carry sacred items like holy water, a rosary, or a crucifix.
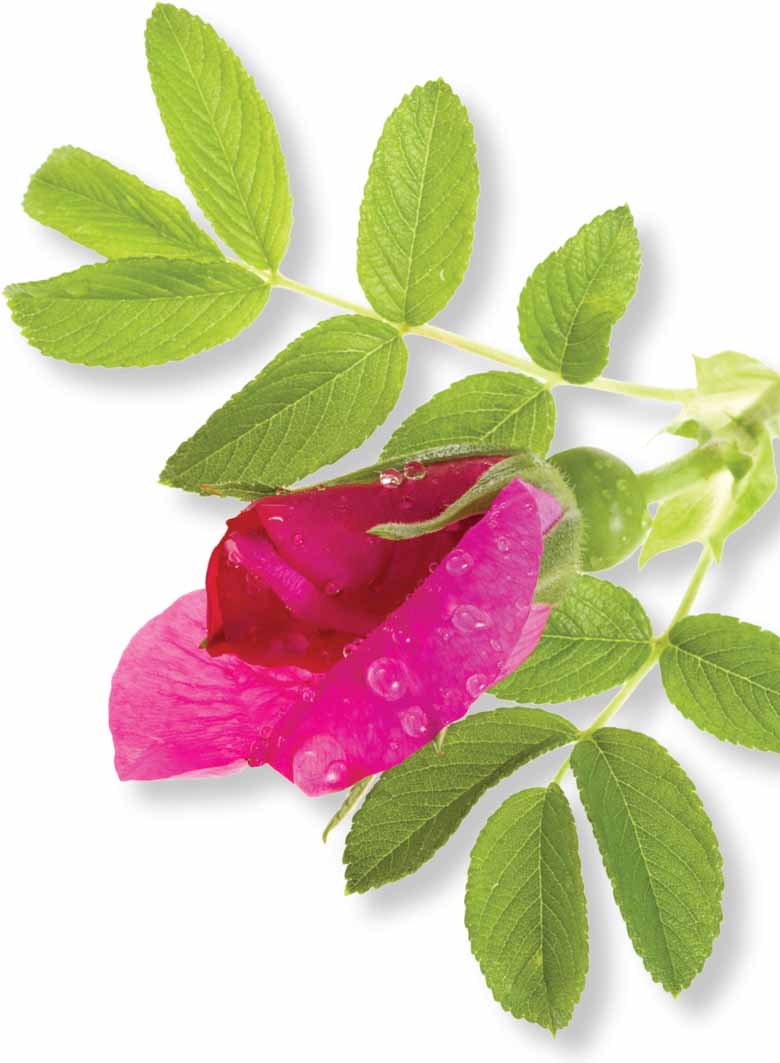
3. Keep a sprig of wild rose or hawthorn at hand.
4. Hang a mirror on your front door, facing outwards.
5. Don’t invite him/her into your house.
6. Don’t rely on sunlight to save you. Some vampires are impervious to the sun.
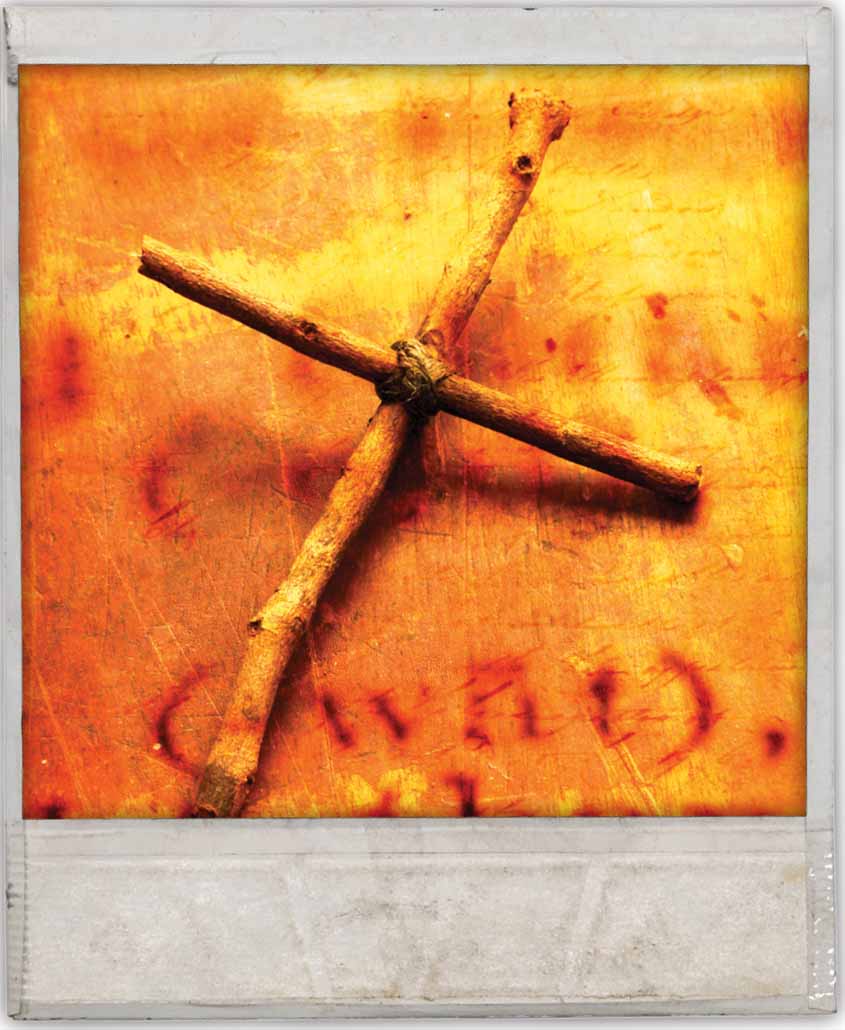
7. Carry a stake, preferably made from oak, hawthorn, or ash.
8. Cut off his/her head. Then run. Just in case he/she has friends nearby.
The Scottish Vampire
1. Beware of anyone with a strange accent and hooves.
2. Carry a weapon made of iron. Better yet, carry two.
The African Vampire
1. Don’t offer fruit to anyone with glowing armpits. If fed, the voracious Obayifo may decide to suck the life out of your children and your crops.
The Japanese Vampire
1. Watch out for anyone with red symbols around their neck.
2. Destroy the Nukekubi’s body while its head is out on a mischievous errand.
The Chinese Vampire
1. Get thee across water. The Chiang-Shih has a slight problem with running water.
2. Hold your breath. Yes. Really.
3. Carry garlic and salt.
4. Pray for a thunderstorm. Loud noises chase these beasts away.
The Haitian/Trinidad/Philippine/Malaysian Vampire
1. Sprinkle sand or rice outside windows and doors. Both the unsuspecting Loogaroo and the Soucouyant will be forced to stop and count every grain before attacking.
2. Sprinkle salt on the skin left behind when the Soucouyant shape shifts.
3. Hang a variety of garlic, onion, and thistle branches around your windows and doors to prevent the Manananggal or Penanggalan from entering.
4. Turn your clothes inside out. Apparently this bizarre behavior amuses the Tiyanak so much that it will set you free.
5. Cut her hair and fingernails. Then stuff them into that convenient hole in the back of her neck. This will make a Langsuir turn into a human woman.

The South American/Mexican Vampire
1. Beware of one-legged beautiful women who try to befriend you in the wilderness.
2. Consult with the Machupe medicine woman. She’s got the inside scoop on how to get rid of that enormous flying snake that’s been following you.
3. Avoid that strange dog-like creature with glowing eyes that has the ability to hypnotize. He’s not your new best friend.

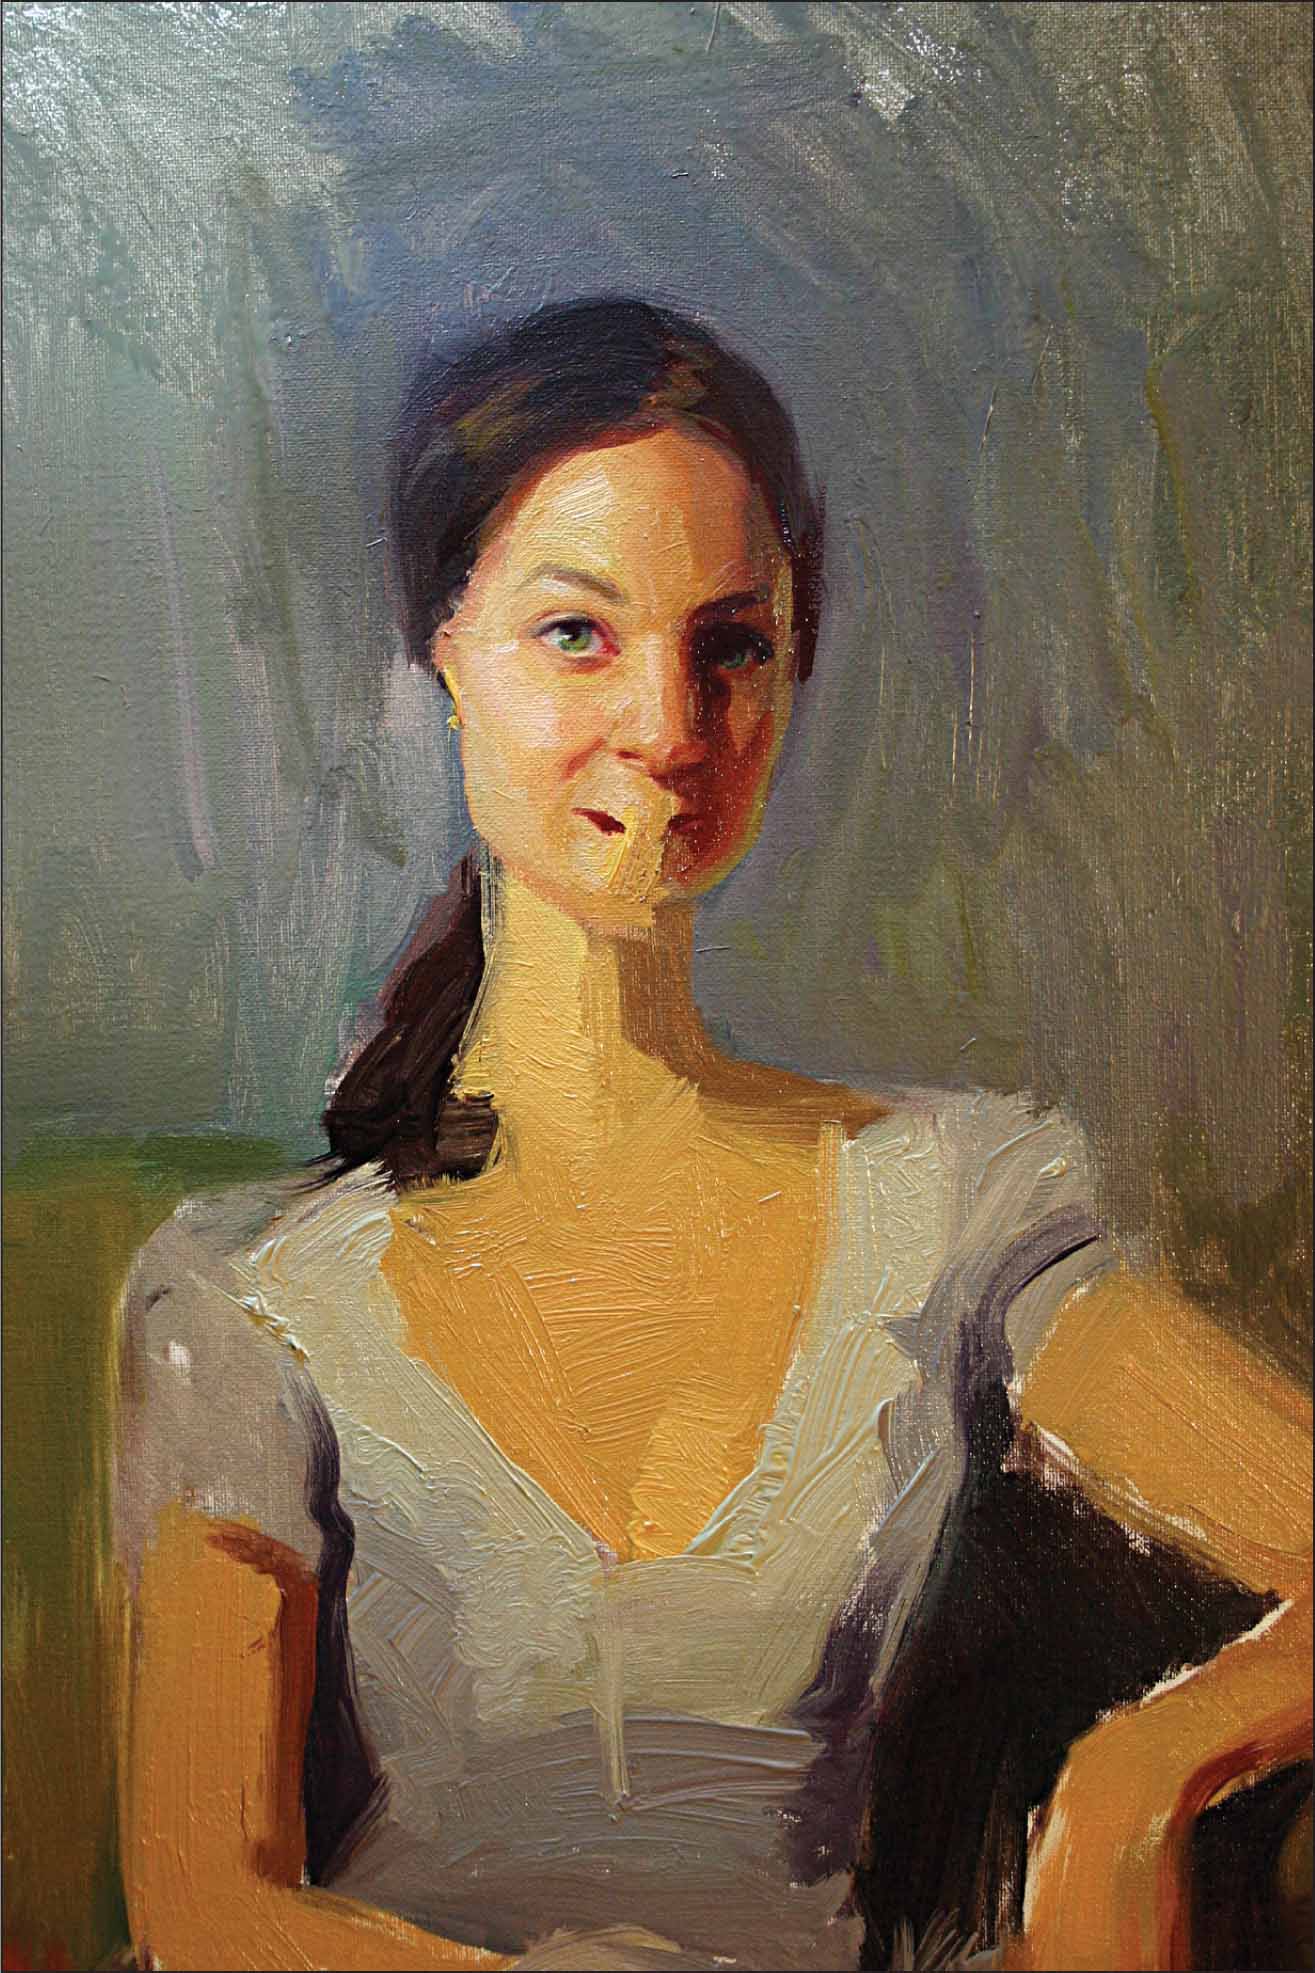
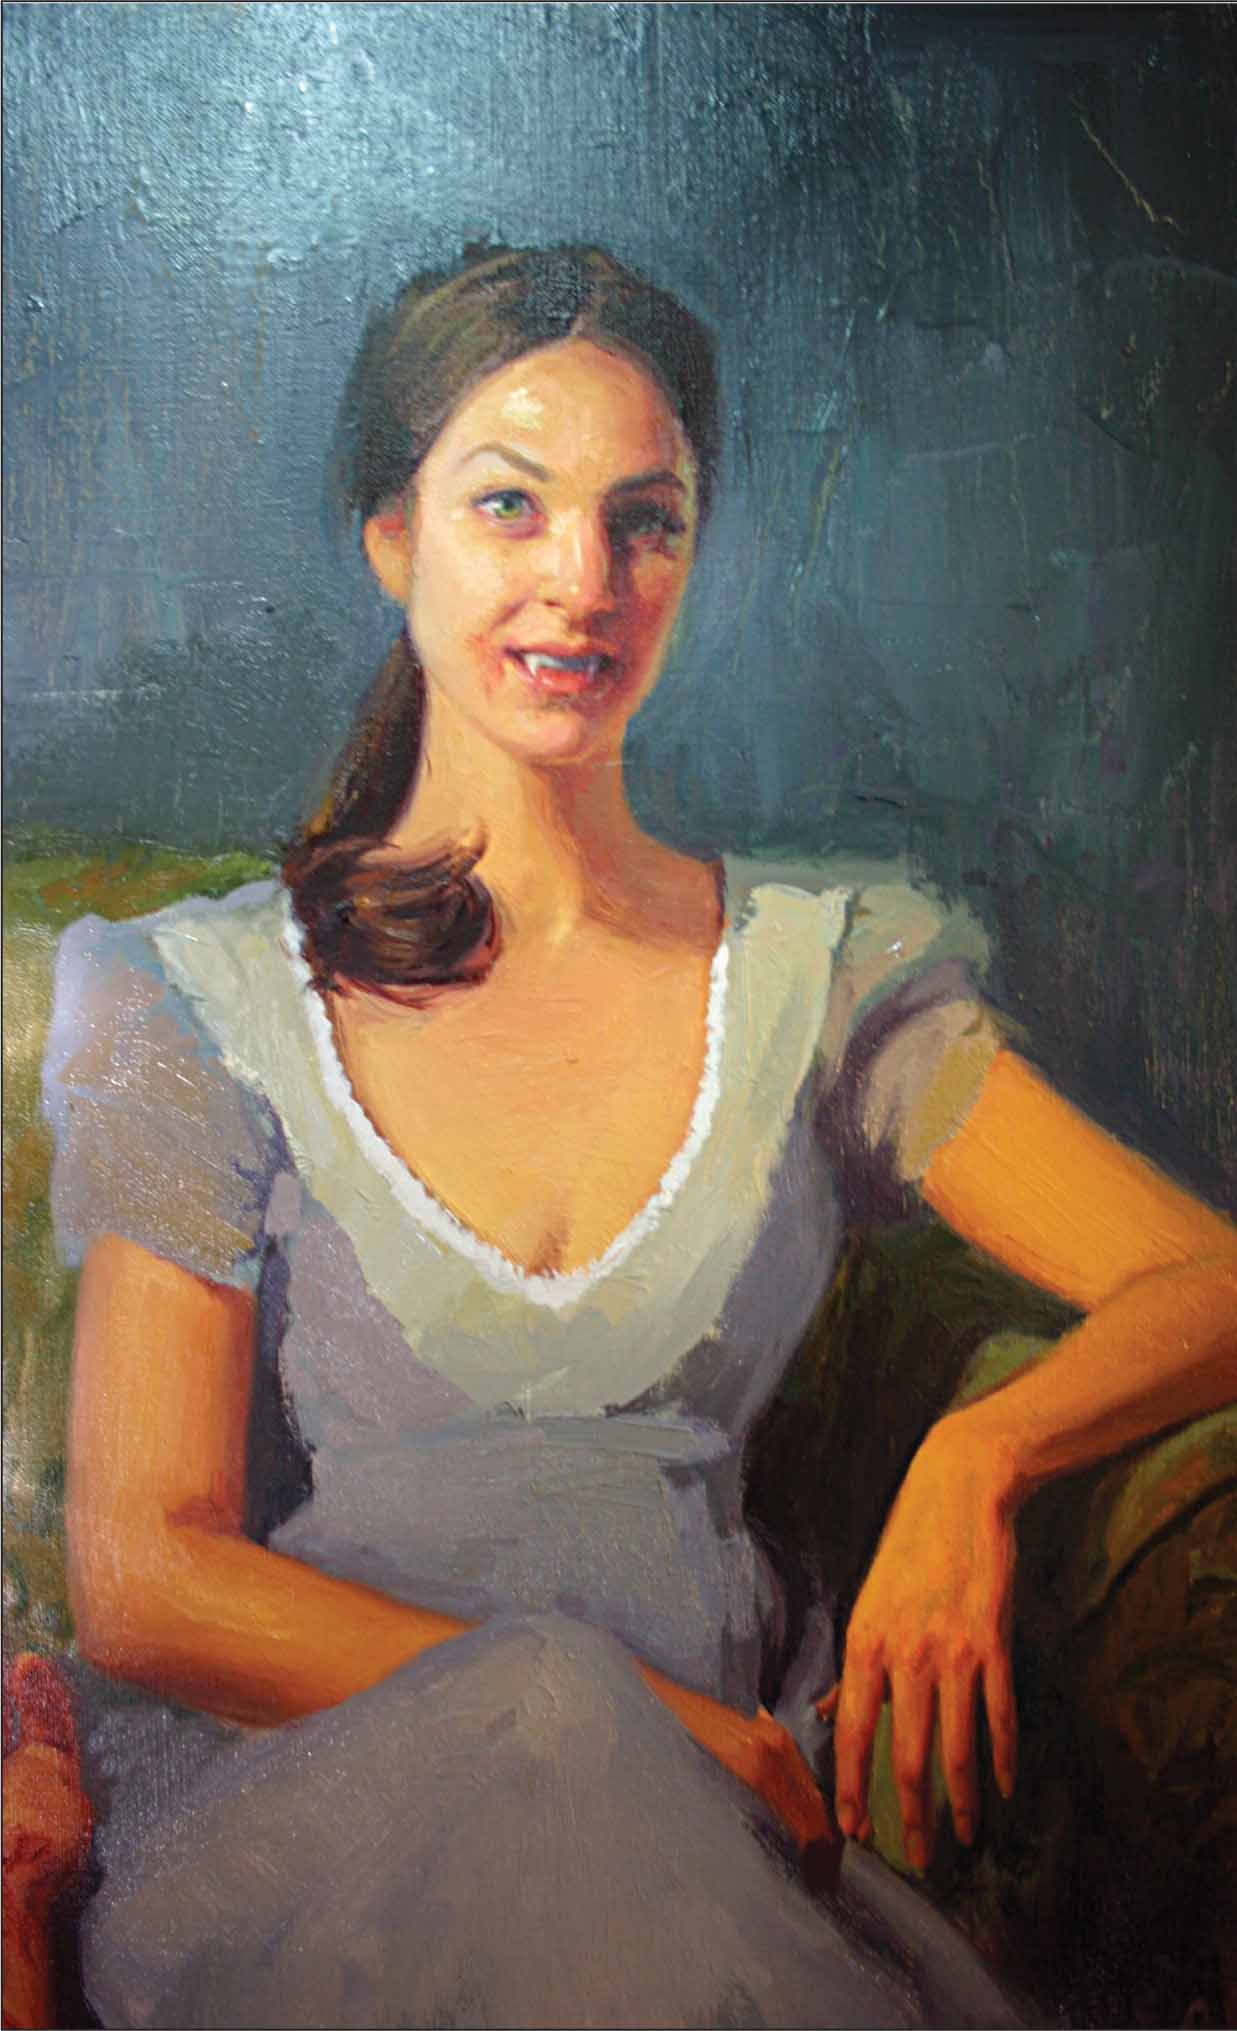
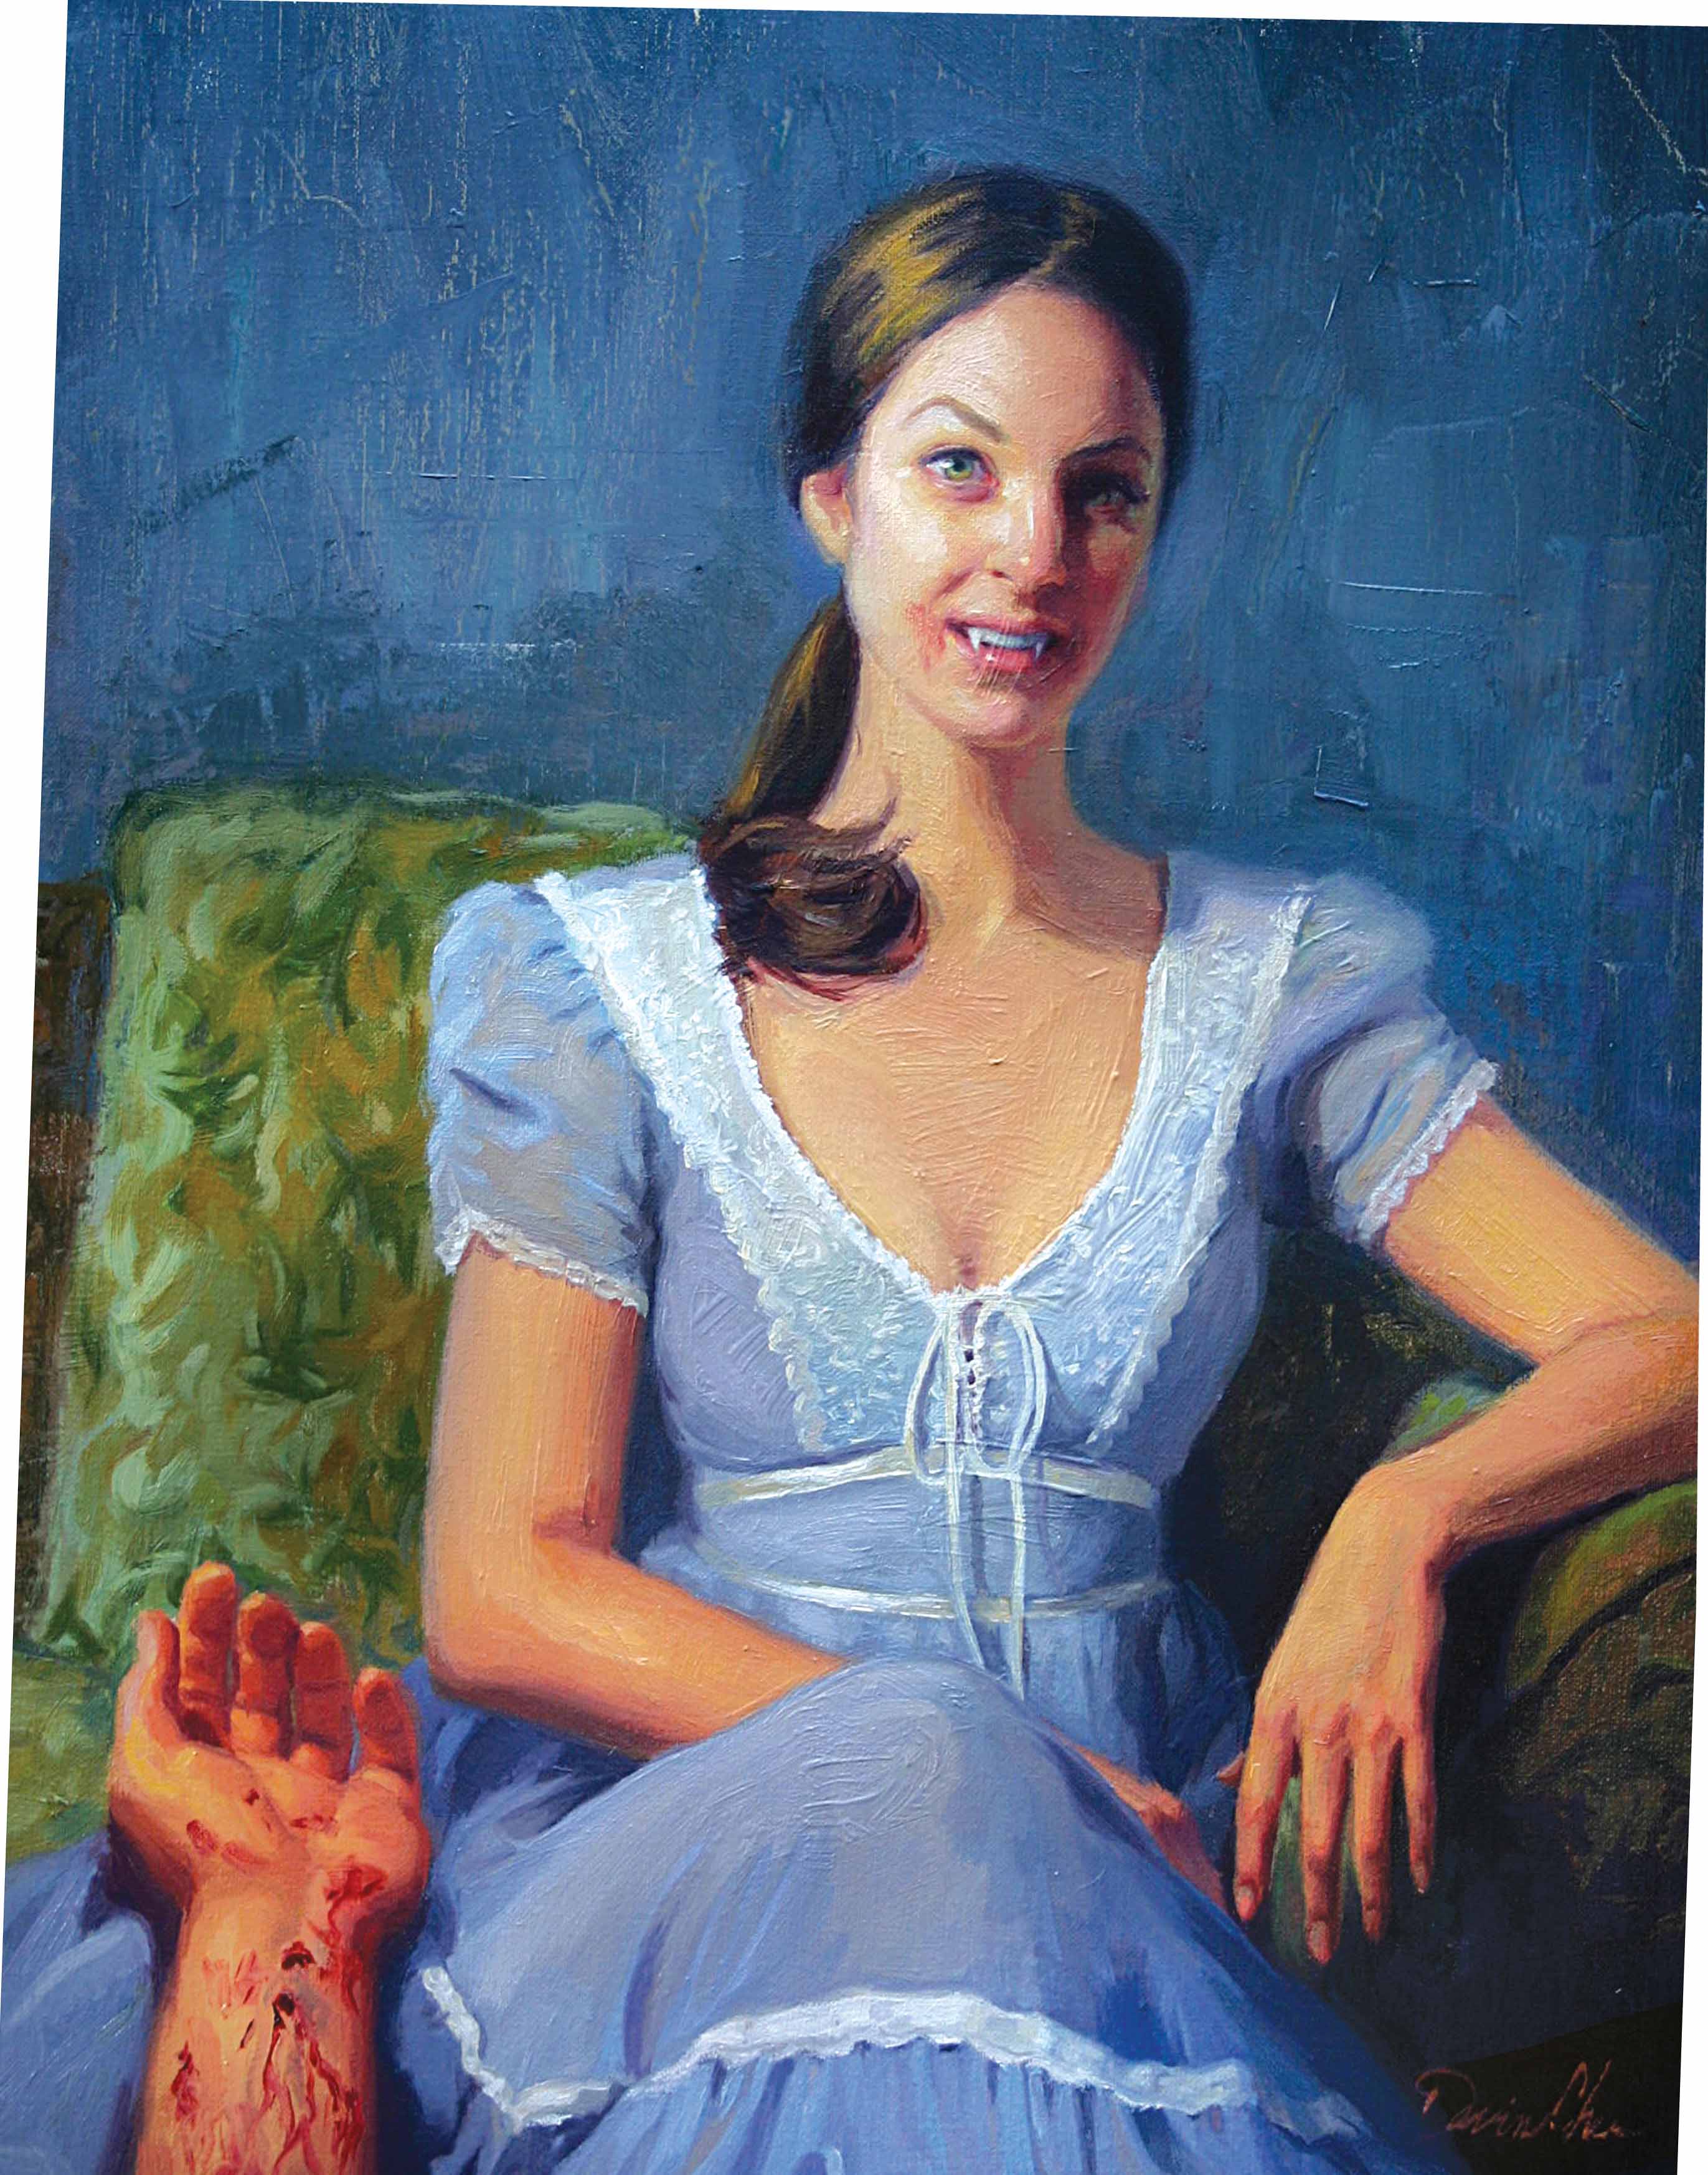
You never know who might wander into your studio and want a portrait painted. In this case, it was a wealthy vampire socialite—known to all the elite bluebloods as Lady V. You’ll notice that she wasn’t able to make it through the sitting without a snack. Make sure any potential undead clients understand that you are not on the menu.
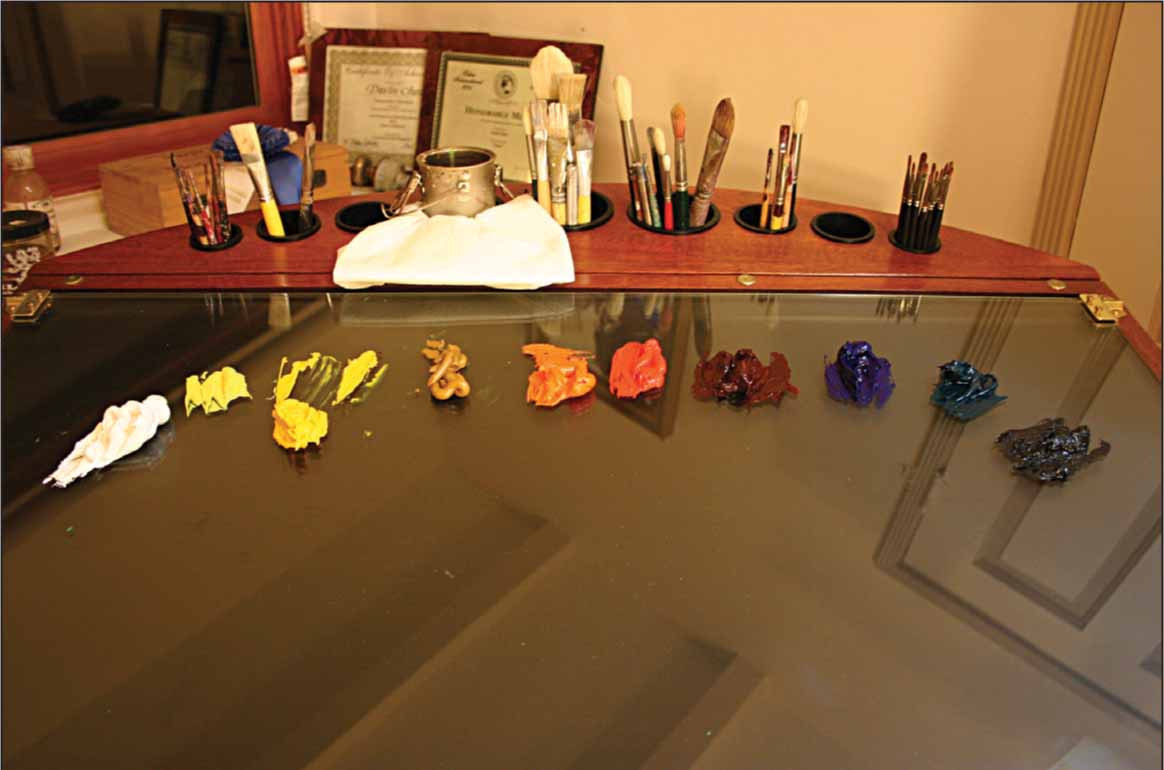
Step One Before you start painting, lay out your colors beginning with white and then moving on to warm and cool colors. Make sure you have a variety of brush sizes available and plenty of room to mix your paint.

Step Two One common element in most formal portraits is the display of the sitter’s most prized belongings. In this vampire socialite’s case, her pride and joy is a fresh kill. Begin your block-in using a mixture of alizarin crimson, yellow ochre, and viridian. This will create a mid value—neither too warm nor too cool—that won’t interfere with subsequent layers of paint. Notice that I work with my photo reference within view. (You may choose to transfer the sketch for this project; see “Transferring a Drawing” on page 25.)
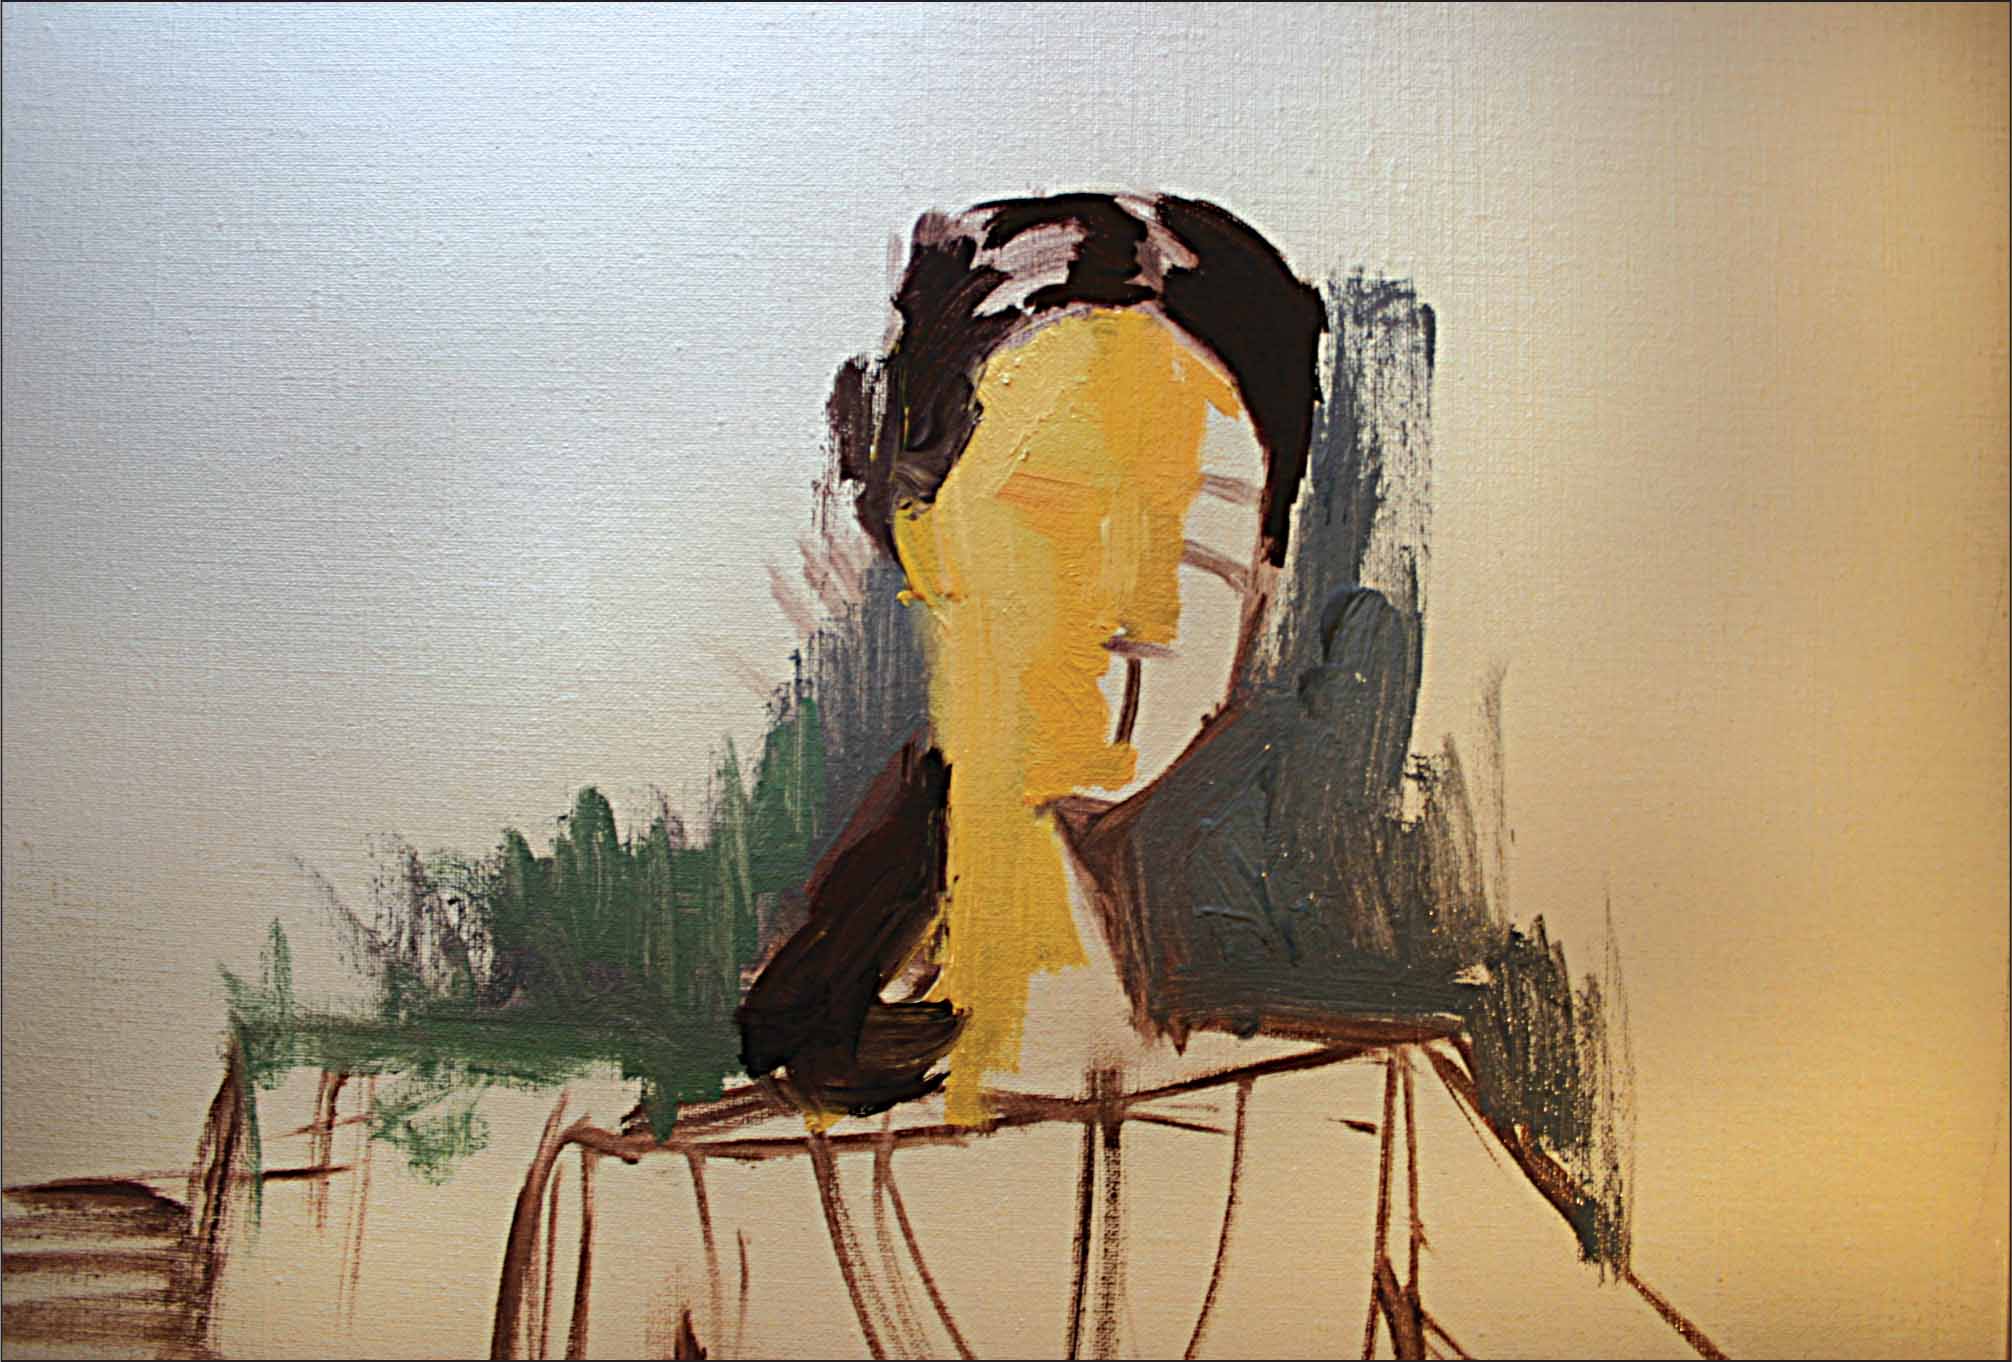
Step Three Looking at the photo reference, you’ll notice that the left side of the model’s face is in bright light, transitioning to warm shadows on the right. When working on the color block-ins, try to create big blocks of accurate color, value, and temperature right away. You can also develop the background and foreground at the same time, so the white canvas won’t be a distraction.
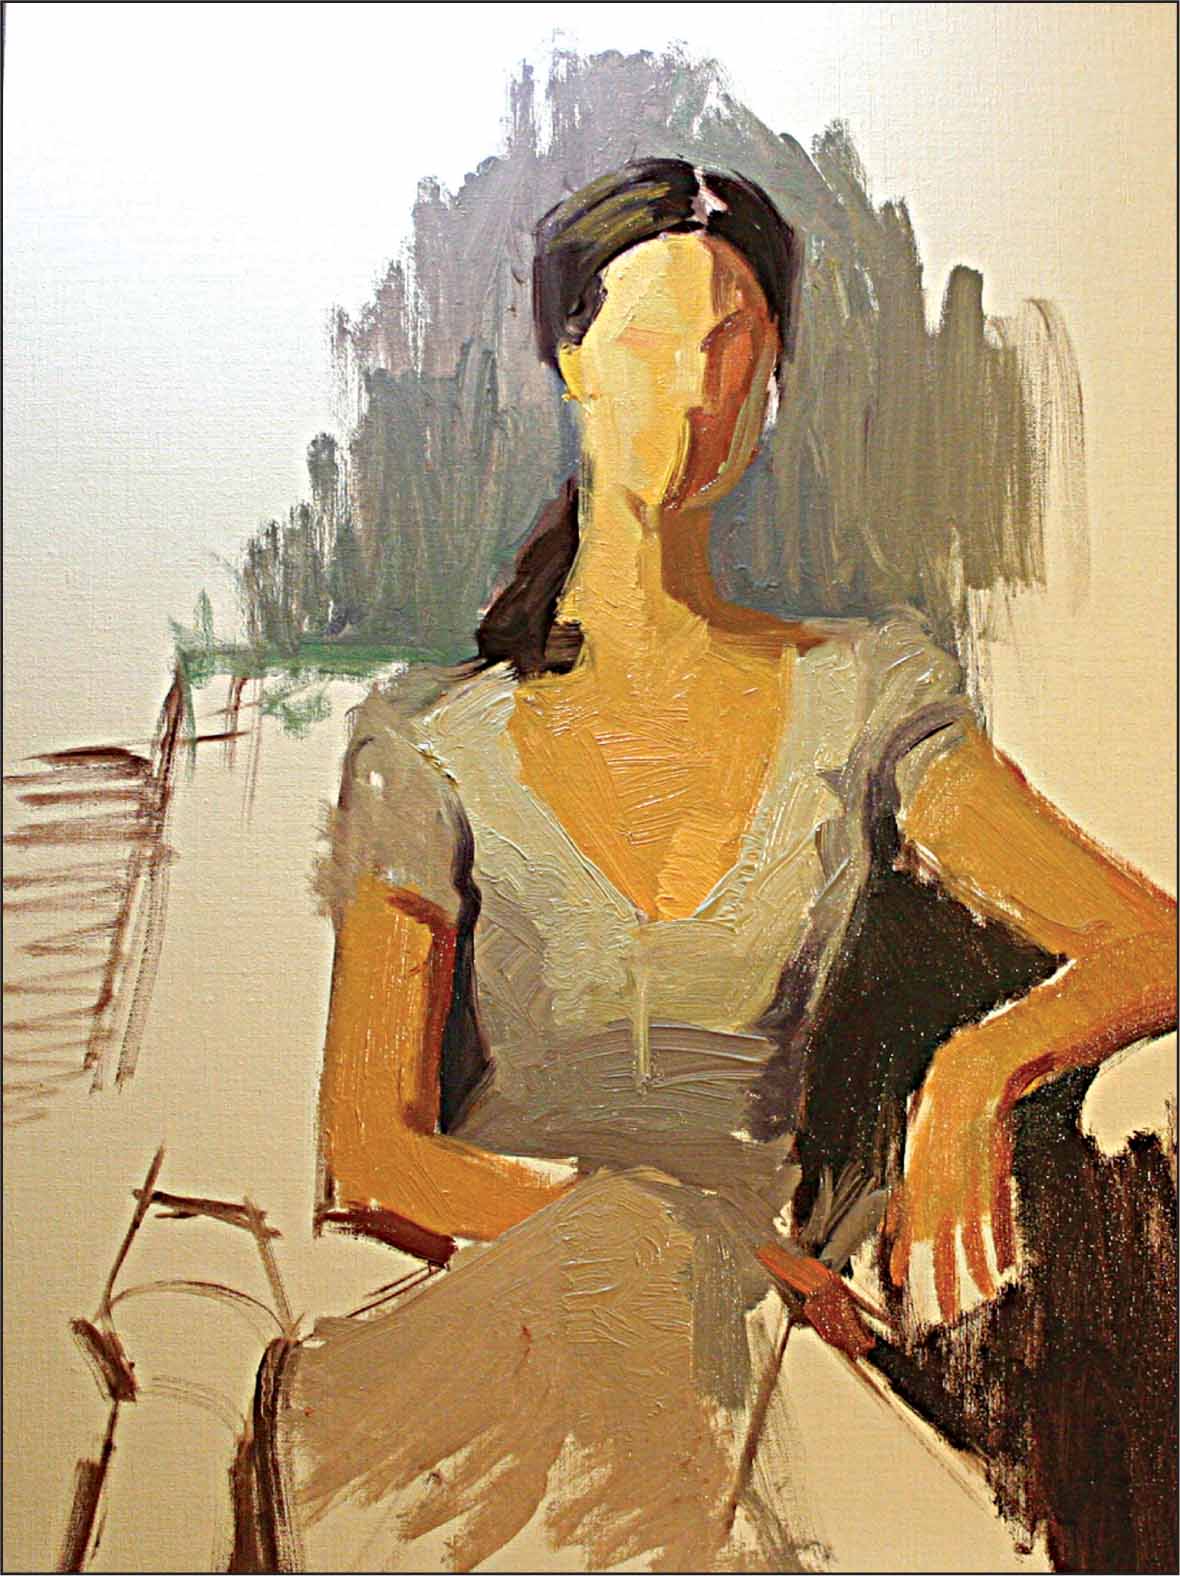
Step Four Next, quickly lay in large shapes of color for the shadows and the lights. Step back frequently to make sure your proportions have remained intact.
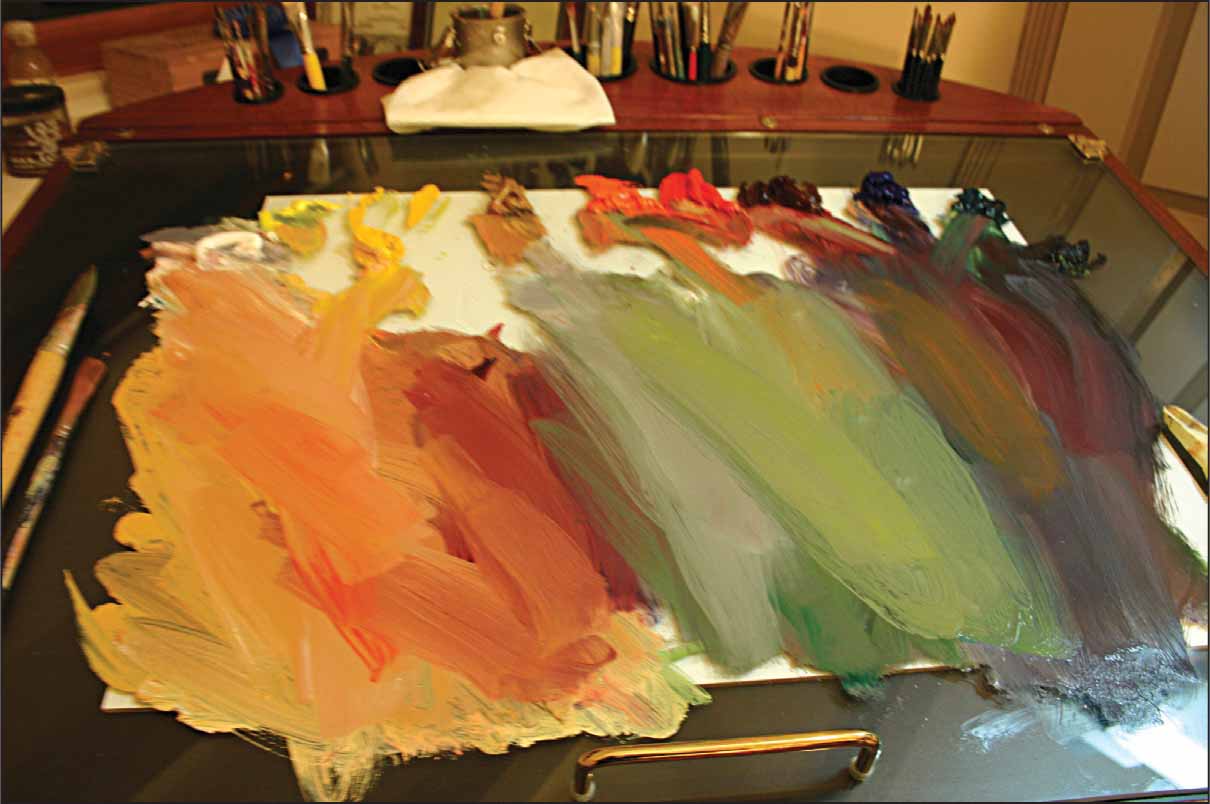
Step Five The wonderful thing about using a spacious palette is that you’ll be able to see and compare all the colors you’ve mixed. Then you can quickly dip into the mixture you need, whether it be for the skin tone, the dress, or the background.
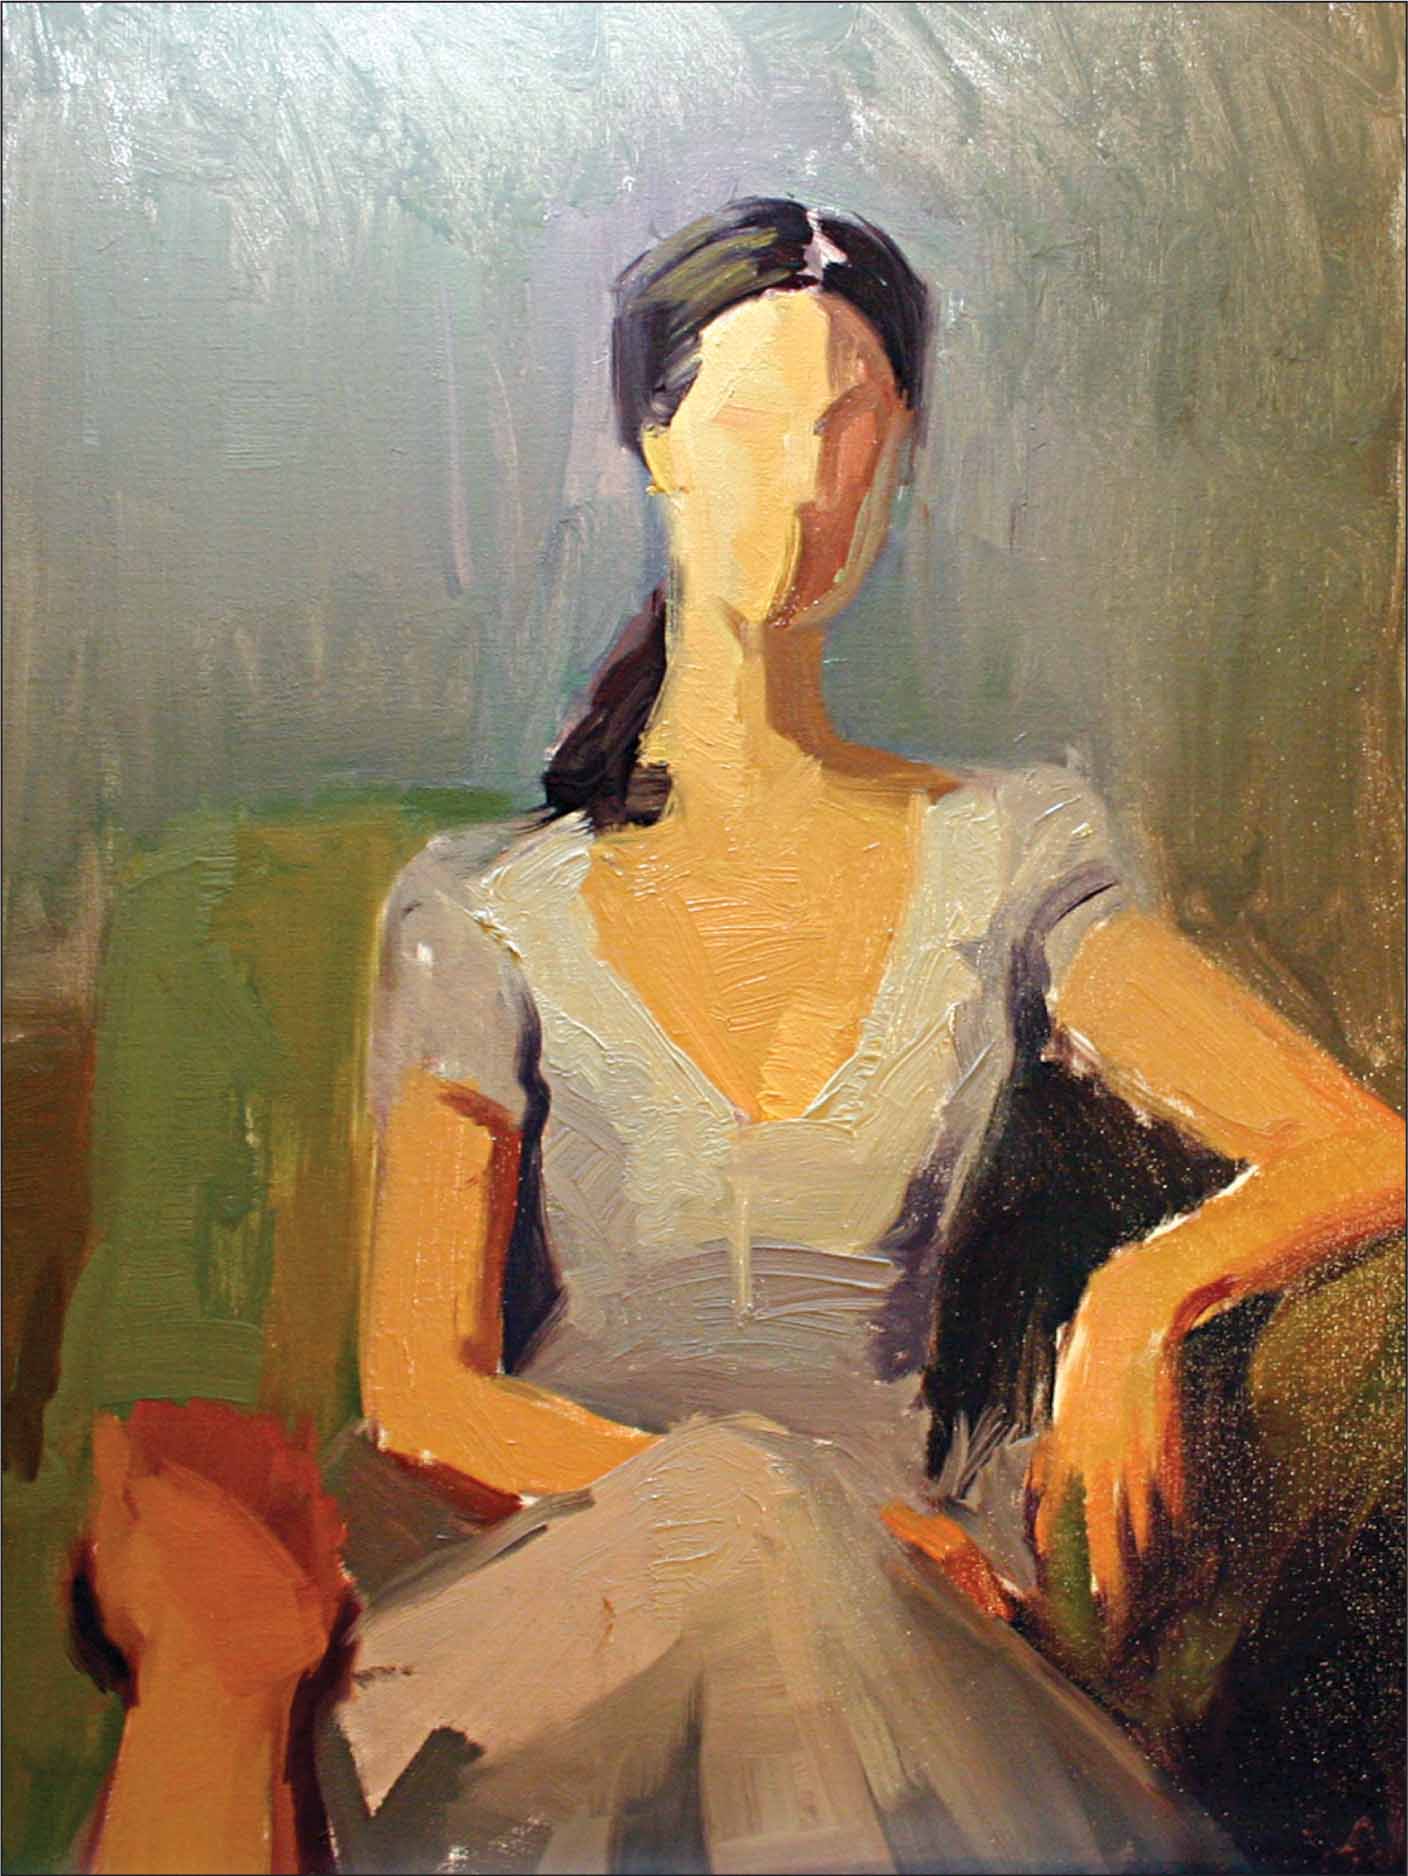
Step Six In this step, you’ll cover the rest of the canvas and with broad strokes. Paint in the direction that best describes that particular form. In this early stage, one of your main concerns will be establishing the light and dark patterns.
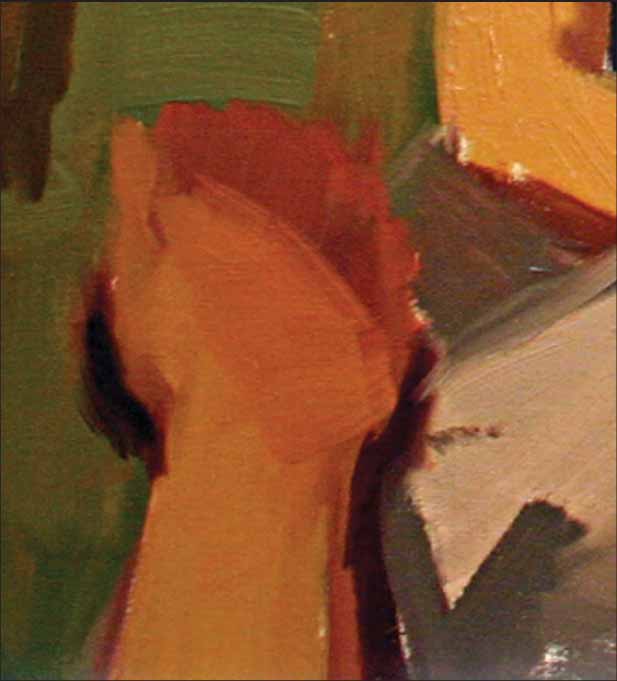
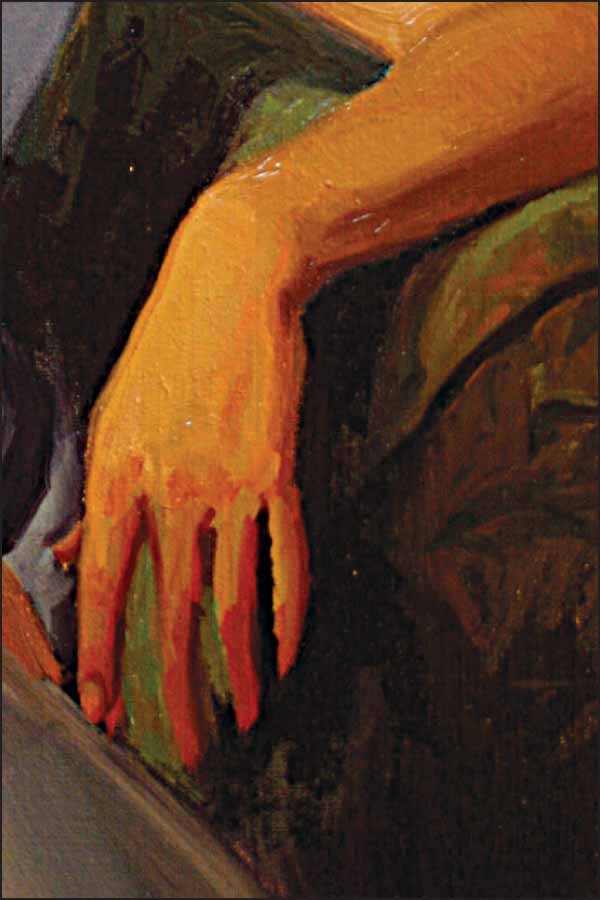
Step Seven You want to establish right off the bat that the victim’s hand belongs to a big, burly guy. Once again, this proves that size does not matter in a battle with the undead.

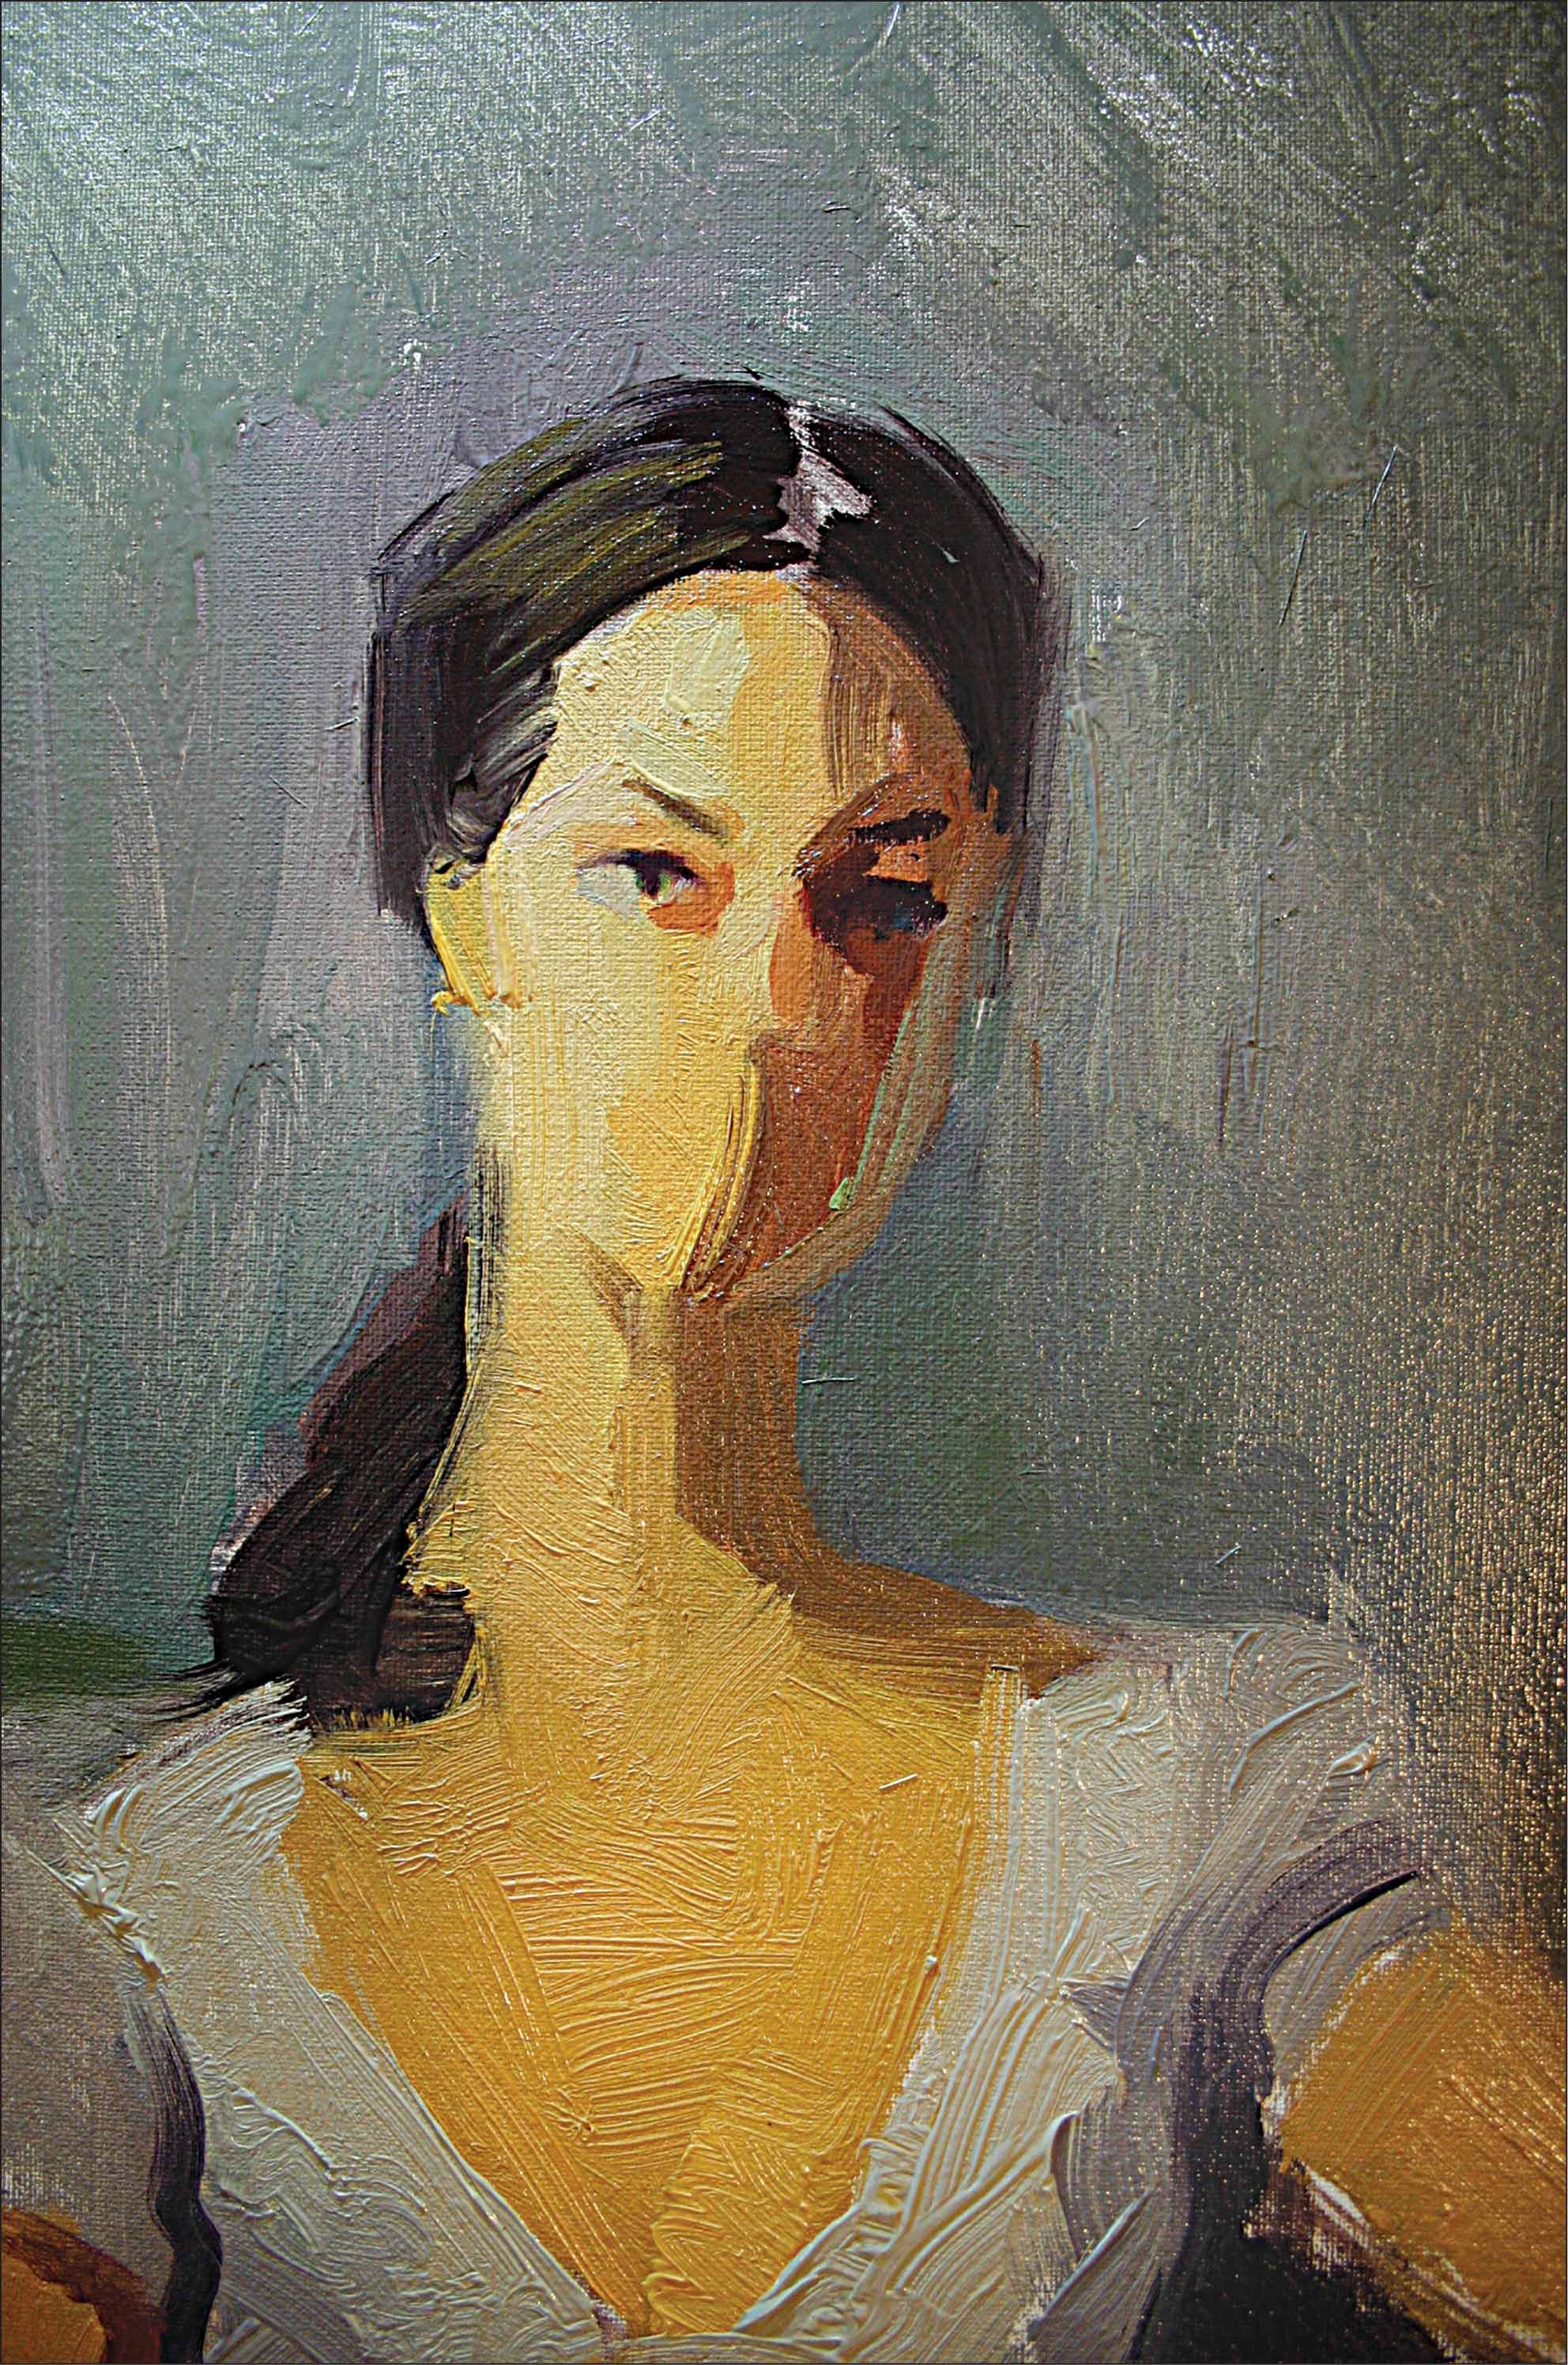
Step Eight Now, start on the face. Squint at your photo reference to see the graphic shapes of the light and dark patterns; then begin painting these shapes.
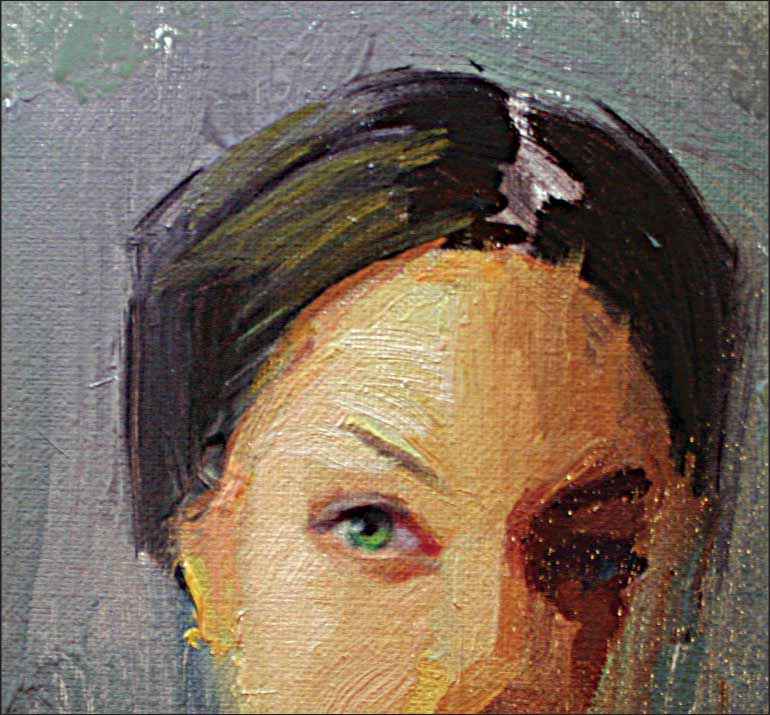
Step Nine First, concentrate on the eyes. It’s extremely important to keep the edges soft and the colors clean when painting the eyes. By doing this, you’ll bring life and vitality to the painting.
Step Ten Once the eye is laid in, move on to the rest of the face. Again, remind yourself to keep the edges soft. Step away from the canvas often to make sure the features are not misaligned. Another technique for monitoring proportion and placement involves looking at the reflection of your painting through a mirror. You will spot any mistakes right away.
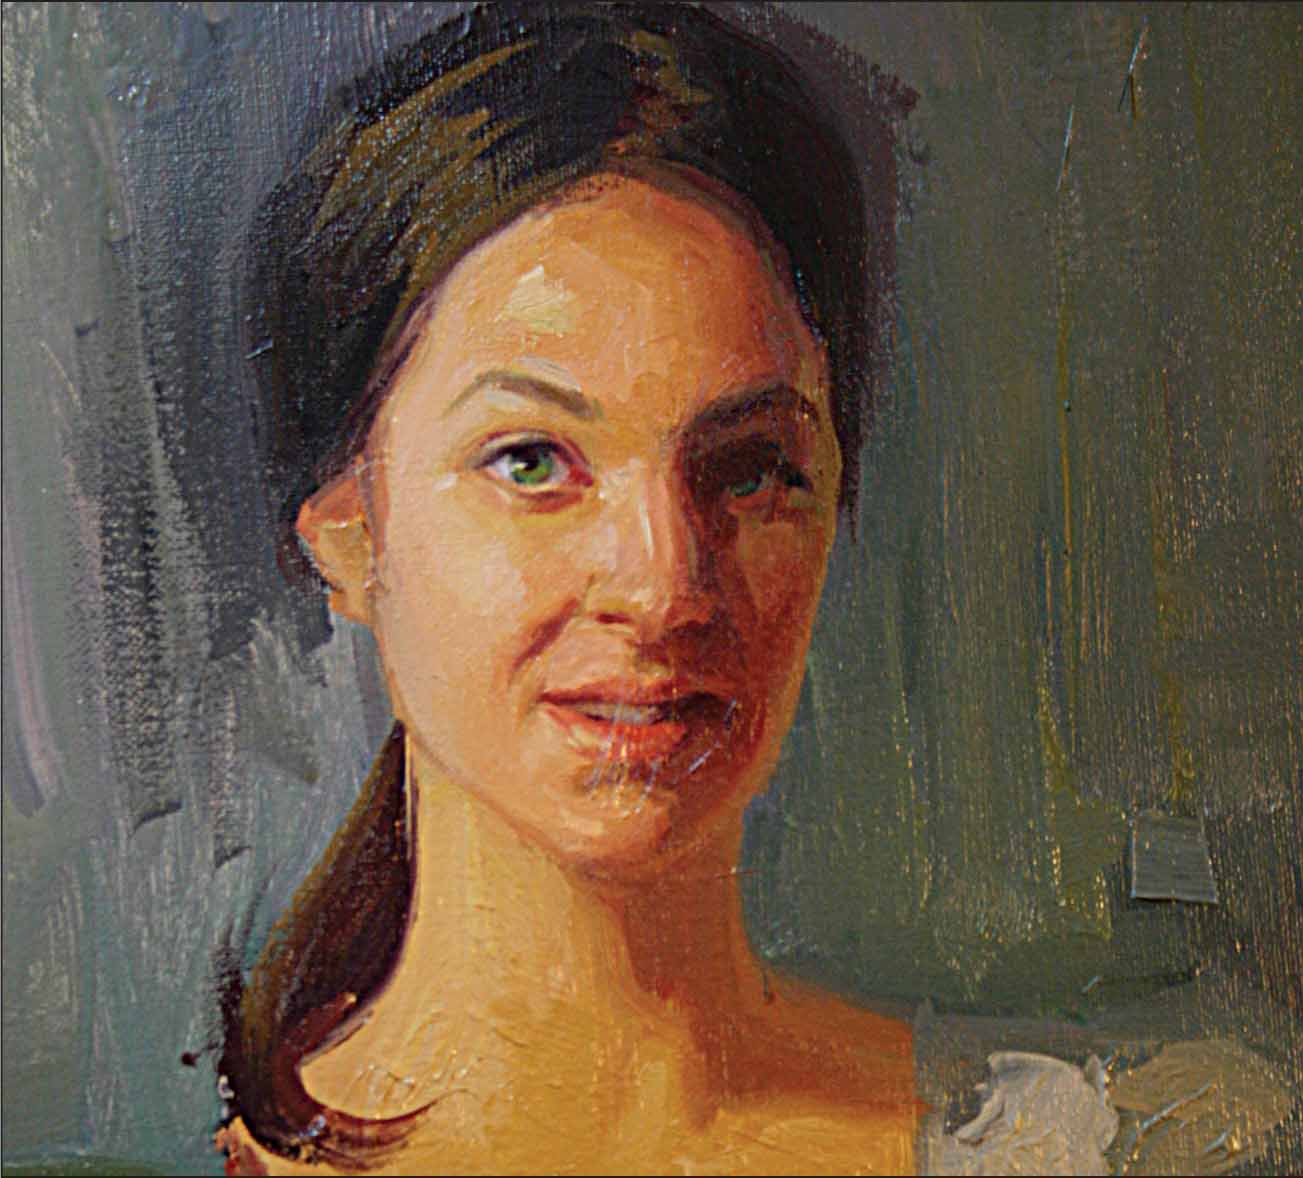
Step Eleven Since this vampire fed right before her sitting, we want her to look slightly flushed with exhilaration. Mix a little bit of alizarin crimson, a bit of yellow ochre, and some white; then use this to paint the blush on her right cheek and nose. Also, make sure to observe all the little highlights on her face and even exaggerate them slightly to give her a healthy glow.
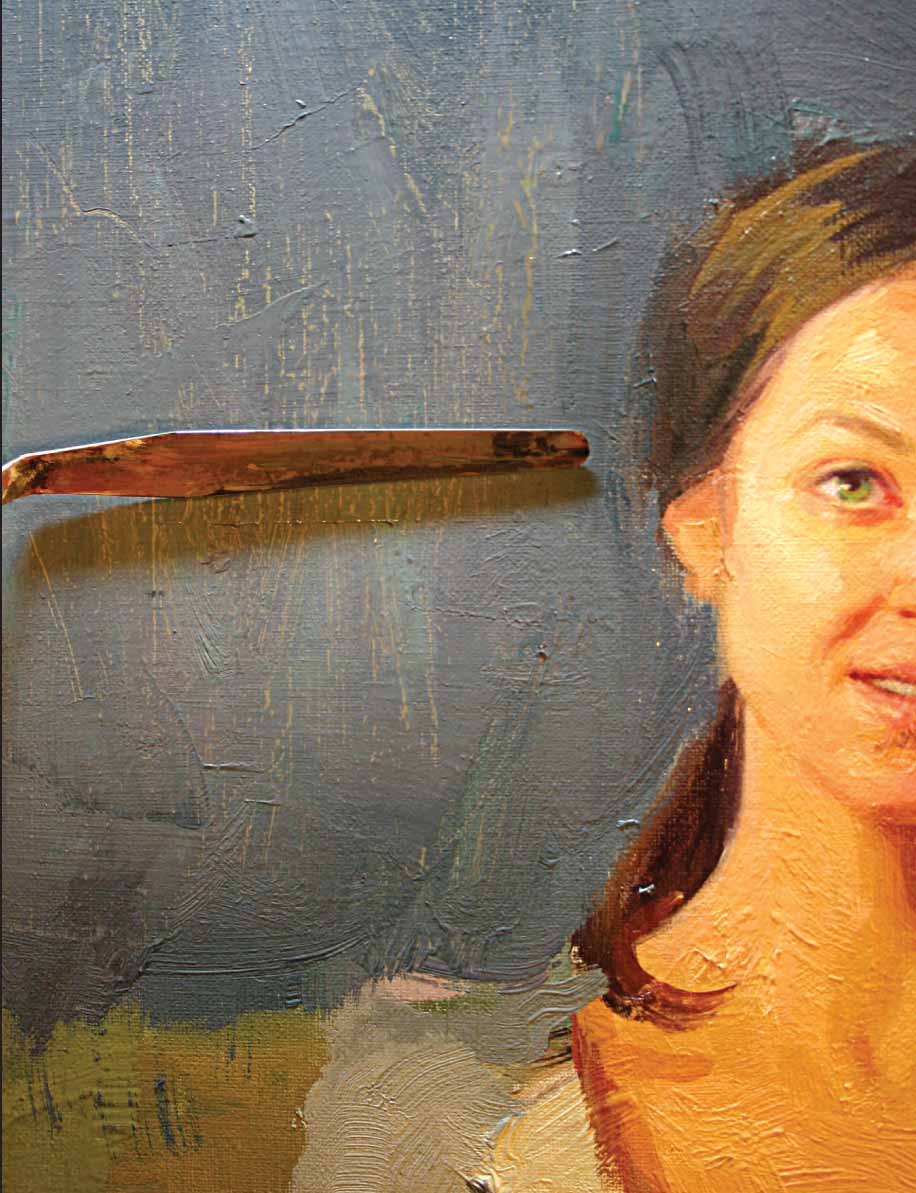
Step Twelve At this point, we’ll work on the background, making it a subdued grayish blue with a little interest in it as well. Take your palette knife, then scrape off some paint in certain areas. This will reveal a bit of the underlying colors while adding texture.
Step Thirteen Continue looking for errors in proportion. In this case, I noticed that her head was becoming a bit large, so I broadened her shoulders a bit by extending the sleeves. Start to bring in the shadows along the side of her torso and the bottom of her dress. Keep the shapes graphic to uphold the structure.
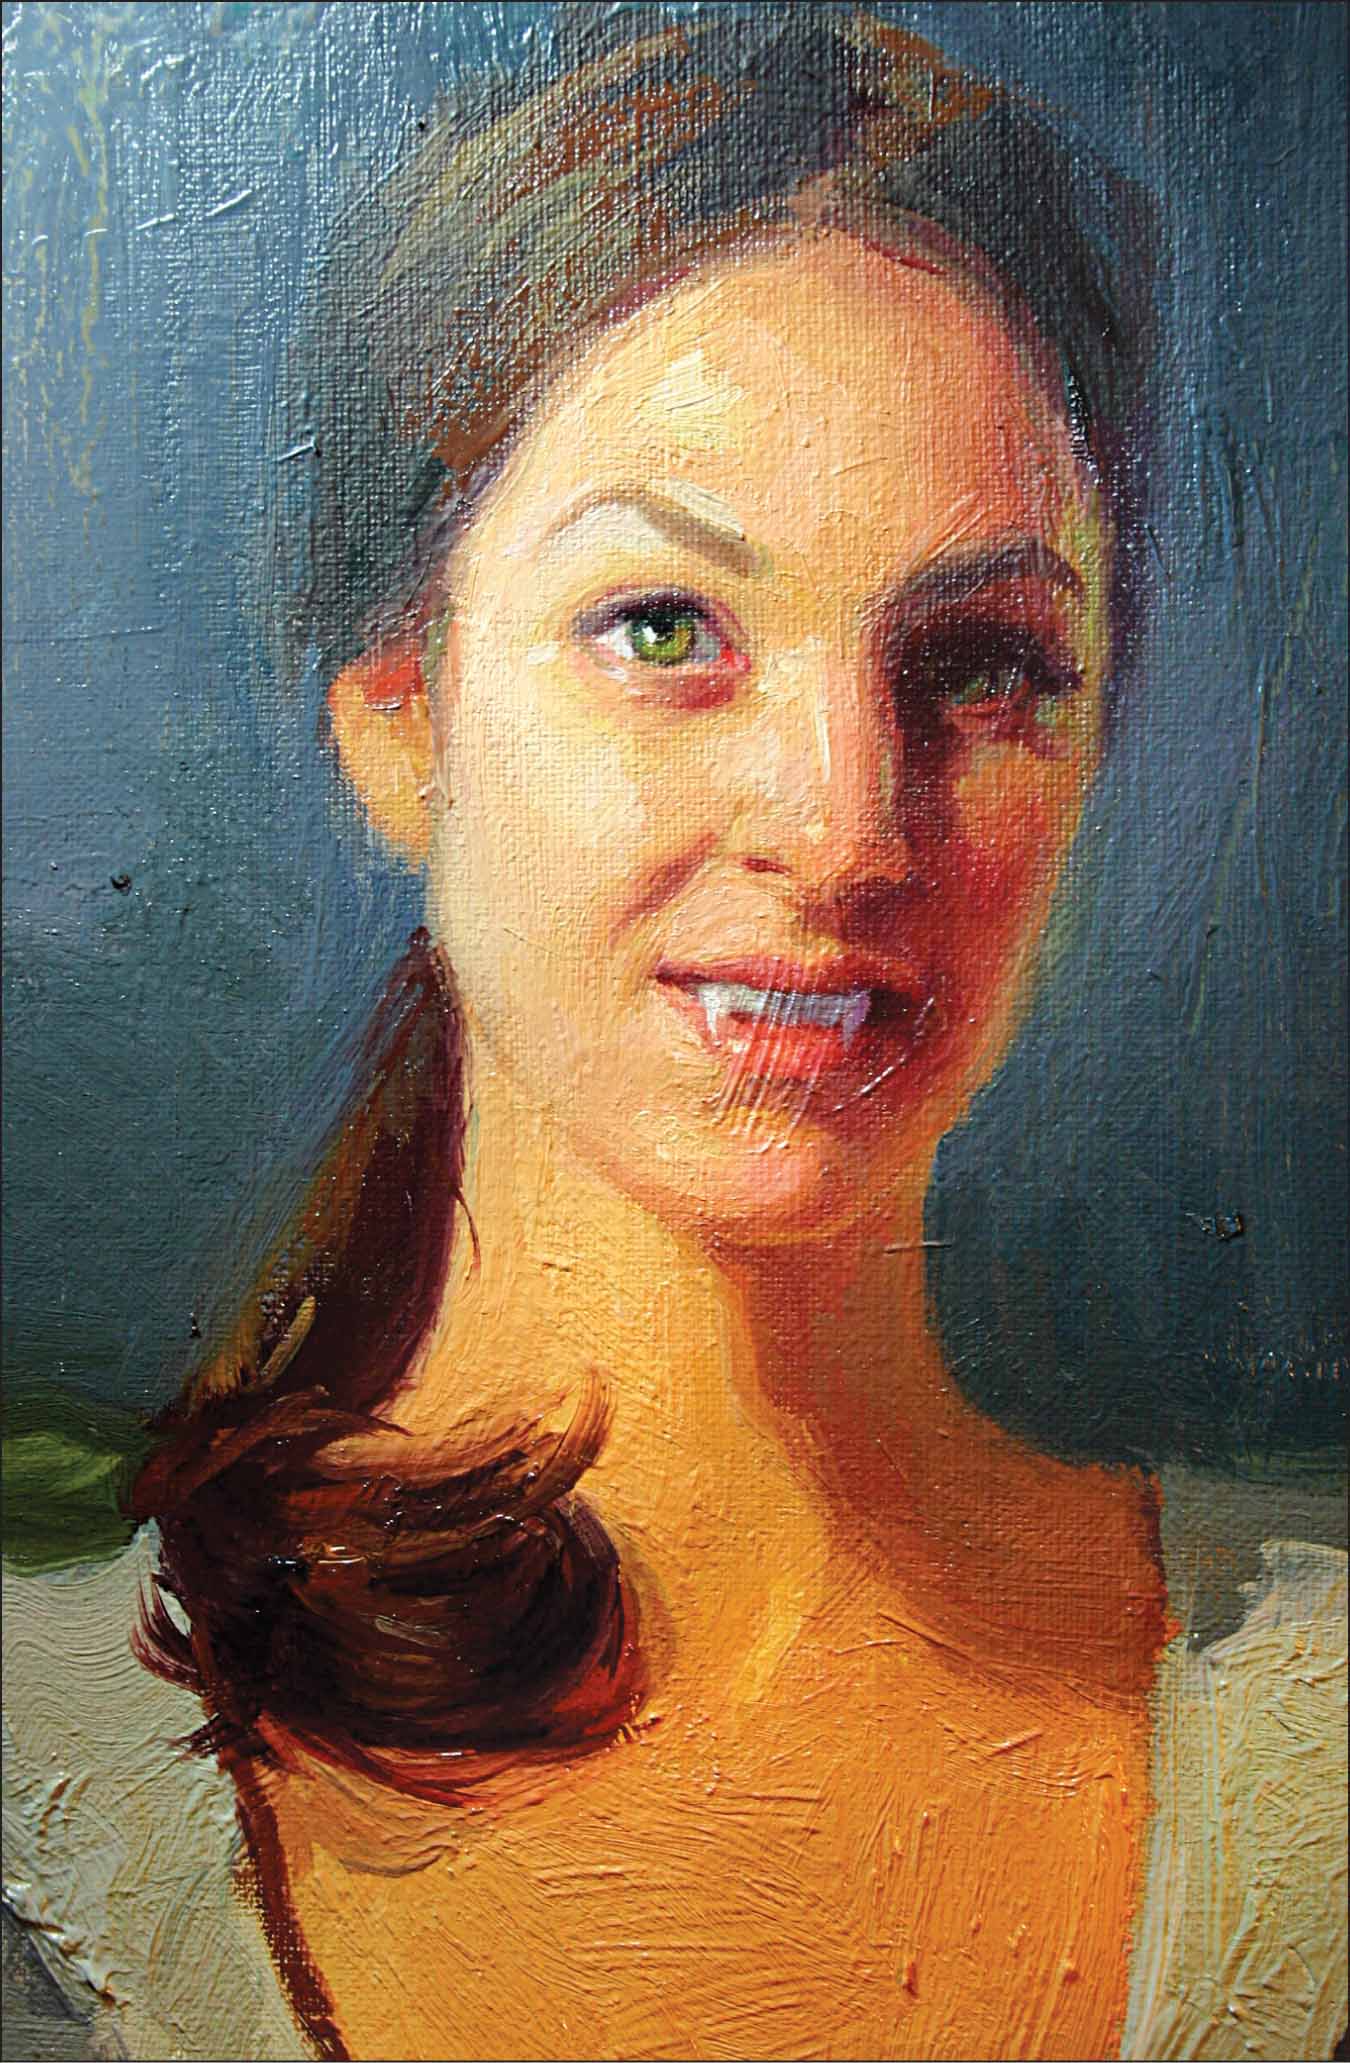
Step Fourteen Here, we begin to refine the shadowy side of her face and soften all of the edges. We also paint in the long-awaited fangs. Leave a light smear of blood on one corner of her mouth, as if she missed wiping it off with her handkerchief.
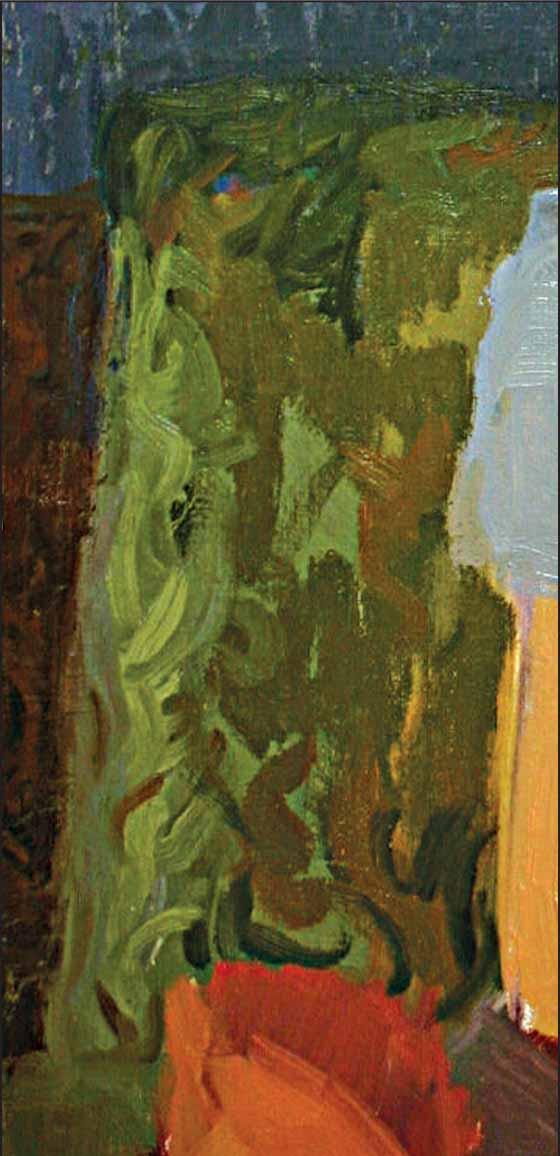
Step Fifteen Since the upholstery is not our main focus, we don’t have to spend a lot of time copying the patterns. Approach it the same way you did with the vampire. First, block in the big shapes of color and value. Then, subtly indicate the floral pattern with a smaller brush. Paint it as if you’re looking at the sofa while standing 10 feet away.
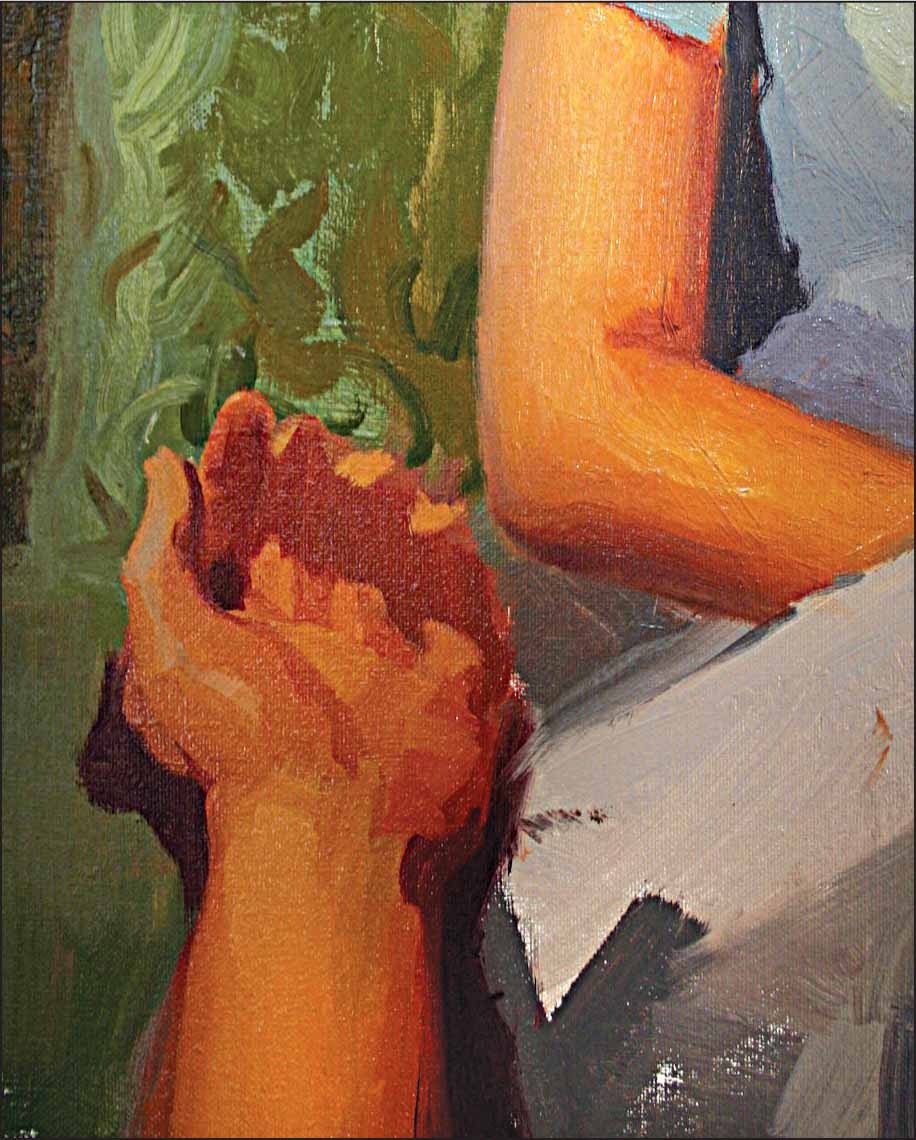
Step Sixteen Hands are often thought of as being very difficult to paint because of all the fingers, knuckles, and so forth. Ignore these elements and just focus on one big shape at a time, gradually moving to the smaller ones.
Step Seventeen Use the same approach as you did in Step Sixteen when working on the lady vampire’s hand. But this time you want it to look long, delicate, and slender, in contrast to the hand of her victim.
Step Eighteen Her dress is made up of beautiful shades of lilac and blues. When hit by the light, there’s a hint of transparency. To achieve this look, mix a bit of cadmium orange, ultramarine blue, and white. Then, apply this between the folds of her sleeves, along the side of her bodice, and over her crossed leg.
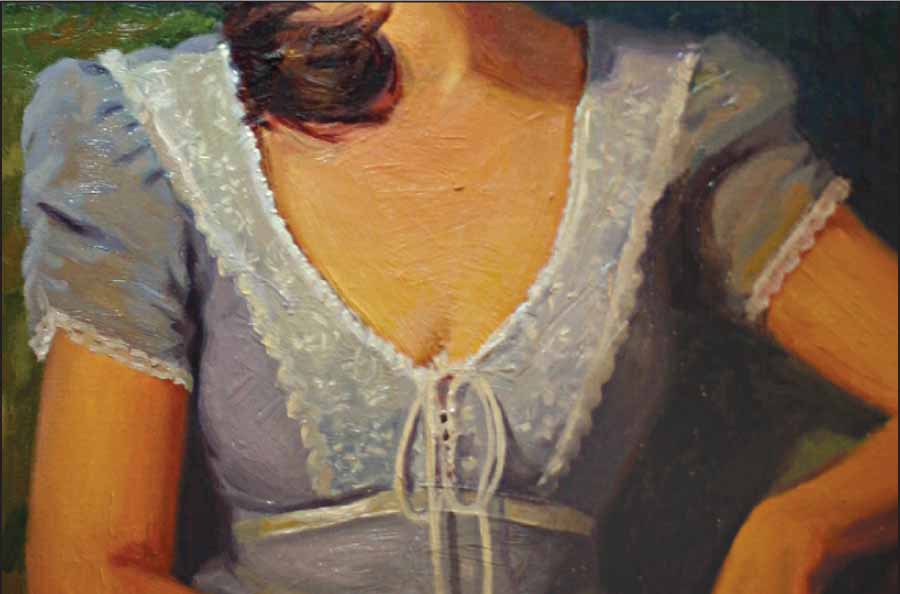
Step Nineteen For the lace embroidery, mix a batch of warm white and cool white. Then, use a small brush and begin to indicate the little flowers with small quick strokes. Make sure to adjust the white as you move into the shadow area.

Step Twenty Hair is another area where the edges need to be soft. Do this by observing the transition of colors and values—not by blending.
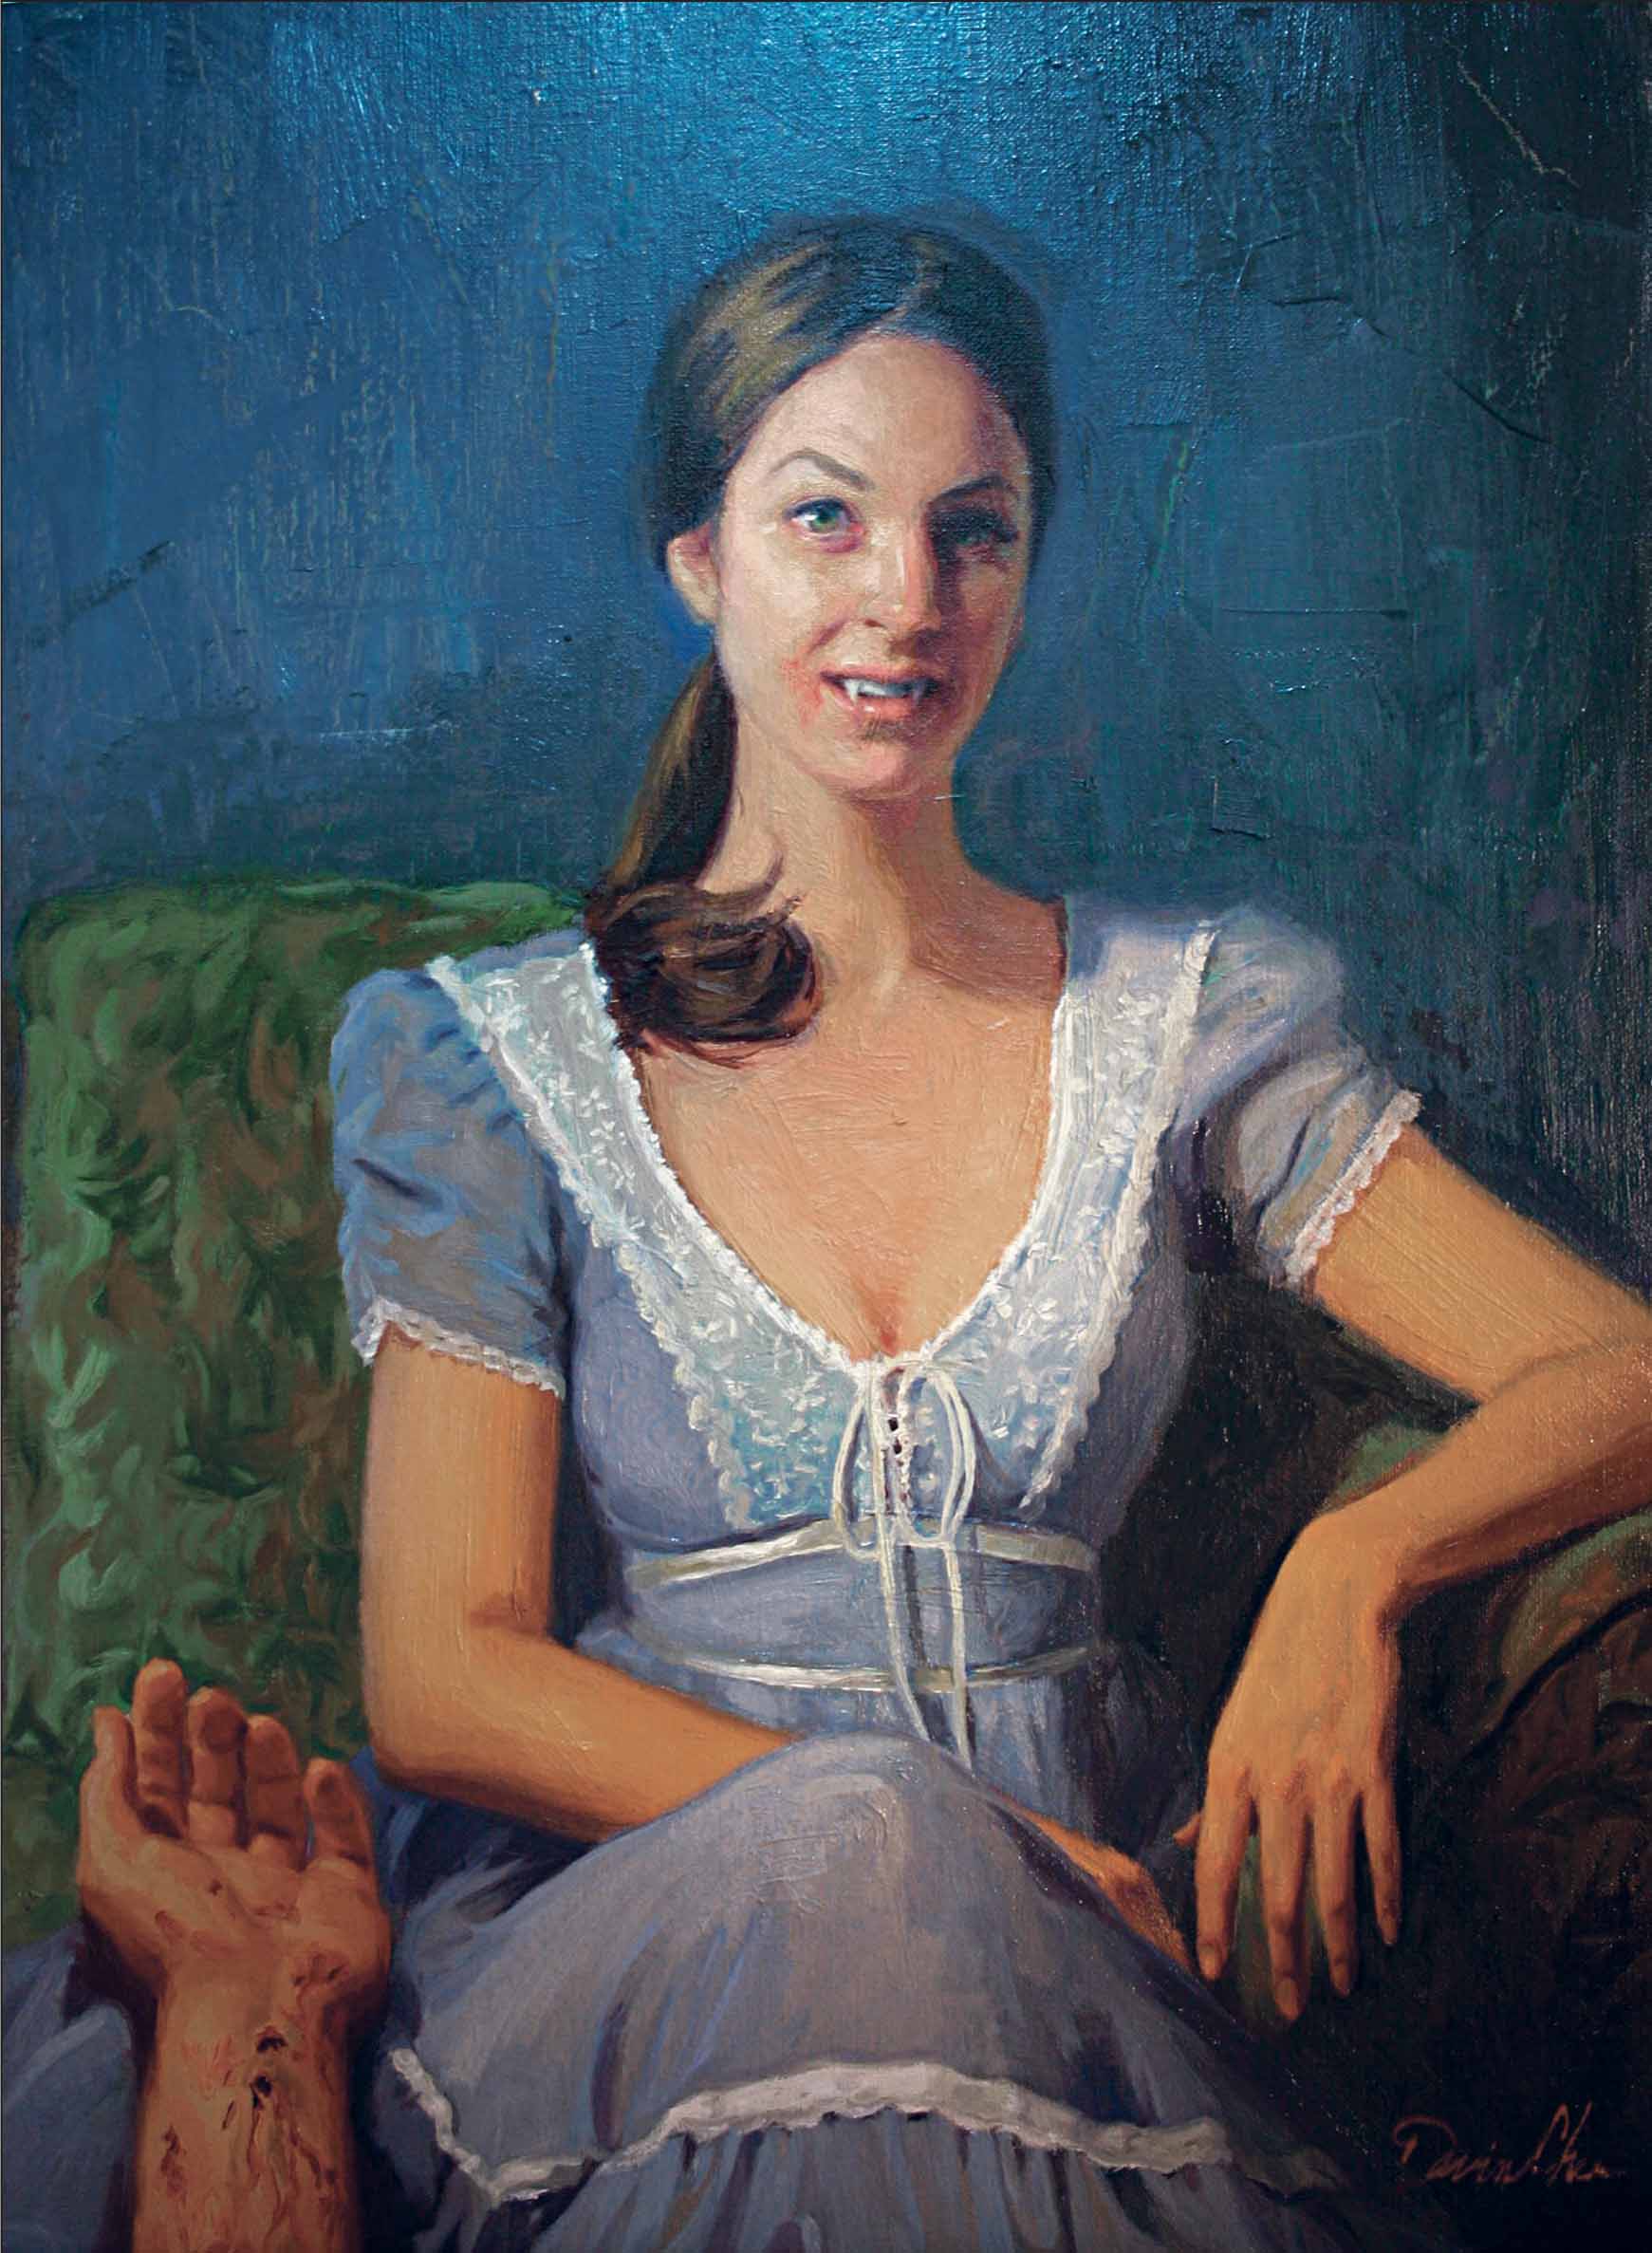
Step Twenty-One Finish the hand, and then move on to the blood and gore. Since we don’t have a reference for the gore, we won’t spend too much time trying to make it up—otherwise the gore could end up looking unbelievable. Mix a little cadmium red and alizarin crimson for the smudges of blood. Then mix alizarin crimson and ultramarine blue for the puncture wounds. Also add some bruising for more realism.
Step Twenty-Two Once you are done, take a few steps back and study the painting for anything you may have overlooked. It’s easier to fine-tune your oil painting during the first couple of days after it’s finished, when the paint is still wet and malleable.
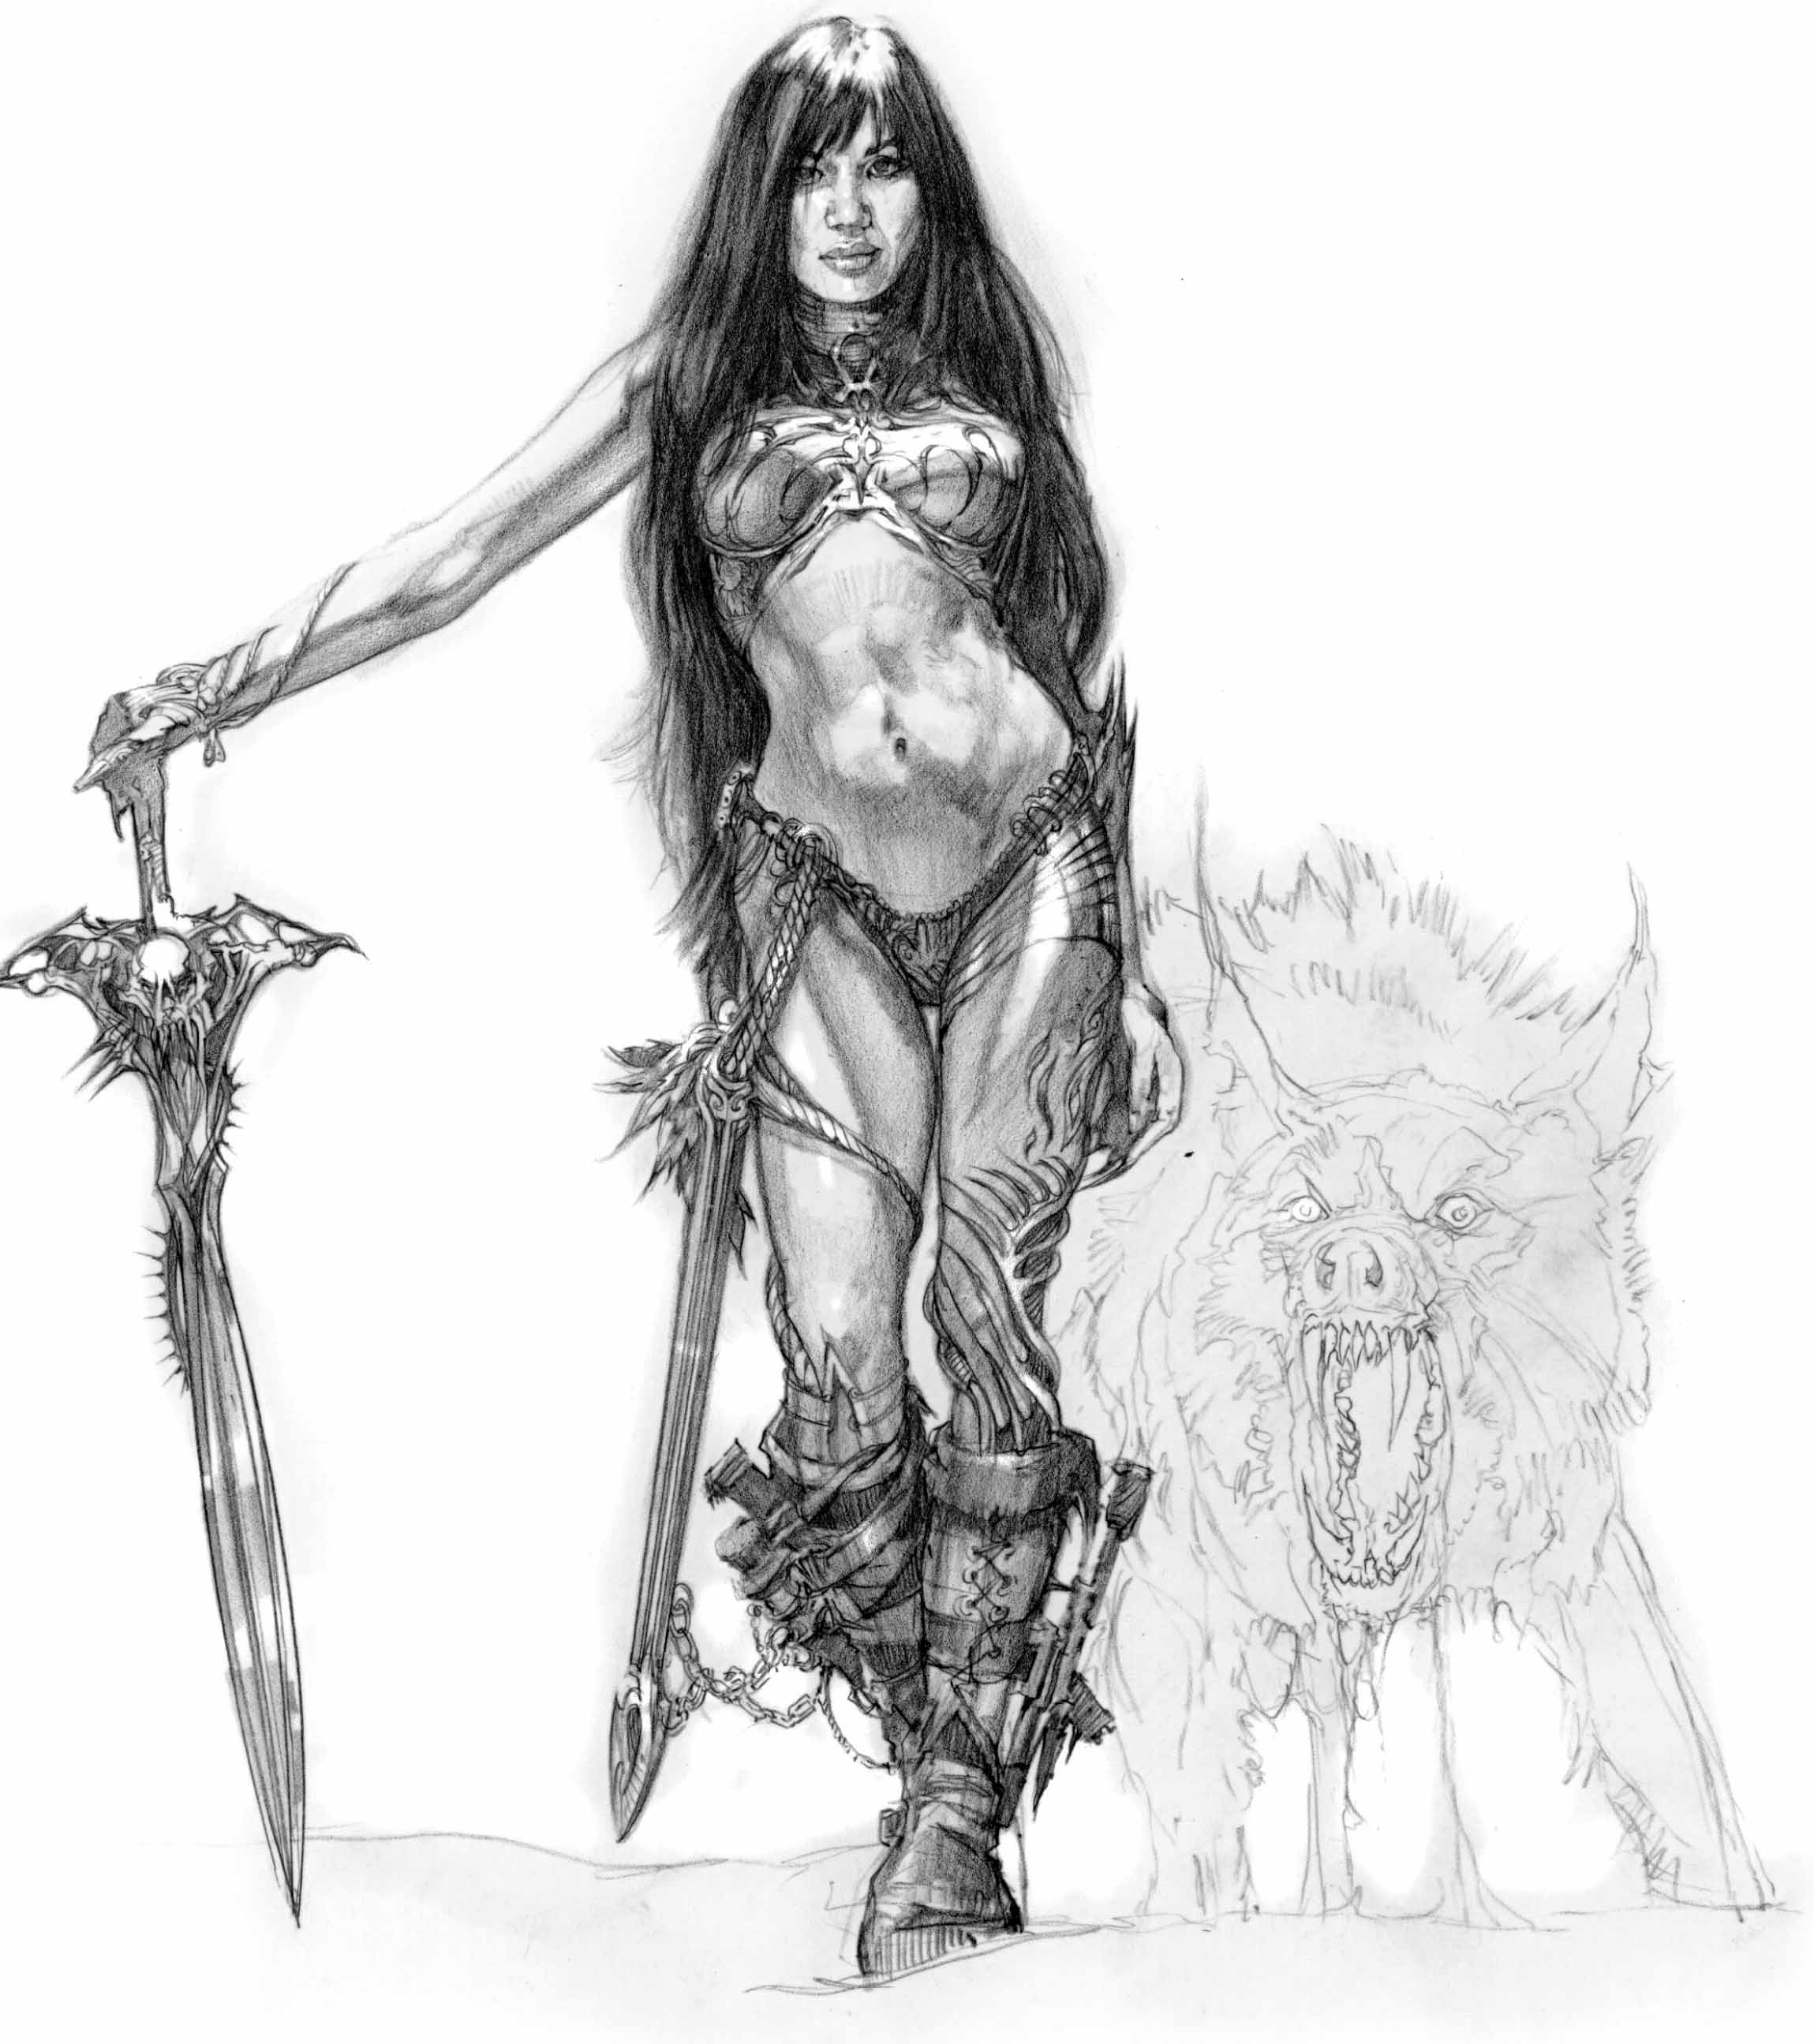
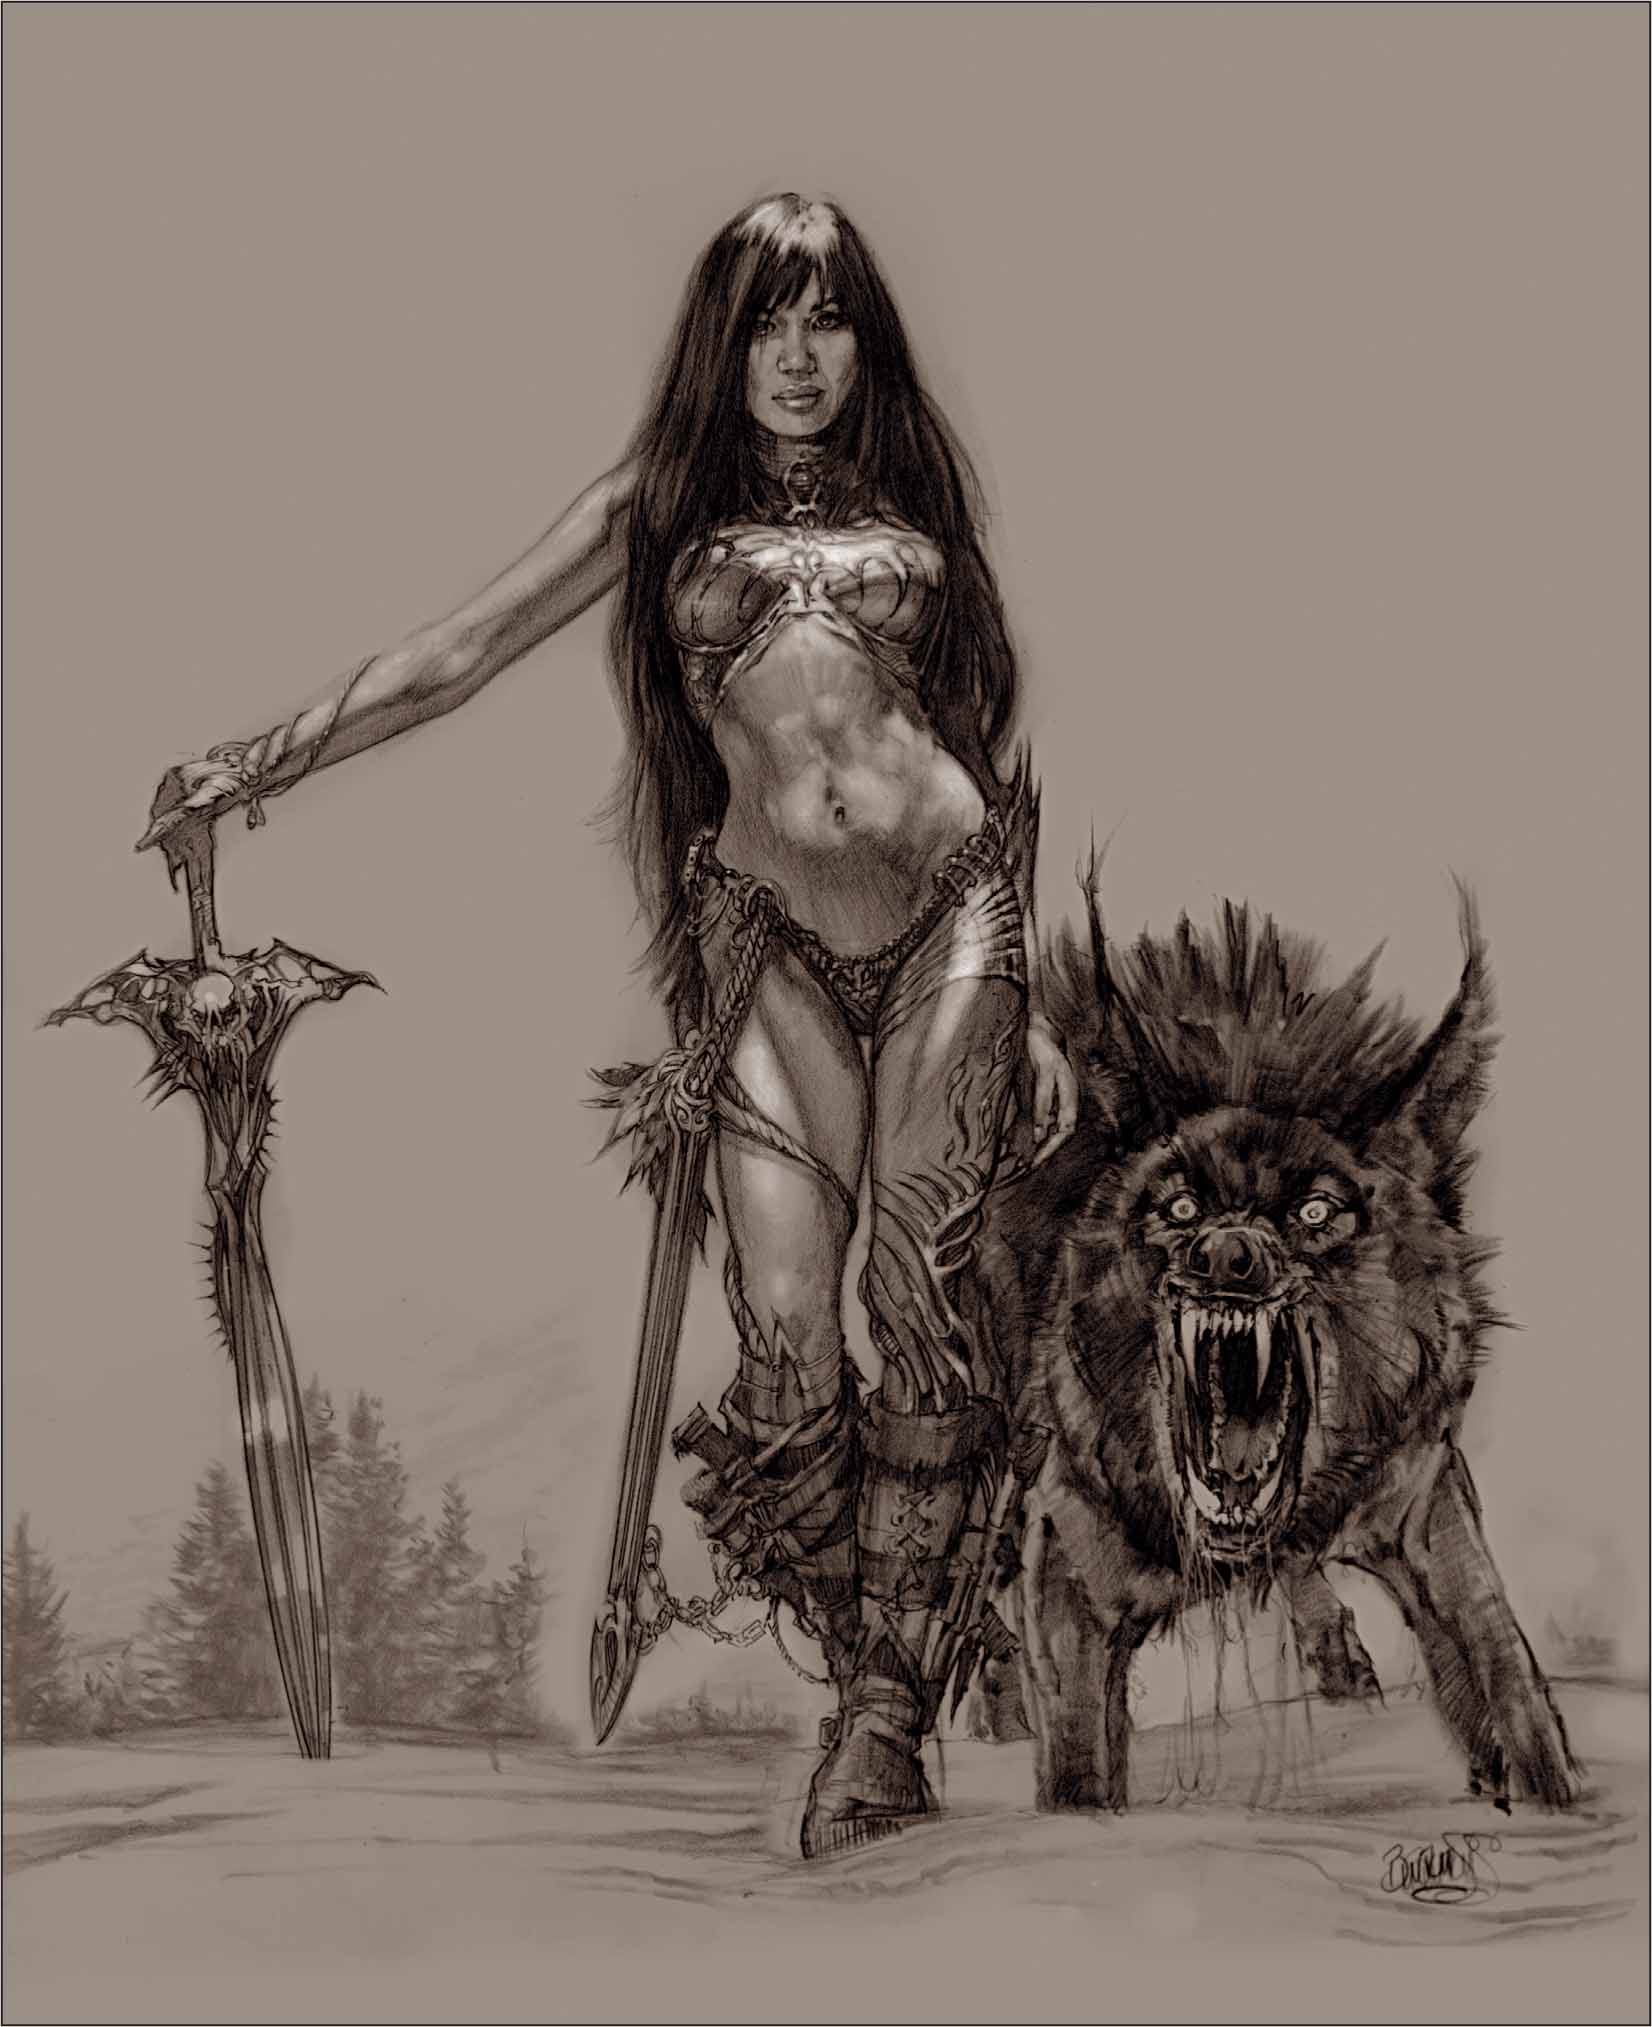
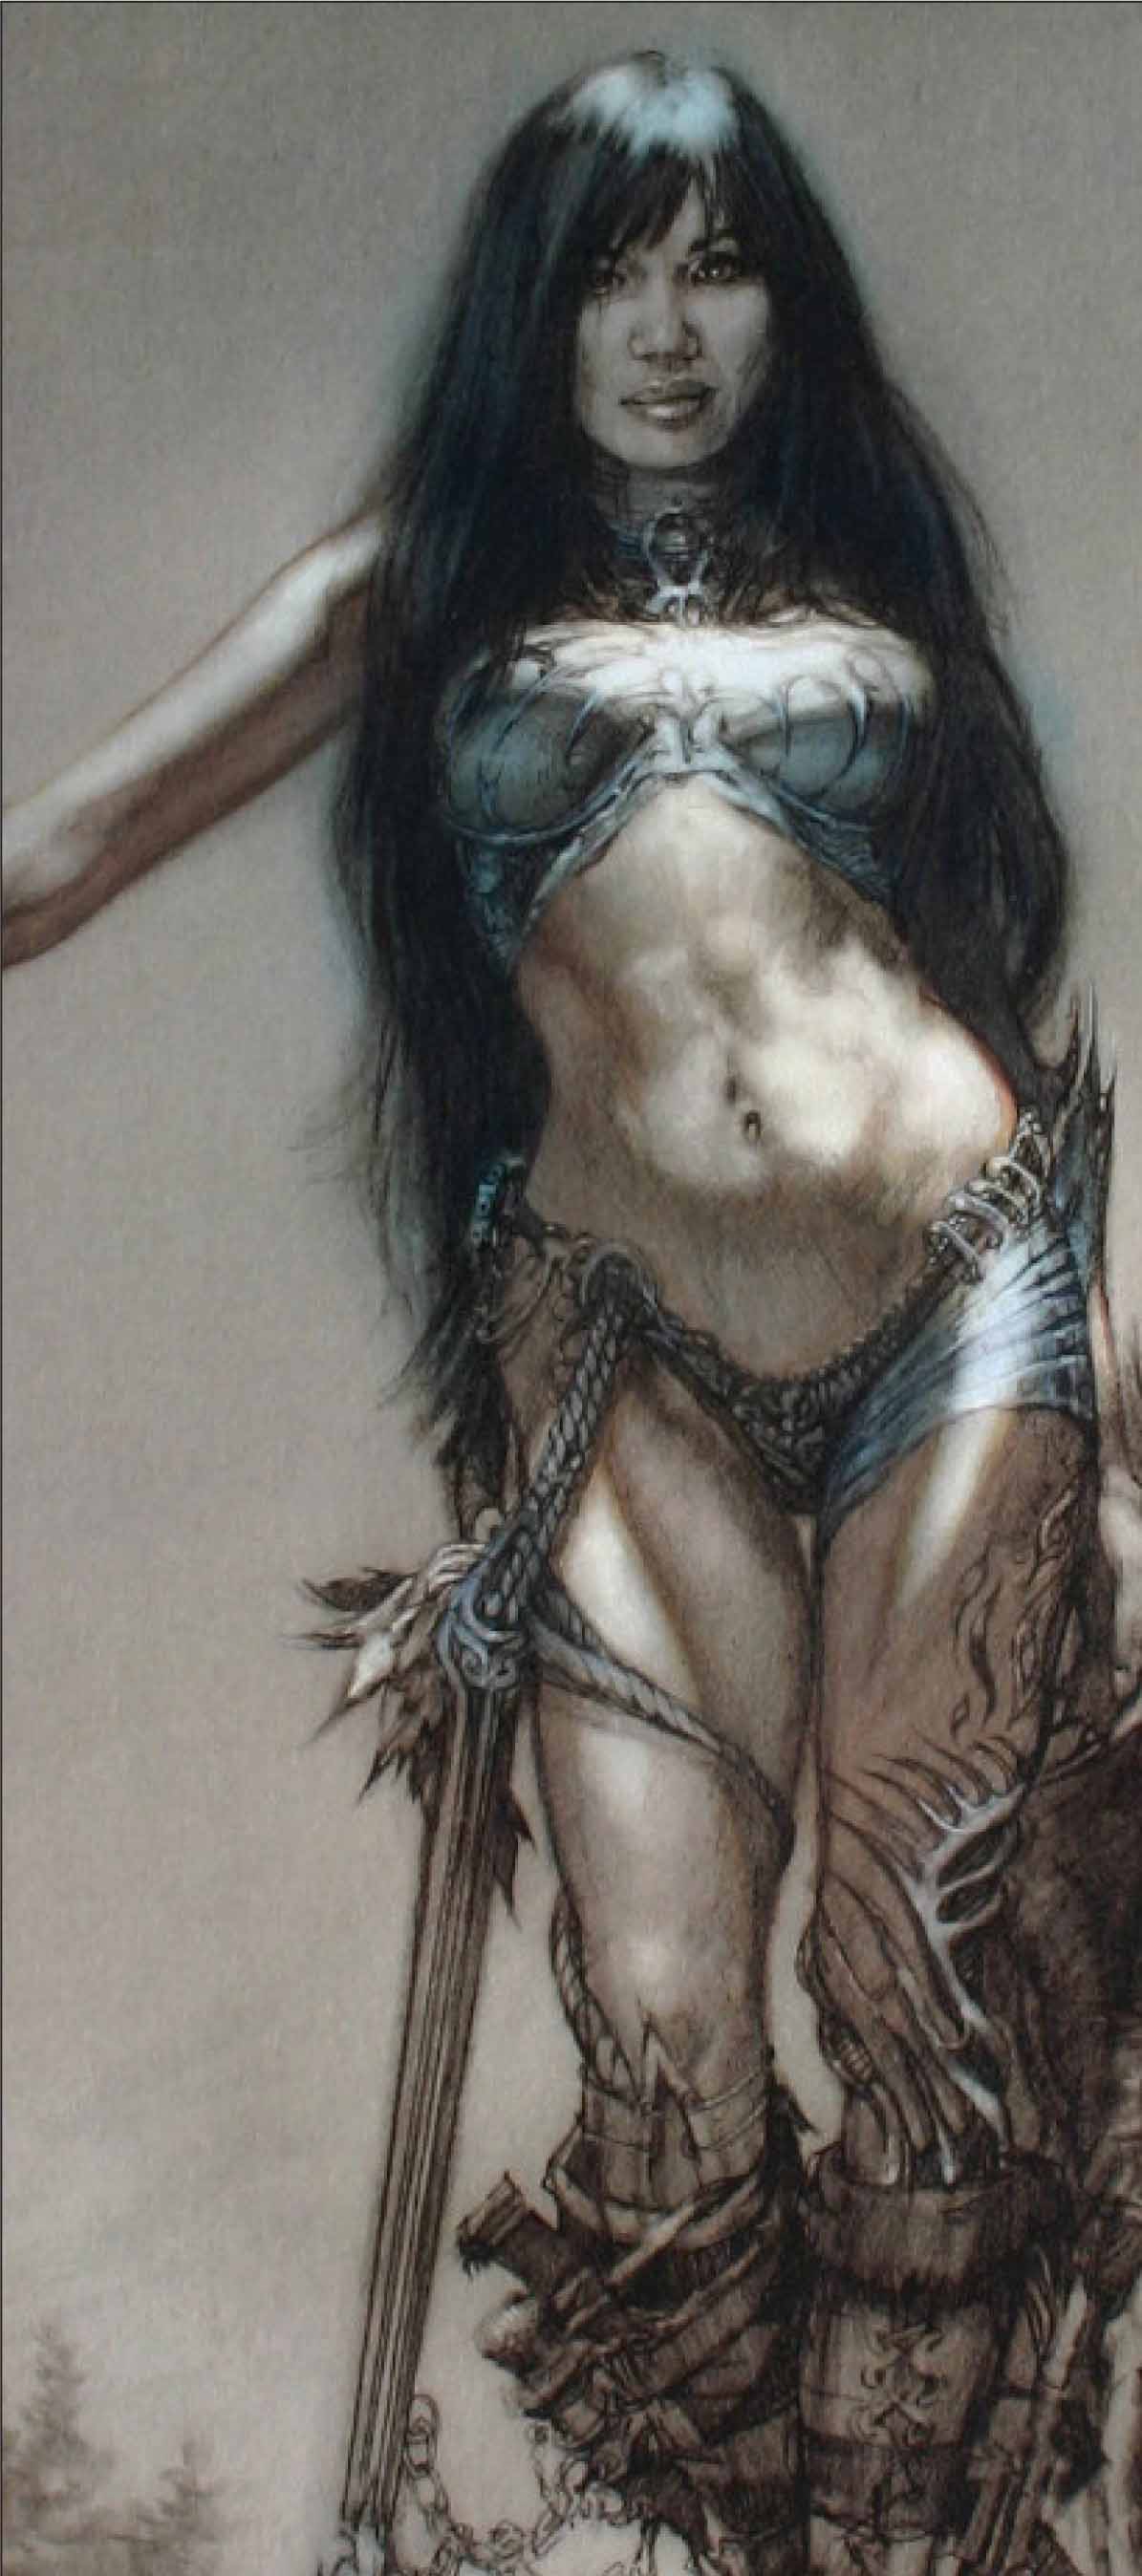
This vampire bounty hunter hikes through snow and a barren landscape, with nothing but a vicious wolf and an arsenal of weapons for company. And yet, despite her gruesome task, few vampires have been able to resist her when she draws near. This project will give you the opportunity to work with a model and a photo reference, thus creating a more realistic drawing.
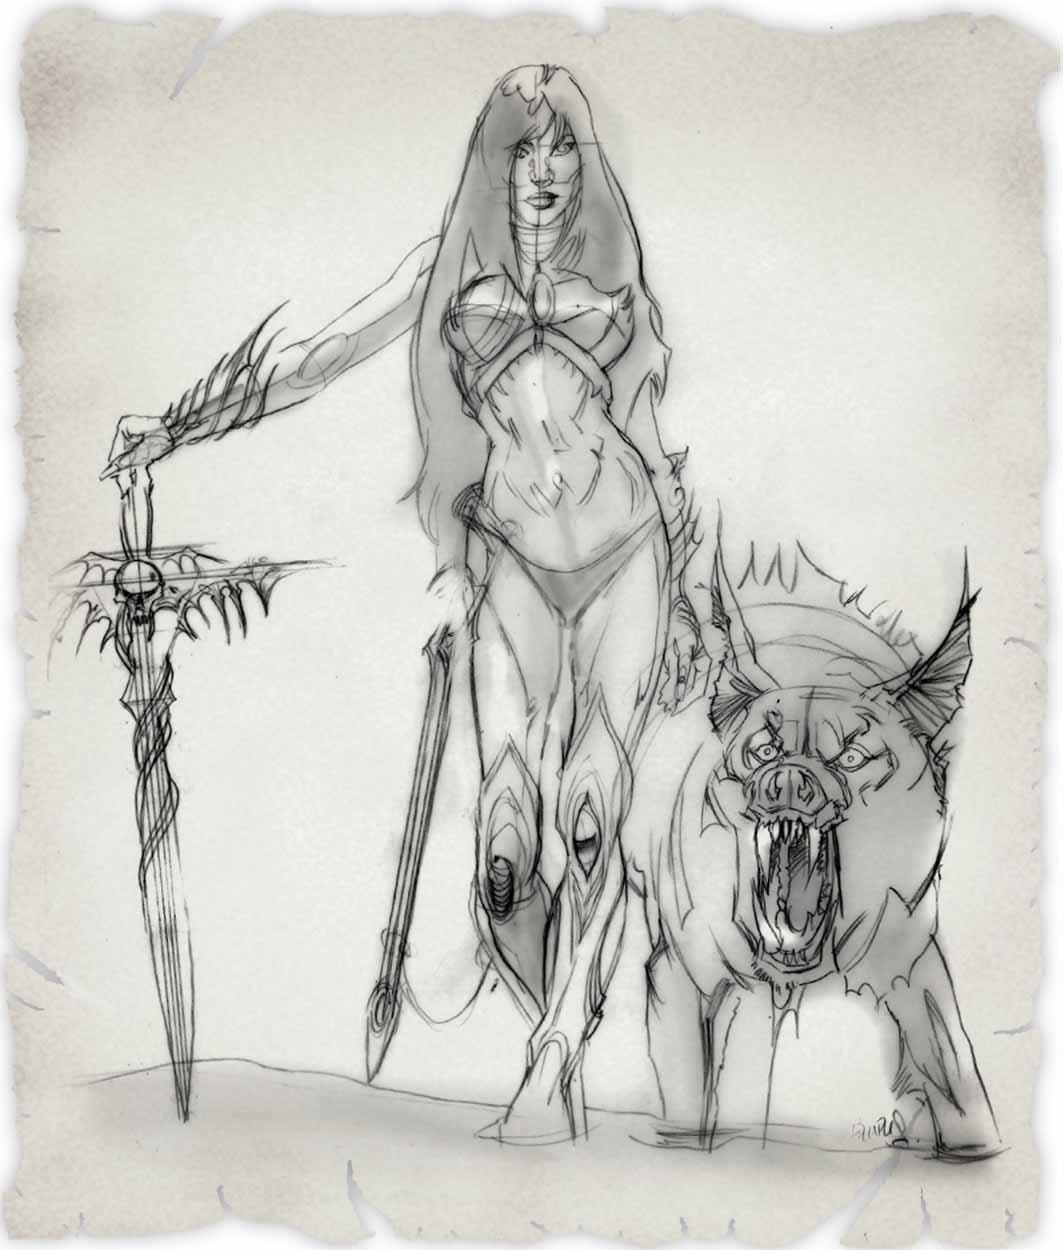
Step One This illustration is more realistic and aims to capture all the subtle nuances of the human figure. So, you may need to set up a photo shoot with an appropriate model. (However, finding a psychotic wolf to pose for you may prove difficult.) Create an initial sketch that defines the shapes and maps the shadow patterns. (You can also transfer the sketch from this book; see “Transferring a Drawing” on page 25.)
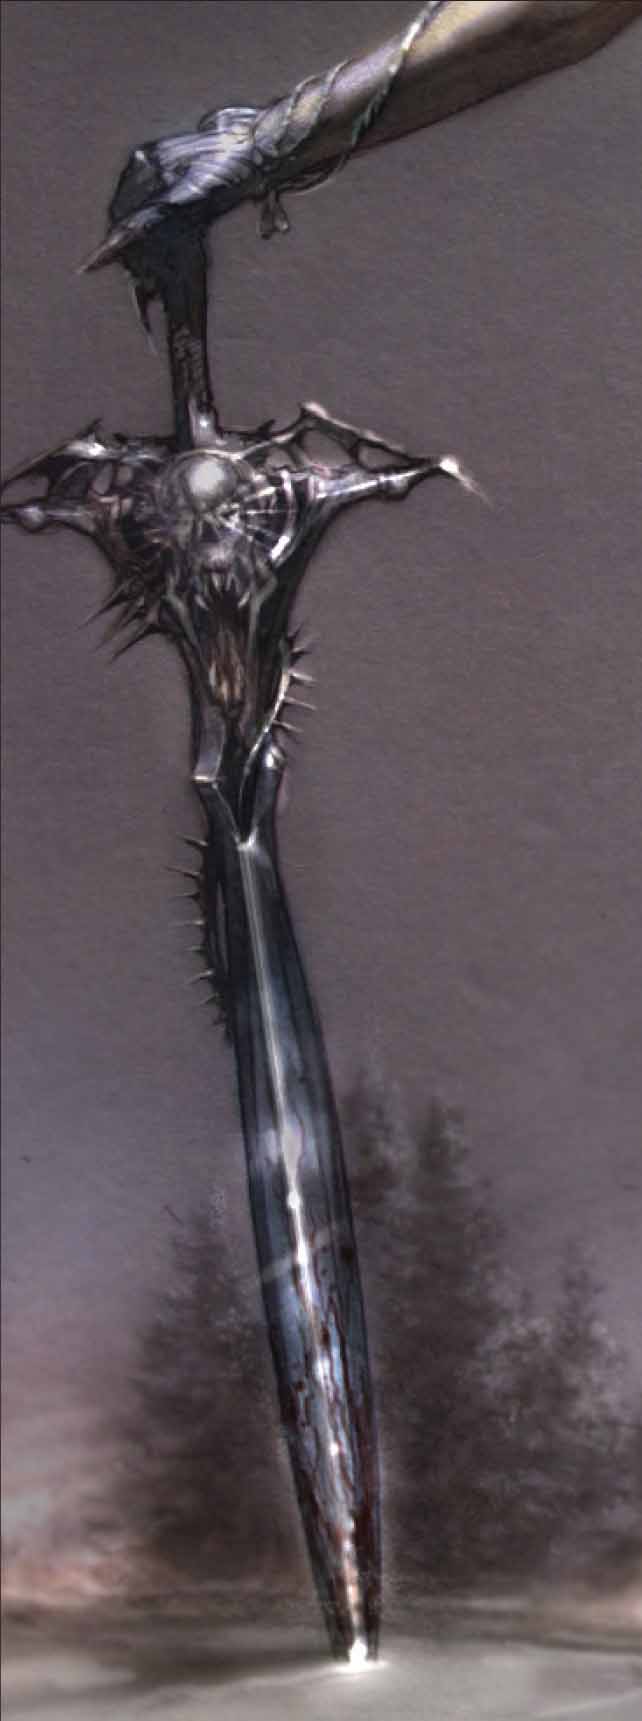
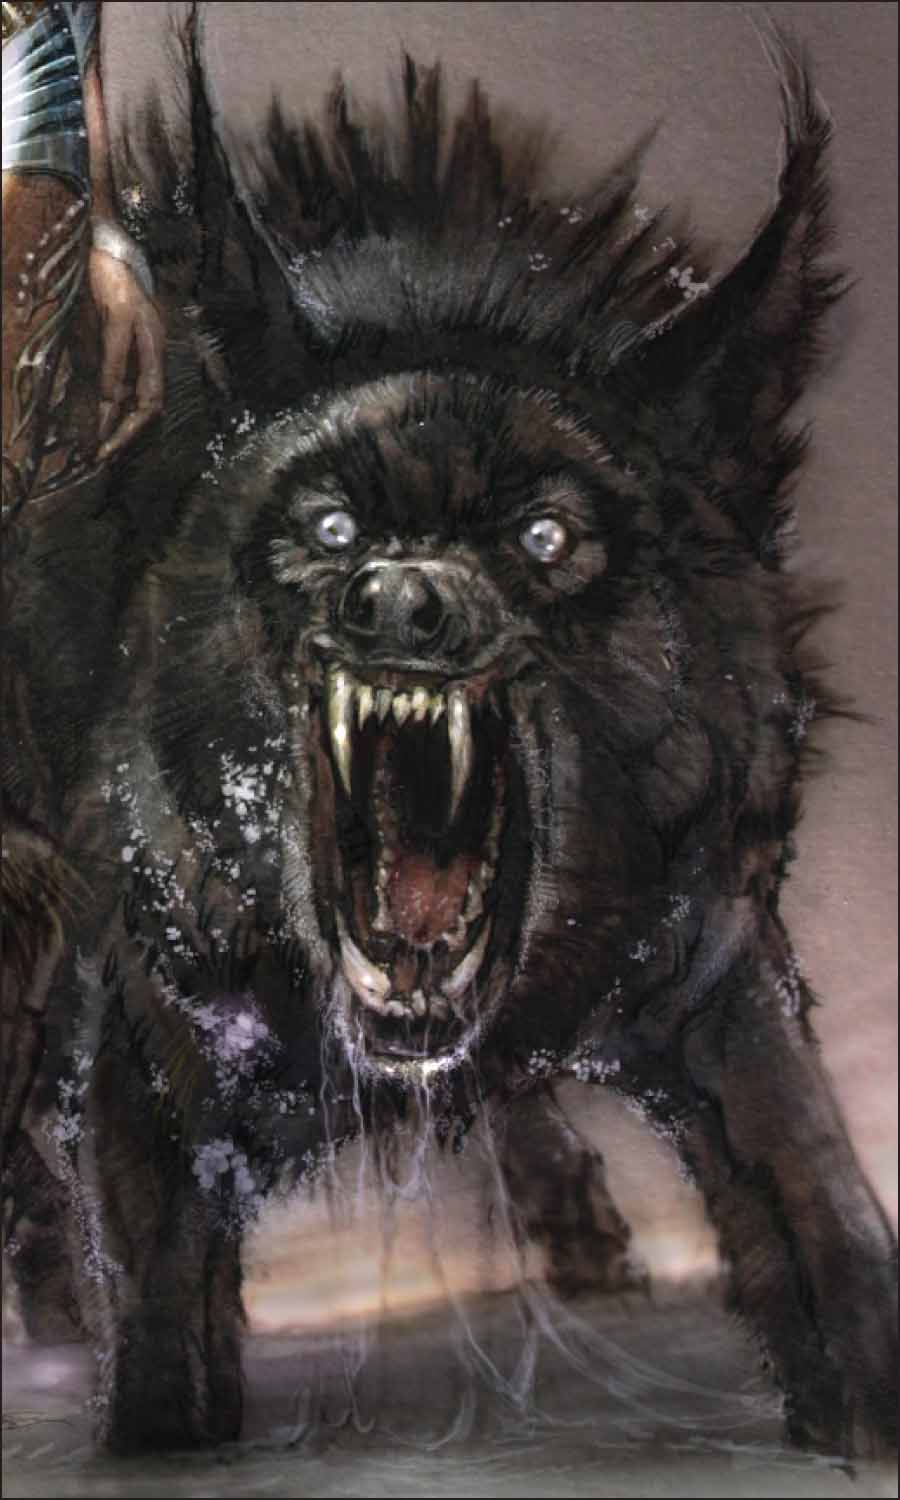
Step Two Notice that as I develop the sketch, I get rid of the spiky cuffs on her wrists and the spikes on the sword. These shapes are too distracting to the viewer. Also, I push her left hip out a bit further so she’ll have a more relaxed demeanor. It’s important to take some time to think through and refine your sketch. Edit her costume a bit more, then work on the wolf, exaggerating his demonic expression.
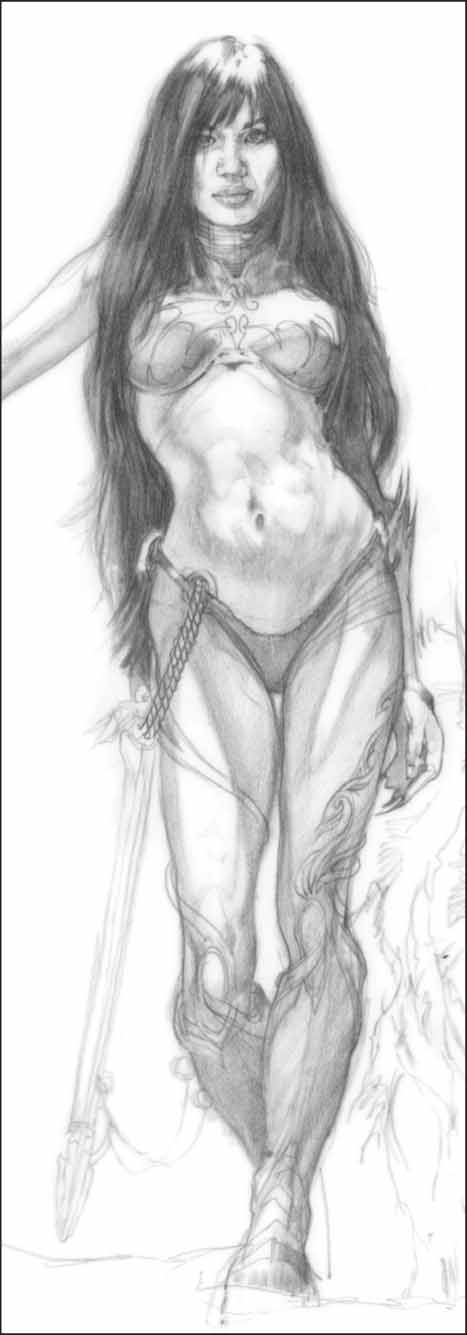
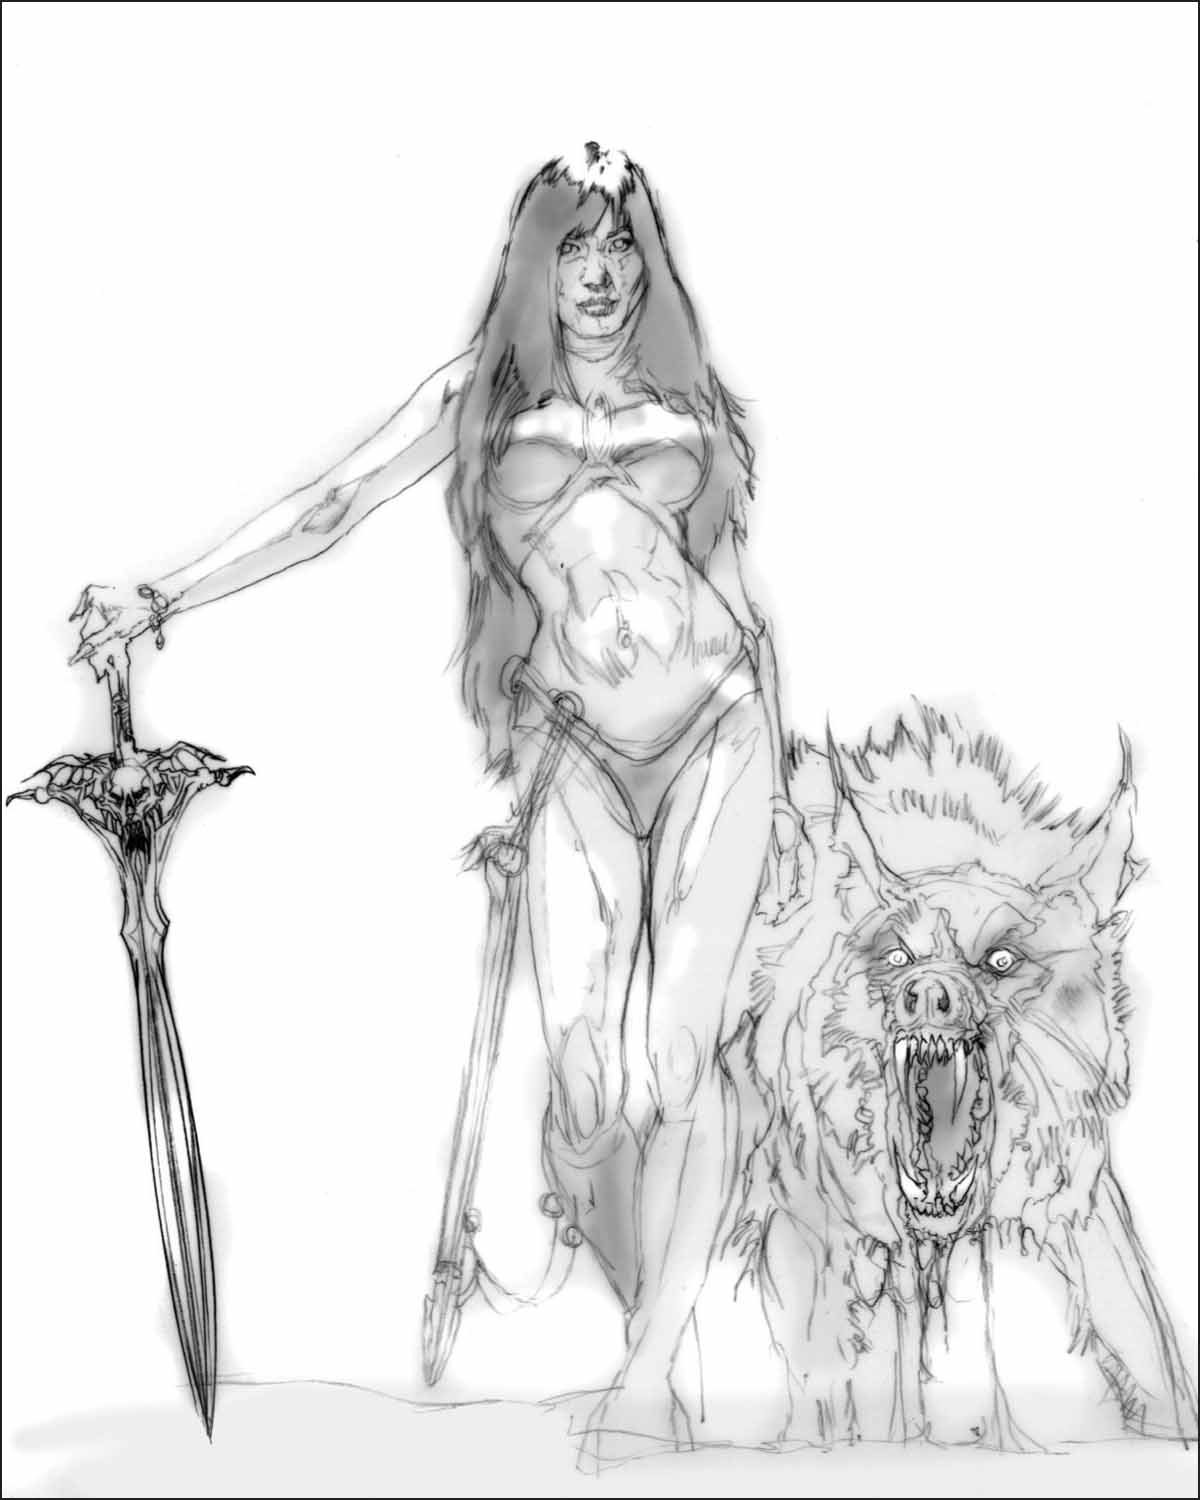
Step Three Once you’re happy with her body language, begin shading in the darks. Use light, consistent strokes for the shadow patterns. Heavy handedness can detract from the femininity of a female figure.
Step Four Slowly darken the values, keeping the edges soft. At this point, we’re getting a better feel for what her gear should look like. Make the design of the weapons feminine, yet still keep dangerous razor-sharp edges. Even the nastiest vampire would think twice about resisting capture by this bounty hunter.
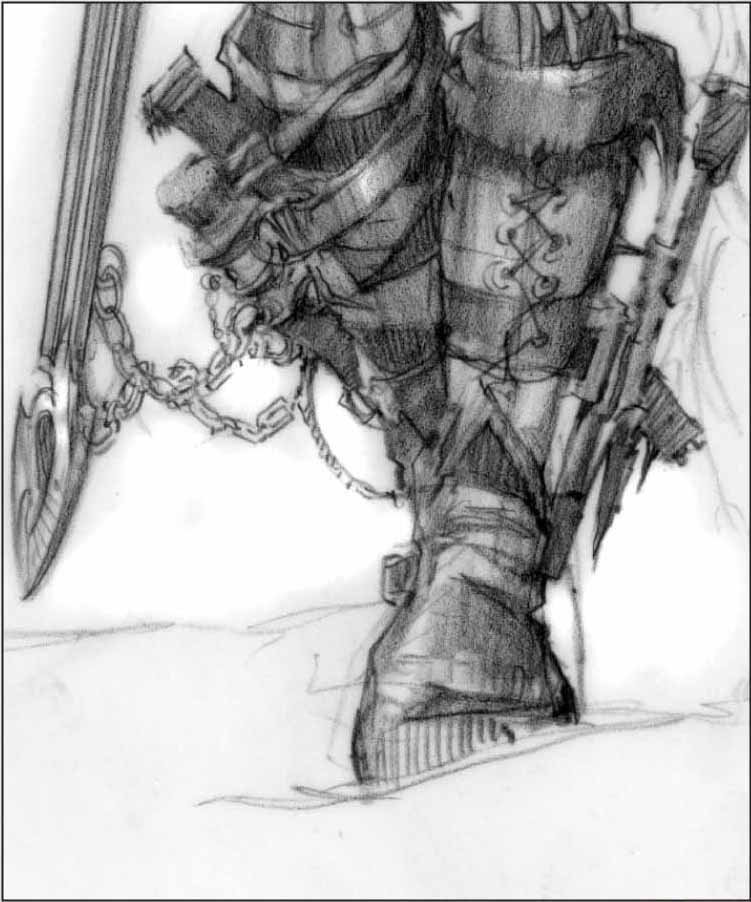
Step Five Our bounty hunter is trekking through the snow, so she needs more practical boots for this mission. Give her boots that are made with tough leather, have thick soles, and are equipped for carrying multiple silver daggers.
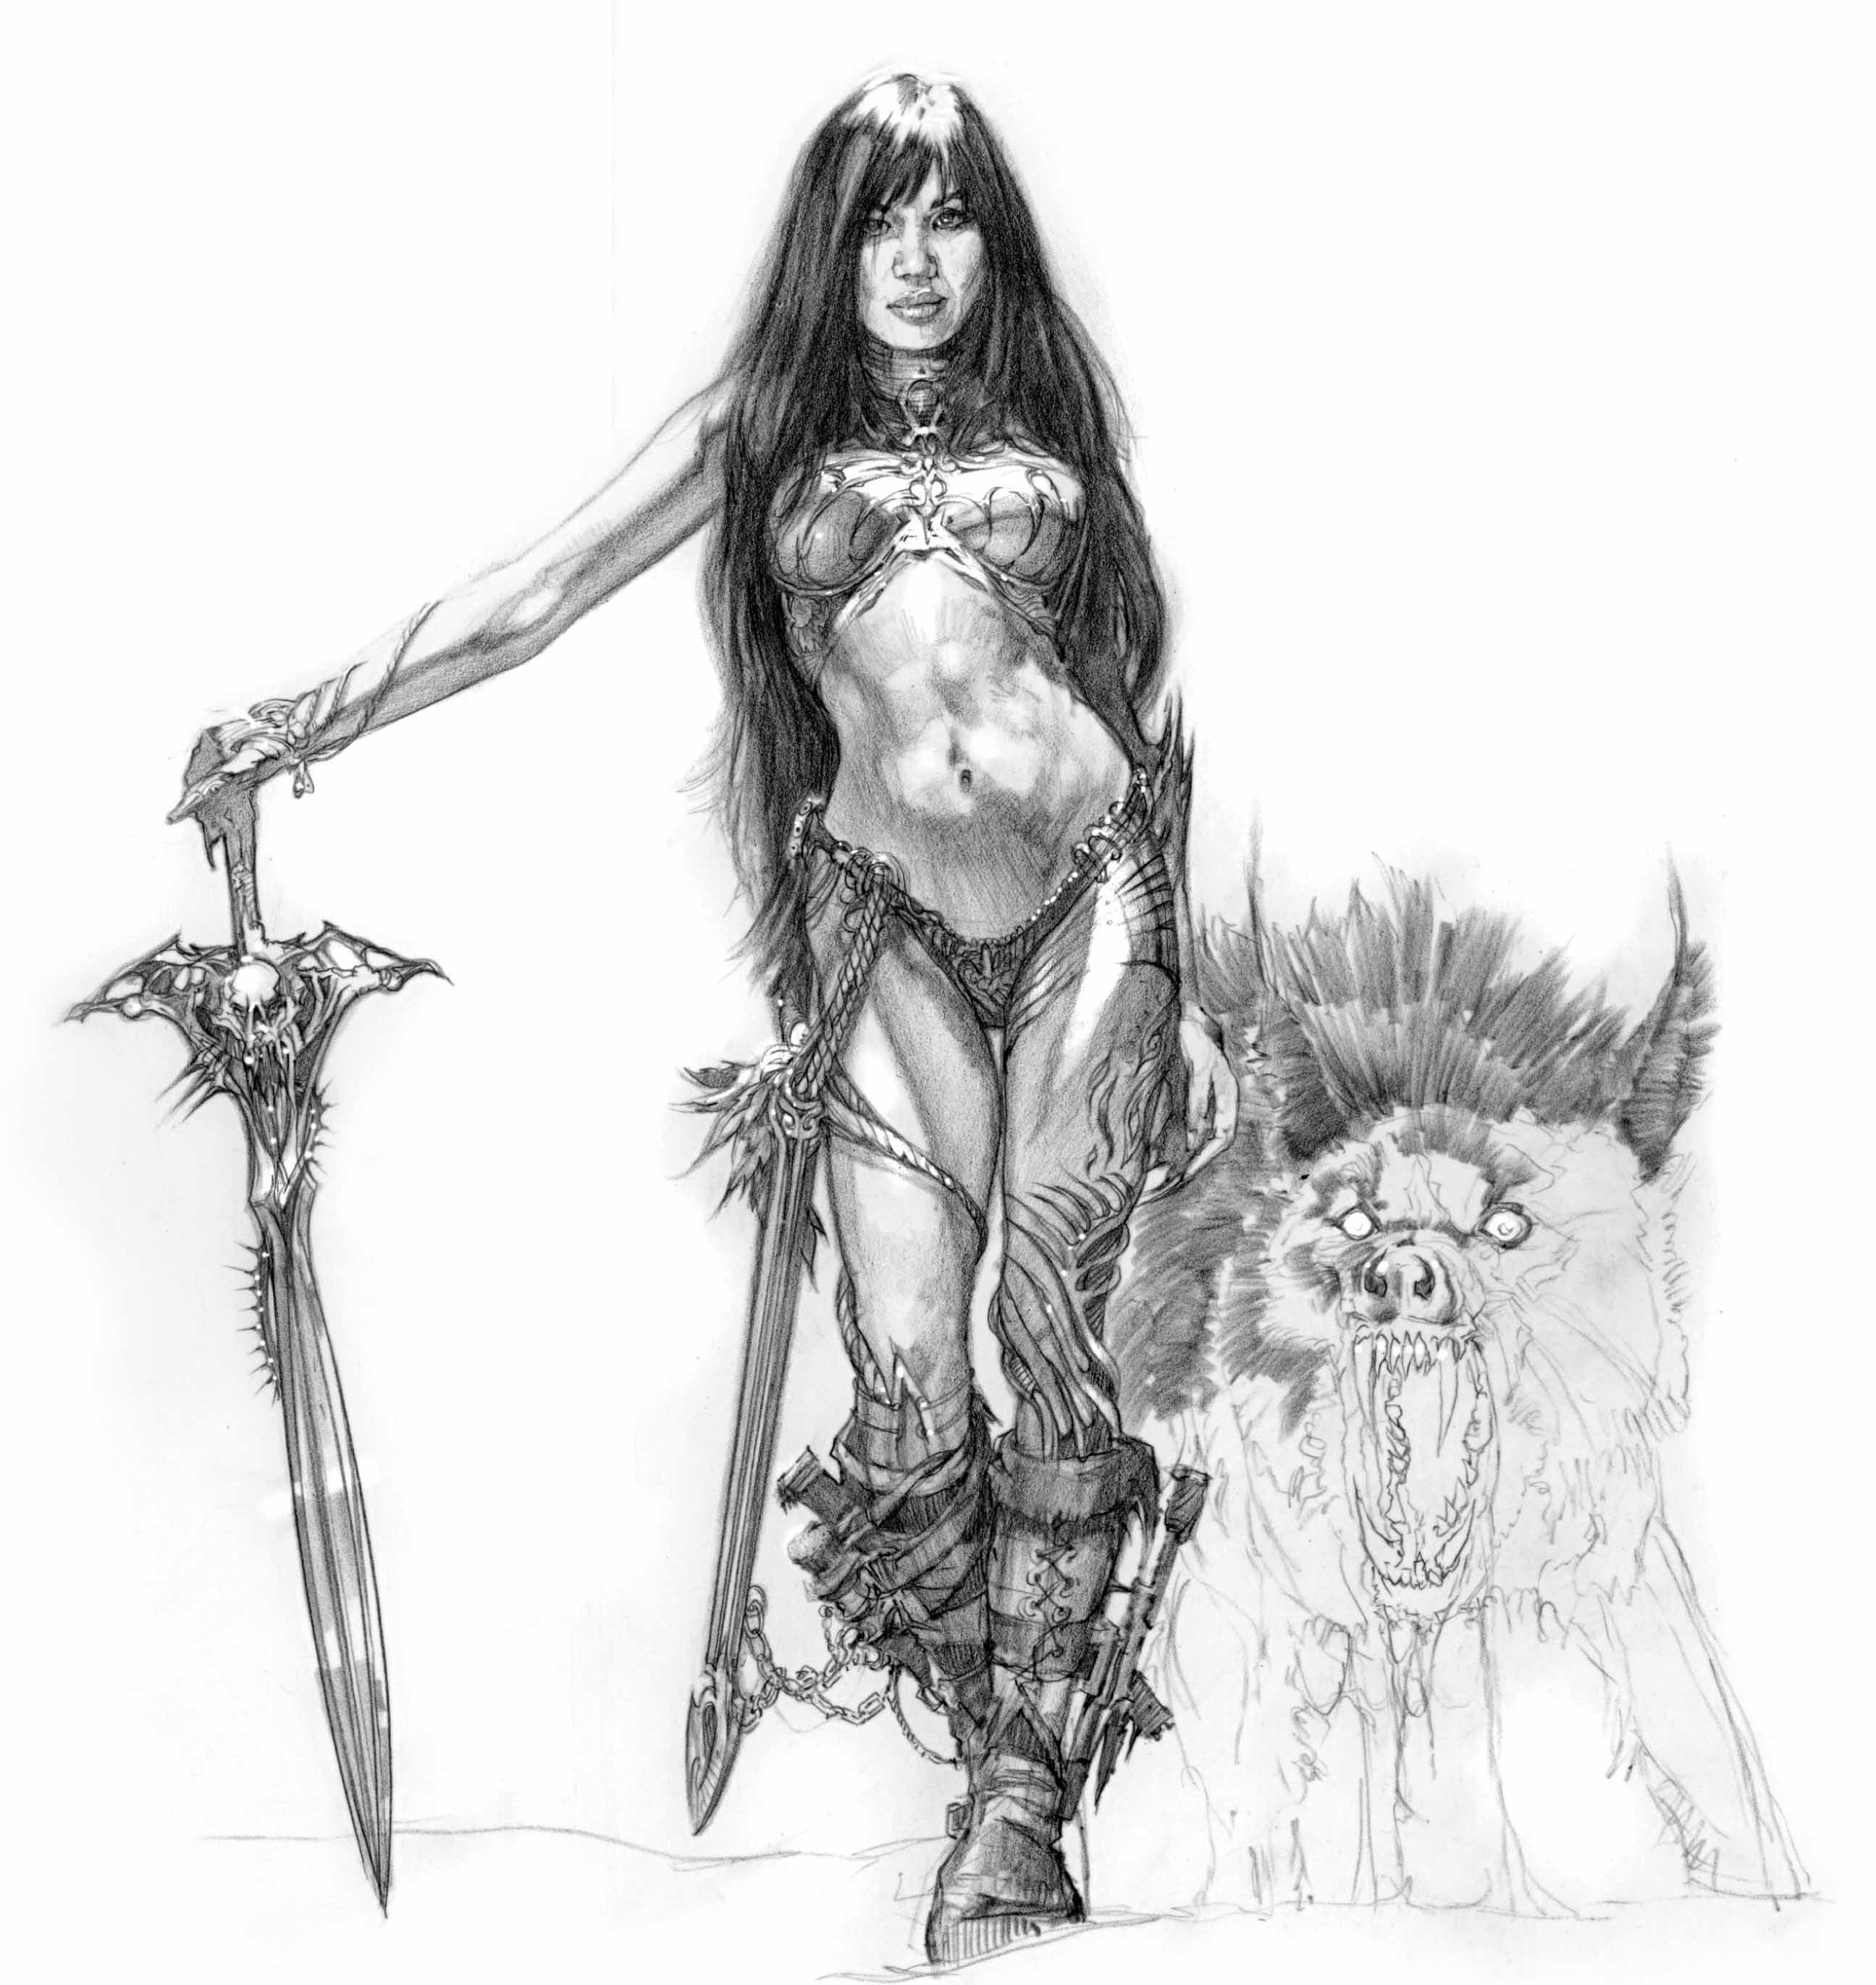
Step Six Her silver body armor makes graphic light and dark patterns, so let’s brighten up the highlights even more. Also, begin shading in the wolf. He’s barely able to contain his frenzy for vampire blood, so convey this with quick pencil strokes, creating fur that seems to shoot from his body.

Step Seven Continue using frenetic pencil strokes for the rest of the wolf’s body. Then, add dark accents along his ears and in his gaping mouth, leaving his fangs bright white. The combination of his raised fur and the crosshatching strokes in between give a maniacal energy to this not-so-cuddly beast.
Step Eight Next, indicate soft shadows and indentations in the snow, thereby grounding the characters. Also, add a scenic background of pine trees in the distance.
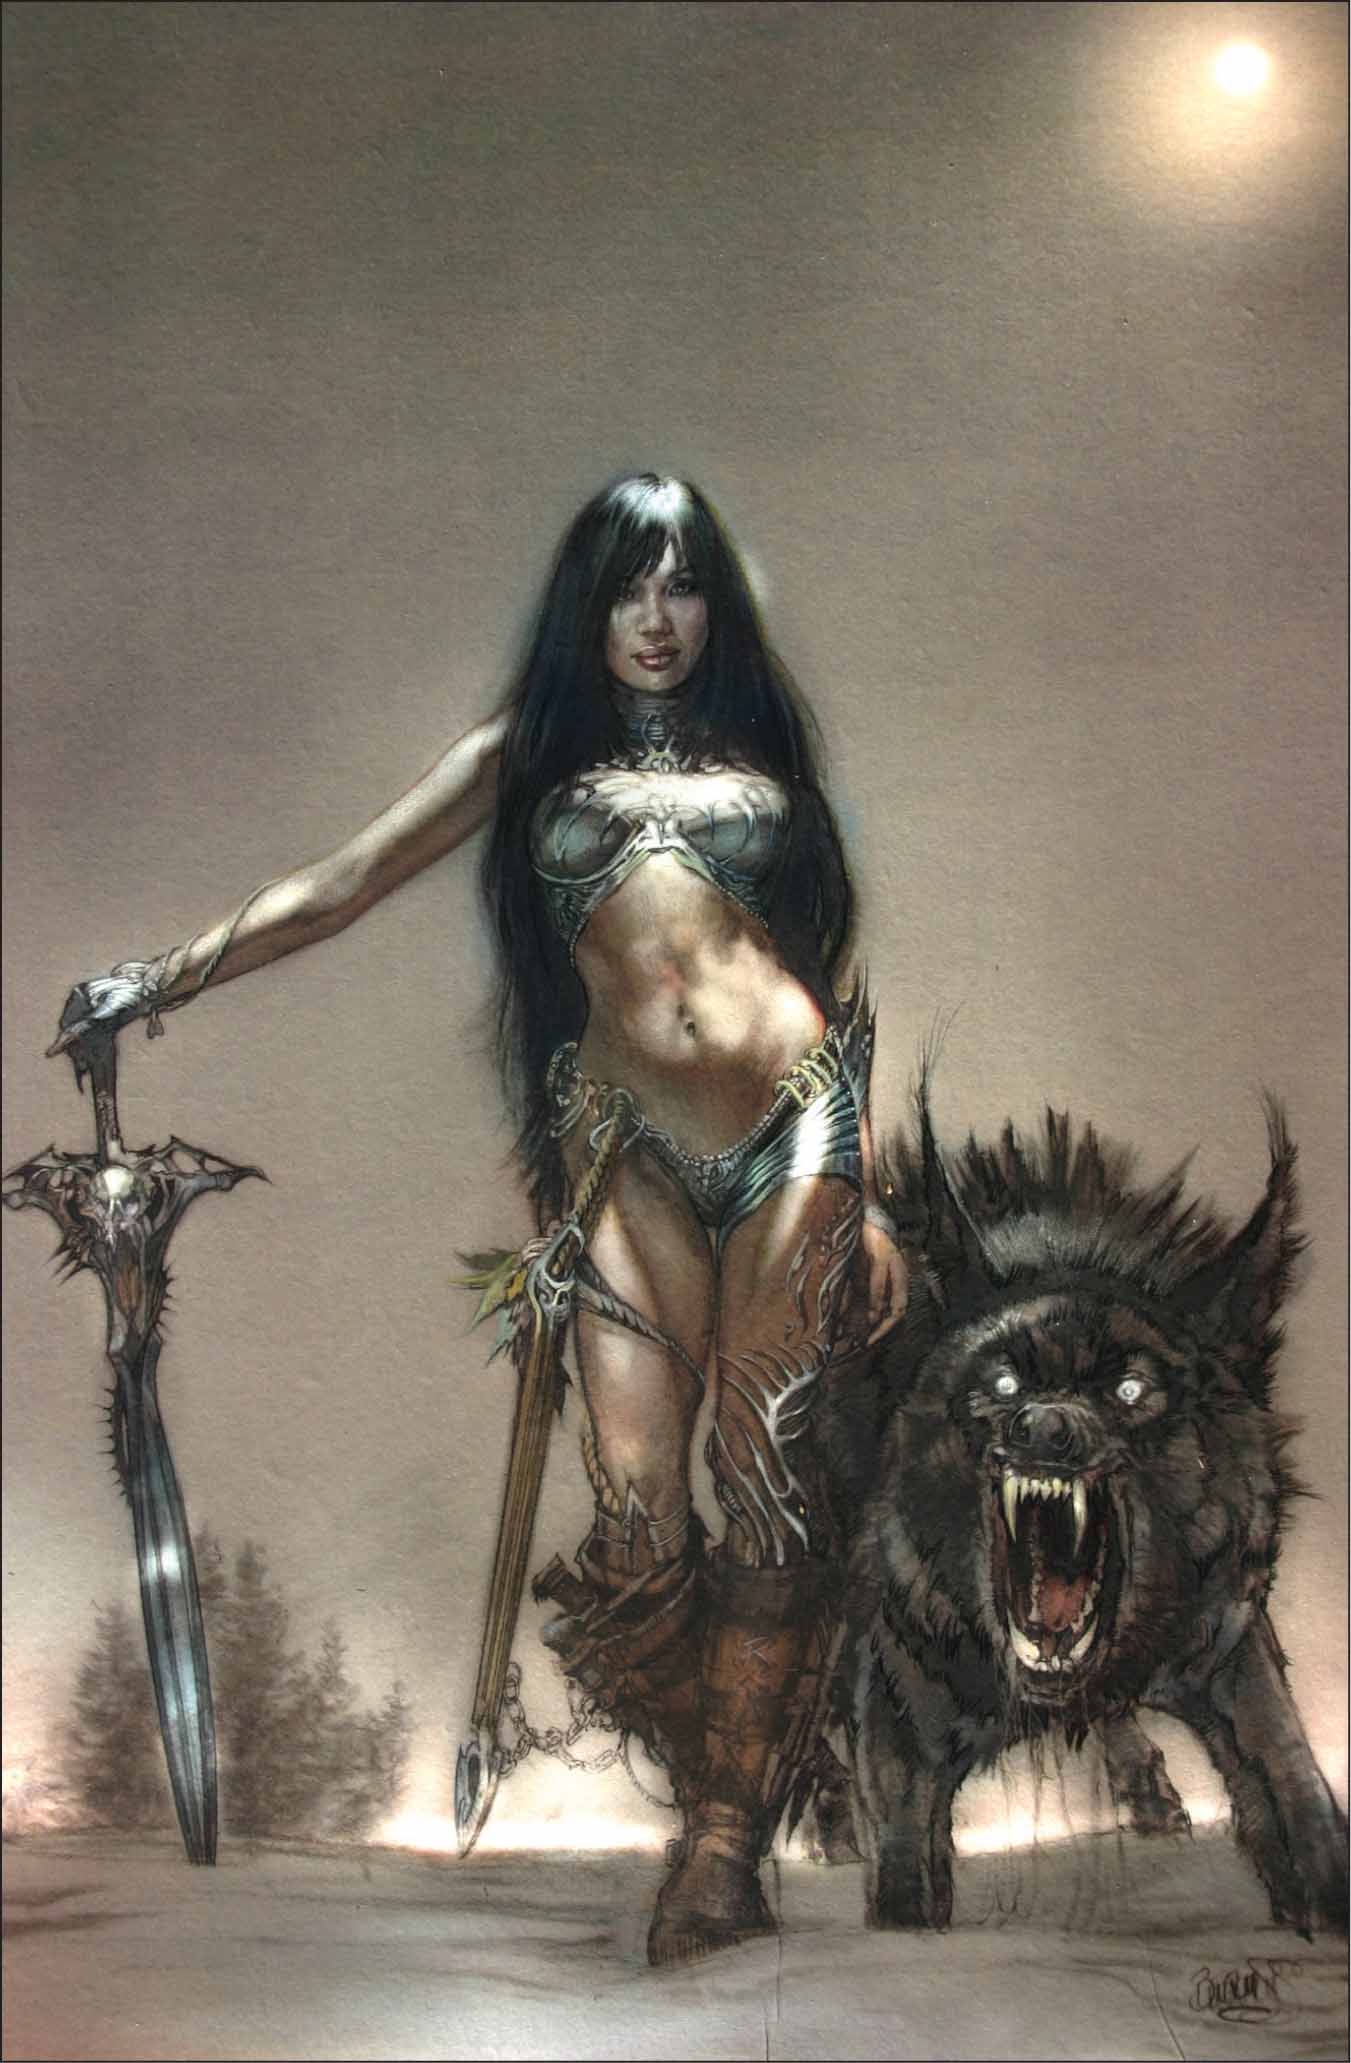
Step Nine Once you’re done with the drawing, begin to prep it for painting. You’ll need a warm undertone for this painting, and there are a few ways to quickly achieve this. You can either take your drawing and run it through a color copier, selecting the “sepia tone” setting. Or if you have Photoshop®, scan it in and adjust the color balance to your liking. You may also complete this stage traditionally by sealing (see Step Eleven on page 98) and toning the drawing with a warm wash of paint. However, using the shortcuts described above will produce similar results.
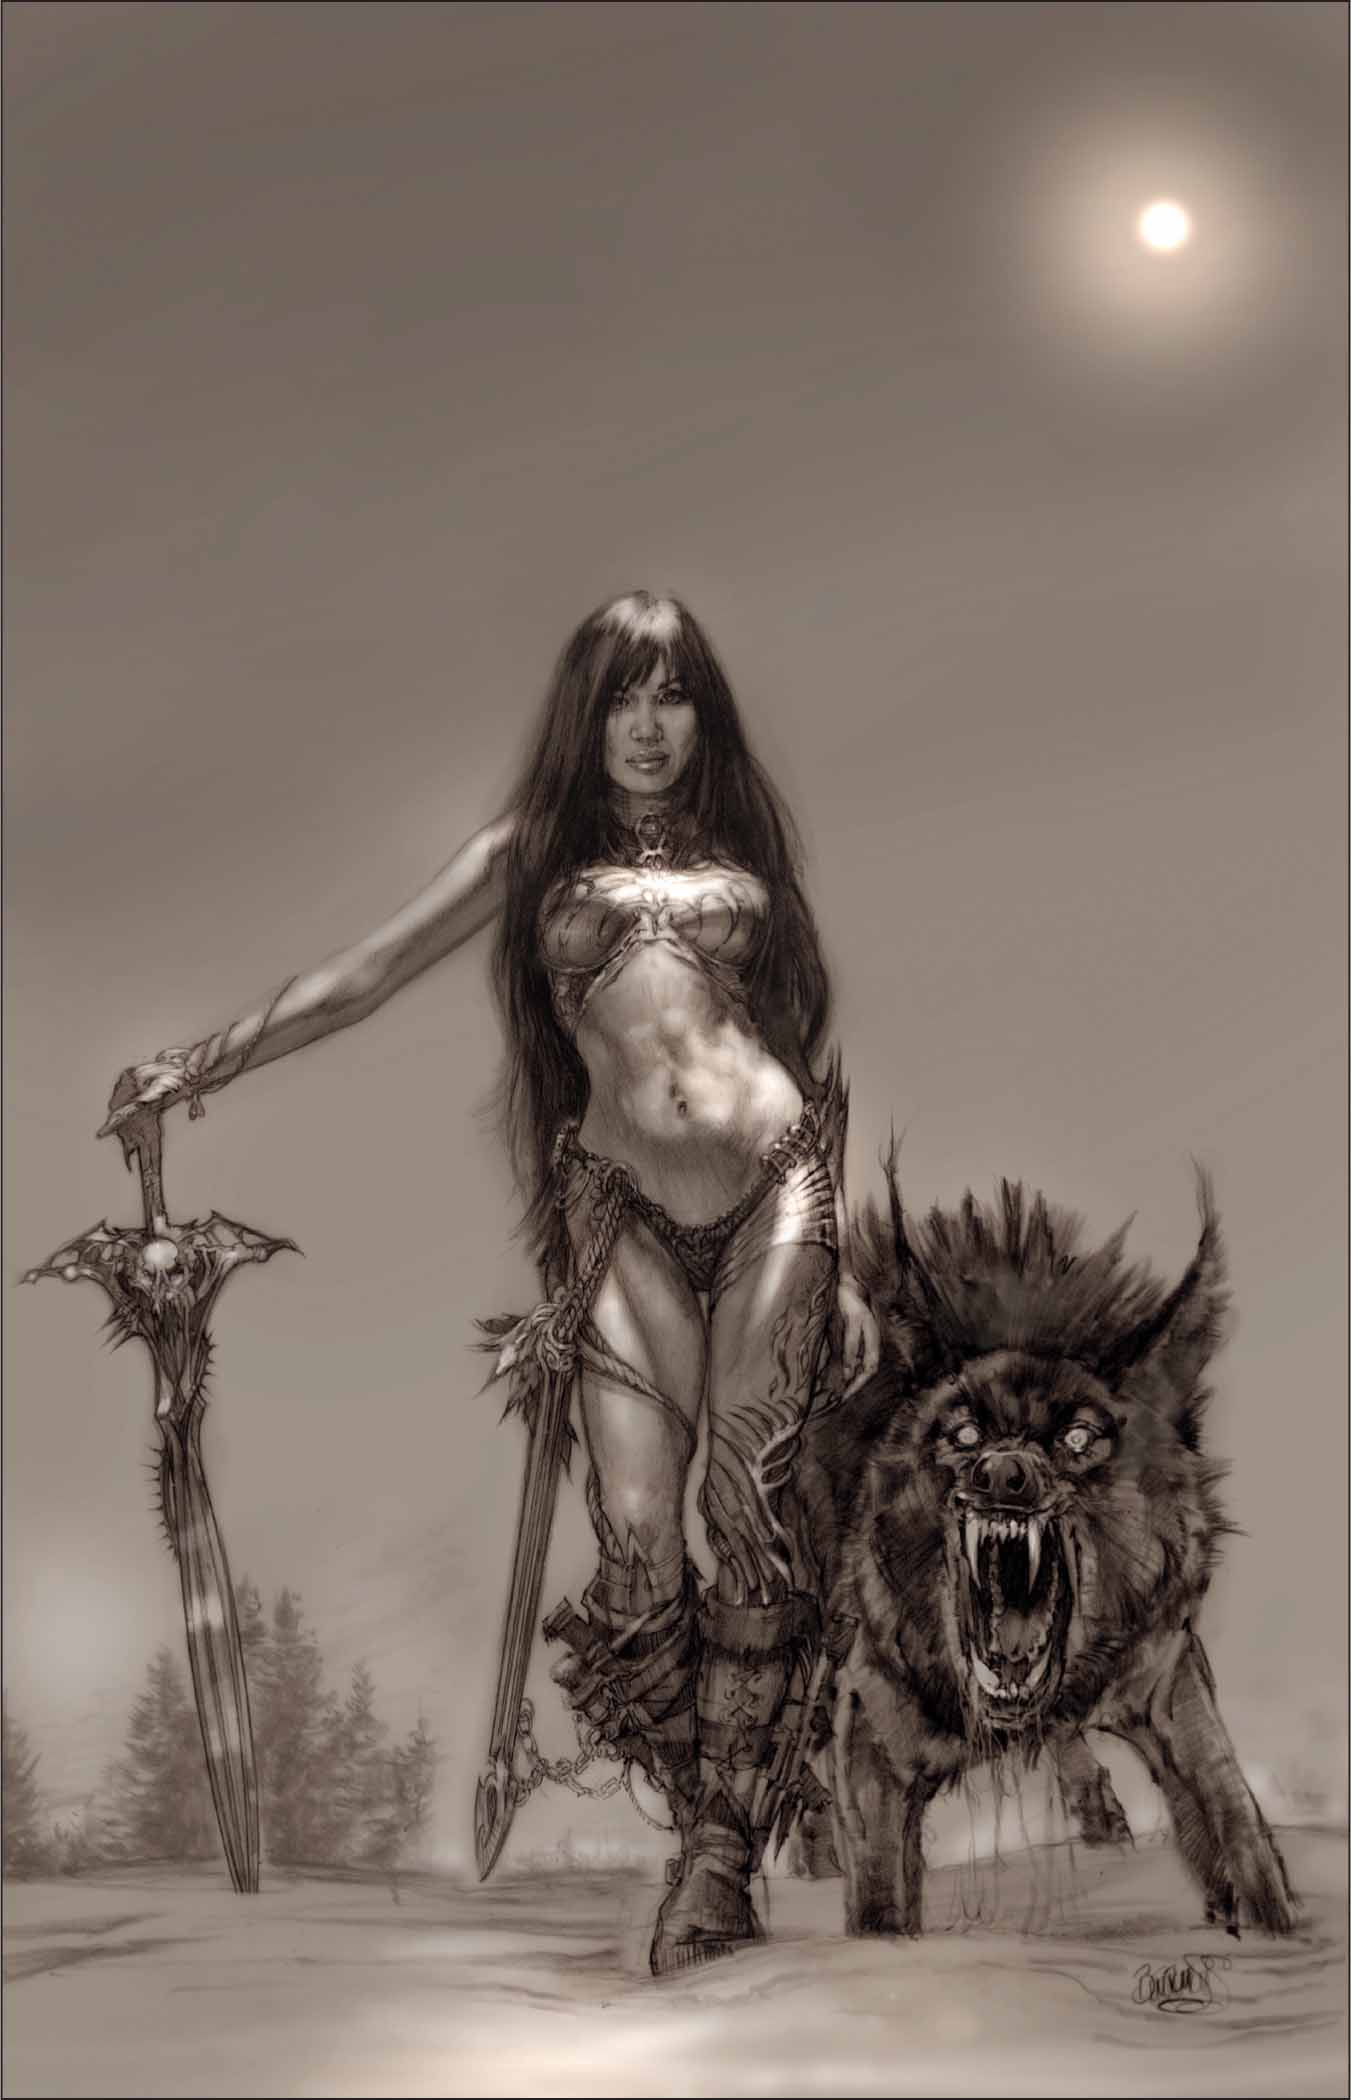
Step Ten While we’re in Photoshop®, let’s brighten up the highlights (see page 107). Select the eraser tool, then lower the opacity to about 15% and change the mode to “multiply.” Then, slowly brighten up the areas along her stomach, her armor, and the snow. Create the moon with the dodge tool and select a warm, off-white color from the palette. Increase the opacity to about 75% for the moon’s center, and then decrease it in the same way as the moon’s glow.
Step Eleven Next, print out your drawing on regular copy paper. Then, mount it onto a masonite board using a mixture of 50% matte medium and 50% water. Just take any old house brush and use it to slather the matte medium mixture over the print. If desired, you can use a blow dryer to speed up the drying process. Once it dries, the illustration will be sealed and ready for the acrylic paints.
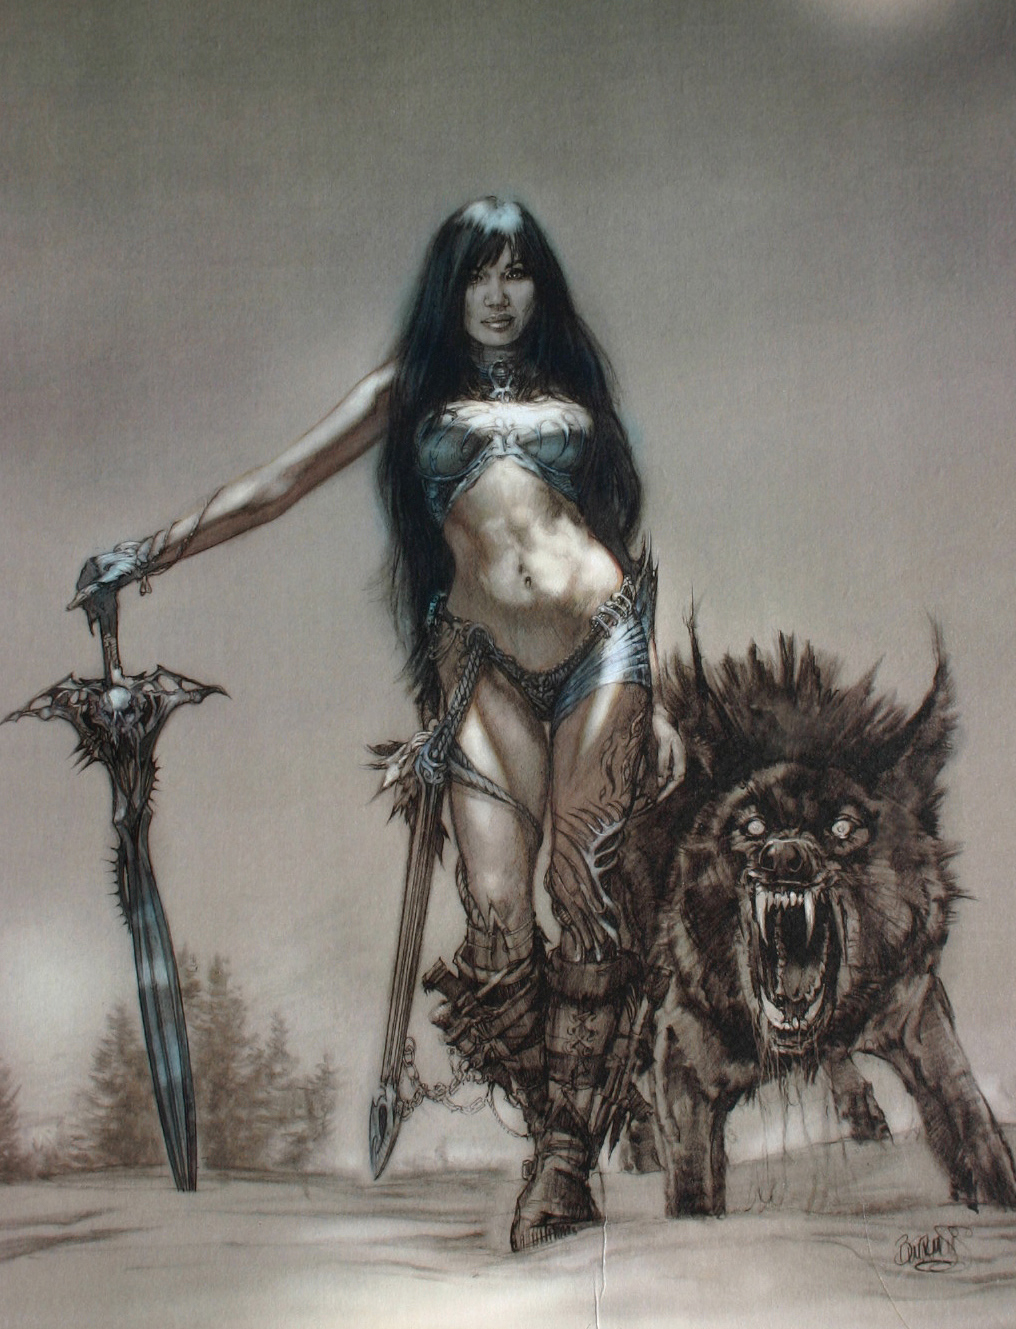
Step Twelve We’ll use a limited palette and keep the colors muted for this painting. First, knock the sky back by coating it with a cool value of burnt umber and ultramarine blue. Then, using the same mixture, lightly dust both her skin and the wolf. You can either use an airbrush or apply thin layers of paint.
Step Thirteen Mix a little ultramarine blue, yellow ochre, and a lot of water to create a wash. Then use this to paint in the bounty hunter’s sword and silver armor. You want the drawing and the warm undertone to come through, so you’ll be doing a lot of layering with the diluted paint. Add some warmth to her skin and her gear by using a little alizarin crimson and yellow ochre.
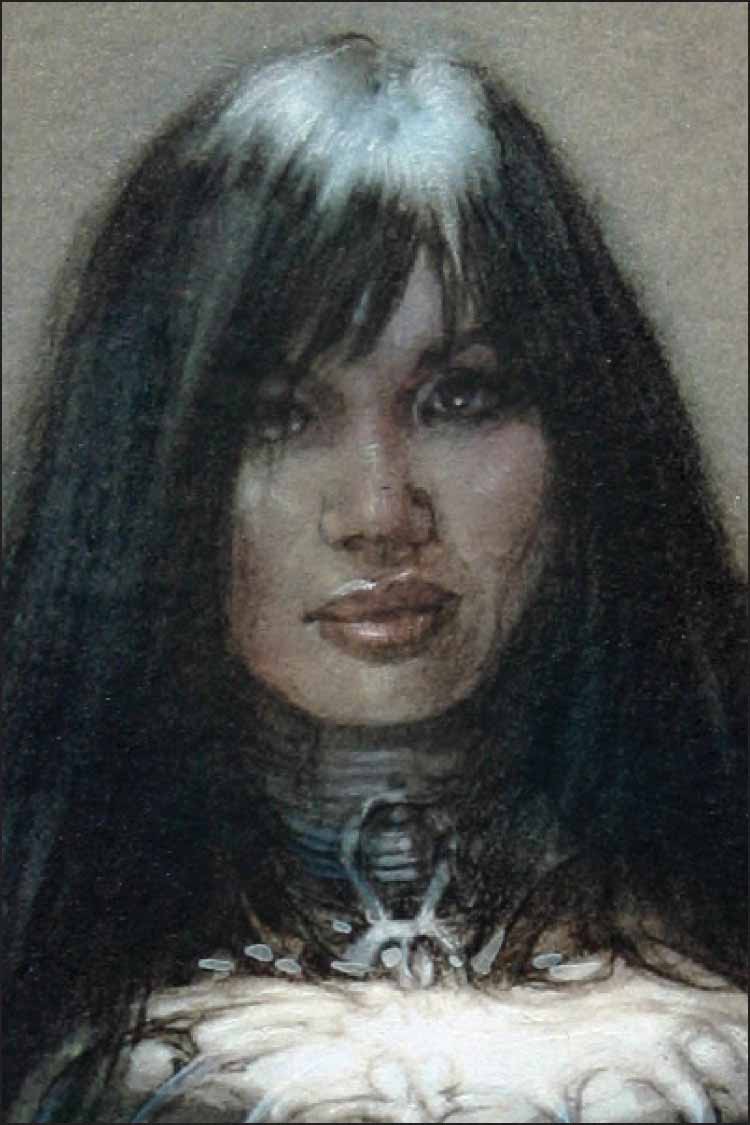
Step Fourteen Her face is set in shadow, so paint it with cool tones. Add a little raw sienna and yellow ochre for warmth in her features. Then, for all the highlights use an extremely sharp cream colored pencil and lightly go over the top planes.
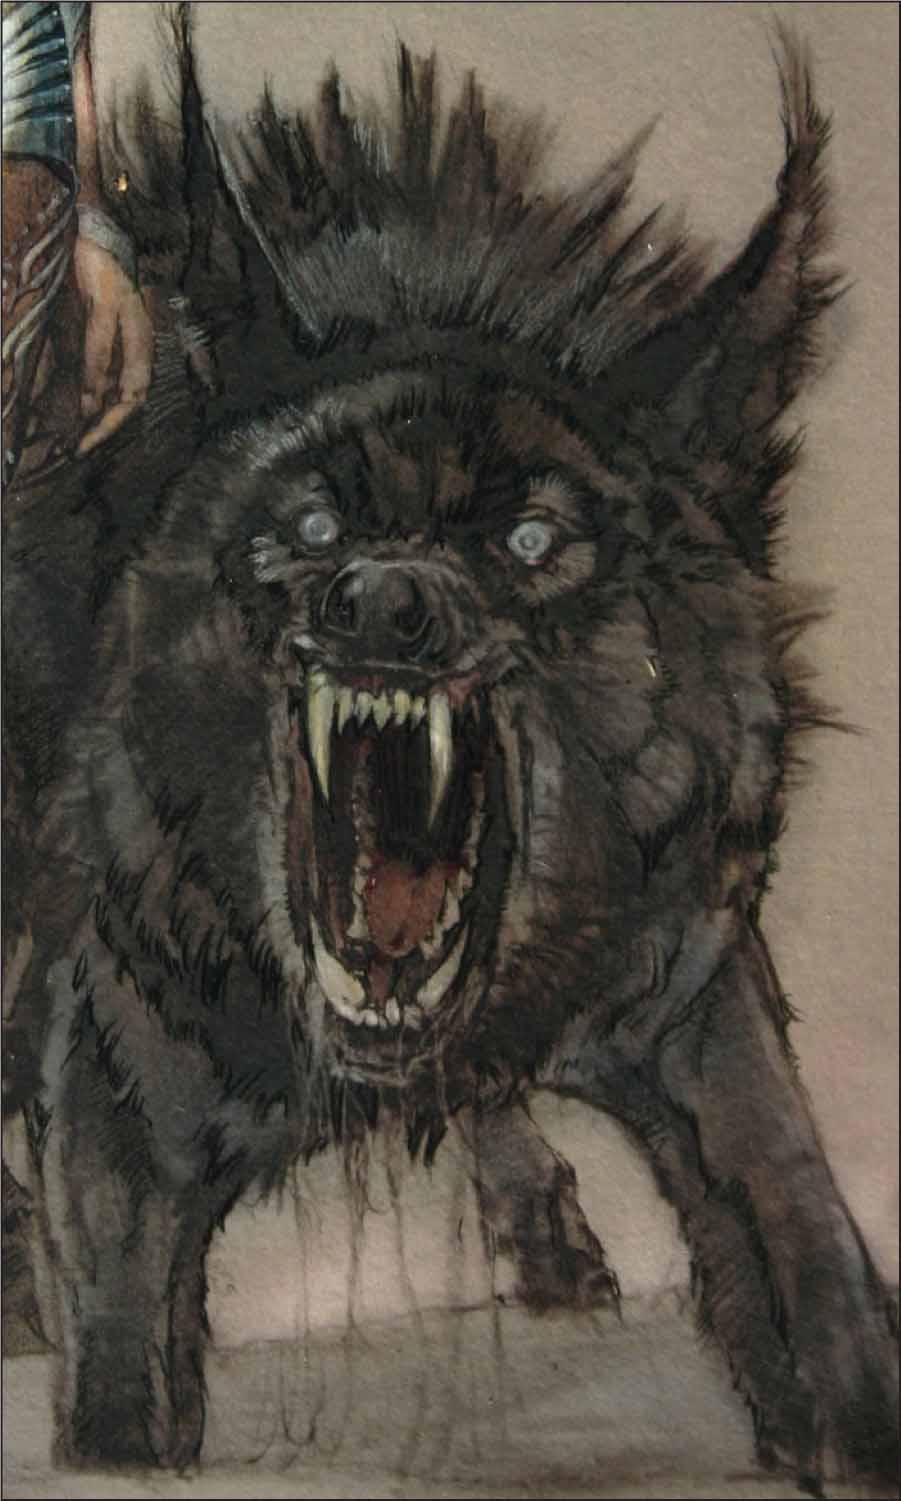
Step Fifteen Paint the wolf with warm and cool washes. Since there’s no black in our palette, take a black colored pencil and outline his fur and darken the shadow areas. Also, use other colored pencils to detail his fangs and eyes.
Step Sixteen Now you can scan the painting into Photoshop® for the finishing touches. Working on the computer to complete a painting gives you the freedom to test out large and daring adjustments without ruining the physical painting.

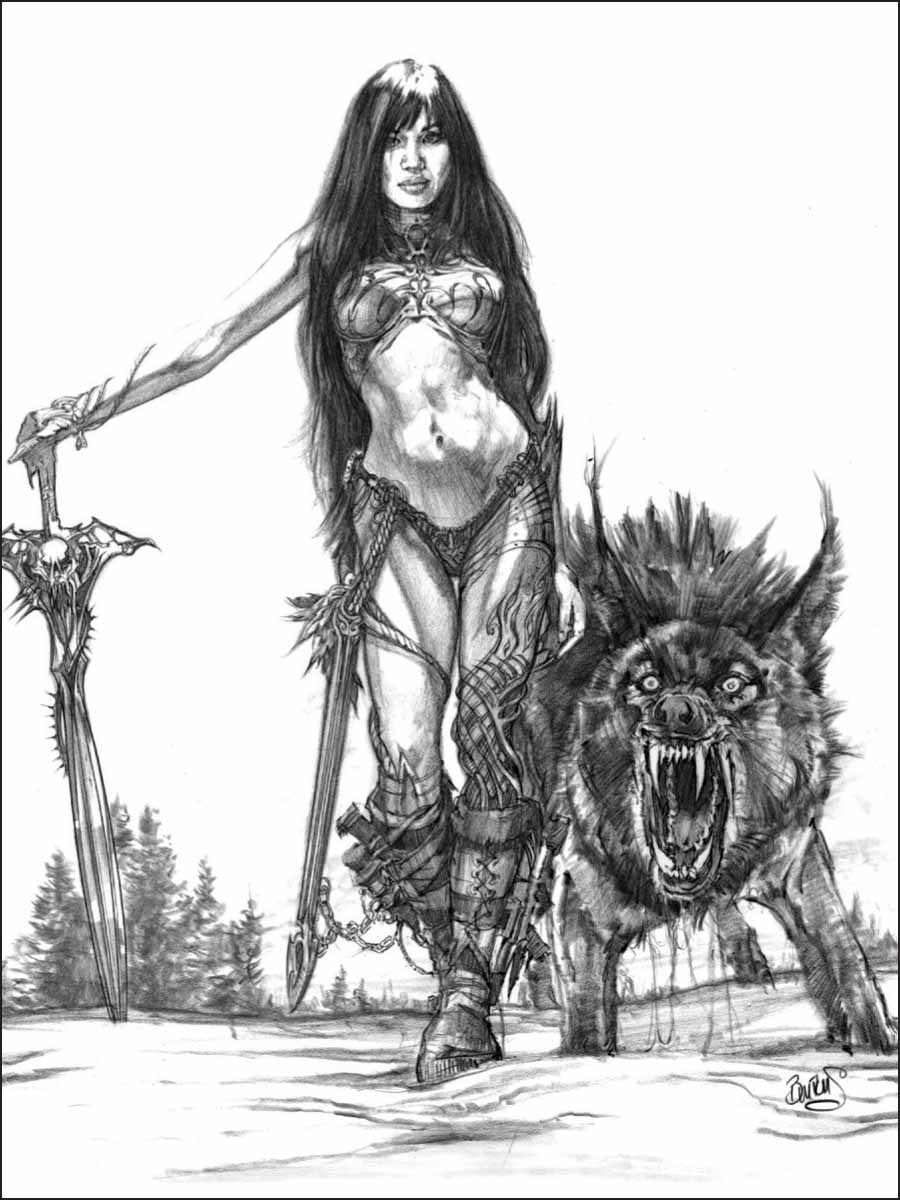
Step Seventeen Once in Photoshop®, you can play around with the sky. Darken it, giving it a purple hue. This contrasts nicely with her warm skin tone.
Step Eighteen Sample the purple from the sky using the eyedropper tool, and use the brush tool to lightly paint her glove and sword. Use the dodge tool for the highlights, keeping the opacity around 40% so that it will pick up the color underneath.
Step Nineteen What is a homicidal wolf without copious amounts of drool? Take the eraser tool, then lower the diameter and keep the opacity at about 50%. Then, simply draw in the disgusting dribble that only the bounty hunter could love.

Step Twenty Darken the shadows in the snow to weigh down the characters. Then, give the snow a softer, slushier texture. Select the eraser tool, decrease the hardness to 0% and the opacity to about 50%, and pull the eraser over the light areas.
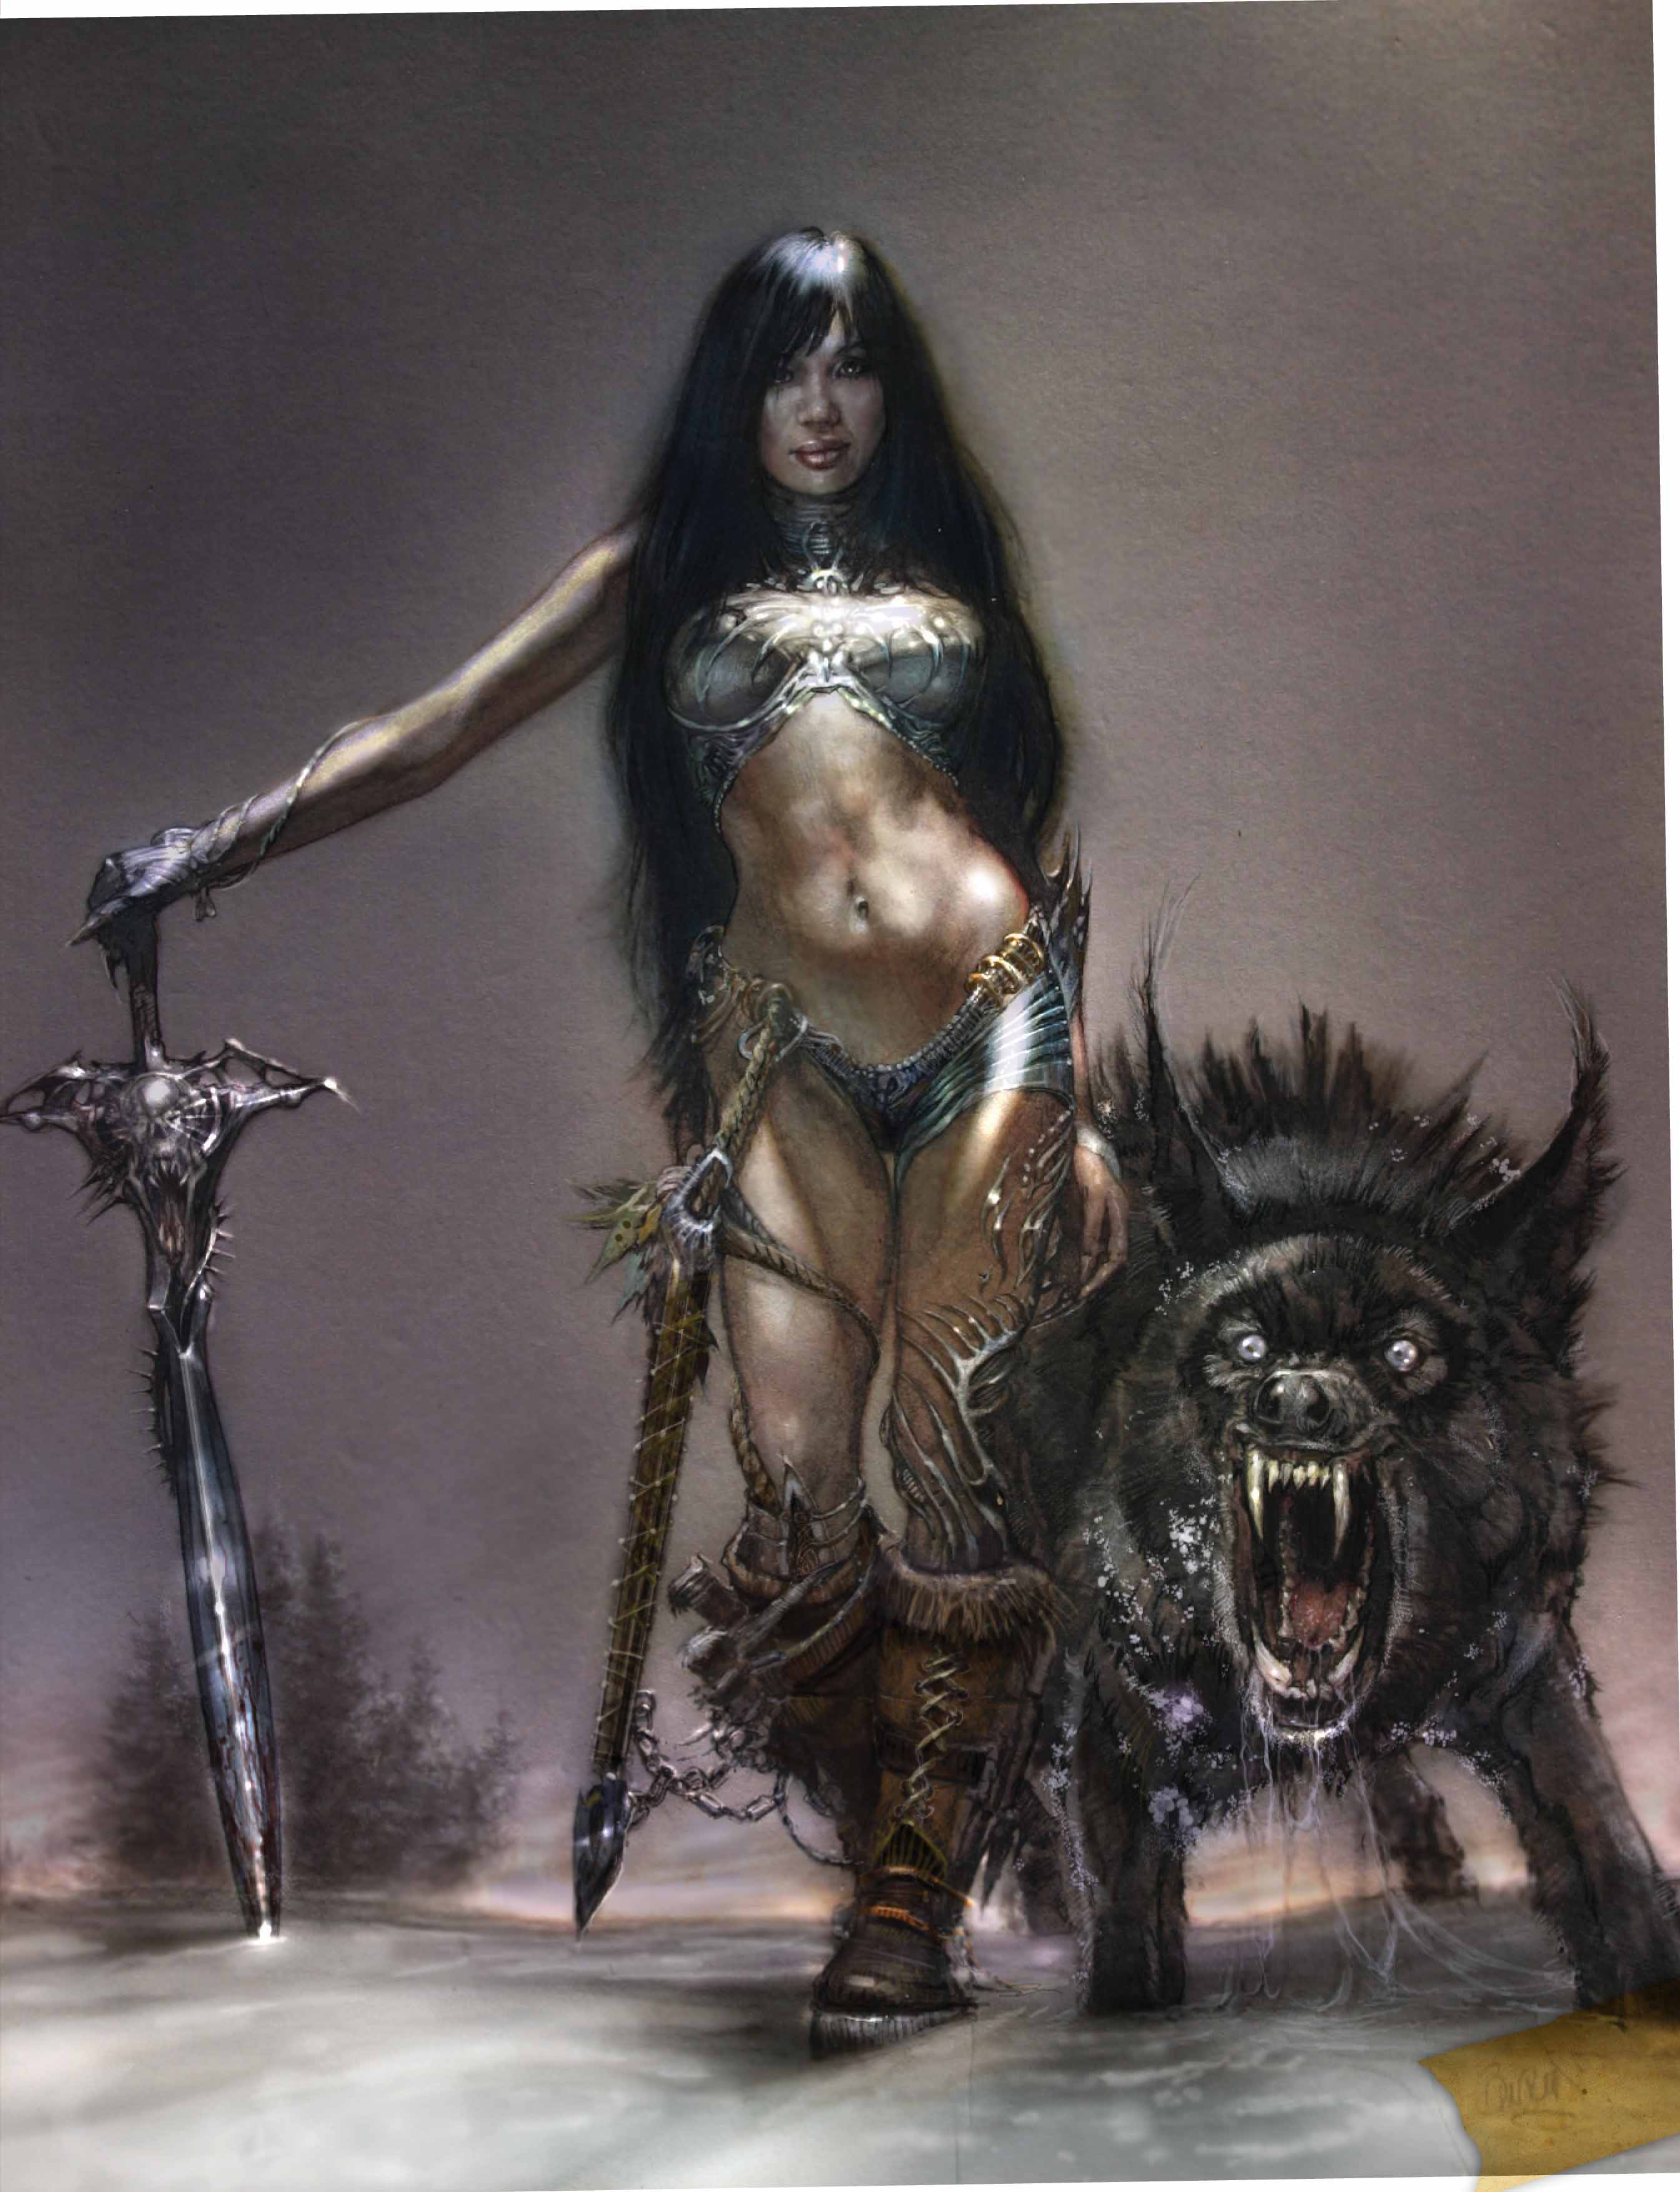
Step Twenty-one Here we see the final image.