Chapter 2. Intro to the Raspberry Pi
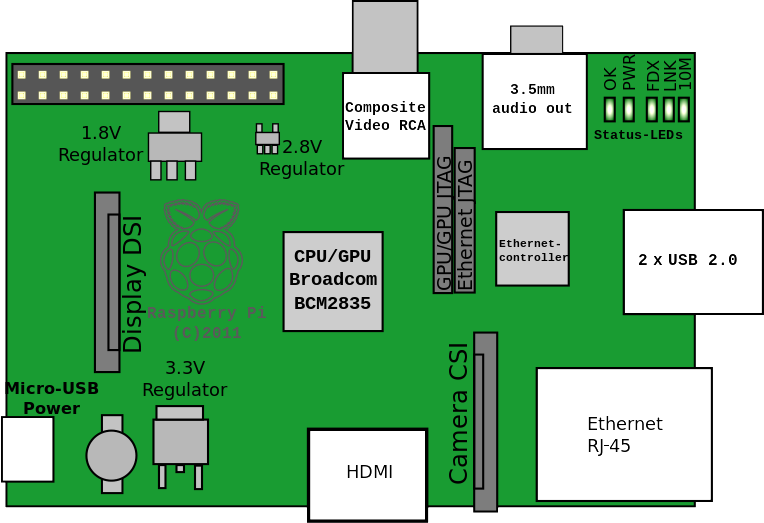
Because the robot we’re building is using the Raspberry Pi for its brain, giving you a short introduction to this nifty little computer isn’t a horrible idea. If you’re already familiar with it, feel free to skip this chapter. Otherwise, read on for a quick tour around the board (Figure 2-1). As of this writing, the Raspberry Pi Foundation has released a new version of the board, called the model B+, with extra USB ports and more GPIO pins. If you have one of these newer boards, I’ll go over its features a bit later in the chapter.
Model A and Model B
We can start the tour at the Ethernet port, as that’s pretty much common ground for any computer you’re familiar with. It’s a standard 10/100 port—nothing special about it at all. If you’re not familiar with the terminology, the “10/100” stands for 10 and 100 megabits per second (Mbps), the two worldwide standard data rates for Ethernet communication. Older computers are limited to 10Mbps, and newer computers are capable of 100Mbps, but they can usually communicate at slower speeds to maintain backward compatibility. All Ethernet networks are connected to a central hub or switch, and that connection is either wireless or via twisted-pair cables attached to an RJ-45 connector that closely resembles an old analog phone jack.
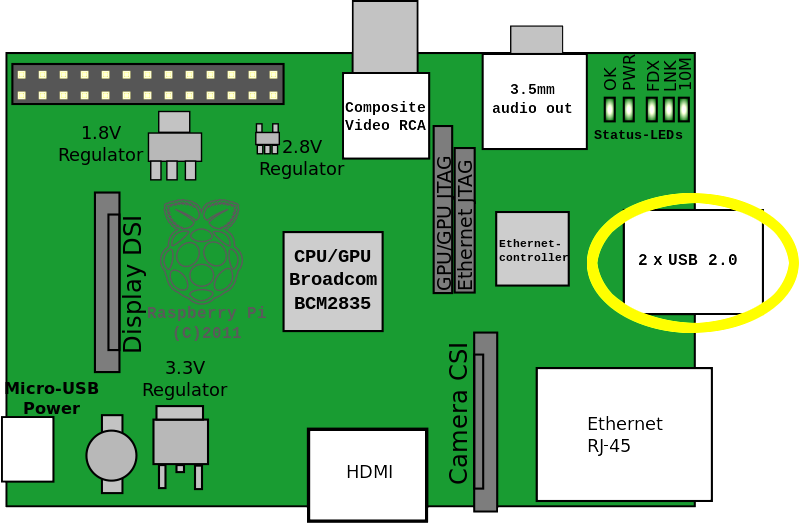
Moving counterclockwise around the board, the next thing you come across is the pair of USB ports (Figure 2-2).
Both these USB ports and the LAN (Ethernet) port are handled via the onboard LAN9512 chip. According to the datasheet, the chip is capable of 480 Mbps USB 2.0 speeds, and fully integrated 10base-T and 100-baseTX Ethernet support. What that means, for lack of a better description, is that almost any device you plug into your desktop or laptop machine—printer, external hard drive, USB fan—can be plugged into your Pi.
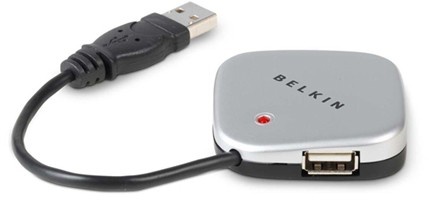
These ports let you plug in a keyboard or mouse, and control your Pi that way. You can even plug in a USB hub to connect more devices to your Pi. This is a common configuration if you use a WiFi USB dongle; you can plug the dongle into one of the Pi’s USB ports, and plug your USB hub (Figure 2-3) into the other. (Don’t try to plug a WiFi USB dongle into a USB hub—you’ll most likely get strange behavior. Some devices need to be connected directly to the Pi.)
If you use a USB hub, get one that’s externally powered. The Pi doesn’t provide a lot of current, and relying on it to power both a hub and the connected devices can lead to even more strange behavior from your Pi and the devices. On the simplest level, the devices might not even get enough power to work. On the other hand, the hub I use is not externally powered, and it works fine, so your results may vary.
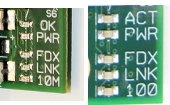
The next step on the path around the board is the row of five status lights (Figure 2-4). In order, from the center of the board outward, they’re labeled OK (or ACT, if you have the Pi version 2.0), PWR, FDX, LNK, and 10M (or 100), and are green, red, green, green, and orange, respectively. The FDX and LNK lights may be orange, again depending on your board version.
These lights can be helpful for troubleshooting your Pi. Because the Pi doesn’t have a BIOS like most computers, nothing gets printed to the screen if there’s a boot failure, leaving you to interpret the lights. The green ACT light flickers when there is SD card activity, such as writing or reading to memory. It should always be a bright green when it’s lit; a dull green glow means that no boot code has ever been executed. The red PWR light means that the board has 3.3V and is powered properly. The FDX and LNK lights are related to connectivity: FDX means there is a full-duplex Ethernet connection, and LNK means that there is activity on that connection. Finally, the 100 light means that there is a 100 Mbit Ethernet connection.
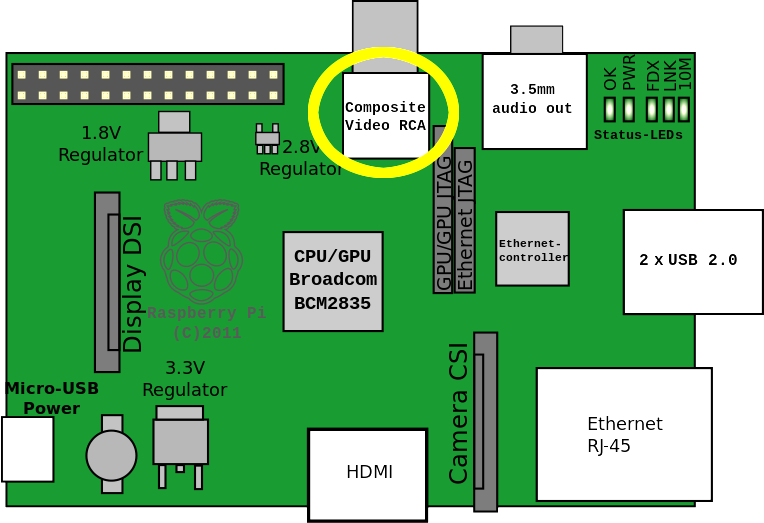
Moving beyond the status lights, we come to the audio jack. It takes a standard 3.5mm headphone plug. Next to it is the composite video RCA jack (Figure 2-5), where you can connect to an external video device—such as a pair of video goggles like the MyVu set. The Pi doesn’t support RGB video, unfortunately; connecting it to a monitor will require a monitor with an HDMI port.
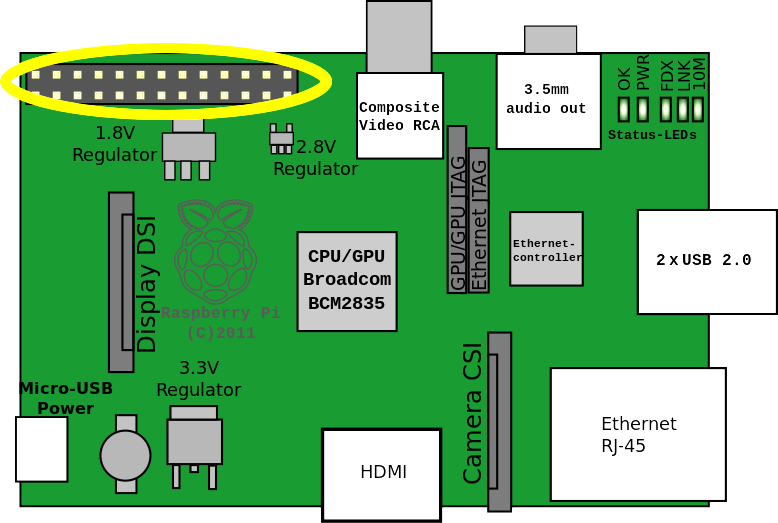
The next stop on our tour is arguably the coolest thing about the Pi. The two rows of pins sticking straight up are the general-purpose input/output (GPIO) pins (Figure 2-6). They enable the Pi to interact with the physical world—getting input from sensors and controlling outputs like motors, servos, and lights. You may remember when laptops and desktops had serial and parallel ports, which could be used, with a little effort, as interfaces to the computer hardware. They’ve pretty much been replaced by USB ports. With the Pi, we have a computer that gives us access to the hardware again. Using the GPIO pins, you can immediately control at least eight servos—enough for a quadruped robot, for example.
Using the Python RPi.GPIO library, which is included in later versions of the Pi’s Raspbian operating system, we can turn specific pins into INPUTs or OUTPUTs. If you’ve used the Arduino integrated development environment (IDE) at all, you’ll recognize the concept. With the Arduino, to set up a pin as OUTPUT and send voltage to it, you use the following:
pinMode(11,OUTPUT)digitalWrite(11,HIGH)
With the Raspberry Pi, you use this:
importRPi.GPIOasGPIOGPIO.setmode(GPIO.BCM)GPIO.setup(11,GPIO.OUT)GPIO.output(11,1)
A bit more complicated, but then the Pi is a bit more complicated than the Arduino. Likewise, setting up a pin as an INPUT (with a software-based pull-up resistor, no less!) is simply done as follows:
GPIO.setup(11,GPIO.IN,pull_up_down=GPIO.PUD_UP)
If you’re not familiar with the concept of a pull-up or pull-down resistor, I’ll go over it when we get to switches and sensors in Chapter 10.
Continuing our trip around the board, we come to the SD card. This is your Pi’s combination hard drive and RAM, so when you choose your card, give yourself room to grow. I usually recommend 16GB cards, but on the other hand, I just saw an advertisement for a 256GB SD card for around $100, so I’m torn. I’d ordinarily consider a card that size to be unnecessary, but if you’re going to be dealing with video files or a lot of sensor data (as this rover may do), it might be worth the expense.
At any rate, I’d suggest getting a name-brand card, as personal experience has shown that some of the cheap generic cards are unreliable and prone to failure. At least get in the habit of backing up your card regularly, using either Linux’s dd command or a similar Mac or Windows tool. It’s difficult to describe the pain you feel when days and weeks of work are rendered useless by a simple SD card meltdown.
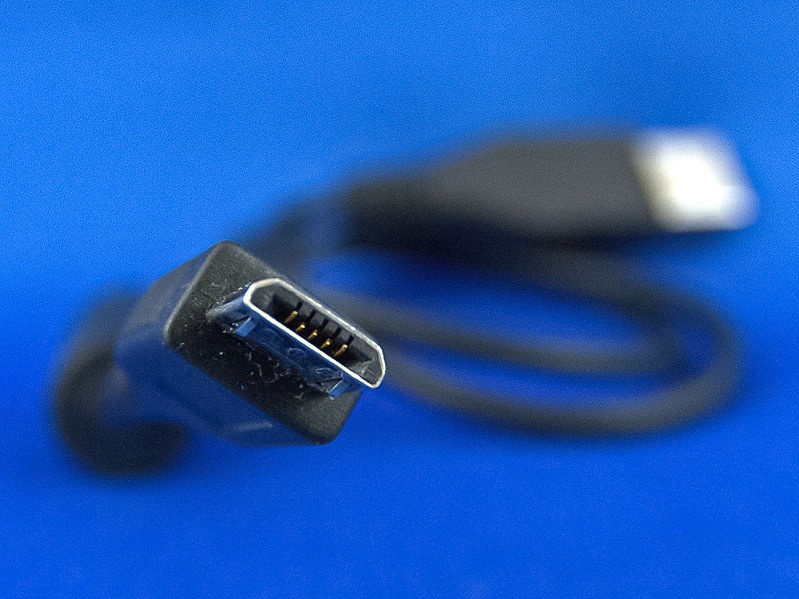
Next up: the power_in port. It’s just a 5V micro USB B port (Figure 2-7), similar to the one on many cell phones or tablets. As a matter of fact, the easiest way to power your Pi is to use a standard cell phone charger. Be aware, however, that you may have mixed results, as different chargers deliver different amounts of current, and the closer you can get to 2A of current delivered, the better. If your Pi doesn’t work—or acts strangely—with one charger, just try another one. You’ll need at least 1A of power for the Pi to run without hiccups and glitches.
The Pi does not have an onboard voltage regulator, so you must power it with 5 volts and only 5 volts! Those of you familiar with the Arduino are probably used to just plugging in a 9V battery and going merrily on your way. If you try that with the Pi, you’ll have a nice fried, dead paperweight on your hands. If you’re unsure of your charger, check its output with a voltmeter. If you’re using batteries, funnel them through a regulator before sending the power to your Pi.
The last important item on the periphery of the board is the HDMI port. Some would argue that this is where the Pi truly comes into its own, as it’s capable of outputting full 1080p graphics, with 1 gigapixel/sec processing power. The onboard GPU can do Blu-ray Disc–quality playback, using OpenGL and OpenVG libraries on the chip.
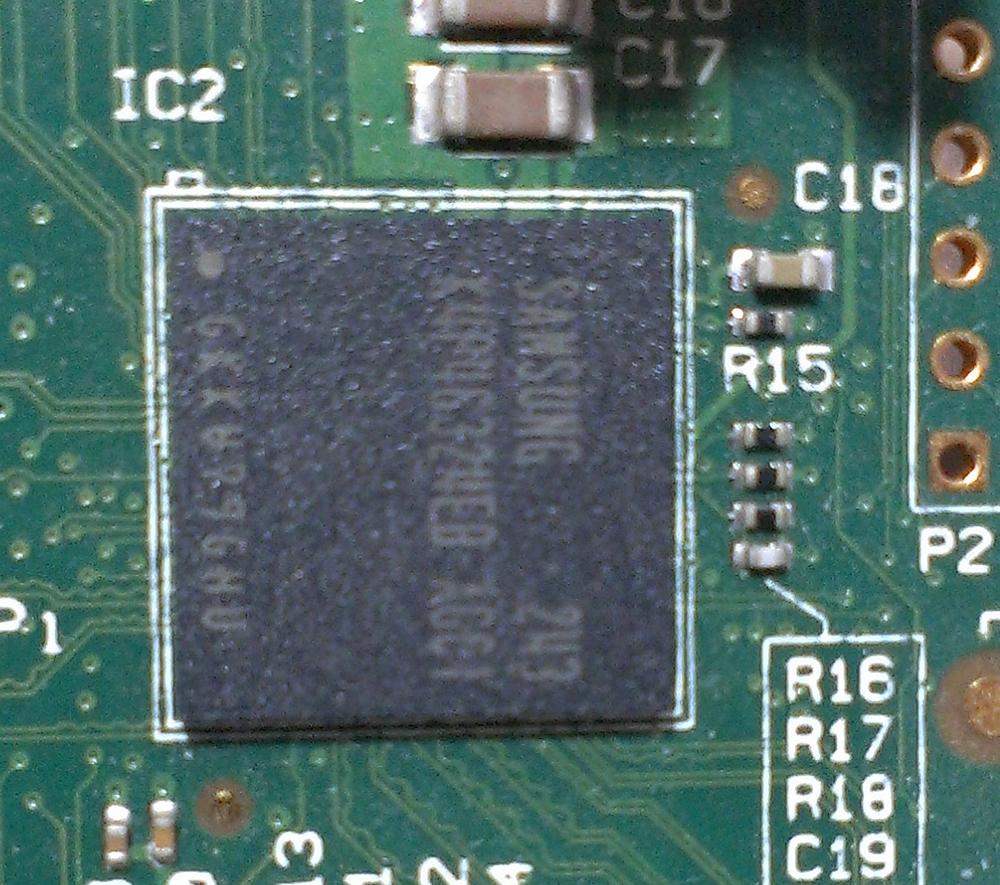
That chip is located in the center of the Pi (Figure 2-8). It’s a Broadcom PCM2835 system on a chip (SoC) and has an unmodified speed of 700MHz. It can be overclocked up to 1GHz if you so desire, though be aware that it can lead to some system stability issues. At its normal speed, it doesn’t get hot enough to require cooling or a heat sink. It can be compared, performance-wise, to a Pentium III, with the graphics capabilities of a first-generation XBox. Not bad for a little computer about the size of a credit card.
Model B+
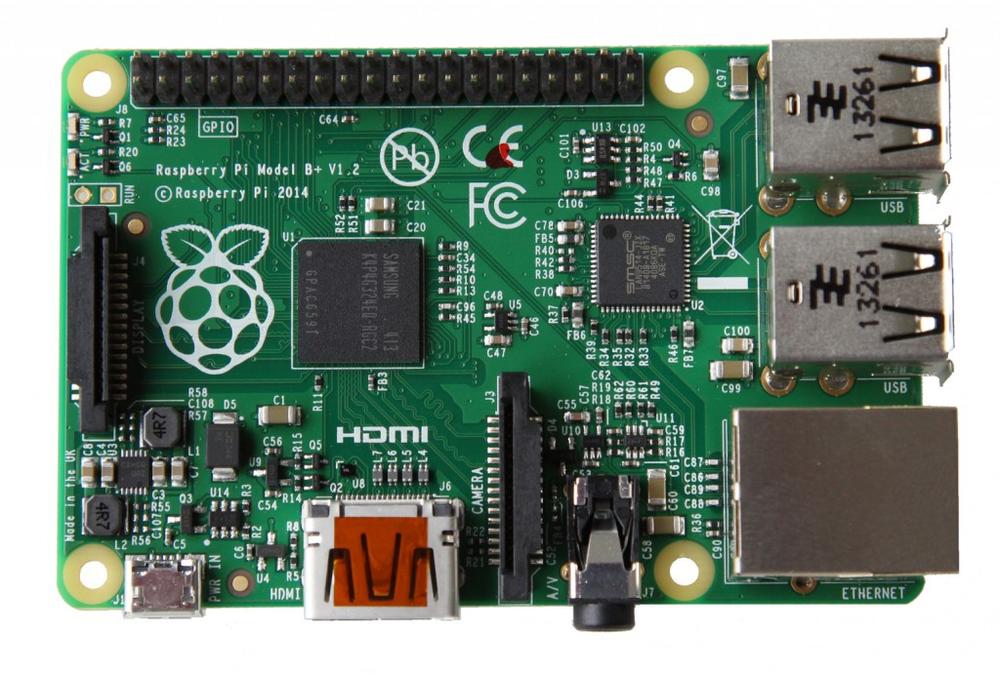
In July 2014, the Raspberry Pi Foundation announced the existence (and release) of the Raspberry Pi B+, an upgrade to the existing model B for the same price (Figure 2-9). It’s been enthusiastically received by the Pi community. Let’s take a look at how it differs from the original model B.
GPIO
Probably the biggest difference in the B+ is the addition of 14 GPIO pins, for a total of 40. Luckily, the pinout of the first 26 pins remains the same, so pin connections designed to work with the first version will still work with the updated one. The additional pins give you nine more general-purpose pins, three more ground pins, and two specialized I2C ID EEPROM pins. Those two pins, numbers 27 and 28, are used to connect an I2C EEPROM, or Electrically Erasable Programmable Read-Only Memory chip. Those two pins are checked when the Pi boots up to see whether they’re connected to a board; in this way, the Pi is able to detect a connected device and configure the GPIO pins to work with it. If you don’t have such a board, leave those pins free, and have fun with the extra nine general-purpose pins.
USB
The B+ also has four USB ports instead of two, possibly making a separate USB hub unnecessary. The only thing that may be an issue is that USB 2.0 specifications state that each port should provide 5V and 500mA, for a total of 2A across all four ports; a few users have reported that the model B+ provides a total of only 1500mA across the four ports, so you may need that powered hub after all if you need to power more than three devices.
Power
The new model B+ also requires less power than its predecessor—quite a feat considering all of its extra features. The Pi Foundation replaced the old linear voltage regulators with switching regulators, which had the effect of trimming up to 1W of power from the Pi’s consumption. If you’re using batteries to power something like a robot, this is great news. The Pi Foundation also added a dedicated low-noise power supply for the audio circuit.
Shape
Finally, of course, the Pi Foundation moved stuff around and made the board a bit more streamlined. The foundation lined up the USB connectors with the edge of the board, combined the composite video and 3.5mm audio jack, and even added four evenly spaced mounting holes for mounting the Pi by using standoffs. There will certainly be add-on boards coming soon, designed to take advantage of the extra GPIO pins and EEPROM support, and the four mounting holes should make connecting it securely to the Pi an easy task. All in all, the model B+ is a definite step forward, Pi-wise.
Where to Get Help
It’s true: as easy as the Raspberry Pi is to get started and operate, at times you’re going to need help, sometimes more than a simple Google search can provide. There are a few places you should be familiar with before you go stomping off into the great unexplored expanses of the Internet, looking for answers.
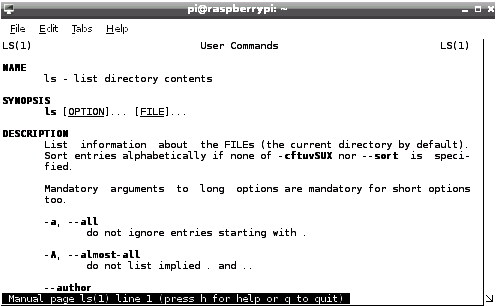
The first place is on the Pi itself, and that means using Linux’s man command. It’s short for manual, and can be invoked for darn near any Linux command or function you’re having problems with. In fact, my only beef with the man command is that it can be too comprehensive; the help pages for the simple ls command (which lists the contents of a directory) go on for pages (Figure 2-10), giving you more information than you ever wanted or needed to know about ls. Still, although man can be overwhelming, it provides a lot of information.
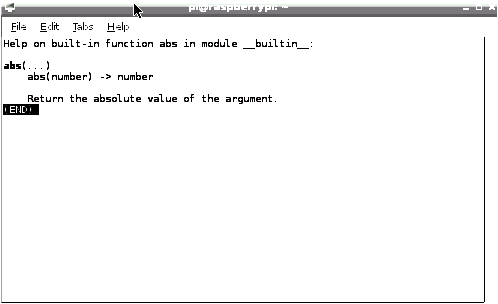
The second way to get help is with Python’s help function. Just typing help() at the Python prompt brings you to the interactive online help utility. When you first bring it up, it gives instructions on how to use it, like telling you to type “modules,” “keywords,” or “topics” if you’re totally lost. Typing abs at the prompt, on the other hand, gives you the specific instructions, as you see in Figure 2-11.
You can go directly to the help page for a function by just including it as an argument to help—help(abs), for instance. If you need help with a function not in Python’s default libraries, you’ll have to import that library first. For example, to get help with the square root function, you type:
importmath
followed by:
help(math.sqrt)
If, however, neither of those onboard utilities have what you need, you’ll have to ask other humans. In my experience, two sites stand out for both comprehensiveness and general helpfulness among fellow Pi programmers.
The first is the forum on the Raspberry Pi website. As of this writing, there are 12,000 topics in General Discussion and 2,500 in the Python subforum. Staff and engineers from the Pi Foundation itself frequently stop by on the forum; some other members have been there since before the Pi existed in reality. There are subforums dealing with topics ranging from graphics programming and gaming—there’s even a For Sale section. It’s definitely worth your time to stop by and create a profile.
The other site that is well worth visiting is Raspberry Pi Stack Exchange. On this free site, anybody can ask (and answer) questions—no registration is even required. It doesn’t have nearly the amount of traffic as some other programming sites, but it has the advantage that it is specifically geared toward the Pi. If you’re stuck, browsing its questions can sometimes be helpful.
As for other sites, Stack Overflow—every programmer’s best friend—has many, many questions dealing with the Pi, so it’s normally worth your time checking out as well. And though I knocked it at first, many times a good Google search will help. No matter how bizarre or off-the-wall your project may be, there’s a good chance that somebody, somewhere has run into the same wall.
And speaking of asking and answering questions: as your experience grows, jump in and help answer questions on both sites! The Raspberry Pi community is definitely that—a community—and there is always someone who is just getting started who may benefit from your experience. Before you know it, you’ll be helping and getting help like thousands of others!
That was a short, down-and-dirty introduction to the Pi. If you have no experience setting it up, jump to Appendix A, where I’ll walk you through the steps of downloading an operating system, loading it onto the Pi, and so on. Otherwise, let’s go to the next chapter, where I’ll give you a quick introduction to Linux.
