RECIPES
ECO-MINDED LIVING
SELECTED PRIMERS
Plus 17 more useful tips.
HOMEMADE STOCKS, SAUCES, AND TOPPINGS CAN RAISE A MEAL UP A notch—from simply good to spectacular. Great examples are the Coconut Chile Sauce spooned over our amazing Coconut-Crusted Salmon, or the Quince and Pear Chutney alongside slices of Herbed Rib Roast of Pork. Our Seared Salmon topped with Grilled Corn Salsa captures the sweet fresh tastes of summer. And our Hummus beautifully complements my latest passion: baking homemade whole-wheat pita bread.
Spending time over the weekend to make a special sauce, stock, or condiment gives me a head start preparing certain dishes during a busy workweek. When tomatoes are ripe—just begging to be picked and enjoyed—I try to make a big batch of Farm Stand Pico de Gallo. I reap the reward when I come home famished after a long day at work, and can cook up cheese quesadillas in just a few minutes. The fresh tomato salsa elevates this quick meal from just ordinary to extra-delicious and very nutritious.
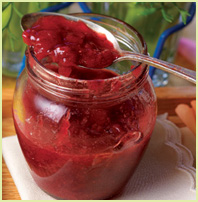
There are other recipes here that are well worth the time to make yourself. They also make good eco-sense: preserving bumper crops in season, or using up foods that ordinarily go to waste, such as bones, Parmesan rinds, shellfish shells, and older vegetables. For Fresh Strawberry Jam, I buy organic strawberries at the peak of their season, when they’re red, sweet, plentiful, and least expensive—usually July and August. My jam recipe is a bit less sweet than most versions, so the fresh strawberry taste really shines through—long into winter, when we enjoy it spread on our morning toast. It brings back memories of summer sunshine and the feel of warm earth on bare feet.
Fresh Strawberry Jam (page 424)
Stock—meat, vegetable, seafood—is the flavor foundation for many recipes, so I’ve given you all the basics here. I admit that I don’t often have time to make my own stock, but when I do put in the effort, I realize just how much better my soups taste. And I don’t have to worry about cans or cartons winding up in landfills. Making your own stock also allows you to control all the ingredients, avoiding the undesirable additives often present in commercial brands.
I like the idea of not wasting anything when I make my own stock. I simmer all the nutrients and flavor out of the bones from roasted meat or poultry, clean out the leftover vegetables in the fridge, add my own herbs and spices—and voilà, I have a flavorful foundation for soup that rivals anything you’d find in a great restaurant.
Top-quality ingredients separate the flavor of homemade basics from their commercial counterparts. And you can save money, too. Gourmet components like crème fraîche or chutney can be very expensive to buy ready-made, but with a bit of time and simple know-how, you can make your own for a fraction of the cost. You can also turn some of the recipes into wonderful gifts. Who wouldn’t appreciate a jar of our Fresh Strawberry Jam or Quince and Pear Chutney, or a little tin of the Savory Nut Mix?
Many of the recipes in this chapter are for foods that are readily available in the grocery store; we don’t have to make them. So when you have the opportunity to make your own, I hope the extra time and effort you spend in your kitchen brings you a special joy and satisfaction.
RICH AND FLAVORFUL, HOMEMADE BEEF STOCK is the foundation of many soups and sauces, adding a clean, bright flavor. It takes all day to slowly simmer a really flavorful beef stock, but it’s worth it to make your own rather than purchase commercial stock. Accumulate meaty scraps and vegetables in the freezer so that when you have a little extra kitchen time, you can cook up a batch. Adding red wine boosts the flavor and complexity of the stock, but is not required. If you plan on freezing your stock and your freezer space is at a premium, you can reduce the stock to a manageable quantity by simmering it longer. The greater the reduction, the stronger the concentration of flavor will be. You’ll be glad to have it on hand.  Makes about 3 quarts
10 pounds beef or veal bones, preferably with some meat attached
2 tablespoons olive oil
2 large yellow onions, unpeeled, cut into wedges
4 large carrots, unpeeled, cut into 2-inch pieces
4 celery ribs with leaves, cut into 2-inch pieces
1 bottle (750 milliliters) dry red wine
1 pound brown (cremini) or white mushrooms, cut in half
1 can (28 ounces) crushed Italian plum tomatoes, with their juices
¼ cup tomato paste
1 teaspoon whole black peppercorns
½ bunch (about
4 ounces) fresh flat-leaf parsley
8 fresh thyme sprigs
1. Position a rack in the lower third of the oven and preheat the oven to 450°F.
2. Place the meat bones in a single layer in a large roasting pan, and rub the olive oil over them. (If necessary, arrange the bones in two pans to avoid crowding, which could slow down the browning process.) Roast the bones until they begin to brown, about 1 hour.
3. Reduce the heat to 400°F and add the onions, carrots, and celery. Continue roasting, stirring occasionally, until the bones are deep brown and the vegetables have begun to caramelize, 45 to 60 minutes.
4. Transfer the bones and vegetables to a very large soup pot, or divide them between two pots if necessary. Add the wine to the roasting pan and deglaze it by scraping any brown bits from the bottom of the pan. Pour this into the soup pot and add enough cool water to cover the bones, about 12 cups.
5. Bring the liquid to the start of a boil over high heat. Then reduce the heat to medium-low to maintain a simmer. Using a large spoon, skim off any foam that accumulates on the surface.
6. Add the mushrooms, tomatoes, tomato paste, peppercorns, parsley, and thyme. Simmer gently, uncovered, adding more water as needed to keep the bones barely covered with liquid, for at least 6 hours or up to 12 hours.
7. Remove and discard the bones. Strain the stock through a fine-mesh sieve into a large, clean pot and discard the solids. If the stock lacks flavor, bring it to a simmer over medium heat and cook, uncovered, until reduced by a third to intensify the flavor, 30 to 45 minutes.
8. If you are using the stock at this time, let the fat rise to the surface, then skim it off with a metal spoon or ladle. If it’s not for immediate use, let the stock come to room temperature using the quick cooling method (see sidebar, page 405). Refrigerate the stock, covered, until the fat has solidified on the surface; discard the fat. The stock can be refrigerated, covered, for up to 3 days or frozen for up to 6 months.
THE FLAVOR AND NUTRITION OF HOMEMADE CHICKEN STOCK cannot be overstated, and once you realize how easy it is to make, you may become a convert. The technique is very basic: Oven-roast chicken wings with aromatic vegetables until they are golden brown, cover with water, add herbs, and cook until the liquid is reduced and flavorful. Chicken wings are one of the least expensive cuts of meat, but they are full of flavor and collagen, which makes them perfect for stock. If you’re pressed for time, skip the roasting step. The resulting stock will be lighter and less full-bodied, but still far superior to canned or boxed versions. Makes about 8 cups
5 pounds chicken wings Coarse (kosher) salt and freshly ground black pepper
2 large yellow onions, unpeeled, cut into
8 wedges each
4 large carrots, unpeeled, cut into 2-inch pieces
2 celery ribs, cut into 2-inch pieces
4 cups very hot water About
16 cups cold water
2 dried bay leaves
20 fresh parsley stems (or whole sprigs; see sidebar, page 404)
1 teaspoon whole black peppercorns
1. Position a rack in the middle of the oven and preheat the oven to 400°F.
2. Season the chicken wings with salt and pepper and arrange them in a single layer in a large roasting pan (use two pans if necessary). Roast until the wings turn golden, 30 to 40 minutes.
3. Stir the wings, add the onions, carrots, and celery to the pan, and continue to cook until the vegetables start to soften, 20 to 30 minutes.
4. Transfer the wings and vegetables to a large stockpot. Add the hot water to the roasting pan and scrape the pan to loosen the bits that have browned and hardened (which is where much of the flavor resides). Add this combination of water and pan drippings to the stockpot.
5. Add the 16 cups cold water to the stockpot—or enough cold water to cover the wings by 2 inches. Bring the stock to the start of a simmer over medium-high heat. Reduce the heat to medium-low and simmer for 15 minutes, using a large spoon to skim off any foam that rises to the top. Add the bay leaf, parsley stems, and peppercorns, and cook the stock at a slow simmer, uncovered, for 5 hours. Do not let the stock boil or it will be cloudy.
6. Place a colander or sieve over a clean pot and strain the stock into it, discarding the solids. Return the stock to the stove and reduce over medium heat until the flavor has concentrated and you have approximately 8 cups of liquid.
7. If you are using the stock at this time, let the fat rise to the surface, then skim it off with a metal spoon or ladle. If it’s not for immediate use, let the stock come to room temperature using the quick cooling method (see sidebar, facing page). Refrigerate the stock, covered, until the fat has solidified on the surface; then discard the fat. The stock can be refrigerated, covered, for up to 3 days or frozen for up to 6 months.
DUCK STOCK CAN BE VERY DIFFICULT TO FIND, so it’s great to know how to make it yourself. The technique is similar to our Chicken Wing Stock: Vegetables and bones are roasted to maximize flavor, then a long slow simmer extracts all the rich flavors and aromas. Using duck stock really adds dimension and complexity to sauces, as in our Braised Duck with Quince and Apples (page 121) and Duck Breasts with Dried Cherry Sauce (page 119). Makes about 6 cups
2 duck carcasses with wings, necks, and giblets
Coarse (kosher) salt and freshly ground black pepper
1 large yellow onion, unpeeled, cut into wedges
2 large carrots, unpeeled, cut into 1-inch pieces
2 celery ribs with leaves, cut into 1-inch pieces
1 cup dry white wine
1 dried bay leaf
1 teaspoon whole black peppercorns
8 fresh flat-leaf parsley sprigs
4 fresh thyme sprigs
2 large tomatoes, cut into ½-inch dice
1. Position a rack in the lower third of the oven and preheat the oven to 425°F.
2. Remove the wings from the duck carcasses and place the wings in a roasting pan. Add the necks and carcasses, and season the duck with salt and pepper. Roast the duck bones until they begin to brown, about 45 minutes.
3. Add the onion, carrots, and celery, and continue roasting, stirring occasionally, until the bones are brown and the vegetables have softened and begun to caramelize, about 30 minutes.
4. Transfer the bones and vegetables to a large stockpot. Add the wine to the roasting pan and deglaze it, scraping with a wooden spoon to release the caramelized brown bits that have stuck to the bottom of the pan. Pour this into the stockpot and add just enough cool water to cover the bones (about 12 cups).
5. Bring the liquid to the start of a boil over high heat. Then reduce the heat to low to maintain a simmer. Cook for 30 minutes, using a large spoon to skim off any foam that accumulates on the surface during that time. Then add the bay leaf, peppercorns, parsley, thyme, and tomatoes. Simmer the stock, uncovered, until it has reduced by half, 3 to 4 hours.
6. Let the stock cool slightly. Then strain it through a fine-mesh sieve set over a clean pot, and discard the solids. If the stock lacks flavor, bring it to a simmer over medium heat and cook until reduced by a third to intensify the flavor, about 30 minutes.
7. If you are using the stock at this time, let it the fat rise to the surface, then skim it off with a metal spoon or ladle. If it’s not for immediate use, let the stock come to room temperature using the quick cooling method (see sidebar, this page). Refrigerate the stock, covered, until the fat has solidified on the surface; then discard the fat. The stock can be refrigerated, covered, for up to 3 days or frozen for up to 6 months.
It feels as if I am always cleaning my kitchen—wiping counters, loading the dishwasher, scrubbing pots, washing dish towels, rearranging food and cleaning up spills in an overcrowded refrigerator. To get all this done, I rely on quite a few cleaning products. Over time I’ve learned how important it is to use nontoxic, biodegradable cleaners that don’t harm me or my family when we handle them, or adversely affect our waterways and wildlife when they go down the drain. In the past few years, I’ve been very happy to see more and more “green” cleaning products popping up in almost every store I go to.
Lately, though, I’ve been opting to make many of my own cleaners from common ingredients used in cooking—it’s ecological and inexpensive. One part distilled white vinegar, diluted with two parts water, makes a perfect glass and counter cleaner. I find that the vinegar odor fades quickly, but if you prefer, you can temper the smell by adding a splash of lemon juice. You can also use pure vinegar to sanitize wooden cutting boards. A gallon of white vinegar is inexpensive and lasts for months. Also, keeping your homemade mixture in a reused plastic bottle instead of buying a new one saves energy and resources.
Baking soda is another green-cleaning staple.

Keep counters clean by sprinkling them with baking soda, then scrubbing with a damp cloth or sponge. If you have stains, make a paste of baking soda and a little water. Place it on the stain and let it sit for a while before you wipe it up. This method also works great for stainless steel sinks, cutting boards, containers, refrigerators, oven tops, and more. I feel good knowing that I’m preparing food on—and often eating right off of—surfaces cleaned with just vinegar or baking soda instead of harsh chemicals.
Label Claims to Look for in Cleaners That You Buy:
• Made from natural ingredients, from renewable and/or abundant natural resources
• Non-toxic, non-irritating, and non-hazardous
• 100% biodegradable
• Free of formaldehyde, petrochemicals, phosphates, chlorine, and ammonia
Ingredients to Avoid
Many chemicals used in cleaning products are harmful to our environment. Check the labels and try to avoid the ones listed below.
Phosphates
Phosphates are minerals that act as water softeners, but once released into waterways, they also act as fertilizers and are known to promote algae growth that in turn suffocates aquatic life in rivers, lakes, estuaries, or oceans. Some states have banned phosphates in laundry detergents, but automatic dishwasher detergents are usually exempt from phosphate restrictions, and most major brands still contain them. Look for phosphate-free alternatives, which are becoming more readily available. Common pantry ingredients, like baking soda, make ecologically sound cleansers.
Chlorine
Chlorine bleach, or sodium hypochlorite, is hazardous because it’s a lung and eye irritant. Products containing chlorine bleach also usually contain trace amounts of organochlorines, which cause cancer in animals and are suspected of also doing so in humans. After disappearing down drains, chlorine reacts with environmental organic matter, creating harmful organochlorines such as dioxin.
Petrochemicals
The key ingredients in most cleansers are called surfactants. Most surfactants are made from petroleum, a limited resource whose extraction and refining process pollutes the environment. Petroleum-based synthetic dyes, fragrances, and other chemicals are often added to detergents for aesthetic appeal, and these synthetic fragrances may contain hormone-disrupting phthalates, which prevent the scent from dissipating but also provoke asthma and other respiratory problems.
APEs (alkylphenol ethoxylates)
You probably won’t see “APEs” on a product label, but if “surfactants” are mentioned, chances are the product contains these commonly used chemicals. A study of contaminants in stream water samples across the country by the U.S. Geological Survey found evidence of detergent and disinfectant chemicals in 69 percent of streams tested. These contaminants were members of a class of chemicals called alkylphenol ethoxylates (APEs). APEs are surfactants, or “surface active agents” that are added to some laundry detergents, disinfectants, laundry stain removers, and citrus cleaner/degreasers to make them more effective. APEs have been shown to mimic the hormone estrogen, and their presence in water may be harming the reproduction and survival of salmon and other fish.
For more information:
Washington Toxics Coalition:
www.watoxics.org/files/cleaningproducts.pdf
The National Geographic Green Guide:
www.thegreenguide.com
Healthy Child Healthy World:
www.healthychild.org
AT THE ASTRONOMICAL PRICE PER POUND you have to pay for quality Italian Parmesan cheese (Parmigiano-Reggiano), it’s plain good sense to use the hard rinds. Tightly wrap the heels and ends of your cheese in plastic wrap, place them in a zip-lock bag, and freeze until you have at least half a pound of rinds. Then cook them to make a flavorful stock that’s a wonderful addition to soups, pasta sauces, and vegetable braises. Makes about 1 quart
½ tablespoon olive oil ½ cup thinly sliced yellow onions or leeks
1 cup white wine
8 ounces Parmesan rinds
1 small dried bay leaf
10 whole black peppercorns
6 cups cold water
1. Heat the oil in a large stockpot over medium-high heat until it is hot, and then add the onions. Reduce the heat to low, place a round of parchment or wax paper directly on top of the onions, and sweat the onions (see sidebar, this page), stirring them occasionally, until they have softened, about 15 minutes.
2. Discard the paper and add the wine to the pot. Raise the heat to high and bring to the start of a simmer. Add the Parmesan rinds, bay leaf, peppercorns, and water, and bring the mixture to a boil. Reduce the heat to maintain a slow simmer, and cook the stock, uncovered, for 2 hours, or until the liquid has reduced by about half.
3. Let the stock sit at room temperature until it is lukewarm. Strain it through a fine-mesh sieve into a container, and discard the solids. If it’s not for immediate use, refrigerate the stock until it is cold; then cover and freeze for up to 3 months.
In culinary parlance, sweating is a common preliminary step in vegetable cooking, particularly for onions and leeks. The vegetables are cooked in a small amount of butter or oil over low heat, with a piece of parchment paper pressed directly onto the vegetables. (The parchment traps the heat so the vegetables soften without browning and cook in their own juices.) Sweating vegetables usually results in tender, sometimes translucent, pieces and is used further in various culinary preparations.
A STOCK MADE OF SHRIMP (OR ANY SHELLFISH) SHELLS makes a flavorful base for soups, chowders, risottos, and pasta dishes. This quick version utilizes raw shrimp shells, an item that is usually discarded. Rather than waste them, simmer the shells with a few aromatic vegetables (whatever you have on hand will suffice) to make a quick stock that adds a briny depth of flavor to dishes such as our Shrimp and Corn Chowder (page 14). Shrimp shells can be saved and frozen for several months, so if you like, store them in an airtight container until you have about a pound; then, when you have time, make a larger quantity of this stock, doubling all of the ingredients for a yield of 8 cups. Makes about 4 cups
Reserved shrimp shells and tail pieces, or other shellfish shells (at least 2 cups)
1 small carrot, chopped
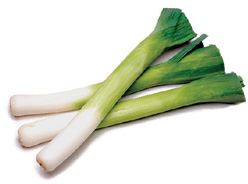
1 medium leek, white and light green parts only, rinsed and chopped
1 small onion, quartered
2 celery ribs with leaves, chopped
6 whole black peppercorns
1 dried bay leaf
12 fresh flat-leaf parsley sprigs (see sidebar, page 404)
6 cups cold water
1. Combine all the ingredients in a medium-size saucepan. Bring to the start of a simmer over medium-high heat, skimming off any foam that rises to the surface. Reduce the heat to maintain a simmer, and cook, uncovered, for 45 minutes.
2. Strain the stock through a fine-mesh sieve, discarding the solids. Store, covered, for up to 2 days in the refrigerator, or in the freezer for up to 2 months.
Artificial flavors, sugar, and MSG are all common ingredients in nonorganic store-bought broths. When you make homemade stocks with all natural ingredients, there’s no need for any additives to boost flavor.
MAKING STOCK IS A GREAT WAY TO USE UP THOSE ODDS AND ENDS lurking in your refrigerator. To make this stock as flavorful as possible, we’ve loaded up on the vegetables. There is no hard-and-fast rule about what vegetables or herbs to use, although strong-flavored items (such as cabbage, broccoli, peppers, and rosemary) and deeply colored vegetables (beets, red bell peppers) should be used only in small quantities so as not to dominate or overwhelm the flavor of the stock. Experiment with different vegetables and herbs to create your own personalized vegetable stock. Makes 6 cups
3 cups (about 4) diced fresh tomatoes (see Note)
2 large carrots, unpeeled, thinly sliced
2 celery ribs with leaves, thinly sliced
1 medium yellow onion, cut into chunks
1 cup cauliflower florets
1 cup corn kernels (fresh or frozen)
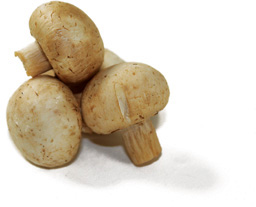
1 cup (2½ounces) cremini or shiitake mushrooms, stems and caps chopped
1 fennel bulb, trimmed and thinly sliced
6 garlic cloves, unpeeled
1 teaspoon whole black peppercorns
1 dried bay leaf
9 cups cold water
12 fresh flat-leaf parsley stems (see sidebar, page 404)
4 fresh thyme sprigs
1. Place the tomatoes, carrots, celery, onion, cauliflower, corn, mushrooms, fennel, garlic, peppercorns, and bay leaf in a large stockpot. Add the water and bring to a simmer over medium-high heat. Reduce the heat to low and simmer, uncovered, until the flavor develops, about 1 hour.
2. Add the parsley stems and thyme sprigs and let simmer until the herbs release their flavor, about 15 minutes.
3. Remove the pot from the heat and let the stock cool slightly. Then strain the stock through a fine-mesh sieve into a large bowl or pot, and discard the solids. If you are not planning on using the stock at this time, let it come to room temperature using the quick cooling method on. The stock can be refrigerated, covered, for up to 5 days or frozen for up to 6 months.
Note: Fresh tomatoes are specified here because the canned variety will tint your stock a rosy-red hue. If this is not a concern, canned tomatoes can be used in place of fresh tomatoes.
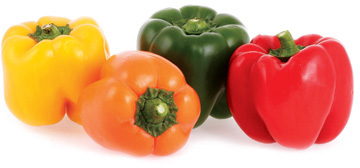
THE RICH, PURE FLAVOR of home-roasted bell peppers is a world removed from the jarred variety. Roasted peppers are a terrific item to have in your pantry. They add a touch of color and distinction to sautéed or steamed vegetables, sweet flavor to sandwiches and crostini, and punch to pasta and bean salads, like our cumin-scented French Lentil Salad (page 143). Store roasted peppers in the refrigerator for up to a week, where they’ll come in handy for leafy green salads, grain salads, egg dishes, appetizers, pizza, casseroles, and more.
Bell peppers of any color, preferably a mix of red, yellow, and orange
Extra-virgin olive oil
1. Place a rack 4 inches from the broiler element, and preheat the broiler. Brush a rimmed baking sheet lightly with oil.
2. Place the whole peppers on the baking sheet so that they do not touch each other. Broil, turning them frequently with tongs, until the skin is blistered and charred all over, 10 to 20 minutes. Have patience and turn the peppers frequently so that the skin chars but the flesh itself does not burn. Take care not to pierce the peppers with the tongs, or you will lose the delicious juices.
3. As the peppers become charred, transfer them to a bowl or a paper bag. Cover the bowl or seal the bag, and allow the peppers to steam for 5 to 10 minutes to loosen the skins.
4. When the peppers are cool enough to handle, slit them over a medium bowl to catch the juices. Scrape or peel off and discard the skins. Cut the peppers in half and remove and discard the seeds, stems, and membranes. If you wish, cut the pepper halves into wide strips.
5. Transfer the peppers to a container and drizzle olive oil over them. Covered tightly, they can be refrigerated for up to 7 days. For the best flavor, serve at room temperature.
A MIDDLE EASTERN SPECIALTY, BABA GHANOUJ (or Baba Ghanoush) is traditionally served as a dip or spread for pita or flatbreads. There are numerous versions, some of which feature pomegranate seeds, tahini, pistachios, or mint. Our version is all about the eggplant, which is cooked to a silky softness, then simply flavored with sesame oil, lemon, and garlic. Baba Ghanouj makes a delicious accompaniment to our Greek-Style Lamb Chops (page 103) or Maklube (page 104). Makes about 2½ cups
3 pounds eggplant
2 tablespoons toasted sesame oil (see sidebar, page 25)
2 tablespoons fresh lemon juice
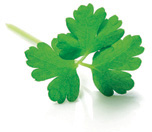
1 garlic clove, peeled and minced Salt Cayenne pepper, to taste ¼ cup chopped fresh flat-leaf parsley
1. Position a rack 8 inches from the broiler element, and preheat the broiler.
2. Wash and dry the eggplants. Transfer the whole eggplants to a rimmed baking sheet. Broil, turning the eggplants once or twice, until they are soft and tender, 15 to 20 minutes.
3. Remove the baking sheet from the oven and let the eggplants cool for 10 minutes. Then peel them, discarding the stems and skins, and coarsely chop.
4. Combine the sesame oil, lemon juice, garlic, and 2 teaspoons salt in a small bowl and whisk to blend.
5. Place the eggplant in a medium-size bowl, and beat with an electric mixer or an immersion blender until smooth. Gradually beat in the oil-lemon mixture. Season with additional salt to taste. Transfer the Baba Ghanouj to a pretty bowl and serve at room temperature sprinkled with the cayenne pepper and parsley. It can be stored, covered, in the refrigerator for up to 5 days. Let come to room temperature before serving.
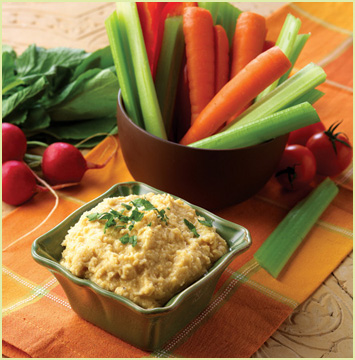
MAKING HOMEMADE HUMMUS IS SUPER-EASY, and it puts you in control of the garlic. This is a classic version with garlic, sesame oil, and tahini, and with a splash of fresh lemon juice to brighten and enliven the flavors. It makes a terrific sandwich spread or dip for raw vegetables. Or serve it with the whole wheat pita bread on page 287. Makes about 1½ cups
1¾ cup cooked chickpeas (garbanzo beans), rinsed and drained if canned (or see page 422 to cook your own)
3 tablespoons toasted sesame oil (see sidebar, page 25) ¼ cup fresh lemon juice
2 tablespoons sesame tahini
1 garlic clove, peeled and minced
1 teaspoon salt ½ teaspoon freshly ground black pepper ¼ cup chopped fresh flat-leaf parsley
 LIVING GREEN
Homemade chickpeas taste fresher and have better texture than canned. So if you have the time, avoiding those cans is a delicious way to go.
1. Place the chickpeas, sesame oil, lemon juice, and 3 tablespoons water in a food processor or blender and puree until smooth. Add the tahini, garlic, salt, and pepper and puree until smooth.
2. Transfer the hummus to a pretty bowl and sprinkle the parsley around the edges. The hummus can be refrigerated, covered, for up to 1 week. Serve chilled or at room temperature.
Hummus
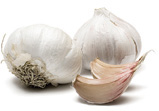
SLOW-COOKING WHOLE CLOVES OF PEELED GARLIC in extra-virgin olive oil results in a fragrant garlic oil as well as garlic that literally melts in your mouth. This easy-to-prepare condiment is one of the most useful staples to have on hand in your kitchen. Need garlic for a pasta dish? Mash a few cloves of garlic confit into your sauce and voilà—that distinctive rich and mellow flavor is at your fingertips, without the worry of burning or bitterness, which can often be the case when cooking raw garlic. You’ll find that both the oil and the garlic are useful additions to your pantry, ideal for flavoring everything from mayonnaise to mashed potatoes. Makes about 2 cups oil and 30 cloves of garlic confit
2 whole garlic bulbs, cloves separated, peeled, and trimmed
2 to 3 cups extra-virgin olive oil
1. Place the peeled garlic in a small pan and cover with the oil. The garlic must be completely submerged, so if your pan is large, you will need to add more oil.
2. Place the pan over medium-low to low heat and cook until the garlic is very tender, about 45 minutes. Do not allow the oil to simmer. You want a very gentle, slow cooking temperature. Remove the pan from the heat and let the garlic cool in the oil at room temperature.
3. Transfer the garlic and oil to a clean, dry container. Seal tightly and refrigerate for up to 6 weeks. Before using, let the oil and garlic sit at room temperature until the oil softens enough to remove the cloves with a spoon.
SO MUCH BETTER THAN PREPARED HORSERADISH sold in jars, this homemade version is fresh-tasting and zesty without any added preservatives. It just takes a few minutes to make, and once you’ve had a taste, we think you’ll be convinced that homemade is superior to anything you can buy. Makes 1½ cups
1 cup sour cream ⅓ cup mayonnaise
3 tablespoons finely grated fresh peeled horseradish (see Note)
1 teaspoon fresh lemon juice
1 teaspoon salt
Place all the ingredients in a small bowl and whisk to blend. Refrigerate, covered, for at least 30 minutes before serving, to allow flavors to infuse. The sauce can be stored, covered, in the refrigerator for up to 5 days.
Note: Fresh horseradish is very pungent. When grating, be aware that, like onions, horseradish may cause your eyes to burn and water.
LIVING GREEN
Every glass bottle that is recycled saves enough energy to keep a 100-watt bulb lit for 4 hours.
CREME FRAICHE IS THICKENED CREAM with a slightly tangy, nutty flavor. Generally available at specialty food shops, it’s expensive to buy. Crème fraîche is a convenient item to have in your pantry. It makes a delicious substitute for sour cream, especially in soups or sauces because it can be heated to a boil without curdling. Crème fraîche can also be used in place of whipped cream. To serve it with fresh fruit, crisps, or pies, stir in a little honey or sugar for a touch of sweetness. Makes about 2¼ cups
2 cups heavy (whipping) cream
2 tablespoons sour cream or buttermilk
Place the heavy cream in a small container and add the sour cream. Whisk to combine. Cover the container with a lid and let it sit at room temperature (about 70°F) until thick, 12 to 18 hours (the sour cream or buttermilk protects the cream from developing harmful bacteria while it is thickening). Once thickened, the crème fraîche can be refrigerated, covered, for up to 1 week.
JUST FOUR INGREDIENTS COMBINE TO FORM A TASTY, MELLOW sauce that has intriguing hints of sweetness and spice. For a change of pace, substitute ½ tablespoon Thai red curry paste for the chile paste. This velvety sauce partners beautifully with our Coconut-Crusted Salmon (page 134), with Thai-Style Salmon Cakes (page 138), and with grilled fish or scallops. Makes about ¾ cup
1 cup unsweetened coconut milk
1 tablespoon fresh lime juice
1 tablespoon honey ½ tablespoon Thai chile paste Salt
Combine the coconut milk, lime juice, honey, and chile paste in a small saucepan and cook over medium-high heat until the sauce reduces and thickens slightly, about 4 minutes. Season the sauce with salt to taste. The sauce can be refrigerated, covered, for up to 5 days.
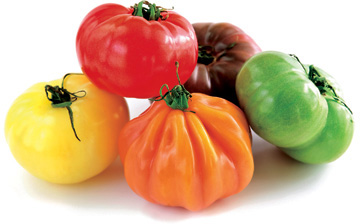
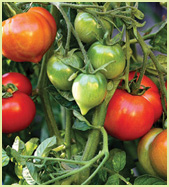
I CAN’T THINK OF MANY THINGS THAT taste better than heirloom tomatoes that have ripened on the vine in the warm sunshine. When the season is upon us, I take full advantage of summer’s bounty to make my favorite tomato sauce in huge batches, which I then put away in the freezer to use all winter long. If I’m setting aside some time to make a large quantity, I generally peel the tomatoes first. But if I’m just making enough sauce for one meal, I skip that step and just pick out the skins with tongs—much faster! I generally don’t seed the tomatoes unless they are particularly “seedy.” I like to combine a mix of heirlooms—any color—and usually add some Romas too, because they have fewer seeds and are very meaty. Makes about 3 quarts
2 tablespoons extra-virgin olive oil
1 large yellow onion, cut into ½-inch dice
3 large garlic cloves, peeled and chopped
12 pounds assorted vine-ripened tomatoes, peeled (see sidebar, page 131) and cut into large chunks
½ cup tomato paste Salt and freshly ground black pepper
1 cup fresh basil leaves, roughly chopped
1. Heat the olive oil in a large, heavy pot over medium heat. Add the onion and cook, stirring frequently, until soft but not browned, about 6 minutes. Add the garlic and cook until fragrant, about 2 minutes.
2. Add the tomatoes and any accumulated juices to the pot. Raise the heat to medium-high, cover the pot, and cook until the tomatoes slump and are very soft, 10 to 15 minutes.
3. Using a potato masher, smash the tomatoes, right in the pot, into a coarse puree. Use tongs to pick out any missed pieces of skin.
4. Add the tomato paste and simmer the sauce, uncovered, stirring frequently, until it thickens to the desired consistency and the flavors are concentrated, 30 to 45 minutes.
5. Season with salt and pepper to taste. Stir in the basil, and cook for 2 minutes to release the flavors. Remove the pan from the heat. If you are not planning to use the sauce immediately, let it cool to room temperature. It can be refrigerated, covered, for up to 1 week or frozen for up to 6 months.
LIVING GREEN
I like to use plastic produce bags, both for when I shop and for storing fruits and vegetables in the refrigerator, but I don’t take fresh ones every time I go to the store. They are sturdy enough to reuse multiple times. Most are still pretty clean once the original produce has been used up. If they’re a little dirty, I rinse them with cold water and let them air dry completely before I use them again. When they look tired or start to rip, I make sure to recycle them.
WE LOVE THIS LIGHT, FRESH-TASTING SAUCE, which is a handy addition to your repertoire when ripe, sun-kissed tomatoes are not in season. Because there are so few ingredients, the quality of the canned tomatoes is paramount. The very best variety is San Marzano, which originated in the volcanic fields near Mount Vesuvius. These are acclaimed as one of the best cooking tomatoes in the world, so look for “San Marzano” on can labels. Garlic confit is great in this sauce because the mellow, rich taste of the garlic, slow-cooked in oil, adds depth of flavor to the sauce without a strident note. To preserve its fresh, bright taste, stir in the basil only after the sauce is cooked. Makes about 3 cups
1 can (28 ounces) crushed Italian plum tomatoes, preferably San Marzano ¾ teaspoon dried oregano
3 cloves Garlic Confit (page 414), mashed, or
3 fresh garlic cloves, peeled and minced
2 tablespoons extra-virgin olive oil
2 tablespoons finely minced yellow or white onion
1 teaspoon sugar, or to taste Salt and freshly ground black pepper, to taste
6 fresh basil leaves, coarsely torn
1. Place the tomatoes, oregano, garlic confit (if using), and 1 tablespoon of the oil in a medium-size saucepan and bring to the start of a simmer over medium heat, stirring occasionally.
2. Meanwhile, place a small skillet over medium-high heat, and when the pan is hot, add the remaining 1 tablespoon oil. Reduce the heat to medium and cook the minced onion, stirring frequently, until it is soft, about 5 minutes. If you are using minced garlic (not garlic confit), add the garlic to the skillet and cook, stirring frequently, until the garlic is fragrant, about 2 minutes. Add the onion-garlic mixture to the tomato sauce.
3. Simmer the sauce over medium-low heat, stirring frequently, until it has thickened slightly, about 15 minutes. Taste the sauce, and if it is too acidic, add the teaspoon of sugar, or more or less to taste. Season with salt and pepper and stir in the basil leaves. Remove the sauce from the heat and cool to room temperature. The sauce can be refrigerated, covered, for up to 5 days or frozen for up to 3 months.
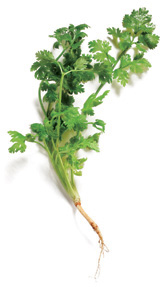
SALSA IS SO SIMPLE TO MAKE, and homemade is much fresher-tasting than store-bought versions. Best of all, you control the amount of garlic and the heat, so it’s a custom blend of your favorite flavors. Our version balances the sweet-tangy edge of roasted tomatillos, the complexity and richness of roasted garlic, and the smoky heat and spice of both jalapeño and chipotle chiles. Serve the salsa with grilled meats or chicken, add it to soup, mix it with sour cream for a vegetable dip, or use it as a condiment with Fish Tacos (page 139). This is a necessary accompaniment to our Chicken and Green Olive Enchiladas (page 109). Makes about 1¼ cups
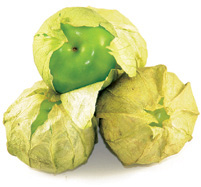
1 pound (about 8 large) tomatillos, husked and rinsed (see sidebar, page 98)
6 large garlic cloves, peeled
½medium yellow or white onion, cut into 6 chunks
1 jalapeño chile, cut in half and seeded
1 tablespoon olive oil
1 teaspoon salt, or to taste
1 canned chipotle chile in adobo sauce (see sidebar, facing page), or more to taste
¾ cup (loosely packed) fresh cilantro leaves
1. Position a rack in the middle of the oven and preheat the oven to 375°F.
2. Place the tomatillos, garlic, onion, jalapeño, oil, and salt in a glass baking dish and toss or stir to coat the vegetables. Roast until the vegetables are very soft, about 1 hour.
3. Transfer the mixture to a food processor, and add the chipotle chile and cilantro. Pulse until coarsely pureed. Pour the salsa into a clean bowl, and let it cool. Serve chilled or at room temperature.
SWEET AND SMOKY FROM A BRIEF STINT ON THE GRILL, fresh corn really makes this pretty salsa sing. It’s not fiery hot, but you can certainly increase the heat by adding chile peppers. If you prefer not to turn on the grill, use a cast-iron skillet to brown the corn. We like this salsa served as a condiment with our Fish Tacos (page 139) and with Seared Salmon with Chipotle-Lime Butter (page 136). Makes about 5½ cups
4 ears fresh corn, shucked, silk removed
2 teaspoons canola oil Salt and freshly ground black pepper 1½ cups diced tomatoes (¼-inch dice; about
3 small tomatoes) ¼ cup finely diced red onion
3 tablespoons chopped fresh cilantro
1 tablespoon fresh lemon juice
1 tablespoon thinly sliced scallion, green part only

1. Set up a barbecue grill and preheat it to high. (Alternatively, heat a cast-iron skillet over high heat.)
2. Rub the ears of corn with the canola oil, and season with salt and pepper. Grill the corn (or cook in the skillet), turning it frequently, until lightly browned all over, 3 to 4 minutes on each side.
3. Transfer the corn to a bowl, cover, and let steam until the kernels are tender, 5 to 10 minutes. When the corn is cool enough to handle, cut the kernels off the cobs (you should have about 4 cups).
4. Place the kernels in a medium-size bowl and add the tomatoes, onion, cilantro, lemon juice, and scallions. Stir to combine, and let the salsa rest at room temperature for 30 minutes to develop the flavors before serving. Season with salt and pepper to taste. The salsa can be refrigerated, covered, for up to 2 days.
THIS IS A VARIATION ON OUR LIGHT AND FRESH-TASTING Grilled Corn Salsa. We’ve added black beans to make it more substantial. A touch of cumin contributes a subtle dimension to the salsa, enhancing the mild flavor of the beans. We encourage you to cook your own beans, but if time is short, you can substitute a 15-ounce can. Just be sure to rinse and drain the beans before adding them to the salsa. Makes about 7½ cups
4 ears fresh corn, shucked, silk removed
2 teaspoons canola oil Salt and freshly ground black pepper
2 cups cooked black beans (see box, page 422)
1½ cups diced tomatoes (¼-inch dice; about
3 small tomatoes)
1¼ cup finely diced red onion
3 tablespoons chopped fresh cilantro
1 tablespoon fresh lime juice
1 tablespoon thinly sliced scallion, green part only
1 tablespoon ground cumin
1. Set up a barbecue grill and preheat it to high. (Alternatively, heat a cast-iron skillet over high heat.)
2. Rub the ears of corn with the canola oil, and season with salt and pepper. Grill the corn (or cook it in the skillet), turning it frequently, until lightly browned all over, 3 to 4 minutes on each side.
3. Transfer the corn to a bowl, cover, and let steam until the kernels are tender, 5 to 10 minutes. When the corn is cool enough to handle, cut the kernels off the cobs (you should have about 4 cups).
4. Place the kernels in a medium-size bowl and add the black beans, tomatoes, onion, cilantro, lime juice, scallion, and cumin. Stir to combine, and let the salsa rest at room temperature for 30 minutes to develop the flavors before serving. Season with salt and pepper to taste. The salsa can be refrigerated, covered, for up to 2 days.
PICO DE GALLO (SPANISH FOR “ROOSTER’S BEAK”) is a fresh salsa typically served as a condiment with tacos, fish, eggs, meat, and poultry dishes. It’s easy to make and adds a terrific zestiness to just about everything. We like it with our Fish Tacos (page 139) or Tofu Scramble (page 378), and it even makes a great dip for chips. This salsa is especially good made with heirloom tomatoes when they’re in season. Makes about 2⅓ cups
2 cups diced fresh tomatoes (¼-inch dice; about 3 medium tomatoes)
½ cup finely minced red onion
½ jalapeño pepper, seeded and finely minced
⅓ cup chopped fresh cilantro
1½ teaspoons fresh lemon juice Salt and freshly ground black pepper
Combine the tomatoes, red onion, jalapeño, cilantro, and lemon juice in a small bowl and stir to combine. Season with salt and pepper to taste. Let sit at room temperature for 30 minutes before serving, to allow the flavors to develop. If making in advance, refrigerate, covered, for up to 5 days.
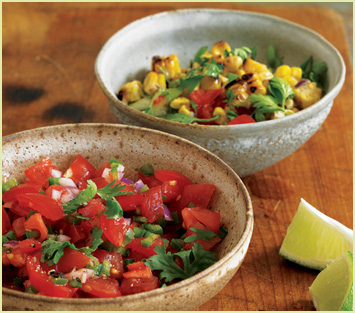
Farm Stand Pico de Gallo and Grilled Corn Salsa (page 419)
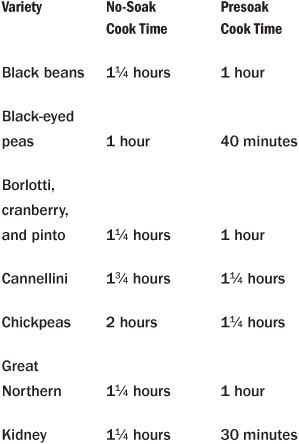
When you cook your own beans, you save both money and natural resources. Dried beans are a nutritional powerhouse of protein, fiber, and iron and a valuable component of every pantry. There are numerous ways to cook dried beans, and several methods involve presoaking, which will shorten the cooking time. To presoak dried beans, place them in a large pot with cold water to cover. If you have the time, presoak small beans for 4 hours; large beans for 8 hours or overnight. If you’re short on time, quick-soak the beans by boiling them in water to cover for 1 minute. Then remove from the heat, cover the pot, and let sit for an hour. With either method, drain the beans and cover them with fresh water or other liquid for cooking. One pound of beans will yield 5 to 6 cups when cooked.
1 pound dried beans
Cold water
Salt and freshly ground black pepper
1. Pick through the beans, removing any pebbles or clumps of dirt. Rinse them thoroughly.
2. Place the beans in a large pot and add cold water to cover by 2 to 3 inches. Bring the water to a boil over high heat; then reduce the heat to maintain a slow simmer. Partially cover the pot and cook, stirring occasionally, until the beans are close to tender. The cooking time can range from 30 minutes to 4 hours, depending on the variety and age of the beans (see box for approximate times), and whether or not you presoaked them. Sample them frequently to gauge doneness, adding more water as necessary to keep the beans covered.
3. When the beans are tender, add salt and pepper to taste. Continue to simmer until they are cooked to the texture you prefer. Let the beans cool in their liquid, and then refrigerate, tightly covered, for up to 5 days.
Tips on Cooking Dried Beans
• Always cook beans in plenty of water and at a very slow simmer (the water should barely bubble) so that they will remain intact and have room to expand.
• Add salt during the last 15 minutes of cooking, when the beans are nearly ready. Adding salt too early causes the skin of the bean to seize and resist absorption of water, which results in tough beans.
• Add a few sprigs of fresh herbs, a crushed garlic clove, and one or two large pieces of aromatic vegetables (such as onion, carrot, celery, or leek) to your pot of beans to flavor the cooking water. You can also use chicken stock or a combination of stock and water.
• Squeeze gently to test if a bean is tender—it should feel soft through to the center.
• Store cooked beans, tightly covered, in the refrigerator for up to 5 days.
• Cooked beans can be frozen for up to 3 months. Spread the drained beans in a single layer on a baking sheet and freeze. Then transfer the frozen beans to an airtight container.
• Ideally, buy dried beans that have been harvested and dried within the past year. Because this can be difficult or impossible to determine, purchase beans at a store that has a large selection and quick turnover. Those that are old take longer to cook and are more difficult to rehydrate and prepare.
• Store dried beans in a dark cupboard; some of their nutrients deteriorate quickly when exposed to light.
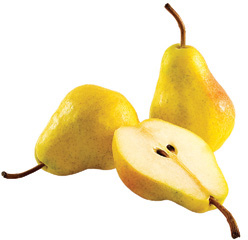
IF YOU’VE NEVER COOKED WITH QUINCE BEFORE, you’re in for a pleasant surprise. Although they closely resemble apples, this heirloom fruit is refreshingly distinctive (see box, page 330). With sticky skins, a large proportion of seeds and core, and tart flesh, quinces are more obstinate to prepare than apples, but the extra bit of effort involved is rewarded by their haunting fragrance and flavor. Here we’ve created a sweet-spicy condiment that makes a delicious accompaniment to roast pork, chicken, or turkey. Quince pairs beautifully with other autumn fruits, and juicy pears make an exceptional partner. Ginger, in both fresh and crystallized forms, enlivens the mixture and adds a counterpoint of spice and heat to the chutney. Verjus is the juice of unripe grapes and is nonalcoholic; look for it at specialty stores. Makes about 4 cups
1½ cups verjus or fruity white wine, such as Riesling or Viognier
1 cup sugar, or more to taste
1 star anise pod
1 cinnamon stick (3 inches), broken in half
¼ cup finely grated peeled fresh ginger
2 cups diced peeled quince (½-inch dice; about 3 medium quinces)
3 large firm pears, cored, peeled, and cut into
½-inch dice (about
3 cups)
½ cup golden raisins
¼ cup finely diced crystallized ginger
1. Combine the verjus or wine, sugar, star anise, cinnamon stick, and grated fresh ginger in a medium-size saucepan. Bring to a boil over medium-high heat, stirring frequently until the sugar dissolves. Reduce the heat to medium and cook, uncovered, for 10 minutes. Add the quince and cook for 5 minutes. Then add the pears and raisins. Reduce the heat to low and simmer the mixture until the quince and pears are tender but not mushy, 15 to 20 minutes.
2. Remove the pan from the heat and skim off any foam. Stir in the crystallized ginger.
3. Spoon or ladle the hot chutney into clean glass jars, cover tightly, and let sit at room temperature until cool. The chutney can be refrigerated for up to 6 months. Discard the cinnamon stick and star anise pod before serving.
WHEN STRAWBERRIES ARE AT THEIR PEAK AND PRICES have fallen to a seasonal low, set aside an hour to make a batch of homemade jam. Making jam is an age-old pastime: one that connects us with the land and the rhythm of the seasons. Best of all is the vibrant flavor. There is nothing mysterious about jam making. This recipe requires just four ingredients and no special tools. Our version is less sweet than traditional jams and sets to a slightly looser consistency, but we like its true fruit flavor. If you want to improvise on this basic recipe, get creative and add spices, liqueurs, or candied ginger. Long after summer-sweet berries have disappeared, it will be a pleasure to pull a jar of jam out of your pantry to share with family and friends—a treat that will be welcomed by all. Makes about 4 half-pints
3 pounds fresh strawberries, hulled and finely chopped or coarsely mashed (to make 6 cups)
1 cup sugar
3 tablespoons fresh lemon juice
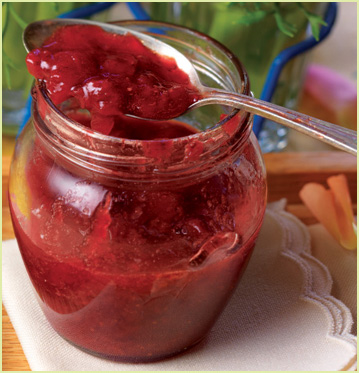
Fresh Strawberry Jam
1. Combine the strawberries and sugar in a heavy-bottomed 6- or 8-quart saucepan. Cover and bring the mixture to a full rolling boil, and then reduce the heat to maintain a simmer. Cook, stirring frequently, until the jam is thick, 30 to 40 minutes. In the latter stages of cooking, watch carefully so that the jam does not scorch.
2. Remove the pan from the heat and skim off any foam. Stir in the lemon juice.
3. Spoon or ladle the hot jam into clean glass or sterilized canning jars, filling them to within ⅛ inch of the top. Seal them following the manufacturer’s directions. (You will need four half-pint jars.) If you are not using sealed canning jars, allow the jam to cool completely and then transfer it to clean containers with tight-fitting lids. The regular containers of jam will keep, covered and refrigerated, for up to 2 months.
THIS RICH, BUTTERY PASTRY CRUST IS LIGHT AND TENDER, perfect for fruit pies and tarts. I find the food processor technique the quickest and least messy method for making pie dough. It’s almost foolproof—just be sure not to overwork the dough in the machine or the pastry will be tough. For directions on making pastry by hand, see sidebar, this page. Makes enough for 2 single-crust pies or 1 double-crust pie, 9 to 10 inches in diameter
2½ cups unbleached all-purpose flour, plus extra for rolling out the dough
2 tablespoons sugar
¼ teaspoon salt
1 cup (2 sticks) cold unsalted butter, cut into
½-inch pieces
¼ cup ice water, or more as needed
1. Place the flour, sugar, and salt in a food processor and process to blend. Add the butter and pulse until the mixture looks like coarse meal.
2. With the machine running, add the ice water and process just until the dough holds together loosely in a ball, 5 to 8 seconds. Do not allow the dough to form a solid mass or it will be overworked. Test the dough by pinching a small amount between your fingers. If the dough is not moist enough to form a cohesive mass, add an additional tablespoon of ice water, process briefly, and test again.
3. Turn the dough out onto a large piece of parchment paper and divide it in half. Form each half into a flat disk. Wrap a piece of parchment paper around each piece of dough to cover it, and refrigerate until chilled, 20 to 30 minutes. (If you intend to chill the dough overnight or freeze it, tightly wrap the pieces in plastic wrap. The wrapped dough can be frozen for up to 3 months. Let the frozen dough thaw overnight in the refrigerator before rolling out.)
4. Remove the dough from the refrigerator (for a single-crust pie you’ll need one disk of dough; for a double-crust pie you’ll need both disks), and open the parchment paper to a flat rectangle. If it was refrigerated for more than 1 hour, let it sit at room temperature for 10 to 20 minutes to soften slightly. (If the dough is too cold or firm, it will crack when you try to roll it out.) Lightly dust a work surface and rolling pin with flour. Roll the dough into a round about ⅛ inch thick and 2 inches larger than your pie plate.
5. Fold the dough in half or drape it over the rolling pin, and transfer it to the pie plate. Press the dough firmly into the pie plate, and brush off any excess flour with a pastry brush. If there are holes or cracks, press the dough back together or patch them with small bits of the overhanging dough.
6. For a single-crust pie, trim the dough with a pair of kitchen scissors, leaving a 3/4-inch overhang. Fold the edge under to form a double layer, and crimp or flute it.
For a double-crust pie, fit the dough for the bottom crust into the pie plate and trim the dough even with the rim. Roll out the second disk of dough. Place the filling in the bottom crust and place the dough for the second crust on top. Trim the top crust with scissors, leaving a ½-inch overhang. Fold the top crust under the edge of the bottom crust, and crimp or flute it to seal.
7. Cut three slits in the center of the top crust with a sharp knife to allow steam to vent as the pie bakes.
AT OUR FARM STAND we use whole wheat pastry flour and rolled oats in lieu of refined white flour whenever possible in our recipes. Creating a delicious-tasting, light, and workable pastry crust was a challenge, but we think the result is spectacular. This pie dough is extremely easy to make, and as an added bonus, it’s also very easy to handle. The result is a light, flaky crust with a pronounced nutty, buttery flavor. The recipe can be doubled and the dough refrigerated for up to 3 days or frozen for up to 3 months. Let the frozen dough thaw overnight in the refrigerator before rolling it out. Makes enough for 2 single-crust pies or 1 double-crust pie, 8 to 9 inches in diameter
1¼ cups unbleached all-purpose flour, plus extra for rolling out the dough
½ cup whole wheat pastry flour
½ cup old-fashioned rolled oats (see sidebar, page 307)
1 tablespoon sugar
¼ teaspoon salt
12 tablespoons (1½ sticks) cold unsalted butter, cut into
½-inch pieces
2 tablespoons ice water, or more as needed
LIVING GREEN
Most natural foods stores have self-serve bulk bins of dozens of foods, including beans, grains, cereals, nuts, seeds, and spices. Buying in bulk (especially if you bring your own reused plastic bag) cuts down on packaging and also avoids food waste. It allows you to buy only as much as you need, so you’re less likely to have extra food around that has passed its expiration date. I like to save my spice bottles when they’re empty, and then buy the spices in bulk to refill the jars. Buying in bulk not only saves natural resources, it saves money, too, because packaging adds a significant cost to food products.
1. Place the white and whole wheat flours, rolled oats, sugar, and salt in a food processor and process until the mixture is combined and the oats have been pulverized to a flourlike meal. Add the butter and pulse until the mixture looks like coarse meal.
2. With the machine running, add the ice water and process just until the dough holds together loosely in a ball, 5 to 8 seconds. Do not allow the dough to form a solid mass or it will be overworked. Test the dough by pinching a small amount between your fingers. If the dough sticks together, it is ready. If the dough is not moist enough to form a cohesive mass, add an additional ½ tablespoon ice water, process briefly, and test again.
3. Turn the dough out onto a large piece of parchment paper and divide it in half. Form each half into a flat disk. Wrap a piece of parchment paper around each piece of dough to cover it, and refrigerate until chilled, 20 to 30 minutes. (If you intend to chill the dough overnight or freeze it, wrap the pieces tightly in plastic wrap. The wrapped dough can be frozen for up to 3 months. Let the frozen dough thaw overnight in the refrigerator before rolling out.)
4. Remove the dough from the refrigerator (for a single-crust pie you’ll need one disk of dough; for a double-crust pie you’ll need both disks), and open the parchment paper to a flat rectangle. If it was refrigerated for more than an hour, let it sit at room temperature for 10 to 20 minutes to soften slightly. (If the dough is too cold or firm, it will crack when you try to roll it out.) Lightly dust a work surface and rolling pin with all-purpose flour. Roll the dough into a round about ⅛ inch thick and 2 inches larger than your pie plate.
5. Fold the dough in half or drape it over the rolling pin and transfer it to the pie plate. Press the dough firmly into the pie plate and brush off any excess flour with a pastry brush. If there are holes or cracks, press the dough back together or patch them with small bits of the overhanging dough.
6. For a single-crust pie, trim the dough with a pair of kitchen scissors, leaving a 3/4-inch overhang. Fold the edge under to form a double layer, and crimp or flute it.
For a double-crust pie, fit the dough for the bottom crust into the pie plate and trim the dough even with the rim. Roll out the second disk of dough. Place the filling in the bottom crust and place the dough for the second crust on top. Trim the top crust with scissors, leaving a ½-inch overhang. Fold the top crust under the edge of the bottom crust, and crimp or flute to seal.
7. Cut three slits in the center of the top crust with a sharp knife to allow steam to vent as the pie bakes.
BUCKWHEAT CREPES ARE STURDIER than ones made with white flour, and thus better suited to an array of hearty fillings such as eggs, mushrooms, creamed spinach, or ham and cheese. We think they taste delicious and work perfectly with sweet fillings as well; see the recipe for Banana–Chocolate Chip Crêpes on page 340.
The key to the perfect crêpe lies in technique. Once the batter hits the hot pan, you must quickly tilt and swirl the pan so the batter spreads into a thin round. The old adage “practice makes perfect” is especially true for the art of crêpe making. The proper pan is also important. French steel crêpe pans, with shallow sloping sides, are available at good cookware stores, but I think that a cast-iron skillet is the best choice because it retains the heat exceptionally well. Crêpes can be made a day or two ahead of serving. Simply stack them neatly on a piece of parchment paper as you make them, and when they are cool, wrap the stack tightly in plastic wrap and refrigerate. Makes about fifteen 10-inch crêpes
⅔ cup buckwheat flour (see sidebars, this page and page 430)
⅓ cup unbleached all-purpose flour
¼ teaspoon salt
2 cups low-fat (2%) milk, or more if needed
2 large eggs About
¼ cup (½ stick) unsalted butter
1. Place both flours and the salt in a medium-size bowl and whisk to combine. Add 1½ cups of the milk and whisk to combine. Add the eggs and whisk until the batter is smooth. (You can also make the batter in a blender or with an immersion blender if you prefer.) Transfer the batter to a large measuring cup with a spout or to a pitcher. The batter can be used immediately, or you can cover it with plastic wrap and refrigerate it overnight.
2. Before cooking the crêpes, add ¼ to ½ cup of the remaining milk to the batter, depending on how thick it has become while resting, and whisk to combine. The batter should resemble fairly thin pancake batter and should be whisked before making each crêpe.
3. Melt the butter in a small saucepan and keep it warm.
4. Place a 12-inch skillet, preferably cast-iron, over medium heat, and when the skillet is hot, brush it with some of the melted butter. Pour or ladle a scant ¼ cup of the batter into the center of the skillet, lift the skillet off the heat, and tilt and swirl the skillet so that the batter spreads thinly in a widening circle across the bottom. Don’t worry if the crêpe is not a perfect round. If there are some small holes in the crêpe, simply dot some of the crêpe batter on the holes and they will fill in quickly. Return the skillet to the heat and cook until tiny bubbles begin to appear in the crêpe batter; depending on how hot the pan is, the crêpe will be ready to flip in 15 to 30 seconds. Using a spatula, lift up one corner of the crêpe to check if the cooked surface is golden around the edges. If it is, flip the crêpe over, using the spatula.
5. Cook the crêpe on the second side until it is lightly golden, 15 to 30 seconds. Then transfer the crêpe to a parchment-lined plate, cover it loosely with a towel, and repeat with the remaining batter, stacking the crêpes as you go. Make sure to brush the crêpe pan with butter before cooking each crêpe. The batter will thicken as it rests, so thin it with a tablespoon or two of milk as needed, and whisk it before making each crêpe. For thin, lacy crêpes you need a fairly thin batter.
A WORD OF WARNING: THESE NUTS ARE ADDICTIVE. Lightly coated with a mixture of pure maple syrup, oregano, and thyme, with a subtle kick of cayenne, they make an irresistible cocktail nibble. We suggest these nuts as a crunchy topping for our Curried Garnet Yam Soup (page 21) and like them with salads, too, such as Chopped Autumn Salad (page 62) or Escarole with Walnuts, Dates, and Bacon (page 59). They make a delicious, nutritious snack and a perfect hostess gift. The nuts will keep, tightly covered, at room temperature for up to 3 weeks. Makes 6 cups
½ cup pure maple syrup
3 tablespoons olive oil
1 teaspoon salt
1 teaspoon cayenne pepper
1½ teaspoons dried oregano
1½ teaspoons dried thyme
1½ cups whole almonds (skin on)
1½ cups walnut halves and pieces
1½ cups blanched hazelnuts
1½ cups pecan halves
1. Position a rack in the middle of the oven, and preheat the oven to 300°F. Line a rimmed baking sheet with parchment paper or aluminum foil, preferably recycled.
2. Combine the maple syrup, olive oil, salt, cayenne, oregano, and thyme in a medium-size bowl and whisk to blend. Add all the nuts and stir to thoroughly coat.
3. Pour the nut mixture onto the prepared baking sheet, and spread the nuts into a single layer. Bake, stirring several times, until the nuts are fragrant and lightly browned, 35 to 45 minutes. Cool completely before storing at room temperature in an airtight container for up to 3 weeks.

GARAM MASALA IS A BLEND OF GROUND DRY-ROASTED SPICES that is traditionally used in regional Indian cuisine. There may be as many recipes for this spice blend as there are cooks in India. Although you can buy it prepared, it’s fun and easy to make your own, and it will usually be fresher than anything you find in the market. Try it in the Curried Garnet Yam Soup (page 21). Don’t be tempted to skip the dry-roasting step, as this is what contributes the depth of flavor to the spices. The spices can be ground in a mortar with a pestle, if you don’t have a spice (coffee) grinder. Makes about ½ cup
1 cinnamon stick (3 inches), broken into 3 pieces
1 teaspoon whole black peppercorns
1 tablespoon cumin seeds
1 teaspoon fennel seeds
1 tablespoon coriander seeds
1 teaspoon black mustard seeds
1 teaspoon ground fenugreek
1 teaspoon ground allspice
1 tablespoon chili powder
1 tablespoon ground turmeric 1½ tablespoons ground ginger
1. Combine the cinnamon stick, the peppercorns, and the cumin, fennel, coriander, and mustard seeds in a small skillet and toast over medium heat until the mixture is hot to the touch and fragrant, 4 to 8 minutes. Do not allow the pan to smoke. Remove the pan from the heat and let cool completely.
2. Transfer the toasted spices to a spice grinder and grind to a fine powder. Transfer the mixture to a small bowl and add the ground fenugreek, allspice, chili powder, turmeric, and ginger, whisking to blend.
3. Store the Garam Masala in an airtight bottle for up to 6 months, keeping it away from heat and light.