Many of the ideas in this section can be applied when the problem is a stain as well.
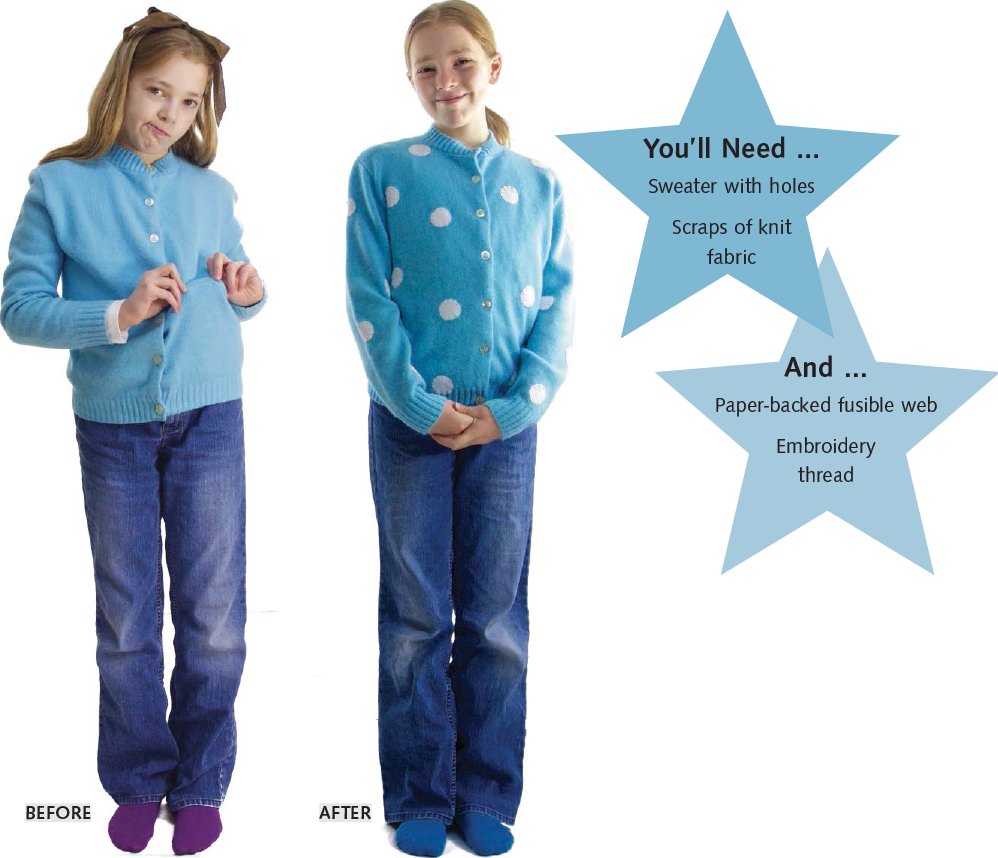
Polka-Dot Sweater Patches
Snags and holes turn up in the weirdest places sometimes. While it might look strange to put one patch on to cover a hole, hiding it with lots of polka-dot patches looks fun and cute!
1. Use the iron-on appliqué technique (page 14) to create 20–30 circle appliqués. A

2. Place a dot over each hole and iron the patches on according to the fusible web manufacturer’s instructions. Place the other dots all around the sweater and iron on. B

3. If desired, hand stitch around the dots with matching embroidery thread. C

TIP Try different-colored polka dots, or stitch around the dots with a fun contrasting thread color for a whimsical look.

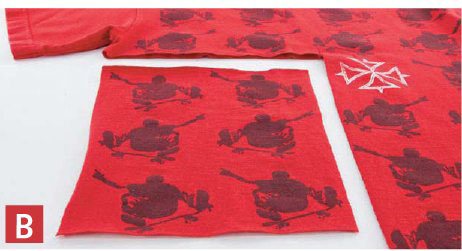
T-Shirt Transplant
I love how easy this project is! Sewing part of one T-shirt onto another not only covers any stains but is also a great way to recycle a favorite T-shirt that has gotten too small.
1. Measure the length and width of the area on the shirtfront that you want to cover. A

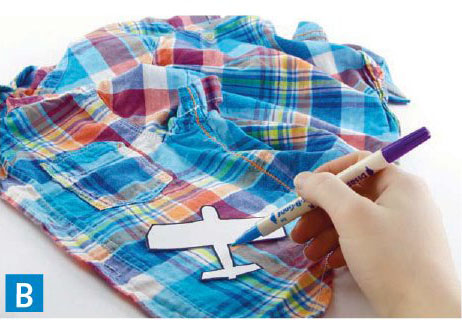
2. Search the “too-small” bin for a T-shirt with a fun design or grab an old adult-sized T-shirt. Mark cutting lines with a fabric-marking pen and a ruler, based on your measurements from Step 1. Cut out the design. B
3. Pin the cut-out design to the front of the stained shirt. C

4. Sew all the way around the design, close to the edge of your “transplant.” Use 2 rows of stitching for a decorative effect. Be careful not to stitch the back of the T-shirt! D


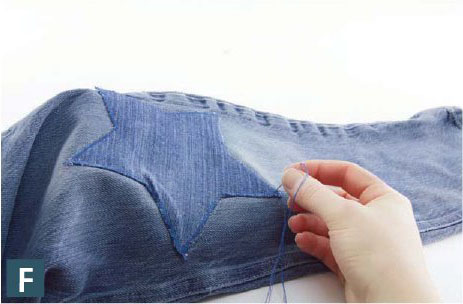
Knee-Hole Patches
The number one issue that parents face with kids’ clothing has got to be the classic hole in the knee. Cover a hole with a fun patch or add patches to a new pair of pants to prevent future holes.
1. Measure the hole you are going to cover. A

2. Trace an oval, or the star or heart pattern (For all printable patterns or digital content, click here.), onto paper or template plastic, enlarging the design if necessary to cover the hole well. Cut out the template and set it aside. B

3. Cut a piece of denim about 1˝ larger than the pattern all around. Cut a piece of fusible web a little smaller than the denim. With the fusible side down and the paper on top, iron the fusible web to the wrong side of the denim. Remove the paper backing. C

TIP To protect your iron, use a piece of freezer paper (shiny side down) or silicone release paper between your iron and the paper-backed web.
4. Trace the template onto the right side of the fused denim using a fabric-marking pen. D

5. Following the traced pattern lines, serge or sew around the edges with a satin stitch (or zigzag stitch with a short stitch length). Trim around the shape close to the stitching. E

6. Place a piece of freezer paper inside the pant leg behind the hole, shiny side up (to keep from fusing the patch to the back of the pants!). Iron the patch to the right side of the pant leg, covering the hole, and then hand stitch it on along the edges. F
TIP
■Use colored denim patches for a little pop of whimsy.
■Cut an extra patch in a fun corduroy print and fuse it on top of the denim patch after Step 5.
■Try using knit fabric to add patches to girls’ leggings for a cute look!
ANOTHER FIX-IT OPTION
■Pants to Cut-Offs—Three Ways (page 41)

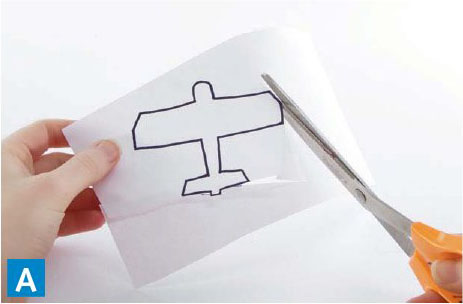
Reverse Appliqué
Reverse appliqué is just what it sounds like: appliqué in reverse! Add fabric to the wrong side of the shirt to turn rips and holes into something decorative.
1. Choose a pattern (For all printable patterns or digital content, click here.) and enlarge or reduce it to the desired size. Trace the design onto paper or template plastic and cut it out. A
2. Trace the template design onto the right side of the shirt, making sure to completely cover the hole or tear. B
3. Pin a large square of knit fabric to the wrong side of the shirtfront behind the template design. Make sure the knit fabric covers at least 1˝ beyond all the edges of the template design. C

4. With the right side of the shirt facing up, sew along the marked lines with a satin or zigzag stitch. D

5. Carefully snip away the shirt fabric close to the stitches, revealing the knit fabric underneath. Be careful not to cut the knit fabric appliqué! E

6. Turn the shirt over and trim any excess knit, leaving ½˝ around the stitches. F

OTHER FIX-IT OPTIONS
■T-Shirt Transplant (page 92)
■Faux Plaid Shirt (page 88)—try using just a few “stripes”

Bib-Front Shirt
There were some times in my daughter’s life when I wished she could wear a bib all day, every day, to keep from staining the necklines of her shirts. When the stains won’t come out, try replacing the area and turning it into a cute layered-look shirt!
1. Use a fabric-marking pen to trace an oval shape on the front of the damaged shirt and a slightly shorter oval shape on the back. It may help to trace around a platter or other oval-shaped item. The oval should be about ½˝ smaller than you want the new shirtfront to be. A

2. Carefully cut along the traced lines. B

3. Tuck the collared shirt into the stained shirt. Match and pin together at the shoulder seams. Trace the neckline. Cut ½˝ outside the line for the new neckline on the front and back of the collared shirt. C

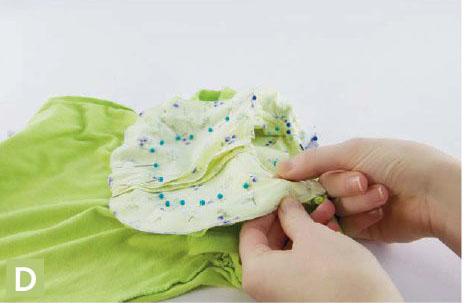
4. Turn the stained shirt and the collared shirt piece inside out and pin the raw edges together with right sides facing. D
5. Sew all the way around the neckline, being careful not to sew the body of the shirt into the bib seam. E

6. Turn right side out and press the seam toward the bib. F

TIP Sew lace or other trim to the edge for extra cuteness. For Kayla’s shirt, I used the ruffled trim that was on the bottom of the collared shirt.