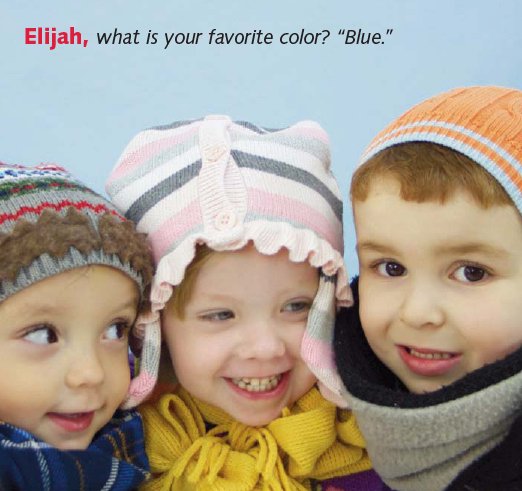
IF ALL ELSE FAILS—ACCESSORIZE!
Has your child ever had a garment that was so far gone you didn’t even want to donate it? Surely there isn’t any hope for those worn-out, faded pajama pants. Or is there? One of the great things about clothing is that even when it seems to be useless for wear, the fabric can still be used—even if it’s only a scrap to make a hair clip.
T-Shirt Headband
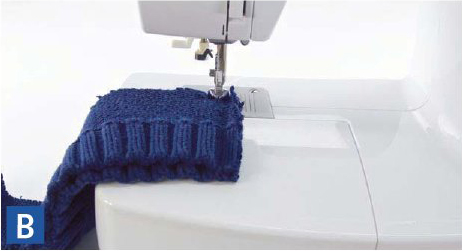
A great way to use T-shirts or tights that have seen better days is by braiding strips into a sweet headband. Let your girls choose wide strips for a bigger braid or narrow strips for a subtler look.
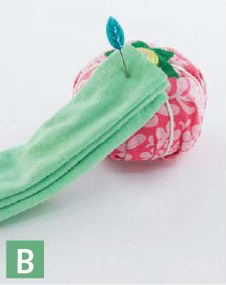
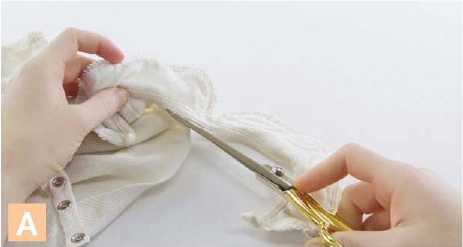
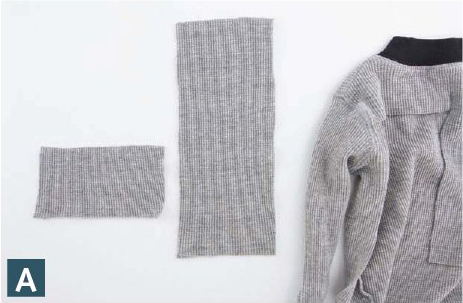
1. Cut 3 long strips, each 2˝–4˝ wide, from the front or back of the T-shirt. A

2. Stretch each strip so that the edges roll in slightly. Pin an end of each strip onto a pincushion. B
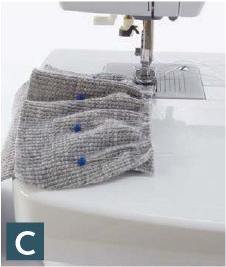
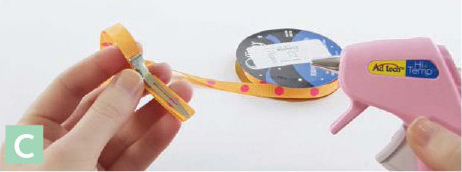
3. Braid the strips all the way down. Trim so that the braid fits snugly around your child’s head, with a 3˝ gap between the ends. Pin each end to secure it. C

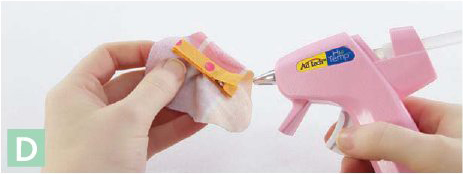
4. Sew an end of the braid to a 3˝–4˝ piece of elastic. Pin the other end to the elastic and check the fit. Sew. D

5. Wrap a small scrap of knit around the elastic at each end where it joins the braid. Sew on. E

TIP Try with different colors of knit scraps or rows of multiple smaller braids for a different look.
OTHER FIX-IT OPTIONS
■Poppy Hair Clips (page 146)
■Poppies on the Poppy-Scattered Shirt (page 85)
■Butterflies on the Butterfly Cutout Shirt (page 83)
■Sweater Belt (page 132)
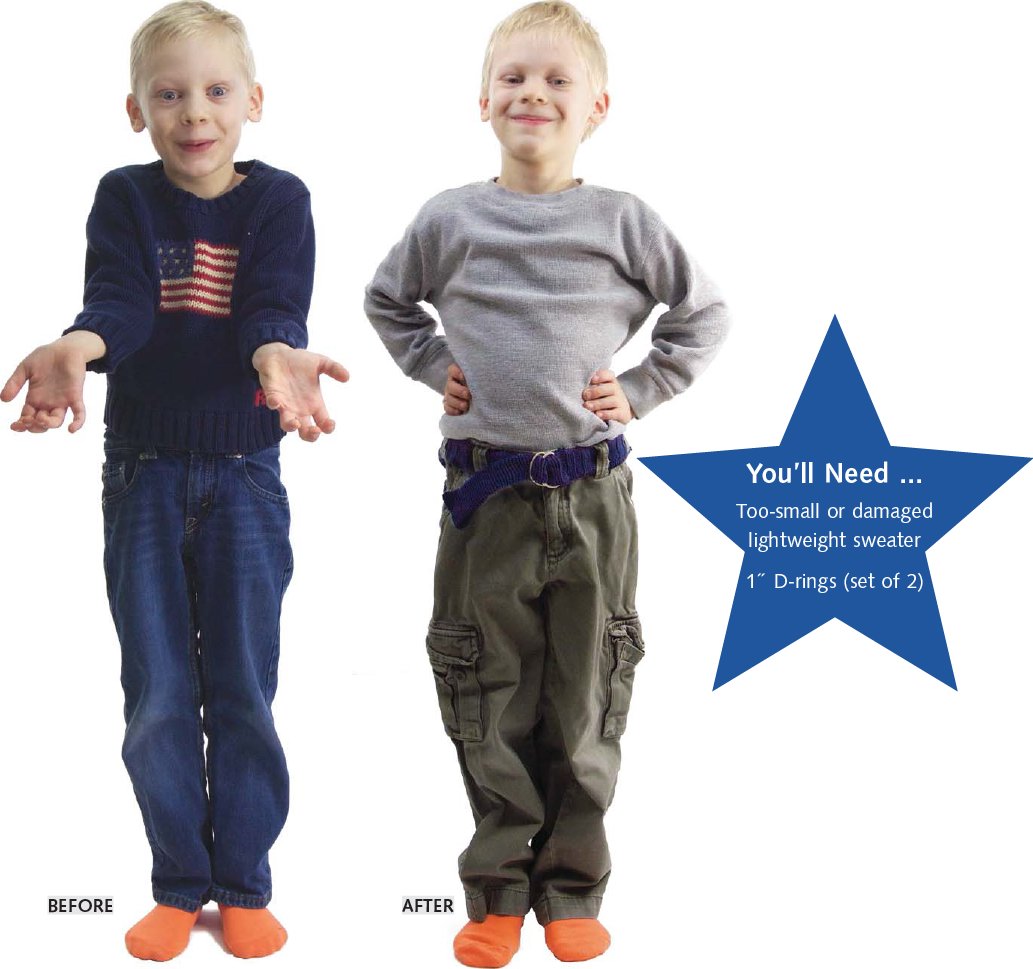
Sweater Belt
A sweater that is too small or worn out can find new purpose as a great-looking girl’s or boy’s belt.
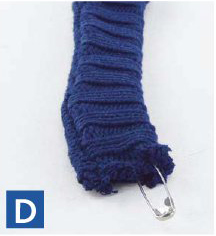
1. Cut a piece from the bottom or middle of the sweater that is about 4˝ wide, and snip a side open to form a strip. Cut pieces from the sleeves in the same way if additional belt length is needed. A

2. If you are working with a very small sweater, it may be necessary to cut multiple strips. Then sew them end-to-end, with right sides facing, to make a single long strip. B
3. Fold the strip in half lengthwise with right sides facing, and serge or sew with a zigzag stitch. Let the strip stretch naturally as you sew. C

4. Turn right side out using the safety pin technique in Turning a Fabric Tube (page 16). Then turn the ends under and sew closed. D
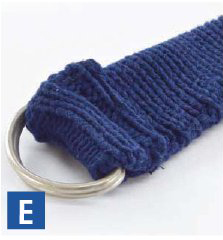
5. Loop an end through both D-rings and fold back over the straight edge of the rings. Sew in place. E
TIP Other pieces of clothing will work for this belt, too—T-shirts, old dresses, even colored jeans!
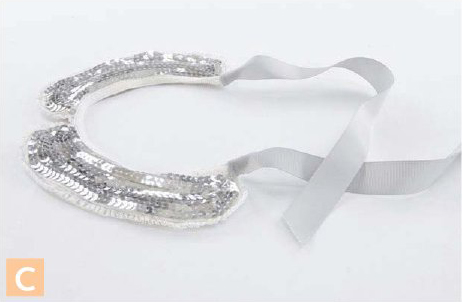
Sequined Collar
There is nothing sweeter than a Peter Pan collar. Add sequins or lace trim to the collar of an outgrown shirt for a precious accessory that can be worn with almost any outfit.
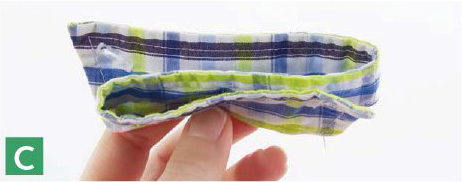
1. Cut the collar off as close to the seam as possible. Serge or zigzag stitch the raw edge, or enclose it in bias tape. A
2. Stitch or hot glue sequins, lace, or other decorative trim to the right side of the collar. Start at the outside edge and move inward. Turn under the ends of the trim. B

3. Cut 2 pieces of satin ribbon 10˝ each and hem both ends of each piece. Sew a ribbon to the back of each end of the collar. C
ANOTHER FIX-IT OPTION
■Bib-Front Shirt (page 100)

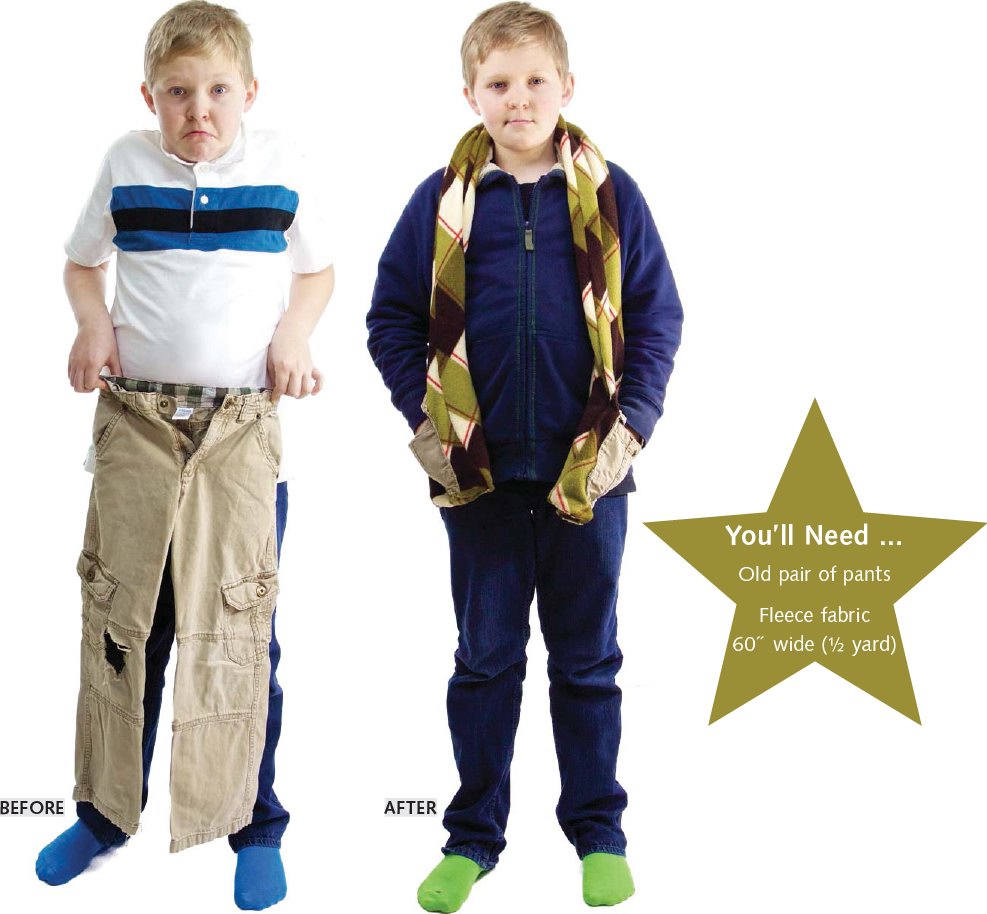
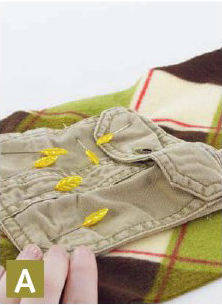
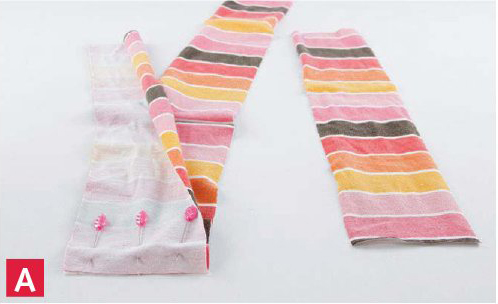
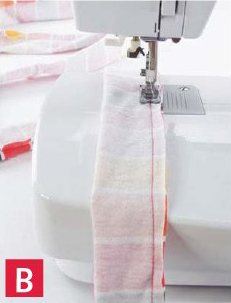
Scarf with Pockets
Remove the pockets from unusable pants and sew them to a fleece scarf for a unique accessory that keeps him (or her!) toasty warm.
1. Cut 2 strips of fleece 8˝ wide, across the full width of the fabric.
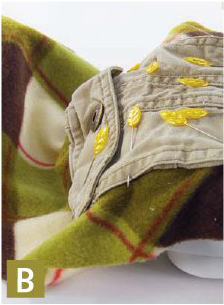
2. Cut the pockets off the pants, leaving 1˝ around the sides and bottom. Pin a pocket on each end of a fleece strip. Position the pockets at a comfortable height for your child. A
3. Sew the pockets to the scarf piece with the raw edges tucked neatly underneath. B
4. Lay the other strip of fleece on top of the first piece with right sides facing. Pin the sides, leaving the ends open. C

5. Sew along the pinned edges and turn right side out. D

6. Turn the edges of each end to the inside of the scarf and sew closed. E

OTHER FIX-IT OPTIONS
■Pockets for Pants to Cargo Shorts (page 33)
■Legs for Shorts to Pants (page 122)
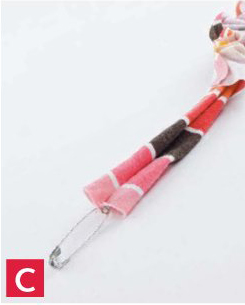
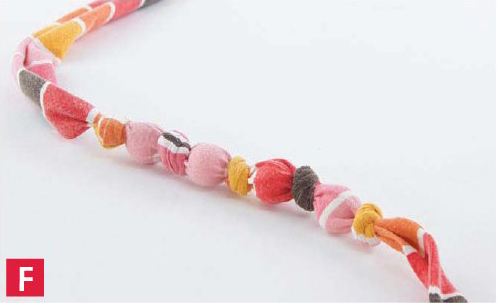
Covered Bead Necklace
Her favorite dress that she wants to wear every day has been through the wringer. When it’s too small (and covered in stains), try turning it into this super-cute necklace that she can wear as long as she wants! She’ll love helping with the process, too.
1. Cut several 3½˝-wide strips and sew the ends together to make a strip 70˝ long. A
2. Fold the strip in half lengthwise and sew a seam on the long side. B
3. Turn right side out using the safety pin technique (see Turning a Fabric Tube, page 16). C
4. Tie a knot in the fabric 12˝ from the end. D

5. Put in a bead and slide it to the bottom, next to the knot. Tie another knot right next to the bead. E
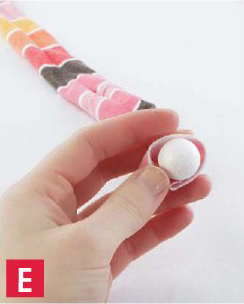
6. Repeat Step 5 until you have about 13 beads. Trim the fabric to leave 12˝ after the last knot. Turn the ends to the inside of the tube and sew closed. F
TIP Stitch on a flower embellishment using the poppy flower pattern (For all printable patterns or digital content, click here.) or the circle flower from the No-Sew Flower Sash (page 154).
OTHER FIX-IT OPTIONS
■Easy-On Infinity Scarf (page 150)
■As-Long-as-You-Like Skirt (page 56)
■Overall Overhaul (page 53)
Retro Tie
Vintage-style ties look adorable on boys or girls. Make your own using shirt sleeves or even a pair of waffle-knit pajama pants.
1. Cut a 5˝ × 10˝ rectangle and a 3˝ × 7˝ rectangle from the sleeves of an old garment. (These dimensions are good for a medium-sized tie.) Cut 11˝ of elastic. A
2. Gather a long side of the 7˝ rectangle using the ruffling technique (see Sewing a Ruffle, page 11) until it is 5˝ wide. Pin to the 5˝ side of the 5˝ × 10˝ rectangle with right sides facing. B

3. Sew together. C
4. Fold the tie in half lengthwise and sew all the way down the side. D
5. Turn it right side out and iron flat with the seam centered on the back. E

6. Turn the top and bottom edges under and sew closed using the slip-stitch technique (page 13). Sew the ends of the elastic together and stitch to the back of the tie. F


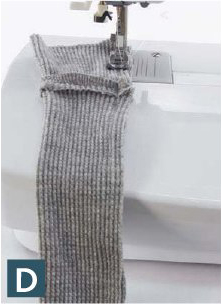
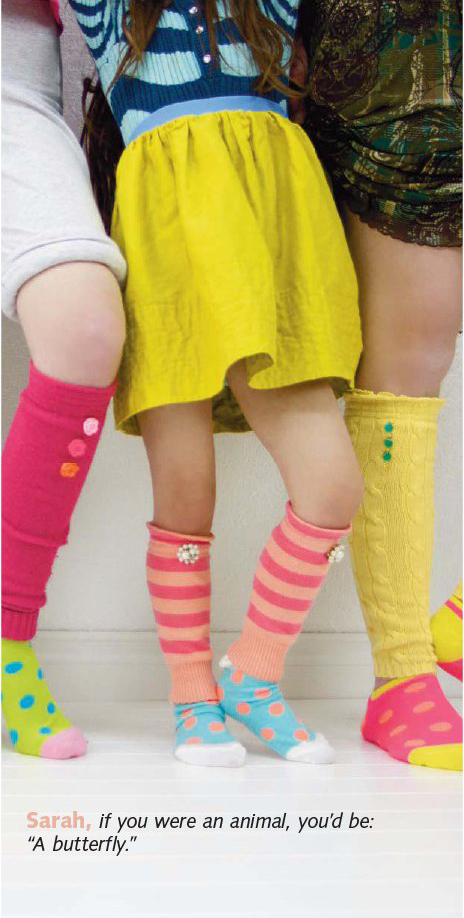
Arm or Leg Warmers
Every year my daughter and I make a new pair of leg warmers from the sleeves of last year’s cuddly sweater. They’re quick and fun, and I can’t get enough of her cute little legs in them!
1. Cut the sleeves off the sweater just below the underarms. A

2. Turn the top edges under and sew a row using the shirring technique (page 16). B

3. Shirr 3 or 4 more rows. C
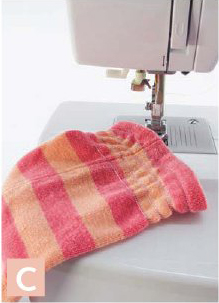
4. Stitch on buttons or get creative with flowers or other embellishments! D
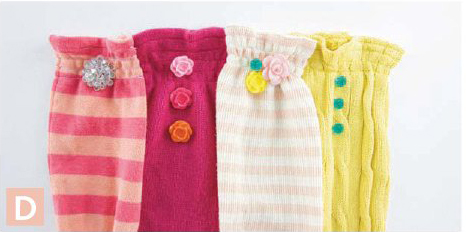
TIP Have her wear them peeking out from a pair of boots, or even on her arms.
OTHER FIX-IT OPTIONS
■Sweater Beanie (page 152)
■Sweater Belt (page 132)
■Retro Tie (page 140)— (if the sweater is lightweight)
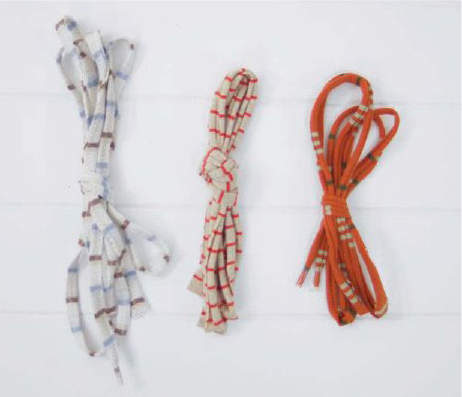
T-Shirt Shoelaces
Cut a trash-worthy tee into strips to make awesome shoelaces. Your kids will love having their own homemade laces, and you’ll love getting use out of something you would have thrown away.
1. Cut several long 1½˝-wide strips from the pajamas. Cut the strips as long as possible. A

2. Sew the ends of the strips together to make 2 strips that are at least 30˝ long. B

3. Gently stretch each strip lengthwise. If the edges of the strips curl, continue to Step 5. C

4. If the strips don’t curl on the edges, fold each strip in half lengthwise with wrong sides facing and serge or zigzag the full length. D

5. Wrap ½˝ sections of clear packing tape tightly around each end several times. E

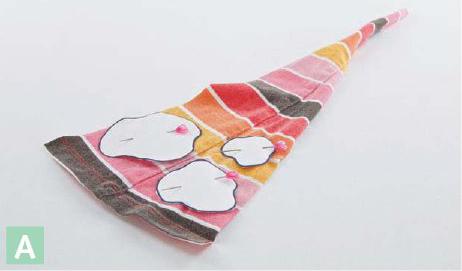
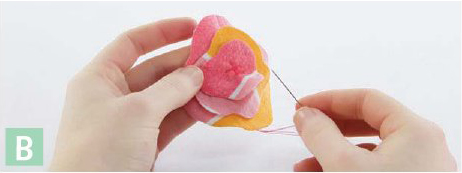
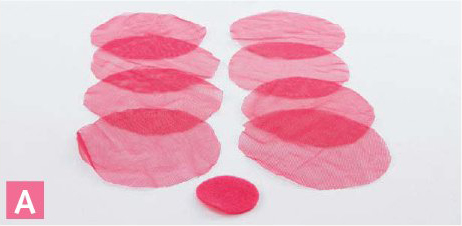
Poppy Hair Clips
These hair clips are proof that even the tiniest scraps of clothing can be useful. You can also put the poppies on pins, on headbands, or even on the side of a purse or pillow.
1. Trace large, medium, and small poppy patterns (For all printable patterns or digital content, click here.) onto paper or template plastic. Trace the template designs onto the fabric with a fabric-marking pen. You’ll need a piece of each size for the flower. A
2. Lay the petals on top of each other, with the smallest petal on top, and stitch together with an X in the middle. B
3. Use a hot glue gun to glue the ribbon to an alligator clip or barrette. C
4. Glue the poppy flower to the top of the clip. D
OTHER FIX-IT OPTIONS
Use scraps for:
■Butterfly Cutout Shirt (page 83)
■No-Sew Flower Sash (page 154)
■Polka-Dot Sweater Patches (page 90)
TIPS
■Try stitching a bead or button to the center of the flower.
■Use the circle flower technique from the No-Sew Flower Sash (page 154) to add a different flower.
■Glue multiple poppies to a plastic headband.

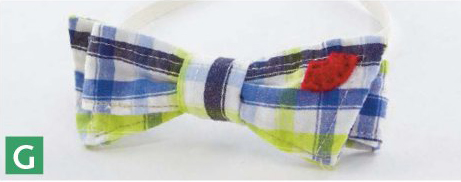
Bow Tie
Before throwing away a ragged old button-up, snip off the collar and whip it into a darling little gentleman’s bow tie!
1. Cut the collar off the shirt, cutting as close to the seam as possible. A

2. Turn the raw edges under and sew the opening closed. B

3. Fold the collar in a Z shape, with the 2 bottom layers sticking out slightly more than the top layer, and pin in place. C
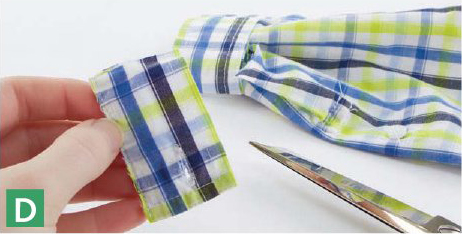
4. Cut a 1½˝ × 3˝ rectangle from the sleeve cuff. Turn the raw edges under and sew closed. D
5. Fold the small cuff piece in half lengthwise and wrap it snugly around the tie to make a loop. Hand stitch or glue on. E
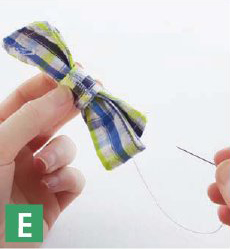
6. Cut an 11˝ piece of elastic. Slip the elastic through the back of the tie loop and stitch the ends together. F

7. If the shirt collar has buttonholes, cover the buttonhole in front with a little felt heart or “kiss.” G

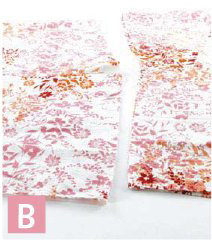
Easy-On Infinity Scarf
When my daughter was young, she could never keep a scarf on. With a hook-and-loop tape closure on the back, this dress-turned-scarf stays on and stays cute.
1. Remove the waistband or bodice and cut up the back of the skirt piece from the waist to the hem to make a large rectangle. A

2. Cut the rectangle in half lengthwise to make 2 rectangles, and hem the long sides. B
3. Lay the 2 pieces in an X shape. C
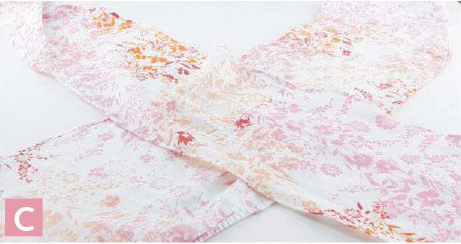
4. Bring both ends of a scarf piece together with the edges flush. Fold both edges over together and hem (double-check the length before hemming). Repeat for the other scarf piece. You’ll have 2 interlocking circles of fabric. D
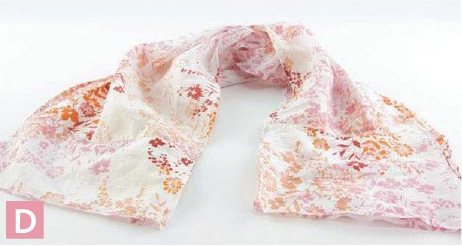
5. Fold each end into thirds lengthwise and pin. Sew the ends along the pinned edge. E F


6. Sew a few inches of hook-and-loop tape to each end of the scarf. G

TIP This project works best with lightweight fabrics such as cotton, silk blends, or lightweight flannel.

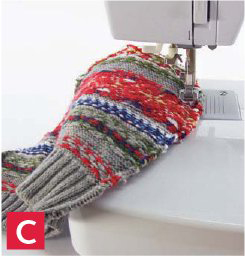
Sweater Beanie
Some see a too-small sweater, but we see a too-cute hat! Use felt or fleece to add crazy eyebrows or anything else you can think up.
1. Measure around your child’s head. At the bottom edge of the sweater, measure a distance equal to half your child’s head circumference, plus 1˝. With the measured edge as a base, cut a dome shape through both layers of the sweater. The height of the dome should be about the same as the length of the base. A

2. Pin the 2 pieces together with right sides facing, leaving the bottom edge open. B

3. Serge or zigzag around the pinned edges to make a ½˝ seam. Turn right side out. C
For Eyebrow Variation: Cut 2 rectangles of felt (approximately 1˝ × 2½˝) and snip out tiny triangles around all the sides. Sew the rectangles to the front of the hat, about 1˝ from the bottom. D

For Earflap Variation: Cut 2 smaller dome shapes for each earflap, allowing ½˝ all around for seams. Follow Steps 2 and 3 to complete the flaps. Pin and sew to the inside of the bottom of the hat on each side. E

No-Sew Flower Sash
This precious flower sash is my favorite way to use small scraps. It’s easy to customize: one flower or many, centered or off-center, one fabric or several different fabrics.
1. Cut 1 felt circle 1½˝ in diameter and 8 fabric circles 3˝ in diameter. A
2. Fold 4 fabric circles in half and then in half again. Snip off the corners. B
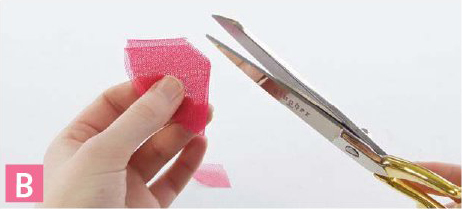
TIP If your fabric frays easily, add a bit of antifray product to the edges of each circle before folding.
3. Hot glue the 4 flower petals to the edges of the felt circle. C

4. Repeat Step 2 for the other 4 circles and then glue them to the center of the felt circle. D
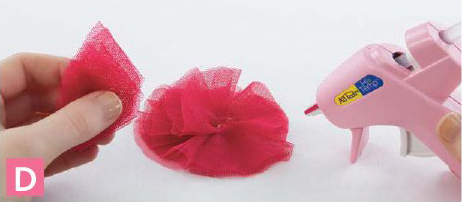
5. Repeat Steps 1–4 for each flower. E
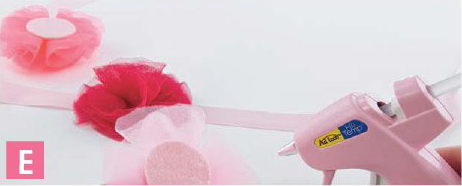
6. Cut a piece of ribbon long enough to tie as a belt, and trim each end at a 45° angle. Hot glue flowers to the center front. F
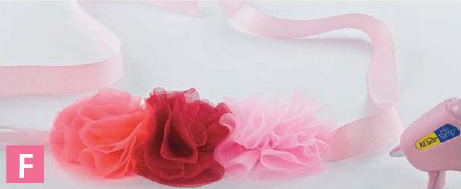
TIP Make a sparkly version by using stretchy sequin trim with two snap closures sewn to the ends.