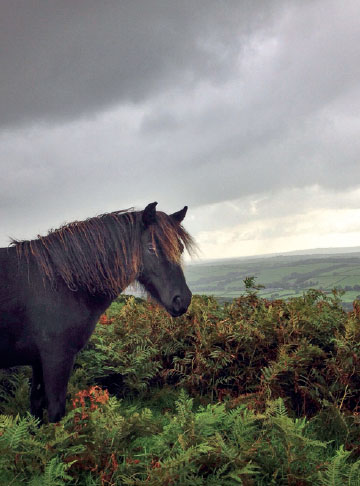
IN THIS CHAPTER YOU WILL DISCOVER WHAT MAKES A PICTURE APPEALING AND LEARN SIMPLE METHODS TO ACHIEVE VISUAL HARMONY IN YOUR PHOTOGRAPHS. FOCUS IS THE SINGLE MOST IMPORTANT THING THAT WILL MAKE OR BREAK YOUR PICTURES, SO READ ON TO LEARN HOW TO FOCUS PERFECTLY EVERY TIME.
CHAPTER 1 LESSON 1
COMPOSITION
COMPOSING YOUR PHOTOGRAPH EFFECTIVELY MAKES THE DIFFERENCE BETWEEN A HASTY SNAP AND A PHOTO YOU WILL BE PROUD OF. IF YOU CAN PERFECT THE ART OF ARRANGING ALL THE ELEMENTS, YOU WILL END UP WITH A PLEASING, WELL-BALANCED RESULT THAT WILL ELEVATE YOUR PICTURES TO A NEW LEVEL.

Think about the relationship between objects in the foreground and background. How does your subject relate to what is around them? Have they got a lamppost sprouting out of the top of their head? Is there a flowering bush growing out of their ear? Try to arrange the compositional elements in such a way that they don’t overlap or overwhelm each other. Let each one speak for itself. Keep it clean and uncluttered.
COMPOSING WITH COLOR
Colors can be compositional elements in a big way. A splash of color from a small yellow umbrella will speak across the composition to a yellow cab elsewhere; the colors will create a dynamic all their own.
Remember that according to art theory, blue colors tend to recede in the frame and warm colors will come forward. Use this knowledge to help you compose with color.
CHAPTER 1 LESSON 2
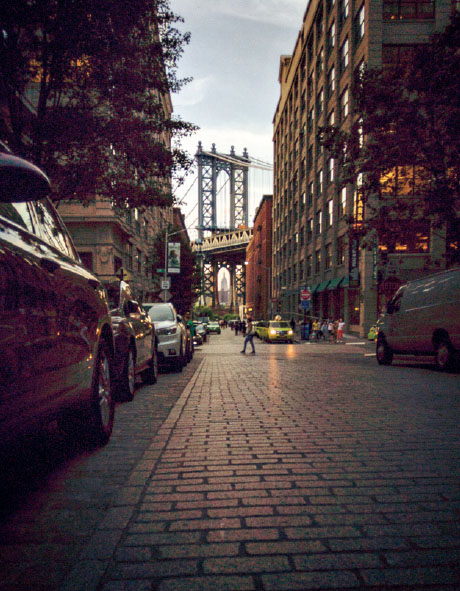
LET’S LOOK AT WHAT MAKES A GOOD PHOTOGRAPH. THERE ARE RULES FOR COMPOSITION AND BALANCE TO MAKE YOUR IMAGES VISUALLY APPEALING—USE THEM AS TOOLS, NOT RULES.
The rule of thirds is the best-known principle of composition in photography. This simple technique is considered by many to be the basis for making well-balanced, attractive photographs. The rule of thirds is a simplified version of an ancient principle known as the golden ratio. The golden ratio (approximately 1:1.6) was arguably used by artists such as Leonardo da Vinci—his masterpiece The Last Supper includes a number of objects whose length and width appear to be in the golden ratio. If it was good enough for him, it’s good enough for us. Let’s look at how you can apply this simple idea to your pictures.
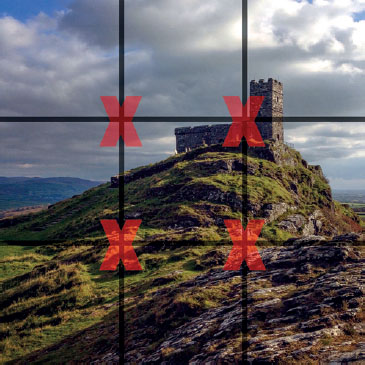
Imagine the photo you are taking is broken down into thirds horizontally and vertically. This means that the image has nine sections, broken up into three sections across and three sections down. There are four places where the lines of the grid cross (marked with a red X in the illustration opposite). These intersections are the ideal places to position your subject or point of interest. The four lines are useful guides for positioning the other elements of the picture. Various studies into this ancient concept have shown that when people look at a picture, their eyes do not look at the center first, but they are naturally drawn to one of the intersection points.
I have applied the grid to one of my photographs featuring a church on a hill; the church is situated along the vertical line on the right-hand side and sits squarely where the horizontal and vertical lines intersect.
MAKING INFORMED DECISIONS
Rules are made to be broken. Learn the rule, but be prepared to ignore it sometimes. You may find that you naturally place your subjects according to the rule of thirds without even thinking about it—or it may turn out that your subject suits a different composition altogether.
All that matters is that you understand the ideas of composition so that you can make informed decisions about when and where to apply them in your own work.
I use a grid overlay in my screen to help me frame a shot according to the rule of thirds. The grid will not only help you with composition, but it will also banish those wonky horizons and leaning buildings for good!
All smartphone cameras have a grid function; it can either be found within your camera’s settings or within the general settings.
For an iPhone, go to the main Settings menu for your device. Scroll down to “Photos & Camera,” scroll down to the “Camera” heading, and swipe the “Grid” button to the right to turn it on.
On Android phones, open the camera up, and swipe to the left to reveal several options. Open up the “Settings” option, and under the “General” tab you will find the option to turn your grid on.
Keep the grid on from this point; it will subconsciously train your eye and brain to reach new heights of perceptiveness!

FOCAL RANGE EXPERIMENT: WHAT YOUR DEVICE CAN DO
THE BEST WAY TO GET YOUR HEAD AROUND DEPTH OF FIELD IS TO GET YOUR CAMERA OUT AND HAVE A PLAY.
Explore how your camera reacts to foreground, background, and middle-ground depth of field by setting up a quick little test for it and taking three photos.
▶ Set up an object like a glass of water (or whatever is at hand) on a table or stool in front of a window, then put a vase or similar object nearby on the windowsill.
▶ Set your camera up so that you can see both objects in the frame without them overlapping and so you can see some of the scene outside the window too. With any luck you will see the hard line of a rooftop or something in the far distance (background) to test your sharpness on.
▶ Stand in the same place for all three photos. You can set up a tripod if you like, but this isn’t necessary.
▶ First, take a photo by tapping on the screen so that you are focusing on the glass of water in the foreground.
▶ Then, without moving your camera, tap the screen to focus on the vase on the windowsill and take another photo. Finally, tap on the view outside the window to focus on the background and take a photo.
Now look at the three photos you took and see how the area of focus changes. All cameras vary, so the results will be similar but not identical from device to device; this shows you what yours is capable of.
Notice how shallow the focal range and depth of field are in the first image where the focus is on the glass of water and the middle and background is blurred.
In the second image, see how the focal plane extends when you focus on the middle ground. The foreground is probably not sharp now, but look at how much more of the frame is in focus in this photo.
In the third and final photo, you will notice that the focal range extends farther through the image, with everything in the middle to foreground looking sharp.
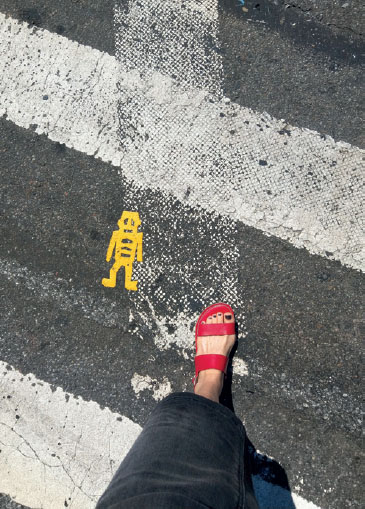
When you take a photo, the camera guesses what you want it to focus on. It often thinks that you want it to focus on whatever is right in the center of the frame, but if you have been paying attention to your composition you might have your subject aligned on the rule of thirds grid (see page 15). So, it is important to take control of the focusing away from the camera and own it yourself.
Just tap on the area of the screen that you want to focus on and hey presto! The focal point will change to that spot. That covers anything that is not moving in your photo. But quite often things are moving and this presents a different problem, but one with an easy solution. Instead of just tapping the screen to focus, tap and hold your focal point until the AE/AF indicator comes on. This will lock the focus. Now if the focal point moves, the camera is tracking it and will keep it in focus. Clever, huh?
Note that focus has a close relationship with exposure, so ideally the area that is correctly exposed should be the focal point of the image as well. Correct exposure is covered in the section on the exposure triangle beginning on page 30.
ZOOMING IN
Many smartphones can only zoom digitally, and you should avoid using this feature at all costs, because it decreases image quality. Unlike optical (lens-based) zoom, which you will find on DSLR cameras, the digital zoom on a smartphone’s computer is guessing at the extra pixels it will take to make your picture bigger or appear closer. The result will generally look degraded and fake. If zoom is a game changer for you, then you will be pleased to know that the newest generation of high-end devices have optical zoom features.
If you want to fill more of the frame with your subject, then either attach a telephoto lens, or get those feet moving and step closer. See the Kit List section on page 142 to read more about lens attachments.
CHAPTER 1 LESSON 4
THIS IS A VERY EASY CONCEPT TO GET YOUR HEAD AROUND. WHEN THINKING ABOUT PLACING YOUR SUBJECTS IN THE FRAME, YOU SHOULD CONSIDER USING DIAGONALS.
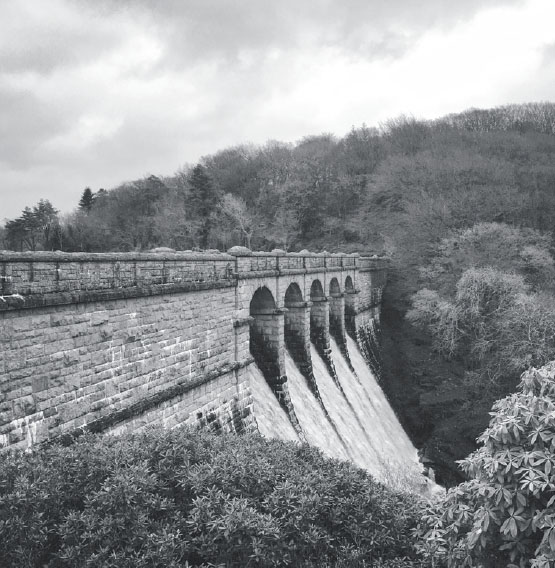
There are six main elements of design: line, shape, form, texture, pattern, and color. The strongest of these elements is line. Diagonal lines evoke impressions of movement, which is why they are considered to be dynamic. Diagonal lines will help to define the space and guide the eye to the visual aspects of the scene.
According to the diagonal rule, important elements of the picture should be placed along diagonal lines. Diagonal lines give an image depth by suggesting perspective, and they are a simple, yet effective, way to breathe life and energy into a composition.
CHAPTER 1 LESSON 5
LEADING LINES
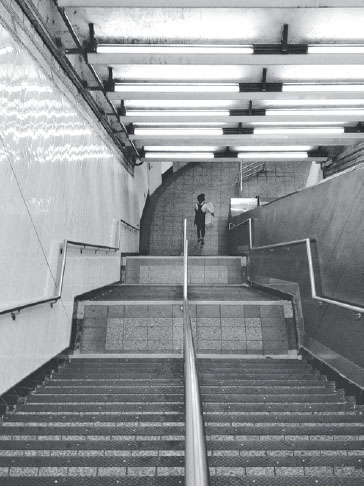
LEADING LINES DRAW YOU INTO THE SCENE, ACTING AS POINTERS TO WHAT YOU WANT THE VIEWER TO NOTICE. THEY PROVIDE COMPOSITIONAL STRUCTURE THAT LEADS THE EYE AROUND THE IMAGE, GIVING THE PHOTO DEPTH AND MAKING IT MORE DYNAMIC. LOOK FOR LINES THAT WILL LEAD INTO YOUR FRAME AND GUIDE THE EYE TOWARD THE SUBJECT. THEY MAY BE ON THE WALLS, IN THE SKY, OR ON THE FLOOR.
Once you have taken your first shots on pure instinct, stop and look for some leading lines and take another few shots. Try stepping to the left, leaning to the right, crouching down, sitting down, and lying down. Look at the lines each time you move and stop when you find the scene that has balance. This will train your creative brain to look for them next time without even thinking about it!
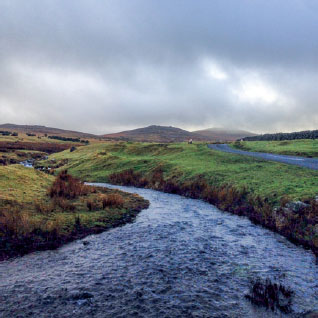
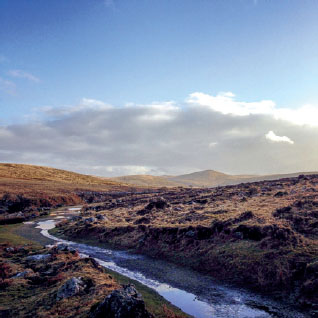
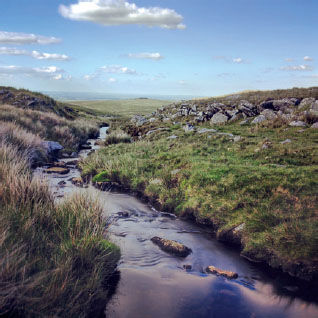
You will need to keep an eye out for those tricky horizontal and vertical lines, and make sure that they work with the framing of your image and not against it. A leading line that comes in from the bottom corner will work wonders for an otherwise static composition. When executed well, the leading line can act as foreground interest in its own right.

WORKING WITHOUT ZOOMING IN
ALTHOUGH A POWERFUL TOOL, ONE AREA WHERE MANY SMARTPHONE CAMERAS ARE FLAWED IS WITH THEIR INABILITY TO ZOOM OPTICALLY. THIS WEAKNESS CAN TURN INTO A STRENGTH WITH GOOD COMPOSITION.
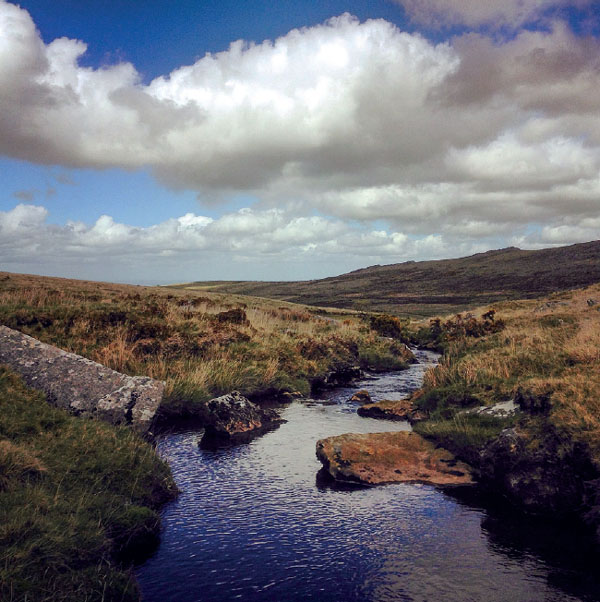
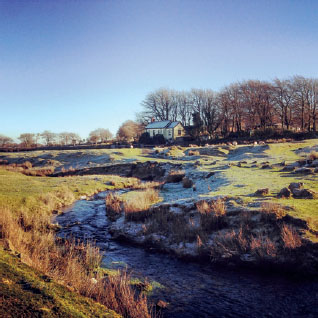
Working with your tiny smartphone camera lens, that distant mist-shrouded hill, rolling green valley, or quaint country cottage may be too far away to feature as the main subject in your image, but you can still include it if you have a leading line as foreground interest that sweeps through the picture and deposits the eye right there. Once you train your eye to look out for compositional gems, you will start to find them everywhere. Every small stream and bend in the road could be leading the eye to something interesting far off in the distance.
COMPOSING FOR BLACK AND WHITE
THERE IS A TIMELESSNESS TO BLACK-AND-WHITE PHOTOGRAPHY, A PARED-DOWN VISION OF A WORLD SEEN IN TONAL CONTRASTS AND SHADES OF GRAY.
Working in black and white is a great way to hone your compositional skills because it allows you to concentrate on line, shape, form, and texture.
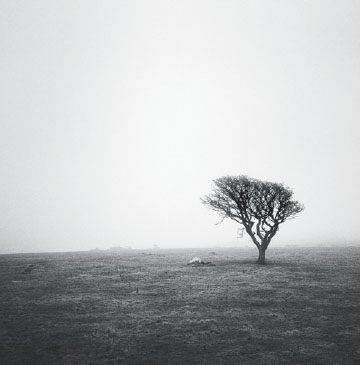
Black-and-white landscapes rely heavily on a strong composition; reducing a photo to monochrome tones requires a good eye for a graphic composition. Pay attention to bold, interesting shapes, and look for leading lines and good light. Your image can be about nothing more than the quality and play of light and shade.
Give consideration to your focal point. This is a good time to try using silhouettes in your images. If you reduce your subject to a silhouette, do so where there is a strong variation in tonality between the subject and the background. Silhouettes work best with a shape that is easily recognized, such as a human form, an animal, or a tree. Expose for the bright background to throw your subject into silhouette. During the edit phase you will be able to use the Snapseed app to darken selective areas of the silhouette, if required. See The Editing Process and Snapseed on pages 130–131 for more about selective brightness adjustments.
Overcast skies become moody and brooding in black and white, so use this to your advantage and work in black and white on bad weather days. That said, I always shoot in color and edit the pictures into black and white with the VSCO app afterward.
Head over to my section on Editing with Apps to find out how I edit my photos into black and white using the VSCO app (see page 129).
ASPECT RATIO
Aspect ratio is the relationship between the width and the height of your image.
A square format image has an aspect ratio of 1:1 where both the width and height are the same.
Landscape photographers like the 4:3 aspect ratio (i.e. an image wider than it is tall), which is like the proportions of a large-format camera.
If you still hanker for the proportions of 35mm film photos, then the 3:2 aspect ratio (i.e. even wider than 4:3) is the one for you.
It's easy to alter aspect ratio to suit your own preferences, so check the options in your phone’s settings.
FORMATS
A LOT OF PEOPLE GOT USED TO SHOOTING FOR SQUARE FORMAT WHEN WORKING WITH SMARTPHONES BECAUSE INSTAGRAM USED TO PRESENT PHOTOS IN GRIDS OF SQUARE TILES. I STILL OFTEN FRAME UP IN A SQUARE FORMAT, POSSIBLY BECAUSE IT IS HABITUAL BUT PERHAPS ALSO BECAUSE IT OFTEN FEELS LIKE A NEAT WAY TO PRESENT AND FRAME AN IMAGE. I LIKE THE WAY THAT CIRCULAR AND SPIRAL COMPOSITIONS WORK SO WELL WITHIN A SQUARE FRAME, WHICH MAY BE PARTICULARLY INTERESTING TO PEOPLE SHOOTING IMAGES OF STAIRCASES, ARCHITECTURE DETAILS, PATTERNS IN NATURE, AND SO ON.
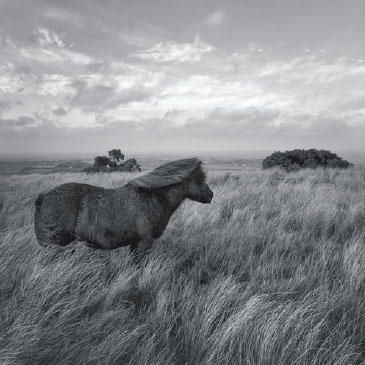
Landscape format is wider than it is tall and is well-suited to shooting wide landscape views. Its width naturally draws the eye to horizon lines. I like to position focal points near an edge of the frame to give the composition space. You will find that compositions based on the rule of thirds sit very nicely in a landscape format.
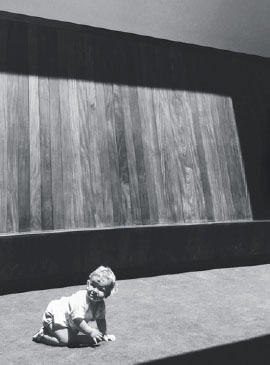
Portrait format is great for shooting people, as the name suggests. It follows the same sort of proportions as the human body, so it allows you to frame up easily for that kind of image-making. But there is more to the portrait format than meets the eye. I enjoy shooting landscapes in a portrait format where the image is taller than it is wide. This allows me to feature more of the big skies and astounding cloud structures that I am always drawn to. It also gives me the opportunity to include leading lines in the landscape that link the foreground neatly to the background, providing an enhanced sense of perspective.
SYMMETRY AND REFLECTIONS IN WATER
ANY BODY OF WATER HAS THE POTENTIAL TO PROVIDE A REFLECTION OF THE SKY ABOVE. THE WATER NEEDS TO BE STILL FOR THIS TO WORK PROPERLY, THOUGH. EVEN AN UNREMARKABLE PUDDLE CAN YIELD SURPRISING RESULTS IF YOU KNOW HOW TO USE IT.
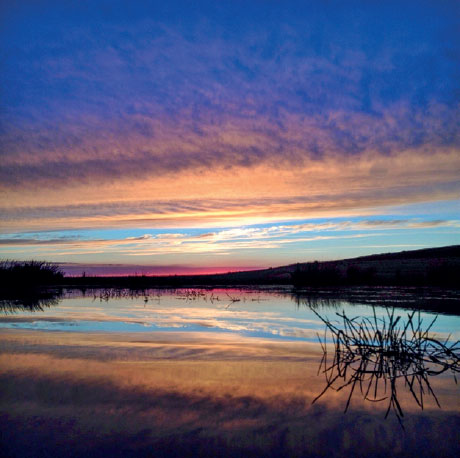
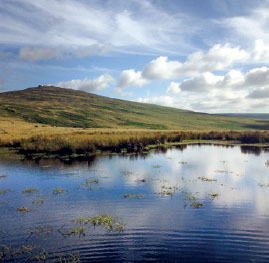
Crouch down to get closer to the water’s surface, put your camera out above the water rather than at the edge of it, and hold your camera so that you are almost dipping your hand into the water—I’m sure I don’t need to give you a safety warning here; common sense should prevail! You will immediately notice that the water’s surface becomes a mirror for the landscape and light. I rarely walk away from these shots without soggy shoes, but crouching down low makes all the difference.
If you are shooting a lake and you want perfect symmetry, you simply have to line up the top of the water with the horizontal center of the frame and everything above and below it should be nicely symmetrical.
On some phones, you are able to adjust the camera’s ISO (the sensitivity of your camera’s sensor to light; the higher the setting, the more sensitive the camera is to light). Alternatively, you can use an app like Camera+ to adjust the ISO. Try setting it to ISO 100, which will stop the image from looking grainy or “noisy.”
Play with your focal points: start by tapping to focus on the place where the water ends and the land begins. Check the photo to see if you are happy with the amount that has rendered sharp. If not, take more shots with slightly different focal points until you find the one that works best in your composition.
PANORAMAS
ULTRA-WIDE PANORAMA PHOTOS ARE A GREAT WAY TO MIX UP YOUR REPERTOIRE. A PHONE CREATES A PANORAMA BY STITCHING MULTIPLE IMAGES TOGETHER TO CREATE ONE SUPER-WIDE IMAGE. IN PANORAMA MODE, YOU CAN TAKE 240º PHOTOS IN A SINGLE IMAGE. THERE ARE APPS THAT ALLOW YOU TO SHOOT 360º PHOTOS TOO.

Strange though it may seem, you will need to hold your phone in portrait orientation rather than landscape to take a conventional horizontal panorama. Select panorama mode and you will see a guidance arrow in the center of the screen.
Expose for the bright area by tapping there on the screen. You can lock down your exposure (usually done as you tap to set exposure by pressing and holding the screen until the AE Lock sign comes on—the AF sign might come on, but don't worry about that now). This will avoid those exposure fluctuations that occur as the camera tries to adjust for the changing light conditions as you move toward or away from the position of the sun in your image.
Find some shelter from strong wind because you will need to have a steady hand as you swivel around.
Perfect your stance: your feet should be shoulder-width apart and facing the center of the scene of your panorama. Keep your hips facing the center of the frame and your feet firmly planted, then swivel your upper body to the left or right.
Start your panorama and slowly swivel your upper body from the waist around to the middle and on smoothly to the far right of your panorama (start at the right and go left if you prefer). You may need to practice this a few times to perfect your speed, because if you go too fast, the camera won’t be able to keep up!
Remember to hold the lens and screen level to keep your horizon straight.
Have a few goes until you get the hang of it in each location. I usually find that my first one doesn’t look all that smooth but, practice always seems to make perfect, so write the first one off as a dummy run and try again!
Have you tried a vertical panorama yet? They’re great for shooting tall buildings or for capturing somewhere with a decorative interior that runs from floor to ceiling. Hold your phone horizontally this time. Stand with your arms outstretched in front of you, lock your elbow out, and slowly arch your arms up and over your head. Remember to keep your arms stretched out the whole time.