Fresh Cheese

Fresh Cheese
Fresh cheese is a great starting point for cheesemaking; it is the easiest to produce and great to experiment with. I love fresh cheese and make a lot of it at home, as the process is so quick, and you can make most of the cheeses with ingredients you already have in the kitchen.
Fresh cheese is the youngest, purest cheese. This variety is widely popular because it is so simple and has a lovely mild, salty and tangy taste. Fresh cheese doesn’t typically have a rind as it is not aged for long periods of time. The texture can range from very soft and spreadable to more crumbly.
This cheesemaking process is very simple: the milk is ripened by adding a starter culture that changes the milk sugar (lactose) into lactic acid, causing the milk to thicken. At this point rennet can also be added to create thicker curds, if desired. Once curds form, the whey is drained away and what remains is turned into cheese. It is that easy!
A lot of people are put off the idea of making cheese at home by the thought of having to buy special equipment and supplies, but these fresh cheese recipes are really easy and require no special tools other than those you would find in an ordinary kitchen. Cheeses like ricotta or goat’s cheese can be made using lemon juice or vinegar.
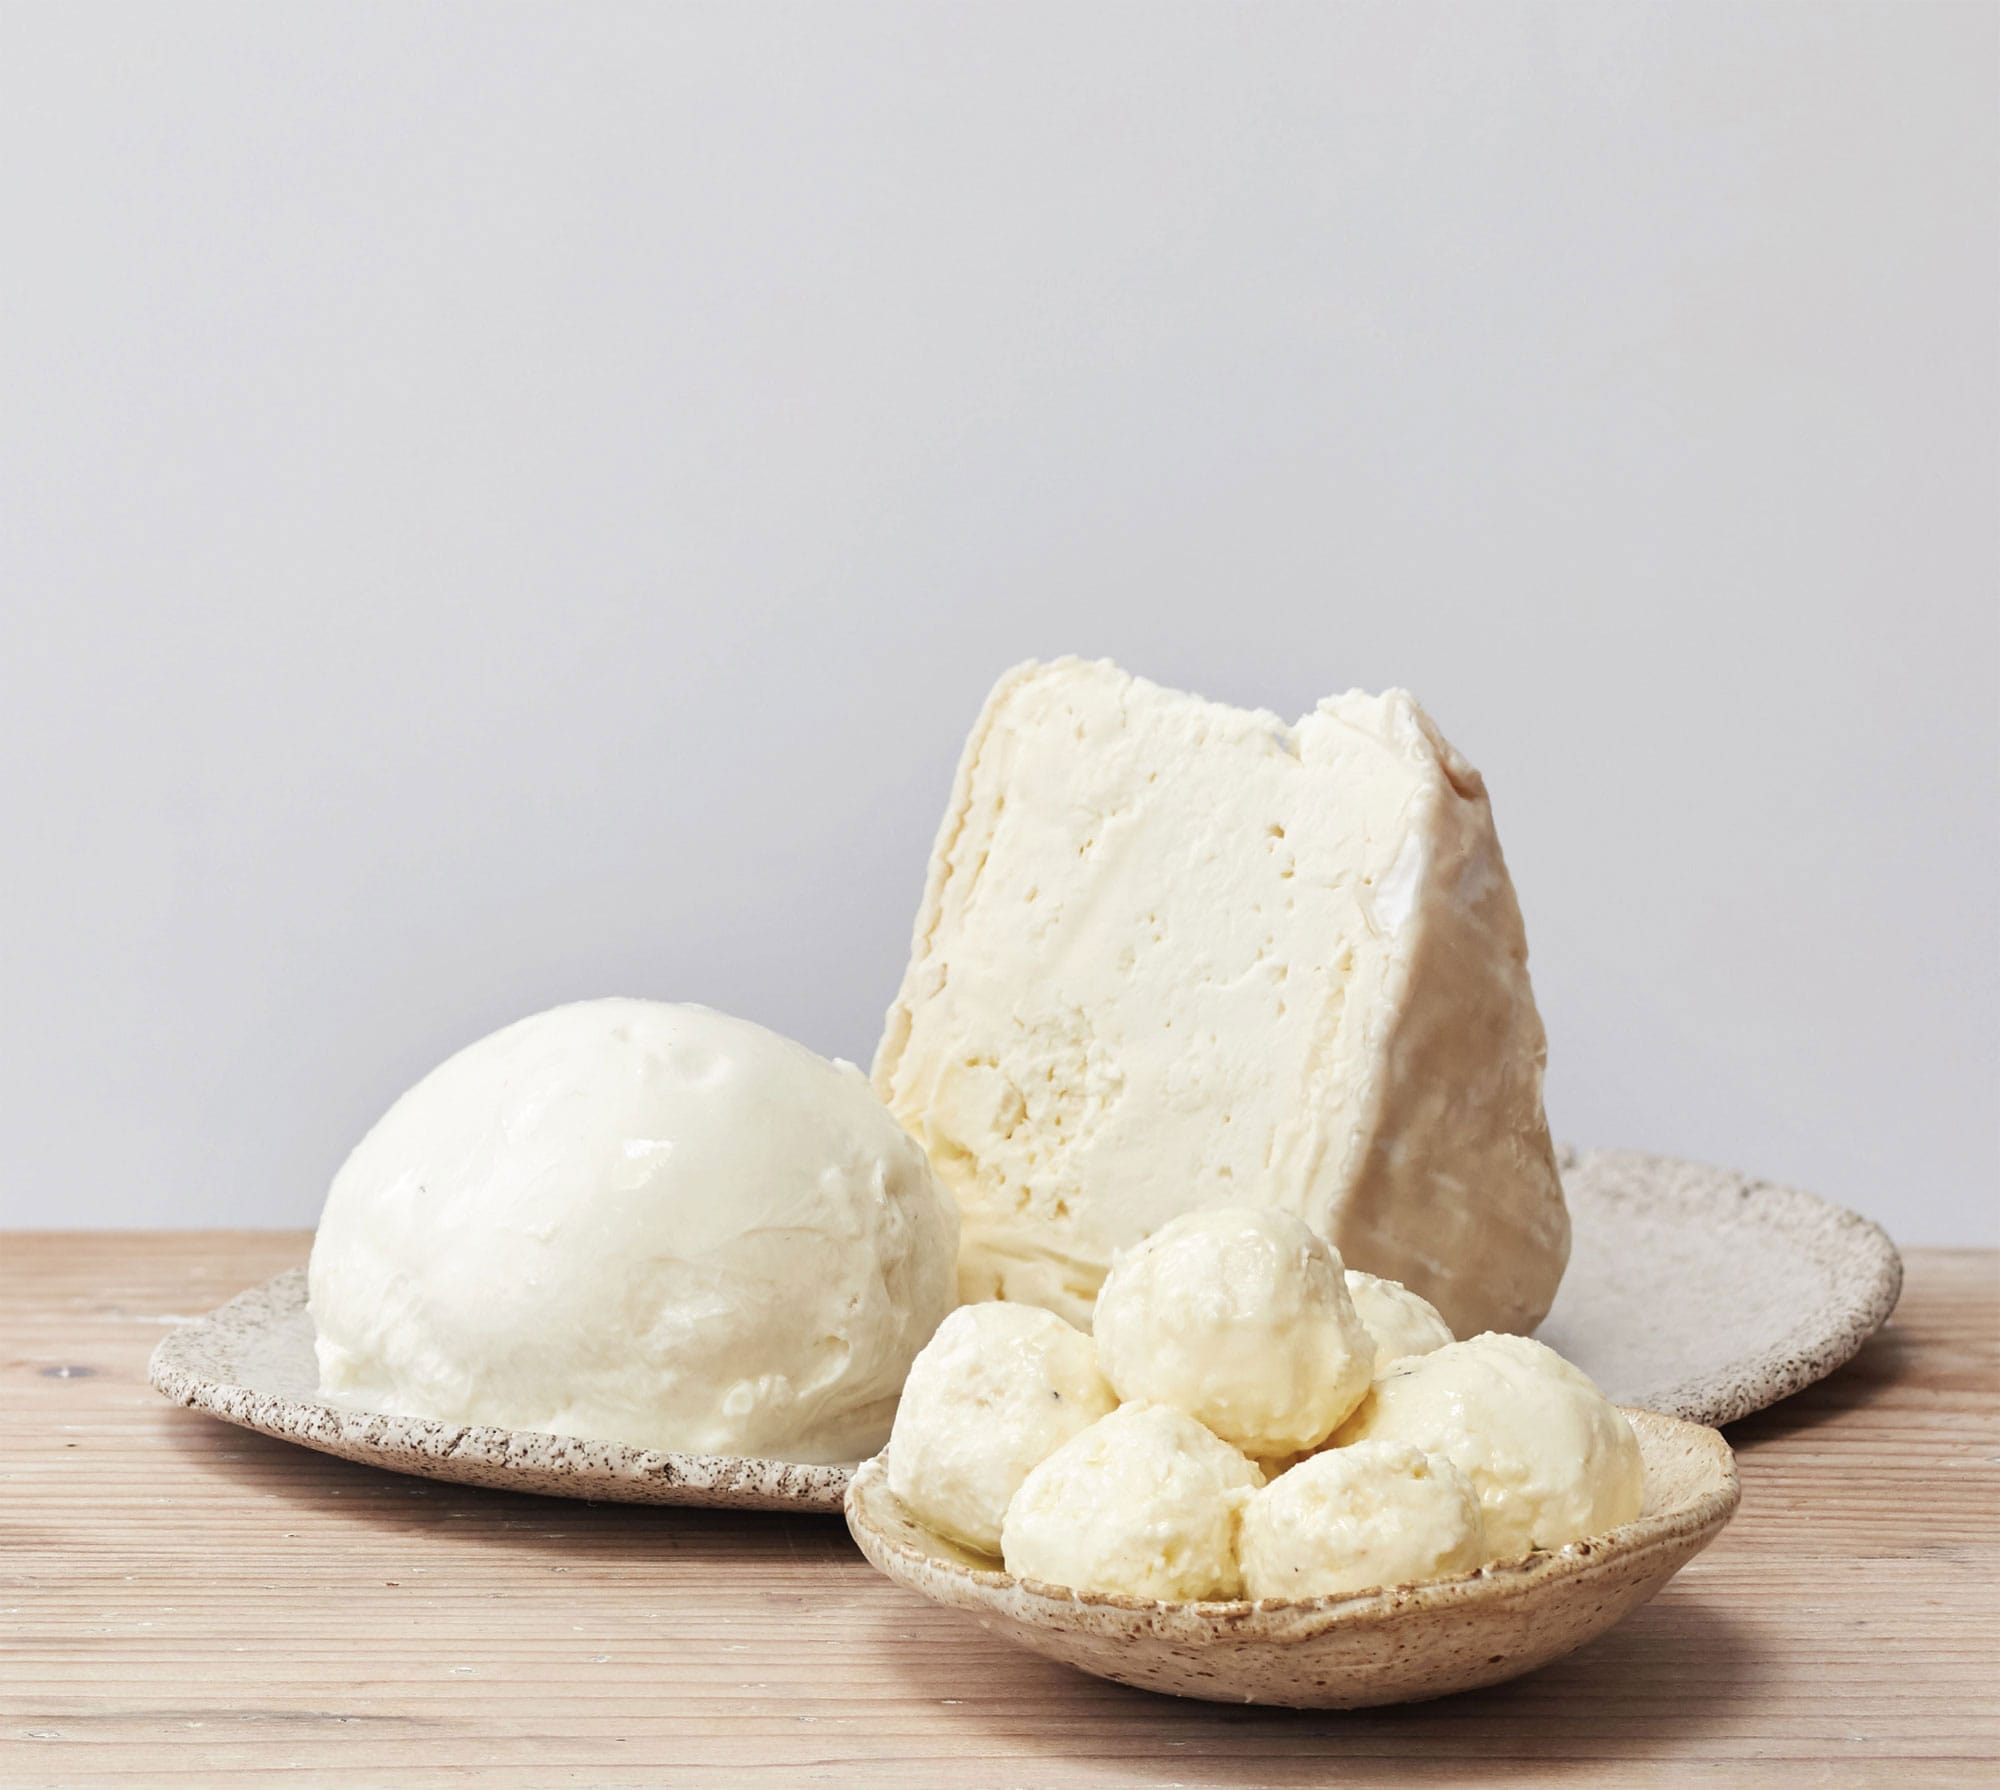
Mozzarella (left) is a wonderful fresh Italian cheese loved by many. A whopping 20 million tonnes (metric tons) of cheese are produced worldwide each year and production is increasing with growing demand.
Délice de Bourgogne (right) is a decadent triple-cream French cheese. Rich and full-flavoured, it has a smooth, velvety, melt-in-the-mouth texture.
Labneh (front) is a marinated fresh yoghurt cheese popular in the Middle East.
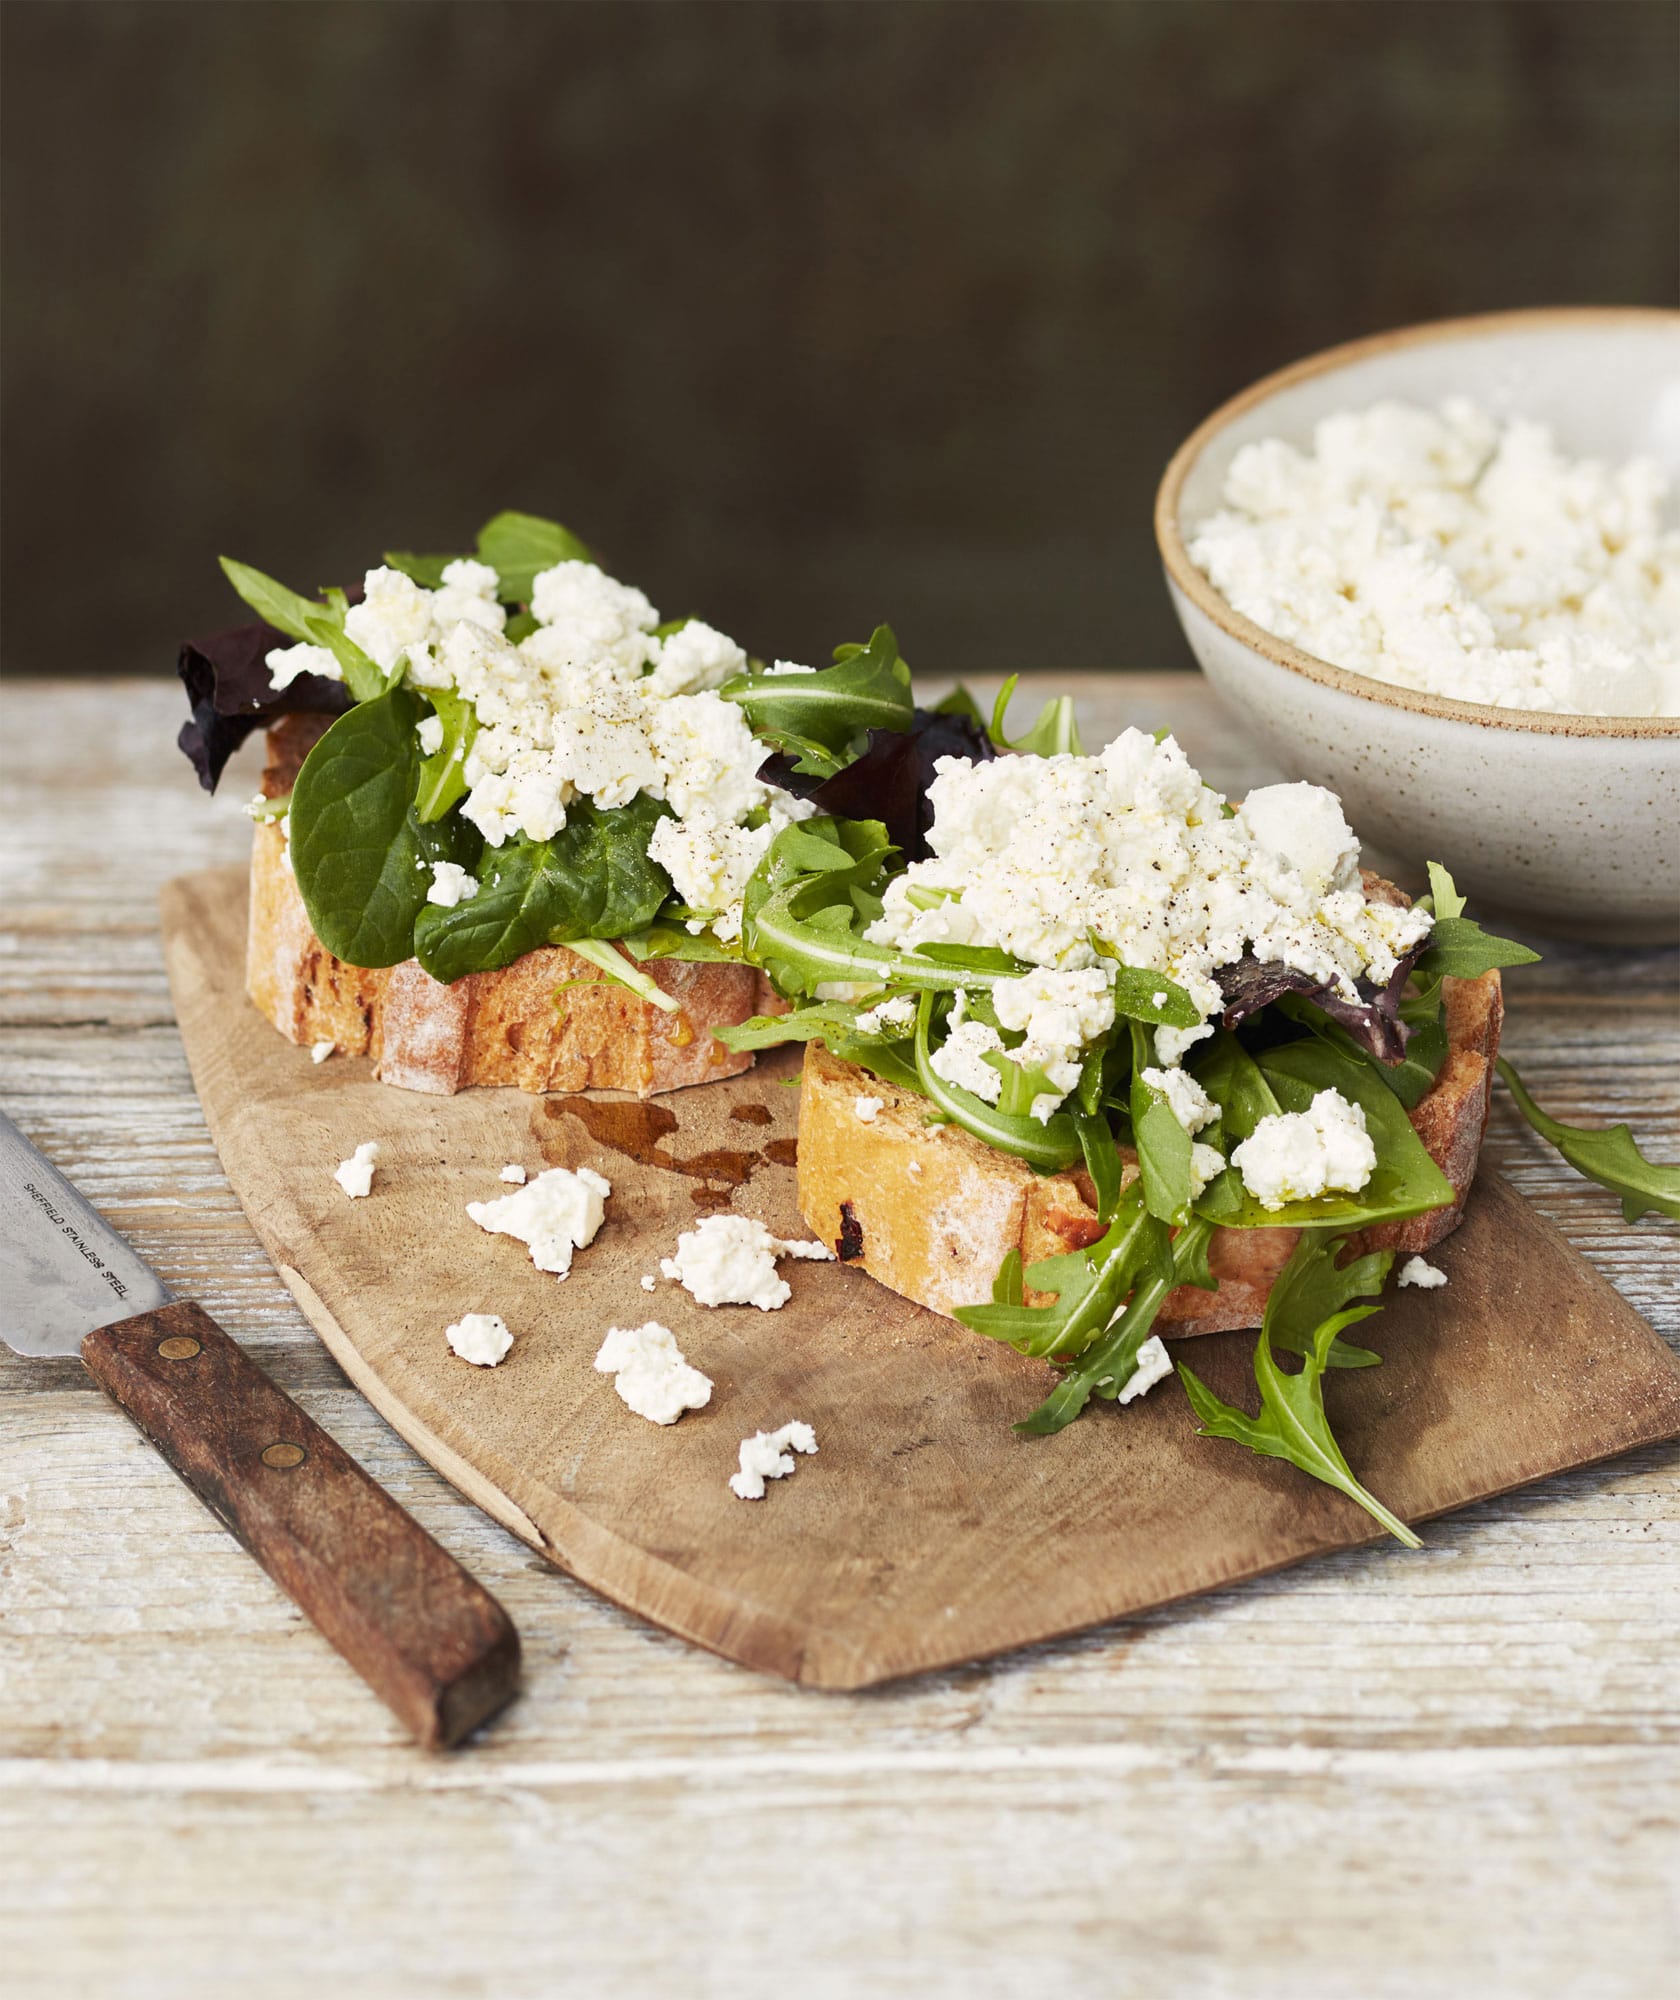
◁ Curd Cheese
Curd cheese is a real favourite of mine, beautifully fresh and the simplest of all cheeses, so a great one to start with. Curd cheese is the first stop on your cheesemaking adventure before you move on to some more (ever so slightly) complex cheesy creations. You can also make it a little richer and more indulgent by adding a touch of cream.
2 litres (31/2 pints/81/2 cups) milk
pinch of salt
2 tsp liquid rennet
MAKES 250g (9oz)
You will need: a cheesecloth or muslin sheet and an instant-read thermometer

1 Put the milk and salt into a large saucepan.

2 Heat the milk to 38°C (100°F).
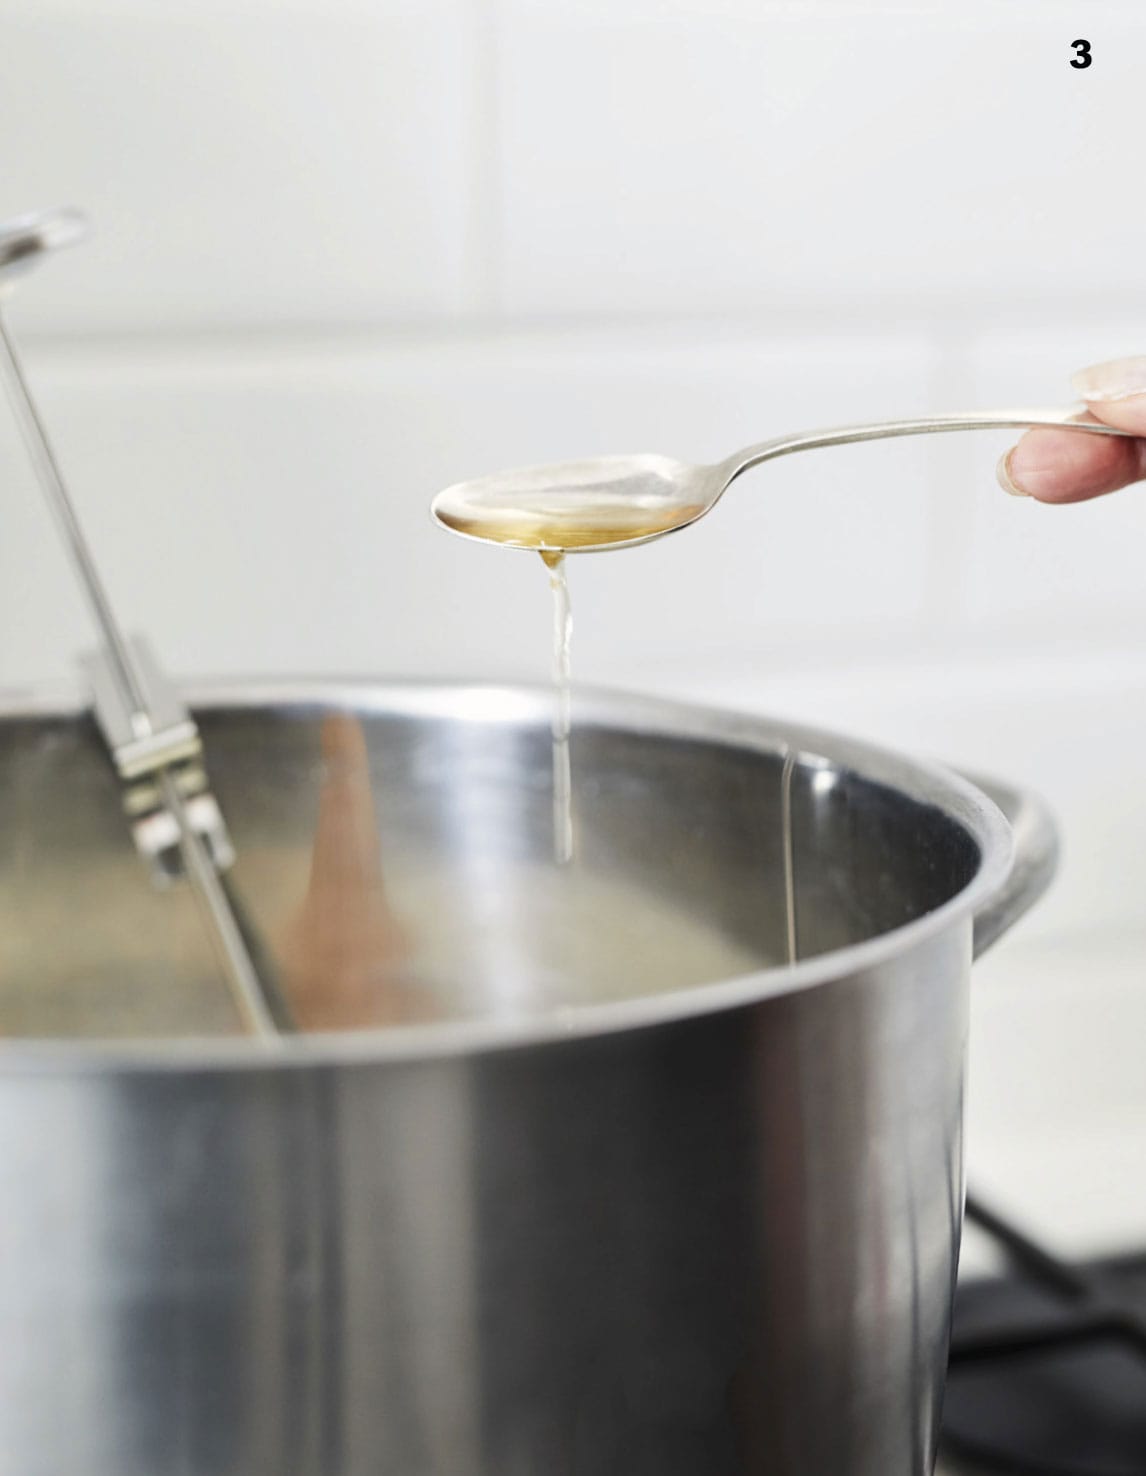
3 Remove from the heat and add the rennet. Stir in well, until it is completely dissolved, and set aside uncovered for 15 minutes. After 15 minutes, the whey and curd should have separated: the curd will be at the top and the whey at the bottom of the pan.

4 Place your cheesecloth or muslin over a small bowl and use a strainer ladle to gently scoop up the curds and place them into the cloth. Following the steps shown here, create a cloth bag and hang it over a sink or bowl for about 3 hours to allow the whey to drain off.
5 Remove the cheese from the cloth and it is ready to serve. The cheese can be kept in a sealed container in the refrigerator for up to 1 week.
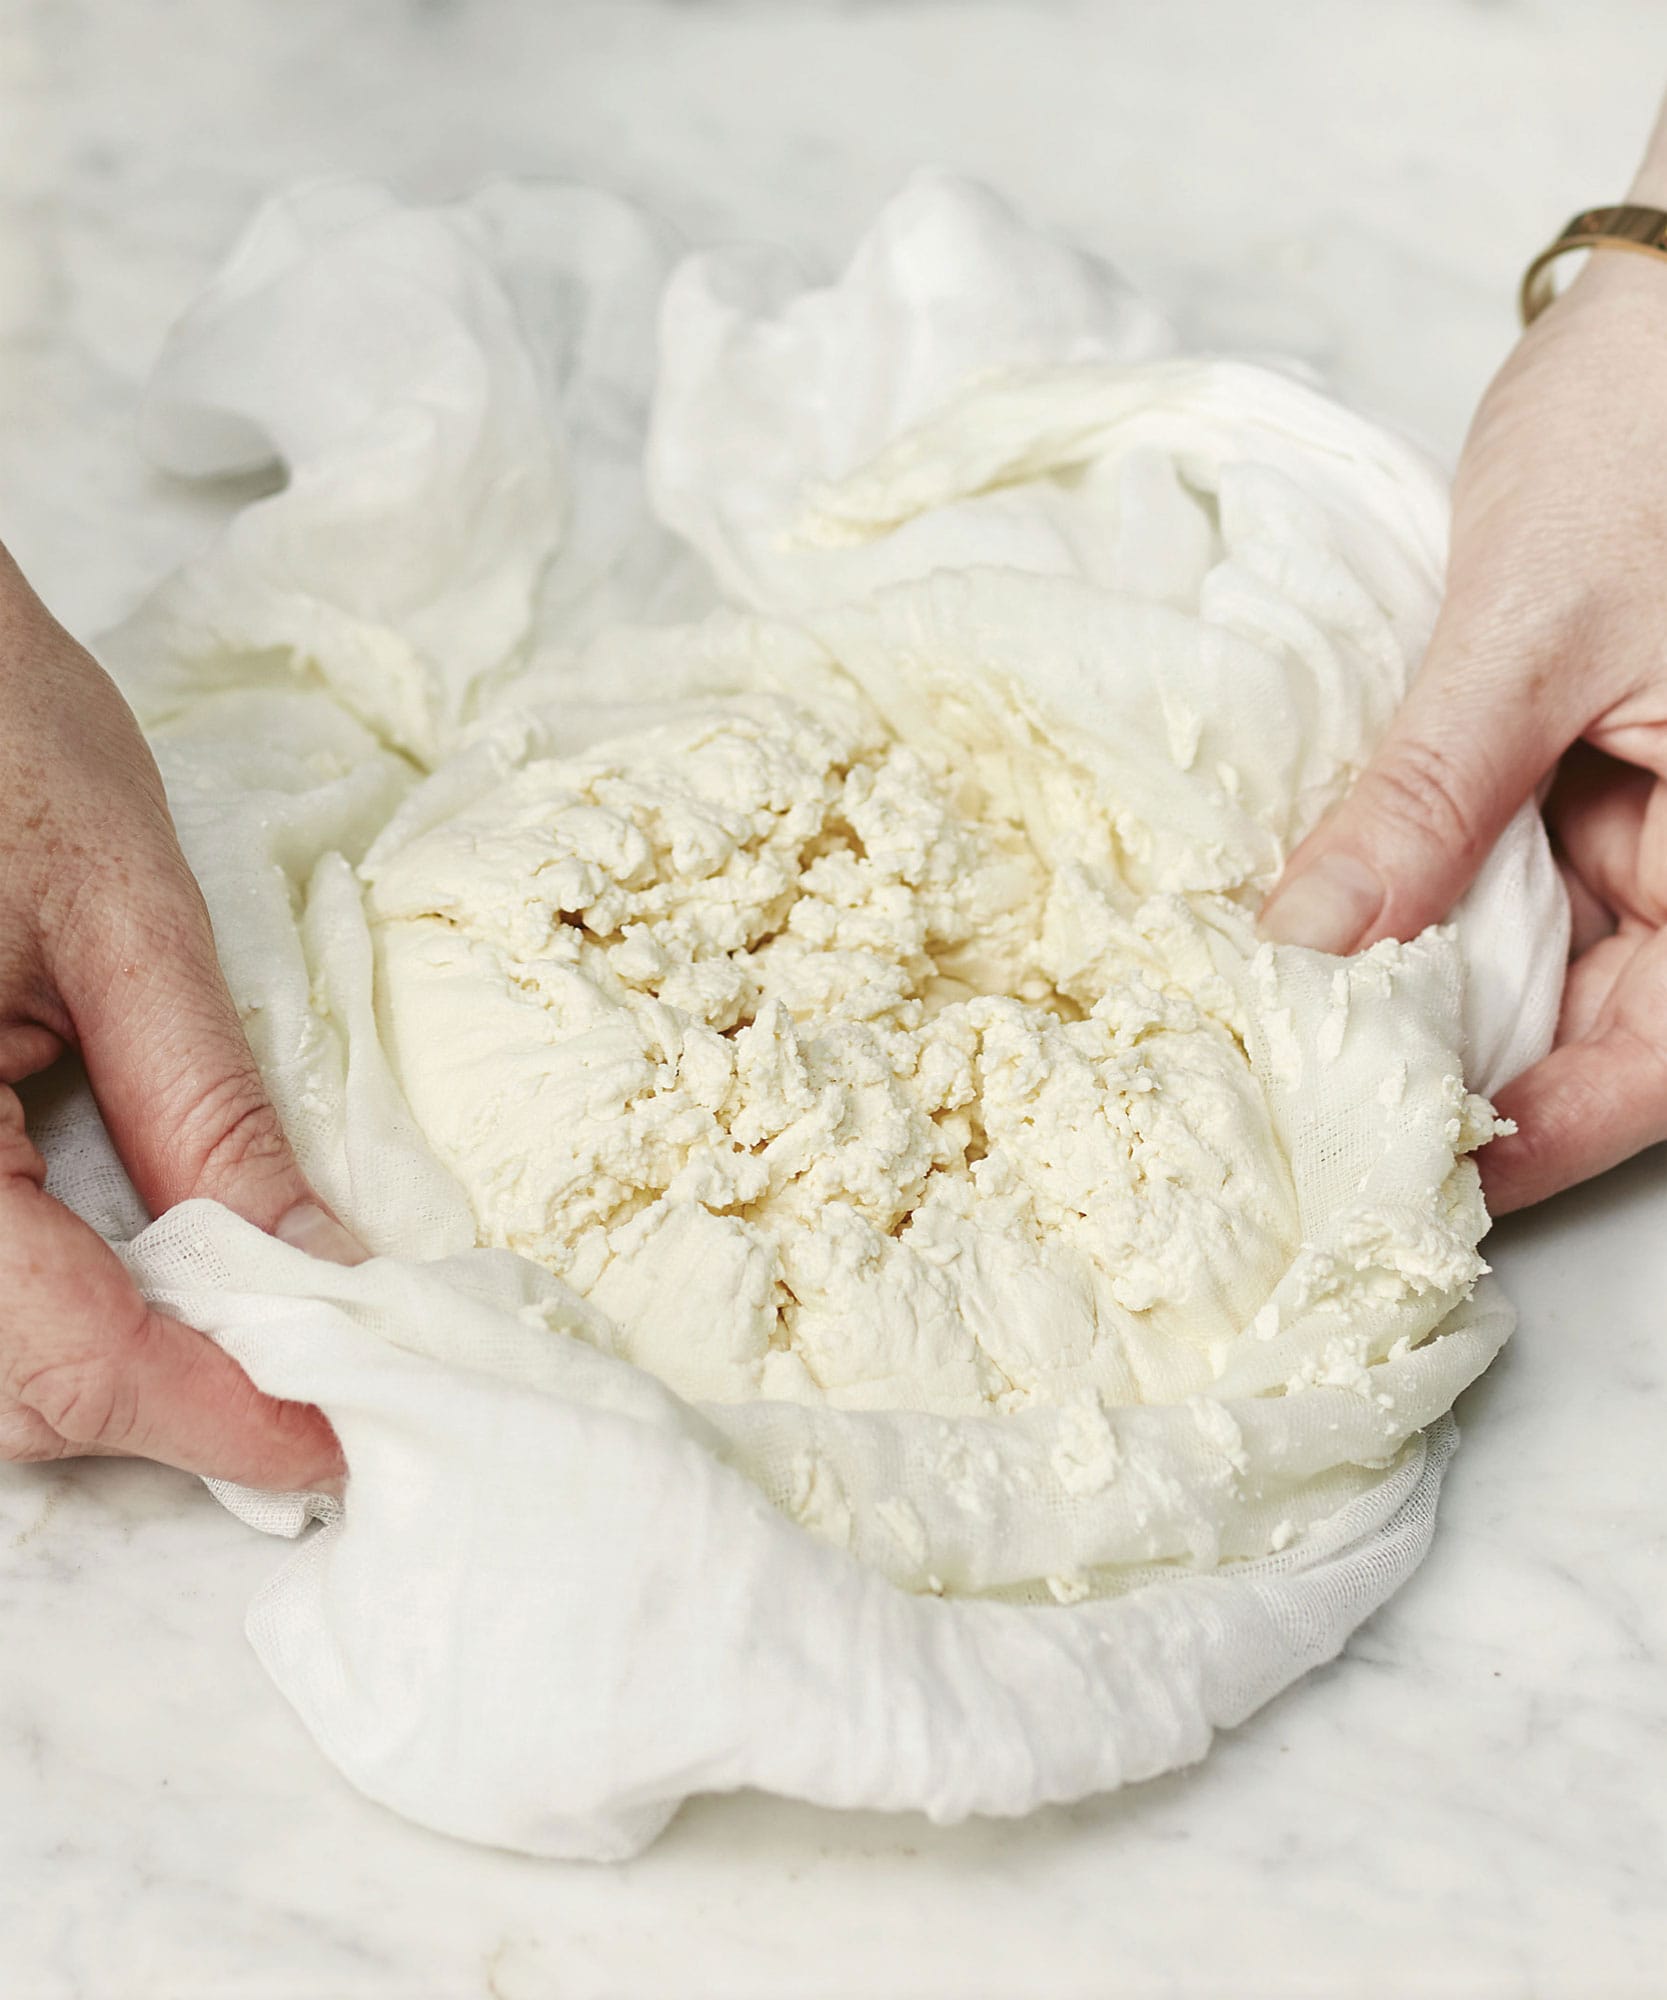

◁ Curd Cheese Dip
Easy to prepare ahead for a picnic or party, and a great little snack in summer – low in calories, guilt-free and yummy.
250g (9oz) curd cheese (see here)
20g (3/4oz) chopped shallots
20g (3/4oz) fresh parsley, chopped
1 garlic clove, finely chopped
handful of fresh chives, chopped
1 tsp Dijon mustard
1 tbsp red wine vinegar
1 tbsp extra-virgin olive oil
100ml (31/2 fl oz/scant 1/2 cup) whipping cream, lightly whipped
salt and freshly ground black pepper
SERVES 4
Place the curd cheese into a bowl and add the shallots, parsley, garlic and chives, reserving a few chives. Add the mustard, vinegar and olive oil and mix to incorporate everything together.
Stir through the lightly whipped cream and season with salt and pepper.
Sprinkle the remaining chives on top and eat immediately, or cover and chill until you are ready to serve, with some crispbreads and vegetable crudités for dipping.
Ricotta
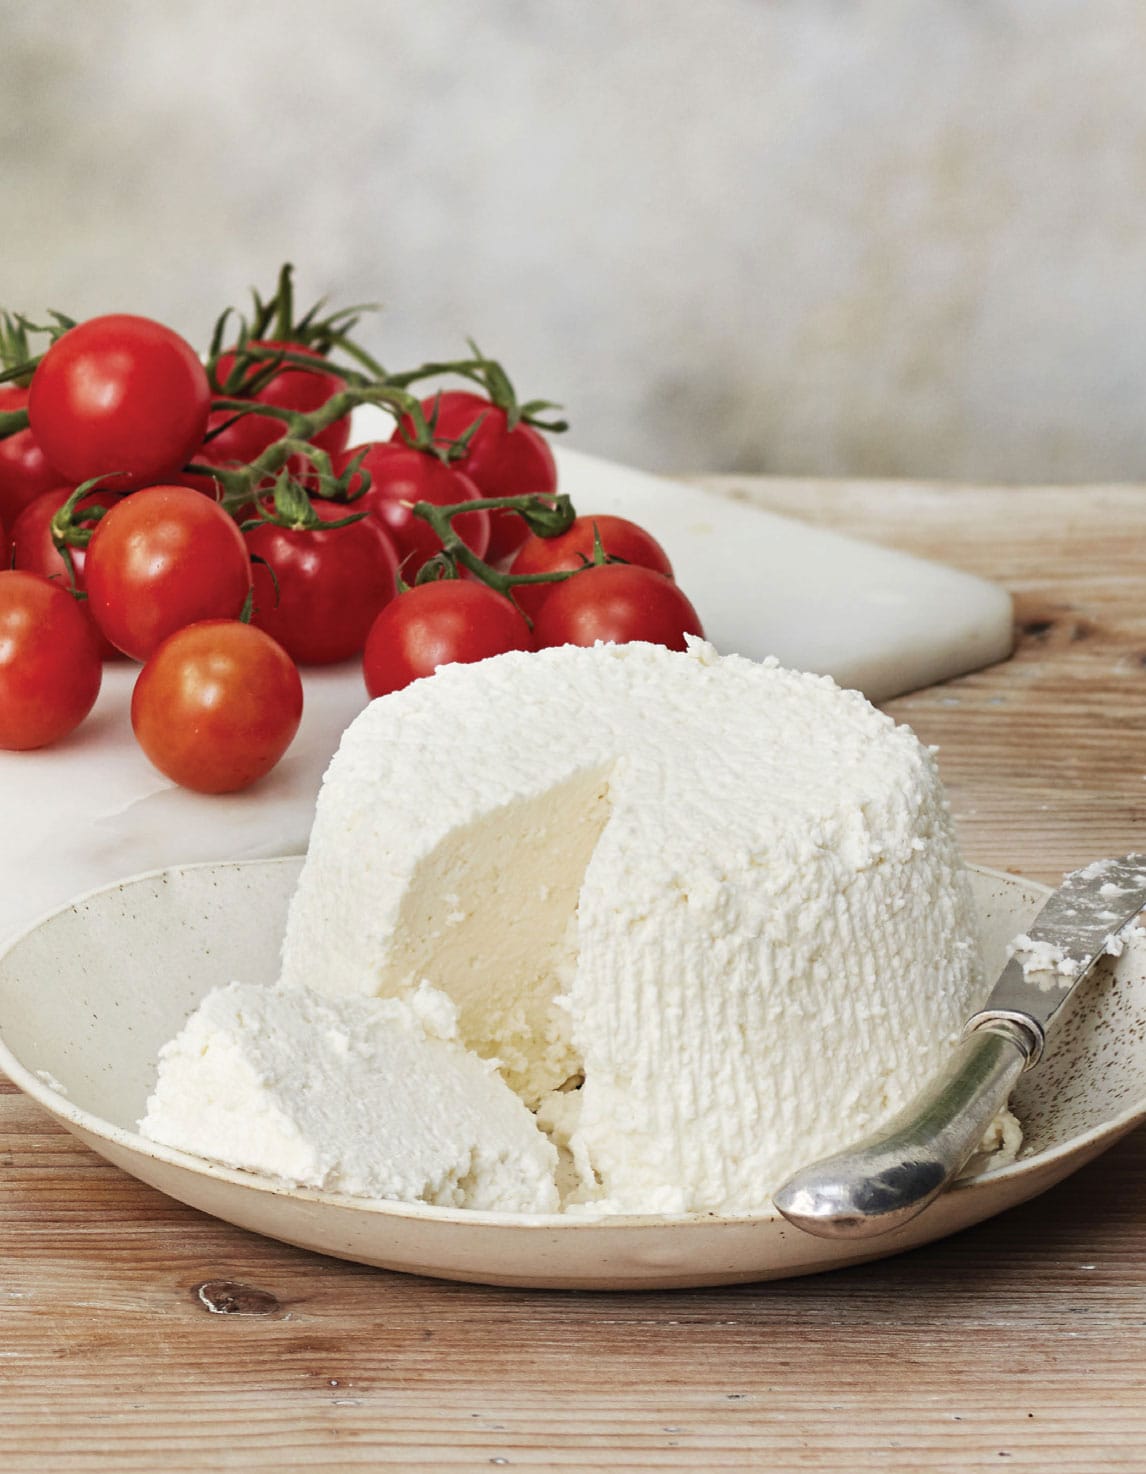
Making ricotta at home is such a lovely, easy process, and the end result is so delicious, you won’t bother buying the stuff in a tub again. It really is as simple as fresh milk, vinegar and about 45 minutes out of your day, and you have produced your very own fresh, creamy ricotta. Homemade ricotta really does have a better texture and flavour than anything I’ve bought in a supermarket. I love that you can control just how wet or dry the ricotta is simply by how long you let it drain for.
2.25 litres (4 pints/91/2 cups) milk
21/2 tbsp good-quality white wine vinegar salt
MAKES 250g (9oz)
You will need: a cheesecloth or muslin sheet and an instant-read thermometer
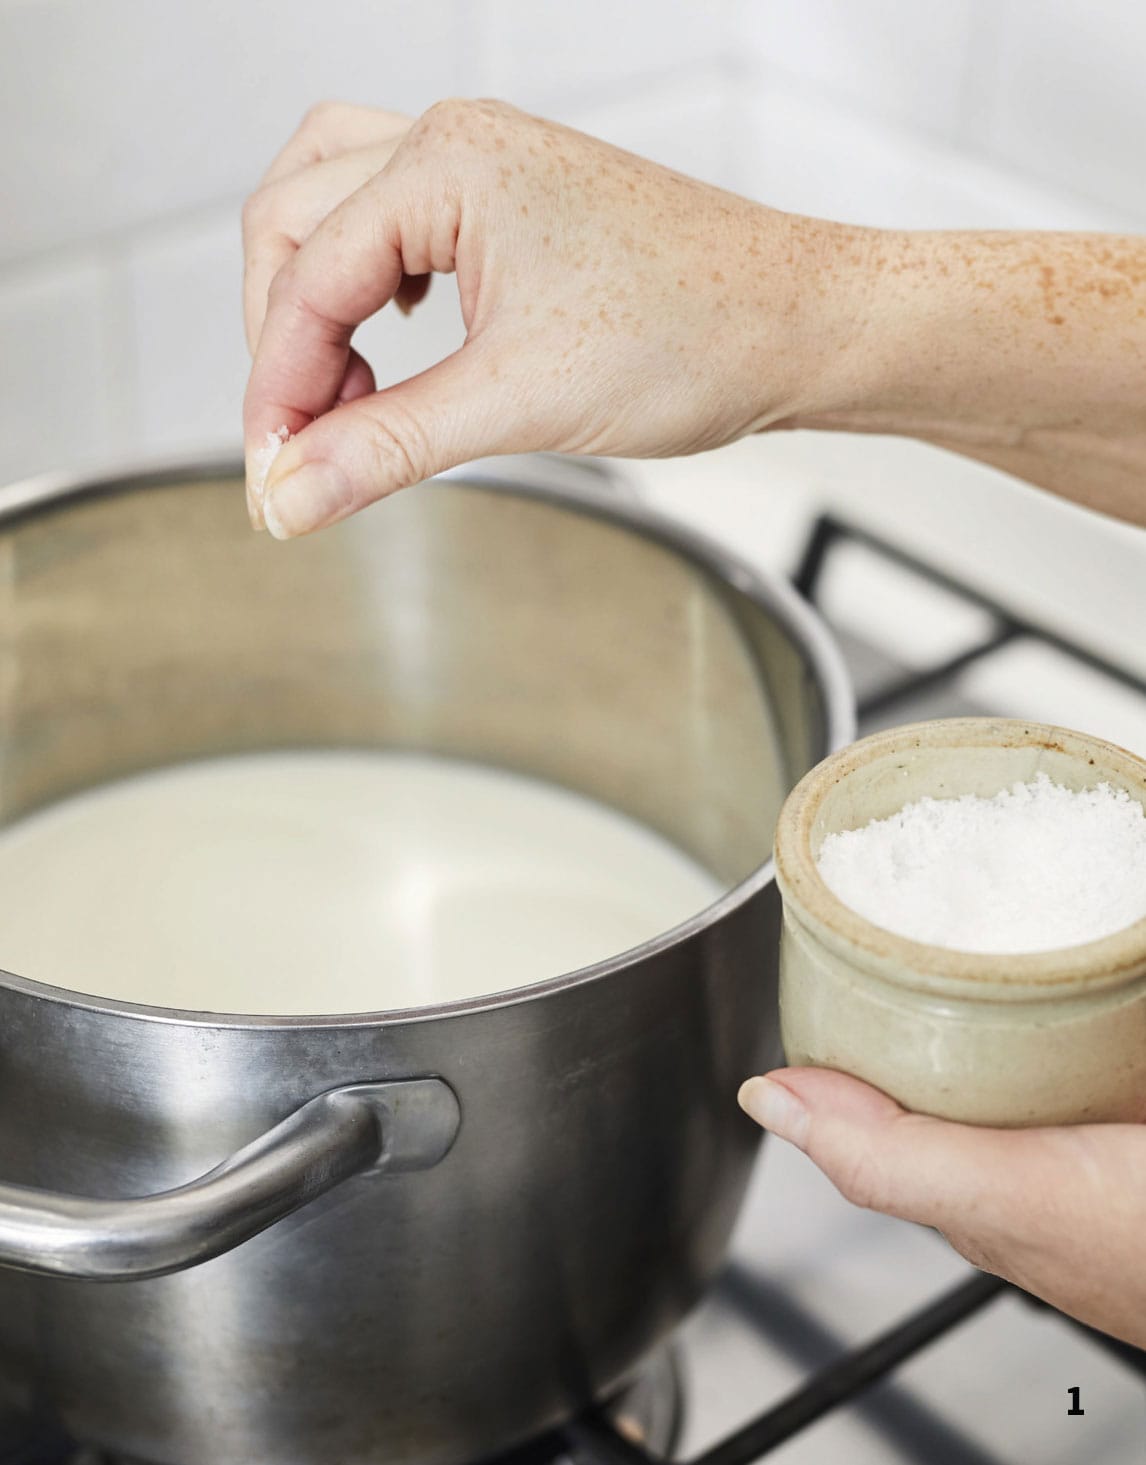
1 Put the milk into a large saucepan, add a couple of pinches of salt, then place the pan over a medium heat. Keep an eye on the milk and stir occasionally to prevent it sticking or burning. When the milk is almost coming to the boil, you will see small bubbles begin to appear. Remove from the heat when the temperature reaches 85°C (185°F).
2 Add the vinegar and stir gently. You should start to see the curds form. Continue to stir for a few minutes, then cover with a clean tea (dish) towel and set aside for a few hours.

3 Once the ricotta has had time to rest, line a colander with a large piece of cheesecloth or muslin and place over a mixing bowl. Slowly spoon the curds into the cloth and leave to drain for about 1 hour.
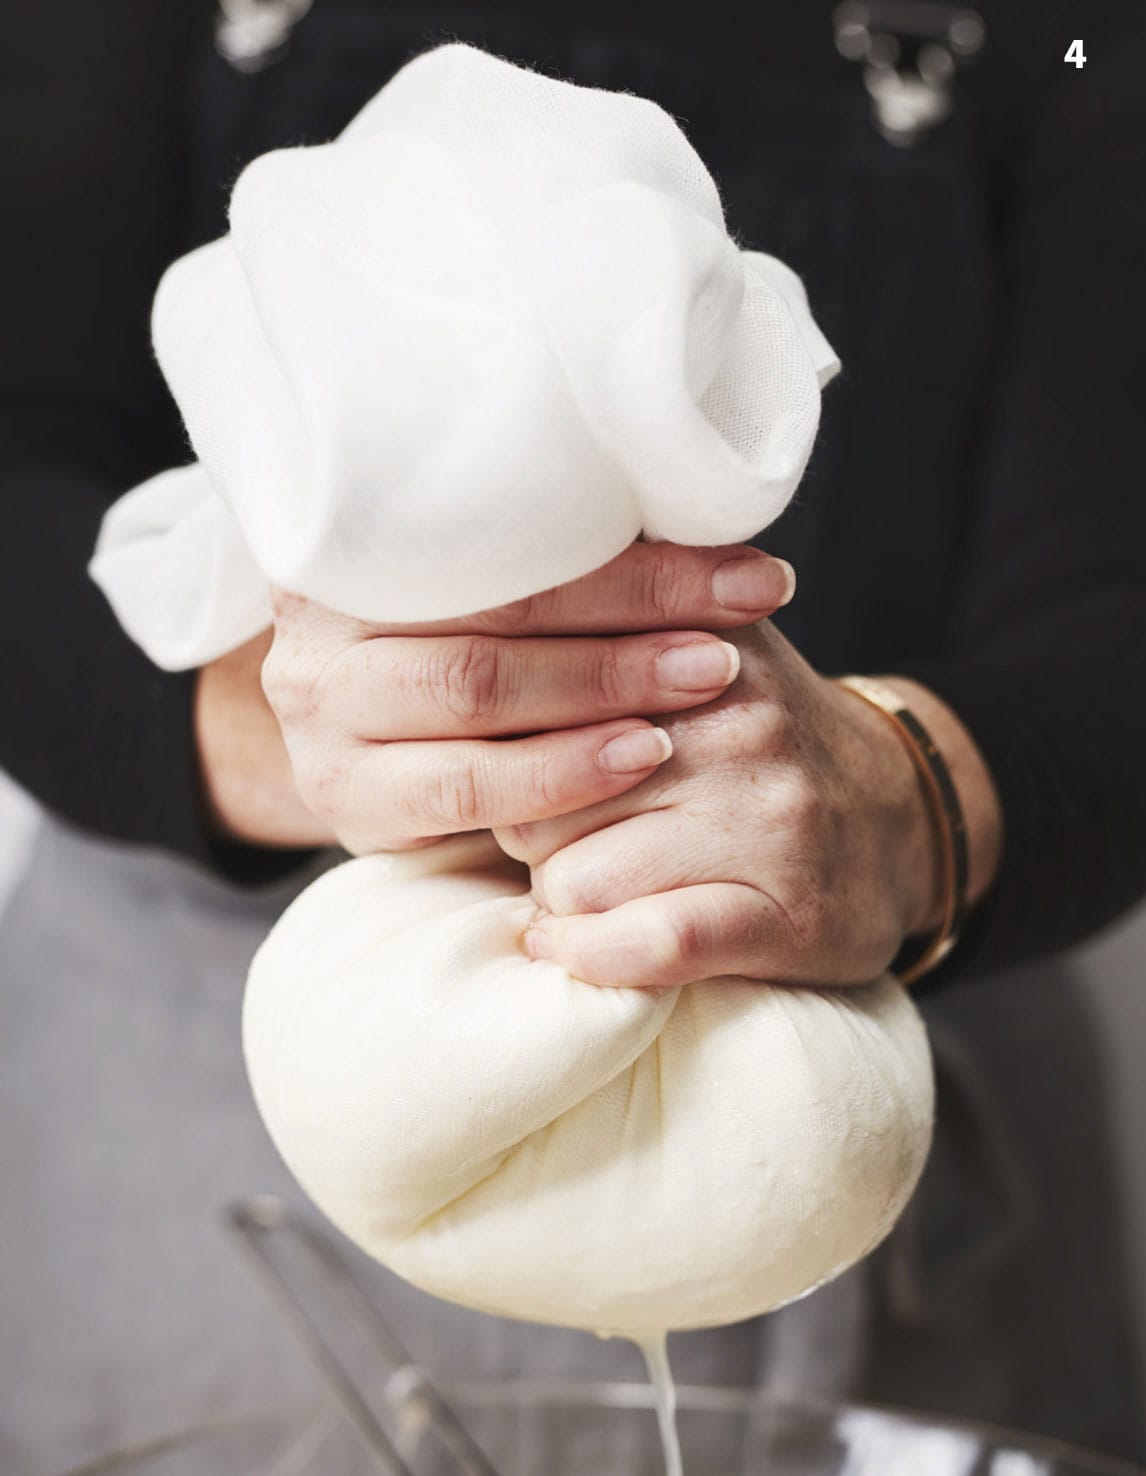
4 After an hour, check if the cheese is ready by gently lifting the cloth and squeezing tightly, making sure all the whey has drained out.
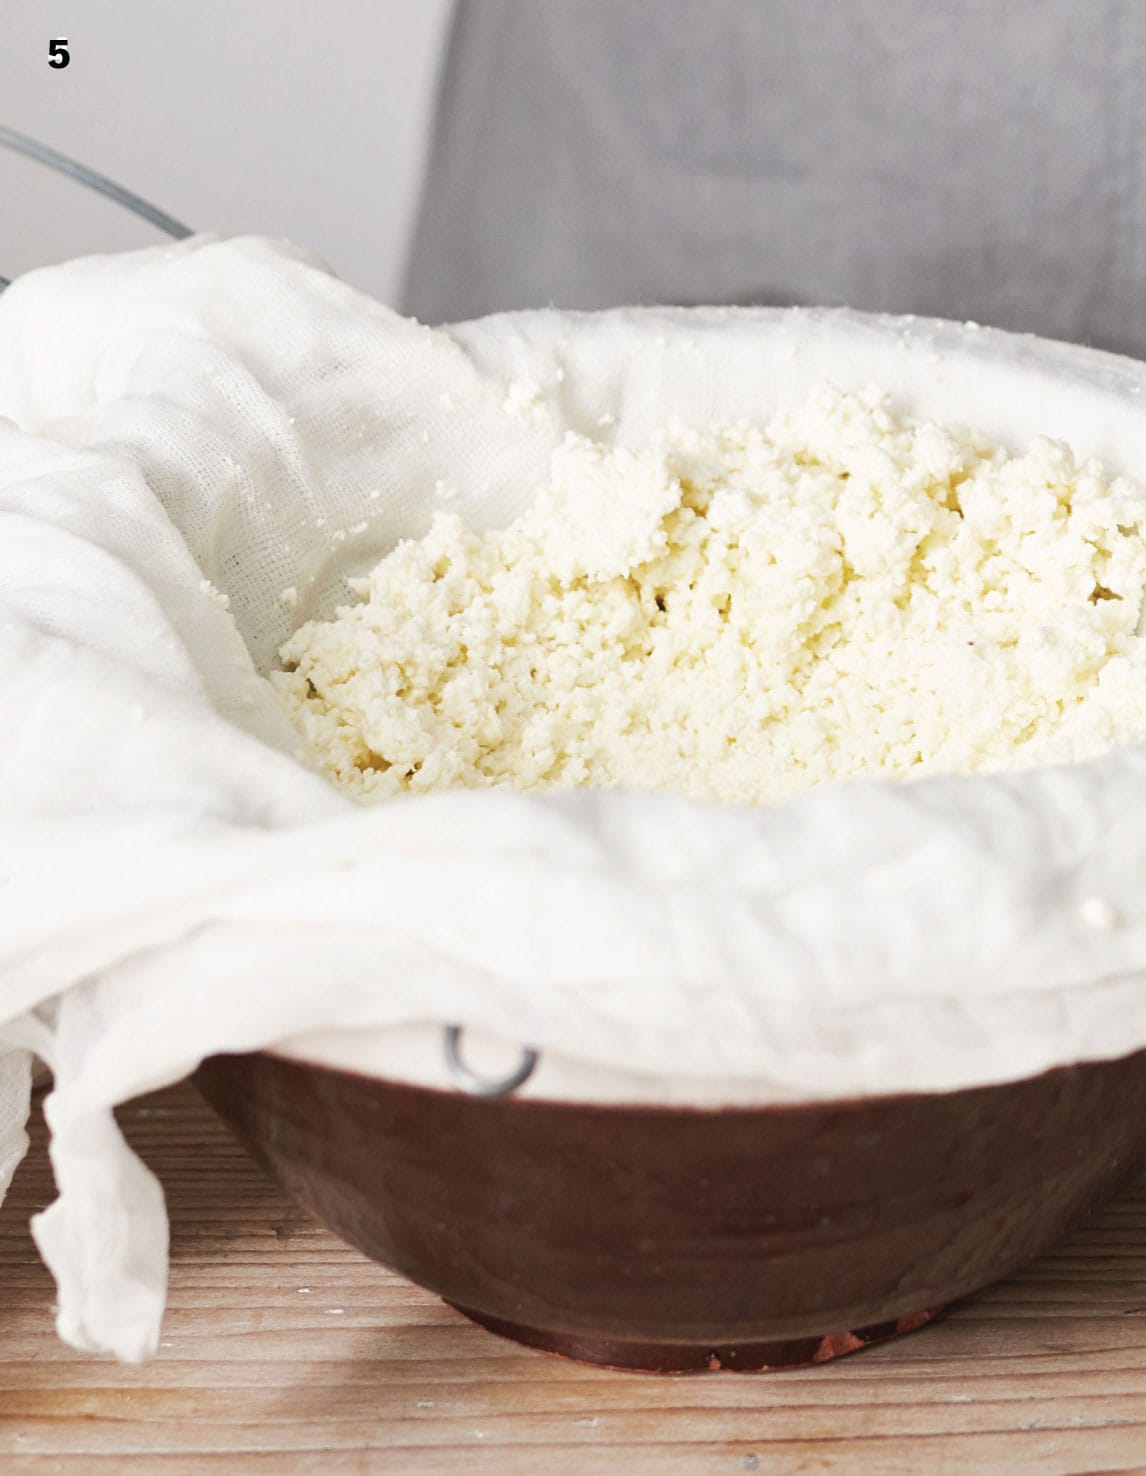
5 The ricotta is now ready to eat. It can be stored in a sealed container in the refrigerator for up to 1 week.
Very Indulgent Ricotta
The recipe shown here shows how incredibly simple it is to make fresh ricotta at home using milk alone. But if you want to make a naughtier version, this recipe, which uses cream and milk, is for you. The ricotta is so amazing that I can simply eat it with bread.
2 tbsp citric acid
8 litres (14 pints/34 cups) milk
pinch of salt
2 tbsp double (heavy) cream
MAKES 250g (9oz)
You will need: a cheesecloth or muslin sheet, an instant-read thermometer and ricotta moulds
1 Dissolve the citric acid in 50ml (13/4fl oz) cooled boiled water.
2 Put the milk in a large saucepan, add the citric acid mixture and salt, and mix thoroughly.
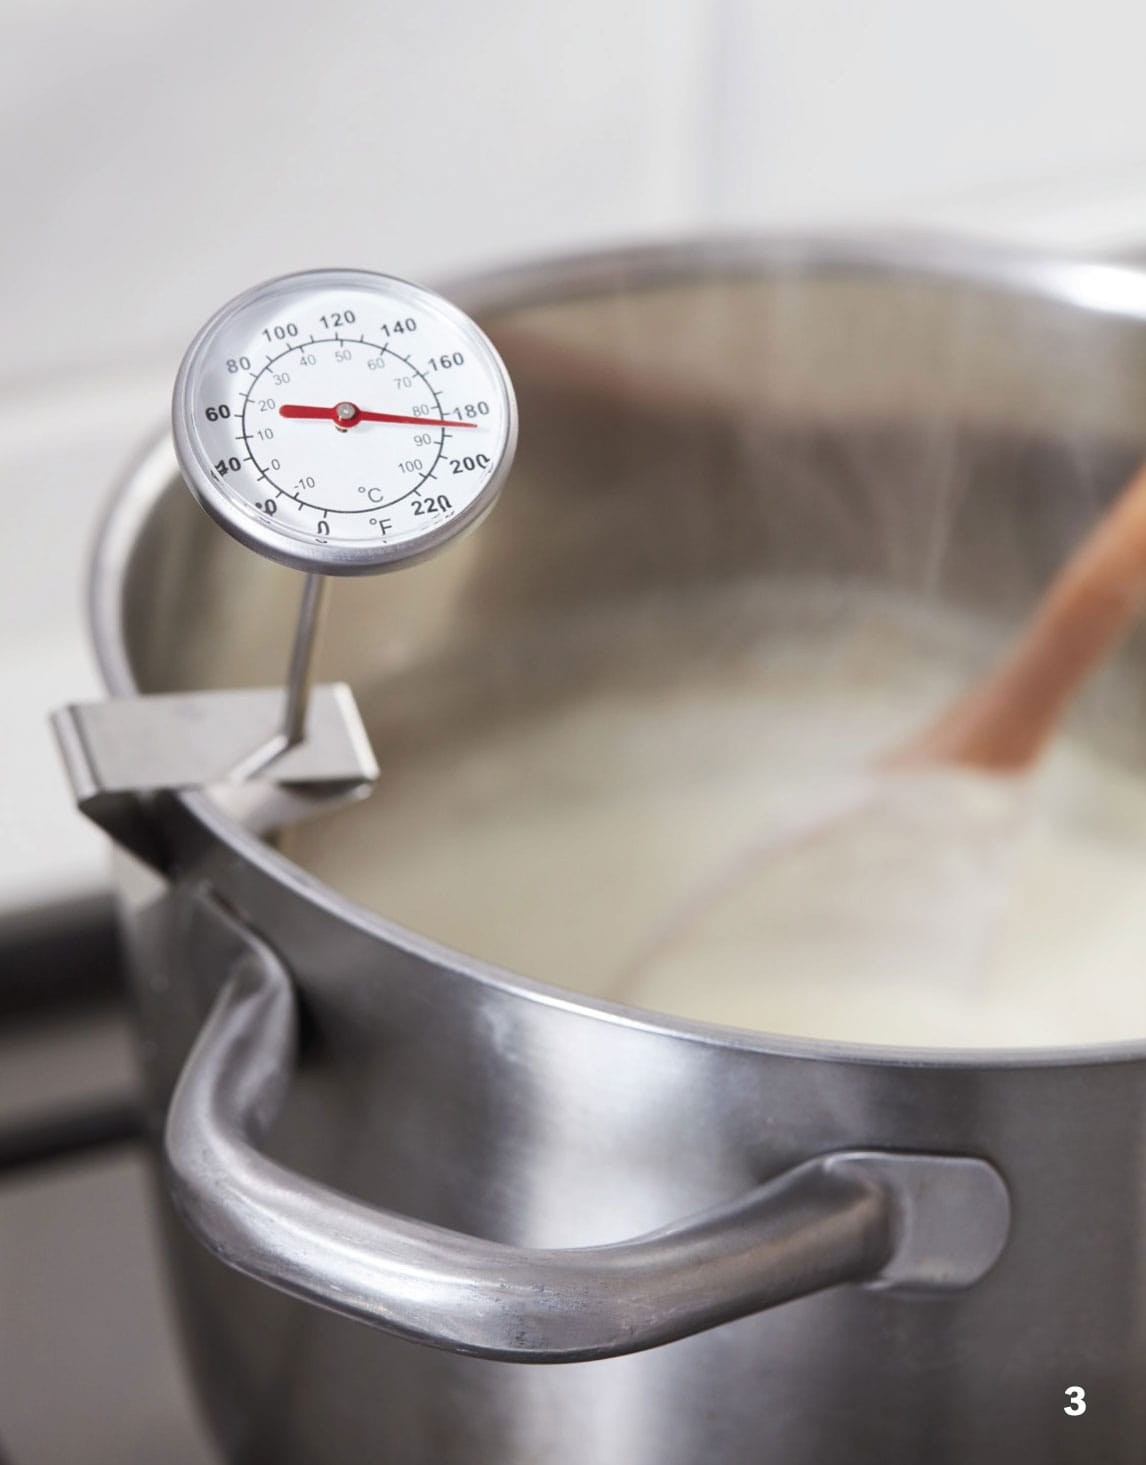
3 Place the pan over a low heat until it reaches a temperature of 82°C (180°F). Stir often to stop it sticking to the base of the pan; heating the milk too fast can also affect the flavour. As the milk heats, you should be able to see the curds separating from the whey. The curds will be solid and the whey a yellow milk substance. Once the milk has reached the required temperature, remove from the heat, cover with the pan lid and set aside for 20 minutes.
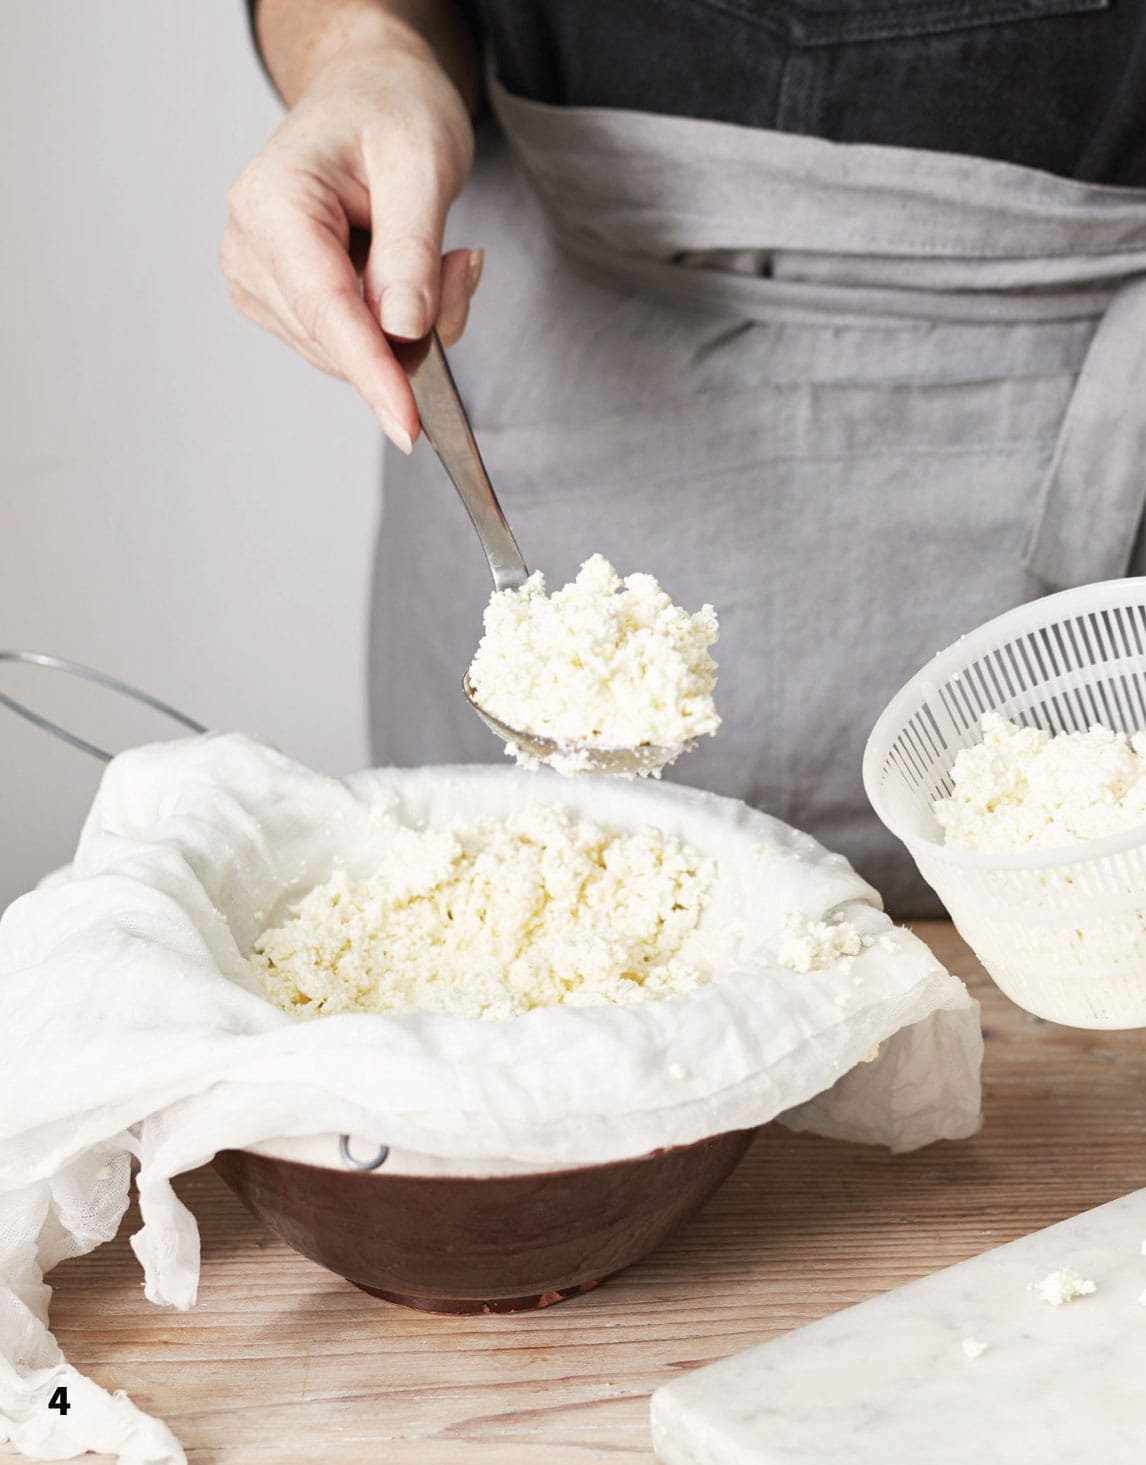
4 While the curds are resting, line a colander with cheesecloth or muslin and place over a mixing bowl. Transfer the curds to the colander and leave the whey to drain for about 30 minutes. Add the cream to the curds and stir to combine. Using a slotted spoon, scoop the curds carefully into your ricotta moulds, making sure any remaining whey has drained off.
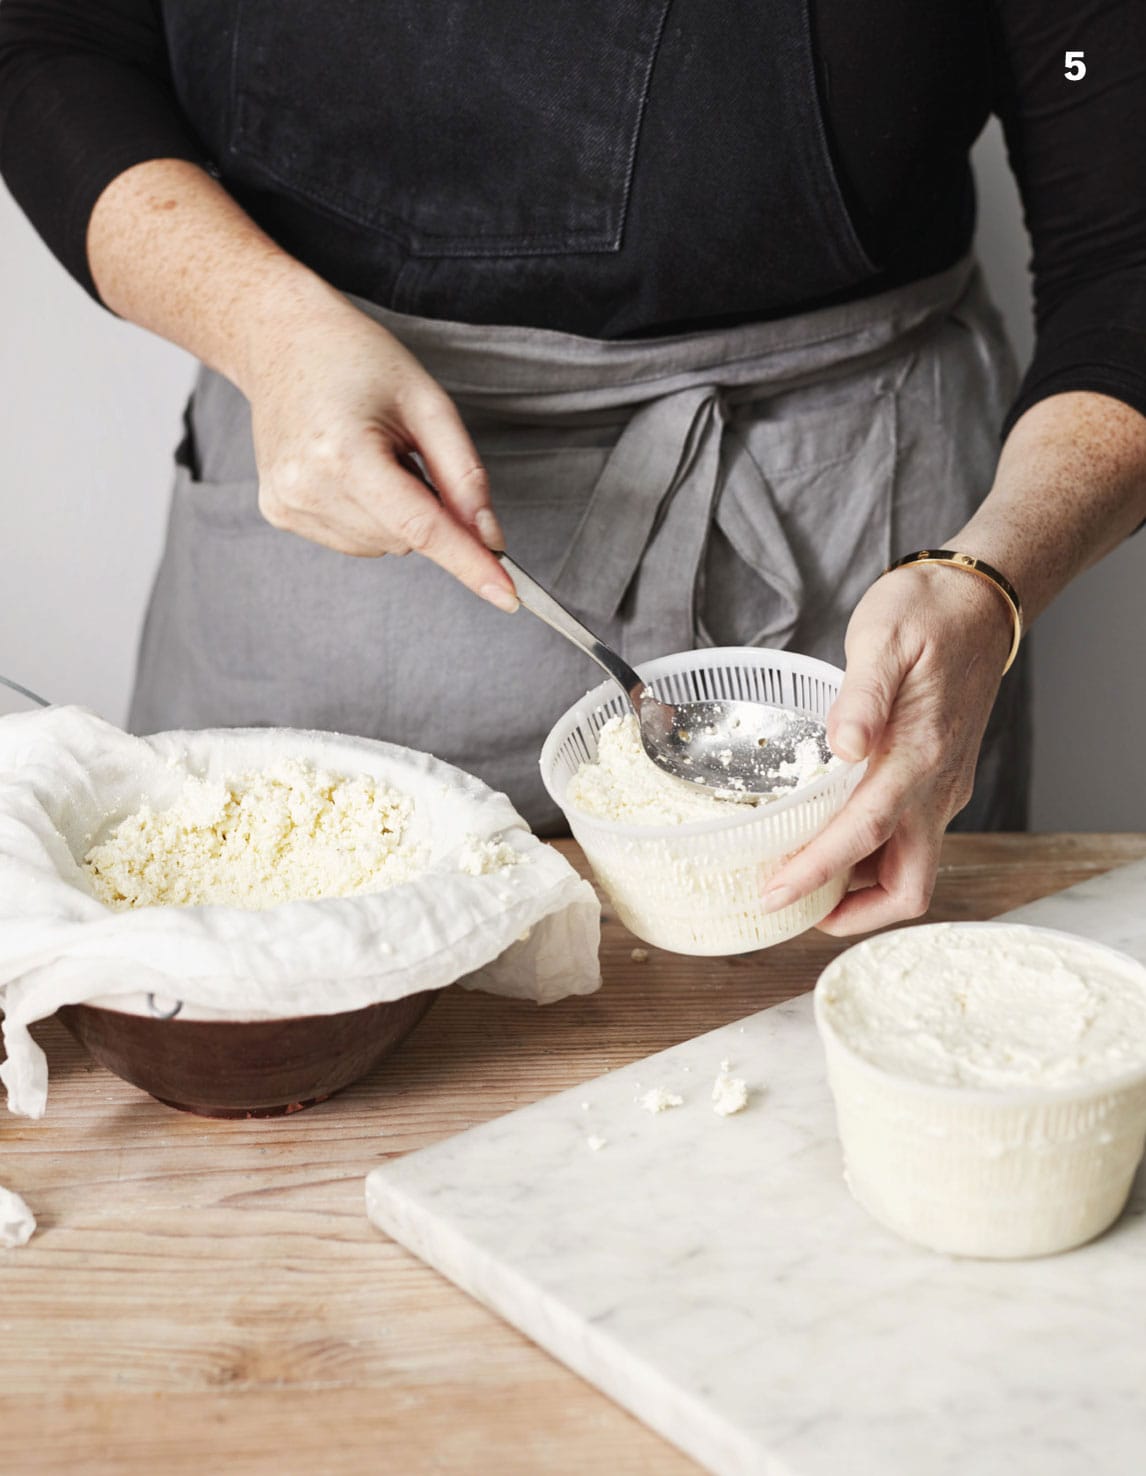
5 Press down firmly then put the ricotta moulds in the refrigerator to chill for at least 1 hour. Turn it out of the mould and serve immediately to enjoy it at its freshest, or store in a sealed container in the refrigerator for up to 1 week.

◁ Homemade Gnocchi with Ricotta and Basil Pesto
Once you have made your wonderful homemade ricotta, I love to use it in fresh pesto, which I serve with gnocchi. This gorgeous dish is so fresh, and I love how every element of it is made from scratch. This is perfect comfort food.
Homemade gnocchi
4 large potatoes, peeled
2 tbsp butter
1 egg
200g (7oz) plain (all-purpose) flour, plus extra for dusting
salt and freshly ground black pepper
Ricotta and basil pesto
3 handfuls of fresh basil
1 tbsp pine nuts, plus extra for sprinkling
3 garlic cloves, halved
2 tbsp lemon juice
70g (21/2oz) ricotta (see here)
SERVES 4
To make the gnocchi, place the potatoes in a large pan of cold salted water. Bring the water to the boil and cook for 20 minutes until the potatoes are soft. Drain the potatoes and leave to cool until you can touch them.
In a large bowl, use a potato masher or fork to mash the potatoes with the butter until there are no more lumps. Then add a teaspoon each of salt and pepper and give it a good mix.
Next, make a little well in the middle of the bowl and add your egg. Beat the egg, then use your hands to mix the potatoes and egg together into a ball.
Place the mixture on a lightly floured surface, then add all the flour to the mix. Work quite quickly to knead the flour into the mix until it is no longer sticky.
Separate the mixture into eight, then roll each one into a long, skinny sausage shape about 2.5cm (1 inch) wide. Cut the sausages into 1cm (1/2-inch) pieces and press lightly with a fork.
Place your fresh gnocchi into a large pan of salted boiling water and boil until they float to the top – usually about 30 seconds – then drain and set aside.
To make the ricotta and basil pesto, place the basil, pine nuts, garlic and lemon juice in a food processor, and process until finely chopped. Add the ricotta and season with salt and pepper. Process again until just combined. Stir through the gnocchi, sprinkle a few pine nuts over the top and serve immediately.
You can also serve the pesto tossed through hot pasta, with grilled chicken or as a dip.

◁ Lemon and Raspberry Ricotta Cheesecake
Fresh ricotta is perfect for sweet dishes. This easy cheesecake recipe is an ideal summer dessert.
220g (73/4oz) digestive biscuits (graham crackers)
100g (31/2oz) butter, melted
250g (9oz) ricotta (see here)
600g (1lb 5oz) cream cheese (see here)
4 eggs
200g (7oz) caster (superfine) sugar
grated zest of 5 unwaxed lemons, plus juice of 3 lemons
150g (5oz) raspberries
SERVES 4
Preheat the oven to 170°C (325°F/Gas Mark 3). In a food processor, whizz the biscuits and melted butter until they resemble breadcrumbs. If you don’t have a food processor you can crush the biscuits and mix them with the butter by hand. Press the mixture into the bottom of a 23cm (9 inch) cake tin (pan), then chill in the refrigerator while you make the cheesecake mix.
In a large bowl, mix together the ricotta, cream cheese, eggs, sugar and the zest and juice of the lemons. Mix until smooth, then pour over the biscuit base. Chill in the refrigerator for 3 hours until set. Turn out onto a plate and top with the raspberries.
◁ Mozzarella
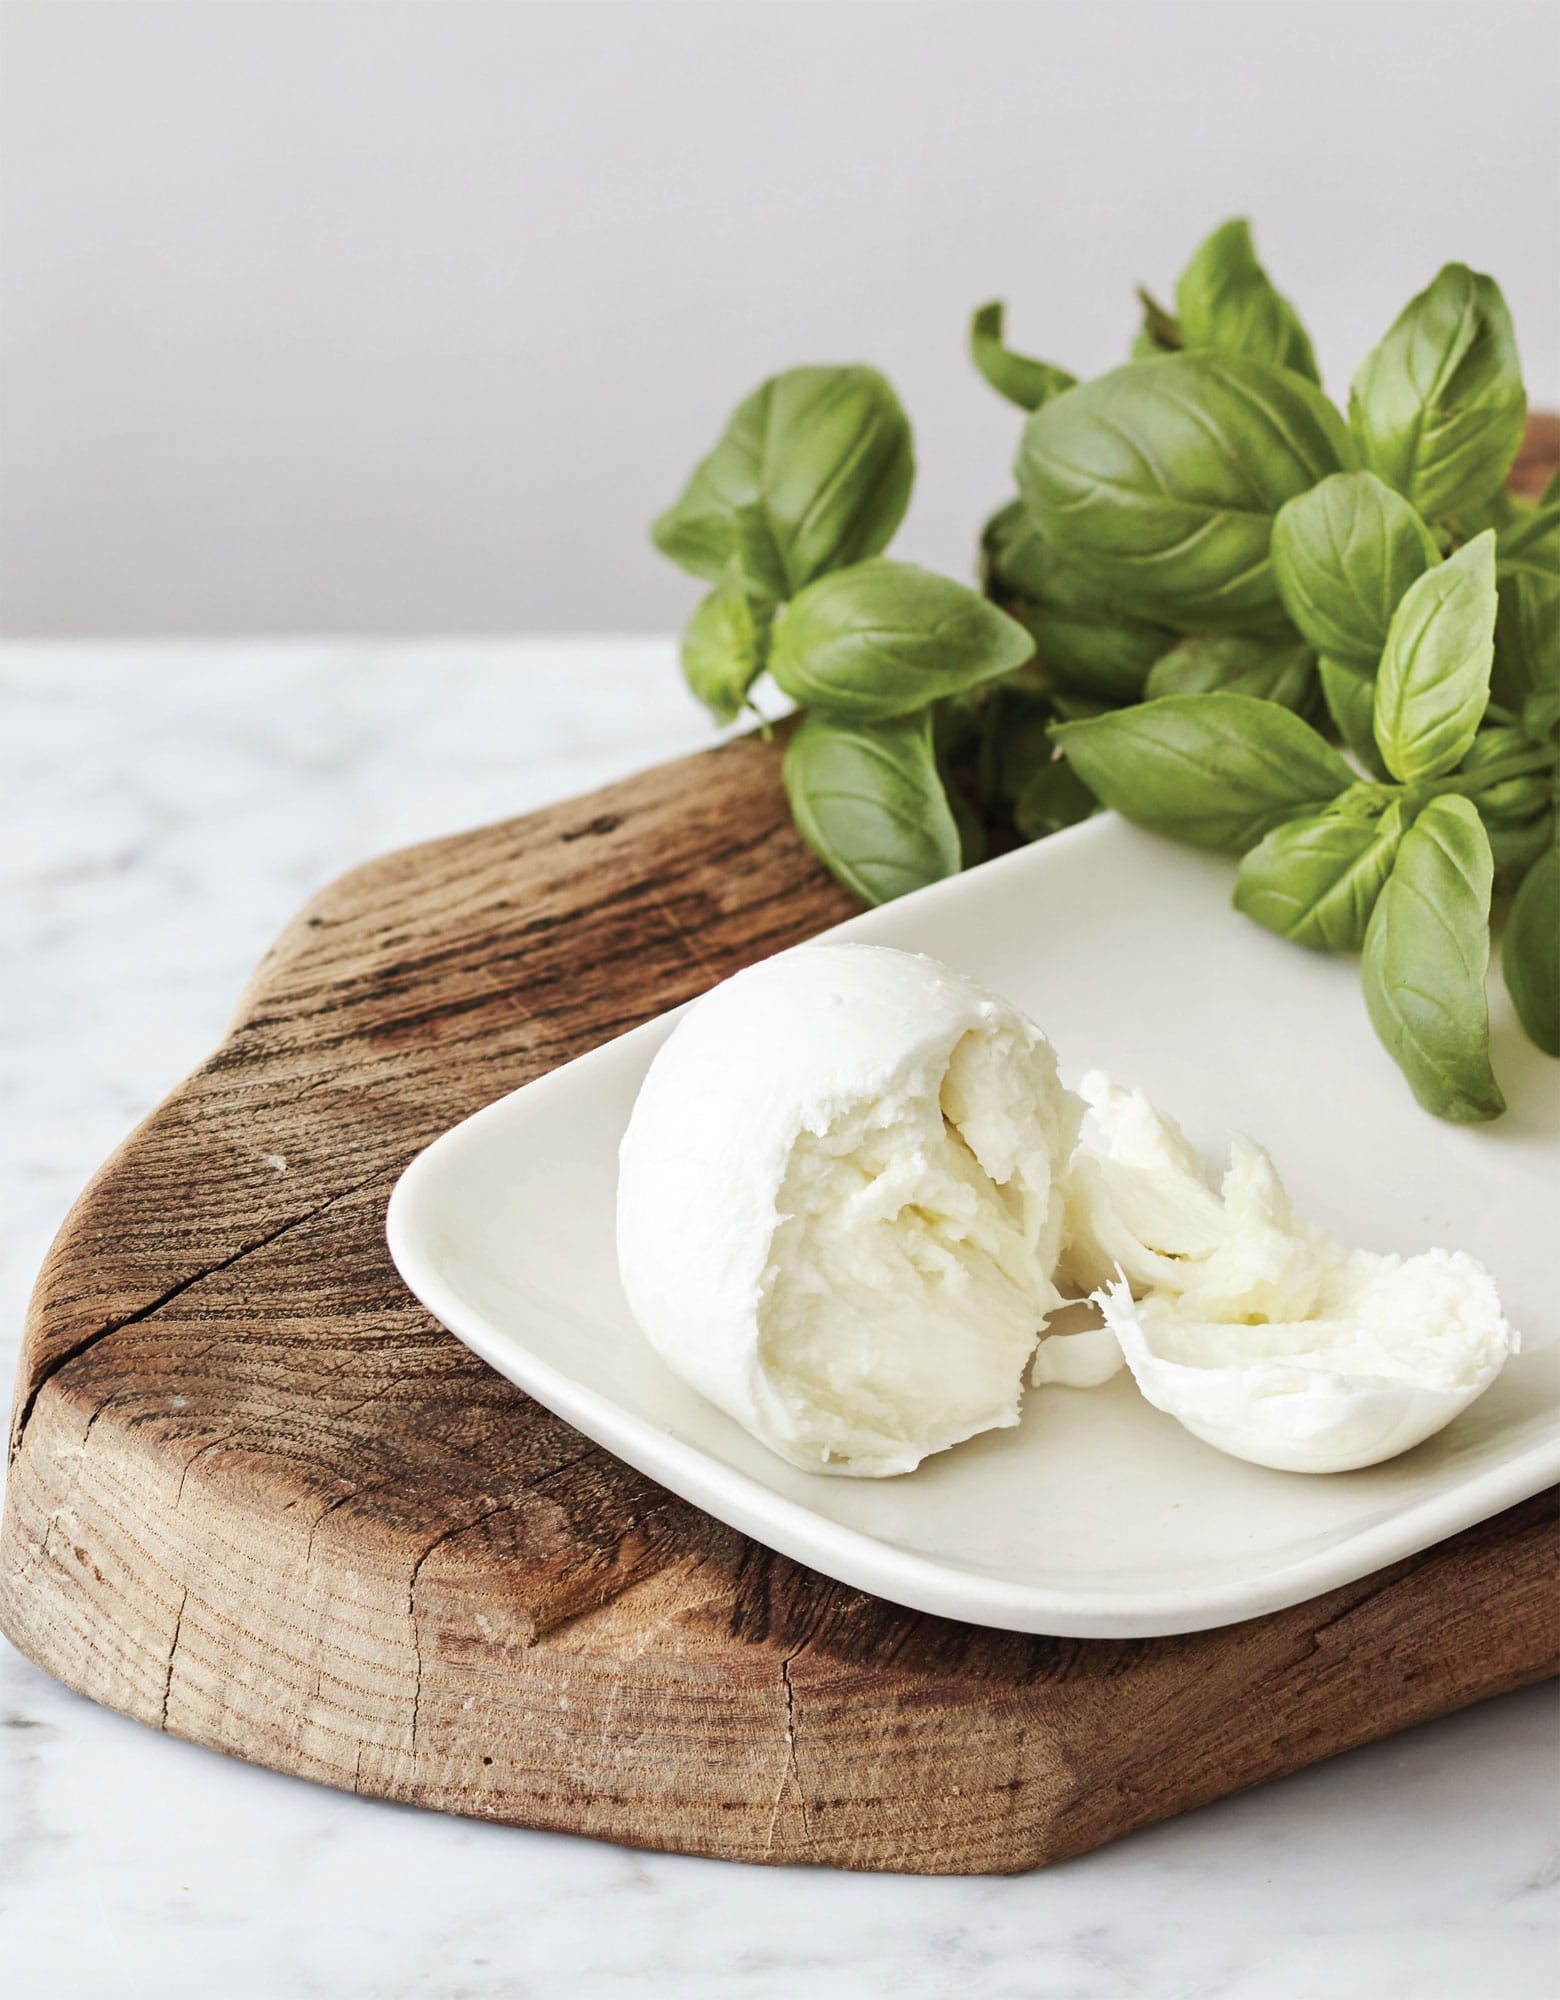
Understanding how to make your own mozzarella is a fantastic thing – knowing that at any moment, should you desire it, you could whip up your very own ball of creamy cheese, still warm from the whey whence it came. Mozzarella is a really fun cheese to make – there is lots of pulling and shaping, so it’s great to make with the kids. Once you have mastered the curd, you can keep this in the refrigerator and make mozzarella quickly and easily whenever you fancy it.
1/4 vegetable rennet tablet
11/2 tsp citric acid
4.5 litres (8 pints/19 cups) milk
1 tsp salt, plus salt for brining
MAKES 2 x 100g (31/2oz) balls
You will need: an instant-read thermometer and a curd knife
1 In a measuring jug (cup), dissolve the rennet tablet in 50ml (13/4fl oz) cooled boiled water, stirring until completely dissolved.
2 In a separate jug, repeat the process with the citric acid.
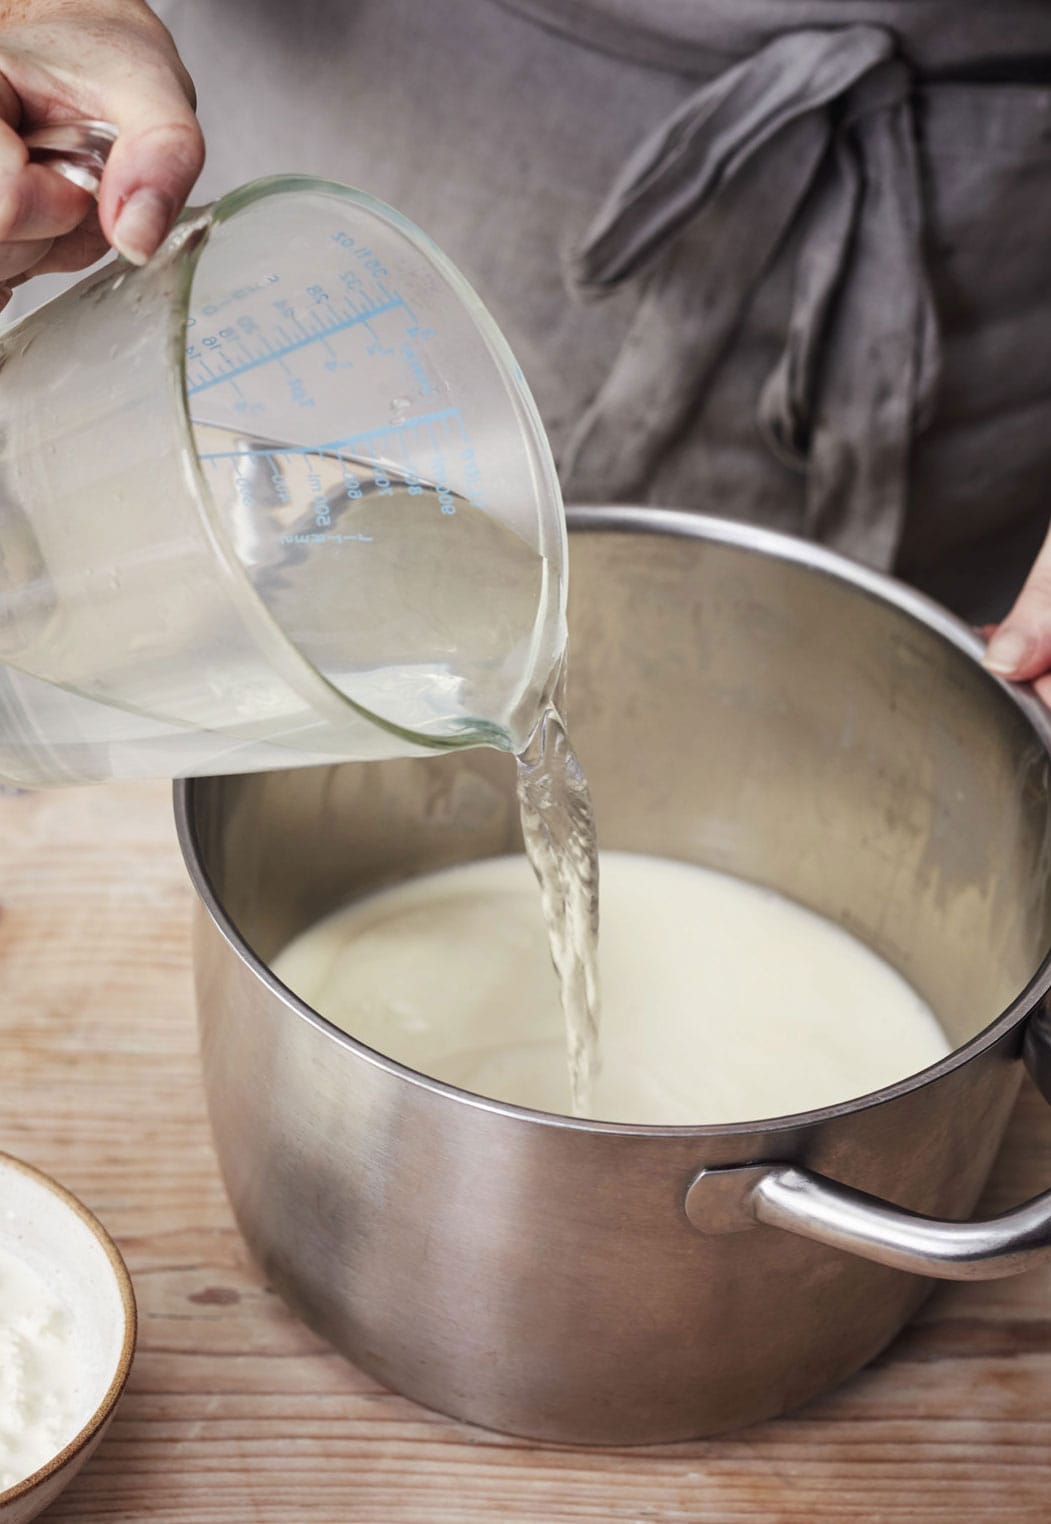
3 Put the milk in a saucepan and add the citric acid mixture, making sure you combine them thoroughly. Gently heat the milk, keeping a close eye on the temperature, and once it reaches 35°C (95°F) slowly add the rennet mixture and stir for 1 minute. Remove from the heat, put a lid on the pan and leave for 25 minutes.

4 After 25 minutes, the curds should have separated from the whey. You can check this by inserting a knife and seeing if it comes out clean, rather like checking a cake. Cut your curds into 2.5cm (1-inch) cubes using a curd knife.
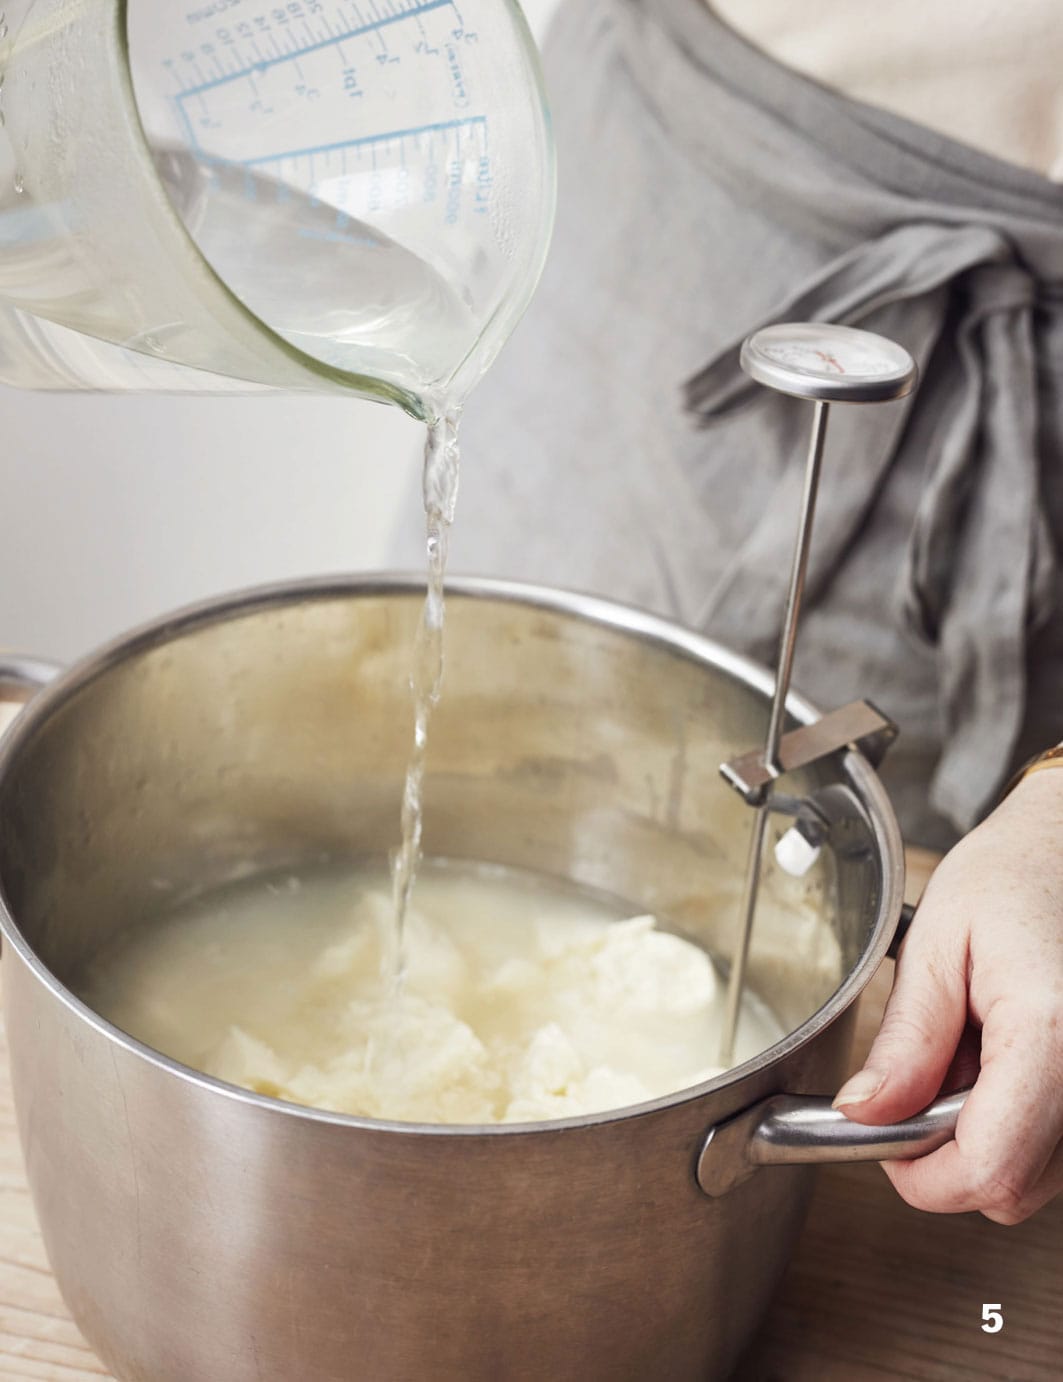
5 Add some boiling water to the pan very carefully, not directly on top the curds. Check the internal heat of the curds. It should be around 57°C (135°F). If necessary add more hot water.
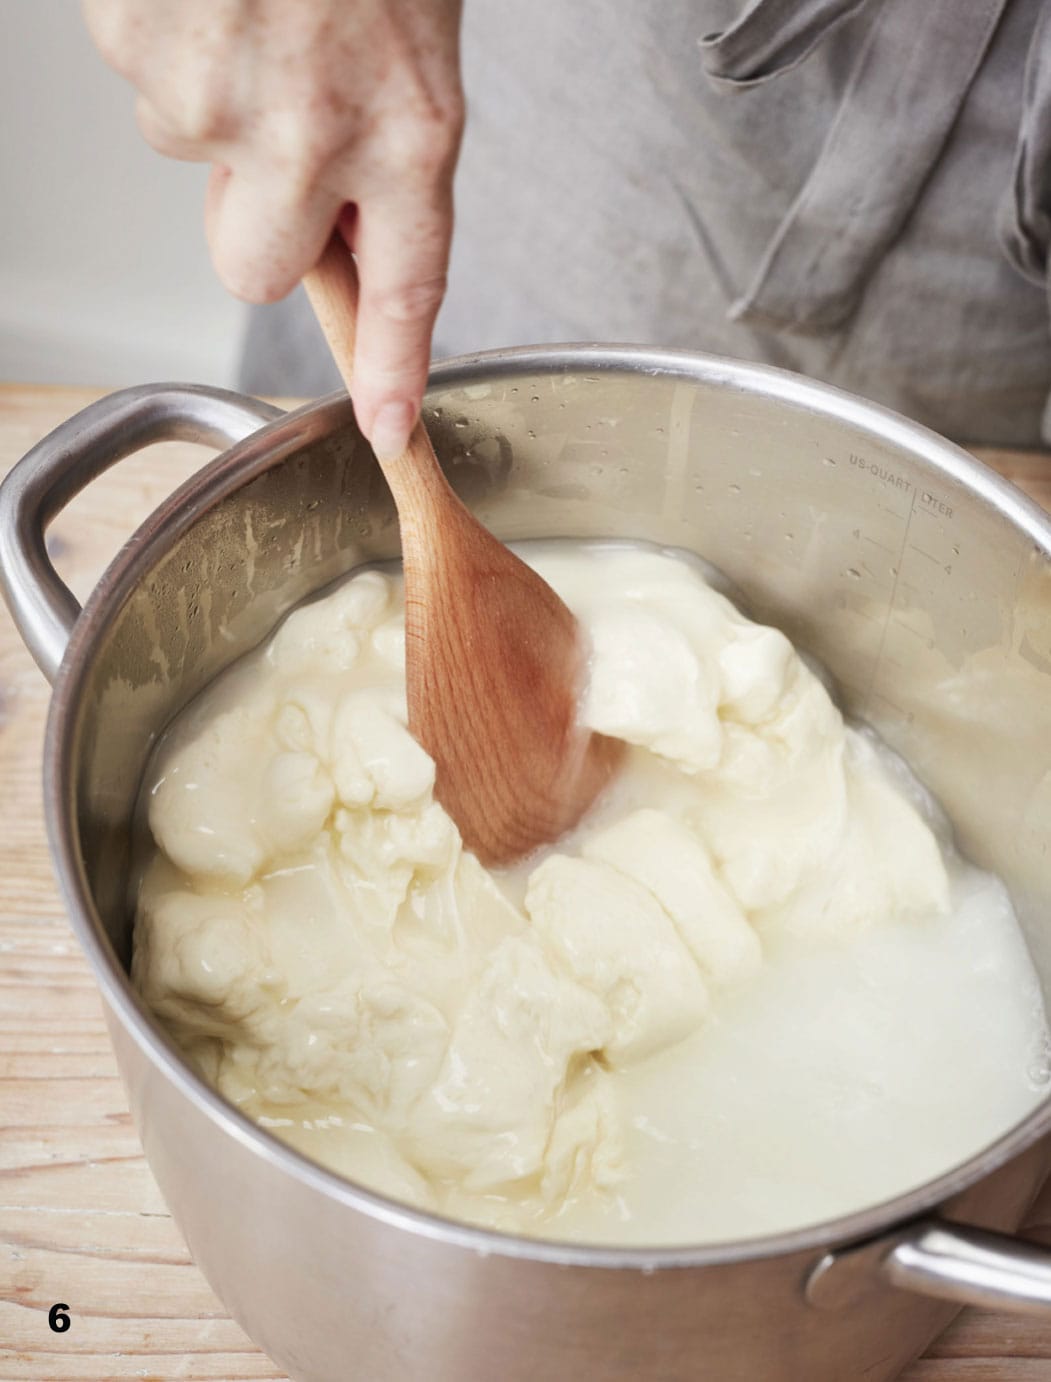
6 Using a wooden spoon begin to gently fold the curds, stretching as you fold. If the curds get cool, return them to the hot water for 20 seconds then continue.
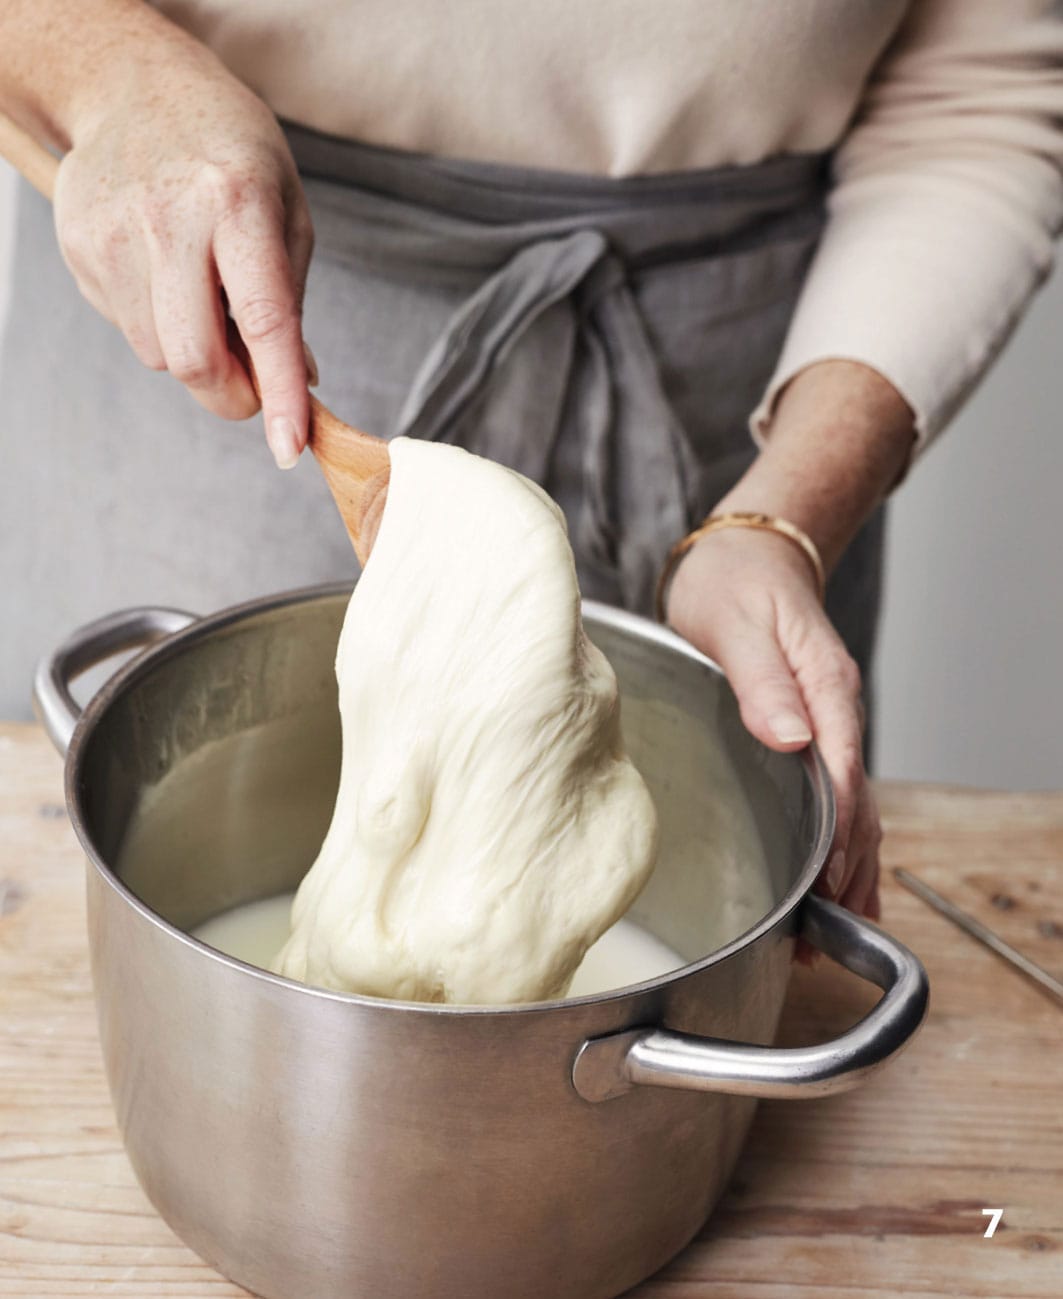
7 Repeat folding until the curds become smooth and elastic. Start to work them by hand, wearing gloves.
8 Fill a separate bowl with salted water, ready for the finished cheese. Thoroughly dissolve the salt into room-temperature water (around 700g/1lb 81/2oz salt to 4.5 litres/8 pints/19 cups water), then chill it until ready to use. Brine should generally be around 13°C (55°F).

9 Add 1 teaspoon of salt to the cheese, and stretch and fold it for a further 30 seconds. The longer you stretch and fold the cheese, the firmer it will become.
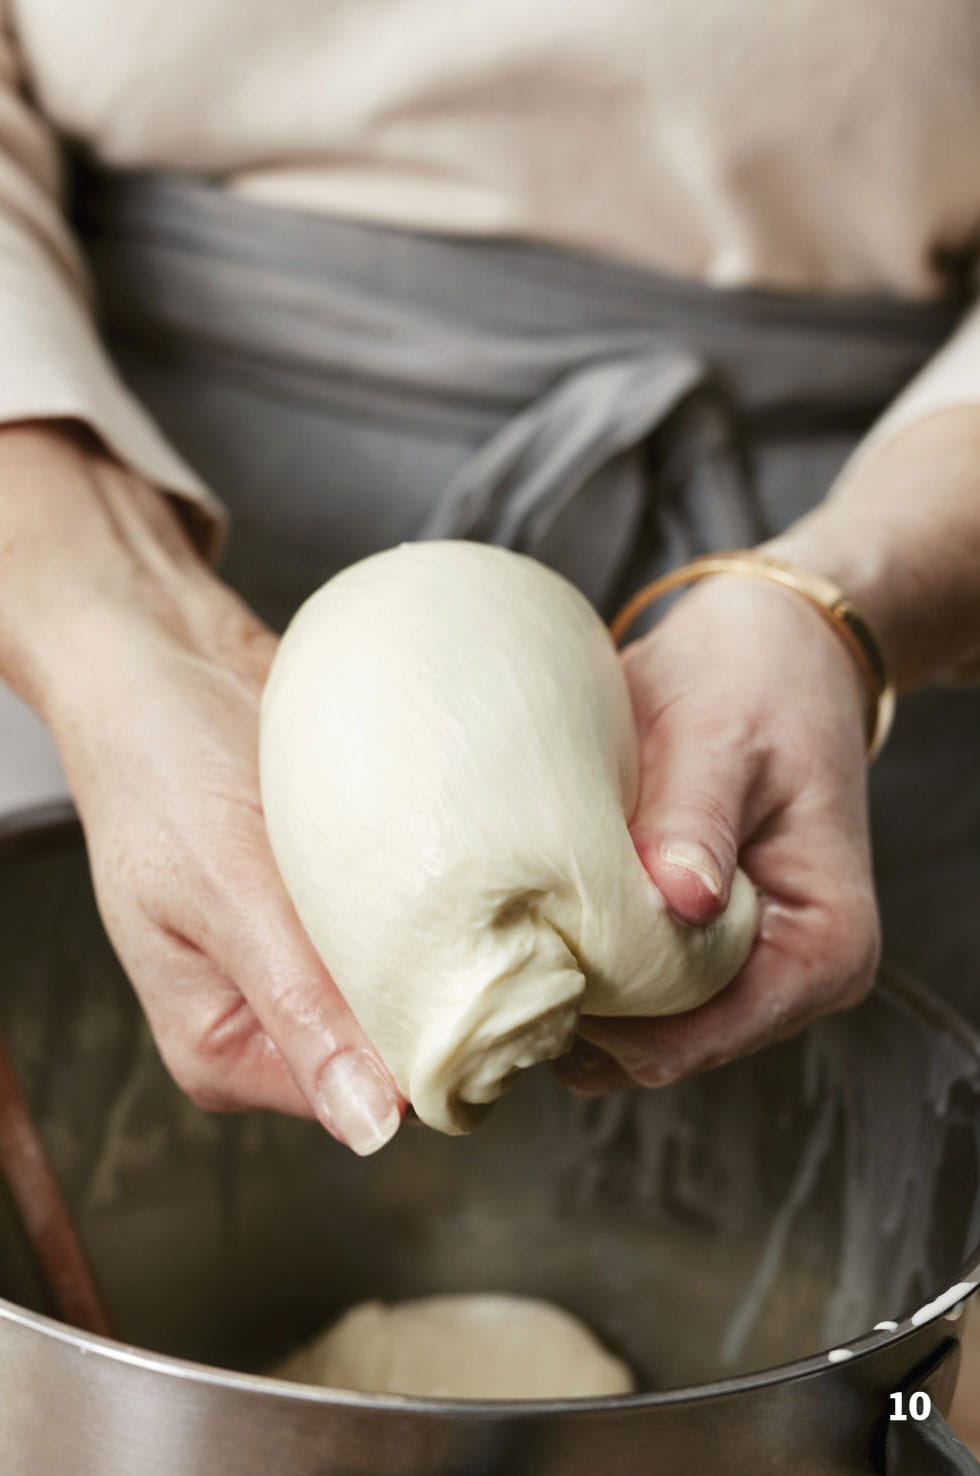
10 Continue to stretch and fold until the cheese has a stringy and shiny texture. Once the cheese is smooth, shape it into a ball.
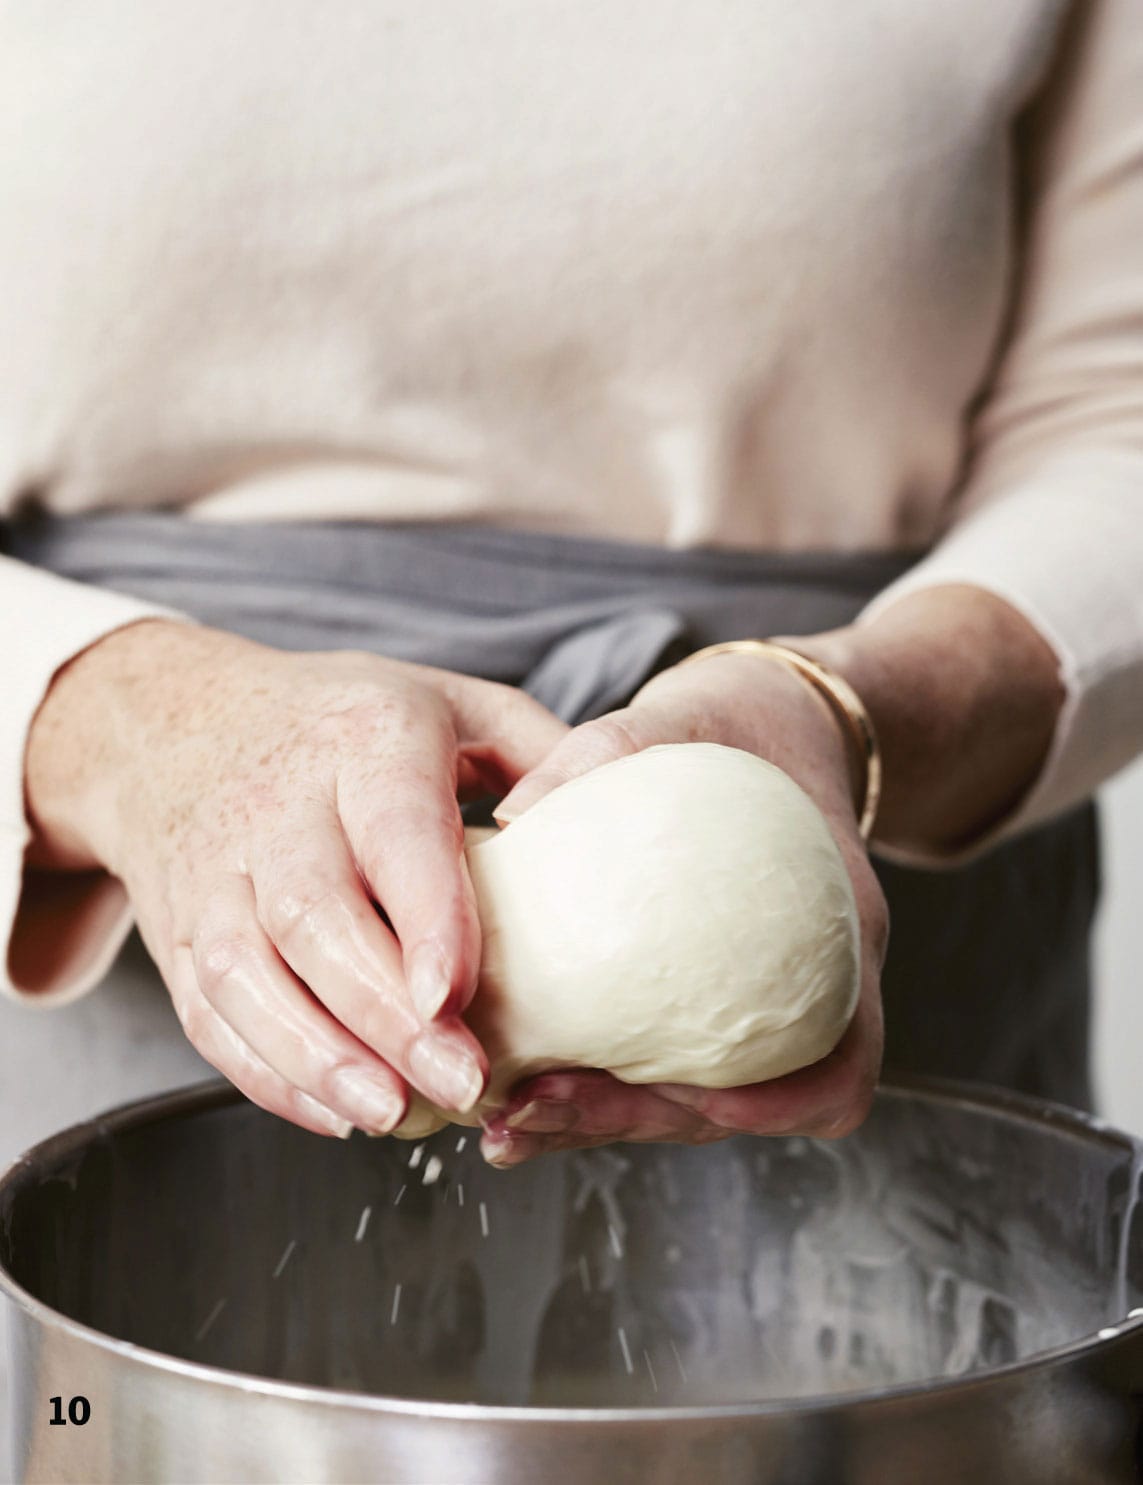
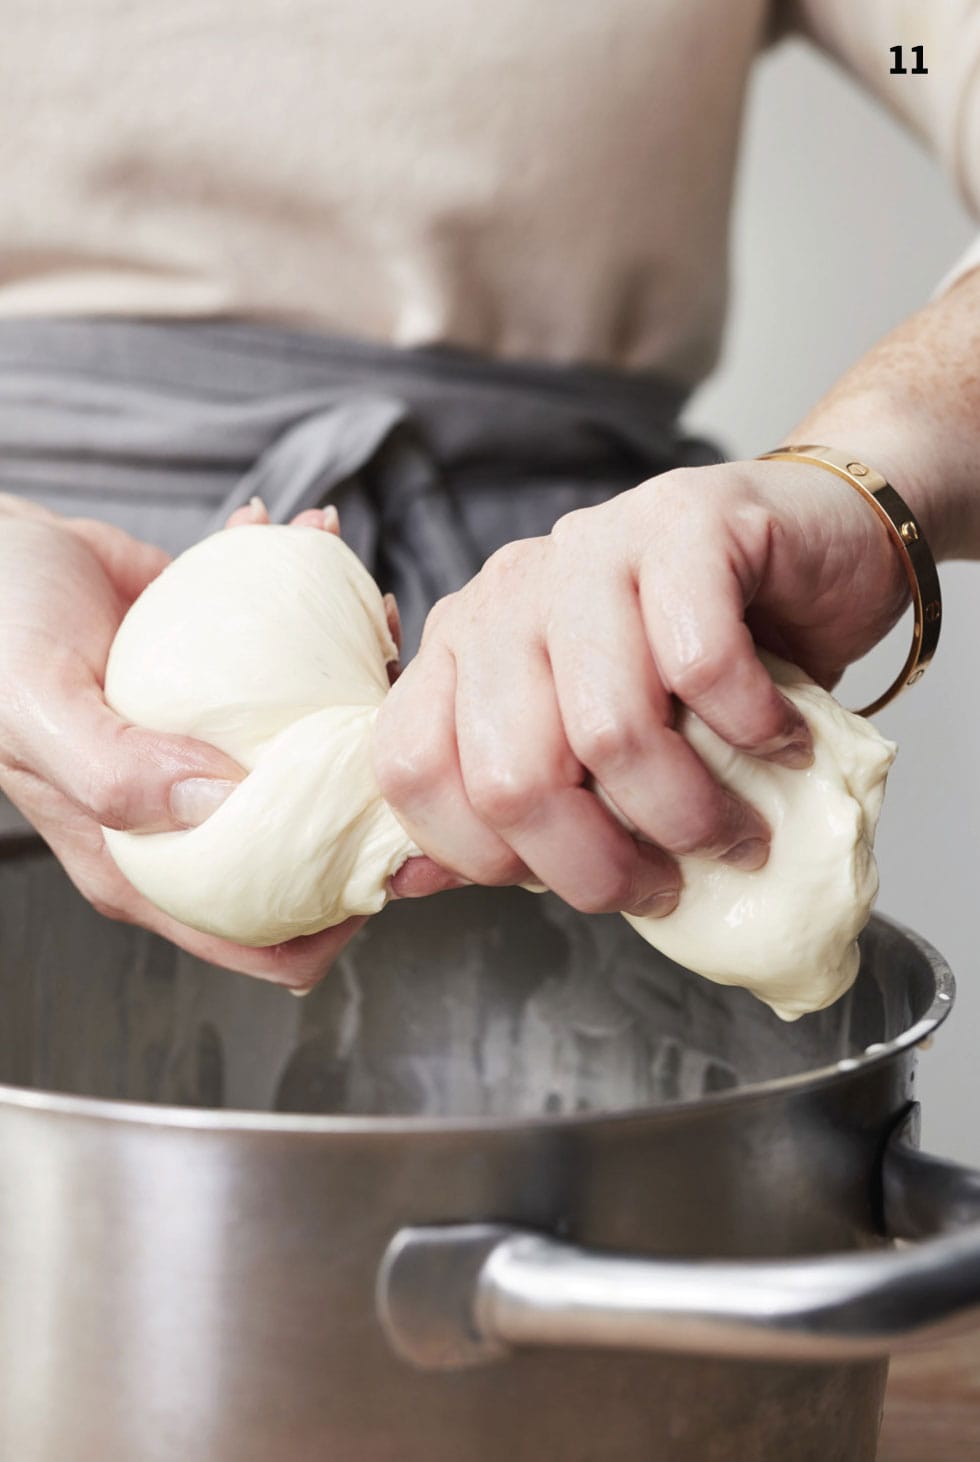
11 Divide the cheese into two balls. Add them to the prepared saltwater bath, to help with the smoothness. After 20 minutes in the water, the cheese will be ready to eat. Or you can store it, in the salt water, in the refrigerator for up to 1 week.
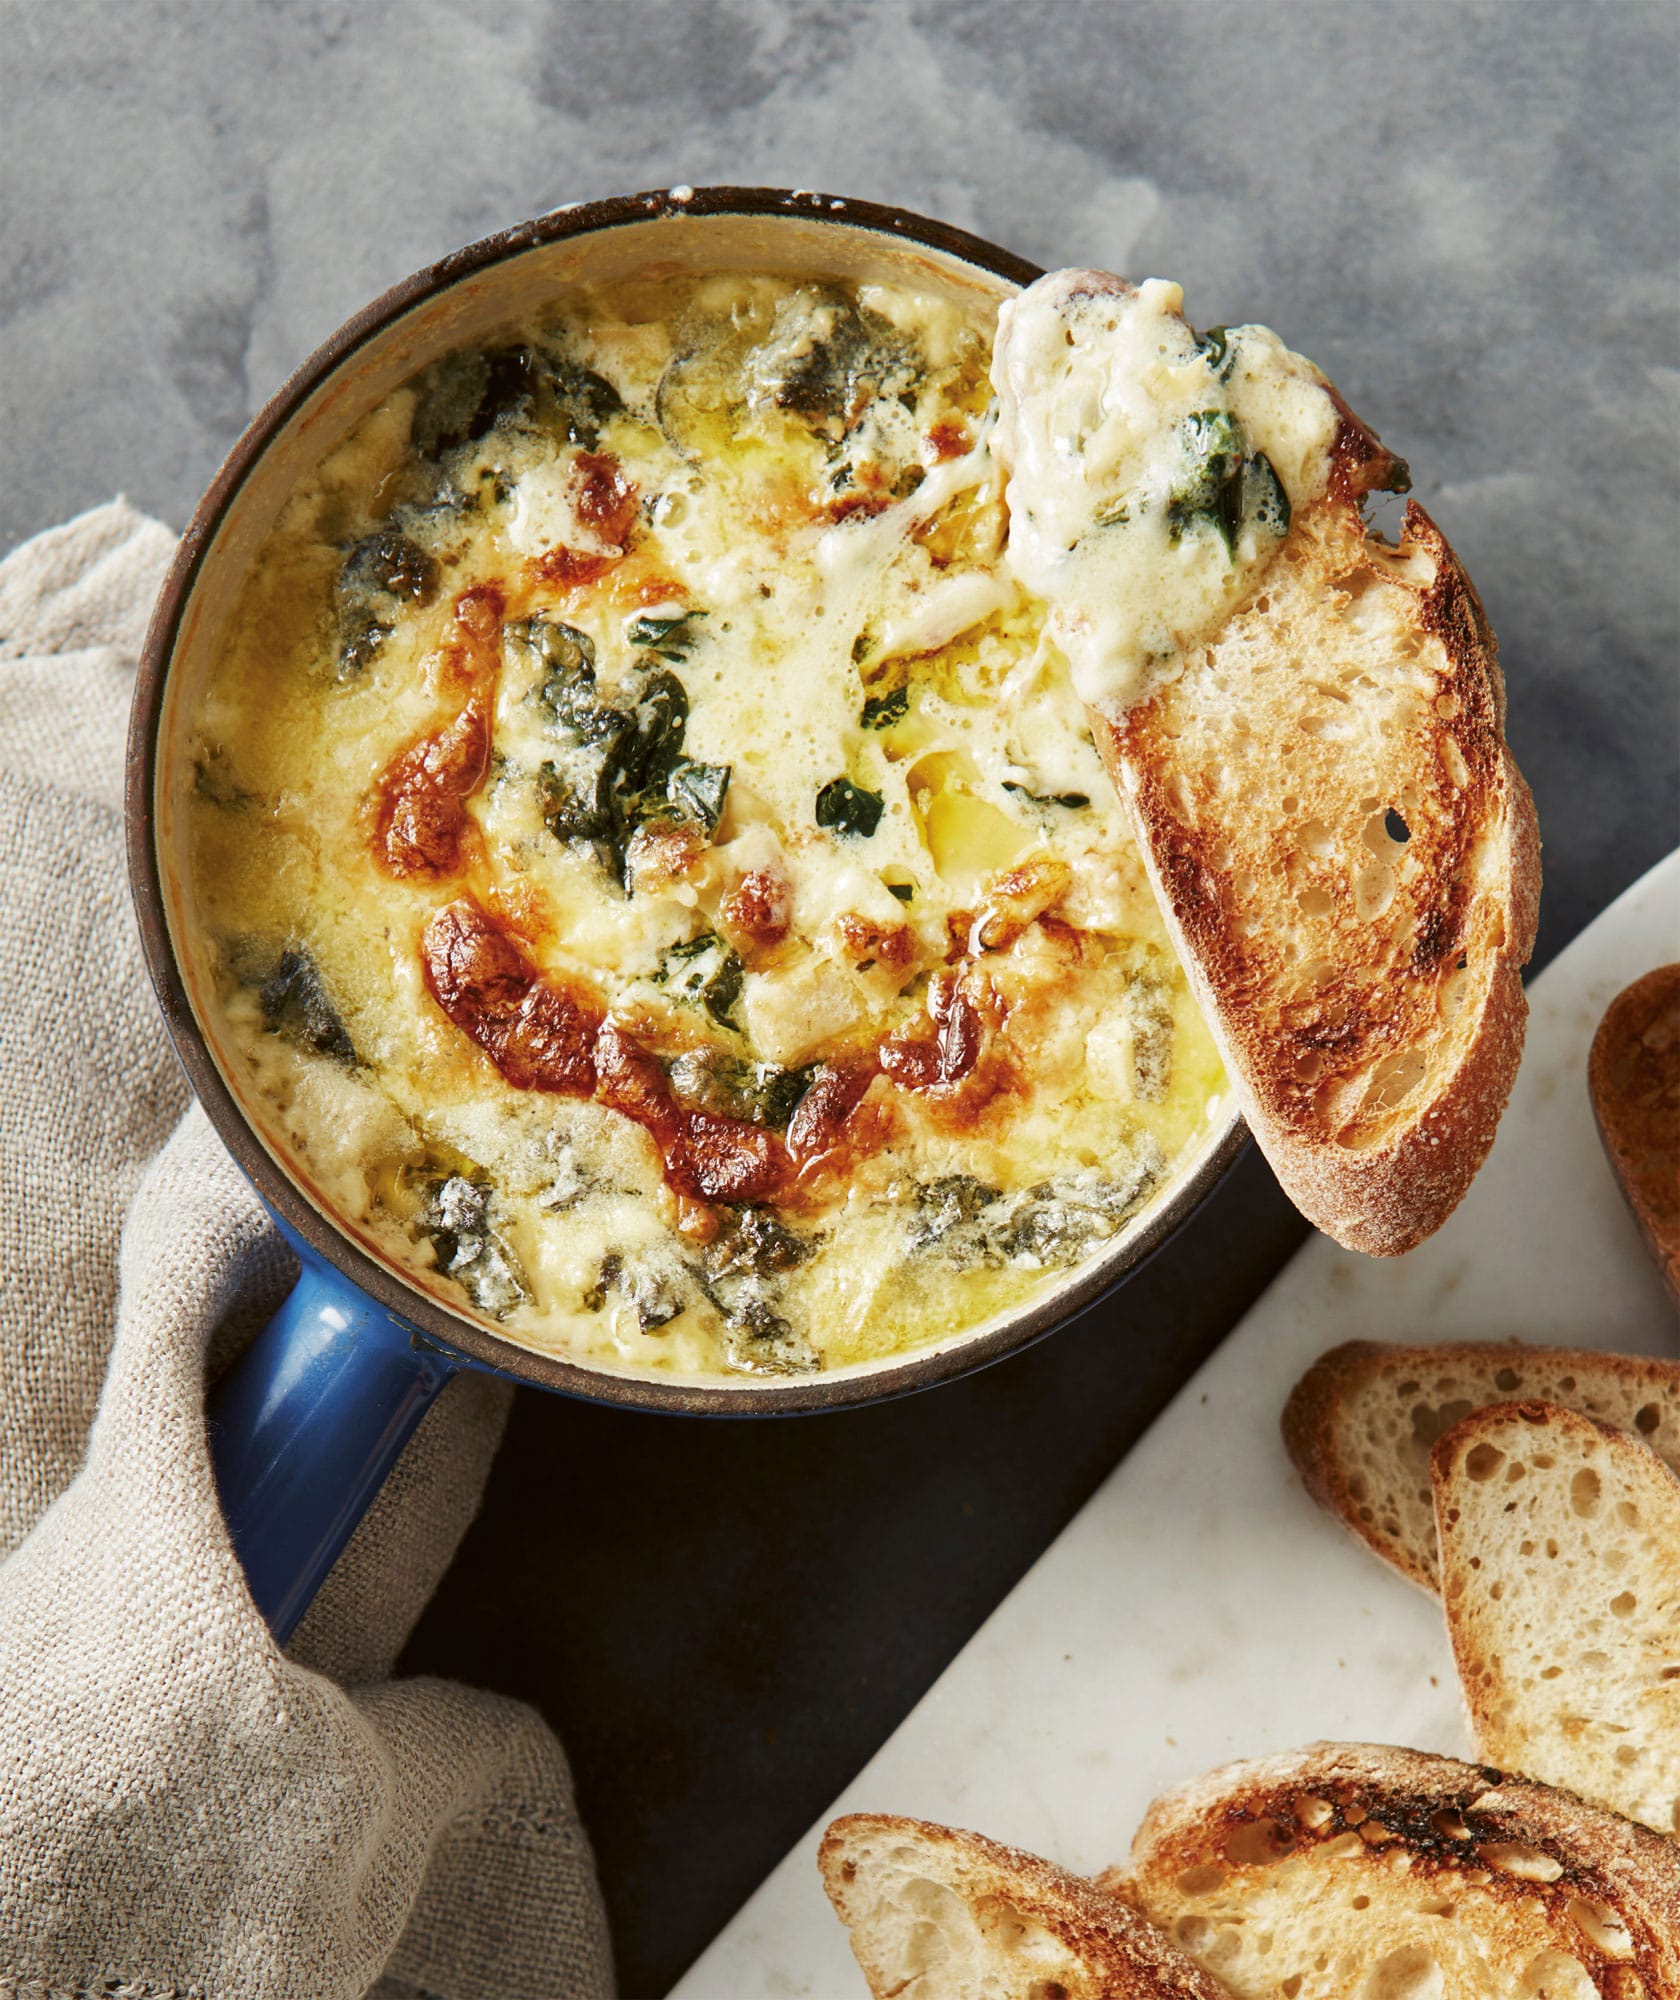
◁ Baked Mozzarella, Artichoke and Spinach Dip
This super-easy, cheesy spinach and artichoke dip is perfect with toasted baguette slices, crackers or just scooped with a spoon. This is a recipe an American friend made for me years ago, and ever since it’s been my go-to recipe for our New Year’s Eve party, cosy nights in or if I fancy some delicious comfort food after a long day in the cheese shop.
butter, for greasing
350g (121/2oz) grated mozzarella (see here)
2 garlic cloves, crushed
200g (7oz) Parmesan, grated
2 tsp salt
400–500g (14oz–1lb 13/4oz) spinach, cooked and drained
200–250g (7–9oz) marinated artichokes from a jar, drained and chopped
100ml (31/2 fl oz/scant 1/2 cup) double (heavy) cream
100ml (31/2 fl oz/scant 1/2 cup) soured (sour) cream
SERVES 6
Preheat the oven to 190°C (375°F/Gas Mark 5) and grease a 25cm (10-inch) round baking dish.
Add all the ingredients to a large mixing bowl, then mix until fully combined.
Pour the mixture into the greased dish and bake for about 25 minutes, until browned and bubbly. Leave to cool, then serve with toasted slices of French bread and dip away!

◁ Burrata
Burrata was first produced in southern Italy, and was created by the mozzarella cheesemakers as a way of using up some of their mozzarella scraps. They would blend them with fresh cream and wrap them up in a fresh ball of mozzarella. Burrata is now a wonderful delicacy in its own right.
homemade mozzarella (see step 1)
120ml (1/2 cup) double (heavy) cream; more as needed
2 tsp salt, plus extra for brining
MAKES 2 x 100g (31/2oz) balls
1 Follow the recipe for mozzarella shown here to the end of step 4.
2 Now move a quarter of the curds to a small bowl. Add the cream and 1 teaspoon of salt and combine the mixture with your fingers. Set aside.
3 Fill a large bowl with cold water and ice and set it aside.
4 Add 1 teaspoon of salt into the pan of curds using your fingers.
5 Pour boiling water carefully into the pan of curds – not directly onto the curds, but around them until they are submerged. Let them sit for a minute or two.
6 Next, give the cream mix a stir and add a little more cream if it appears too dry.

7 With your hands, preferably wearing gloves (remember, this water is really hot!), shape half of the curds into a ball, then pull and stretch it between your hands, returning it to the water to add heat if needed. Continue to stretch it until it is shiny and elastic. The curds should be easy to stretch at this point. If the water gets too cool, add more hot water.
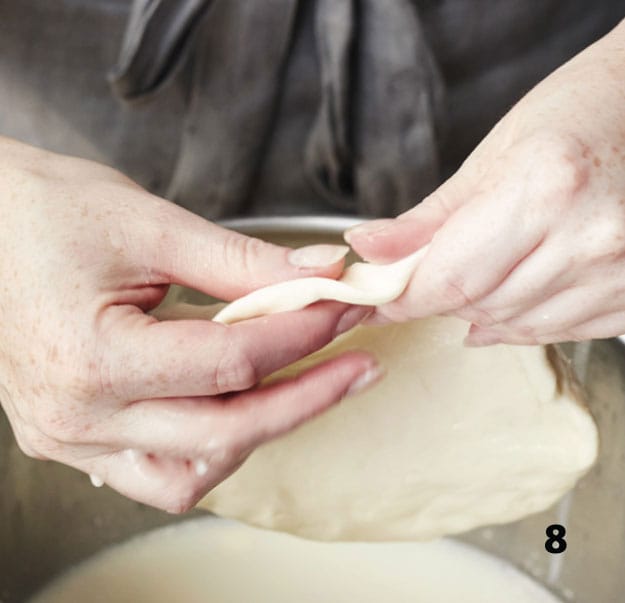
8 Working quickly, shape the ball into a disc, about 15cm (6 inches) in diameter and 5mm (1/4 inch) thick.
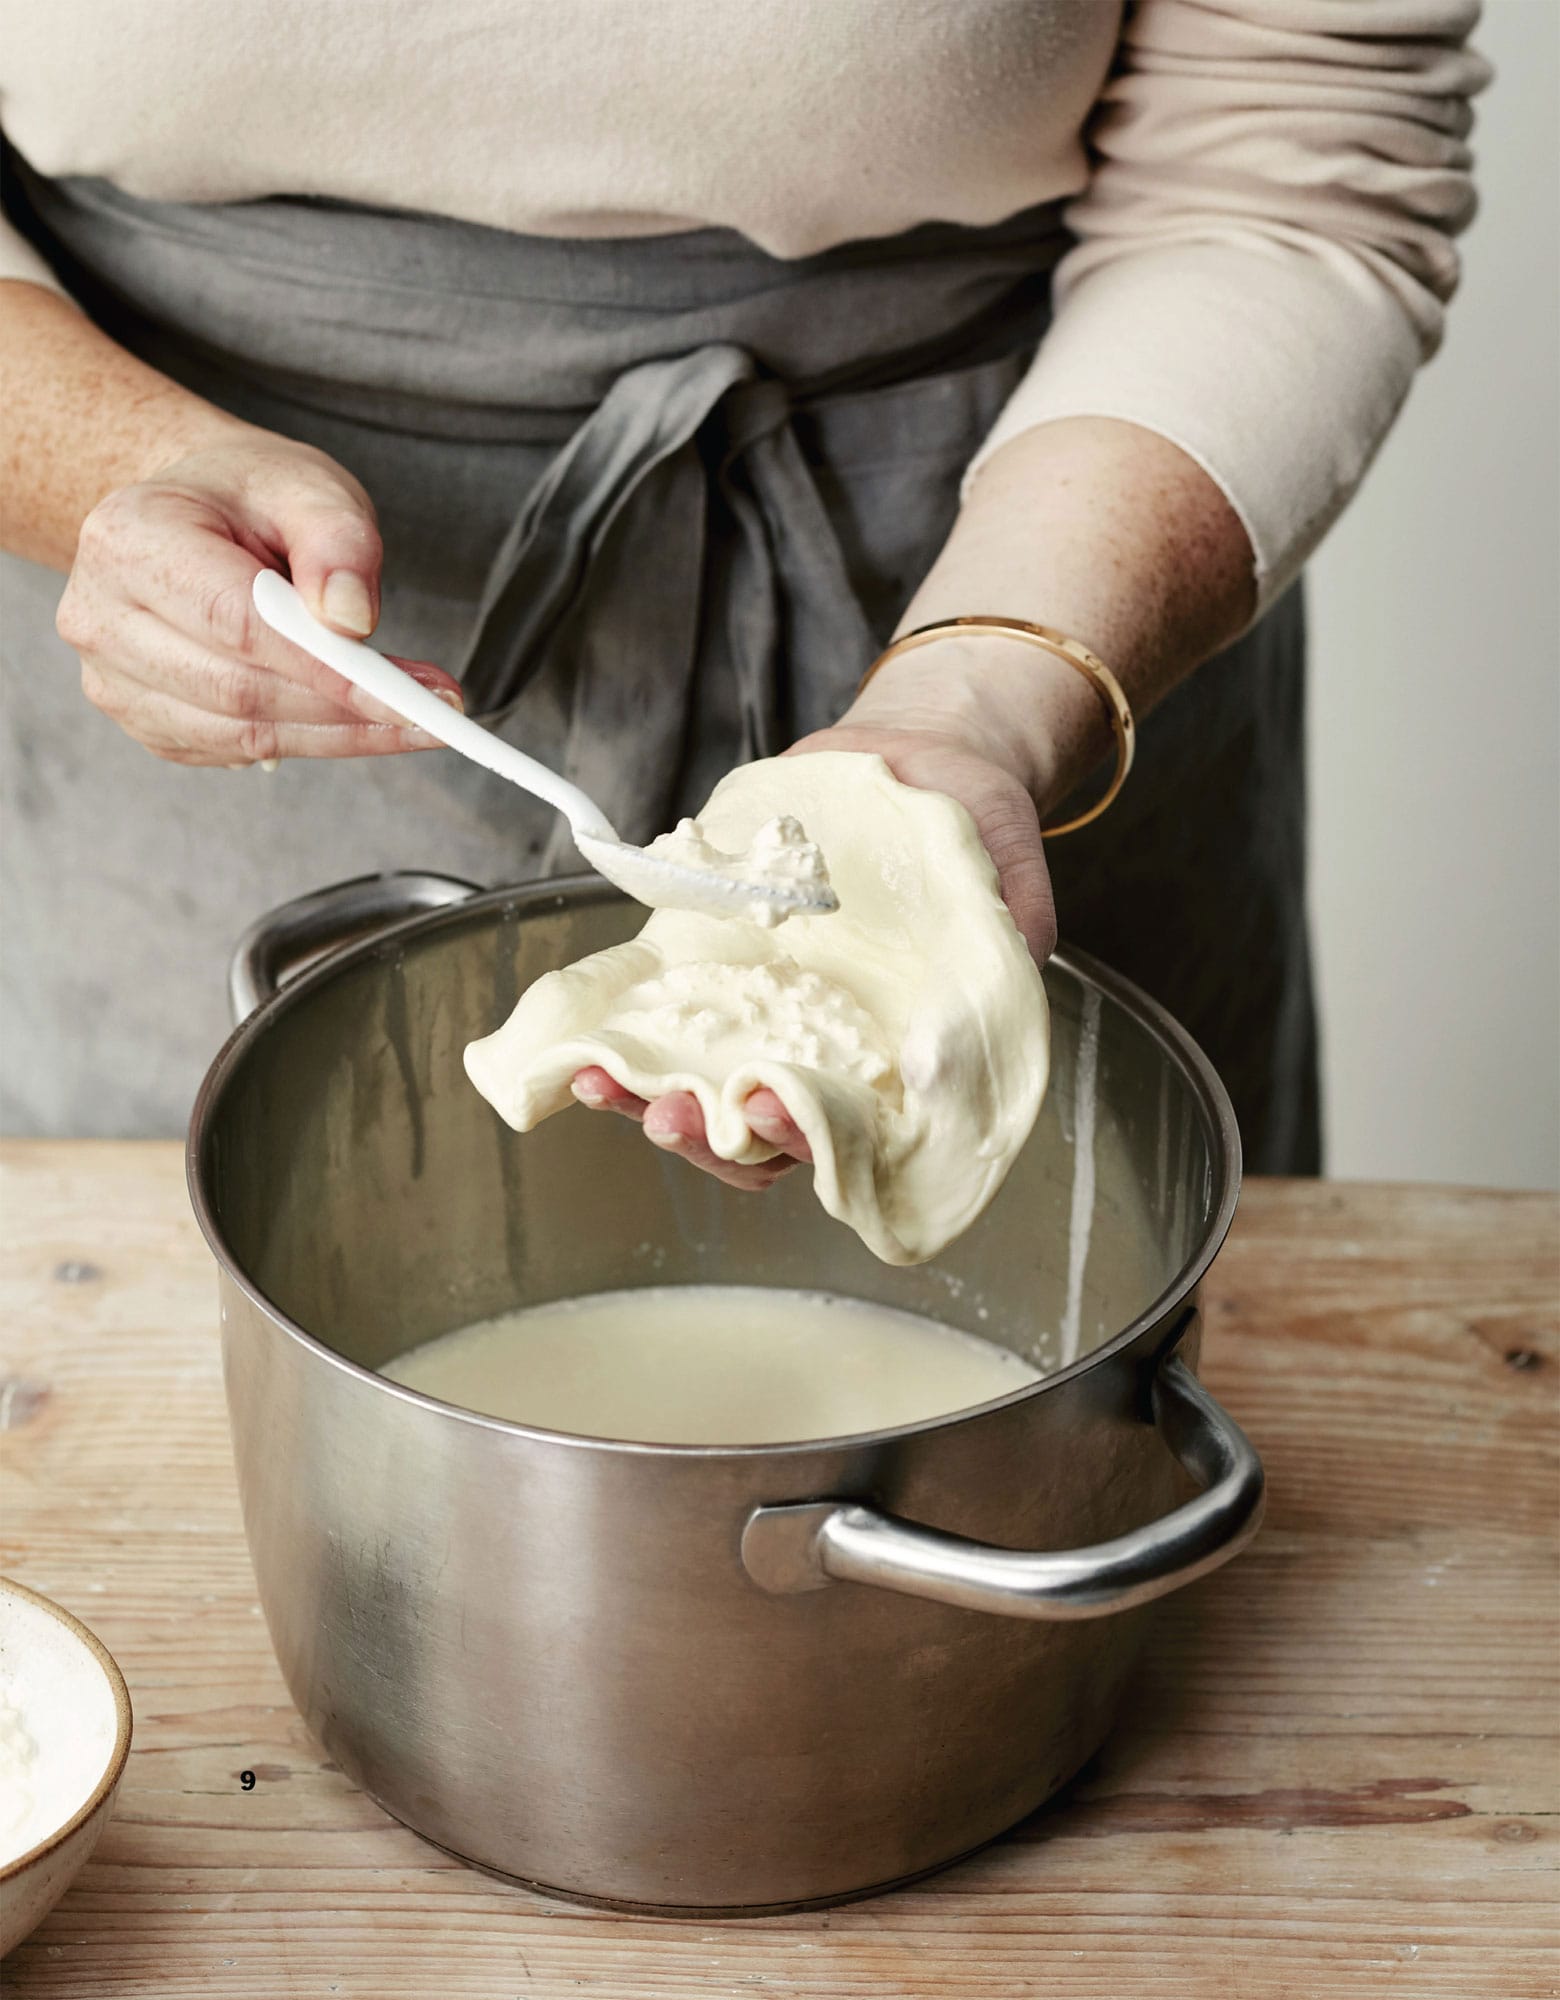
9 Place the disc in the palm of your hand and carefully add half the cream mix in the centre of the disc.

10 Gather the edges together to create a ball.
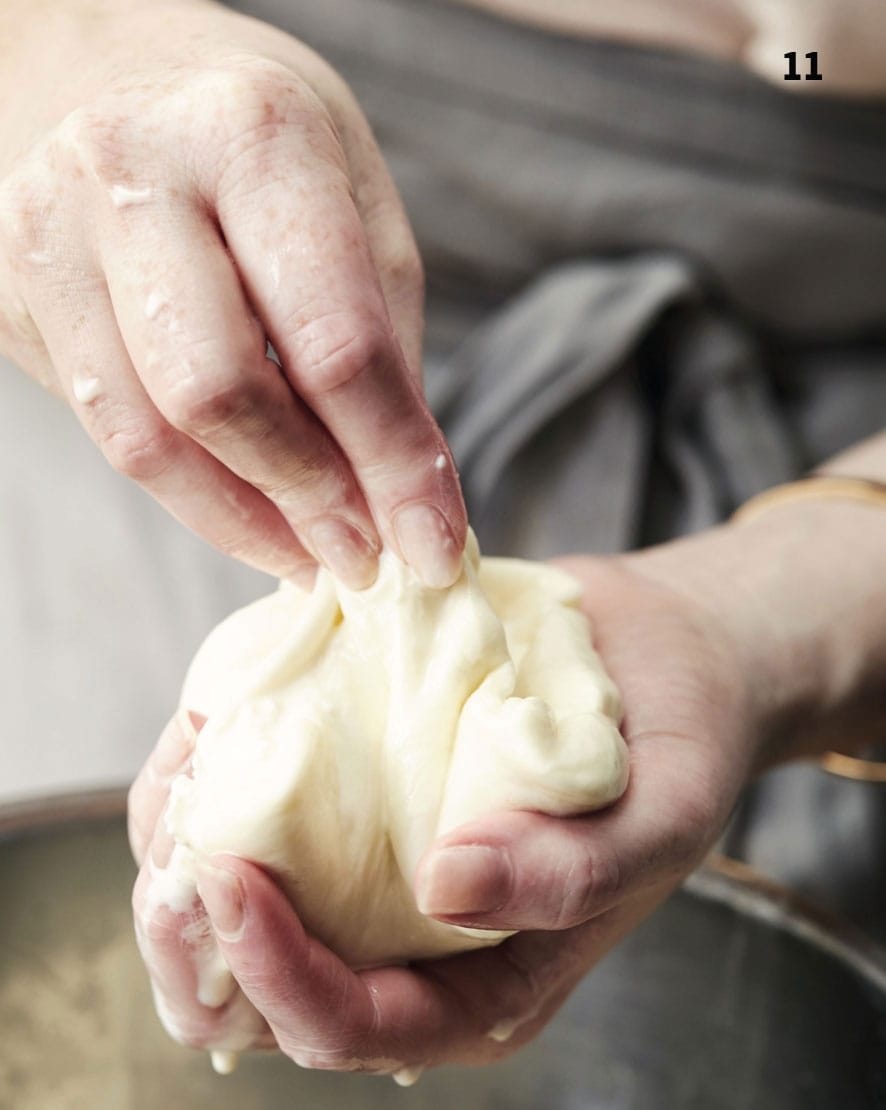
11 Pinch the top and twist to seal. Repeat with the rest of the curds and cream mix to make a second ball.

12 Place the burrata balls into the iced water and leave for 45 minutes to stiffen up before serving. Or you can store them in salt water (see here), in the refrigerator for up to 1 week.

◁ Burrata and Tomato Salad
This salad is so simple, and its success relies on using the ripest tomatoes and beautiful homemade burrata. Choose the tastiest varieties of tomato you can find – sun-ripened, juicy and fleshy – they are perfect for salads! I would recommend making this salad the day you make your cheese, as it such a vibrant, fresh dish.
350g (121/2oz) mixed tomatoes (choose about 3 different colours and sizes), halved or thickly sliced
2 pinches of sea salt
large pinch of freshly ground black pepper
pinch of caster (superfine) sugar
3 tbsp extra-virgin olive oil
finely grated zest of 1 unwaxed lemon, plus 1 tbsp of juice
20g (3/4oz) fresh oregano, roughly chopped
20g (3/4oz) fresh flat-leaf parsley, roughly chopped
small garlic clove, crushed
200g (7oz) burrata (see here)
SERVES 2
Place the tomatoes randomly in shallow bowls. Sprinkle with the salt, pepper and sugar, then cover and leave to marinate at room temperature for 20–30 minutes.
Meanwhile, mix the olive oil with the lemon zest and juice. Add the oregano and parsley to the dressing with the garlic and stir to combine. The tomatoes are already well seasoned, so you shouldn’t need to add any further salt and pepper to the dressing.
Drain the burrata and place in the centre of the tomatoes. Cut into the top of the cheese with a sharp knife and pinch the sides with thumbs and forefingers to open it up. Drizzle the dressing over the salad, sprinkle with extra pepper if desired, then serve immediately with some crusty bread.
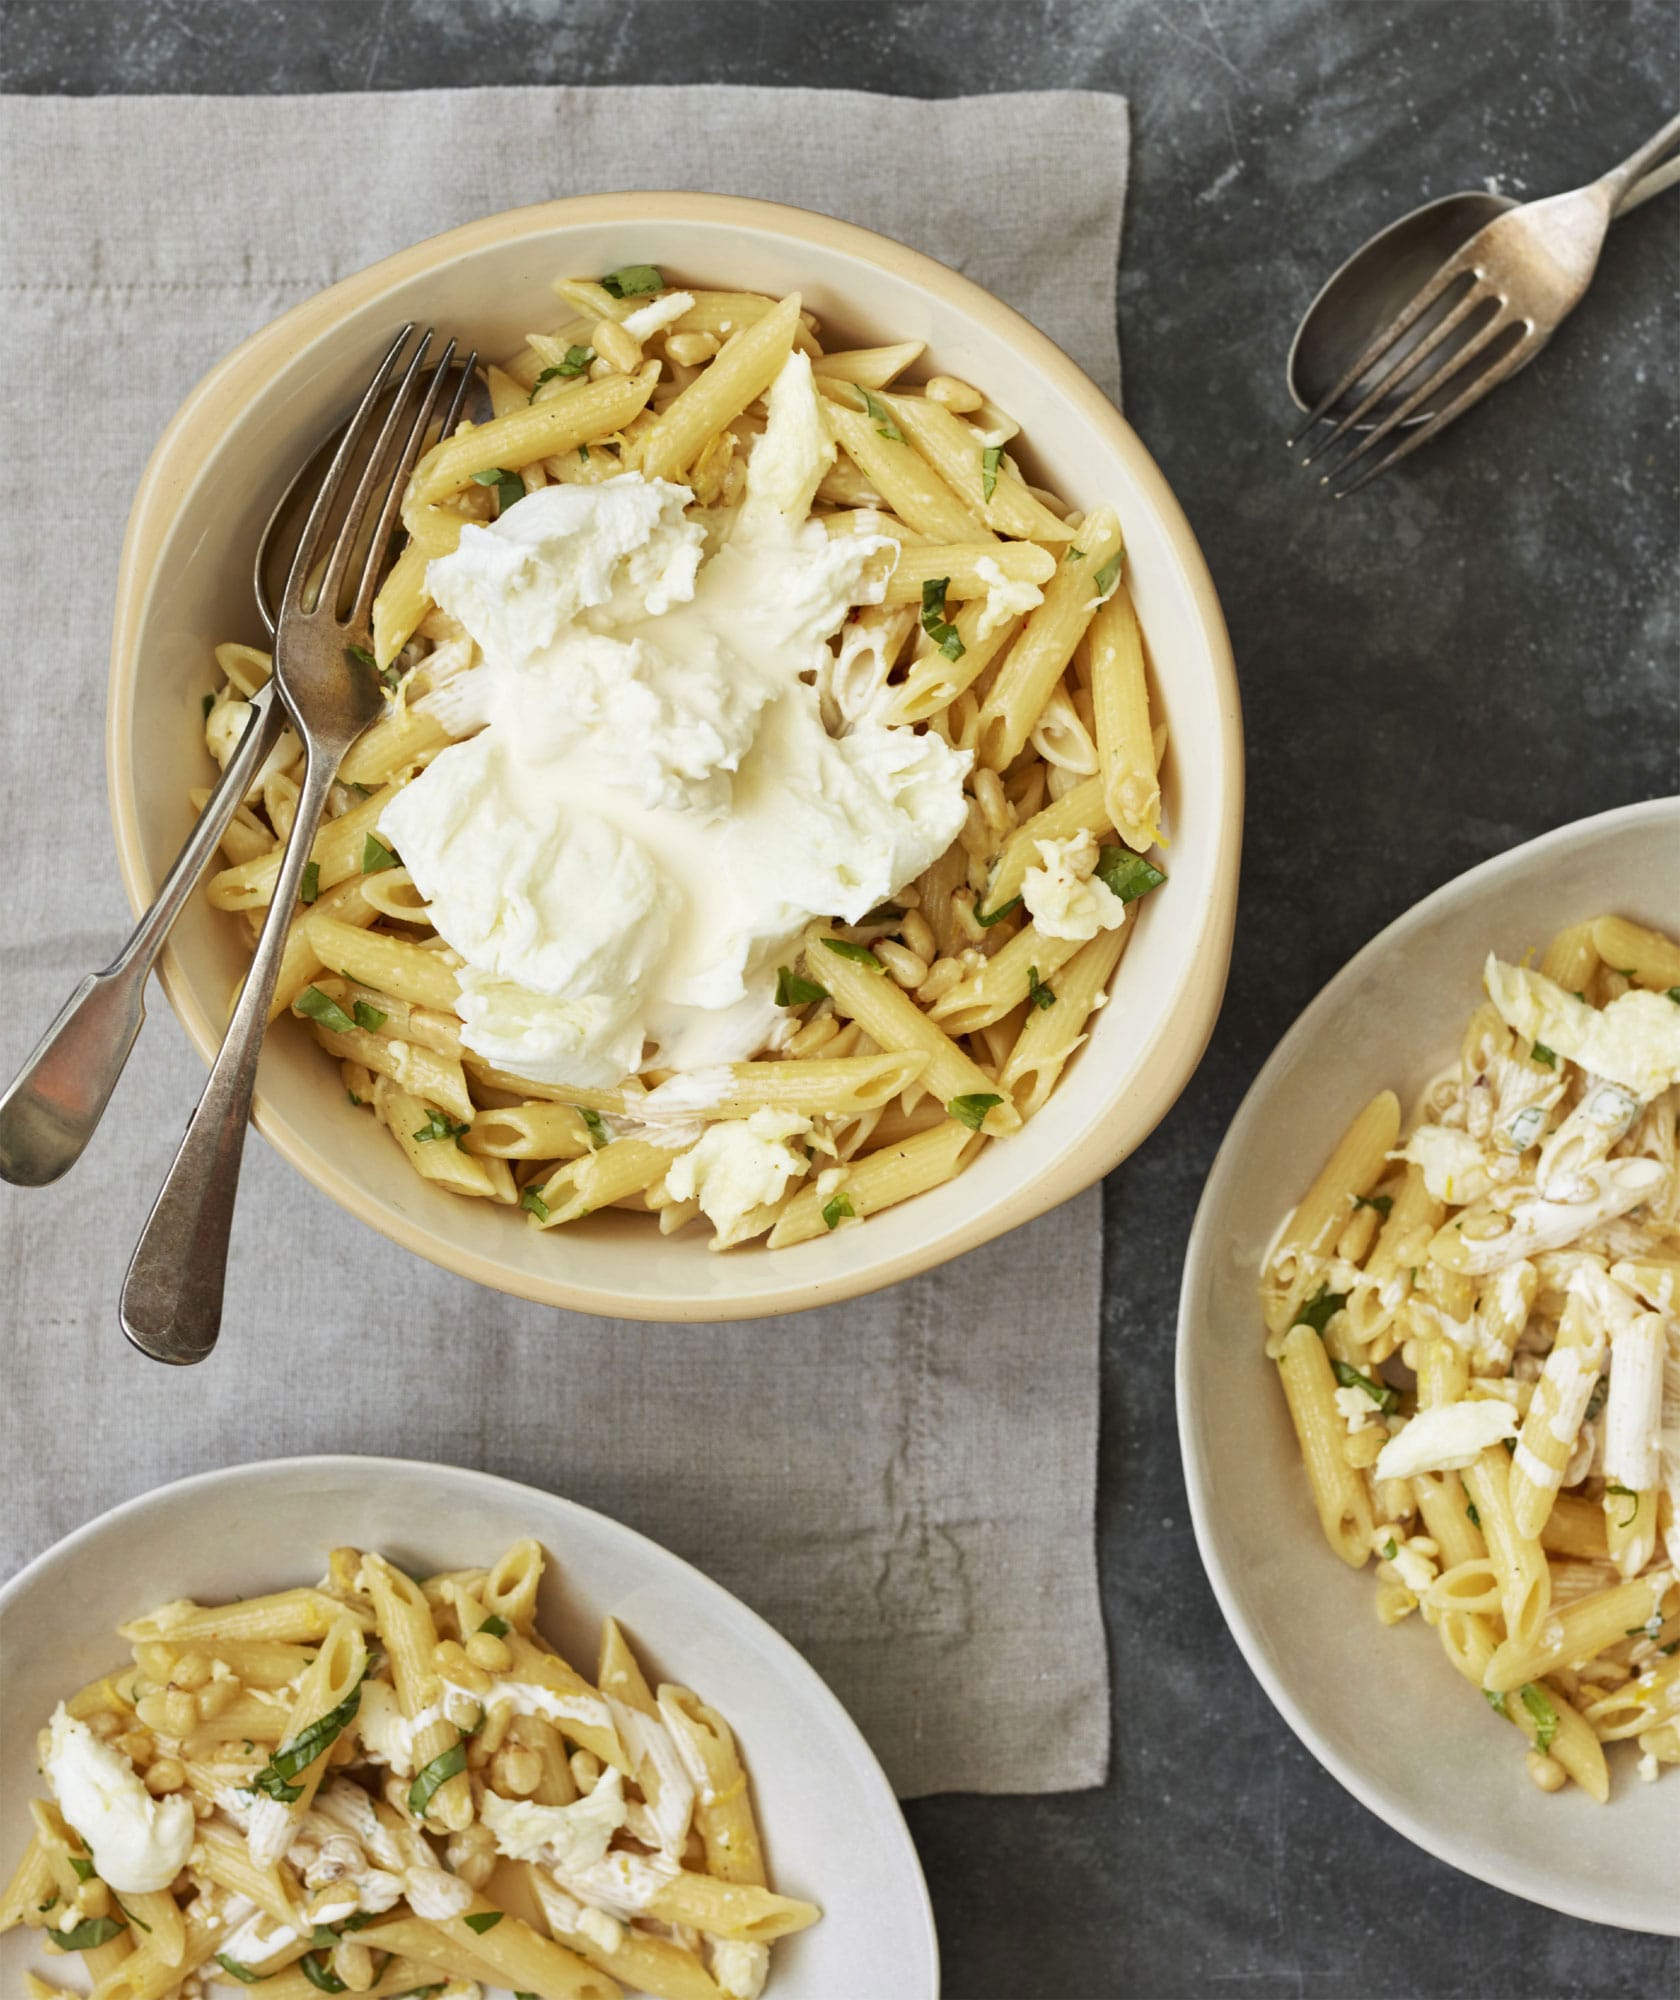
◁ Burrata and Lemon Penne
This is for Friday nights in – the TV is on and I’m in my PJs eating a big bowl of this amazing pasta. Don’t be shy with the burrata – more is more. It takes only 15 minutes to make this simple, flavourful and satisfying dish.
200g (7oz) dried penne pasta
2 tbsp olive oil
grated zest of 1 lemon, plus 1 tsp lemon juice
2 garlic cloves, crushed
2 egg yolks
200g (7oz) burrata (see here)
50g (13/4oz) pine nuts
50g (13/4oz) rocket (arugula)
salt
SERVES 2
Bring a large pan of salted water to the boil, then add the penne and lower the heat to a simmer. Cook the pasta for about 8 minutes, until al dente.
In a bowl, mix together the olive oil, lemon zest and juice, garlic and egg yolks.
Drain the cooked pasta and return to the pan, then add the sauce, reduce the heat and leave to cook for a few minutes.
Tear your burrata into bite-sized pieces. Add the burrata, pine nuts and rocket (arugula) to the pasta and serve.
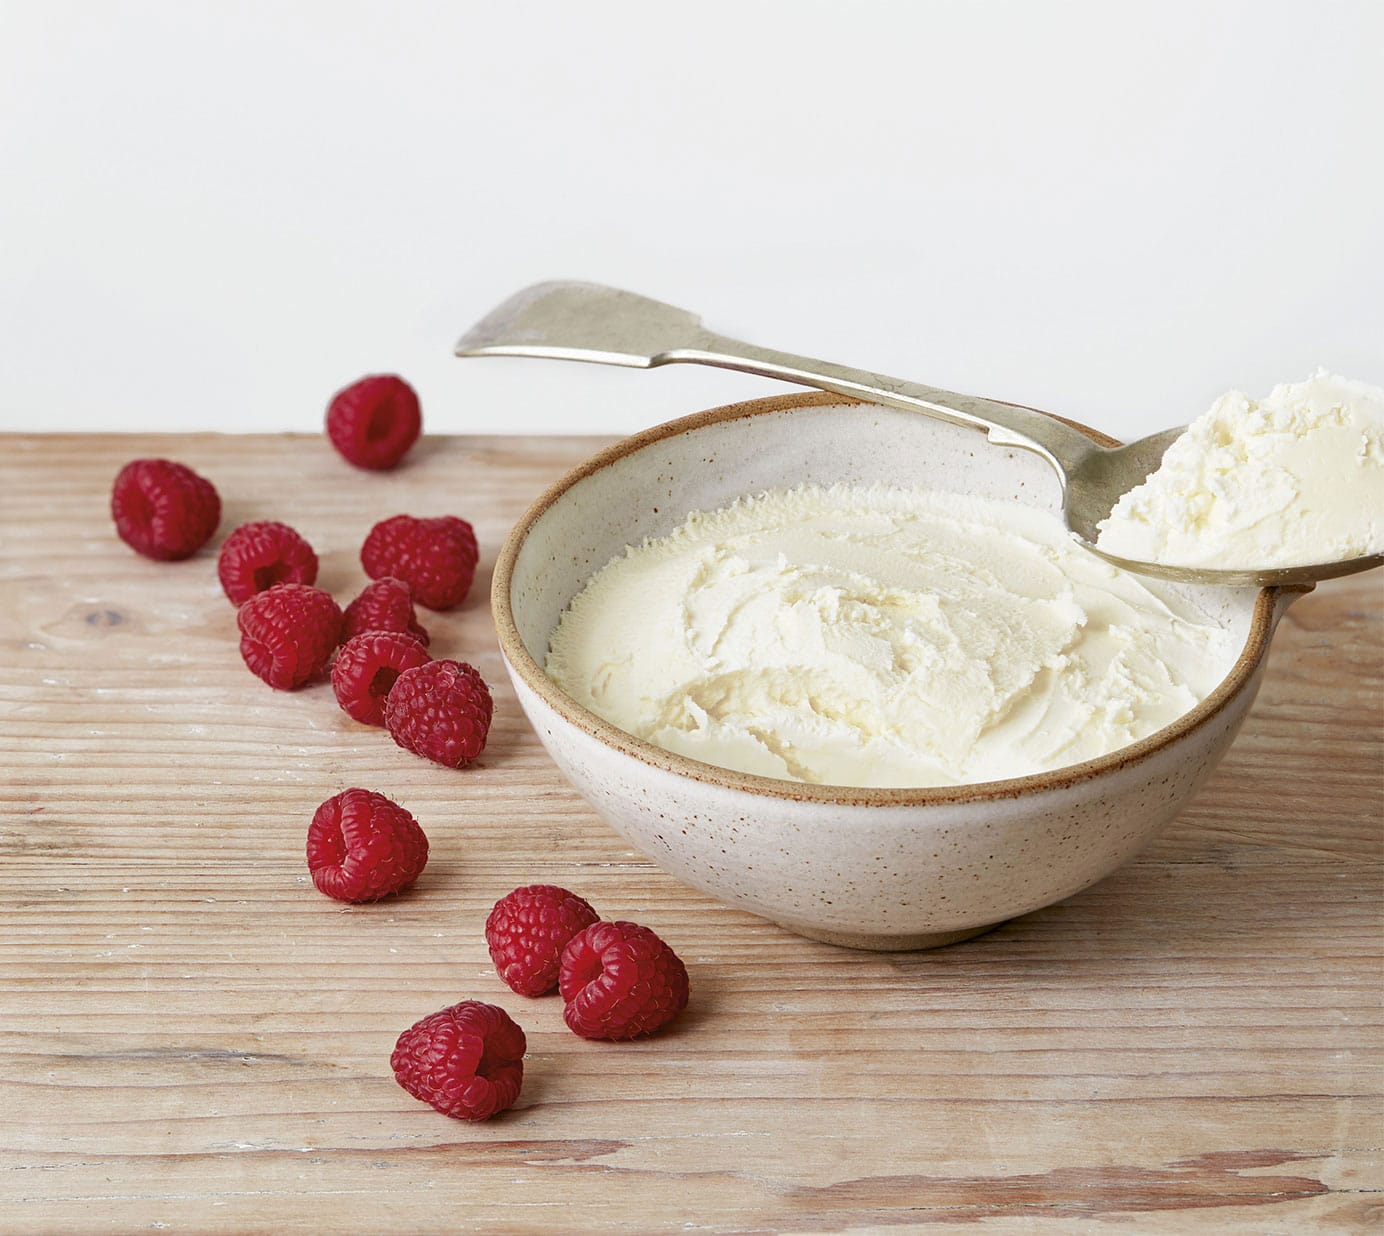
◁ Mascarpone
Making mascarpone from scratch is ridiculously easy, and only requires two ingredients, so you can quickly whip up a batch of your own fresh and creamy cheese at home the Italian way. Homemade mascarpone has the most beautiful texture – far superior to shop-bought – and is perfect for so many sweet and savoury dishes.
1/2 tsp citric acid
1 litre (13/4 pints/14 cups) double (heavy) cream
MAKES 300g (101/2 oz)
You will need: a cheesecloth or muslin sheet and an instant-read thermometer
1 Dissolve the citric acid in 2 tablespoons of cooled boiled water, stirring until completely dissolved.
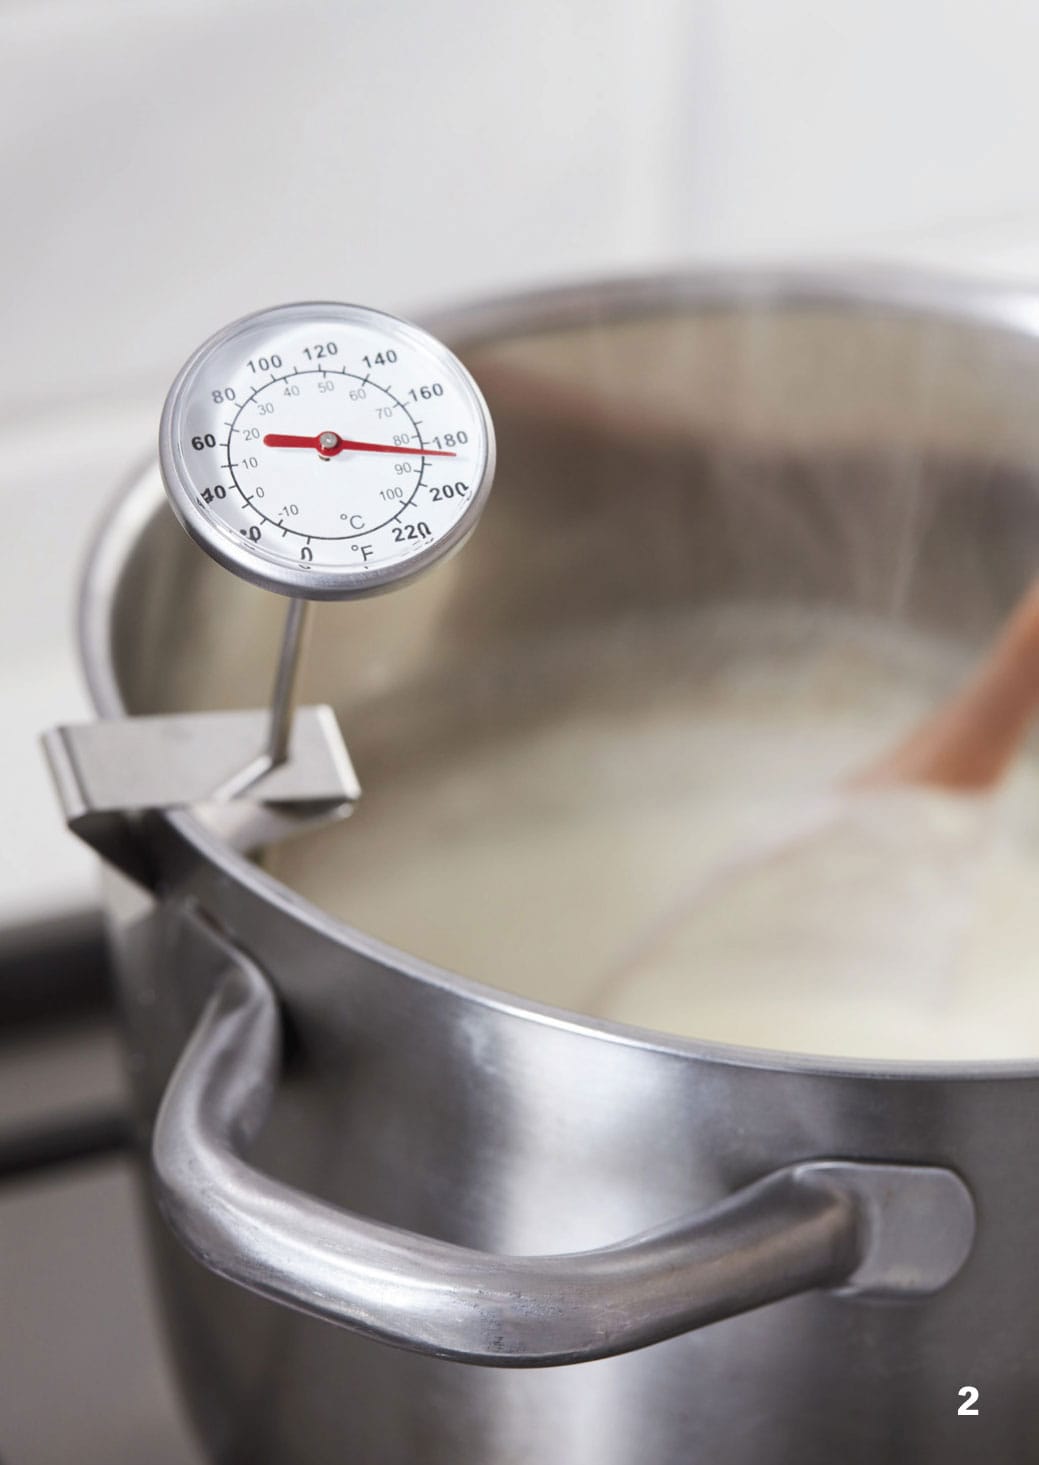
2 Pour the cream into a pan and place over a medium heat until it reaches 85°C (185°F). Make sure you keep stirring so the cream doesn’t stick to the bottom of the pan and burn.
3 Add the citric acid mixture and stir in. Keep the cream at 85°C (185°F) for 1 minute, then remove from the heat and place the lid on the pan for 5 minutes. Leave the pan on the hob (stovetop) to keep warm, and keep the heat at 85°C (185°F); if you see it dropping, turn the heat to low to maintain the temperature, making sure to stir.
4 Transfer to a bowl and leave the mixture to cool for a few hours or overnight.

5 Set a colander in a large bowl and line it with the cheesecloth or muslin. Pour in the cream.

6 Drain the excess liquid off the cheese and squeeze gently in the cloth. Carefully transfer the cheese from the cloth into a bowl. You can serve it right away or it can be kept covered in the refrigerator for up to 1 week.

◁ Mascarpone Chocolate Pots with Homemade Honeycomb
I love Crunchie chocolate bars, and this is my homage to that delicious treat. Making honeycomb at home is so much easier than you might imagine – and everyone loves it, so these super-easy chocolate pots are real crowd-pleasers.
150g (5oz) milk chocolate, broken into pieces
284ml (10 fl oz/11/2 cups) double (heavy) cream
250g (9oz) mascarpone (see here)
Homemade honeycomb
150g (5oz) granulated sugar
25g (scant 1oz) honey
60ml (2 fl oz/1/4 cup) golden (light corn) syrup
1 tsp bicarbonate of soda (baking soda)
SERVES 4
Line a shallow baking dish with greaseproof (wax) paper.
For the honeycomb, combine the sugar, honey, syrup and 1 tbsp of water in a saucepan over a medium heat, stirring until you see the sugar dissolve. Keep an eye on it as it simmers, stirring gently all the time. Continue stirring until the mixture forms a caramel, turning a golden brown colour like warm honey.
Remove from the heat and have the lined dish ready, as the next step will happen quickly.
Add the bicarbonate of soda (baking soda). The mixture will start to froth, so pour it immediately into the lined dish, then set aside for about 15 minutes, or until cool to touch. Once cool, break it into pieces.
Melt the chocolate in a heatproof bowl set over a pan of simmering water, making sure the bottom of the bowl doesn’t touch the water, then stir in most of the honeycomb pieces, reserving a few for decoration.
In a separate bowl, gently stir the cream into the mascarpone. Then stir two-thirds of the mix into the chocolate mix until just marbled. Spoon into small glasses or cups and top with the remaining cream mix and honeycomb pieces.