Hard Cheese

Hard Cheese
Now for something a little bit harder … in both texture and technique. I absolutely adore hard cheese. My favourite childhood snack was a good Cheddar and fresh apples. Some of the best cheeses in the world fall into this category, such as stunning aged Comté from the Jura mountains in France, or beautiful rich, strong Cheddar from the rolling hills of Somerset.
My recipes for hard cheese have been inspired by some of the world’s best cheesemakers. After visiting their farms and dairies, I have picked up wonderful tricks of the trade that inspired me to start making hard cheese at home. Hard cheese is a labour of love; it requires time spent making and ripening the cheese. Despite this, it is well worth doing, as cutting into your very own homemade hard cheese is fantastic. After all those months of maturing, all the flavours you are tasting are down to the hard work and time you have put into it.
When making hard cheese, you will learn some fantastic cheesemaking skills. Affinage is also important for hard cheese, so you will further develop this skill. And you will learn the unique art of Cheddaring. After curds form during the cheesemaking process, they are cut into smaller pieces to get rid of the whey. The smaller the curds are cut, the more liquid will drain from them and the firmer the cheese will be. This process is used when making almost all types of cheese, but is taken one step further for Cheddar.
For Cheddar, the curds are cut, then pressed together into slabs. The slabs of curds are stacked on top of each other and the weight of stacking presses out even more moisture. Then the slabs are cut again, pressed into slabs once more and restacked. This is Cheddaring, and it results in a cheese with a crumbly, layered, dense texture.
As ever, keep a note of each stage of your cheesemaking, so you can change and adjust the recipe as you practise.
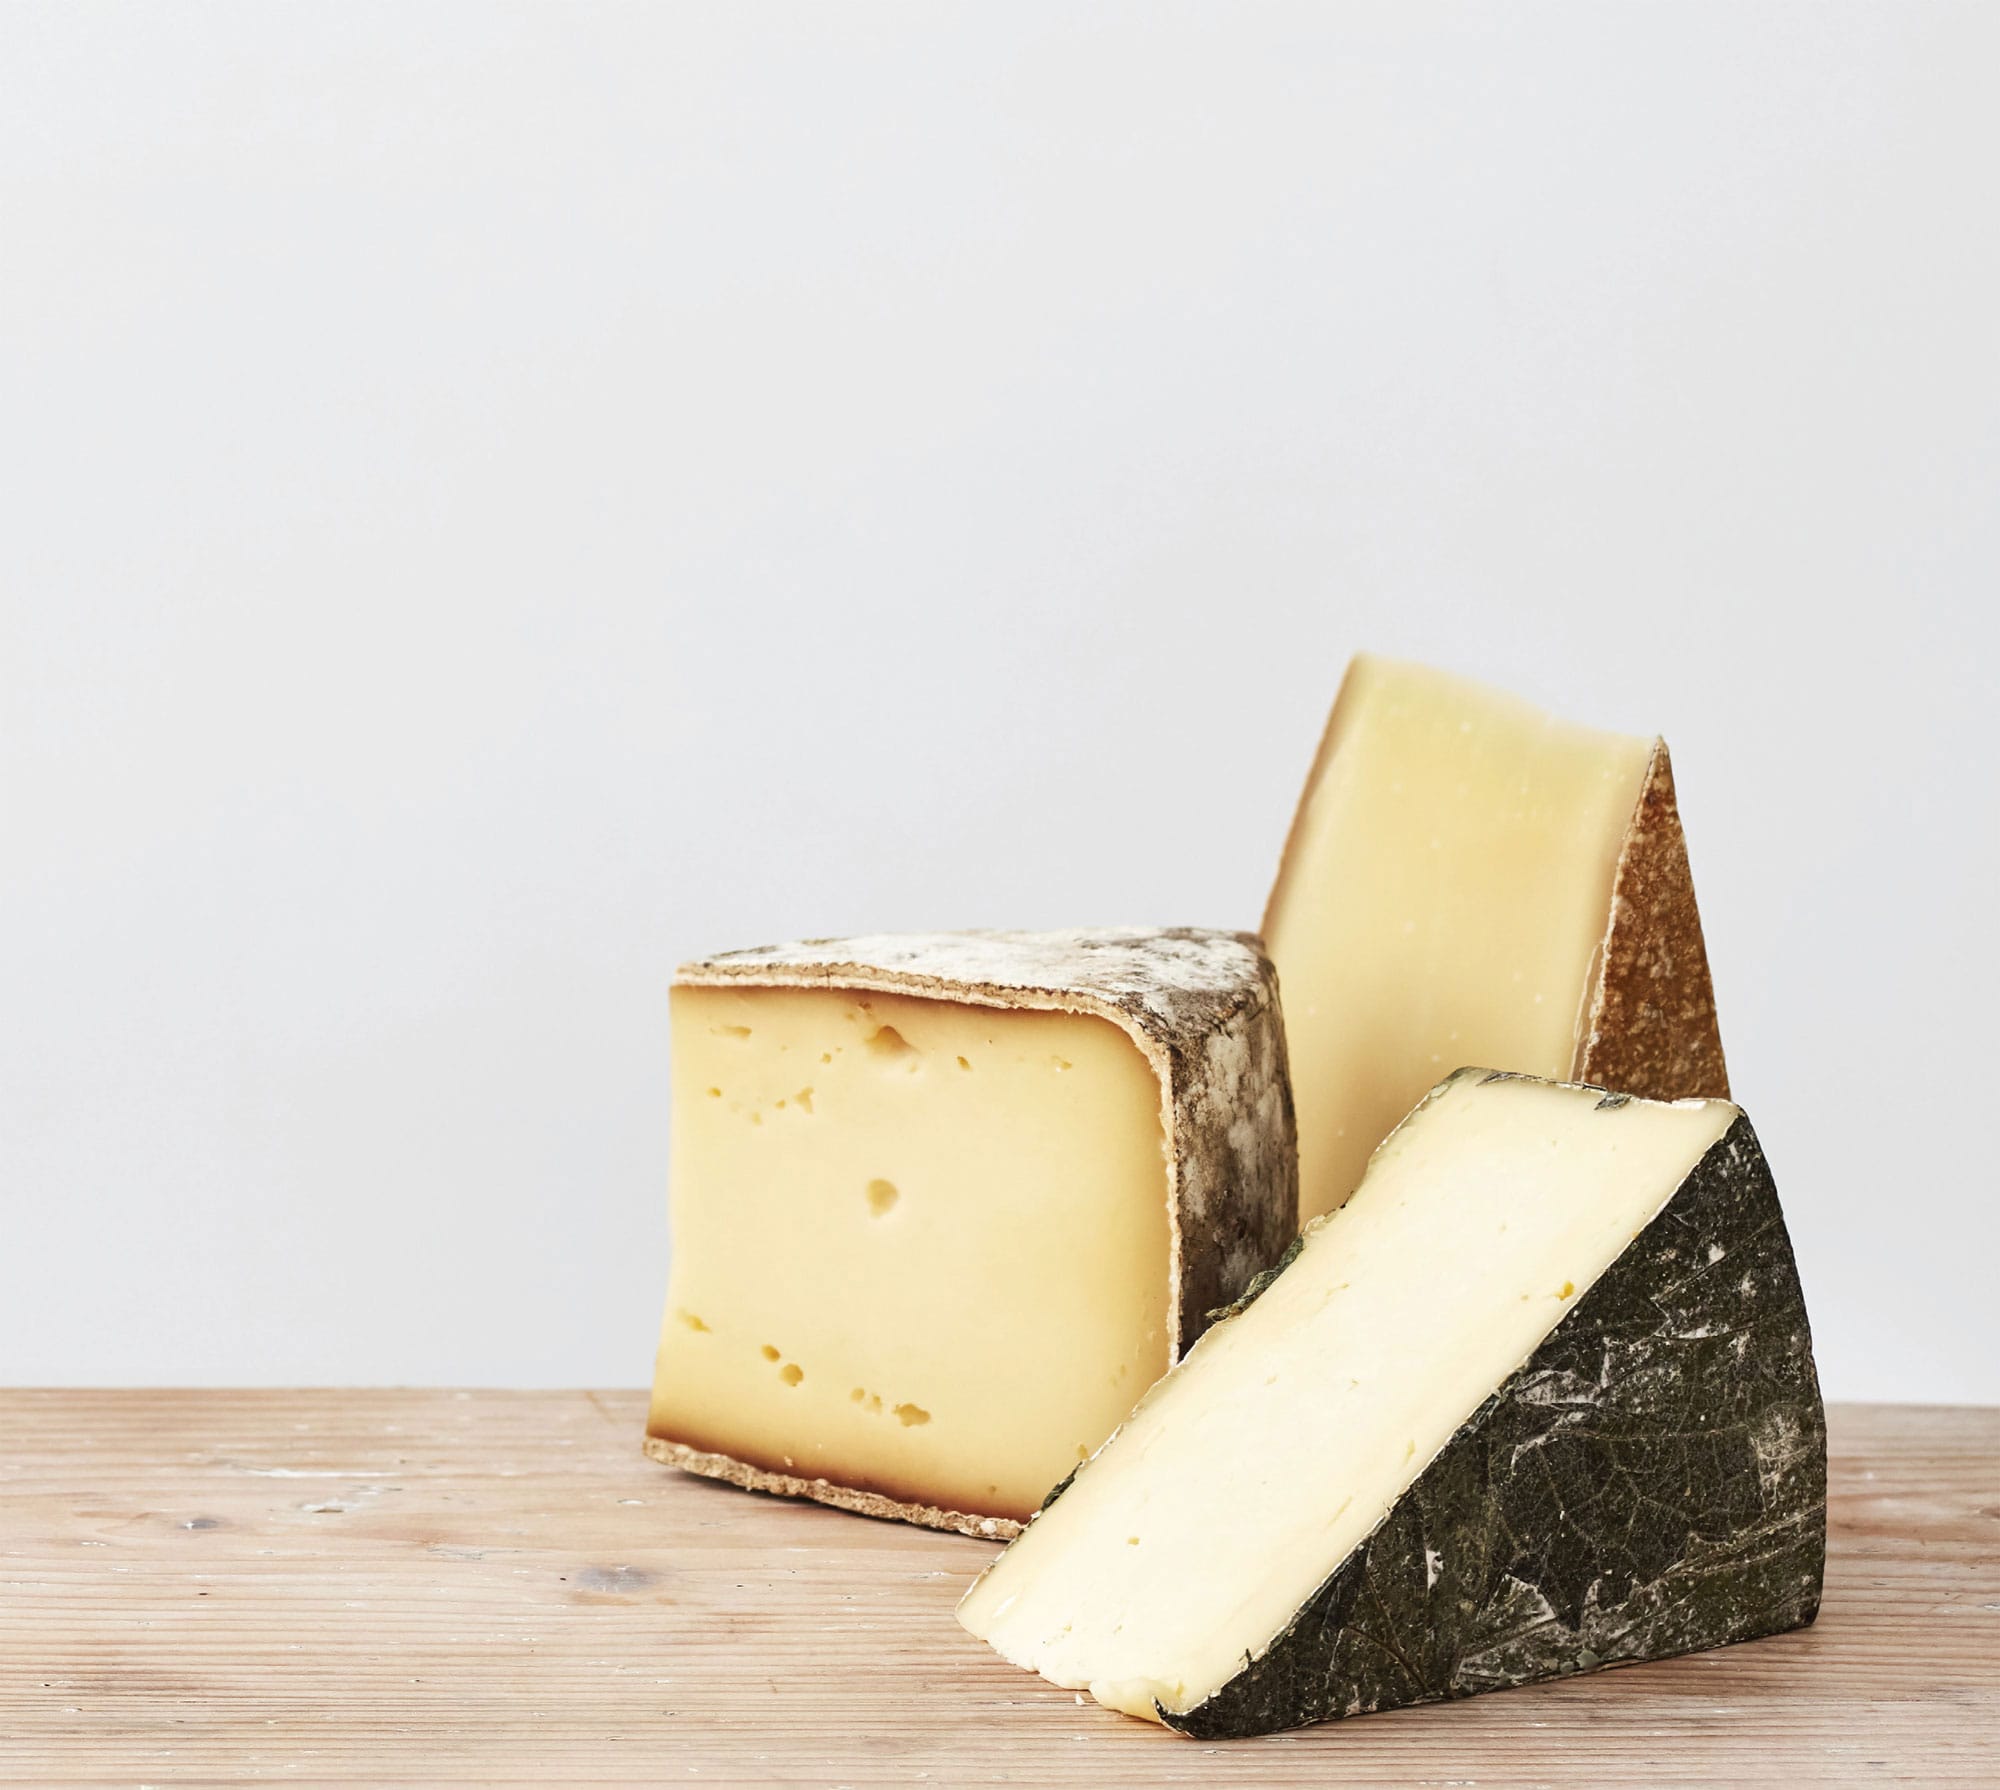
Mature Comté (right) is full of crystals and is crunchy, with a strong and sharp aftertaste. Just a small chunk will give you a burst of long-lasting flavour. This cheese has been matured for 36 to 42 months and is sweet with a nutty flavour. A most exceptional Comté.
Ossau-Iraty (left) is my favourite cheese of all time. With a drizzle of truffle honey, this is the best thing you will ever taste. Beneath its amber, mould-dappled rind lies an ivory paste that is both slightly gritty and very rich, boasting grassy-sweet and nutty flavours.
Cornish Yarg (front) is a delicate, buttery cheese, which is wrapped in nettle leaves. It tends to have a fluffy-textured centre with lactic flavours and a buttery, creamy body underneath a beautiful rich green earthy rind.
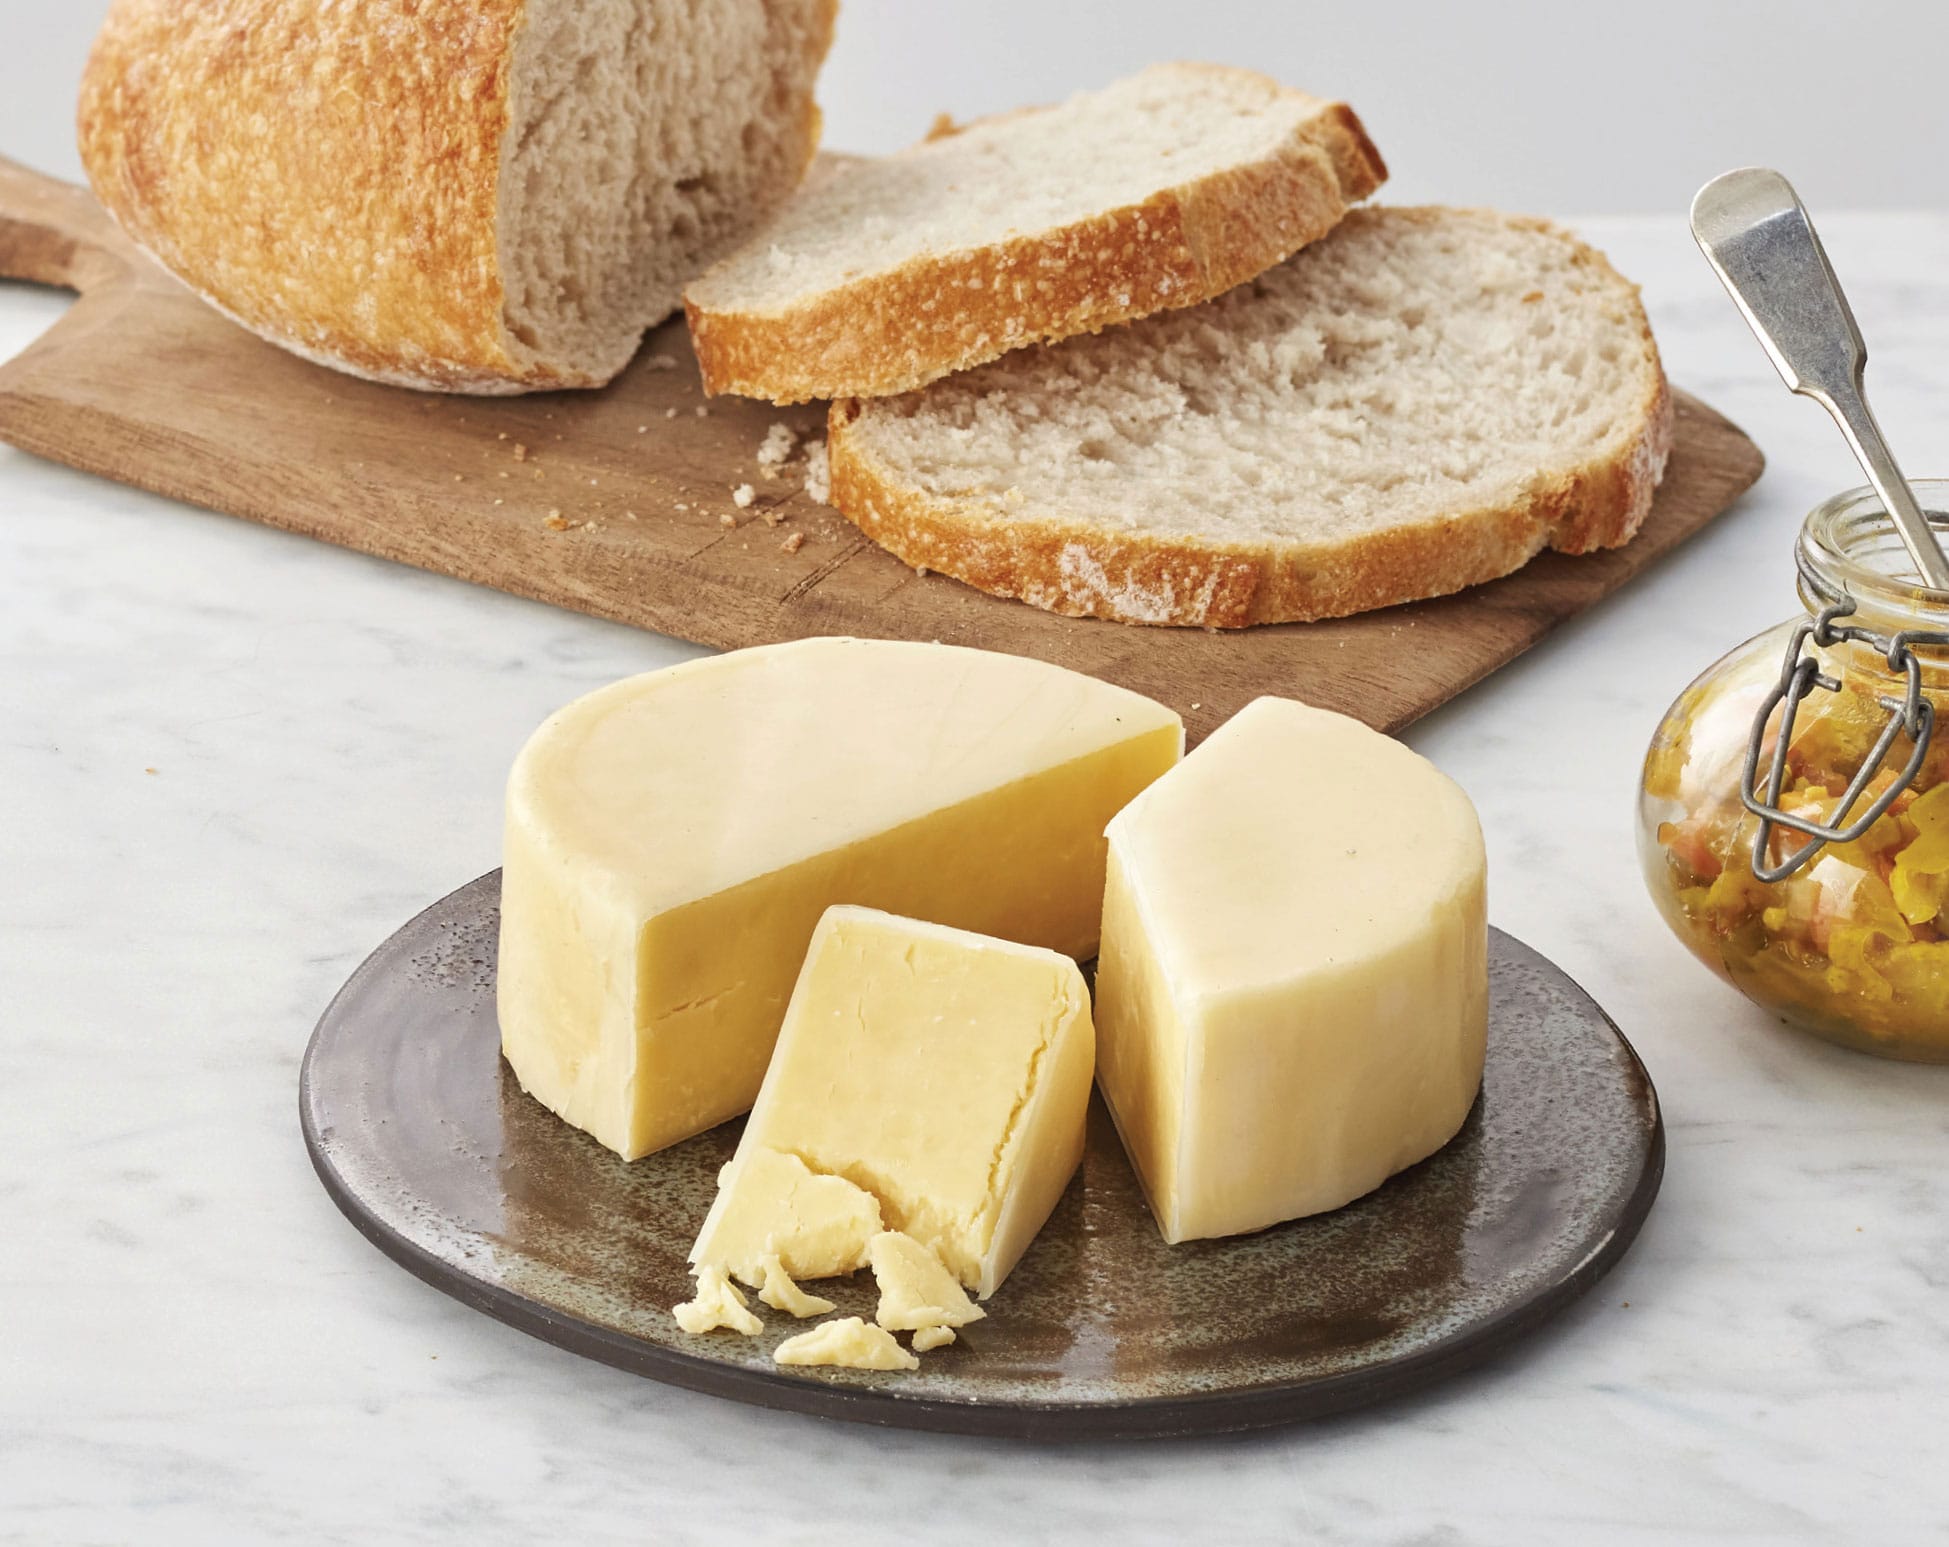
◁ Cheddar
I was lucky enough to be raised on good farmhouse Cheddar, and it is still one of my favourite cheeses. I love a good British Cheddar like Westcombe, Quicke’s or Montgomery’s, and have found inspiration for this recipe from those traditional makers.
9 litres (153/4 pints/38 cups) milk
1/8 tsp calcium chloride, diluted in 50ml (13/4fl oz) water
1/8 tsp mesophilic culture
1/2 tsp liquid rennet
2 tbsp salt cheese wax (optional)
MAKES 800g (1lb 12oz)
You will need: cheesecloth or muslin sheets, an instant-read thermometer, a curd knife and a Cheddar mould
1 In a large saucepan, heat the milk to 29°C (85°F), stirring frequently to prevent it sticking to the bottom of the pan. As the milk is heating up, add the calcium chloride. When the milk reaches the required temperature, add the mesophilic culture, stir, cover with the pan lid and set aside for 1 hour.
2 Stir the milk, then add the rennet. Mix in thoroughly to make sure the rennet is evenly distributed, then set the milk aside for another hour until you see the curds separate from the whey.
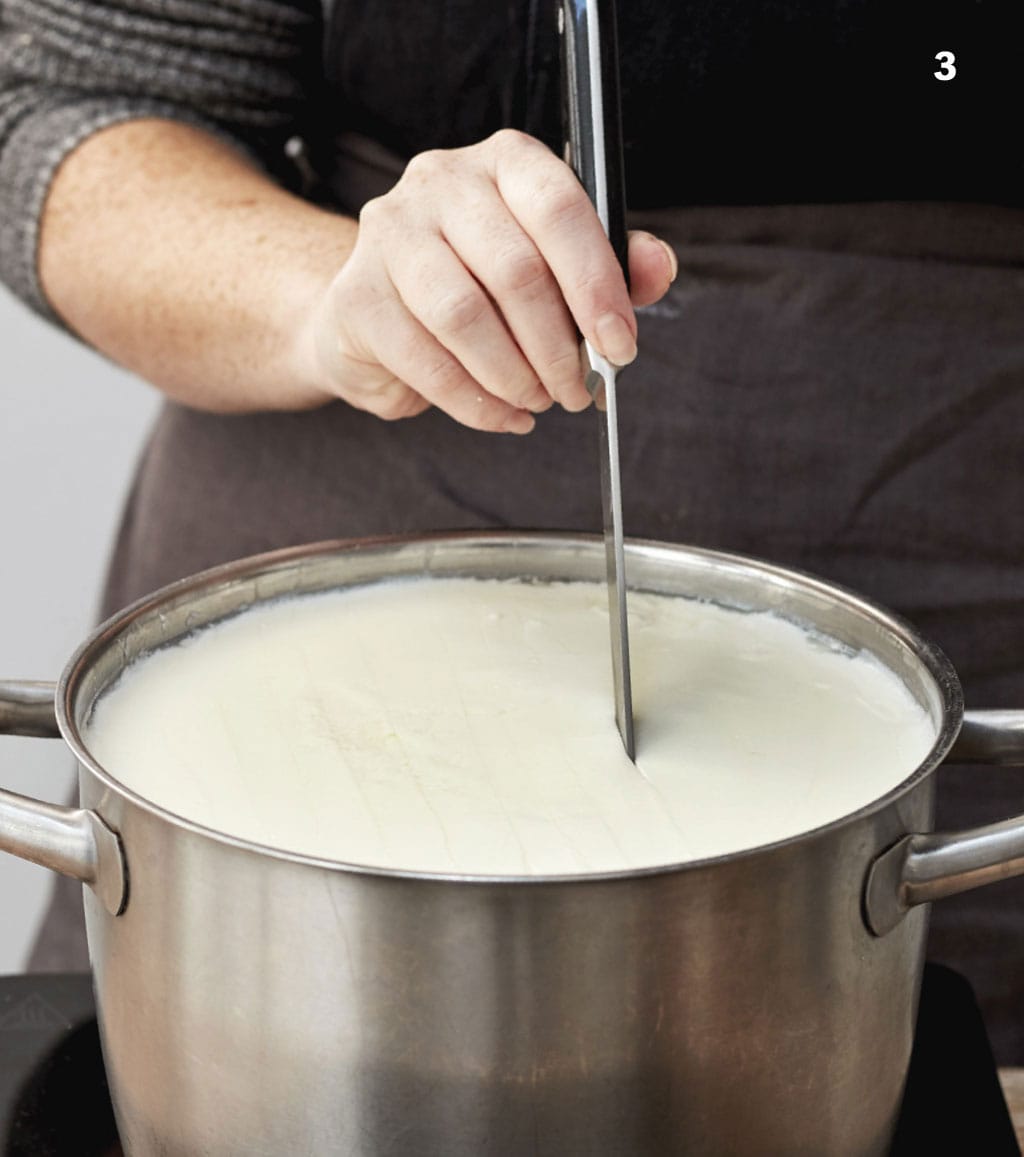
3 Using a curd knife, carefully cut the curds into 6mm (1/4-inch) cubes and leave them to rest for 5 minutes.
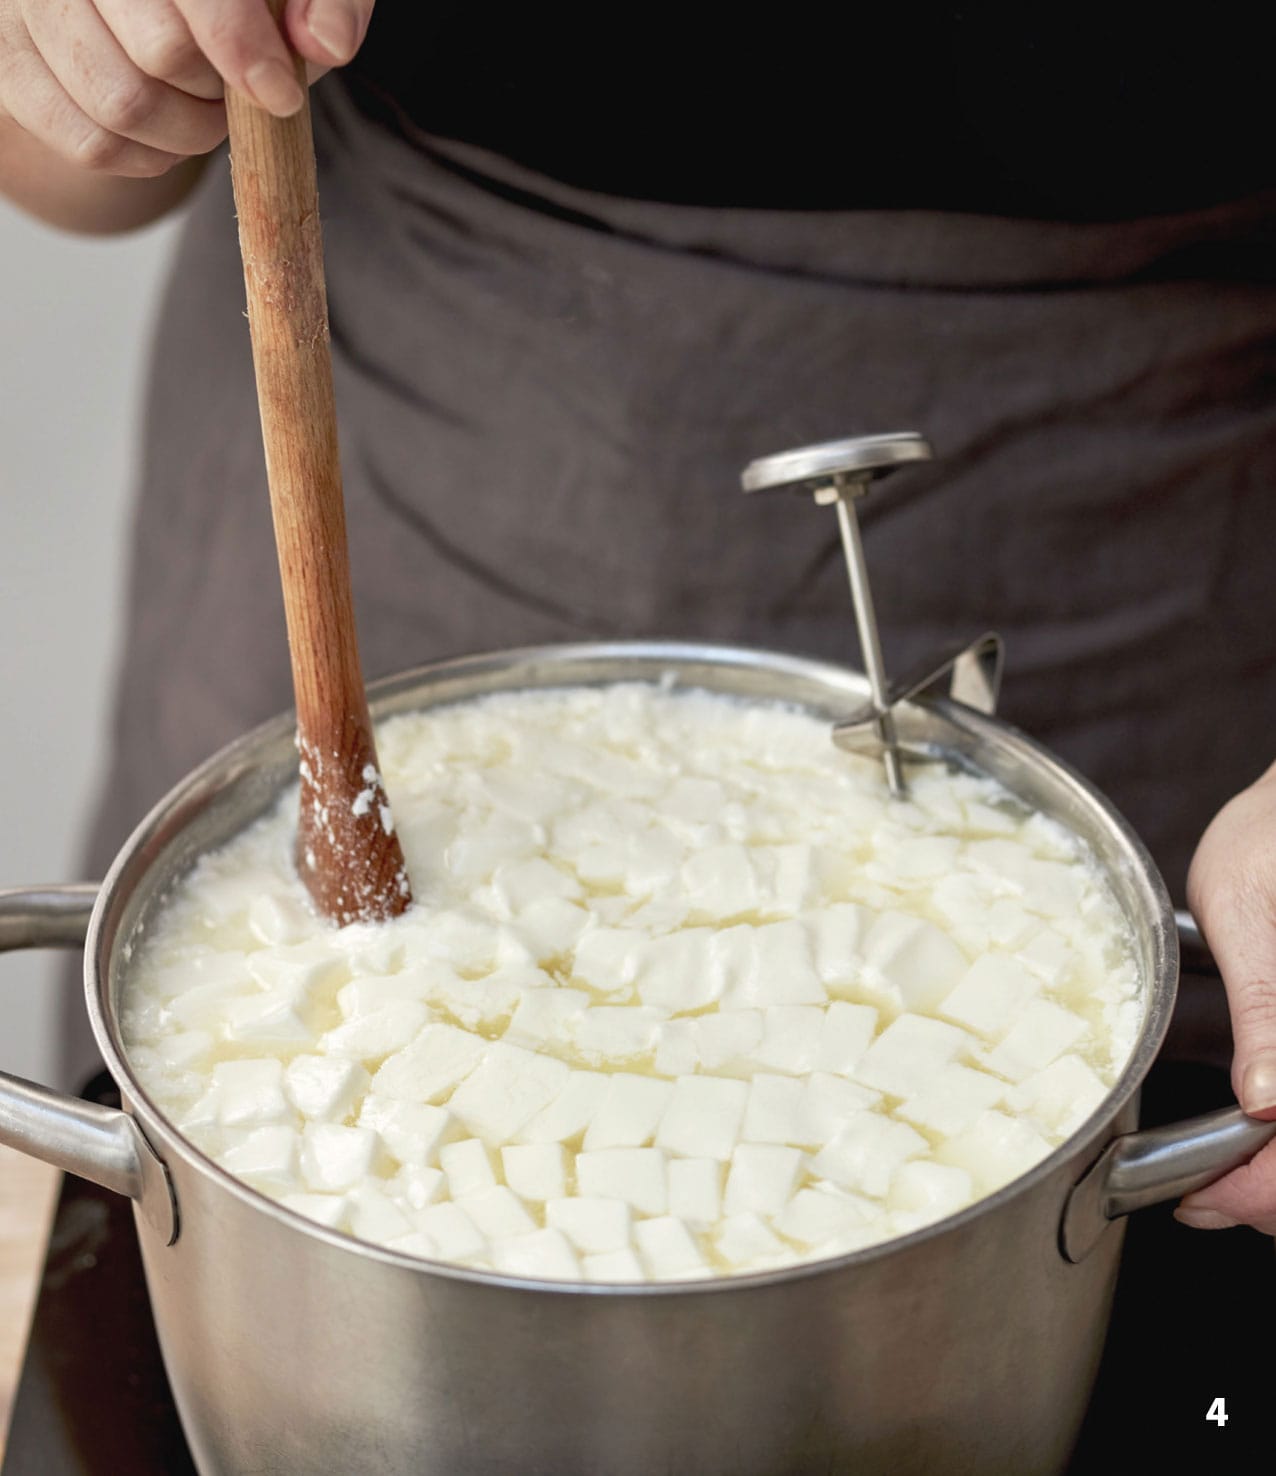
4 Return the curds to the heat and slowly heat to 38°C (100°F), for about 30 minutes. Once the curds reach 38°C (100°F), maintain the temperature for a further 30 minutes, stirring continuously.
5 Remove from the heat and leave the curds to settle at the bottom of the saucepan; this should take about 30 minutes.
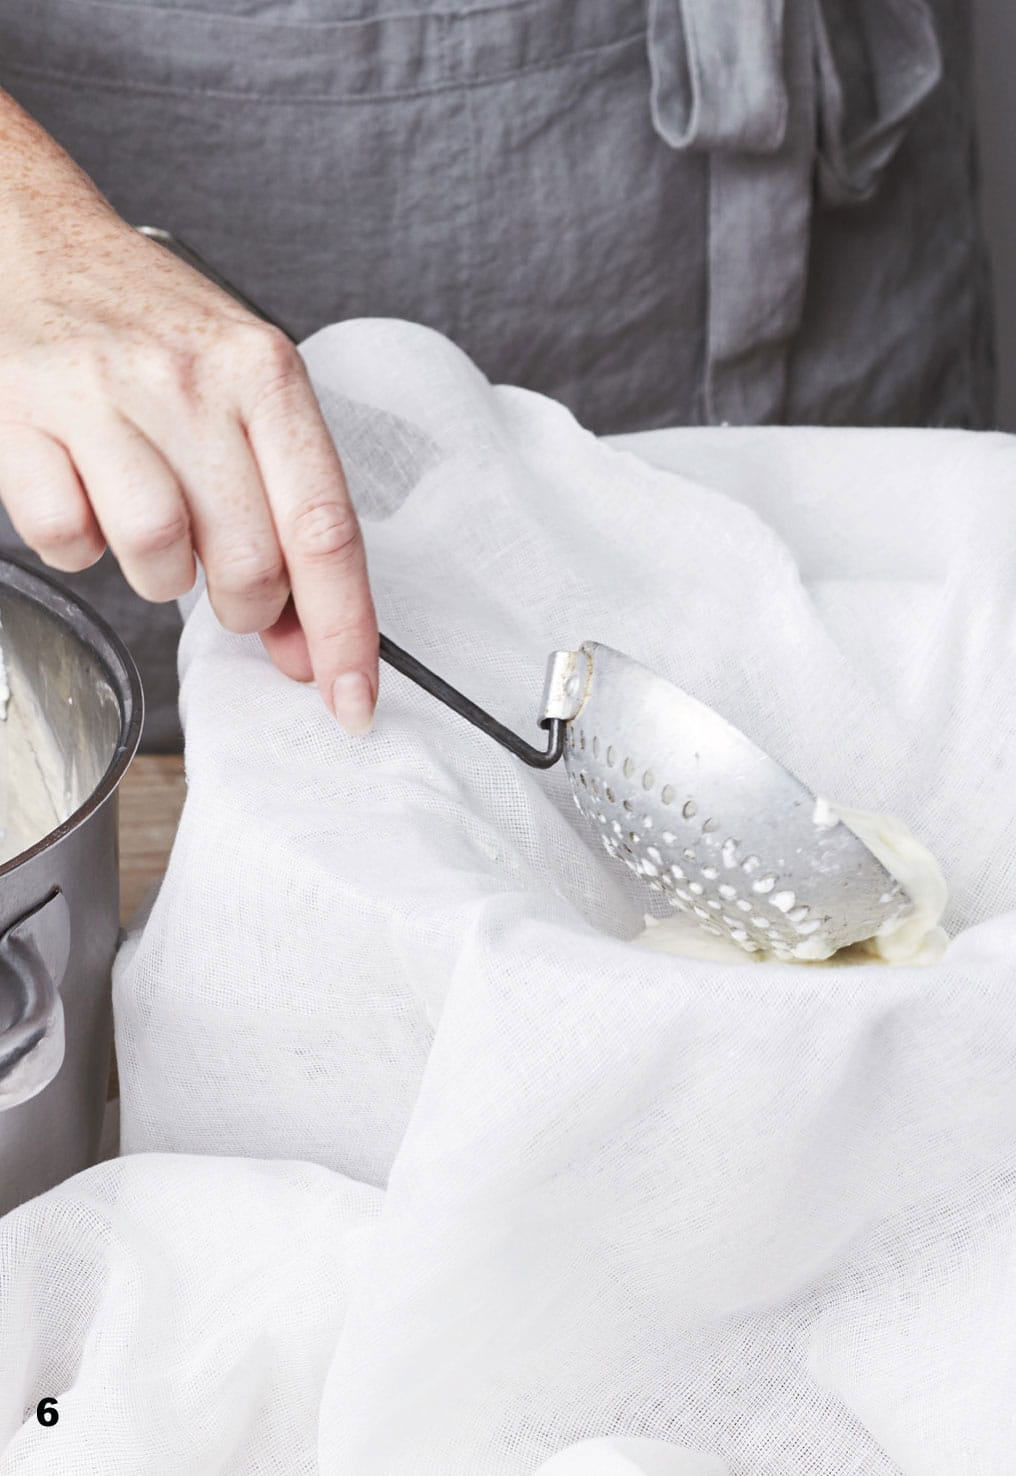
6 Line a sieve (fine-mesh strainer) with cheesecloth or muslin and set it over a pan. Carefully spoon your curds into the strainer and leave them to drain for 15 minutes. Remove the whey from the pan, place into a separate bowl and set aside.
7 Transfer the curds to a chopping (cutting) board. They should be jelly-like in consistency. Cut the curds into five slices, return to the pan and cover with a lid.
8 Fill your sink with water at a temperature of 39°C (102°F) and place the pan of curds into it, keeping the temperature of the curds about 38°C (100°F). Turn the stacked curd slices every 15 minutes for 2 hours; this is Cheddaring.
9 After 2 hours the curds will be shiny and firm. Remove from the pan and cut into 1.25cm (1/2-inch) cubes. Return to the pan, cover with the lid and place in the sink filled with 39°C (102°F) water.
10 After 10 minutes, stir the curds with your fingers. Then do this two more times, leaving 10 minutes between each stirring.
11 Remove the pan from the sink and add the salt, stirring it through gently.
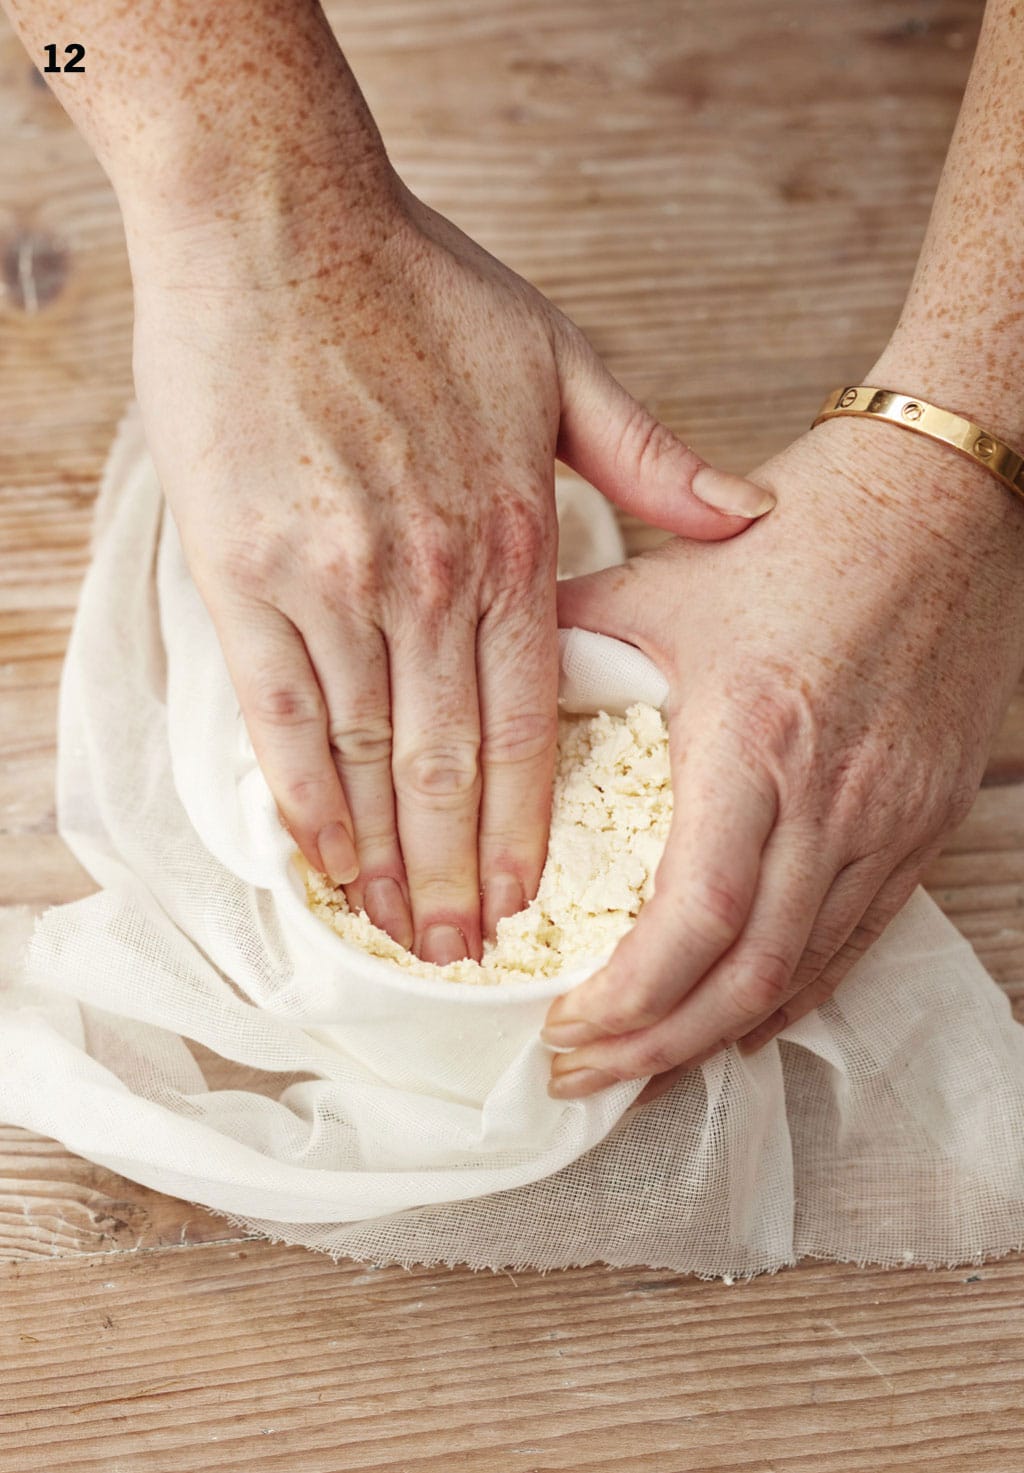
12 Line the mould with a cheesecloth or muslin sheet. Carefully add the curds, wrapping the cloth around the cheese and holding down with 5kg (11lb) of weight for 20 minutes.
13 Remove the weights from the cheese, unwrap and flip the cheese over. Rewrap using a fresh piece of cloth. Now press the cheese with 18kg (40lb) of weight for 12 hours.
14 Remove the weights from the cheese again and repeat – unwrap and flip the cheese, rewrap and this time press the cheese with 23kg (50lb) of weight for 24 hours. Remove the cheese and leave it to air dry, uncovered, for 2 days, until it is smooth to touch.
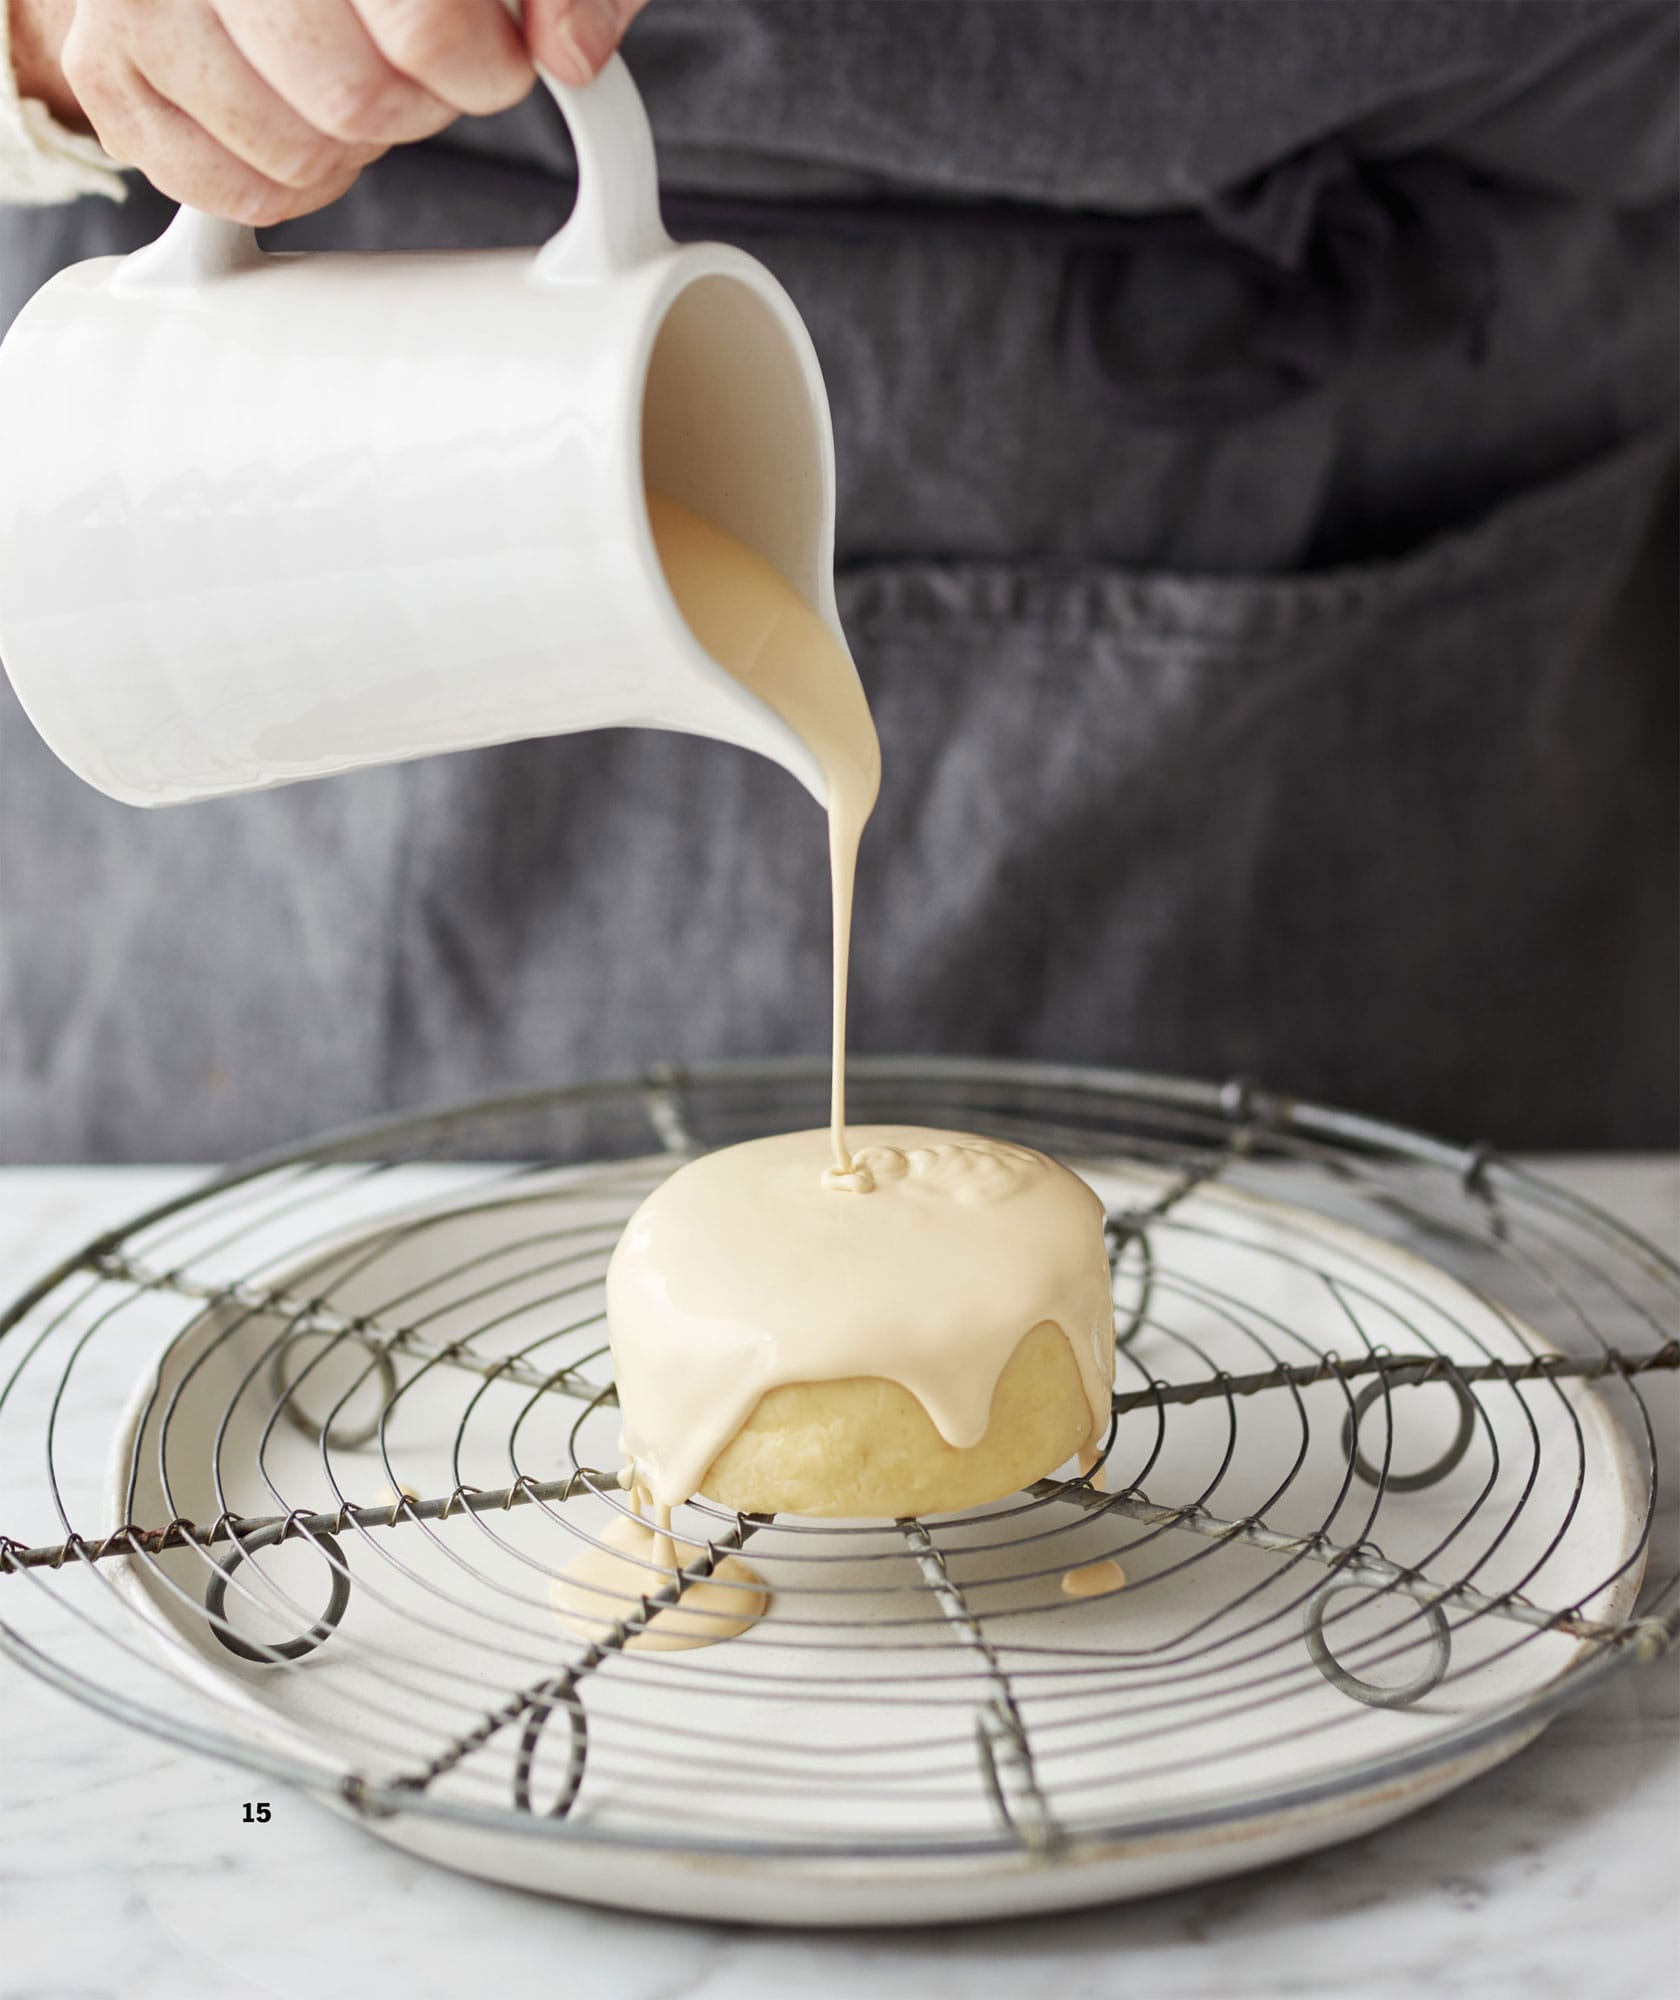
15 Now is time to wax your cheese, if you would like to. Waxing cheese protects hard cheese from airborne bacteria, unwanted mould and drying out. It is typically used for cheeses that are going to be aged for a couple of months or so, while cheeses that will be matured for over 5 months are usually cloth-wrapped. I use a prepared wax, so no need to heat, just empty it into a deep bowl, then hold one side of the cheese and dip it into the melted wax, holding it there for only about 3 seconds. Place the waxed cheese onto some greaseproof (wax) paper and leave it to harden for about 1 hour, then move it to a wire (cooling) rack set over a plate. Pour a second coat of wax over for a smooth finish and leave to harden once more.
16 Alternatively, keep your cheese in a cloth (see here). Whether waxed or wrapped, you can mature the cheese at a temperature of 10–15°C (50–60°F) for 60 days. The longer you leave it, the more mature it will become.
Mature Clothbound Cheddar
Wrapping your cheese in cheesecloth is a great way to add a wonderful rind, amazing flavours and beautiful textures to the cheese. I use it a lot on Cheddars, because they lend themselves so well to this ripening technique.
Lay out enough cheesecloth or muslin to cover a whole cheese. Rub the Cheddar in oil, butter or lard, making sure you fully coat the cheese and create an even layer. Wrap the cheese fully in the cloth, pressing it into the cheese, using the fat to keep it in place. Repeat once more with more fat and cloth. Once done, place the cloth-wrapped cheese in a cool, dry place away from draughts and sunlight for the duration of the ageing period. The technique stops unwanted mould from growing directly on the rind of the cheese; instead, the mould grows on the cheesecloth, allowing the cheese to develop flavours undisturbed. To test, unwrap the cheese, then use a cheese iron (like a cheese apple corer) to extract a small sample from the centre of the uncut cheese wheel. Turn it around twice and pull it back slowly. After you have tasted the cheese, push the little plug back into the hole and seal with a little bit of fat.


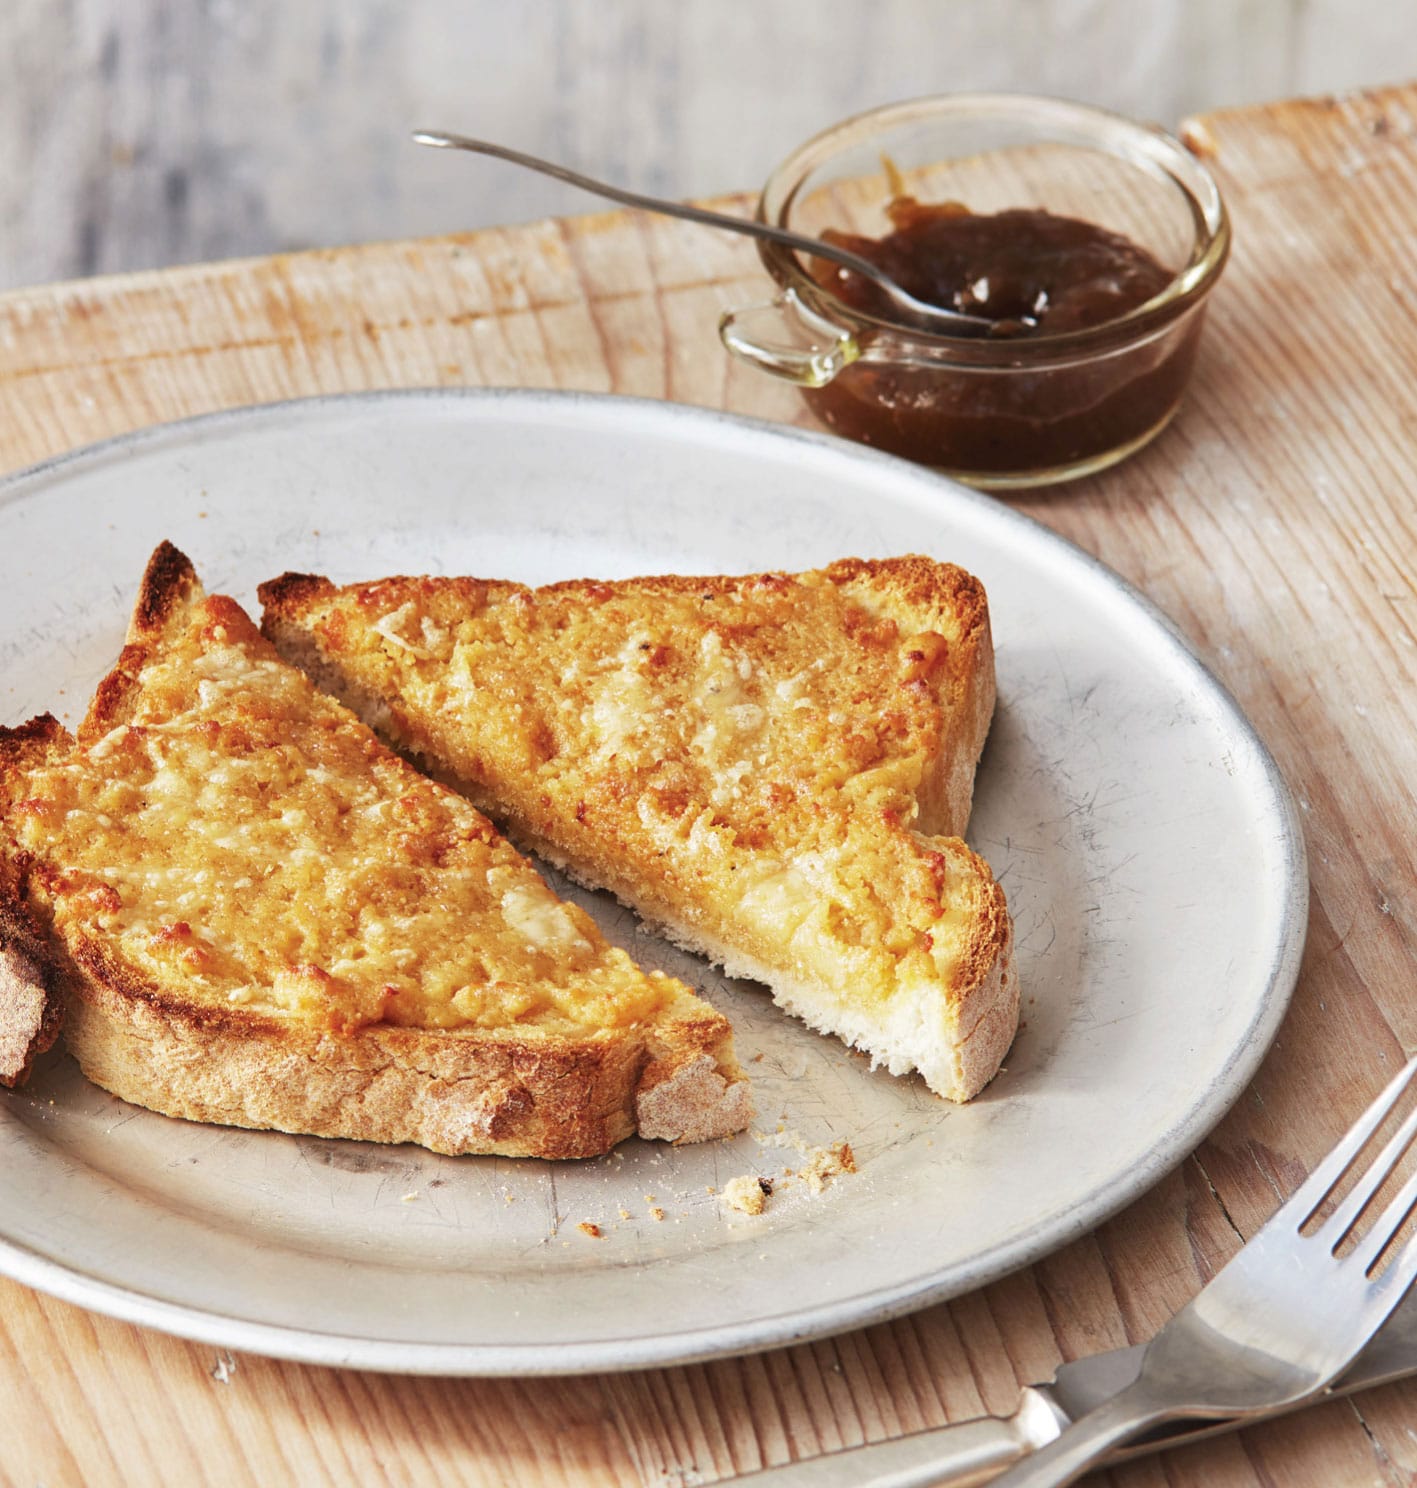
◁ Welsh Rarebit
Welsh rarebit is perhaps the most famous Welsh dish of all, yet there is no evidence that it actually originated in Wales, although the Welsh have always had a reputation for loving it. Wherever this dish started out, it is the most delicious cheesy treat and there is nothing better on a rainy day. I always love it with pickle for extra relish.
4 tbsp brown ale
1 tsp English mustard powder
30g (1oz) butter
1 tsp Worcestershire sauce
100g (31/2oz) Cheddar (see here), grated
100g (31/2oz) Red Leicester (see here), grated
1 tbsp double (heavy) cream
2 thick slices of farmhouse bread
2 egg yolks
salt and freshly ground black pepper
SERVES 2
In a pan, combine a little of the brown ale with the mustard powder to make a paste. Add the rest of the ale, the butter and Worcestershire sauce and place the pan over a medium heat until the butter has melted.
Add the Cheddar and Red Leicester and stir until melted and smooth. Add a pinch of salt and pepper and the cream, then set aside to cool.
Preheat the grill (broiler) to medium and toast the bread on both sides.
Stir the egg yolks into the cheese mixture until smooth, then spoon the mixture onto the toast slices and return to the grill (broiler) until golden and bubbling.
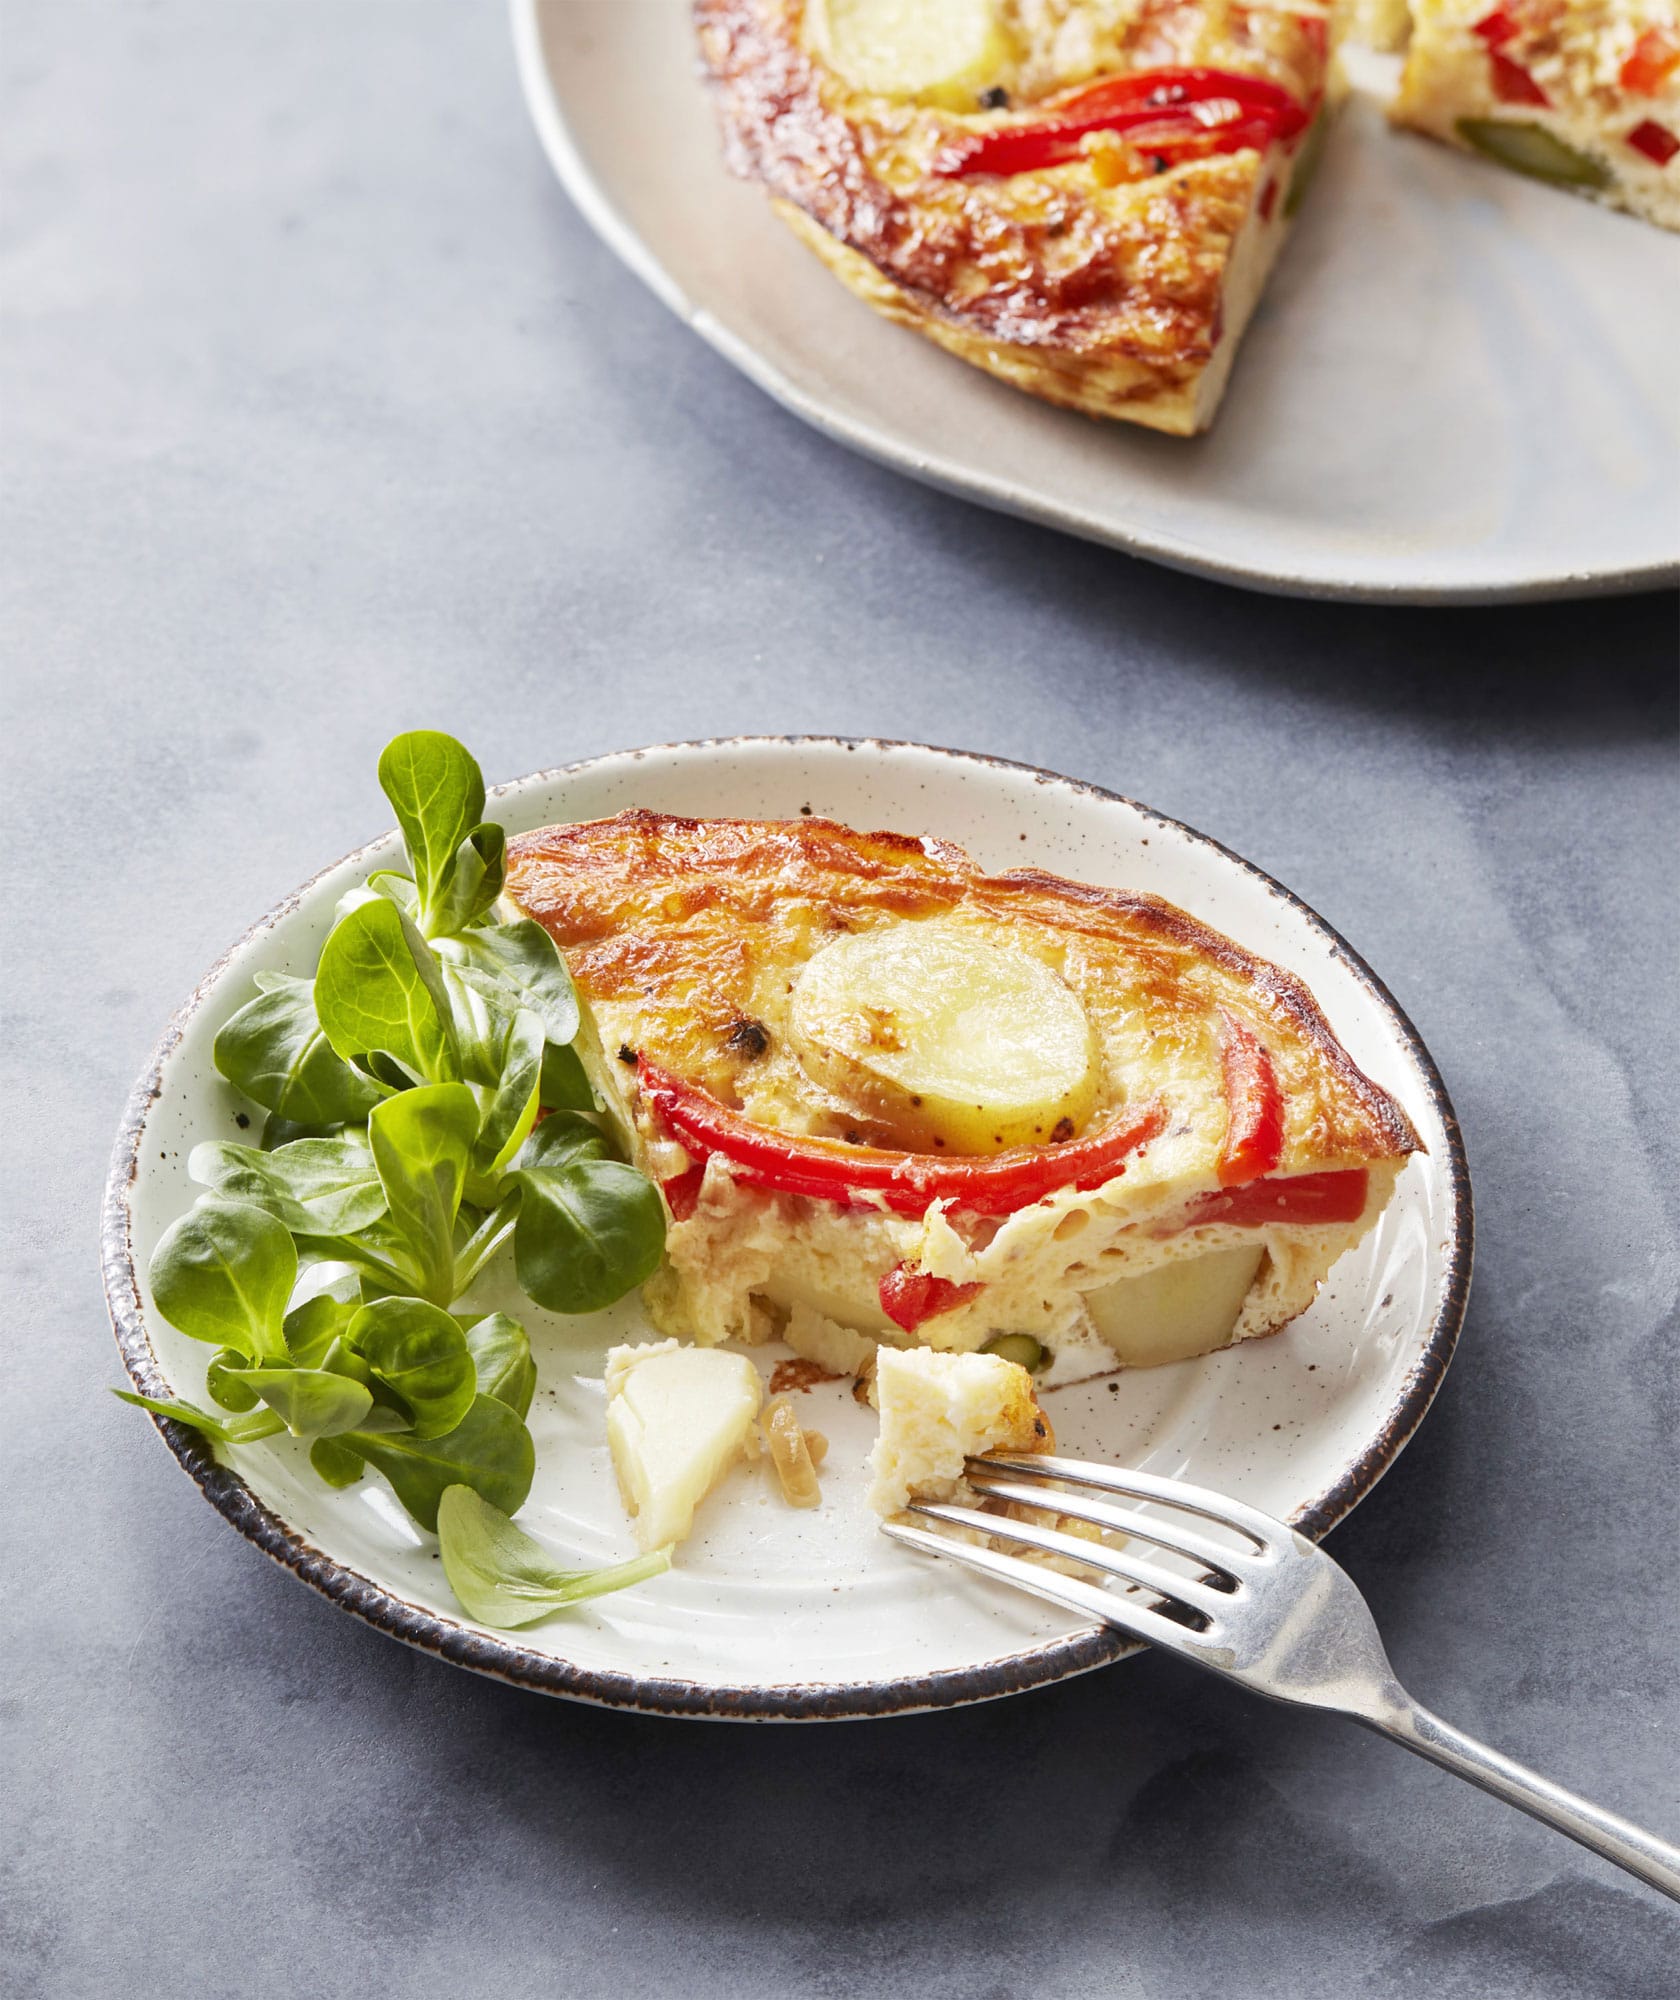
◁ Cheddar and Veggie Frittata
This is Malcolm McGlynn’s famous veggie frittata recipe … in our household anyway. My dad has been making this since I was a little girl and it’s one of my favourite dinners.
200g (7oz) waxy new potatoes, cut into quarters
100g (31/2oz) asparagus, chopped
1 tbsp olive oil
1 red onion, thinly sliced
50g (13/4oz) cherry tomatoes, sliced
1 red (bell) pepper, deseeded and thinly sliced
6 eggs
50g (13/4oz) Cheddar (see here), grated
2 tbsp double (heavy) cream
salt and freshly ground black pepper
SERVES 4
Cook the new potatoes in a pan of boiling water for about 5 minutes until tender. Add the asparagus and continue to cook for 1 minute, then drain and leave to cool.
Heat the olive oil in a non-stick heatproof frying pan (skillet). Add the onion and cook until golden brown, then add the tomatoes and peppers and cook until softened.
Preheat the grill (broiler) to high.
In a jug (large measuring cup), mix the eggs, half the cheese, the cream and a pinch of salt and pepper. Pour the mixture over the onions, red (bell) pepper and tomatoes, then add the asparagus and potatoes.
Sprinkle over the remaining cheese and cook under the grill (broiler) for 5–10 minutes until golden and cooked through. Serve with lamb’s lettuce.

◁ Very Naughty Mac and Cheese
This is the ultimate mac and cheese – no holding back or counting calories here! It has a whopping five cheeses in it, and is a proper gooey, stringy mac and cheese.
400g (14oz) dried curly macaroni
550ml (19 fl oz/21/4 cups) milk
50g (13/4oz) salted butter
50g (13/4oz) plain (all-purpose) flour
50g (13/4oz) fontina, grated
40g (11/2oz) Parmesan, grated
50g (13/4oz) mozzarella (see here), grated
275g (93/4oz) Cheddar (see here), grated
1/2 tsp mustard powder
50ml (13/4 fl oz) double (heavy) cream
25g (3/4oz) raclette cheese, grated
salt
SERVES 4
Bring a large pan of salted water to the boil and cook the pasta until al dente. Drain in a colander and leave to stand for a few moments.
Meanwhile, place another pan over a medium heat and add the milk, then heat until hot, but not boiling.
In a third pan, add the butter and heat until melted, then reduce the heat and gradually stir in the flour using a wooden spoon until you have a paste. Continue to cook, stirring continuously, for 3–4 minutes until the roux turns golden in colour.
Add the hot milk to the roux little by little and continue to stir until the two are fully combined. Cook over a medium heat for a further 4 minutes until the mixture starts to thicken. Keep stirring to ensure the mixture doesn’t stick to the bottom of the pan.
Stir in the fontina, Parmesan, half of the mozzarella and 250g (9oz) of the Cheddar. Add the mustard powder, cream and the drained pasta and stir to combine.
Preheat the grill (broiler) to high.
Transfer the mixture to a heatproof dish. Sprinkle the raclette cheese and the rest of the Cheddar and mozzarella over the top and grill (broil) until the cheese is bubbling away. Serve with a side salad.
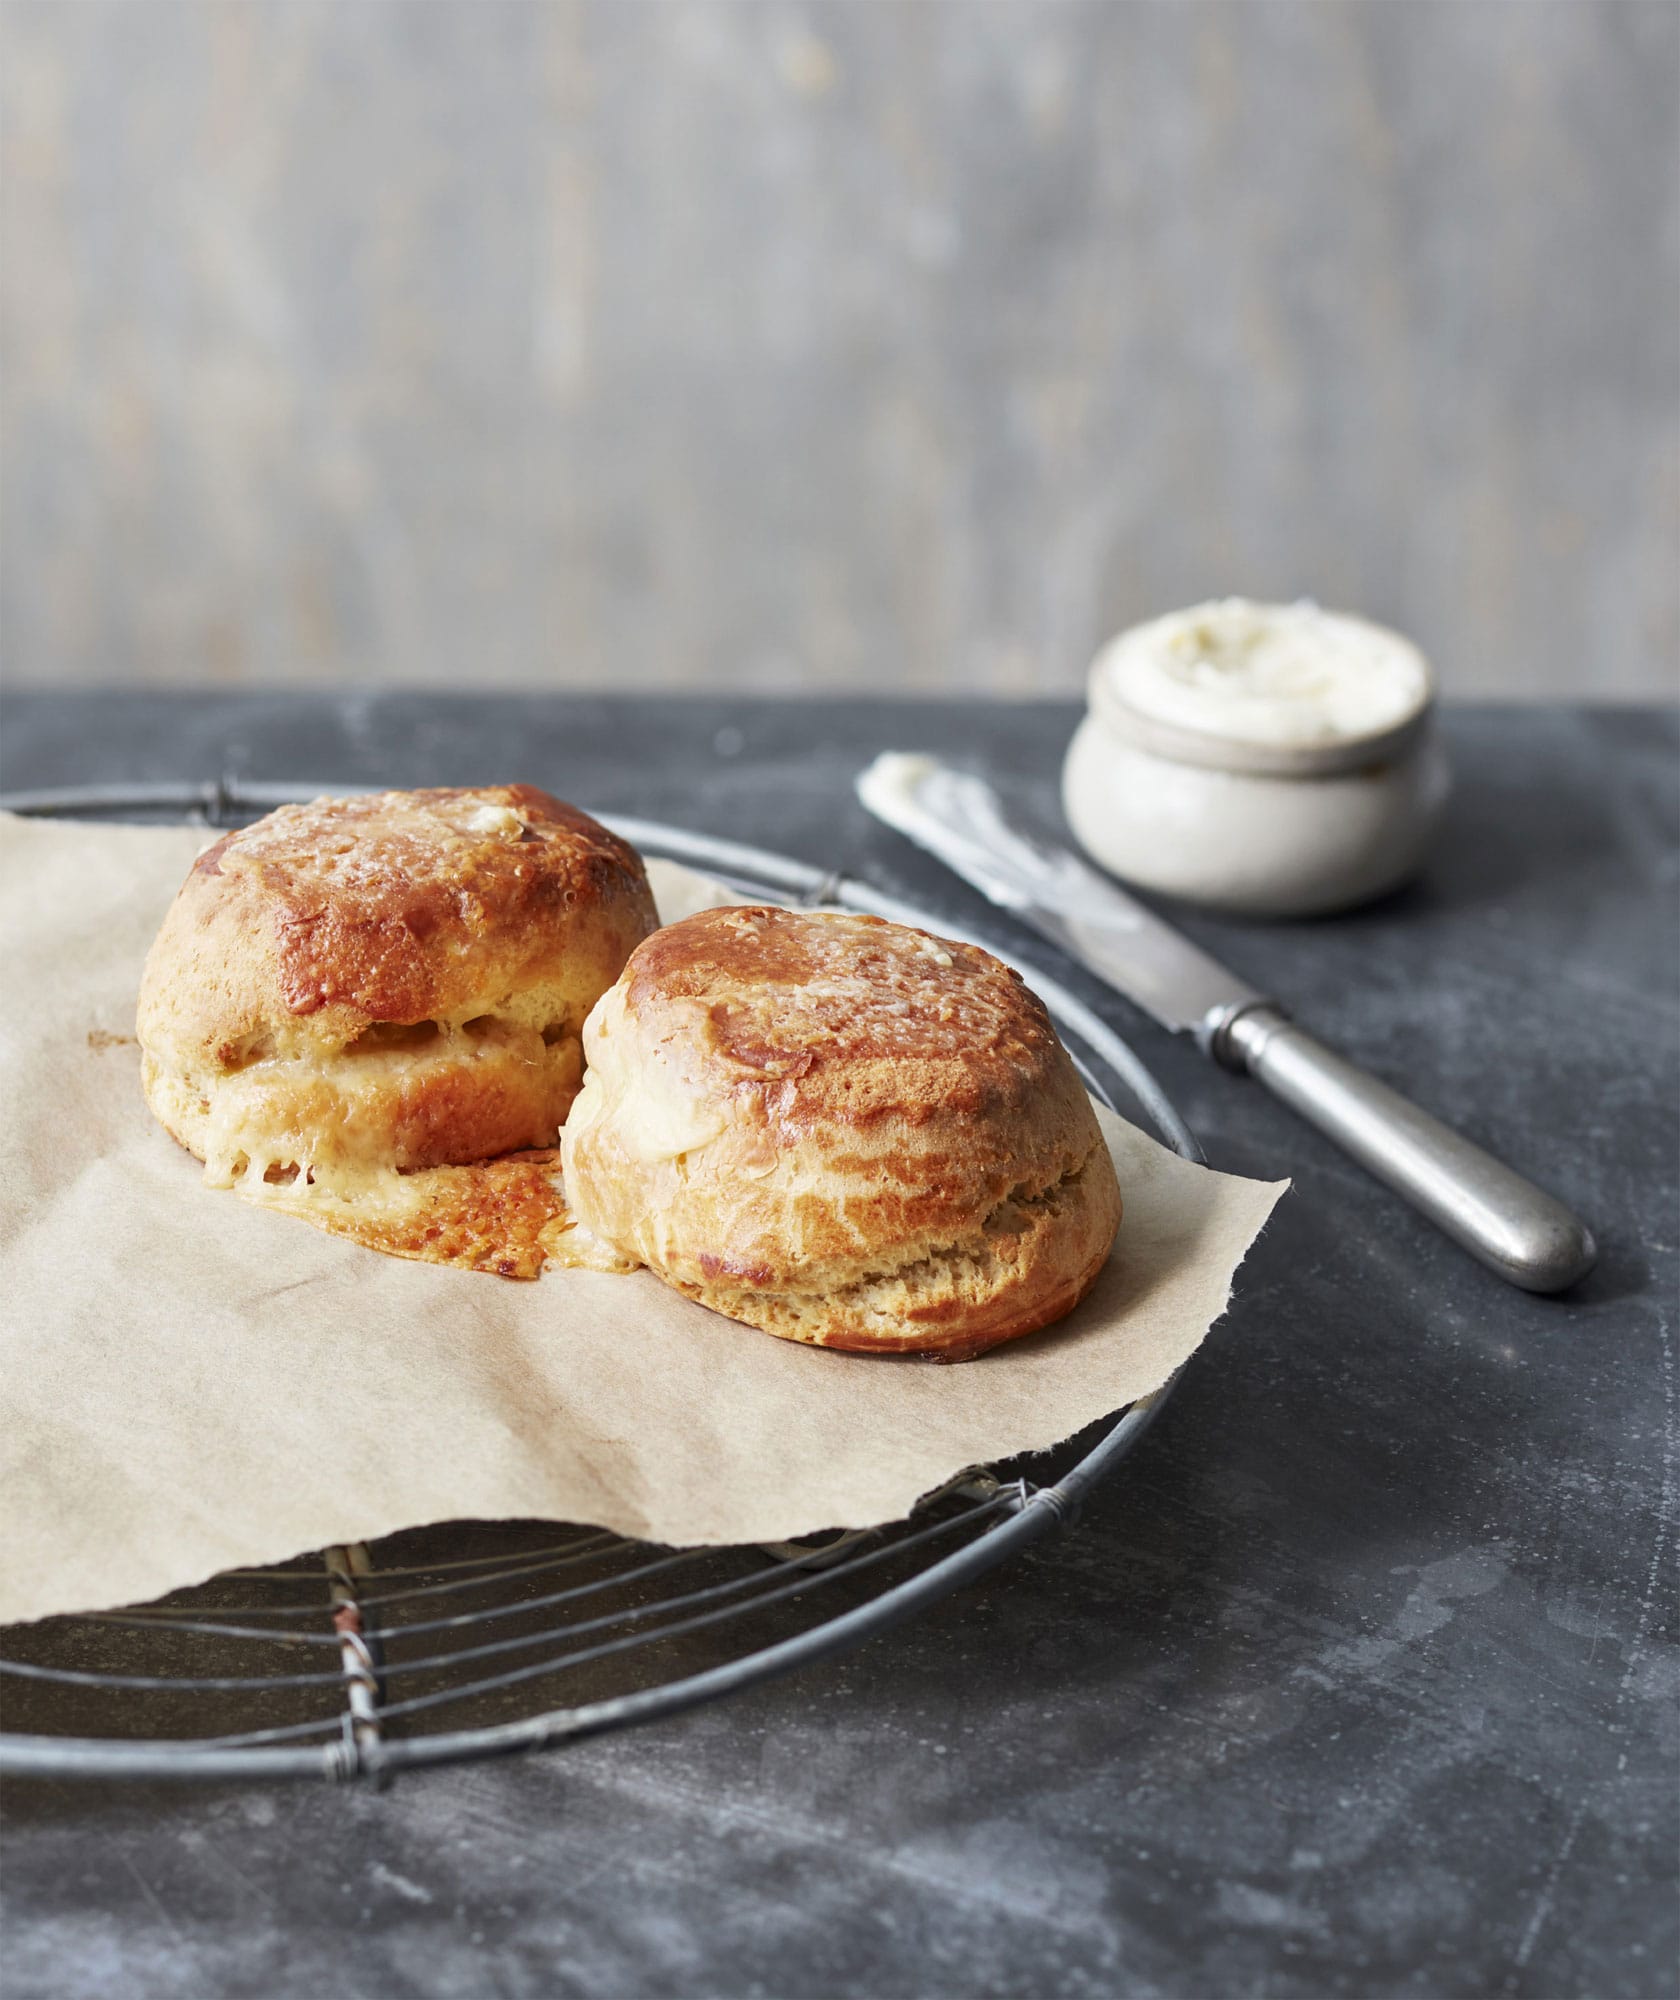
◁ Cheese and Garlic Scones
This is one of my favourites. I was taught this recipe by the wonderful Nigel Slater, who came to my house a few years ago, and we made cheese scones from off-cuts (scraps of cheese) from the shop. I use Cheddar in mine, but you can use any cheese you like, really.
50g (13/4oz) butter, plus a little extra for greasing
225g (8oz) self-raising (self-rising) flour, plus extra for dusting
pinch of salt
200g (7oz) Cheddar (see here), grated
1 garlic clove, crushed
6 tbsp chopped fresh chives
150ml (5 fl oz/scant 2/3 cup) milk, plus extra for brushing
MAKES 4 LARGE SCONES
Preheat the oven to 220°C (425°F/Gas Mark 7) and lightly grease a baking sheet.
Mix together the flour and salt in a bowl, then rub in the butter using your fingertips. Stir in the cheese, garlic and chives, followed by the milk, to form a soft dough.
Turn the dough onto a floured surface and knead very lightly. Pat out to a round 2cm (3/4 inch) thick. Using a 5cm (2-inch) cutter, stamp out rounds and place on the baking sheet.
Brush the tops of the scones with milk, then bake for about 12–15 minutes until you see them rise and they are golden brown. Leave to cool before eating.

◁ Red Leicester
Red Leicester is a hard cheese, normally coloured with annatto, and can be dark yellow to red in colour. This is where the name comes from. I love making Red Leicester, mainly because the colour is so wonderful. Once made it can be kept in the refrigerator for ages, or waxed. It’s so delicious on a good ploughman’s board. Similar to Cheddar, but much milder, it’s great for kids or if you prefer a good mild hard cheese.
7.5 litres (13 pints/32 cups) milk
1 packet direct-set mesophilic starter
4 drops annatto food colouring, diluted in 120ml (4 fl oz/1/2 cup) cold water
1/2 tsp liquid rennet, diluted in 120ml (4 fl oz/1/2 cup) cold water
5 tbsp salt
cheese wax (optional)
MAKES 800g (1lb 12oz)
You will need: cheesecloth or muslin sheets, an instant-read thermometer, a curd knife and a cheese mould
1 In your largest saucepan, heat the milk to 29°C (85°F) using the water bath method – setting the pan into a sink filled with hot water – rather than over direct heat. When the milk reaches the required temperature, add the mesophilic starter, leave for 30 seconds, then stir through the milk. Use a spoon in an up and down movement to make sure it is evenly distributed. Cover the milk and leave for 1 hour, then remove from the sink.
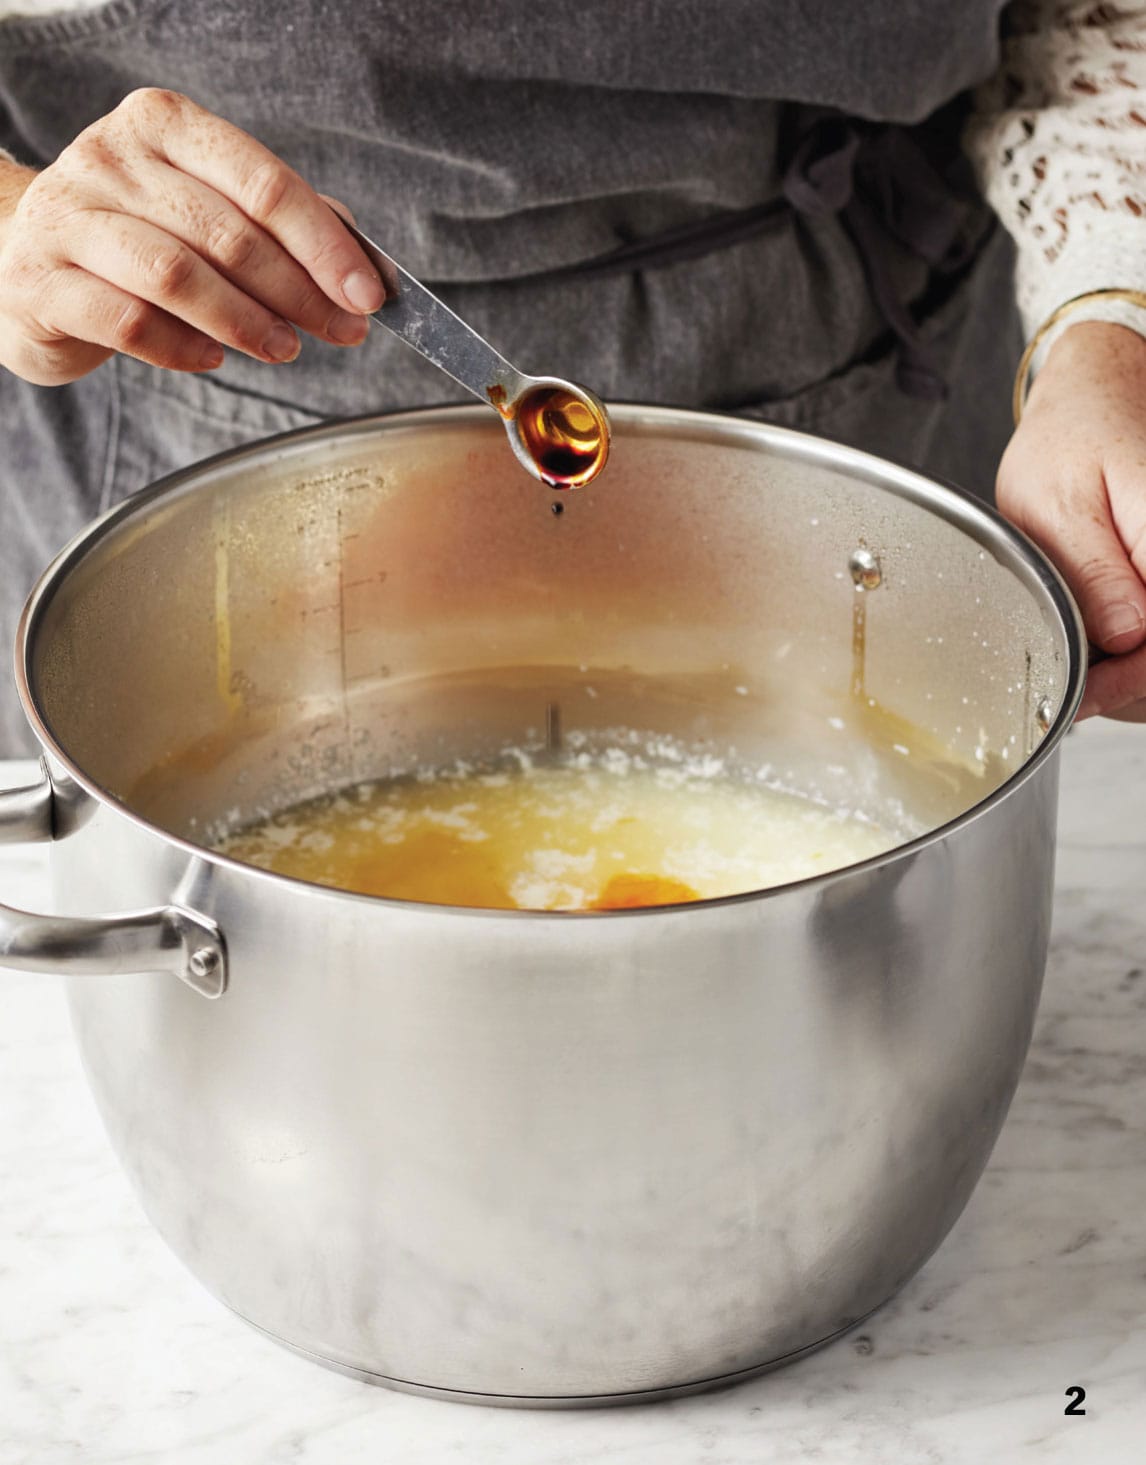
2 Next, add the colouring, stirring well to mix it into the milk.
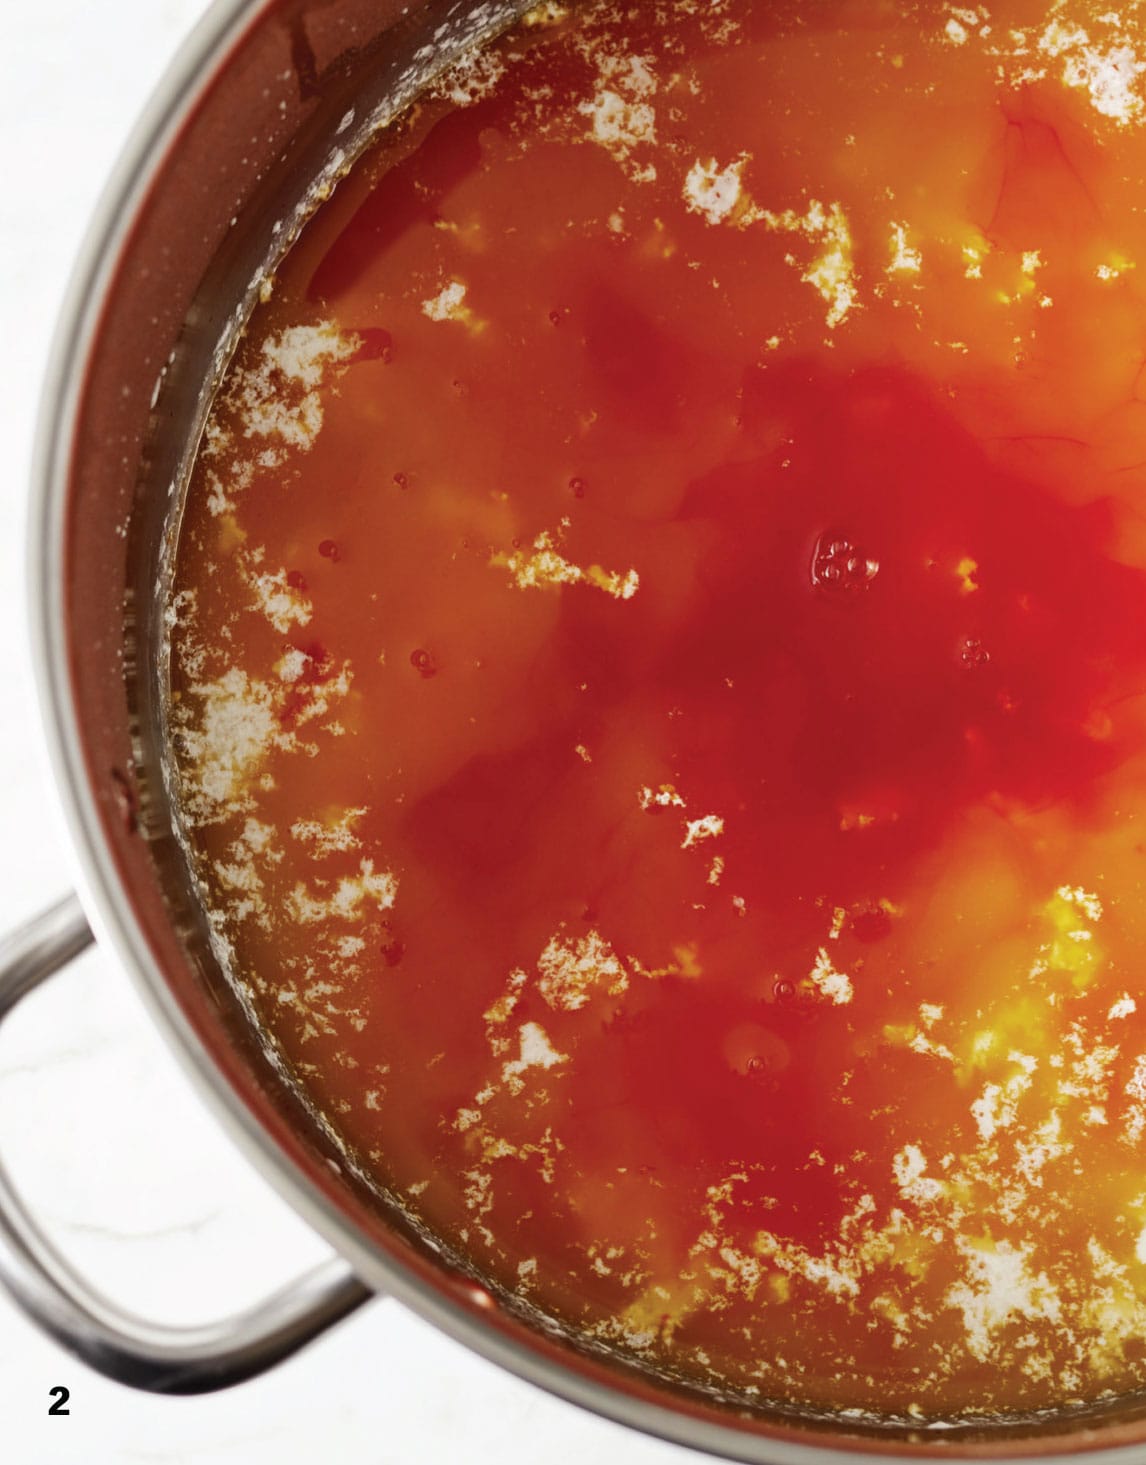
3 Return the pan to the sink and, keeping the milk at 29°C (85°F), add the rennet and stir it in for 1 minute. Cover and leave for a further hour, keeping the milk at 29°C (85°F) by adding more hot water as necessary. Do not remove the lid.
4 After the hour is up, slowly bring the temperature up to 35°C (95°F). Keep stirring to prevent the milk sticking to the pan. Keep the mixture at 35°C (95°F) for 30 minutes.
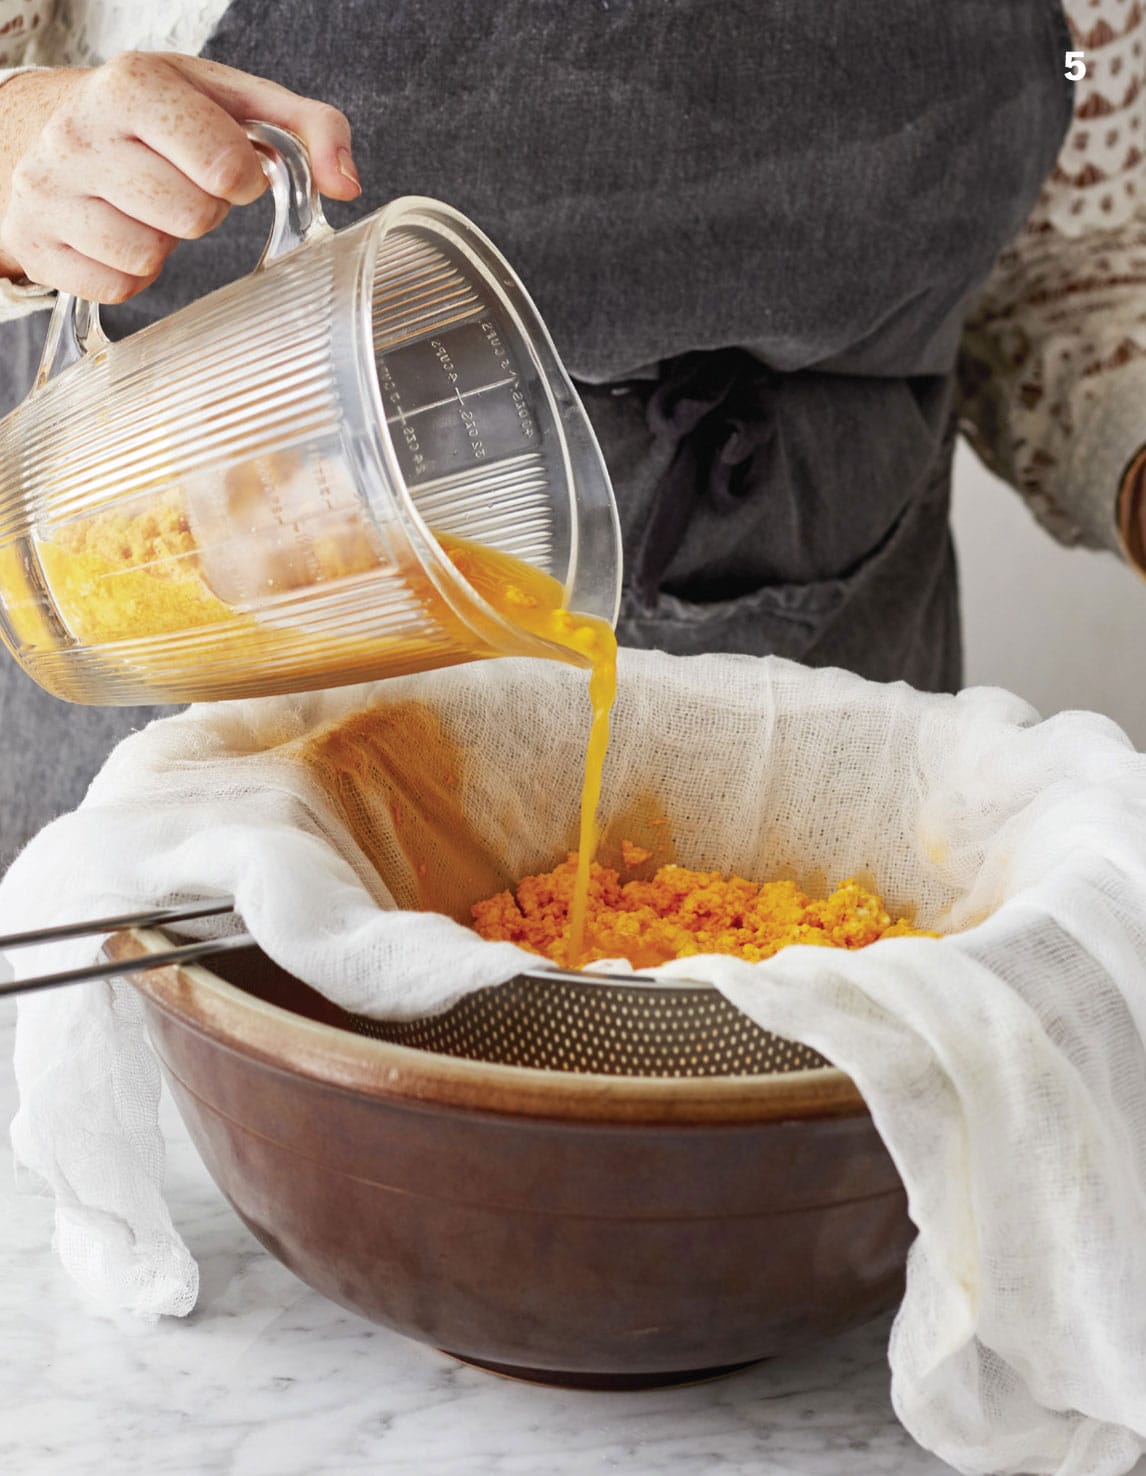
5 Line a sieve (fine-mesh strainer) with cheesecloth or muslin set over a bowl, add the curds and drain. You might find it easier to transfer them with a jug (large measuring cup). Leave to sit for about 30 minutes.
6 Place the curds on a board and cut them into six long strips. Place them onto a draining board, cover with a warm cloth, and turn the curds over every 15 minutes for a total of 1 hour. Try to keep the cloth warm too.
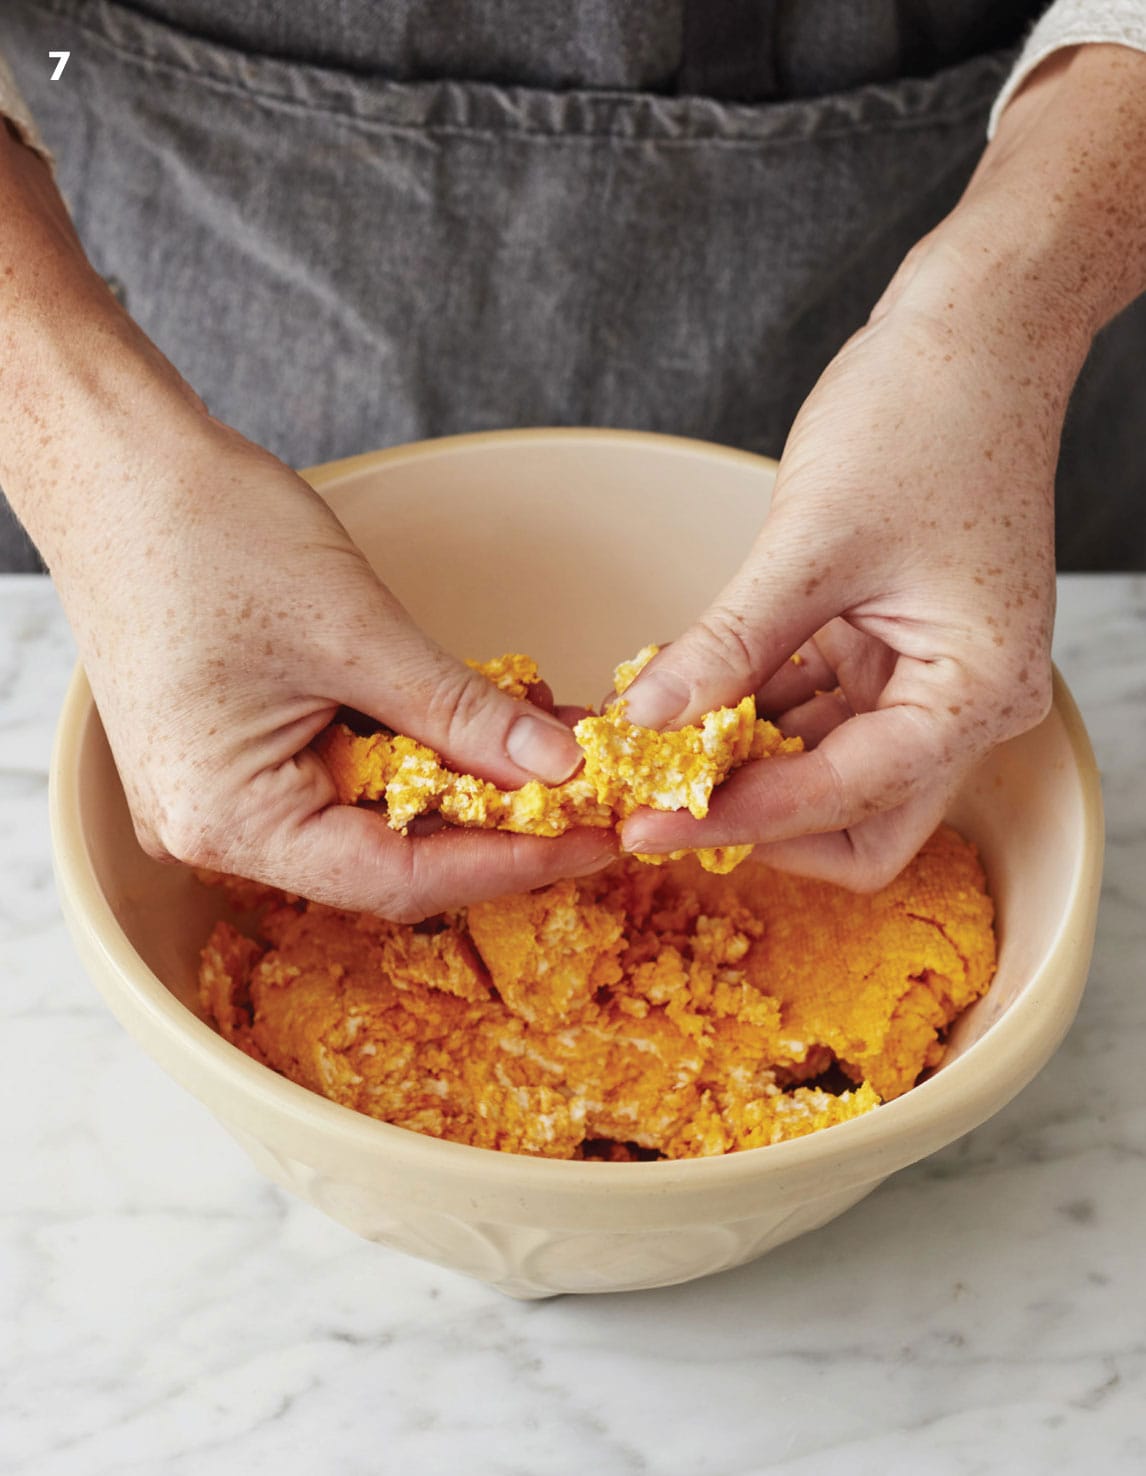
7 Transfer to a large bowl. Add 2 tablespoons of the salt then crumble the curds in your hands for 2 minutes.
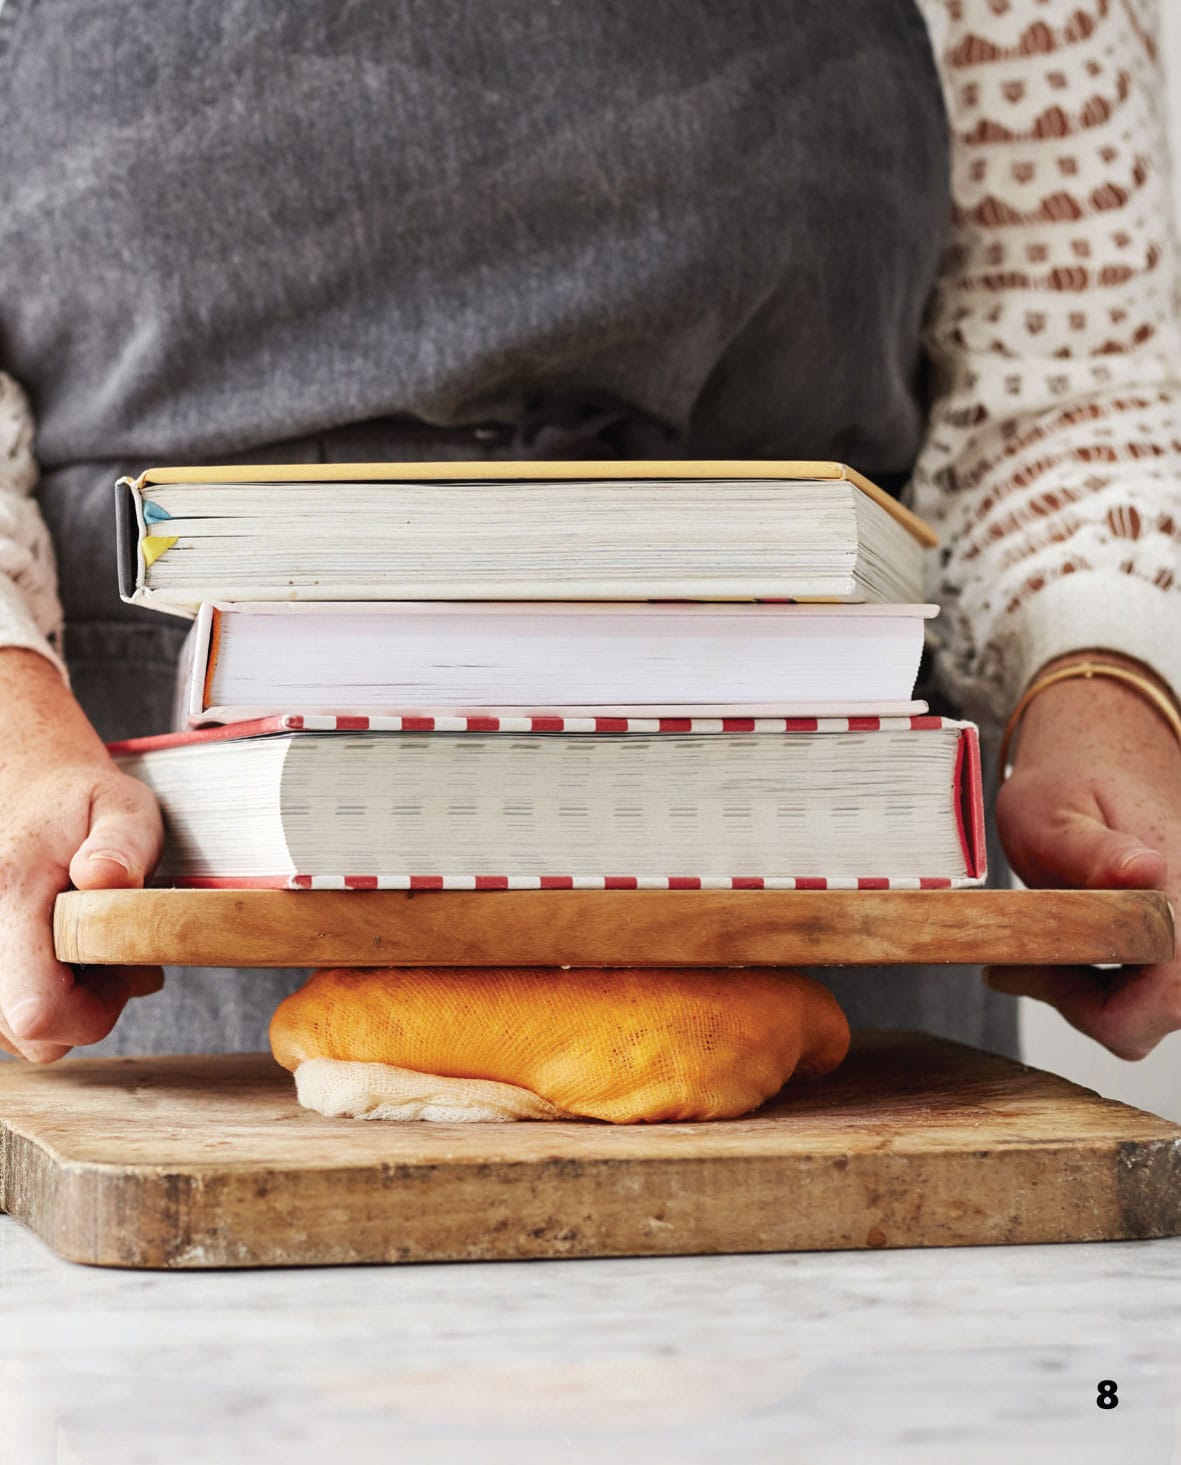
8 Transfer the curds to a clean cheesecloth or muslin sheet, wrap them tightly and weigh them down for 30 minutes – you can use two wooden boards and a few heavy books.
9 Now wrap the cheese in the cheesecloth and place it into a cheese mould. Press the cheese for 2 hours with some weights, such as tin cans, placed on a plate on top of the cheese. Then rewrap the cheese in a fresh piece of cloth, flip it over and press for another 2 hours. Rewrap, flip and press with double the amount of weight for 24 hours.
10 Remove the cheese from the cloth. Rub and coat it in the rest of the salt, then leave to sit at room temperature for 2 days until dry.
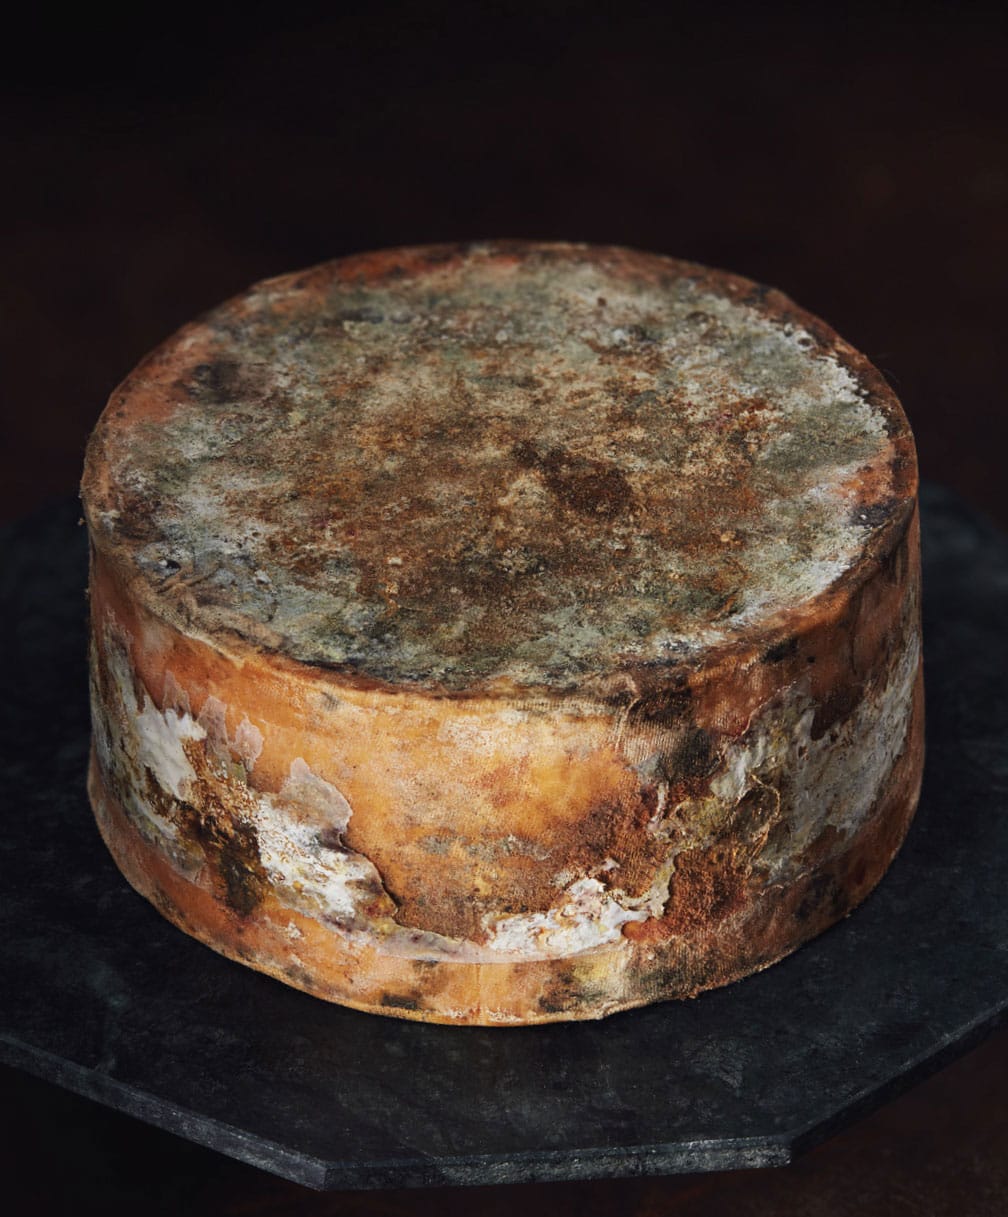
11 Now you can wax the cheese (see here) or leave it with a natural rind. I mature my Red Leicester for about 12 weeks at 13°C (55°F), but you can mature it for as long as you like; I have aged it for up to 12 months, which results in a very strong, mature cheese (left).

◁ Red Leicester, Cherry Tomato and Courgette (Zucchini) Tarts
These little tarts are wonderful served as appetizers at a party, especially at Christmas, or great to take cold on a picnic. It is such an easy recipe, and you can make them ahead of time and freeze them, as they reheat beautifully.
1 sheet of readymade shortcrust pastry (pie dough)
200g (7oz) assorted cherry tomatoes
olive oil, for frying
2 small courgettes (zucchini), sliced 1cm (1/2 inch) thick
1/2 red onion, thinly sliced
4 eggs
100ml (31/2 fl oz/scant 1/2 cup) milk
30g (1oz) plain (all-purpose) flour
handful of fresh basil, chopped
1/2 tsp cayenne
1/2 tsp mustard powder
200g (7oz) red Leicester (see page 1500, grated
1 tsp paprika
1 tsp each salt and freshly ground black pepper
MAKES 4 TARTS
Preheat the oven to 180°C (350°F/Gas Mark 4).
Cut four circles from the pastry (dough), around 10cm (4 inches) in diameter. Line individual tart tins (pans) with the pastry (dough), line with baking (parchment) paper and baking beans (pie weights) and blind bake for 12–15 minutes until golden.
Wash and slice the tomatoes, then place on a plate lined with kitchen paper (paper towels) to drain.
Heat a little olive oil in a frying pan (skillet) over a medium heat. Add the courgette (zucchini) slices in a single layer, season with salt and pepper and cook until lightly browned. Transfer to a plate and add the onion to the hot pan. Cook for just a few minutes until lightly browned but still crunchy. Add the onions to the courgette (zucchini) and set aside.
In a medium bowl, combine the eggs, milk, flour, basil, cayenne, mustard powder, salt and pepper. Beat by hand until well blended, or make it super-easy and use a stick (immersion) blender.
Sprinkle the cheese in the bottom of the baked crusts. Layer half the tomatoes, courgettes (zucchini) and onions over the cheese. Gently pour the egg mixture over, and top with the remaining tomatoes, courgettes (zucchini) and onions.
Sprinkle with paprika and bake for 30 minutes, or until the egg mixture is set in the centre. Cover the tarts with foil during baking if the crusts brown too quickly.
Remove from the tins (pans) and leave the tarts to cool on a wire (cooling) rack for 10–15 minutes before serving. They may also be served at room temperature.

◁ Gouda
Gouda is a beautiful caramel-sweet cheese, with a real depth of flavour. This Dutch classic is a wonderful hard cheese and really rewarding to make. It is advanced cheesemaking at its best. This Gouda is quite a mild, smooth cheese, but it really comes alive during the maturing process, so the longer you mature it the more flavour you will get, and you can mature the cheese for up to eight months.
7.5 litres (13 pints/32 cups) milk
1 packet direct-set mesophilic starter
1/2 tsp rennet, diluted in 50ml (13/4fl oz) cold water
500g (1lb 13/4oz) salt
1 tbsp calcium chloride cheese wax
MAKES 1kg (2lb 3oz)
You will need: cheesecloth or muslin sheets, an instant-read thermometer, a curd knife and a cheese mould
1 In a large pan over a low heat, heat the milk to 32°C (90°F), stirring frequently to prevent it sticking to the bottom of the pan, then add the mesophilic starter and stir well until it is evenly distributed. Remove the milk from the heat, cover and let it sit undisturbed for 15 minutes.
2 Add the rennet and stir through for 2 minutes. Cover and set aside for 1 hour.
3 Using a curd knife, cut the curds into 1cm (1/2-inch) cubes. Cover and set aside for 15 minutes.
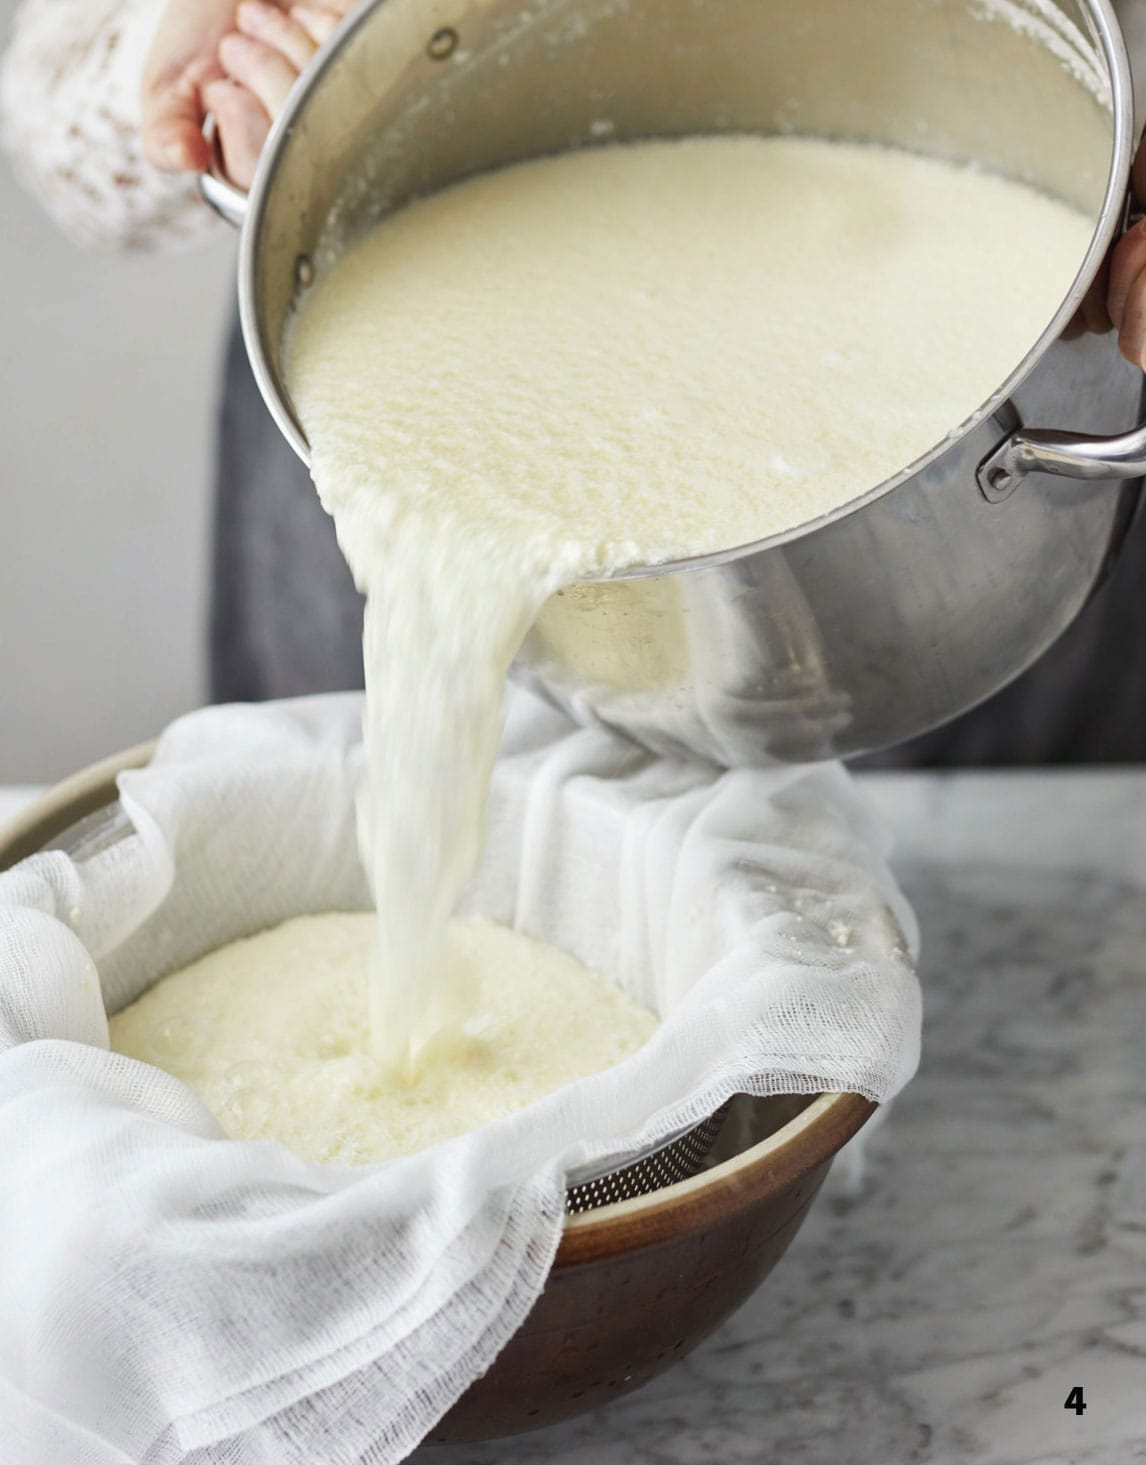
4 Drain off one-third of the whey, then add to the pan 2.5 litres (41/2 pints/101/2 cups) of water at a temperature of 82°C (180°F). The temperature of the curds should be 32°C (90°F). Let the curds sit for 10 minutes, then pour off the whey until the tops of the curds are visible. Add another panful of water at 79°C (175°F). The overall temperature of the curds should be 38°C (100°F) and should stay like this for 15 minutes. Stir the curds to avoid sticking, then leave them, covered, for a further 40 minutes. Line a sieve (fine-mesh strainer) with cheesecloth or muslin, set over a bowl, then pour in the curds and leave to drain.
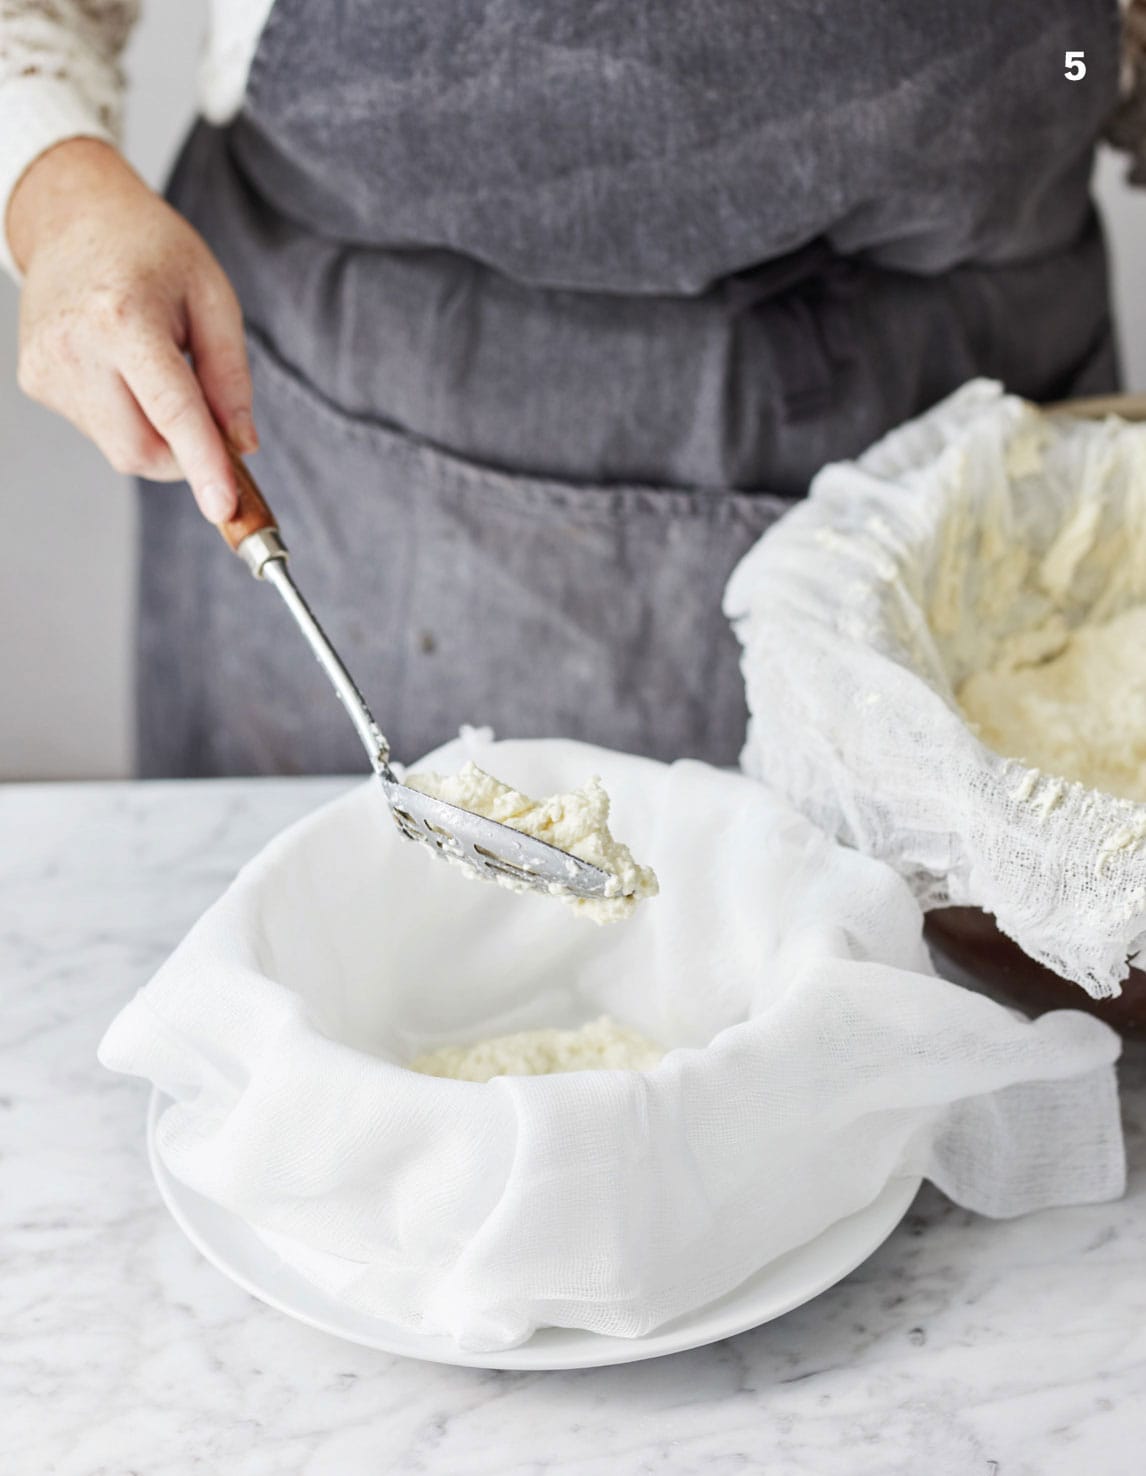
5 Gather the cloth up into a bag, squeeze out any remaining liquid and press the curds together. Once the curds are matted, transfer them to a cloth-lined mould and apply about 1kg (2lb 3oz) of weight set on a plate on top of the cheese for 1 hour.

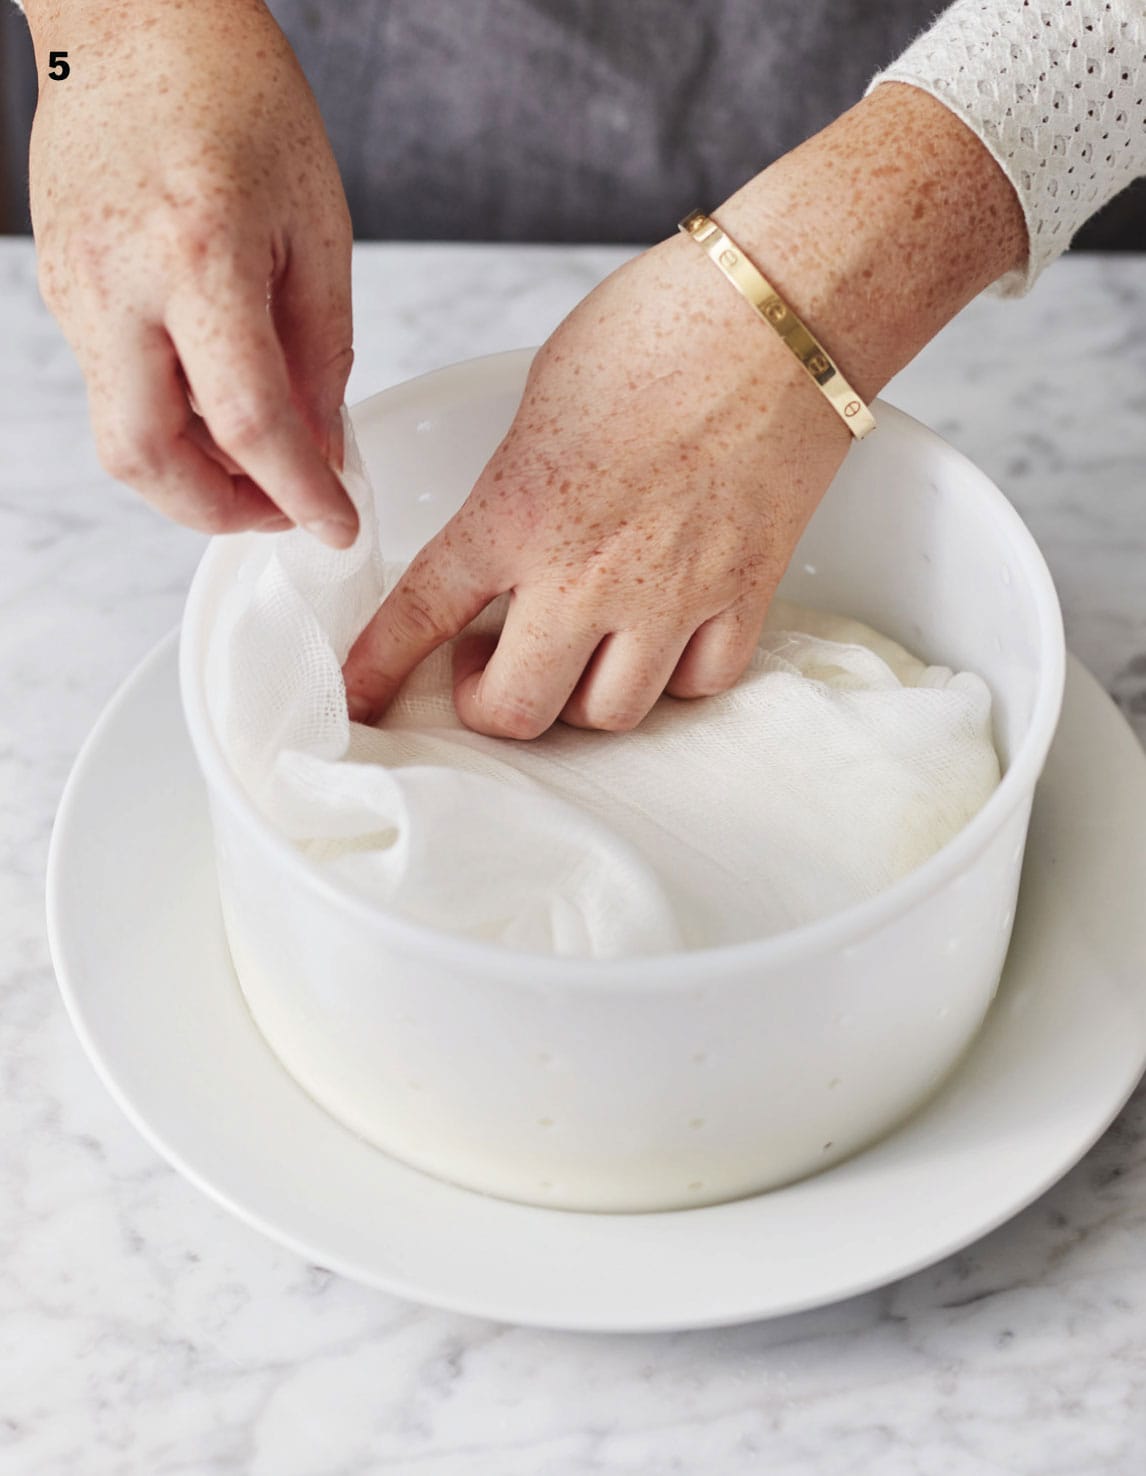
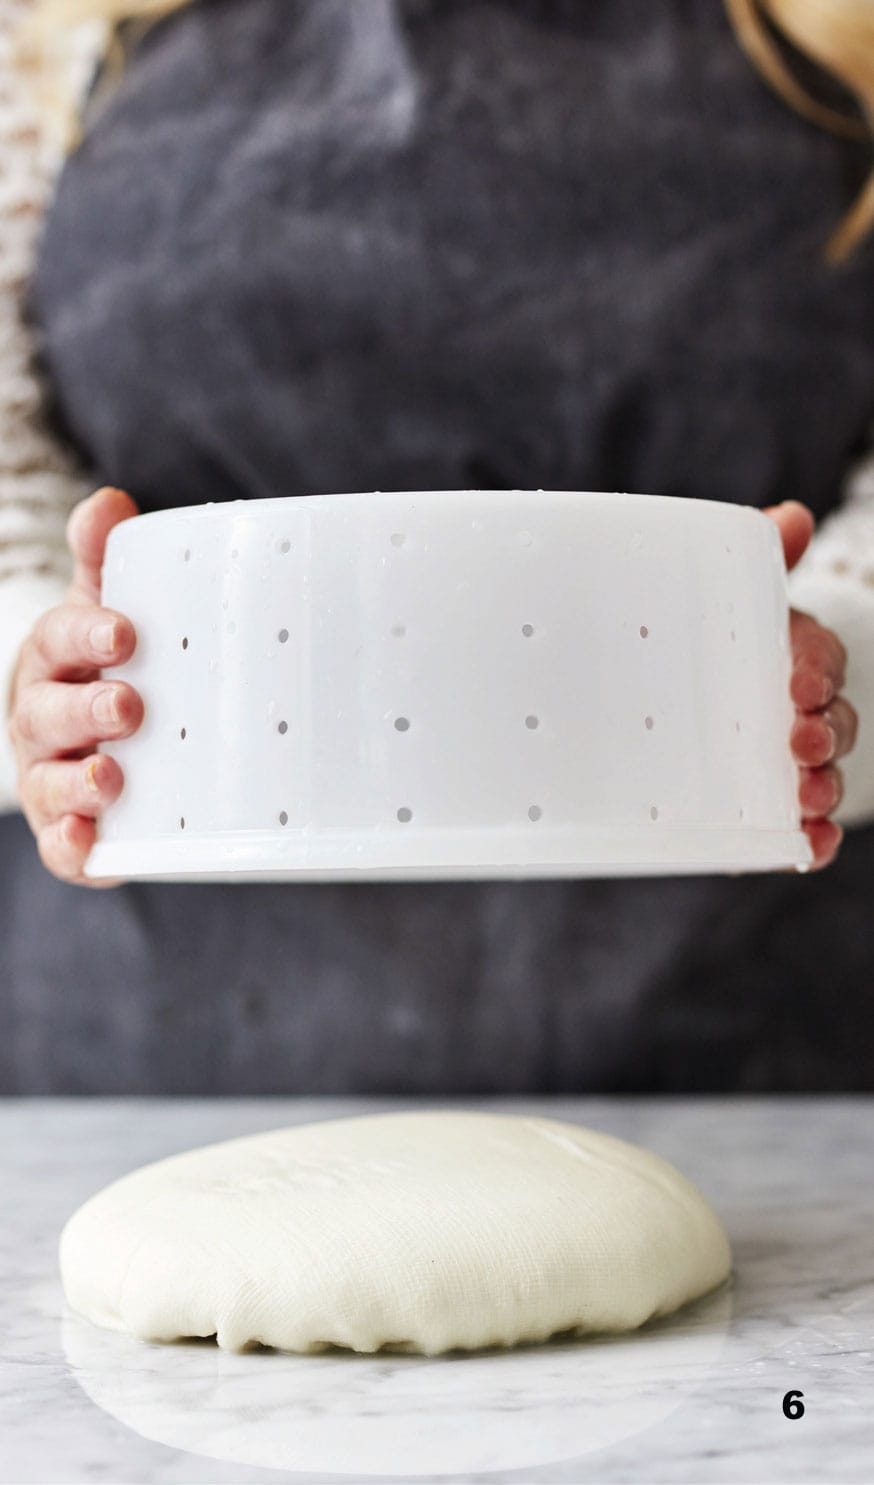
6 Remove the weight, take the cheese out of the mould, unwrap it and flip it over. Rewrap it in a clean cloth and return it to the mould. Repeat every 15 minutes for 1 hour, then increase the weight by 500g (1lb 13/4oz) and press for a further 15 hours.
7 Make a brine mix. In a bowl, add the salt and calcium chloride to 3 litres (51/4 pints/121/2 cups) of cold water. Unwrap the cheese and cover it completely in the brine. Leave it to soak for 10–12 hours, flipping it every couple of hours.
8 Remove the cheese from the brine and leave it to dry for 3 days in a cool, dry place.
9 Wax your cheese (see here), then leave it to mature in a cool, dark place for 4–6 months. For a more mature cheese, leave it for 9–12 months.
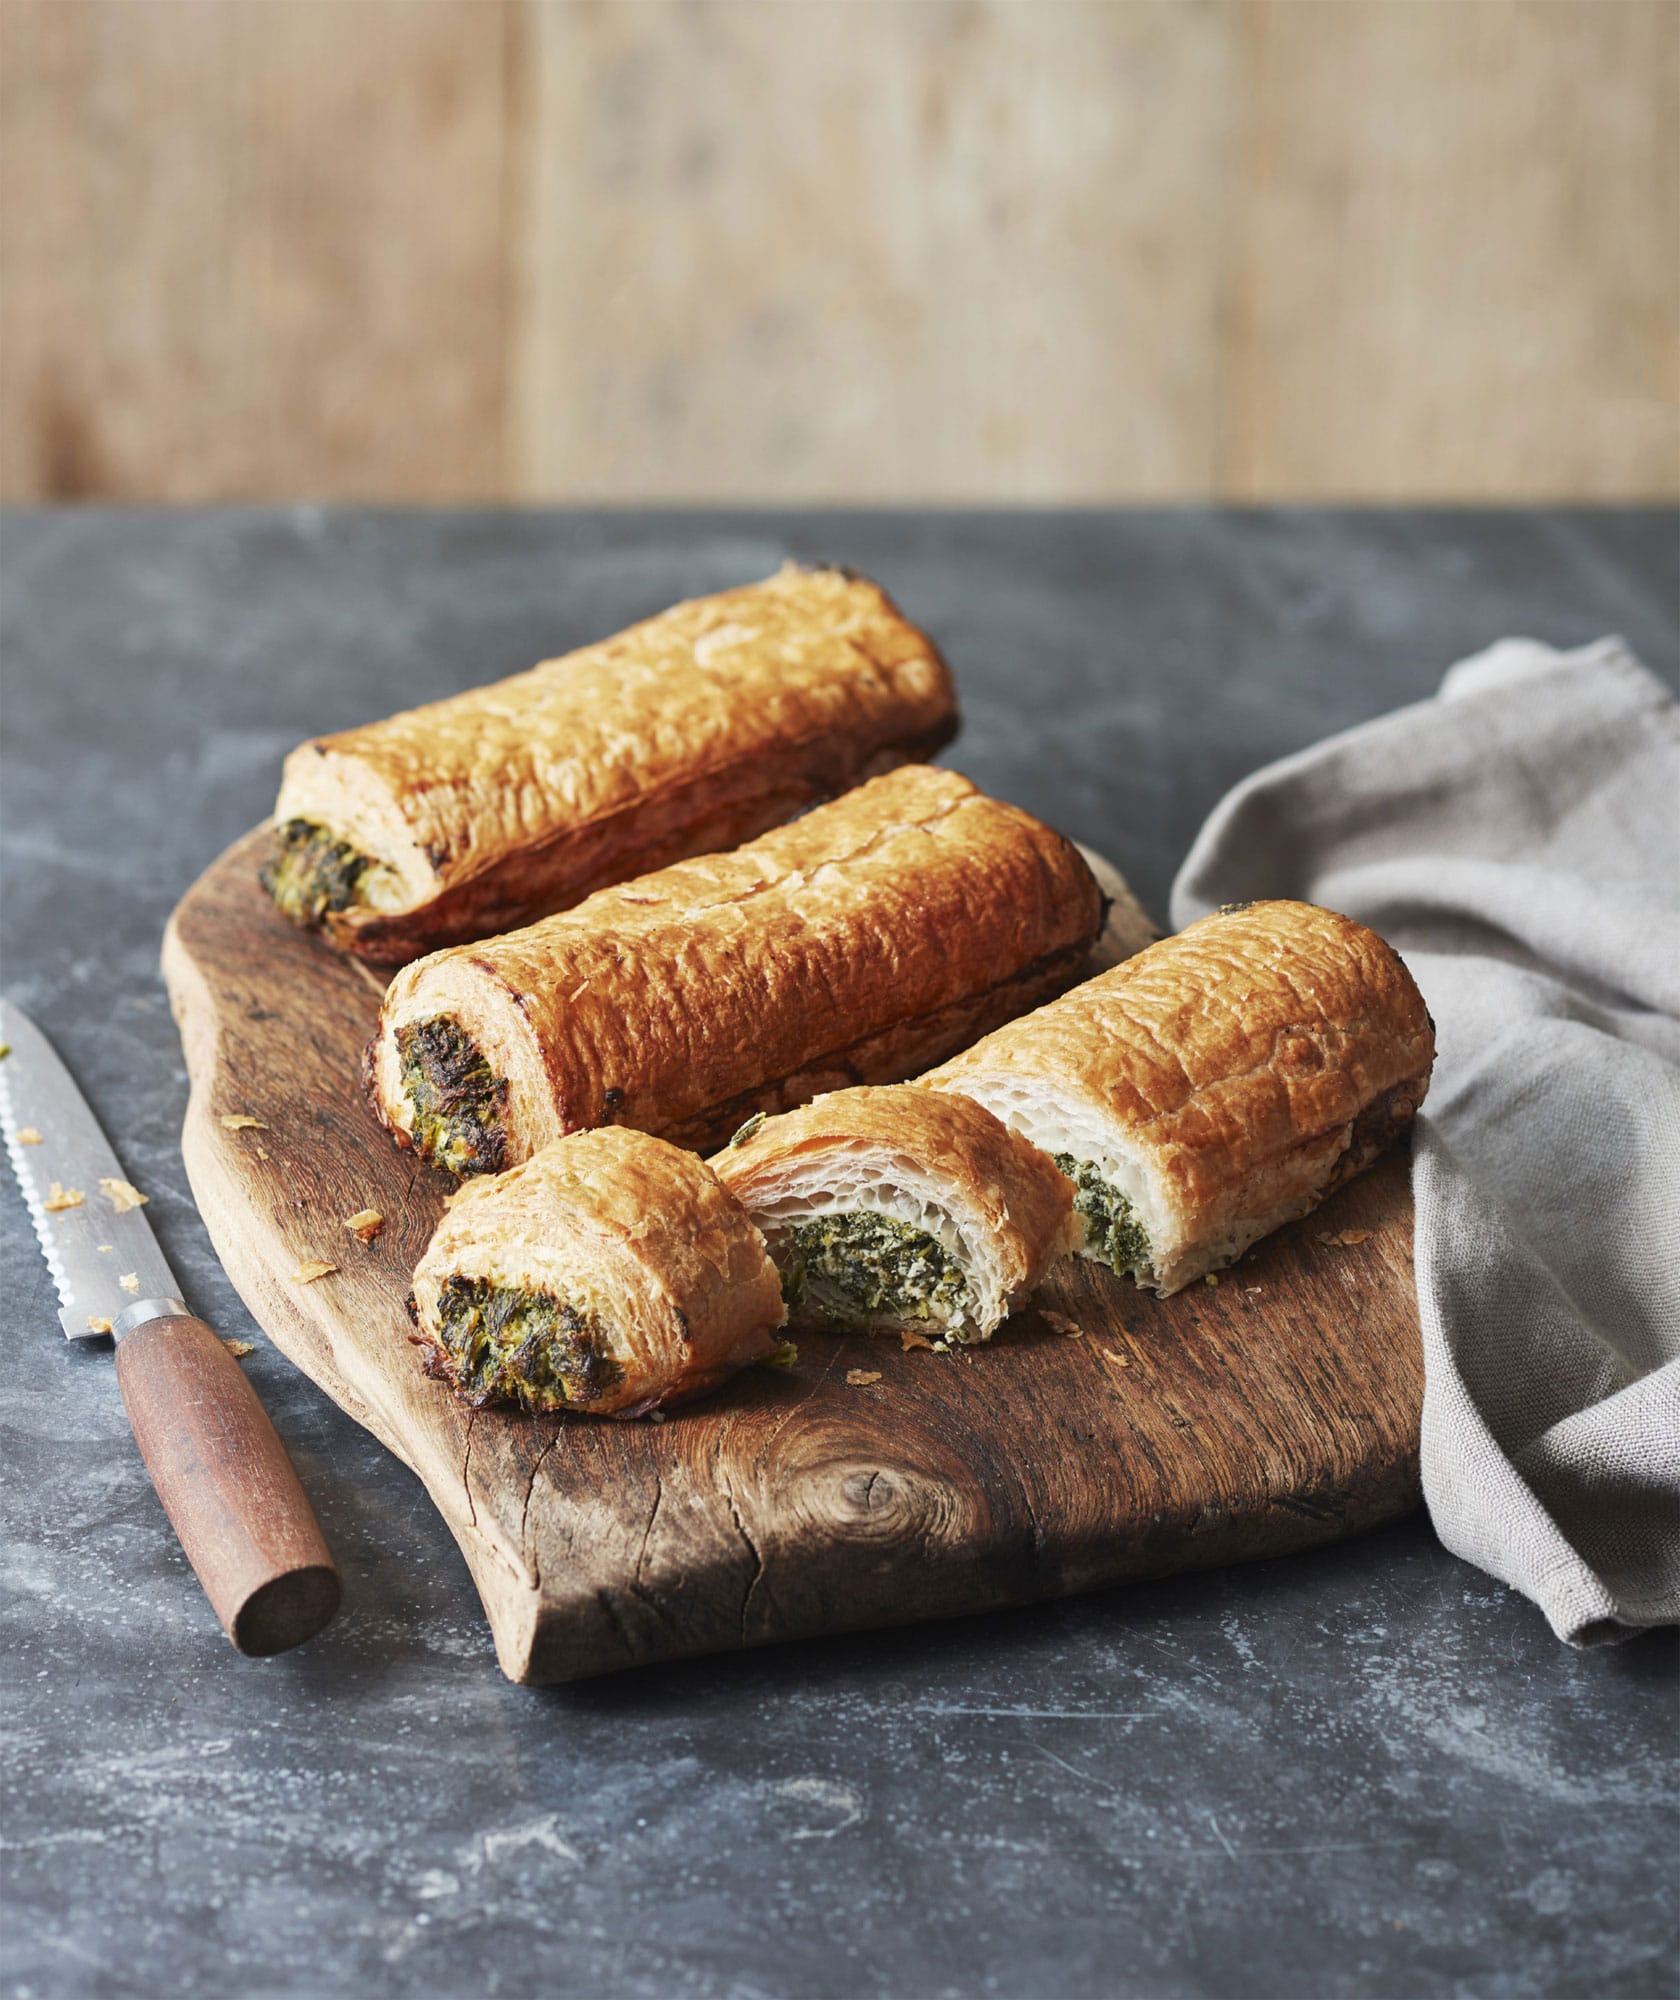
◁ Gouda, Parmesan and Spinach Rolls
These are nice, strong-flavoured vegetarian rolls. Great as finger food at a party, or baked in a big batch to fill lunch boxes.
butter, for greasing
300g (101/2oz) spinach, cooked and drained
8 tbsp Parmesan cheese, grated
250g (9oz) feta (see here), crumbled
1 onion, chopped
250g (9oz) mature Gouda (see here), grated
splash of milk
1 sheet of readymade puff pastry
2 eggs, beaten
MAKES 3 ROLLS
Preheat the oven to 200°C (400°F/Gas Mark 6) and grease a baking sheet.
In a large bowl, mix together all the ingredients except the pastry and eggs.
Unroll the pastry sheet and cut it lengthways into three equal pieces. Divide the cheese mixture into three and place one-third down the middle of each length of pastry dough.
Brush down one side of the dough with the beaten egg. Roll the dough around the cheese mix, using a little of the egg mixture to seal the edges. Place in the refrigerator for 20 minutes.
Brush the tops of the rolls with the rest of the egg mixture. Bake for 20 minutes, or until golden and cooked through.
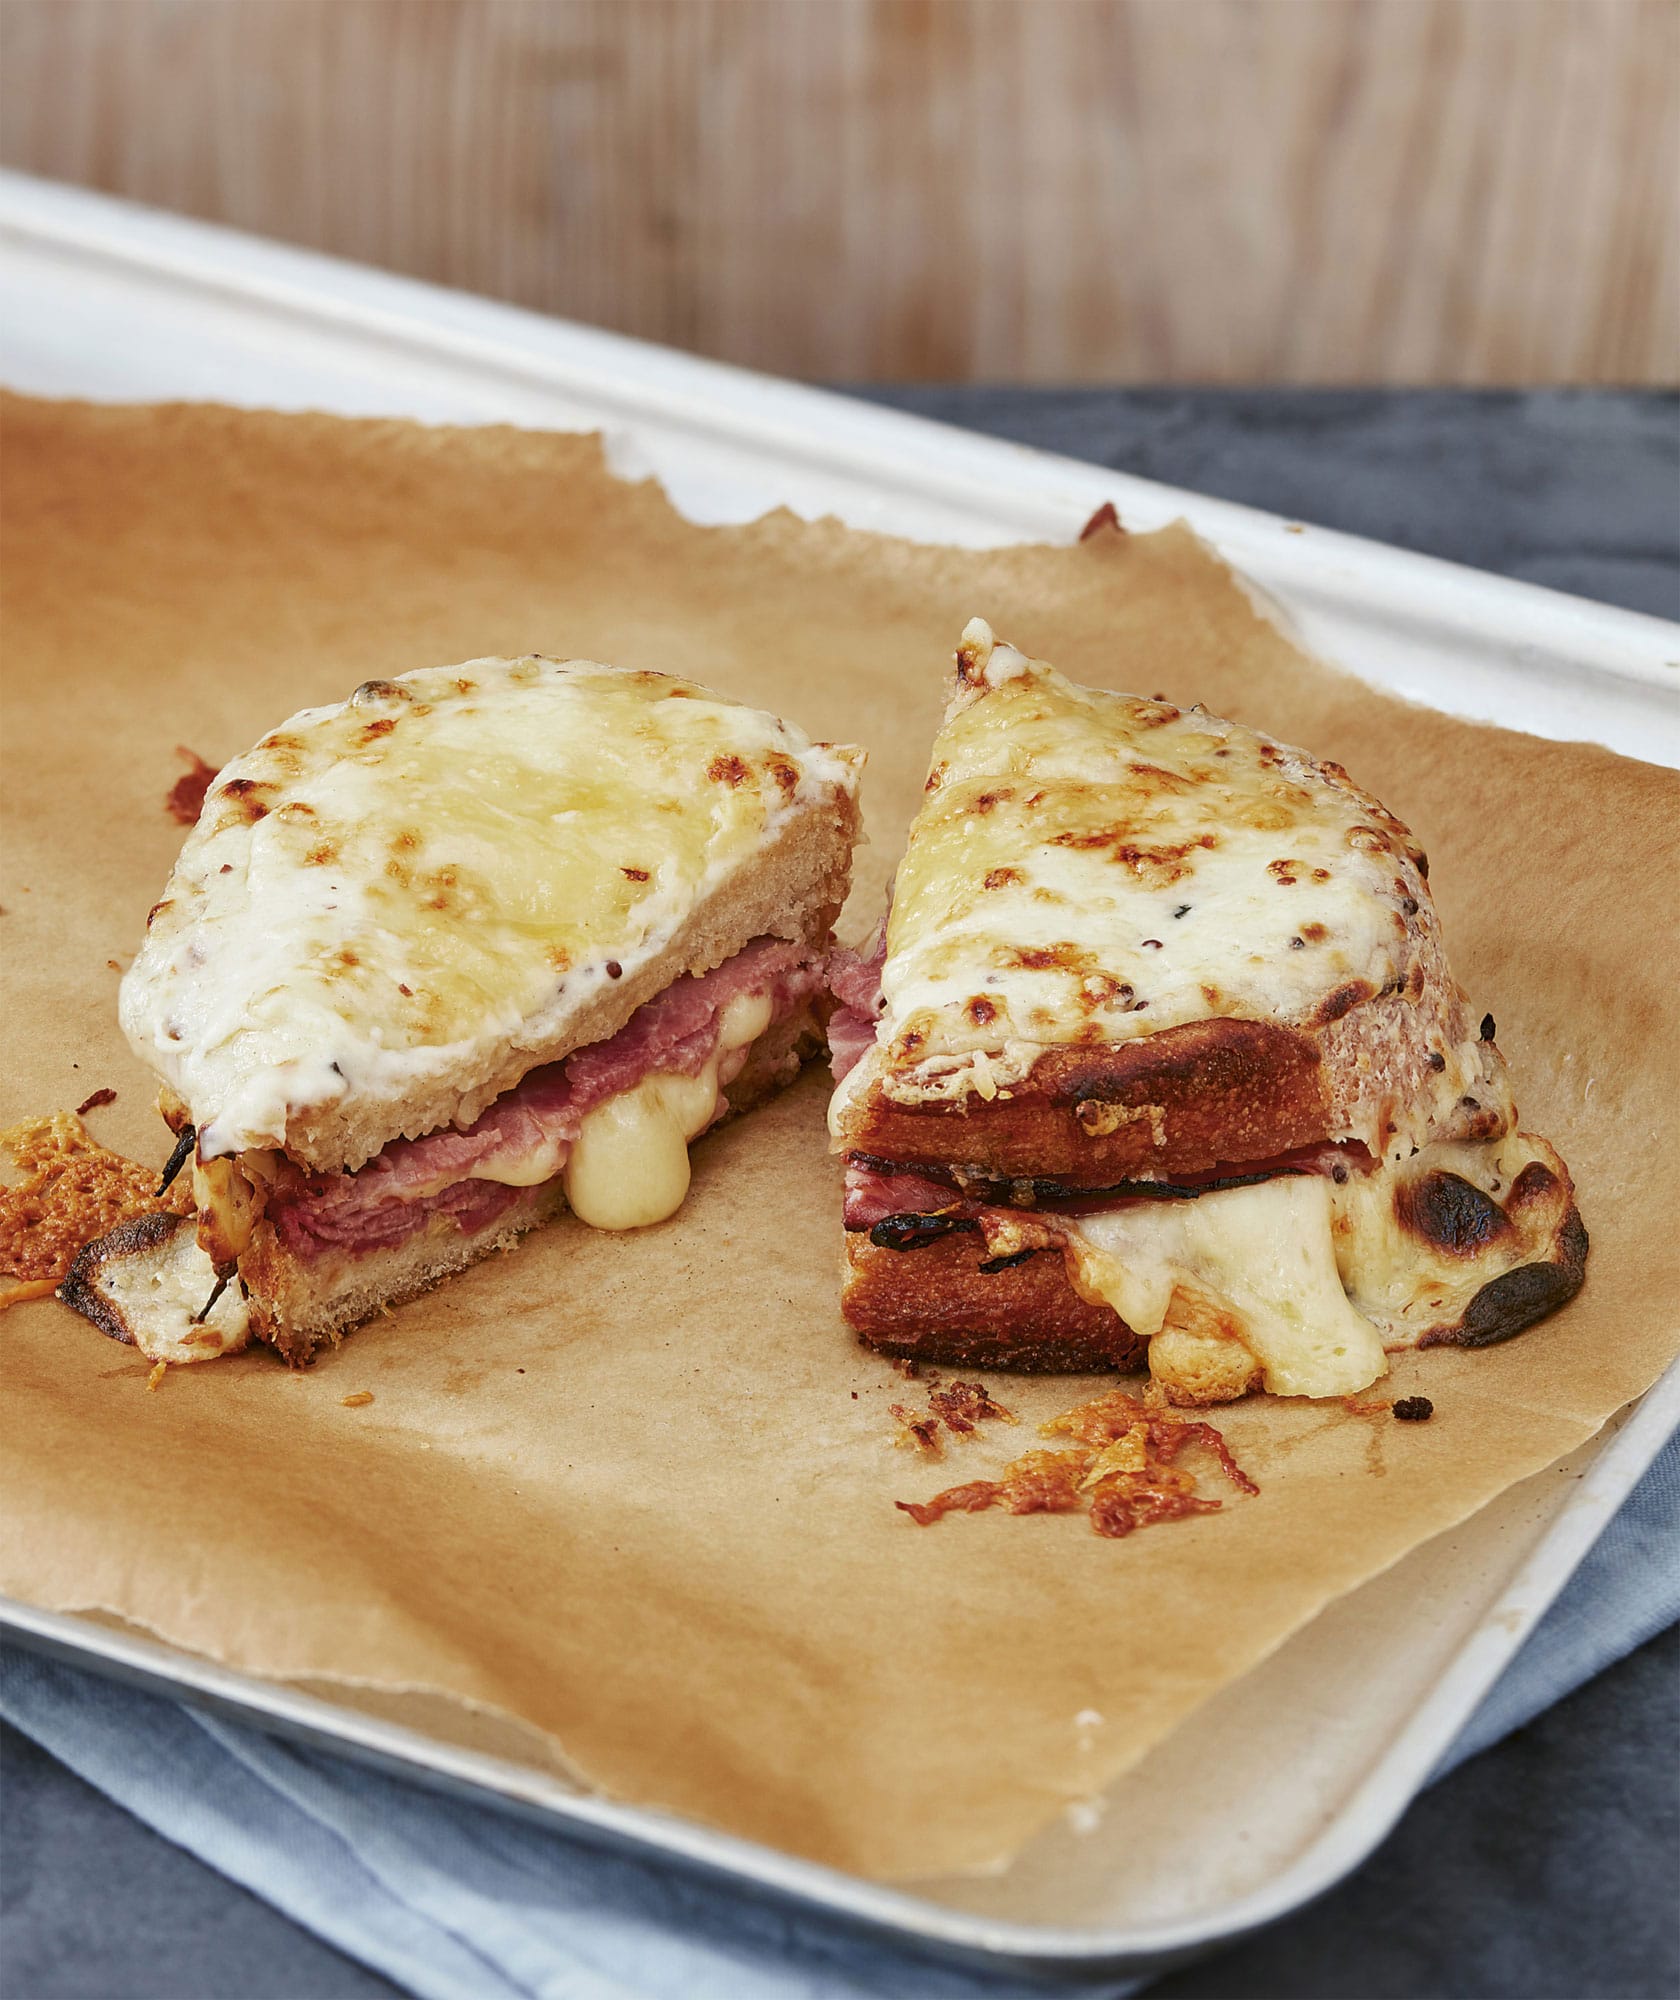
◁ Classic Croque Monsieur
Croque monsieur is the gourmet French version of a toasted ham and cheese sandwich – and it is delicious!
100g (31/2oz) unsalted butter, plus 1 tbsp for frying
2 tbsp plain (all-purpose) flour
250ml (9 fl oz/1 cup) warm milk
pinch of nutmeg
pinch of freshly ground black pepper
2 thick slices of sourdough bread
2 tsp Dijon mustard
300g (101/2oz) Gruyère
150g (5oz) thickly sliced ham
SERVES 1
To make a béchamel sauce, melt the butter in a pan over a medium heat. Once melted, add the flour, stirring continuously to make sure it doesn’t burn. Add the warm milk gradually and stir until smooth and thickened, then add the nutmeg and pepper and set aside.
Spread one side of each slice of bread with the mustard. Slice 200g (7oz) of the Gruyère, then top one slice of bread with the ham and sliced cheese. Place the pieces of bread together to make a sandwich.
In a large pan, melt 1 tablespoon butter, add the sandwich and lightly cook on both sides.
Preheat the grill (broiler) and line a baking sheet with a piece of non-stick baking (parchment) paper. Transfer the sandwich to the baking sheet. Grate the remaining Gruyère, then top the sandwich with the béchamel sauce and grated cheese. Cook under the grill (broiler) until golden brown and bubbling.
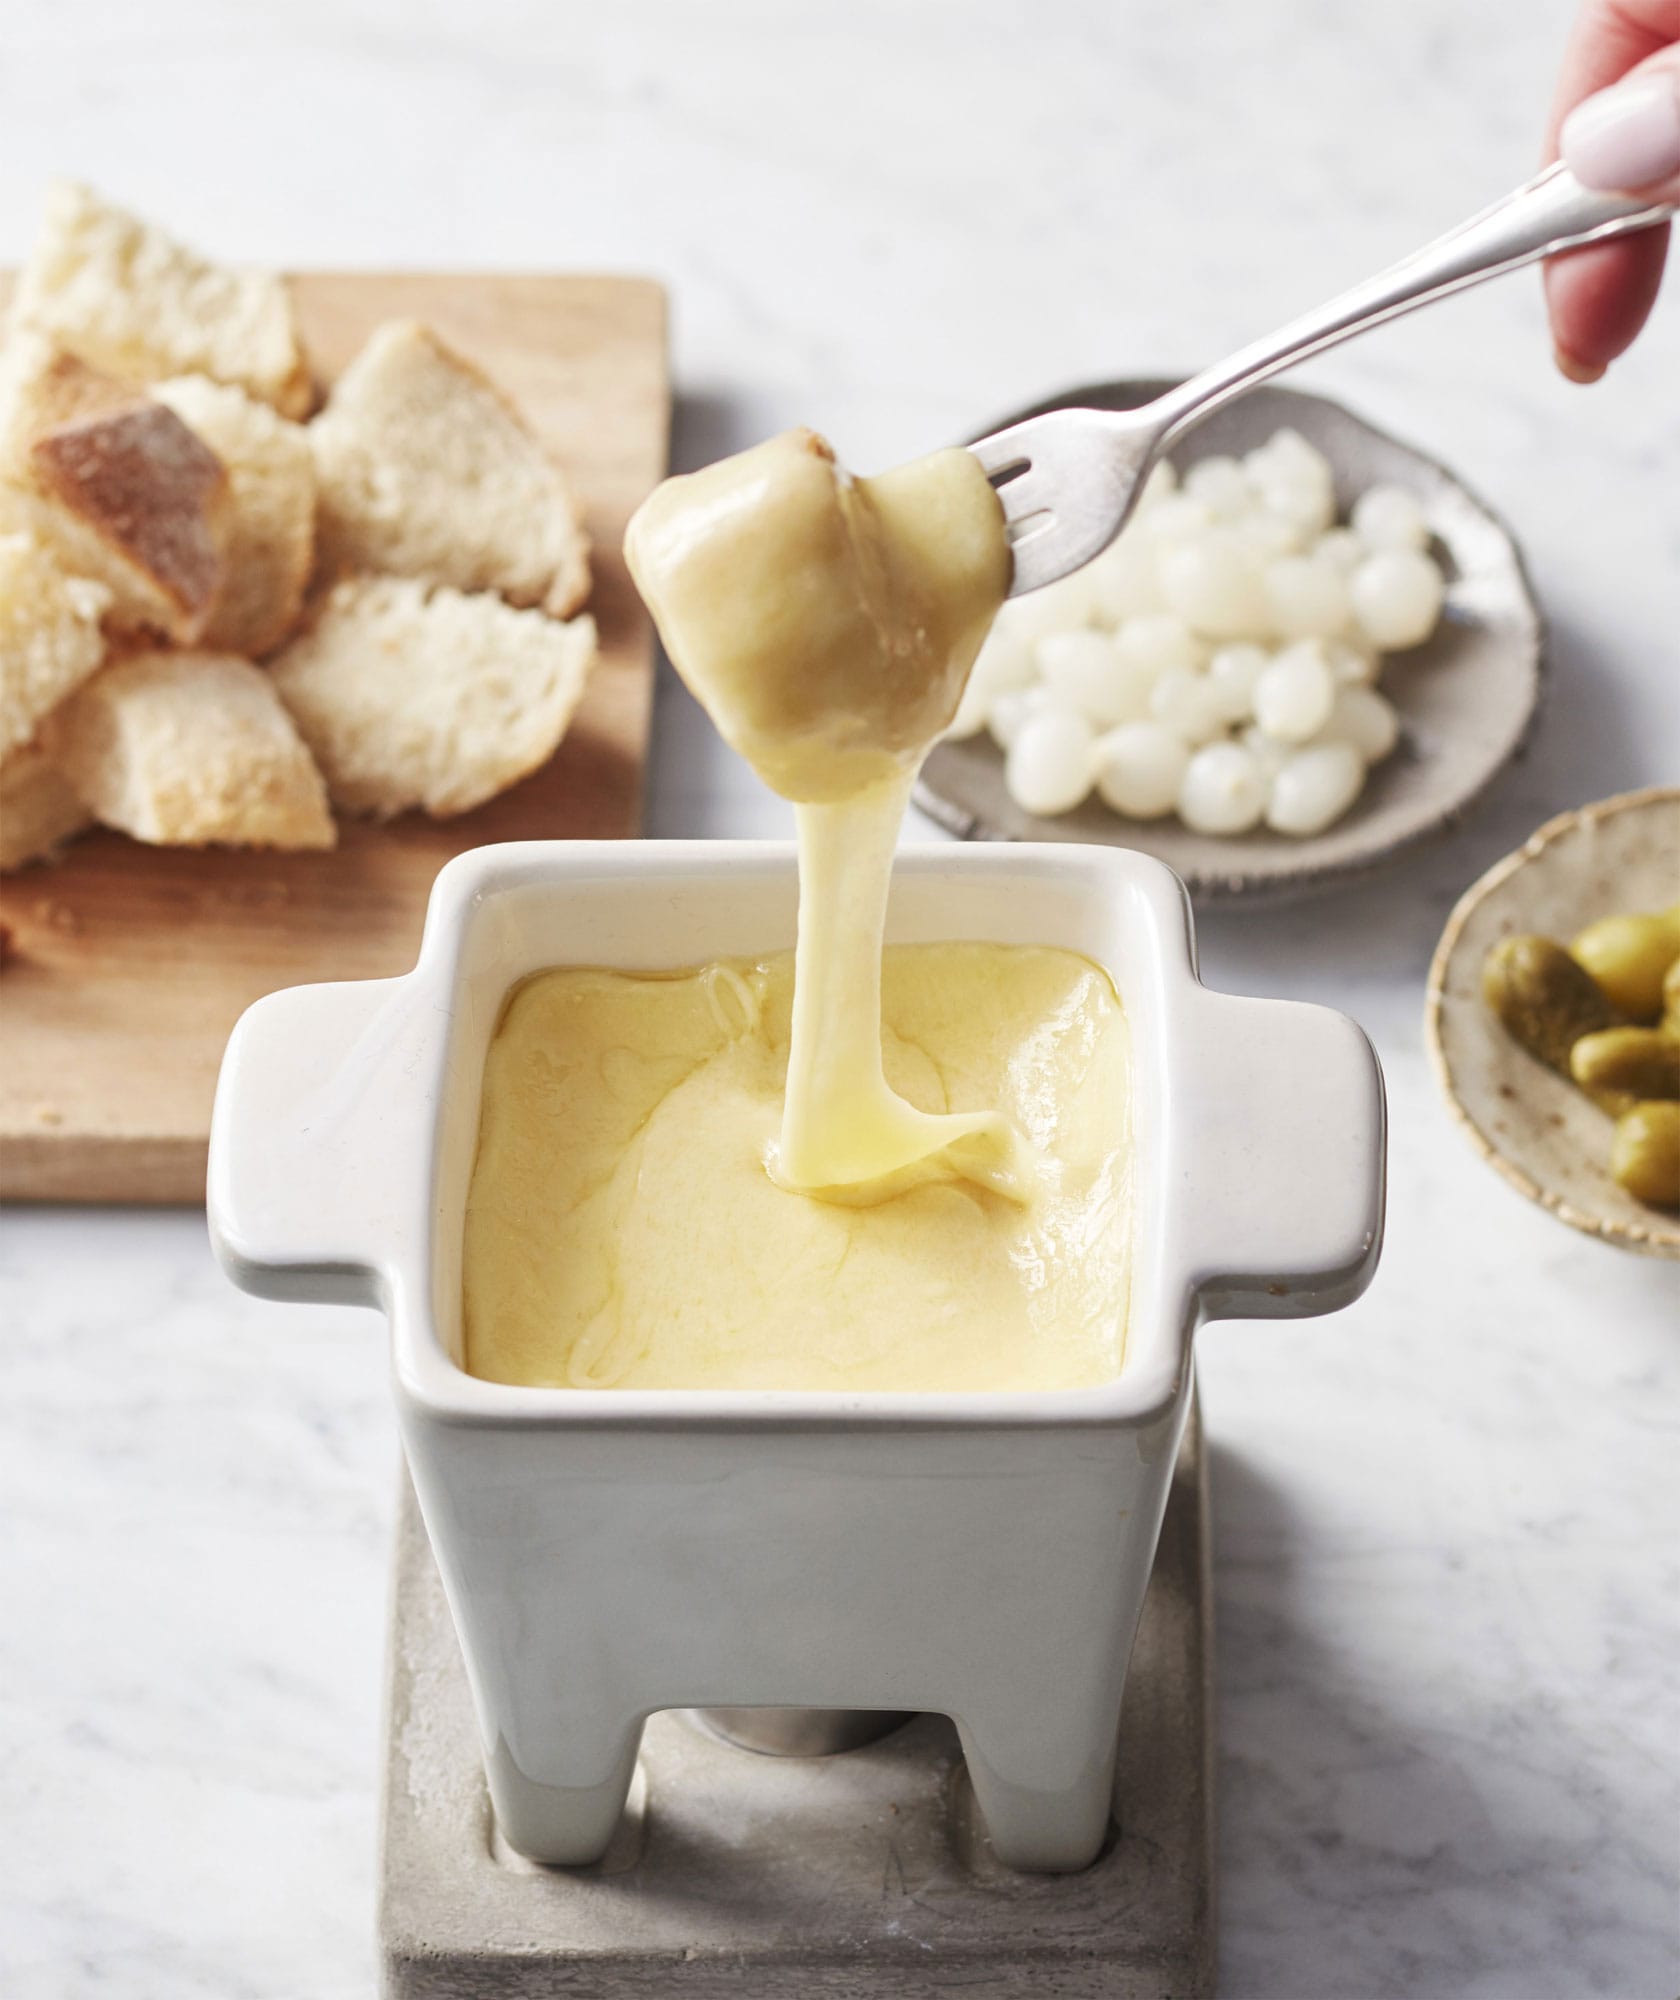
◁ Cheese Fondue
The French word ‘fondue’ (melted) describes a very old traditional method of spearing bread cubes onto a long fork and dipping them into melted cheese. It was invented to use up stale bread, and both the Swiss and French would originally eat this dish in the winter months because it was delicious but also warming. This is the perfect dish to enjoy with family and friends.
200g (7oz) Emmental, grated
200g (7oz) Gruyère, grated
50g (13/4oz) Appenzeller, grated
3 tbsp plain (all-purpose) flour
1 garlic clove, halved
250ml (9 fl oz/1 cup) white wine
1 tsp lemon juice
2 tbsp Kirsch
pinch of freshly ground black pepper
pinch of nutmeg
SERVES 2
Put all the grated cheese in a large bowl and add the flour.
Rub the fondue pot or a saucepan with the halves of garlic. Add the wine and heat gently, but do not boil. Add the lemon juice and the Kirsch.
Slowly add the cheeses, stirring continuously until the cheese has the texture of a smooth sauce. Add the pepper and nutmeg, then serve with cubes of crusty bread for dipping.
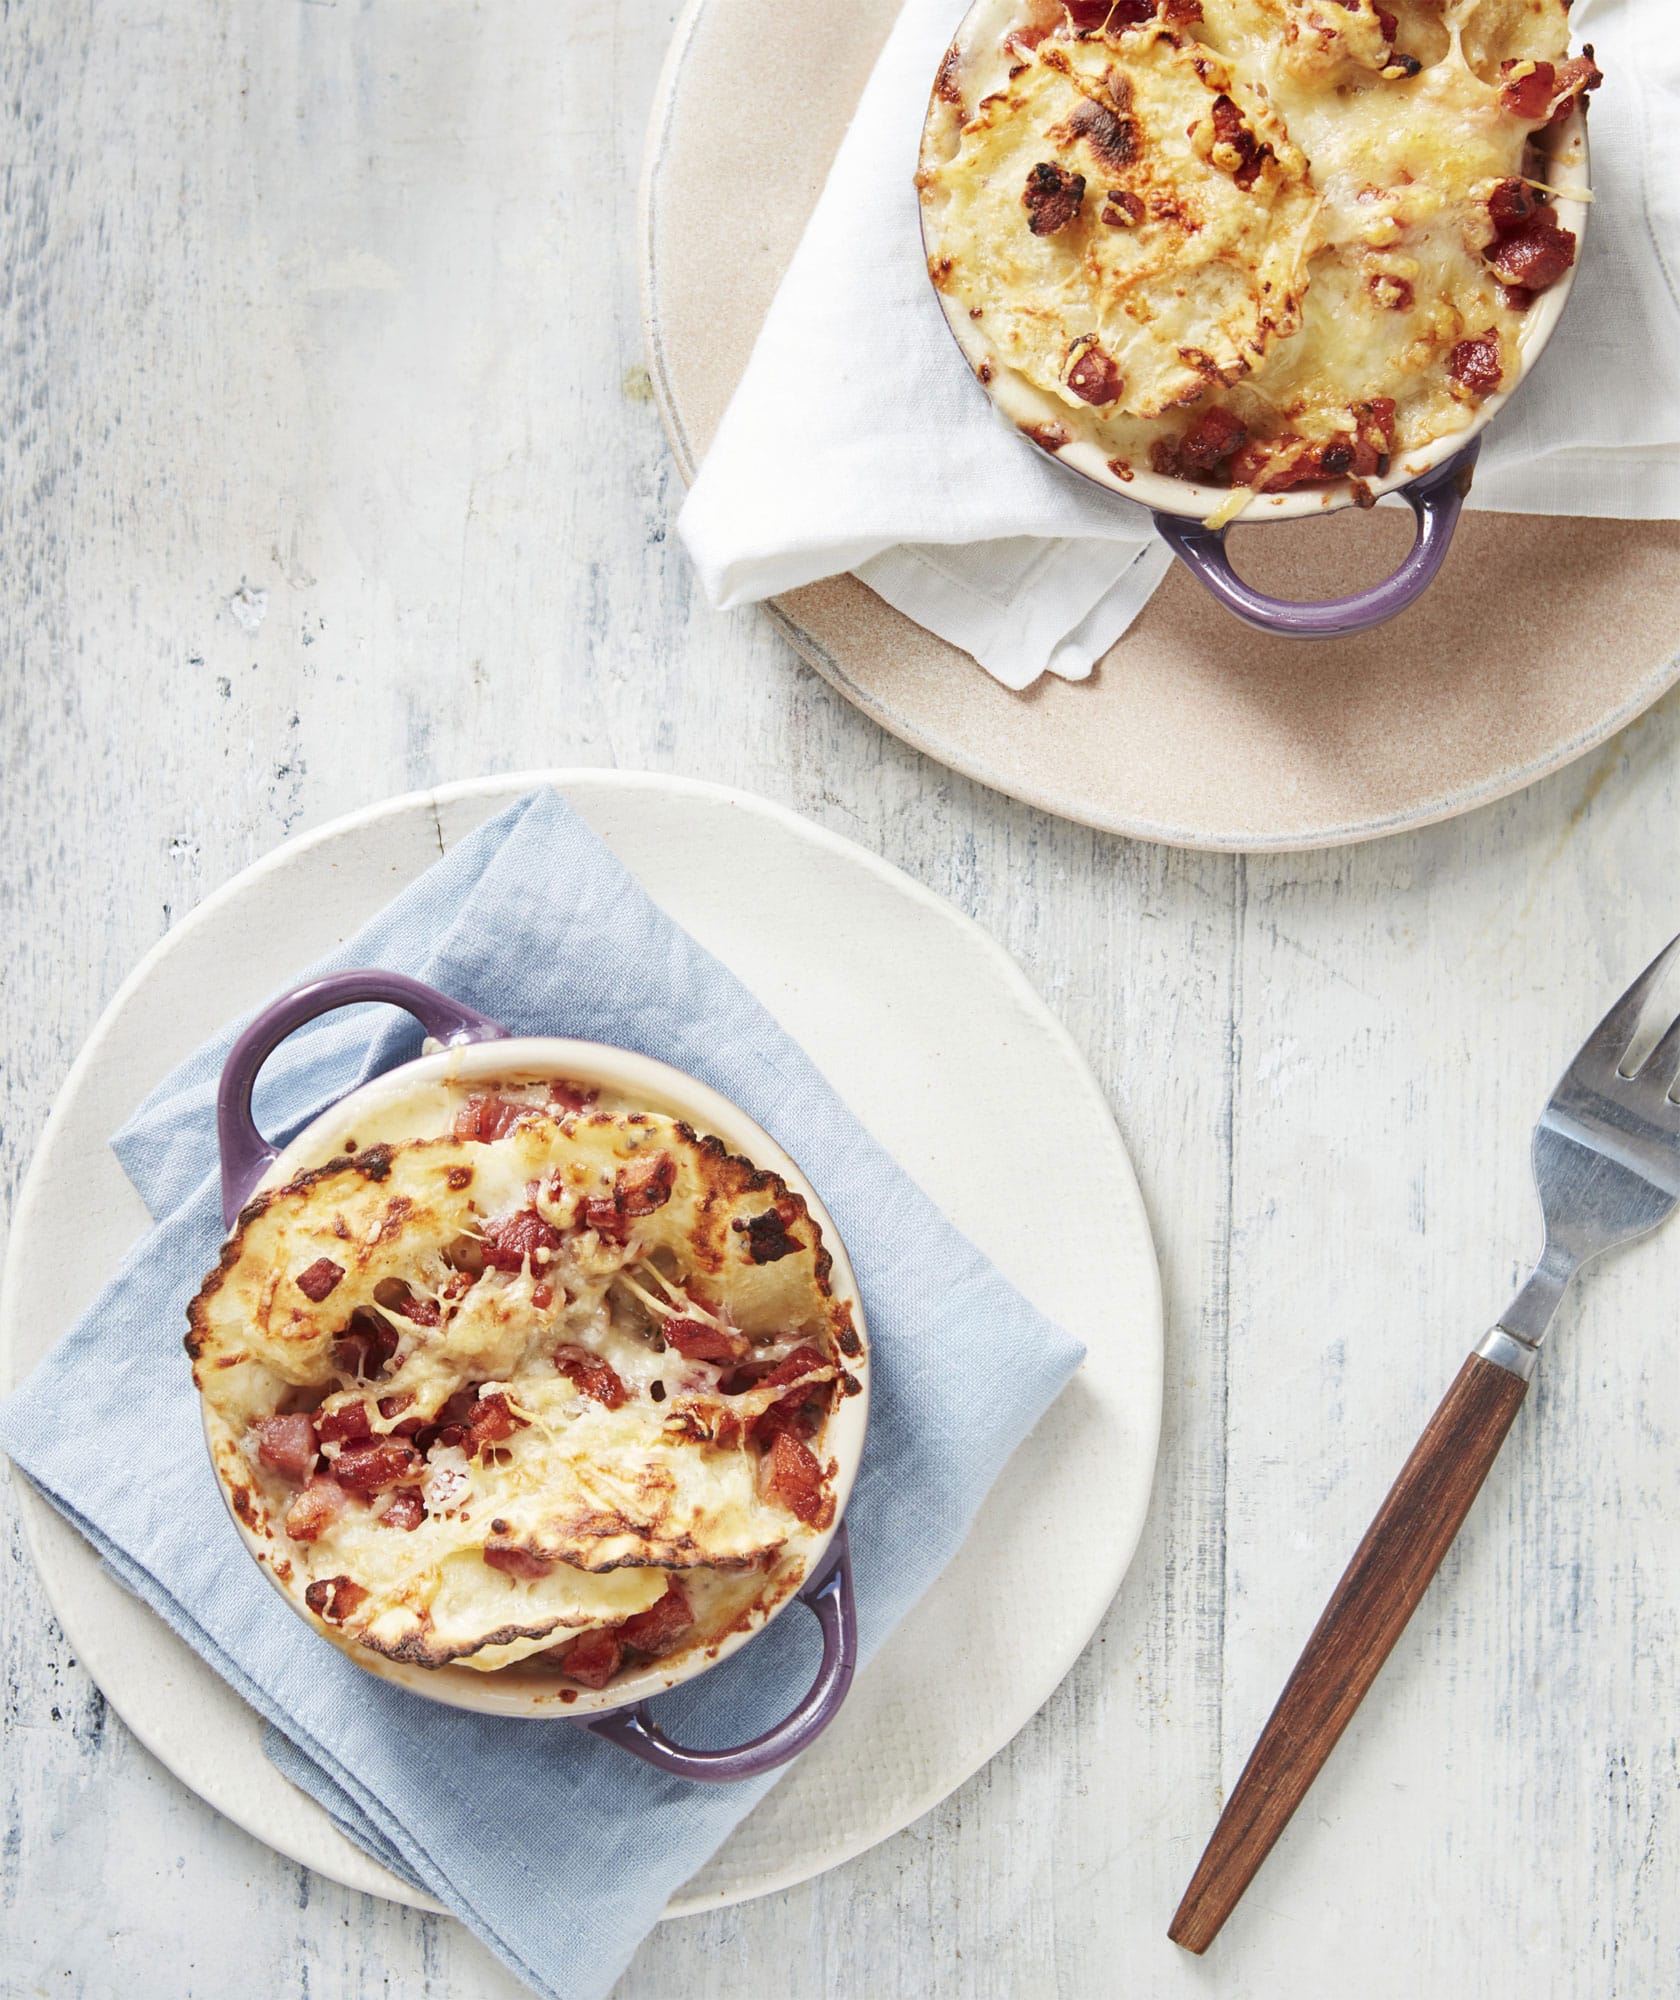
◁ Tortellini Bake
This recipe was born when I didn’t have the energy or time to make mac and cheese. It’s a super-quick, easy dish, and a great alternative to the original classic. I also make it using gnocchi.
100g (31/2oz) butter, plus extra for greasing
50g (13/4oz) plain (all-purpose) flour
550ml (19 fl oz/21/4 cups) milk
1 tsp Dijon mustard
pinch of nutmeg
1 garlic clove, crushed
100g (31/2oz) fontina, grated
250g (9oz) pack of tortellini (the flavour of your choice)
3 smoked streaky (lean) bacon slices, cooked and chopped
150g (5oz) Cheddar (see here), grated
50g (13/4oz) Parmesan, grated
salt and freshly ground black pepper
SERVES 2
Preheat the oven to 200°C (400°F/Gas Mark 6) and grease 2 baking dishes with butter.
Melt the butter in a saucepan over a medium heat, then add the flour and stir through. Cook over a low heat until a paste forms, then add the milk gradually. Stir the sauce and simmer for a minute or two until it thickens. Add the mustard, nutmeg, crushed garlic and the grated fontina. Stir through, then set aside.
Cook the tortellini following the directions on the packet.
Drain the pasta, then stir into the cheese sauce with the cooked bacon. Pour the pasta into the baking dishes and top with the Cheddar and Parmesan. Bake for 25 minutes until the cheese is melted and golden brown. Remove from the oven, leave to cool slightly then serve.
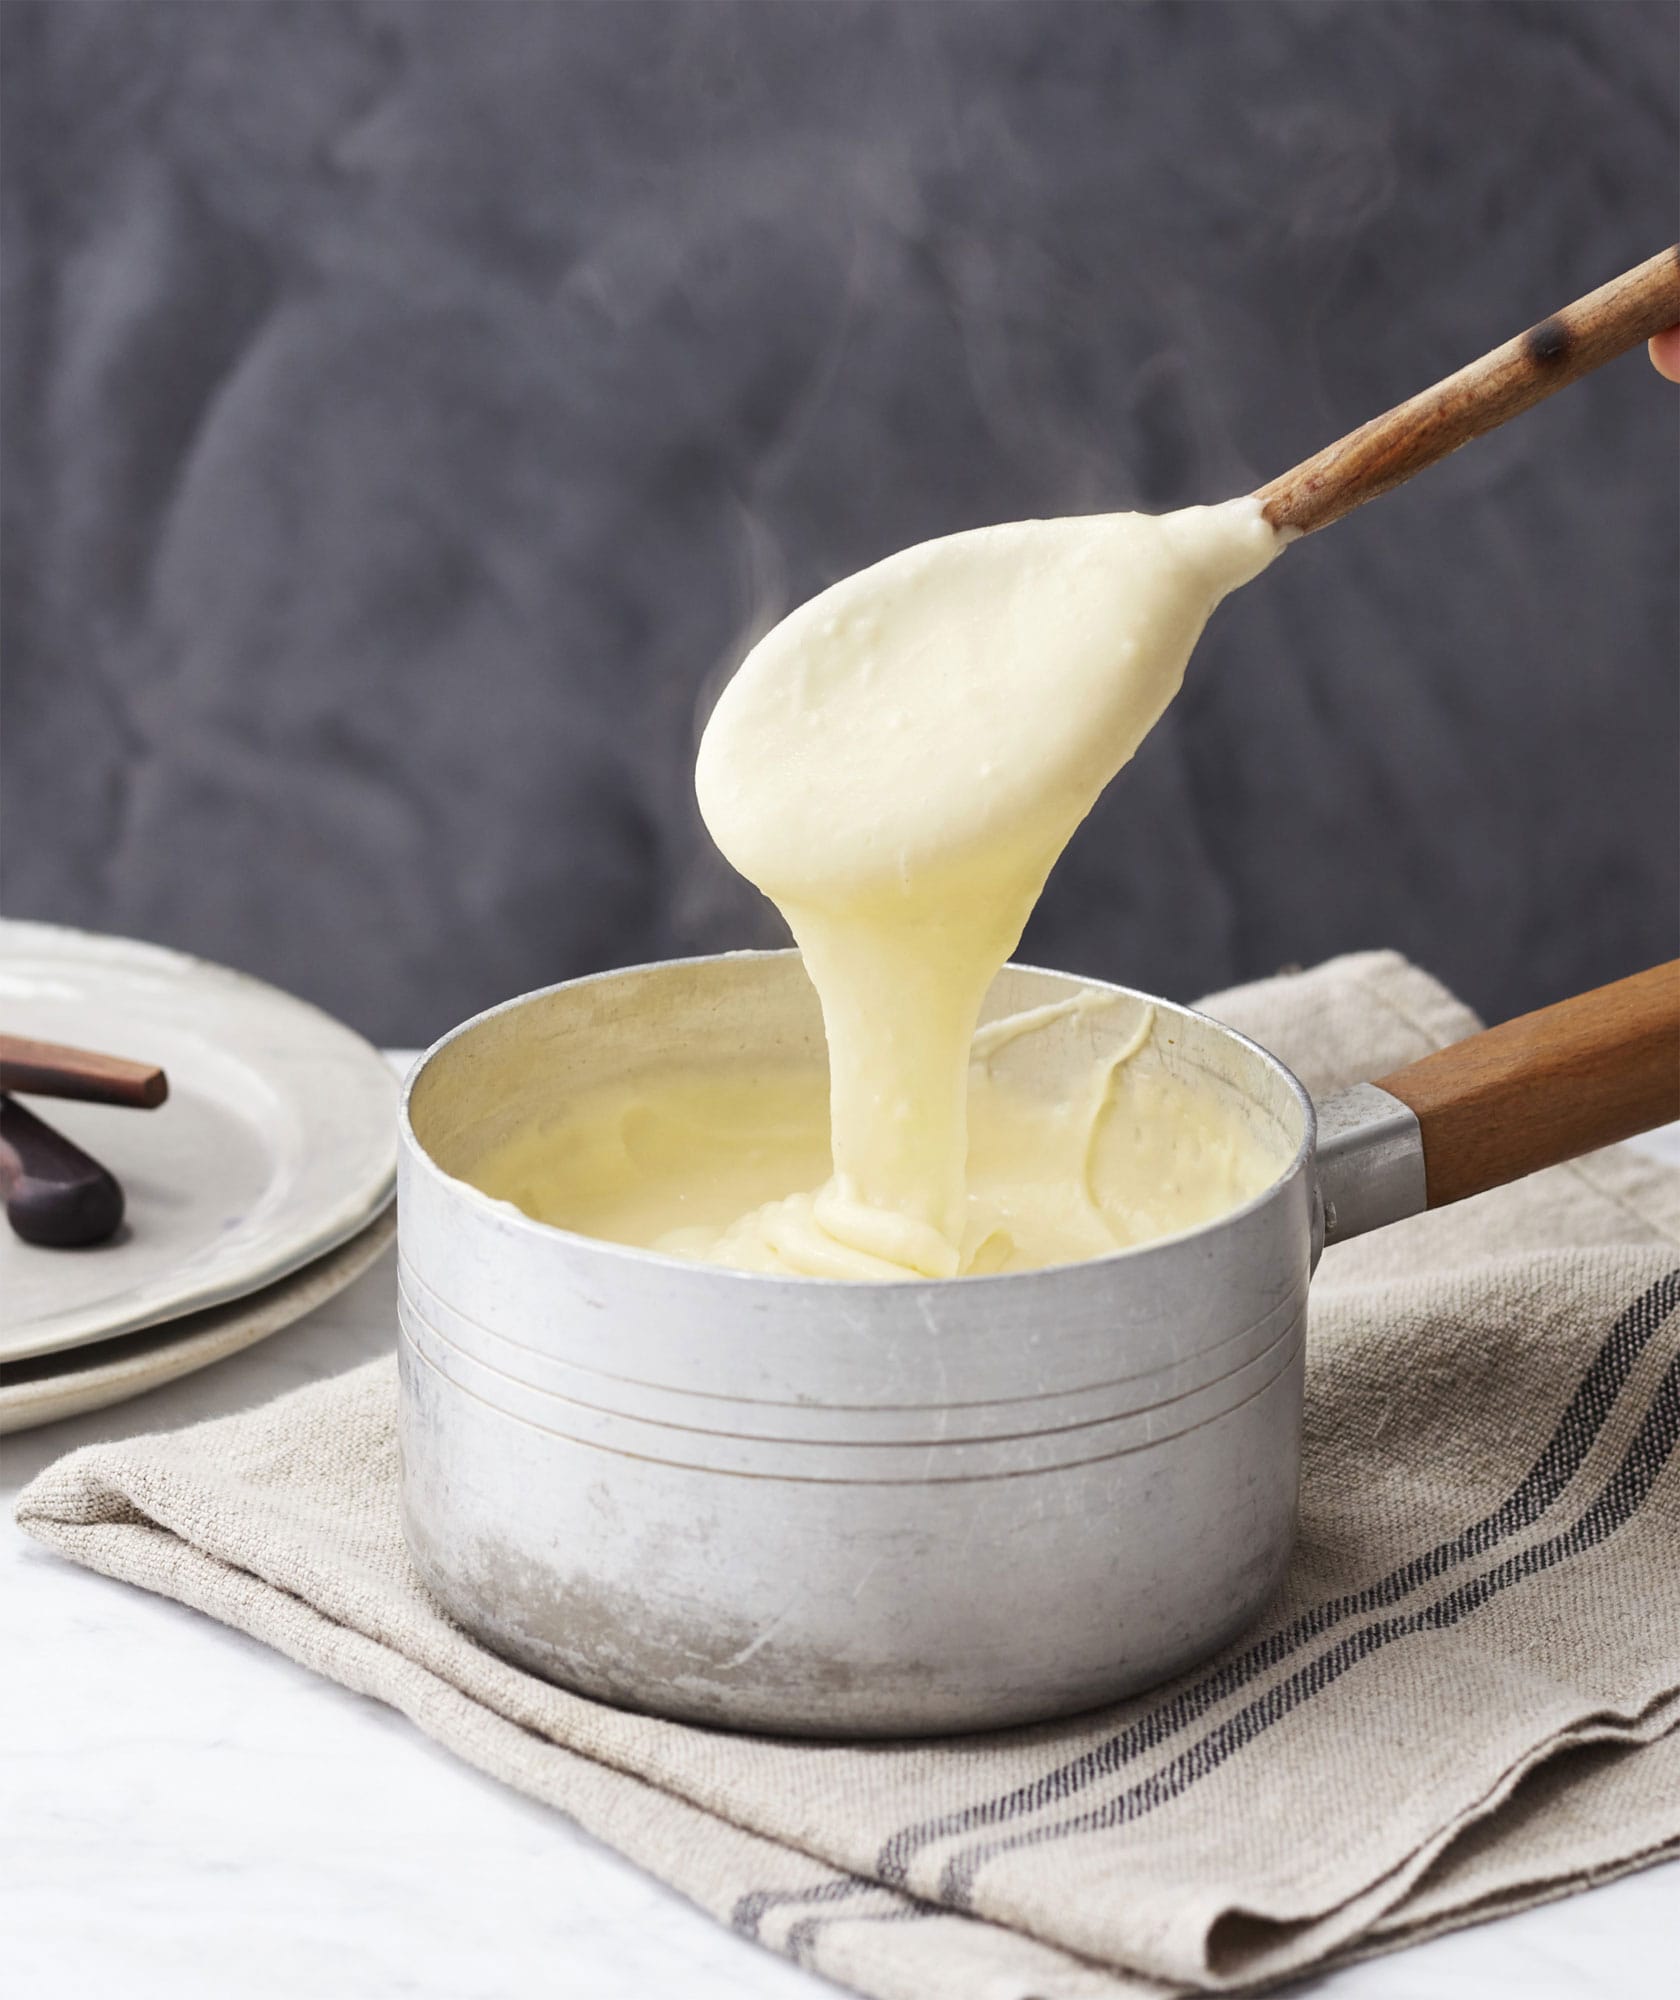
◁ Aligot
Aligot is a magical cheesy mashed potato. This is a French recipe from the Pyrenees, which blends potatoes and cheese and is traditionally served alongside meat. If you love mashed potatoes and cheese, this is the recipe for you.
1.5kg (3lb 5oz) potatoes
250g (9oz) unsalted butter
350ml (12 fl oz/11/2 cups) double (heavy) cream
900g (2lb) Gruyère, grated
450g (1lb) mozzarella (see here), grated
salt and freshly ground black pepper
SERVES 4
Peel the potatoes and cut into 2.5cm (1-inch) cubes. Place the potatoes into a large pan of boiling water with a pinch of salt. Cover and cook until tender, about 10–15 minutes.
Drain the potatoes and leave to cool for 5 minutes. Pulse the cooked potatoes in a food processor until you have a fine purée. Return to the large pan with the butter, cream and a pinch of salt and the pepper. Stir thoroughly to combine.
Add the grated Gruyère and mozzarella and mix into the potatoes with a wooden spoon; put a bit of elbow grease into it, as you are looking for the cheese and potatoes to come together and have a stringy, elastic texture. Season to taste, then serve.
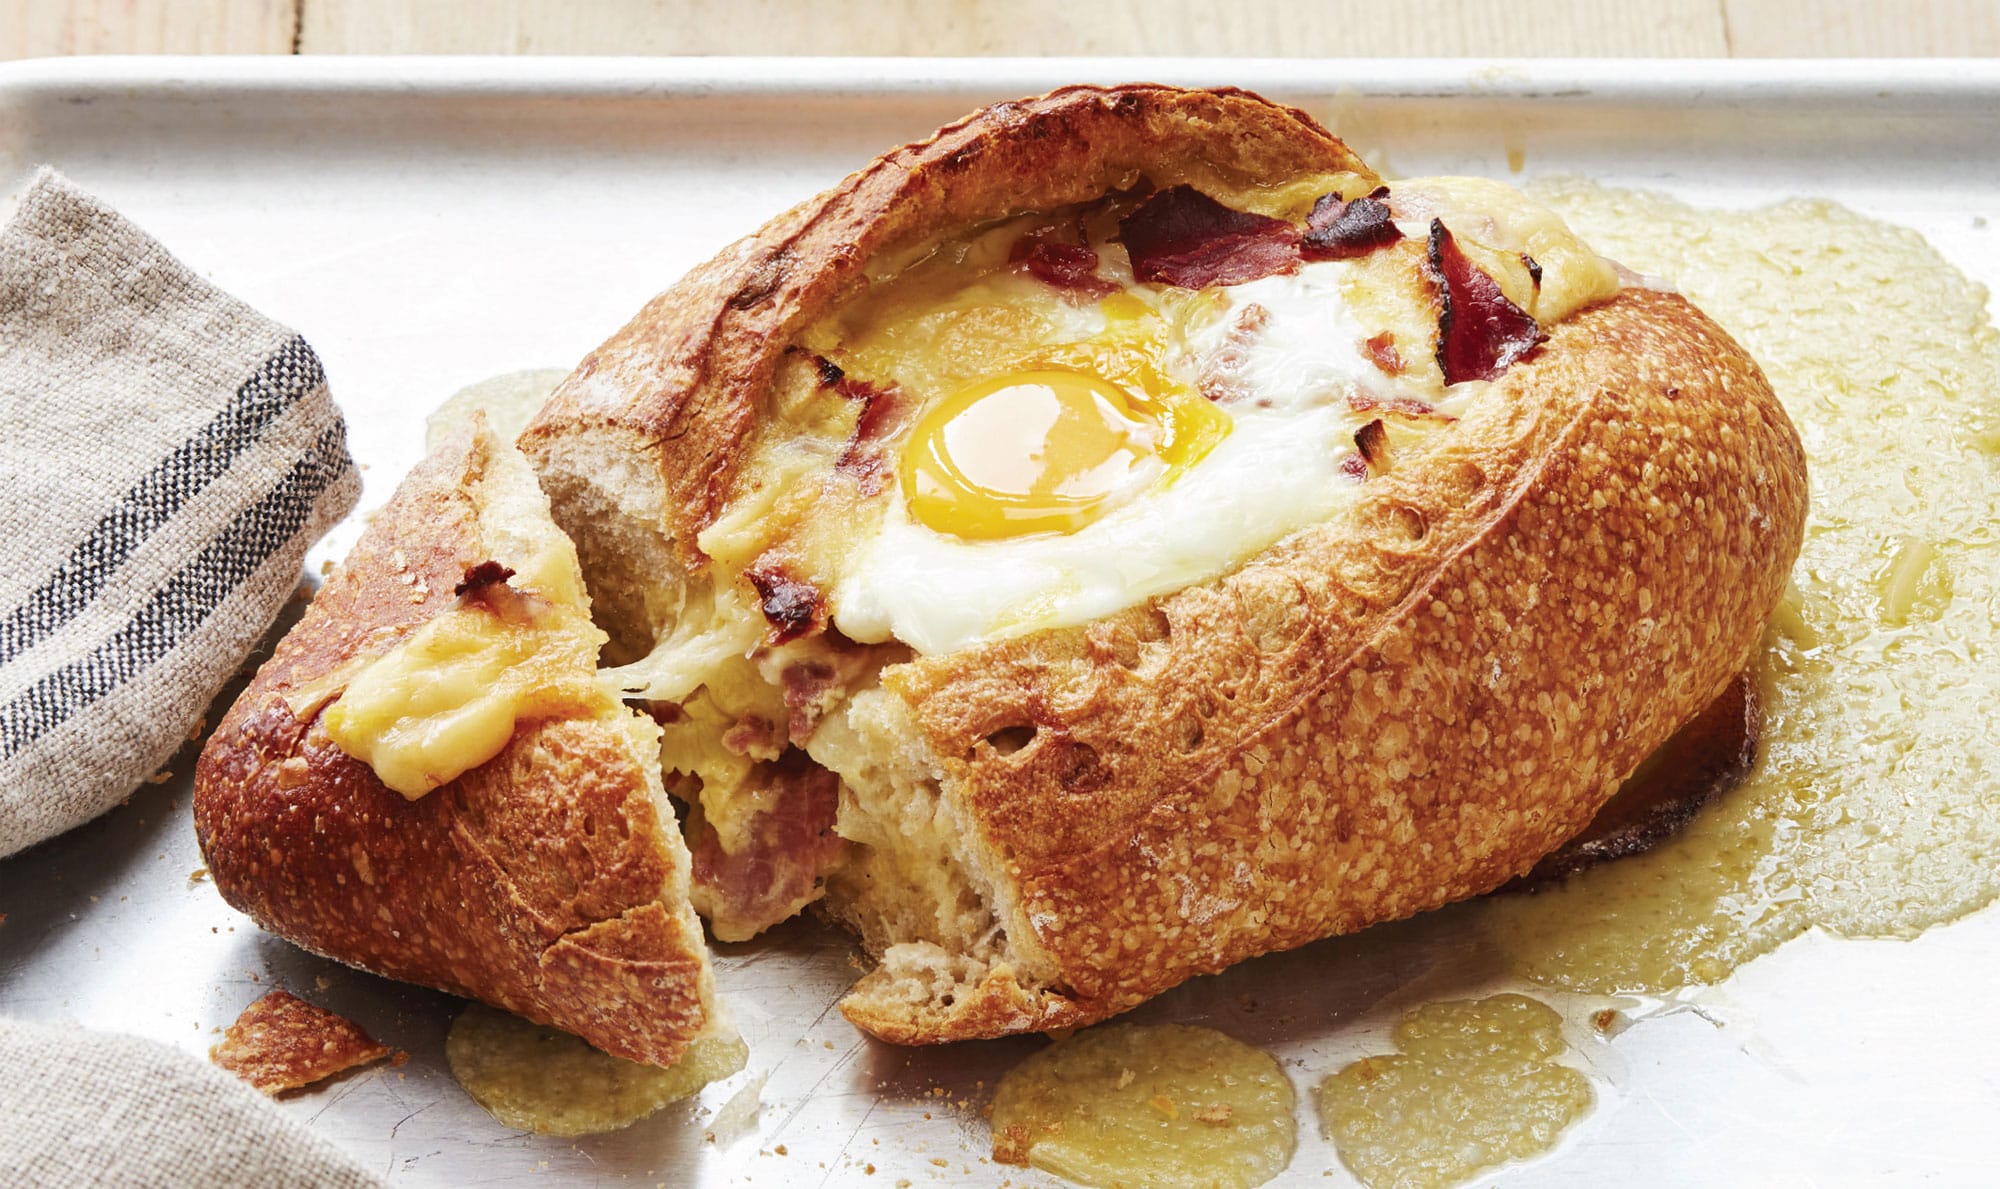
◁ Comté, Ham and Onion Sunday Brunch Rolls
Sunday brunch is the best meal of the week, and I love spending it with some of my favourite people: Tim, Simon, Charlie, Mike, Alice and Mel. Brunch is such a luxury and an easy way to enjoy a lazy weekend. My Sunday brunch roll is the best – ideal for one or make lots to share with friends.
4 crusty rolls
5 eggs
300g (101/2oz) ham, chopped
2 onions, finely chopped
400g (14oz) Comté, grated
SERVES 4
Preheat the oven to 190°C (375°F/Gas Mark 5).
Start with the rolls: cut 4cm (11/2 inches) across the length of the bread; then hollow out the inside, making sure to leave a thick shell. Place the rolls on a piece of non-stick baking (parchment) paper on a baking sheet.
In a bowl, mix together 1 of the eggs, the ham, onions and Comté, then fill your rolls with the mixture. Break the remaining eggs on top and bake for 15–20 minutes until golden brown. Serve hot.
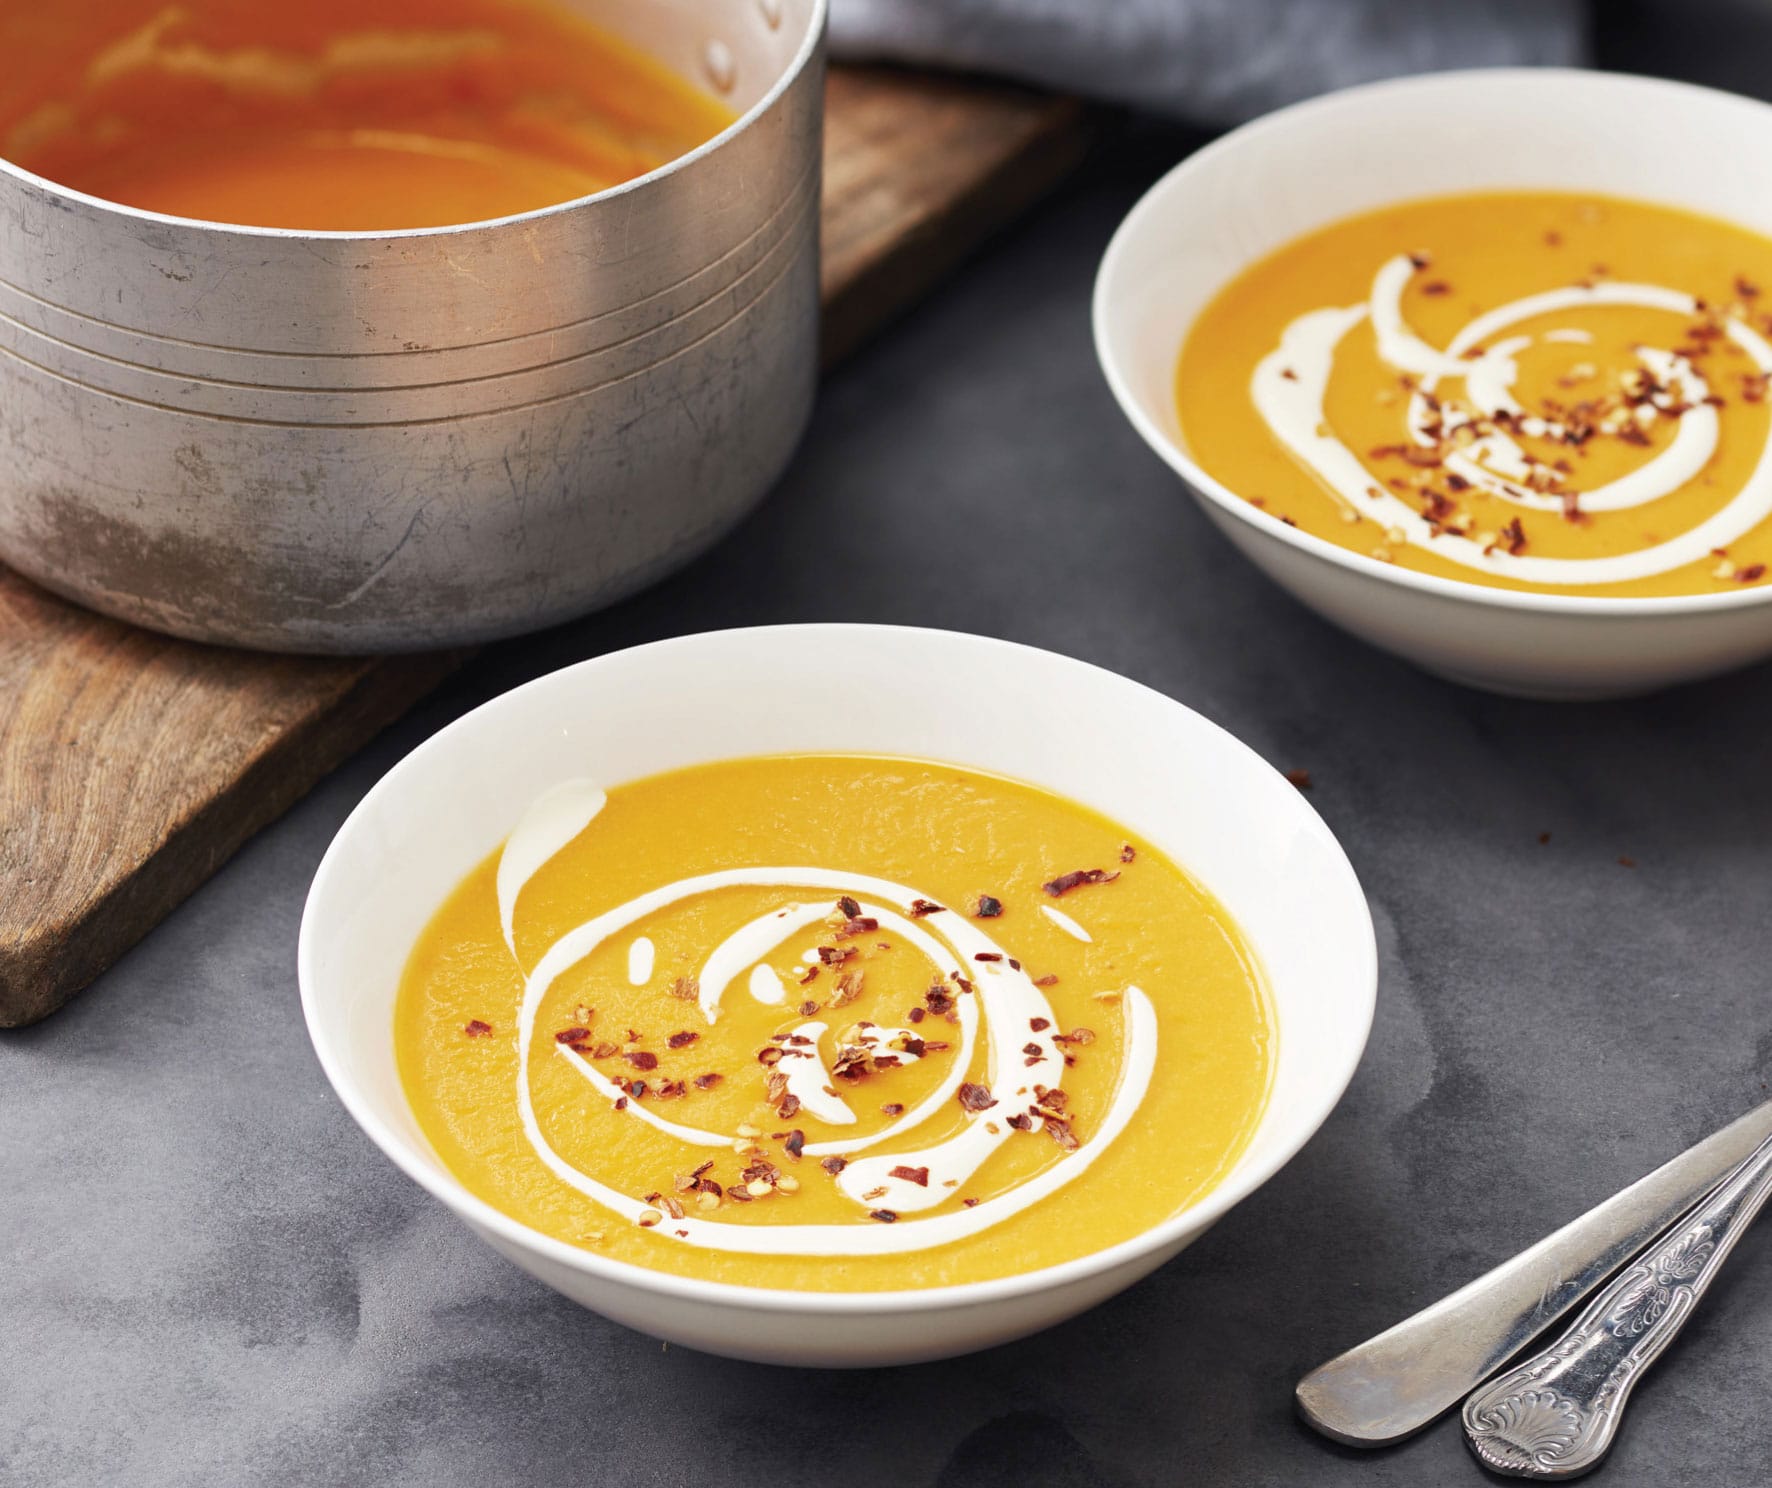
◁ Butternut Squash Soup with Comté
Quick and easy, creamy and comforting, this soup has the perfect blend of butternut squash and Comté. The cheese brings a lovely nuttiness to the soup, making this perfect on a chilly evening.
1 onion, chopped
20g (3/4oz) butter
400g (14oz) butternut squash, peeled and cut into cubes
200g (7oz) potato, peeled and cut into cubes
500ml (18 fl oz/2 cups) hot chicken stock
150ml (5 fl oz/scant 2/3 cup) double (heavy) cream
200g (7oz) Comté, diced
pinch of salt, freshly ground black pepper and nutmeg
dried chill flakes, to serve
SERVES 4
In a large saucepan, sweat the onion in the butter over a medium heat for 3 minutes. Add the squash and potato and cook for another 3 minutes. Add the chicken stock and simmer, covered, for 15 minutes.
Once the potatoes and squash are cooked through, add the Comté and the cream, reserving 1 tbsp for serving. Heat through for 2 minutes, then transfer to a food processor and blend to a smooth soup.
Add the salt, pepper and nutmeg, then serve in individual bowls, with the remaining cream drizzled over the top, and the dried chilli flakes sprinkled over.
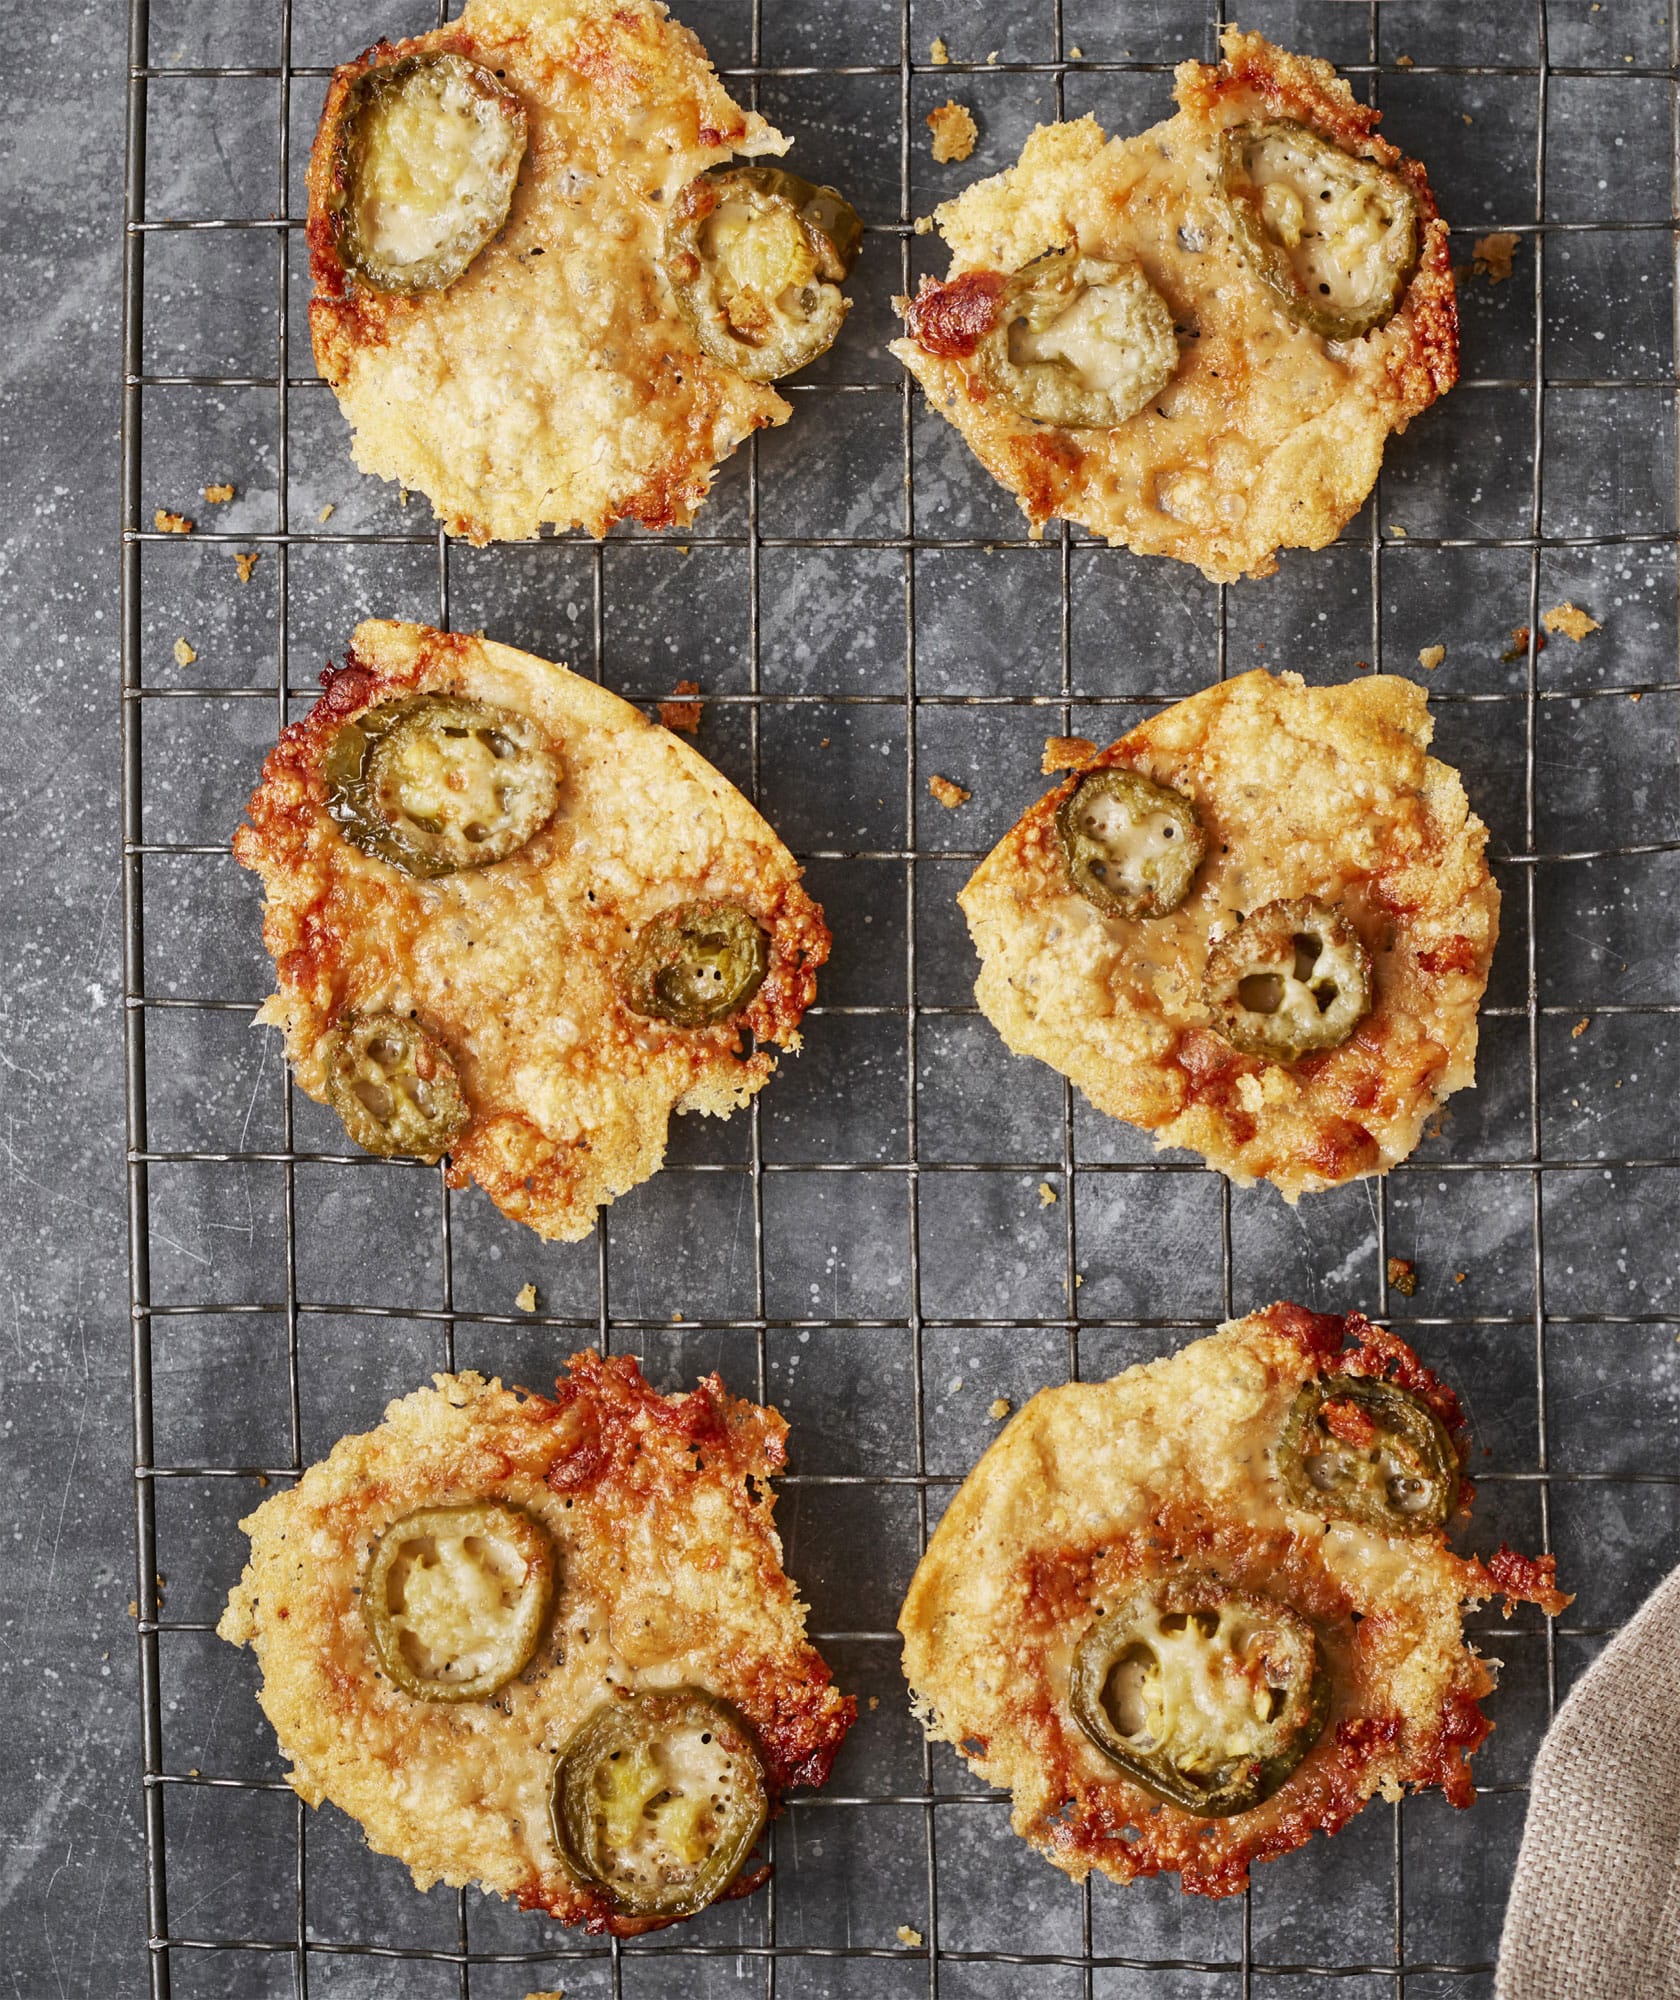
◁ Jalapeño and Parmesan Crisps
A great go-to snack, Parmesan crisps are so easy and quick to make. I always like to have them on standby, just in case I fancy a nibble. Serve with some yoghurt for dipping.
150g (5oz) Parmesan, grated
2 medium jalapeño chillies, thinly sliced (or use Scotch bonnet chillies if you like things a little spicier)
100g (31/2oz) provolone, grated
MAKES 8 CRISPS
Preheat the oven to 180°C (350°F/Gas Mark 4).
On a piece of non-stick baking (parchment) paper, make eight mountains of Parmesan (about 1 tablespoon each), about 5cm (2 inches) apart.
Lay the jalapeño slices on a baking sheet and cook for 5 minutes. Remove from the oven and increase the temperature to 220°C (425°F/Gas Mark 7).
Once the jalapeños are cooked, place them on top of the Parmesan mountains, pressing them down into the cheese.
Split the provolone into eight and spread on top of the jalapeños and Parmesan. Cook for 10 minutes until golden and crisp. Once cooled, remove carefully with a palette knife. Serve immediately.