8
The LED Display
You have already used the LED display quite a lot. However, there are still quite a few features of this useful little matrix of LEDs to explore. You can use it to scroll text messages, display images, make animated displays, and even play simple games.
Controlling Individual LEDs
Let’s start by experimenting with the REPL. Try the following commands, watching what happens to the LEDs between each step:
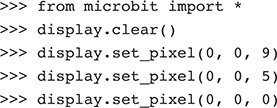
display.clear() turns off all the LEDs in the display. The first set_pixel command sets the brightness of the LED at position 0, 0 to a brightness of 9 (maximum). The line after sets it to half brightness, and the final line turns the
LED off.
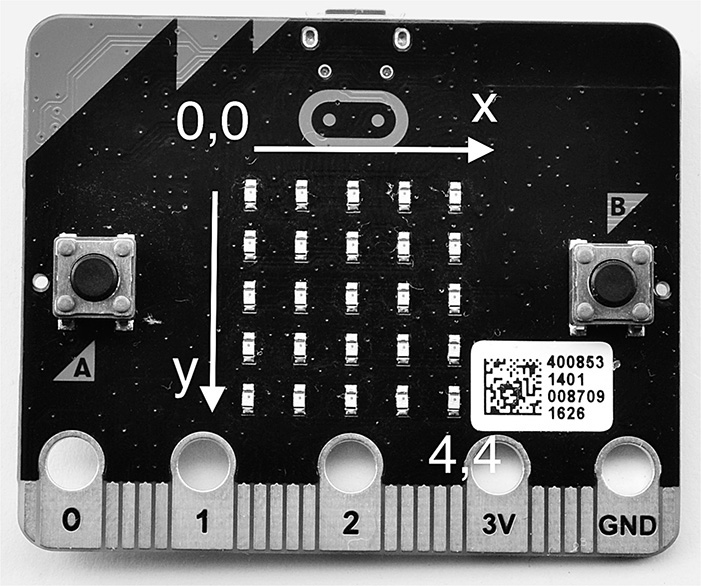
The LEDs are accessed by their column (x position) and row (y position) numbers. The LED at the top left is LED 0, 0, the LED to its right is LED 1, 0, and so on. Figure 8-1 shows the coordinates of the LEDs.
Figure 8-1 LED display coordinates.
Flash the program ch08_random_pixels.py onto your micro:bit. This produces a pleasing effect of random pixels turning on
and off on the display.
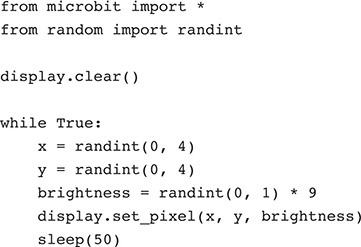
The x and y coordinates to turn the LED on and off are set using randint (see the section “Numbers” in Chapter 3). We want the brightness to be either 0 or 9, so we first create a random number that is either 0 or 1 and then multiply it by 9. This works because 0 × 9 = 0 and 1 × 9 = 9.
Scrolling Text
At its simplest, to display a scrolling text message, you can just type the following in the REPL:

The message will scroll across the screen at a pace that is easy to read but a little
on the slow side. You can control the scrolling speed using the optional parameter
of delay, which sets the delay in milliseconds between each scrolling step. By default, this
is set to 150 ms. Try changing it to 50 ms.

Suddenly the message whizzes past much faster and is still just about readable. Experiment
with a few different values of delay.
By default, the micro:bit cannot do anything else while the display is scrolling.
The call to scroll is said to be blocking because it blocks anything else from happening on the micro:bit. This includes responding
immediately to button presses, gestures, or anything else that you might want to be
going on while a message is being displayed. The optional parameter wait can be set to False to force your program to continue with the next line of code without waiting for
the scrolling message to finish.
The optional parameter loop will instruct the micro:bit to repeat the message until the message is replaced with
a different one or clear is called. The loop and wait parameters are often used together, as they are in ch08_scroll_no_wait.py.
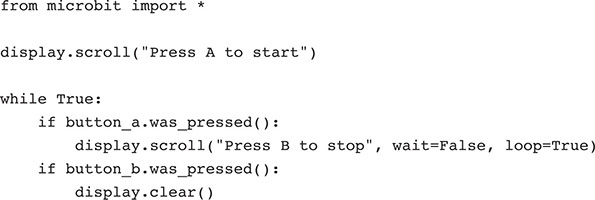
Try out this example. After the initial normal blocking message, if you press button A, a message will start scrolling and repeat until you press button B.
Showing Text
The best way to display text of more than a single character is to use scroll. However, if you just want to display a single letter or number, then use show. Try this out in the REPL:

This can also be useful for displaying numbers, as in the example ch08_ counting.py. However, you will need to use str to convert the digit into a string before using it with show.
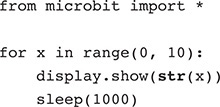
You can actually achieve the same effect as ch08_counting.py as follows. Try it in the REPL.

Here each letter of the string of digits is displayed in turn. The optional delay parameter sets a 1-second delay (1,000 milliseconds) between each digit.
Showing an Image
There are a whole load of images bundled with MicroPython. To display an image, use
show like this:

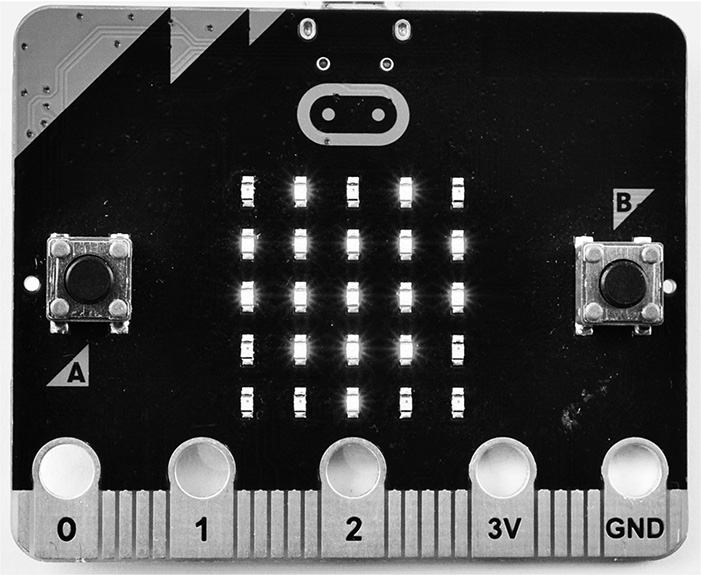
Figure 8-2 shows the HEART image.
Figure 8-2 The HEART image.
You can find a full list of built-in images at https://microbit-micropython.readthedocs.io/en/latest/image.html#attributes, but some of the more useful ones include

Image.HAPPY—smiley face

Image.SAD—sad face

Image.YES—checkmark

Image.NO—cross
Some of the images (Image.RABBIT, for example) require a fair amount of imagination.
Animation
Animations are basically sequences of images shown in quick succession. Load the example
ch08_clock.py, and run it. You will see the display indicate 12 positions around the face of a
clock. This is fairly crude, but the best you can do with 25 pixels.

And yes, just these few lines of code are needed to do this. This is helped by the
fact that Image.ALL_CLOCKS returns not just a single image but a List of 12 images. The show method, when provided with a List of images, will display one image after the other.
The optional parameter delay=1000 slows it down to a 1-second tick.
To make your own animation, you just need to create a List of images. Load the example
ch08_animate.py. This will animate a square expanding and then contracting.
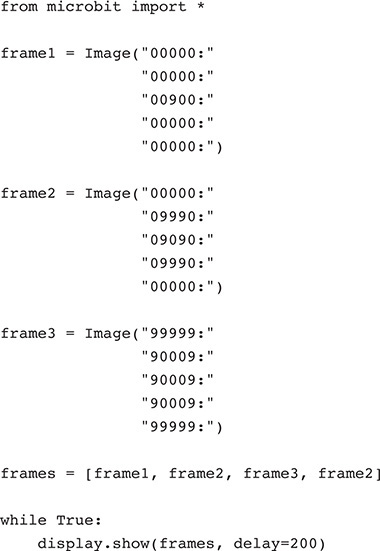
Each of the frames is created as an image, and then the frames List combines them all in the correct order. Note that frame 2 is used twice in the
List.
Racing Game
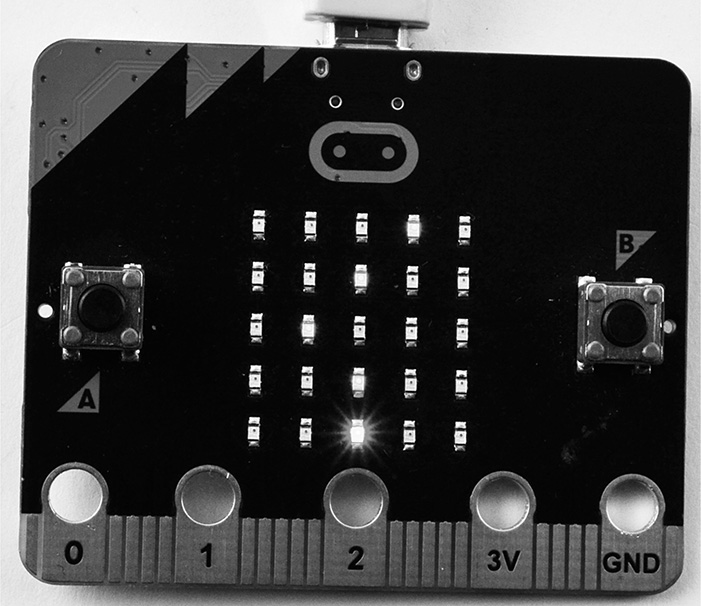
Let’s end this chapter with a simple game (Figure 8-3) that is surprisingly addictive. Buttons A and B are used to steer a “car” (bright
dot) left and right at the bottom of the screen while obstacles (dimmer dots) appear
at the top of the screen and scroll toward the car. The aim is to keep going as long
as possible before hitting something. To make it harder, the obstacles move faster
and faster as time goes on. You will find the program in ch08_racing.py.
Figure 8-3 The racing game.
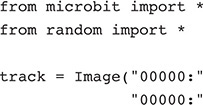
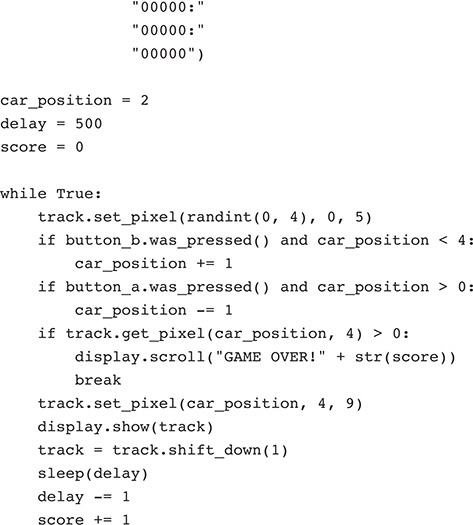
The variable track contains a blank image. It is this image that will be displayed on the screen. The
reason that the screen is not modified directly is that we want to be able to make
use of the shift_down method to move the approaching obstacles down the screen.
The x position of the car is kept in the variable car_position. The variable delay holds the delay period in milliseconds between successive updates of the game. This
starts at 500 ms and decreases by 1 ms for each frame of the game. Similarly, the
variable score starts at 0 and then increases by 1 until you crash into an obstacle.
The first thing that happens inside the while loop is that an obstacle is introduced on the top line at a random position. Next,
both buttons are checked, and car_position is moved left or right in response.
To check whether you have hit an obstacle, the pixel at the car’s position is checked,
and if the pixel is anything other than off, a collision has happened and the message GAME OVER! followed by the score is scrolled across the display. To play again, press the Reset
button.
Summary
The microbit library makes is super easy to use the LED display, and it’s surprising what you can do with it despite its very low resolution. In Chapter 9, you will learn more about the various sensors on the micro:bit.
