CHAPTER FOUR
SETTING THE TABLE
FROM THE CAMPFIRE to the kitchen table, pottery has long been used to contain, serve, and beautify food. In fact, throughout human history, pottery making has been inextricably linked with food, drink, and nourishment. This chapter will explore the functional parameters of well-designed tableware.
Before we jump into how to make the perfect cups, bowls, plates, and teapots, let’s discuss a core design concept that you’ll need to keep in mind whenever you’re making tableware: scale. There are two components to scale: the relationship of the object to the human body and the relationship of the object to other objects on the table.

The table is set and it’s time to celebrate a good kiln firing with Alex Matisse and East Fork Pottery. Photo courtesy of the artist
When making functional objects, it is important to consider a range of scales that are comfortable for the human body. Designing your pots to meet the infinite variations of people might seem overwhelming, so I recommend you size your pots based on your own hands and mouth. These are our two main points of contact as we hold an object to consume its contents, and considering your own personal preferences will go a long way towards making objects that are a pleasure to use.
We’ll discuss the relationship between the lip of a pot and your mouth later in the chapter, so let’s consider the shape and scale of your hands. When holding a tumbler, your fingers wrap two-thirds of the way around the form. This allows you to comfortably grasp the form even if it has condensation on its surface. Now consider holding a cup that contains a hot liquid. With a squat yunomi (Japanese handle-less teacup), your fingers wrap only halfway around the form. This allows firm control over the pot but ensures less direct skin contact with the form as it holds the steaming hot tea you might be drinking. Look in your own cabinet and grab a few mugs with a variety of handles. What does your favorite mug have, design-wise, that makes the handle the best one for you? Is it the size, the contour against your fingers, or both? Every form in this chapter, and in the book, must be designed to be easily held during its intended use. How your fingers grasp a handle, curl around a foot, or pinch a rim should be considered relative to the food the form will serve.
Another aspect of scale involves the relationship multiple objects have to each other. If you are designing a dinnerware set, the overall circumference of your soup bowl should be smaller than your dinner plate. The common sense logic behind these scale relationships is based on how much of each food you will consume during a meal. If soup is your starter, then you would serve out of a smaller bowl so that you aren’t too full to finish the main course. Thinking about objects relative to each other on the table applies even if you are designing one-off pieces that are not designed in a larger set. You might make tumblers that you sell separately, but your buyer will still use them in a mismatched set with other plates and bowls.
CUPS
The cup is one of the most basic functional forms in ceramics, yet it’s also one of the most nuanced. The wrong tilt of a lip or too much heft in the form can relegate an otherwise beautiful cup to the back of the kitchen cabinet. In this section, we’ll focus on the core components of a variety of cup forms. Since handles are their own discussion, see an in-depth explanation of them in their own section shown here.
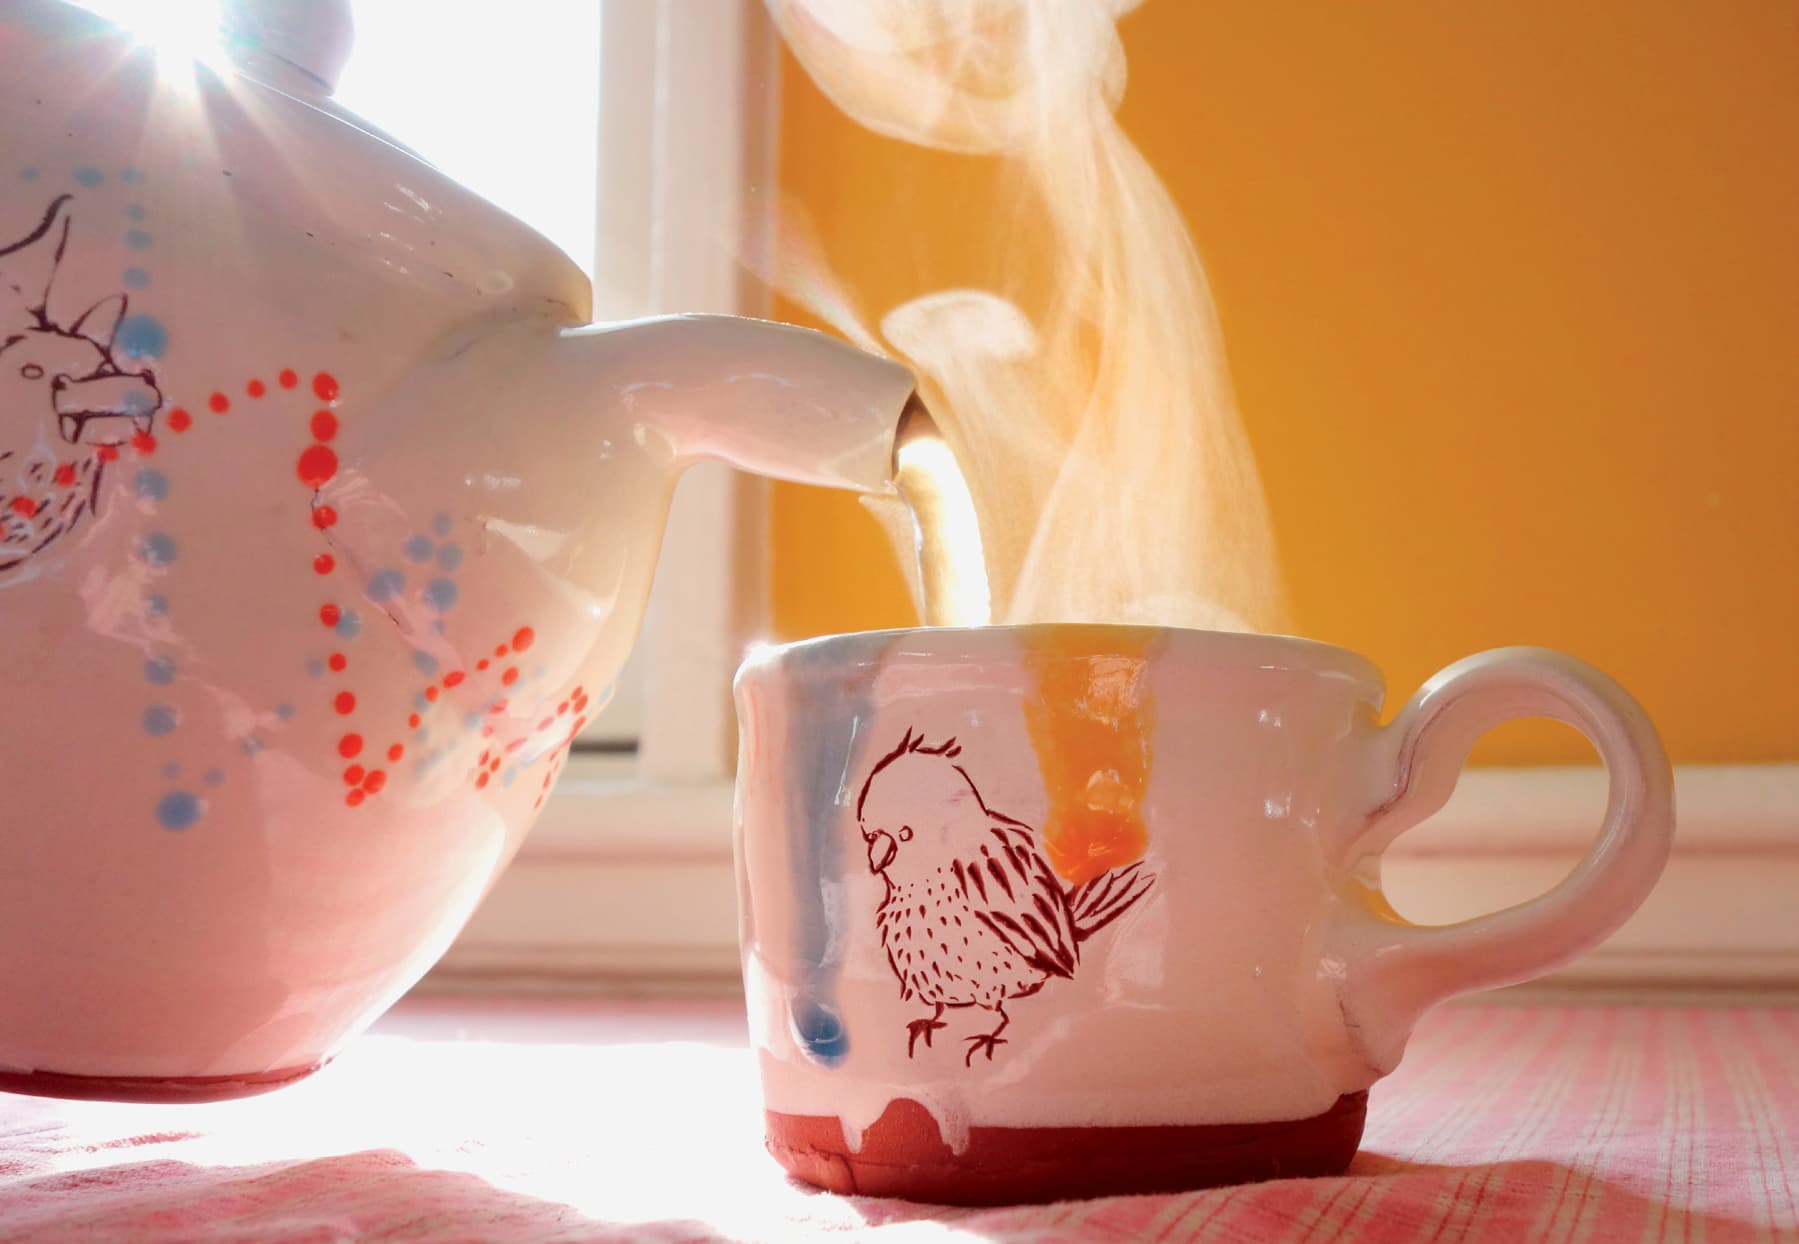
The surface decoration on Ayumi Horie’s mug and teapot form a conversation with each other when both pots are in use. Photo courtesy of the artist
SUGGESTED STARTING WEIGHTS
Water cup for bathroom or rocks glass: 3/4 pound
Tumbler or large coffee mug: 1 pound
Beer stein: 1 1/4 pounds
MAKING CUPS
Start by centering your clay, making sure the base is close to the final size you envision for the base of the cup. A Open the form. If your cup design incorporates a foot, stop opening 1/4 inch from the wheel head. A flat-bottomed cup with no foot will only require 1/8 inch of clay to be left in the bottom. To check the thickness, stop the wheel and puncture the base of the pot with a pin tool to make sure it is the thickness you desire. Compress over top of the hole with a rib to create a smooth interior.
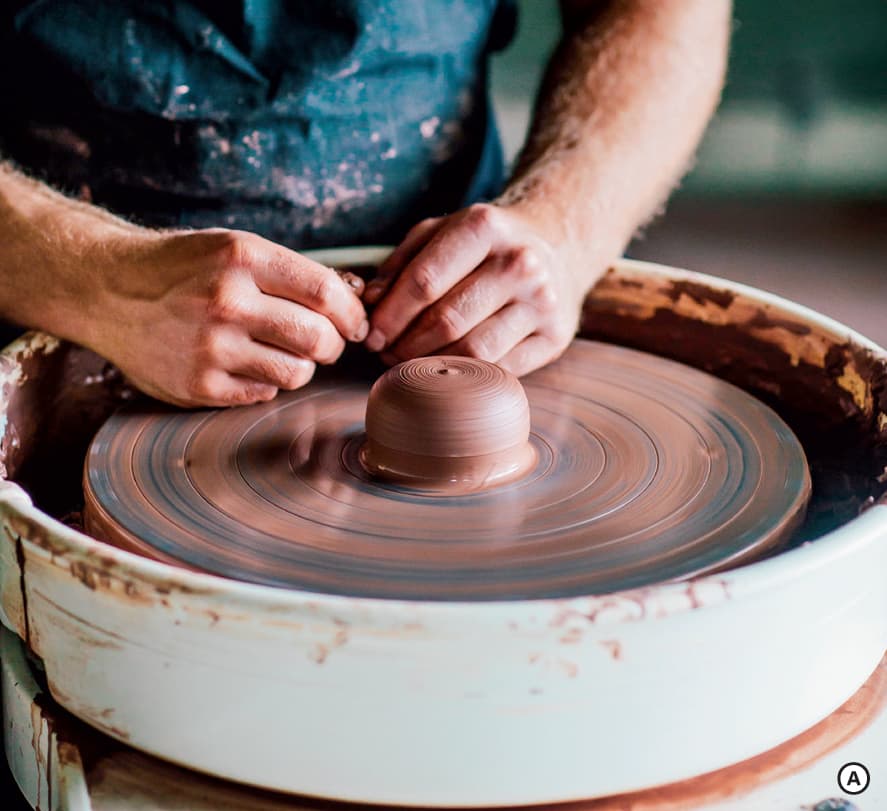
Open out to a width where you can comfortably wrap your hand around the form. This will vary from a tall tumbler to a squat rocks glass, so experiment with proportions until you find the right solution.
Before starting your first upward pull, you must decide if you want a flat or round bottom. For a flat-bottomed cup, initiate your first pull directly above the interior wall. For a round-bottomed cup, pull upward and slightly outward to make a smooth-sloping interior curve. The choice between the two should support the other design components present in the form. Pull upward for three pulls before initiating a final shaping pull. The wall of the cup can vary in thickness, but an average thickness between 1/8 and 1/4 inch is generally the goal for a nicely weighted cup. B
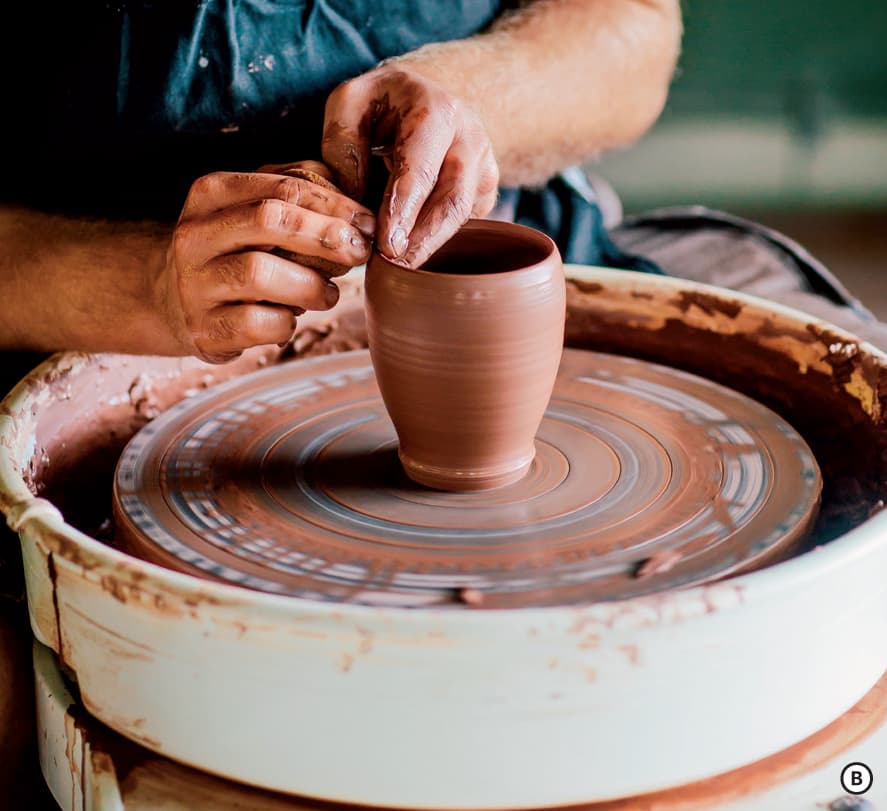
When designing the body of a cup, think about making square or non-round forms. Cups that are altered into a soft square or hexagon are visually striking and can be great platforms for surface design in the later stages of making. (See here for more on altered forms.)
When considering the angle of the rim relative to the body, think about the flow of liquid out of the interior of the form. Too much inward curve will shoot the liquid into the nose of the user! Too much outward curve is not ideal either, as it will send the liquid in a wide pour pattern around the mouth of the user. In between these two extremes, there is a considerable range that will function well and allow you as the designer to complement the other focal points of the form. C

To create a tapered lip, apply pressure from the interior outward to bevel the lip. D The top of the bevel should meet the exterior line created in the body of the form. A chamois cloth or small strip of plastic can be helpful in creating a soft bevel with a smooth transition.
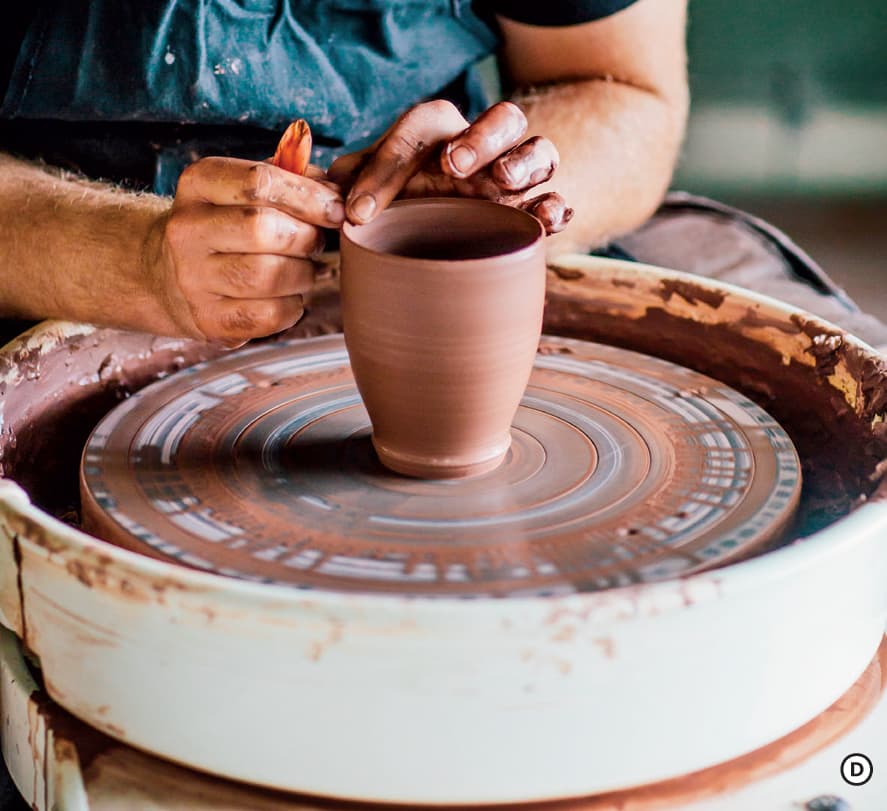
Note: The shape and angle of the rim determines how your mouth interacts with the form. A round lip will be more comfortable than a sharp lip, but too much thickness and you might feel like you are drinking out of a bucket. I’ve found a tapered lip to be the most comfortable and durable for a variety of cup forms.
Once your cup is leather hard, proceed to the foot and handle. See here for considerations on the foot relative to the body of a cup form and see here for more on trimming a foot. Handles start shown here.
BOWLS
While there are many varieties of bowls, I find it helpful to think of bowls broadly as either containing or presenting their contents. A containment bowl has a lip that terminates with a slight inward or vertical tilt. These are often used for serving hot liquids, like soup, that need to remain hot throughout the course of a meal. Presentation bowls have lips that tilt outward, releasing the heat of the dish and making it easier to serve. These forms are used for cool dishes or for foods that can rapidly cool and maintain their flavor. Presentation bowls are often paired with shallow lids that can hold the heat of the contents while still being easy to serve from.

Mackenzie Smith’s bowl is a containment form that keeps hot liquids warm much longer than an outward-tilting presentation bowl. Photo courtesy of the artist

Here you will see the difference between a flat-or round-bottom form on a bowl. The interior bottom is the foundation of the pot, so make sure to design the rest of the form to accommodate your design choice. You can also see the contrast between a presentation form that tilts out slightly at the rim and a containment form that rises straight upward at the rim. Photo courtesy of the artist
SUGGESTED STARTING WEIGHTS
Soup bowl: 3/4 pound
Salad bowl with flared rim: 1 pound
Medium serving bowl: 4 pounds
Elevated serving bowl: 6 to 8 pounds
MAKING BOWLS
When you’re making a bowl, it’s important to pull the majority of the clay up from the wheel head before you start shaping the pot. A The more clay you can get up off the wheel, the less you will have to trim later. A good rule of thumb is to pull three times for height then start shaping outward with successive pulls.
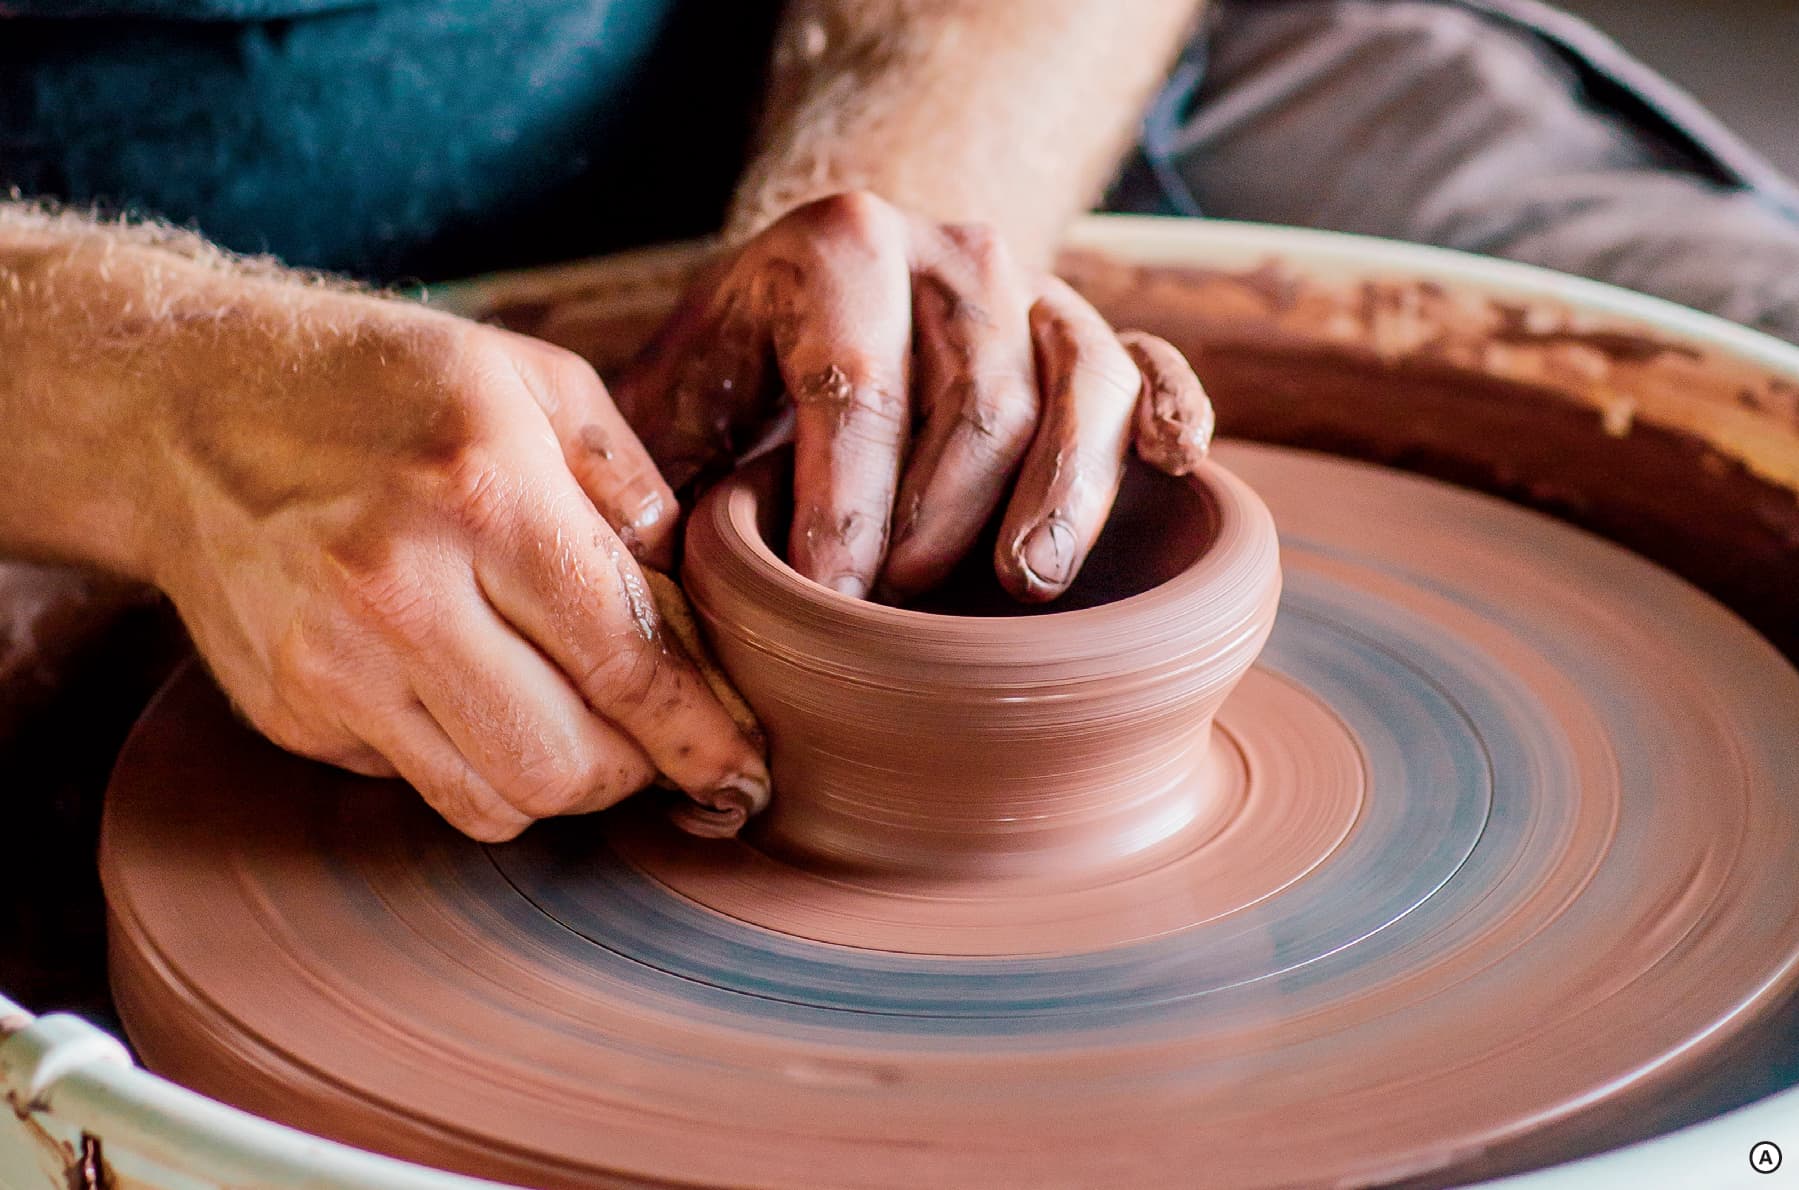
When shaping outward, make sure to create a round interior as you progressively open the pot. To do this, lift up your inside hand for the final few inches of expansion. When pulling the walls, make sure not to flatten that curve. You can finish the process by using a wide bowl rib to create a continuous curve from the central axis of the pot to the rim.
The thickness of a bowl lip is important to consider when designing the form. When being washed or used, the rim is often the point of contact. Creating a lip that is thicker than the body is helpful to ensure durability, as the lip will be impacted during use. When pulling the walls of the bowl, decrease pressure at the top of your pull to leave clay for the rim. When giving the rim a shape, remember that sharp edges are easier to chip during use than round curves. You can still make an angular rim, but softening the edges will significantly increase strength. To create a round rim, apply slight pressure with a chamois cloth around the lip as the wheel is spinning at medium speed. B Increase the amount of pressure towards the edges to round the lip.
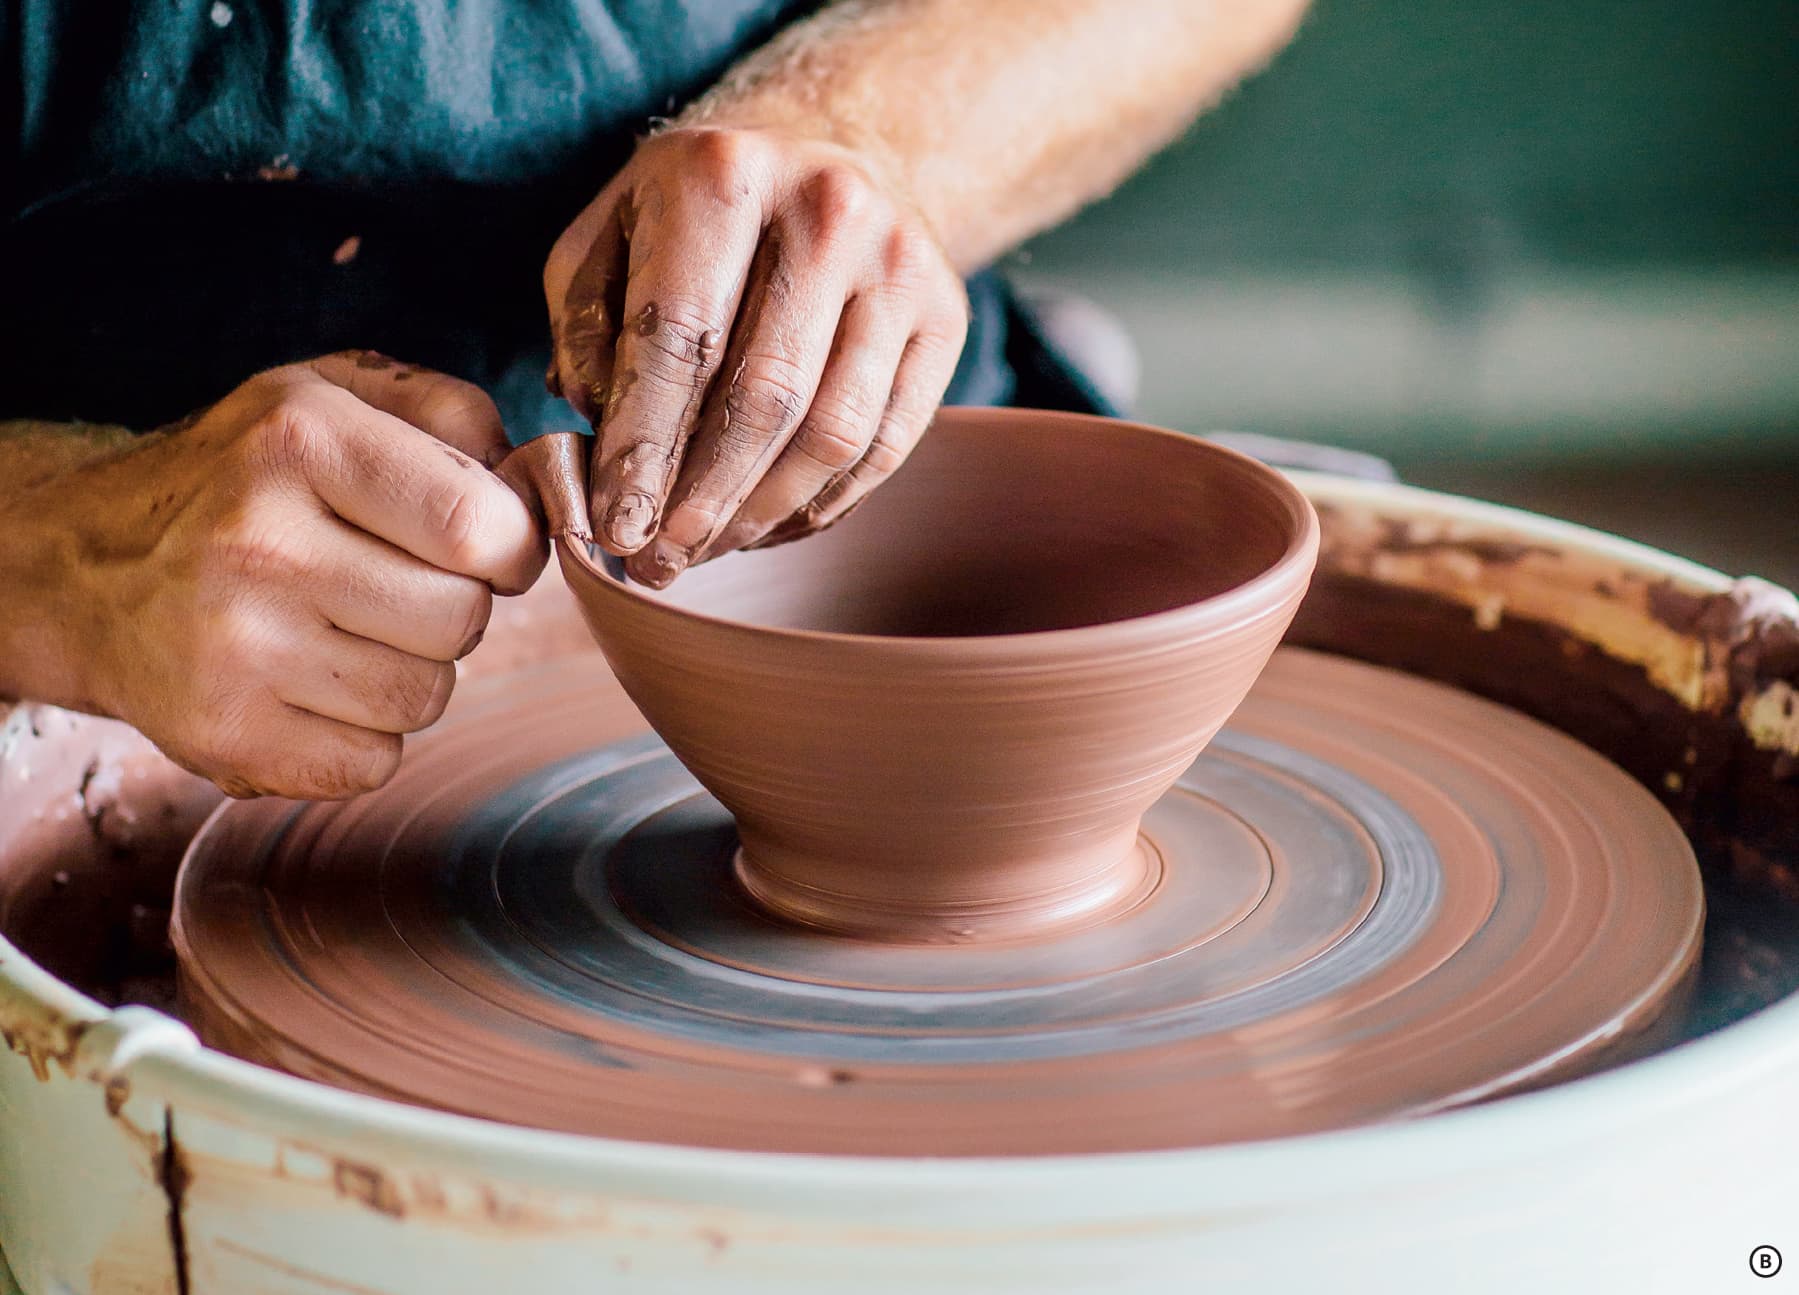
Here are some specifics on other rim options:
• Rolled rim: At the end of your last pull, thin the lip to 1/8 inch. With your right pointer finger resting upside down 1/2 inch below the outside of the lip, push outwards with your left hand. In a slow progression of applied pressure, shape the lip around your upturned finger. Remove your finger and continue to move the lip into a thick, hollow tube. When the pot is soft leather hard, make a small hole on the underside to release trapped moisture.
• Split rim: After your last shaping pull, compress the lip to 1/4 inch. As the wheel is spinning at medium speed, lightly pinch the rim with one hand. With the other hand, apply pressure with the edge of a wooden fettling knife directly in the middle of the rim to create two sections. You can leave this impression to catch glaze or you could pinch the two sections together at regular intervals. Try sectioning the pot into quarters or eighths to change the rhythm of the rim.
• Angular rim: Apply downward pressure with your left pointer finger on the inside edge of the rim. You can create a bevel that leans inward, outward, or some other variation that gives your glaze an edge to break from. Make sure to remove any sharpness with a sponge or chamois cloth.
The foot placement of a bowl is determined by the relationship of the horizontal and vertical walls. The general principle for either form is that the foot must sustain the curve of the body. (See here for more on trimming a foot.) If you are making a flat-bottomed bowl, the juncture where the walls meet is very easy to spot. On a bowl with a curved interior, there is more leeway on foot placement. The outside of the foot should be underneath the point in the curve where the vertical and horizontal walls meet.
PLATES
Plates are surprisingly challenging for potters. This is likely because plates are one of the forms most affected by mass production. The large-scale manufacture of mold-made plates has given the public, and often the potter, the idea that plates should be thin. I ask you to reconsider that notion and offer that a good plate is one that has the proper heft for durability and function. A plate that has a thick foot and rim relative to the overall body will warp less and avoid pyroplastic stability problems that are common during firing. This additional thickness will also help stabilize porcelain or other high-shrinking clays that tend to warp in the drying process.
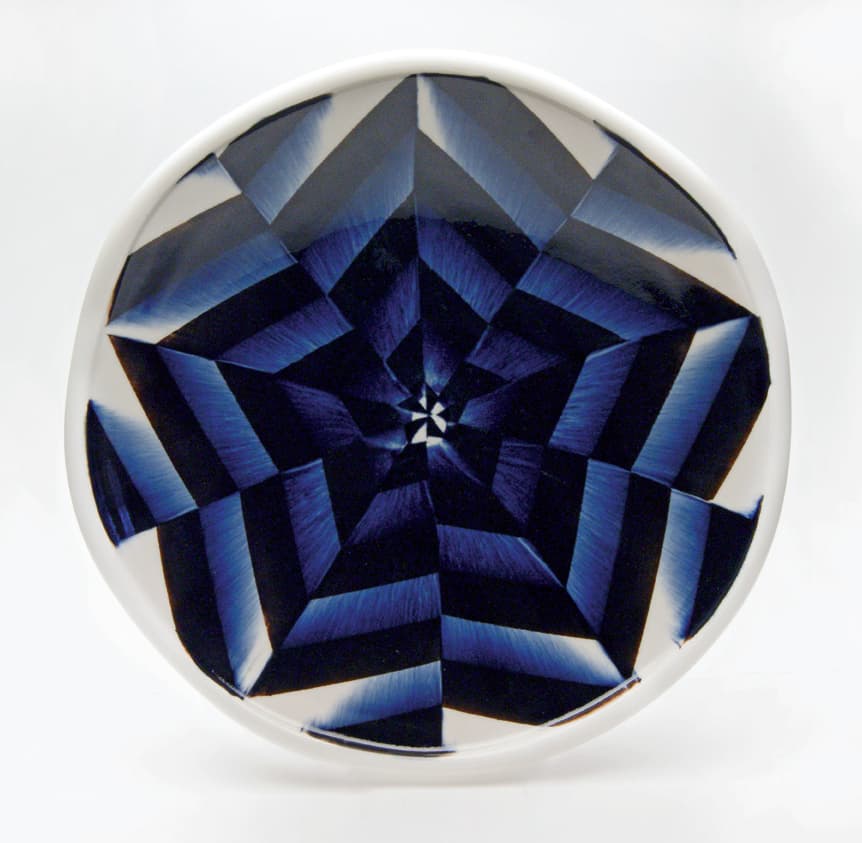
Sean O’Connell uses the charger form as a canvas for his intricate patterns. The slight concave surface of the form allows the glaze to run toward the center, creating visual depth that enlivens the surface of the pot. Photo courtesy of the artist
SUGGESTED STARTING WEIGHTS
Saucer: 1.5 pounds
6-inch luncheon plate: 3 pounds
10-inch dinner plate: 6 to 7 pounds depending on thickness of desired foot.
MAKING PLATES
Start by centering your clay to a height of 2 inches off the wheel head with as wide a base as possible for the amount of clay.
Open outward, being mindful not to push down or alter the thickness of the plate floor. Stop when the wall of the pot starts to hang over the base. A B If this happens earlier than expected, you will need to center the clay lower the next time you make the form.


Note: A common problem when making plates is that friction increases during the opening, causing your hand to wobble. To avoid this on smaller plates, open with a wet sponge wrapped over your index and pointer finger to ensure equal lubrication. For larger plates, open by pulling out with the bottom, fleshy side of your clinched fist while holding a sponge. Squeeze the sponge during the opening process to decrease friction.
With the clay wall now hanging over the base, pull up and out, creating a smooth curve. Compress the rim after every pull to ensure the proper thickness. A wide rib can be used to even out the curve. C
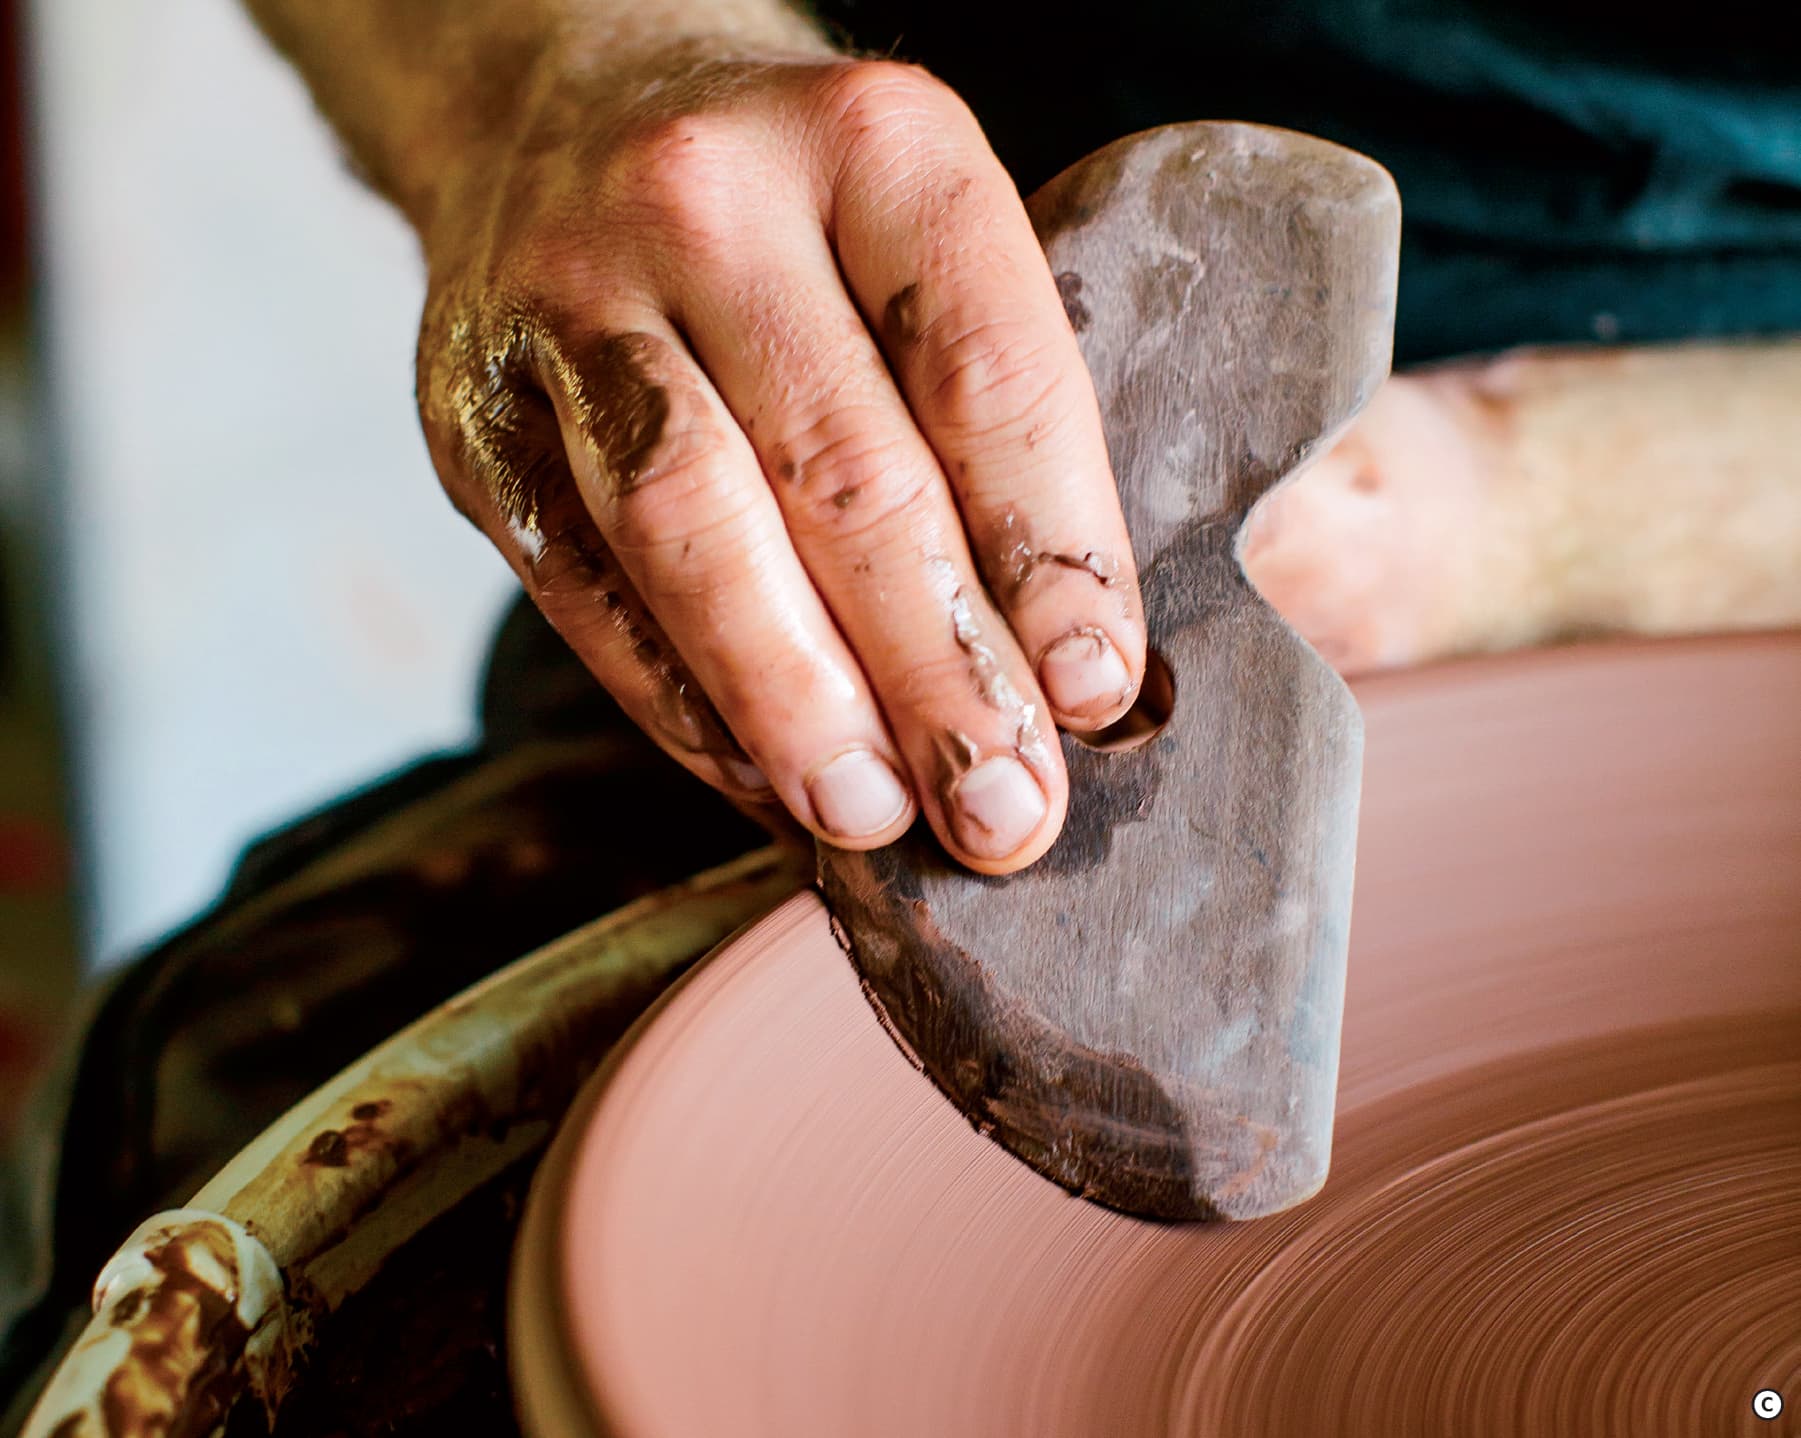
The lip of a plate can be narrow and fluid or segmented out and flattened to create a pasta bowl shape. In culinary design, the wide rim of a pasta bowl is a framing device that gives emphasis to the food, but how you frame your plate is, of course, up to your preferences and design sensibility.
To leave the rim narrow and fluid, finish the lip with a chamois cloth after your last pull. Make sure to slightly round the edge of the lip as a thin angular edge is more likely to chip. To create a larger, pasta-bowl style rim, push out from the inside with your right index finger supporting underneath the rim. Try altering the width of the rim to change the proportions of the form or use the space for applying decoration.
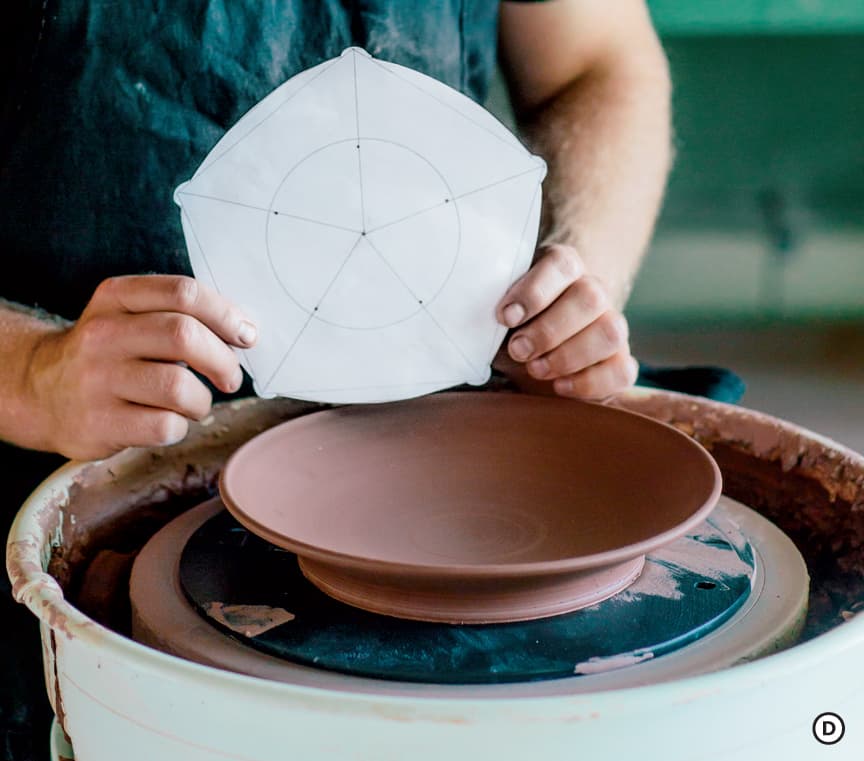
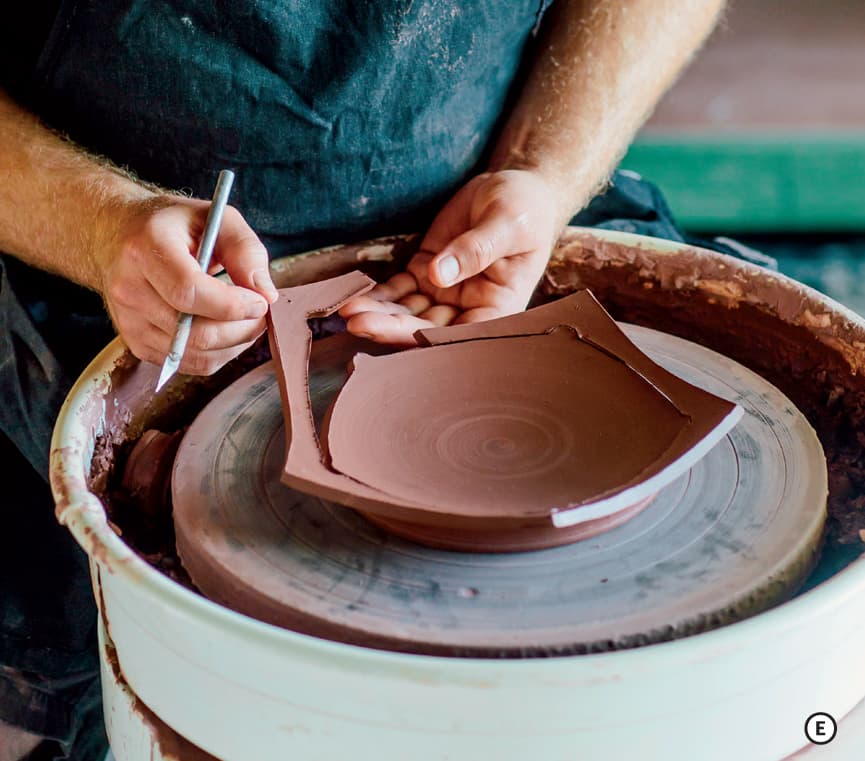
Square and other non-round plate shapes can be created by cutting or surforming the rim into shape. I’ve found using a template not only makes this process easier, but repeatable as well—which is important if you’re making a set. To do this, create a tar paper template to map out the parts you want to remove from the form. D Then use the template as a guide to cut the rim. E Use a surform to finish the shape and/or smooth the surface with a plastic rib to articulate the angle and shape. F (You can create small ribs with custom shapes by cutting into old hotel room keys.)

USING A MOLD
Another way to create a non-round shape is to use a hump mold that is attached to the wheel. To start the hump mold, throw a bowl with 2-inch-thick walls. Once at the leather-hard stage, trim the back side to your desired curve. Dry the mold slowly to ensure it does not warp, and then bisque fire.
Attach the bisque mold to the wheel head with clay. Lay a precut slab over the mold and compress with a plastic rib as the wheel is spinning. This creates compression similar to a thrown plate but without the need to trim the exterior shape. Attach a coil to the plate and throw the foot into shape.

Matt Towers throws his plates out of a more elaborate carved mold system. The mold is loaded with a slab of clay and mounted to the wheel head. As the mold is spinning, the slab is compressed into the form. The foot is thrown into shape after a coil is attached to the base of the plate. Photo courtesy of the artist

Photo courtesy of the artist
Sets and Special Forms
Once you master individual standalone pieces, one of the great challenges of making pottery is figuring out how all the individual pieces will work together as a set on the table. When making sets, I think about how the intended function dictates the form and the arrangement of pieces. For instance, when making a sugar and creamer set, it’s good to consider the scale of the object relative to how long the contents will stay fresh without refrigeration. With milk going bad well before sugar, you will notice creamers are often smaller as they only hold an amount that will be used during one coffee or tea service. Sugar, however, has a long shelf life, so you often see a lidded form that can be stored without refrigeration.
In addition to function I think about the aesthetic opportunities a set presents. When designing multiple forms that go together, it is good to have unity without uniformity. A uniform set would have exactly the same color, pattern, or form. In that instance the set is more of a collection of similar objects. While it is easy to exactly replicate colors and other design elements, I find the most interesting sets are filled with variety and contrast. A more interesting set might be unified by shape, color, or texture, but the objects are not exactly the same. The variety present in a set of this type sparks a closer inspection because the differences between the pieces encourage you to explore the individual pieces with more focus and interest.
To create unity within a set of cups, you might repeat one surface design motif throughout the set but reverse the color scheme. Sunshine Cobb’s set of tea cups A shows this principle as she keeps the form and texture the same but glazes the forms in a variety of eye-catching colors. You could also maintain a similar form and color scheme but add a variety of textures to the surface. Janet Deboos’s set of jars B shows this principle with their energetic patterns and unifying earth-toned color scheme. Lastly, look at the eight-piece dinner set by Adam Field C. The pieces all share the celadon color, but the shapes, textures, and scale of the forms vary dramatically between pieces. All three of these examples show the principle of unity without uniformity.

Photos courtesy of the artists
In addition to dinnerware, special service ware can be an exciting area for potters to focus their creative energy. Salt and pepper shakers, butter dishes, and gravy boats are just a few of the special service items that can present a design challenge. Consider the unique forms and designs of the pieces on the following pages. Let them inform and inspire you!

Lorna Meaden is a master of special service ware. Her punch bowl includes a ceramic spoon and mugs that hang off the side of the piece. During use, everything would be unstacked and then restacked after it was finished. It’s an amazing tour de force of ceramic design that harkens back to the decadence of kings and queens. Photo courtesy of the artist

Lisa Orr’s fantastical salt cellar is a blend of sculptural ornament and color on a functional vessel. If you look closely you will see one of the birds on the left is a spoon that comes off the side of the form to serve the salt. Photo courtesy of the artist

Alleghany Meadows uses the arrangement of a set of plates to create a beautiful sculptural display. During use, the plates would unstack and reveal an otherwise hidden donut-shaped tray. The precision throwing needed to pull this off is impressive! Photo courtesy of the artist
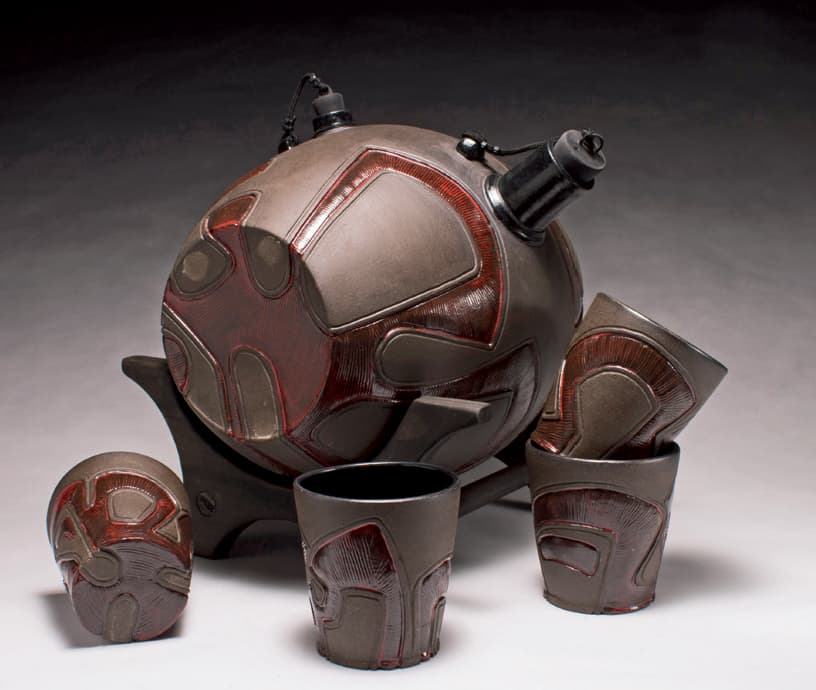
Nigel Rudolph’s whiskey barrel is a fascinating piece of special service ware. The core of the form is thrown upright, but during use it is turned on its side to rest in a wooden container. In use, the barrel is rotated back and forth to allow the whiskey to flow easily into the accompanying cups. Photo courtesy of the artist
TEAPOTS
Tea is one of the most influential trade goods of all time. It has shaped economies and cultural practices as its consumption spread from east to west across the globe. As cultures created pottery forms specifically for the drink, an evolving canon of tea vessels started to build. In this section I will talk about a few of these designs and offer methods for making a teapot.
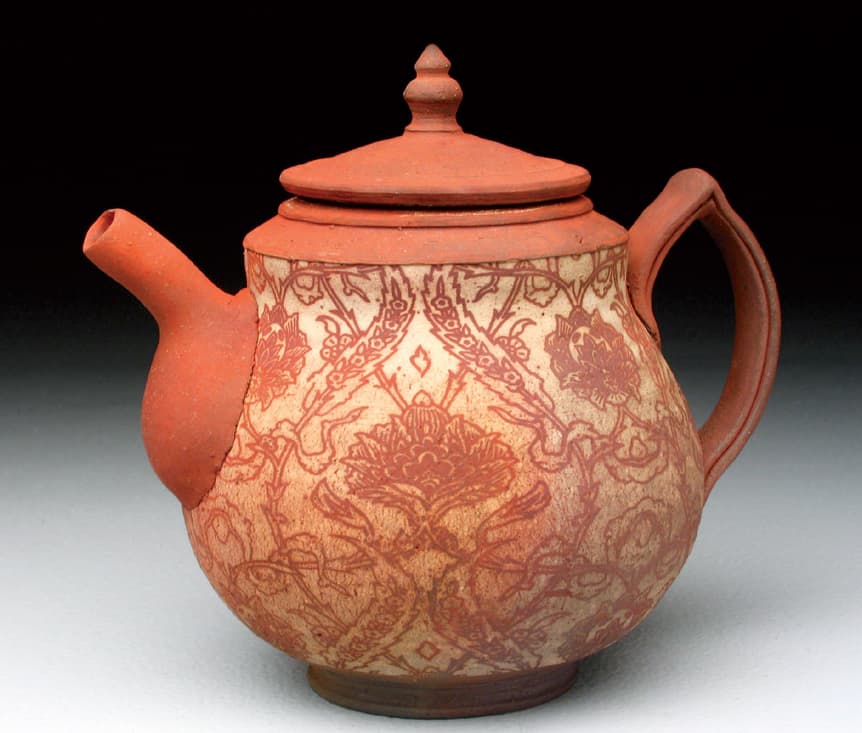
Forrest Middelton’s teapot is unglazed on the outside but still has a beautiful surface from the reduction cooling in his gas kiln. Photo courtesy of the artist
SUGGESTED STARTING WEIGHTS
Teapot body for green tea: 1 pound
Teapot body for black tea: 2 pounds
Medium to large teapot body for black tea: 4 to 6 pounds
One of the most challenging of pottery forms, the teapot can provide years of focus for a potter. When working through the skill-building exercises at the end of the chapter, I encourage you to make a trip to your local teahouse or tea store. Beyond enjoying a warm cup of tea, you can seek out others that share a passion for the beverage. Tea aficionados have some of the most refined tastes of the culinary world, and their strong opinions might help you design a better teapot. I’ve found this also goes for coffee loves, whiskey aficionados, or other beverage enthusiasts. Don’t hesitate to tap the gold mine of opinions and insight that a passionate consumer might offer!
DESIGNING A TEAPOT
Since the elements of a teapot are covered elsewhere in this book (see Chapter 3 for more on handles, spouts, and lids), this section will focus on how these elements come together on the specialized form that is the teapot. The first part of designing a teapot body is deciding which shape and scale to make the form. From a functional standpoint, the body of a teapot acts as a reservoir in which the tea will be brewed. The scale is dictated by the speed at which the tea you are brewing steeps. Green teas are best steeped for a short amount of time (1 to 2 minutes) and are usually served in small teapots with 8-to 16-ounce capacity. Black teas can be steeped for a longer amount of time (3 to 5 minutes) and are served in larger forms that hold 16 to 32 ounces. I won’t go into sizes for all tea types, but I do want to reiterate that as the maker, you should match the teapot to the specific type and brewing style of the tea you wish to serve.

John Neely, left, Linda Sikora, center, and Doug Casebeer, right, are all master teapot makers who use the handle orientation to help support the function and aesthetic of the pot. Notice that Doug Casebeer’s top handle is constructed from a flexible rubber tube. A unique solution for an age-old design! Photos courtesy of the artists
In contrast to size, the shape of a teapot body is a point of personal expression. When looking to industry for teapot designs, you often see globe-like bodies that have equal proportions of width and height. Let’s think about this as a basic shape that can be changed and rearranged to come up with a unique form. One variation might be to throw a form with an upwardly progressing curve that peaks in the top third of the pot. The height of these forms is often greater than the width to accentuate the graceful uplift of the curve. Conversely, you might throw a form with the opposite proportions emphasizing a downward progression of the body’s curve. The low profile will make the body appear heavier and might benefit from a substantial foot that lifts the pot off the table. Another option might be to alter the teapot body off round. You can experiment with a variety of shapes, including ovals, soft squares, or organic, loosely structured forms. (See here more information on altering techniques.) With all of these forms you are looking to create a strong profile that the spout, lid, and handle can accentuate.
After deciding on your teapot body, the next step is to determine the orientation of the handle. A few principles to consider are that teapots that hold a large amount of liquid will be easier to pour with an over-the-top handle. This has to do with the weight-bearing limitations of the wrist. You can easily hold a ten-pound weight from above but might struggle to hold it horizontally in the air. For this reason, small teapots often have side handle, while larger ones almost always use the over the top orientation.
Along with weight distribution, consider how close your hand will be to the teapot body when grasping the handle. A placement that is too close will cause your hand to be burnt by the heated body. A handle that is too far away will feel unstable when held and might easily be knocked off when you are storing the teapot in your cupboard. I often look at other teapot makers or photos from ceramic history to find the balance between a handle that is too close or too far.
Another characteristic to consider is whether you will pour away or towards your body during use. Over-the-top or side placements of a strap handle dictate that you pour away from your body. Conversely, the stem-like side handles used on small Korean or Japanese teapots encourage pouring towards yourself. After the pourer fills a cup, it’s then presented to the drinker in a gesture of offering. This simple movement is built into the orientation of the teapot handle, which shows the ability of a form to change the behavior of its user.
After handle placement, the next design element to consider is the spout. Most teapot designs incorporate closed spouts to help condense their flow of liquid into a smooth, solid stream. A closed spout will also help build pressure, increasing the velocity of the liquid and making it easier to direct into a cup. The length of a spout is mostly a matter of personal preference, but I recommend you test your teapots to see how the spout length affects the pouring motion.

When designing your teapot, think about the type of tea you want to serve. Handle placement, the scale of the form, and strainer configuration are based on this essential choice.
Another aspect of teapot design is the holes you will cut in the body to release the liquid into the spout. The design is dictated by the nature of the tea you drink. If you enjoy loose tea, you will need to create a strainer comprised of many small holes cut into the body with a hole punch tool. If you prefer to brew tea already contained in bags, you can cut one large hole that is slightly smaller the throat of the spout.

The exquisitely crafted small teapots of Yixing, China are used over top of a wooden slatted table. To begin the tea service, hot water is poured over the cups, teapot, and serving implements. Excess water runs through the table into a reservoir where it can be emptied.
Any sharp edges created by the hole punch or cutting knife will be razor sharp when the teapot is glaze fired. To reduce this hazard, make sure to smooth the interior of your strainer or spout opening with a wet sponge. Then you’re ready to attach the spout.
The last element to consider with a teapot (and any form for that matter) is the expectations and local customs of the culture you produce work for. In my travels I have noticed people have very different expectations for the fit of a teapot lid and the dribbling of teapot spouts. In China, lids were expected to fit tightly enough that they would not move during pouring. To accomplish this, the teapots had deep flanges, or lid locks, that held their lids in place when pouring with one hand. In the United States, I’ve observed most people hold the lid on with one hand while pouring with the other.
Another difference between cultures is the expectations of a spout after pouring. In the United States, a teapot maker is judged by how many drips run down the spout after a pour. More than one small drip relegates the teapot and the maker to lesser status. When I mentioned this to Chinese potters, they looked completely confused. Upon further investigation I realized this might link to the Chinese practice of using a slatted tea table instead of a solid table for tea drinking. The slats of the table allow any drips of hot water or tea to pass through the surface into a reservoir that can be emptied later. Contrast this will a solid table that would be ruined if water sat on its surface. I mention this difference between American and Chinese teapot makers because it highlights the fluid nature of pottery forms and expectations.
Sugar and Creamer Sets
On the subject of tea customs, let’s look to Europe and the cream and sugar set. Green tea and other varieties served in China are not mixed with sugar or cream. With no custom, these forms are not part of a Chinese tea set. The European custom of adding sugar and cream to black teas led to the innovation of sugar and creamer sets. Once produced to accompany a multipart high tea set, many potters now make these forms as standalone specialties.
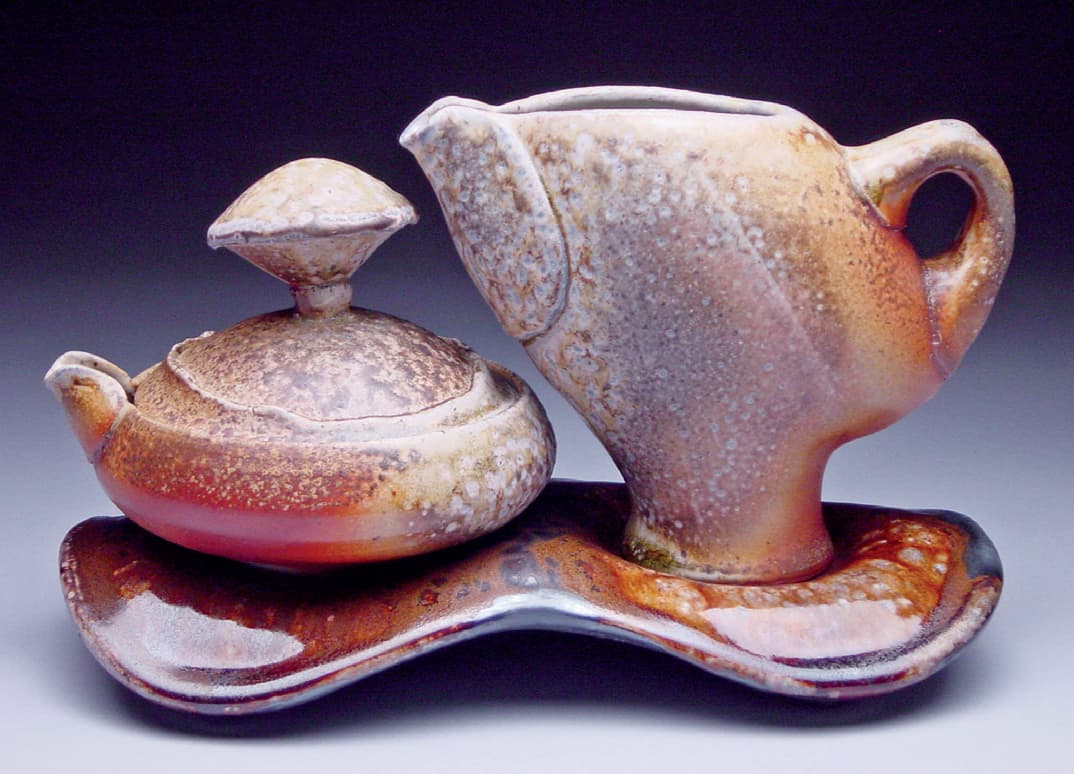
Chris Pickett’s wood-fired sugar and creamer set nestle together on a pillow-like stand. Thinking about how your set will be stored when not in use is key to making a nice sugar and creamer set. Photo courtesy of the artist

Steve Godfrey uses the sugar jar as a platform for his finely sculpted Dodo Bird. The bird acts as the knob while being the focal point of the piece. Photo courtesy of the artist
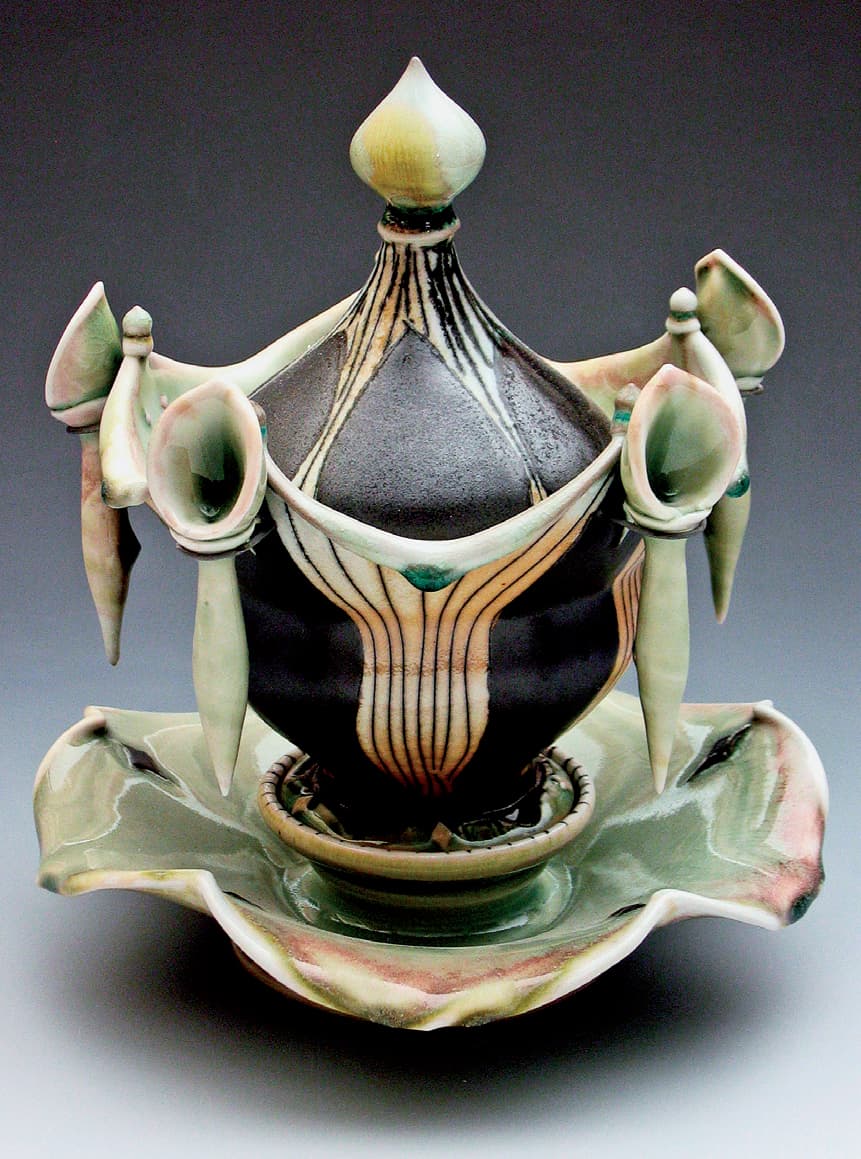
Lorna Meaden’s sugar bowl come with five spoons. This allows each user to keep their spoon after stirring their coffee or tea. Notice how she incorporates the spoon into the upward motion of the altered rim. Photo courtesy of the artist
GALLERY
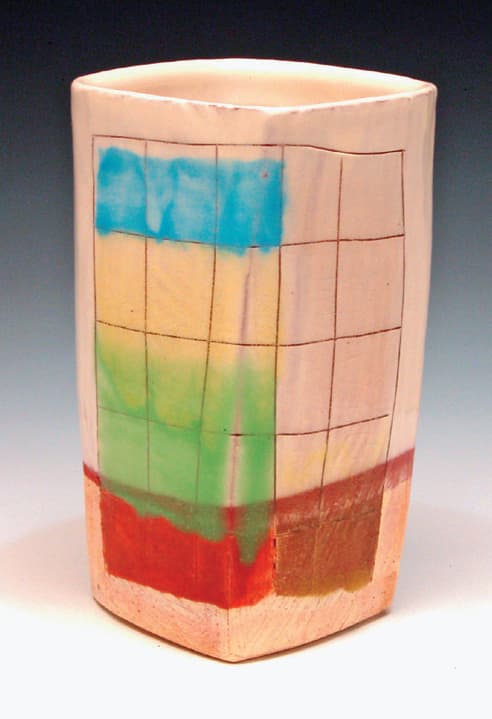
Brian R. Jones, tumbler. Photo courtesy of the artist

Samantha Henneke of Bulldog Pottery, dotted mug. Photo courtesy of the artist
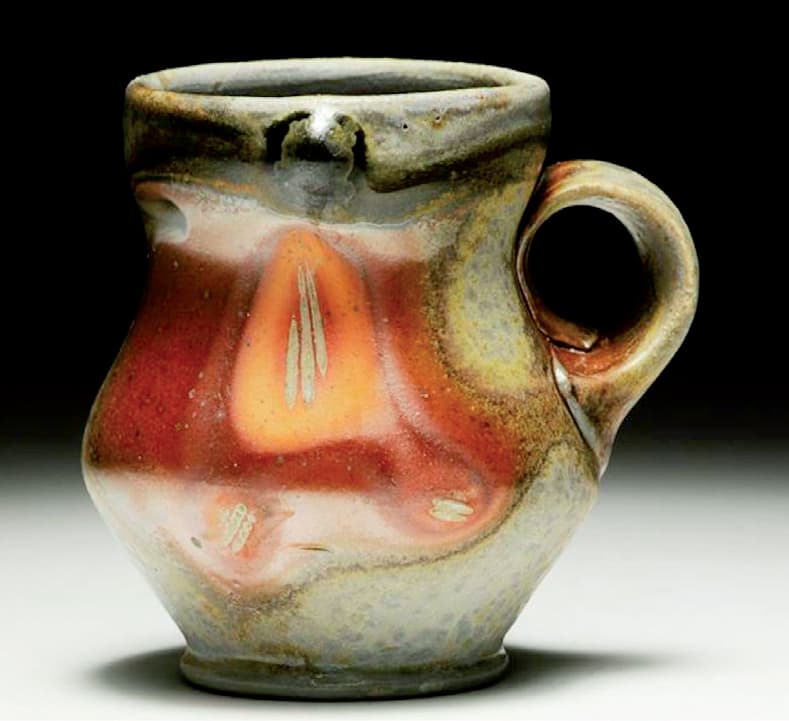
Matt Schiemann, mug. Photo courtesy of the artist

Samuel Johnson, cup with cord-impressed texture. Photo by Steve Diamond Elements, courtesy of the artist
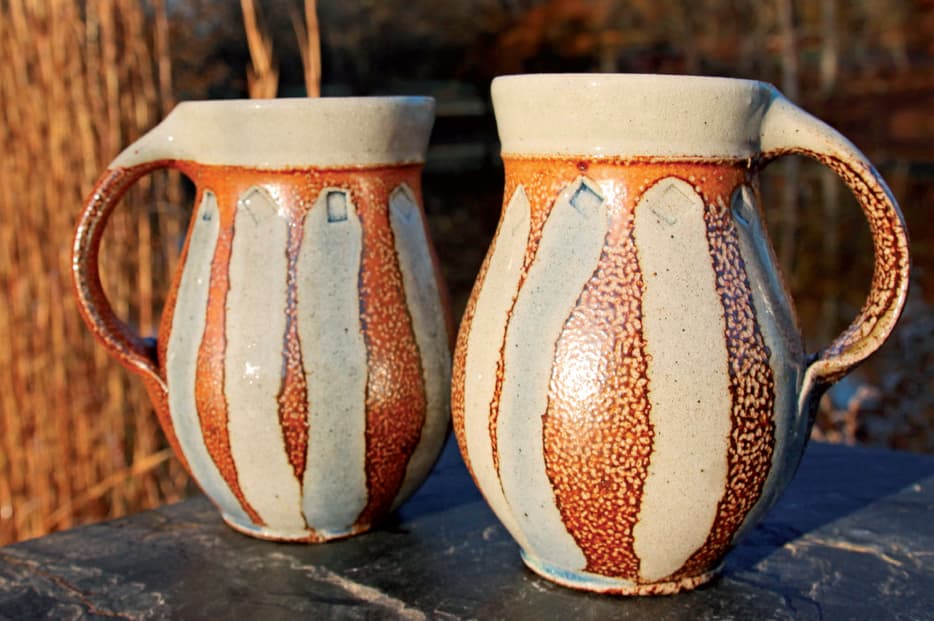
Mark Hewitt, two mugs (with embedded glass). Photo courtesy of the artist

Ron Meyers, Yunomi. Photo courtesy of the artist
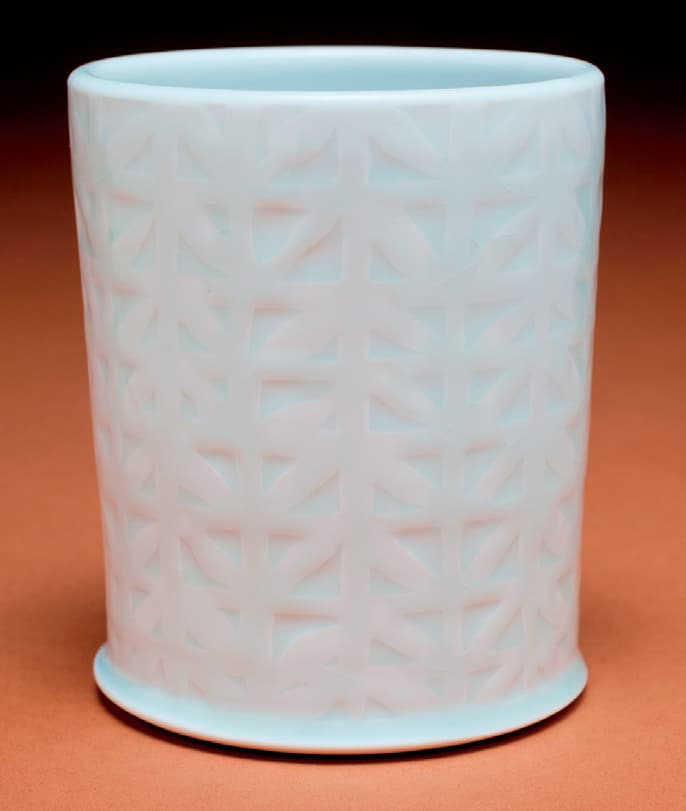
Andy Shaw, tumbler. Photo courtesy of the artist

Andy Shaw, place setting. Photo courtesy of the artist
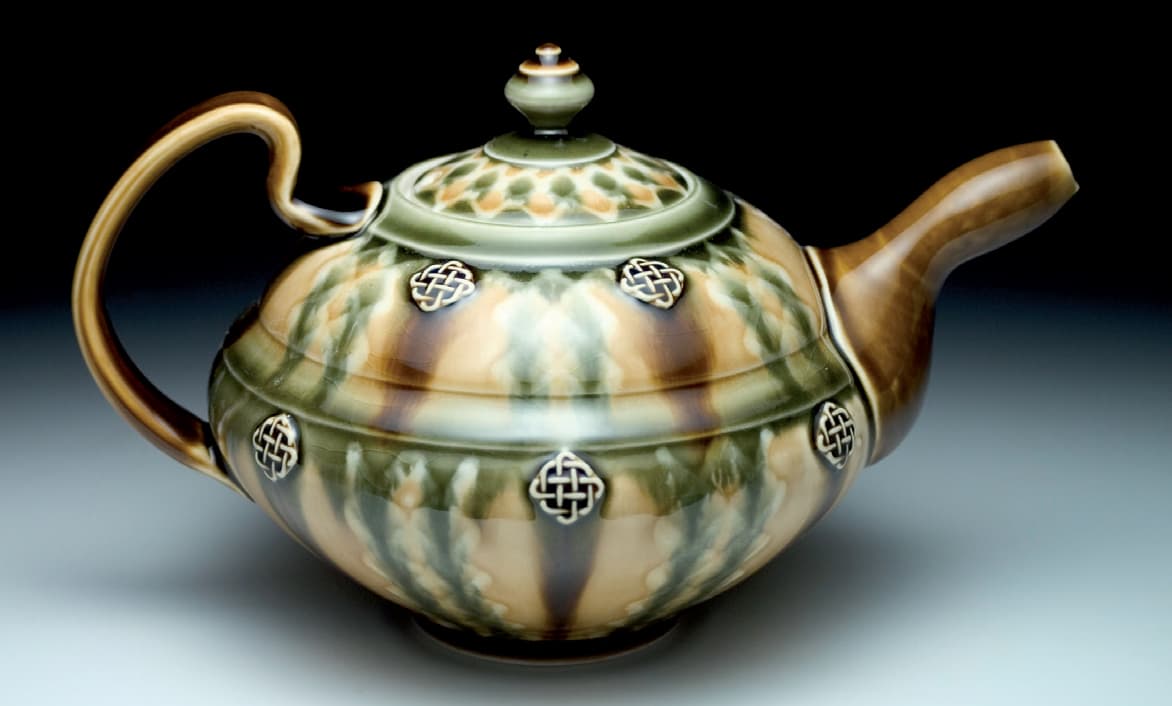
Ryan Greenheck, teapot. Photo courtesy of the artist
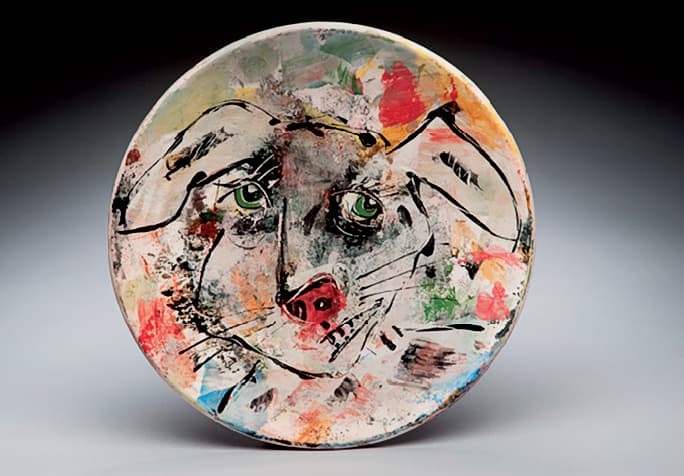
Ron Meyers, bunny plate. Photo courtesy of the artist
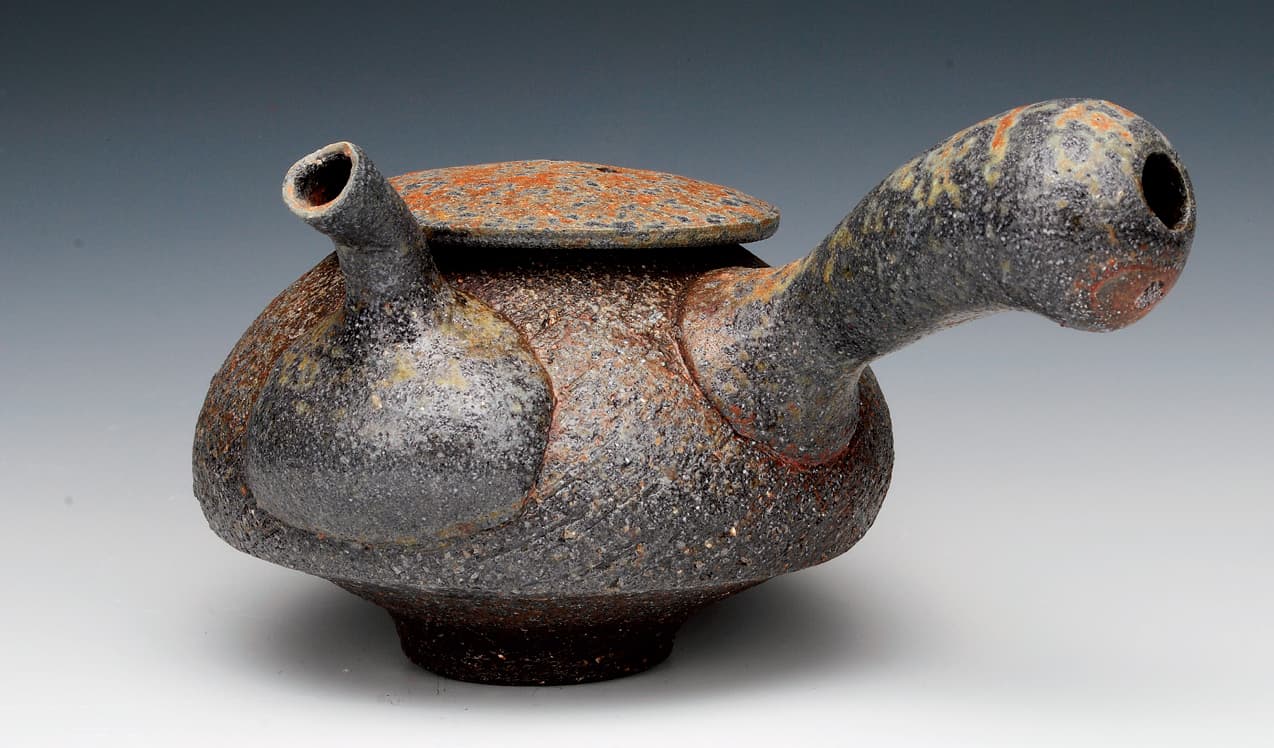
Perry Hass, teapot. Photo courtesy of the artist

Mike Helke, pouring pots. Photo courtesy of the artist

Doug Peltzman, teapot. Photo courtesy of the artist
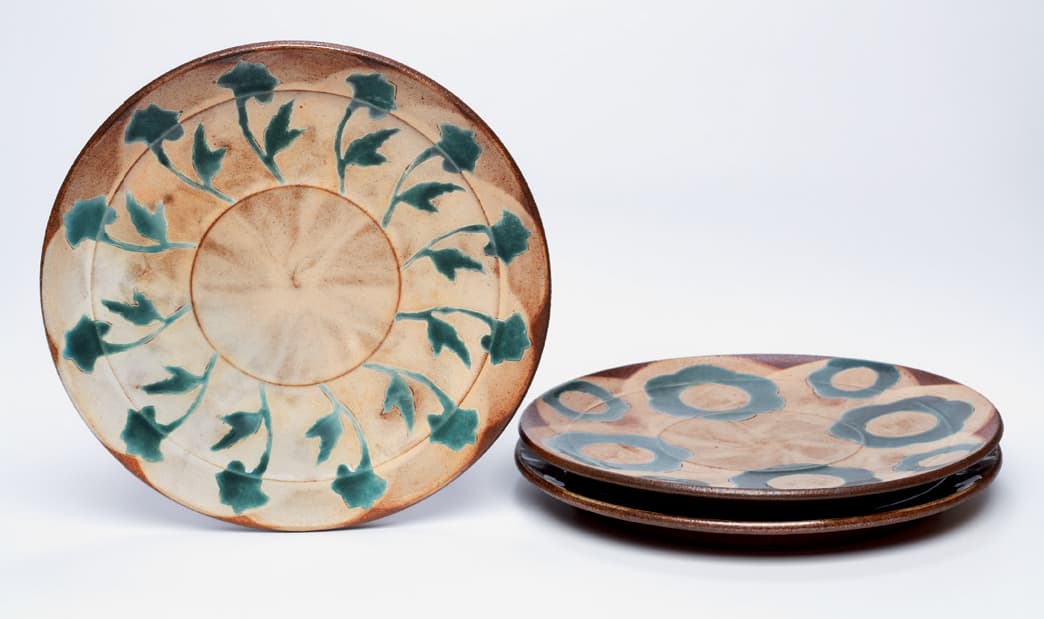
Sanam Emami, plates. Photo courtesy of the artist
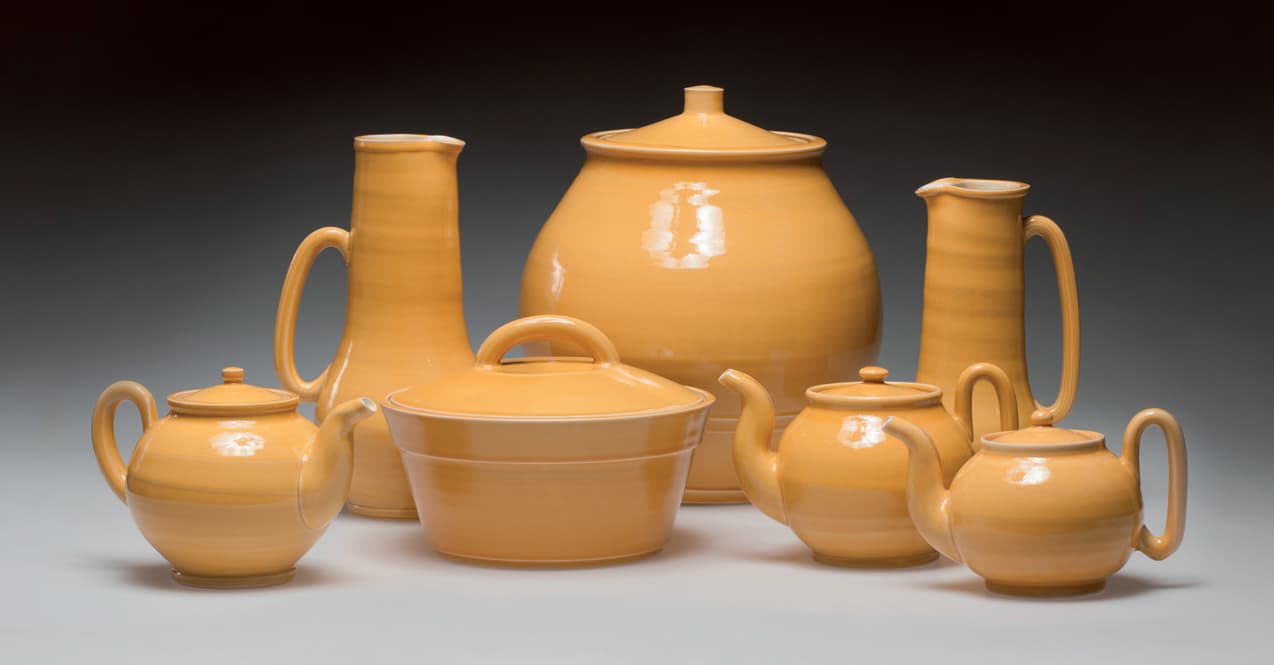
Linda Sikora, yellow ware group. Photo by Brian Oglesbee, courtesy of the artist
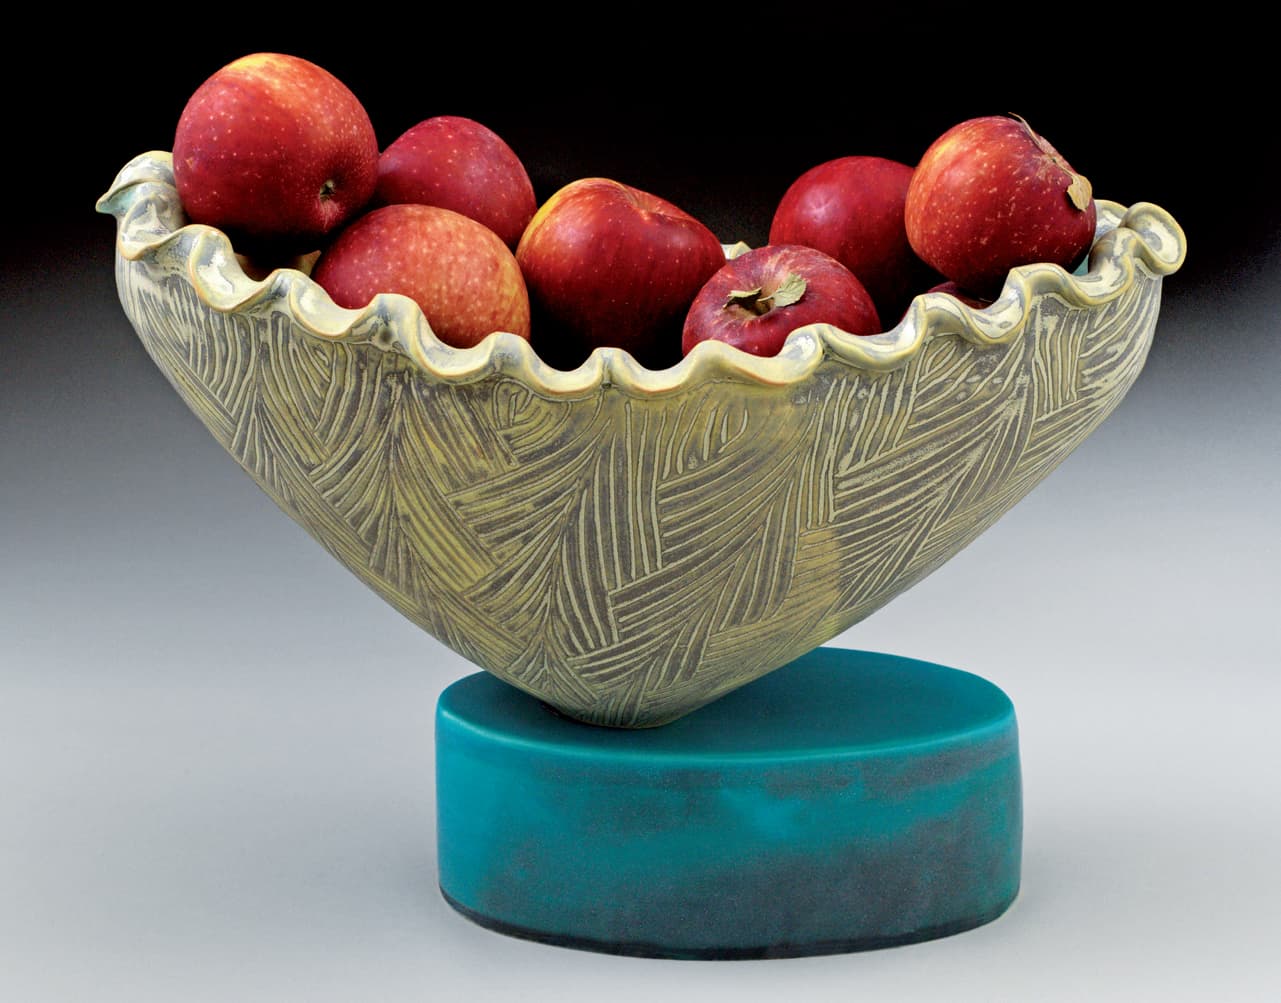
Silvie Granatelli, oval serving bowl. Photo courtesy of the artist