CHAPTER FIVE
ALTERING POTS
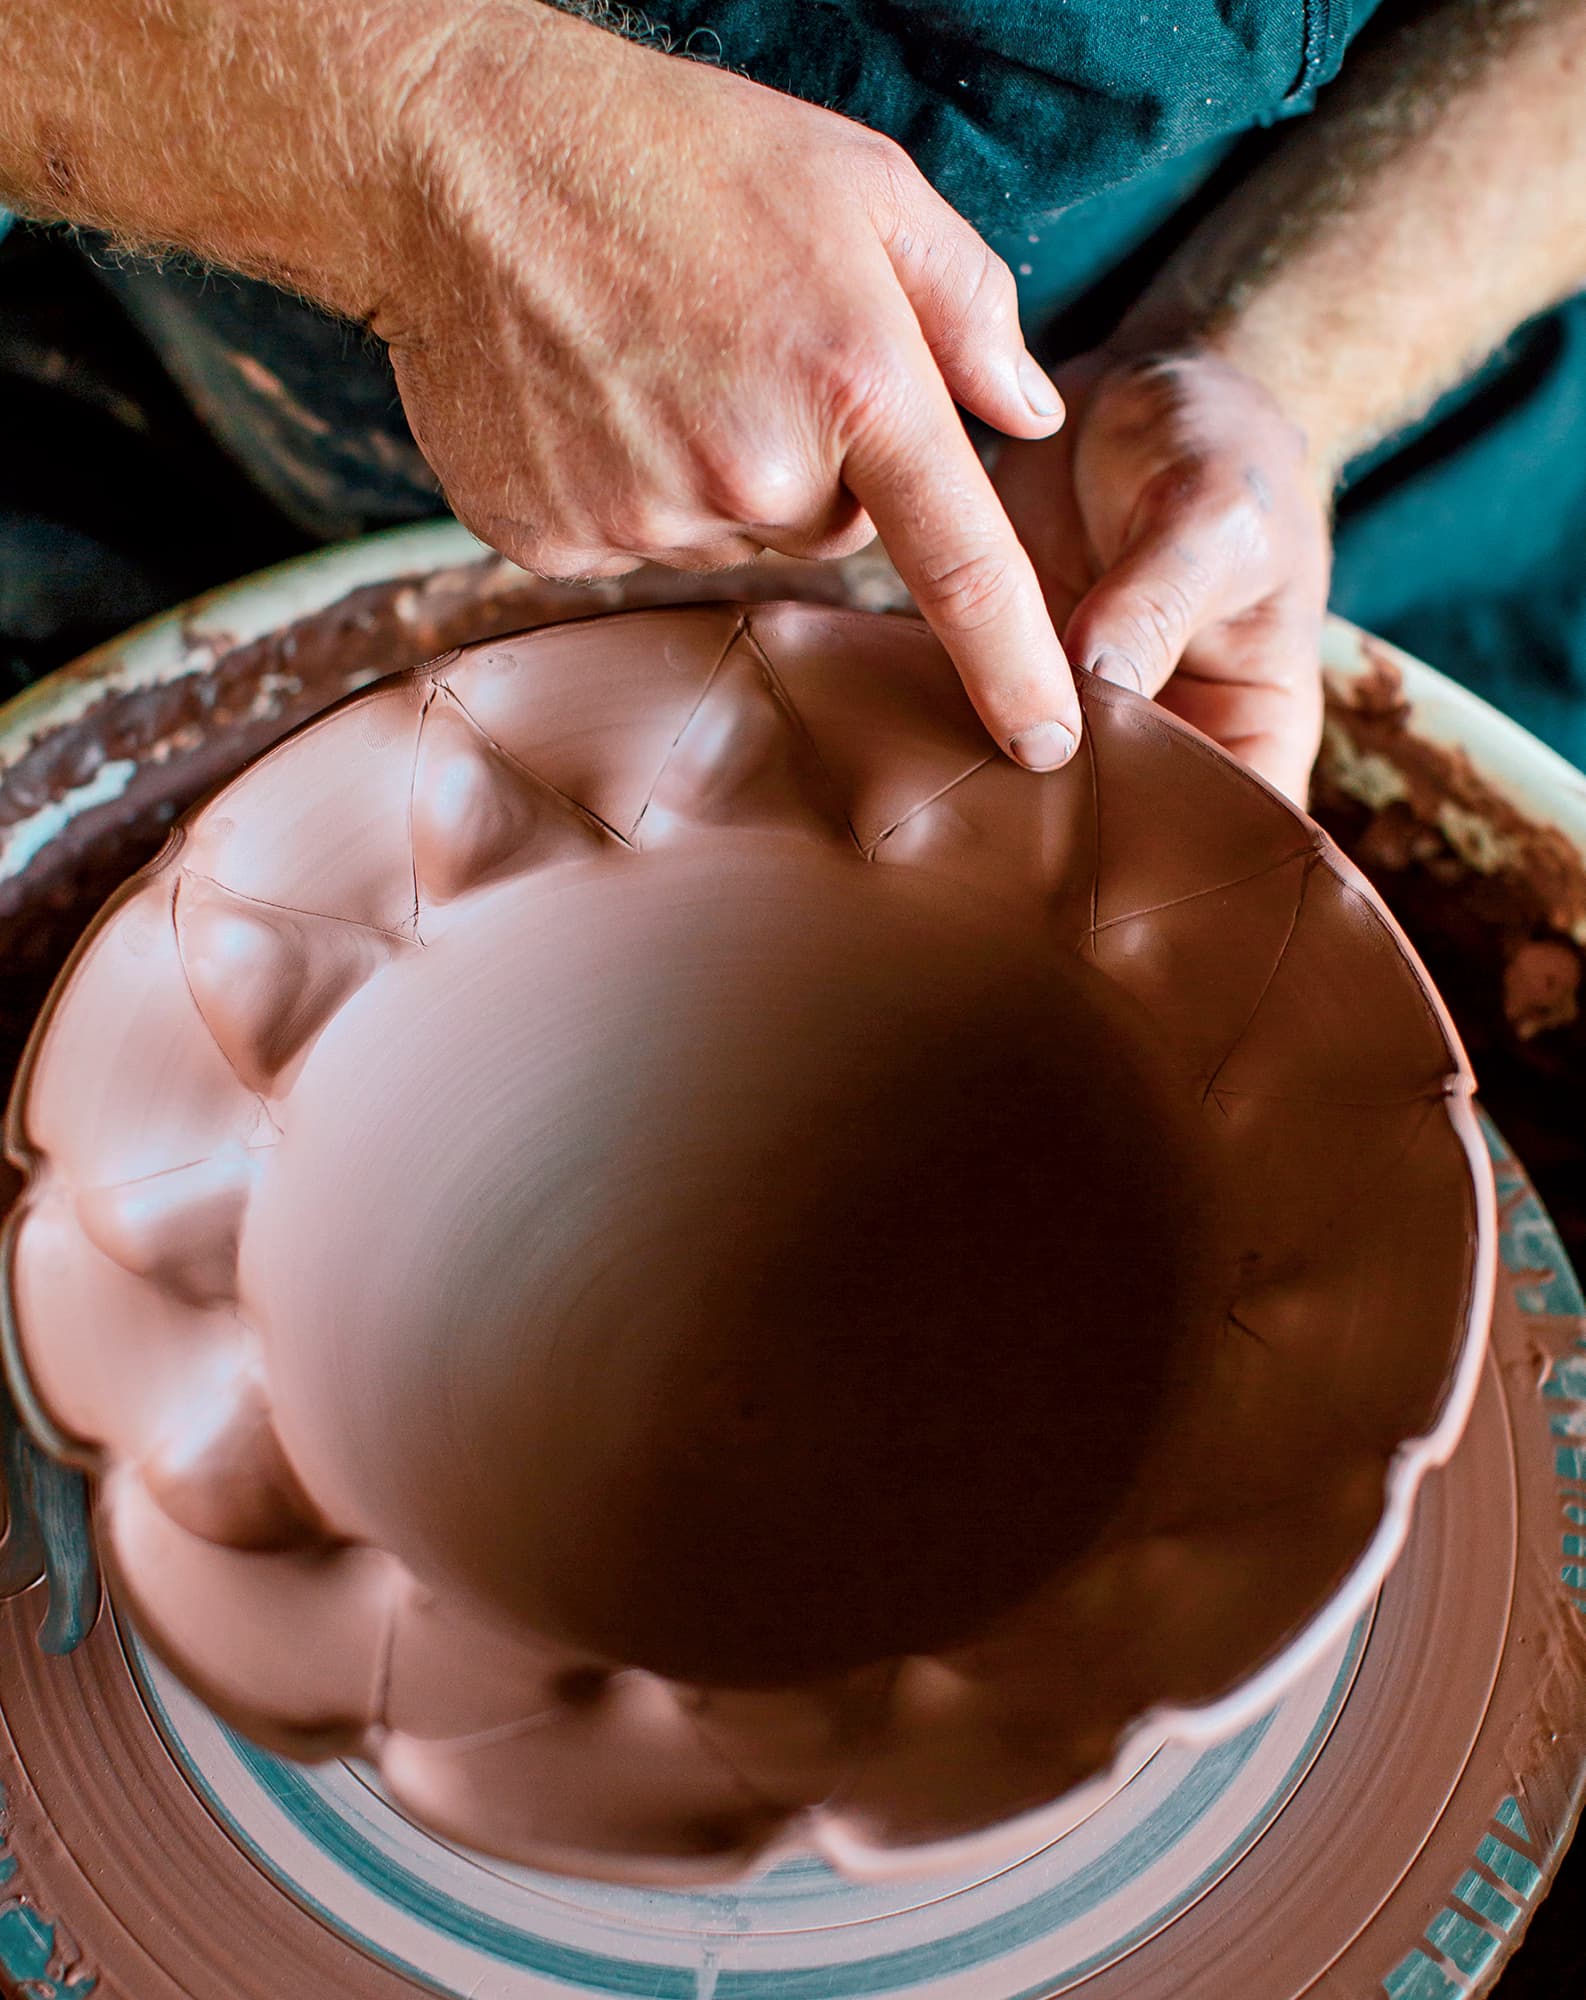
ONE DAY WHEN I WAS OBSESSING over the perfect roundness of a pot, my teacher walked by and said, “As soon as you figure out how to make that perfectly, you will stop wanting it to be round.” She was exactly right, and I now find many of the pots I make are altered. While the topic of altered pots might seem like one for advanced throwers, I want to encourage you to embrace the carefree attitude a child might have when throwing on the wheel.
When you’re first beginning to alter, make sure to isolate your ideas from the outcomes, and allow yourself longer than usual to master an altered form. As you make many versions of the same form, don’t feel like you have to keep them all. Altering a pot to the point of collapse might teach you more than a “successful” pot shaped with fear and a hesitant touch. Coming up with a good design for an altered pot might come after many failed attempts. Altering can thus serve as a reminder that no pot is precious. If you are dissatisfied with the alteration of one pot, rewedge the clay and make it again. If you want to document your progress, take a quick photo before you recycle the clay. Knowing you can easily reuse your clay will help you to embrace the playful spirit that is needed when testing out new forms.
As you progress through the chapter, you will move from abstract freeform alterations to rhythmic, patterned alterations. Both can be effective ways to create energy and excitement in a form. While you are working on the wheel, imagine how you might decorate the pot you are working on. I often find altered pots are easier to decorate because I have already made definitive aesthetic decisions in the early stages of their forming process. If you plan on decorating your pots more than a few days after they are made, you might want to take notes on your thoughts so you don’t forget your original idea.
SHAPE CONSIDERATIONS AND LIMITS
The first opportunity you will have to alter your pots is during the shaping stage of the throwing process. After making your last upward pull, rib the outer surface of the form to remove slurry that might later cause weakness in the form. Once you have determined your target shape, analyze how many times you will need to touch the pot to create the shape. Less is more when it comes to altering, so try to shape the pot with as few touches as possible.
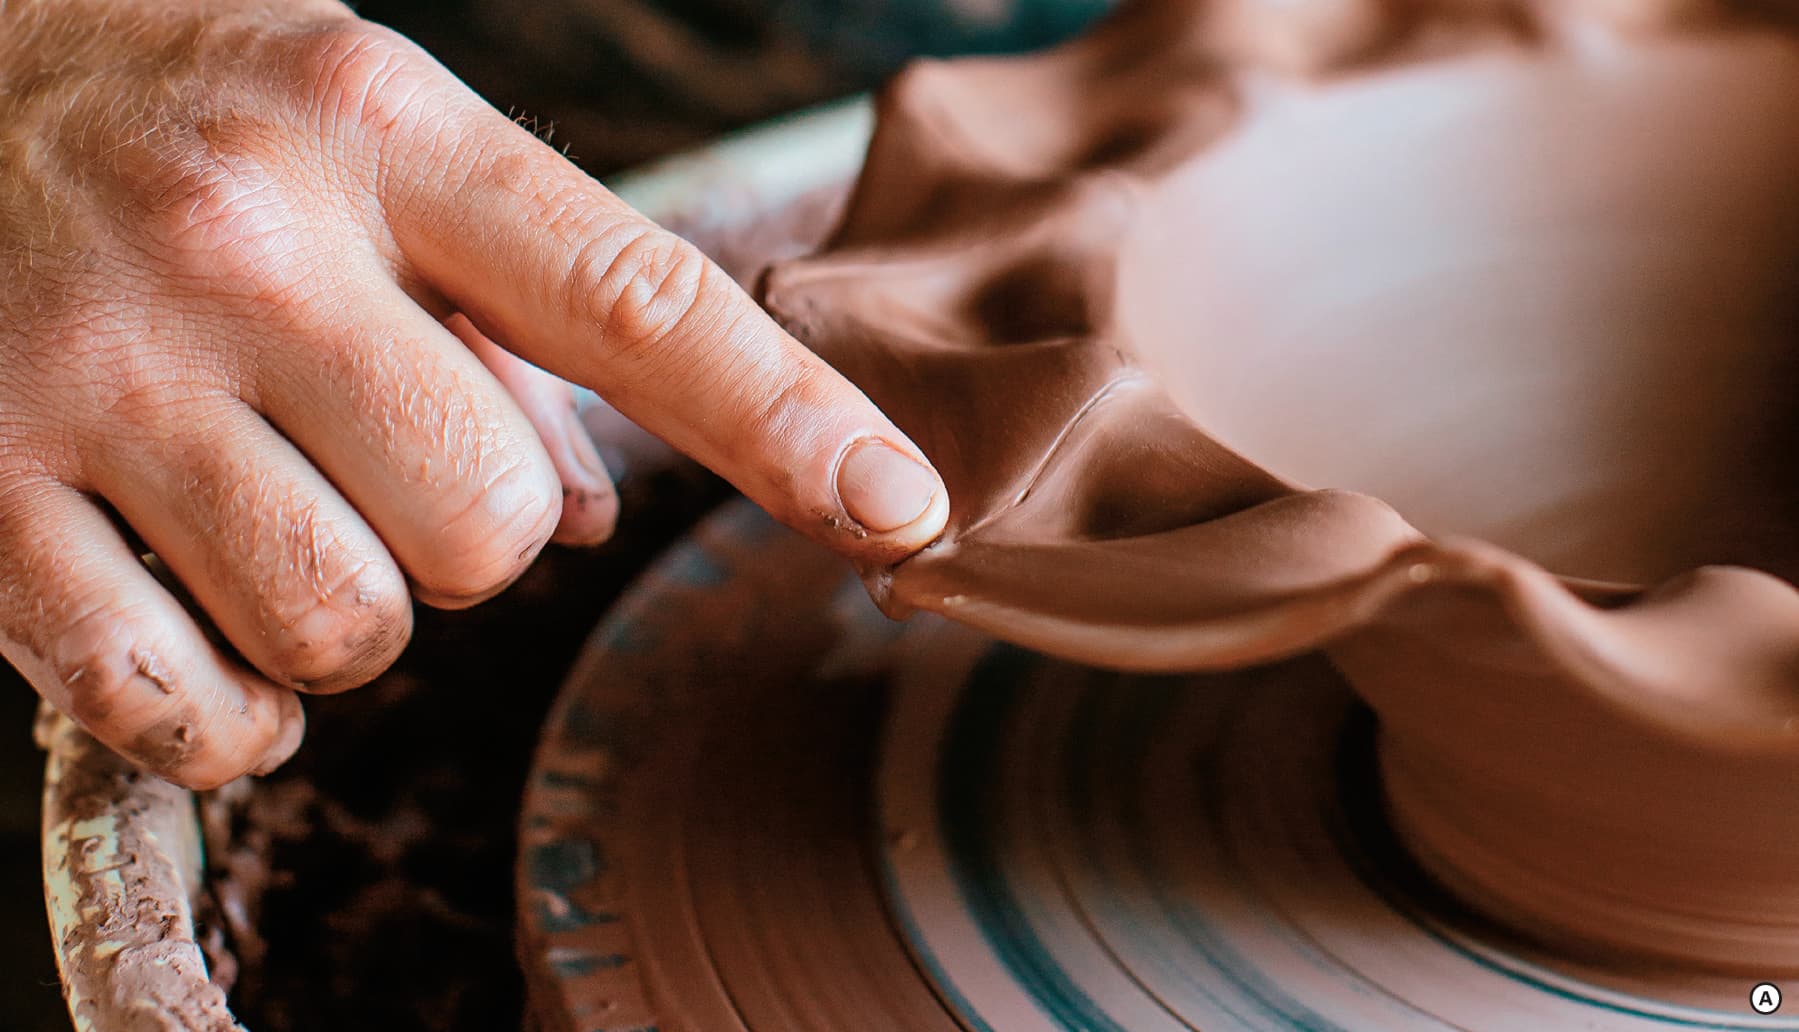
The main enemy of altered pots is water. Excessive surface moisture that’s present after you alter the form can seep into the walls, causing the form to collapse. Make sure to rib surfaces and/or use a heating device to dry the form before you alter it. The movements you initiate during altering will affect the strength of a curve as they will loosen the particles that were aligned during the throwing process. A round thrown bowl will sustain a steeper curve than an altered one because both the interior and exterior of the form have been compressed into shape. By stretching the form away from round, you are weakening its structure. If you find your forms are collapsing mid-process, try altering them when they are in a drier state. A With practice you might stretch a soft, leather-hard pot into shape with a rib better than you could alter it into the same form when it’s wet.
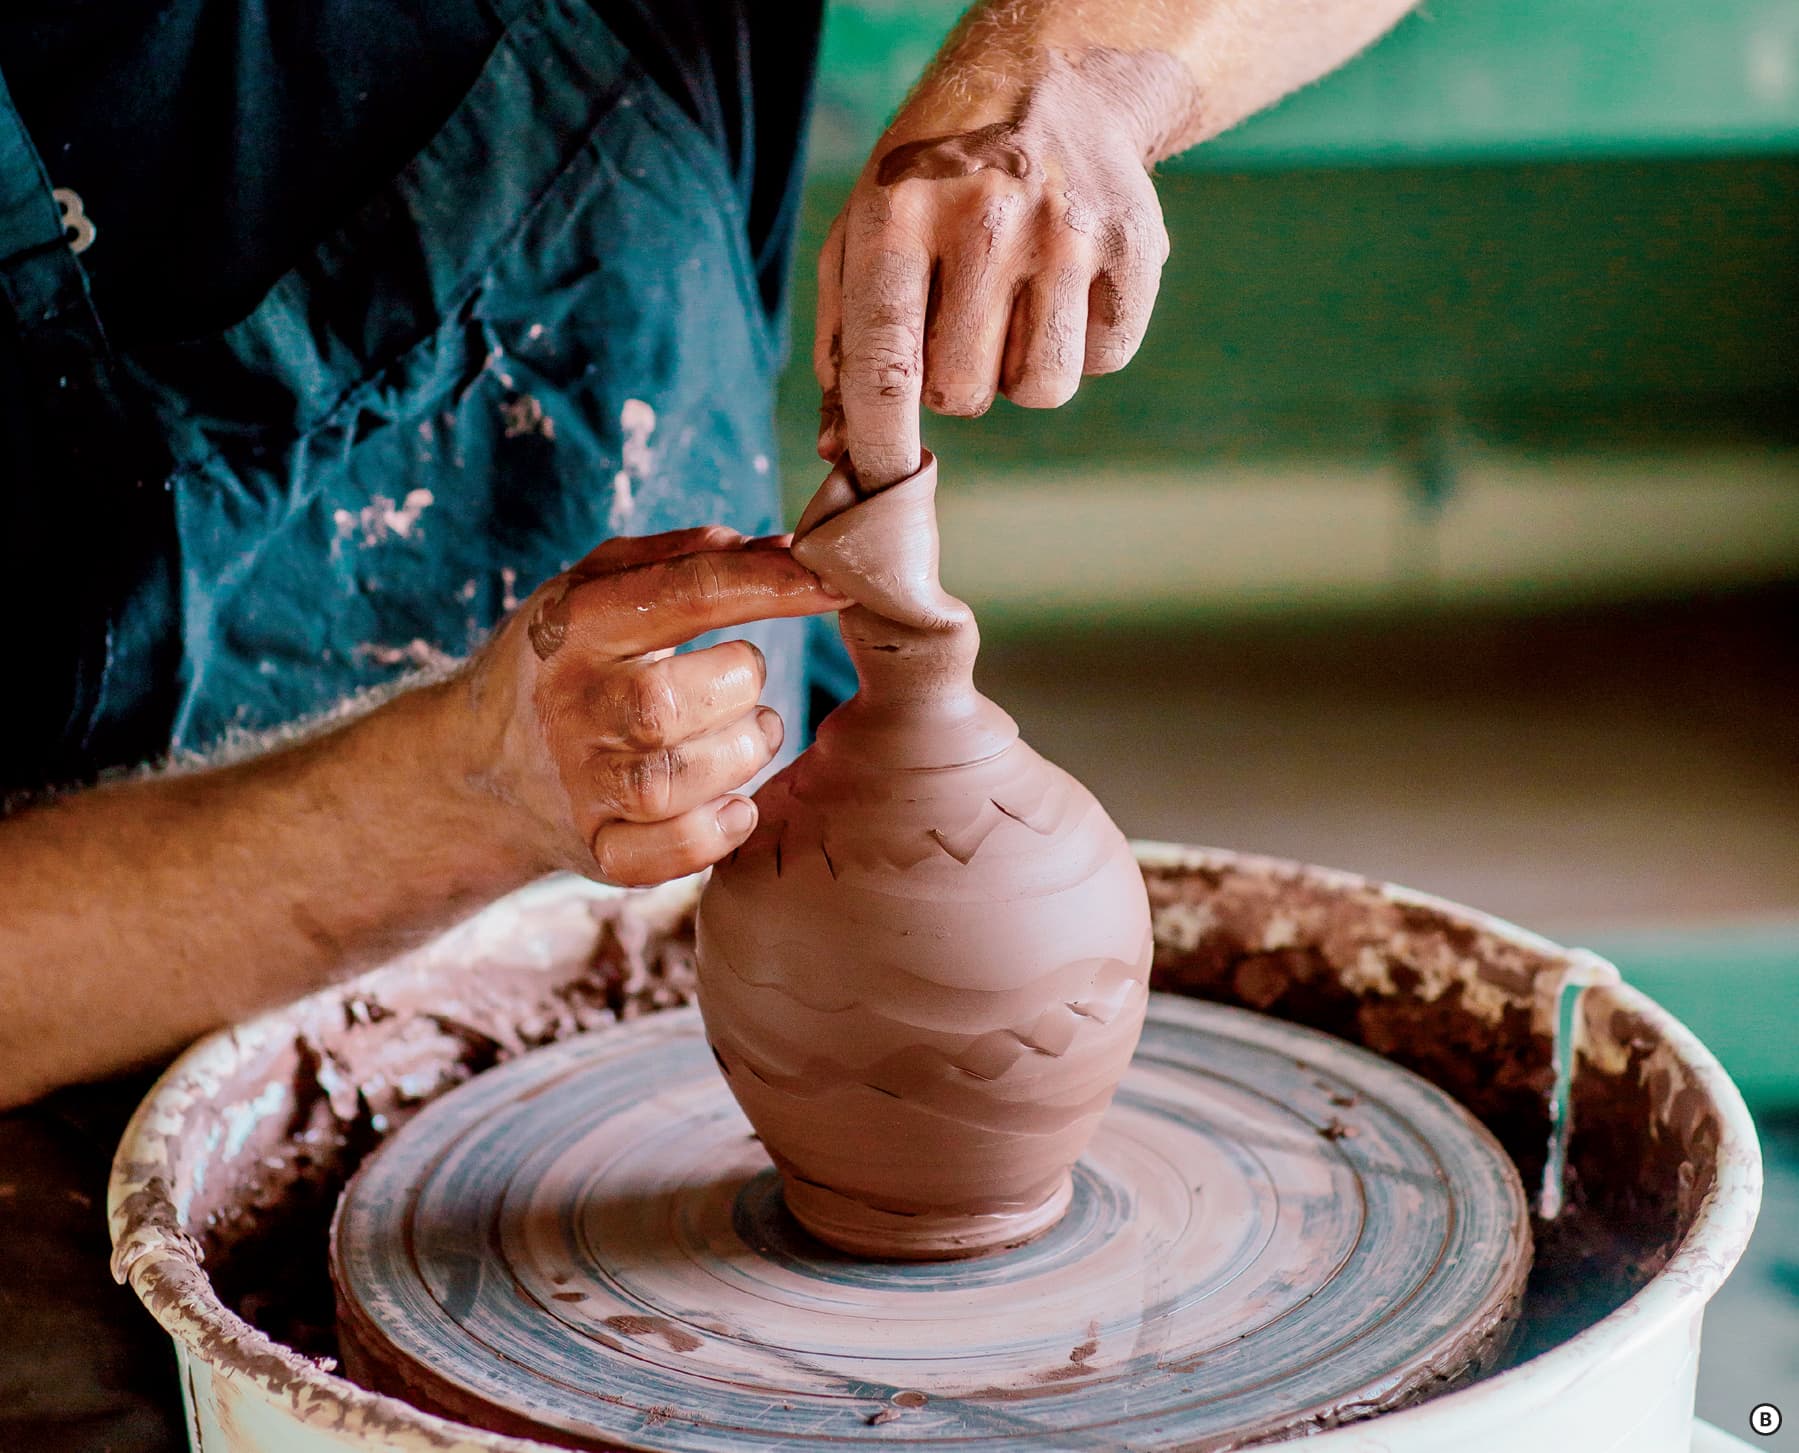
Alterations that require the wheel in motion will cause stress in the clay wall. The pressure you exert during the alteration will increase friction at the top of the piece, creating a diagonal torque line. B This area of weakness in the clay wall forms to relieve the pressure of the top of the pot spinning slower than the bottom. Many torqued pots can be fixed by pushing out on the clay wall from the inside. This will thin the wall, shaping the pot outward into a convex curve, which might correct the torque. Other times the torque will result in a more severe fold that will cause the clay wall to fail.
When it comes to shapes, consider the line quality of an altered pot. A thrown and altered square will have a more relaxed feeling than a similar slab-built form. Starting from a round shape imbues the form with a soft quality that can either be accentuated or removed during the altering process. To make the edges of your alteration harder, you can refine them at the leather-hard stage with a rubber rib.
Squares, triangles, hexagons, and other geometric shapes are just a few forms that can be made from a pot that starts off round on the wheel. Think about how planes and angles will be created during the alteration process. Geometric alterations create decorative space that can be utilized later in the process. Consider how a complex form might be decorated versus a simpler version. When working on a new series, I will often make two versions of the same pot with similar proportions but different levels of alteration. For example, try making a square teapot alongside a hexagonal teapot so that you can compare how a more complex alteration affects the pot. I’ve noticed larger forms like serving bowls can sustain a complex alteration while smaller everyday pots are more successful with less alteration. After trying the methods in this chapter, you will no doubt come up with your own design philosophy and comfort level with altering.
WET ALTERING ROUND FORMS
This section highlights alterations to pieces that have just been made on the wheel. All of the techniques will change the silhouette of the pot, but will not move the basic shape off round. Think about these methods as a foundation that will be further developed as you progress onto other techniques later in the chapter.
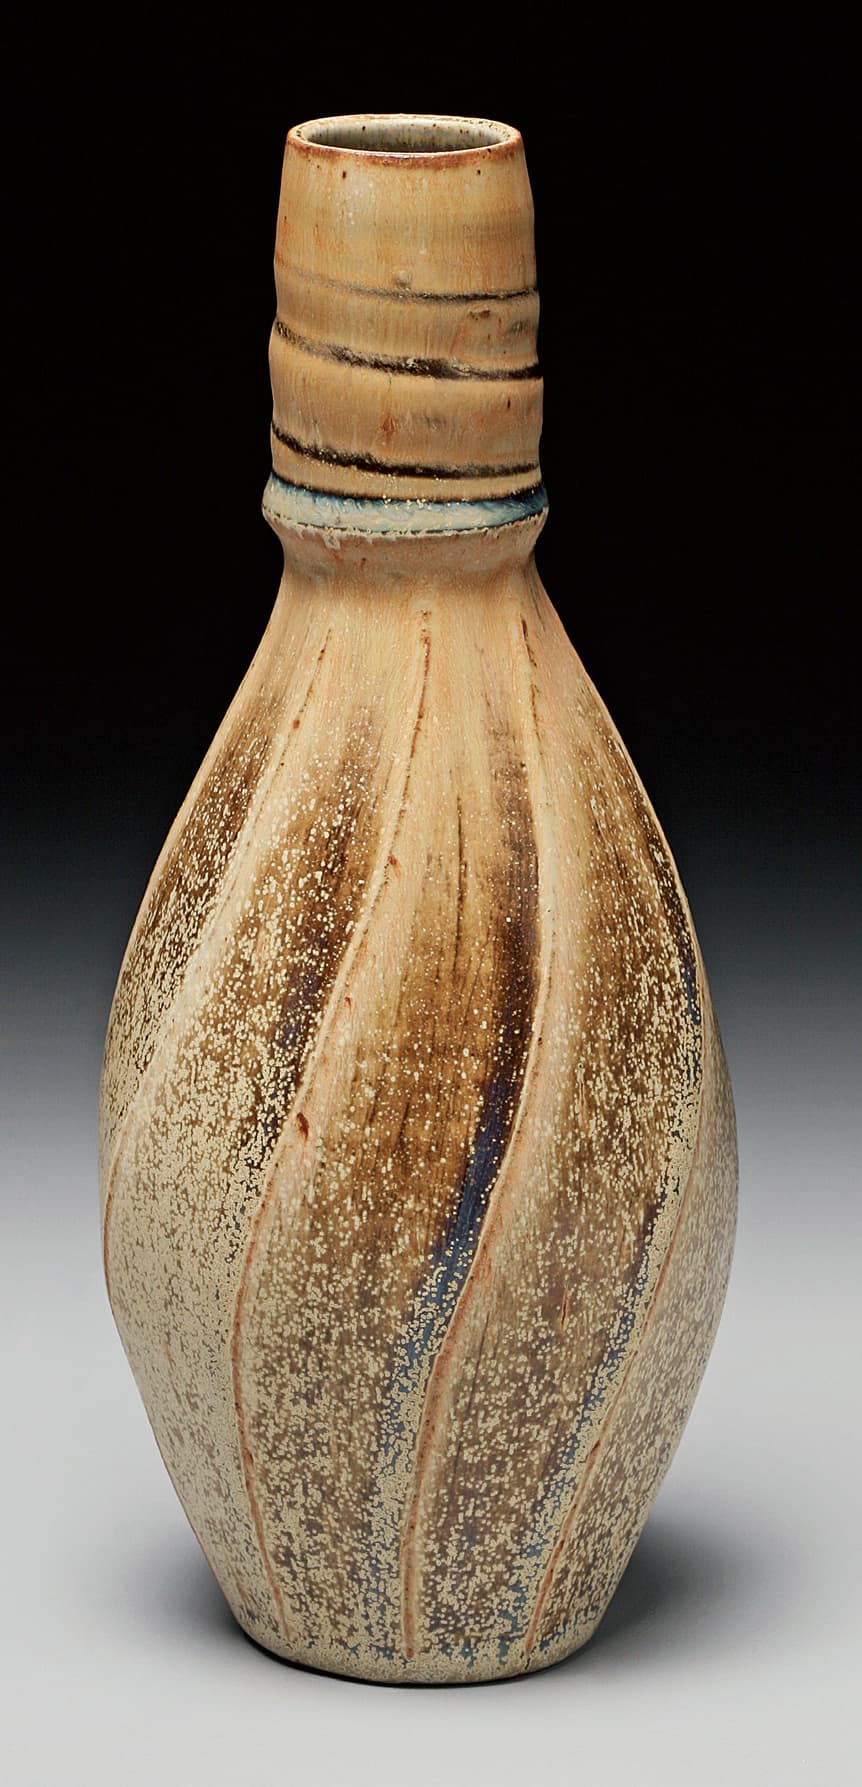
This bottle form by Ellen Shankin shows both a horizontal and vertical alteration of a round form. Photo courtesy of the artist
FREE-FORM ALTERATION
Free-form alteration is a fun way to break your desire for perfectly round forms. The term free form can mean many different things, so I will loosely define it as any alteration that changes the silhouette of the form in an irregular way. If you’ve seen a potter poke outwards from the inside of the form, you’ve witnessed free-form alteration.
Before starting a free-form alteration, I recommend sketching a basic silhouette of your form. This will be a starting point from which you will continue to work. You might think about maintaining symmetry through a pattern-based alteration, or conversely, design an asymmetrical pot that leans out over its base.
Throw the core shape focusing on the form’s proportions and maintaining walls that are substantial enough to sustain your desired shape. With clean, dry hands manipulate the form into shape. Allow yourself to improvise as you respond to the material. Consider shaping the form with a soft rubber rib from both the inside and outside.
Fingerprints or imperfections that were made during shaping can be removed after the form dries to leather hard. You will have many opportunities to fine-tune the shape at later stages in the process, so resist the temptation to overwork the surface.
After the form has dried to leather hard, trim away excess clay. Subtractive methods leave distinct marks, so be aware of the subtle shifts in surface quality. You might apply a light texture to the form or smooth out the entire surface with a rib. For extreme angles, I recommend you compress the surface multiple times as the pot dries. This will reduce the chances of cracking or warping.
ADDING DESIGNS WITH RIBS
In the throwing technique section (shown here), I discussed using ribs to clean the surface as a part of the shaping process. In addition to this function, ribs can also be used to alter the silhouette of a pot or add texture. When used to make alterations, the rib replaces your fingers as the primary contact point for the pot.
Start with a basic shape, such as a round vase, and throw the form to the approximate dimensions you desire. Use a rubber rib to remove any slurry that might be on the surface. A To enhance the effects of the rib, it’s best to start with a surface that is as clean as possible.
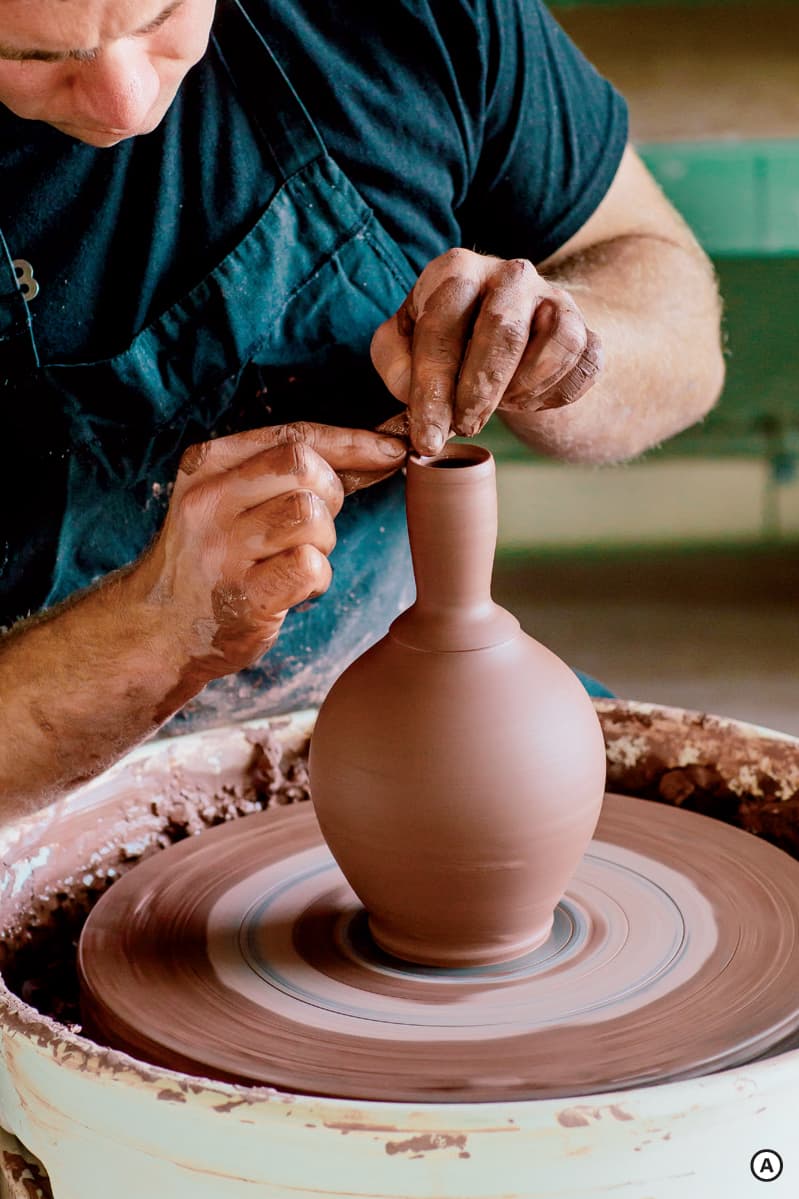
Using the flat edge of a metal or wooden rib, apply pressure to the surface as the wheel slowly spins. A smooth spiral can be made if your hand comes up at an even rate. An undulating line can be made if your hand wiggles up and down as the form rotates. B C
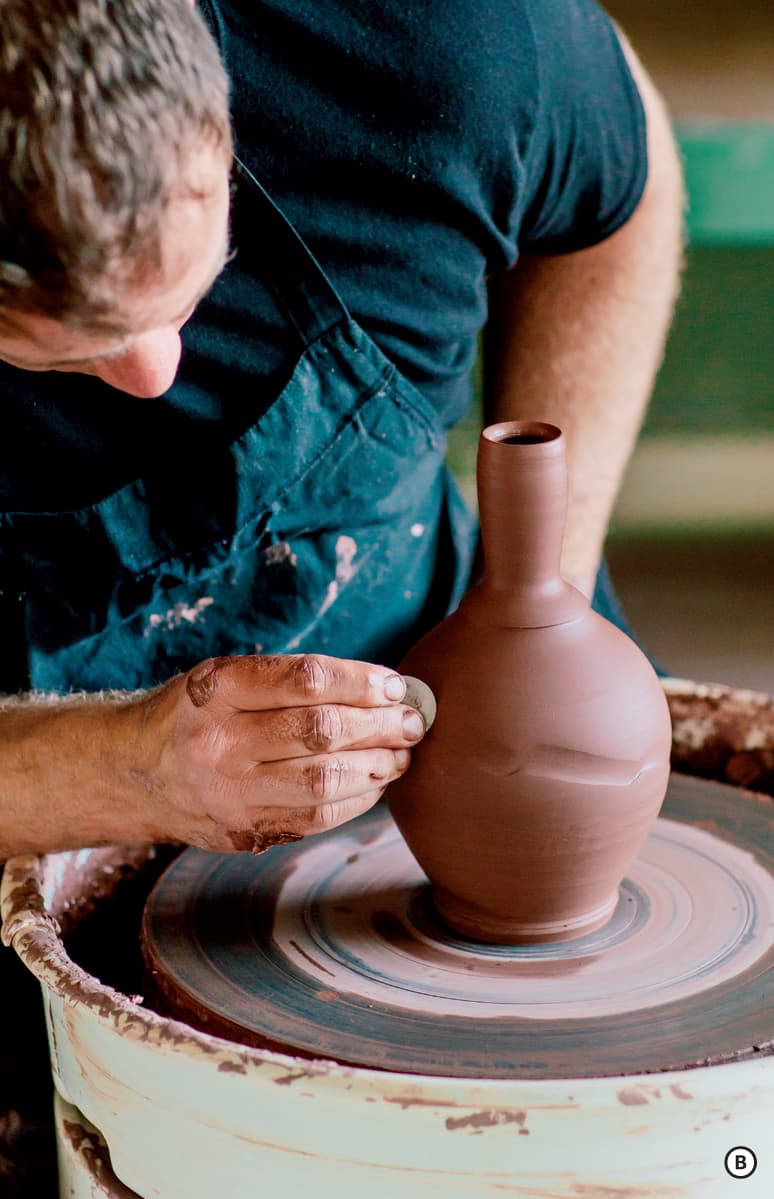
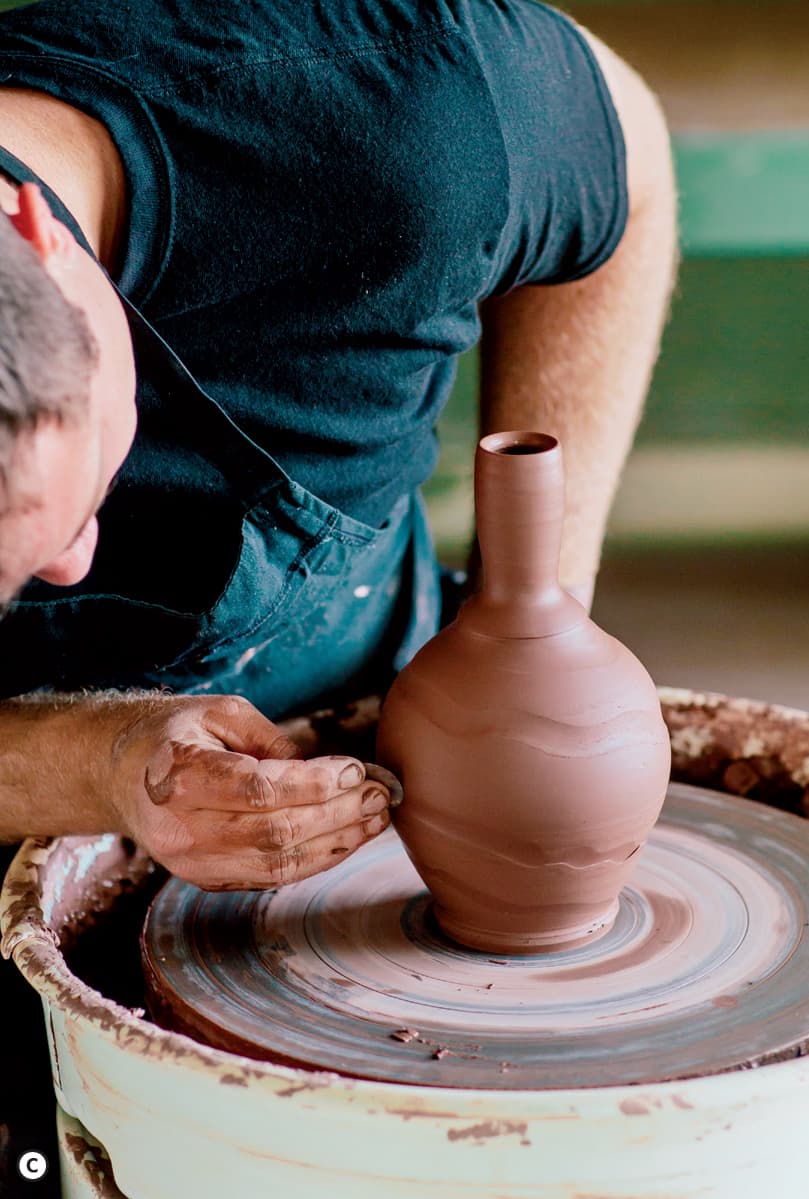
Consider how a convex form is affected by the inward alteration of the rib on the outside of a pot. The constraining force will decrease the volume of the pot as it spins. Think about how the same method on the inside of a concave form will increase the volume of the pot. Experiment with both to see which effect works the best on a variety of forms.
If you find you’ve created edges that are too sharp, swipe a wet sponge across the surface at the leather-hard stage. You can accentuate the crisp line left by the rib by using a glaze that will pool in the indention.
USING SLIP FOR A SOFT SURFACE ALTERATION
When altering pots, you might want to manipulate the surface of a pot instead of the core shape. You can achieve this by applying a thick slip texture that will affect the surface of the pot without diminishing its structural stability. This method is often referred to as applying a skim coat of slip. For this technique, you’ll want to prepare a thick slip that is the consistency of pudding from the same clay body that you are using to throw. To create the smoothest slip possible, sieve the material through an 80 mesh sieve to remove grog or other coarse particulates. Because you will be adding the slip’s moisture to the form, remember to start with leather-hard pots.
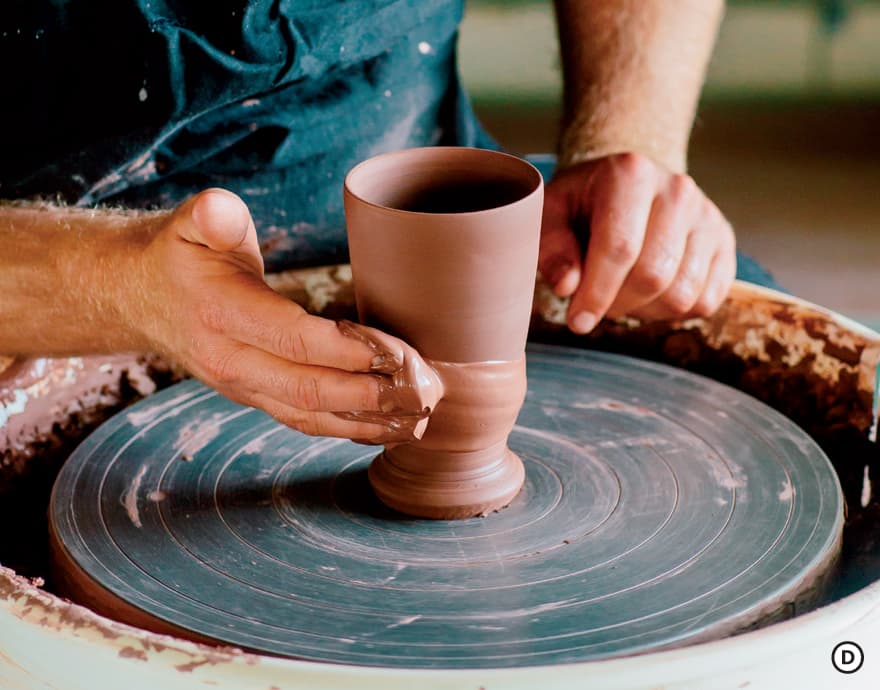
To give this a try, throw a form with a slight convex shape. Allow the form to dry to leather hard. To apply a skim coat, start by centering your form on the middle of the wheel head. If necessary, secure the foot in place with coils of clay. Place a bucket of prepared slip that is the consistency of pudding beside your wheel for easy access. Start the wheel so it’s spinning slowly and scoop up a handful of slip.
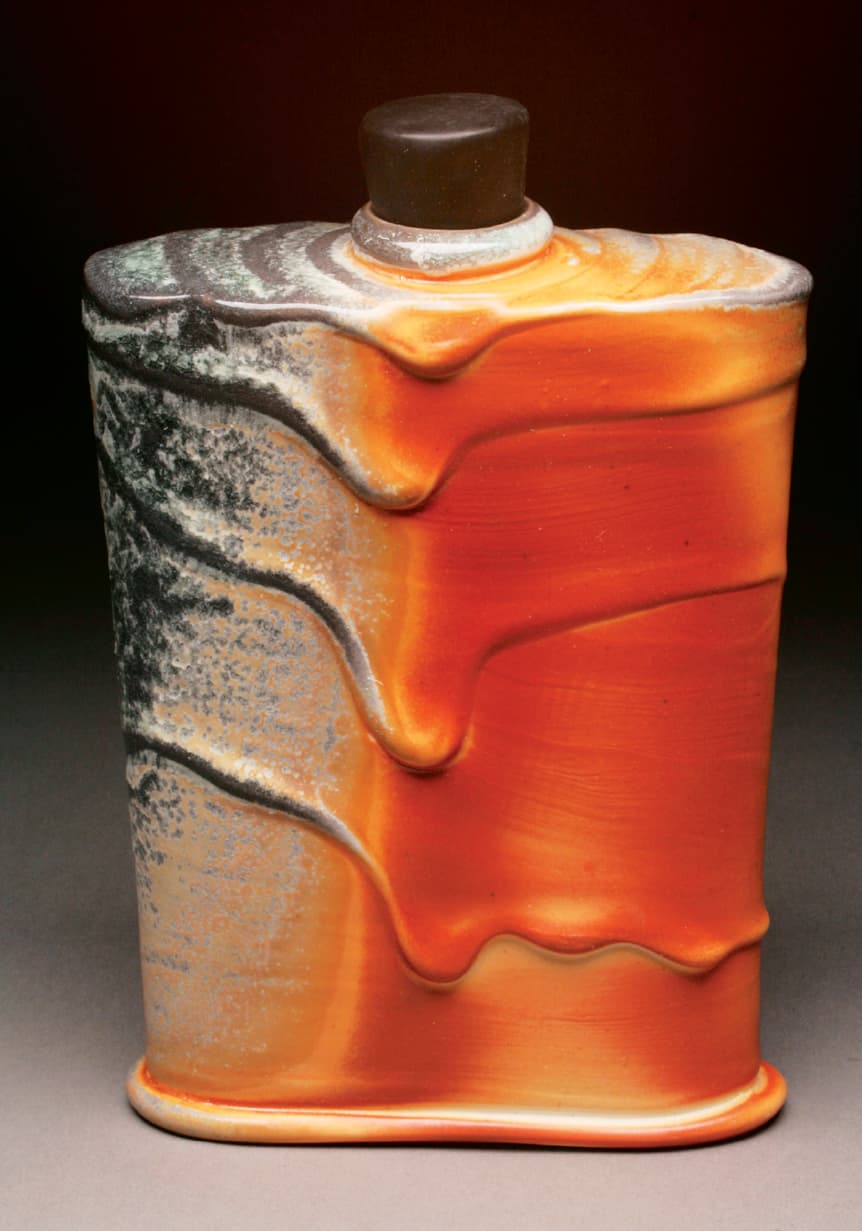
Matt Long uses the skim coat technique to apply porcelain slip to his flasks and bottles. Photo courtesy of the artist
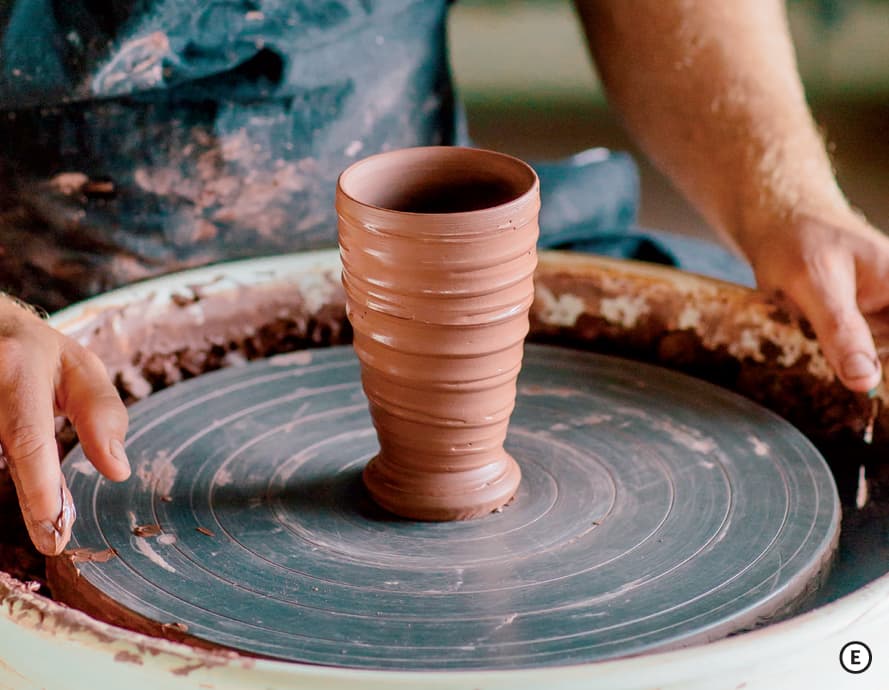
Apply the slip to the pot. D E Experiment by moving your hand up and down as the wheel spins to create a wavy surface. A thicker application of slip makes for a more exciting texture, but be mindful of shrinkage. The thicker the slip goes on, the more likely it will be to crack during drying. Also be aware that adding thick slip will add more weight to the finished pot.
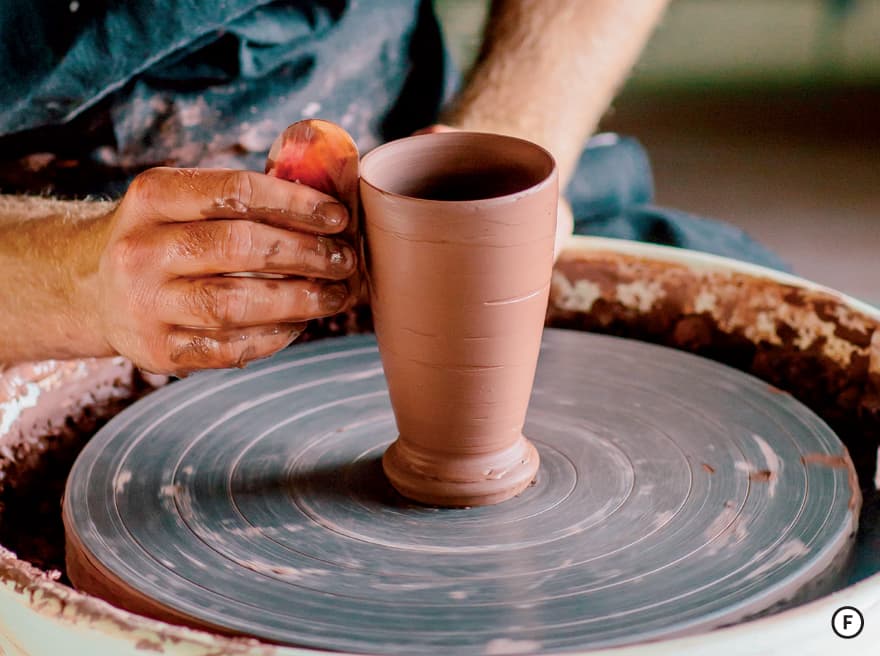
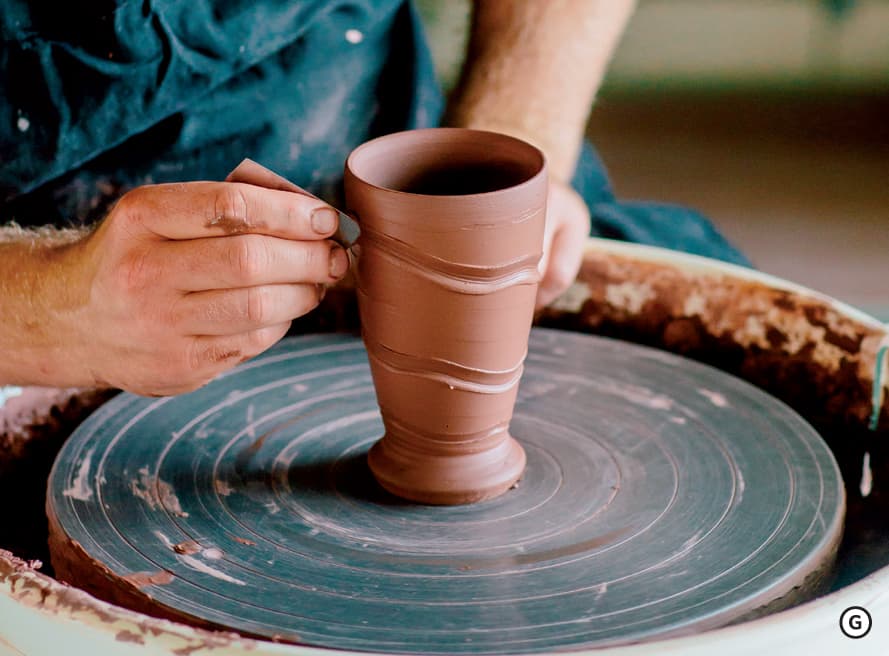
If you are not satisfied with the texture of your slip, you can use a rubber rib to smooth the slip back into one smooth, even coat. F Think of this as a blank canvas for other patterns, or try using a metal rib or other tool to create a dragged texture in the surface of the slip. You might also try combing the slip with a plastic tool for an aggressive texture. G You can even use quick finger swipes to create a subtle pattern.
Skim coat decoration can also be used on an open form like a bowl. Apply slip to the top interior section of the form and use a rubber rib to create an even surface. For this demonstration, I am using a bowl that has a lip that tilts outward to form a border-like ring around the bowl. H
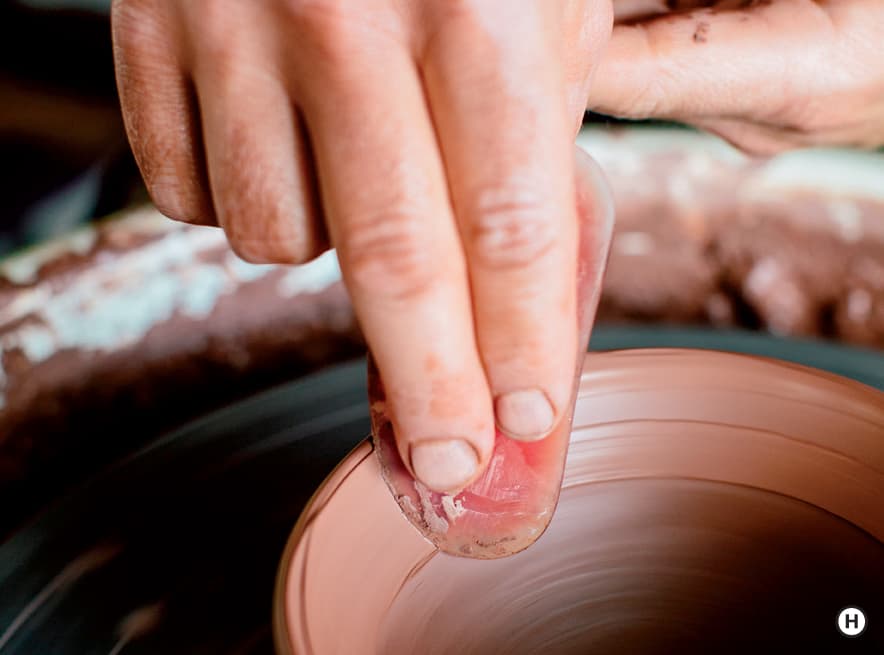
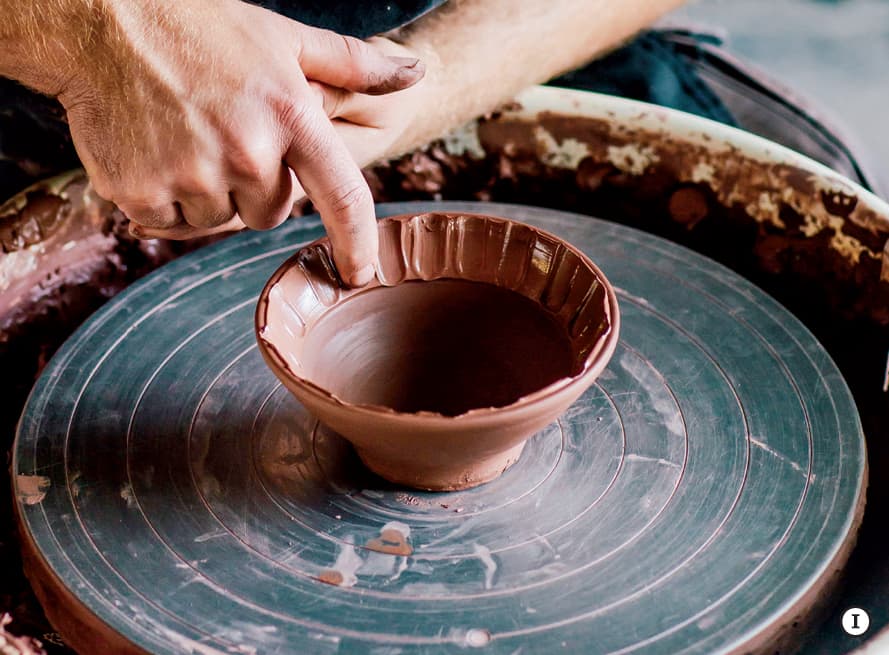
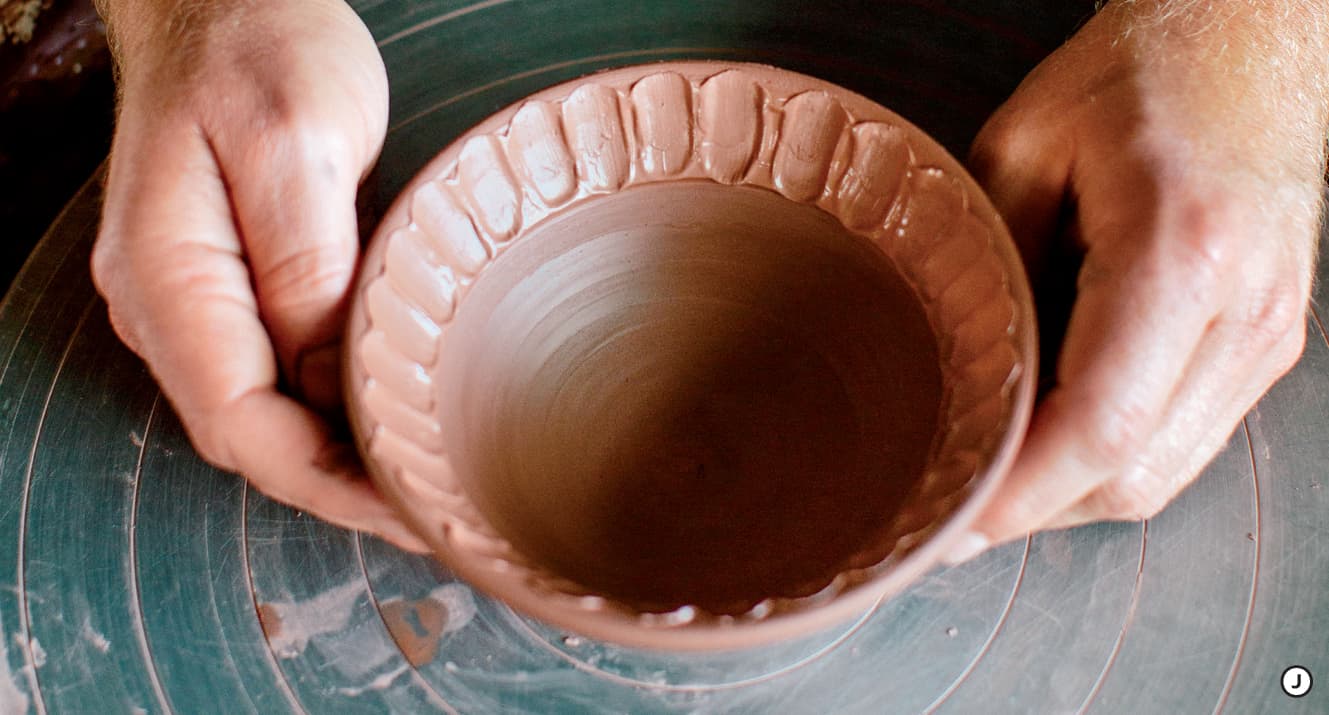
Using your middle finger, make a quick vertical finger swipe through the slip. I Continue around the form until the textured pattern is complete. J The interior of the bowl does not need additional decoration as the smooth surface provides a nice counterbalance to the active pattern of the rim. This also leaves room for the colors and textures of the food to be the final decoration for the form.
ALTERING BASED ON GEOMETRIC PATTERN
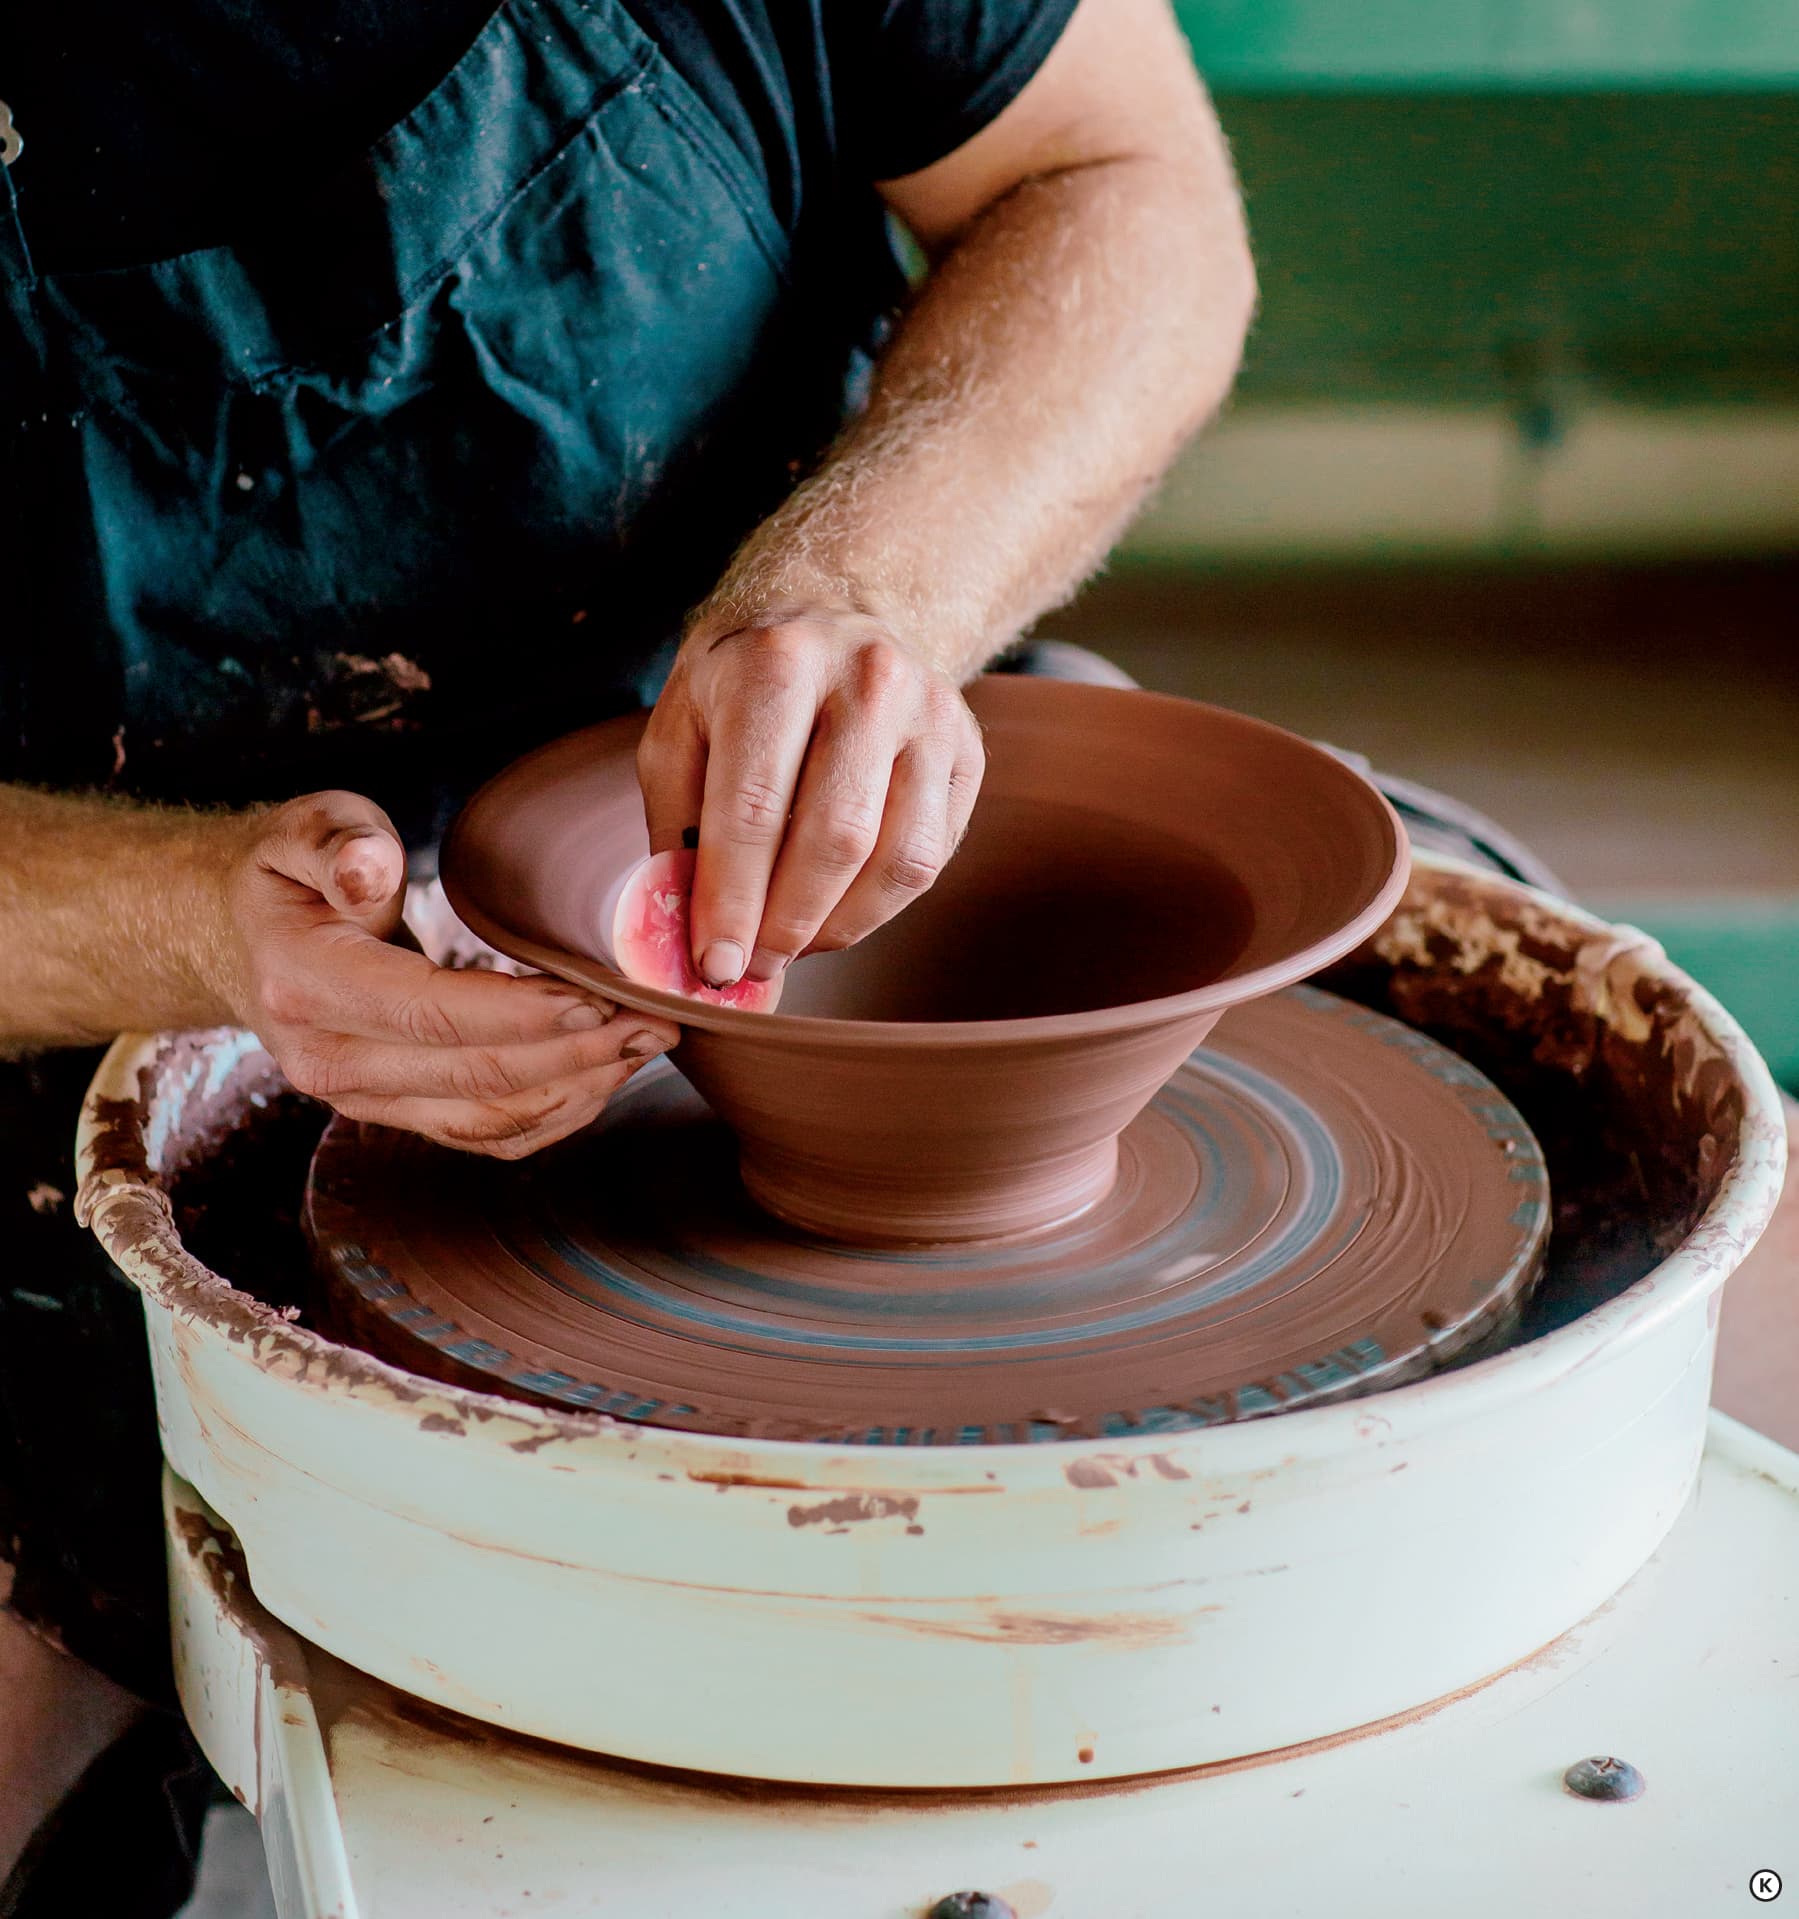
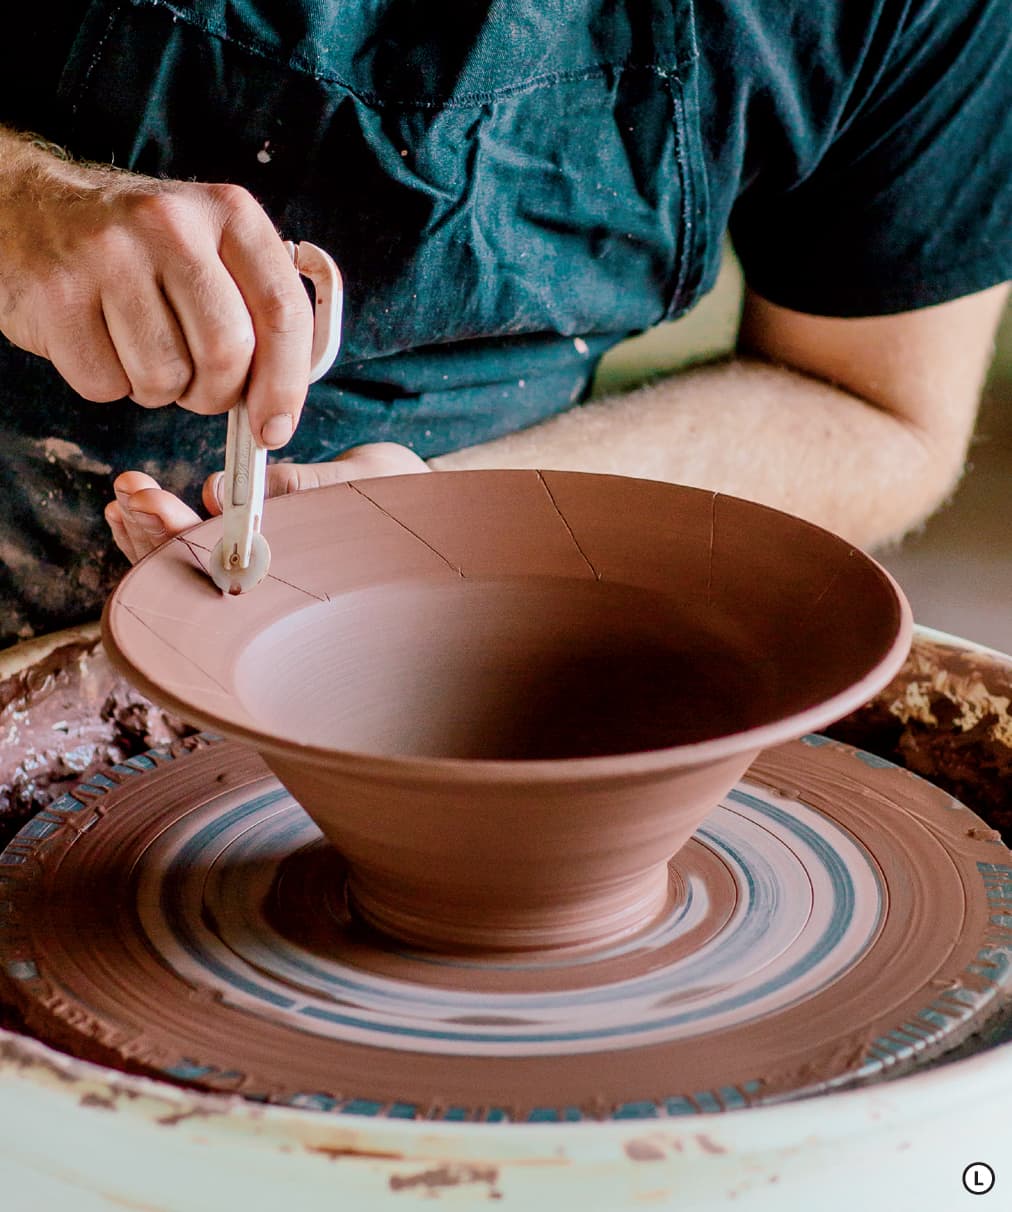
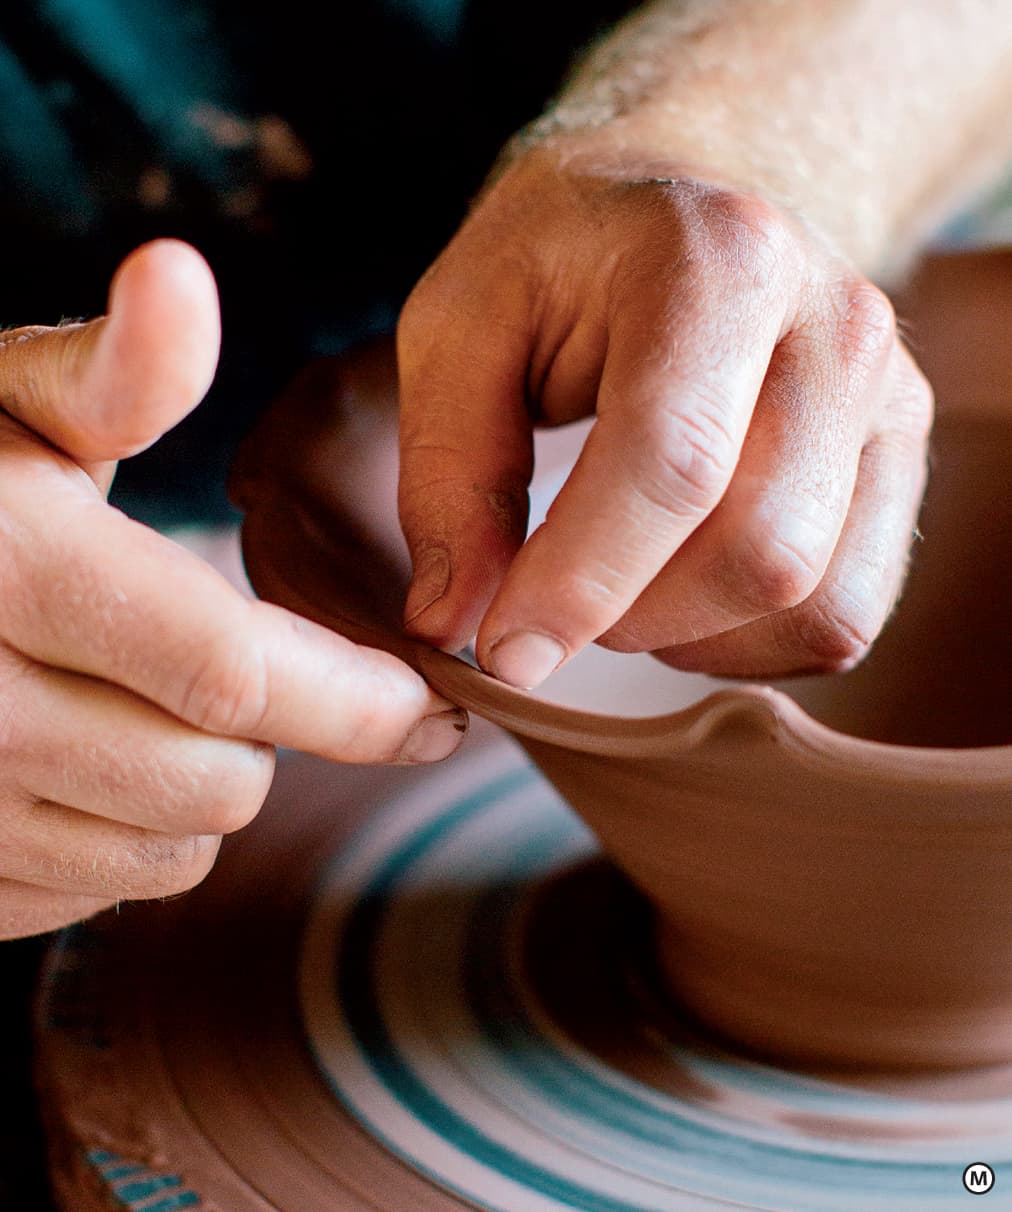
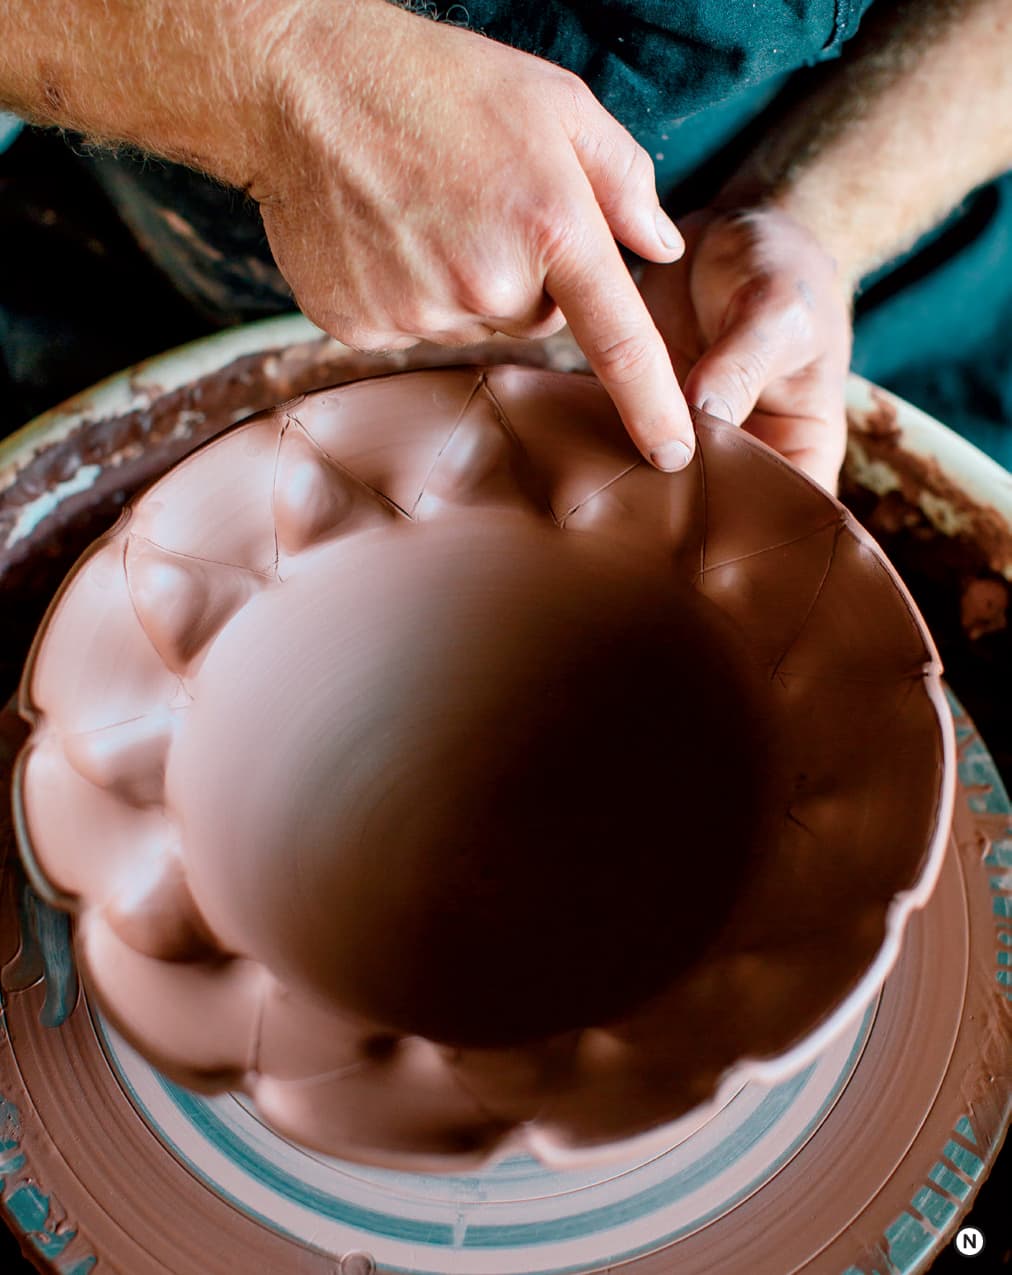
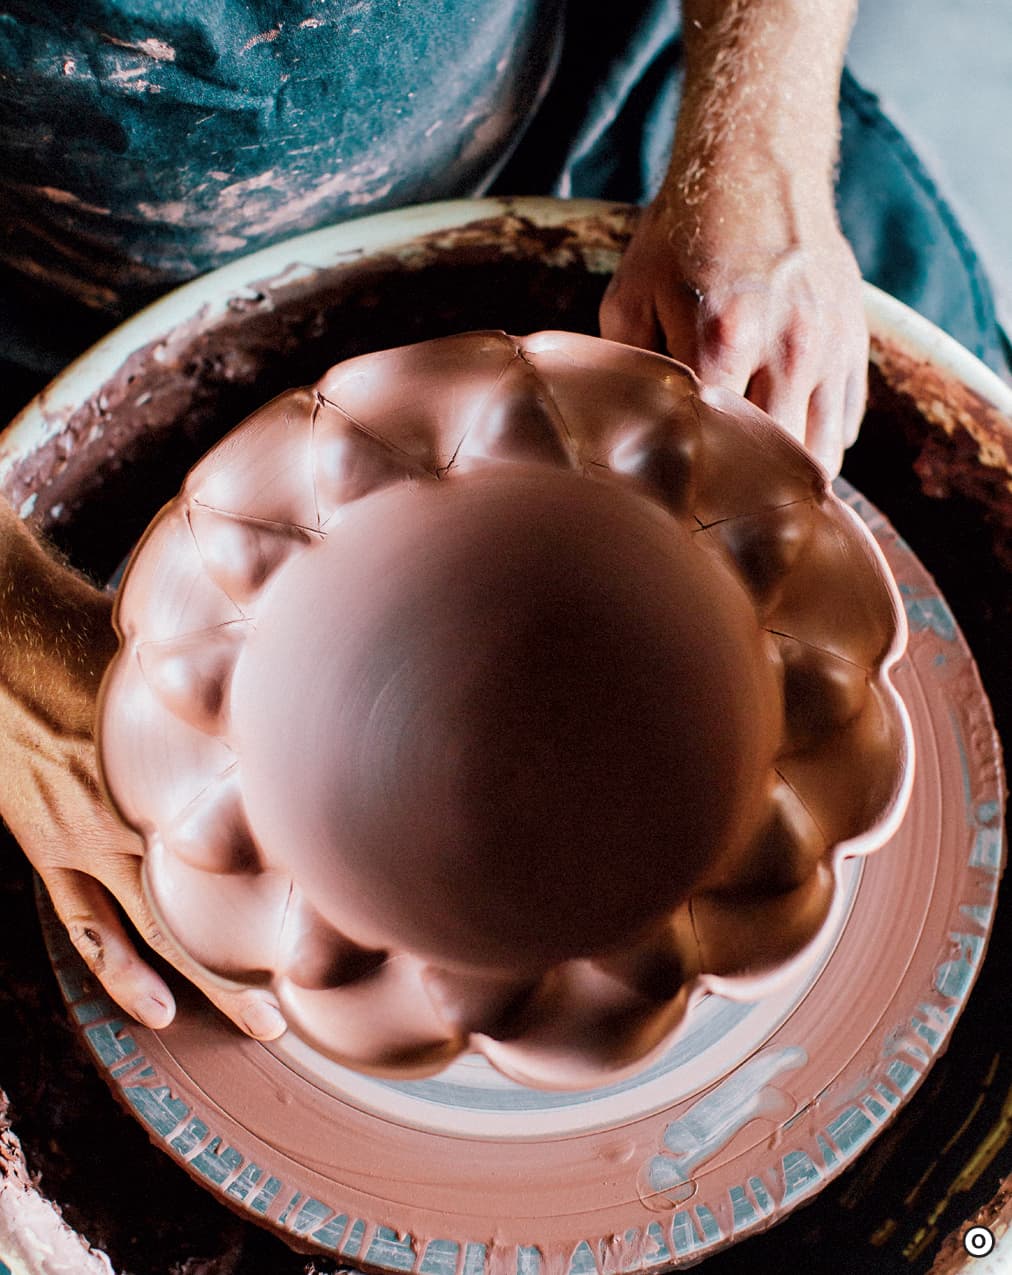
One of my favorite ways to wet alter is to draw a two-dimensional pattern with a roller tool and then push it into three dimensions. This style of alteration can cause a lot of stress to the body of the pot, so I often only do this on a rim or a defined section rather than the whole pot body.
Start with a bowl form that has a sectioned flat rim. K Draw a pattern, in this case a border of triangles, around the rim of the pot. L Push up to form scallops at the points where the triangle hits the rim and the interior border. M Supporting the underside of the rim, work your pointer finger back and forth on the triangles that make up the interior border. N The combination of upward and downward alteration turns this two-dimensional triangular border into a dramatic three-dimensional rim. O
MAKING OVALS
The techniques you just learned accentuate wheel-thrown forms while maintaining an overall round shape. These next sections will instead introduce ways for altering pots off-round. We will start with an oval form, which is a nice transition into bilateral symmetry.
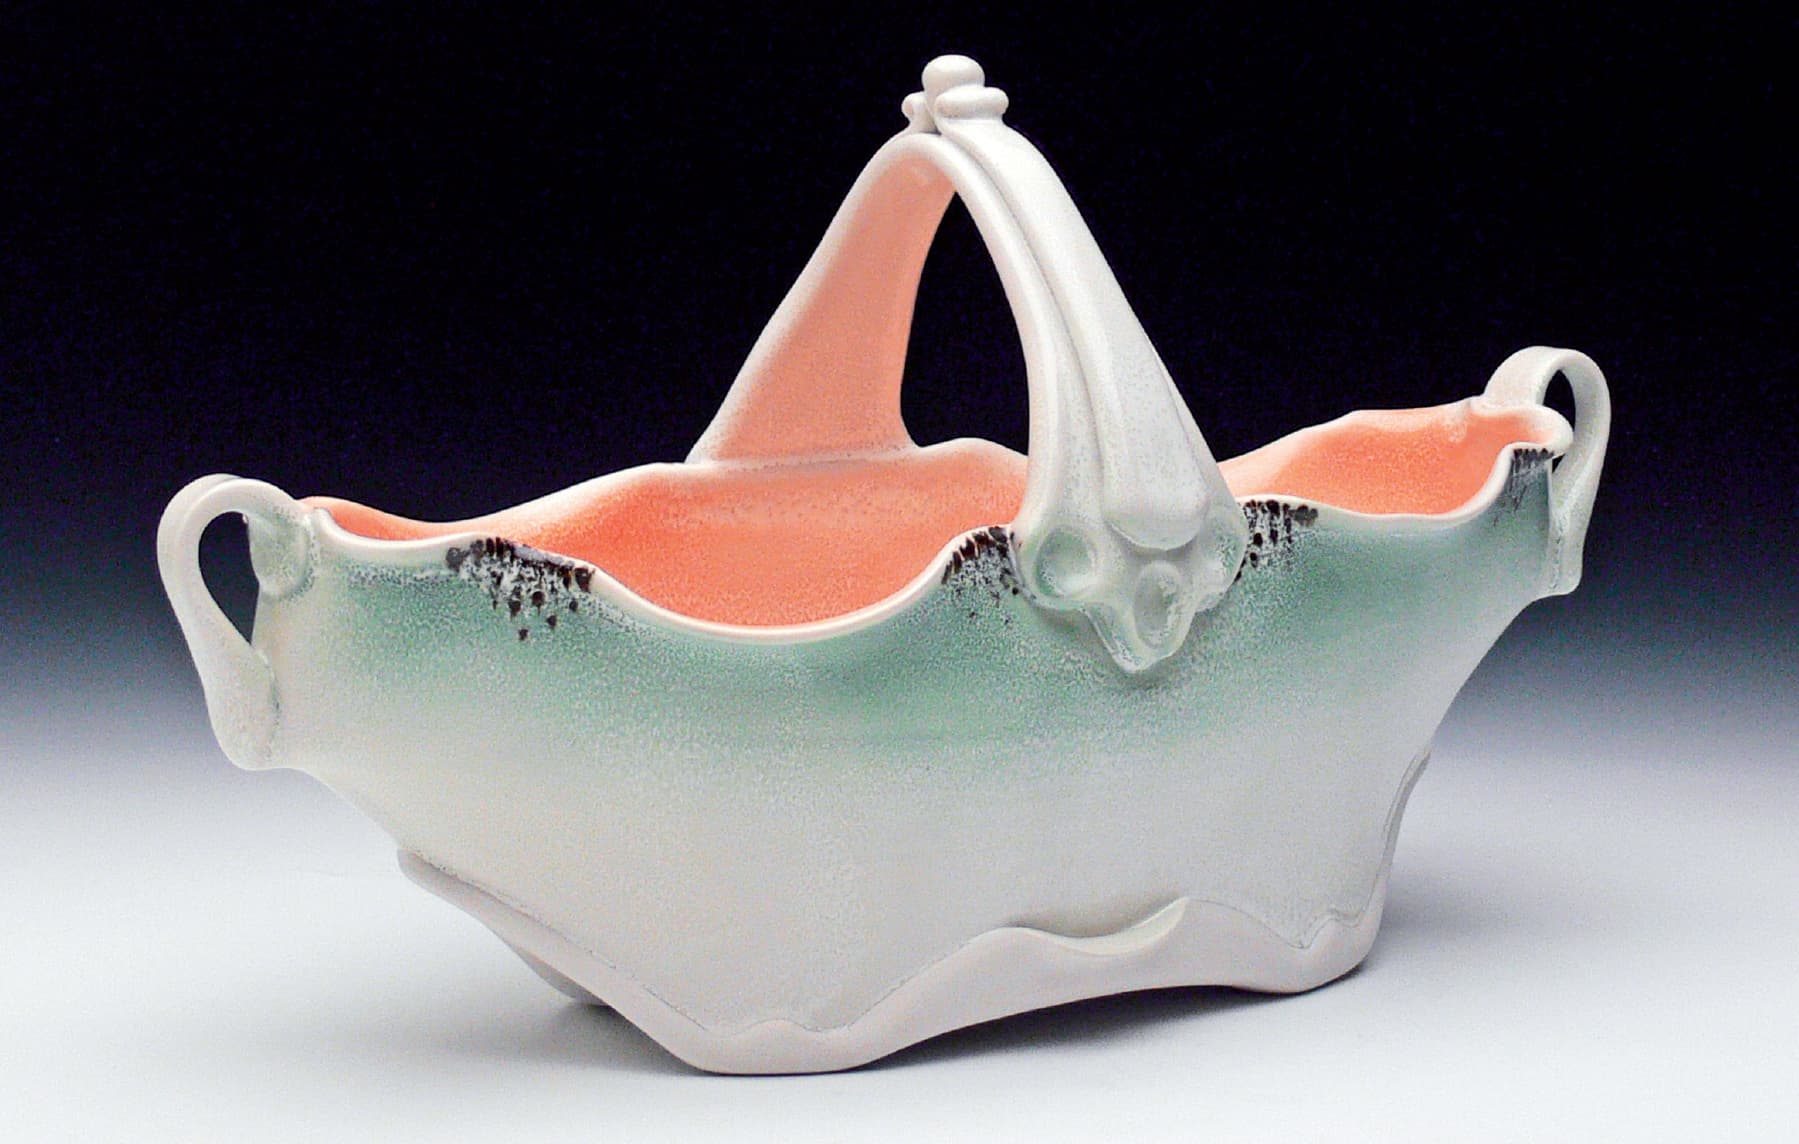
Moving off round into an oval shape is a great way to create an energetic form. Martha Grover’s oval server is a graceful example of an oval form that has been accentuated by its foot, rim, and handle. Photo courtesy of the artist
There are two ways most potters make oval forms, and I’ll demonstrate both. I will start with the willow leaf method, a reductive method where clay is removed during the alteration process, and then move onto a bottomless oval. I find both to be effective for creating elongated ovals that are much longer than they are wide. When trying these techniques you will alter the pots right on the wheel head when the clay is the most wet and plastic.
THE WILLOW LEAF METHOD
Throw a bowl with a rim that is not more than twice the width of the foot. You can change the proportions after you master this technique, but starting with a shallow curve will help you get the hang of it the first time. When opening, leave 1/4 inch of clay in the bottom of the form. Let the bowl dry until your fingerprints are not left on the clay but the rim is still flexible.
Now you’ll see why this technique draws its name from a willow leaf: the leaf has the ovoid shape you will remove from the base of the pot! A While the pot is attached to the wheel, use a sharp knife to cut an elongated oval down through the interior base of the pot. Drag a wire underneath the pot, releasing the piece from the surface of the wheel. Remove the cut central area of clay and put it to the side. B Slip and score the edges of the oval hole.
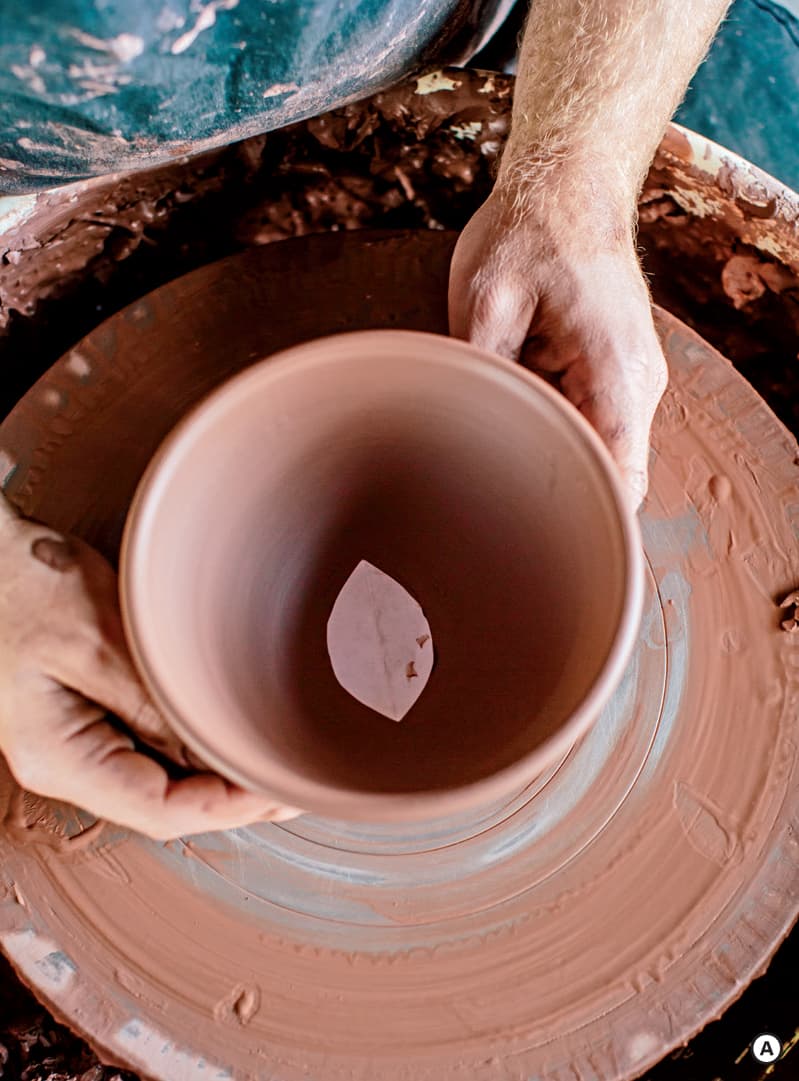
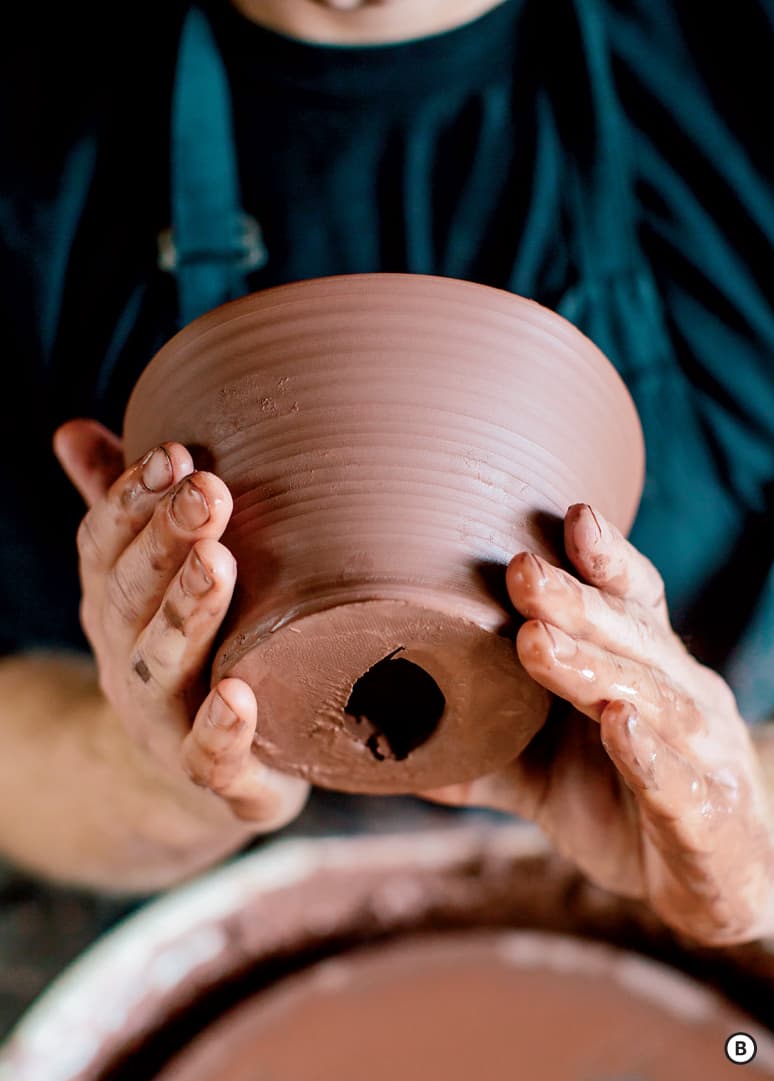
Place water on the wheel head and redrag the wire. The pot should now move freely. Place your hands parallel to the edges of the leaf and push inward, but make sure the floor of the pot remains down against the wheel head. As the base comes into an oval shape, allow the rim to distort. Continue to work the base inward until it closes together. C If there is a dent in the interior of the form, take the oval piece of clay you removed and apply it above the connection point. Use a rubber rib to smooth the surface into a continuous curve.
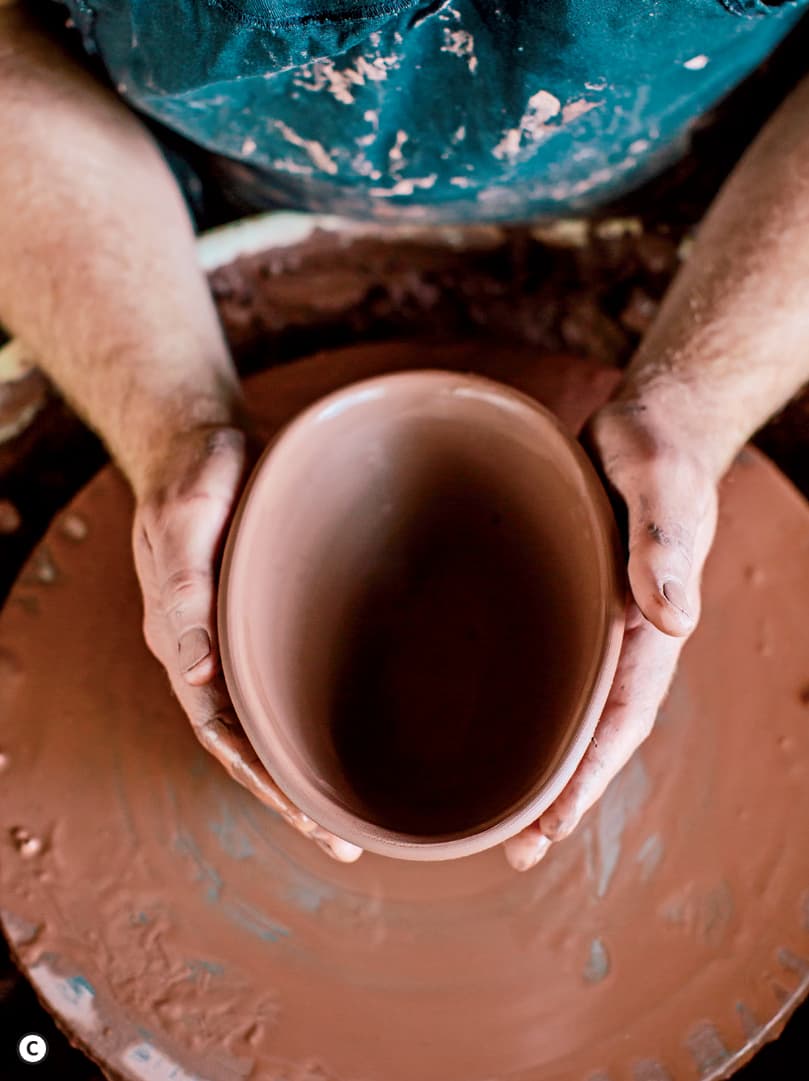
To shape the rim, push just below the lip to create an oval shape similar to the foot. In the beginning, try not to touch the top edge of the rim as it will “remember” any harsh movements. After a general shape has been established, move a wet finger or chamois cloth around the rim to refine the shape. It is common for the section of the rim that is above the long side of the foot to tilt up, resulting in a pot that will not rest flat when turned over. These elevated features can be a nice part of the design, but they could also be cut off for a flat rim.
After the piece dries to leather hard, trim by hand with a metal loop tool. (See here for more in-depth information on trimming a form like this.) Consider using a wire cut-off tool to facet a four-pointed foot into the base of the pot. This will create negative space under the form giving it visual lift.
THROWING WITHOUT A BOTTOM
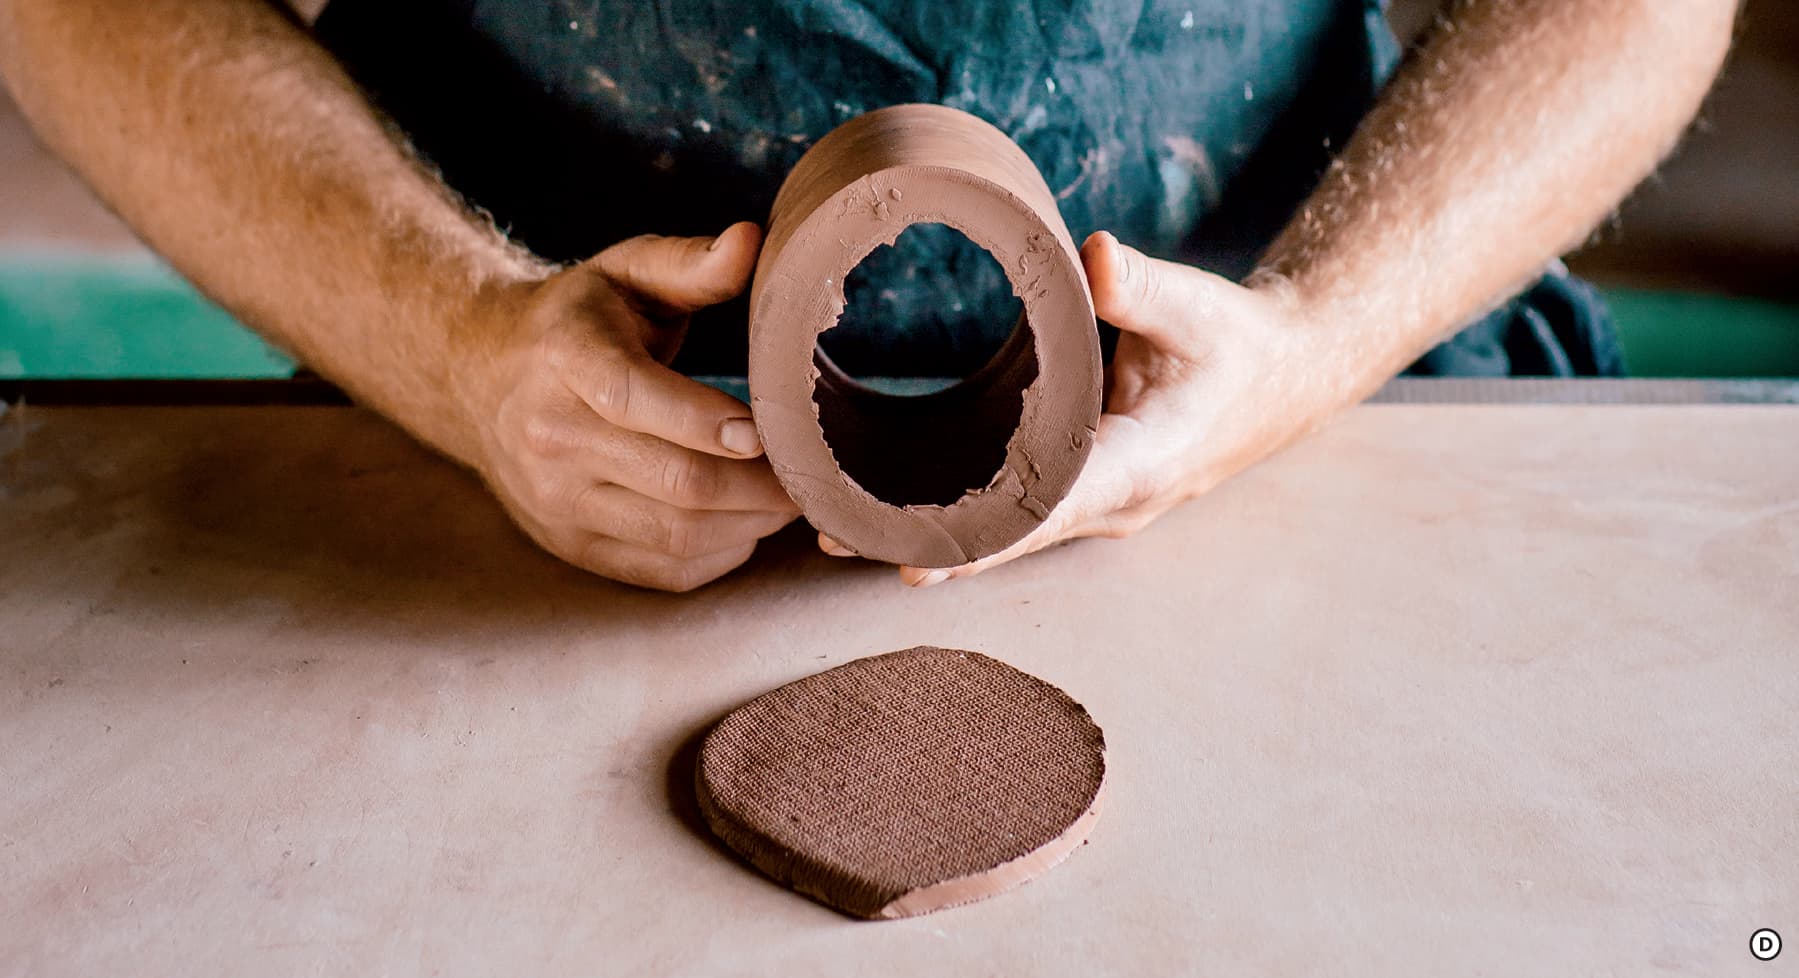
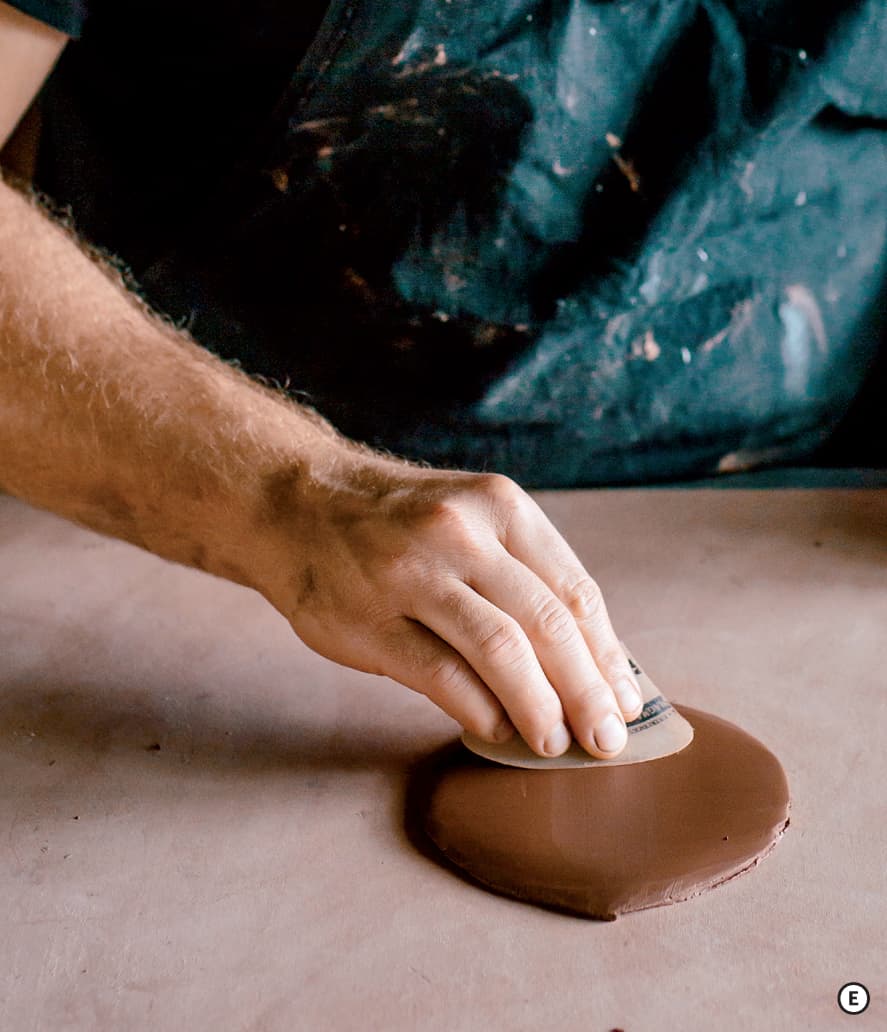
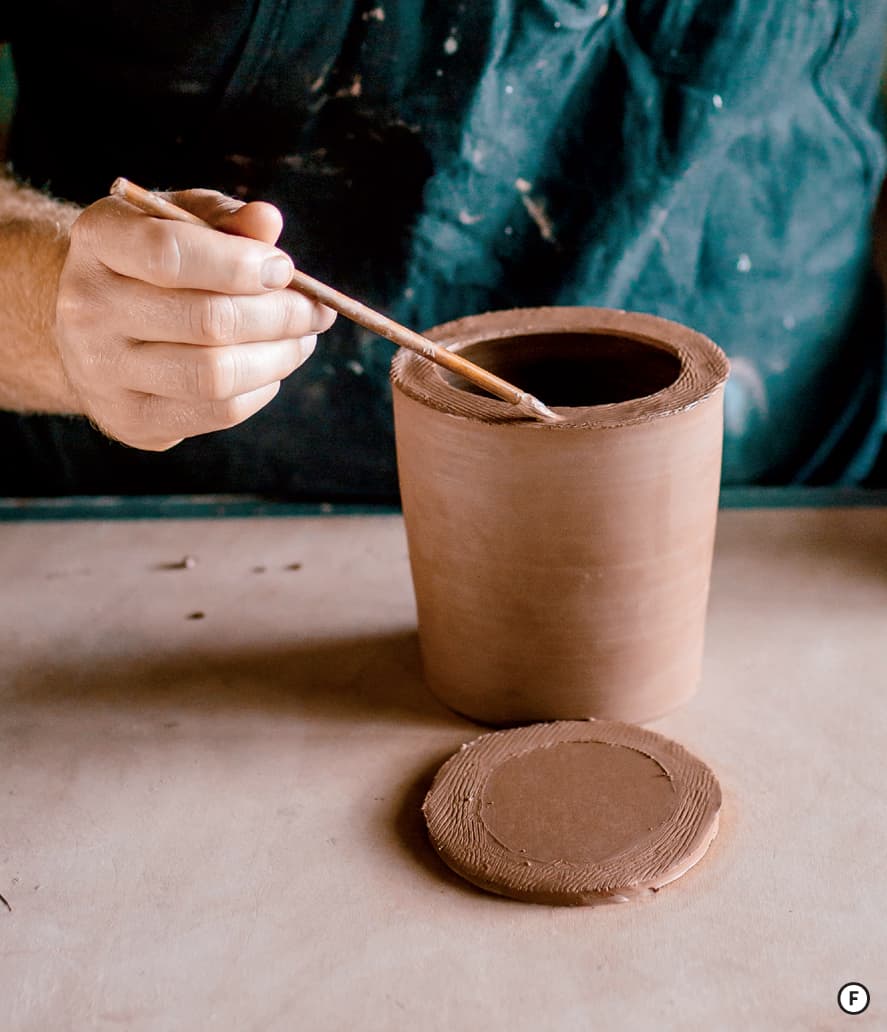
No lid: Another method for making an oval is to throw a straight-sided cylinder with no bottom. After dragging a wire underneath the form, you can move the pot into any shape. Manipulate the bottom of the form before moving the rim into the corresponding shape. Remove the piece from the wheel and let it dry to leather hard. Place the leather-hard piece on top of a 1/4-inch slab. Using the base of the form as a template, cut the slab to fit the form. D Use a plastic rib to compress the slab in all directions before attaching the slab to the bottom of the form. E Make sure to slip and score both sides of the joint for a strong connection. F
Lid option 1: Start by throwing a bottomless cylinder, but this time inset a gallery 1/4 inch down from the lip. Shape the form into an oval or any non-round shape. (See here for more on insetting a gallery.) As you push the bottom into an oval, make sure the gallery does not tilt downward in the crux of the curve. Attach the form to a slab at the leather-hard stage using the same method already described.
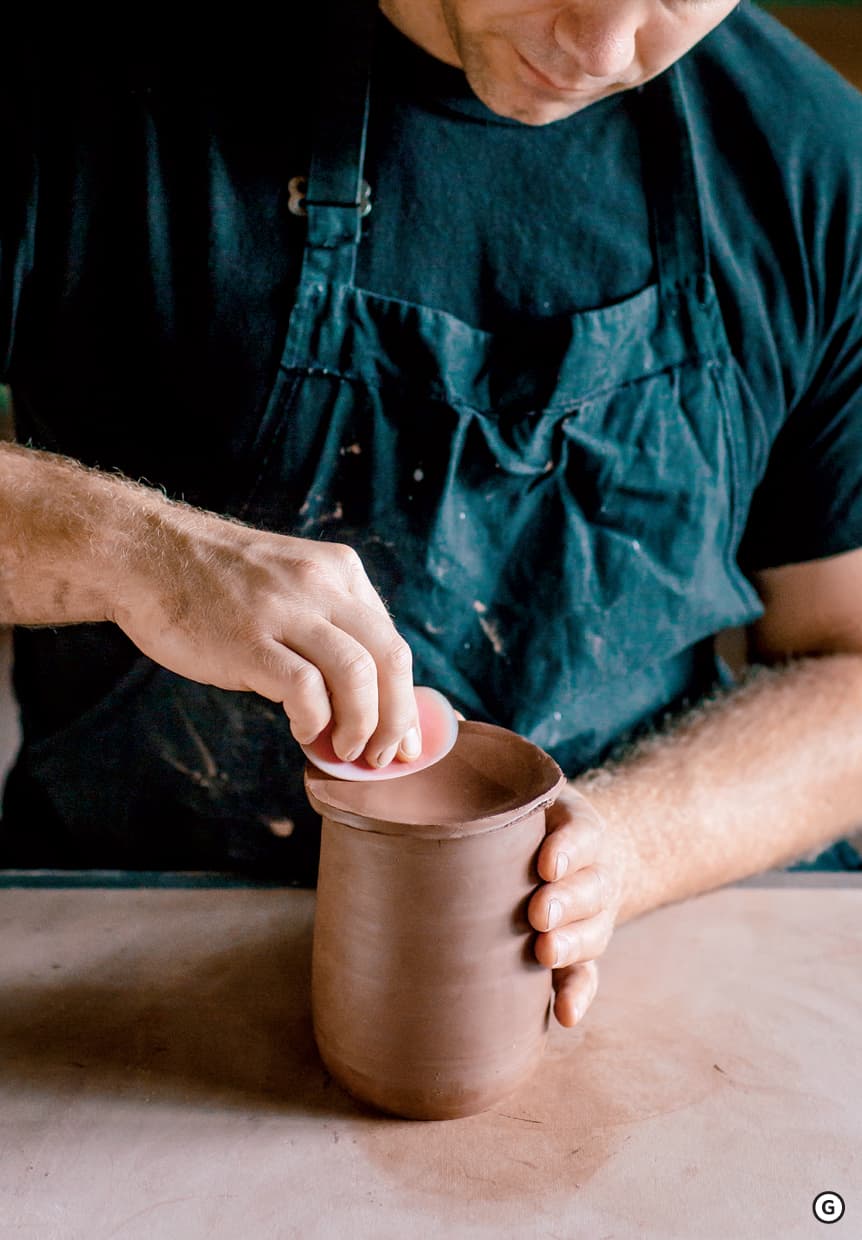
Now lay a soft slab on top of the pot that is 1/4 inch larger than the rim on all sides. G Compress the slab down into the leather-hard form. Try to create a continuous curve from one edge of the lip to the other. Let the slab dry in place. Once it’s leather hard, pick the slab up and cut off the excess clay. H The lid will now fit just inside the inset gallery. Attach a knob to make the lid easy to remove.
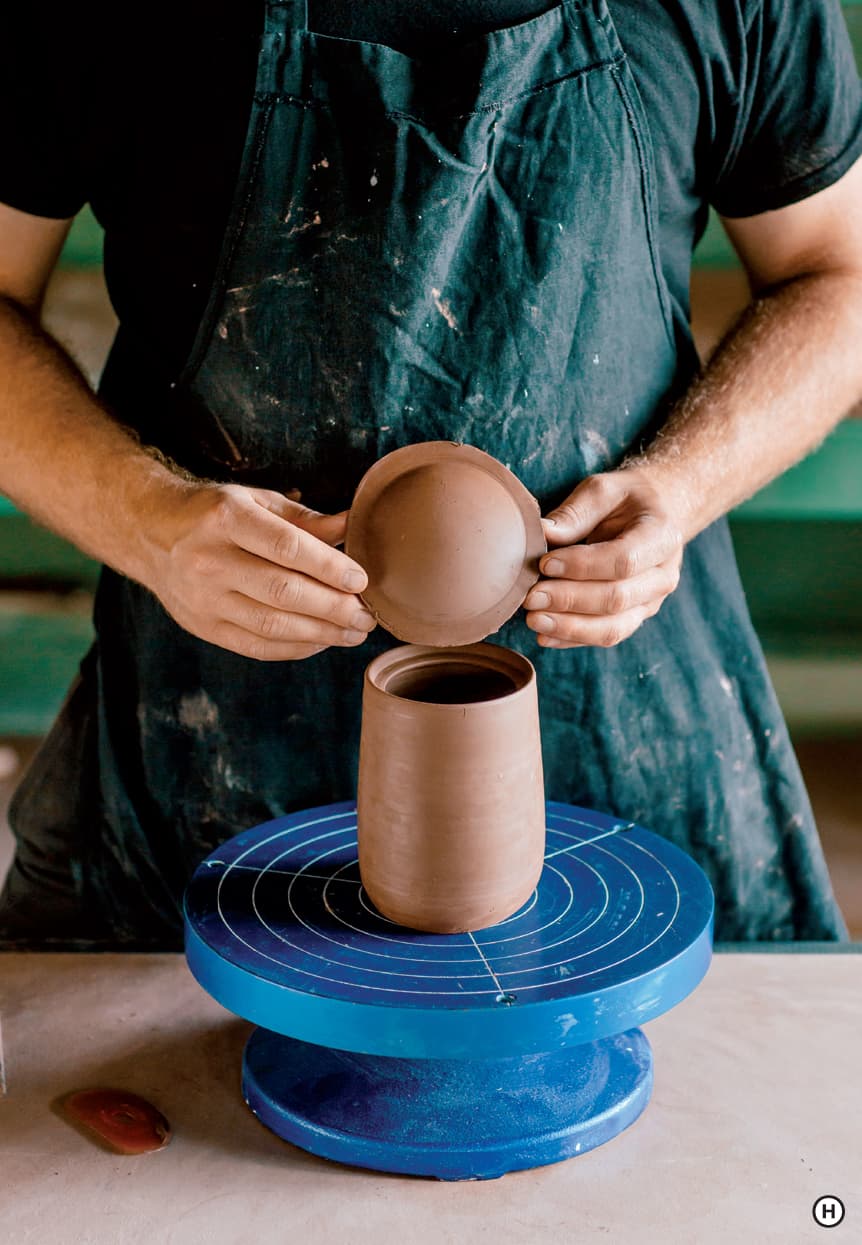
Lid option 2: Use this method with more exaggerated wheel-thrown shapes. Throw an upside-down cone that has no bottom. Dry with a heating device until the form is not tacky. Shape the cone into an oval and attach a slab base to the widest side. Use this cone as a standalone vase or as a base on which another inverted cone could be placed. With two stacked cones you have an hourglass shape that is much easier to make in two parts than in one piece. Use this technique as a starting place for complex compound forms.
PADDLING AND DARTING
Paddling and darting are both well suited for shapes that are more geometric than they are round. These techniques work well on pots that are soft leather hard. Your pot should be wet enough to remain flexible but dry enough that you don’t leave fingerprints on the surface.
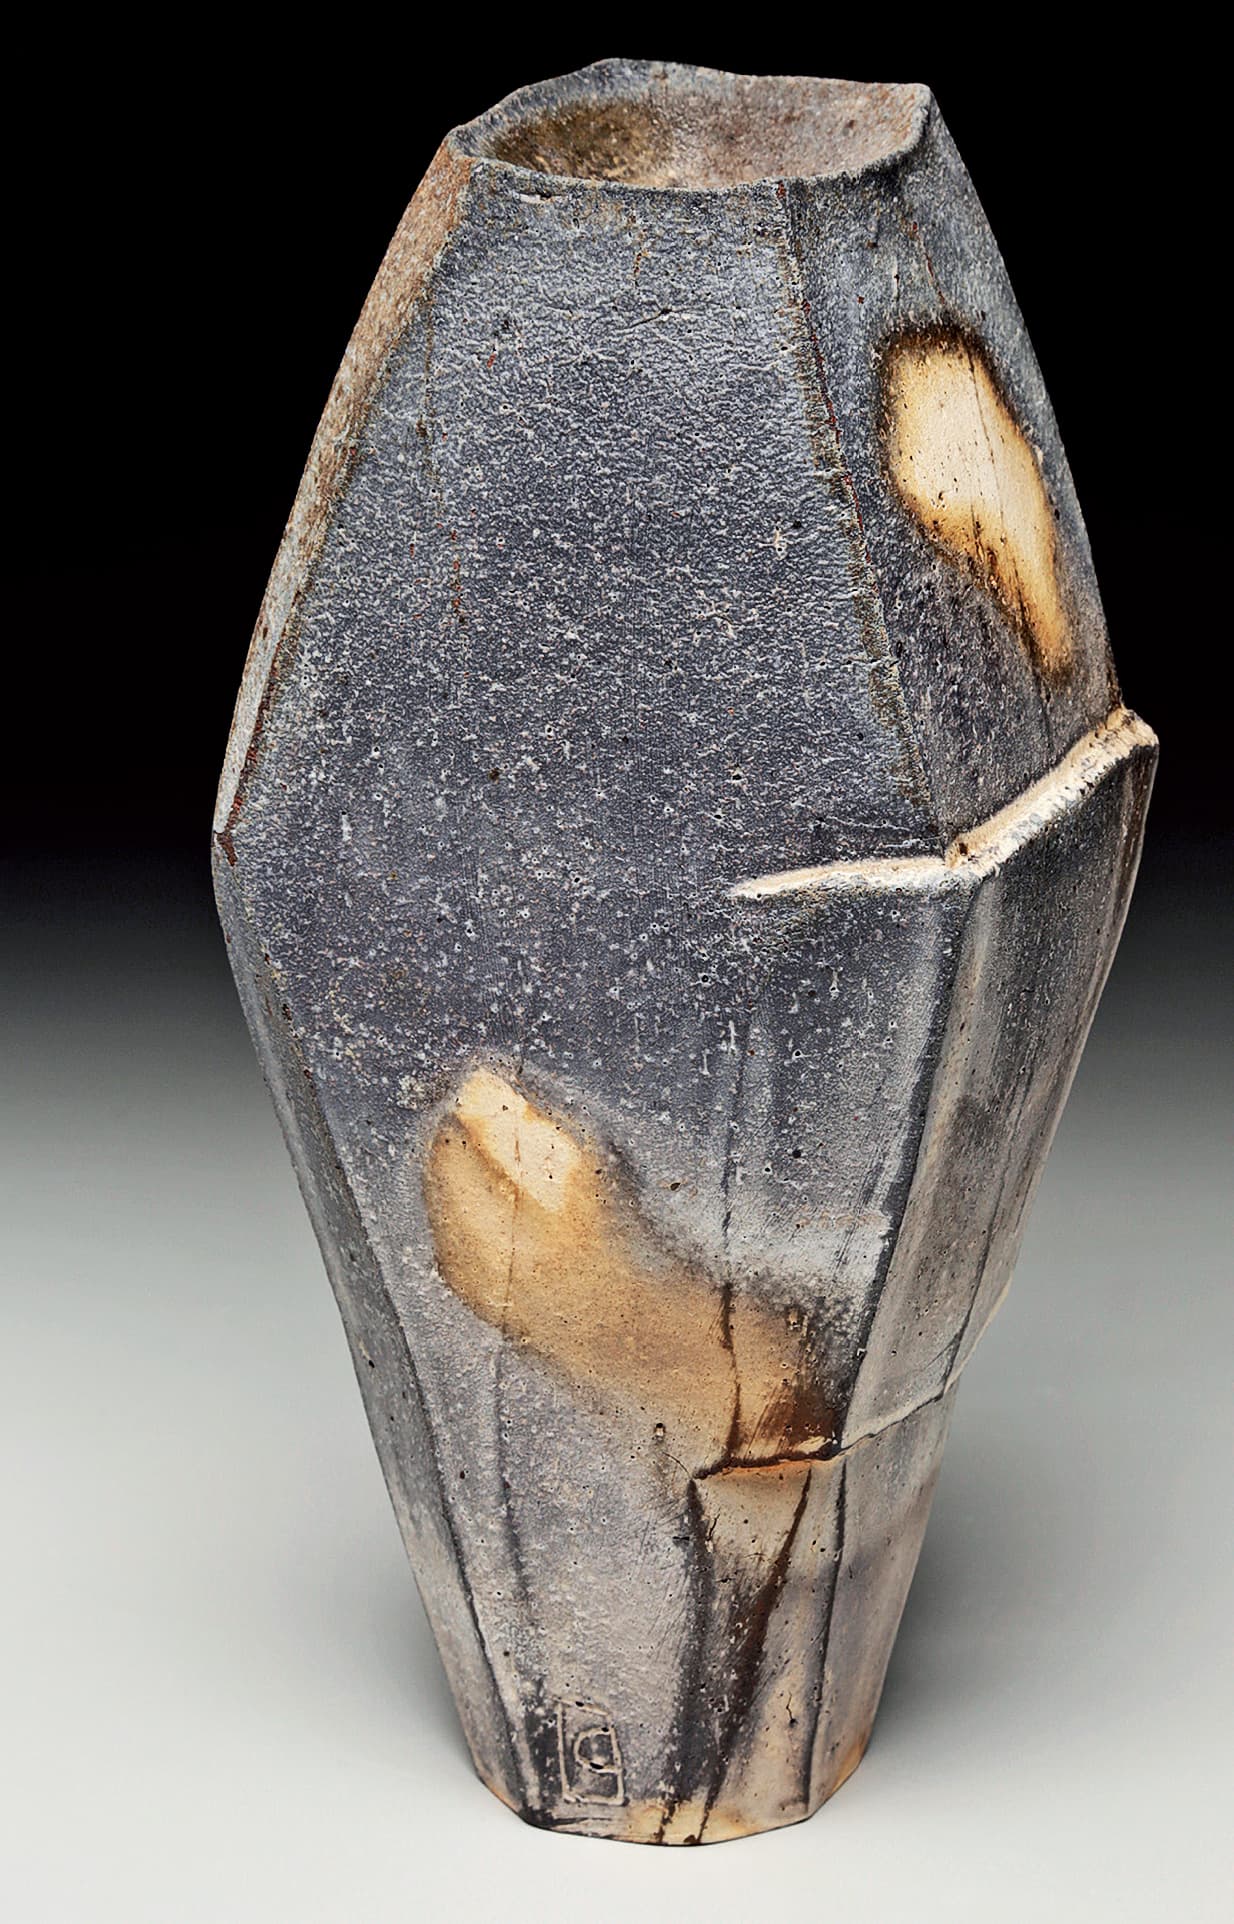
Paddling can be combined with other techniques. Josh Copus combines two thrown cylinders before paddling and faceting to refine his large vase forms. Photo courtesy of the artist
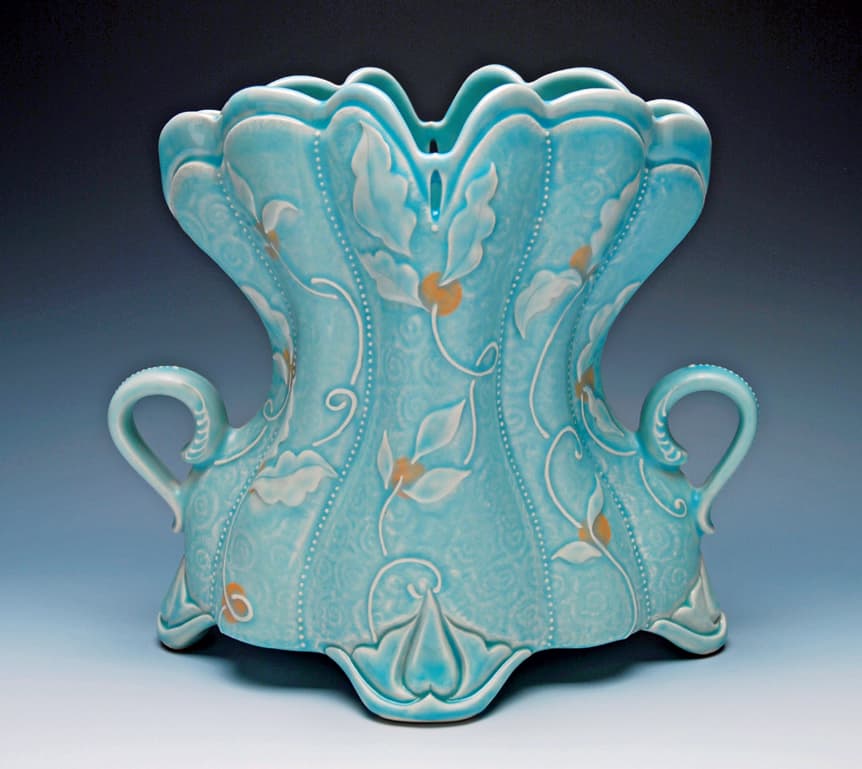
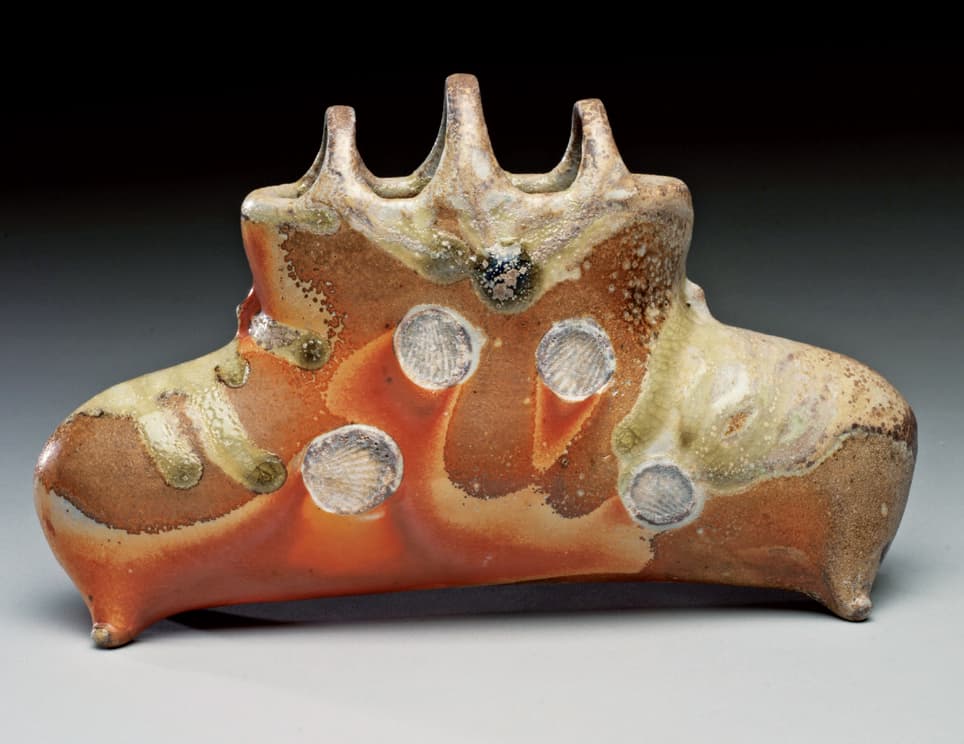
Kristen Kieffer’s, top, and Tara Wilson’s, bottom, flower bricks both utilize darting to create their distinctive shapes. When using this technique, think about how the form terminates at the foot and the lip. You will notice that both Kristen’s and Tara’s forms rise gracefully upward from smaller feet. This lifts the piece up in the air, allowing an otherwise heavy horizontal form to appear visually light. They also energize the bottom third of the pot by using diagonal lines to articulate the transition into the feet. This makes the pot feel more energetic than it would with a straight horizontal-or vertical-oriented foot. Photos courtesy of the artists
PADDLING
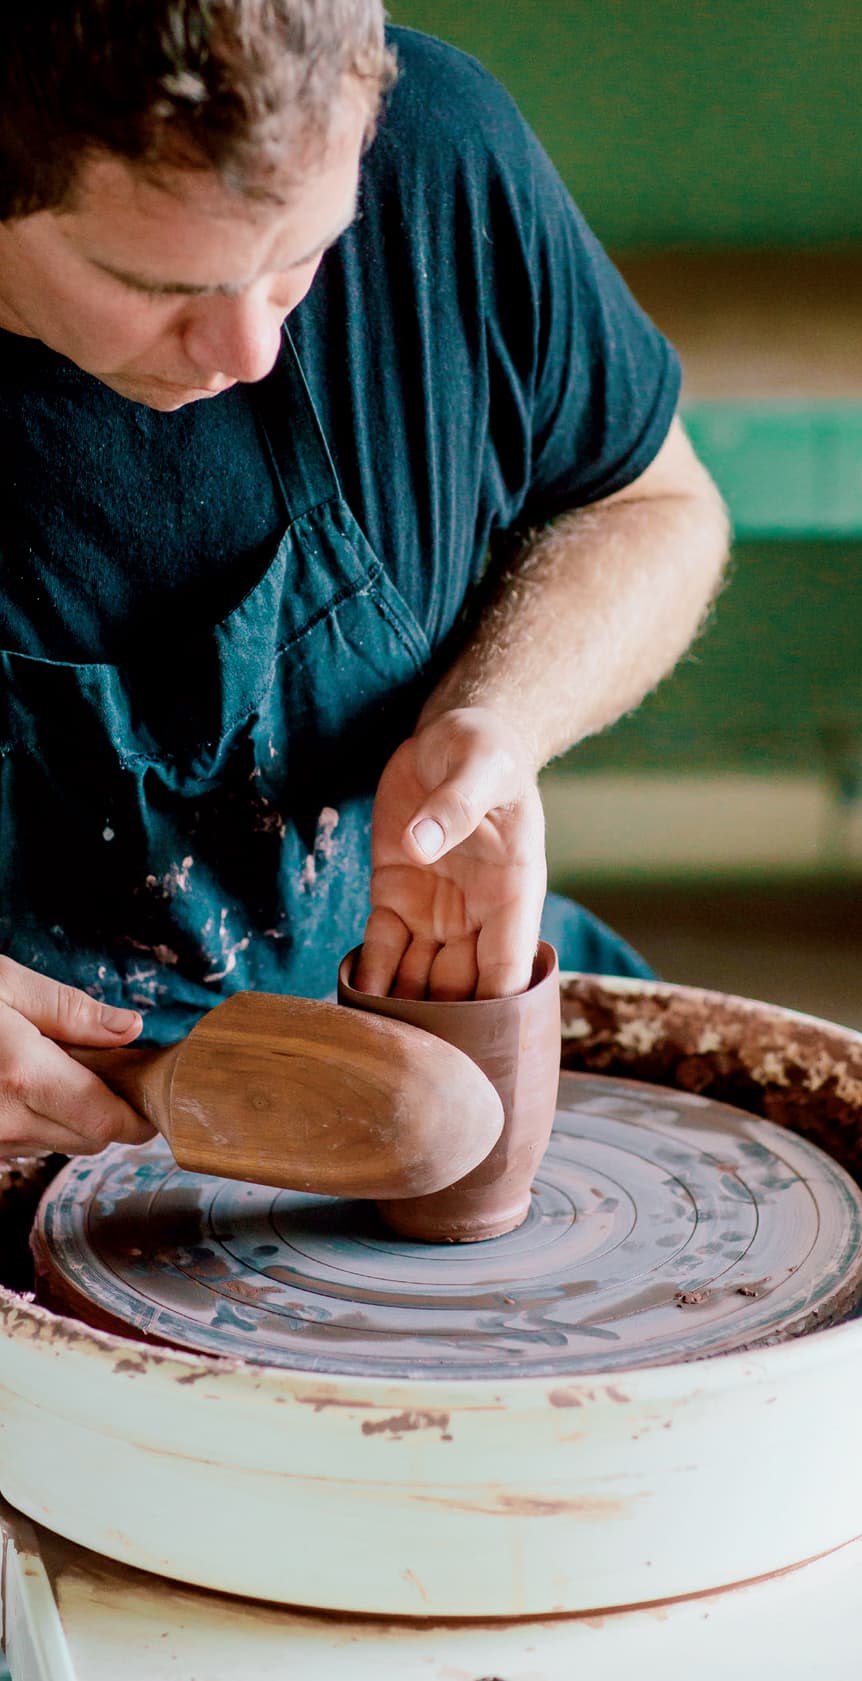
Paddling is one of the most intuitive forms of alteration. The technique requires you use a piece of wood or hard plastic to shape the exterior of the pot through concussive force. Your local clay supplier might sell clay-specific paddles, but you can also use a large wooden kitchen spoon for this purpose. I’ll demonstrate using a paddle to make a square-sided form, but you could also use this technique to make more elaborate geometric shapes, like octagons.
You can also use this technique to make free-form asymmetric alterations. Josh Copus’s vase forms are an example of paddling large forms. The pieces are made of multiple thrown sections that are then paddled and refined with a carving knife.
Throw a cup form that curves out from the foot into a straight-sided wall one-third of the way up the form. Leave the walls a little thicker than you normally would. Set the piece aside for a while to let the surface dry or dry it with a heating device before paddling the top two-thirds of the form.
Divide the pot into four equal parts by pushing out the rim to create a square. Brace your left hand on the inside of the form with your hands in the three o’clock position. Using a wooden paddle, strike the outside surface of the pot in the area that corresponds to your inside hand. With soft but forceful strikes, shape the exterior from a curved shape into a plane. Continue around the form, making four even sides. A paddled square form can have a soft quality left over from its round beginning. To make the pot look more angular, rib the sides of the pot, making sure to accentuate sharp edges at the corners. Trim normally for a round foot or facet a square foot with a knife.
You can also add some texture while paddling. The square cup pictured above was paddled with a smooth paddle. Try paddling with a textured paddle to create surface texture. You could also start by paddling a cup into a square shape and then add rope or other rolled texture to the form.
DARTING
Darting is a subtractive technique used in both tailoring and metal-working. By removing geometric shapes (triangle and diamonds) from the top or middle of a form, you can bend a cylinder into a non-round shape. The number of darts that are removed will affect the shape of the pot. Removing two or more darts will create a symmetrical shape while removing one larger dart can create an asymmetric shape. A Much like other altering techniques, darting requires that you work with the clay at the right moisture level. It should be dry enough to not be tacky, but also remain flexible.
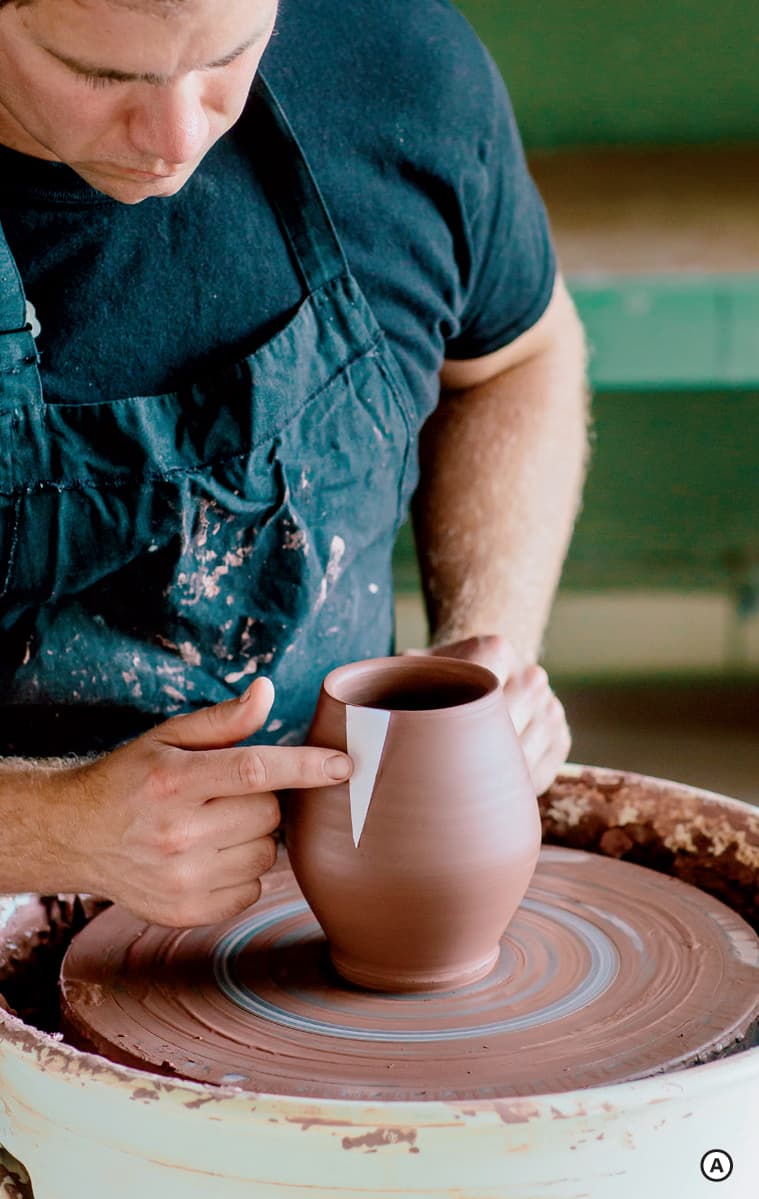
For the first time you try it, start by throwing a 6-inch cylinder that is slightly wider than a cup. Practicing darting on a simple cylinder will help you understand the process. For this demonstration, I am using a rounded form whose widest curves happen one-third of the way up the pot. Allow your form to dry to soft leather hard. Cut two opposing triangles from the top of the form with the widest side being at the lip of the cylinder. B
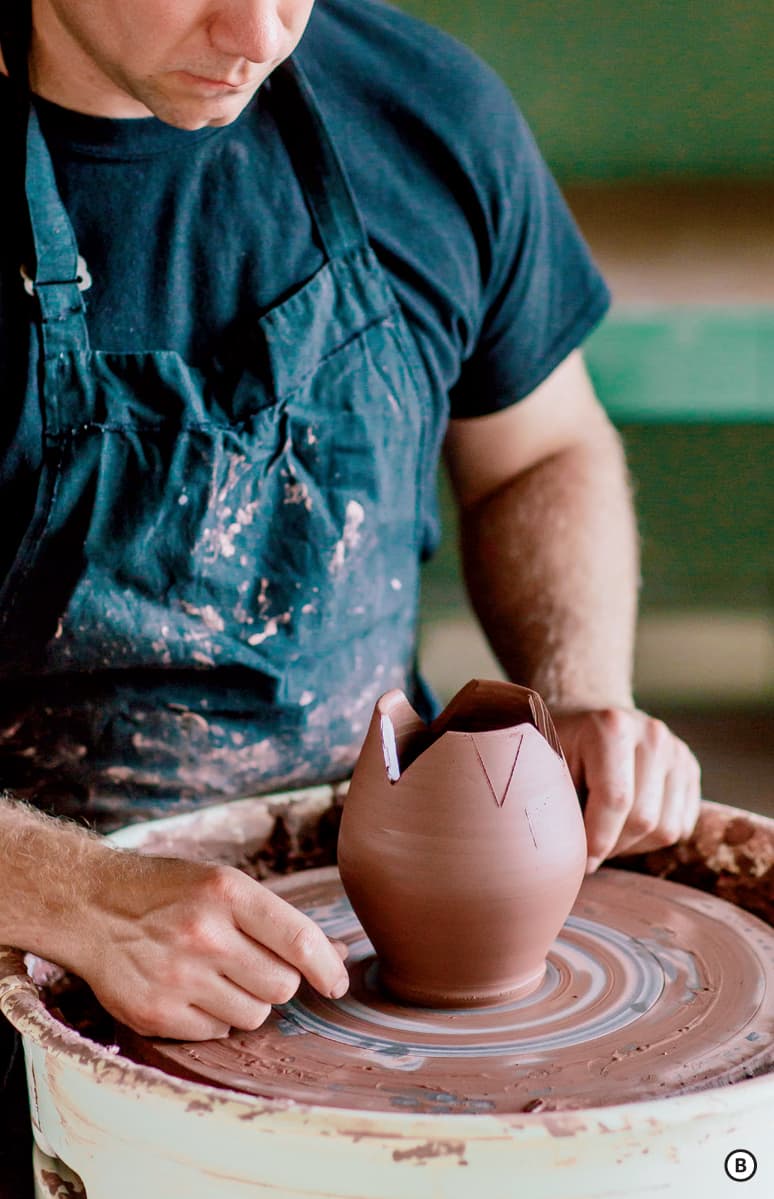
Fold the corresponding wings down so that the cut edges match. C If you want a seamless match, make your cuts with a slight inward bevel. You can also overlap the edges to leave evidence of the construction method. Slip and score together.
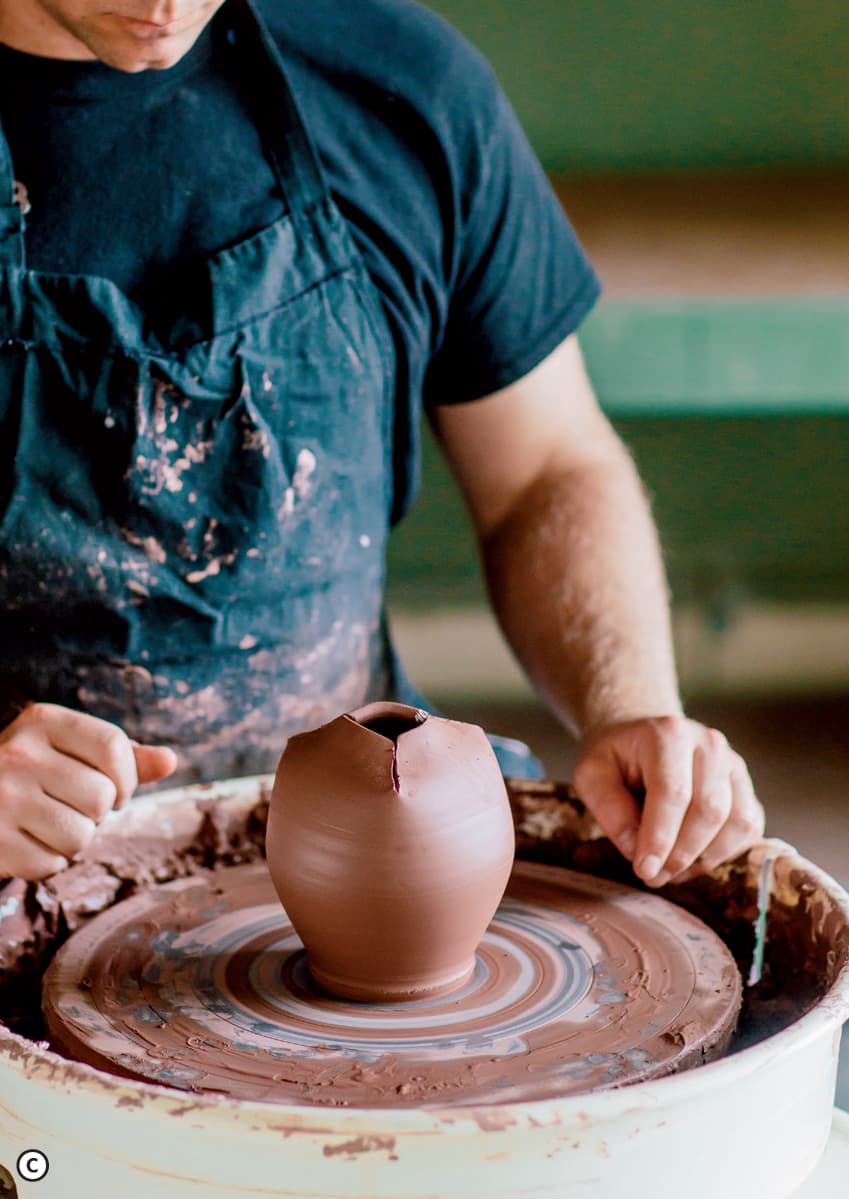
The size of the darts and the softness of your touch will affect how much volume is left in the form. All darting will decrease volume, but pushing out on the wall below the dart can help to create the swelling volume that many thrown forms have. You can do this with your finger, a throwing stick, or even a breath of air pushed into a closed form. As we discussed in the design considerations section of Chapter 2, pots that are touched last from the inside tend to look as if they are expanding. Taking a little extra time working on the interior of your darted pots can make the difference between a pot that looks dead or full of life.
Jen Allen is a master of darting. See the sidebar on the next page for drawings of the single-and double-pointed darts beside images of the work she creates using this technique.
GALLERY
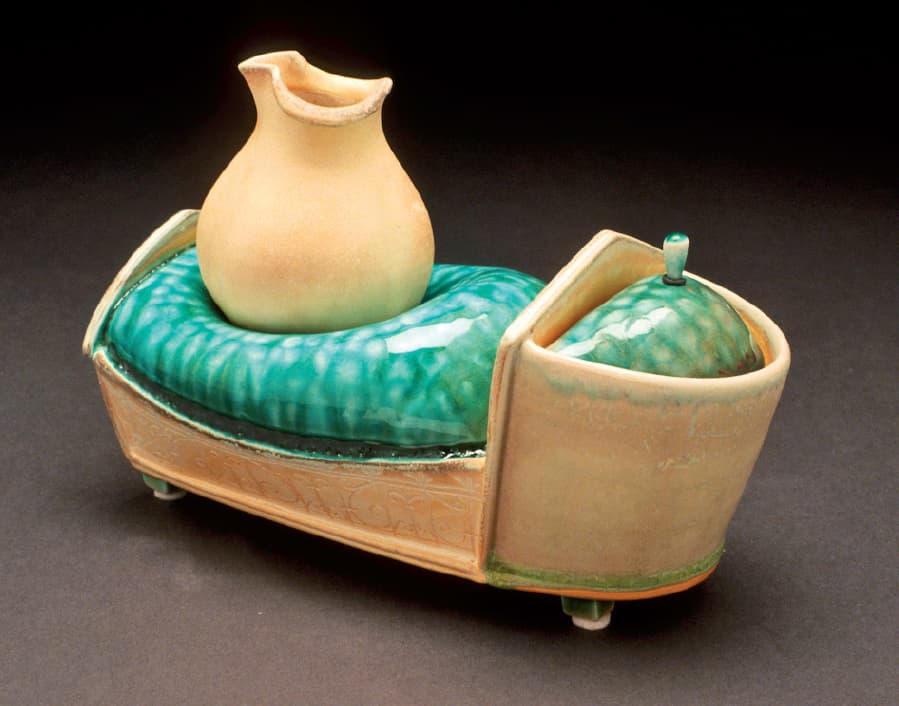
Julia Galloway, sugar and cream set with tray. Photo courtesy of the artist
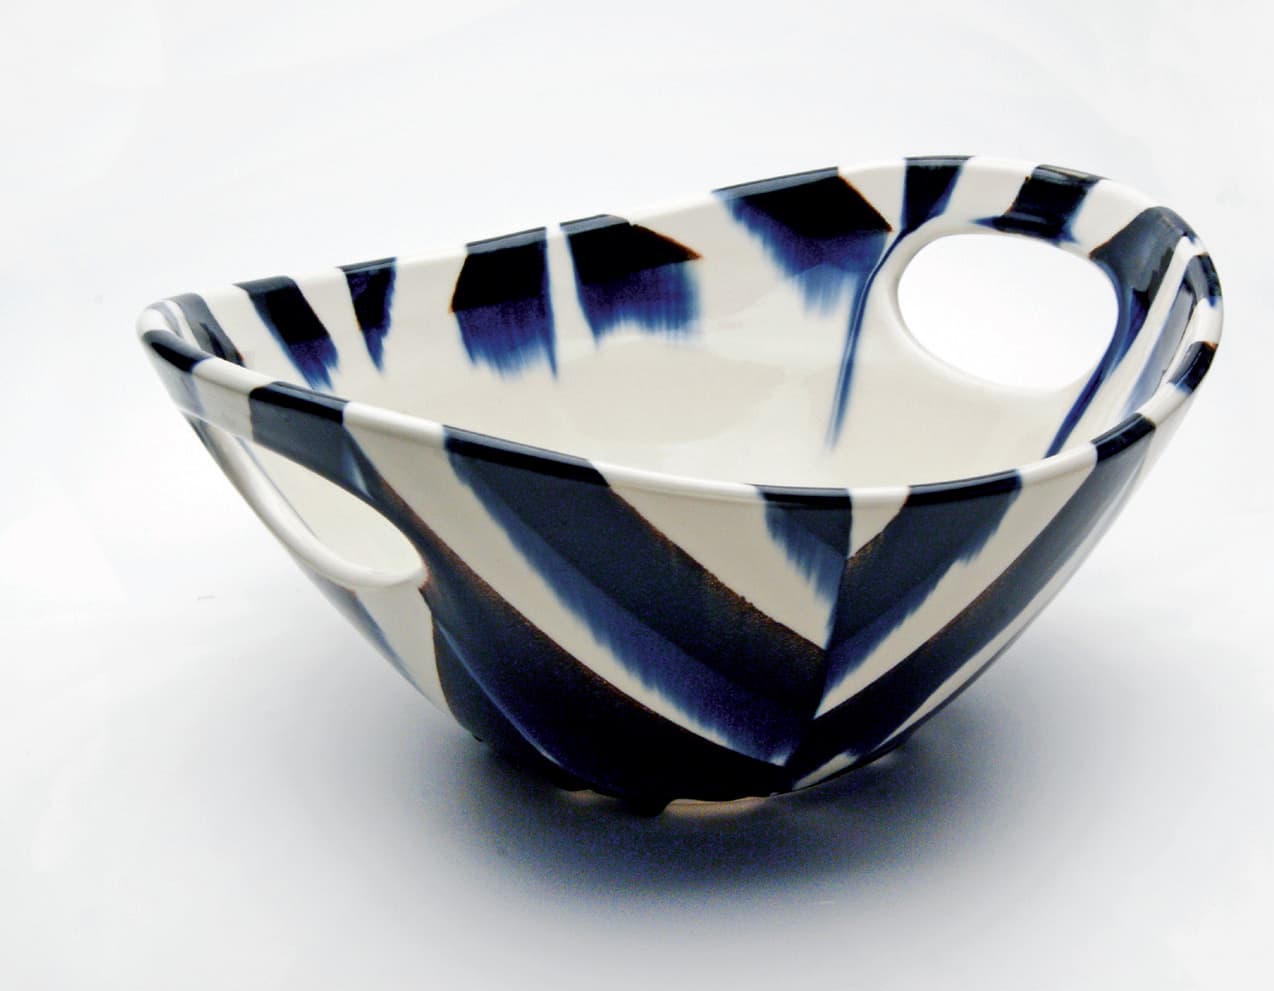
Sean O’Connell, oval serving bowl. Photo courtesy of the artist
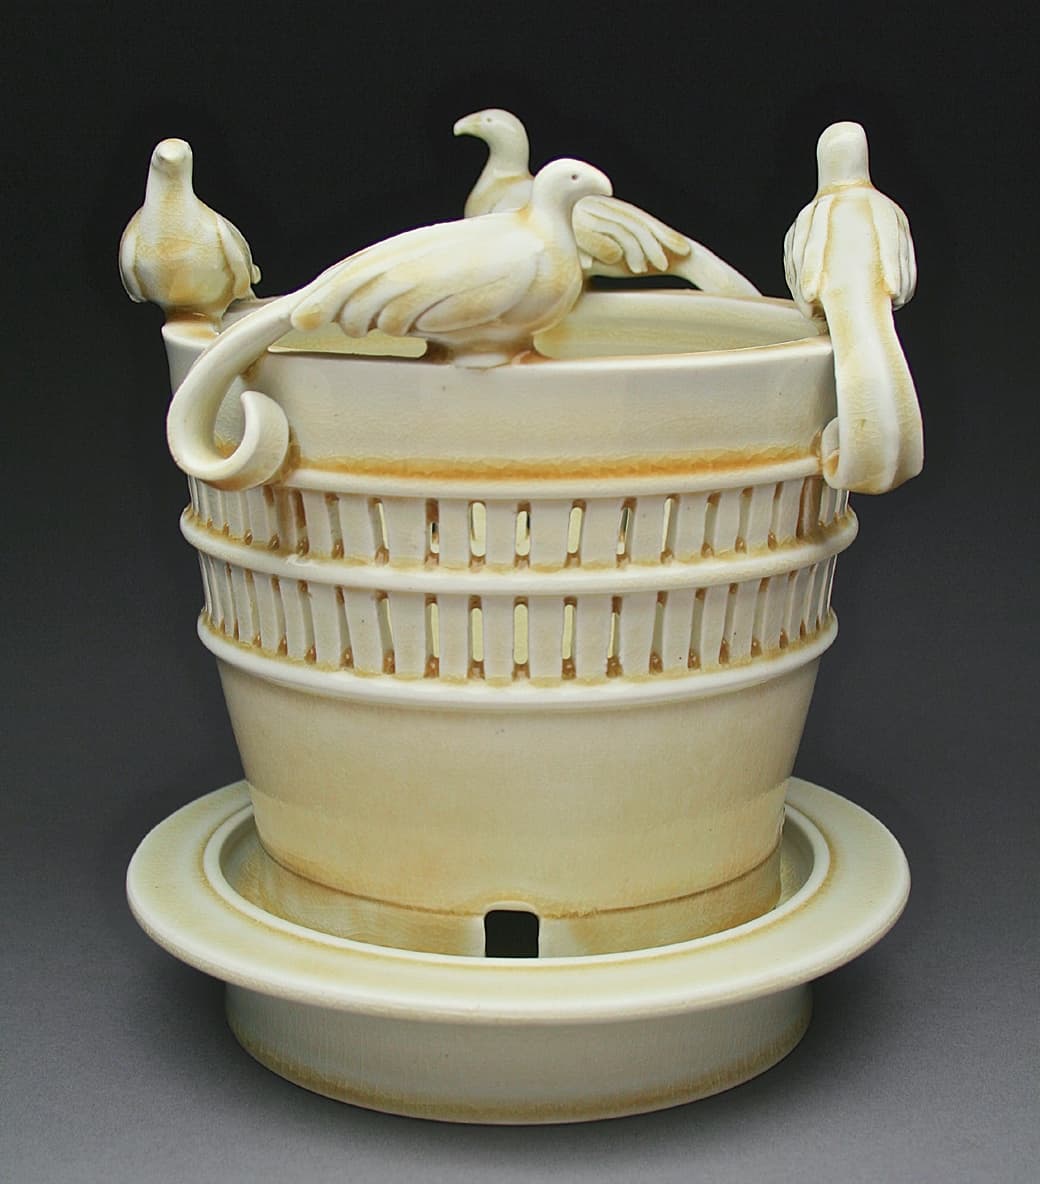
Steven Godfrey, orchid planter. Photo courtesy of the artist
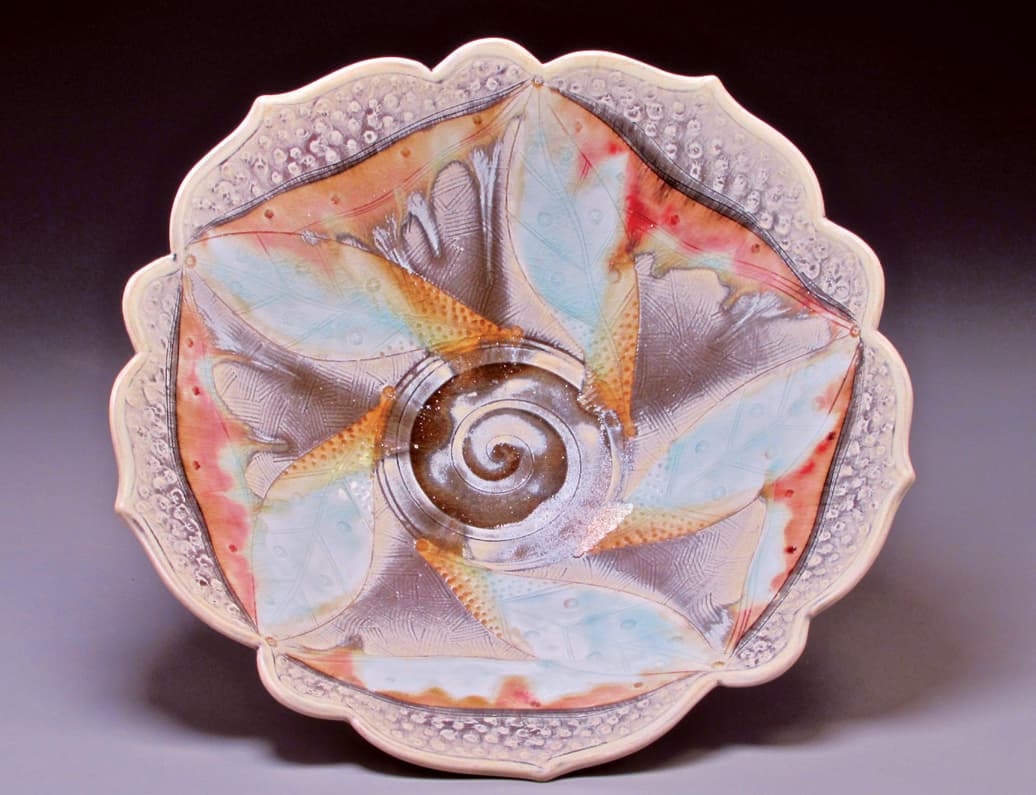
Richard Hensley, scalloped bowl. Photo courtesy of the artist
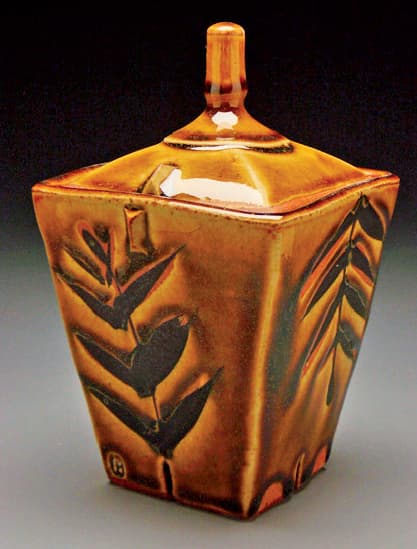
Mackenzie Smith, golden box. Photo courtesy of the artist
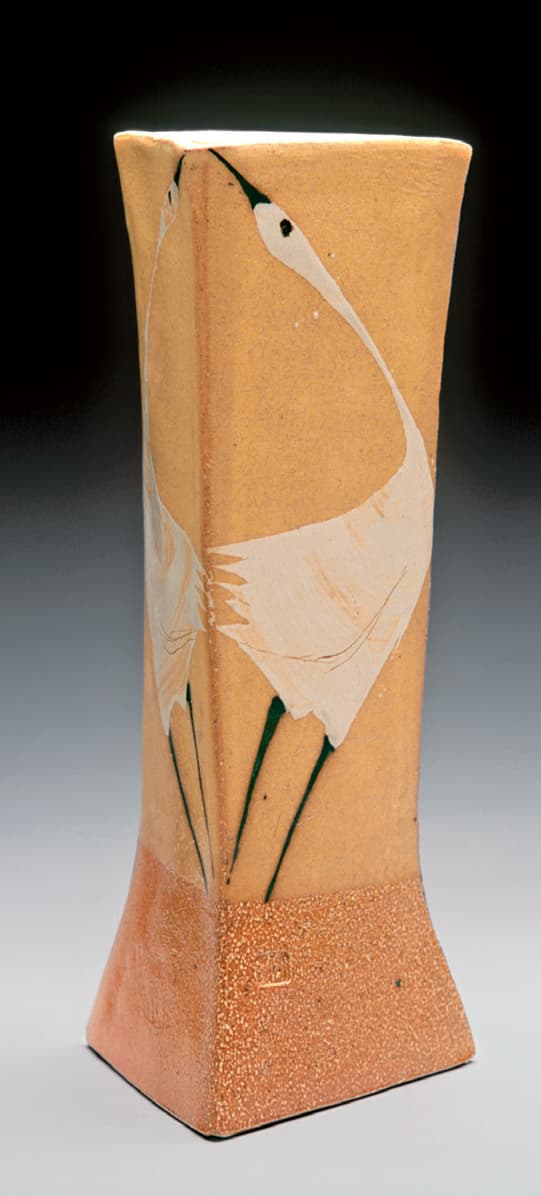
Michael Simon, triangular vase. Photo courtesy of the artist
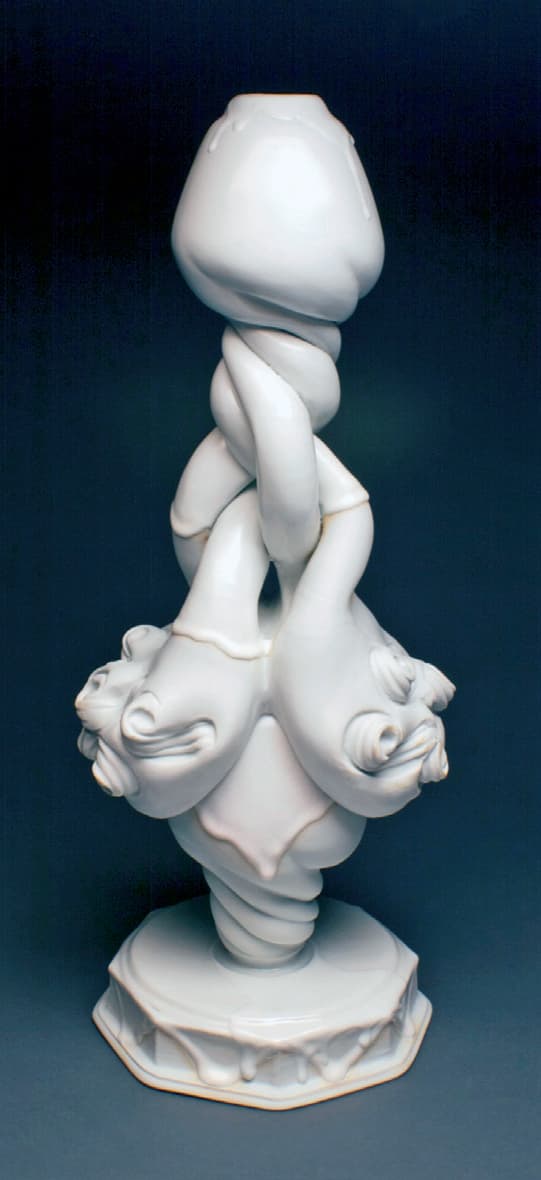
Matt Towers, Catastasis vase form. Photo courtesy of the artist
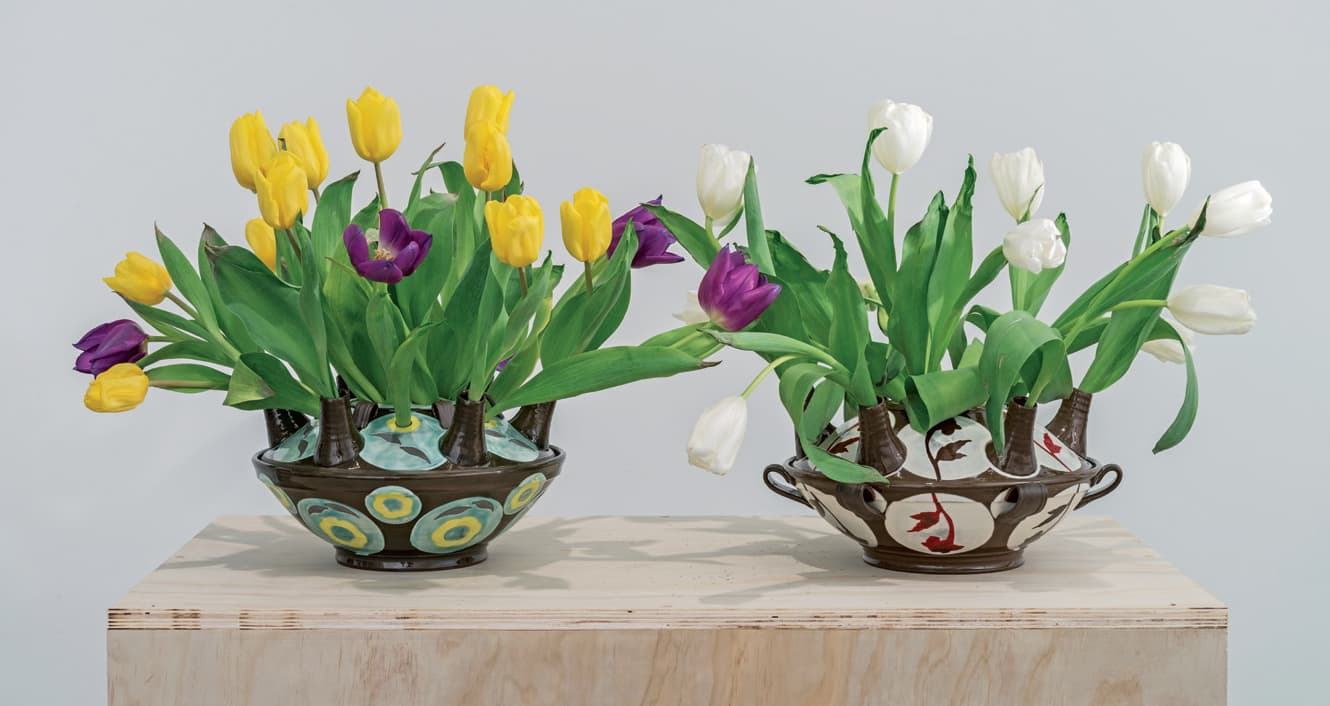
Sanam Emami, bowl-shaped flower holders. Photo courtesy of the artist
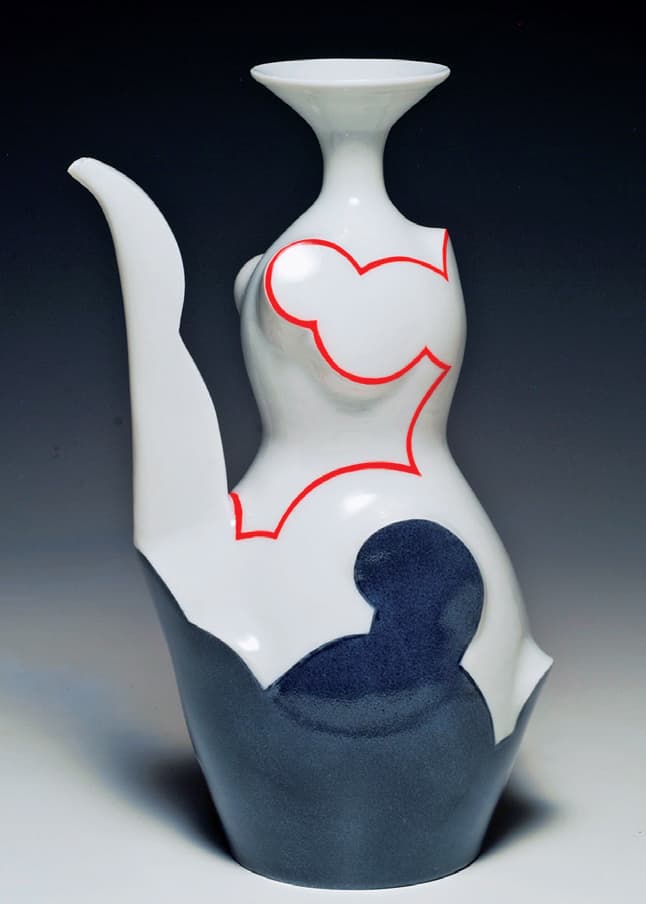
Sam Chung, cloud Ewer. Photo courtesy of the artist
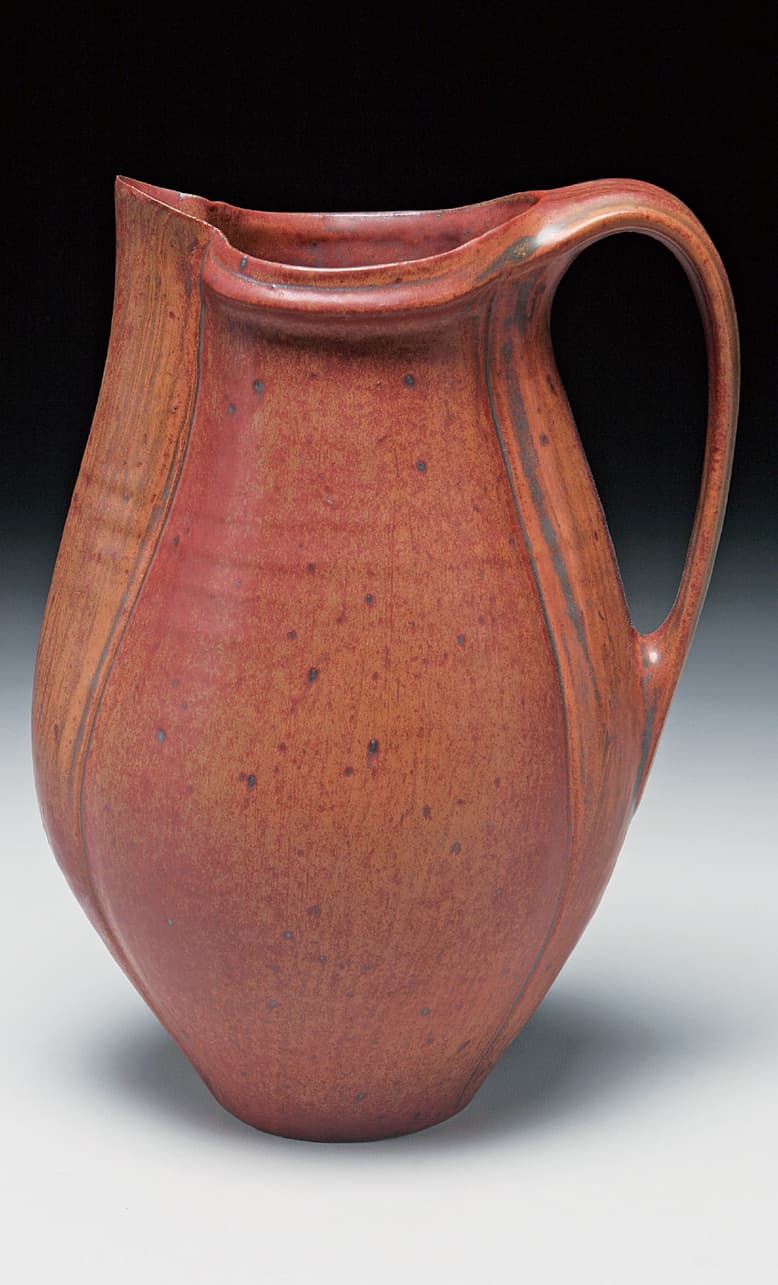
Ellen Shankin, pitcher. Photo courtesy of the artist
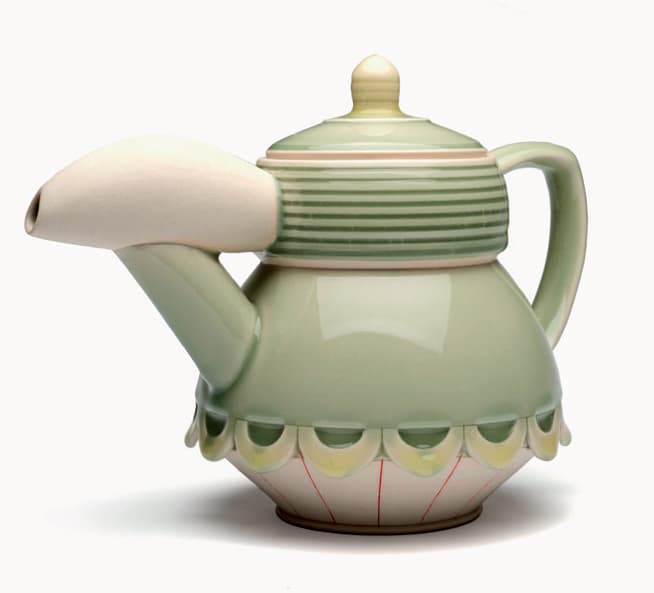
Shawn Spangler, teapot. Photo courtesy of the artist