CHAPTER THREE
MAKING LIDS, KNOBS, HANDLES, AND SPOUTS

NOW THAT YOUR THROWING SKILLS are warmed up, you’re probably ready to move onto more challenging forms that are composed of multiple parts. Well, you’re in the right place! This chapter will progress through lids, knobs, handles, and spouts that you can use on the forms in the chapters that follow.
As you start to wrap your head around these components, I recommend you begin by sketching the mugs, pitchers, and teapots you want to make. By focusing on the silhouette of the pot during the drawing process, you will refine the way you see the parts in this chapter relate to the greater whole of the form. This is particularly important as you learn to balance the addition of handles, lids, knobs, and spouts. You might find that your first attempts lead you to make attachments that are much too small or too large. (I have great memories of laughing at my early teapots that had handles large enough to hold a bucket!) Approached with a good sense of humor, these out-of-proportion pots have taught me how to see correct scale relationships. If you make a “bad” teapot, don’t shove it off on your family members as a Christmas present; make yourself serve tea from it instead. Pots with flaws will often teach you more than perfect pots. Only through embracing imperfect pots can we define what makes the perfect pot in our mind’s eye.
As you approach these new pieces, allow yourself to increase or decrease the amount of clay you are using during the learning process. You might have more success early on using twice as much clay than what would be functionally necessary. Allowing yourself to make oversized pots or pieces of pots during your first attempts will allow you to build muscle memory without the additional pressure of working very small on the wheel. I also suggest you make multiple attachments of slightly different sizes so that you will have scaled options when building the form.
LIDS
To start out this section on lids, let’s start by identifying key terms. The gallery is the horizontal right angle that is created in the lip of the pot. A properly thrown gallery will hold the lid in place without allowing it to move horizontally. The flange is the vertical ring of clay that could be attached to the lid or could be embedded in the pot. Not every lidded pot has to have a gallery, but those that don’t will have a vertical flange that will also hold the lid in place.
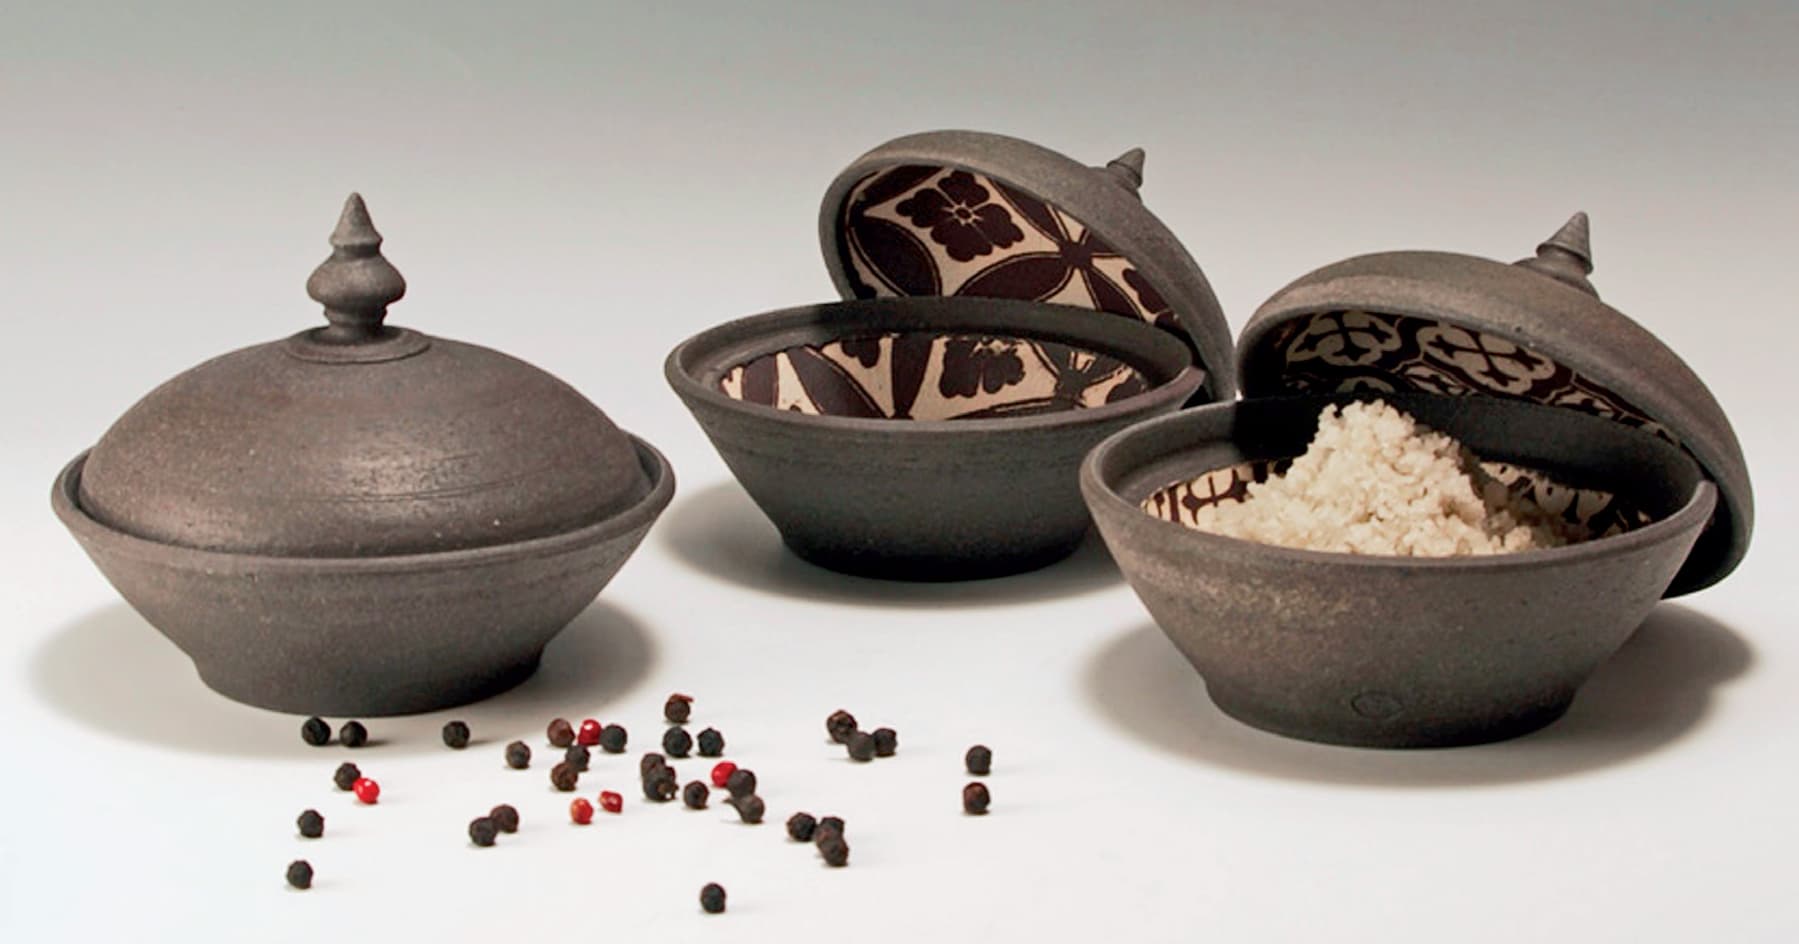
Forrest Lesch-Middelton’s set of three covered jars shows the relationship between exterior and interior space on a lidded vessel. He uses contrast to his advantage by decorating the interior right up to the underside of the gallery. This provides a nice surprise when you take off the lid for the first time. Photo courtesy of the artist
SUGGESTED STARTING WEIGHT
Lids: 0.5 to 1 pound or 30 percent of the weight of your pot
PLANNING FOR A LID
The setup for a lid’s design starts before you finish throwing the pot that will receive the lid. Plan to match the form’s curve with the exterior curve of the lid. A cohesive form will appear to have one continuous curve uniting the walls and the lid. If you choose to break this curve, do so intentionally to establish a focal point in the form. When making a lidded form, you will need to leave around 1/4 inch of extra clay at the lip when you are throwing. This could be used to make a gallery on which the lid will sit or to reinforce the lip on a pot that does not have an embedded gallery. Planning the lip of the pot is an important step in making a lid.
MAKING A GALLERY
If you choose to create a gallery for the lid, pinch your left thumb and pointer finger around the rim as the pot is spinning. Divide the lip into two equal parts and push down on the inside edge using a wooden fettling knife or a curved metal angle trim tool. A Keeping your wheel speed constant, move the clay down about 1/4 inch to create the gallery.
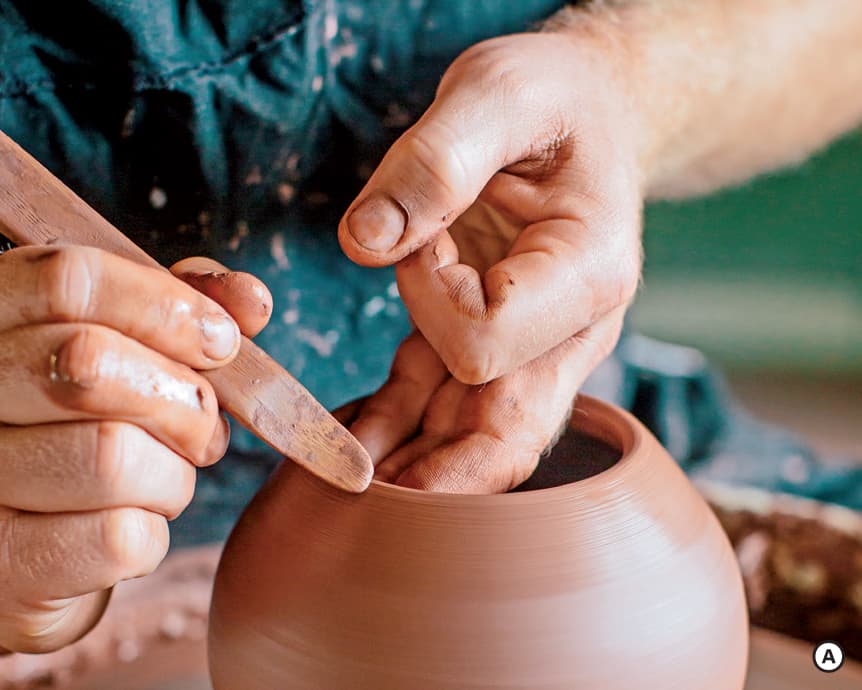
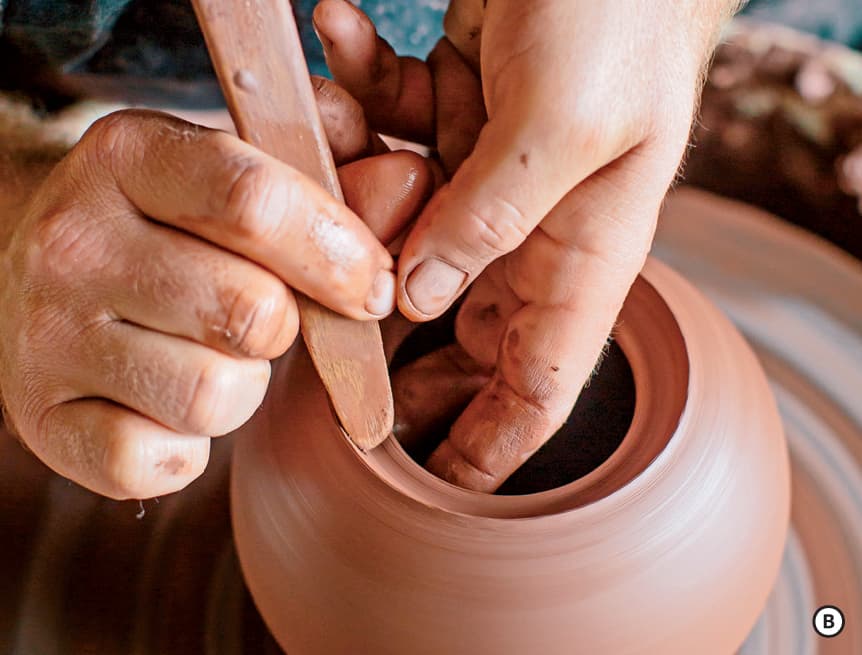
Experiment with galleries that are more or less deep and more or less angular. A deeper gallery will be helpful in pots that will be tilted during their use. B Pots that stay at rest during use can have galleries that are shallower. When thinking about the angle of the gallery, the goal is to match your gallery angle with the lid edge to ensure the tightest fit. I find it easiest to make 90-degree angles for both the gallery and the lid edge, but you could also make both round. C
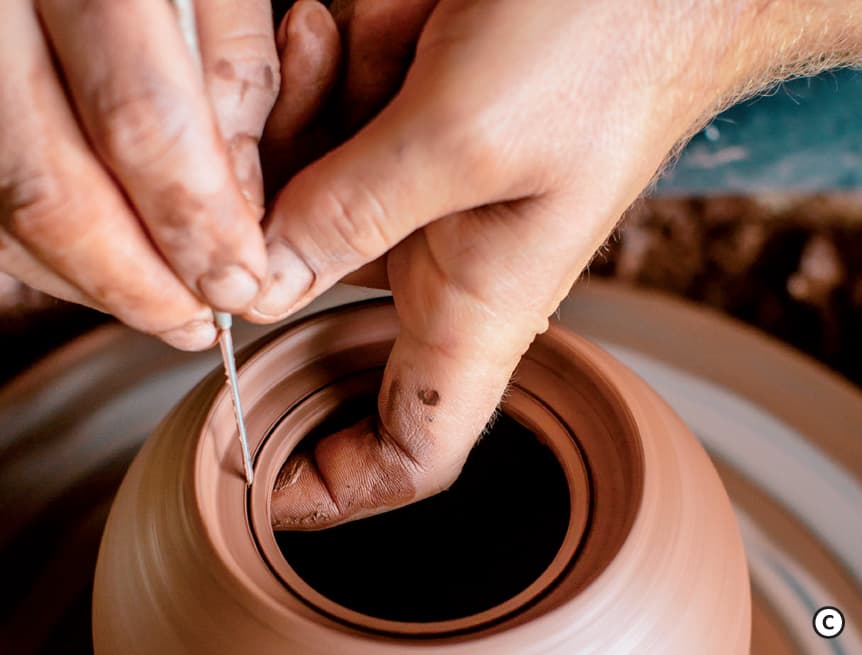
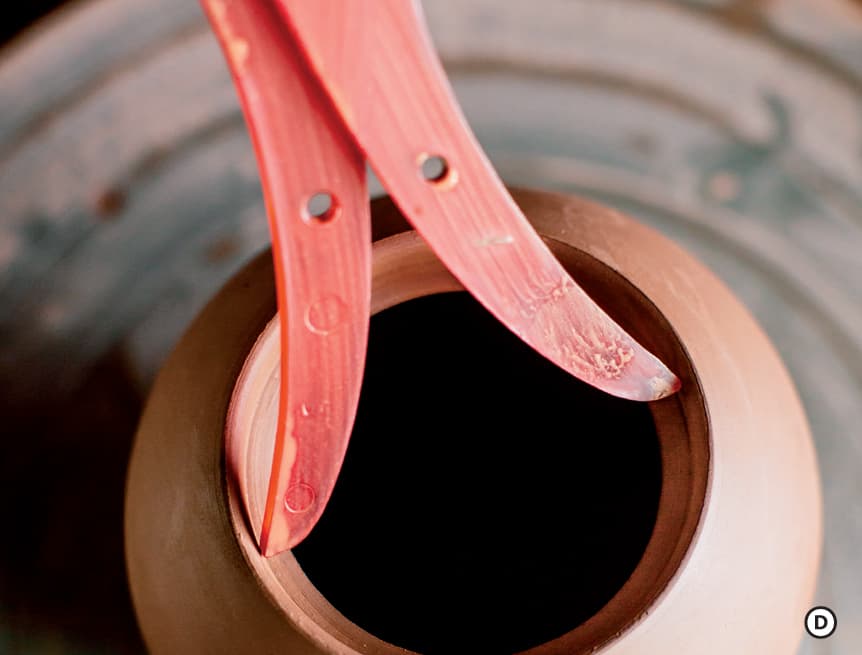
Making the gallery should be the last step before finishing the pot. If you adjust the shape of the pot after creating the gallery, be careful not to bend or damage the gallery when you move your hand in and out of the pot. When the pot is complete, measure the inside of your gallery with calipers before removing the pot from the wheel. D Lock your measurement into place on the calipers and set them aside. When removing the pot from the wheel, make sure not to let the pot go ovoid as you lift it. To realign an unintentional ovoid, rotate your hands 180 degrees from your original position and lift from the bottom, shaping the pot back into the round. Keeping the rim round is important whether or not the pot has an inset gallery.
MAKING A LID
To make the lid, you will need to weigh out a small portion of clay or use a larger portion to throw off the hump. E Judging how much clay you will need for a lid will take some practice. Keep in mind that you can trim away excess clay, so overestimate and work your way smaller. I suggest you write down weights for both the lid and the pot so that you don’t have to guess every time you revisit the form.

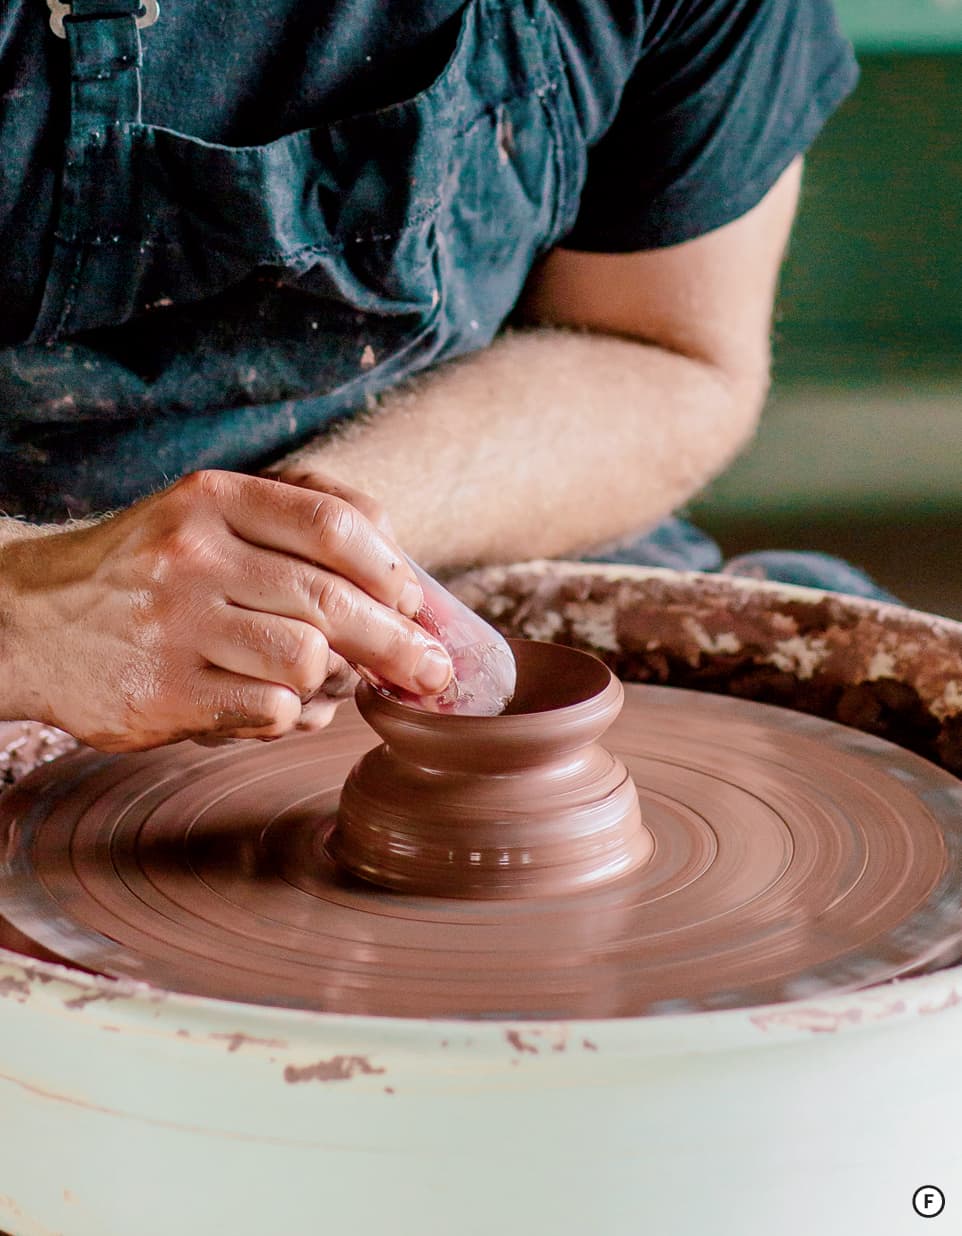
For pots that have an inset gallery, you will throw a shallow bowl that will be turned upside down for the lid. F Remember, the goal is to match the angle of the lid to the curve of the pot, so be mindful of the depth of your lid curve as you are throwing. Using the measurement you took with your calipers, you will be able to throw the lid to the exact width of the gallery. G I suggest you make lids at the same time you make the form so that they shrink at the same rate. If you choose to make lids after your forms have started to dry, you must take shrinkage into account. Some calipers have percentages of shrinkage labeled to help you with this process.

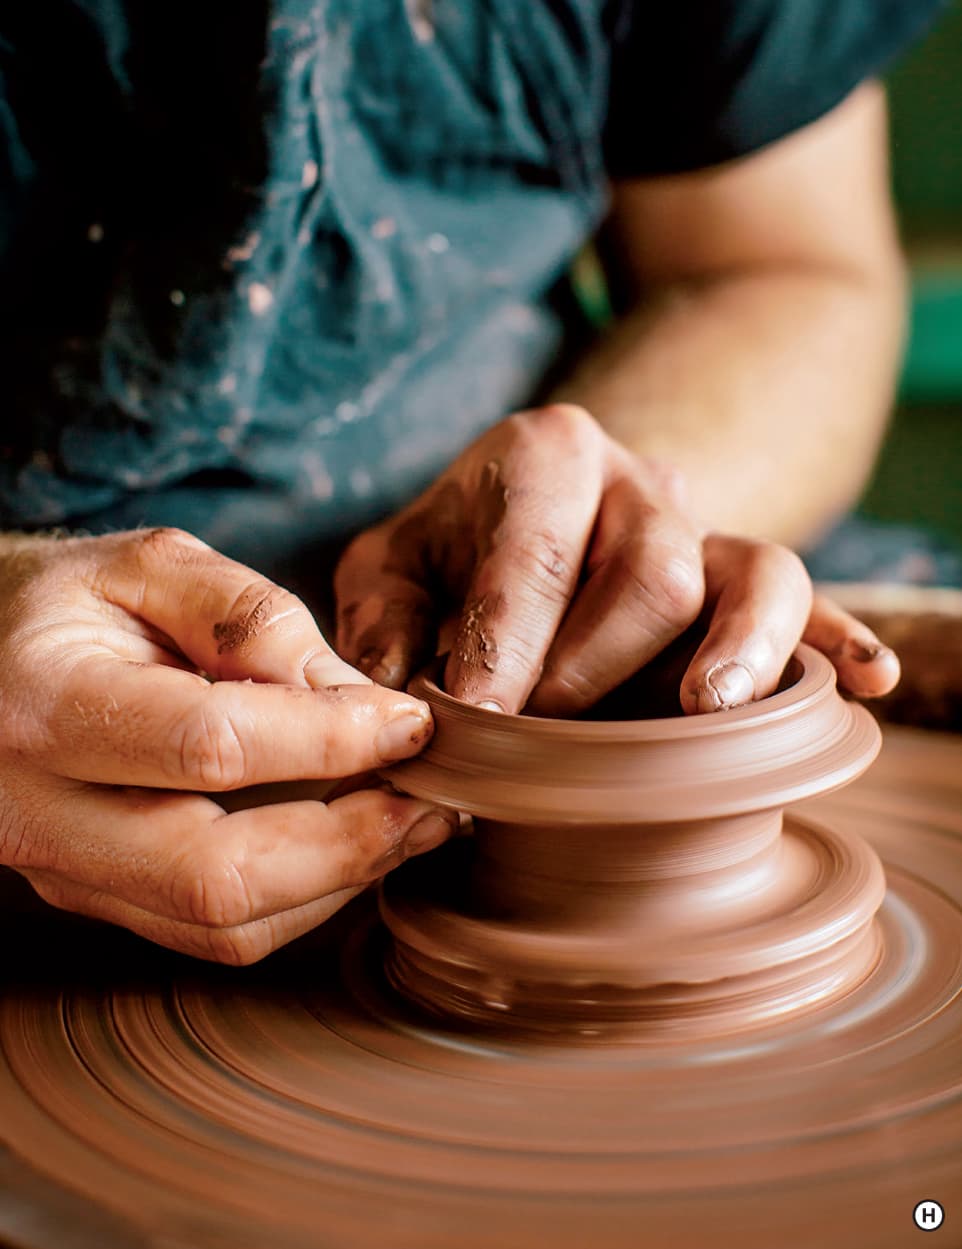
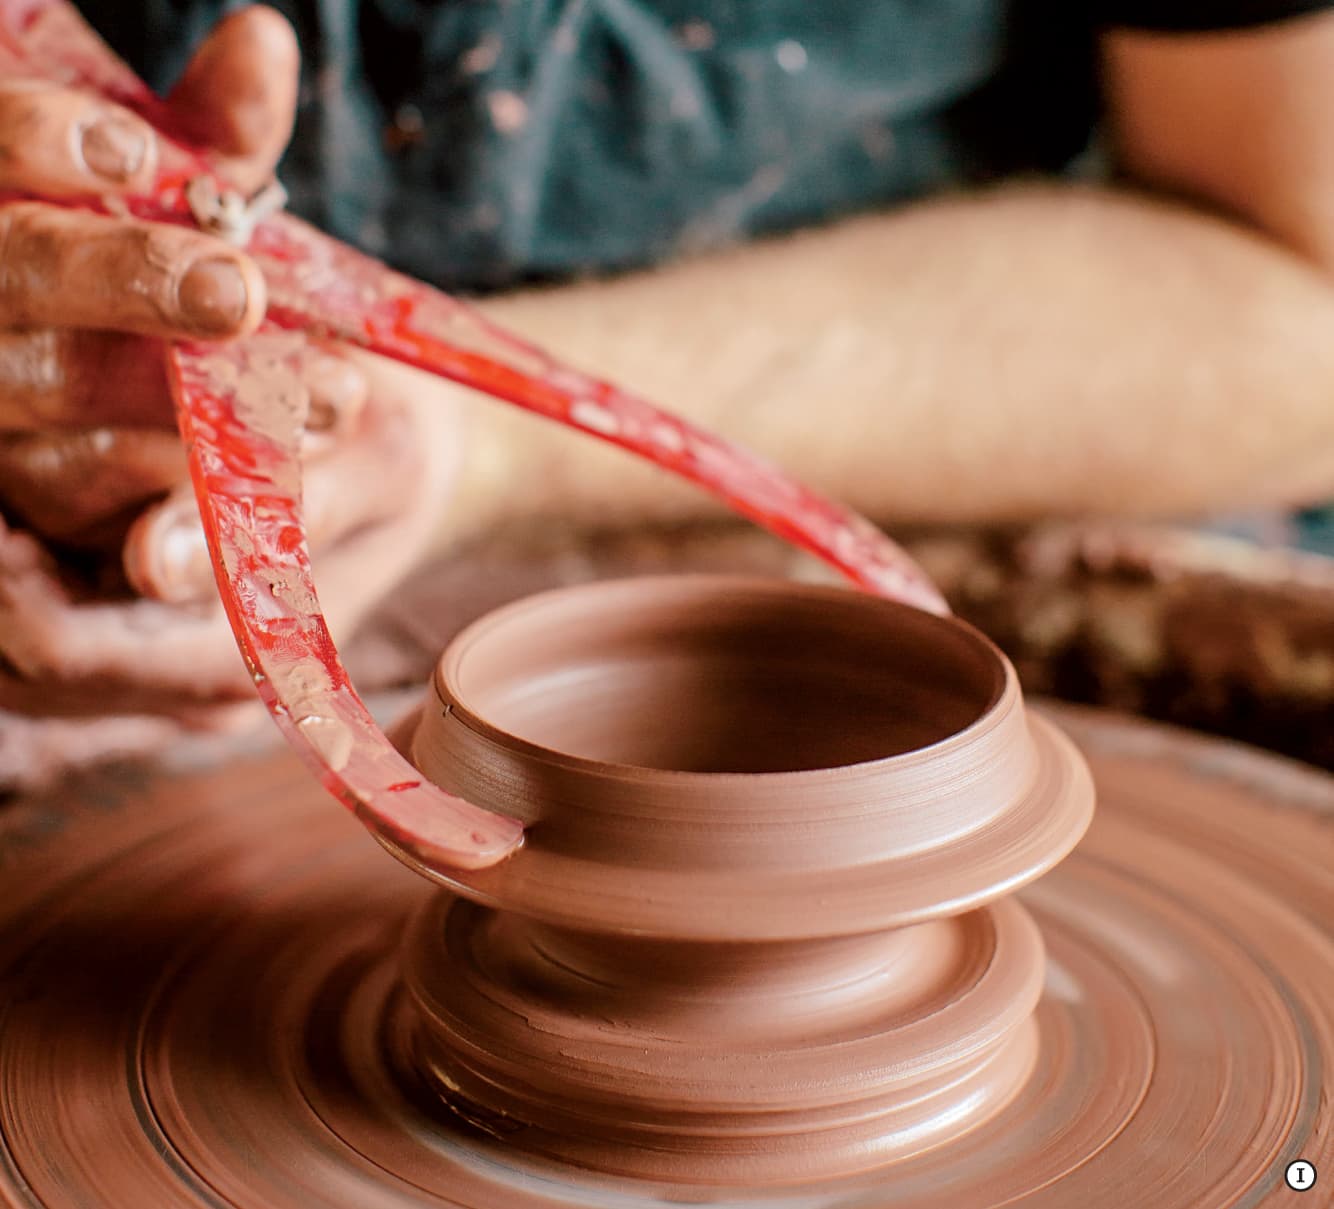
For pots without an inset gallery, the lid will have a flange. You will still start by throwing a shallow bowl. Make the bowl approximately the right measurements but leave extra clay at the rim so that you can set the flange. Divide the rim into two parts by pushing down on the outside edge with a wooden or metal tool. This flattens a small horizontal section of clay that will rest on the rim of the pot. The part you did not push down will be the vertical flange which will rest on the inside edge of your pot’s rim. The deeper you make the flange, the better the lid will be held in place when the pot is tipped. H Measure the flange. I Mark Hewitt’s 2-gallon jar (see here) is a great example of this lid type. Notice that the curve of the domed lid matches the tilt of the jar’s body. There is no flange in the pot body, though, so the lid’s outward edge rests on the lip of the pot. Lids of this design are great for teapots, which I will discuss in the next chapter.
Jars and Other Lidded Forms
There are many lid solutions that have evolved to suit the utility of the jar’s contents. The ginger jar is a common lid solution where the flange is in the pot’s body, but it points up, and not inward, so as not to restrict the opening of the container. The lid sits down around the flange, sealing the form. This design enables you to better reach into the jar to remove the gnarled roots of ginger that were kept inside. Below we have lid variations based on both in the pot and in the lid flanges as well as a host of other lid solutions.
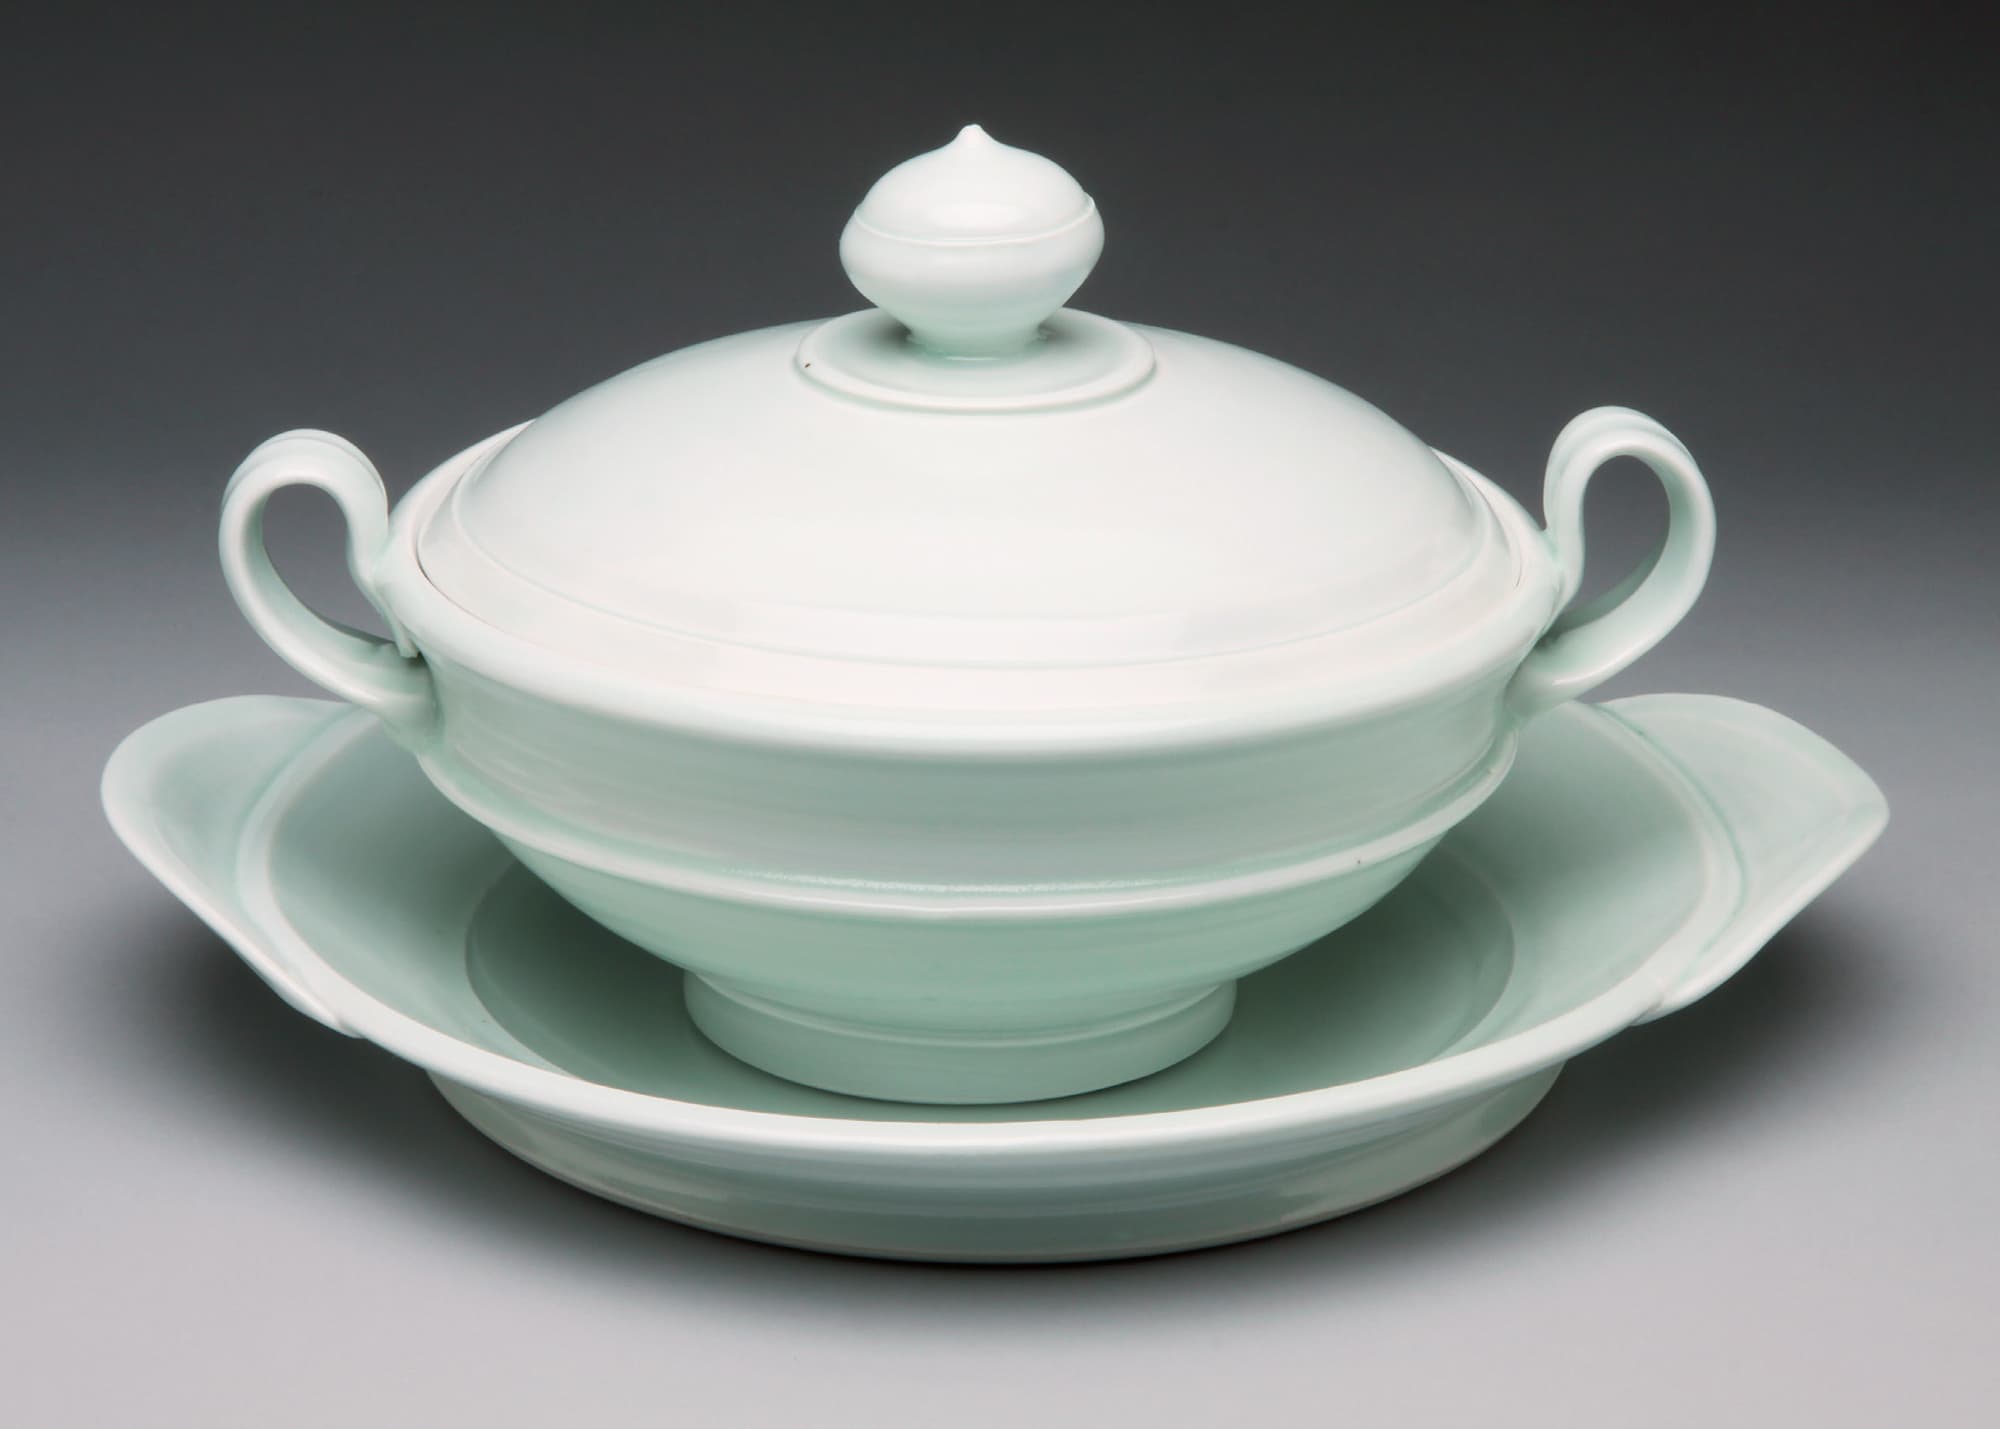
The lid on Sarah Jaeger’s tureen set rests on a gallery inside the pot. This is a common inset lid solution but can be a tricky one for such a wide lid. When making wide lids, make sure to always fire the lid in the pot so that the opening of the form doesn’t warp during the firing. Photo courtesy of the artist

The lids on these jars by Doug Fitch are thrown upside down with a flange attached so that the outer edge of the flange nestles into the rim of the jar. A lid of this style is functionally strong, while also providing a focal point for the form. The horizontal line created by the lid gives the form a visual break, which is a counterpoint to the strong finger-swipe decoration on the body of the form. Photo courtesy of the artist
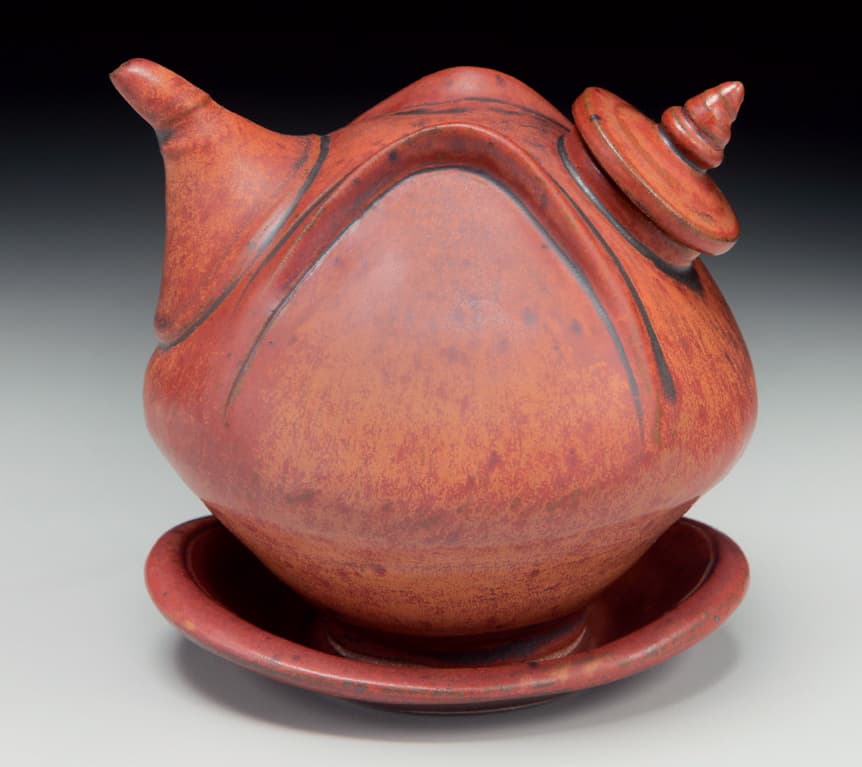
The lid on this Ellen Shankin soy bottle is thrown with a longer narrow flange. This holds the lid in place as the ewer is tilted during use. Notice how the angle of the lid’s knob mirrors the angle of the spout. The symmetrical balance between those two elements is a nice balance to the triangular shape of the pot. Photo courtesy of the artist

Matt Long uses a cap lid on his flask that slides down around a flange thrown on the form. He also uses epoxy to fasten a cork on the inside of the cap lid. In combination with the cap lid style, this creates a lid that will not move and will not let any of the contents out if the pot is tipped over. Photo courtesy of the artist
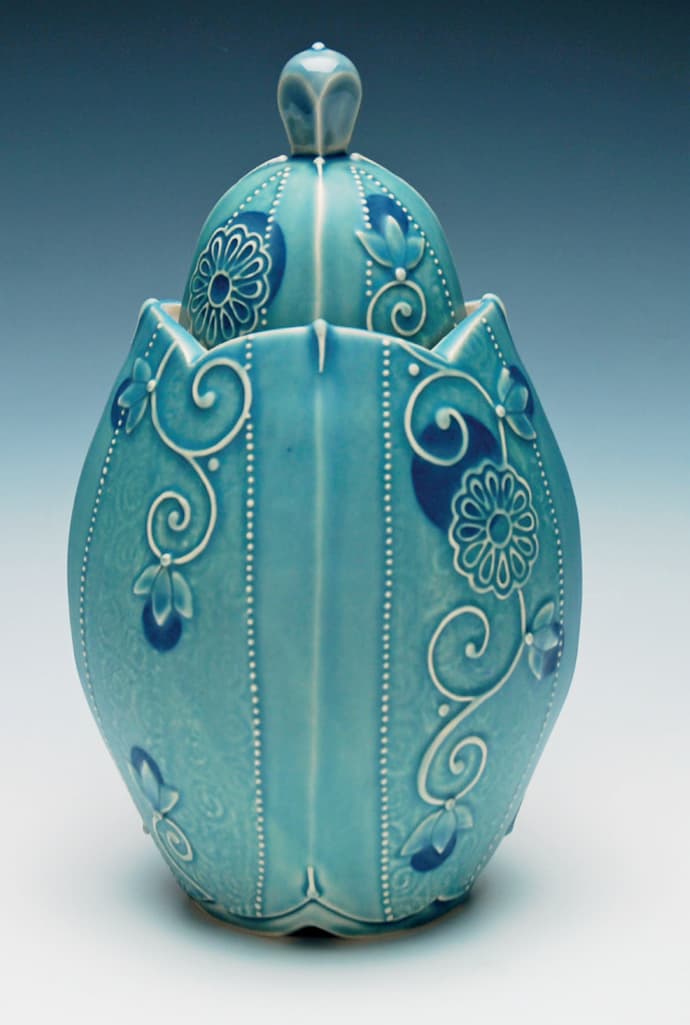
Kristen Kieffer’s altered square jar is a great example of an inset lid. The gallery is in the form of the pot, but both the lid and the form are altered into the shape of a square. Notice the way the glaze breaks off the edge of the squared corners, helping to highlight the shape of the form. Photo courtesy of the artist
LIDS FOR ALTERED FORMS
There are times when the alterations you make to a form will make it difficult to throw a lid. Forms such as ovals, squares, or rectangles are perfect candidates for slab lids. These forms are thrown without a bottom and one is attached after throwing. J K L You’ll want to create an inset gallery that is similar to the example above. When altering the form, make sure the gallery stays horizontal as you push the form into shape. If the gallery starts to dip in the corners of the alteration, use your finger to push it back into shape. After the form has been thrown, attach a slab bottom and cover the piece in plastic for twelve hours to allow moisture levels to equalize.

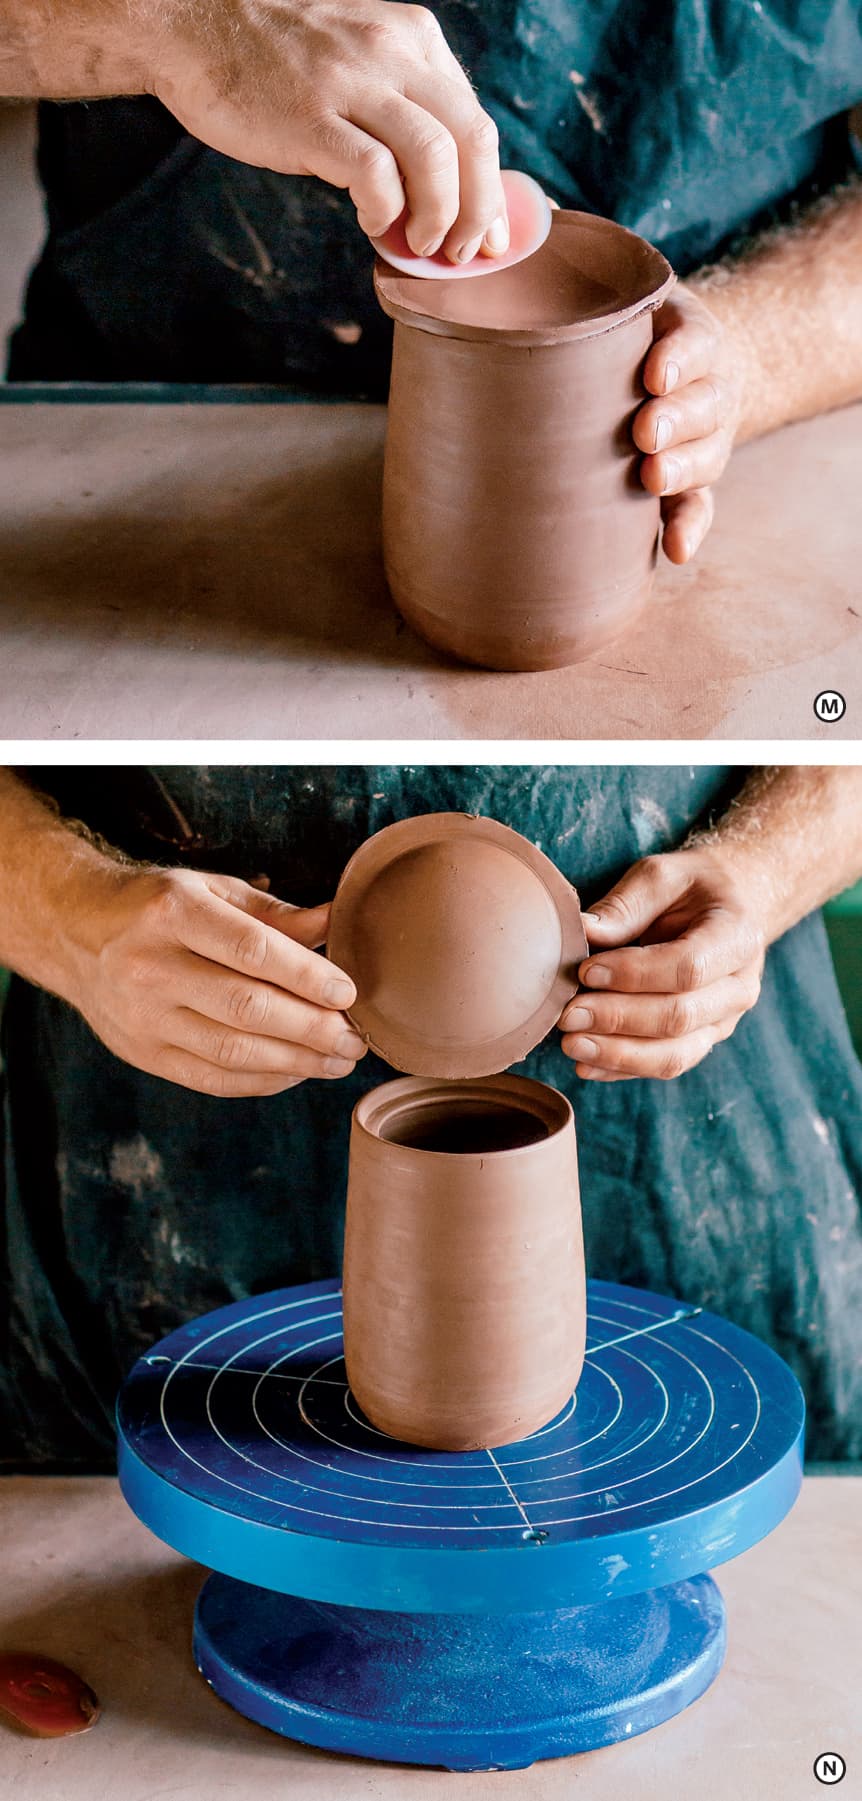
Unwrap the piece and allow it to dry to leather hard. Because the pot is leather hard, you will be able to use its rim as a drop mold for the lid. Place a compressed 1/4-inch slab on top of the rim, leaving at least an 1/8 inch of extra clay around the rim to hold the slab in place.
Rub a flexible plastic rib back and forth to compress the slab into the shape of the form. M Allow the slab to dry to leather hard and cut off the excess clay. When you flip the slab over, the lid will slide down into the inset gallery. N A surform can be used to refine the lid for a tight fit.
KNOBS
After making the body and lid of the pot, consider how a knob will complete the function and aesthetic of the form. Knobs help the user grasp the lid while also reinforcing aesthetic decisions in the design. Before we get into technique, I want to emphasize design considerations. For containers used in the service of hot foods, think about how heat will transfer through the form. A piping hot casserole dish will be handled with an oven mitt, which necessitates the use of a larger, more aggressively shaped knob. Conversely, the knob on a cookie jar will never be hot and could be grasped directly by the user’s hand. Knobs on these forms can be smaller and more elaborate while still being functional.
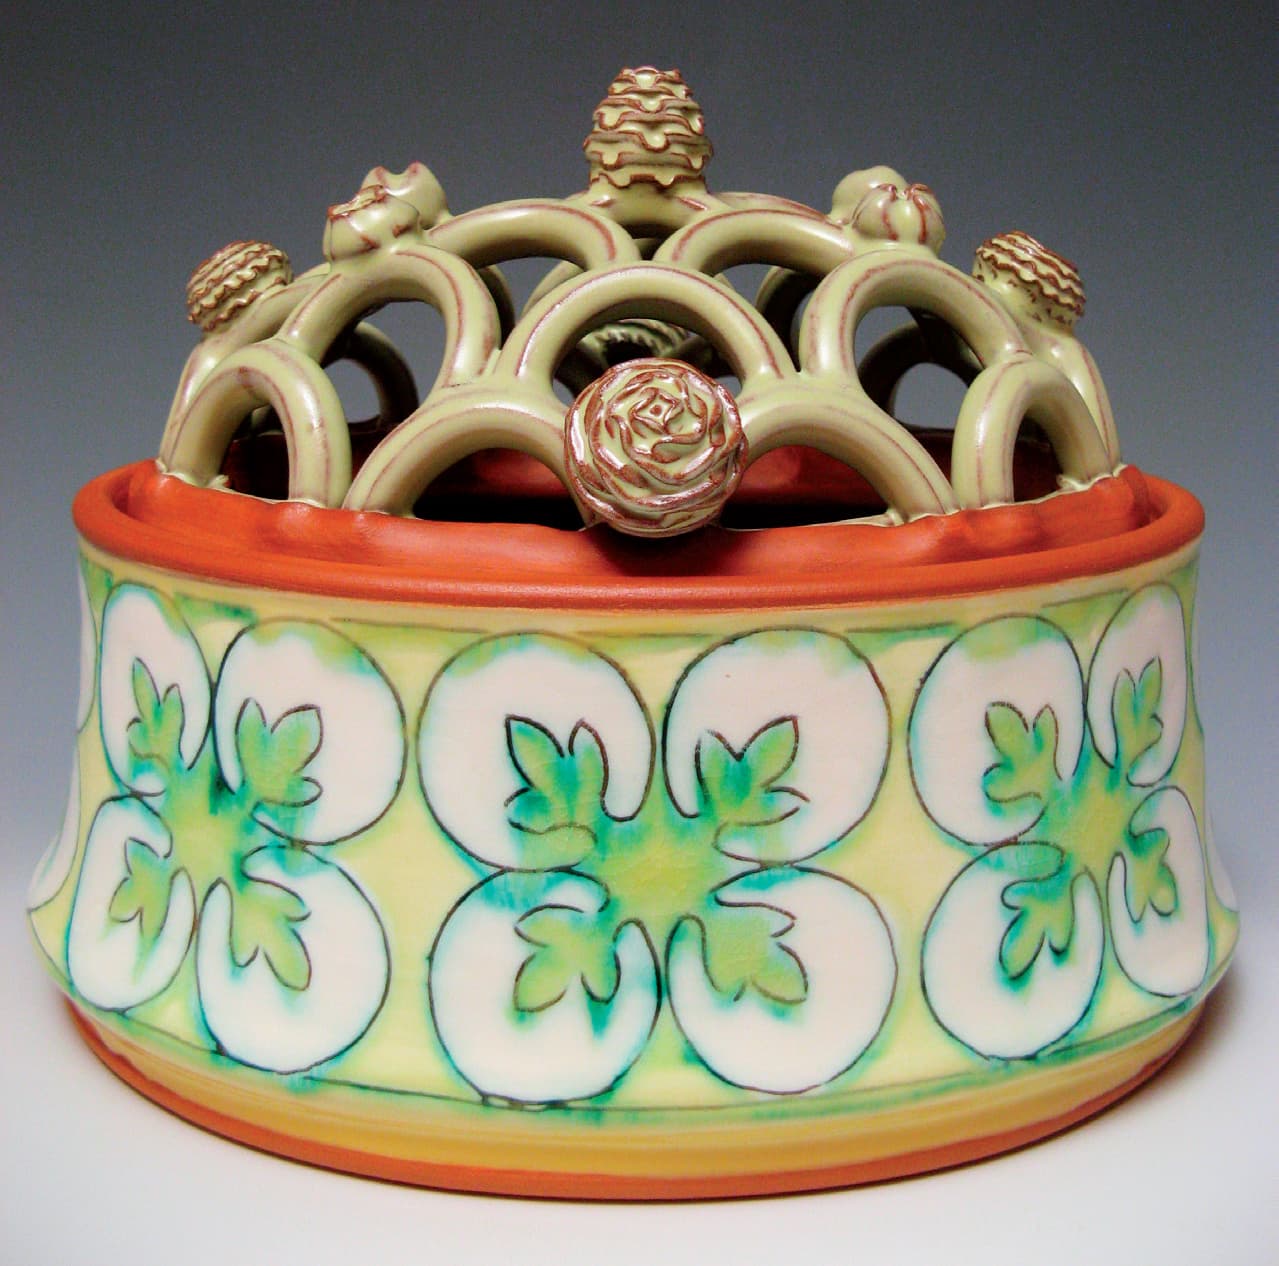
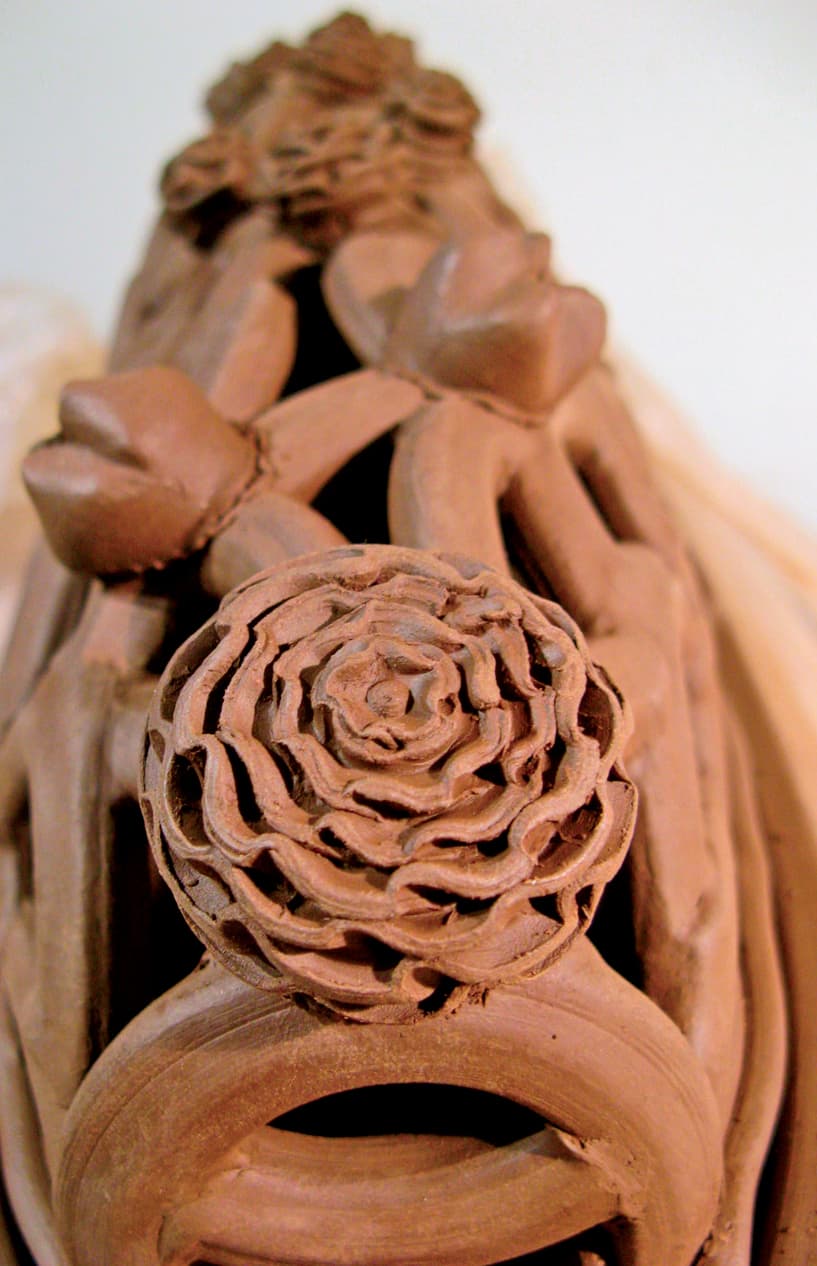
Joan Bruneau throws textured knobs that become decorative elements on her flower bricks. Photos courtesy of the artist
Along with the functional concerns I mentioned above, you will also need to consider how the shape stands in unity or contrast to the pot’s form. A plump, round knob might accentuate a volumetric round form, while a sculptural knob might provide a focal point that stands in contrast to an angular form. Scale and proportion are other important considerations. A proportionately smaller knob will make the body of the pot seem larger and will accentuate the interior volume of the shape. An oversized knob will make the pot seem smaller but might add a sense of humor or gesture to the form. When working on a new lidded pot, I recommend you make multiple knobs of each type so that you will have options when finishing the piece.
SUGGESTED STARTING WEIGHT
Knobs: 0.2 to 0.6 pounds
MAKING A KNOB
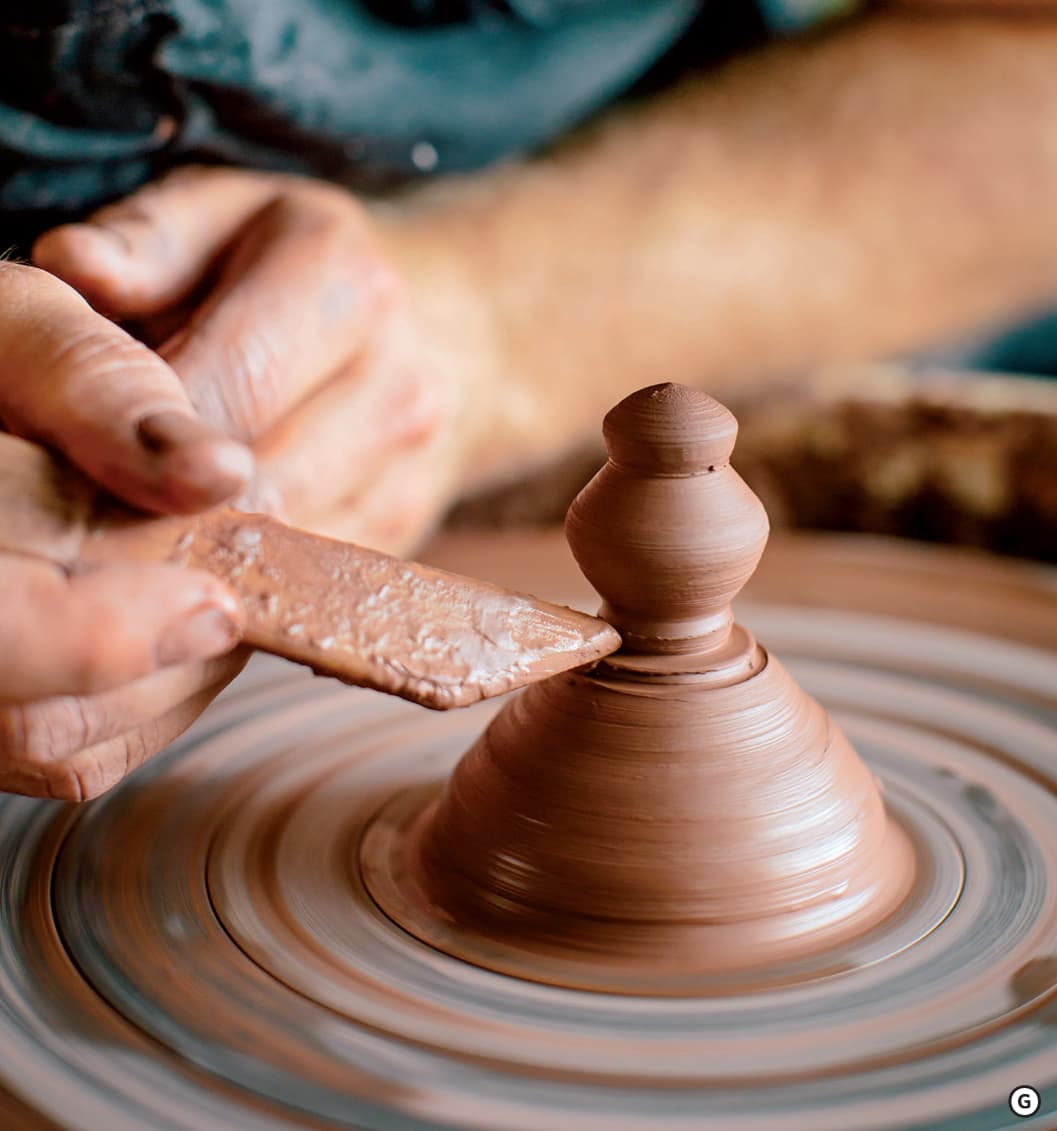
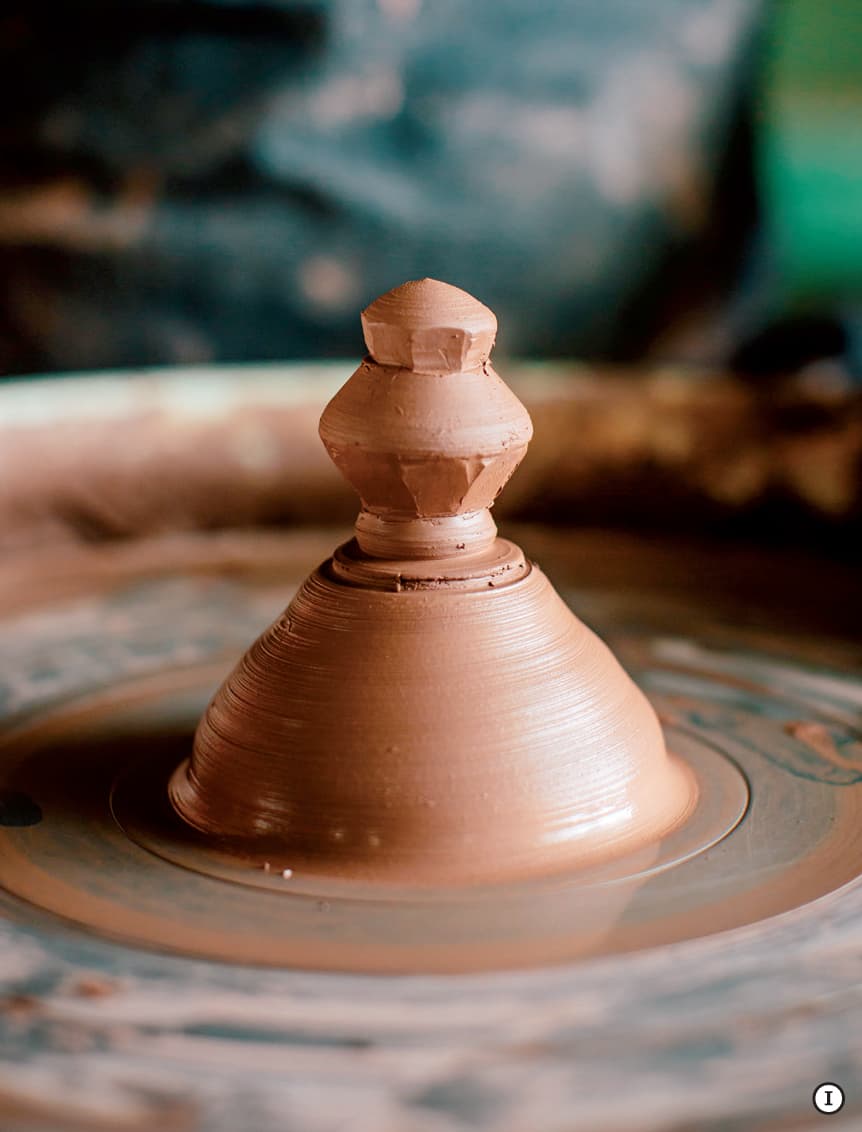
When making knobs, I often throw off the hump (see here). This allows me to quickly alter the amount of clay and therefore the scale of the knob. To make a solid knob, use your pointer finger and thumb to manipulate the shape of the form. A There is some concern that a large, solid knob will crack during drying or blow up in the kiln, so I recommend keeping the circumference of a solid knob under the side of your thumb. B C Below you will see four separate ways to make a knob: strap, hollow, paddled, and faceted. I encourage you to try them all and to use the general processes to make your own unique knob style.

Strap handle knob: Making a knob out of a pulled strap handle can be a versatile option. They can be an especially good complement to side handles on a casserole, or other wide, lidded dishes. For more information on handles, see the next section where I talk extensively about handle making.
Hollow knob: If you wish to make a larger knob, a hollow knob might be a good option. Open a small cylinder and throw your preliminary shape the same as you would a larger form. D E Close the form by collaring in the top so that you trap air inside the cylinder. F The air inside can now be used as a counterforce balancing the external pressure you apply with your hands. Think about altering the knob in the ways described in the chapter on alterations.
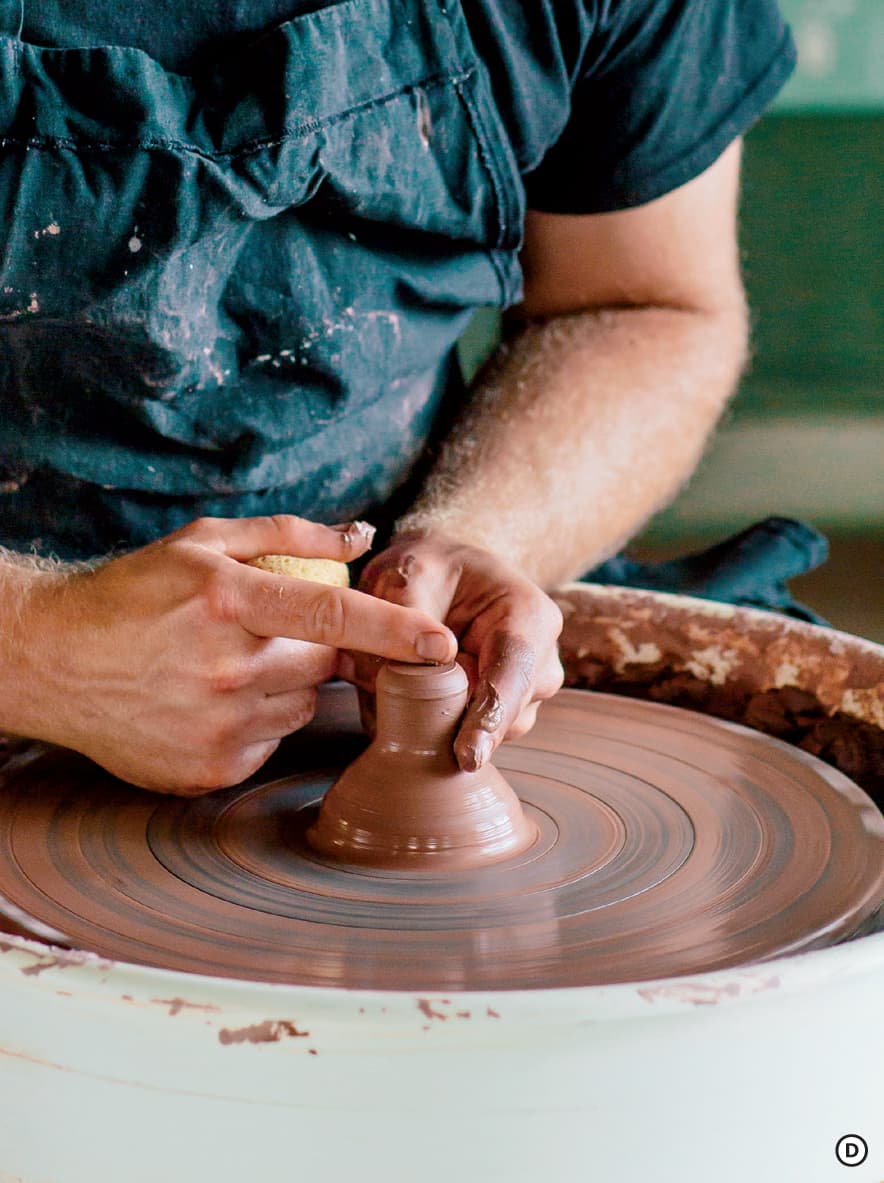


Paddled knob: Start with a shape that has been thrown and dried slightly with a heating device. To paddle the knob into shape, use the side of a wooden spoon or other object to flatten the form into a square. If the paddle starts to stick to the knob, dry it off and repeat the process. The small nature of the knob might necessitate that you put one finger in top of the knob to keep it from falling over during paddling. When finished, cut the knob off the wheel and put to the side.
Faceted knob: Start with a thrown knob that has been lightly dried. Use a nib or wooden fettling knife to refine the form. G Using a wire tool stretched between your hands or another tool, cut down into the knob to create facets. H I Think about how many facets will fit on a form this small, as well as how the facets might trap glaze during kiln firing. Make sure not to puncture the side of the knob by cutting the facets too deep. When finished, cut the knob off the wheel and put to the side.

HANDLES
The goal of many handles is to hold the pot comfortably without coming into contact with the heated surface of the form. This can be achieved with a side handle placement on a mug, or a top handle on a teapot. Choosing one orientation over the other is an aesthetic decision that relates to the form and the proportions of the overall form. Vessels that are vertical in orientation (taller than they are wide) often use side handles, while horizontal pots (wider than they are tall) often use top handles. The goal of both placements is to grasp the form at the point closest to its center of gravity. This is not to say that you can’t put a top handle on a tall, rectangular form, but the farther away your handle rests from the center of gravity, the greater the perceived weight of the pot will be.
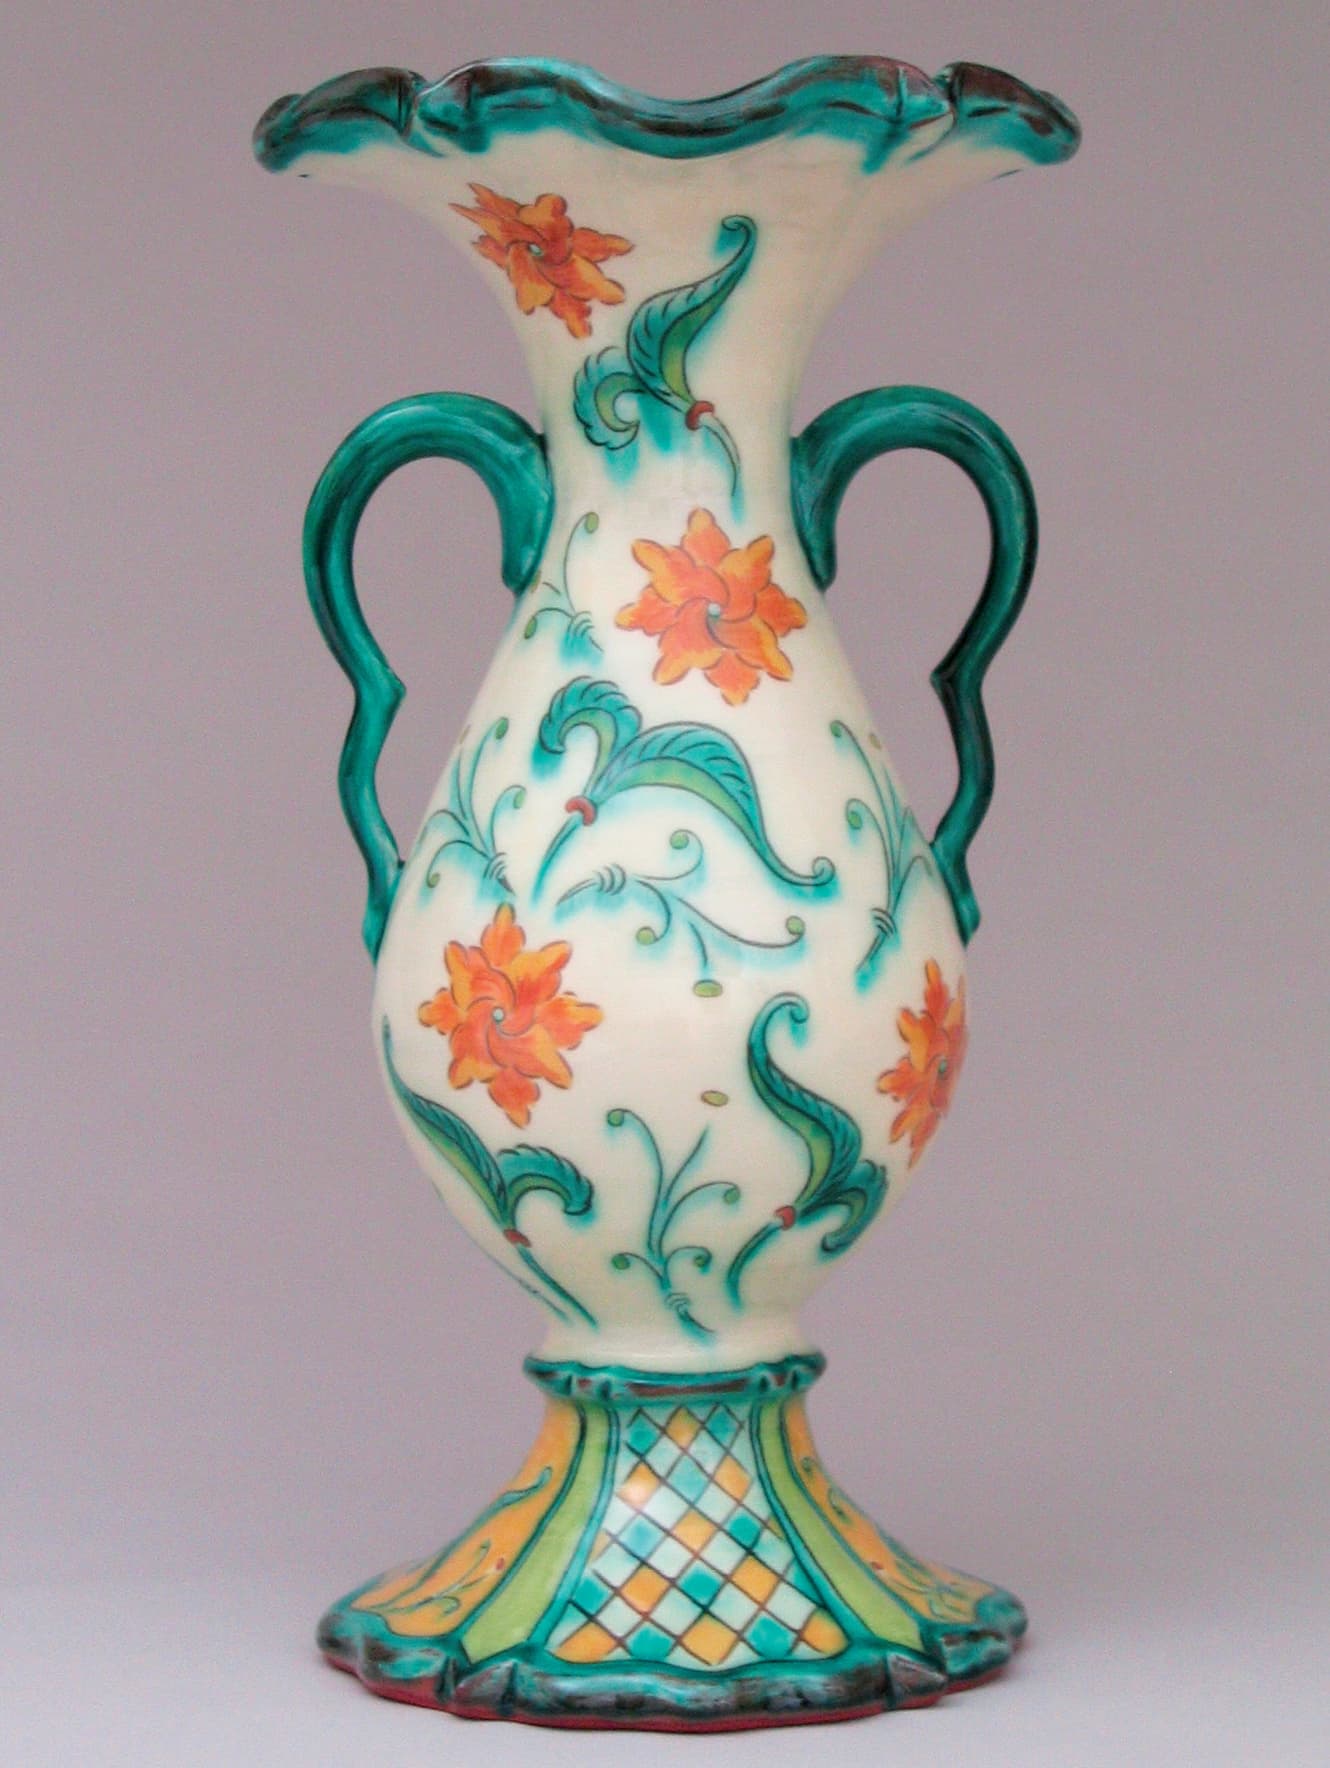
Jim Smith’s curvilinear handles are the perfect addition to his vase form. They accentuate the curved rim and the Etruscan rosettes that make up the surface decoration. Photo courtesy of the artist
SUGGESTED STARTING WEIGHT
Handles: 1 pound, depending on the size of the form
DETERMINING HANDLE PLACEMENT
To determine handle placement, I find it helpful to diagram my pots. First, draw a sketch of your pot plotting a horizontal axis across the bottom of the drawing and a vertical line through its central axis. A On the right side quadrant of the diagram, plot a line at 45 degrees, or roughly halfway between the vertical and horizontal lines. To maximize weight distribution of a side handle, you will need the crux of the curve to rest at or above the 45-degree line of the pot. If your handle curve rests below 45, the pot will feel unbalanced and heavier during use.

This mug shows the diagramming process that I use to determine proper handle placement. Photo courtesy of the artist
A similar formula can be used to determine the placement for a top handle. Draw your pot with the same vertical and horizontal plotted lines. Add a second horizontal line directly through the center of the form to represent the pot’s center of gravity. Measure between the center of gravity and the tallest edge of the pot so that you may plot a third line equidistant above the form. B Draw the shape of your handle, making sure the curve rests above the third line. In essence you are dividing your form into thirds, with the negative space of your handle occupying the top third of the pot. If your handle rests well above one-half of the height of your pot, it will feel unstable when you pour. This general rule could be broken to meet your aesthetic needs, but it will give you a starting point for top handle designs.
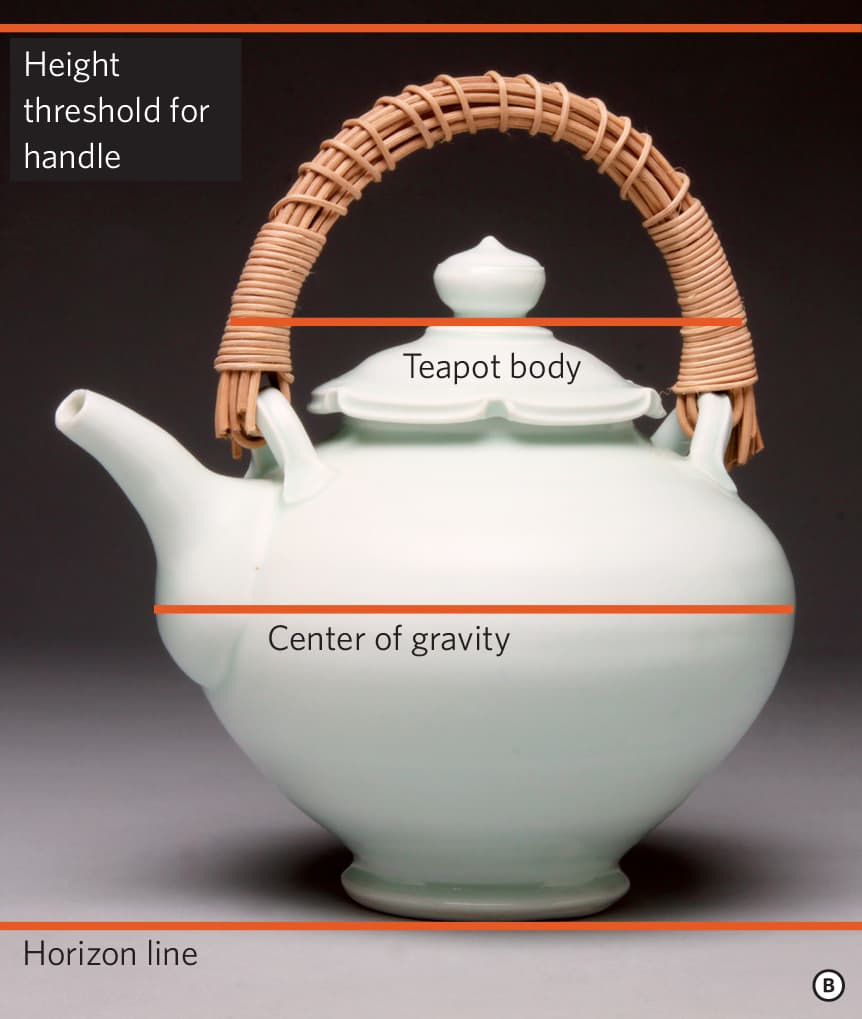
Sarah Jaeger, porcelain teapot with reed handle. Photo courtesy of the artist
When designing your pot, consider the weight of the form, which might double when filled with liquid during use. When holding a heavy weight, our wrists have strength thresholds with more limits horizontally than vertically. Large top handle teapot forms allow the user to hold the pot’s weight under their hand, keeping their wrist in alignment. A heavy side handle teapot will cause the wrist to bend, causing discomfort. As the weight of your pot increases, you will also need to consider any textural or sculptural embellishments you add to the handle. A small teapot with an aggressive handle texture might add character to the pot, but this same texture up-scaled for a larger pot might hurt your hand during use.
To best design your handle think about how users across all age groups and strength levels might feel when holding your pot. Experiment with a variety of shapes and orientations until you find the balance between comfort and aesthetic.
PULLING A HANDLE
A common way to create a handle is to pull it from a thick tapered coil. Hold the wider end of the clay “carrot” in your nondominant hand. C Dip the bottom two-thirds of the clay into water before you pull downward with the thumb and pointer finger of your dominant hand turned into the shape of a C. D Pull with decreasing pressure away from the mass of clay multiple times until you create a small, thin strap of clay. E


Every third pull, rotate the clay so that you are pulling the opposite side of the strap to create an even thickness all the way through the handle. F Add water if necessary and make sure the pulling motion is fluid. Depending on the size of the clay carrot you start with, you can make multiple four-to five-inch handles that are detached and place on a bat to dry.

With slight alterations in pulling pressure, this method can be used to pull a handle from the side of a completed pot. Many potters prefer this method for its speed and their ability to pull the handle directly into a shape that suits each individual pot. To pull a handle from the pot, first attach a smaller carrot at the top attachment point and hold your pot sideways with its central axis parallel to the ground. G H Pull in the same way described above and let gravity help you shape the handle. I When your desired length is reached, turn the pot right-side up to create an elegant curved handle that terminates near the bottom of the pot. J K

A MODIFIED WAY TO PULL HANDLES
The methods described so far form the core method for pulling handles. After many years of using these methods, I developed a similar hybrid method that starts the process with a partially hand-built handle. I find this allows me more control in shaping the profile of the handle.
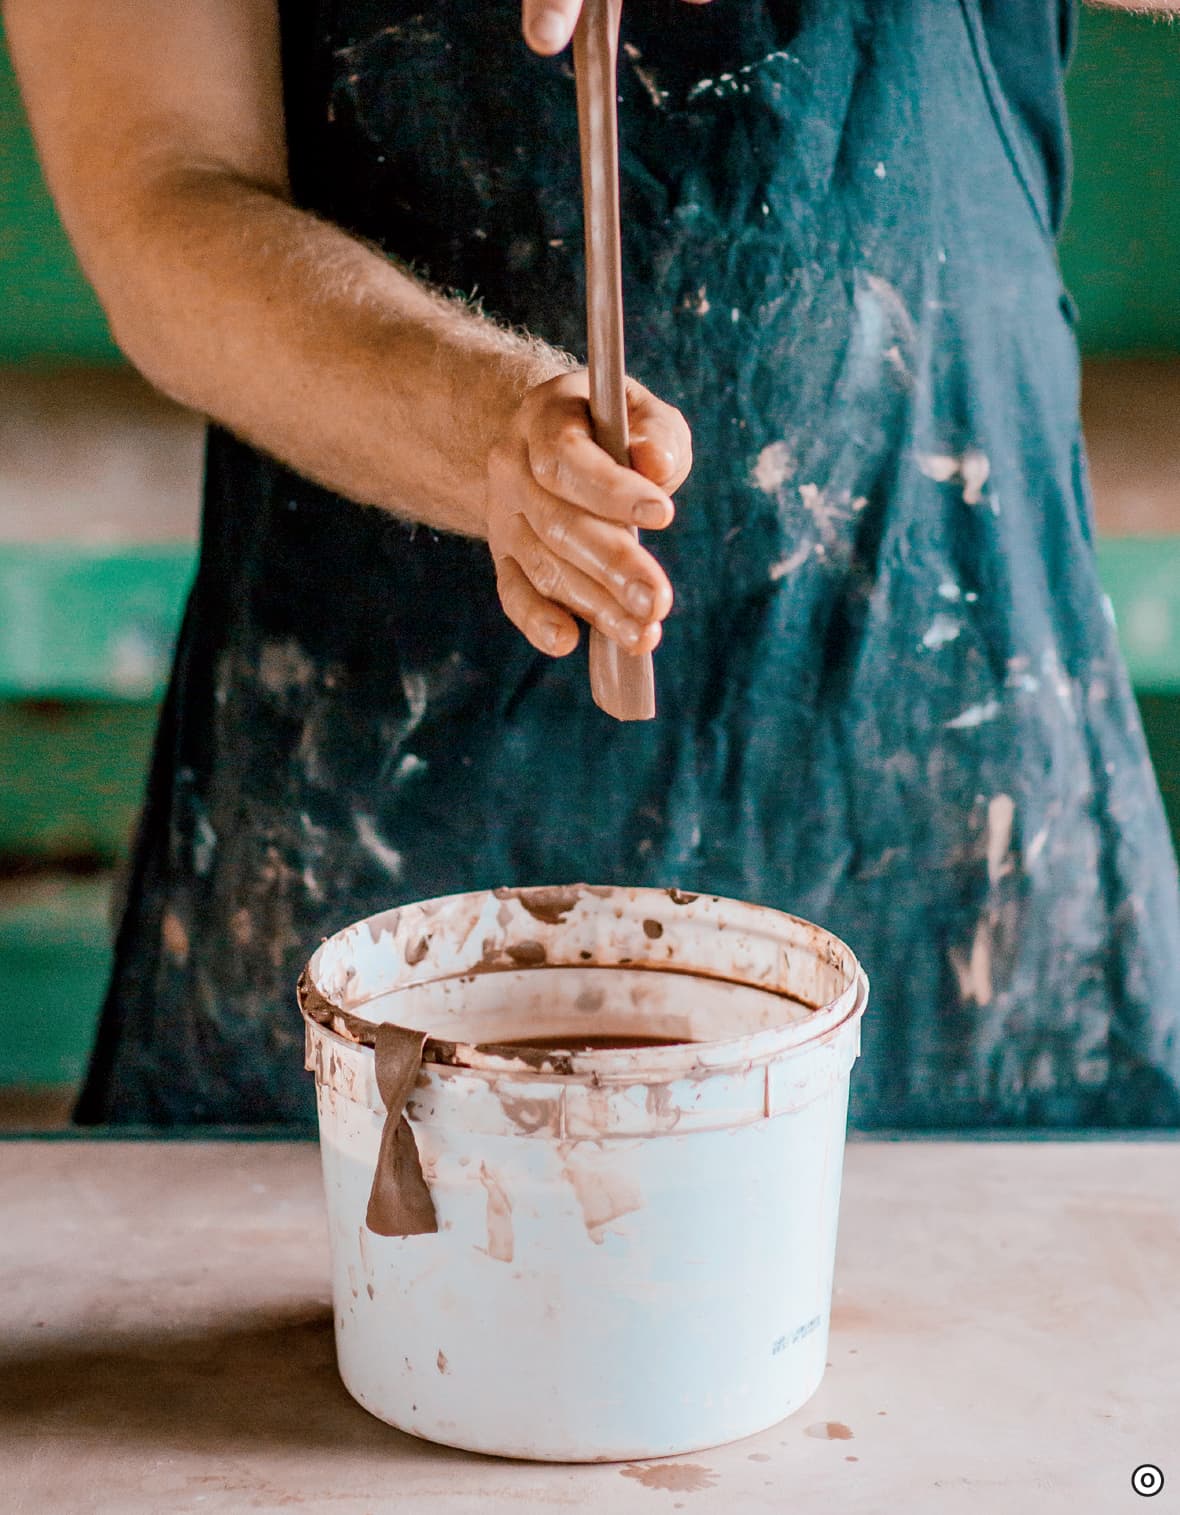
Start with a tapered coil that is thinner in the middle and thicker on the ends. L

Drop the coil onto a dry table to flatten one side, leaving the other side round. M If you cut a cross-section of the coil at this point, it would be oval with a substantially thicker center core and refined thin edges. N The oval cross-section allows you to utilize the strength and thickness of the handle’s core while seeing the elegant line quality of the tapered external edge.


Thin the handle by adding water and pulling in the traditional way. O To further refine the edges, put your thumb and pointer finger together to taper both edges of the handle. P Halfway through the pulling process, dry off the bottom of the handle, turn the handle upside down, and pull from the opposite direction. When the desired length is reached, place the handle on a bat to dry in the shape you want.
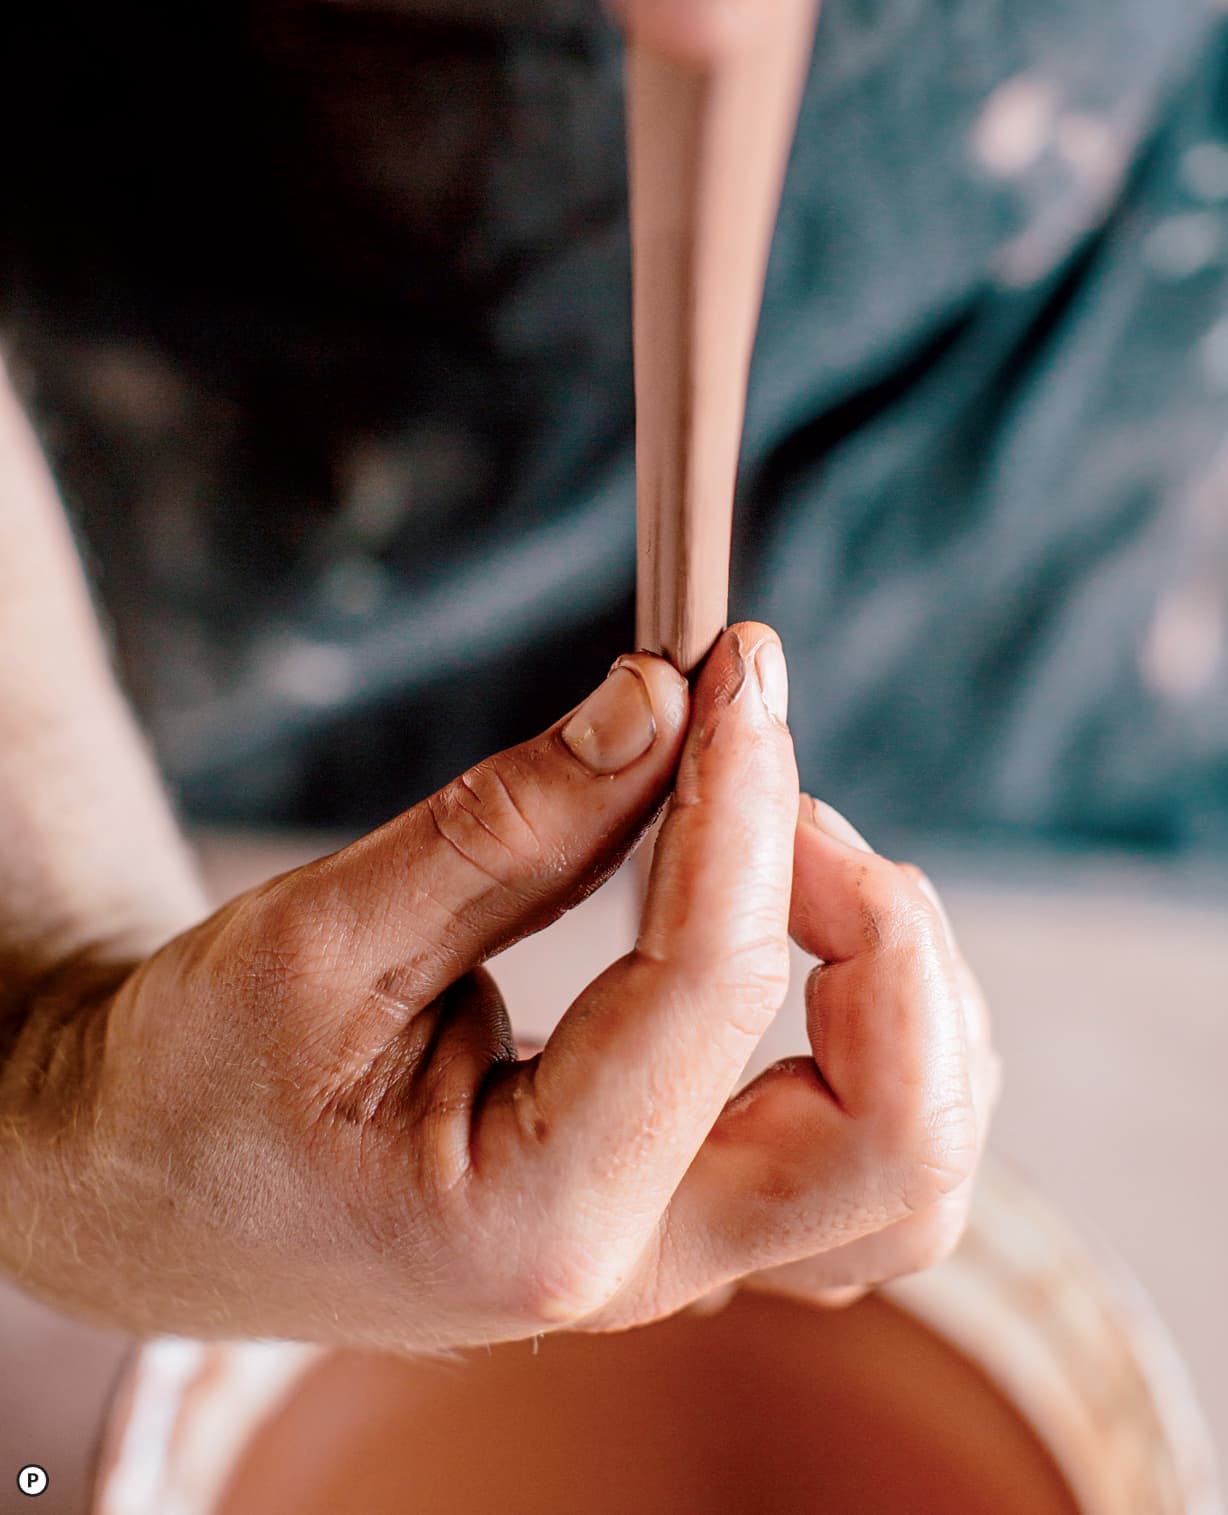
Consider how many fingers will fit comfortably in the curve of your finished handle. A more open curve will allow two or more fingers, while a tighter curve would only allow one.
Consider adding texture to the inside or outside surface of the handle to make unique variations. Rolled rope, stamping, and pinching are just a few techniques you might try. Q

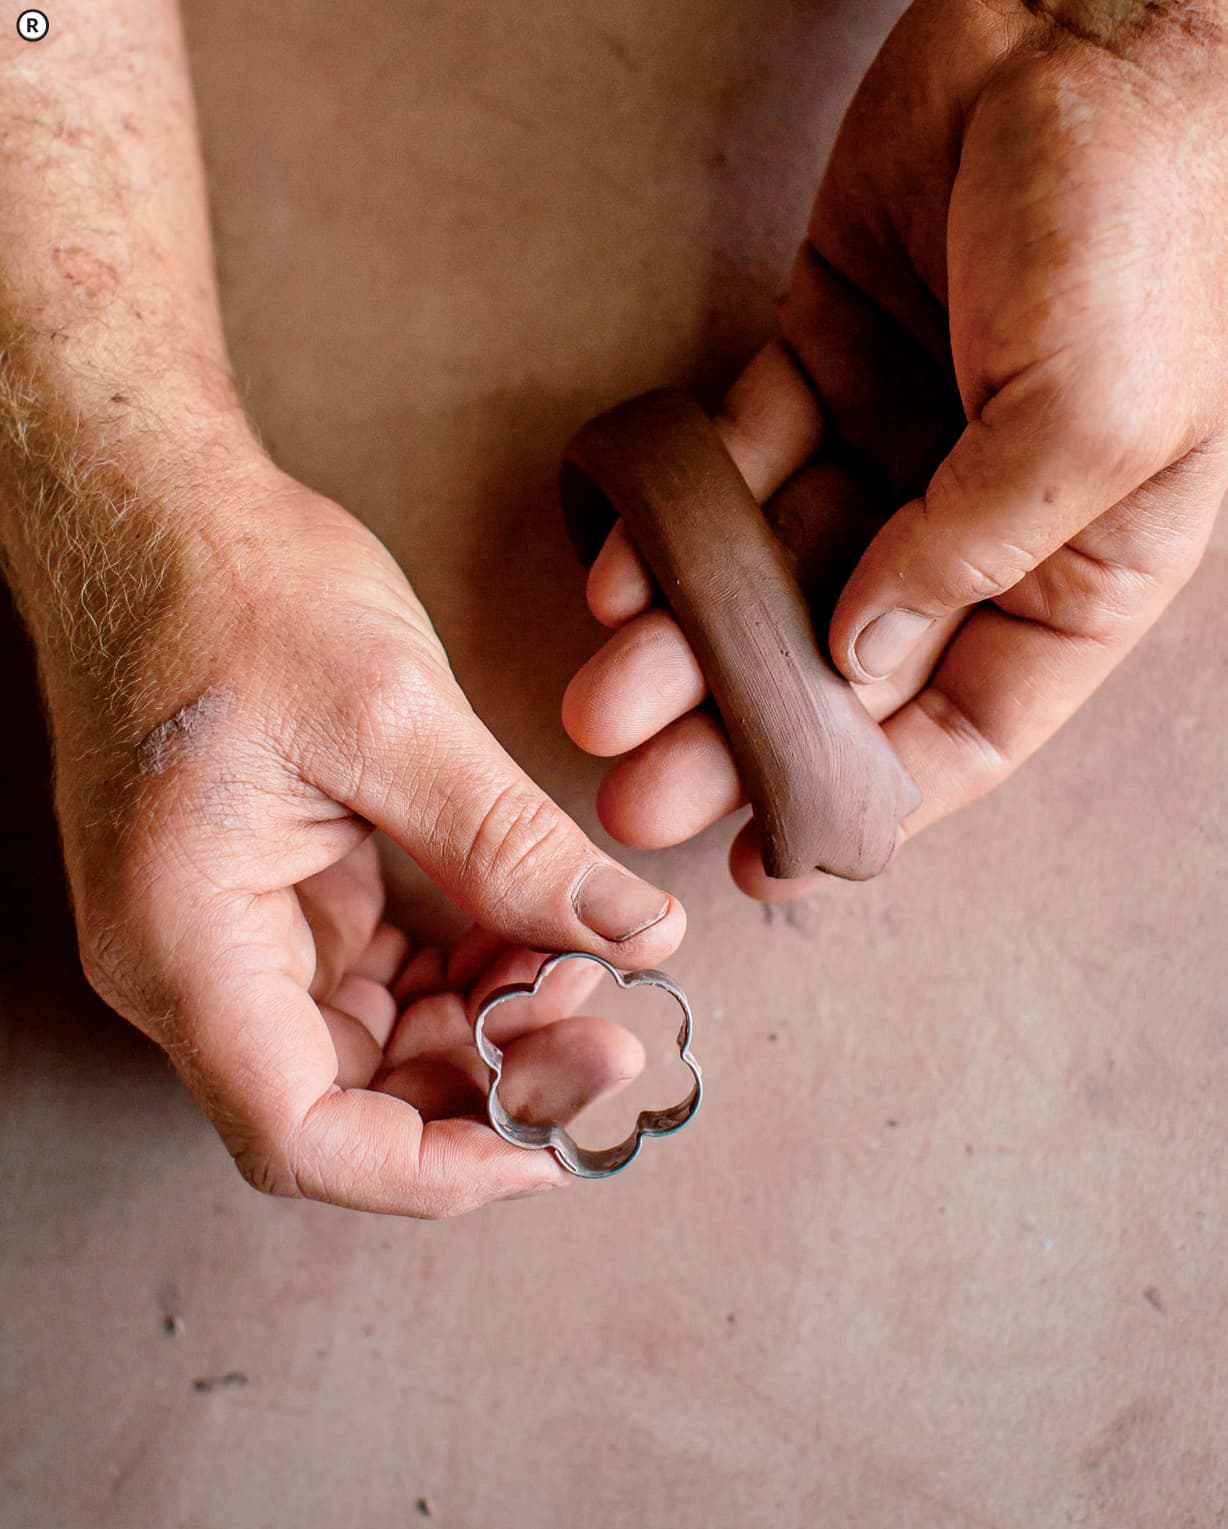
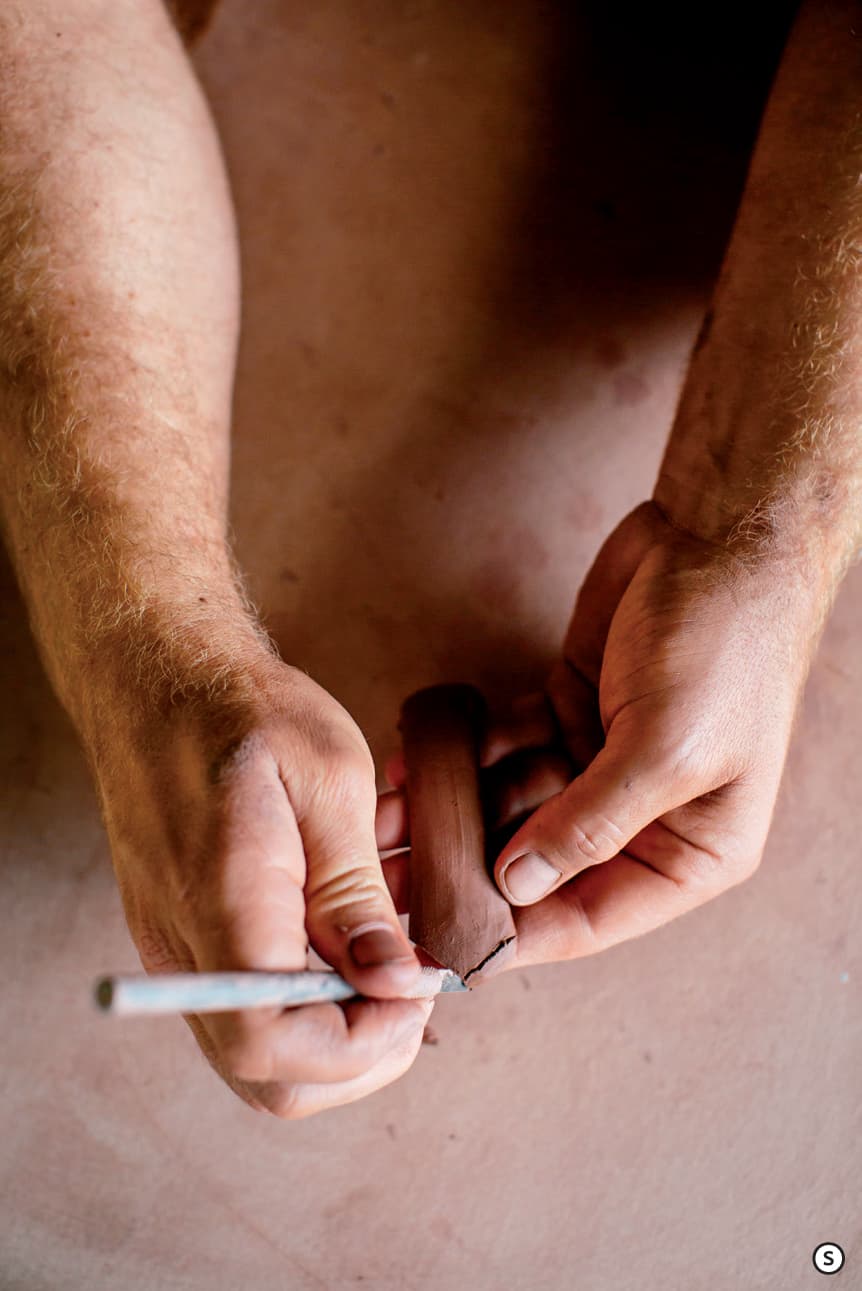
Also consider cutting the connection points of the handle into a shape. I like to use a cookie cutter or craft knife to refine the ends of my handles before attaching them. R S T

ATTACHING HANDLES
Attaching your handle is the single most important part of the process. When adding secondary parts like a handle to a pot, remember the saying “hard to hard, soft to soft.” If you are pulling a handle directly from the pot, both the pot and the handle need to be on the soft side to ensure they shrink at the same rate. If you are applying a soft leather-hard handle that has started, you will need to ensure the pot is of similar hardness before application. This will limit how much you can bend the handle in the application process, but it will help match shrinkage. The problem most beginners have is that they apply a soft handle to a leather-hard pot. The handle then dries more than the pot and cracks at the connection point or the central crux of the curve.
When attaching additions to a pot, I first hold the handle in place to test which placement looks best. U The surface of the pot is round but the handle’s connection point is flat, so I push the connection up against a bucket to create a reciprocal round curve that will fit the pot perfectly. V


Holding the handle into place, trace a line on the pot around both connection points. Score the surface of both parts with a serrated rib, or fork, before adding water to the scoring pattern. W Let the pot and the handle sit for thirty seconds to allow the water to absorb into the surface. Some potters prefer using slip for hydration, but I have found water to be equally effective.

Once the junction points are soft but still sticky, place the top connection point into place and wiggle back and forth. Continue to move the connection point until it will no longer move. The friction of the movement ensures a bond is made. Adding too much water or applying too little pressure when pressing the handle into the form can cause attachment failure.
Repeat the same process with the bottom connection point. If done properly with a leather-hard handle and pot, you can immediately pick the pot up by the handle to make sure it is connected. Clean away excess clay that might have accumulated in the attachment process with a pin tool or a rubber-tipped sculpture tool. X

SPOUTS
From a purely functional standpoint, a spout is an exit for liquid to leave a pot. There are a variety of shapes a spout can take, but all spouts have two core parts: the throat, which is the wide attachment that faces the pot, and the lip, which is the smaller opening from which the water is released. Both closed (teapot) and open (pitcher) spouts share physical characteristics that are based on the dynamics of flowing liquid. For a spout to pour well, the throat must allow enough liquid to flow so that pressure, and therefore speed, will be created through the act of pouring. Increasing the volume of liquid that enters the throat or restricting the size of the lip will make your spout pour smoother.

Looking at Shawn Spangler’s ewer spout, I see a bird in the form. With a straight, less adorned spout, this form would seem architectural. Isn’t it amazing how the shape of a spout has the power to change your whole perception of the pot? Photo courtesy of the artist
Another aspect to consider is how the spout’s scale will affect the aesthetic of the pot. Over-or under-sizing a pot’s additions can enhance their formal or emotional qualities. Numerous cultures throughout ceramic history have used spouts, handles, and knobs to create focal points in a pot’s design. Consider the way a dragon’s head was replicated in Chinese Tang Dynasty handles or the way a dog’s mouth gave form to a terra cotta spout in Peruvian Moche ware. I encourage you to find your own balance between function and aesthetic.
SUGGESTED STARTING WEIGHT
Spouts: 0.5 to 1 pound
MAKING AN OPEN SPOUT
To ensure you have an adequate amount of clay to form the spout, leave 1/4 inch of clay at the rim. Terminate your form at a slightly inward angle to set up for the spout. A

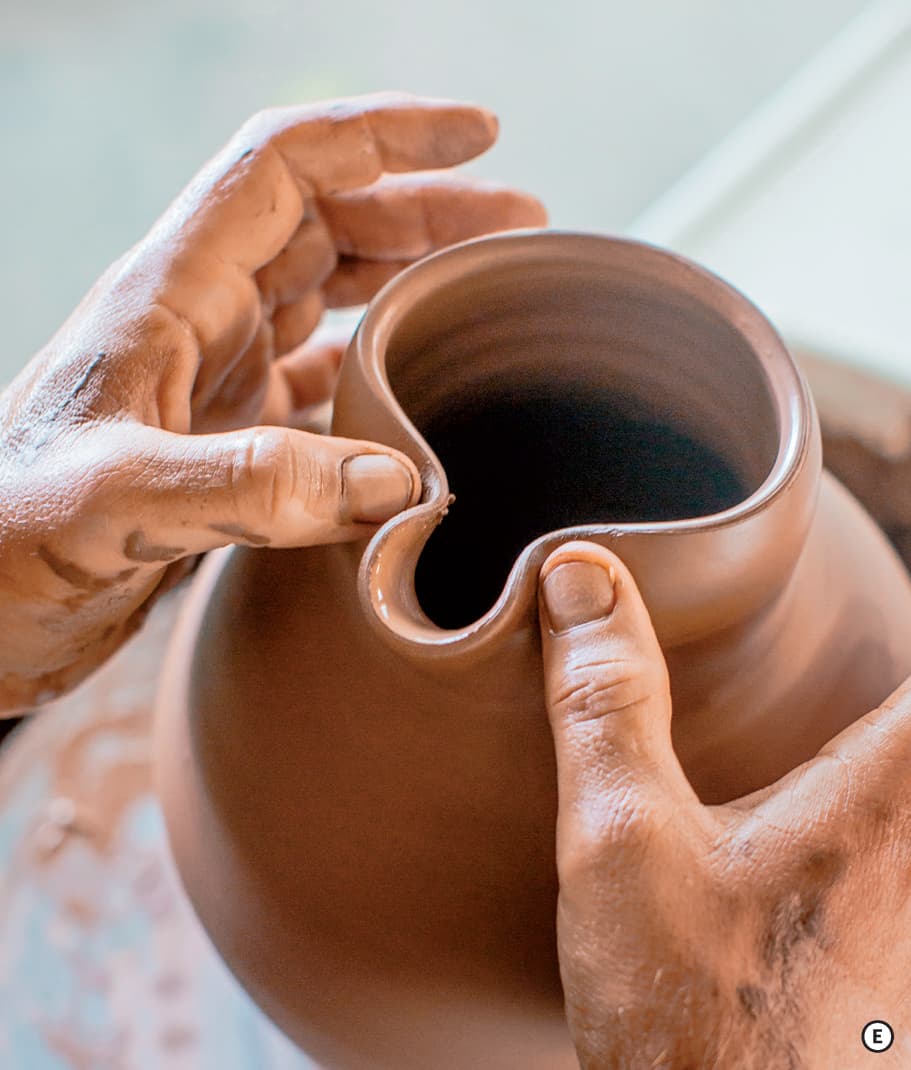
Place your left hand upside down underneath the location on the lip where you want the spout. Push up with your thumb and pointer finger just below the rim. Wet the top side of the lip and rub your right pointer finger back and forth. B Applying slight downward pressure, shape the spout opening. Refine the lip of the spout to create a sharp taper. C If the spout’s lip is too round or undefined it will dribble liquid at the end of the pour.
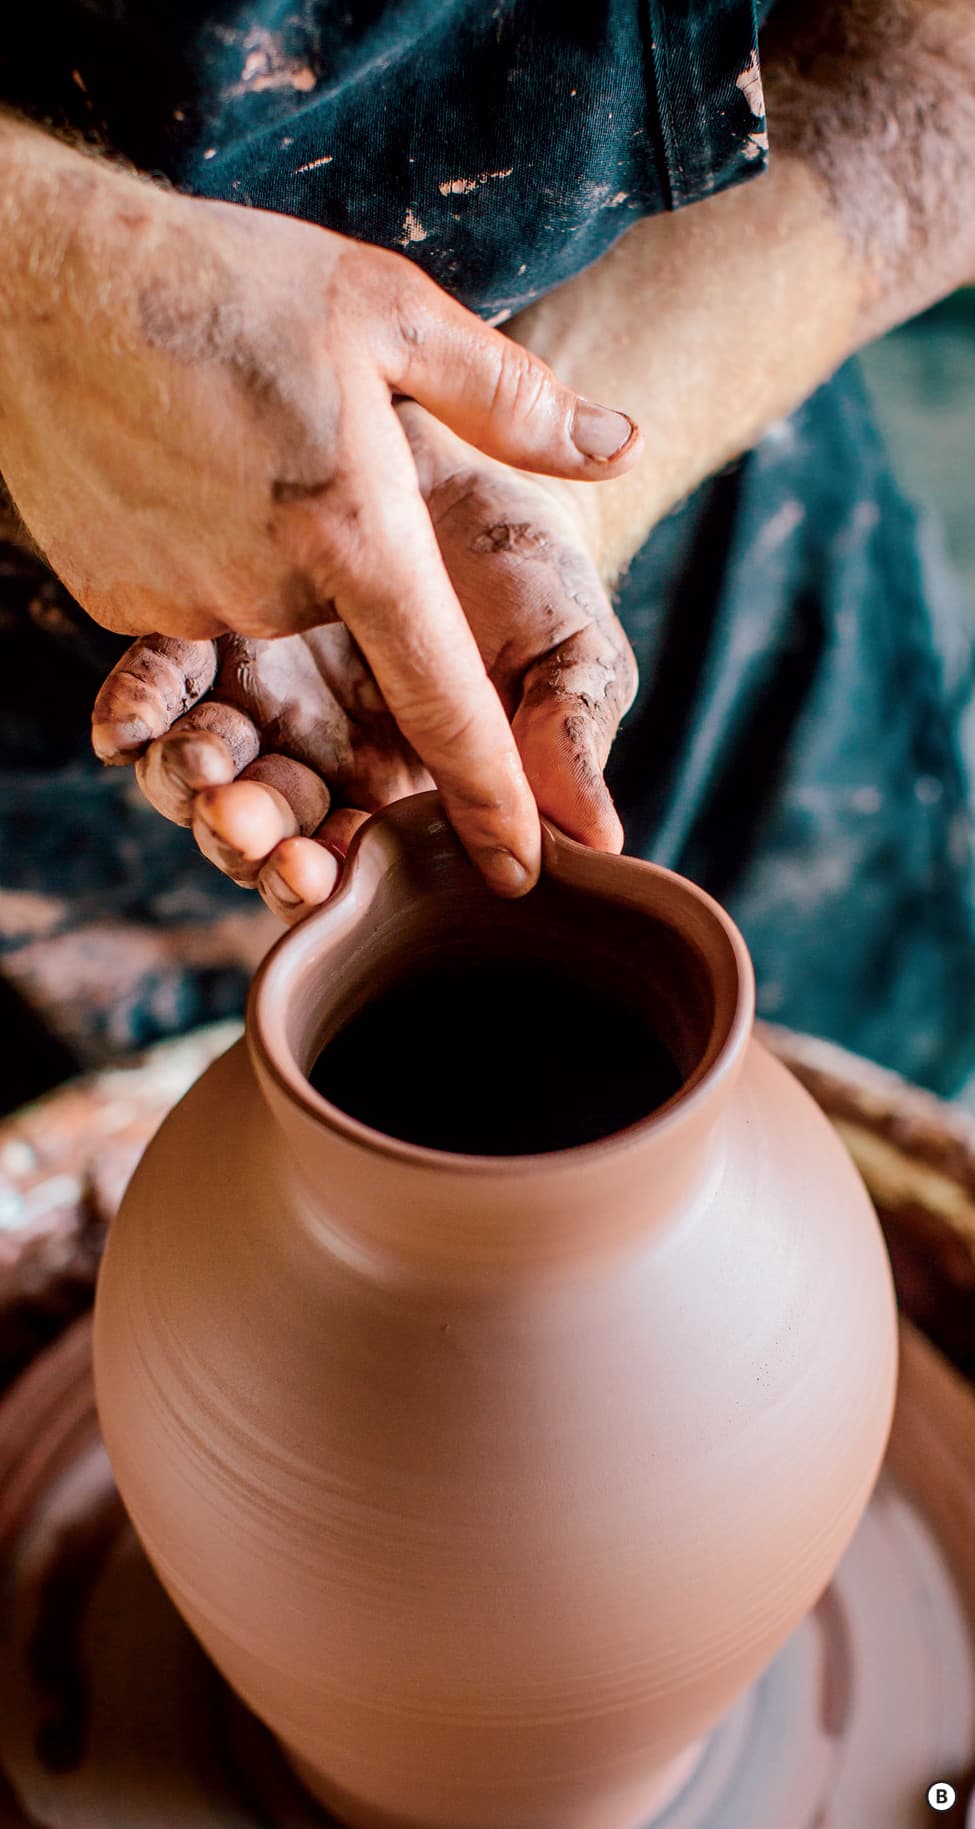

A popular variation for making spouts is to pull up on the lip where the spout will be located. D This thins the clay and raises the edge of the lip in that spot, making a slightly elevated spout. This technique can be exaggerated to create a dramatic raised spout. E Another variation involves making the spout separately out of a small slab. I will cover this technique in Chapter 6 under pitchers.

MAKING A CLOSED SPOUT
Throwing off the hump (shown here–53) is an effective way to produce multiple spouts in a short amount of time. Center a 4-pound lump of clay before sectioning off a smaller portion to make your spout, or center a small amount of clay directly on the wheel head. If throwing off the hump, trace a line at the bottom of the section to help you recognize the bottom as you are throwing.
Open down to form a hollow cylinder. F Before pulling up, push out the bottom of the spout to the desired width. When taken off the wheel this will be the throat of the spout.

Pull up and inwards to create a volcano-like shape. G As you are pulling, maintain an even 1/8 inch thickness of the spout wall. Your instinct might be to throw a thin-walled spout, but this has little to do with its efficacy.

Around one-third of the way up the cylinder, start to collar in by pressing lightly with your thumb and pointer finger. H Moving from the bottom upwards, repeat this collaring motion until you have reduced the top two-thirds of the cylinder into a long narrow tube. I Adjust the proportions of the tube until you feel comfortable with the spout length and width. You can cut the spout to a shorter length if necessary.
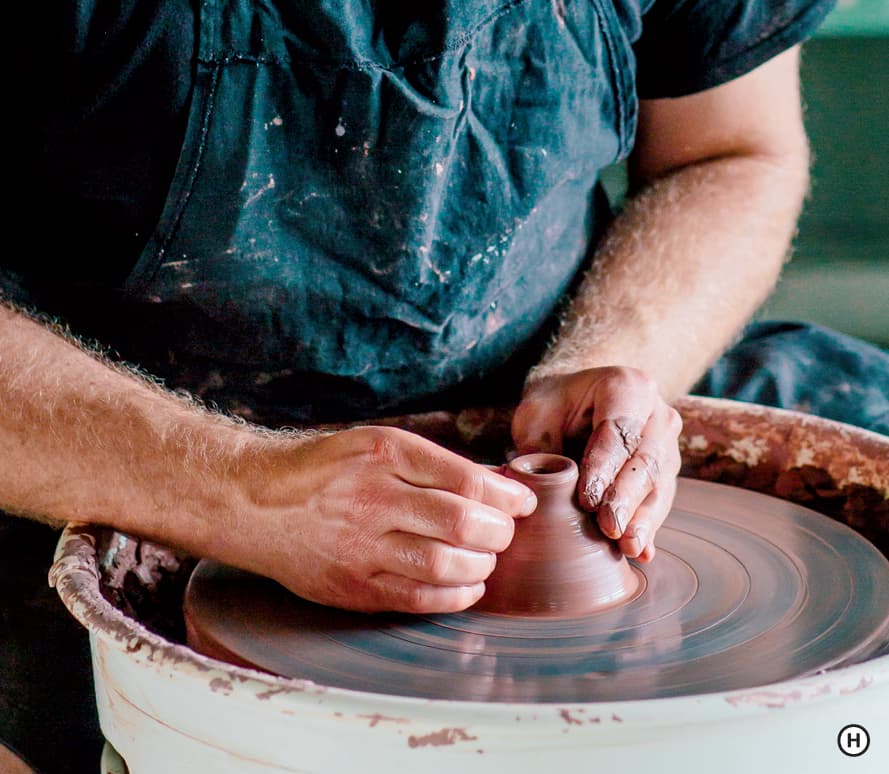
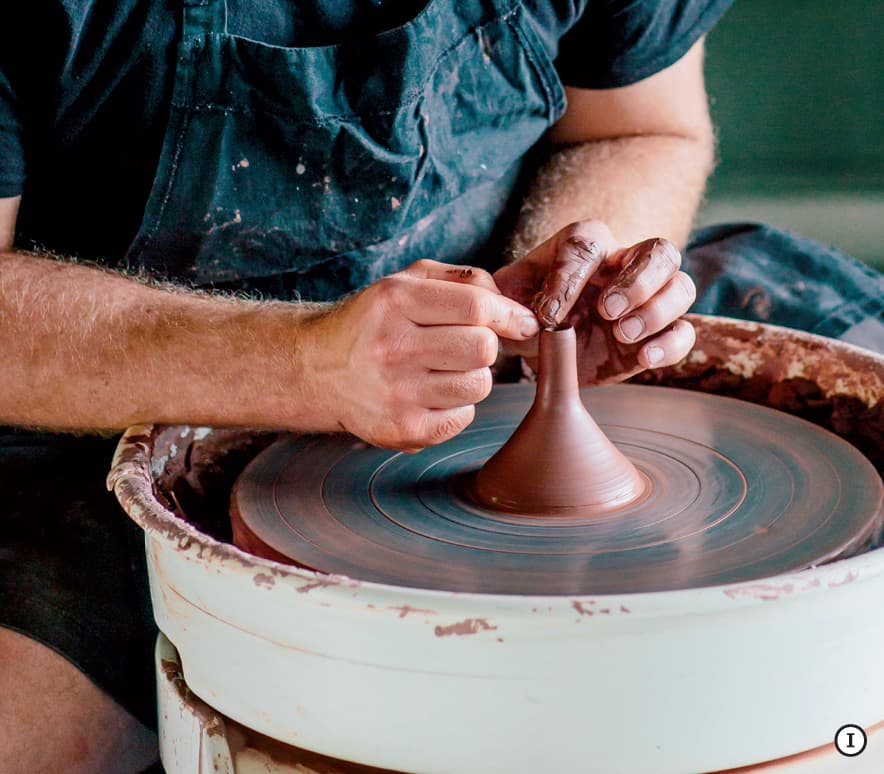
Establish a sharp inward taper at the end of the spout. J This will help the spout cut the stream of liquid in a precise manner and reduce dribbling.
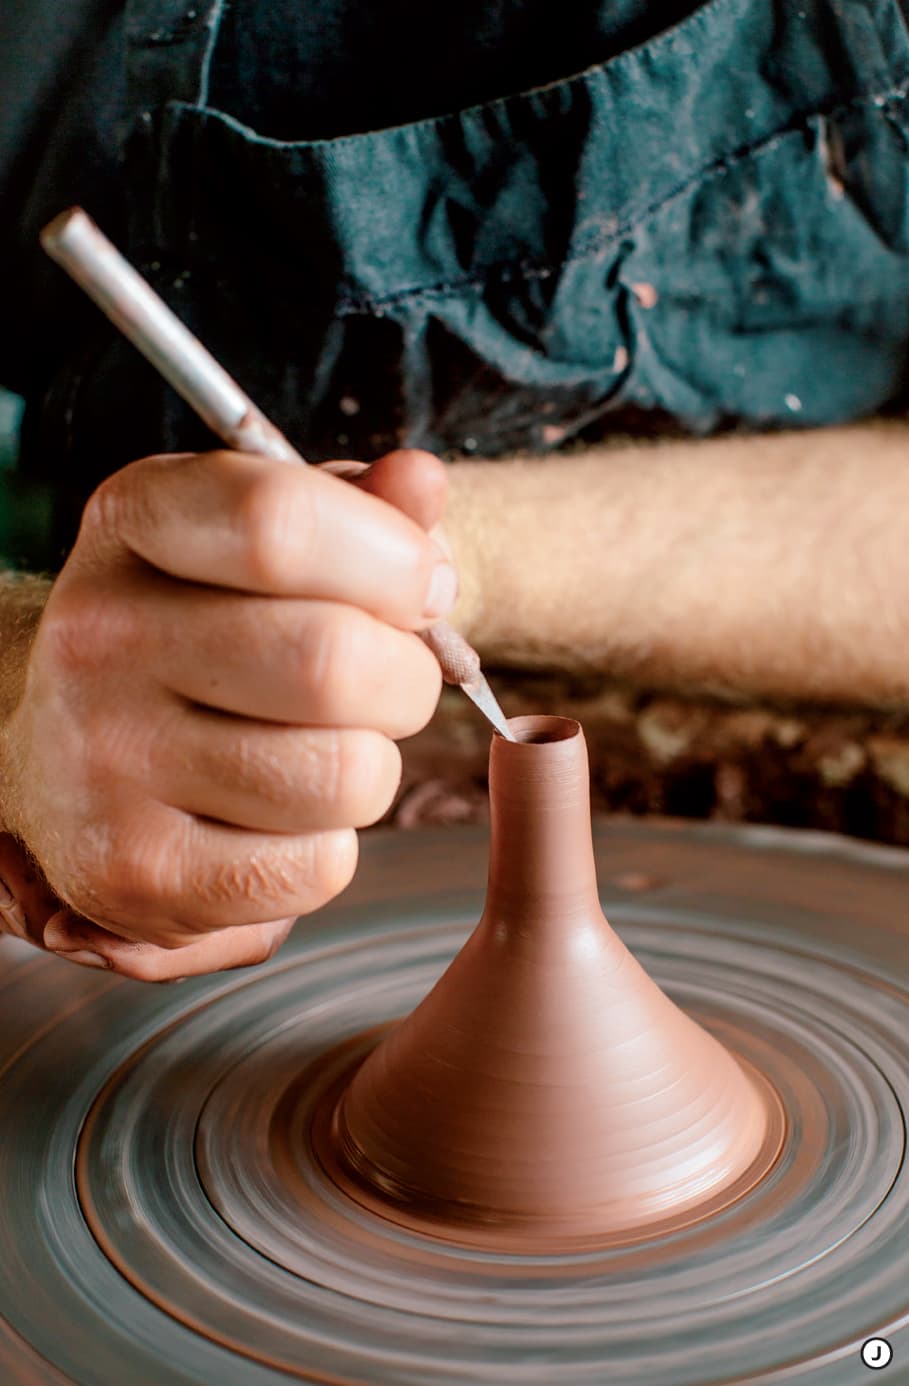
Depending on the shape you wish the spout to take, you might apply pressure to one side of the spout to establish a curve. When considering the curved versus straight spout, think about matching the characteristics of the spout to the pot. Softly rounded forms will benefit from a spout that is curved, while an angular form might benefit from a rigidly straight spout. Let the spout dry. A heat gun or blowtorch can help if the top is drying faster than the base. K Cut the spout off the hump at the point where you traced the line in step one. L M

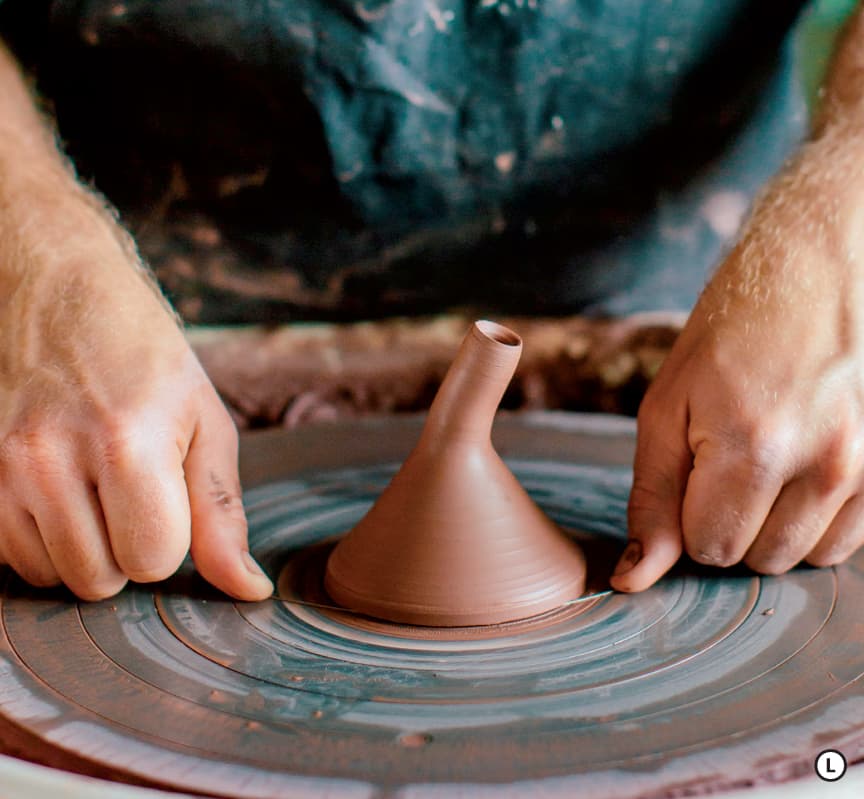

Attaching a Closed Spout
A thrown spout will need to be cut at an angle so that it will conform to the curve of the teapot body. To approximate the angle that will be cut away from the spout, draw a thin line down the center of the spout closest to the base. N This centerline will help you keep the spout straight even after multiple side cuts. If you cut right up to the line, be sure to extend the line.
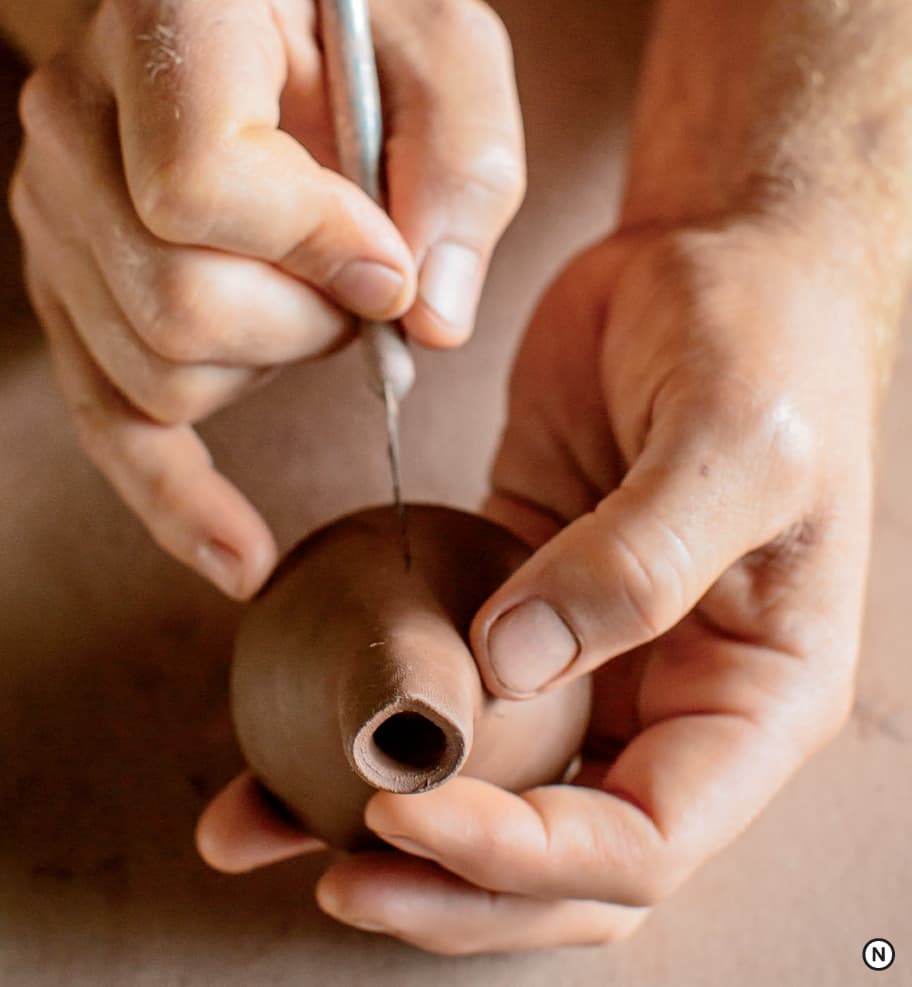
Hold the spout up to the teapot body, tilting the end up and down until you have an angle that you feel comfortable with. This is a matter of personal preference, but do consider how the angle of the spout will affect the severity of tilt need to initiate the pour. Taller angles that put the spout opening above the lip of the teapot body will require you to tilt the teapot at a steeper angle. Conversely a less severe spout will not require the teapot to be tilted as far. Once you’ve decided, draw an angle down from the centerline to the widest point of the spout’s circumference on one side.
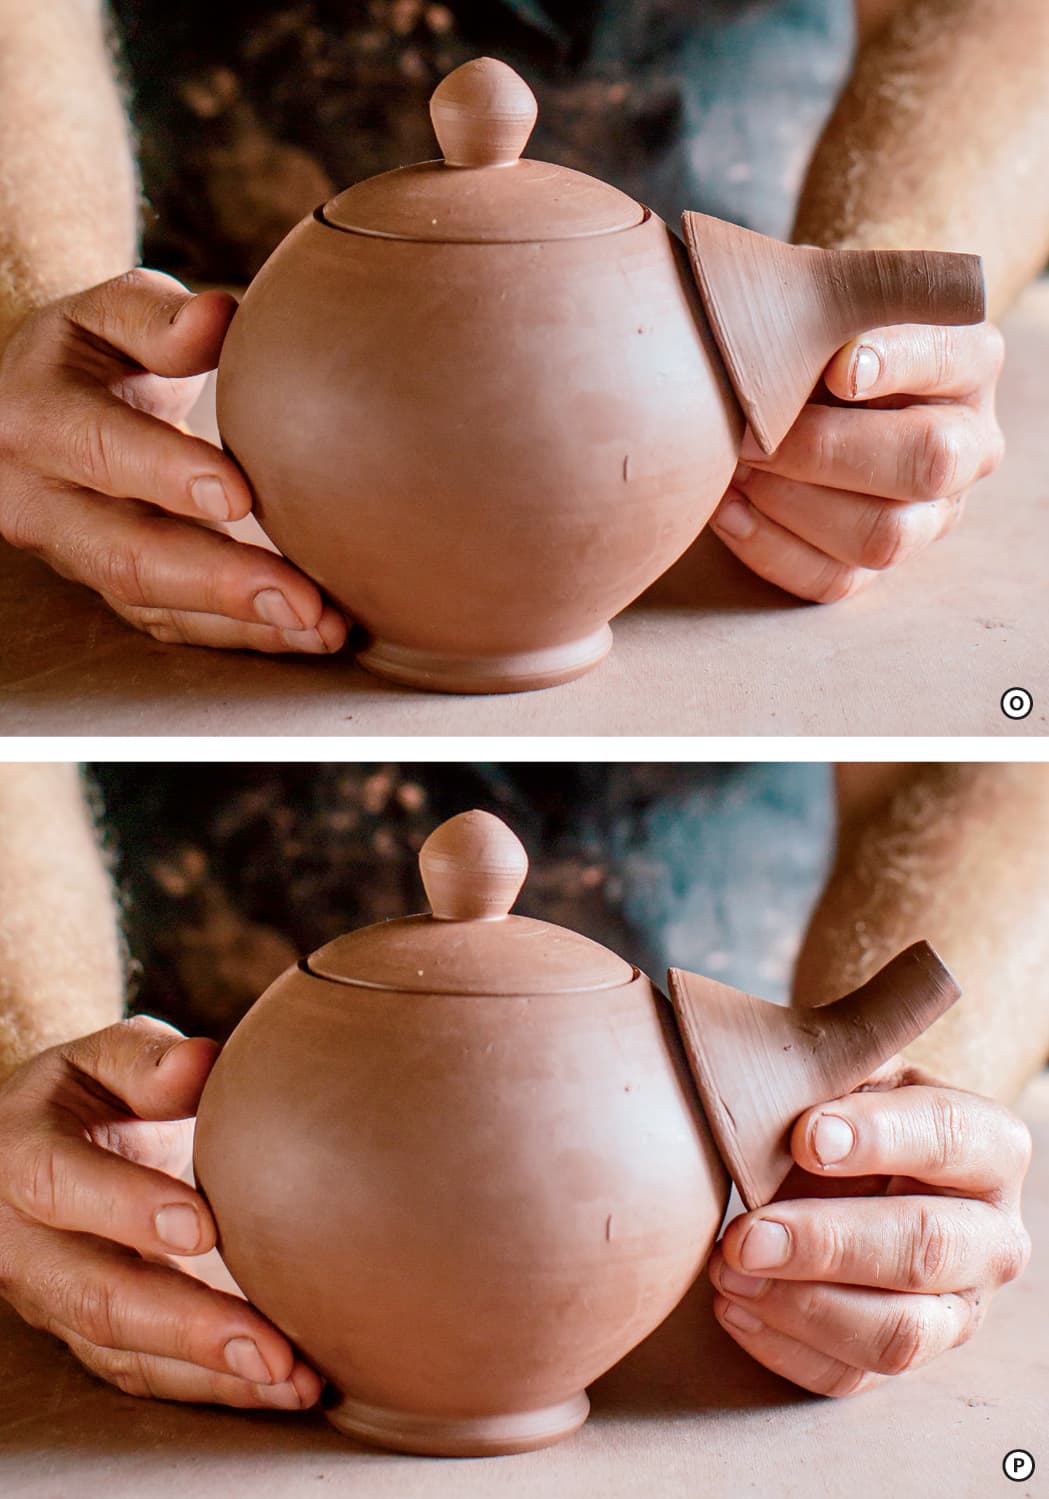
Make sure that your spout ends above the tallest place you will fill the teapot body. If it ends below, tea will rush out of the spout when you fill it with hot water, causing a huge mess. Also think about making a gracefully curved spout that swells up from the base to the spout opening. Of figures O P and Q, which one do you think has the correct angle for a spout? The answer is the third one Q, with its smooth angle and correctly placed spout opening.

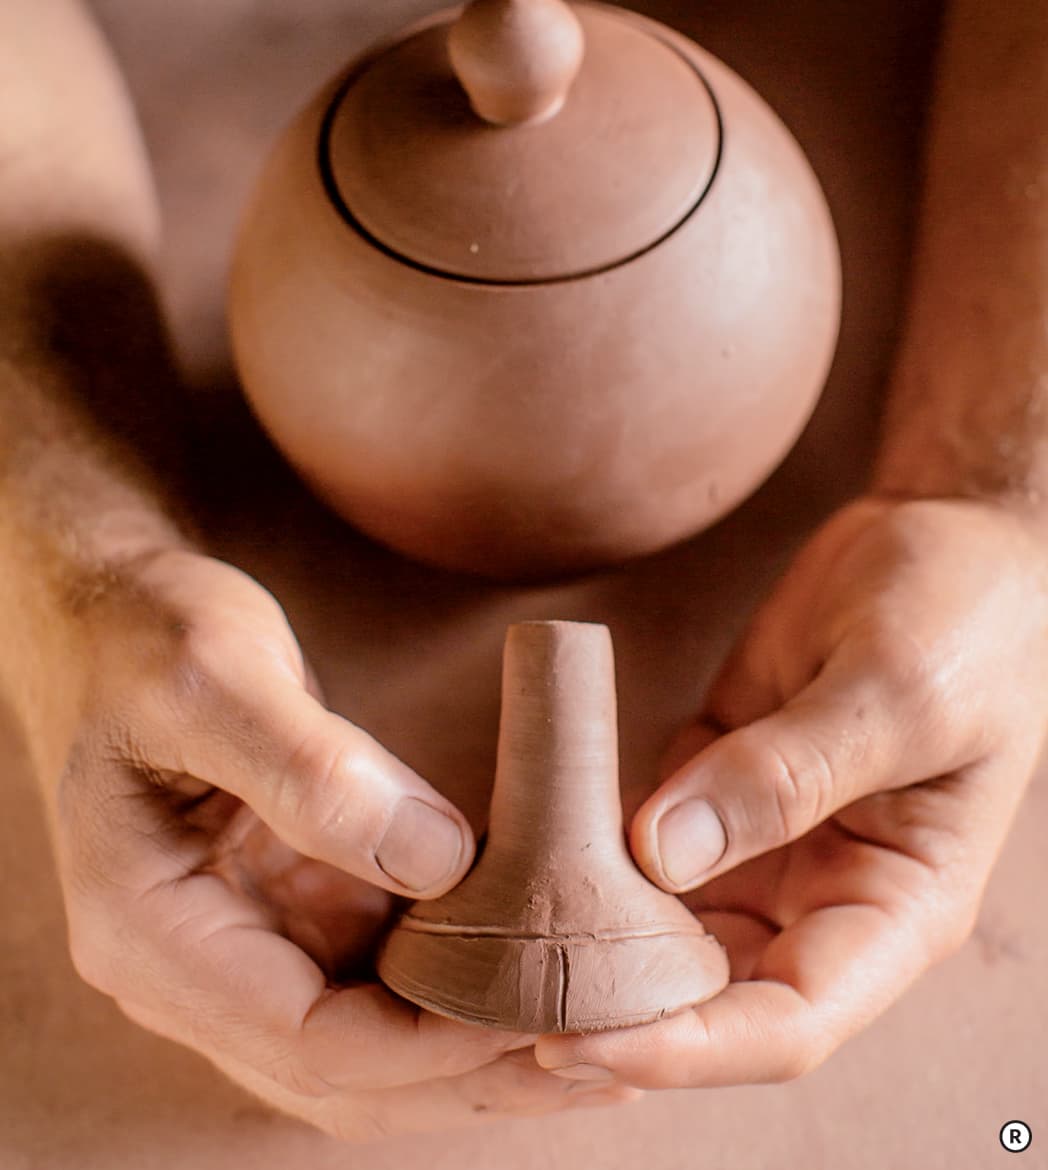
Look down from directly above the spout and trace a reciprocal curve that matches the one you sketched. R Using the lines you just drew, remove the clay that is not needed. You might have to cut a few times to correctly match the angle of the teapot body.
Hold the properly cut spout up to the teapot body and trace around the spot where the spout will be placed. Use a hole-cutting tool, or a drill bit, to cut a matrix of holes in the teapot body. The holes should be large enough that they cannot fill with glaze during glazing. S Make sure to leave 1/4 inch of clay around the edge of the holes so that your spout will have a sturdy surface on which to adhere. Slip and score both the spout base and the pot’s surface before attaching. T
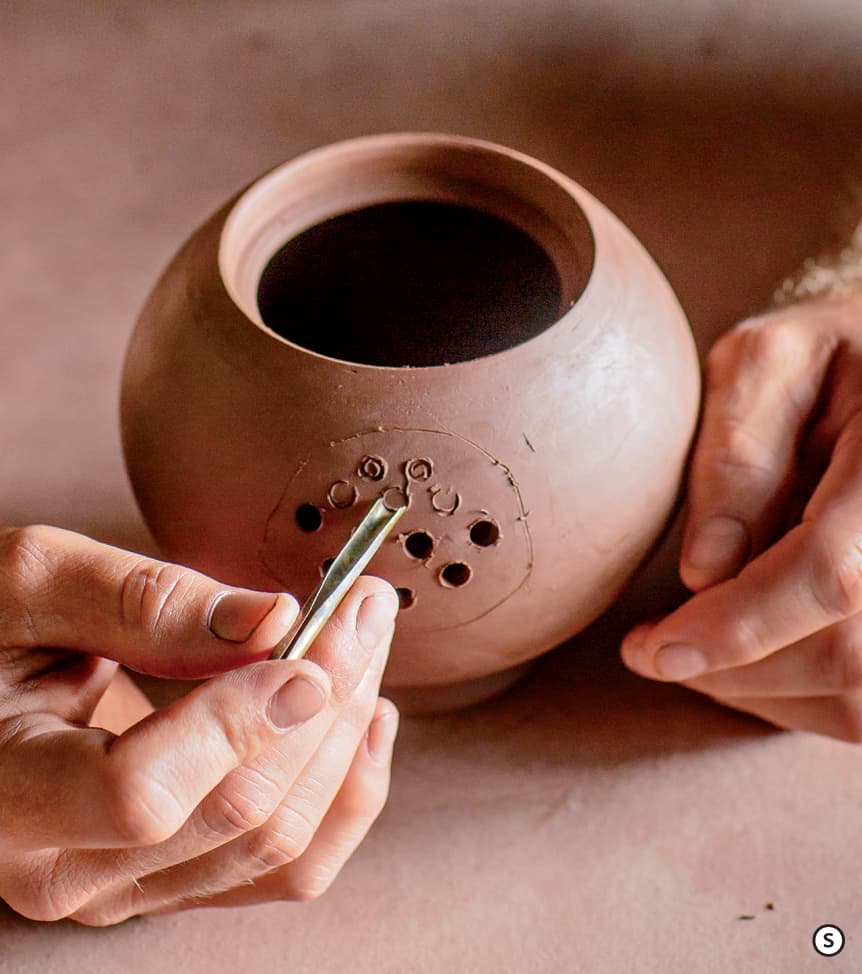
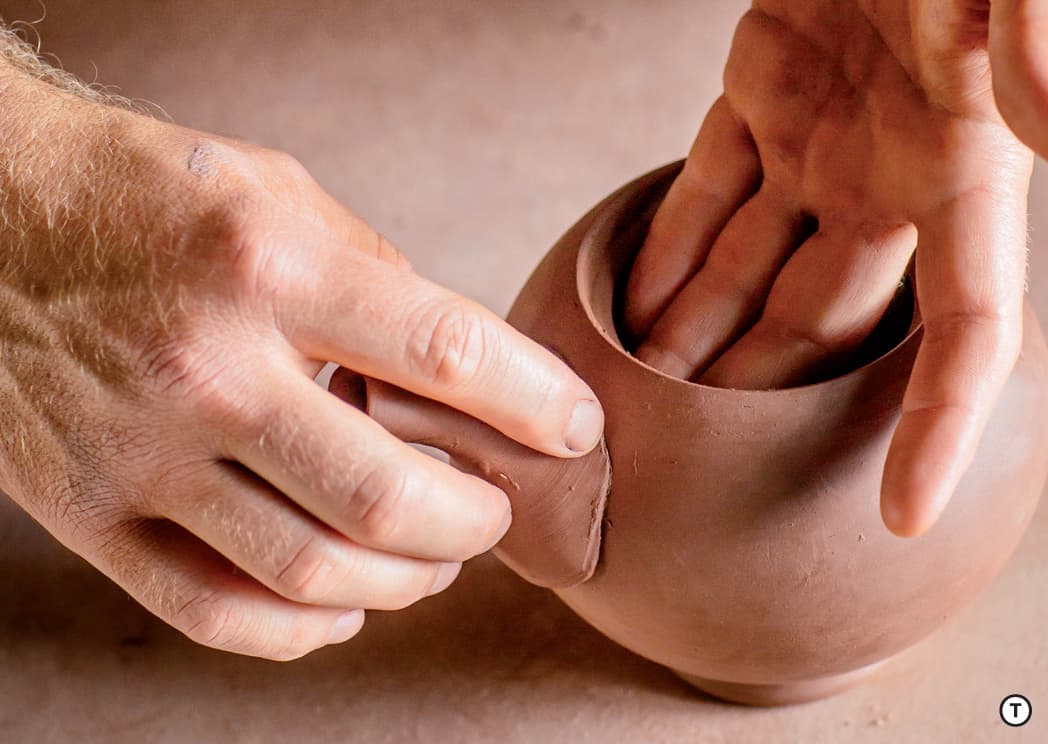
After attaching the spout, you are now ready to attach the handle. U Make sure to line the handle up opposite of the spout so your teapot pours straight.

GALLERY
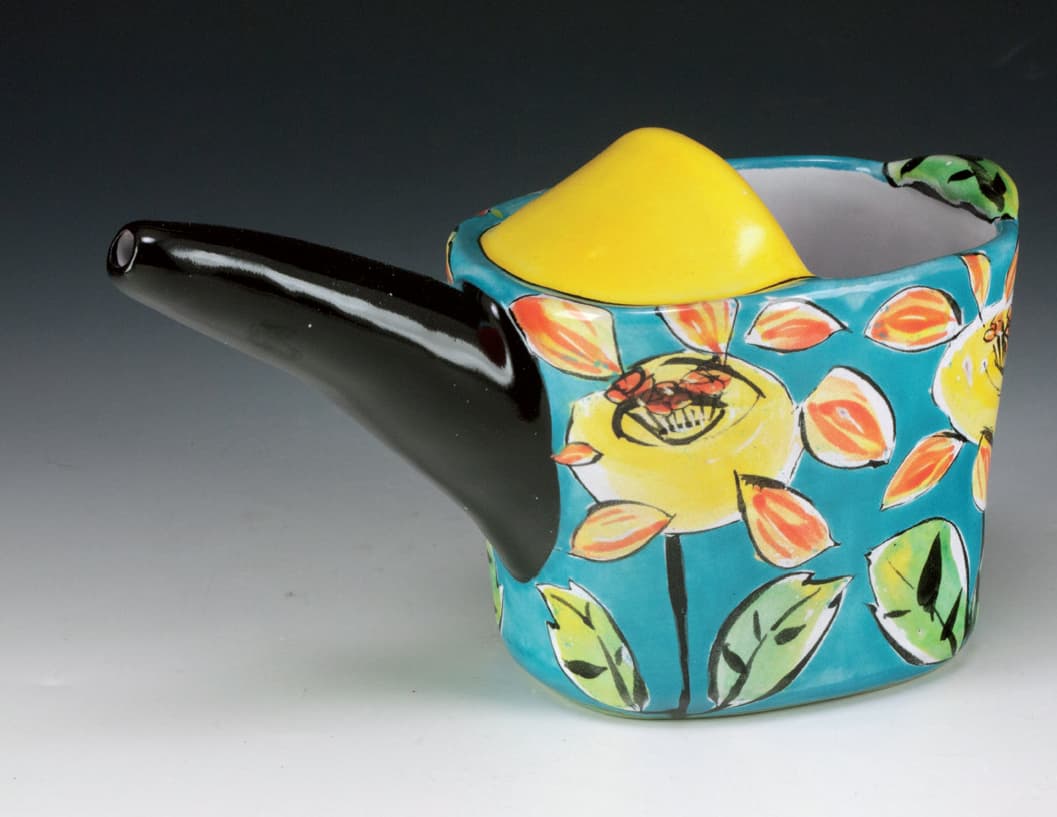
Linda Arbuckle, Small Pour: Sunflowers. Photo courtesy of the artist
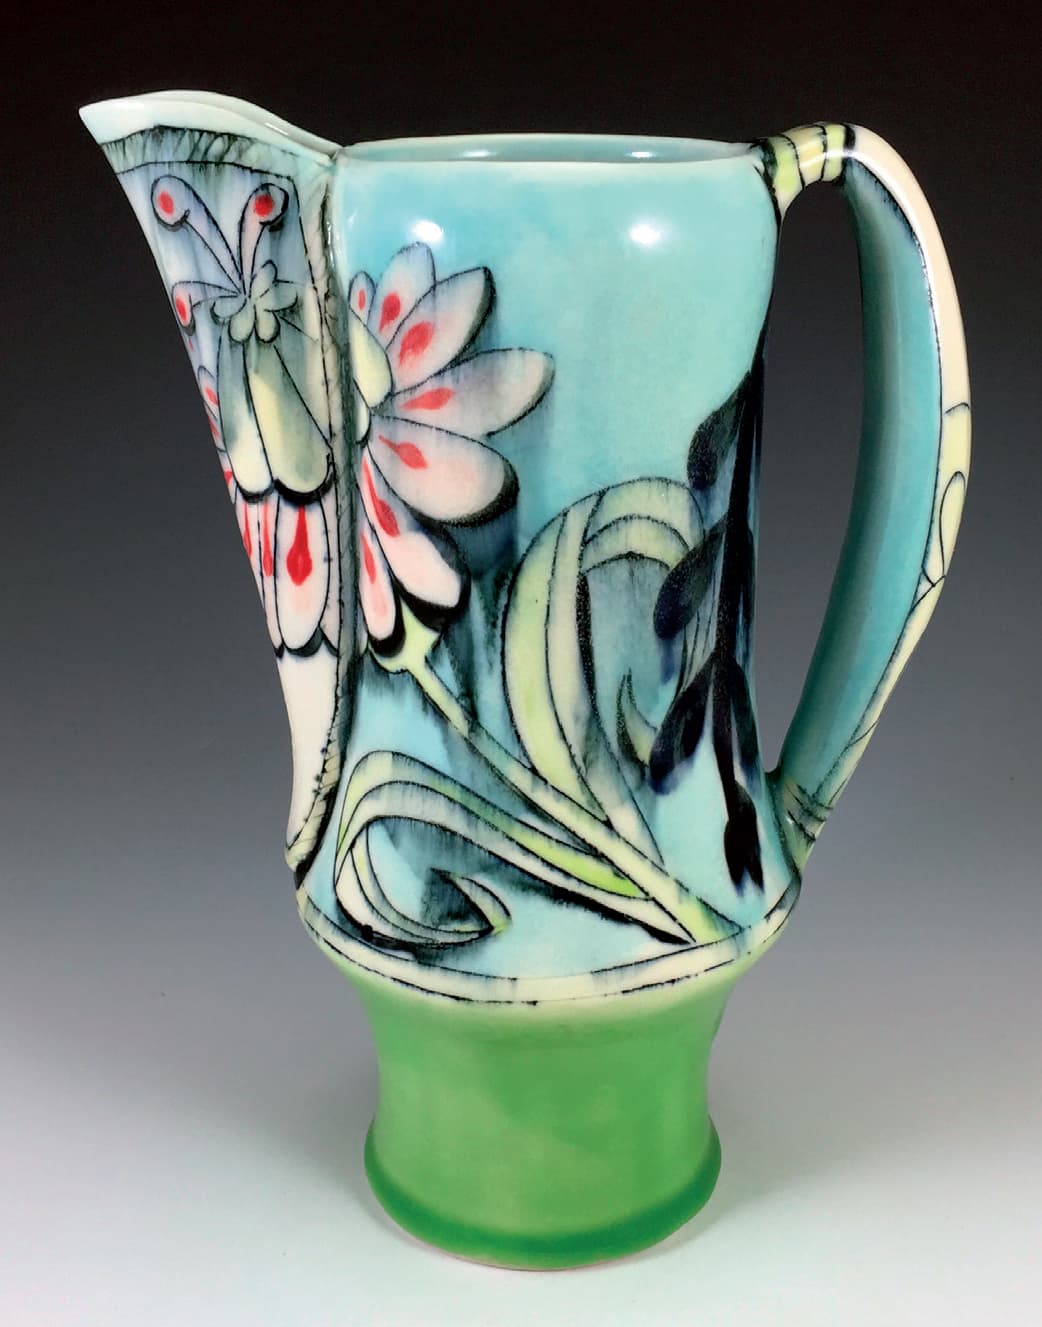
Chris Pickett, Ewers. Photo courtesy of the artist

Chandra Debuse, floral pitcher. Photo courtesy of the artist
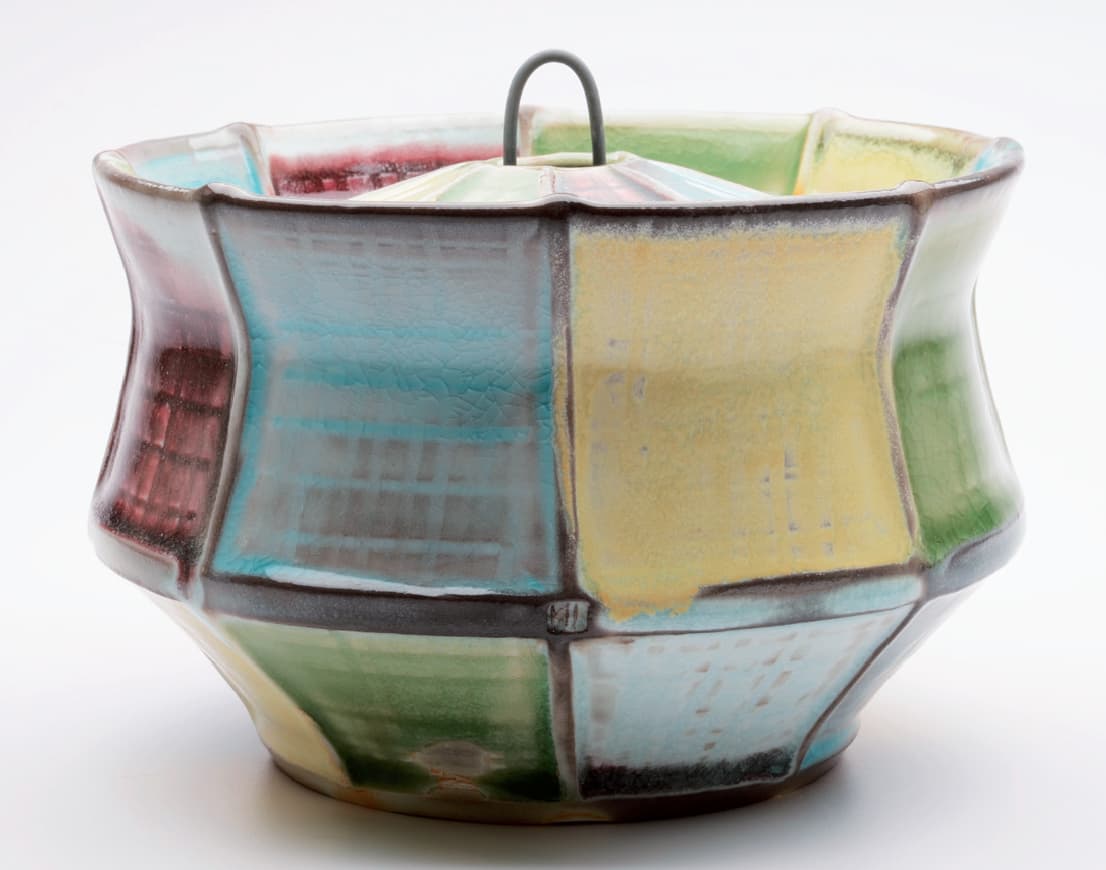
Kenyon Hansen, covered jar (with Nichrome wire handle). Photo courtesy of the artist

Julia Galloway, pitcher with clouds. Photo courtesy of the artist
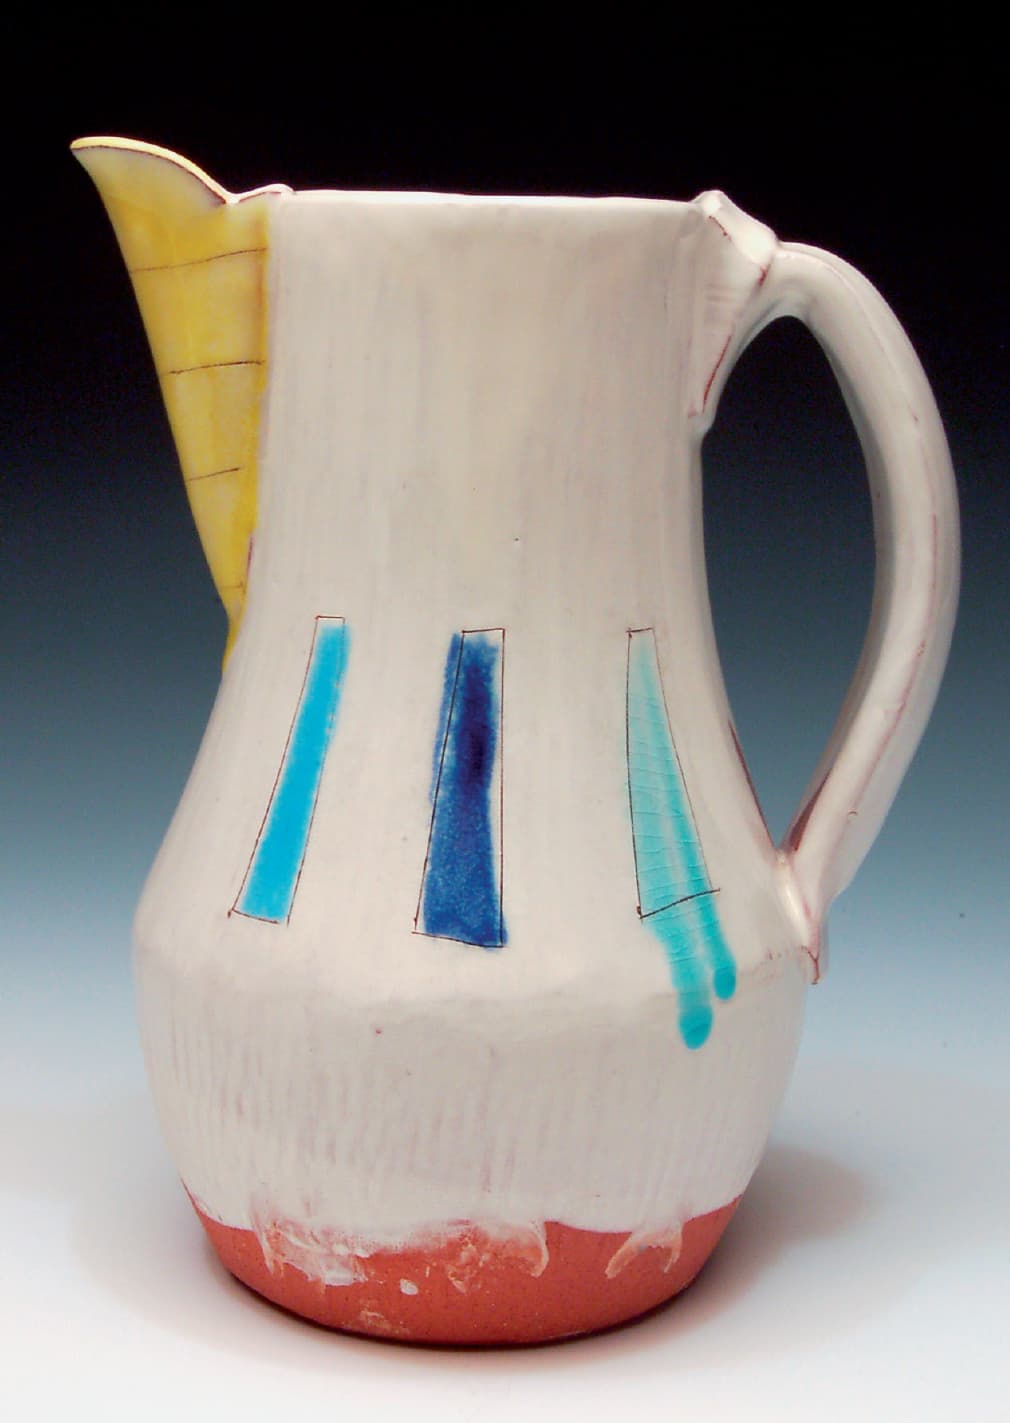
Brian R. Jones, pitcher. Photo courtesy of the artist
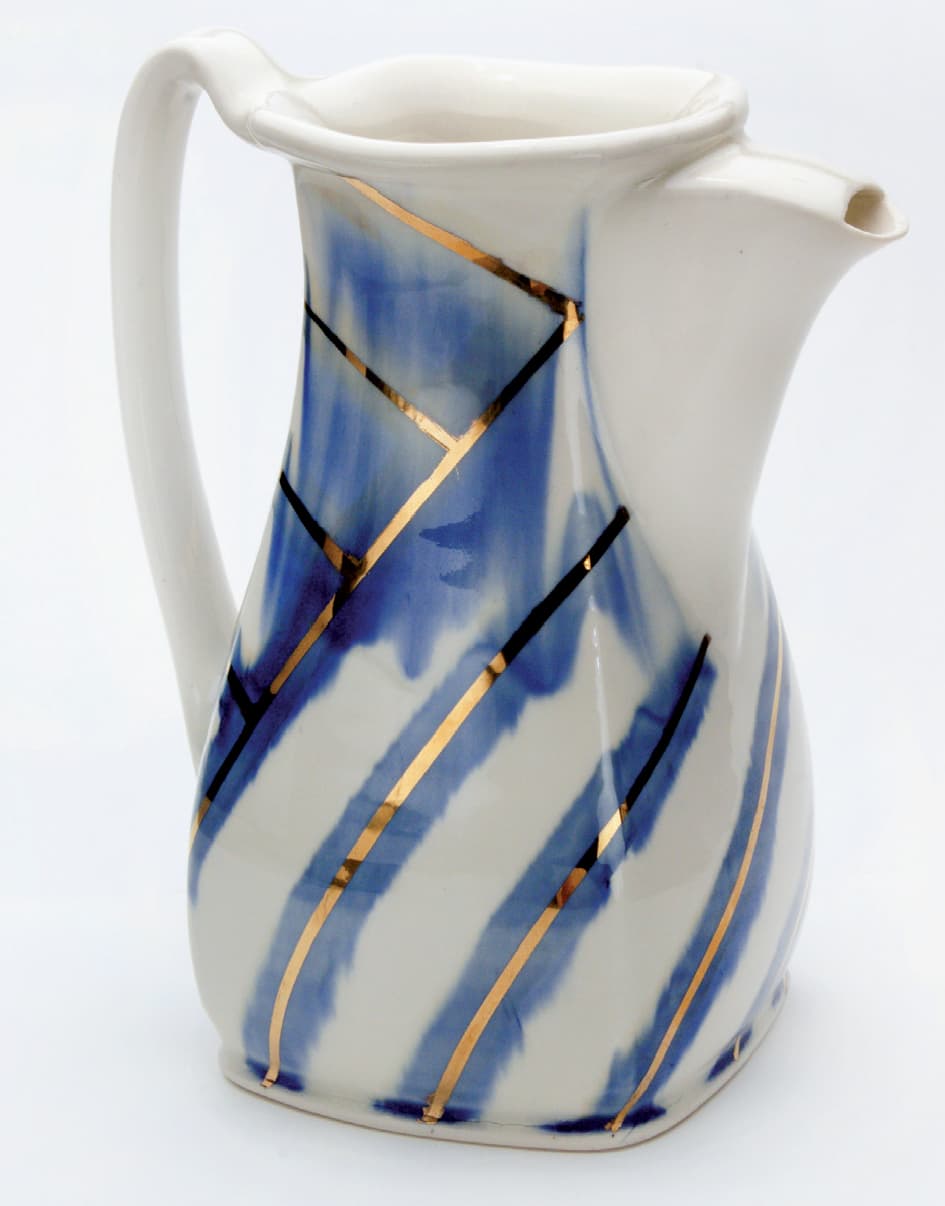
Sean O’Connell, cocktail pitcher. Photo courtesy of the artist

Matt Schiemann, whiskey jug. Photo courtesy of the artist
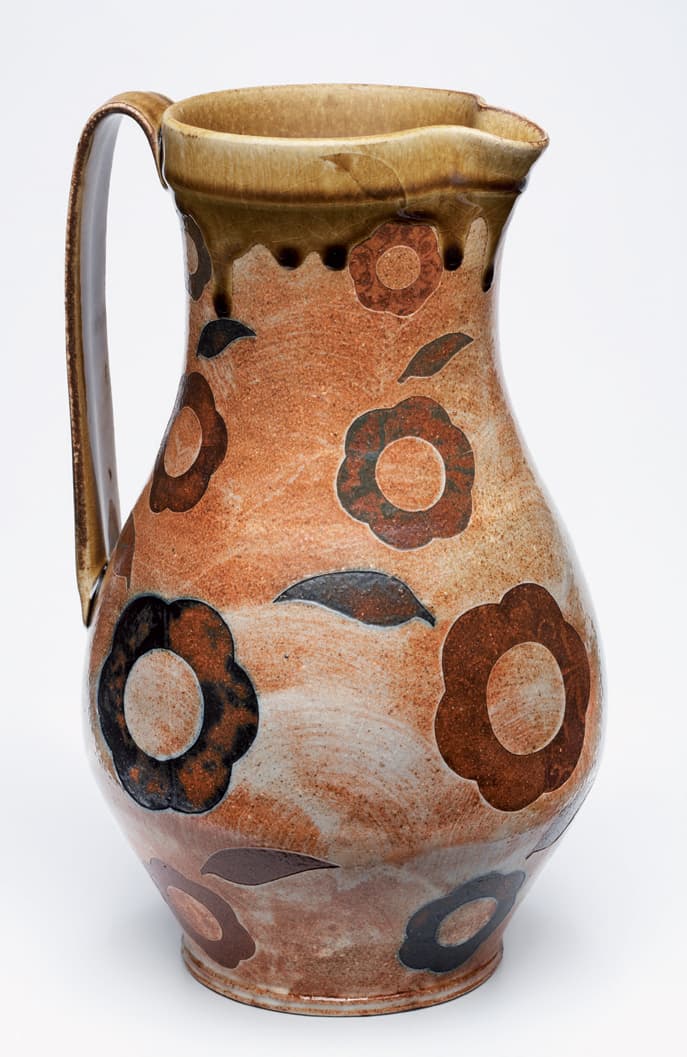
Sanam Emami, pitcher. Photo courtesy of the artist
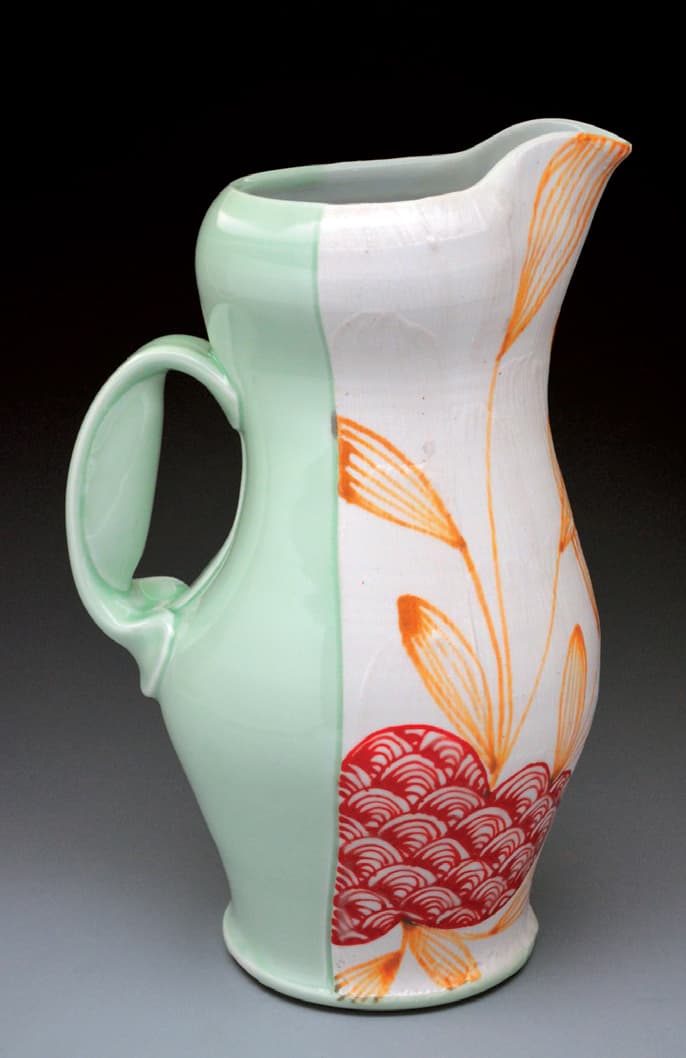
Jennifer Allen, pitcher. Photo courtesy of the artist
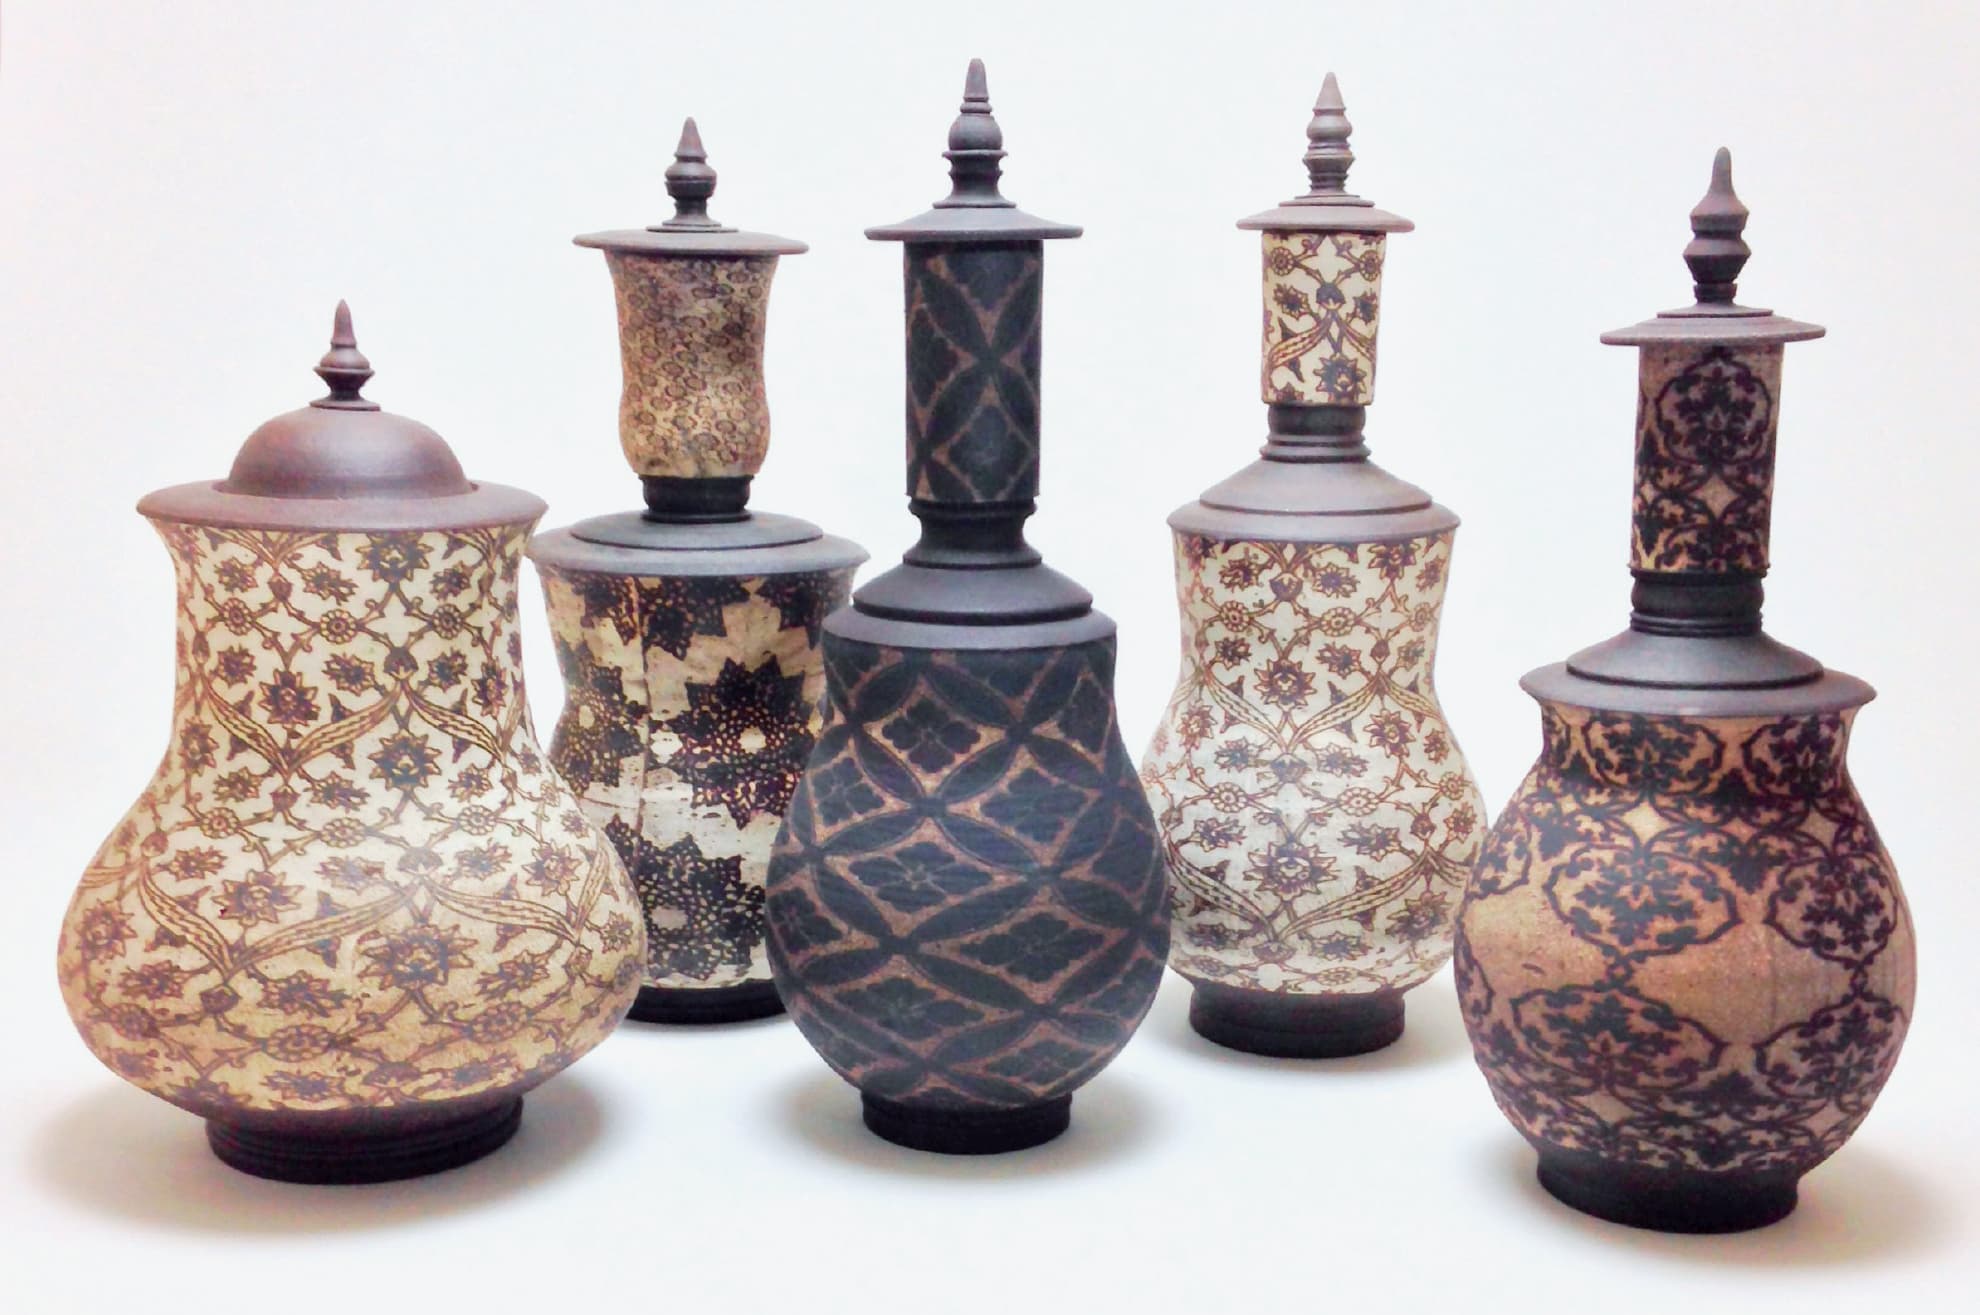
Forrest Middelton, Minaret bottles. Photo courtesy of the artist
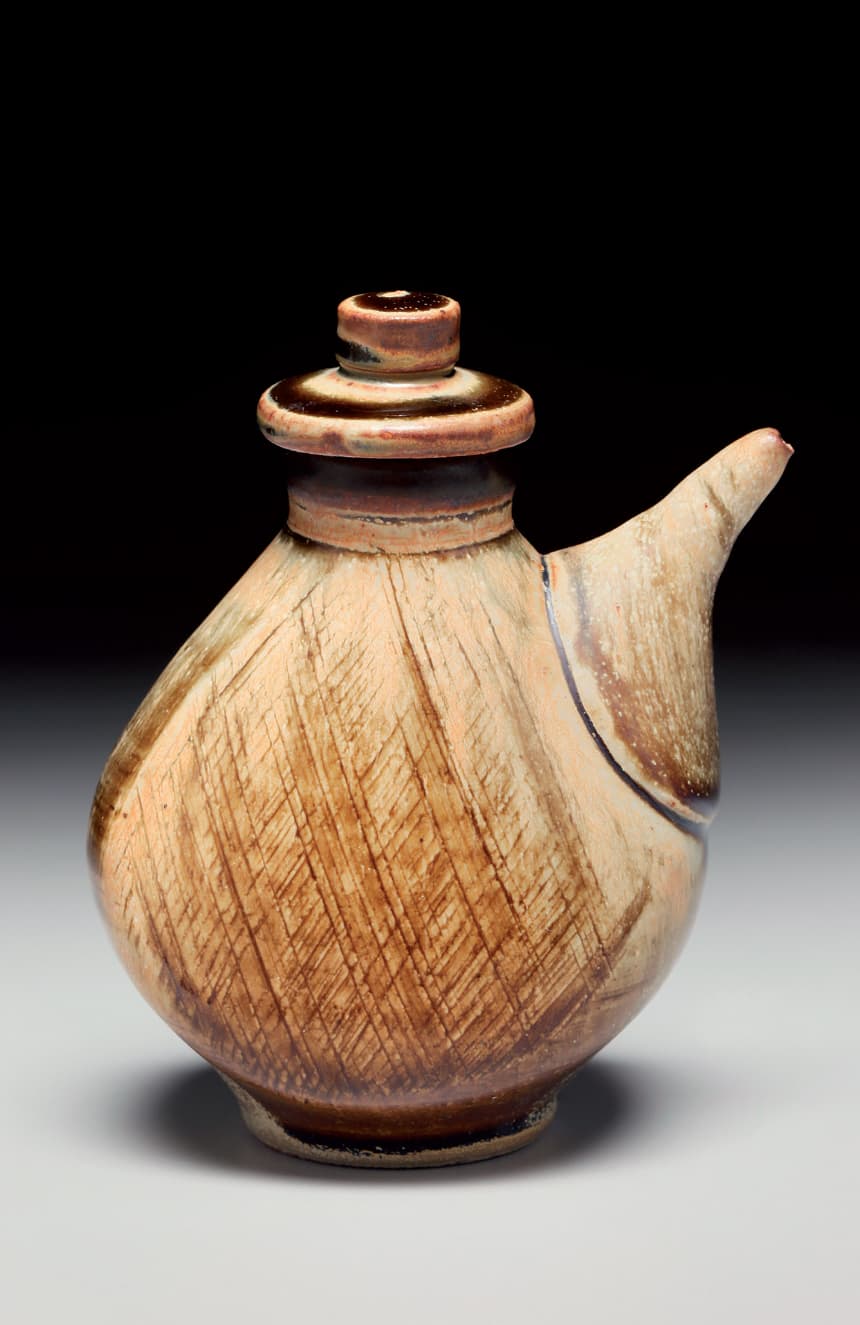
Ellen Shankin, Ewer. Photo courtesy of the artist

Tara Wilson, pitchers. Photo courtesy of the artist

Matt Metz, pitchers. Photo courtesy of the artist

Richard Hensley, casserole dish. Photo courtesy of the artist