CHAPTER SEVEN
DECORATING AND FINISHING
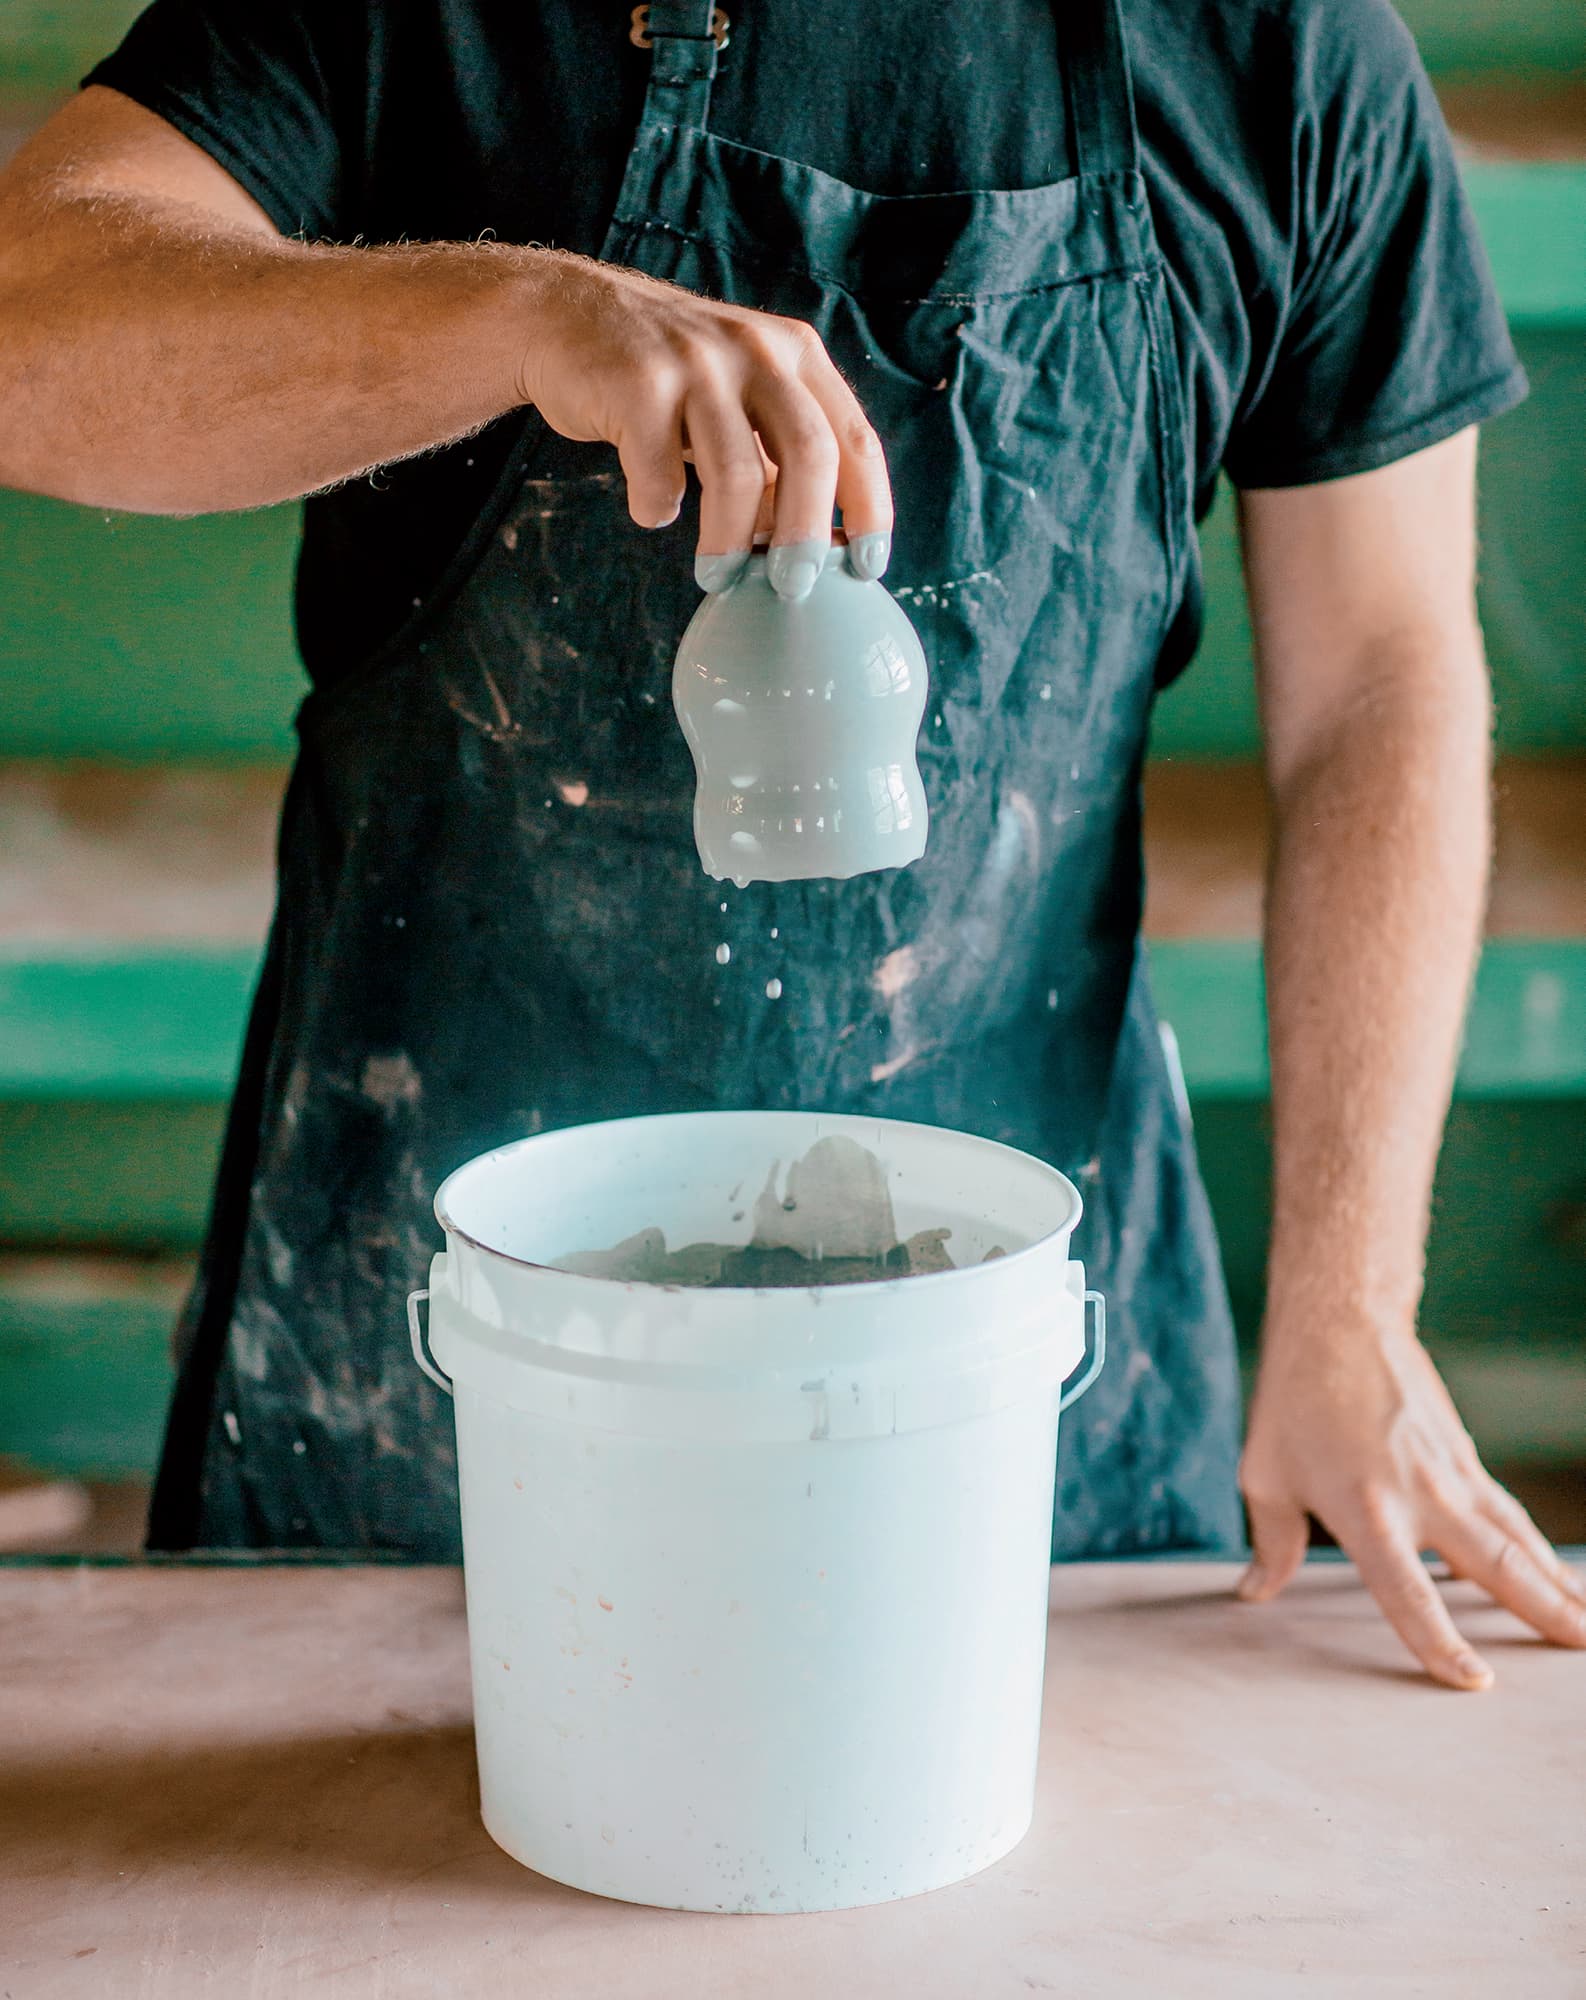
THERE ARE A VARIETY OF WAYS to decorate ceramic forms in the greenware, bisque, or glaze stage of the making process. Since glazing and post-bisque finishing can easily take up an entire book, this chapter will only cover some of the most common and accessible methods to decorate at the greenware stage. In other words, the methods for decoration in this chapter are most commonly used after the pot has been thrown and trimmed but before it is goes into the kiln for a bisque firing.
Before we get into techniques, I want to outline a few decorative strategies that might help you better understand why humans have an impulse to decorate. Looking back to history for inspiration is itself a strategy that is ubiquitous in the ceramic world. I’ve heard it said that “creativity is the obscurity of your sources,” which points to a vast history of material culture that is available to the modern artist. I am not advocating that you copy historical works (although this can be helpful in the early stages of learning decoration), but that you mine our collective visual history for ideas and inspiration.
In terms of strategies, let’s first think about constructing narratives, or communicating culturally significant ideas, through the use of symbols. Storytelling with language and visual symbols has been a core component of transmitting knowledge between generations. Narration continues to be one of the most effective ways to construct and document cultural importance across time. You’ve likely seen this on historical pots from many cultures. Popular examples include the narrative scenes of Greek military battles painted on Amphorae, and more poetically, in the animal drawings on Membres bowls used in burial rituals.
Alluding to the natural world through patterns, textures, and colors is also a very strong tradition in pottery. You may see this in addition to the building of a narrative structure, or you may see it used in more observational forms of artistic interpretation. Examples include the pineapple pottery of Patamban, Mexico, and the floral patterns of Iznik, Turkey. In this case, the goal is to isolate a plant, landscape, or geographic region that informs your aesthetic decisions.
The last decorative strategy I’ll mention is the act of engaging with the ceramic process itself, letting the qualities of a glaze or a clay body inform an intuitive desire to create pattern and image. You can see this in the runny tri-colored patterns of Tang Dynasty China and asymmetric fly-ash patterns of Bizen ware from Japan. All of these strategies can be utilized in the design of ceramic vessels and can be a jumping-off point from which you might develop a more singular point of view.
TEXTURING
Creating a texture on the surface of the pot is an effective way to add energy and depth to a freshly thrown vessel. In this section we will look at techniques for dragging, rolling, stamping, and sprigging. Keep in mind that when you’re applying texture, it is important to match the clay’s hydration level to the technique. For example, dragging, rolling, and stamping work best for clay that has dried a little but is still flexible. Sprigging, on the other hand, is best when the clay has dried enough that it won’t lose its shape when the sprig is pressed onto the surface.
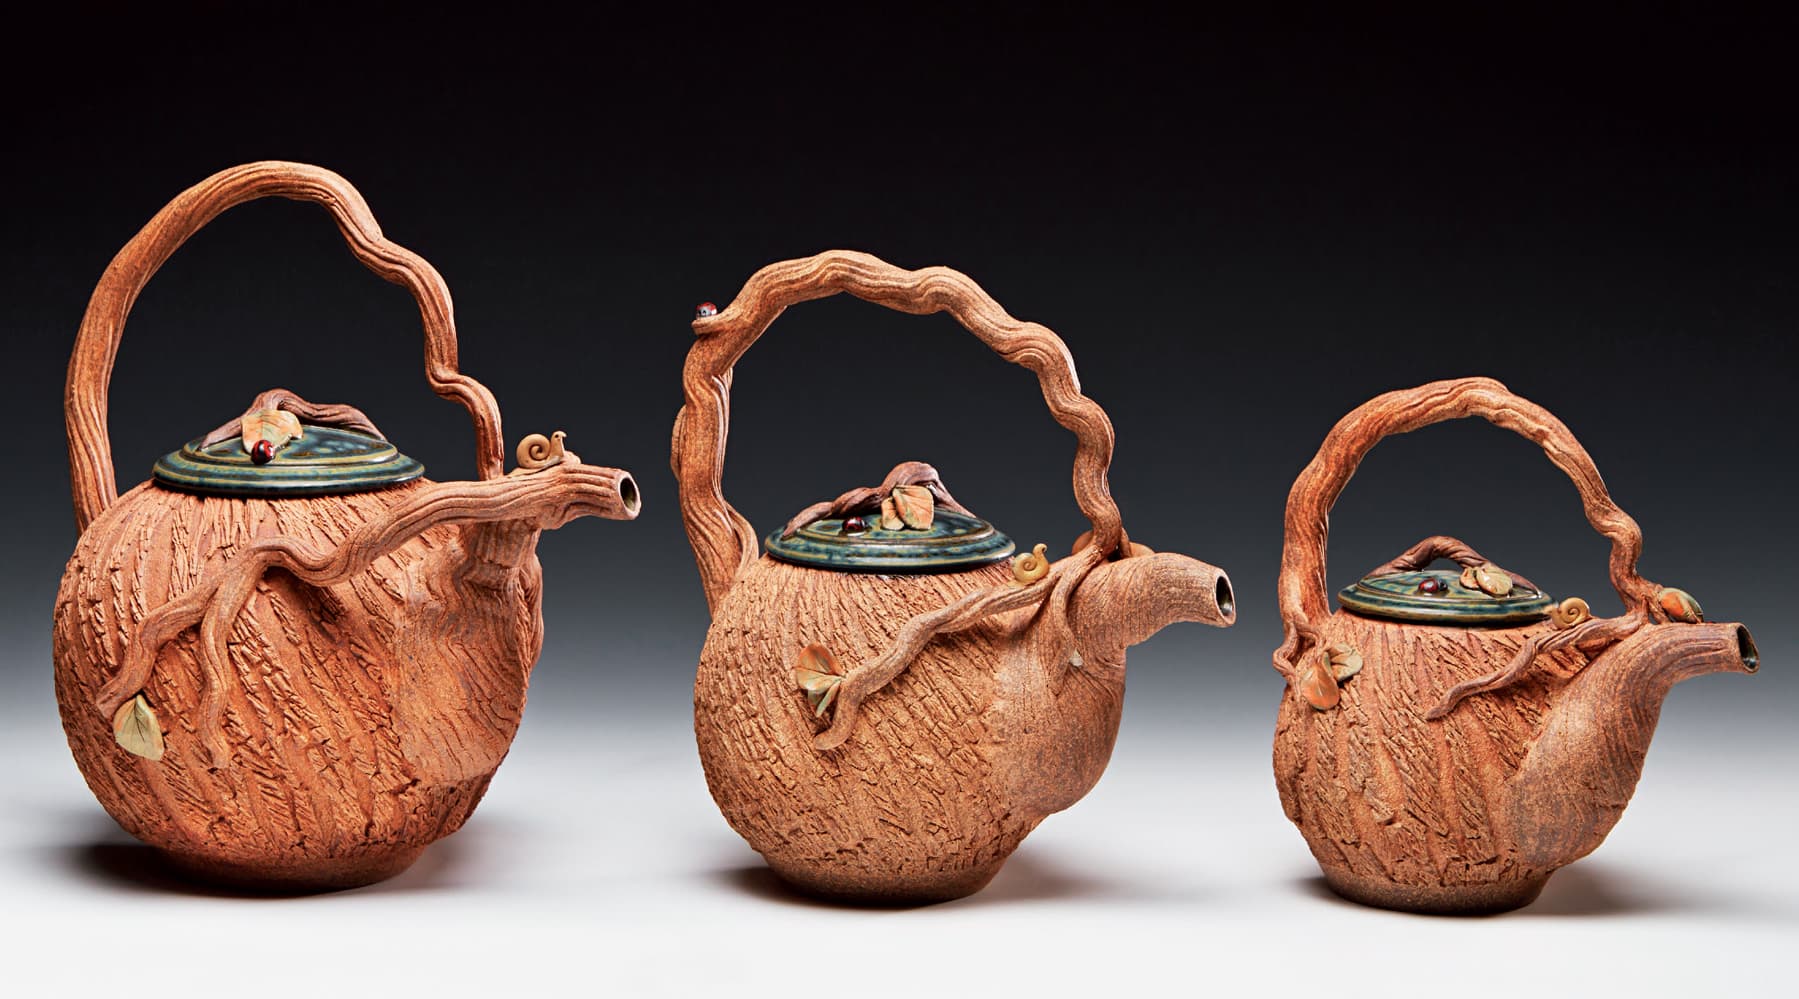
Maud Boleman’s textured teapots look like they have been carved out of wood. Clay’s ability to mimic other materials is one of its best attributes. Photo courtesy of the artist
DRAG TEXTURING AND ROLLED TEXTURING
One method of texturing that works with the wheel itself is to hold a tool against a slowly spinning pot. The amount of pressure you apply the tool with will control how deep or active the texture will be. This method will create a dragged texture that will cut into the surface of the clay. Maud Boleman’s bark-inspired teapot (above) shows the benefits of creating a dragged texture. In contrast, a rolled texture comes from using a tool that skims across the surface of the pot. With this method, clay is not removed, but is more rearranged by the application of the tool. Sunshine Cobb’s textured cups (see here) are created with a rolling stamp that impresses into the surface of the pot.
To create a dragged or rolled texture, the first step is to prepare the surface of the pot. After throwing your form, clean the surface with a plastic rib to create a smooth, clean surface. A
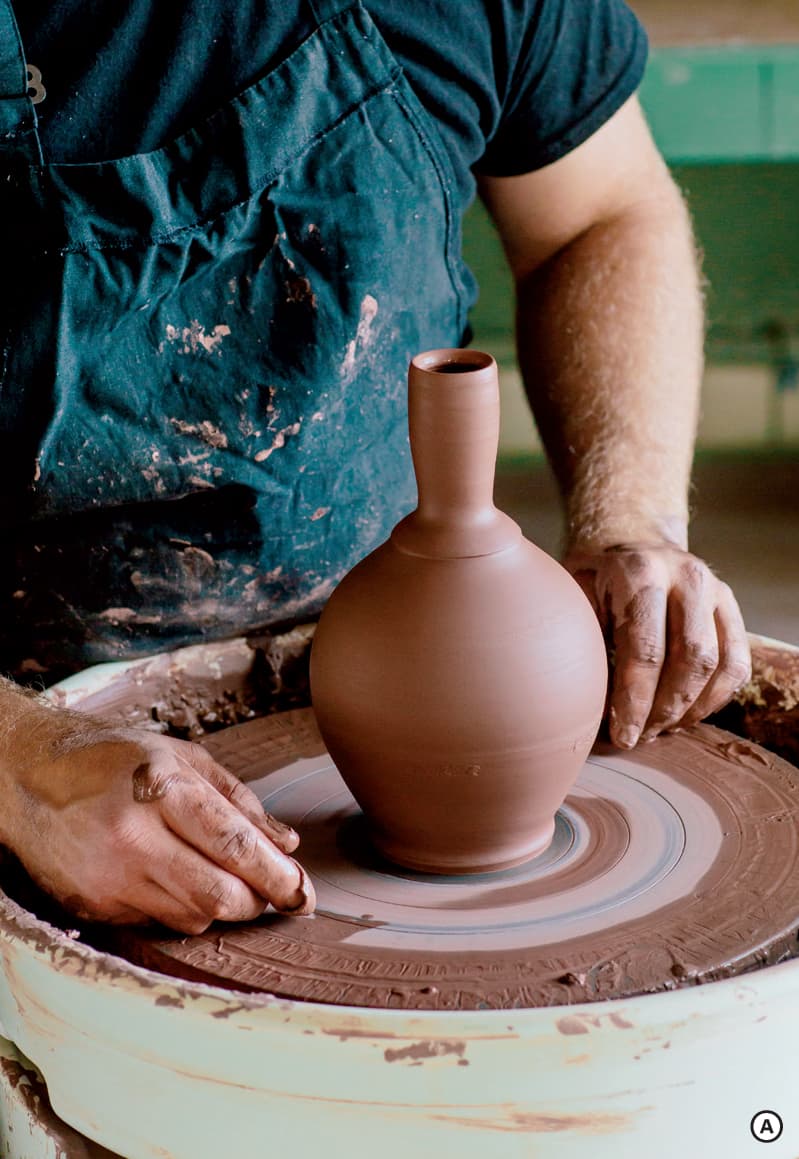
Now try experimenting with a tool to create some texture. Using the edge of a metal rib, push into the clay’s surface as the wheel spins. To create a more fluid line, move your hand up and down as the line progresses up the form. B Think about how repeating this process can turn an active line into a texture as the lines criss-cross over themselves.
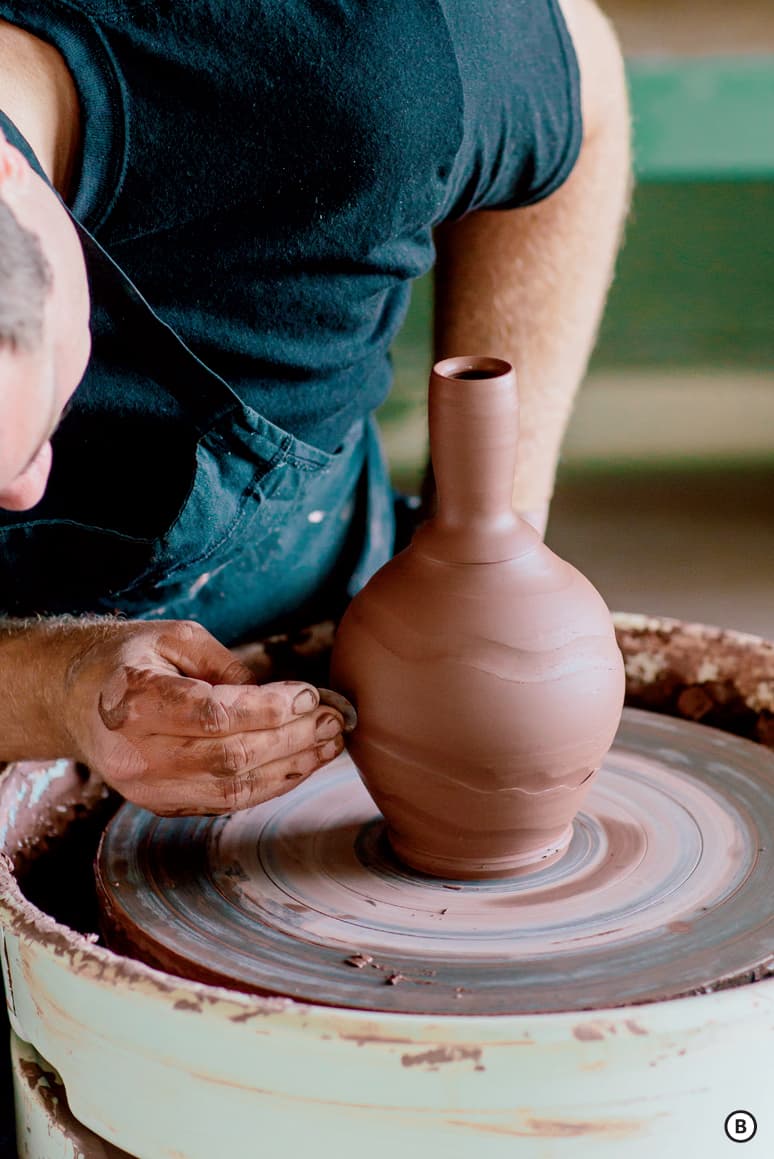
Be mindful of the amount of tension you create when applying a texture. After texturing the base of this bottle form, I applied the same dragged texture technique to the neck. As the form rises towards the rim, it is helpful to decrease pressure with your tool or finger. If too much friction occurs on the surface, you will create a torque that could potentially collapse the piece. C
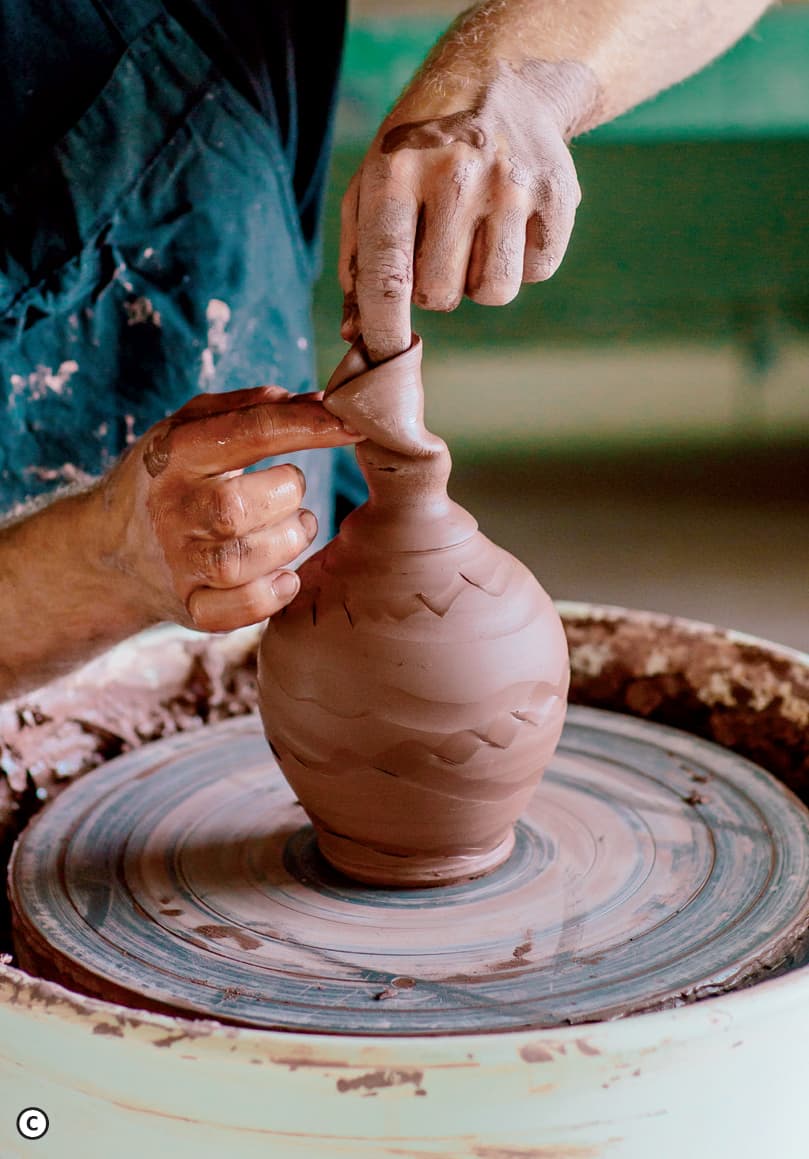
Rolled textures are perfect for the wheel because they utilize the spinning motion of the pot to create the mark. To apply a texture, use any textured surface that can be rolled into clay. Well-tested examples include a corded rope, a store-bought plastic roulette tool, or a homemade bisque roulette tool.
Start with a thrown form that has dried enough that your fingerprints are not left on the surface. To use a roulette tool, lightly push the tool against the surface as you accelerate the wheel. You will immediately see the tool-embedded texture in the pot. Now accelerate the wheel or push out from the inside to accentuate the texture. To use a corded rope, let the pot dry enough that you can pick it up without deforming its shape. Hold the pot in your left hand as you roll the rope up the pot with your right hand.
STAMPING
Impressing a stamp into the surface of a form is a wonderful way to create texture and pattern at the same time. You can purchase premade stamps through your clay distributor, but I recommend making your own as well so that you have more control and individuality with the technique. Start by collecting objects that have a texture you are interested in incorporating into your work. These might include buttons, swaths of fabric, or plastic toys that have a texture. While you might be able to use the object itself to stamp into the surface, I find making a bisque stamp is often more effective because the clay will not stick as easily to the porous surface of bisqued clay.
To make your own stamps, start by rolling out a 1/2-inch slab, compress both sides, and let it dry to soft leather hard. Impress the slab surface with your objects, leaving a few inches around each object. Try your best to remove the object without damaging the imprint. If you find your objects are sticking to the clay, dust the surface with corn starch before impressing it with clay. Bisque fire the impressed slab and then push clay into the impression. Make sure to use enough clay that you can fashion a small handle to make the stamp easier to hold. Clean up the surface of the stamp by carving away unwanted sharp edges.
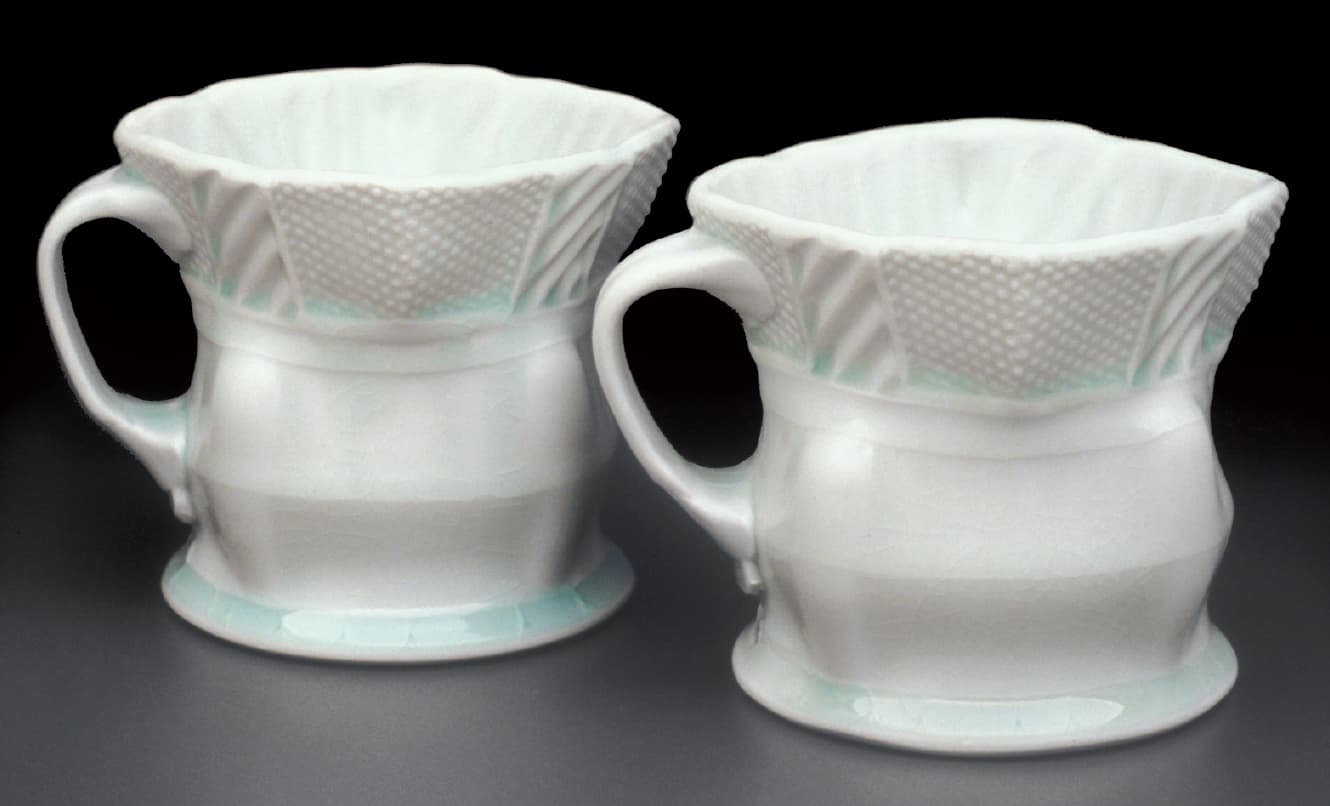
Andy Shaw uses stamps to both create texture and alter the form of his mugs. Notice how the edge of the stamp created an energetic line at the rim of the pot. Photo courtesy of the artist
After bisque firing your new stamp, you can use it to push into the surface of pots. When using stamps, think about how each individual mark redefines the shape of the form. The consistency of the clay is an important part of the stamping process. Stamping a leather-hard pot will result in clean, exact impressions that pierce the clay’s surface. Soft stamping is less about precisely marking the surface and more about giving the form a soft undulation that loosens the surface. Soft stamping imparts a hand-built quality that helps each piece form a unique presence.
If you are using stamps to make a continuous pattern on the form, you will need to calculate how many stamp marks will cover the circumference of the form. You can measure this precisely with a fabric ruler or you can experiment using trial and error. You can select a spot and then work in a circular fashion around the pot. If you’re working vertically with the stamps, I recommend starting at the bottom of a pot. This allows you to plot the pattern and correct any unwanted undulation in the rim.
Note: You might also consider textures that can be made by pressing textured fabric or other lightly textured materials into the clay. This allows you to place texture in specific spots on the pot while leaving the other areas smooth. Refer back to the chapter on altering (shown here) to consider how texturing one side of an altered form might provide contrast or a focal point for the form.
SPRIGGING
Sprigs are small additions of clay made by pushing clay into a mold. Much like stamping, sprigging is a technique that breaks the plain of a thrown pot, giving the surface an enhanced three-dimensional quality.
The process of making a sprig mold is very similar to the process I just described for making stamps. First collect objects that have interesting textures or surfaces. Roll out a 1/2-inch slab, compress both sides, and dry to soft leather hard. Impress the slab surface with your objects, leaving a few inches around each object. Remove the object without damaging the imprint. If you find your objects are sticking to the clay, dust the surface with corn starch before impressing with clay. After you bisque fire the impressed slab, you now have a sprig mold.
You can also create plaster sprig molds by casting around the objects, but I find the durability of a bisque mold to be more suitable for the sprigging process. When making a mold, be sure to watch for undercuts, which might inhibit the sprig from coming out of the mold. (An undercut is a deep indentation, or harsh angle, that will trap a small amount of clay, restricting the sprig from coming out of the mold.) If you have a large and obvious undercut in your bisque mold, you can sand away the problem area with an electric rotary tool. This will alter the sprig but will most likely not affect the overall success of the sprig.
Now fill the indentations of the bisque sprig mold with clay. For smaller molds, the sprig might come out right away as you fill it with clay. If it doesn’t, allow the sprig to dry for a few minutes before removing it. I recommend making enough sprigs at a time to finish the thrown piece you are working on. To keep the sprigs fresh, keep them in a small plastic container with a wet paper towel to help them stay moist.
To apply a sprig, slip and score the back side before pushing it onto the surface of the form. When working with sprigs, remember the rule that applies to clay additions: “hard to hard, soft to soft.” A sprig that has dried will be best applied by slipping and scoring to a piece of the same consistency, while a malleable pot might accept a soft sprig with very little slipping and scoring. Be mindful of the width of your sprig as well. A wider sprig will need to curve around the surface of the pot, necessitating that it should be applied while both the pot and the sprig are still flexible. The goal is to apply the sprig without marring the rest of the pot’s surface and with as little cleanup as possible. It will take some practice, but mastering sprigging can lead to wonderful pots. See Ryan Greenheck’s sprigged pots at right for an example.
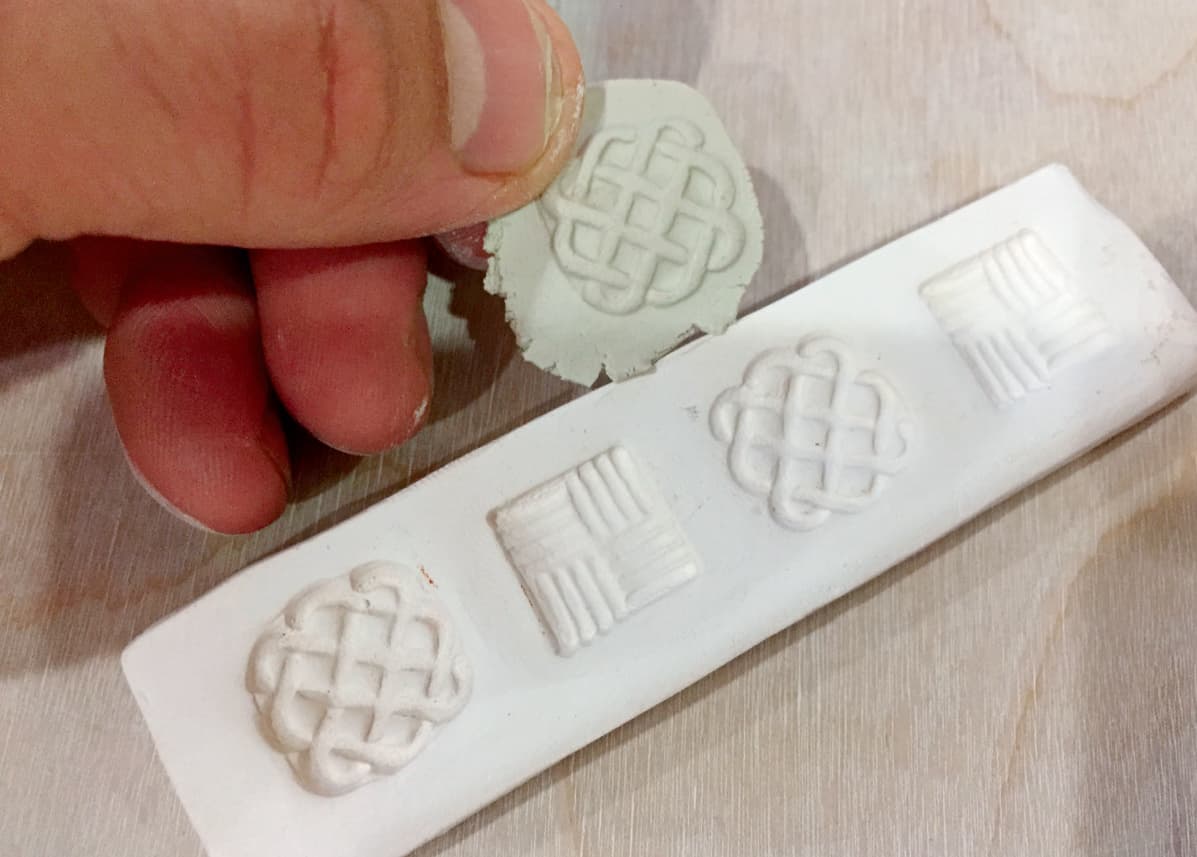
Sprig molds can be made from plaster or bisque-fired clay. Experiment with both, but remember that small chips off of plaster molds can cause blowouts if they find their way into your clay. If you choose to use plaster in your studio, make sure to treat your molds gently to avoid this problem. Photo courtesy of the artist
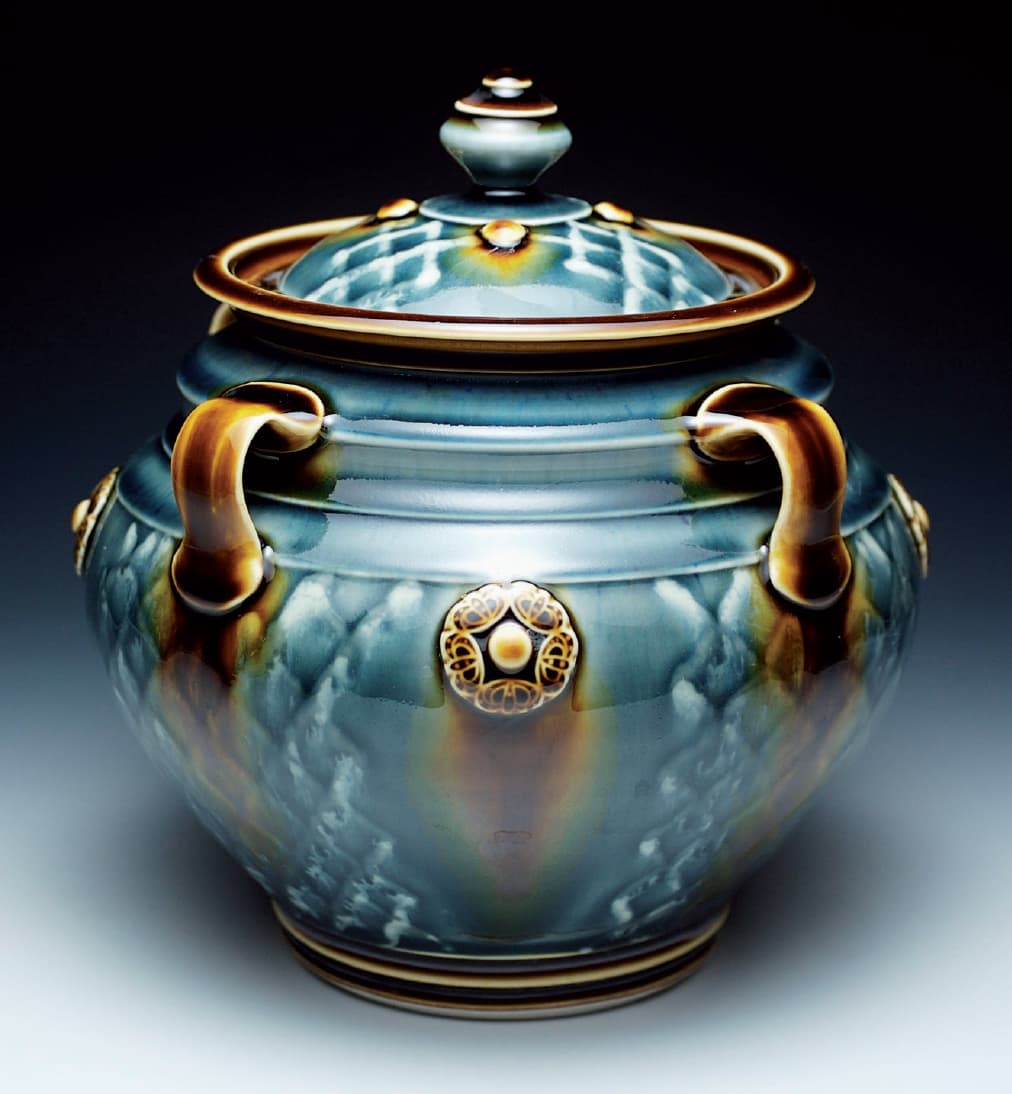
Sprigging is a great option for creating low-relief textures on pottery. Ryan Greenheck combines sprigs with stamping to create rich surfaces on his jars. Photo courtesy of the artist
USING SLIP
A slip is a mixture of ceramic materials suspended in water. Slips are often used in the construction of a form, as in slipping and scoring or slip casting. However, slips are also commonly used on their own or with added colorants on the surface of a form—which is how we’re going to use slips in this section. When looking for a more decorative slip, you have two main options. You can create a slip from the clay body you are using to throw with, or you can mix a separate recipe.
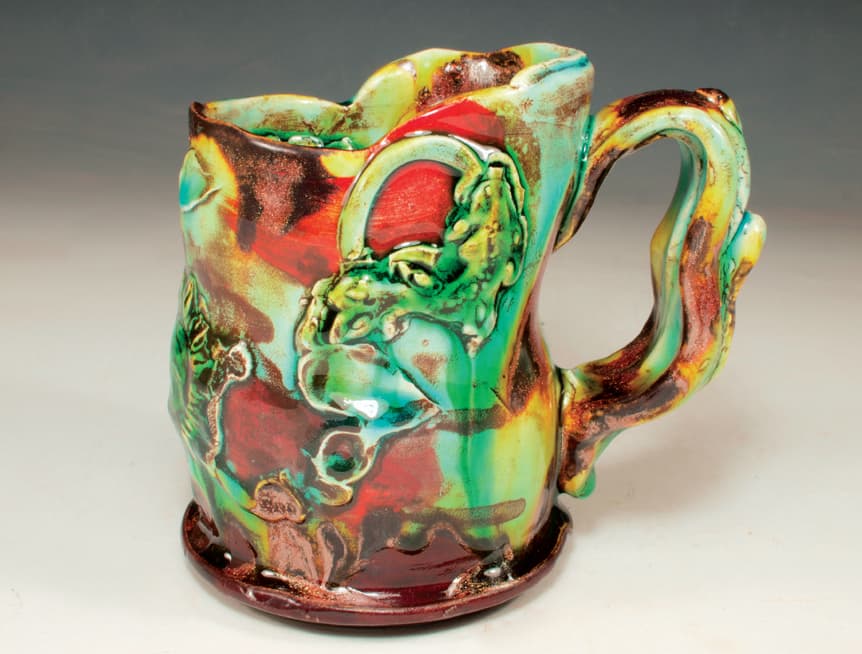
Lisa Orr uses slip in a variety of creative ways. For example, she uses slip trailing to draw on a piece of fabric. As the slip dries, it turns into a sprig-like three-dimensional texture that can be picked up and transferred to the pot. You can see this type of texture on the side of her Monk’s cap mug. Photo courtesy of the artist
MAKING SLIP FROM YOUR CLAY BODY
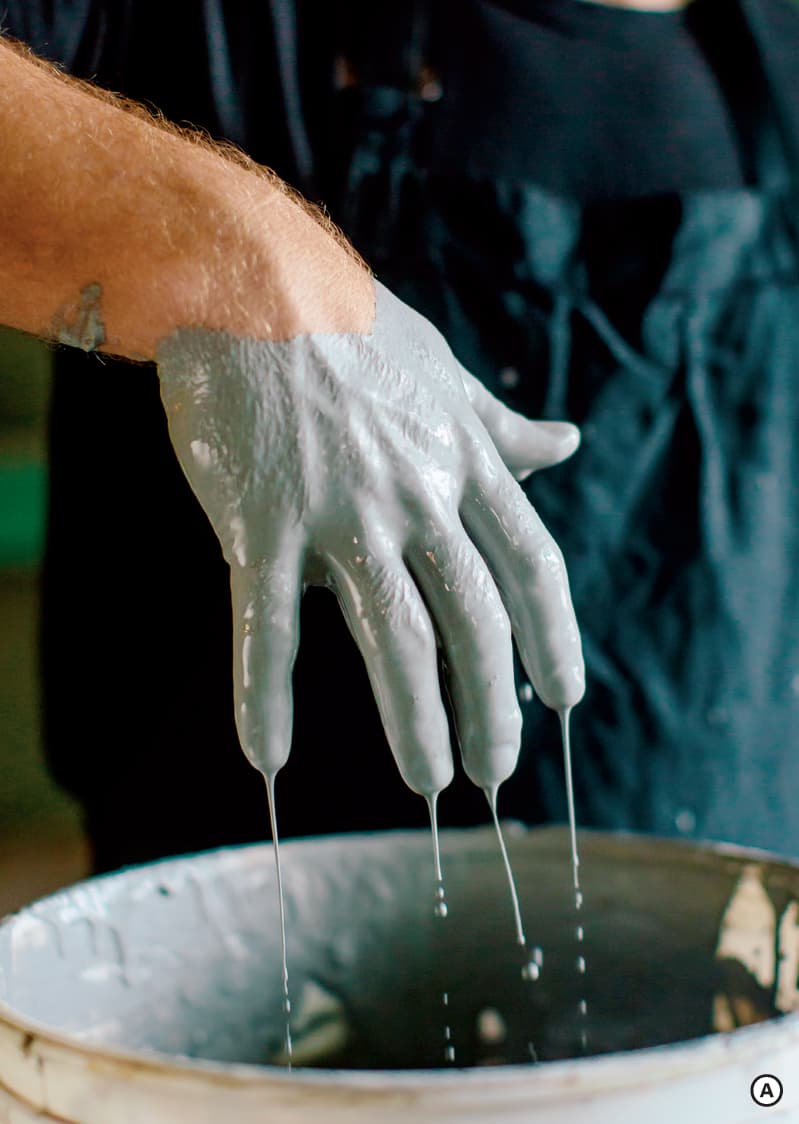
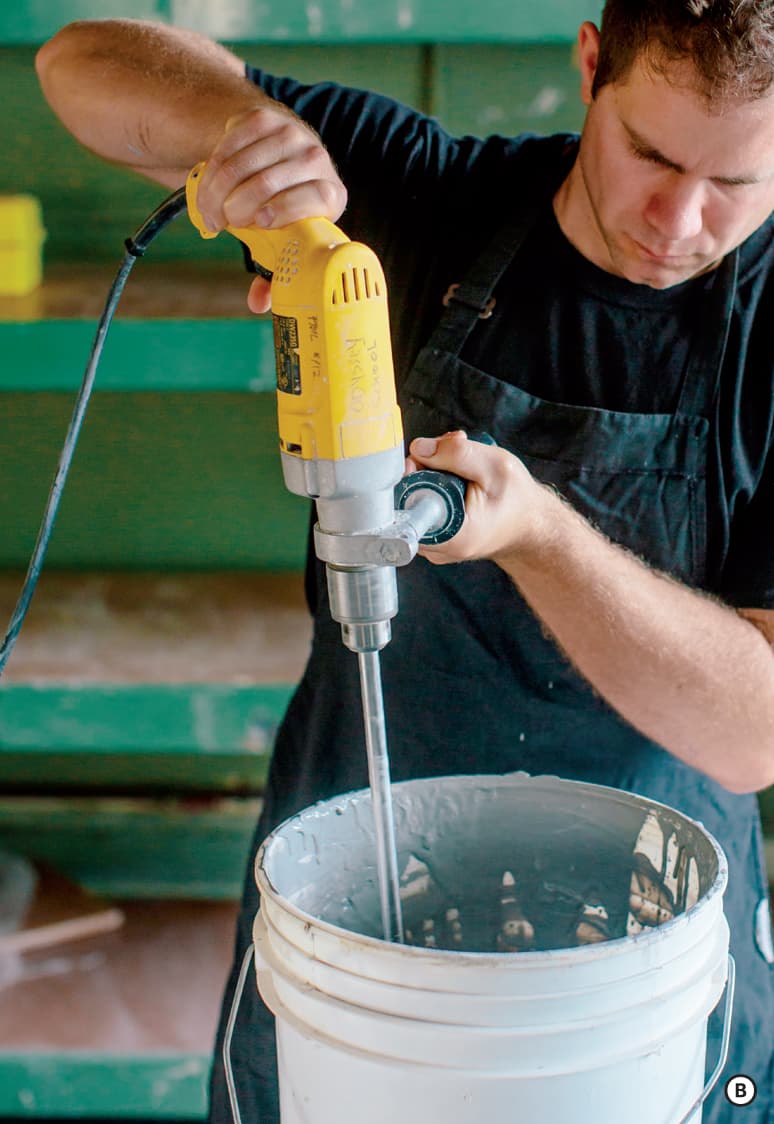
To create a slip from your clay body, roll out 1/4-inch slabs and let them dry to bone dry. Wearing a respirator to avoid dust, put the slabs into a pillowcase and pulverize them with a hammer. Put the dry, powdered clay mix into a bucket that is one-eighth filled with water and let sit for an hour. Be mindful not to add too much water as you are trying to get it the consistency of a thick pudding. A You can add more water at any stage in the process, but removing water is much harder. If you add too much, you will need to wait for the slip to settle—usually about a day—and then pour excess water off the top. To help even hydration, blunge with a paint-mixing paddle attached to a drill. B
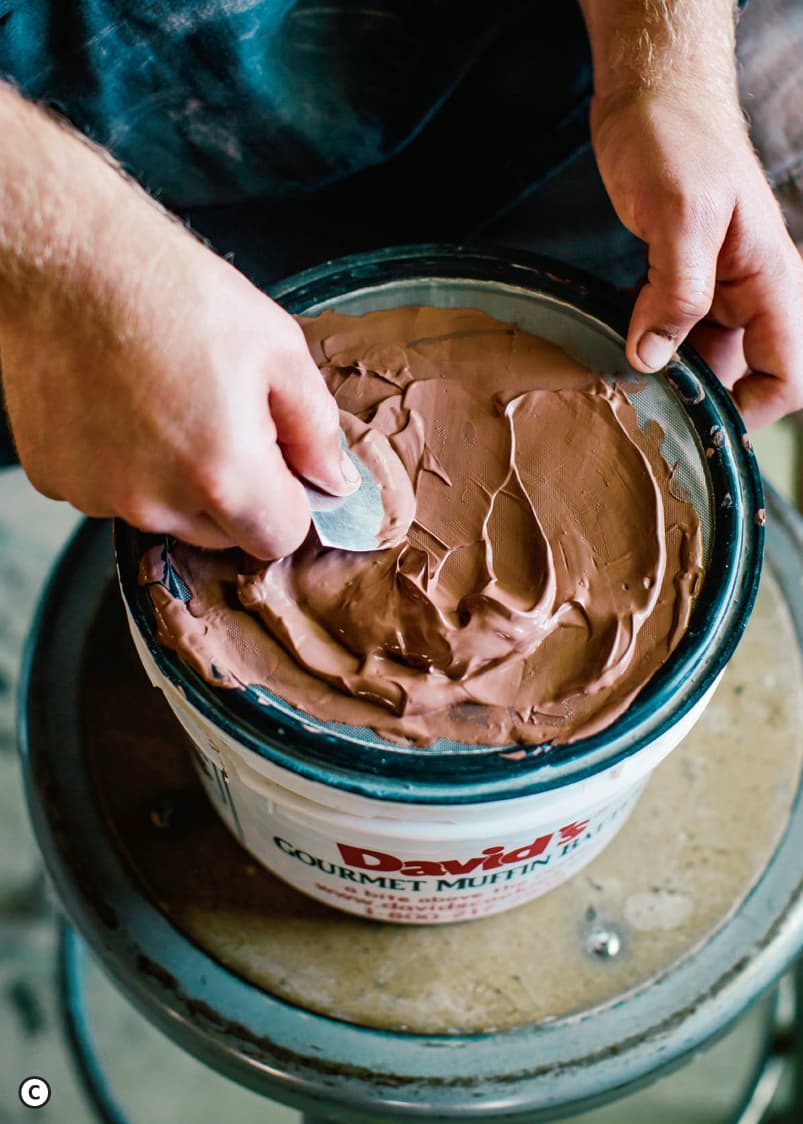
If your clay body includes heavy grog, you will want to sieve it out by working the slip through an 80 mesh sieve. C If left in, the grog might clog a slip trailer. Once it’s sieved, you can use the smooth slip for slip trailing or other three-dimensional decorations.
MAKING SLIP FROM A RECIPE
To create a slip that’s not made from your clay body, search out recipes online or in ceramic resource books. Make sure to match the temperature of your recipe to the temperature you will fire the pot. A low-fire slip fired to cone 10 might act like a glaze or potentially cause overfiring problems like bubbling or blistering.
One of the main concerns when using slip is matching the shrinkage of the slip to the shrinkage of your clay body. In most cases, a liquid slip will be fluid because it has high water content. As the pot dries, the water evaporates, causing the clay particles to dehydrate and shrink. If you apply a slip with high water content to a bone-dry pot that has already shrunk, you will have a mismatch. The goal is to have the pot and the slip shrink together so that the slip doesn’t crack off the pot. Slips are formulated for leather hard or bone dry/bisque based on their shrinkage. When looking at a slip recipe you will notice bone-dry and bisque slips have more non-shrinking particles by percentage than their leather-hard counterparts. Most recipes will come with notes on which stage will be best for application, but testing is always recommended with a new slip.
Another problem with slips that have a high percentage of water is that you can potentially oversaturate the pot body, causing a collapse. To address this, you can make a slip with less water and add a deflocculant. Material solutions of this type, like sodium silicate and Darvan, will change the ionic attraction of the liquid, making them more fluid as their particles slide across each other. An easy metaphor for this phenomenon is found in magnets, which will attract each other if opposite poles, positive and negative, are near. If similar poles, positive and positive, face each other, it is impossible to push the magnets together. A deflocculated slip is much the same with all particles taking on a positive charge. The result is a liquid that is very fluid but does not have high water content. Deflocculated slips are great for pouring or dipping as they flow well over the surface of the pot.
I have included a few base recipes shown here to help you get started. Choose a recipe based on your needs and follow these instructions for mixing your slip.
Start by combining your dry ingredients. Now add water and start mixing your slip to the consistency of a thick pudding. Once the slip is a uniform consistency, use a blunger on a drill to agitate the slip as you add a few drops of deflocculant. Add slowly while you continue to blunge until you get the consistency of skim milk. Be careful not to over-deflocculate as you will then have to add more dry ingredients or a flocculant. The practical test that I use is to dip my finger in the slip and look for it to run quickly off the edge of my fingernail. It should break over the edge, creating a halo effect. If this does not happen, then I need more deflocculant.
If your deflocculated slip goes unused for a few days you will notice it starts to thicken. Blunge to reactivate or add a few drops of water and deflocculant to freshen up the slip.
APPLYING SLIP BY POURING, DUNKING, BRUSHING, OR SPRAYING
There are many ways to apply slip on a pot but the most popular choices are pouring, dunking, brushing, and spraying. The best method for you depends on the amount of time you would like to spend and how much surface variation will be built into the process.
The quickest and most even way to apply slip is to pour it on. With practice, you can control the pour to create a very even coat. If you are working with a deflocculated slip, you may have a hint of the effect of gravity in the slip as it dries. This can actually be quite nice if you are pouring the slip over a texture, as it will create halos around the high points. Dunking is another fast way to apply an even coat to a piece, though again the effect of gravity can be present as the slip runs down the pot as it dries.
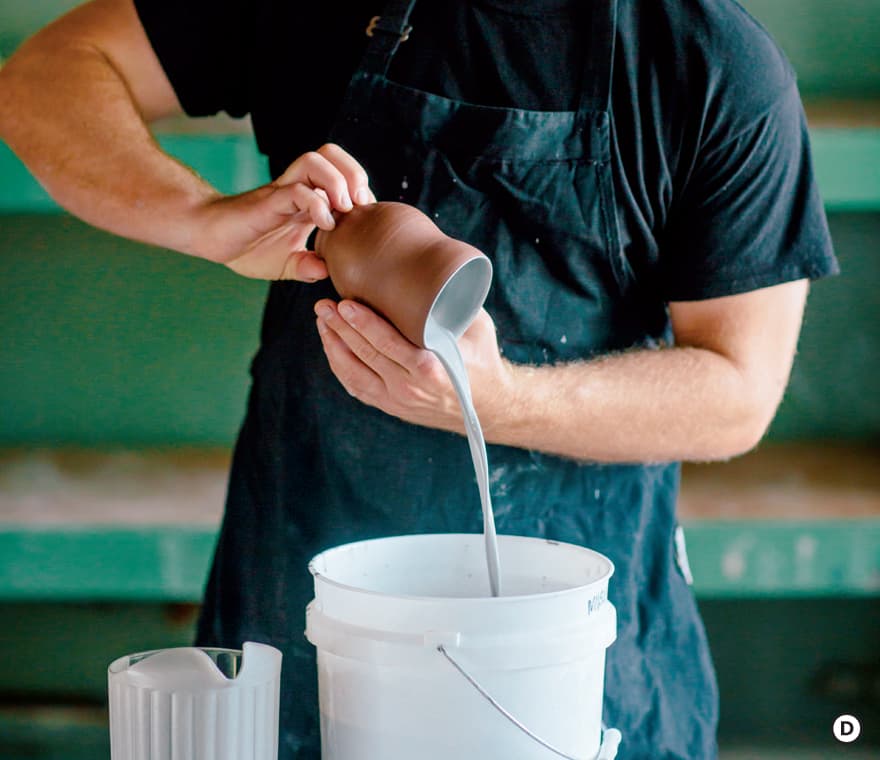
Start with a pot in the leather-hard state that has been thrown and trimmed. To coat the inside of the pot, pour slip on the inside of the form. Swish the slip around and pour it out, trying to not let any get on the outside of the pot. D Slip that does make it to the outside of the pot can be wiped off with a sponge while it is still wet. Let the pot dry back to leather hard.
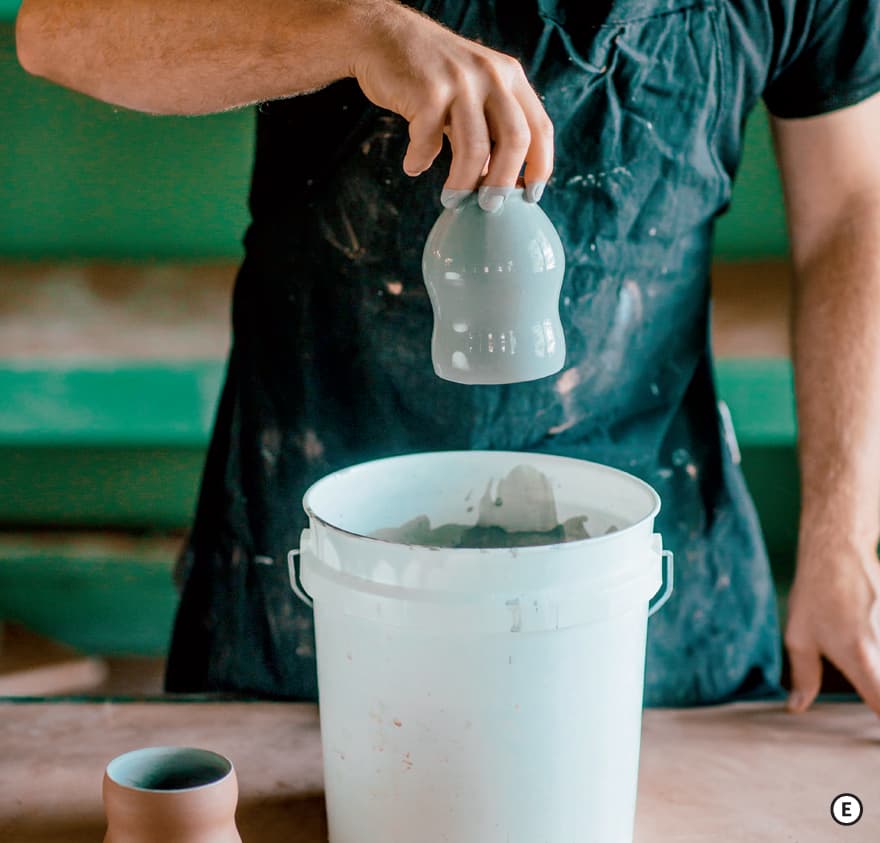
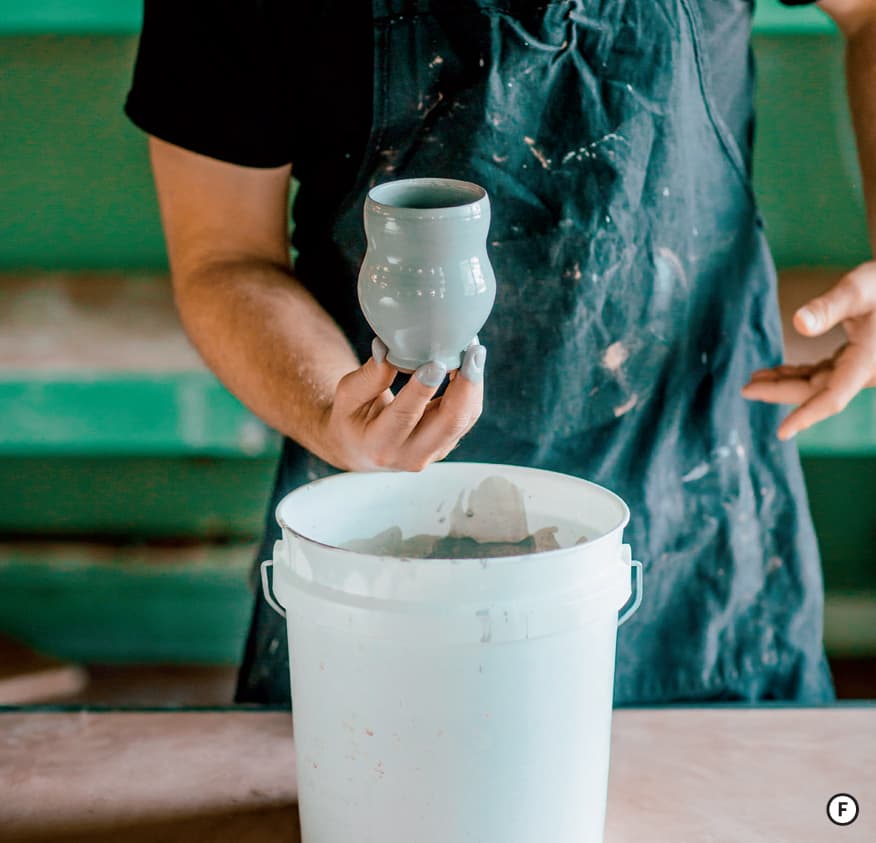
To coat the outside of the pot, hold the pot upside down and dunk it into the slip. E Make sure to keep the form very straight so that the air trapped inside the pot will keep the slip from recoating the inside. After removing the form from the slip, turn it right-side up and lightly shake to encourage any excess slip to run away from the rim. F If left at the rim, the slip might feel too thick when your lips touch the finished surface. Let the pot dry to leather hard before painting with underglaze or decorating with sgraffito.
Brushing is a slower method, but it also gives you a high level of control. You will be able to apply slip exactly where you want it. There will be residual texture left when you brush, so I encourage you to harness the brush marks to create a subtle pattern. Applying two coats of slip with a large Japanese Hake brush will give you a coating thick enough to cover your base clay but thin enough to look like a skin on the pot.
If you have a spray booth with adequate ventilation, you will also be able to spray on your slip. Spraying is especially helpful for forms like large oval platters and other forms that might be hard to pour slip over or dunk. Spraying is efficient, but it can be difficult to judge the depth of the coat you are creating. You will generally need at least two coats to cover your base clay. Always wear a respirator when spraying.
With all these methods, the moisture of the clay you are applying the slip to will have an effect on the drying. Most slips should be applied at leather hard, which will soak up slip in approximately 10 to 30 seconds. If you are applying a slip formulated for bone dry or bisque, you will notice the pot will soak up the slip immediately. You might have to adjust your application method to get the most even coat in the fastest amount of time.
Terra Sigillata
Terra sigillata (also called terra sig or sig) is a refined slip used to color and seal porous clay bodies. Although traditional terra sigillata is mostly used in low fire, thin slips can be used on clay bodies at all temperature ranges to highlight textured surfaces. The microfine nature of the clay particles in terra sigillata allow it to seal up the pores of a larger particle size clay body. You can create a slight sheen when it is applied to bone-dry or hard leather-hard pots and burnished with a soft cloth. The end result is somewhat watertight and can be used to seal the feet of porous terra cotta pots. I’ve copied Pete Pinnell’s recipe and notes for making terra sigillata through liquid settling.
PETE PINNELL’S EASY TERRA SIGILLATA
In a 5-gallon bucket put 28 pounds (28 pints or 31/2 gallons) of water. Add 14 pounds dry clay. XX Sagger works well for white base, Redart for red. Add enough sodium silicate to deflocculate (a few tablespoons). For red clays use 2 teaspoons sodium silicate and 1 tablespoon soda ash. Allow to settle. Overnight is average. Less plastic red clays such as Redart or fire clay, may require only six to eight hours, while very plastic clays like XX Sagger or OM4 ball may take up to 48 hours. Remove the top half without disturbing the mixture (syphon off). This is the terra sigillata. Throw the rest away; do not reclaim.
Terra sigillata is best when the specific gravity is about 1.15. Useful range is 1.1 to 1.2. Specific gravity is measured by weighing out 100 grams of water, marking the volume, and weighing the same volume of the sigillata. Divide the weight of the sig by 100. If too thin, evaporate. If too thick, allow to settle longer. Apply sig to bone-dry greenware and buff. For “patinas,” use 1 gerstley borate + 1 colorant as a thin wash over bisqued sigs, applied and rubbed off. Works well on textured areas.
Color suggestions to 1 cup liquid terra sigillata:
white = 1 teaspoon Zircopax or tin
off white = 1 teaspoon titanium dioxide
green = 1/2 teaspoon chrome oxide
blue = 1/2 teaspoon cobalt carbonate
black = 1 teaspoon black stain
purple = 1 teaspoon Crocus Martis
USING A BALL MILL TO MAKE TERRA SIGILLATA
In my first year of grad school I discovered ball milling as a way to increase the sig’s consistency, yield, and shine when burnishing. A ball mill uses a spinning drum to rotate milling media, usually steel or porcelain balls, to crush wet/dry solutions into finer particle sizes. If you don’t have a ball mill, you can build your own by following Digitalfire’s instructions or buy one online.
The first step after getting the ingredients is measuring the capacity of your ball mill. Then divide the recipe so that it will fit in the ball mill. The duration of milling depends on the base clay you are using. Coarse clays with short particle size ranges (like Redart) need to be ball milled longer than clays that naturally have a wide range of particle sizes (like OM4). Since terra sig is made from the finest particles of clay, the end goal of ball milling is to increase the number of that size particle. Ball milling significantly increases yield, but overmilling can cause a host of problems (clay fit, won’t burnish to a shine, etc.) When clay particles are overmilled they become an unusable mush. I attribute this to the particle losing its hexagonal structure. You want the clay particle to become shorter in length but not lose its hexagonal shape.
When I make Redart terra sigillata, I ball mill the clay, water, and deflocculant for twelve hours before starting the separating process. I then take the mixture out of the ball mill and put it into a see-through container. After six hours of settling, I collect the liquid portion of the mixture. There will be a thick sludge at the bottom of the container that can be thrown out. If you desire only the finest clay particles, which will give a shinier burnished surface, then you can repeat the settling process for another six hours. Boiling off moisture or adding water after decanting are necessary at times to achieve the ideal specific gravity for burnishing, which is 1.15 to 1.18.
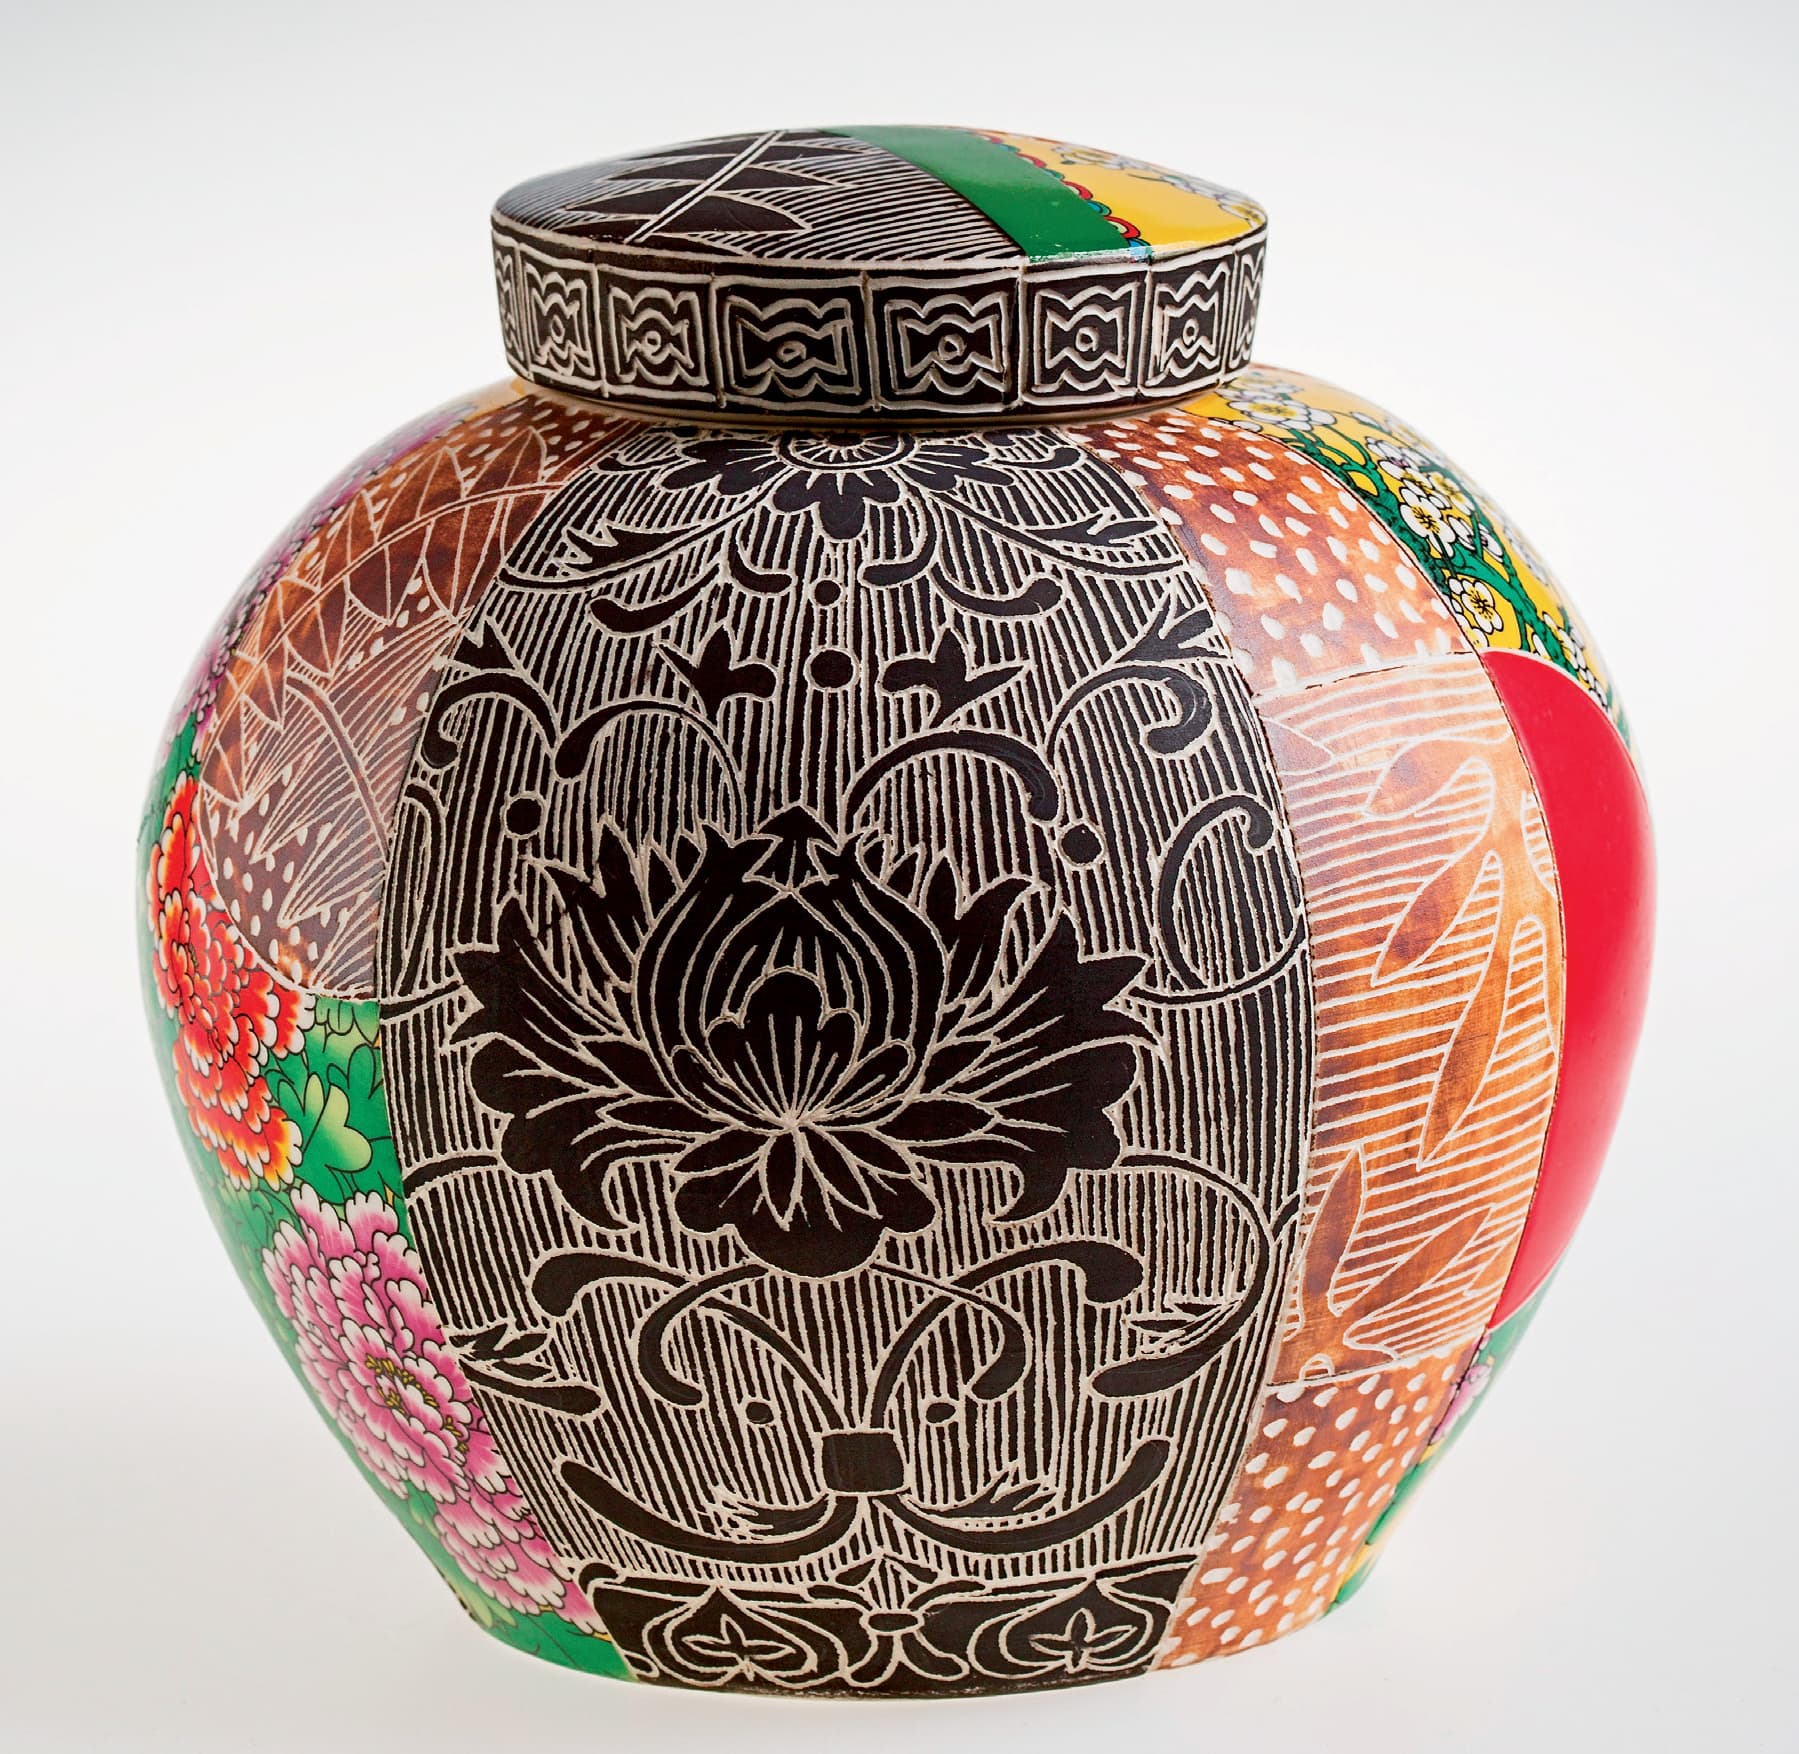
Janet Deboos lidded jar. Photo courtesy of the artist
For a deep maroon sig, I add 1 teaspoon of Crocus Martis per cup of liquid. Crocus Martis is a slightly soluble iron sulphate. I got color happy one day and added 3 teaspoons thinking it would be three times as good. Unfortunately oversaturating the solution made the burnishing properties worse. This makes sense because I introduced a semi-coarse metallic particle into the solution. One teaspoon per cup is sufficient for any high-iron/heavy metal colorant. When I apply the sig to hard leather-hard pots, I burnish after each of the two layers. If you stick to this specific gravity range, you can almost burnish to a glossy finish. It’s remarkable how the Crocus Martis helps the shine. If you look at the jar above, the dark brown color is the sig. After burnishing, it is water repellent on vertical surfaces and on the feet of terra cotta pots.
APPLYING SLIP WITH A BULB TRAILER OR BAG
Slip trailing is a quick and easy way to create raised lines on a piece. Unlike the techniques previously described in the chapter, slip trailing is not used to create a cover coat. It is used to decorate, or provide textural pattern, in one specific part of the pot. The technique often utilizes a bulb trailer, which can be purchased at your local clay supplier, to apply linear elements on the form.
To load a bulb trailer, you squeeze the red plastic bulb, which will push out the air inside and allow you to suck the slip up into the reservoir. You can then squeeze the bulb to push the slip out of the trailer and onto the pot. Slip trailing works best with slip that has been mixed to the consistency of yogurt but is not deflocculated (it would be too runny). Slip trailing is best for the surface of soft leather-hard pots. If applied at bone dry or bisque, the slip will most likely dry and crack off the piece.
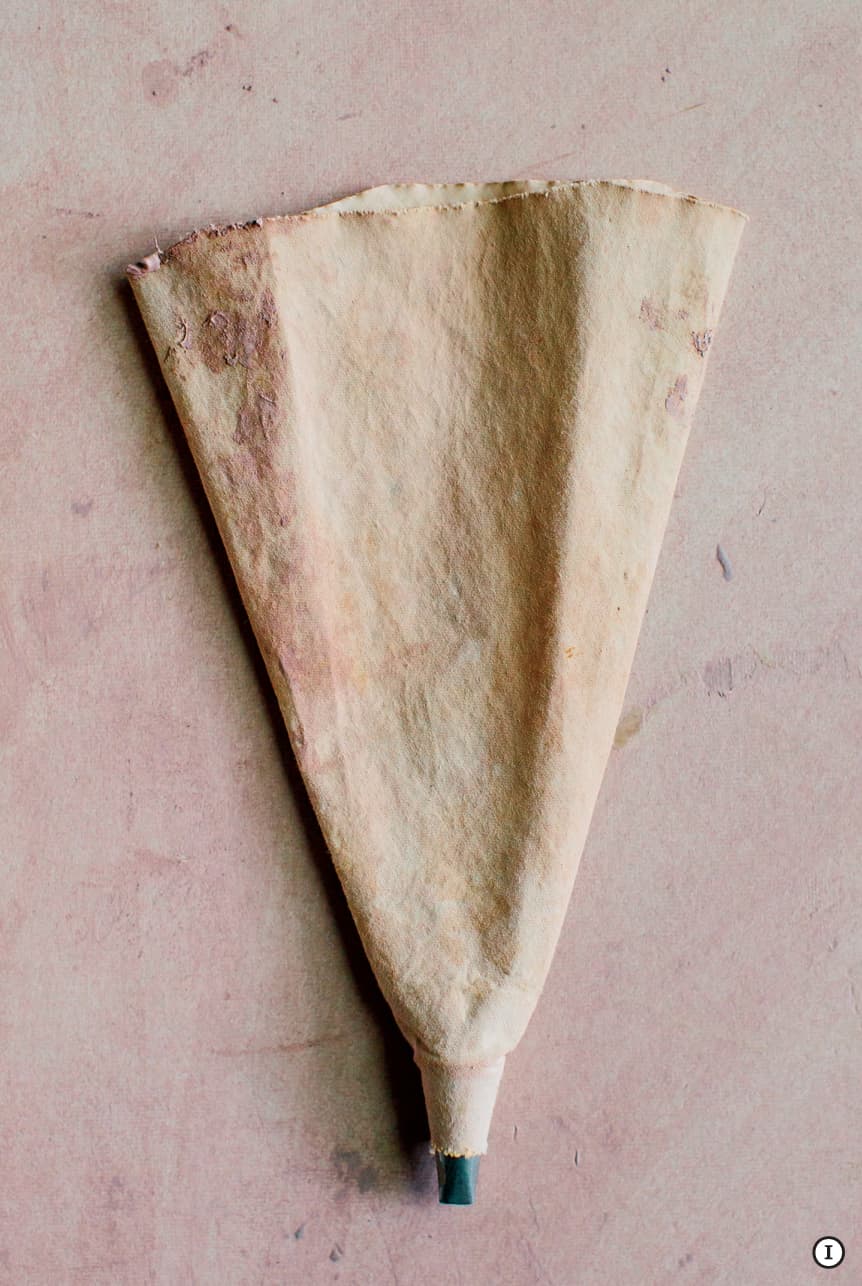
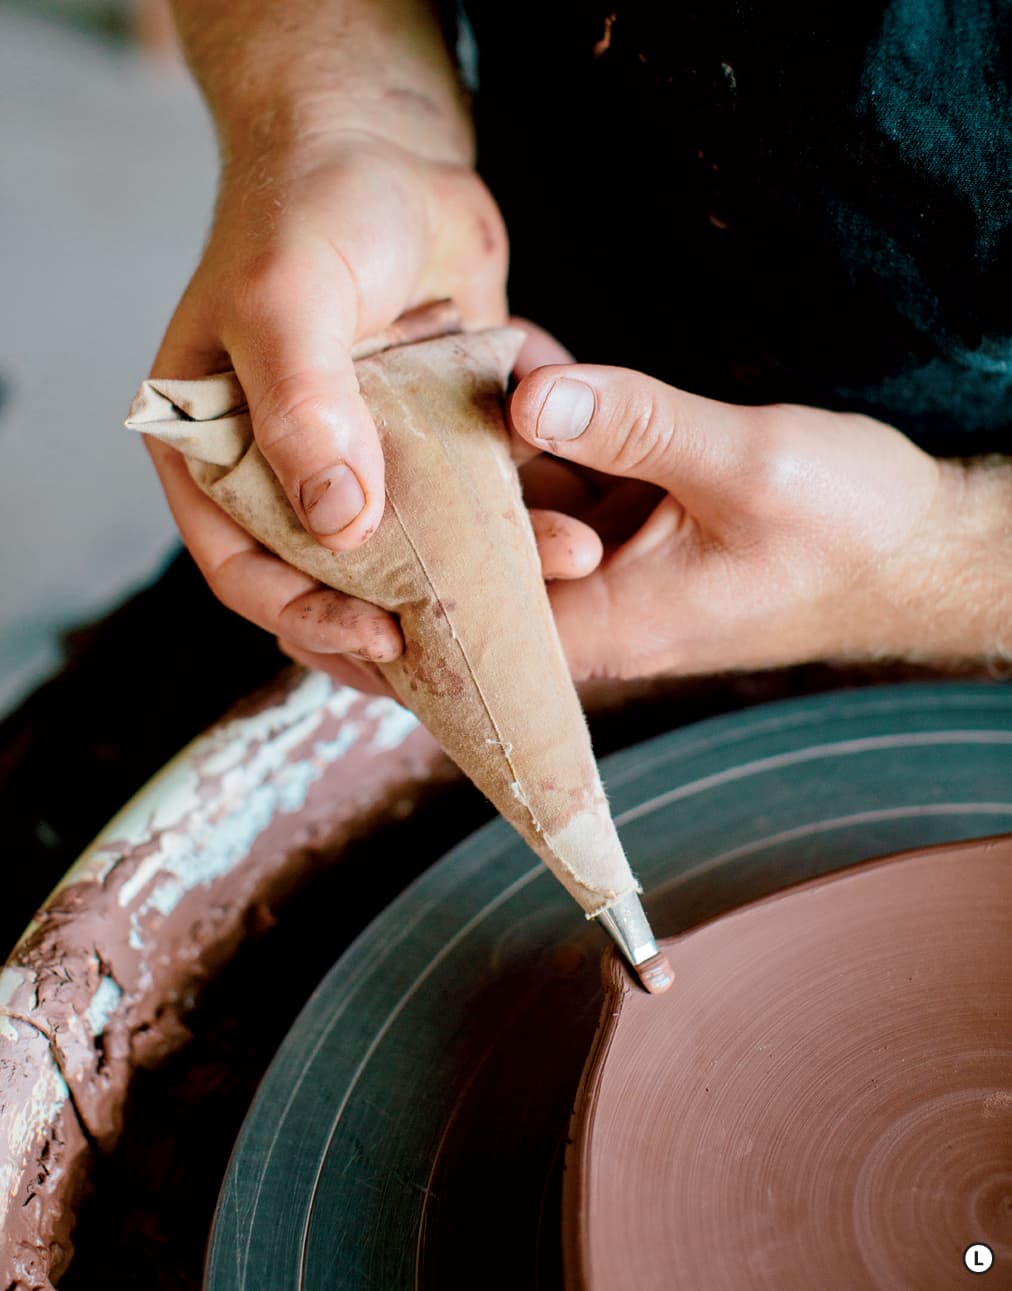
For a new twist on an old technique, try slip trailing with a pastry bag. I J A canvas pastry bag and metal nibs can be purchased from your local kitchen store. Fill the bag two-thirds full before folding the top edge down to seal the bag. K This allows you to squeeze the bag, creating pressure in the same way you would a plastic bulb trailer.


To demonstrate this technique I will use the five-pointed plate from shown here. Make your own piece to follow along or adapt this technique to a form you have in progress!
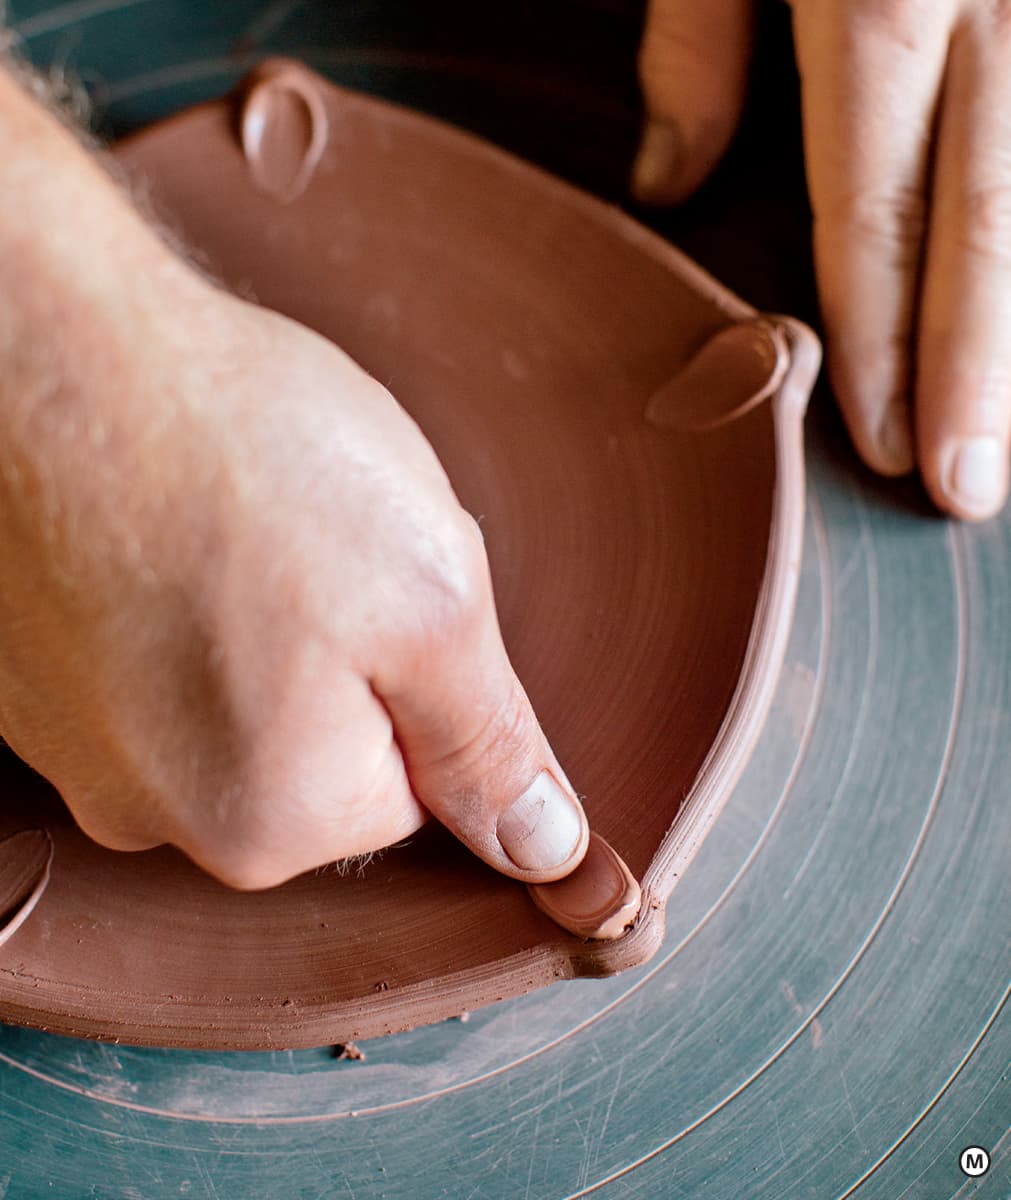
Start by squeezing a small line of slip out of the bag onto all five points of the plate. L After the slip has dried enough to lose some of its sheen, perform a quick inward finger swipe through the slip. M After the slip has dried, you can clean up excess slip around the finger swipe. This small accent of slip provides a three dimensional highlight to the flat two-dimensional plane of the plate. It also provides a nice focal point that other decoration could build on.
BISQUE FIRING
The primary focus for the book is the shaping process for making pottery on the wheel. In addition to forming techniques, I wanted to include a brief section on firing to give you a cursory understanding of what happens after the piece is made. Glazing and firing kilns could provide a lifetime of study, so I recommend you consult books like John Britt’s The Complete Guide to High-Fire Glazes or The Complete Guide to Mid-Range Glazes for more detailed explanations of the chemistry involved with firing ceramics.
First, let’s return to our earlier conversation in Chapter 1 about the states of clay. In the making process, clay moves from a wet plastic state to a dry brittle state to a dense hard state. The process starts with slaked clay consisting of pulverized raw materials that are placed in water to achieve maximum hydration. After pugging or other formulation processes, we can use the newly plastic clay to make pots on the wheel. During the drying process the clay moves from the leather-hard stage to the final bone-dry stage. This initial phase moving from wet to dry is comprehensively called greenware.
The pots then turn into bisque ware through the introduction of heat in a kiln. The term bisque refers to the first firing in which the pots are heated above 800°F. This removes the chemical water bound up in the clay particle, creating a new dense particle that will not slake down into workable clay. Technically any temperature above 800°F could be called a bisque firing, but in practice most bisque firings happen between 08–02 on the Orton scale. Once bisque fired, many materials have been burned off, including sulfur and carbon. The clay remains porous after bisque and glazes can be applied by dipping, pouring, brushing, or spraying. The clay is then fired a second time to maturity at which point we refer to the pots as glaze ware. I’ve attached three firing schedules that will help you understand the rate at which bisque and glaze kilns are fired.
FIRING SCHEDULES
If you have access to a computer-controlled kiln, I have found these schedules to be very helpful. You could also use a pyrometer to approximate these ramps in an older kiln model that uses switches. These schedules show a variety of rates of climb for firing low temperature earthenware. They can all be adjusted for bisque or glaze at any temperature range by altering the final temperature in the last ramp. When firing a new schedule, make sure to take copious notes about the effect the rate of climb and the final temperature have on the finished wares.
Bisque Schedule for Cone 04
Rate |
Temp |
Hold |
100 |
200 |
Up to 8 hours if work is wet to the touch |
250 |
1000 |
|
150 |
1300 |
|
180 |
1685 |
|
80 |
1940 |
|
Glazes Prone to Bubbling/Blistering
Rate |
Temp |
Hold |
100 |
200 |
|
200 |
950 |
|
125 |
1300 |
|
250 |
1835 |
|
50 |
1925 |
1 hour |
I developed this schedule to combat glaze bubbling/blistering in low fire clear glazes. If you are struggling with these problems in glazes that have a high percentage of frit, I encourage you to thin your glaze coat. If you are still having trouble, you might try firing to a lower temperature as overfiring can cause glaze defects.
If you fire this schedule by witness cone, it is about cone 03 even though the final temperature is well below 04. Firing slow at the end is essential for fixing glaze melt problems. This could be adjusted to any temperature range. The theory is to slow down to a rate of 50 an hour for the last 100 degrees of the firing and hold for an hour.
Faster Cycle for Less Problematic Glazes
Rate |
Temp |
Hold |
120 |
200 |
|
175 |
600 |
|
215 |
1940 |
15 minutes |
GALLERY

Michael Hunt and Naomi Dalglish, Yunomi with Fingerwipes through Slip and Clear Ash Glaze. Photo courtesy of the artists
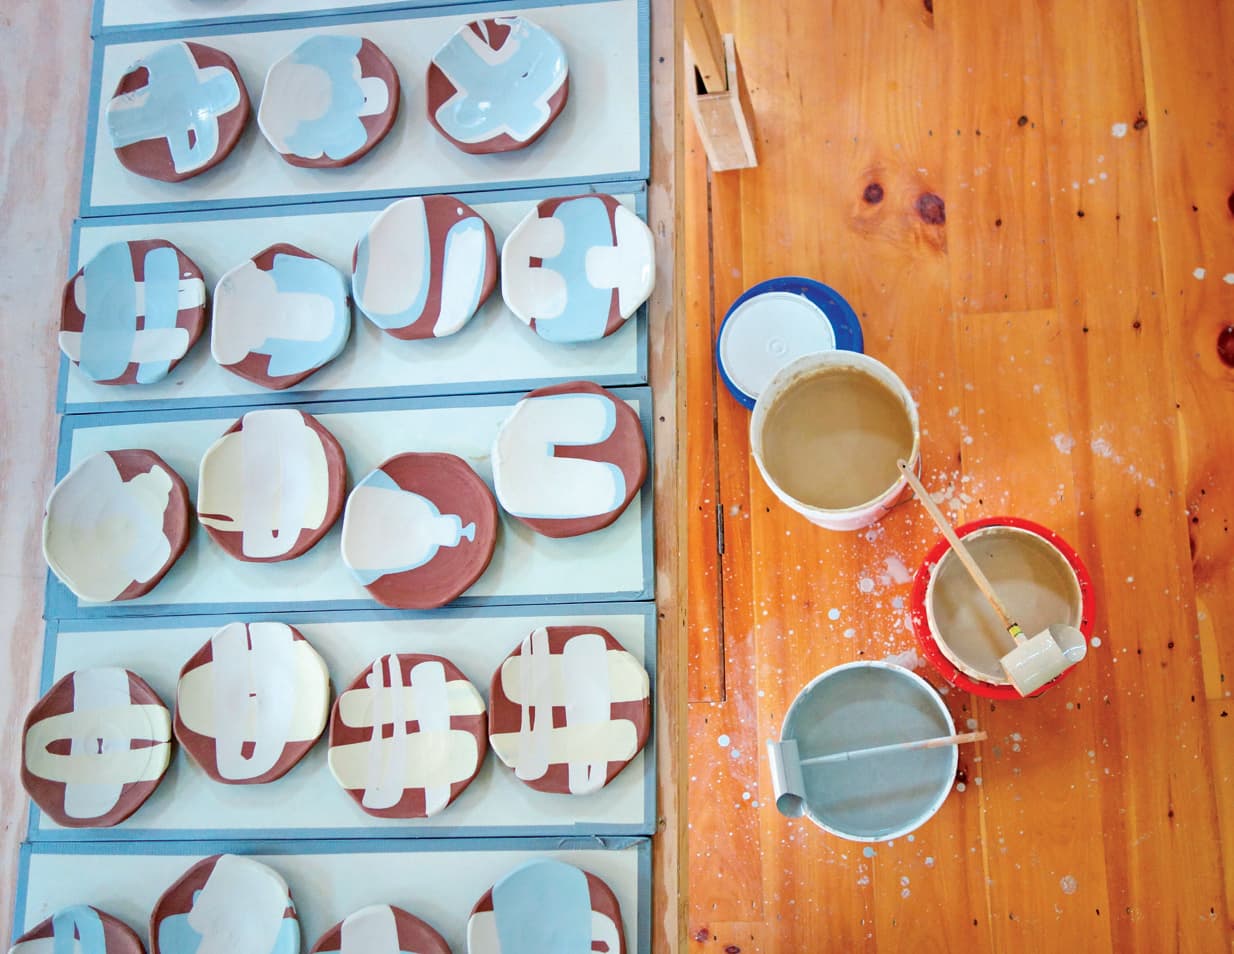
Ayumi Horie, slipping plates. Photo courtesy of the artist

Joan Bruneau, pitchers. Photo courtesy of the artist
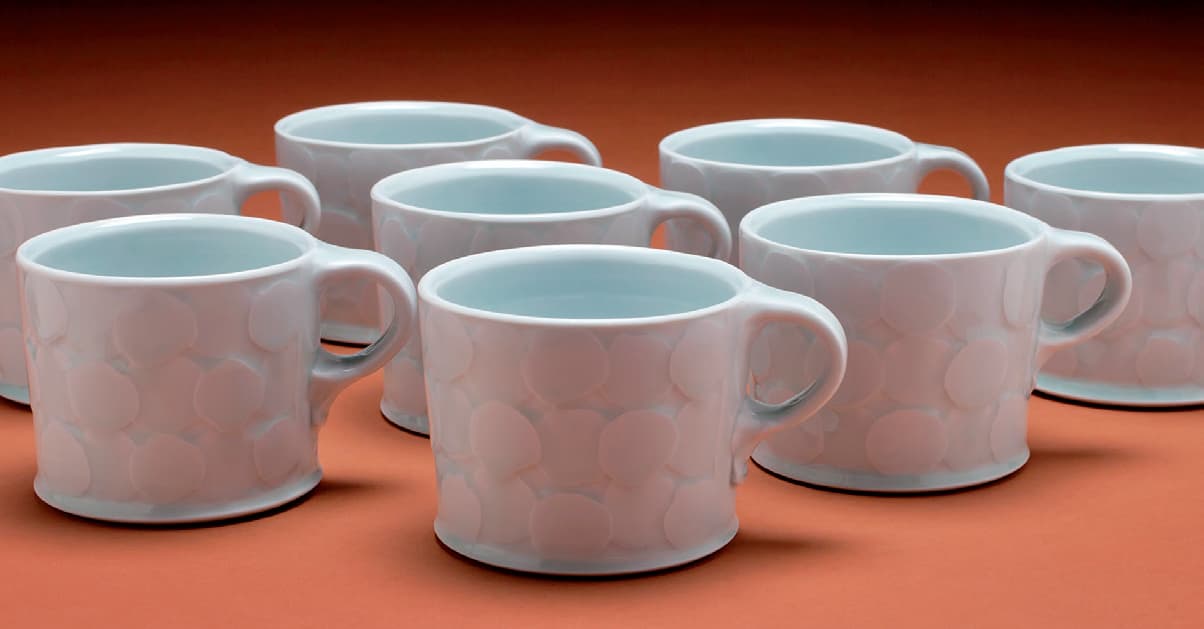
Andy Shaw, stamped mugs. Photo courtesy of the artist
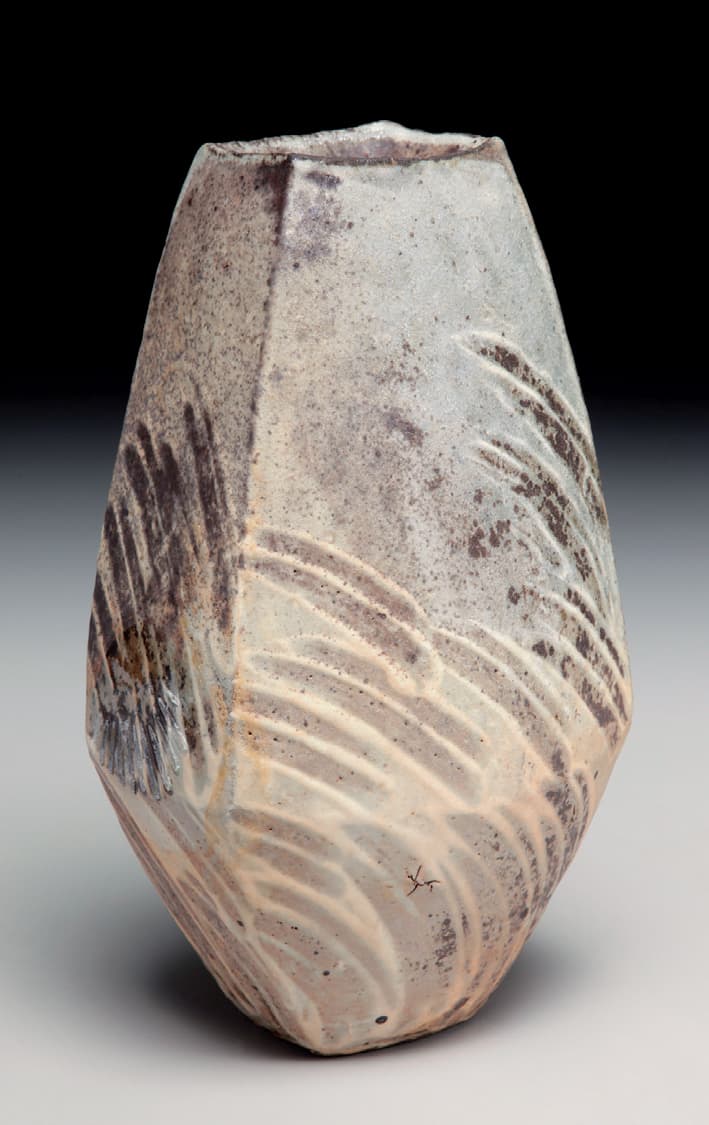
Josh Copus, vessel. Photo courtesy of the artist
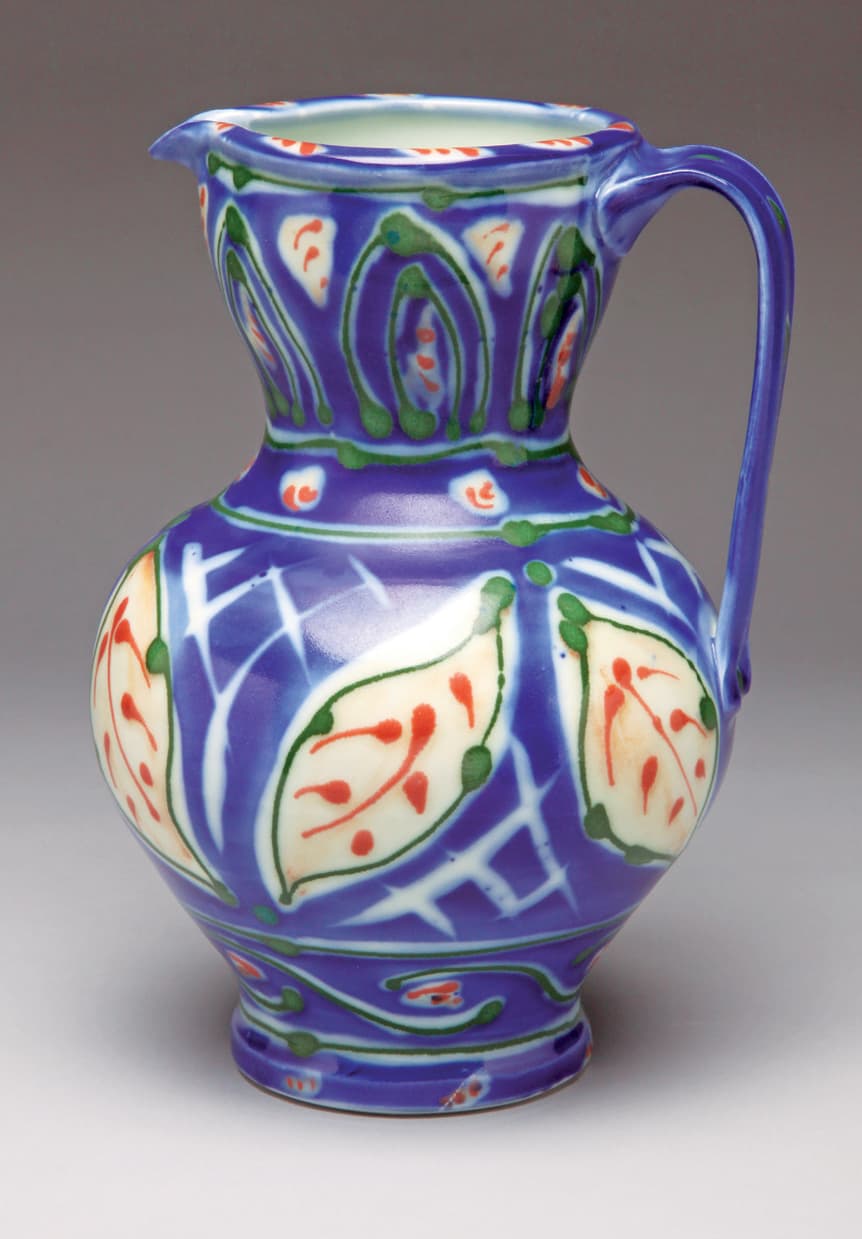
Sarah Jaeger, pitcher. Photo courtesy of the artist
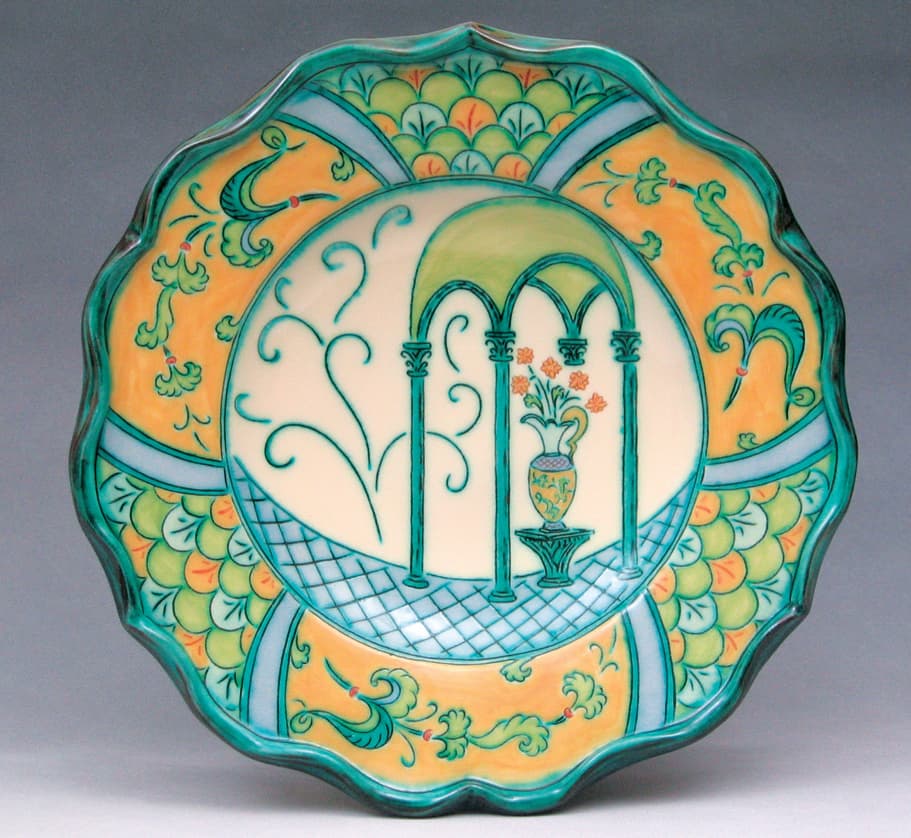
Jim Smith, charger with pitcher and cupola. Photo courtesy of the artist
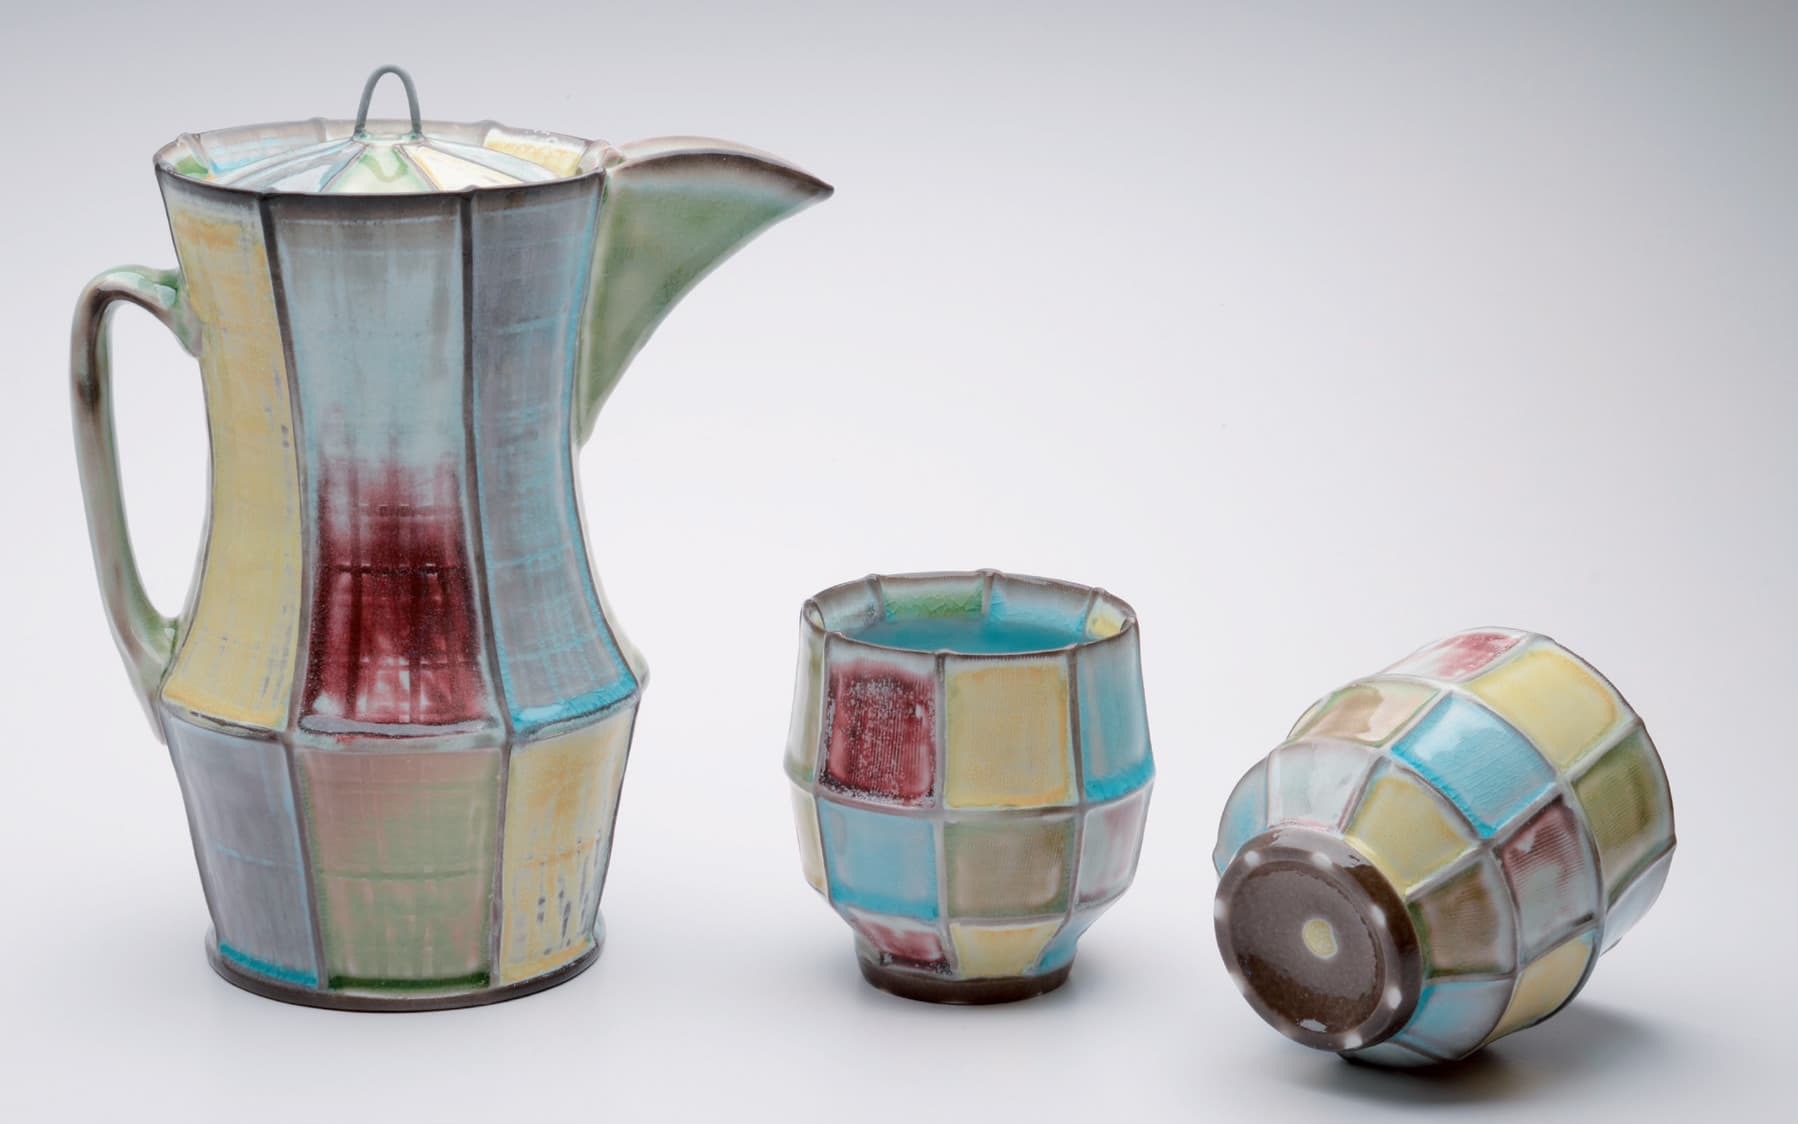
Kenyon Hansen, lidded pitcher with Yunomis. Photo courtesy of the artist
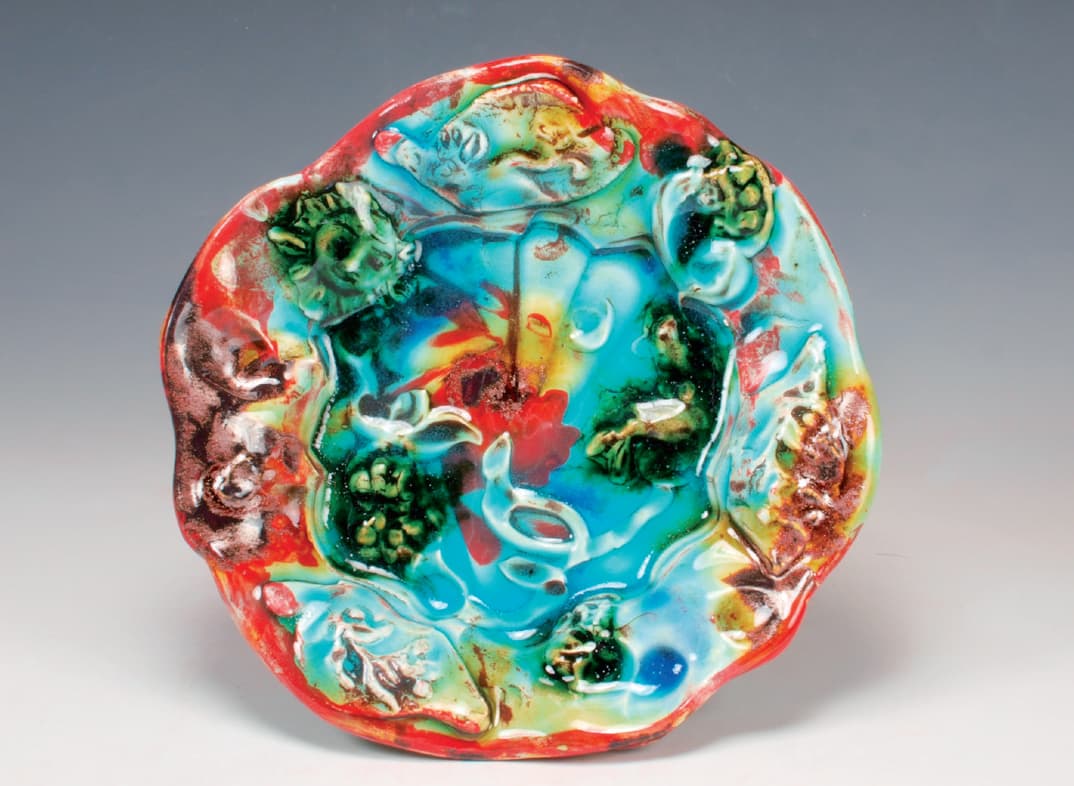
Lisa Orr, salad plate with sun. Photo courtesy of the artist
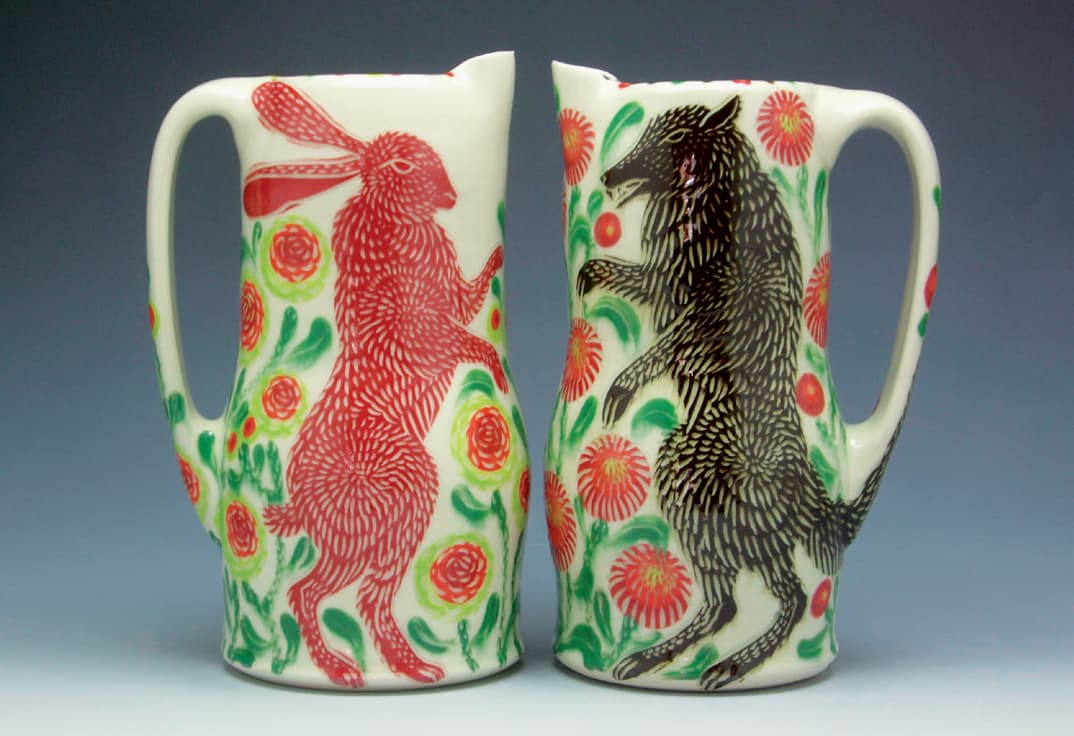
Sue Tirrell, Hare and Wolf pitchers. Photo courtesy of the artist
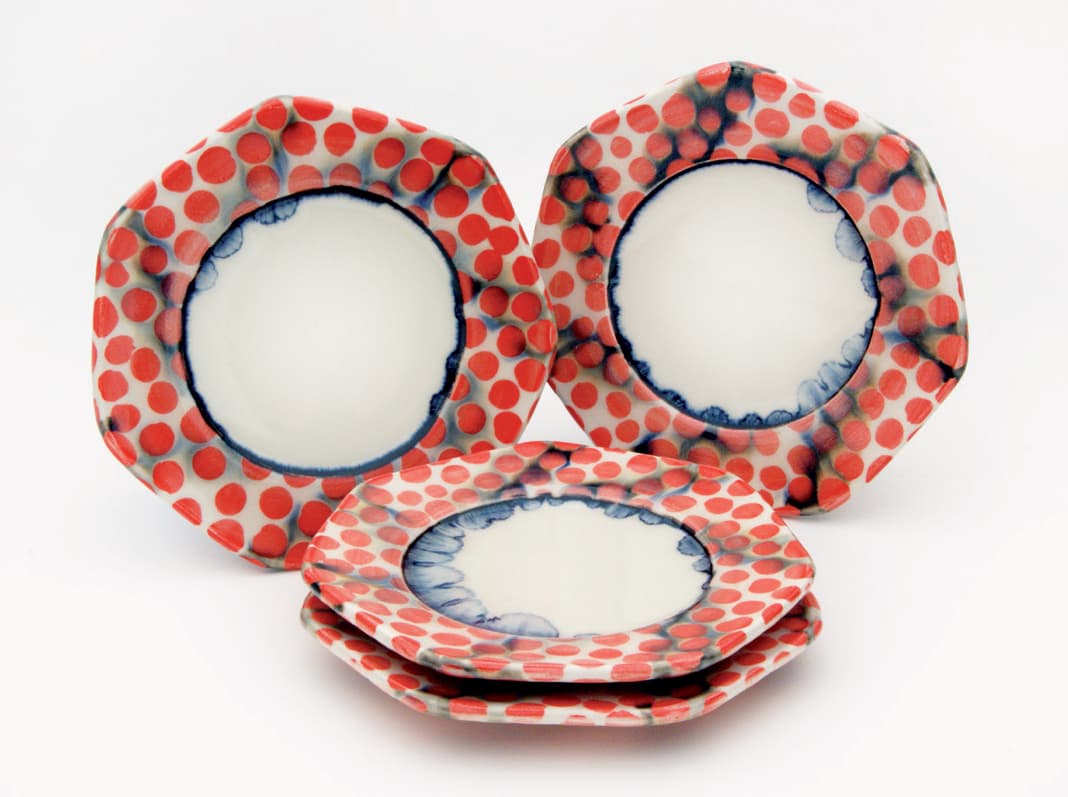
Sean O’Connell, dessert plates. Photo courtesy of the artist
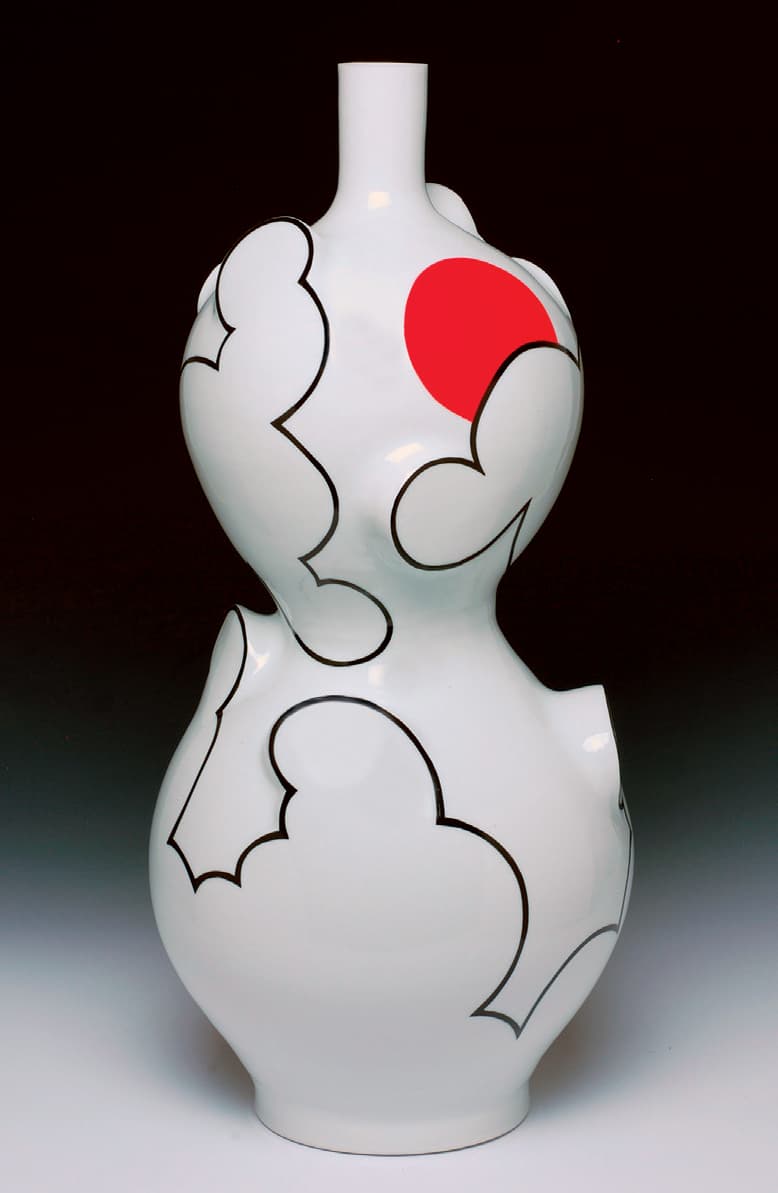
Sam Chung, cloud vase. Photo courtesy of the artist
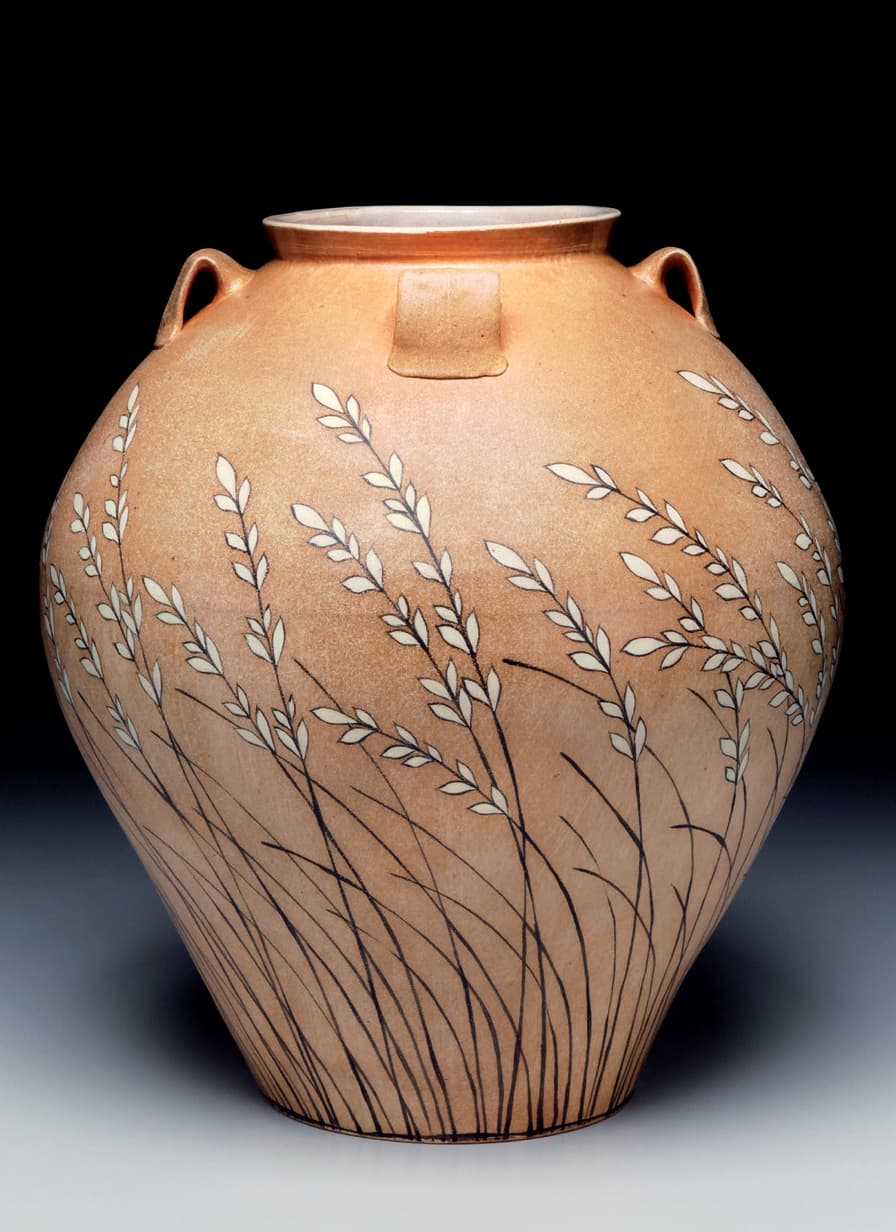
Kyle Carpenter, large vase. Photo courtesy of the artist
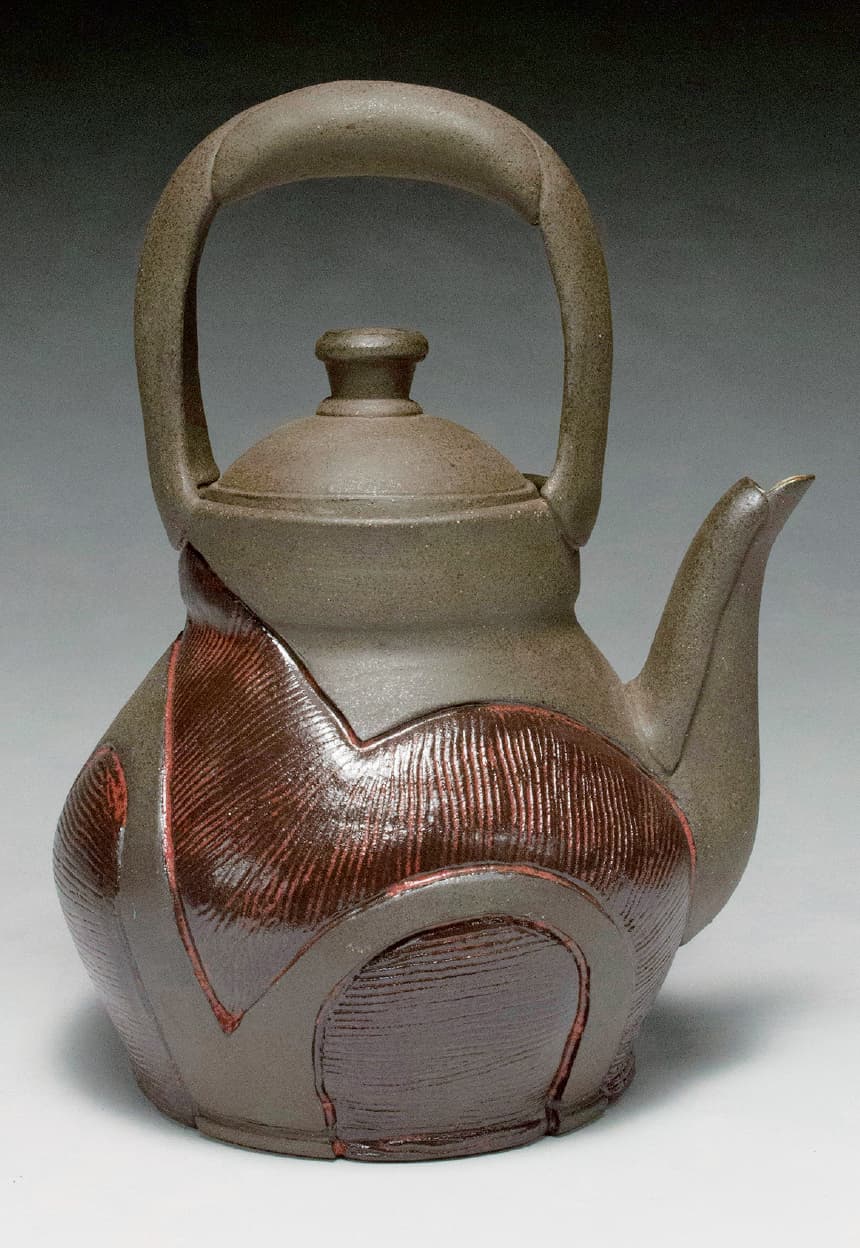
Nigel Rudolph, teapot. Photo courtesy of the artist
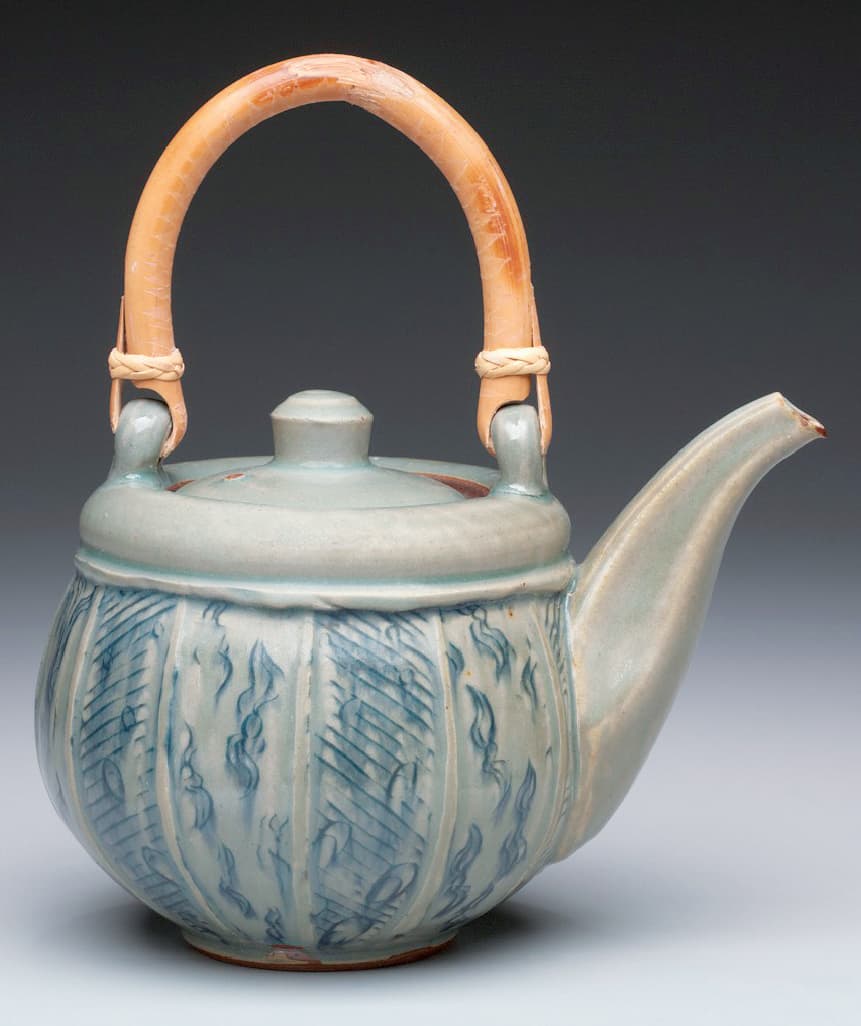
Steven Rolf, teapot. Photo courtesy of the artist
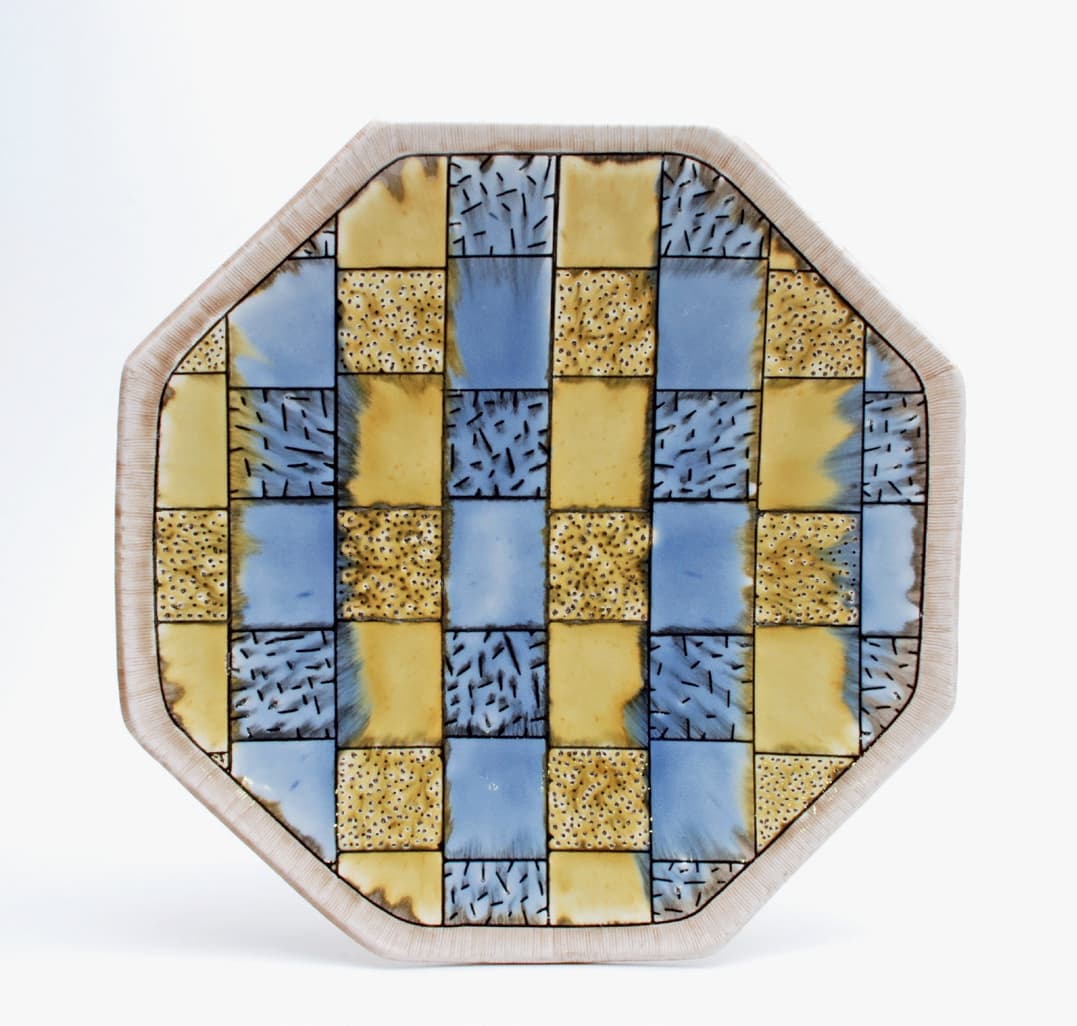
Doug Peltzman, dinner plate. Photo courtesy of the artist
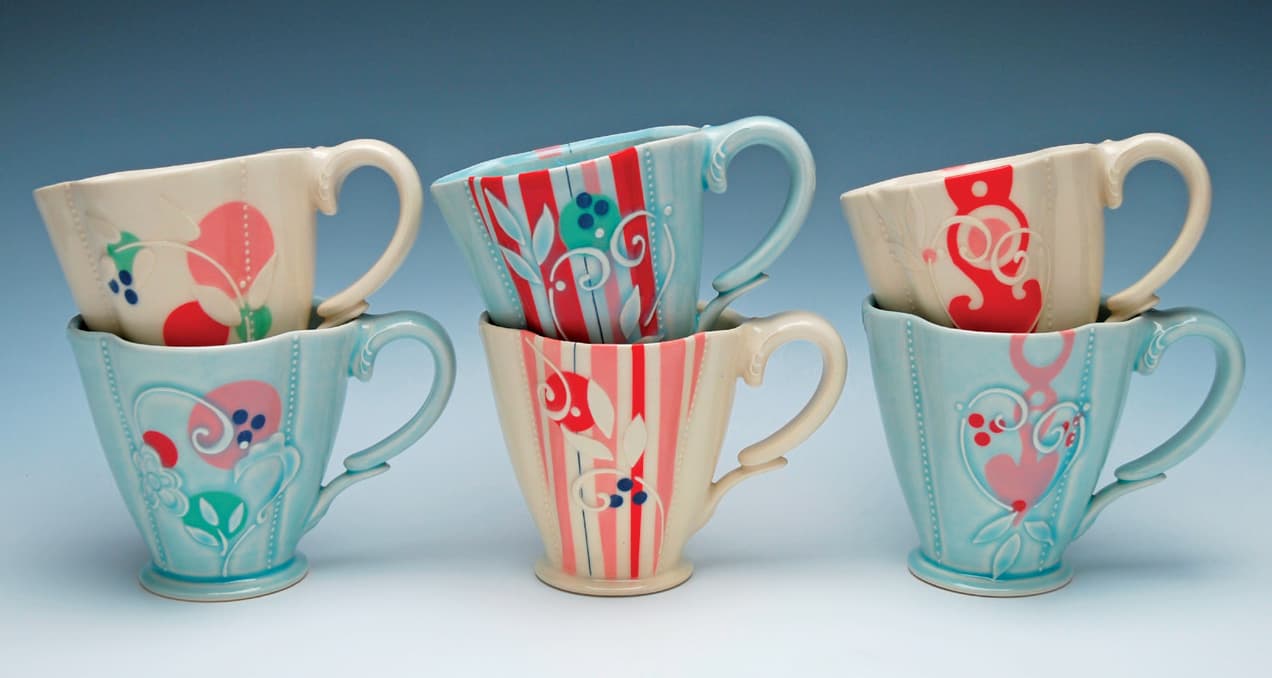
Kristen Kieffer, deluxe clover cups. Photo courtesy of the artist
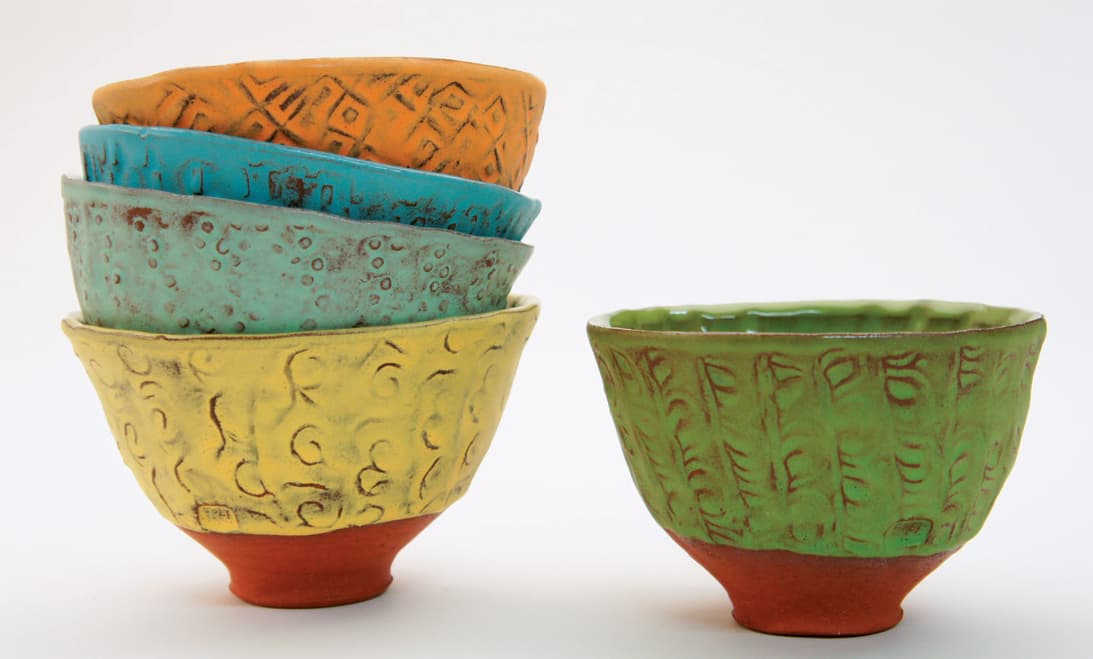
Sunshine Cobb, bowls. Photo courtesy of the artist