CHAPTER 2
Blueprint For a Faerie House
Before we can get down to the basics of building, I need to teach you about the various elements, processes, and materials used in faerie house construction. The ultimate location where you plan to place your faerie house will impact the design and materials used, as will your skill level. Here are some essential tips to help you orient yourself as you design your first creation.
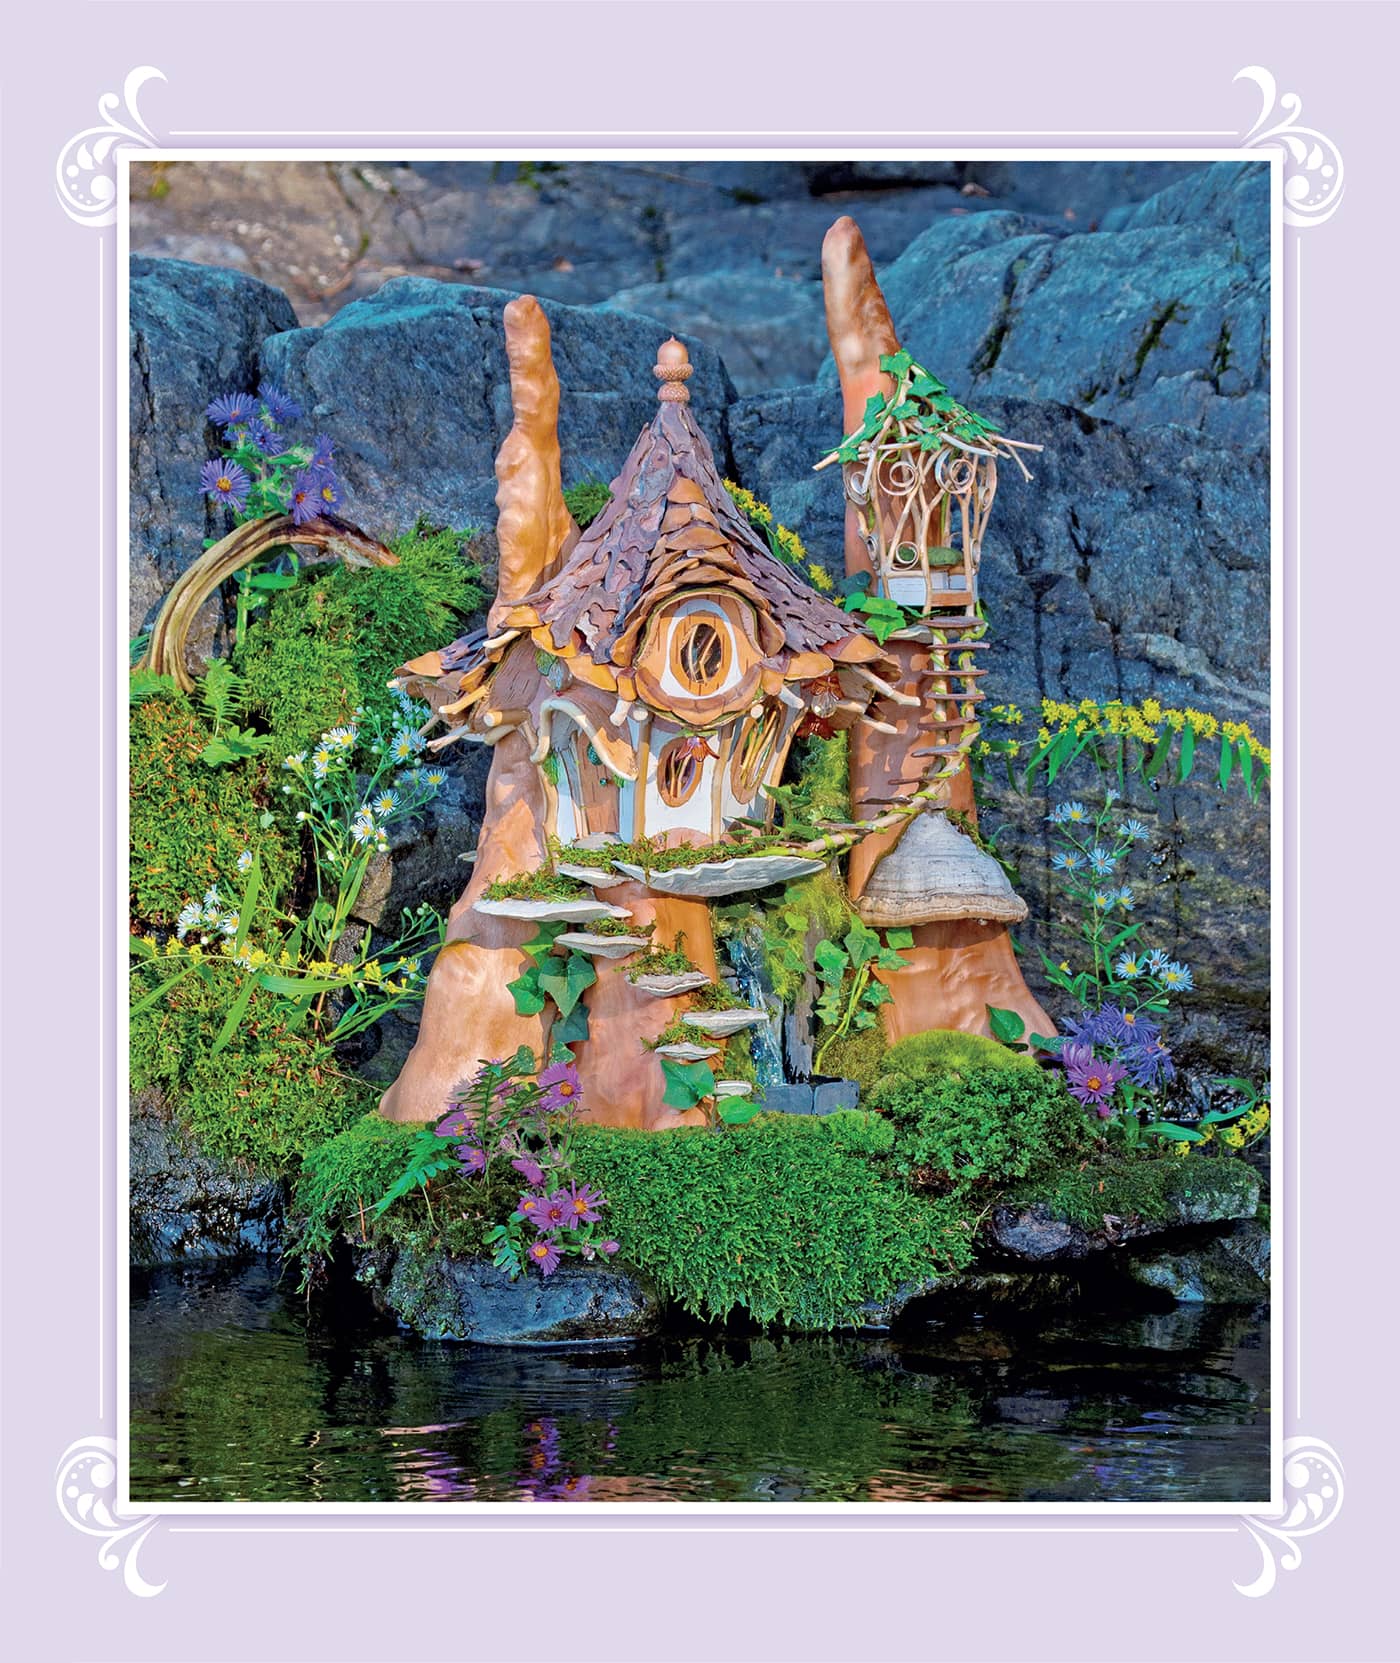
An extravagant Faerie Château perched on the edge of a quiet lake is kissed by morning light. Sustainably harvested cypress knees make excellent bases for treehouse-type constructions.
LOCATION! LOCATION! LOCATION!
The first place to start in discussing the building of faerie houses is to consider whether you want to work strictly outdoors or if you want to create your house in a studio or indoor location.
OUTDOOR FAERIE HOUSES
Building faerie houses outdoors with materials found right in the immediate area results in sculptures that are spontaneous and fun but not very durable. “Locally sourced” takes on a whole new meaning when you are looking at stumps, forest floors, or other natural locations for building materials. A general rule of thumb is to collect respectfully and leave living materials in place untouched. While it is true that some of my images contain fresh-collected leaves and flowers, I always did so following sustainable practices and asked permission first … even from the plants themselves. Sometimes, even if they are plentiful, a tree may not wish to share its leaves. Consult your intuition and respect the answer that comes.
These little creations are naturally ephemeral as they come from the earth and return to it. It’s likely you’ll make your little house and enjoy it for a bit, only to leave it for others to discover while it still stands.
Oftentimes the site itself will help guide that process.
When building outdoors, you can bring premade elements, such as doors or windows, with you. I like doing this because it adds creativity and sophistication to the design. Some things are difficult to make out in the field but can be made in the studio ahead of time. I keep a stash of premade items in a basket to take into the woods with me. It is great fun to work this way!
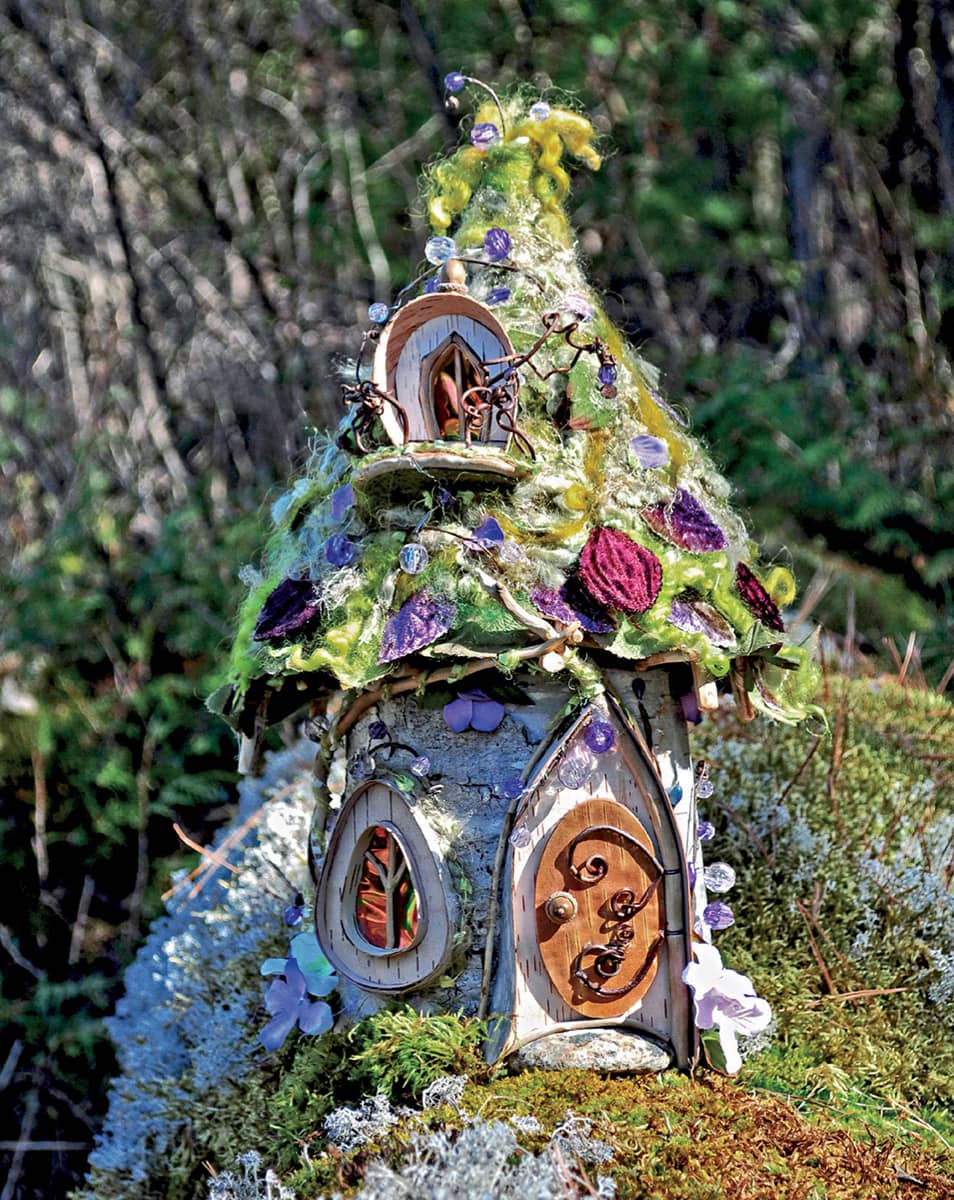
Making houses for different seasons gives us fabulous opportunities to expand our creative expression.
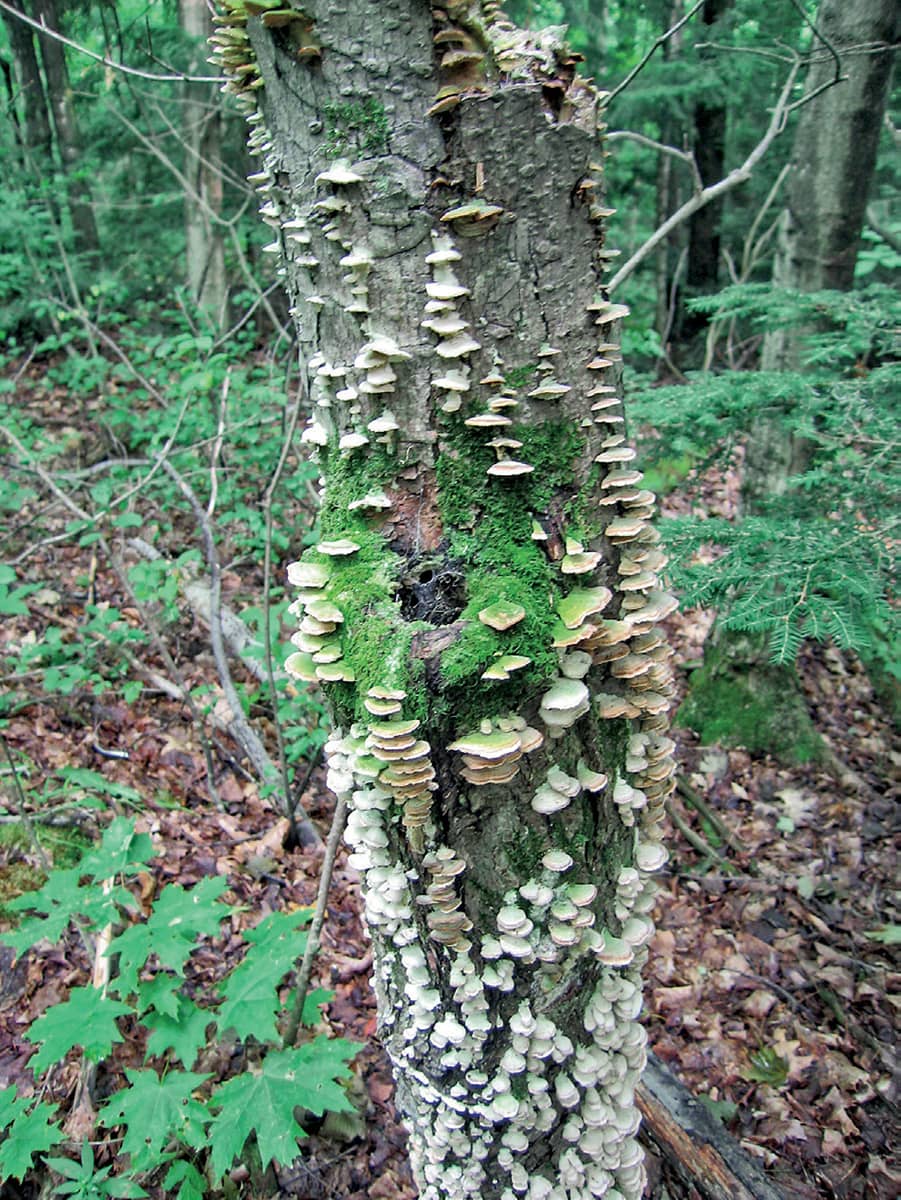
Once you start creating, you’ll find inspiration everywhere—such as this moss- and fungi-covered tree.
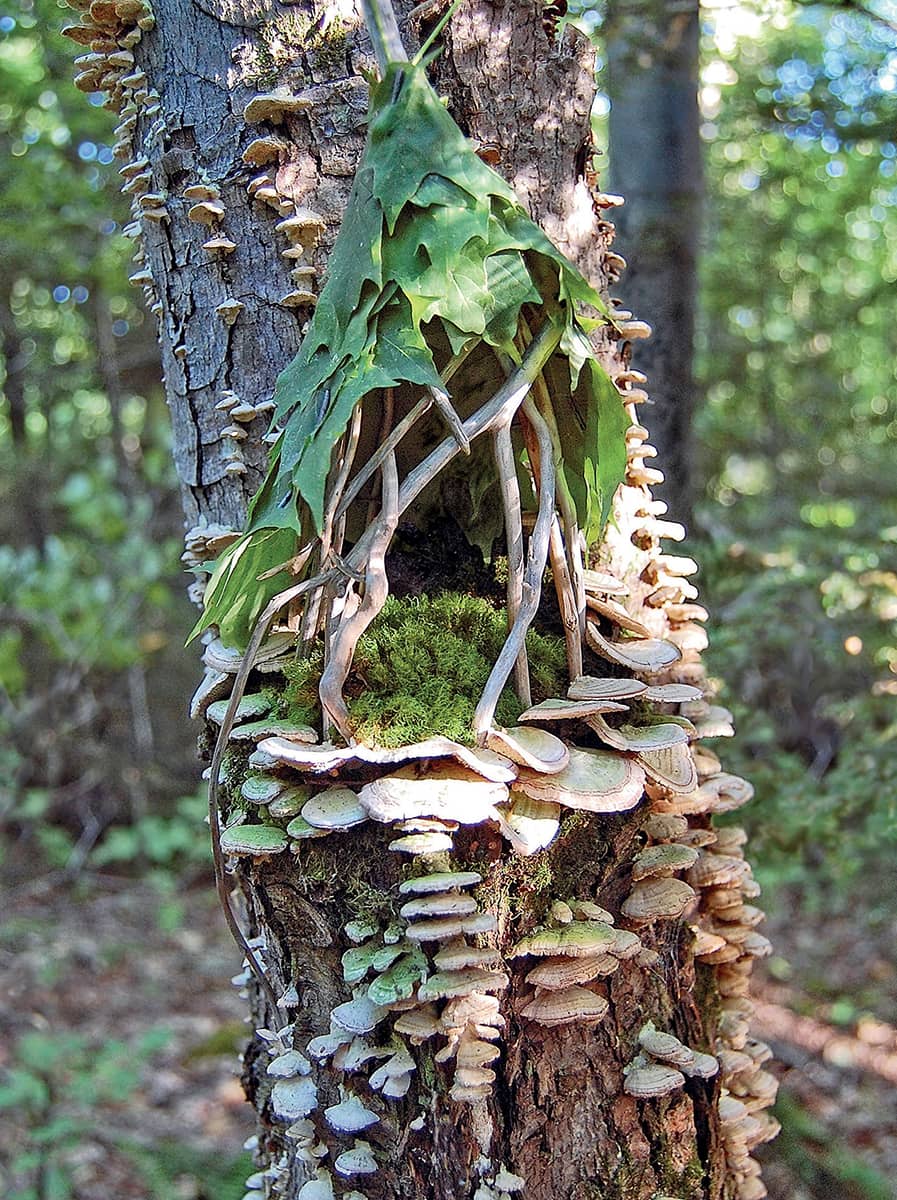
Here is the same location with the addition of a few twigs and leaves. Sometimes less is more.
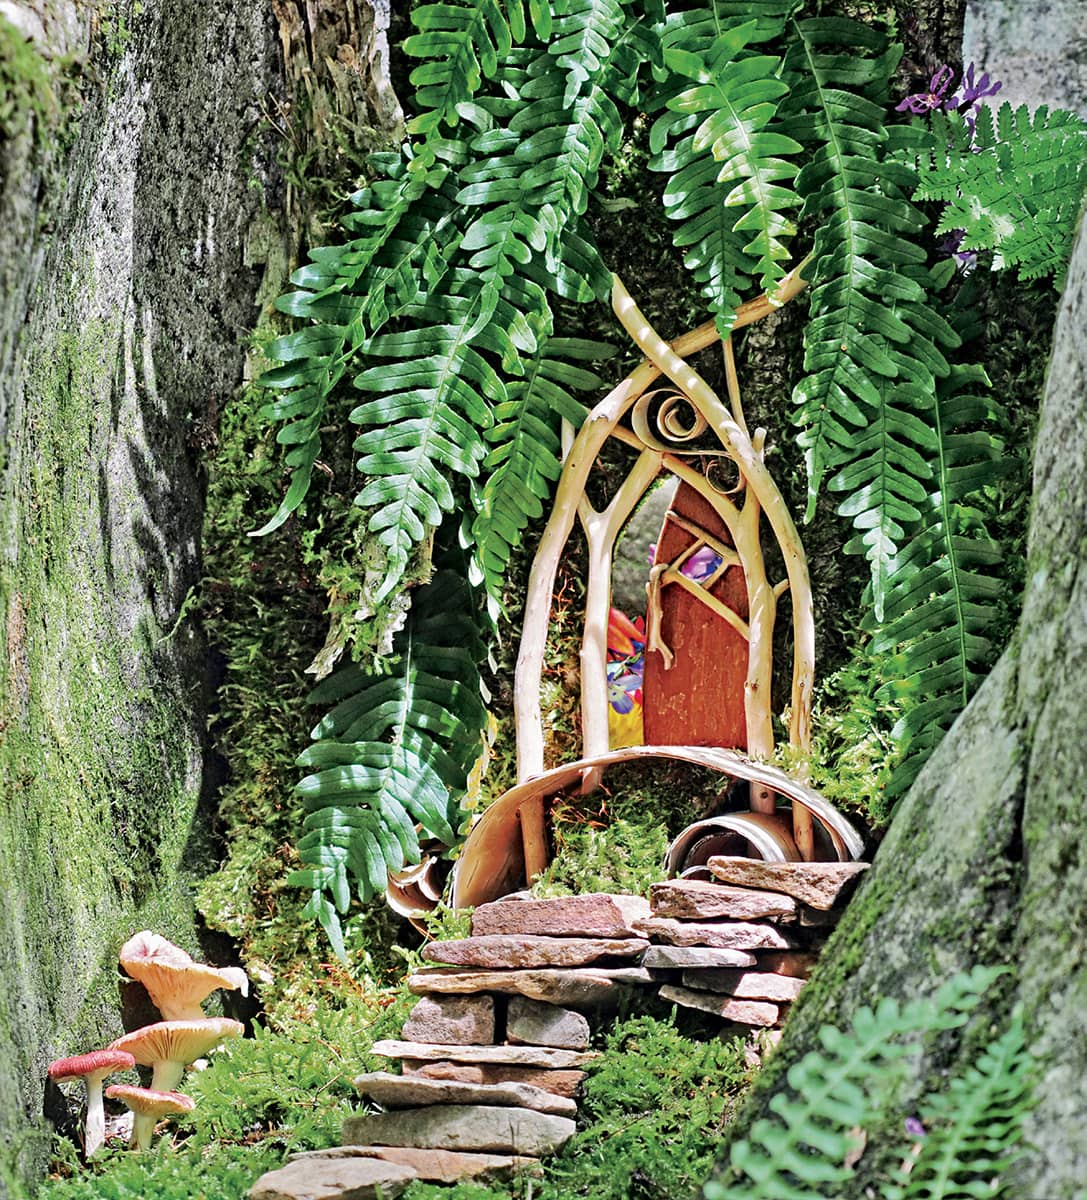
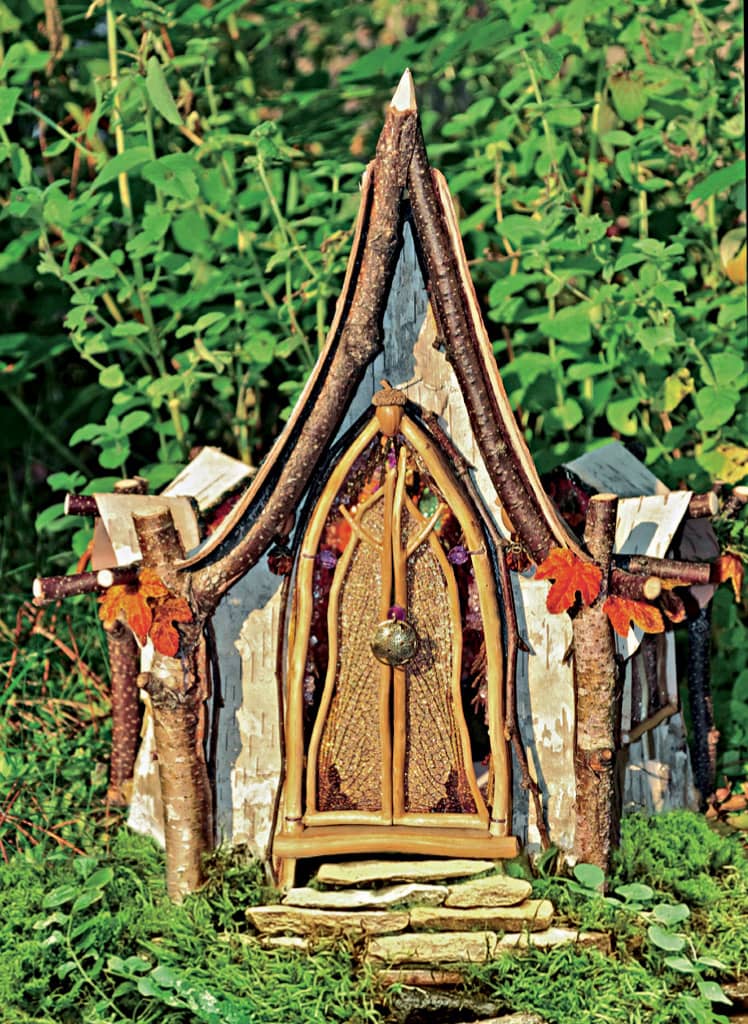
This studio-built door turned into a perfect faerie portal.
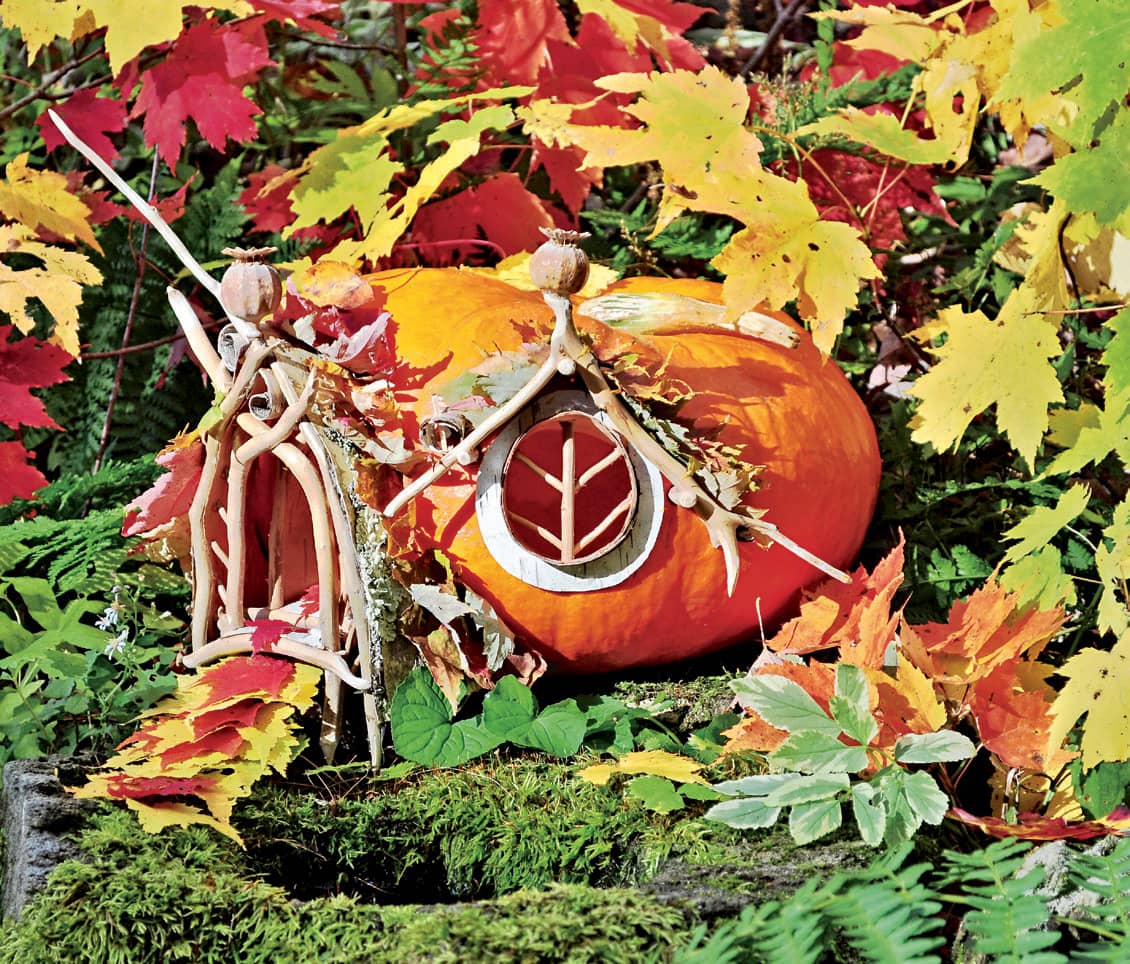
When this real pumpkin house began to collapse, I retrieved the door and window to be used again in a different house. Can you find them in these pages? If you want to create a permanent pumpkin house, make or buy a faux pumpkin to use as your base.
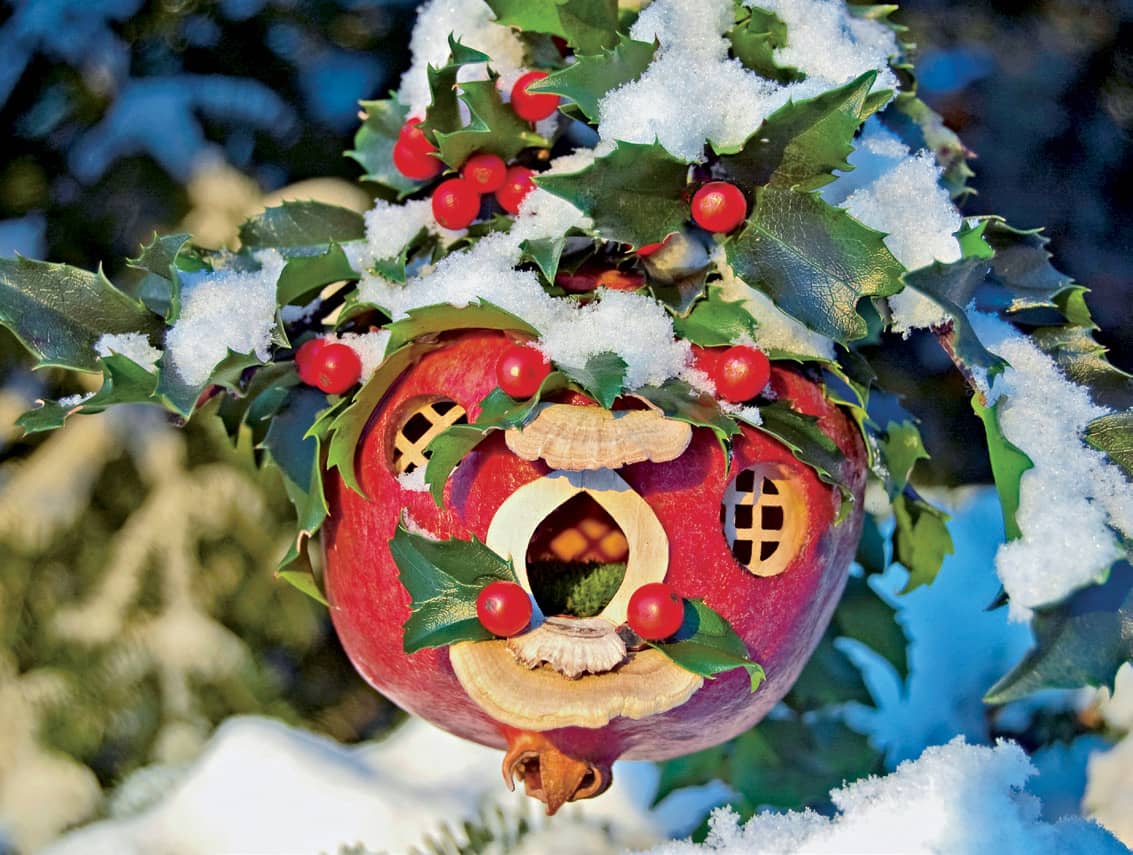
A festive holiday house made from a hollowed-out pomegranate. I used hawthorn thorns to pin the doorframe and awning in place. I used eco-glue to make the window lattice ahead of time and used more thorns to pin the latticework to the inside of the windows. Holly covers the top opening. Because the house was 100 percent natural, I left it for the woodland faeries to enjoy.
INDOOR FAERIE HOUSES
Building a faerie house indoors in a controlled environment with lots of tools, pre-gathered or purchased materials, and plenty of time allows you to make one-of-a-kind, truly amazing artistic creations. Houses that will be kept safely indoors (with an occasional visit to the garden) can be made with more durable components and adhesives, and with more luxurious decorative elements such as battery-powered lights, sparkly glass beads, velvet leaves, wallpapers, and so forth.
SELECTING A HOUSE STYLE
After choosing a location (indoors or outdoors), decide whether the house will have round/curved walls or flat ones. There are construction challenges to each design style. For example, doors and windows are a bit more difficult to install on curved walls. Flat-walled houses require more creativity on your part to ensure that they don’t look like miniature human houses. Once you’ve had a little experience with each, you will feel comfortable using either design format.
Here are some examples to illustrate the point.

A round-walled house with and without its roof.
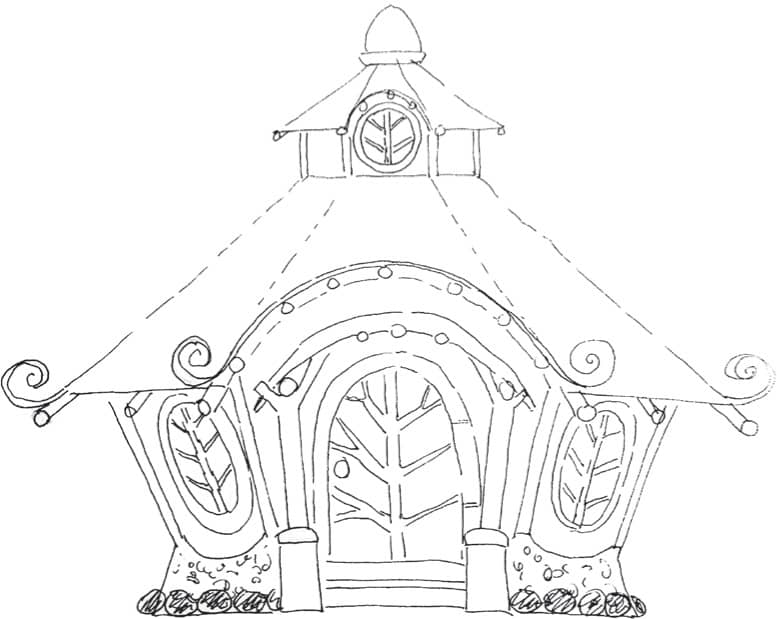
A flat-walled house with and without its roof.
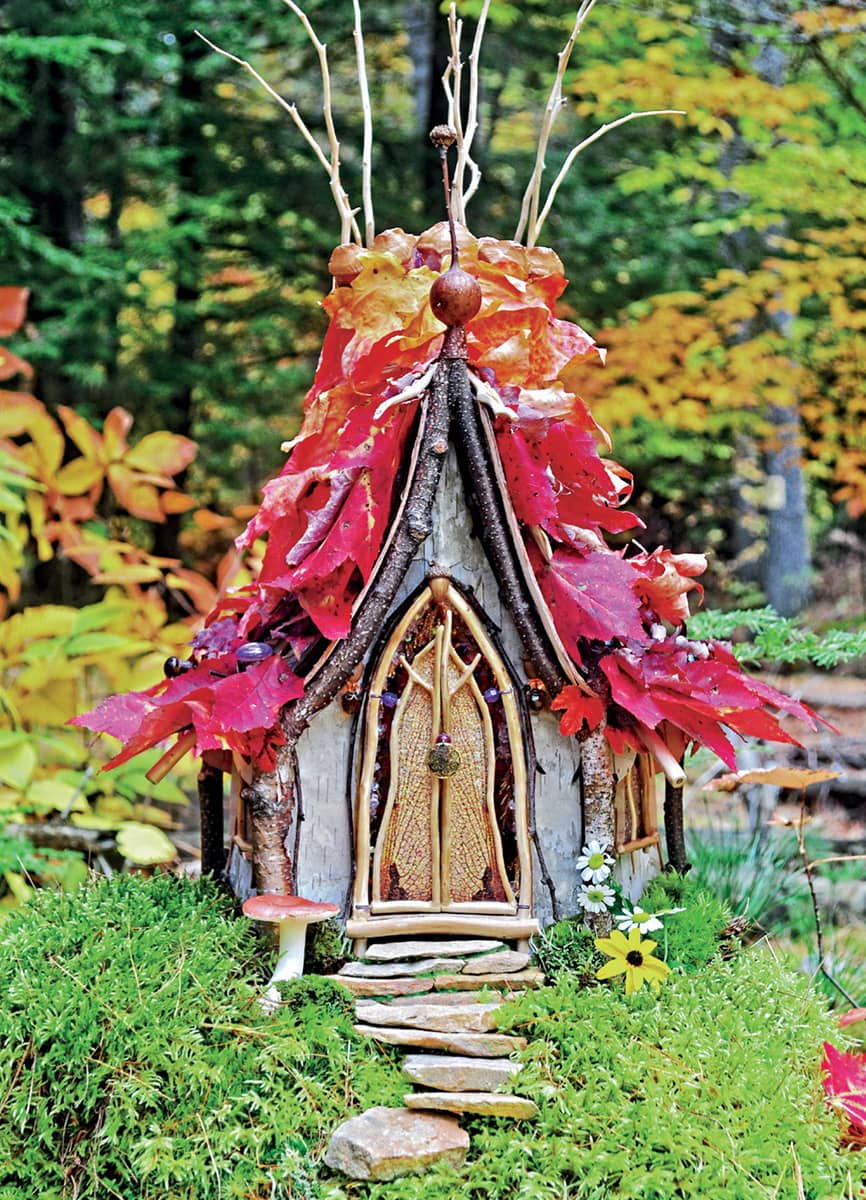
DESIGNING & BUILDING A FAERIE DREAM HOME
Once you have decided whether to use curved or flat wall construction, it’s helpful to make a quick sketch of the house so you know where you plan to put doors, windows, and towers on your house. You should also think about the type of roof you’d like to build.
Once the sketch is done, you can gather your materials. Select interesting materials to inspire construction—perhaps a particular twisted branch, a lovely jewelry finding, or a special shell or stone that you’ve found. Don’t worry about having absolutely everything on hand before you begin, as part of the process—the adventure of creating—is going out to find additional bits for your project to enhance its design.
When you have a basic plan for your faerie house, you’ll follow these general steps to build it.
1. Select and prepare the wall materials, as well as the base—if the house will have one.
2. Create the individual elements for the house such as doors, windows, vestibules, towers, porches, and so forth. It is much easier to create these elements separately ahead of time and add them to the body of the house.
3. Install the doors and windows while keeping in mind whether the house is to be finished on the inside or not, if lighting will be added or not, and if the roof will be removable or not.
4. Attach towers, bay or bump-out windows, decorative outside features (such as vines and twig trim), and prepare for the roof attachment.
5. Install lighting, keeping the battery pack handy (but as hidden as possible) so it’s easy to operate the switch and change the batteries, when needed.
6. Finish the interior walls, including decorative elements and trims, lighting sconces, window seat upholstery, and so forth. Final finishing is done at this step if the house will have a fixed roof. If the roof will be removable, finishing can be done later.
7. Build the roof(s). Build attached roofs directly onto the house. Build removable roofs separately. Add dormers, towers, chimneys, and finials that are part of the roof. Finish the inside of the roof if it will be removable.
8. Create and install the floor for the house. If a fixed roof has been installed, this will be your final chance to make any adjustments to the interior of the house before it is sealed up. For removable-roof houses, adding the floor is usually completed before the final interior finishes are done.
9. Add final landscaping details to the house. If you desire to attach the house to a base, do that now as well, and landscape around the base.
Chapter 6 will show you step-by-step instructions for house building.
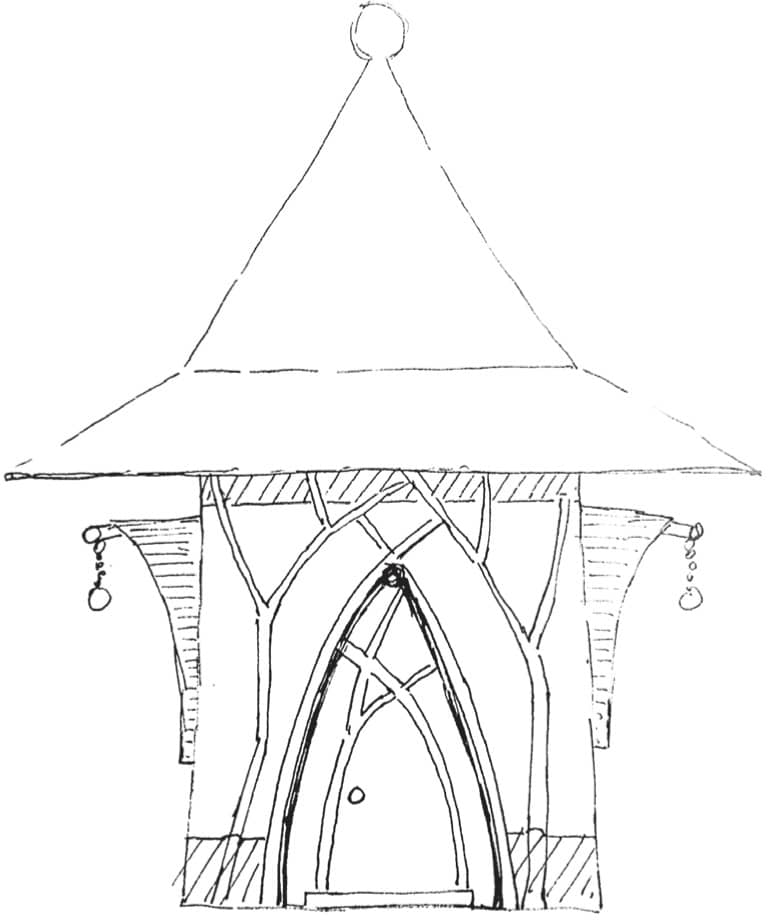
Here are two sketches for the houses you’ll learn how to build in Chapter 6.
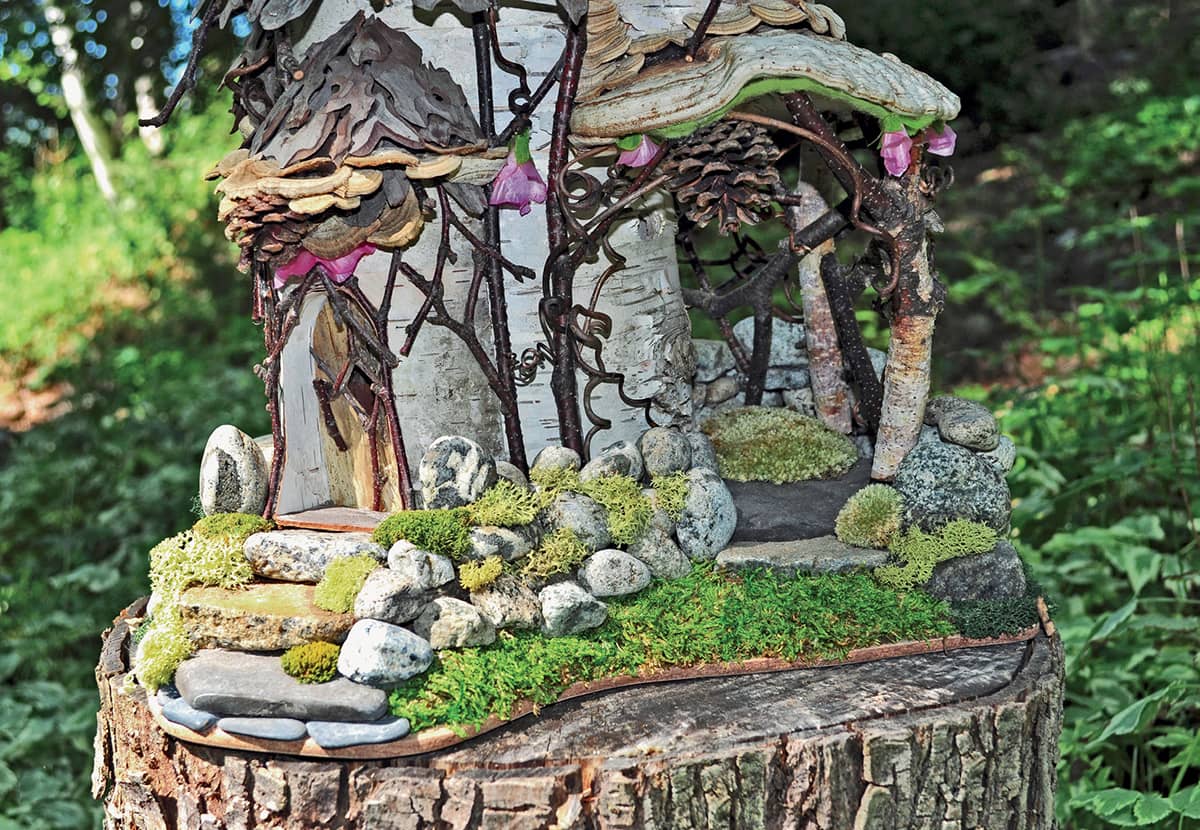
The base of the house adds just as much to the overall look and feel as the rest of the elements. Learn more about constructing bases in Chapter 5.
FAERIE HOUSE TOOLKITS
If you’re like me, you’re always going to want to have your faerie house toolkit handy because you never know when inspiration might strike! There are certain tools, such as hand pruners, that I always carry when I’m walking about, looking for materials or building faerie houses in nature. Other items, including things like glue guns and epoxy resin, are only used indoors, so I have two different toolkits with a few items that are common to both. Because building out in nature requires respect for the environment, I tend to use a lot of thorns, raffia, and cotton/linen thread to hold things together, as they will eventually break down and return to nature.
Let’s take a peek at my outdoor kit first.
OUTDOOR TOOLKIT
There are a few more tools in my kit that I bring with me that are not in this image because they are larger, but I always bring them with me and I’m happy that I have them when I work in the woods. They are:
• Leather gloves
• Small foam kneeling pad
• Collecting bags or baskets
• Notebook and pen
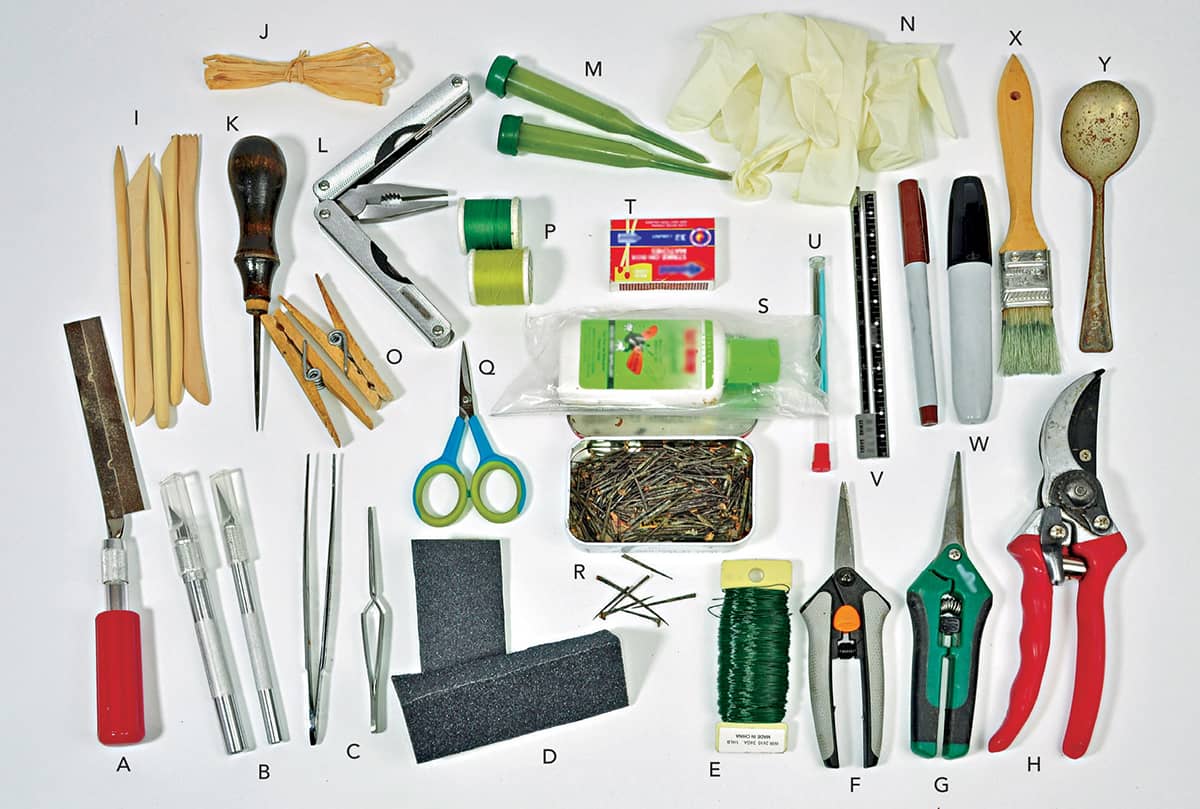
(A) Fine-toothed flat saw, (B) small, sharp hand knives, (C) tweezers, (D) sandpaper, (E) florist’s wire, (F) micro garden snips, (G) long-nosed garden snips, (H) hand pruners, (I) wooden clay sculpting tools, (J) raffia or other natural fiber twines and heavy threads, (K) awl, (L) folding multi-tool device, (M) florist’s water piks, (N) surgical gloves—mandatory for mushroom handling, (O) wooden clothespins—helpful for holding things together during assembly, (P) cotton thread—various seasonal colors to blend in with seasonal foliage, (Q) small scissors, (R) hawthorne thorns—my essential fastening method for outdoor creating, (S) natural insect repellent, (T) safety matches—only for emergencies, (U) assorted sewing needles—for stitching and sewing items together in the field, (V) small ruler—to help estimate distances during construction, (W) marker pens, (X) 1"-wide natural bristle brush—for sweeping and cleaning the site, (Y) large, old spoon—for digging and landscaping the site.
STUDIO TOOLKIT
The toolkit for studio work contains more carving, cutting, and sculpting tools as well as various kinds of adhesives. Below is my basic set of tools that I use in the studio.
Tools not shown but part of my studio collection:
• Flat, fine-toothed draw saw
• Coping saw—essential for cutting plywood bases
• Small hand drill and bits
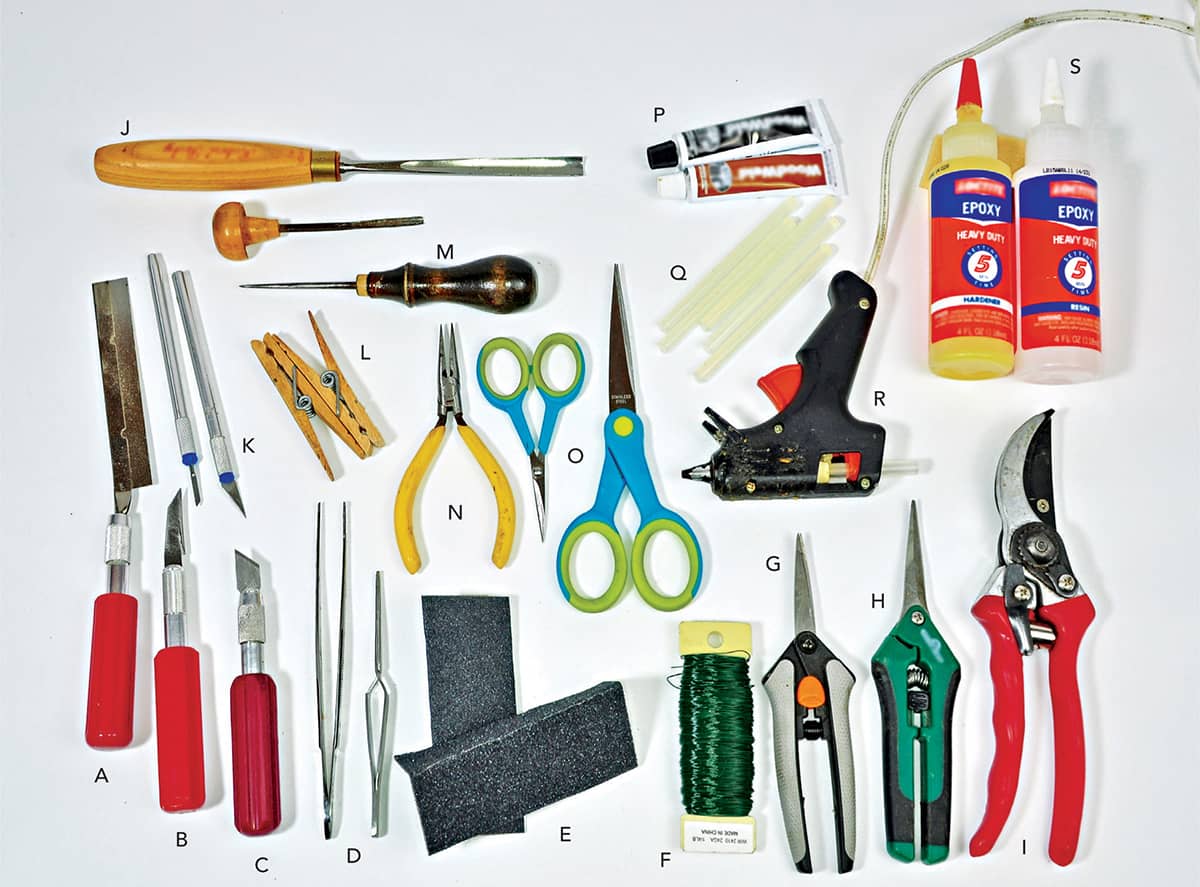
(A) Fine-toothed flat saw, (B) 2" flat-bladed knife, (C) flat, chisel-bladed knife, (D) tweezers, (E) sandpaper in many sizes/grits, (F) florist’s wire, (G) micro garden snips, (H) long-nosed garden snips, (I) hand pruners, (J) wood carving gouges—fine and extra-fine sizes, (K) fine and extra-fine craft knives, (L) wooden clothespins, (M) awl, (N) needle-nosed pliers, (O) regular and fine-point scissors, (P) wood-colored two-part epoxy adhesive, (Q) 4" glue sticks for hot glue gun, (R) hot glue gun, (S) clear epoxy resin, 2-part resin.
BUILDING MATERIALS
Let your imagination run wild! Between your backyard and your neighborhood craft store, you should be able to find everything you need to create all manner of magical faerie dwellings.
COLLECTING MATERIALS FROM THE WILD
Take a look at the inspiration pictures to see what you can collect to build your faerie house. Dried mushrooms, twigs, bark, lichens, seed pods, and leaves can all help enhance your project and make it more inviting for faerie folk.
Keep these tips in mind while collecting materials:
• Never pull bark off of a living tree, as it can cause irreparable and irreversible damage to the tree.
• Collect first on your own property, and always ask for permission when collecting on someone else’s. Follow all city, state, and federal laws for removing items from public property.
• If removing material from living plants, such as leaves from a tree, never take more than 5 percent of the overall plant mass. (That is likely to be much more than you would ever possibly need.) Ask permission from the plant first before collecting. Never collect protected or endangered plants.
Here are some of my favorite building materials.
Twigs and branches.
These are twigs and branches that I commonly use. Of course, what is available in your area may be different. Whenever possible, collect twigs and branches that have already been shed naturally. Make friends with your local garden center so that you can stop by when they’re pruning. This can be an excellent source for beautiful and unusual twigs, vines, and branches.
Fresh twigs and small branch cuttings can be bent and shaped into positions that will be useful for construction purposes later once they have dried. For example, bend dogwood or willow stems into complete circles and wire them together. The twigs will then dry in that shape and be useful for windows later on. You can also make arches for doorways this way. It takes a bit of planning, but the natural-looking results are worth it.
Here are some of the many different kinds of twigs and branches that go into making my faerie houses.
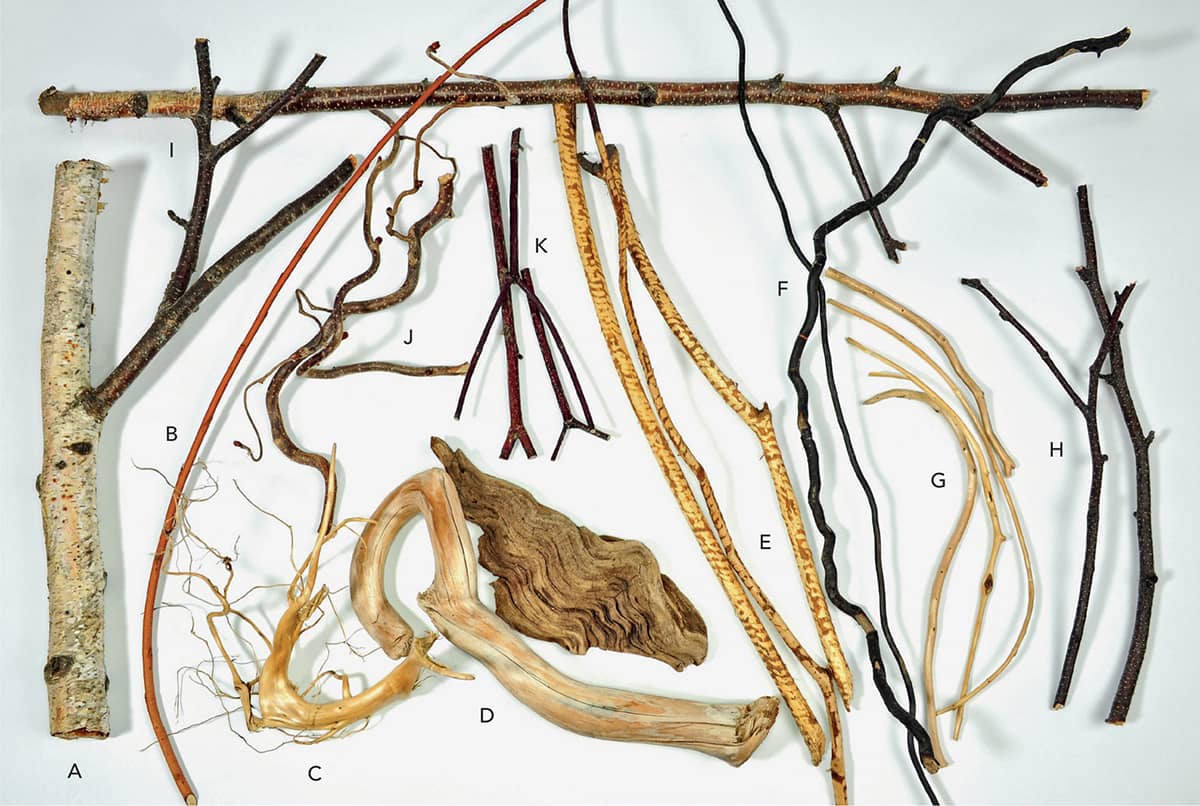
(A) White birch branch with dark twigs, (B) flame willow branch, (C) white cedar root, (D) driftwood, (E) willow twigs, (F) roots, (G) white cedar twigs, (H) birch twigs, (I) birch branches, (J) corkscrew hazel twigs, (K) redosier dogwood twigs.
Birch bark samples.
Because I am blessed to live in an area where birch trees are abundant, it is one of my most commonly used building materials. I love working with it because it is so versatile and because it comes in a wide range of colors and textures.
Note:
Never collect bark off a living tree! The one exception with birch bark is if the piece is being naturally shed and is about to come away from the tree. But if the piece resists at all when you pull it, it’s best to leave it alone because you can damage the tree if you pull bark off prematurely.
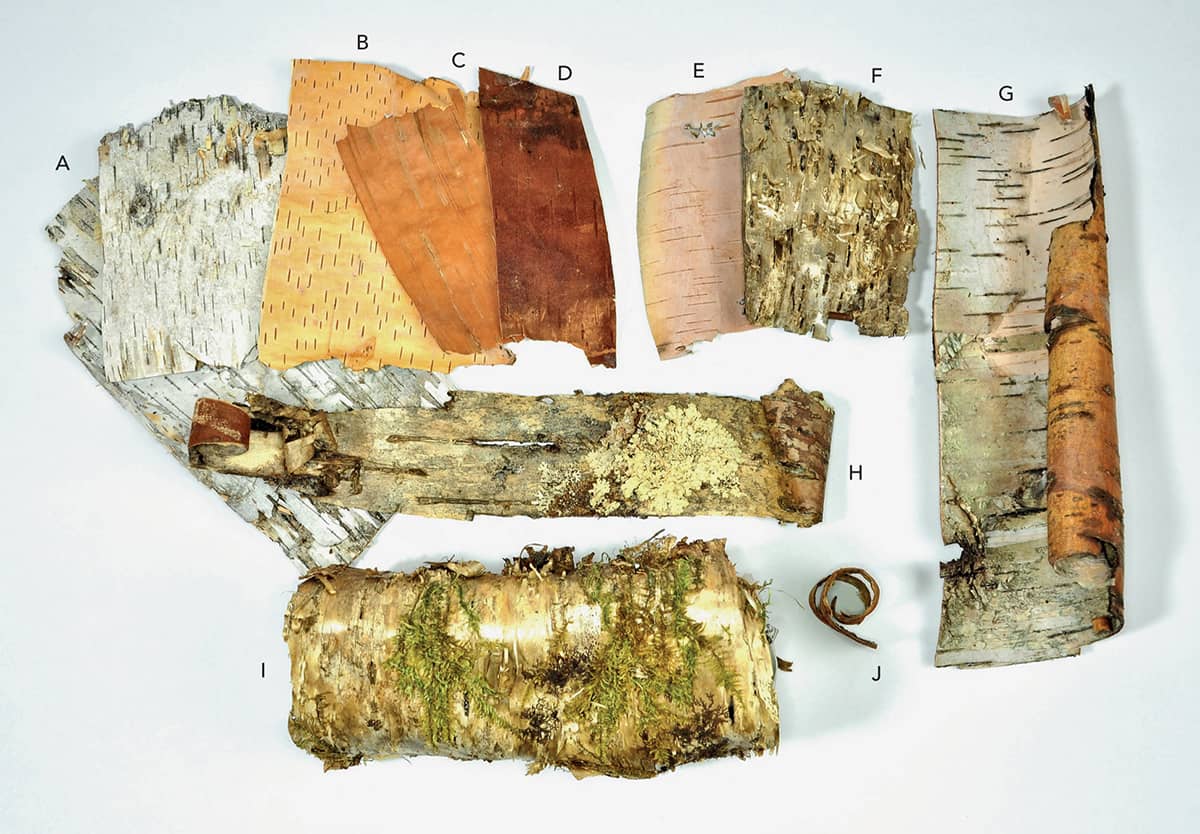
(A) Ordinary white or gray birch bark, (B–E) inner layers of white birch bark, (F) golden or yellow birch bark, (G) thick piece of white birch bark, (H) golden birch, (I) a tube of golden birch, (J) naturally occurring birch curl.
Mushrooms and tidbits.
Below are some of my other favorite natural building materials for faerie houses, including some house elements that I would make ahead of time to take with me out into the wild to build houses that have a more finished look.
Note:
Some of these fungi are not very durable. Use only in structures that you’ll want to keep for a year or so. After that, they tend to disintegrate.
Make sure all gathered materials are brushed clean and dried fully before storing/using.
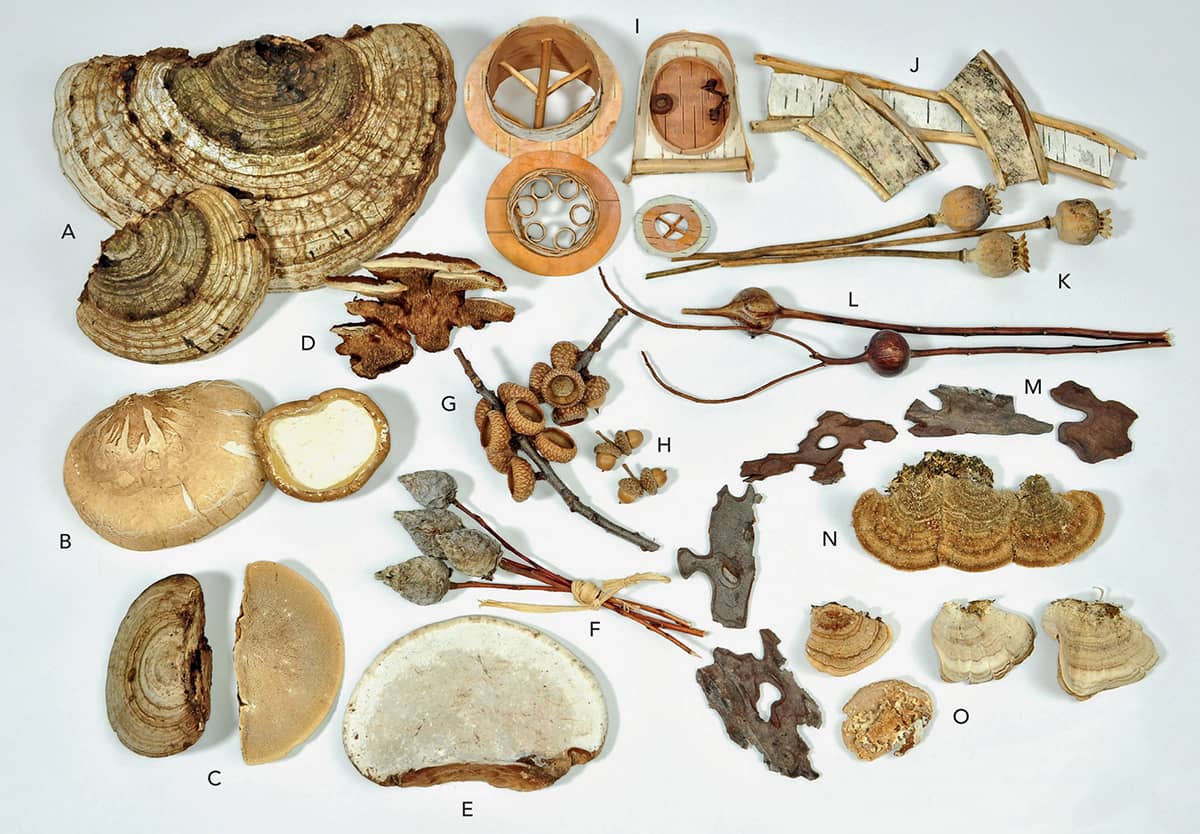
(A) Shelf mushrooms, (B) birch conk, (C) bracket fungus, (D) multiple shelf fungus group, (E) artist’s fungus, (F) willow pinecone galls, (G, H) acorns, (I) premade parts for fieldwork installations, (J) premade ramps and bridge, (K) ornamental poppy pods, (L) goldenrod galls, (M) pieces of bark from red pine trees, (N, O) thin bracket fungus showing typical damage after two years of normal storage, best used for short-term projects.
BITS AND BAUBLES FOR FINISHING TOUCHES
People often ask me where I get all of the materials that I use for decorating my houses, particularly for finishing the interiors. Because I live in a rural area, I tend to do a lot of my shopping on eBay because of the large selection and because there are international sellers with unique items. Yard sales, thrift shops, and vintage clothing (especially hats and jewelry) can have excellent potential for finding that special faerie house decoration. Etsy can be a good source as well.
Decorating these little creations is where you can really let your imagination soar. Use all kinds of materials, personalized items, and whatever bits of magic and enchantment you want to make the structure truly yours and unique. Everyone will have their own sense of style, desired color palettes, and specialty items that they want to use for their faerie houses.
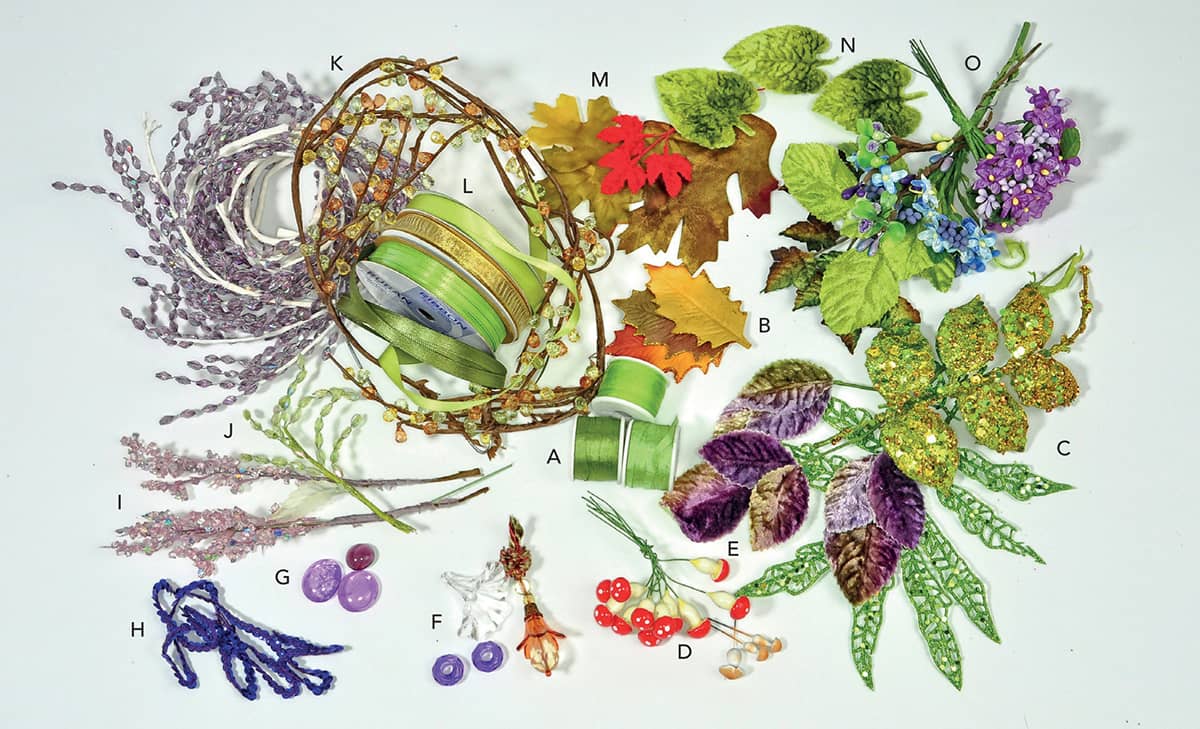
(A) Silk ribbon on spools, (B) manufactured, embossed paper leaves, (C) glittery floral embellishments, (D) miniature mushrooms made from either cotton, clay, or sculpted paper, (E) vintage velvet leaves wired together, (F) glass and acrylic beads, faceted and vintage designed beading used in lighting, (G) glass baubles, (H) sequin trim and other novelty trims, (I) glass and plastic florist accessories built onto florist wires, (J) modern beaded garlands and swags that can be taken apart, (K) vintage garlands to repurpose, (L) loose ribbons, (M) silk fabric leaves, (N) modern single velvet leaves (not wired together), (O) silk botanicals, including flowers and leaves.
Keep scale in mind and don’t be afraid to take items apart in order to get at smaller components. For example, large silk flowers cut apart for their petals, sewn together, and stuffed make excellent faerie seat cushions.
Be thoughtful about the longevity of the items that you select for adding details. While feathers and butterfly wings may be appealing now, will they still look good in a year or two? It’s still possible to use fragile and short-lived items in your constructions, but make sure that they are easy to repair and replace if you must use them. See here for materials I commonly use for finishing touches.
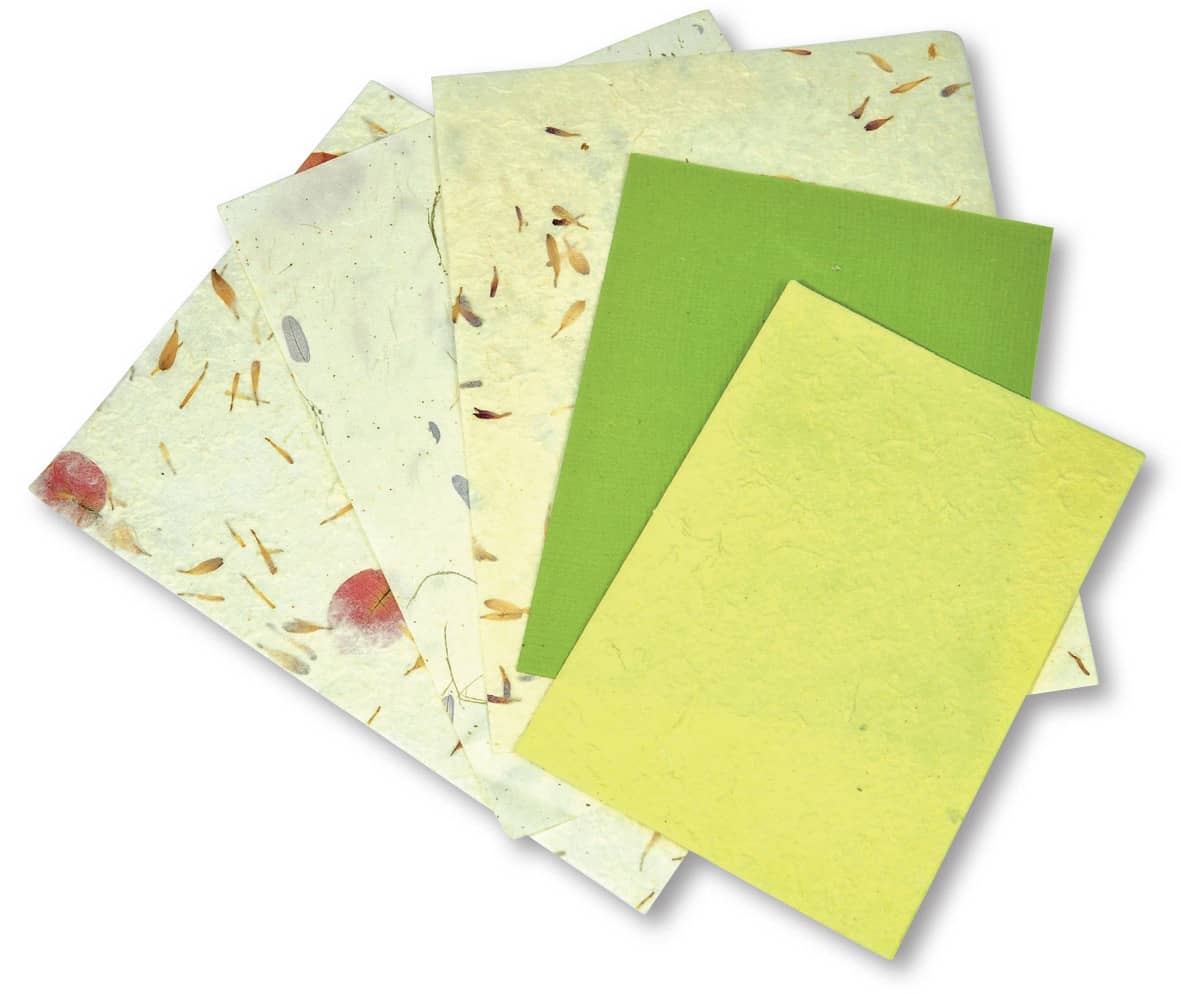
Handmade mulberry and bamboo papers.
WALL COVERINGS
There are various types of paper, wallpaper, and card stock that work well as interior wall coverings for faerie houses. Here are a few examples.
Now that you’ve gathered your materials and planned your house, you’re ready to build!

Japanese Chiyogami papers, which make a beautiful and elegant wall-coverings.
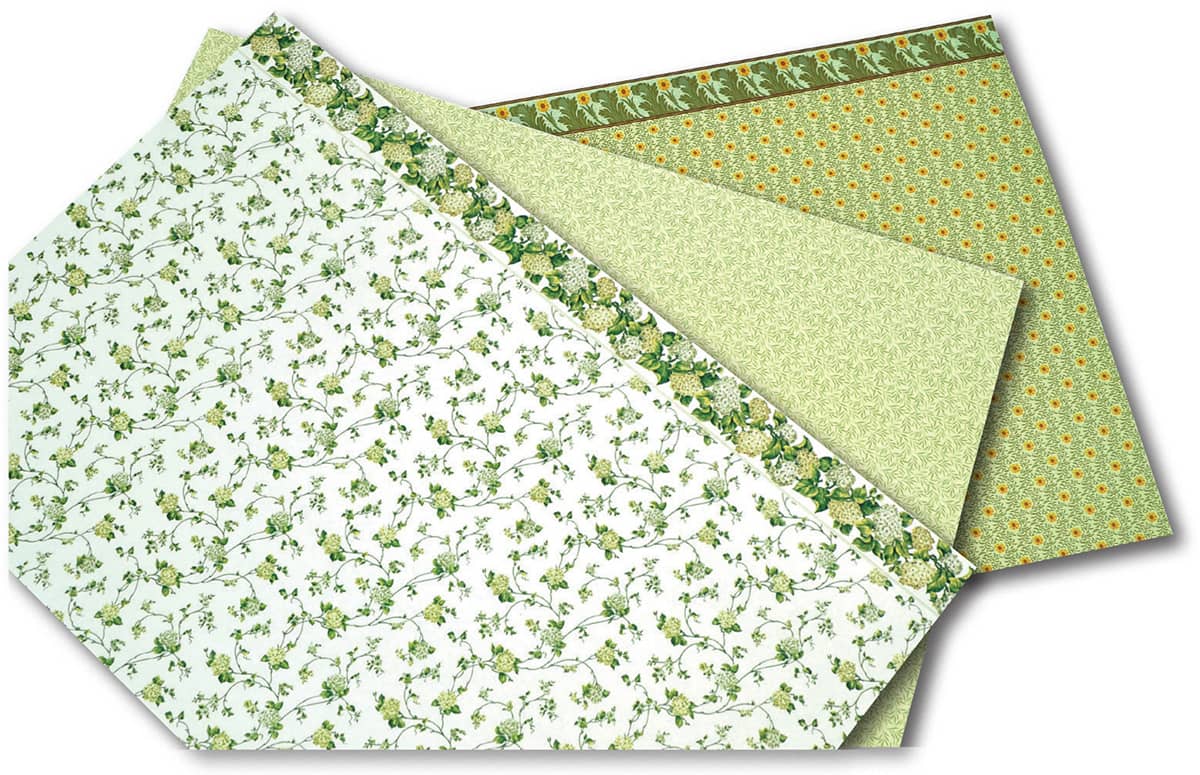
Wallpaper that is specifically made for dollhouses. The tiny delicate patterns are the perfect scale for most faerie house constructions.