I know that we’ve covered a few of the menu options provided with the Nautilus file browser over the last few chapters, but those features only scratch the surface of what’s on offer. So, let’s look at these menus in a little more detail, starting with the File menu, as shown in Figure 6-12.

The file menu is context-sensitive, so you will have different options available depending on whether you have selected an item or not, and some will be grayed out if you have insufficient permission. When no files or folders have been selected, the options on offer are:
- New Tab
This option creates a new tab within the file browser. Initially, it will show the same files and folders as the original window. You can then switch between the different tabs, using them as though they were separate windows.
- New Window
Select this option to open a new file browser window. In contrast to the New Tab option, this one will always open up your home folder.
- Create Folder
Select this option to create a new empty folder within the current one being viewed. The new folder will be given the default filename of untitled folder, but the text will be selected so that you can easily rename it.
- Create Document
When you select this option, an empty text file will be created with the name new file highlighted so that you can rename it. This file will then be editable in whichever application has been set to handle text documents. By default, this is the gedit program.
- Connect to Server
This option has the same functionality as selecting Places → Connect to Server…, as covered in the section Mounting Network Folders.
- Empty Trash
This option is available only when there are items in the Trash. When you select it, you are prompted to confirm whether you wish to delete the files. In non-American English installations, the word Trash will be replaced with Deleted Items or Wastebasket.
- Close All Windows
This option immediately closes all file browser windows without prompting. If you merely want them out of the way temporarily so that you can see the desktop, you may prefer to use the Hide/Show Desktop icon at the bottom-lefthand corner of your desktop instead.
- Close
This option closes the current window in the same way as clicking the close icon on the title bar.
If you have one or more items selected, the File menu will include the following options:
- Open
If a file has been selected and it has an associated application, this option will appear as “Open with” followed by the application’s name. Clicking it will open the application and load in the file. If more than one file of the same type is selected, they will all be passed to the application, which may or may not open them all, depending on the program. If the selected item is a folder, it will be opened as though it had been clicked. If the selection contains two or more folders, they will be opened up in new tabs.
- Open in New Tab
This option is available only when a folder has been selected. If two folders have been selected, the menu will say Open in 2 New Tabs, and so on.
- Open in New Window
This is the same as the previous option except that the folders will be opened up in new windows instead of tabs.
- Open with Other Application
Sometimes you will have more than one application that can use a particular type of file. For example, GIMP, F-Spot, and the OpenOffice.org Drawing program can all handle graphic files. For each type of file, one program is the default “Open with” program on the menu, but this option lets you choose a different application.
- Properties
This option brings up the files and folders properties window, as covered in the section Other File Attributes of Chapter 5. If more than one item is selected, you can change all their properties at once.
Like the File menu, the Edit menu is context-sensitive. By default, when no files or folders have been selected it will look like Figure 6-13. This is quite a powerful menu with a number of options you haven’t yet seen:
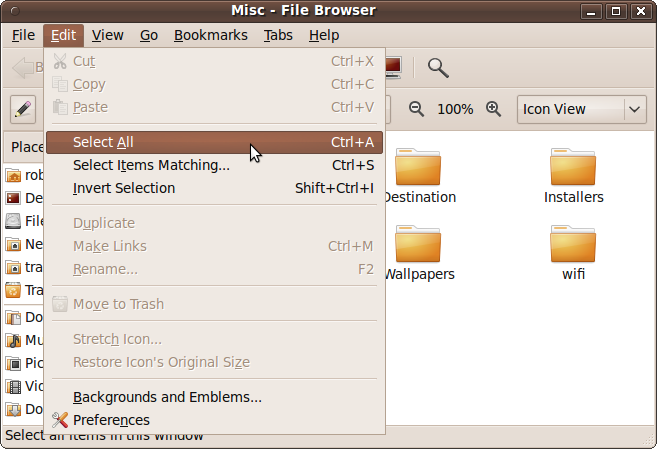
- Select All
This option has the same effect as pressing Ctrl-A, discussed in the earlier section Selecting All Items. All folders and files in the current folder will be selected.
- Select Items Matching…
This is an interesting option for narrowing down a large selection of items. When you select it, a new window pops up requesting a pattern. You can enter filenames containing special characters, such as the
*(asterisk), for use as wildcards. For example, the pattern*.jpgwill select all the files in the current folder with any combination of characters followed by the file extension .jpg. Similarly, to find all files beginning with temp, use the patterntemp*. You can also search for files containing the word memo anywhere in their filename through the pattern*memo*, and so on.- Invert Selection
This option changes the selection state of all files and folders. In other words, any that are selected become unselected, and those that are unselected become selected.
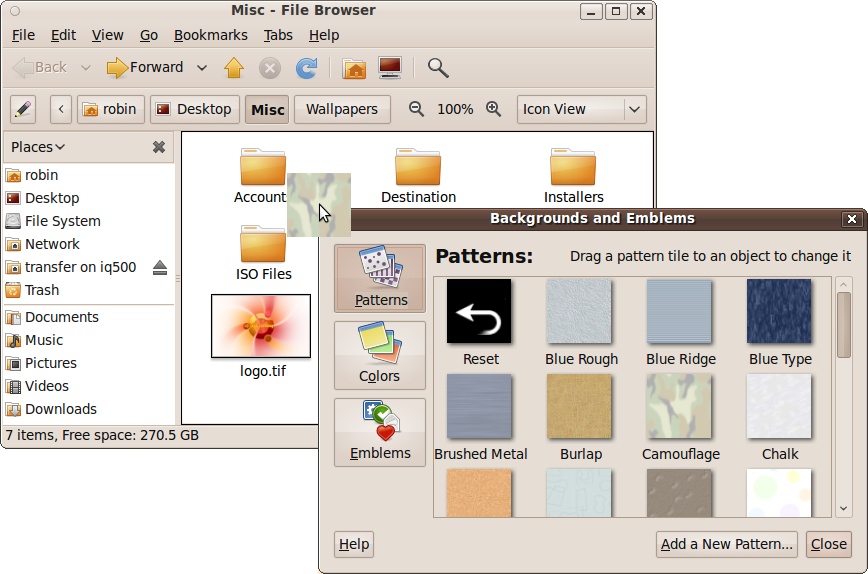
Using this option, you can drag a background of your choice onto a folder to replace the default white background color. If you keep a lot of windows open in the file browser, setting different colors can help you find a folder quickly. The background can be a solid color or a textured pattern, as shown by Figure 6-14, in which the camouflage background is being dragged and dropped onto the folder’s background. To remove a patterned background (and restore the original), you will need to drop the color white on top of it.
The Emblems option offers a way of attaching an emblem to an icon, as detailed in the section Other File Attributes. As long as you have selected an item, you can drag and drop an emblem onto it, rather than having to right-click the item and select Preferences. Figure 6-15 shows a folder with the Camouflage texture applied to the background. To remove an emblem, you can uncheck it.