 IN THIS CHAPTER
If you put the basement and garage at the bottom your home fix-up list, you can expect to feel a mix of emotions when it’s finally time to tackle them. On the one hand, you’ll be relieved that the tough stuff is behind you. No more painstaking finish work, no more deliberating over paint colors, no more experimenting with cleaning solutions for old pet stains. As unfinished spaces, garages and basements generally call for uncomplicated fixes, so now you can really begin to see the light at the end of the tunnel. On the other hand, that bright light of hope may be depressingly obscured by the mountains of junk you’ve been diverting to the garage and basement throughout the process of cleaning up the rest of the house.
If this scenario sounds familiar, the next step should be painfully clear: It’s time for some serious de-cluttering. Not organizing. Not tidying up. But ruthless and decisive pitching of absolutely everything you don’t need. This alone is the most effective thing you can do to make a basement or garage appealing to homebuyers (as well as spouses, renters, or in-laws). More than anything, basements and garages offer the promise and irresistible allure of empty space—for storage, hobbies, house projects, band practice, and much more. Everybody wants more space.
When the last heap of trash has been hauled away, the next step (after marveling at how much more room you have) need be nothing more than cleaning up the walls and floor and, in the garage, making sure the door and opener are running smoothly. Here, you’ll find quick-fix projects for all of these areas, plus tips for dealing with basement moisture and a couple of garage upgrades that might make you wish you had spent a little less on your kitchen.
 Basements
Home buyers are usually looking for one thing in an unfinished basement: clean, dry, empty space. There’s no need for sellers to spend money on homey touches, like flooring or an acoustic-tile ceiling, in an effort to make this utility space seem more livable. Remember, a basement doesn’t count toward a home’s square footage, and even a finished basement won’t necessarily raise your appraised value. If you want to improve the feel of your basement, add a few overhead light fixtures to brighten those creepy corners. Aside from that, a solid-looking concrete box is good enough.
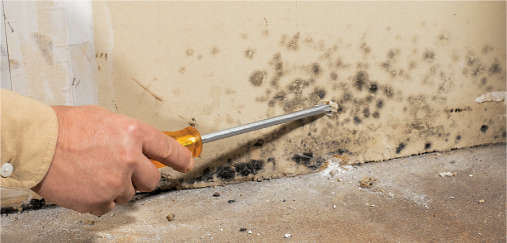
The last thing you want to see in a basement is water. Not only is moisture bad for stored items, it also promotes wood rot. Ongoing moisture can lead to mold growth, which in turn can ruin your indoor air quality. Understandably, house hunters are very wary of wet basements. Dampness can come from a range of sources, including condensation from appliances and AC systems, precipitation outdoors, and excess water in the ground. But the vast majority of basement moisture problems are due to improper drainage outside the house, usually caused by poor gutter drainage and/or improper grading around the house.
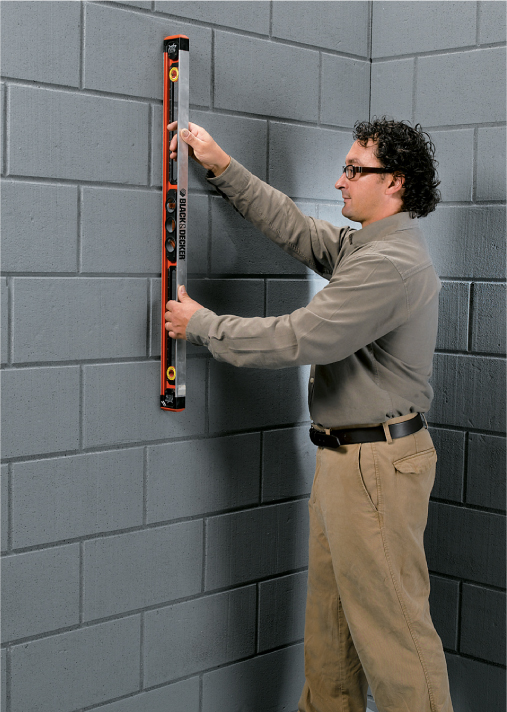
Testing basement walls for level and searching for signs of moisture are two of the many checks potential buyers will perform. But the most important thing you can do as a homeowner is make sure your basement is empty, dry, and well lit for showings.
If moisture shows up in your basement after a heavy rain or snowfall, make sure your gutters are doing their job. Add extension pipes or flexible tubing to the ends of downspouts to carry roof runoff well away from the foundation. The ground around the house should slope down a minimum of one inch per foot for at least the first 10 feet from the foundation, to help keep surface water from pooling. If necessary, re-grade problem areas to promote natural drainage.
You can test for condensation by taping a two-foot-long strip of aluminum foil to the basement wall, sealing all edges of the foil with duct tape. After two days, peel off the foil. If it’s damp on the exposed side, there’s too much moisture in the interior air of the basement. If it’s damp on the wall side, moisture is seeping in through the wall from the outside. Reduce air moisture by insulating all cold-water pipes in the basement, as well as any exposed air ducts if you have central air conditioning. Their cold surfaces promote condensation in humid weather. If your clothes dryer is in the basement, make sure it is properly vented to the outdoors. Excess humidity in rooms above can get into the basement, too, so make sure your bathrooms have good vent fans (and don’t forget to use them!). Running a dehumidifier in the basement during damp or humid weather also helps reduce air moisture.
Basements with serious water problems, like frequent flooding or water coming up through the floor, require professional attention. However, don’t do anything until you’ve corrected any gutter and drainage problems around the foundation.

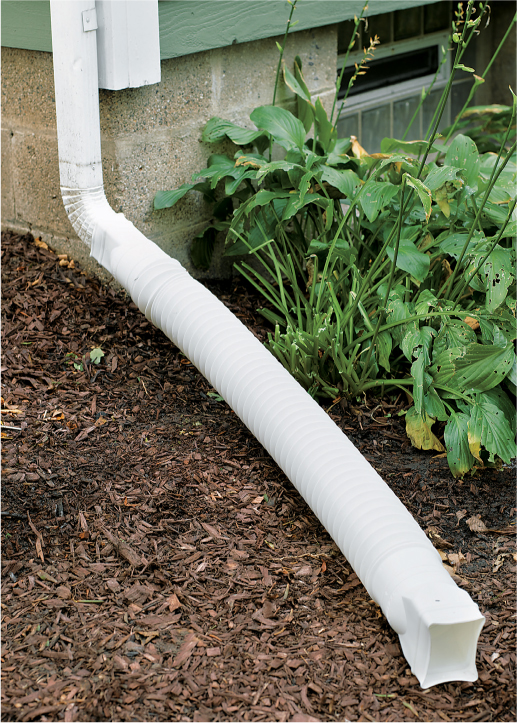
Gutter downspouts without extensions dump huge amounts of water right near the foundation, while an improper grade keeps surface water against the house. Downspout extensions and corrections to the grade solve many basement moisture problems.
What’s That White Stuff on the Walls?
The chalky, white residue commonly found on basement walls is called efflorescence, and it’s really nothing to worry about. Efflorescence is caused by water-soluble salts being carried to the surface by water leeching through the concrete or block masonry. This is a natural process, and all materials containing Portland cement can effloresce, including poured concrete, concrete block, and brick mortar. While the white stuff itself is harmless, it often indicates dampness or excess moisture on the other side of the wall. Because of this, efflorescence can help you locate drainage problems around your foundation.
Efflorescence does create a problem for waterproofing a basement wall, because the coatings won’t stick to it. You have to remove the white stuff before applying the coating: Try a commercial masonry etching solution (most contain acid, such as sulfamic or muriatic acid), following the manufacturer’s directions. If you’re leaving the walls bare, you can simply brush off the bulk of the efflorescence residue so it’s less visible. Washing it off with water alone won’t make it disappear for long, since the water just activates more salts on the surface.
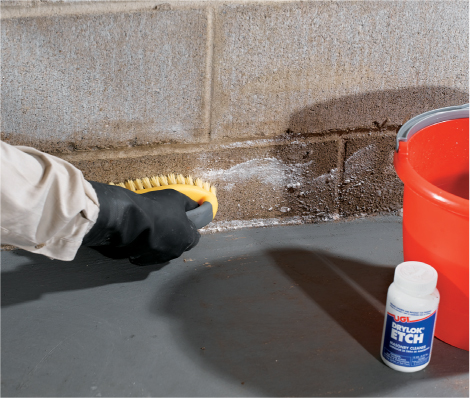
Remove efflorescence prior to coating a concrete or block basement wall. Make sure the cleaner is compatible with the wall coating; it’s best if both come from the same manufacturer.
Basement wall cracks less than 1/8 inch wide are normal and fairly common. Concrete block walls often develop cracks along mortar joints, due to settling, or pressure from water in the soil behind the wall (called hydrostatic pressure). Note: If your basement walls have large or widespread cracking, or if a wall bows in more than one inch, have the foundation checked out by a professional.
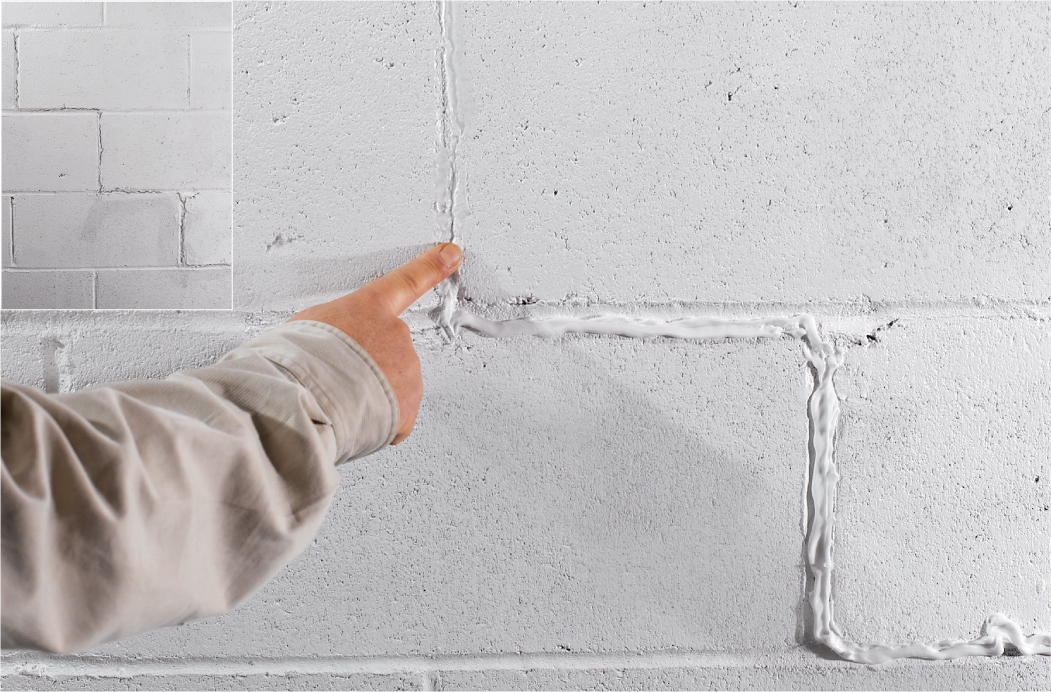
Though minor cracks that aren’t growing seldom indicate structural problems, a crack that goes all the way through a wall creates an easy path for water seepage and insects. You can test the depth of a crack by inserting a wire and comparing the depth to the overall thickness of the wall. It’s a good idea to seal all minor cracks with a high quality epoxy crack filler. Filling cracks is also necessary if you’re planning to coat the wall with concrete paint.
Small holes and cracks can also be filled with hydraulic cement. Sold in dry powder form to be mixed with water, hydraulic cement sets up in about 10 to 15 minutes and quickly expands as it dries to form a tight plug in the cavity. This makes it capable of stopping a leak even as water is flowing in. To seal a cavity with hydraulic cement, clean out all loose material with a cold chisel and hammer. For a crack, chisel out the sides at the base, so the crack is wider at the bottom than at the surface, thus creating a triangular key to help hold the cement. Clean the repair area with a wire brush and a shop vacuum.
Mix the cement to a peanut butter consistency, following the manufacturer’s directions. Dampen the crack with water, then fill the cavity with cement, smoothing it flush to the surface with a trowel. Work quickly; the cement begins to set up almost as soon as you mix it. To fill holes and gaps where the floor meets a wall, mix a thin batch of cement and pour it into the cavity until it’s flush with the surface.
Seal minor cracks in concrete or block basement walls with epoxy crack filler. Smooth it flush with a wet finger to ensure a good seal and create a flat surface for wall coatings.
If your basement walls suffer from occasional dampness, a good coating of basement wall paint or surface cement can help. For best results, follow the manufacturer’s directions carefully, and be sure to take care of any drainage problems (see page 134) beforehand to help keep water away from the basement walls. Do not expect that a simple coat of paint (even if it is called waterproofing paint) will rectify any water problems you may have in your basement. Apply these products purely for cosmetic purposes.
Basement wall paint goes on with a brush and roller, just like regular paint. It comes in a few basic colors, such as white, beige, gray, and blue, and in both oil-base and water-base formulas. Some products can be tinted with approved colorants. As with any paint, waterproofer can’t hide surface flaws, but it does provide consistent coloring and a freshly renewed look. Its easy application makes for a good quick fix on most basement walls.
To coat your walls with this paint, complete all prep work recommended by the paint’s manufacturer. Filling cracks and holes in the surface and removing efflorescence are typical prep projects. Scrub the surface thoroughly with a wire brush to remove all loose concrete or mortar and dirt. Wipe down the wall to remove dust. Note: Waterproofer works best over bare masonry. If the wall has been painted, check with the manufacturer for recommendations.
Apply the first coat with a stiff paintbrush, working the paint into all of the pores and fine cracks in the masonry surface. The coverage rate is important: You don’t spread it out thinly like you do with regular paint. The manufacturer will specify how much to use in a given area so the coating is thick enough. Let the first coat dry as directed. Apply the second coat with a brush or a heavy-nap roller, being careful to cover any missed spots or pinholes left in the first coat. Let the second coat dry.
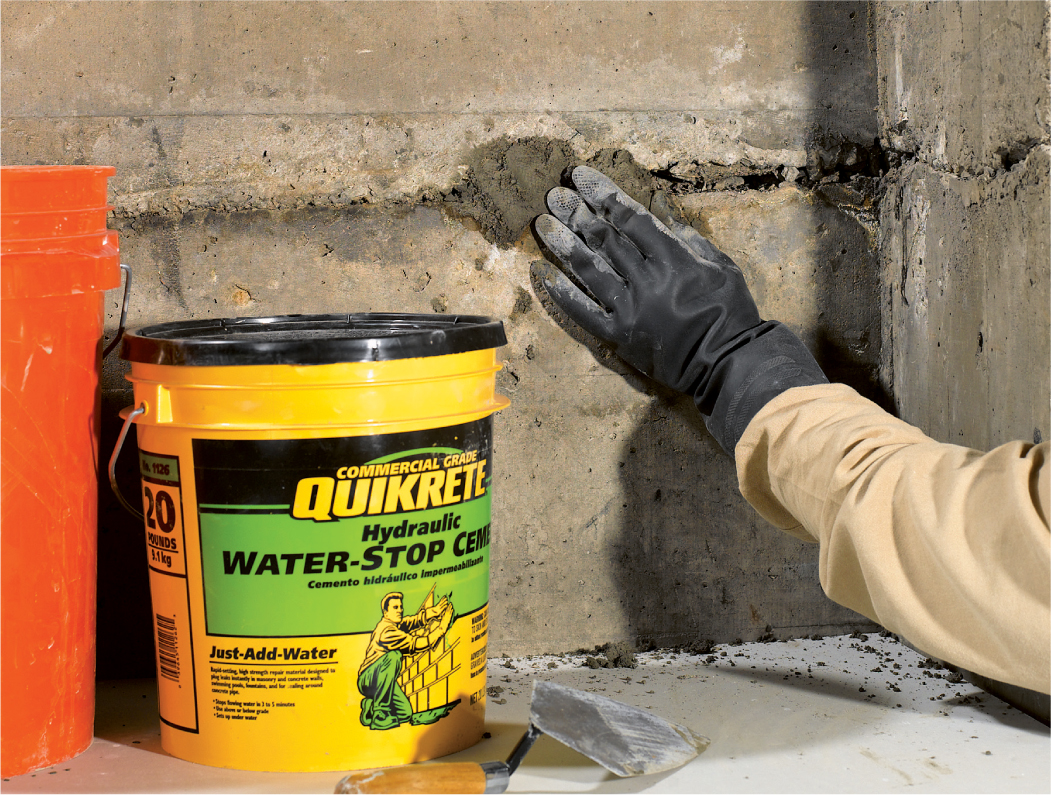
Hydraulic cement expands as it dries, creating a watertight seal. Repairs can be left as-is or be covered with masonry paint or waterproofer.
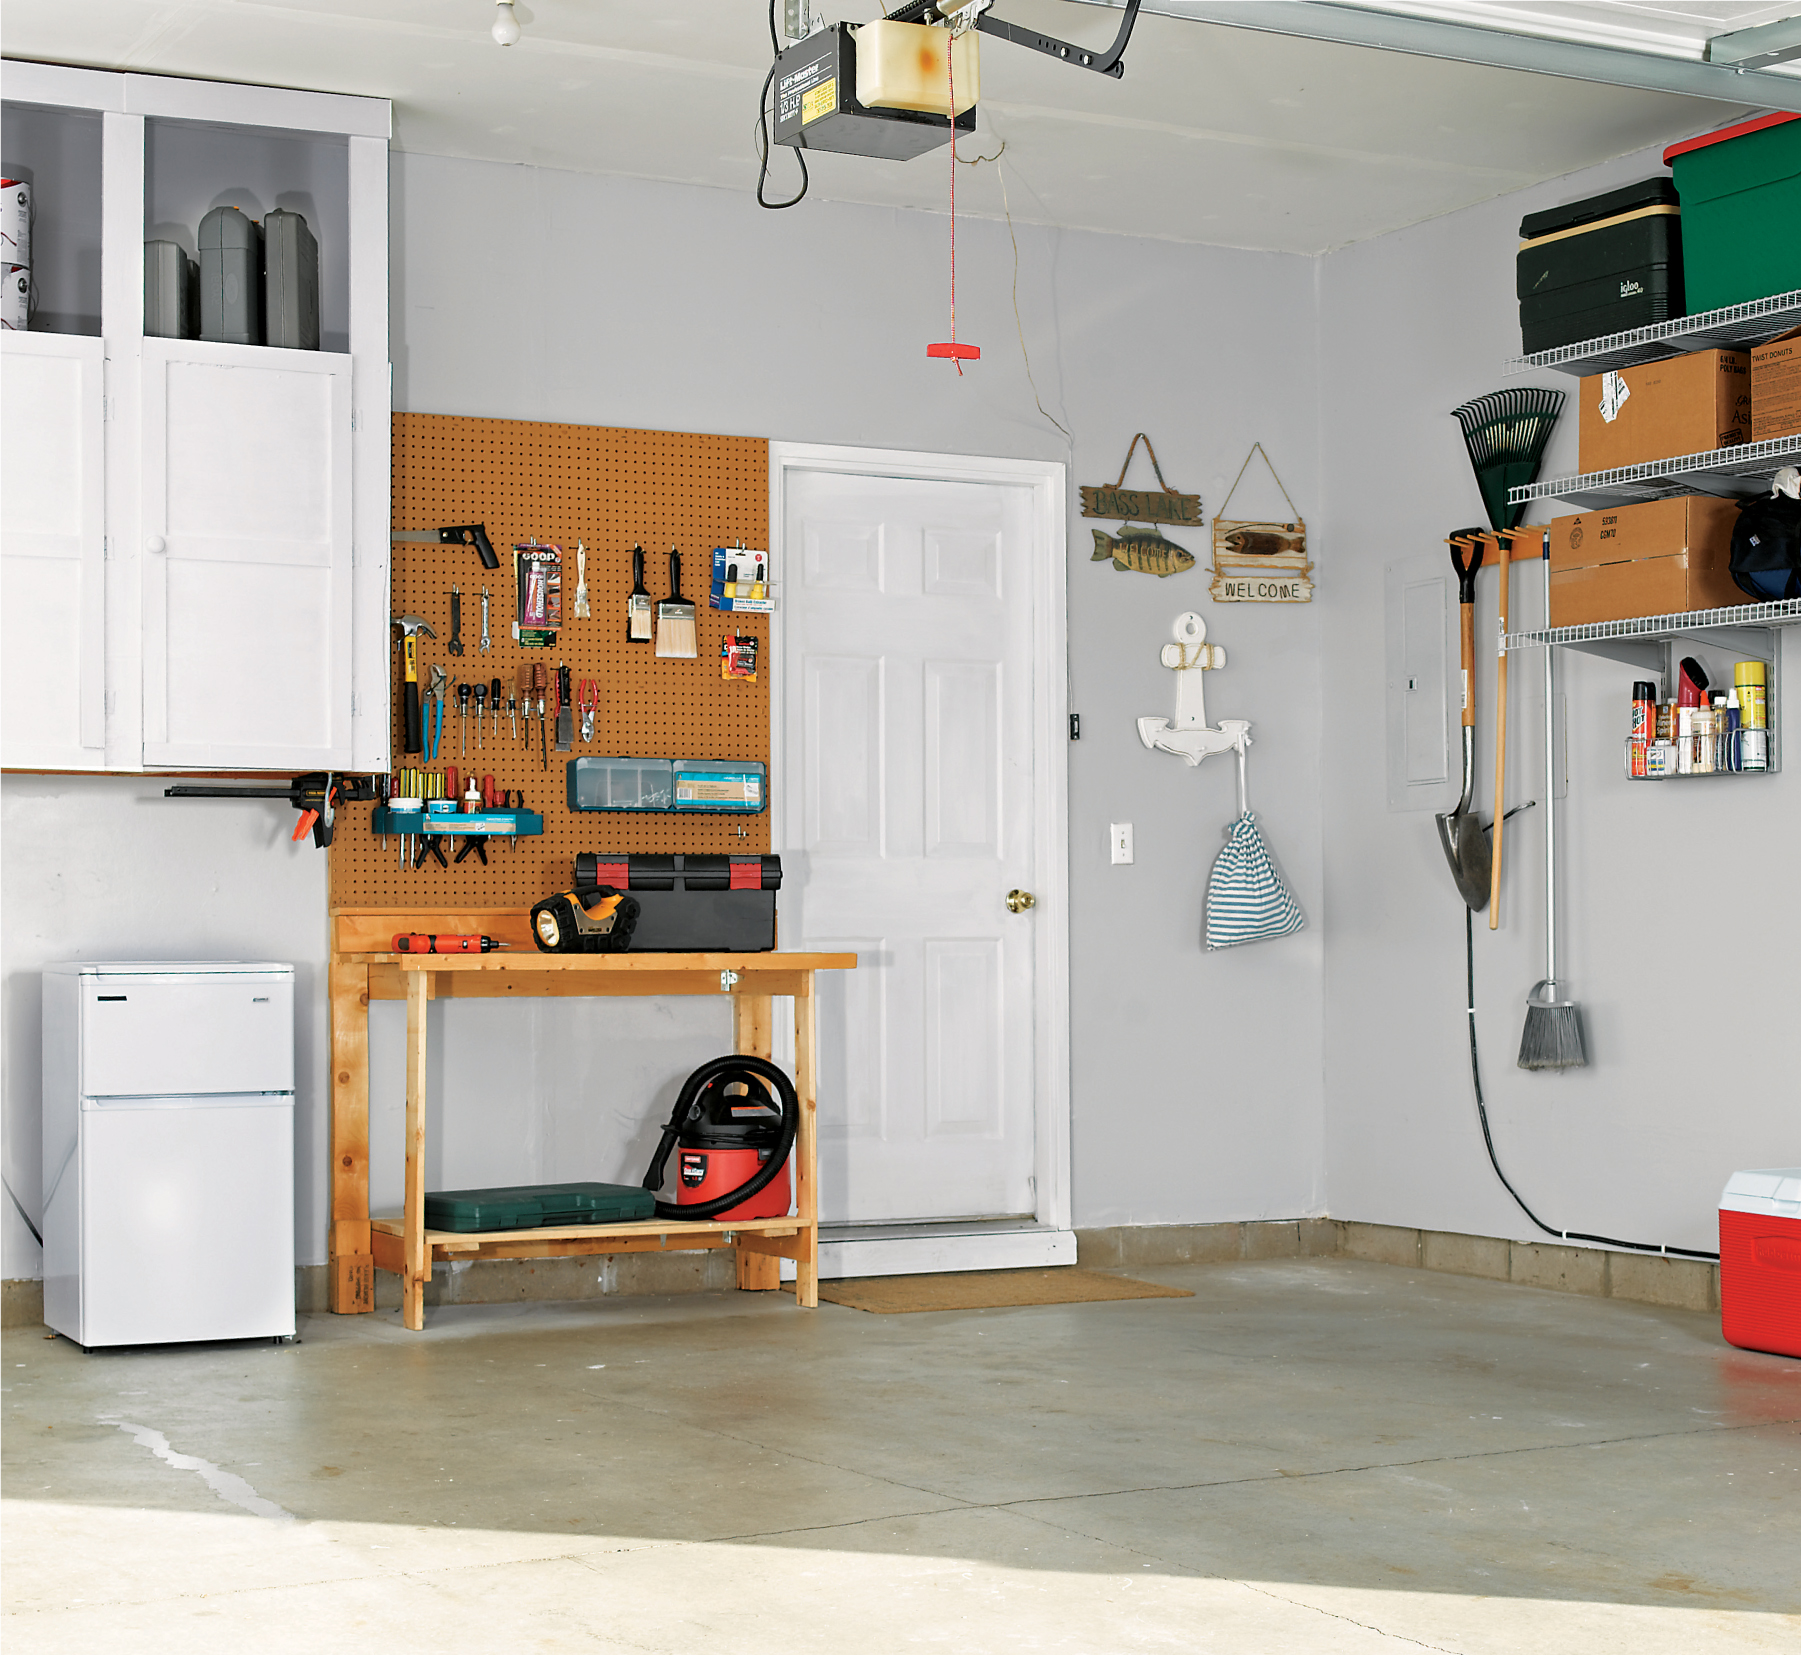
GaragesA well-maintained and spacious (or at least uncluttered) garage is an unqualified bonus for any home. Some house hunters inspect garages with little more than a cursory glance at the floor space, to see whether their cars would fit. Others do a thorough critical walkthrough, like a seasoned cook evaluating the layout and equipment of a kitchen. And some are simply swept away by the prospect of off-street parking. All will look for an automatic door opener.
It’s up to you to decide what you or potential buyers want from a garage and to plan your fix-ups accordingly. As a bare minimum, a garage makeover should include cleaning all surfaces and inspecting the appearance of the walls and ceiling. If the walls are drywalled, patch any holes and repair failed seams following the steps on pages 60 to 61. You might go so far as to slap on a new coat of paint for a quick renewal. If the walls aren’t covered, it’s probably not worth the time and expense for sellers to finish them with new drywall. Instead, make sure the insulation (if there is any) is in good shape.
Check the operation of all doors and windows and make repairs accordingly. Give the windows a good cleaning—natural light adds an especially nice touch in a garage. With the walls and ceiling in decent shape, you can turn your attention to the floor.
For some reason, garage floors tend to get noticed almost as much as those in living spaces. And while no one expects perfection in a hard-used concrete slab, deep layers of oil stains and badly pitted concrete are unsightly and even a little off-putting. Remove old oil stains from a garage floor with a commercial concrete cleaner/degreaser. If the concrete is pretty beat up, you can repair cracks and fill holes following the techniques shown on pages 118 to 120. If you really want your garage floor to look snazzy, you can add a surface treatment, such concrete resurfacer (see pages 119 to 120) or epoxy coating. Both treatments do a great job of covering repair patches and old, discolored concrete for a totally renewed look.
Water damage is common when wallboard is installed too close to a garage floor. Replace damaged areas like this with strips of new drywall, keeping it at least 1" above the floor.

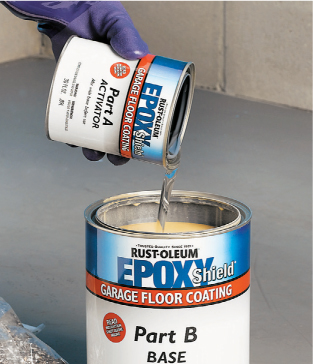
Epoxy-based garage floor paint costs about $50 a gallon, but you should be able to cover a single stall garage floor with one gallon. Once applied it is attractive, attention-grabbing, and easy to clean.
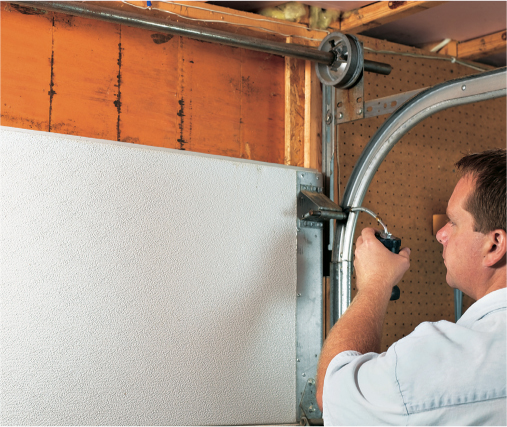
Smart house hunters will open a garage door to check its operation. If you’re a new owner, tuning up your garage door now can save you major headaches down the road. Begin your tune-up by tightening every mounting bolt you can find—on the hinge plates, lock assembly, track mounts and connector plates, and lift bars and handles. Replace any missing bolts. Next, check the alignment of the roller tracks that carry and guide the door. Ideally, the vertical sections of the tracks are installed plumb (perfectly vertical), from side to side and front to back.
Adjust the position of the door in relation to the frame by loosening the bolts securing the track to its mounting brackets on the wall. Move the tracks toward or away from the frame as needed, then tighten the bolts. When door tracks are out of plumb from side to side, the rollers can bind or, conversely, they can pull too far out of their hinge sleeves, resulting in rough travel and causing undo wear on the rollers. Adjust the side-to-side alignment by loosening the bolts where the track mounts meet the wall, then nudge the track sideways as needed (a rubber mallet helps with this) and retighten the bolts. Replace the light bulb if necessary.
Begin the tune-up by lubricating the door tracks, pulleys, and rollers. Use a lightweight oil, not grease, for this job. The grease catches too much dust and dirt.
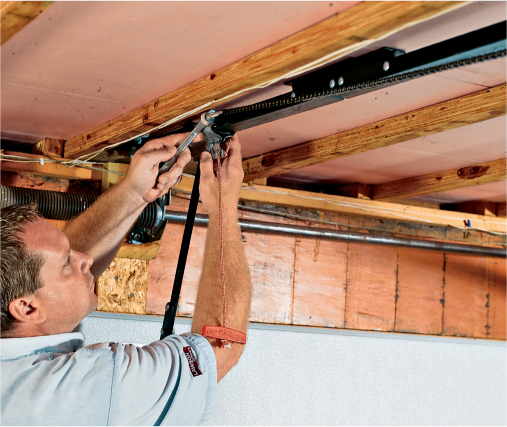
If the chain on your garage door opener is sagging more than ½" below the bottom rail, it can make a lot of noise and cause drive sprocket wear. Tighten the chain according to the directions in the owner’s manual.
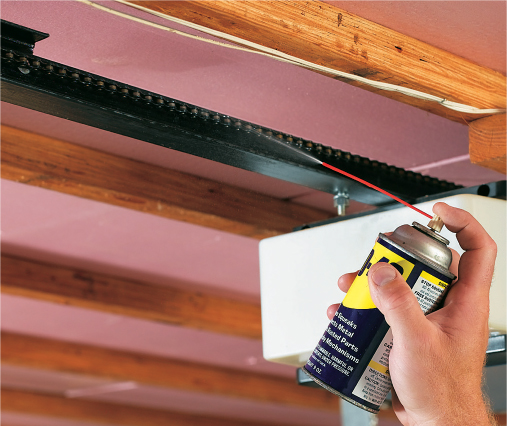
Lubricate the garage door opener drive chain or screw.
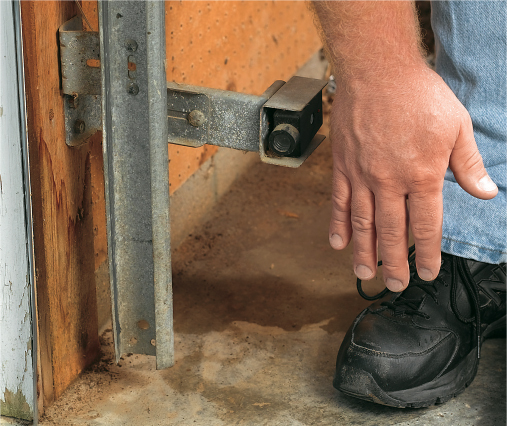
Test shutoff sensors to make sure they are operating correctly.