 a wide range of BTU capacities, up to almost 50,000 BTUs, depending on the manufacturer
The Way to Great
Grilling—Outdoors and In
Whether you cook on a shoebox-size hibachi or in a state-of-the-art gas grill with side burners and an infrared rotisserie, you know that grilling imparts an incomparable flavor that no other cooking method can. The intense heat, the savory smoke, and the pleasure of cooking (and eating) outdoors all enhance the natural flavor of top-grade steaks, plump chicken breasts, sparkling seafood, and garden-fresh vegetables.
Before you fire up your grill, spend a few minutes with these pages to assess your grill and utensils, bone up on techniques and flavor-enhancing tricks, and review safety procedures.
TYPES OF GRILLS
Whether you prefer to cook on a gas, charcoal, or electric grill (and some avid grillers own more than one type of grill), manufacturers are now offering consumers an enticing array of options to choose from.
Gas Grills
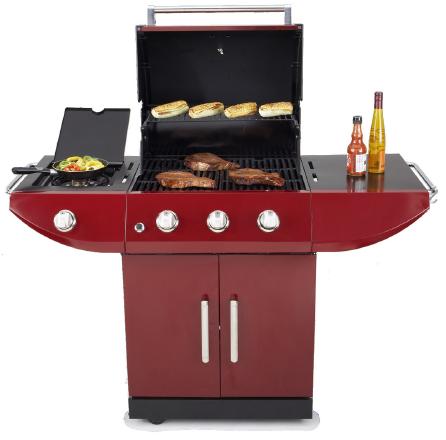
Offering speed and ease of operation, the gas grill has become America’s favorite type of grill. And what’s not to like? Open the gas valve, turn on the controls, preheat for about 10 minutes, and you’re ready to go. With gas grills—fueled by either liquid propane or natural gas—you’ve got a world of features to choose from, including:
 a wide range of BTU capacities, up to almost 50,000 BTUs, depending on the manufacturer
 stainless steel, cast-iron (holds the heat better for a superior sear), or porcelain-coated cooking grates (makes for easy clean-up)
 stainless steel or porcelain-coated flavor bars (V-shaped bars that catch dripping fat and return it to the cooking food in the form of tasty smoke)
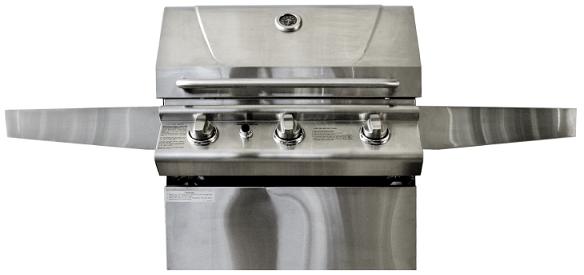
 infrared burners for searing
 side burners that allow you to do stovetop cooking while you grill
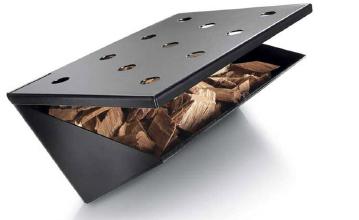
 a special lower-BTU smoker burner, as well as a smoker box for wood chips
 a rotisserie burner and attachment
 a warming rack, which allows you to stop food from cooking as soon as it’s done
 built-in grill thermometers, grill lights, and storage
In terms of size, you can find a gas grill to fit your needs, whether you’re cooking for one or the entire neighborhood.
Charcoal Grills
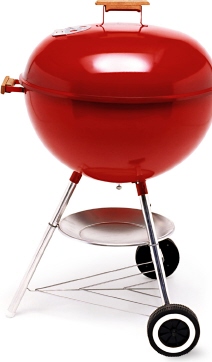
Fueled by charcoal briquettes or natural hardwood charcoal chunks, charcoal grills are, on the whole, less expensive than their gas-powered brethren. Look for a charcoal grill made of heavy-gauge steel; a porcelain-enamel coating will give you better protection from rust. Look for sturdy legs positioned to keep the grill steady. Other features you can look for in a charcoal grill include:
 plated steel, preseasoned cast-iron, or porcelain-enameled cooking grates
 adjustable-height fire grates
 side shelves and bottom storage
 warming rack
 temperature gauge
 removable ash trays for easy cleaning
As with gas grills, you can find a charcoal grill to fit your needs. If you’re cooking for one or two, consider the hibachi, a small cast-iron grill that’s just right for a pocket-sized patio.
Electric Grill
The electric grill offers an alternative to messing around with propane tanks and charcoal. Plug it in and you’re good to go. Or, if you live where charcoal or gas is not allowed on the terrace, patio, or deck, there are tabletop versions as well as full-size electric grills available; just be sure to position your grill within reach of a grounded outlet.
OTHER EQUIPMENT
Cooking over fire calls for some specialized tools, and there are also optional gadgets to consider for easier grilling of fish, kabobs, and so on. Here are the basics, plus some extras:
GRILL TOPPER: If you often grill delicate foods such as seafood and vegetables, you’ll want a grill topper, a perforated metal sheet or tray that provides a nearly smooth surface for grilling. Food is less likely to break up or fall through, and you can virtually “stir-fry” cut-up foods over the flames.
GRILLING BASKETS: This is another option for delicate or small foods. There are classic fish-shaped baskets (which hold whole fish) as well as square and oblong baskets with long handles to hold kabobs, baby vegetables, or fish fillets. Once the food is inside and the basket is clamped shut, you can turn the entire thing at once—easy!
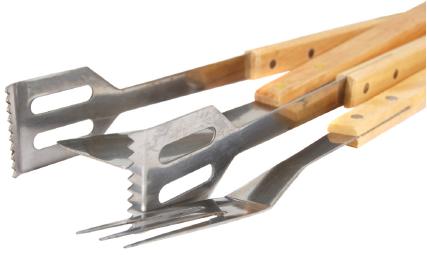
TONGS: Better than a fork for turning foods, because they don’t pierce the surface and release juices. Barbecue tongs should have heatproof handles and rounded ends that won’t cut into the food.
SPATULA: Use one with a long, heatproof handle for flipping burgers and moving food around on a grill topper.
SKEWERS: Long metal skewers are a must for kabobs. Choose skewers with flat shafts rather than round ones; food will be less likely to slip or spin around as you turn the skewers.
BASTING BRUSH: A heatproof handle and a long shaft are two definite brush requirements. As for bristles, silicone is the way to go—it’s nearly indestructible and has the added benefit of being nonstick, making cleanup a snap. Your next best bet is a brush with natural bristles, which will stand up to heat better than synthetic bristles other than silicone.
THERMOMETERS: Consider two different types of thermometers for grilling ease. The first measures the internal temperature of the food you’re cooking (see “Is It Done?,”). You can do this with an instant-read thermometer (available as a dial or a battery-powered digital probe), which is inserted into the center of the food when you think it’s getting close to done. Another alternative is a thermometer that consists of a probe that is inserted into the food as it goes onto the grill, which is attached to a digital readout that sits outside the grill.

The other kind of thermometer is a grill surface thermometer, which measures the heat of the fire. When you’re cooking with charcoal, it takes the guesswork out of determining whether you’ve got a hot or medium fire (see “How Hot Is Your Fire?”). It’s especially useful when you’re cooking “low and slow,” which requires maintaining an even temperature over many hours.
GRILLING MITTS: A more serious version of oven mitts, these are longer and better insulated, to protect more of your arm from higher heat. Heavy suede mitts are excellent.
BRASS-BRISTLED SCRUB BRUSH: Use this to clean the grill rack. The best time for this? While the grill is still hot.
FOR THE FIRE
Gas and electric grills are easy to light; just follow the manufacturer’s directions. A charcoal fire requires a little more finesse. Be sure to leave enough time after starting the fire for the coals to develop a light layer of ash before you start cooking. Allow 20 minutes to be on the safe side.
Getting Started on Your Charcoal Grill
You don’t want to run out of heat before your food is cooked, so start with enough briquettes. Estimate the right amount by spreading an even layer over the bottom of the firebox. Before lighting, stack them into a pyramid to allow air to circulate among them. The following are options to help you get the fire going:
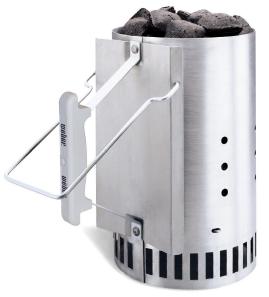
CHIMNEY STARTER: This is an open-ended metal cylinder with a handle. Stuff crumpled newspaper in the bottom of it, fill the top portion with briquettes, then light the paper through an opening in the bottom. The briquettes will burn to ash-covered readiness.
ELECTRIC STARTER: A loop-shaped heating element with a handle, this device is placed in a bed of briquettes; plug it in and the briquettes will ignite.
LIQUID FIRE STARTER: Saturate briquettes with the liquid, then wait for a minute before lighting. By the time the coals are ready for proper cooking, the fluid will have burned off and will not affect the flavor of the food. Never add liquid starter to a fire that’s already burning or to hot coals; a spark could ignite the whole can.
SOLID FIRE STARTER: Place these waxy-looking cubes in the firebox, pile briquettes on top, and light. They’re safer to handle than liquid starter.
SELF-STARTING BRIQUETTES: These are impregnated with starter fluid. A match will ignite them immediately. Don’t add them to a fire that’s already lit.
HOW HOT IS YOUR FIRE?
You’ll know the coals are ready when they are about 80 percent ashy gray (at night, you’ll see them glow red). To test the level of heat, hold your palm above the coals at cooking height (about 6 inches): If you can keep your palm over the fire for just 2 to 3 seconds, the fire is hot (above 375°F); 4 to 5 seconds, the fire is medium (above 300°F); 5 to 6 seconds, the fire is low (above 200°F).
Tapping the coals will remove their ash cover and make the fire hotter. Pushing the coals together intensifies the heat; spreading them apart decreases it. Opening the vents on a covered grill increases the temperature, and partially closing them lowers the heat.
8 Safety Rules
for the Backyard Chef
1. Make sure the grill is on a level surface and not too close to the house, trees, fences, or even deck railings—all can catch fire from flare-ups or flying sparks.
2. Don’t line the bottom of a gas or charcoal grill with aluminum foil; it will obstruct airflow, and the fire will die out faster.
3. Use lighter fluid only to start a fire; don’t squirt it onto hot coals to get a dying fire going again, because it can ignite in the can as you pour it.
4. We can’t say it too often: Reduce the risk of cross contamination and food poisoning by transferring cooked food from the grill to a clean plate, not one that held raw meat, fish, or poultry.
5. Boil used marinades and glazes for 1 minute if you want to serve them with cooked meat. Or reserve some in a separate dish before it comes in contact with the meat, fish, or poultry.
6. Use long-handled barbecue utensils (not your regular kitchen set) for good reach and control. And watch out for dangling sleeves.
7. Be careful not to serve undercooked meat, poultry, or fish. (See “Is It Done?”, for guidelines.)
8. Don’t throw water on flare-ups; it produces steam vapors, which can cause severe burns. Instead, remove the food from the grill until the fire subsides or cover the grill for a few minutes. To prevent flare-ups, trim excess fat from meats.
Choose Your Cooking Method
One of the keys to successful grilling is cooking over the right kind of heat—direct or indirect—over the right level heat for the food you’re preparing. Here’s a primer to get you started.
DIRECT COOKING: The gas grill is preheated with all the burners on or, in a charcoal grill, the prepared coals are spread evenly. Food is placed on the grill rack directly over the heat source. This method works best with foods that take less than 25 minutes, such as steaks, chops, and vegetables. Direct heat is necessary for searing, which gives meats that nice crusty surface.
INDIRECT COOKING: Place your food on the grill rack of a gas grill, over the drip pan. Preheat the burners on the two outer sides for a three-burner grill (or on one side for a two-burner grill). Set the food over the unheated burner. For a charcoal grill, push the briquettes to the edges of the kettle and place a drip pan in the middle before placing your food on the rack. Indirect cooking is best for longer-cooking meats such as roasts and whole chickens or turkeys, or for delicate foods like fish fillets that might be scorched or dried out by direct heat. Consider placing the food in a pan rather than directly on the grill rack.
TO COVER OR NOT TO COVER? Most grill manufacturers—both gas and charcoal—recommend closing the cover for all grilling. It reduces flare-ups, helps prevent charring, and greatly shortens cooking time.
HIGH VERSUS MEDIUM HEAT: Use high or medium-high heat for thin cuts of meat that cook quickly: skirt steak, thin pork or lamb chops, frankfurters, or shrimp and other shellfish. Use medium heat for  - to 1-inch-thick rib-eye, tenderloin, or flank steaks; hamburgers; chicken parts; vegetables; fruit; or whole fish. It’s a good idea to sear thick steaks over high heat first, then reduce the heat so the meat can cook through. In all of our recipes, we indicate what level of heat to use.
MAINTAINING PROPER HEAT: For long, slow cooking, you may need to adjust the controls on your gas grill. It’s a bit trickier with a charcoal model. If the fire is too hot, close or partially close vents (top, bottom, or both); if it’s not hot enough, open the vents fully or add more briquettes after each additional hour as the manufacturer recommends. Most gas and some charcoal grills have thermometers that permit you to monitor the interior temperature without lifting the lid (uncovering causes the temperature to drop very quickly).
IS IT DONE?
The best way to know if your food is done is to measure its internal temperature. Below are the temperatures, as determined by the USDA, that you want you food to register before taking it off the grill. Temperatures should be taken in the thickest part of the food; the thermometer should not touch bone, fat, or gristle.
Chicken breasts and whole poultry 165°F
Ground beef 160°F
Pork 160°F
Fish 145°F
Beef steaks and roasts 145°F
Lamb steaks, ribs, or leg 145°F
FLAVORING THE FIRE
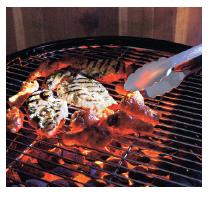
It’s the delicious taste of food cooked over flames that makes grilling such a popular cooking method. You can enhance the effect by adding flavor to the fire itself, or, more specifically, the smoke that rises from it. This works best in a covered grill, which holds the smoke in. Aromatic woods, such as mesquite or hickory, are well known for the tang they add to grilled meats. Herbs, spices, and other cooking ingredients add their own flavors.
Grilling woods are sold in chunks or chips to be tossed onto a charcoal fire or into foil packets or the smoker box of a gas grill. You want the wood to smoke slowly, not burn quickly, so soak it in water before adding it. Chips require about half an hour of soaking; larger chunks should be soaked for up to two hours. Here’s how to suit the wood to the food:
 Use oak and mesquite, which are strongly flavored, for cooking beef and pork; their smoke can overpower poultry and seafood.
 Hickory’s sweetness is well suited to turkey, chicken, and pork.
 Fruitwoods, such as apple and cherry, are mild enough to use with chicken and seafood.
If you’ve got a gas grill, use wood chips, not chunks. If your gas grill doesn’t have a smoker box, wrap the chips up in heavy-duty foil, punch a few holes in it, and place it over the flavor bars.
If you’re using a charcoal grill, add chunks of wood to the fire from the start; place chips on the coals later in the cooking process.
Dried grapevines give off a subtle wine flavor, and corncobs (dried for a few days after you’ve cut the kernels off) produce a hickory-like smoke. Partially cracked nuts in the shell, soaked for 15 minutes or so, release their flavors when heated.
Whole spices or fresh or dried herbs can be placed in the smoker box or on the fire to complement the seasonings in a marinade, glaze, or rub. Soak them for about 30 minutes before using. Fennel is traditional for grilling fish, while rosemary, thyme, bay leaves, and cilantro are other options. Experiment with other smoke flavorings, such as whole cinnamon sticks or cloves, strips of orange or lemon peel, and whole garlic cloves.
ENTERTAINING OUTDOORS
For many of us, grilling is a year-round proposition, but grilling really comes into its own when you can enjoy the fire-roasted fruits of your labors outdoors. And when you’re planning a patio party or barbecue bash, there’s no reason not to approach it as you would an indoor shindig and let your personal style shine through. Here are some pointers for your next outdoor soiree from our own Good Housekeeping staff:
 Plant an old wooden tool caddy with potted herbs for a centerpiece.
 Fill antique bottles with field flowers— arrange five in the middle of the table or put a bottle at each place setting.
 Press rosemary, basil, or wildflowers such as Queen Anne’s lace under the glass of a large picture frame to make a serving tray.
 If it’s really buggy out, stow everything from barbeque chicken to potato salad to pie in picnic baskets on the table and keep them closed while everyone’s eating.
 Make a colorful, edible centerpiece: peaches, nectarines, and plums, with a sprinkle of berries, arranged in a footed glass bowl.
 Chill water, soda, seltzer, wine, and beer in old galvanized-steel tubs filled with ice.
 Arrange long flatbread crackers in an enamel pail or child’s beach pail.
 Offer bread and cheese on a tray covered with pretty leaves. Just make sure they aren’t poisonous (mint and basil are good choices)!
 For dessert, fill a rustic wooden box with four kinds of cookies, and serve with vanilla ice cream. Or tuck a homemade pound cake with sliced fruit into the box.
 Use colorful cotton dish towels for napkins. Slide cookie cutters (such as butterflies or flowers) over the rolled towels for napkin rings.
 Place forks, knives, and spoons in small, clean terra-cotta flowerpots.
 Use miniature pepper or cherry tomato plants as centerpieces.
 Pour lemonade into old mason jars or retro soda-fountain glasses. To frost glasses, pop them in the freezer for a few hours.
 Arrange grilled meat on platters lined with banana leaves (sold fresh or frozen in Asian and Hispanic markets) or green-onion tops.
 Serve dips in a hollowed-out cabbage or radicchio head, or a scooped-out crusty bread round. Cut the top off to make it level, then spoon out the insides, leaving a
  -inch-thick border all around so the dip doesn’t soak through. (Don’t fill bread more than 1 hour ahead of time.)
NOT GUILTY!
Concerned about taking salads or sandwiches made with mayonnaise on a picnic because the mayo might spoil? You’re blaming the wrong ingredient: Mayo has a clean record. The rumors began decades ago with homemade mayonnaise, which contains raw eggs; commercial brands, made with pasteurized eggs, have a high acid content (they contain vinegar and lemon juice) that actually prevents the growth of food-poisoning bacteria. The real culprits? Low-acid salad ingredients and sandwich fillings, such as tuna, ham, chicken, eggs, potatoes, and macaroni. When mishandled (left unrefrigerated too long or prepared with hands or utensils that have not been washed properly), they can encourage bacterial growth, even if dressed with mayo.
GOING MOBILE
Want to take your grilling on the road for a picnic at a park? Here are some tips for efficient packing and food safety when you have to leave your refrigerator behind.
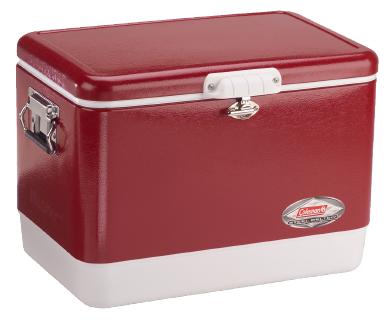
 Gingham-trimmed baskets are romantic, but they won’t keep food cold. You need a cooler— and it should be the right size. A full cooler keeps food cold longer than a partially empty one. (If necessary, pack empty space with ice or frozen juice boxes.)
 For the ultimate in cool, prechill carriers (especially beverage holders) by filling them with ice water and pouring it out just before packing.
 A cooler can’t chill foods that aren’t already cold. To be sure foods and drinks are completely cold before stowing, refrigerate them until the last minute. Make dressed salads and cooked meats the night before.
 To keep things neat and clean at the picnic, do as much prep as possible at home. Wash fruit and lettuce, and pat dry. Shape burgers, cut tomato and onion rounds, slice cheese. Remove chicken or steak from store wrappings, pat dry, and season as desired.
 Double-bag raw meat, poultry, and seafood—whether it’s marinated or not—in zip-tight plastic bags to prevent juices from contaminating other food.
 Put ice packs next to perishables like chicken and cold cuts, but don’t place them directly on top of fragile greens, vegetables, or fruits, which can freeze and then wilt, even through their wrappings.
 At the grill, have a clean plate on hand for cooked foods. Discard any unused marinade or glaze that’s touched raw meat or poultry.
 Once you’ve finished eating, pack up the buffet. Discard foods left outdoors for more than two hours. Cold cuts, which are especially sensitive to heat, shouldn’t be left out longer than thirty minutes. Refrigerate leftovers as soon as you get home.
GRILLING INDOORS
Even if you’re an intrepid, all-weather sort of grillmeister, sometimes grilling outdoors just isn’t an option—or you’d simply prefer to get your grill on indoors. But that doesn’t mean you can’t still enjoy the great taste of grilled food. When you think indoors, think grill pan.
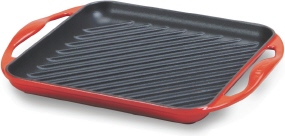
A grill pan is a essentially a skillet with ridges in the bottom. Grill pans come in a wide range of sizes, including griddle-style pans without sides built for cooking over two stovetop burners at once—very useful when you’re cooking food for more than two people. You’ve also got your choice of materials, from the classic cast iron and enameled cast iron to stainless steel and hard-anodized aluminum. One thing to consider when purchasing a grill pan is whether you want a stay-cool handle. If you opt for one without that feature, please remember that the handle will get just as hot as the rest of the pan, so don’t absentmindedly grab it. If you do, you’ll end up with a nasty burn on the palm of your hand.
We do not recommend buying a grill pan with a nonstick coating; these should not be preheated empty and if they are heated over more than medium heat, the coating can begin to degrade, releasing harmful chemicals. Seasoned cast iron pans are naturally nonstick. Whether you’ve seasoned your pan or you’ve bought it preseasoned from the factory, all you need to clean it after each use is a rinse in hot water and a good scrubbing with a stiff brush—no detergent, as that can remove the seasoning. Immediately dry your pan to keep it from rusting. And if it does develop rust, just tackle it with a scouring pad, rinse well, towel dry, and reseason it.
So, can you prepare anything you cook on an outdoor grill in a grill pan? No, but there’s an awful lot you can do—all manner of steaks, burgers, lamb, veal, and pork chops, fish steaks and fillets, scallops and shrimp, boneless chicken breasts, and turkey cutlets. Vegetables and greens work too—try whole endive, radicchio, and romaine, as well as asparagus, strips or rings of bell peppers, and thick slices of veggies like squash, eggplant, and fennel. You can also pan-grill slices of pineapple, or peach, plum, or nectarine halves. And try using your grill pan to toast bread for bruschetta.
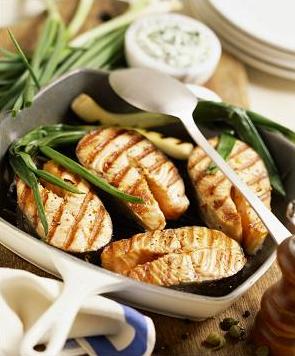
Grilled Salmon with Herb-Caper Cream
You can also use your grill pan to make grilled sandwiches or panini. Usually you see people making these on a contact grill or panini press, but a grill pan works just fine. To weight the sandwiches down, you can either set another, smaller, cast-iron pan on top of the sandwiches, or invest in a device that is also, confusingly, called a panini press, a heavy, flat piece of cast iron with a handle.
We’ve sprinkled an assortment of grill pan recipes throughout the book, and whenever possible, we offer grill pan variations—including lots of great burgers you can grill up on your stovetop. From Sizzling Shrimp Quesadillas and Croque Monsieur to Pan-Grilled Pork Cutlets and Coriander Steak with Warm Corn Salad, these easy-to-execute recipes all boast great grilled flavor.
Whether you’re inside or outdoors, happy grilling!