DESSERTS FOR JAPANESE MEALS
SOY MILK “ICE CREAM” WITH POACHED KUMQUATS AND BLACK SESAME
TRADITIONAL JAPANESE SWEETS FOR TEA BREAK
KUZU SWEETS WITH BLACK SUGAR SYRUP

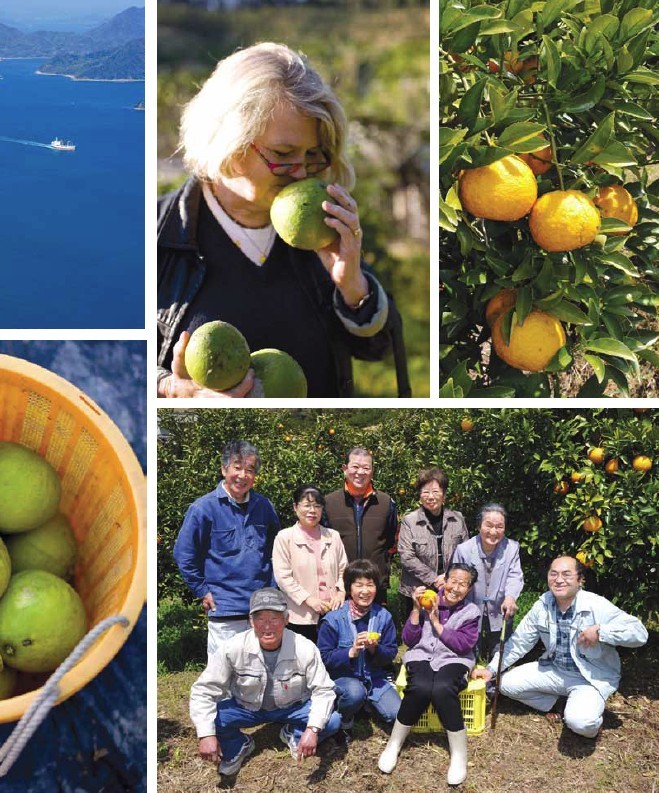
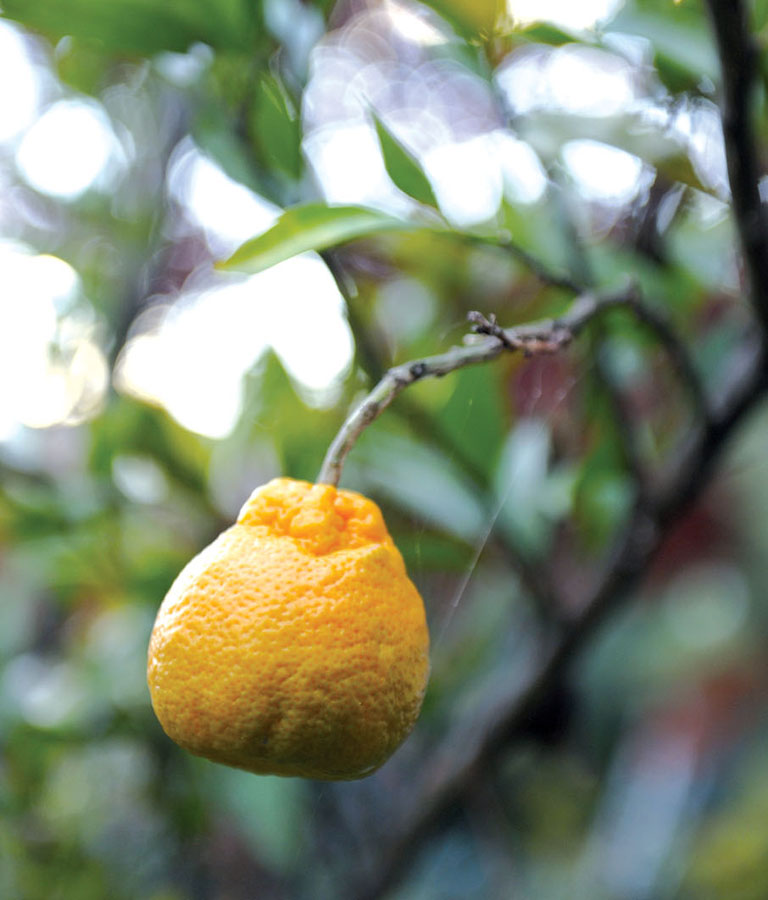
OUR CITRUS GROWER
I adapted this recipe (slightly) from Lindsey Shere’s Chez Panisse Desserts, just about the only dessert book I ever use these days. Her recipes transform fruit into desserts that still taste like the fruit itself. Fruit of any kind is really the most orthodox of desserts in Japan, but fruit ice cream is always welcome. (Japanese are big consumers of ice cream.) Try to use unwaxed or organic fruit, since you will be using the peel to infuse the custard.
tangerine ice cream MAKES ABOUT 1 QUART (1 LITER)
MIKAN AISU
4 organic tangerines
⅔ cup (135 g) organic granulated sugar
½ cup (125 cc) milk
4 large egg yolks, at room temperature
2 cups (500 cc) heavy cream
A few drops of vanilla extract
Slice off the outside peel layer of 2 tangerines with a sharp knife or vegetable peeler, working in a circular fashion. Be careful not to remove any of the bitter white pith.
Measure the sugar and milk into a heavy-bottomed nonaluminum saucepan, drop in the tangerine peels, and heat over medium-high heat until just before the mixture reaches a boil. Remove from the heat and let sit, covered, for 10 minutes to extract the flavor from the peel.
Whisk a few ladles of warm milk mixture into the yolks and return to the saucepan. Heat over low heat, stirring, until the custard has thickened slightly (see here).
Strain directly into a plastic container. With a Microplane, finely grate the peel of the 2 remaining tangerines directly onto the warm custard. While you are waiting for the custard to suck up the flavor of the zest (about 5 minutes), juice the tangerines. Stir the cream, 6 tablespoons tangerine juice, and vanilla into the warm custard.
Cool to room temperature, then chill overnight in a plastic container. Freeze according to the directions of your ice-cream maker.
VARIATION: Substitute any kind of orange-like citrus for the tangerines.
ICE CREAM
I love the idea of serving a scoop of sorbet kissing a scoop of ice cream made from the same fruit. Simple, but so logical, this kind of dessert satisfies the longing for a bit of fruit at the end of the meal and also successfully combines creamy with icy textures, two dessert textures to which I am particularly drawn (along with crunch). Stick a piece of Sesame Brittle in the ice cream and you’ll have all three.
tangerine sorbet MAKES ABOUT 1 QUART (1 LITER)
MIKAN SHABETTO
4½ pounds (2 kg) organic sour-tasting tangerines
1 cup (200 g) organic granulated sugar
Wipe the tangerines and grate the peel of one with a lemon zester that creates thin shreds, or use a wide-bladed Microplane for a finer texture. Grate the peel directly into a small bowl in order to catch the precious citrus oil as well as the zest. Do not grate as far as the bitter white pith.
Juice all of the tangerines and strain out the seeds through a wide-mesh strainer set over a medium-sized bowl. Push against the sides of the strainer with the back of a wooden spoon to force as much of the pulp as possible into the juice.
Heat the sugar and 1 cup (250 cc) of the juice into a heavy-bottomed, nonreactive saucepan. Heat over medium-high heat, stirring, until the sugar has dissolved. Mix the sweetened hot juice into the unheated tangerine juice, scrape in the tangerine zest, and chill. Freeze according to the directions of your ice-cream maker.
VARIATION: Substitute any kind of orange-like citrus for the tangerines.
Sometimes we take field trips with the little SSU! preschoolers up to Yamaki, our local organic soy sauce, miso, and tofu place. Tsunokake-san conducts a tour in English (we’re an English-only immersion program). After the tour, the kids get to taste some tofu and also make some of their own. After the tasting and tofu making, we troop downstairs and make fresh rice balls from the rice steamer full of hot rice that we’ve brought. Wrapped with crispy nori, they are delicious. And after lunch we troop back in for the last treat of the day: soy milk “ice cream.” My version has a large milk percentage so it marries well with the bright flavor of poached kumquats. The black sesame seeds complete the eye-catching color palette.
soy milk “ice cream” with poached kumquats and black sesame MAKES ABOUT 1 QUART (1 LITER)
TONYU AISU TO KINKAN
2 cups (500 cc) milk
1 cup (250 cc) best-quality unflavored soy milk
¾ cup (150 g) sugar
3 large egg yolks, at room temperature
2 tablespoons black sesame seeds, for garnish
Poached Kumquats (recipe follows)
POACHED KUMQUATS
½ pound (225 g) kumquats
½ cup (100 g) organic granulated sugar
Measure the milk, soy milk, and sugar into a heavy-bottomed saucepan, and heat, stirring, over medium-high heat until the sugar has melted. Turn the heat down to low.
Whisk a soup ladle or so of warm milk mixture into the yolks and return to the saucepan. Heat over low heat, stirring, until the custard has thickened slightly (see here). Strain, cool to room temperature, and chill overnight in the fridge.
Freeze according to the directions of your ice-cream maker.
Toast the black sesame seeds in a small dry frying pan over medium-high heat until the seeds start to pop. Be sure to shake the pan constantly and occasionally lift it off the heat to keep the seeds from burning. When done, pour into a small bowl to cool, otherwise the seeds will continue cooking in the hot pan (and most likely burn). Toasted sesame seeds will keep in a sealed container for a week or so.
Scoop 2 small mounds of soy milk “ice cream” onto a pretty saucer for each person. Top with a spoonful of poached kumquats (with some of the syrup) and sprinkle with toasted black sesame seeds. Serve immediately.
Wipe the kumquats and slice into ⅛- to ¼-inch (3- to 6- cm) rounds. Discard the ends.
Measure the sugar into a small heavy saucepan and add 1 cup (250 cc) water. Bring to a boil over medium heat, stirring to help dissolve the sugar. Add the sliced kumquats and lower the heat to a gentle simmer. Cook for about 10 minutes, until translucent. Scrape into a plastic container or jar and let cool to room temperature before storing in the fridge. Keeps for a few weeks.
VARIATION: Reverse the proportions of soy milk and milk, or use only soy milk for a nondairy version. Omit the eggs if you like, but the result will be much icier.
During the summer of 2011 I got a call from a Japanese acquaintance who asked if I would be willing to do a photo shoot with Todd Selby at our farm and school in early August. Up to my eyeballs writing recipes, nonetheless I couldn’t say no. Our potatoes were exceptionally good that year (and we still hadn’t finished digging them up), so I thought it would be fun to haul the SSU! Saturday kids over to the potato field to do a little digging.
Japanese-style potato salad with thinly sliced raw red okra, chopped green peppers, and Tadaaki’s homegrown onions would pair well with some barbecued chicken teriyaki and cherry tomato halves dressed with a miso vinaigrette and shiso threads. And what better than a purply-red ice cream made from local blackberries for dessert?
blackberry ice cream MAKES ABOUT 1 QUART (1 LITER)
KIICHIGO AISU
3 cups (600 g) blackberries
2 cups (500 cc) heavy cream
¾ cup (150 g) granulated sugar
A few drops of kirsch (optional)
Pulse the blackberries in a blender or food processor. After the berries are emulsified, whirl for a few seconds to produce a smooth purée. Pass the berry purée through a fine-mesh strainer or food mill, pressing the berries against the sides of the strainer to extract every ounce of the precious purée concentrate and to leave the seeds behind.
Heat the cream with the sugar in a medium-sized saucepan over low heat, stirring occasionally, until the sugar has dissolved. Stir the warm sweetened cream into the seedless berry purée and add a few drops of kirsch, if using. Gently mix until incorporated and chill.
Freeze according to the directions of your ice-cream maker.
VARIATION: Substitute any other similar berries such as raspberries or boysenberries.
LINDSEY REMOLIF SHERE’S CHEZ PANISSE DESSERTS
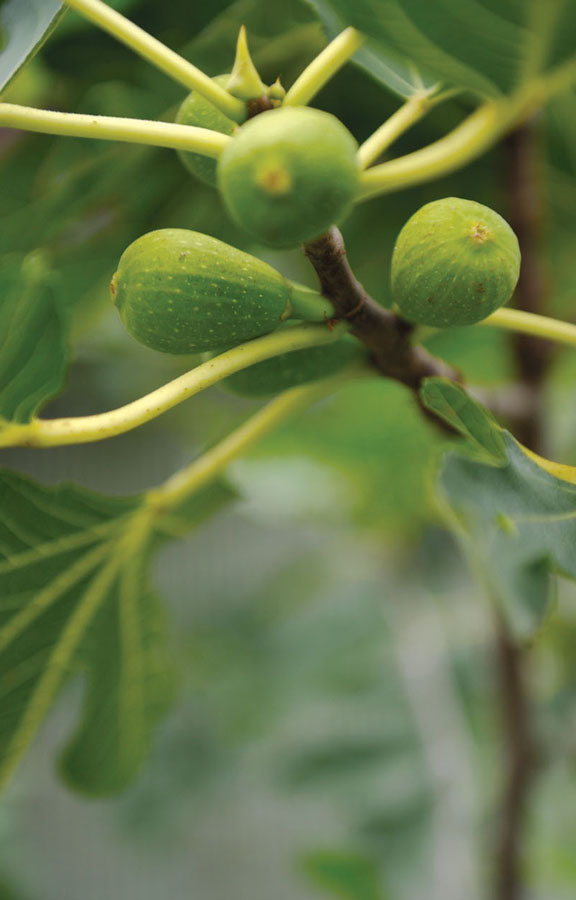
While Fig Ice Cream is not Japanese, we do grow figs here and we do eat ice cream, so it works for me. I served this ice cream, adapted from Lindsey Shere’s Chez Panisse Desserts, with Plum Sorbet and Shiso Granita. The trio was spectacularly balanced in taste and color.
fig ice cream MAKES 1 QUART (1 LITER)
ICHIJIKU AISU
1 pound (500 g) ripe figs
1½ cups (400 cc) heavy cream
8 tablespoons (115 g) organic granulated sugar
3 large egg yolks, at room temperature
A few drops of Cognac (optional)
Remove the stems and cut the figs into quarters. Cook the figs with 3 tablespoons water, stirring frequently, over low heat in a heavy-bottomed nonaluminum saucepan until very soft, about 20 minutes. Pulse the cooked figs in a food processor to chop coarsely or smash with a potato masher. Measure out 1½ cups (400 cc) of purée and reserve.
Measure 1 cup (250 cc) of the cream with the sugar into a medium-sized nonaluminum saucepan and heat over low heat, stirring occasionally, until the sugar has dissolved.
Whisk about half of the warm cream mixture into the yolks, then scrape back into the heavy-bottomed saucepan with the remaining warm cream.
Heat, stirring, over low heat, until slightly thickened (see here). Strain and stir the remaining ½ cup (125 cc) cream, reserved fig purée, and Cognac, if using, into the custard. Cool to room temperature, then refrigerate overnight.
Freeze according to the directions of your ice-cream maker.
VARIATION: Substitute ripe persimmon purée for the fig purée.

I made sorbet for the first time when developing recipes for the book. Why? I suppose until then I was too busy making ice cream. But this plum sorbet (adapted from Lindsey Shere’s Chez Panisse Desserts) made me regret all those years of plum seasons that passed us by. A jewel-bright ruby red, this tart sorbet is a great foil for the subtly creamy Fig Ice Cream.
plum sorbet MAKES ABOUT 1 QUART (1 LITER)
PURAMU SHABETTO
1 ⅓ pounds (600 g) ripe plums
¾ cup plus 2 tablespoons (175 g) organic granulated sugar
A splash of kirsch
Cut the plums in half and remove the pits. Put 5 pits on a chopping board and rap each one smartly with a rubber hammer or meat tenderizer. Be sure to pull up right on impact so you don’t smash the inside kernel to smithereens (this operation takes a little skill, but the almondy kernels add a lovely hint of noisette to the plum).
Cut the plums into ½-inch (12-mm) slices with a razor-sharp knife (otherwise you’ll just be smashing the skin as you saw through). Place the fruit in a heavy, medium-sized nonaluminum saucepan, and add ¼ cup (60 cc) water and the inner kernels. Cook over low to medium heat until soft, about 15 minutes. Stir often from the bottom to discourage the plums from sticking.
Remove from the heat and purée in a food processor or blender. Measure out 2⅓ cups (320 cc) plum purée into a plastic container. Boil the sugar with ½ cup plus 2 tablespoons (150 cc) water in a small saucepan. Stir the sugar syrup and kirsch into the purée and chill the mixture in the refrigerator overnight. Freeze according to the directions of your ice-cream maker.

On one of my trips to Portland to see Christopher, in college there, I stopped by Powell’s to check out the Japanese cookbook section. I discovered an attractive book written by Victoria Wise. This recipe is adapted from a recipe for Green Tea and Shiso Granita in that book, The Vegetarian Table: Japan.
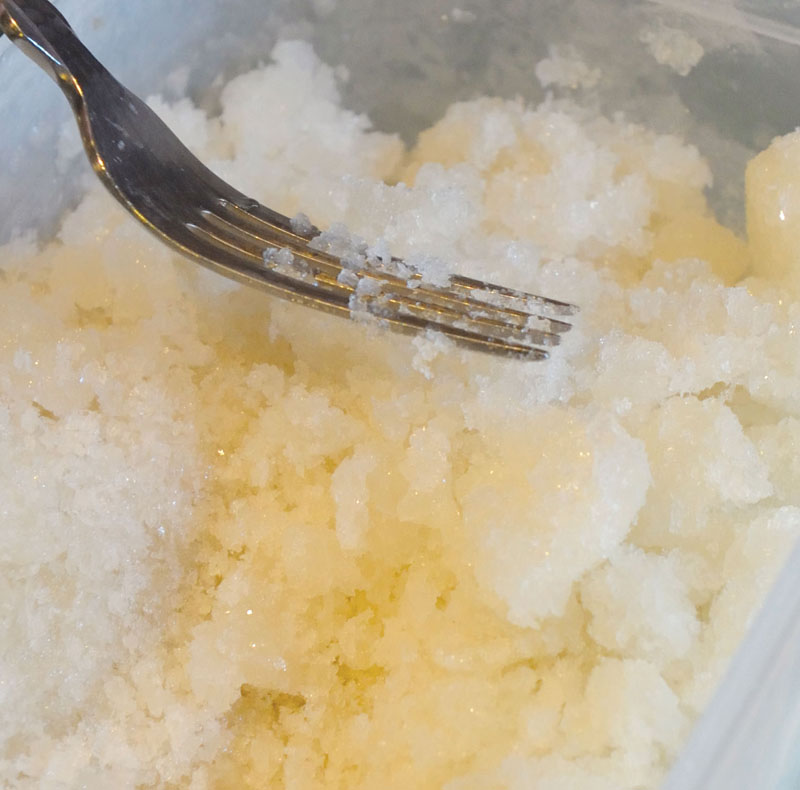
shiso granita MAKES ABOUT 3 CUPS (750 CC)
SHISO GURANITA
15 green (or red) shiso leaves
¼ cup (150 g) organic granulated sugar
Place the shiso leaves in a medium-sized bowl or 4-cup Pyrex measuring cup. Heat the sugar and 3 cups (750 cc) water to boiling in a medium saucepan, stirring the sugar to dissolve. Pour the boiling sugar water over the leaves and steep until cool.
Set a strainer over a plastic container large enough to hold 3 cups and strain out the leaves. Cover and transfer the shiso-flavored sugar water to a freezer shelf. Let sit, undisturbed, in the freezer for 1 hour. Remove to the countertop, open the lid, and gently stir in the crystals that have formed on the perimeter. Repeat this operation every 30 minutes, breaking up any larger crystals as you go. The finished granita should be flaky.
Serve alone in a beautiful glass bowl or goblet. This is also wonderful alongside Fig Ice Cream and Plum Sorbet. Keeps frozen for several weeks.
SORBET

In the midst of my ice cream- and sorbet-making frenzy, two small pale green melons sitting in a basket in my kitchen caught my eye. They had been grown by our friend Toshiharu Suka, so I knew they would be full of flavor and juxtopose nicely with subtly nuanced white peaches. I was not disappointed. Upon cutting them open, I found they were at their absolute perfect peak of ripeness, with peachy centers and pistachio green flesh.
melon sorbet MAKES ABOUT 1 QUART (1 LITER)
MERON SHABETTO
3 pounds (1350 g) nicely flavored ripe melons (such as Charantais, Crenshaw, or cantaloupe)
1 cup (200 g) organic granulated sugar
A few drops of kirsch
Cut the melons in half and scoop out the center pulp and seeds with a soupspoon. Discard or save the seeds to dry and plant later. Scoop the melon flesh into a medium-sized bowl, but don’t scrape too close to the bitter rind.
Purée in a food processor or blender. You should have about 4 cups (1000 cc). Heat 1 cup (250 cc) of melon purée with the sugar in a heavy-bottomed, nonreactive saucepan, stirring over low heat until the sugar is dissolved.
Pour the warm sweetened melon into the rest of the purée and flavor with the kirsch.
Freeze according to the directions of your ice-cream maker.
As I was in the thick of writing the dessert chapter, my editor friend Kim sent me a link to a mango farm on the Ogasawara Islands (Japan). The ordering window is short: from August 1 to August 8. It was July 31, so I phoned the next day. Too late—they had had a bad crop and were already sold out. Miura-san found me another grower, this time in Okinawa. I called her and chatted for a while, reminiscent of the early days talking with Mochizuki-san. It took a few more weeks for her mangos to be ripe, but they were worth the wait. Mangoes are dear wherever you are, so this sorbet should be reserved for special occasions (or special guests). I used Rhum du Père Labat, an artisanal white rum crafted from rainwater by an old guy at a small distillery on L’île de Marie-Galante, an island in the Caribbean. Apparently the guy follows instinct more than a formula, and Tadaaki imagines him dipping his cigarette smoke–stained finger into the vat of rum to taste (and further enhance) his liquor—a bit of fantasy that adds to the wild overtones of this unique rum.
mango sorbet MAKES ABOUT 1 QUART (1 LITER)
MANGO SHABETTO
3 pounds (1500 g) perfectly ripe mangoes
2 teaspoons artisanal white rum (preferably with a “wild” taste)
Juice of 2 limes
¾ cup (150 g) organic granulated sugar
Slice the mango flesh off the pits over a medium-sized bowl to catch all the essential juices. Working one by one (to avoid losing any drops of juice as it runs off onto the counter from the cutting board), lay a piece of mango, peel side down, onto a cutting board. Scrape off the flesh as close to the peel as you can with the back of a knife. Also remove as much pulp as you can from the pits and drop into the mango bowl. After each piece is peeled, be sure to scrape the accumulated mango juices into the bowl along with the fruit.
Purée the mango pieces with their juices in a food processor or blender. There should be about 3½ cups (850 cc). Add the rum and lime juice.
Heat the sugar with ½ cup (125 cc) water in a small saucepan, stirring over medium-high heat to dissolve. Simmer for 5 minutes. Pour into a small bowl or measuring cup to cool.
When the syrup has cooled to almost room temperature, mix in the seasoned mango purée and chill.
Freeze according to the directions of your ice-cream maker.
In the early years of our marriage, Tadaaki’s father would be out in the early summer, wrapping each piece of fruit on his white peach tree with newspaper to keep the birds away. Those were my formative years in Japan. I fought against much and often did not appreciate the subtle flavors around me. Why couldn’t we have a yellow peach tree, I wondered? Why does he wrap the peaches in newspaper instead of the “special fruit paper” used by the local apple pear growers? I found the peaches fairly tasteless and blamed it on the newspaper for not letting the sun’s rays hit the fruit directly during the ripening process. This may or may not have been the case, but more likely I overlooked the essential point of a white peach. For white peaches are juicy, delicate, and refreshing when served chilled in the sultry summer. But in the intervening years, the white peach tree fell prey to disease and was cut down. I never mourned it until now.
It was midsummer when I was writing this book. Fruit was all over the place—on our trees and at the farm stands. We were also the recipients of various kinds of fruit, including a box of unblemished white peaches, so white peach ice cream just made sense. Refreshing, light on the cream, elegant.
white peach ice cream MAKES ABOUT 1 QUART (1 LITER)
HAKUTO AISU
¾ cup (180 cc) heavy cream
¾ cup (180 cc) milk
¾ cup (150 g) organic granulated sugar
3 egg yolks, at room temperature
1 pound (500 g) ripe white peaches
A few drops of kirsch (optional)
Pour the cream and milk into a small nonreactive saucepan with ½ cup (100 g) of the sugar and heat over low heat, stirring occasionally, until the sugar has dissolved.
Warm the egg yolks with a couple of ladles of the warm cream mixture and pour back into the saucepan with the remaining warm cream and milk.
Heat, stirring, over low heat until the custard has slightly thickened (see here). Strain, cool to room temperature, then chill overnight.
Prepare the peach purée the next day about an hour before freezing the ice cream. Cut the peaches in half and peel over a medium-sized bowl to catch all the precious juices (white peaches have a very delicate flavor, so you do not want to lose any speck of them running onto the counter or cutting board). Once peeled, slice into ½-inch (1-cm) segments with a sharp knife, dropping the pieces into the drip-catching bowl. Mix with the remaining ¼ cup (50 g) sugar and let macerate for 30 minutes.
Smash the peach pulp with a potato masher until the pulp retains some small chunky bits (but no large lumps). You should have about 1½ cups (375 cc) of purée.
Fold the peach purée into the chilled ice cream custard and splash in a few drops of kirsch, if using. Freeze according to the directions of your ice-cream maker.
Once I had embraced white peaches as an ice cream, I was all in, so thought white peach sorbet would make a light palate cleanser, particularly good after fried foods such as tempura. I try to avoid using out-of-season lemons in the summer but it couldn’t be helped. I sampled the “batter” before adding lemon and found it a tad flat. A few drops of lemon added that bright note to bring all the flavors up to the front, so don’t leave it out.
white peach sorbet MAKES ABOUT 1 QUART (1 LITER)
HAKUTO SHABETTO
1 ¾ pounds (800 g) ripe white peaches
¾ cup (150 g) organic granulated sugar
A squeeze of lemon juice
A few drops of kirsch
Cut the peaches in half and peel over a medium-sized saucepan to catch the juices. Once peeled, slice with a sharp knife, dropping the pieces into the drip-catching saucepan as you go.
Add 2 tablespoons water and cook over low heat, stirring, for about 10 minutes, or until the peach pieces are hot to their centers. Remove from the heat.
Purée in a food processor or blender but do not wash the warm saucepan. You should have about 3 cups (750 cc). Return the peach purée to the saucepan and stir in the sugar. Continue stirring off heat until the sugar is dissolved. Squeeze in a few drops of lemon juice and kirsch. Chill.
Freeze according to the directions of your ice-cream maker.
Years ago, Tadaaki got a line on some small, intensely flavored pineapples grown organically in Okinawa. We waited (im)patiently for them each year. But since they were only available during a one-week period in August, sometimes we missed it. The tricky thing is that the harvest time follows nature, so each year it is slightly different. But then one year we heard devastating news. The pineapple grower had drowned the winter before, and his wife had not been able to continue on in his place. We ordered pineapples from another organic grower, but they just were not the same—until this year. Growing things takes more than planting seeds or tending trees. It takes a person who really cares. And it takes a person who understands intuitively what the vegetables or fruits need to thrive. We still did order periodically, but did not feel as compelled to as before. Nonetheless, I did not give up hope for that perfect pineapple to come my way again. And it did. The pineapple ice cream (and sorbet) I made from the pineapple was the best of the summer—and maybe the best ice cream and sorbet I have ever tasted.
pineapple ice cream MAKES ABOUT 1 QUART (1 LITER)
PAINAPPURU AISU
1 small ripe organic pineapple (about 1 pound/500 g)
¾ cup (180 cc) heavy cream
6 tablespoons (90 cc) milk
¾ cup (150 g) organic granulated sugar
3 egg yolks, at room temperature
A few drops of vanilla extract
Lop the top off the pineapple and remove the peel with a sharp knife. Cut out the eyes with the tip of the knife. Stand the pineapple upright on a cutting board and quarter vertically. Lay each quarter wedge down on the board and slice off the hard center core section. Cut the pineapple into large chunks and slide into a medium-sized nonreactive saucepan. Heat almost to boiling. Remove from the heat and pulse in a food processor or blender until chunky but not puréed. There should be about 1¼ cups (550 cc) or so of purée.
Pour the cream and milk into a small nonreactive saucepan with the sugar and heat over low heat, stirring occasionally, until the sugar has dissolved.
Warm the yolks with a couple of ladles of warm cream mixture and pour back into the saucepan with the remaining warm cream and milk.
Heat over low heat until slightly thickened (see here). Strain into the pineapple purée. Add a few drops of vanilla, stir gently to mix, and chill overnight.
Freeze according to the directions of your ice-cream maker.
On its own or paired with Pineapple Ice Cream, this sorbet will surprise you. (Reserve the core, peel, and top to make homemade pineapple vinegar. Steep with a handful of organic sugar and a few gallons of water for three months in a clear glass jar covered with cheesecloth under the hot summer sun.)
pineapple sorbet MAKES ABOUT 1 QUART (1 LITER)
PAINAPPURU SHABETTO
2 small ripe organic pineapples (about 2½ pounds/1 kg or so)
½ cup (100 g) organic granulated sugar
Kirsch (optional)
Cut the tops off the pineapples and slice off the peel with a sharp knife. Pare out the eyes with the tip of the knife. Stand the pineapples upright on a cutting board and quarter vertically. Lay each quarter wedge down on the board and slice off the hard center core. Cut the pineapples into large chunks and purée in a food processor or blender. There should be about 3 cups (750 cc); if not, adjust the sugar (1 cup/250 cc pineapple purée : 3 tablespoons/45 g sugar).
Heat the sugar with ¾ cup of the pineapple purée in a heavy-bottomed nonreactive saucepan, stirring over low heat to dissolve. Fold into the unheated pineapple purée and stir in a couple of drops of kirsch, if using.
Freeze according to the directions of your ice-cream maker.
I came across a recipe for peanut brittle in David Lebovitz’s The Perfect Scoop, and especially loved that he had gotten it originally from Mary Jo Thoresen. I had intended to use that method for my sesame brittle, but not in love with corn syrup (or using thermometers), I opted for adapting David’s “croquant” method on the adjacent page. I met David at Food Blog Camp and am hooked on his quirky blog posts. He also puts out some damn good dessert cookbooks (and a laugh-out-loud memoir with recipes). Mary Jo and her husband, Curt, cooked with the Chez Panisse crew at the second Soba Dinner we staged there in 2010. I find comfort in the interconnectedness of the world of food, especially since I live on a farm in rural Japan. Through food, I am part of a larger, supportive community.
sesame brittle SERVES 12
GOMA BURITORU
1 cup (150 g) unhulled sesame seeds
1 cup (200 g) organic granulated sugar
Line a baking sheet with a piece of heavy-duty aluminum foil.
Toast the sesame seeds over medium-high heat in a slope-sided wide frying pan until fragrant and just starting to pop. Sesame seeds burn easily, so you must be attentive. Shake the pan, lifting it off the heat once in a while. Spread out the sesame seeds (up the sides of the pan) to even the heat distribution. When the seeds start to pop, immediately remove from the heat and pour them into a small bowl to cool.
Measure the sugar into a light-colored medium-sized, medium-weight saucepan. If you use organic sugar, the caramelization process is somewhat difficult to gauge and the sugar can easily burn. A light-colored pan is useful; also a medium-weight pan (as opposed to heavyweight) will slow the heating process a bit, so it works in your favor.
Heat over medium heat and roll the pan a bit as the sugar starts to bubble and brown on the edges. A heatproof spatula is helpful to gently nudge the sugar “islands” into the melting caramel if you are careful and don’t overwork.
As soon as all the sugar granules are completely melted, dump in the sesame seeds, mix quickly but thoroughly, and scrape onto the foil-lined baking sheet. Smooth the hot sugar and seed mixture as thinly as you can—it cools immediately on contact with the foil, so move smart!
Cool completely, peel away from the foil, break into pieces, and serve as a garnish to complementary desserts such as ice cream. Use part of the foil to line a plastic container or tin box. Store pieces of sesame brittle, set side by side (not stacked or overlapping), using the rest of the foil (torn into pieces) to separate the layers. Keeps for several week at room temperature, depending on the humidity.
VARIATION: Replace the sesame seeds with 1½ cups (150 g) roasted chopped peanuts, pecans, or walnuts.

In the sixteenth century, Portuguese merchants and missionaries became the first Westerners to enter what was then feudal Japan. The Portuguese eventually were given the boot by Shogun Iemitsu Tokugawa in the middle 1600s, when Japan closed her gates to the world. The shogunate did not take kindly to Christian proselytizing; however, the Portuguese did manage to introduce a number of foods that were adapted and assimilated into what is now traditional Japanese cuisine. Tempura and castella are just a couple of those foods. Castella is similar to pound cake but has a syrup component and is more dense in texture. Also castella is not often made at home.
Kanchan serves pound cake at the end of most meals at his restaurants, so for me it works as a Japanese dessert. In my early years in Japan, I had a little pound cake business going. I learned to hate those temperamental, though tasty cakes. My younger sister Lisa is the cake queen in our family and she swears by (and gave me) Rose Levy Beranbaum’s The Cake Bible. When I make cakes, I use that book because I trust my cake-savvy sister (and Rose Levy Beranbaum). But this recipe (adapted from Lindsey Shere’s Rose Geranium Pound Cake method) won’t disappoint you.
pound cake MAKES 4 SMALL LOAVES OR 1 LARGE BUNDT CAKE
PAUNDO KEIKI
2½ sticks (170 g) unsalted butter, at room temperature, plus more for the pan(s)
2⅔ cups (400 g) unsifted cake flour, plus more for the pan(s)
1⅓ cups (265 g) organic granulated sugar
¾ teaspoon fine sea salt
6 eggs, at room temperature
1½ teaspoons vanilla extract
Preheat the oven to 325˚F (165˚C). Butter and flour four mini loaf pans or a 10-inch (25-cm) tube or Bundt pan.
Measure the flour into a medium-sized bowl and whisk to break up any lumps. Cream the butter, sugar, and salt together in a medium-large bowl with a hand mixer until well emulsified and fluffy.
Break the eggs into a medium-sized bowl and add the vanilla. Slurp the eggs in, 2 at a time, to the batter. Beat until the eggs are nicely incorporated and there are no ripple breaks on the surface of the batter. Scrape down the sides between egg additions.
Add the flour in 4 increments. Scrape in a quarter of the flour, beat at low speed until creamy, scrape down the sides, and continue until all the flour has been added and the batter is thick and velvety.
Divide the batter among the small loaf pans or smooth into the tube pan and rap smartly on the counter to eliminate any air pockets. Bake the small loaves for 45 to 50 minutes or the tube pan (or Bundt) pan for 75 minutes. The cakes should be golden brown. Cool for 3 minutes in the pans. Invert the cakes onto a clean dish towel, then set on a cake rack to finish cooling. Cut and serve when completely cool.
Tadaaki began making custard when he had an excess of eggs (or milk, since I tend to order too much, a vestige of my ingredient-less childhood). He whips it up for the egg workers’ ten o’clock tea break. Originally he used small fluted metal pudding cups because that was the Japanese way. And not wanting to “bother me” by asking where the vanilla was, he bought the only vanilla flavoring available locally—vanilla essence, not real extract. I stepped back and let him have at it. I had only ever made custard in the oven, so didn’t really want to get involved in his stovetop method. But over the years, Tadaaki, Mr. Wing It, ended up perfecting “the recipe” and realized the benefit of sometimes following a formula. He flavors with vanilla or occasionally instant espresso powder. I thought ginger would complement the delicate flavor of this milk-based custard. And it does.
ginger custard MAKES 8
SHOGA PURIN
2 cups (500 cc) milk
¼ cup plus 2 scant tablespoons (75 g) organic granulated sugar
5 large farm-fresh eggs, at room temperature
1 teaspoon ginger juice, squeezed from finely grated fresh ginger
Pour the milk into a heavy-bottomed saucepan, stir in the sugar, and dissolve over medium-high heat. Stir occasionally. Do not let it boil!
Just before the milk reaches a boil, remove from the heat and let cool for 1 minute.
Whisk the eggs lightly until the whites and yolks are incorporated but not frothy. Pour the hot milk into the whisked eggs in a slow, steady stream, whisking continuously. At this point, the custard will naturally be at the perfect ambient temperature, about 160–175˚F (70–80˚C).
Preheat eight ceramic ramekins (½ cup/125 cc) in a bamboo or metal steamer set over a large pan of simmering water. Strain the milk mixture, add the ginger juice, and fill the warm ramekins about three-quarters full. Steam for 15 minutes over low to medium-low heat. The trick here is to steam the custards slowly—even taking up to 22 minutes. For the most silky results, stay on the low end of the temperature setting, and then after 15 minutes, increase the heat just a speck and check every 2 minutes. Toward the end you can gauge the doneness by giving the steamer a little jiggle and seeing how the custard reacts. It should have turned from soupy to a gentle soft consistency.
Remove the steamer from the heat. Serve warm or let cool to room temperature before serving. Also good chilled. (After cooling, cover with foil and refrigerate.)

POUNDING MOCHI
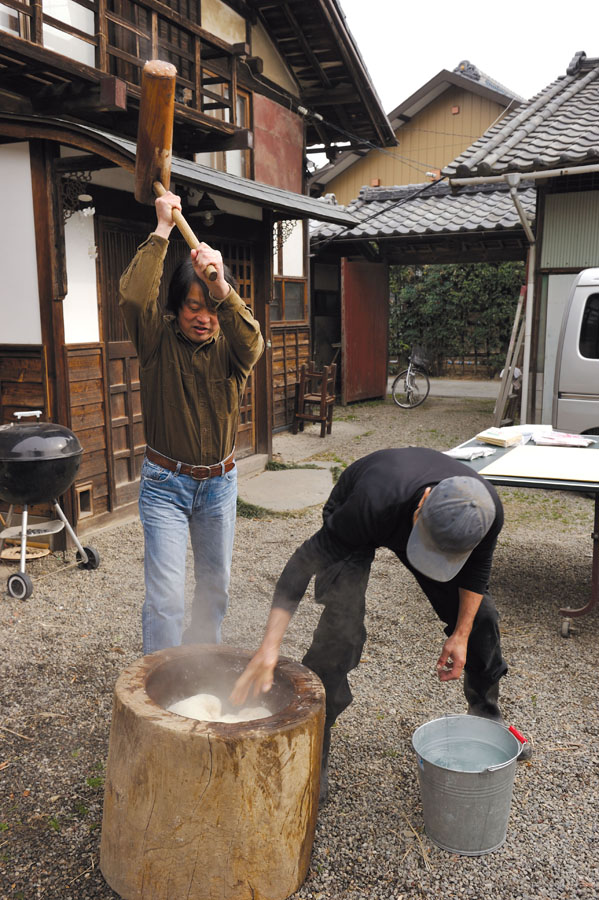


My mother-in-law has a severely bent back caused by the postwar calcium-poor diet and years of working in the rice fields. But at eighty-three, she still makes ohagi on every traditional farming holiday. These sweets go very well with tea and make a tasty and healthy afternoon snack.
The first time I made ohagi with my preschool students, they had a grand old time and begged to make them again the following week. Sadly, sweet bean paste (anko) is not wildly popular with Japanese children today, and chocolate has replaced this traditional azuki bean paste as the flavor of choice. Perhaps it is because so few people make it by hand and because it is often overly sweet. There is a myth that making anko is difficult. Not true. Use organic azuki beans and organic sugar, and what can go wrong?
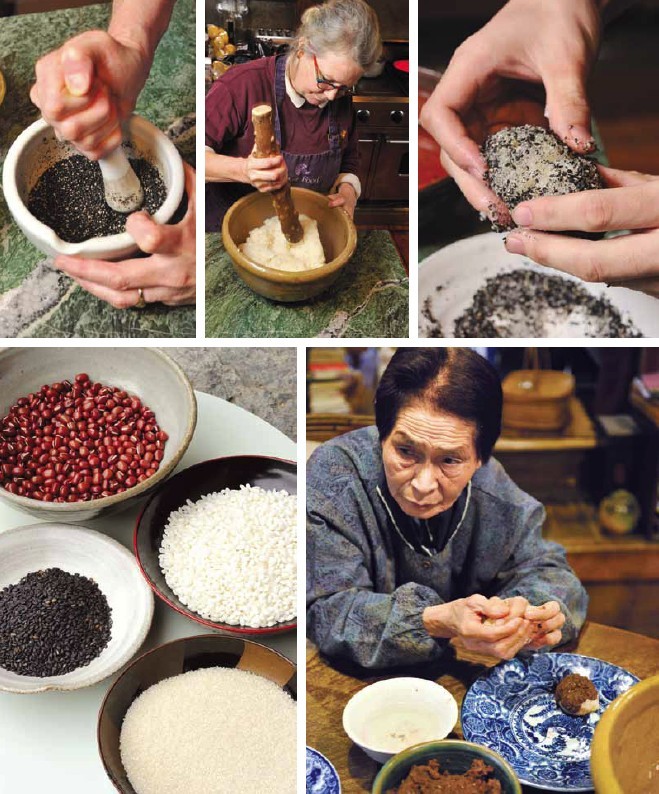
pounded sticky rice sweets MAKES ABOUT 24
OHAGI
2 cups (500 cc) glutinous rice (mochi gome)
2 cups (500 cc) minus 3 tablespoons filtered or spring water
TOPPINGS
4 tablespoons sesame seeds
1 tablespoon organic sugar
¼ teaspoon fine sea salt
4 tablespoons soybean powder (kinako)
1 tablespoon organic sugar
¼ teaspoon fine sea salt
1 cup (250 cc) azuki beans
¼ cup (50 g) organic sugar
¼ teaspoon fine sea salt
Wash the glutinous rice until the water runs clear. Place the rice in a rice cooker. Add the filtered water and let stand overnight. Cook in the rice cooker on the okawa (おかわ) setting or in a heavy saucepan according to the cooking method for Plain Rice.
Transfer the cooked glutinous rice to a large mixing bowl and mash with a large wooden pestle (surikogi) until the rice grains adhere into a sticky mass. There should still be visible grains. Let cool 20 minutes for easier handling.
Set a small bowl of cold water by your side. Dip your fingers in the water to keep the rice from sticking to your hands. Shape the rice into 4 by 2-inch (10 by 5-cm) oblongs. Finish by using one of the three toppings.
Sesame: Toast the sesame seeds in a dry pan over medium heat just until they start to pop. Grind roughly in a suribachi or mortar, add the sugar and salt, and mix. Pour the sesame mixture onto a small plate and roll the rice oblongs in it to coat.
Soybean powder (kinako): Mix the soybean powder, sugar, and salt. Follow the above procedure for rolling the rice pieces.
Azuki bean paste (anko): Measure the azuki beans into a medium-sized, heavy pot and fill the pot three-quarters full with cold water. Bring to a boil over high heat, remove from the heat and let sit 1 hour. Drain, return the beans to the pot, and fill with cold water to about 2 inches (4 cm) above the beans. Bring to a simmer and cook for about 15 minutes, then throw in a ½ cup (125 cc) of cold water. This is known as “surprise water” (bikkuri mizu): it shocks the beans and softens them. Bring back to a simmer and cook until the beans just get soft (about 10 or 15 minutes). Stir in the sugar and salt and continue cooking uncovered, stirring occasionally, until the beans start to fall apart and most of the water has evaporated. If there is still too much liquid left in the pan, boil over high heat to reduce (but take care not to burn the bottom). Mash roughly. The paste should be about the consistency of mashed potatoes but still chunky (technically this style of anko is called tsubu-an). Smooth the anko around the rice oblongs. This recipe makes 3 cups (750 cc), but leftover anko keeps well for several months or more in the freezer.

My youngest son Matthew was hot to become a wagashiya (traditional Japanese sweet maker) several years ago, and he set about making all sorts of Japanese sweets. But a few years ago, after being homeschooled all their life, Matthew and brother Andrew entered Japanese junior high. No more dreams of being a wagashiya, no more going up to the pottery studio to throw plates or bowls—it was basketball and school all the way (though Matthew did pick up the guitar a year or so ago and Skypes with brother Christopher about music and chords). Matthew and Andrew ducked out whenever Miura-san was photographing for the book, so other than a couple photos, are absent from these pages. The boys have some contrived idea that taking their picture takes a part of their souls. Okaaay . . . I wonder where they picked that up?
Kuzu mochi may not be traditional to Tadaaki’s farm family, but I include it because, unlike some of the other sweets, it is uncomplicated and quick to make. Kuzu mochi also combines a couple of my favorite elements in Japanese sweets: kinako and kuromitsu (soybean flour and black sugar syrup). Originally from warabi (bracken) roots, nowadays this is made from kuzu starch. At the height of Matthew’s wagashiya days, he made these often, so this recipe is for Matthew.
kuzu sweets with black sugar syrup MAKES 16 PIECES
KUZU MOCHI
⅔ cup (3.5 oz/100 g) kuzu starch (hon kuzu)
¼ cup (50 g) organic sugar
FOR SPRINKLING
6 tablespoons soybean powder (kinako)
1½ tablespoons organic sugar
¼ teaspoon fine sea salt
Black Sugar Syrup or blackstrap molasses (optional)
Sprinkle 1 tablespoon of the sweetened kinako powder on each bottom surface of two 8 by 4-inch (20 by 10-cm) metal loaf pans.
Fill a wide pan about halfway with water, set a steamer basket over the water, and bring to a simmer over high heat.
Measure the kuzu and sugar into a medium-sized pan and whisk in 1 cup (250 cc) water until no kuzu lumps remain. Add 1½ cups (375 cc) more water, whisk briskly, and cook over medium heat, stirring constantly with a flat wooden spoon. After a while, you will be able to see a few rice-shaped clear gobules here and there. At this point, turn the heat down to low and continue cooking (and stirring) until the liquid thickens into a smooth, milky-white paste, then finally changes to become almost clear. Remove the saucepan from the heat and smooth the hot paste into the two prepared loaf pans. Most likely both pans will not fit in the steamer, so steam one by one over medium heat for 20 minutes (before steaming the second pan of kuzu mochi, be sure to add more hot water to the pan under the steamer since it will have evaporated).
When the kuzu mochi is cool, cut each pan into 8 pieces. To serve: sprinkle a little sweetened kinako on a small plate, lay a piece or two of kuzu mochi on top, sprinkle with some more kinako, and drizzle to taste with some black sugar syrup or molasses, if using.
Kuzu mochi only keeps for a day or two, so serve and eat quickly. Do not refrigerate because the sweets will harden and fade in both color and flavor.
I never really loved the texture of steamed buns, and by the time I came on the scene, my mother-in-law was using store-bought flour and locally made azuki bean paste (anko). Like many farmer women of her generation, decades of postwar privation while raising kids and helping on the farm paved the way for embracing ready-made or store-bought when more prosperous times came. Tadaaki’s father had also stopped growing wheat for flour, so there was that as well. After college, Tadaaki returned home to work on the farm and not only revived old growing customs but also added new. He began to grow wheat again for the udon noodles they ate every night for dinner, and after we were married he experimented with growing hard red wheat for bread flour. There was a bit of trial and error involved in finding the right variety and drying method (the heating hopper overheated the grain, often rendering it gummy). In the meantime, Baachan lost the energy to make manju. Tadaaki occasionally would pair up with Matthew for a manju-making session, but by this time I had given up on sampling them (especially since I don’t take tea breaks). Baachan often asks me, “Ocha arate kun nai?” (“Won’t you drink some tea?”) when I’m dashing out the door. She always asks with a giggle, because she knows I can’t stop. (And don’t.)
Flour from homegrown wheat and anko made at home are sublime. Such homemade manju are nothing like the factory-made manju that abound in Japan, a favorite omiyage (presents from trips to other areas of Japan). But that’s another story.
steamed buns stuffed with azuki paste MAKES 12
SAKAMANJU
1 cup (250 g) anko
1 ⅓ cup (200 g) or more good-tasting unbleached cake or pastry flour
2 tablespoons organic sugar
2 teaspoons baking powder
¾ cup (8.8-oz/250-g package) organic amazake
Make the anko earlier in the day or the day before because it needs to cool before handling.
Measure the flour, sugar, and baking powder into a medium-sized mixing bowl and whisk to break up any lumps. Stir the amazake in slowly with a wooden spoon. Turn the dough out onto a clean, flat surface dusted with flour. Rub off any lingering wet dough scraps left on the sides of the bowl with some flour and drop them on top of the dough. Knead the whole mass gently, adding flour as necessary, until the dough has developed the soft consistency of your earlobe. Return the dough to the bowl, cover with a damp cloth, and let rest for an hour.
While the dough is resting, make 12 anko balls, drape with plastic wrap, and set aside on a medium-sized plate.
Cut parchment paper into twelve (3-inch/7.5-cm) square pieces and place in a bamboo steamer.
After an hour, the dough should have risen a bit but will not be as active as a typical bread dough leavened with yeast. Dust very lightly with flour (this is a slightly sticky dough) and knead a couple of turns. Separate the dough into 4 equal sized balls, roll those into short, fat sausage-like shapes, and pinch each of those into 3 balls for a total of 12.
Working with 4 balls at a time, reroll each dough ball so it is evenly rounded. Flatten the dough on the palm of your hand a bit, then roll/stretch into a ⅓-inch (8-mm) thick, 2½-inch (6-cm) wide circle. Pinch around the perimeter of the circle to thin the edge and to increase the size of the circle to about 3½ inches (9 cm). Place 1 anko ball in the middle of the circle and pinch up the outside edges of circle to form a dome-shaped bun. Arrange, seam side down, on top of the parchment paper pieces in the bamboo steamer. Let rest 30 minutes before cooking.
Fill a wide pan halfway with water and bring to a boil over high heat. Set the steamer vessel on top of but not in the boiling water and steam for 20 minutes. Remove from the heat and serve at room temperature. Do not open the steamer while cooking or cooling, except for one peek after 20 minutes to make sure they are done! The buns are best the same day but will keep wrapped in plastic then stored in a resealable plastic bag for a day or two. Do not refrigerate.
Not all tea snacks need to be sweet, and since farm work can be quite physical, salty flavors are also welcome. These dango were traditionally made unsweetened, brushed with soy sauce and slow grilled over a charcoal fire. If you have never smelled that indescribable aroma of gently caramelizing soy sauce intermingled with the tantalizing smoke from artisanal Japanese charcoal, well . . . you haven’t lived. For me that is the smell of Japan.
You will need six (6-inch/15-cm) bamboo skewers to make this recipe.
soy sauce–broiled dango balls MAKES 6 STICKS OF 4 DANGO
DANGO
1 cup (175 g) rice flour for dango (joshinko)
3 tablespoons organic soy sauce
Sweet Soy-Flavored Sauce (optional)
Bring a large, wide pot of water to a boil.
Set a large bowl in the kitchen sink and fill with cold water. Drop the bamboo skewers into the bowl.
Measure the joshinko into a medium-sized bowl. Whisk to break up any lumps and slowly add ¾ cup (175 cc) hot water to form a firm but pliable dough. Grasp the side of the bowl with one hand and knead the dough briefly with your other hand.
Divide the dough into 24 equal-sized balls and drop into the boiling water. After about 8 or 10 minutes, the balls will rise to the surface. Cook for another 4 minutes and remove from the boiling water by scooping up with a wire mesh strainer and dumping into the bowl of cold water in your sink. Run more cold water into the bowl to keep the overall temperature cool, but be careful the dango don’t flow out of the bowl and escape into the sink.
Prepare a small charcoal “hibachi”-style brazier (shichirin). The charcoal takes some time to burn down and the low embers are best for cooking. Alternatively, set the broiler rack on the third position from the top and heat the broiler.
Remove the skewers from the bowl before draining the cooled dango. Let air dry for a few minutes on a non–terry cloth kitchen towel. Pat dry if you are pressed for time.
Thread 4 dango balls onto each skewer so that they are gently nestled up next to each other but not smashed together. They should be centered on the skewer. Brush with soy sauce and broil or grill about 2 minutes on each of their 4 “sides,” brushing with more soy sauce each time you turn the skewer.
Serve hot from the grill with a cup of Japanese green tea for a midmorning or afternoon snack. If you prefer a sweeter flavor, dip in the sauce before serving.