
MAKE-THE-MOST-OF BAKING
EXTRA-COCONUTTY EGGS-IN-A-HOLE
MIGAS WITH SWEET POTATO RUSKS & CHINESE SAUSAGE
EGGPLANT PANZANELLA WITH FOCACCIA
PANISSE PANZANELLA WITH WILTED & RAW LETTUCES
EGG SALAD MELT WITH ROASTED ASPARAGUS
TEA-INFUSED STICKY BUN BREAD PUDDING
EXTRA-COCONUTTY EGGS-IN-A-HOLE
makes up to 4 large rotis

For someone who is more interested in eating than cooking, my father’s breakfast game is strong. When my brother and I were little, one of our favorites was what Dad did with a piece of bread, a lot of butter, an egg, and a slice of American cheese. It was a Sunday treat, made when Mom was sitting under her egg-shaped hair dryer and we couldn’t contain our hunger anymore. “Egg-in-a-hole with cheese, please!” we’d shout.
This recipe introduces my roti to the flavors of a Singapore specialty called kaya toast, which is filled with butter and a sweet coconut jam and dipped into soy sauce–seasoned soft-boiled eggs. I cut a hole in the roti’s center, flip it over, and, just like Dad did, place an egg in the well. When it’s ready, I smear it with coconut butter and drizzle it with maple syrup and soy sauce. For this “egg-in-a-hole,” skip the cheese, please, and thank you.
4 tablespoons coconut oil
1 recipe Extra-Coconutty Roti batter
4 large eggs
4 teaspoons coconut butter
4 tablespoons maple syrup
6 teaspoons dark soy sauce (see Notes)
6 tablespoons unsweetened coconut flakes, toasted (see Notes)
1 Preheat a 10-inch cast-iron skillet on the stovetop, gradually raising the heat from low to medium. Once the pan is hot, add 2 teaspoons of the coconut oil and tilt to coat. Drop 1 cup of roti batter into the pan. In the first minute, use a spatula to flatten and spread the batter—it should be ¼ inch thick and take up most of the skillet, leaving some room for flipping—and then use a 2½-inch biscuit cutter to remove a hole in the center of the cooking roti. Leave the roti to cook for 3 minutes more, until its underside begins to brown, then flip it over with a spatula.
2 Quickly reduce the heat to medium-low and add 1 teaspoon of the coconut oil into the hole in the roti. Crack an egg into the hole. Cook for 2 minutes, then cover the pan for another minute, until the egg whites have just set but the yolk is still runny. If the egg whites haven’t quite set, continue cooking the roti, uncovered, until they have, watching the pan very closely so the egg doesn’t overcook.
3 Immediately take the pan off the heat and, using a spatula, move the egg-filled roti to a serving plate. Spread 1 teaspoon coconut butter on it; drizzle it with 1 tablespoon maple syrup and 1½ teaspoons dark soy sauce, and sprinkle it with 1½ tablespoons toasted coconut flakes. Repeat the process with the rest of the batter and ingredients to make 3 more eggs-in-a-hole.
NOTES
• You can substitute 2 teaspoons regular soy sauce plus 1 teaspoon honey for 1 tablespoon dark soy sauce.
• To toast coconut flakes, preheat your skillet on the stovetop, gradually increasing the heat from low to medium-high. Add the coconut, using a wooden spatula to move the flakes around to toast them evenly, 4 to 5 minutes.
OATMEAL BREAD POPARA
serves 3 to 4 for breakfast
This is loosely based on a recipe for a Serbian popara, a savory breakfast porridge made with stale bread, water or milk, butter, and a soft white cow’s-milk cheese. With at least half a loaf of my Nutmeg-Spiced Oatmeal Bread on my counter the day after I’d baked it, I wanted to see how it might translate into that porridge. The popara recipes I found looked a tad austere (I couldn’t help but think of Oliver Twist and his gruel), although they do use butter, which I consider proof of pleasure taking and good taste. Rather than boiling the bread, I toasted it in my skillet, before letting it soak up enhanced almond milk. I don’t know how this would be received in Central Asia, but I think young Oliver would ask for more, twice over, at least.
1½ cups unsweetened almond milk
¼ teaspoon freshly grated nutmeg, or ⅜ teaspoon ground
¼ teaspoon vanilla extract
3 tablespoons unsalted butter
⅔ stale loaf of Nutmeg-Spiced Oatmeal Bread, cut into 1-inch cubes (4 to 4½ cups)
3 teaspoons dark brown sugar
¼ teaspoon salt
1 tablespoon almond butter
¼ cup whole almonds, toasted and coarsely chopped
1 In a measuring cup, stir the almond milk, nutmeg, and vanilla and set aside.
2 Preheat a 10-inch cast-iron skillet on the stovetop, gradually raising the heat from low to medium. When the skillet is hot, add the butter. When it is melted and sizzling, add the cubes of stale bread, stirring them until well coated. Sprinkle 2 teaspoons of the brown sugar over the bread cubes, followed by the salt, and continue to stir. The sugar will melt and combine with the butter.
3 Let the bread cubes cook for 5 minutes, until they are nicely toasted and their edges are well caramelized. Reduce the heat to medium-low and pour the spiced almond milk into the pan. It will sizzle and bubble up, then settle into a simmer. Reduce the heat further, if necessary. Simmer the bread in the liquid for 7 minutes, or until the bread cubes absorb the almond milk, begin to break down, and, in turn, thicken whatever liquid hasn’t cooked down or been absorbed. You will be left with a chunky porridge and no liquid in the pan.
4 Remove the skillet from the heat and stir the almond butter into the porridge. Taste it for sweetness, and, if you want, sprinkle the remaining 1 teaspoon brown sugar over the top and stir again to combine. Garnish with the toasted almonds and serve hot.
FARL FRITTATA WITH HALLOUMI
serves 4 for lunch or 6 to 8 for a snack
A frittata is Italy’s tart-shaped answer to the omelet. It’s a group-friendly dish that can be readily shared and presents quite elegantly. It’s also an excellent way to use up extra produce, or, as chef Jody Williams of Buvette taught me, leftover loaves. Scattered amid the light, springy, cooked eggs, hunks of crusty bread absorb some of the yolky batter and become custardy. Halloumi’s creaminess runs through the sunny yellow surface, while a liberal use of fresh herbs offsets all of the richness of the dish.
6 large eggs
½ teaspoon salt, plus more to taste
1 tablespoon fresh marjoram leaves, torn if large
1 tablespoon fresh thyme leaves
1 tablespoon chopped fresh dill
¼ loaf Irish Soda Farls, or 2 cups bite-size pieces stale country loaf or ciabatta
1 tablespoon olive oil
¾ cup cubed halloumi (1 by 1 by ½ inch)
Best-quality extra-virgin olive oil, for drizzling
Coarsely ground black pepper, for garnish
1 Preheat the oven to 400°F. Preheat a 10-inch cast-iron skillet on the stovetop, gradually raising the heat from low to medium-low.
2 In a medium bowl, using a fork, whisk together the eggs, salt, marjoram, thyme, and dill. Tear the farls into large bite-size chunks and drop them into the egg mixture.
3 When the skillet is hot, add the olive oil. It should sizzle. Pour the frittata mixture into the pan. Gently jiggle the pan to evenly distribute the bread and herbs. Increase the heat to high and cook for 1 to 3 minutes, until the bottom of the frittata sets and is evenly pale gold (but not brown). While it’s setting, use a spatula to loosen the batter from the sides of the skillet. This will prevent sticking and slightly lift the frittata, allowing it to cool off so it stays loose. At this point, the top should still be liquid.
4 Evenly dot the frittata with the halloumi cubes and move the pan to the oven for 5 to 8 minutes so the cheese can soften and the top of the frittata can set. Keep an eye on it; you don’t want it any darker than a deep gold. (Browning on the edges is okay, but should otherwise be avoided.)
5 Garnish the finished frittata with a generous drizzle of extra-virgin olive oil, making sure to get the craggy chunks of bread, and add as much freshly ground pepper and, if necessary, extra salt as you like. Serve hot or at room temperature.
MIGAS WITH SWEET POTATO RUSKS & CHINESE SAUSAGE
serves 3

My so-called migas is not so very Spanish, although its Aragonese forebear, which I hoarded at chefs Alex Raij and Eder Montero’s Brooklyn restaurant La Vara, is. I use lap cheong, a type of Chinese sausage in place of chorizo, because I am absolutely mad about the funky, dried sticks of porky dynamite. Their sweet pungency and aromatic complexity are in keeping with the flavors of my Sweet Potato Rusks, which provide the base for this scramble. Fried eggs turn it into a more complete meal, and once cut into, their soft, runny yolks act as a voluptuous sauce. This is one of the dishes in this book that I find myself longing for often. If you don’t have a batch of sweet potato rusks lying around, you can substitute store-bought challah or brioche, or even Parker House rolls.
4 cups (6- to 7-day-old) Sweet Potato Rusks, torn into ½-inch pieces
2½ links dried Chinese sausage (lap cheong), sliced on an angle into ¼-inch-wide pieces (¾ cup)
1 bunch (about 7) scallions, dark green parts only, left whole and trimmed to fit the pan
1 tablespoon unsalted butter
3 large eggs
½ cup canola oil
1 garlic clove, lightly crushed
1 teaspoon salt
2 tablespoons coarsely chopped fresh cilantro
1½ teaspoons garam masala
1 cup halved seedless red grapes
Zest of 1 small lime
1 tablespoon rice wine vinegar
Hoisin sauce
Sambal oelek or your preferred chili paste
1 Preheat the oven to 200°F. Spread the bread pieces out on a baking sheet and bake for about 1 hour, until the chunks have dried out and crisped up. Remove the sheet from the oven and set it aside to cool.
2 Meanwhile, preheat a 10-inch cast-iron skillet on the stovetop, gradually raising the heat from low to medium. Once the pan is hot, add the sausage and sauté for 3 to 4 minutes, until crispy. Transfer the sausage to a small bowl and set aside, then drain the rendered fat into another small bowl and reserve.
3 Raise the oven temperature to 450°F. Wipe the skillet out, blotting any excess sausage fat. Place the scallions in the pan, drizzle them with 1 teaspoon of the reserved fat, and cook in the oven for 10 to 15 minutes, until they’ve begun to brown and their edges turn crispy. Remove the skillet from the oven and transfer the scallions to a small plate. Once they’re cool enough to handle, slice them into 1-inch batons and set aside.
4 Wipe the skillet out and return it to the stovetop over medium heat.
5 In a large nonstick or well-seasoned carbon-steel skillet (see On Frying Eggs), melt the butter over medium heat. Once it is melted and sizzling, crack the eggs, separately, into the pan and fry them for 2 to 3 minutes, until their whites are cooked through and their yolks just set; you want the latter to remain soft. Transfer the fried eggs to a plate and set them aside.
6 Return the cast-iron skillet to the stove and preheat it, gradually raising the heat from low to medium. Once the pan is hot, add the canola oil. When the oil is hot, add the crushed garlic and cook it for a minute or two, flipping it over until it’s golden brown on both sides (be careful not to let it burn). Remove and discard it.
7 Reduce the heat to low. Add the toasted bread pieces and salt to the pan, stirring to evenly coat the bread with oil. Add the cilantro and cook, tossing or stirring with a wooden spatula or spoon, for 5 to 7 minutes, until the croutons are golden and crispy. Add the garam masala, stir to incorporate, then remove the pan from the heat.
8 Quickly add the sausage, grapes, scallions, and lime zest and toss or stir to distribute everything evenly. Add the vinegar and toss or stir to combine. Place the fried eggs over the mixture and drizzle with about 2 tablespoons hoisin sauce and about 1 teaspoon sambal oelek (more or less of each, according to your taste).
9 Serve immediately, distributing the migas among 3 plates, making sure there’s an egg on each.
On Frying Eggs
We can all agree that the cast-iron skillet is a versatile surface capable of so many culinary feats, but it’s not the best for egg cookery. It’s hard on the poor dears, and although it’s relatively nonstick—and it becomes increasingly so with regular use and seasoning—it’s not as nonstick as other materials.
My favorite pan for frying eggs is not the expected Teflon, which definitely gets the job done. It’s a well-seasoned carbon-steel pan—specifically the one hand-crafted in Seattle by the husband-and-wife duo of Blu Skillet. The carbon steel heats evenly, which cast iron does not, and this is better for cooking more delicate items, like eggs. If cast iron is all you have, you can still use it to fry eggs. Just make sure the pan is well seasoned, remember to preheat it first, and watch it so you don’t get an overcooked, solid yolk.
PAN-ROASTED BISCUIT GNOCCHI
serves 3

At Hog & Hominy in Memphis, Tennessee, I had a perfectly executed gnocchi al pomodoro, true to form, except for one difference: the dough had been made using stale biscuits, an ingenious way to transform scraps into a soul-satisfying plateful. Andrew Ticer and Michael Hudman’s Southern-Grandma-Meets-Italian-Nonna pasta inspired me. Full of confidence, I was excited to take my Sorghum Biscuits in a similar direction with butter, sage, pine nuts, and grated Parmesan. For the life of me, I couldn’t figure out how they made those soft, fluffy dumplings. I caved and asked for help. Using their procedure, I increased the flavor factor with grated fresh nutmeg, ground white pepper, and a deep-green pesto. If you don’t feel like making that sauce yourself, you could get a store-bought basil number. The gnocchi won’t suffer for it…too much.
1½ cups dried-out, day-old biscuit crumbs (from about 7 biscuits or 1 recipe Sorghum Biscuits; see Notes)
6 tablespoons grated Parmesan cheese
8 gratings fresh nutmeg
½ teaspoon fine salt
¼ teaspoon ground white pepper
¾ cup vegetable stock, at room temperature
3 large egg yolks
¾ cup “00” flour (see Notes)
1 tablespoon kosher salt
1 tablespoon unsalted butter
1 tablespoon olive oil
Pan-Fried Sage Pesto, for serving
½ teaspoon lemon zest, for garnishing
1 In a large bowl, using a wooden spoon, stir the biscuit crumbs, Parmesan, nutmeg, fine salt, and white pepper together to combine. Place the vegetable stock in a small bowl, add the egg yolks, and whisk until incorporated. Make a well in the seasoned biscuit crumbs, pour the yolk-stock mixture into the center, and stir with a wooden spoon or use your hands to combine the wet and dry ingredients.
2 Add ½ cup of the flour and use your hands to gently incorporate it to form a dough. If it’s too wet, continue to add the flour, 1 tablespoon at a time, until it comes together and is smooth. Give it a quick knead, making sure not to overwork it or you’ll get heavy gnocchi, and let it rest, covered with a kitchen towel, for 1 hour at room temperature.
3 Turn the dough out onto a clean work surface. You shouldn’t have to flour it, but if you’re at all worried, put a Silpat mat down first. Divide the dough into quarters and, working with one at a time, use your fingers to roll each quarter out into a snakelike rod 1 inch wide and 6 to 8 inches long. As you roll the rod and it lengthens, move your fingers out toward the edges and continue to roll until you’ve reached the desired diameter. Cut the rod into ½-inch portions using a bench scraper or a sharp knife. Using a fork or your thumb, press lightly into each gnocchi to flatten its top. Place the shaped gnocchi onto a parchment paper–lined baking sheet and cover them with plastic wrap or a kitchen towel until you’re ready to cook them. If you’re not cooking them immediately—the same day, ideally, or else the following day—you can freeze them in an airtight container for up to 1 month.
4 When you’re ready to cook the gnocchi, fill a medium pot (about 4-quart capacity) with water and add the kosher salt. Bring the water to a boil over high heat. When the water seems close to boiling, fill a large bowl with ice and water. Place a colander in the bowl; you should have enough water in the bowl to fill the colander.
5 Once the water is boiling, add the gnocchi, sliding them off the baking sheet. After about 3 minutes, the gnocchi should float up to the surface. Using a slotted spoon, drain the gnocchi as you lift them from the water and transfer them to the colander to stop the cooking. Using your slotted spoon, transfer the gnocchi from the colander to the (relined) baking sheet. If you aren’t planning to serve them right away, you can set them aside, covered with a kitchen towel, for a few hours or else freeze them for later use. (They don’t need to be thawed before finishing.)
6 When you’re ready to serve the gnocchi, preheat a 10-inch cast-iron skillet on the stovetop, gradually increasing the heat from low to medium. When the pan is hot, add the butter and olive oil. When the butter is melted and sizzling, tilt to coat and add half the gnocchi. Toast the gnocchi, using a spatula to flip them over so each side can get golden, about 2 minutes per side. Transfer the finished gnocchi to a plate to keep warm while you toast the remaining boiled gnocchi in the skillet. You shouldn’t need to add more butter or oil.
7 To serve, divide the gnocchi into 3 portions and top each with about 1½ tablespoons of pesto. Garnish with a grating of lemon zest.
NOTES
• To dry the biscuits out, put them on a baking sheet in the oven overnight at 150°F (or, if your oven doesn’t go that low, as close to that as possible, but no higher than 200°F). Place the dried-out biscuits in the food processor and pulse until you’re left with fine crumbs.
• Ticer and Hudman use Italian “00” (doppio zero) flour for their recipe. It’s more finely ground than the all-purpose stuff and yields softer gnocchi. But you can use all-purpose flour if that’s what you’ve got.
GINGERBREAD CHALLAH BOSTOCK
makes 6 or 7

There is nothing at all wrong with French toast. But, ironically enough, the French themselves have something even better—bostock. It’s self-contained, for one—the stale bread soaks in an almond-flavored syrup, so you don’t need to sauce it and can carry it with you. And you get a free gift with purchase: a frangipane cap. The fluffy butter-and-almond cream is slathered on the syrupy bread and, once baked, forms a delicate crispy crust. This particular bostock is special on two counts: 1) It features that headily spiced gingerbread challah, and 2) Lily Freedman ratcheted up the aromatics with a black-pepper curveball.
When writing a cookbook, it is customary and advised—if not mandatory—to make sure someone else tests your recipes after you’ve done so yourself. Lily was that someone else. She performed her job painstakingly, applying her exceptional palate, uncanny—possibly photographic—memory, and frighteningly sharp attention to detail to each new flatbread or sweet I sent her way. I thought it would be nice—just this once—if we swapped roles. She would turn my challah into bostock, then I would test her recipe. With her frangipane, she knocked it out of the park. Its ginger and clove echo that of the bread, and then there’s that lingering tease of a peppery tickle.
3 slices stale Challah D’Epices, 2 inches thick
1 teaspoon butter
1 Preheat the oven to 350°F with a 10-inch cast-iron skillet in it.
2 Using a 2¼-inch biscuit cutter, cut the challah slices into 6 or 7 rounds, depending on how much usable surface area you have. Dunk each round into the Almond Syrup until it is fully soaked, then give it a gentle squeeze to expel the excess liquid and place it on a large plate with the others. Spread about 2 tablespoons of the Frangipane over the top of each round to create a thick layer. Try not to let the frangipane go over the edges of the challah to avoid excessive spillage onto the skillet during baking and make cleanup easier.
3 Remove the skillet from the oven and add the butter, tilting to coat. Place the rounds in the pan and return it to the oven to bake for about 20 minutes, until the frangipane begins to harden and turn golden. Using a spatula, immediately transfer the rounds from the skillet to a wire rack to cool.
ALMOND SYRUP
makes about 1 cup
¼ cup leftover challah glaze (see Challah D'Epices recipe; see Notes)
¼ cup packed light brown sugar
2 tablespoons buckwheat honey
1 teaspoon almond extract
½ teaspoon vanilla extract
½ teaspoon salt
5 gratings of fresh nutmeg
In a small saucepan, combine all the ingredients plus 1 cup water and bring to a boil, stirring occasionally with a whisk, over medium heat. Remove the syrup from the heat, whisk again to make sure it’s well combined, and let it cool completely before use. (This can be made up to a week in advance and kept in a sealed container in the refrigerator.)
FRANGIPANE
makes about 1 cup
3 tablespoons unsalted butter, at room temperature
1 tablespoon sugar
Scant ½ cup packed almond paste, broken into 1-inch or teaspoon-size chunks
1 large egg
1½ tablespoons unbleached all-purpose flour
½ teaspoon ground cloves
½ teaspoon ground ginger
¼ teaspoon freshly ground black pepper
¼ teaspoon salt
1 In the bowl of a stand mixer fitted with the paddle, beat the butter on low speed for 1 minute or so until it’s smooth and fluffy. Add the sugar and mix for about 30 seconds to incorporate. Increase the speed to medium and mix for 2 to 3 minutes, until fluffy. Add the almond paste and beat for another 2 to 3 minutes, until the almond paste combines with the creamed butter and sugar and the mixture resembles torn pieces of Play-Doh.
2 Add the egg and continue to beat for another 30 seconds, until incorporated into a smooth paste. Return the machine to low speed and add the flour, spices, pepper, and salt and mix for a few seconds. Increase the speed to medium and mix for about 30 seconds, until the mixture looks like a light, creamy frosting. If necessary, using a rubber spatula, scrape down the sides of the bowl and mix again to make sure any additional flour is thoroughly combined.
NOTES
• The challah needs to be seriously stale—at least 3 days old—for the syrup to absorb rather than turn your bread to mush.
• If, for whatever reason, you don’t have leftover glaze, you can make another batch, up to a week in advance, and refrigerate it. If your glaze has separated in the refrigerator, bring it back to room temperature and stir to re-combine.
RASPEACH COBBLER
serves 6 to 8

As for the obvious—sweet—cobbler preparation, the coupling of peaches and raspberries isn’t anything new, but it’s unarguably sublime. Sprinkled with crunchy turbinado sugar and licoricelike aniseeds, Sorghum Biscuit dough provides the covering, and I dropped small blobs of it into the fruit sizzling in the hot pan, so that it resembles, as my friend Gabriella pointed out, cobblestones.
1½ pints raspberries (see Note)
3 cups sliced peaches (about ¼ inch wide)
½ cup granulated sugar
½ cup light brown sugar
2½ tablespoons tapioca flour
⅛ teaspoon salt
1 tablespoon fresh lemon juice
1 teaspoon vanilla extract
1 recipe Sorghum Biscuit dough
1 tablespoon unsalted butter
2 tablespoons turbinado sugar
1½ teaspoons aniseeds (see Note)
Vanilla ice cream and toasted hazelnuts (or else hazelnut gelato), for serving
1 Preheat the oven to 375°F with a 10-inch cast-iron skillet in it.
2 In a large bowl, combine the raspberries and peaches. In a small bowl, whisk together the sugars, tapioca flour, and salt. Pour the mixture over the fruit, followed by the lemon juice and vanilla. Using a wooden spoon or rubber spatula, gently mix everything together to evenly coat the fruit without breaking it. Set the bowl aside while you make the biscuit topping.
3 Make the biscuit dough without refrigerating it (you will be topping the cobbler with it right away).
4 Remove the hot skillet from the oven. Place the butter in the pan and let it melt, brushing it to coat the bottom and sides. Using the wooden spoon or spatula, ease the fruit mixture into the skillet along with any syrup that may have accumulated in the bowl.
5 Using your fingers, tear off small gobs of the biscuit dough and dot the surface of the fruit with them. Sprinkle the turbinado sugar and aniseeds over the top and bake the cobbler for 40 minutes, until the top is golden brown and the fruit is bubbling. Remove the cobbler from the oven and serve warm, with vanilla ice cream and toasted hazelnuts.
NOTE This cobbler doesn’t have to include raspberries—blueberries, cherries, plums, or figs would all make excellent companions for the peaches. Dried fruit reconstituted in hot water or brandy is another option. And if you don’t like aniseed, or want to try something new, poppy or sesame seeds are up to the task. So are crushed peppercorns—black, pink, or Sichuan.
FOCACCIA PANCOTTO
serves 3
When I’m feeling run-down or blue, I crave pappa al pomodoro, a hearty Tuscan tomato soup thickened with bread. One afternoon, in search of solace and in possession of some uneaten focaccia, I became determined to turn the doughy leftovers into pappa, using not a pot but my trusty skillet. There was one major glitch: the pomodoro. Whether or not tomatoes are bad for cast iron is up in the air, but there’s no doubt that cast iron is bad for tomatoes. Any kind of reducing or other low and slow cooking will leave them with a metallic and bitter aftertaste. I held out hope for a commendable alternative, and I found it in pancotto. Eaten throughout The Boot, its name literally translates to “cooked bread,” and its preparation varies in Italy from region to region and household to household. Stale bread appears to be the only nonnegotiable.
I chose leek and parsnip to flavor the cooking liquid and added some chili flakes for heat. The focaccia drank up the vegetal broth and began to fall apart. I pulled the resulting porridge from the heat and stirred in Sicilian Caciocavallo, a type of pecorino produced in southern Italy. Next, I heaped on my favorite leaf, arugula. Wilted by the heat of the soup, its pepperiness balanced the sweetness of the earthy parsnip and the oniony leek, and the saltiness of the focaccia and cheese. Finally, I piled on grassy, green parsley for brightness—aesthetic and gustatory. With this bowlful of comfort, I proved to myself, and now, I hope, to you, that it’s possible to make soup in a cast-iron skillet, and to do it well.
¼ loaf stale (up to 3-day-old) focaccia, sliced ½ inch thick, cut into 1-inch cubes
2 tablespoons extra-virgin olive oil, plus more for drizzling
1 clove garlic, lightly crushed
1 small parsnip (5 to 6 ounces), cut into ¼-inch dice (about 1 cup)
1 large leek, trimmed and sliced into ribbons and rinsed thoroughly in a colander
½ teaspoon salt, plus more to taste
⅛ teaspoon dried chili flakes
½ cup grated Sicilian Caciocavallo (or pecorino) cheese
2 cups arugula
Flat-leaf parsley, for garnish
1 Preheat the oven to 200°F with a 10-inch cast-iron skillet in it. When the pan is hot, add the bread in one layer and bake it until the chunks have dried out and crisped. You just want to dehydrate them; you don’t want them to darken. Remove the skillet from the oven and transfer the bread to a bowl while you work on the rest.
2 Place the empty, oven-warm skillet on the stove over medium heat. Give the pan a couple of minutes to get hotter and add the olive oil. Once the oil is hot, add the crushed garlic and cook it for a minute or two, flipping it over, until it’s golden brown on both sides (be careful not to let it burn). Remove and discard it.
3 Reduce the heat to medium-low and add the parsnip and leek along with a pinch of salt. Using a spatula or wooden spoon, stir the vegetables to coat them evenly in the oil, then sweat them for about 10 minutes, stirring a couple of times throughout the process, until they begin to look dewy and start to soften around the edges. If it seems as though they’re in danger of browning, reduce the heat.
4 Add the chili flakes and 2 cups of water to the skillet and raise the heat to medium to bring the mixture to a boil. Reduce the heat to medium-low, or low, to bring the liquid to a simmer for about 10 minutes, until the parsnip is cooked through.
5 Add the bread with 2 to 3 tablespoons more water and cook for 2 to 3 minutes, until the bread has begun to absorb the liquid and turned soft. Using your spatula or wooden spoon, mush the bread to help break it down and incorporate it into the vegetable base. At this point, the mixture should begin to resemble porridge.
6 Add ½ cup water to the pan, continuing to simmer. As the mixture cooks and absorbs liquid, add more water, 1 to 2 tablespoons at a time, up to another ½ to ⅔ cup, until you have the desired consistency (see Notes). Remove the pan from the stove, add ¼ cup of the cheese, and stir to incorporate as it melts into the soup. Add ¼ teaspoon salt and stir, again, to combine. Add the arugula and stir it into the soup to mix and wilt it. Add the remaining ¼ teaspoon salt, as needed, to taste.
7 Spoon the soup into 3 bowls. Drizzle extra-virgin olive oil over each. Sprinkle 1 tablespoon plus 1 teaspoon cheese (per bowl) on top and garnish with the parsley leaves.
NOTES
• Potatoes, white or sweet—or in combination—can stand in for parsnips; so can butternut squash or salsify, and I think charred, pan-roasted broccoli would be another way to go. Onions are easily swapped in for leeks.
• The cheese is interchangeable, too, so long as it’s salty and good for grating. You could work with chicory, or turnip or mustard greens, instead of arugula. And you could garnish with sorrel or chervil at the very end.
• You are welcome to use vegetable or chicken stock here, but I recommend water, so that you don’t muddle the flavor you’ve coaxed out of the vegetables.
• Once it starts to fall apart, the focaccia will behave like a thickening agent. You should add as much, or as little, water to the resulting porridge to achieve the consistency you desire. I like a thicker, almost stewlike soup. Some will want a thinner, brothier product.
NYC RAREBIT SANDWICH
serves 2
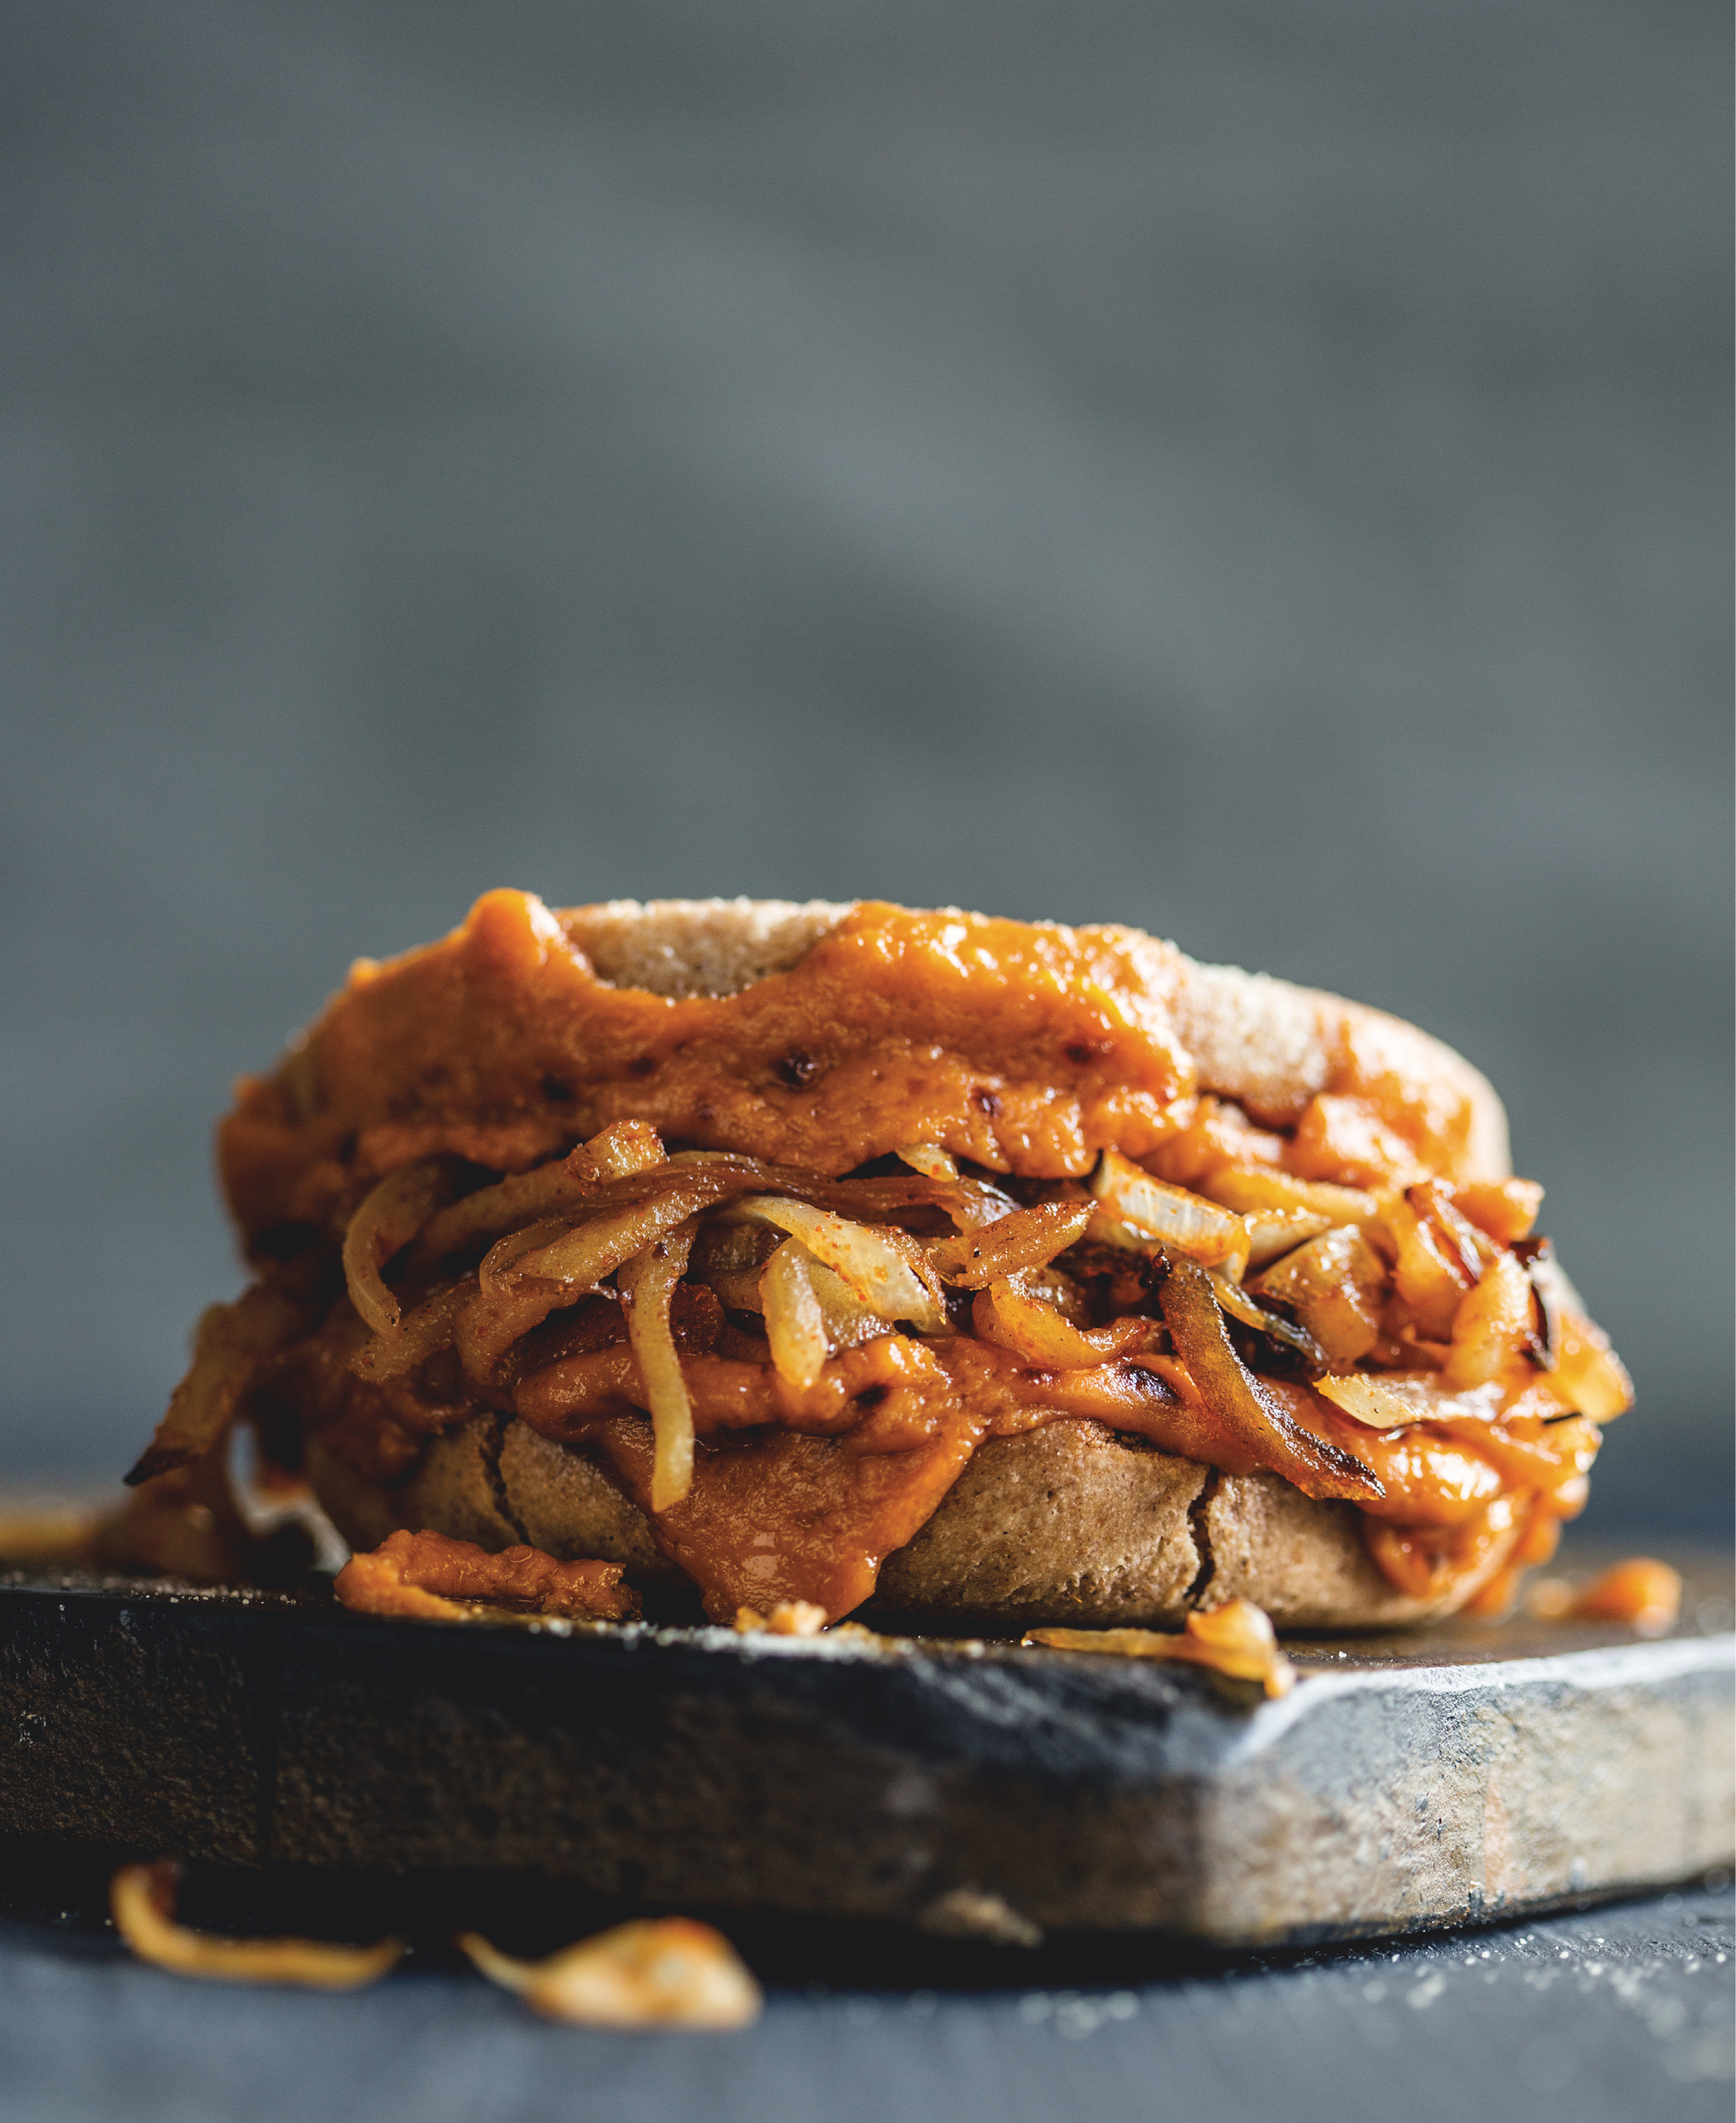
This sandwich references the world’s most perfect hangover food, the UK’s Welsh rarebit. Toasted English muffins drenched in molten cheddar perfumed with beer and Worcestershire sauce hold a mixture of sautéed apples and onions. It’s messy, as it should be. Take an obnoxiously large bite, let the cheesy lava dribble down your chin, and chase it with a hair-of-the-dog pint of Guinness—or maybe a Brooklyn-brewed stout to honor the Big Apple, where me and my rarebit were born.
APPLE AND ONION SAUTÉ
1 tablespoon unsalted butter
1 cup julienned onion
1 cup julienned peeled apple
Kosher salt
Cayenne pepper
TOPPING
2 teaspoons best-quality Dijon mustard
1½ teaspoons ketchup
1½ tablespoons stout
1 tablespoon unsalted butter
¾ teaspoon Worcestershire sauce, plus more as needed
1 cup plus 1 tablespoon grated cheddar cheese
1 egg yolk
2 English Muffins, My Way, split in half
1 Prepare the sauté: Preheat a 10-inch cast-iron skillet on the stovetop, gradually raising the heat from low to medium-high. When the pan is hot, add the butter. When it is melted and sizzling, add the onion and cook for about 7 minutes, so it softens and begins to color.
2 Add the apple and sauté for about 5 minutes more, until the onion is golden brown, the apple has softened, and their flavors have melded together. Transfer the mixture to a heatproof bowl and season with salt and cayenne. Set it aside while you make the rarebit topping.
3 Make the topping: In a small saucepan, combine the mustard, ketchup, stout, butter, and Worcestershire and heat over low heat until the butter has melted, whisking to combine. Add the cheese and, using the whisk, continue to stir, so it melts and incorporates. The mixture will be a bit lumpy, although the whisk will help smooth it out somewhat. Do not let it come to a boil.
4 Once the cheese has melted, taste and adjust the seasoning as needed, then take the pan off the heat. If it’s hot, allow the mixture to cool until it’s just slightly warm; you don’t want it to solidify. Using a whisk, beat the egg yolk into the cheese mixture until it’s smooth.
5 Preheat the 10-inch cast-iron skillet on the stovetop, gradually raising the heat from low to medium-high. When it is hot, place both halves of an English muffin facedown in the pan for about 2 minutes, to toast and begin to brown.
6 Once the inside of each half is toasted, flip it over and place 2 tablespoons of the rarebit topping on the toasted interiors. Let the muffin halves continue to cook for about 2 minutes more, until the cheese mixture is bubbling. Using a spatula, transfer them to a plate and place a heaping of the Apple and Onion Sauté on top of the bottom cheese-covered half. Gently flip the top cheese-covered half over to cover the sandwich. Repeat this process with the second split English muffin.
EGGPLANT PANZANELLA WITH FOCACCIA
serves 3
Bread is the raison d’être for any panzanella, old-style or newfangled. The first of these salads is a more authentic take. It starts with Michelle Rizzolo’s olive oil–enriched focaccia and features the usual supporting actors—tomato, cucumber, basil, and red onion—along with a special guest star: crispy-skinned, melty-fleshed eggplant.
SALAD
1 small eggplant, cut into 1-inch cubes (about 2½ cups)
½ tablespoon kosher salt
⅜ loaf stale (up to 3-day-old) focaccia, cut into 1-inch cubes (5 to 6 cups)
2 garlic cloves: 1 sliced in half, 1 lightly crushed
¼ red onion, thinly sliced
1½ tablespoons olive oil
1 medium cucumber, cut into 1-inch cubes (about 1½ cups)
1 ripe medium tomato, cut into large bite-size chunks
½ teaspoon fine salt, plus more to taste
Freshly ground black pepper
VINAIGRETTE
2 tablespoons rice wine vinegar
¼ teaspoon fine salt
1½ teaspoons maple syrup
¼ cup extra-virgin olive oil
Freshly ground black pepper
Fresh mint leaves, for garnish
Fresh basil leaves, for garnish
1 Make the salad: Preheat the oven to 200°F. In a colander set over a bowl, toss the eggplant with the kosher salt, making sure all the cubes are evenly coated. Let the eggplant sit and drain for at least 30 minutes and up to 1½ hours. Rinse the eggplant under cold water and pat it dry with a kitchen towel or paper towels, pressing out any excess water as you go.
2 While the eggplant is draining, spread the focaccia cubes on a baking sheet in a single layer and bake until the bread has dried out and crisped up. Remove the baking sheet from the oven and rub each warm cube with the raw garlic halves before transferring the bread to a large bowl so it can cool while you work on the rest. Add the garlic halves to the bowl, too, so they can continue to flavor the bread.
3 While the focaccia cubes are in the oven, place the red onion slices in a small strainer submerged in a bowl filled with ice water. Let them soak in the cold bath until you’re ready to add them to the salad.
4 Preheat a 10-inch cast-iron skillet on the stove, gradually raising the heat from low to medium. When the pan is hot, add the olive oil and tilt to coat. Once the oil is hot, add the crushed garlic and cook it for a minute or two, flipping it over, until it’s golden brown (be careful not to let it burn) on both sides. Remove and discard it. Add the eggplant cubes to the pan and sauté for 10 minutes, stirring from time to time, until the flesh has softened and turned golden brown.
5 Transfer the cooked eggplant to a large salad bowl and let it cool for 5 minutes. Add the focaccia cubes—leaving the raw garlic behind—followed by the cucumber and tomato. Drain the red onion, pat it dry, and add it to the salad bowl. Using your hands, a wooden spoon, or a rubber spatula, gently mix the ingredients together to evenly distribute them. Add the salt and 3 grinds of pepper and mix again to combine.
6 Make the vinaigrette: In a small bowl, whisk together the vinegar, fine salt, and maple syrup to combine. Whisk in the extra-virgin olive oil until emulsified. Add 3 grinds of pepper to the vinaigrette and whisk again to incorporate. Taste and adjust the seasonings, as needed.
7 Assemble the salad: Drizzle about half the vinaigrette over the salad and mix to incorporate. If you prefer a wetter, more heavily dressed salad, you can add more vinaigrette to suit your taste.
8 Let the panzanella sit for at least 30 minutes and up to 4 hours so the flavors can marinate and the bread can soak up the vinaigrette. Right before serving, tear the fresh mint and basil leaves (about 5 each) into the salad and mix to combine. Taste the panzanella and adjust the seasoning, adding more salt and pepper as needed.
PANISSE PANZANELLA WITH WILTED & RAW LETTUCES
serves 4 as a salad or side dish
Made with a less obvious “crouton” candidate—leftover Green Pea Panisse is a true celebration of spring. There are a few steps, sure; but each is quick and easy and can be done in your trusty 10-inch pan.
You will learn three new cast-iron tricks: preparing a warm vinaigrette, charring escarole, and wilting lettuce. Of course, you can also do a cheat version where you leave all the torn greens raw, keep the herbs, and use all the dressing. Either way, don’t forget the garnishes, because they bring the pea flavor to the fore and add some sharper textural contrasts to the subtler ones already in the bowl.
VINAIGRETTE
¼ cup plus 2 tablespoons extra-virgin olive oil
4 garlic cloves, aggressively smashed
3 anchovy fillets
2 tablespoons mild red wine vinegar, plus more to taste
Salt
Freshly ground black pepper
SALAD
2 tablespoons plus 2 teaspoons olive oil
½ batch Green Pea Panisse, cut into 1-inch cubes (about 4 cups; see Note)
Salt
2 tablespoons unsalted butter
3 tablespoons minced shallot
5 cups torn Boston lettuce
4 cups torn escarole
1 tablespoon chopped fresh dill
1 tablespoon chopped fresh mint leaves
3 tablespoons fresh or thawed frozen peas
3 tablespoons wasabi peas
Freshly ground black pepper
1 Make the vinaigrette: Gradually raising the temperature from low to medium-high, heat 2 tablespoons of the extra-virgin olive oil in a 10-inch cast-iron skillet. When the oil is hot, add the smashed garlic cloves to the skillet and cook for 1 minute so the garlic toasts and begins to lightly brown without burning. Remove the pan from the heat and add the anchovies. They will immediately begin to melt. Using a wooden spoon, stir the anchovies and the garlic to break them apart and evenly distribute them in the oil. If the garlic isn’t breaking up, use a fork to mash it into the oil so it incorporates.
2 Add the remaining ¼ cup extra-virgin olive oil and the vinegar to the skillet. (Add an extra teaspoon of vinegar if you prefer a more acidic vinaigrette.) Season the dressing with salt and pepper and return it to the stovetop. Bring it to a simmer over medium-low heat. Pour the finished vinaigrette into a bowl kept near the hot stove or else into a small saucepan placed over low heat on the stove so it’s warm upon serving.
3 Make the salad: Wipe out the skillet, place it back on the stovetop over low heat, and add 2 tablespoons of the oil. Gradually raise the heat to medium-high to get the oil hot. Add the panisse cubes and toast them for 5 to 7 minutes, until their exteriors begin to crisp up again and become more golden. Place the finished croutons on a warm, paper towel–lined plate and sprinkle them with a pinch of salt. Set them aside, near the hot stovetop, to stay warm while you prepare the lettuces.
4 Wipe out the skillet, place it back on the stove over low heat, and add the butter. As the butter melts, gradually increase the heat to medium-high and, when the butter is sizzling, add the shallot to the pan and sauté for 30 seconds so it can begin to soften. Add 4 cups of the lettuce. Sauté the leaves quickly, stirring or tossing them continuously for 1 minute, so they are all lightly coated with the butter and just wilted (not soggy). Remove the lettuce and shallot from the pan, draining as much of the cooking liquid as possible, and place them in a small bowl. Season the lettuce with salt and set the bowl aside.
5 Wipe out the skillet, place it back on the stove over low heat, and add 1 teaspoon of the oil, tilting to coat. Meanwhile, place 3 cups of the torn escarole in a medium bowl, making sure the leaves are completely dry. Toss them with the remaining 1 teaspoon oil. Gradually increase the heat under the skillet to medium-high, and when the pan and oil are hot, add the escarole, using a spoon or spatula to spread the leaves out to fill the skillet. Leave the escarole to cook for about 5 minutes, so it toasts on one side. Give the pan a quick toss to move the finished leaves around before placing them in a small bowl.
6 Assemble the salad: Place the wilted Boston lettuce and shallot in a large salad bowl, followed by the remaining 1 cup raw escarole. Next, add the pan-roasted escarole, followed by the remaining 1 cup raw lettuce. Drizzle half the vinaigrette (about ¼ cup) over the contents of the bowl, making sure to include some of the anchovy and garlic sediment, and toss everything together. Add the panisse croutons, dill, and mint and toss everything again. Garnish with the raw green peas and wasabi peas, season with salt and pepper to taste, and add more dressing, if necessary (it shouldn’t be).
NOTE You could, alternatively, make the croutons fresh from the panisse batter, before preparing the dressing. If you opt for this method, place the just-cooked croutons in an oven-friendly pan covered with aluminum foil, and keep them warm in a warming drawer or a low-heated oven.
MY ALL-TIME FAVORITE STUFFING
serves 4 to 6 as a side
My family isn’t big into Thanksgiving. This isn’t much of a surprise—our head cook, my mother, thinks turkey’s a waste of time, and I tend to agree. The last time we got together to celebrate the traditional way at my parents’ house was over a decade ago. Mom deigned to roast the boring bird, and I bossily insisted on handling the stuffing because it’s my favorite Thanksgiving food. I’d imagined the most perfect version made of cornbread baked in a cast-iron skillet. Two cheater moves—the purchasing of canned creamed corn and preroasted and shelled chestnuts (desperate measures)—turned out to be the smartest things I could have done for my side dish, which lived up to my fantasy. A recipe seems almost perfunctory here. You’re mostly putting some delicious things in a skillet, adding some stock and butter, and baking it all together.
½ cup packed dried figs (5 to 6 figs)
1 cup apple cider (or more to cover the figs)
1 cup store-bought cooked whole peeled chestnuts
4 cups large hand-torn chunks of 1- to 2-day-old cornbread (see Note)
½ cup canned creamed corn
½ cup frozen or fresh corn kernels
1 tablespoon fresh thyme leaves
3 fresh sage leaves, coarsely torn
Salt
Freshly ground black pepper
1½ cups chicken or vegetable stock
6 tablespoons (¾ stick) unsalted butter, divided into 4 plus 2 tablespoons, cubed, and kept separate
1 Preheat the oven to 350°F.
2 Place the figs in a small saucepan with enough apple cider to cover them and bring to a simmer. Cook the figs for 5 minutes, then remove from the heat and let cool. Drain the liquid from the saucepan and coarsely dice the reconstituted figs. Set them aside.
3 Preheat a 10-inch cast-iron skillet on the stovetop, gradually raising the heat from low to medium-high. When the skillet is hot, add the chestnuts and toast them for 5 minutes, shaking the pan or stirring them often, making sure not to burn them.
4 Take the pan off the heat, place the toasted chestnuts on your cutting board, and wipe out the skillet. Coarsely chop the chestnuts and set them aside.
5 Put the skillet back on the stove and place it over low heat to stay warm. Meanwhile, in a large bowl, using your hands or a wooden spoon, combine the torn cornbread, chopped figs and chestnuts, creamed corn, corn kernels, thyme, and sage. Be gentle when mixing everything together. You want the ingredients to be well distributed, but you don’t want the cornbread to fall apart. Season the mixture with salt and pepper.
6 Place the cornbread mixture in the skillet and pour the stock over and around it. Dot the top of the stuffing with 4 tablespoons of the cubed butter. Put the pan in the oven and bake for 45 minutes. After 30 minutes, dot the stuffing with the remaining 2 tablespoons cubed butter. Serve warm. Stored in a sealed container, leftovers can be refrigerated for up to 2 days and reheated.
NOTE Mom’s Cornbread Revisited was practically made for this dish. I had stuffing in mind when I developed the recipe! Its onions are a powerful ally of figs, chestnuts, thyme, and sage. You could use another cornbread, homemade or store-bought, but then you might want to consider adding some caramelized onions to the stuffing.
EGG SALAD MELT WITH ROASTED ASPARAGUS
serves 4 (makes 8 open-face sandwiches)

Unlike its sloppy sibling, the NYC Rarebit Sandwich, this tidy sandwich is open-face. I’d never seen egg salad pressed into service of a melt and wondered if it could be done. These musings coincided with the arrival of the season’s first asparagus. I folded the crispy, cast-iron-roasted, chopped spears into the yolky, mayo-bound salad seasoned with Dijon mustard and fresh tarragon. I placed a small pile on each crumpet and smothered it with a combination of Parmesan and mozzarella. Then I ran it under the broiler to brown the cheese. You could stop there; it’s already delicious—plus vegetarian. You could also keep going and fold a cold, thin slice of salty prosciutto over the melt right before you serve it.
1 teaspoon unsalted butter
12 asparagus spears, trimmed to 7 to 8 inches, ends peeled as necessary
1½ teaspoons olive oil
⅛ teaspoon kosher salt
6 large eggs
4 teaspoons mayonnaise (preferably Duke’s)
2 teaspoons Dijon mustard
¼ teaspoon freshly ground black pepper, plus more to taste
⅜ teaspoon fine salt, plus more to taste
½ tablespoon coarsely chopped fresh tarragon
8 untoasted Crumpets
½ cup packed grated Parmesan cheese
½ cup packed shredded low-moisture mozzarella
8 thin slices prosciutto
1 Preheat the oven to 450°F with a 10-inch cast-iron skillet in it. When the pan is hot, remove it from the oven and place the butter in it to melt, tilting to coat. Place the asparagus in the pan, drizzle the spears with the olive oil, and sprinkle them with the kosher salt. Roast for 10 to 15 minutes, until they begin to brown and their tops crisp up a bit and darken. Using tongs, turn the asparagus over midway through roasting to get both sides evenly cooked.
2 Transfer the roasted asparagus to a cutting board and let them cool down so you can cut them. Slice them into ½-inch pieces. You should have about 1 cup. Set the chopped asparagus aside. Wipe out the skillet.
3 Place the eggs in a large pot and add water to cover by ¾ inch. Cook the eggs over high heat, stirring occasionally, for 15 to 20 minutes, until just before the water starts to boil. Remove the pot from the heat and let the eggs sit in the water, covered with a lid, for 9 minutes. Drain the water and run the eggs under cold water to prevent them from cooking further. Peel the eggs and separate the whites and yolks, placing the latter in a medium bowl and the former in a small bowl. Use your hands to break the whites into uneven pieces.
4 In the medium bowl, using a fork, gently smash the yolks with the mayonnaise, mustard, pepper, and fine salt to form a paste. Fold the egg whites, then the asparagus, into the yolk mixture, evenly combining the ingredients and fluffing the salad as you go. Gently fold in the tarragon. Taste for seasoning and adjust as needed. You don’t want to overwork it.
5 Preheat a 10-inch cast-iron skillet on the stovetop, gradually raising the heat from low to medium. With a rack placed 3 to 4 inches from the oven’s ceiling, turn on the broiler. Once the pan is hot, place up to 3 Crumpets in it. Quickly top each with ¼ cup of the egg salad, followed by 1 tablespoon Parmesan and 1 tablespoon mozzarella.
6 Broil for 3 minutes, until the cheeses are browned and bubbling. Remove the pan from the oven and, using a spatula, place the crumpets on a serving platter or plate them individually, 2 per person. Repeat with the remaining Crumpets and egg salad. Place a thin slice of cold prosciutto over each and serve.
ROASTED VEGETABLE COBBLER
serves 4 to 5 as a light meal or 6 to 7 as a side dish
While a fruit cobbler seems like a shoo-in for this kind of cookbook, its vegetable equivalent is probably not a foregone conclusion for most people. It was, for me, because I had half a batch’s worth of unbaked Spiced Butternut Squash Biscuits in my fridge. I had leftover puréed roasted butternut squash in there, too, from that same recipe. Plus I’d toasted the gourd’s seeds in the hopes of employing them as a future garnish. Putting all these remainders into one dish was the best way to use them up.
7 small to medium carrots, scrubbed
1 medium to large fennel bulb
5 baby red, yellow, or orange bell peppers, or 2 large red, yellow, or orange peppers
2 teaspoons plus 1 tablespoon olive oil
½ teaspoon kosher salt
1½ teaspoons fennel seeds
1 cup ¼-inch-diced Spanish or yellow onion (about 1 medium onion)
1 dried bay leaf
½ teaspoon freshly ground black pepper
1 cup vegetable stock
½ cup heavy cream
¼ teaspoon fennel pollen
1 teaspoon honey
2 tablespoons coarsely chopped fresh parsley, plus more for garnish
½ teaspoon fine salt
½ recipe Spiced Butternut Squash Biscuit dough or savory biscuit dough of your choice
Fennel fronds, for garnish (optional)
Carrot greens, for garnish (optional)
Butternut “Crème,” for serving
Spiced Seeds, for serving
1 Prep the vegetables: Slice the carrots, on an angle, into 1½-inch rods, splitting thicker pieces in half lengthwise. Cut the fennel into roughly 1½ by 1½-inch pieces. If you are using large peppers, core and seed them before cutting them, lengthwise, into strips 2 inches wide.
2 Preheat the oven to 400°F. In a medium bowl, combine the carrots, fennel wedges, and bell peppers and, using your hands, toss with 2 teaspoons of the olive oil and the kosher salt to coat. Place the seasoned vegetables on a baking sheet and roast for 25 minutes, stirring the vegetables midway through cooking.
3 While the vegetables are roasting, start the sauce. Preheat a 10-inch cast-iron skillet on the stovetop, gradually raising the heat from low to medium-high. Once the pan is hot, add the fennel seeds and toast them for about 3 minutes, until they begin to pop and release a concentrated aroma.
4 Add the remaining 1 tablespoon olive oil and give it a few seconds to get hot. Add the onion, followed by the bay leaf and black pepper. Cook for 5 minutes, stirring occasionally with a wooden spatula, until the onion has softened and become translucent. Add the vegetable stock to the skillet; it should come to a boil almost immediately. Reduce the heat to medium-low and simmer for about 15 minutes, until the liquid in the pan has reduced by about half. Raise the heat to medium and add the heavy cream. Bring the liquid to a boil and lower the heat to medium-low. Simmer for about 25 minutes, until the liquid in the pan has reduced by half. If you push a wooden spatula through the mixture, the cream should have thickened enough so that it doesn’t immediately run back into the cleared space left behind.
5 While the sauce is reducing, return to the roasted vegetables. Once they’re ready, take the baking sheet out of the oven. Leave the oven on. Let the vegetables cool on the baking sheet for about 5 minutes, or until you can handle them. Transfer the baby peppers, if using, to a cutting board, remove their stems, and cut them into bite-size chunks, scraping away any seeds as necessary. Trim any fennel core. Place the roasted vegetables in a medium bowl and toss with the fennel pollen, honey, and parsley.
6 When the sauce has reduced to the desired consistency, stir in ¼ teaspoon of the fine salt. Turn off the heat, remove the bay leaf, and add the roasted vegetables to the skillet. Using a wooden spatula, stir to combine. Add the remaining ¼ teaspoon fine salt and stir again to incorporate. Top the mixture with seven 2-inch rounds of raw biscuit dough, or, alternatively, you can apply the dough drop-style and place a few heaping tablespoons, in gobs, over the vegetables.
7 Put the skillet in the oven. Because the dough has a tendency to rise significantly and is sitting on top of all the vegetables, you should place the pan on a rack closer to the middle of the oven. Bake for 20 to 25 minutes, until the biscuits are cooked through.
8 Serve the cobbler in the skillet, garnishing it, if desired, with additional chopped parsley, fennel fronds, and carrot greens and placing the Butternut Crème and Spiced Seeds in separate serving dishes on the side, so people can dig in and top to their taste. Or plate it individually, in bowls, garnishing each with a dollop of Crème, a sprinkling of seeds, and, if you’d like, some of the fresh herb and/or vegetable greens. In addition to working as a light supper or lunch, it can function as a side dish, and would make an especially festive one for Thanksgiving.
NOTE In terms of technique, the only real difference between this cobbler and the fruit version is that for the former, the components of the filling are cooked before being baked together. Since the vegetables don’t release the substantial amounts of natural juices that fruit would, stock and cream are combined and reduced in the skillet to create an equivalent thick binding liquid for the roasted vegetables.
BUTTERNUT “CRÈME”
makes about 1 cup
½ cup crème fraîche
½ cup puréed roasted butternut squash
2 tablespoons best-quality Dijon mustard
1 teaspoon honey
½ teaspoon salt
Place all the ingredients in a bowl and, using a rubber spatula, fold them together until completely incorporated.
SPICED SEEDS
makes about 1 cup
1 cup seeds from a butternut squash and pumpkin (see Note)
1 tablespoon granulated sugar
1½ teaspoons dark brown sugar
¼ teaspoon ground cinnamon
⅛ heaping teaspoon cayenne pepper
⅛ heaping teaspoon salt
1 Preheat an oven or toaster oven to 350°F. Toss the seeds with the sugars, cinnamon, cayenne, and salt.
2 Spread the seeds out on a baking sheet lined with aluminum foil and roast for 10 to 15 minutes, until they are toasted and beginning to pop. Midway through the cooking, give the pan a shake to help prevent sticking. Remove the baking sheet from the oven and let the seeds cool. Don’t worry if there’s some sticking; those bits are easy enough to remove from the foil and become deliciously brittlelike.
NOTE One medium butternut squash yields approximately ⅜ cup seeds, which should be scooped out, separated from any clinging squash threads, then rinsed and patted dry. Add enough pumpkin seeds to make a cup’s worth of seeds altogether.
OATMEAL COOKIE FRUIT CRISP
serves 6 to 8
If you happened to have an oatmeal cookie lying around, and if you were in a somewhat imaginative frame of mind, you might perceive that baked good as a crisp topping waiting to happen. Or maybe that’s just my own zany brand of culinary magical thinking. All I know is that I had a giant PB&C Oatmeal Skillet Cookie in front of me, and the only thing I could think to do with it was strew it over a cast-iron skillet flush with fruit.
6 tablespoons (¾ stick) plus 1 teaspoon unsalted butter
½-day-old PB&C Oatmeal Skillet Cookie
¾ teaspoon ground cinnamon
¼ teaspoon cayenne pepper
¼ teaspoon salt, plus more as needed
½ cup plus 1 tablespoon salted peanuts
3½ cups blueberries (about 18 ounces)
4 cups coarsely chopped peeled ripe mango
¼ cup plus 2 tablespoons packed dark brown sugar
Zest of 1 lime
1 Preheat the oven to 375°F. In a small saucepan, melt 6 tablespoons of the butter over medium-high heat and set it aside to cool slightly. Crumble the oatmeal cookie into a medium bowl to get a few larger, loose chunks scattered among smaller bits with a few clusters of crumbs here and there. Add the cinnamon, cayenne, and salt to the broken cookie parts and toss them together gently with your hands to combine. Taste and, if necessary, add more salt.
2 Add the peanuts to the bowl and toss to combine. Pour the melted butter over the crumb base and, using a rubber spatula, stir to incorporate, making sure all the crumbs are moistened. Set the topping aside while you make the fruit filling. (If you want to make the topping in advance, place it in a single layer in a baking pan, cover with plastic wrap or aluminum foil, and refrigerate for up to 1 day.)
3 Preheat a 10-inch cast-iron skillet on the stovetop over low heat. Meanwhile, in a large bowl, combine the fruit with the brown sugar and lime zest, stirring to mix.
4 Place the remaining 1 teaspoon butter in the warm skillet to melt, tilting to coat. Turn off the heat and pour the fruit filling into the pan. Add the topping, spreading it out to evenly cover the fruit. Bake for 15 minutes, until the top is brown and crispy. Cover with aluminum foil and bake for 20 minutes more. Serve hot or warm, from the skillet, with vanilla ice cream, crème fraîche, plain frozen yogurt, or whipped cream, sweetened to taste.
TEA-INFUSED STICKY BUN BREAD PUDDING
serves 6
Stale baguettes, rustic sourdough loaves, or fancier brioches are the default for this breed of “pudding,” a baked, custard-soaked bread dish that is usually sweet, but sometimes savory. Croissants, doughnuts, kouign amanns, and panettone have all been recruited for extra gut-busting, intensely lush expressions of this humble comfort food. Are sticky buns any more indulgent than those others? When they are Melissa Weller’s, they might be. And should you have any to spare, you’re certainly not going to chuck them.
But how to put them in a bread pudding without inducing a nauseating sugar rush or creating something so obscenely rich as to be inedible? I’ll tell you how: tea. Its tannins staunch excess sweetness and pair well with baked goods. A topping in the style of chef Nancy Silverton, who folds a jot of crème fraîche into her cold heavy cream, chimes in with a contrasting cooling note. I slip some apricot jam in there, too, for a tart, fruity pucker that, as it happens, is a verified match for fragrant Chinese oolong tea.
BREAD PUDDING
1½ cups heavy or whipping cream
½ cup milk
1 tablespoon plus 2 teaspoons loose oolong tea (see Notes)
⅓ cup sugar
6 large egg yolks
½ teaspoon vanilla extract
⅛ teaspoon salt
4 sticky buns, each cubed into 6 pieces
APRICOT WHIPPED CREAM
1 cup heavy cream
¼ cup crème fraîche or sour cream
¼ cup best-quality apricot jam
1 Make the bread pudding: In a small saucepan, warm the cream and milk over low-medium heat. Bring the mixture just below boiling point; when you see little bubbles around the rim of the milk, turn off the heat. Using an infuser or small strainer, submerge the oolong tea into the hot liquid. Cover the saucepan and let the tea steep for at least 45 minutes, until the liquid is cool. Remove and discard the tea. (You can also add the oolong buds directly and pour the infused liquid through a fine-mesh sieve to strain it before incorporating.) Gently warm the infused cream mixture over low heat while you prepare the rest of the custard base.
2 In a large bowl, whisk together the sugar and egg yolks until they’re well blended. Slowly add the warm infused cream, whisking constantly to incorporate. Using a fine-mesh sieve, strain the mixture into another bowl and skim off any foam. Add the vanilla and salt and stir to combine.
3 In a large, wide bowl, place the sticky bun cubes and pour the custard over them. Lay a piece of plastic wrap on top of the mixture and put a smaller dish or bowl on top of the plastic wrap to act as a weight to keep the sticky bun cubes submerged in the custard. Add additional weights, such as a stack of even smaller bowls or a large canned item, if necessary. Set it aside to sit for 1 hour, until the cubes are soaked through.
4 Meanwhile, preheat the oven to 325°F with a 10-inch cast-iron skillet placed on a middle rack. Put the mixing bowl and whisk for the whipping cream in the freezer to chill.
5 Fill an ovenproof pan or dish with water and place it on the bottom rack in the oven, and remove the hot skillet. Uncover the soaking cubes and pour them with the custard and any remaining morsels into the cast-iron skillet and cover it with aluminum foil. Using a fork, prick a few holes in the foil to allow steam to escape. Bake it, covered, for 40 minutes.
6 Remove the foil from the skillet and bake for another 15 minutes to let the top brown a bit, without drying out the bread pudding. The buns should looks glossy, with bubbling pockets of melted butter being released.
7 Meanwhile, make the apricot whipped cream: Remove the chilled bowl from the freezer and attach to a stand mixer fitted with a whisk, then begin to whip the heavy cream on low speed until it thickens. Raise the speed to medium-high, continuing to whip. Stop the mixer right before the cream is able to hold soft peaks. Remove the bowl from the machine and, using a whisk, finish whipping by hand. (Alternatively, you can whip the cream with a handheld electric mixer or with a whisk entirely by hand. Just make sure your bowl and whisk are cold.) Using a rubber spatula, fold in the crème fraîche followed by the apricot jam.
8 Remove the finished bread pudding from the oven and let it sit in the skillet for a couple of minutes to set before serving it hot in bowls or on plates with a generous dollop or two of the Apricot Whipped Cream.
NOTES
• You can adjust the amount of tea depending on the type and quality of leaves you’re using. If you’re going with a stronger black tea (a Darjeeling or Earl Grey), a tea with a more pronounced flavor (a fermented Pu-erh or a smoky Lapsang Souchong), or a heavily spiced varietal (Chai), you can use the same quantity. Herbals, like chamomile or rooibos, are weaker so you may need to use more leaves.
• Bread puddings are frequently baked in a bain marie (or water bath) to ensure even cooking with a creamy, moist consistency and a glossy finish. Quick to rust, cast iron can’t be subjected to that technique, hence the pan full of water at the bottom of the oven, which generates steam heat.
