Sheet vinyl is a classic flooring material that is easy to install and simple to maintain.
Preparing a perfect underlayment is the most important phase of resilient sheet vinyl installation (see pages 184 to 189). Cutting the material to fit the contours of the room is a close second.
The best way to ensure accurate cuts is to make a cutting template. Some manufacturers offer template kits, or you can make one by following the instructions on page 377. Be sure to use the recommended adhesive for the sheet vinyl you are installing. Many manufacturers require that you use the glue they provide for installation.
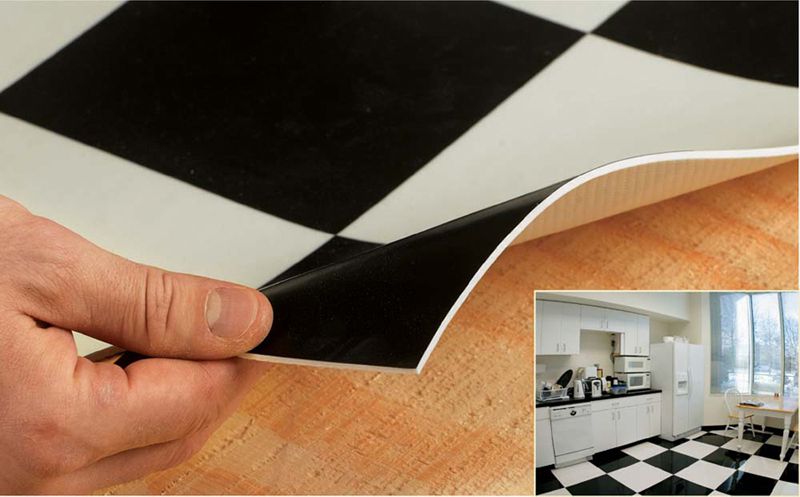
Use extreme care when handling the sheet vinyl, especially felt-backed products, to avoid creasing and tearing.
Sheet vinyl is a classic flooring material that is easy to install and simple to maintain.
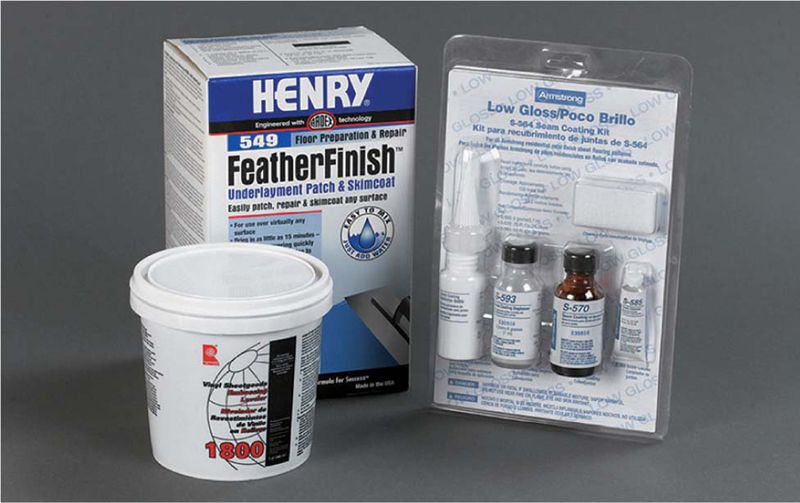
Tools & Materials 
Linoleum knife
Framing square
Compass
Scissors
Non-permanent felt-tipped pen
Utility knife
1/4" V-notched trowel
J-roller
Stapler
Flooring roller
Sponge
Chalk line
Hammer
Heat gun
Straightedge
Vinyl flooring
Masking tape
Heavy butcher paper
Duct tape
Flooring adhesive
5/8" staples
Metal threshold bars
Nails
Wallboard knife
Wallboard saw
Protective equipment
 TOOLS FOR INSTALLING RESILIENT FLOORS
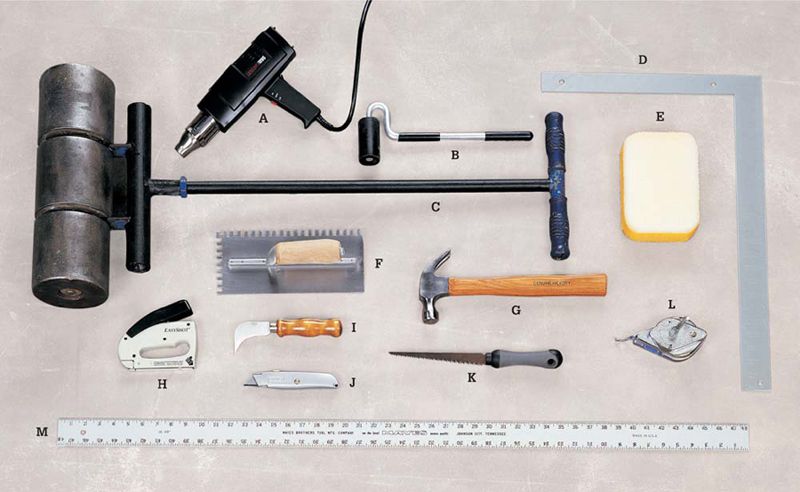
Tools for resilient flooring installation include a heat gun (A), J-roller (B), floor roller (C), framing square (D), sponge (E), notched trowel (F), hammer (G), stapler (H), linoleum knife (I), utility knife (J), wallboard saw (K), chalk line (L), and straightedge (M).
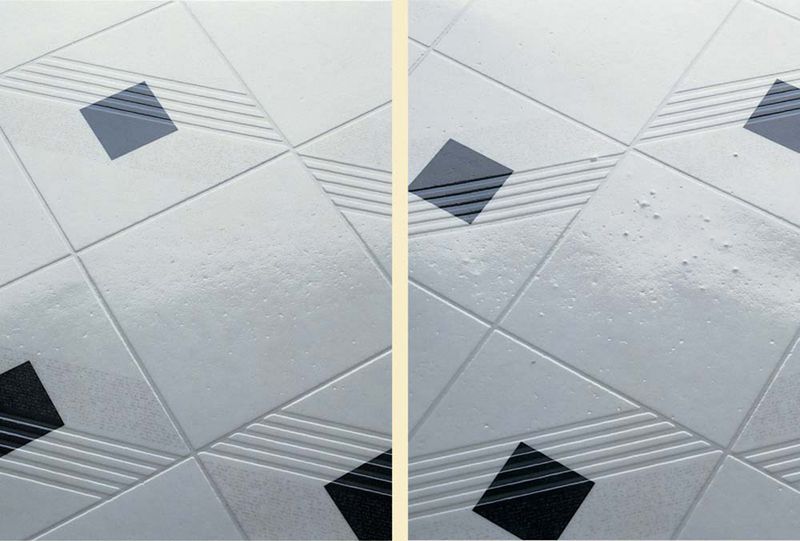
RESILIENT FLOORING TYPES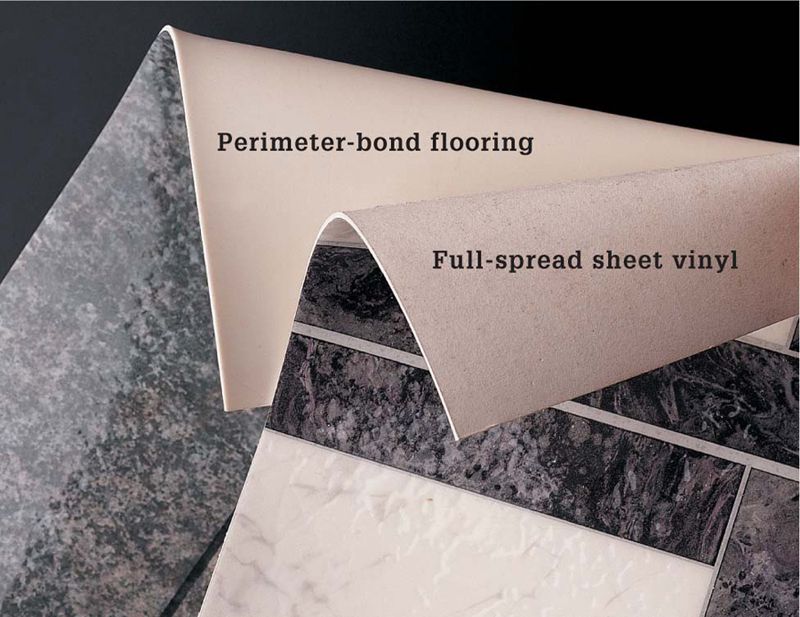
Resilient sheet vinyl comes in full-spread and perimeter-bond styles. Full-spread sheet vinyl has a felt-paper backing and is secured with adhesive that is spread over the floor before installation. Perimeter-bond flooring, identifiable by its smooth, white PVC backing, is laid directly on underlayment and is secured by a special adhesive spread along the edges and seams.
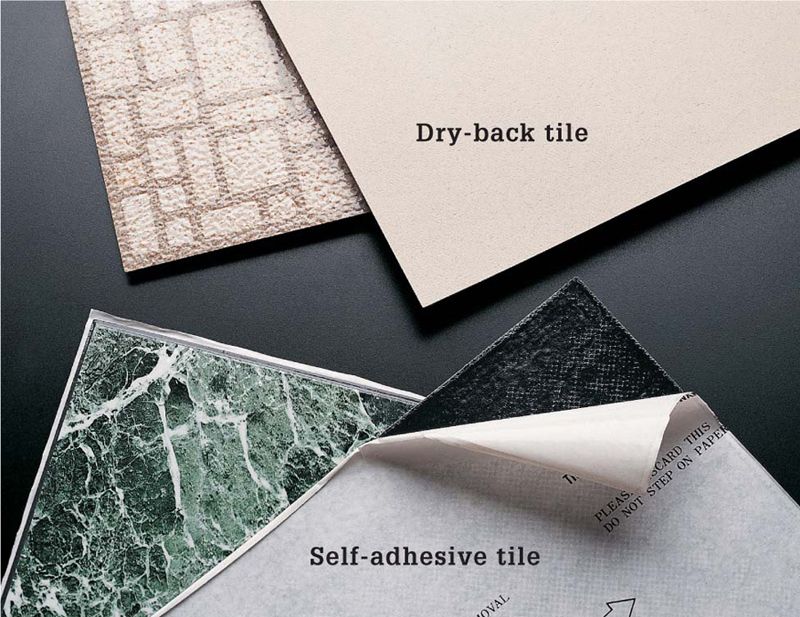
Resilient tile comes in self-adhesive and dry-back styles. Self-adhesive tile has a pre-applied adhesive protected by wax paper backing that is peeled off as the tiles are installed. Dry-back tile is secured with adhesive spread onto the underlayment before installation. Self-adhesive tile is easier to install than dry-back tile, but the bond is less reliable. Don’t use additional adhesives with self-adhesive tile.
Sweep and vacuum the underlayment thoroughly before installing resilient flooring to ensure a smooth, flawless finish (left). Small pieces of debris can create noticeable bumps in the flooring (right).
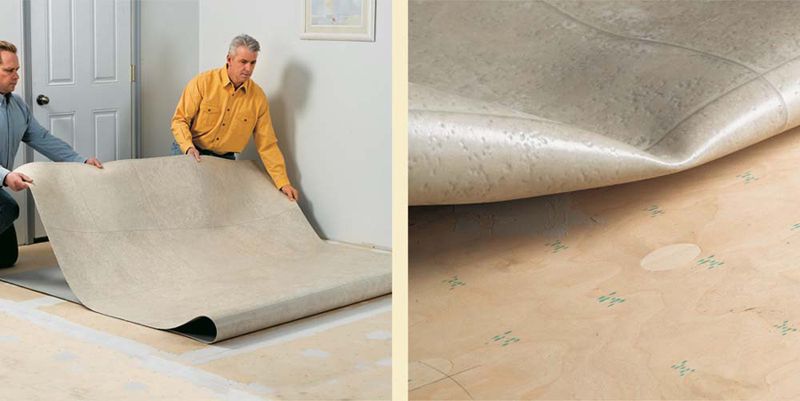
Handle resilient sheet vinyl carefully to avoid creasing or tearing (right). Working with a helper can help prevent costly mistakes (left). Make sure the sheet vinyl is at room temperature before you handle it.
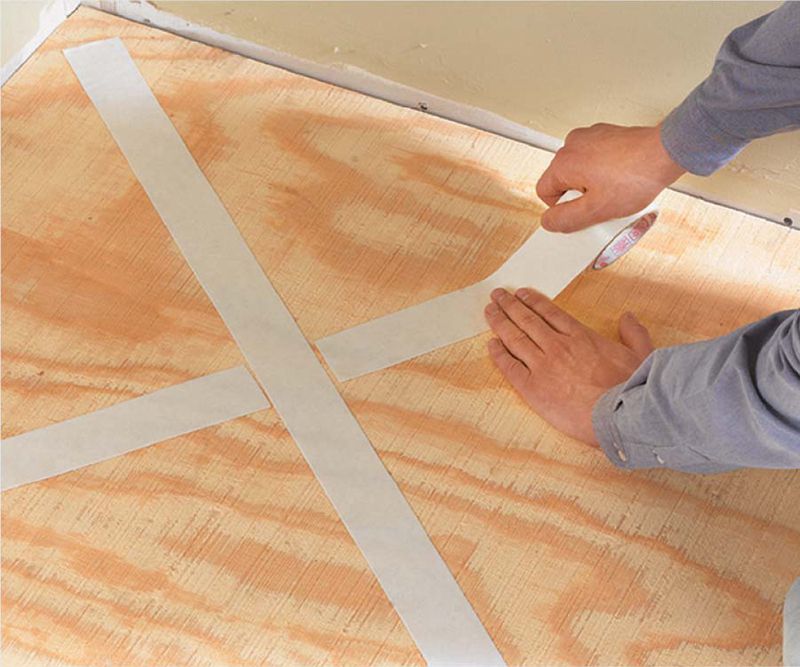
HOW TO MAKE A CUTTING TEMPLATE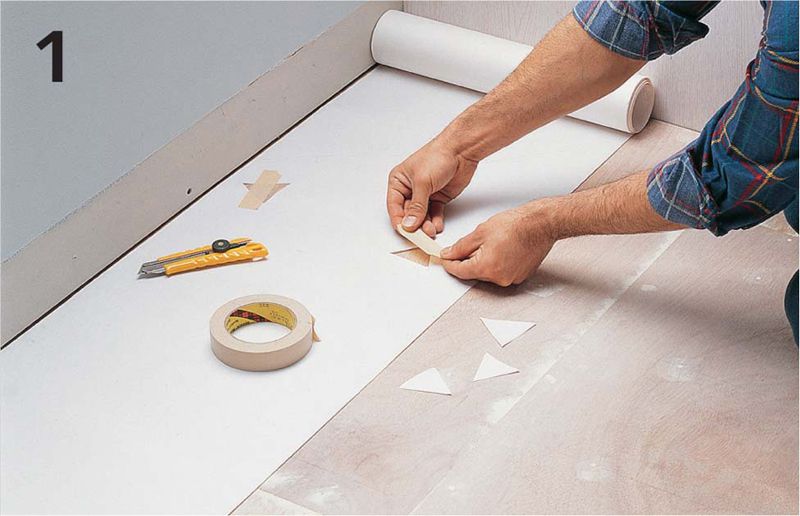
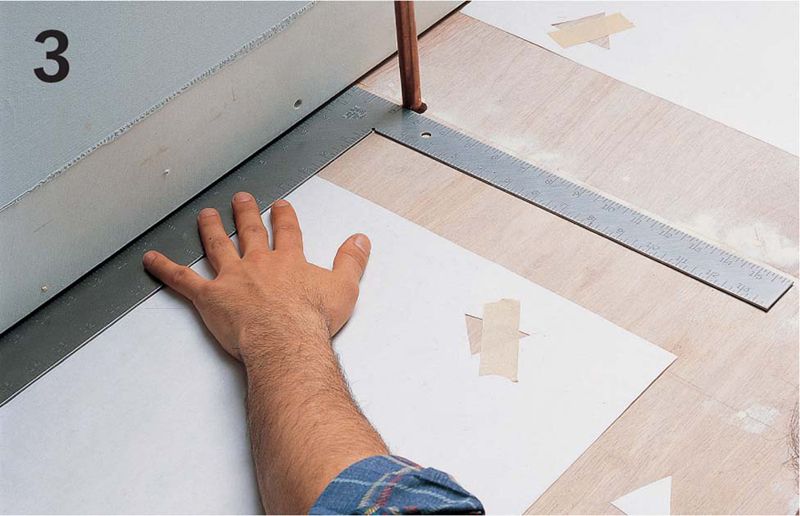
Place sheets of heavy butcher paper or brown wrapping paper along the walls, leaving a 1/8" expansion gap. Cut triangular holes in the paper with a utility knife. Fasten the template to the floor by placing masking tape over the holes.
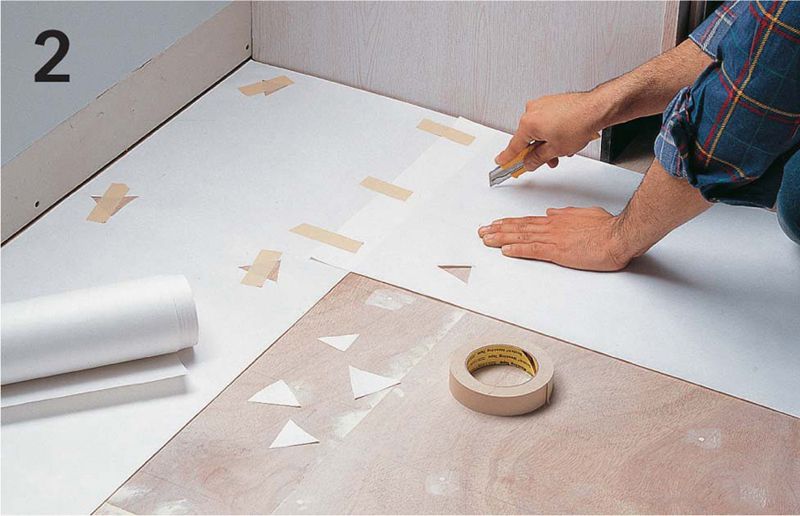
Follow the outline of the room, working with one sheet of paper at a time. Overlap the edges of adjoining sheets by about 2" and tape the sheets together.
To fit the template around pipes, tape sheets of paper on either side. Measure the distance from the wall to the center of the pipe, then subtract 1/8".
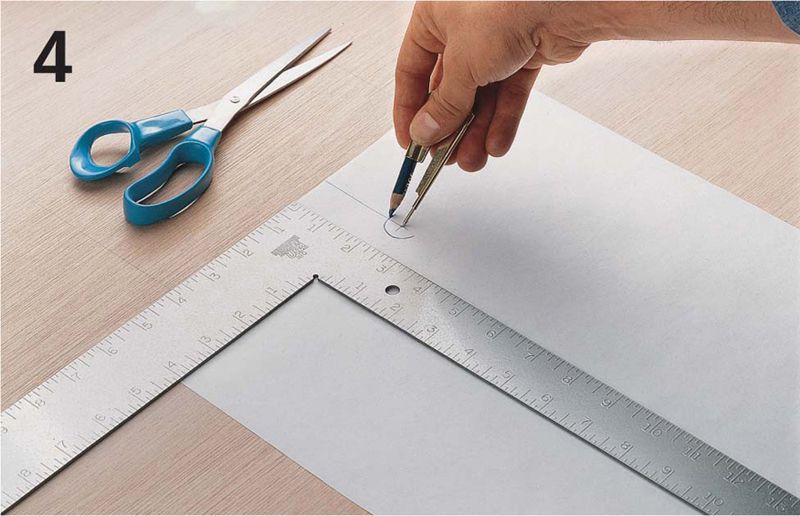
Transfer the measurement to a separate piece of paper. Use a compass to draw the pipe diameter on the paper, then cut out the hole with scissors or a utility knife. Cut a slit from the edge of the paper to the hole.

Fit the hole cutout around the pipe. Tape the hole template to the adjoining sheets.
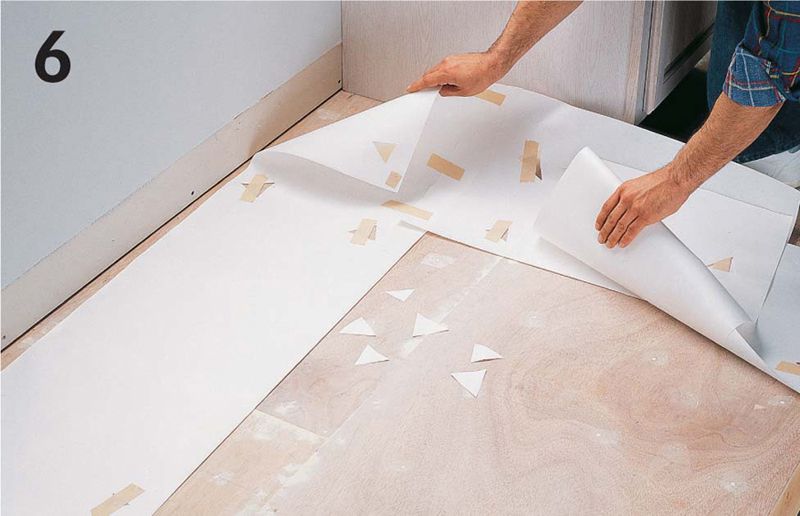
When completed, roll or loosely fold the paper template for carrying.
HOW TO INSTALL PERIMETER-BOND SHEET VINYL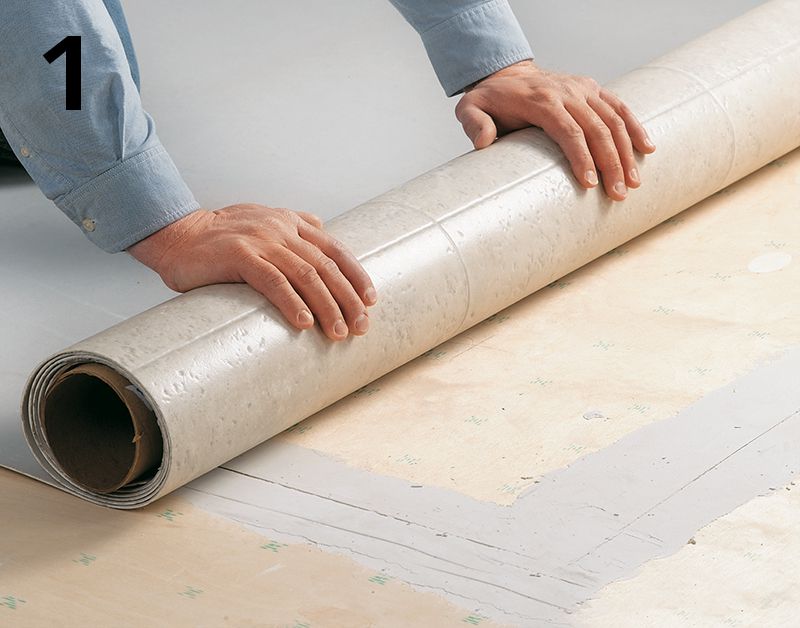
Unroll the flooring on any large, flat, clean surface. To prevent wrinkles, sheet vinyl comes from the manufacturer rolled with the pattern-side out. Unroll the sheet and turn it pattern-side up for marking.

For two-piece installations, overlap the edges of the sheets by at least 2". Plan to have the seams fall along the pattern lines or simulated grout joints. Align the sheets so the pattern matches, then tape the sheets together with duct tape.
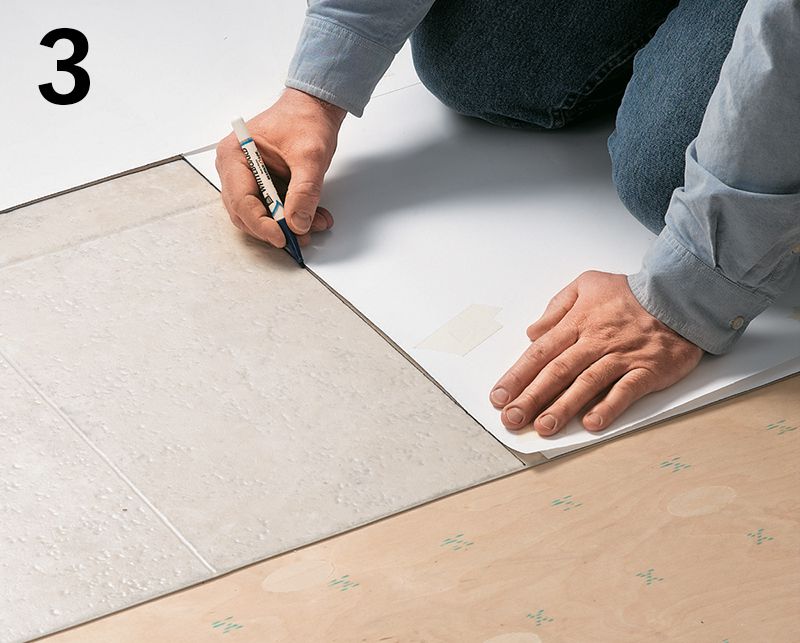
Make a paper template (see page 377) and position it. Trace the outline of the template onto the flooring using a non-permanent felt-tipped pen.
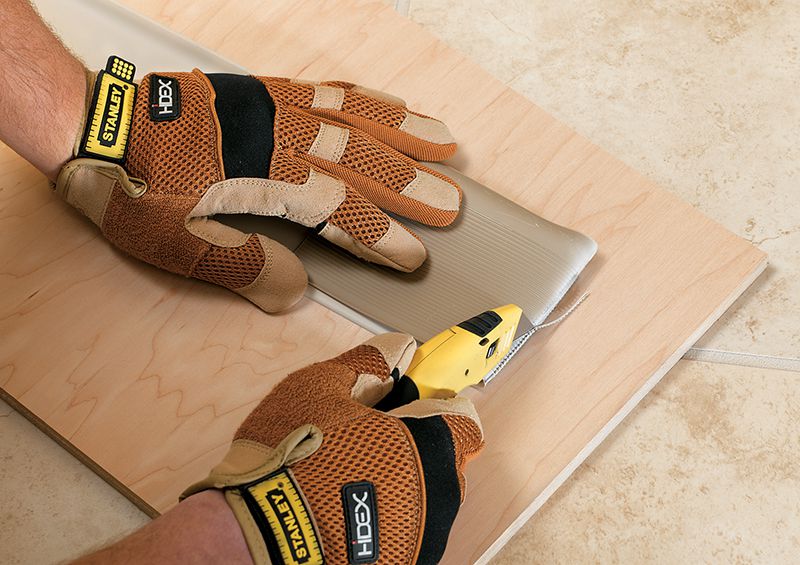
Remove the template. Cut the sheet vinyl with a sharp linoleum knife or a utility knife with a new blade. Use a straightedge as a guide for making longer cuts.
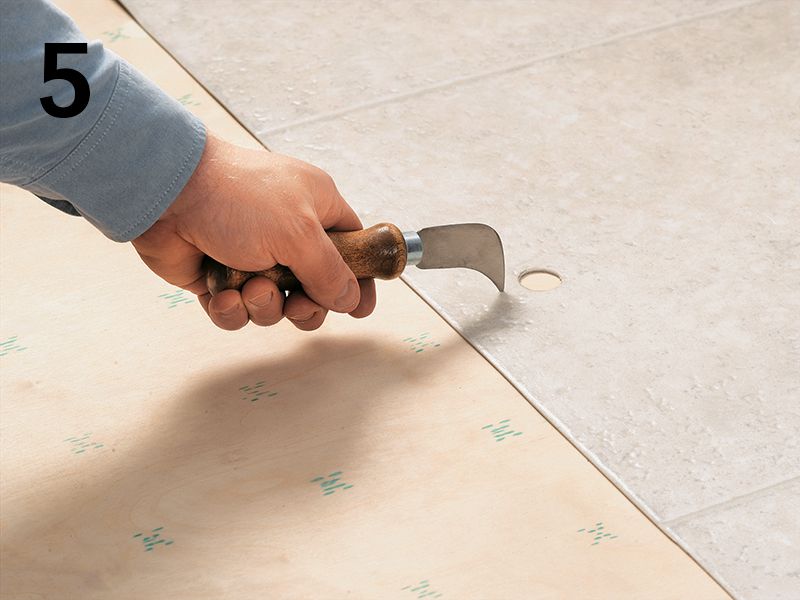
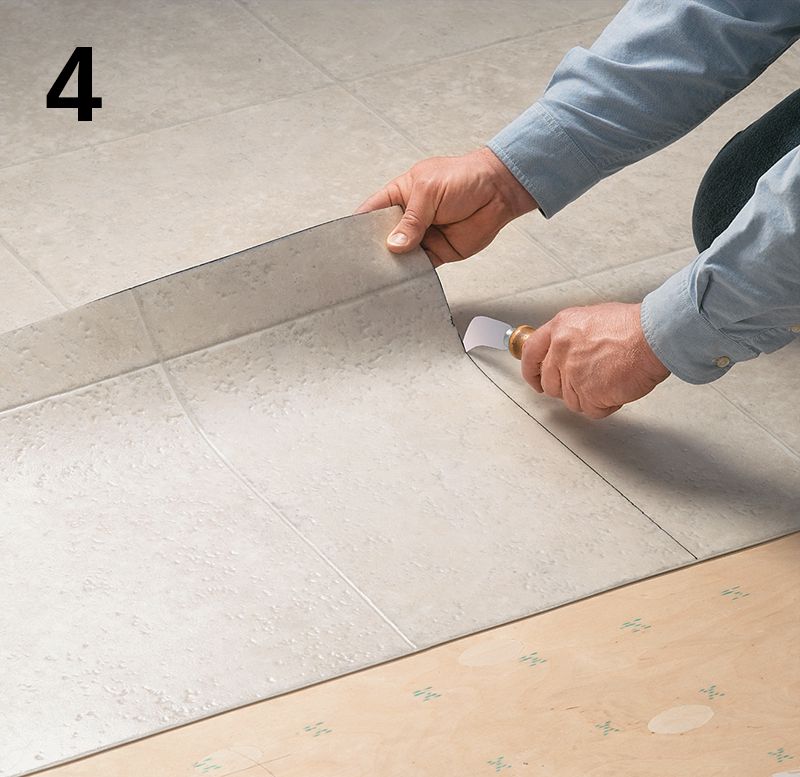
Cut holes for pipes and other permanent obstructions. Cut a slit from each hole to the nearest edge of the flooring. Whenever possible, make slits along pattern lines.

Roll up the flooring loosely and transfer it to the installation area. Do not fold the flooring. Unroll and position the sheet vinyl carefully. Slide the edges beneath undercut door casings.
Cut the seams for two-piece installations using a straightedge as a guide. Hold the straightedge tightly against the flooring, and cut along the pattern lines through both pieces of vinyl flooring.
Remove both pieces of scrap flooring. The pattern should now run continuously across the adjoining sheets of flooring.
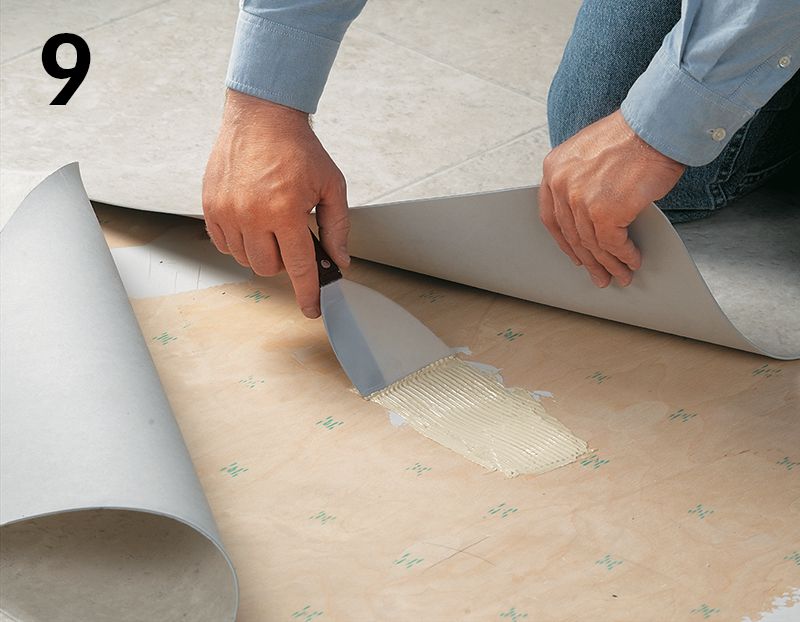
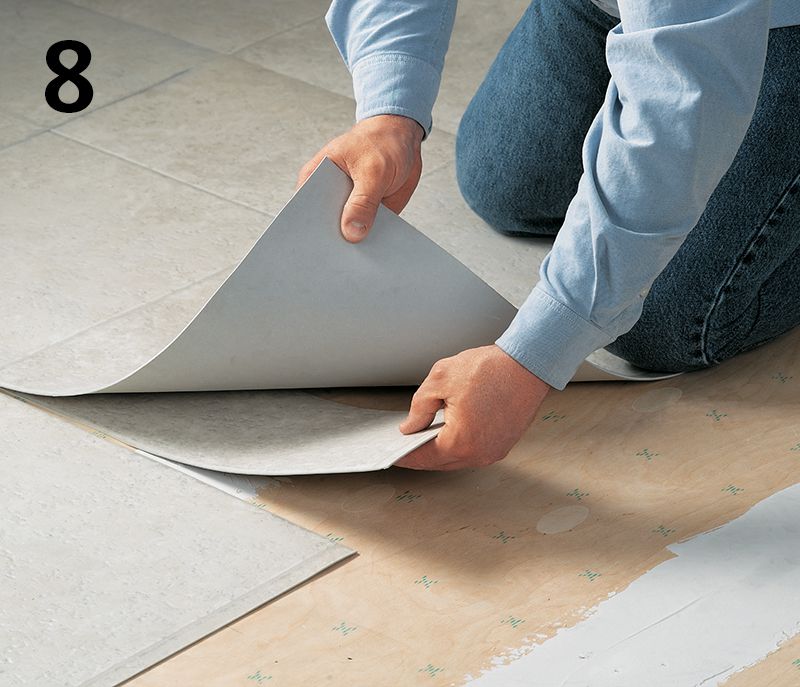
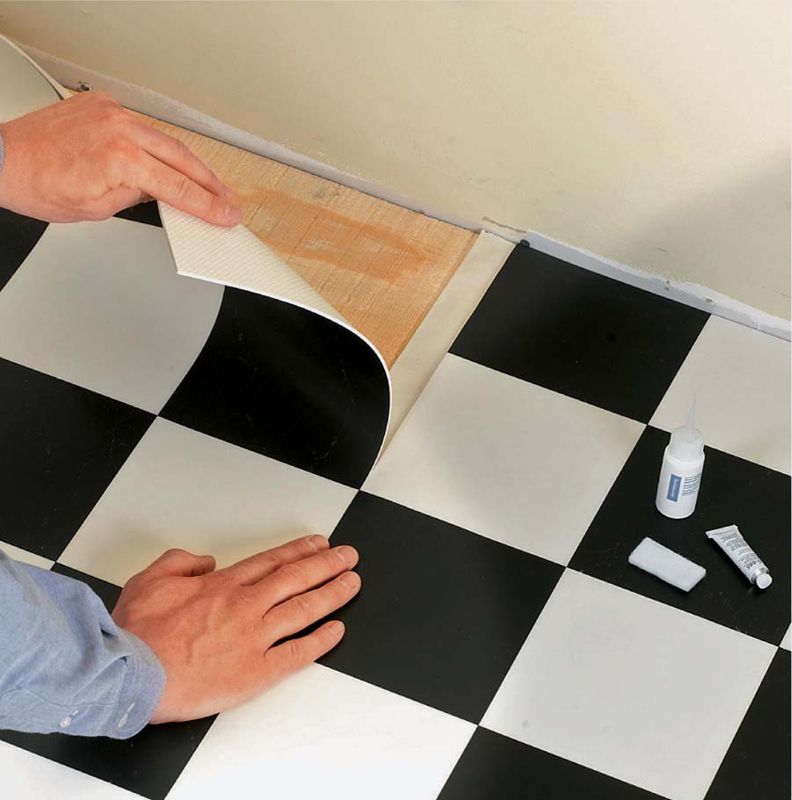
Fold back the edges of both sheets. Apply a 3" band of multipurpose flooring adhesive to the underlayment or old flooring, using a 1/4" V-notched trowel or wallboard knife.
Lay the seam edges one at a time onto the adhesive. Make sure the seam is tight, pressing the gaps together with your fingers, if needed. Roll the seam edges with a J-roller or wallpaper seam roller.
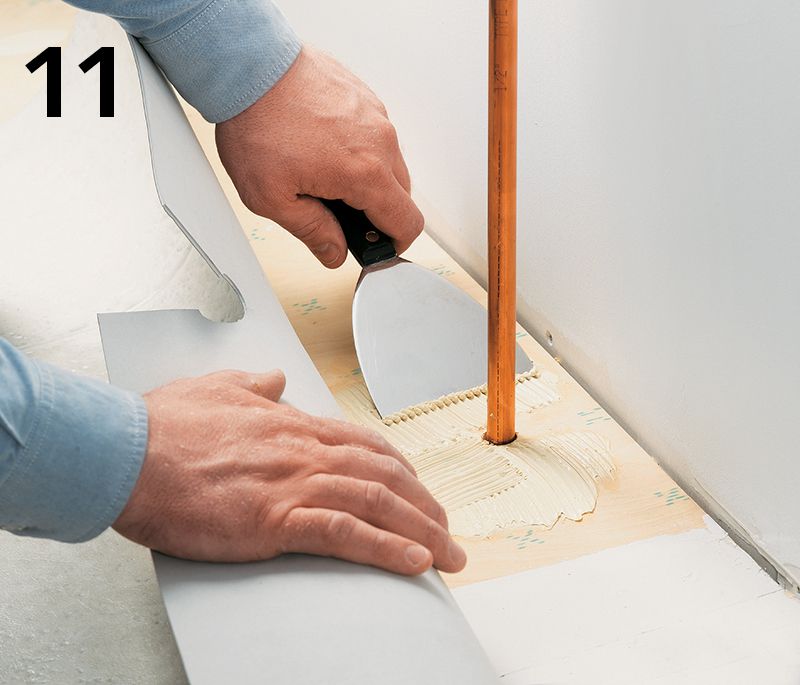
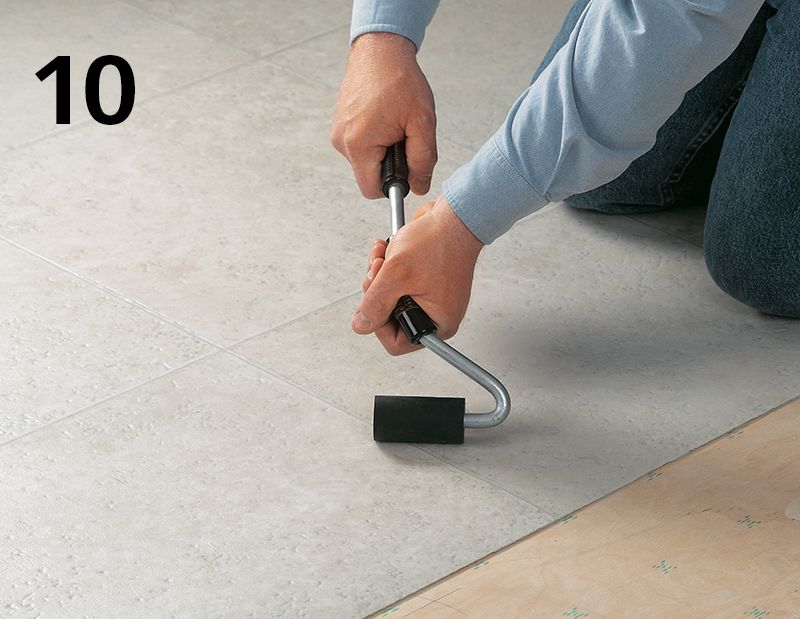
Apply flooring adhesive underneath flooring cuts at pipes or posts and around the entire perimeter of the room. Roll the flooring with the roller to ensure good contact with the adhesive.
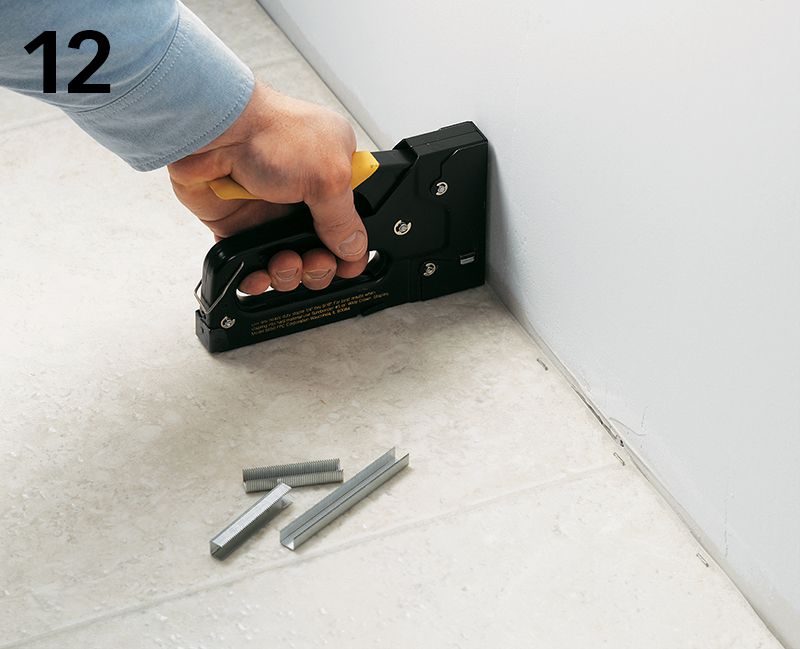
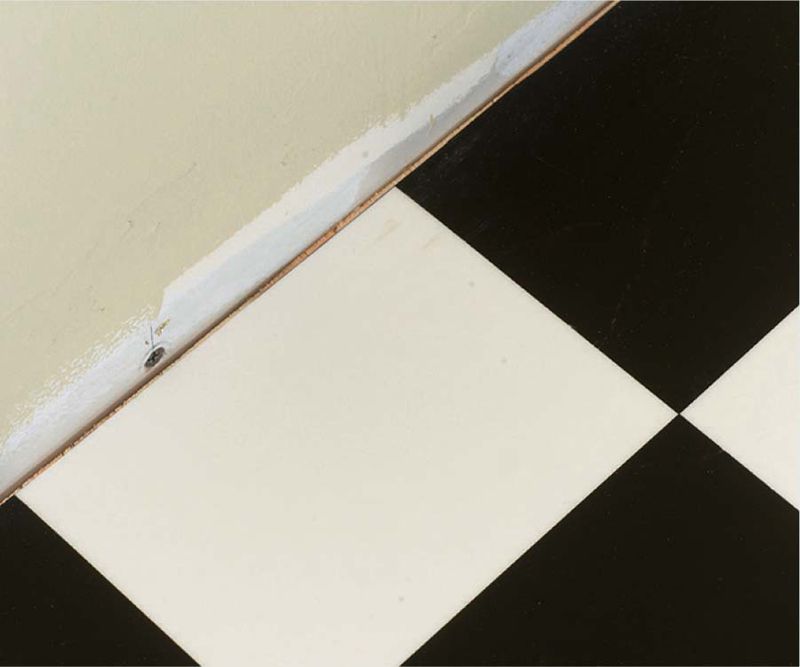
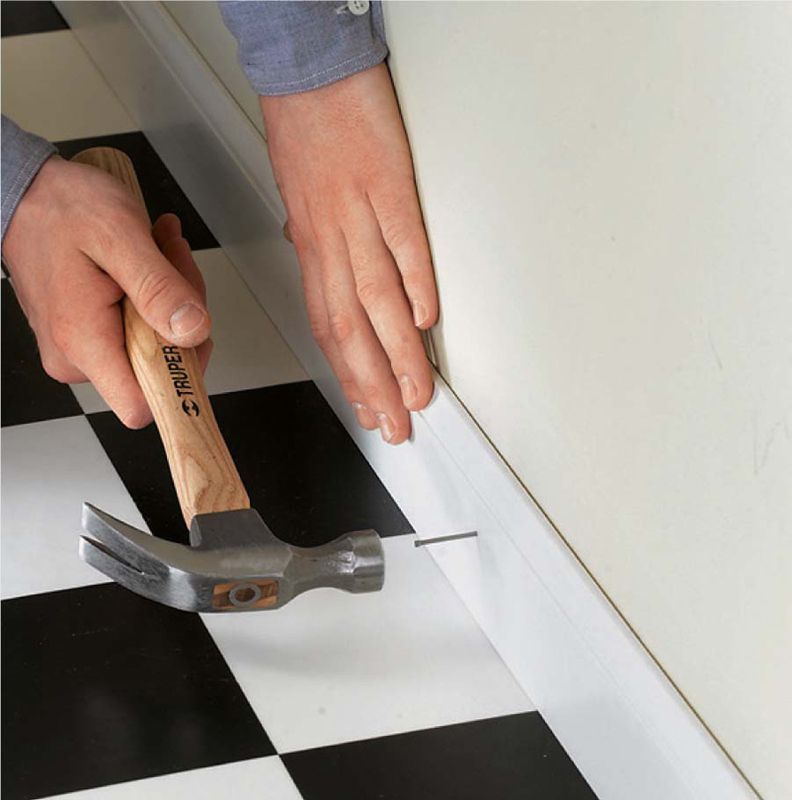
If you’re applying flooring over a wood underlayment, fasten the outer edges of the sheet with 5/8" staples driven every 3". Make sure the staples will be covered by the base molding.
NO-GLUE SHEET VINYLThe latest in the sheet-vinyl world is a “loose-lay” (no-glue) product. It has a fiberglass backing, which makes it cushier than standard felt-backed vinyl. The fiberglass backing also makes this sheet product thicker and more dimensionally stable. Consequently, it only needs to be adhered at seams or under heavy appliances. Also, rather than using glue, you use acrylic double-sided adhesive tape.
No-glue sheet vinyl is installed in much the same way as other resilient sheet goods. Cutting the material to size is the most difficult part of the project. Fortunately, the major manufacturers have kits available to help you do it right.
This loose-lay sheet vinyl can be installed over many surfaces, including a single layer of sheet vinyl or vinyl tile, underlayment-grade plywood, concrete, or ceramic tile. Do not install over particleboard, cushioned vinyl flooring, carpet, strip wood, or plank flooring. Use embossing leveler to fill textured vinyl or ceramic grout lines, or use patching compound on plywood to create a flat, smooth surface. Do not use carpet tape for this product, as it will cause discoloration. Use standard threshold transition moldings where the sheet vinyl meets other floor surfaces.
Supplies for installing no-glue sheet vinyl include a floor leveler and patching compound for preparing the floor, reinforced double-sided tape, and a seaming kit for larger installations.
Thicker than standard sheet vinyl flooring, no-glue sheet vinyl is designed to remain flat and stay put without the use of glues or other adhesives.
Installation Notes for No-glue Vinyl Flooring
Leave gaps. To allow for the normal movement and expansion of the floor and wall surfaces, the flooring must be cut 3/16 to 1/4" away from all vertical surfaces such as walls, cabinets, or pipes. Use a jamb saw to undercut door trim—this will allow for expansion. Make sure vinyl is not contacting the wall surface behind the door trim. Check the fit of the no-glue flooring and then carefully remove the flooring.
Place acrylic double-face tape in areas that will be under heavy appliances such as stoves and refrigerators. Make an X with three pieces of tape—one long piece and two short pieces—so that the tape does not overlap. Place acrylic double-face tape at doorways and under seam lines. Leave the paper covering in place and press the tape down so it adheres well to the subfloor.
Center the tape under the two sides at seam lines. Press one side of the vinyl into place first. Place the second vinyl sheet and press it into place. Use a seam sealer kit to seal the seams.
Drive nails into the wall surface—not through the vinyl flooring—when installing the baseboard or base shoe. Anchoring the flooring with perimeter nails may result in buckling of the vinyl surface when the floor expands or contracts. Also, do not press the molding down into the vinyl. Leave a small gap between the molding and the floor surface so the vinyl is not constricted.
HOW TO INSTALL FULL-SPREAD SHEET VINYL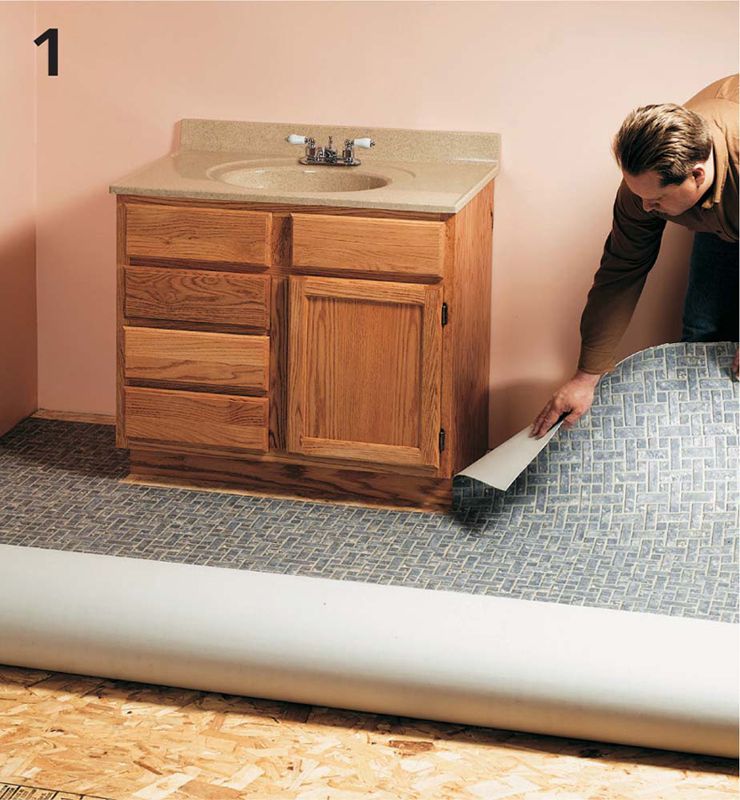
Cut the sheet vinyl using the techniques described on page 378 (steps 1 to 5), then lay the sheet vinyl into position, sliding the edges under door casings.
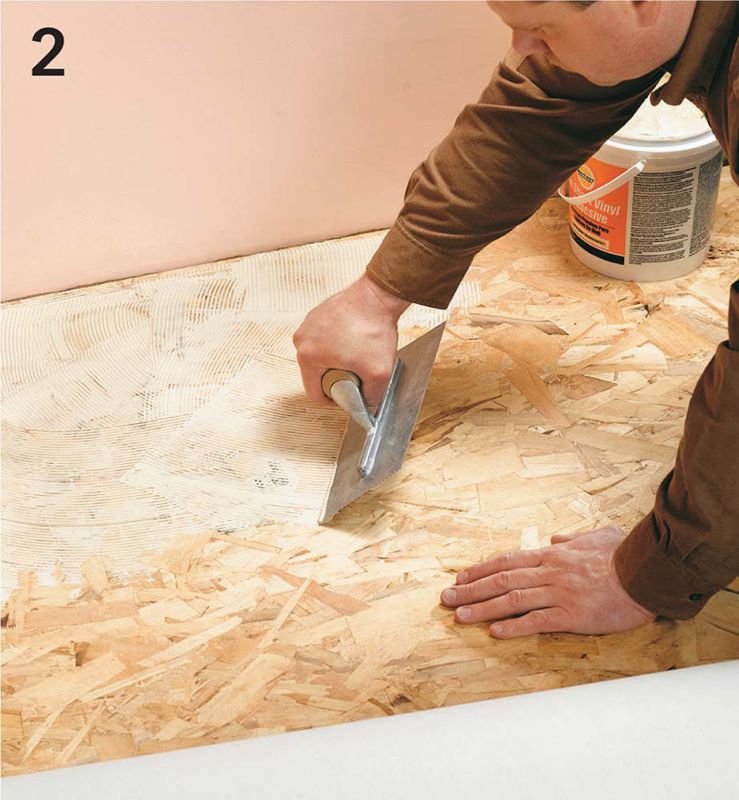
Pull back half of the flooring, then apply a layer of flooring adhesive over the underlayment or old flooring using a 1/4" V-notched trowel. Lay the flooring back onto the adhesive.
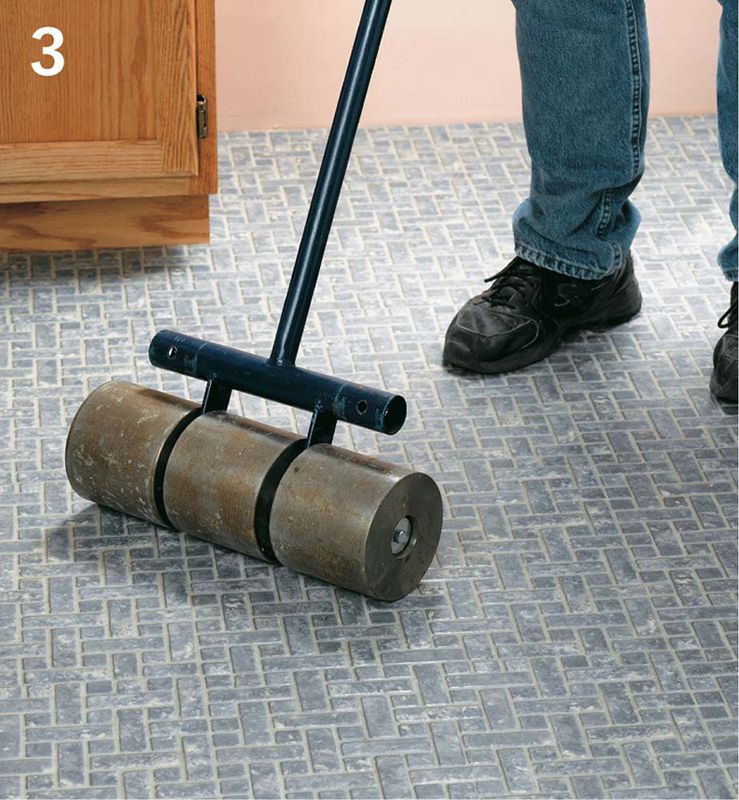
Roll the bonded section with a weighted floor roller. The roller creates a stronger bond and eliminates air bubbles. Fold over the unbonded section of flooring, apply adhesive, then replace and roll the flooring. Wipe up any adhesive that oozes up around the edges of the vinyl using a damp rag.
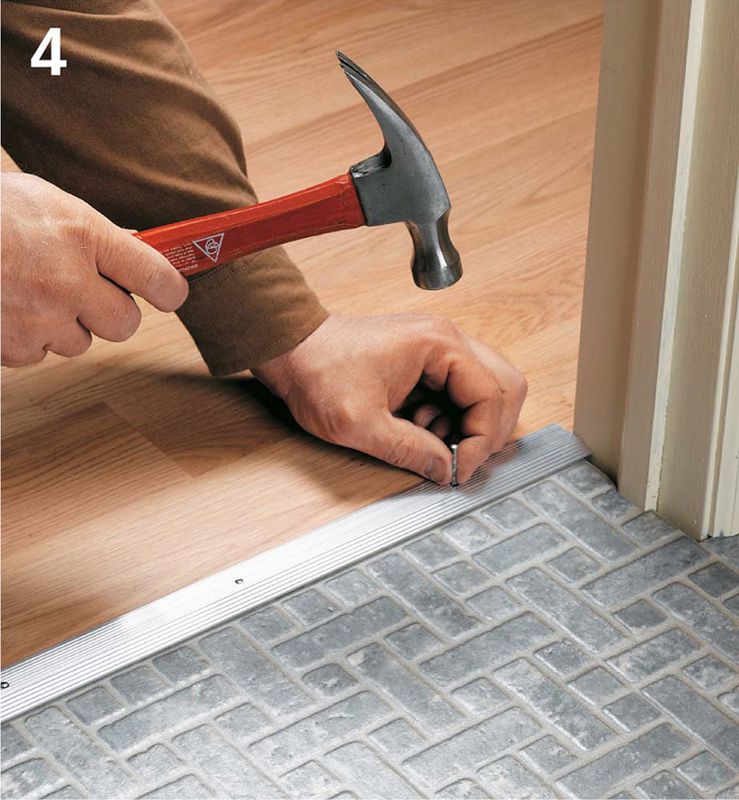
Measure and cut metal threshold bars to fit across doorways. Position each bar over the edge of the vinyl flooring and nail it in place.
VINYL COVE MOLDING
Vinyl cove molding is popular in basements and other damp locations because it is moisture resistant. The plastic appearance and limited color selection make it less desirable from a design standpoint. Moldings are sold in strips and in rolls and are installed using trowel-on adhesive or adhesive caulk (inset).
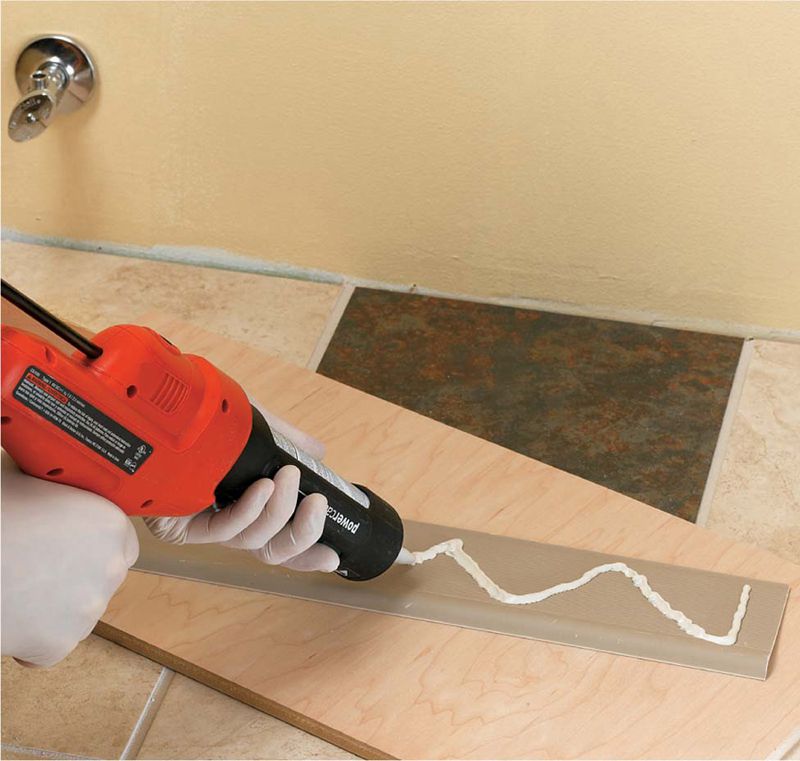
To install, apply adhesive to the back side of the vinyl cove molding, not to the installation wall. If you bought your molding in a roll, roll the material out flat and let it rest for at least an hour or two before installing it. After you have applied the molding to the wall, roll the entire molding surface with a J-roller.
CUTTING VINYL COVE MOLDING
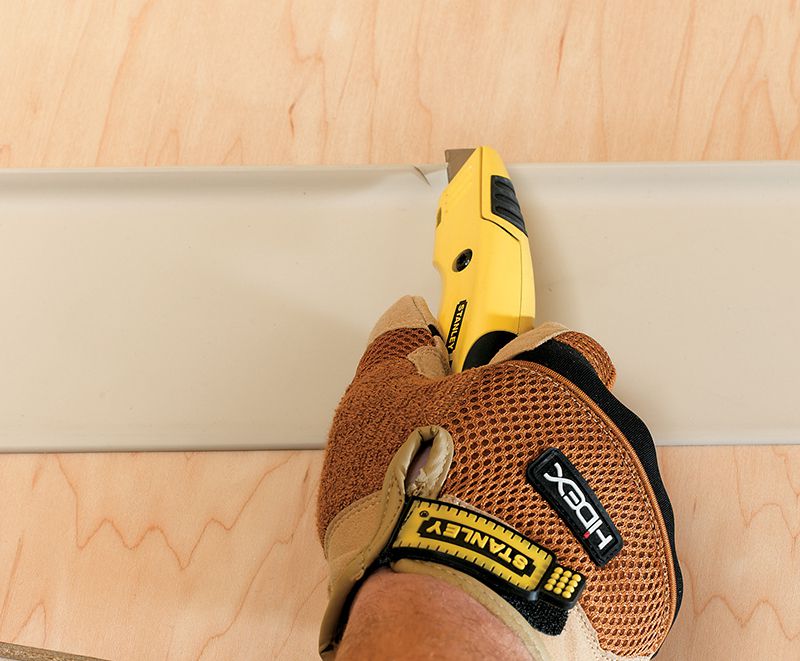
Use a backer board when cutting cove molding. Cut the molding where necessary to fit using a straightedge and sharp utility knife or flooring knife to create a butt joint.
At inside corners, lightly score the back of the molding from top to bottom at the joint of the corner. Notch the base of the molding at the bottom of the score, and press the molding firmly into the corner.
At outside corners, warm the molding with a hair dryer or paint stripping gun, and then fold it so that the back side is exposed, and shave a thin layer off the inside surface. Be careful not to cut all the way through the molding.

