The choice of vegetables has never been greater: potatoes labelled by variety, three or four types of onion or tomato, several different squashes, a selection of fungi and mushrooms, a profusion of salad leaves – all are regularly to be found in greengrocers’ and supermarkets. The growth of farmers’ markets has also extended the choice of varieties and made local produce more accessible. Recent years have seen a huge increase in the availability of organically raised fruit and vegetables, thanks to consumer demand. Generally, they have more nutrients and more flavour, and there is the assurance that they have not been waxed or sprayed with pesticides. Vegetables play a greater and more central role in most people’s cooking today than previously, and quality and flavour are of the utmost importance.
Choosing
Look for vegetables that are firm, bright in colour, unblemished and unwrinkled, and not frost-bitten. Leaf vegetables should not be limp or yellowing; cabbage stalks should not be dried out or slimy; root vegetables should be stiff, not rubbery, and potatoes should not be sprouting or have any green patches. Choose green beans or mange-tout that are crisp and bright; asparagus with firm tips and closed scales; corn-on-the-cob with green husks, golden brown tassels and plump unwrinkled kernels; cauliflowers with a tight, creamy white head; pale, crisp bean sprouts without brown ends; onions and garlic that are firm and dry, without green shoots. Ripe avocados yield to gentle pressure; courgettes should not, they should be firm. Mushrooms soon shrivel so buy only those that are very fresh and slightly moist and don’t buy more than you will use quickly. Turnips, celeriac, aubergines and pumpkins should be firm and feel heavy, an indication that they will be more succulent. Tomatoes are best when ripened on the vine. Young and small vegetables are usually more tender and have more flavour than old and large, although the baby vegetables now widely available look pretty, but many have little taste. Baby fennel and carrots and young spinach are exceptions.
The only frozen vegetables worth buying are artichoke hearts and bottoms, small peas (petits pois), broad beans, sweetcorn and spinach.
Storing
Root vegetables, onions, garlic and pumpkins are best stored in a cool dark place, although once cut they should be refrigerated. Remove root vegetables from plastic bags because they will sweat and go mouldy. Unwashed root vegetables keep better than the washed ones sold in supermarkets. It is preferable not to store tomatoes, aubergines, peppers and courgettes in the refrigerator but keep them at room temperature. Pale tomatoes will turn red, especially if a deep red tomato is among them, exuding ethylene gas which is responsible for the colour change. Most other vegetables, but especially leaf vegetables and herbs, are best kept in perforated plastic bags in the salad drawer of the refrigerator. Leaves not kept in plastic bags quickly go limp. Wrapping in clingfilm is an alternative for beans, fennel, radishes and the like. Do not keep mushrooms in plastic; a paper bag is the best way of keeping them fresh.
Throw away any vegetable that shows signs of deterioration because it can affect others stored with it.
Quantities
Much depends on what else is to be served at the meal, whether the vegetable is an accompaniment to another dish or is the main dish itself. Some guidelines are given below to help when buying.
Vegetables with thick peel, such as pumpkin, squash, celeriac: allow 300g per serving. Vegetables that cook down a lot, such as spinach and chard leaves: allow 300g per serving. Vegetables to be shelled, such as peas and broad beans: allow 300–400g of the unshelled vegetable per serving, and reckon roughly that 400g peas in the pod will yield 100–120g shelled. Broad beans are more difficult to assess, and may well yield a little less.
Artichoke (large), corn-on-the-cob: allow 1 per serving.
Asparagus (white has to be peeled, thin green does not, so you could allow less), fennel, leeks: allow 250–300g per serving.
Aubergines, broccoli, Brussels sprouts, cabbage, carrots, cauliflower, parsnips, peppers: allow 200g per serving.
Green beans, mushrooms, onions: allow 150g per serving.
Preparing vegetables
Washing
Don’t wash, wipe or scrub vegetables until you are about to cook them, or they may become limp or their outer layers harden.
Wash leaf vegetables in plenty of water to which you have added a teaspoon of salt, which will flush out any bugs. They may need washing more than once; spinach can be particularly sandy. Dry salad leaves in a spinner or a clean tea towel.
Leeks also conceal more sand and grit than it first seems. Remove the outer leaves and the coarse green tops and split them in two or in four, depending on size, almost to the root and wash well. If you are going to chop or slice them, do that immediately after taking off the outer leaves and then wash them.
Peeling
Edible skins (e.g. of carrots) that have not been treated can be cleaned and eaten, but if you are not sure, it is better to peel them, since a high proportion of pesticides is retained in the skin. Vegetables that may have been waxed (e.g. cucumbers) should be peeled too.
Potatoes absorb less water if boiled in their skins, and can be peeled afterwards. So can Jerusalem artichokes which can be rather wasteful as well as tedious to peel raw if they are very knobbly. Scorzonera, a delicately flavoured long black root vegetable, and salsify, a similar long root with a creamy skin and succulent flesh, are easier to peel when cooked. Unfortunately neither is easy to find in Britain. Scrub beetroot, taking care not to damage the skin or it will bleed when cooked.
Stalk vegetables – celery, chard, fennel – should have the coarse stringy bits removed. A potato peeler does the job well; otherwise, break the stalk and pull away the threads. White asparagus and the fatter stalks of green need peeling. Large broccoli stalks are best peeled. Runner beans, large green beans, snow peas and mange-tout may need to have the strings peeled from either side.
Mushrooms may be peeled, especially the large portobellos which have a tougher skin, but they usually need only a wipe or to be brushed.
Remove the outer leaves of Brussels sprouts, chicory, cabbage, cauliflower and the base of the stalk of the latter; the husk and silk of corn-on-the-cob; the outer skin of onions and garlic cloves; the tails of bean sprouts.
Shallots and small onions can be peeled more easily after they have been blanched in boiling water for 10 seconds. Drain and rinse in cold water. Trim the root and the top, and the skin will come loose. They can also be blanched in the microwave (p. 146).
Some vegetables – globe artichokes, Jerusalem artichokes, celeriac, salsify, scorzonera – should only be cut with a stainless steel knife and, once peeled, should be dropped into water acidulated with lemon juice or vinegar or they will discolour. Avocados also discolour when cut and the cut sides should be rubbed with lemon juice.
Cutting and slicing
Vegetables to be cooked together should be of a similar size so that they cook evenly. A food processor will cut, chop and slice and is very convenient, even though you may have to pick out any rough bits that have escaped the blade. It is particularly useful for slicing onions (although they will release a great deal of juice) or hard vegetables such as potatoes, for shredding courgettes, carrots and other roots and for chopping vegetables to go into a stew, but don’t chop for so long that you end up with pulp. Cutting by hand needs a very sharp knife, and is essential if you want uniform dice, neat chunks or julienne strips.
Stalks of celery and chard look better cut on the slant, as do thick slices of courgette. Runner beans are cut in fairly thin diagonal slices. Some Asian dishes call for roll-cutting, which is cutting on the slant, but rotating the vegetable a quarter-turn before each cut.
To cut julienne strips, slice the vegetables, stack the slices and cut through them lengthways to make thin strips. To dice vegetables, slice them, stack the slices and slice through them to make strips, and cut across the strips to make dice.
To make a chiffonade – of lettuce, spinach, cabbage – roll several leaves together and slice finely across into ribbons.
To slice a cabbage, cut it in half, or quarters if it is very big, and cut out the thick central stalk. Put the cabbage cut side down and slice through the leaves finely. Discard any thick ribs. You can also feed quartered cabbage onto the slicing plate of a food processor.
To cut very thin slices from cucumber, or from root vegetables for making crisps, you either need a large extra-sharp knife and a steady hand, or a mandoline (p. 528).
To slice ribbons from courgettes, carrots, parsnips and mooli use a potato peeler.
To slice an onion, cut the peeled onion in half through the root, put the cut side down on a board and cut it into vertical slices. Hold the onion half with your finger tips pulled back and knuckles forward so that the knife passes your knuckles and doesn’t accidentally slice into your fingers.
To chop an onion, peel it, leave the root on to hold it together and cut it in half through the root. Make horizontal cuts from the top down to, but not through, the root. Make a similar series of vertical cuts. Holding the onion with your finger tips pulled back, slice through crosswise. To chop it more finely cut through the mound of pieces holding the point of the knife blade against the board with your non-cutting hand and chop briskly up and down. Discard the roots.
To chop herbs, remove large stalks and chop the herb coarsely with a large knife. Hold the point of the blade on the board with the finger tips of your non-cutting hand and chop briskly up and down, scooping the herb into a pile with the flat of the blade.
Stuffing
Almost any vegetable can be stuffed, although the most usual ones are peppers, aubergines, tomatoes, courgettes and onions. Stuffings vary greatly; the most familiar ones are those which originated in the Middle East. Be inventive, experiment with different textures and flavours, but always remember that the stuffing must complement the flavour of the vegetable it is used with.
Stuffed vegetables, served hot or cold, make excellent first or main courses. You can provide a very impressive meal by serving a variety of vegetables with different fillings. Many stuffings work equally well with several different vegetables: for instance, that given for aubergines (p. 106) is perfect for courgettes.

Cooking methods
Cooking in water
Boiling has a bad name when it comes to cooking vegetables yet if they are properly cooked in water the results can be very good. It is basically a question of timing. All overcooked vegetables lose their flavour and nutrients and have a poor texture; overcooked brassicas release sulphur compounds which produce that unmistakable cabbagey smell associated with institutional cooking (school dinners).
Vegetables are usually cooked in salted water (about ½ tbs to 1 litre water) and this reduces the need for seasoning later. Don’t fill the pan too full.
Cooking in a covered pan preserves nutrients and reduces fuel costs, but it causes discolouration because enzymes released from the vegetables collect in the condensation on the lid and drop back into the water. Root vegetables do not discolour and are usually cooked in a covered pan. They need to be cooked through to the centre, but not left to go soggy. Put them in cold water, bring slowly to a simmer, and cook until a knife point or thin skewer pierces the centre. Start timing from the time the water is bubbling. Timing depends on the vegetable, the variety and the size of the pieces; start testing small pieces after 5 minutes; whole or halved potatoes will take 10–20 minutes.
There is little risk of overcooking green vegetables if you plunge them into boiling water, bring the water quickly back to a simmer and cook, uncovered, for 1–4 minutes. Again, start timing from the moment the water returns to the boil. The vegetables should still have a crisp bite, but not be half raw. Drain the vegetables quickly and toss in a little butter or olive oil or serve with a sauce. Young leeks can be tied in bundles before cooking to keep the leaves together. Asparagus can also be tied in the same way, but I prefer to cook it loose in a wide sauté pan and lift the stalks out with tongs when they are done.
Parboiling and blanching soften vegetables before they are cooked further. Put the vegetable into boiling water, bring the water quickly back to the boil and start timing. Small pieces or leaves take only a few seconds to blanch, large slices or dense whole vegetables can take 4–5 minutes.
Strongly flavoured vegetables such as onion, cabbage or Brussels sprouts are blanched to reduce their smell and flavour. Baby onions can be blanched in the microwave (p. 146).
Vine leaves, spinach or cabbage leaves which are to be used to wrap other food are blanched to soften them. Cooking in minimal water is a method I like for spinach. Put the leaves into a large pan with only the water that clings to them from washing, set the pan over moderate heat and turn the leaves as the water evaporates so that they don’t stick to the pan. Serve them as soon as they have wilted (1–2 minutes is all they need), tossed with olive oil or butter, and maybe a handful of toasted pine nuts.
Chard leaves can be cooked the same way, but they should be cut in a chiffonade* first.
Steaming
Steaming vegetables over simmering water helps retain minerals and vitamins that might be leached out by cooking in water. It seems to give a purer flavour too. Most vegetables can be steamed, but green vegetables tend to lose their colour quickly. I would avoid steaming the more pungent brassicas; they are better tempered by cooking in water. Cooking times are longer than for the same vegetable cooked in water: for example, steaming thin green beans will take 6–8 minutes, compared to 3–4 if simmered. A full steamer basket will also take longer than one that is only half full.
Don’t salt vegetables before steaming: it draws out the moisture.
Chinese cabbage and mustard greens, chard, celery, fennel, green beans, leeks, mange-tout and snow peas, pattypan squash and purple sprouting broccoli are particularly successful steamed.
Purées and mashes Vegetables for mashing or puréeing are boiled, steamed, microwaved or occasionally baked first. To keep some texture in a mash, crush the vegetables by hand with a potato masher. A masher is the only way to prepare potatoes and other starchy vegetables because they turn gluey if put in a food processor. Mash small amounts at a time so that you don’t leave lumps. Mashes are easier to make while the vegetables are hot.
A food processor will produce a purée very quickly; if you want a rough texture, stop the machine in time. A blender works well for very soft vegetables like aubergine or pumpkin, but you can also mash those with a fork. Stringy vegetables, or those with skins like peppers, need to be sieved after puréeing or the texture will be unpleasant.
Purées and mashes can be made of single vegetables or a mixture. The Dutch are the masters of mixed vegetable mashes, which they call stamppot (stampen being the verb for mashing). Potato is the dominant partner, mashed to a purée to which is added the same or a smaller amount of cooked shredded cabbage, kale or cos lettuce, finely sliced sautéed leek, apple purée, sauerkraut or fried onions. Sometimes chopped lightly fried bacon is added too. Irish colcannon is made with potatoes mashed with milk and cooked shredded cabbage beaten in; for champ, spring onions are cooked in milk and both are mixed into mashed potatoes. Celeriac, parsnip, swede and turnip used half and half with potatoes make good mashes.
Mashes and purées can be made with butter, cream, milk, yogurt, olive oil or any of the nut oils or with some of the cooking water. Really good potatoes make a well-flavoured mash just beaten with some of their cooking liquid. Seasonings are important too. Apart from salt and pepper, nutmeg, mace or turmeric are good with most winter roots, cinnamon with sweet potatoes, mint with peas, ginger with pumpkin and turnip, ground coriander with carrots and parsnips. I make my favourite mashed potato with saffron and olive oil. Potatoes with lots of chopped herbs and olive oil also make an excellent mash. Other good flavourings are Dijon mustard, pesto (p. 366), horseradish and grated cheese. Garlic – crushed, roasted, or puréed itself – goes with most things. A splash of whisky, Armagnac or rum is good with sweet potatoes, pumpkin or turnip; so is Pernod in a fennel and potato mash.
Vegetable cakes Stiff vegetable mashes can be made into cakes. Use only 3–4 tbs liquid to 500g vegetable, and flavourings as above. 500g vegetable will make 8 cakes, cylinders or balls. Shape the cakes, coat them in beaten egg and then dried breadcrumbs. Ideally, leave the cakes to stand for 30 minutes at this point; they will firm up and keep their shape better. Fry or grill for 4–5 minutes each side, or bake in a hot oven, 220°C, 425°F, gas 7, for 15–20 minutes.
Braising
Slow cooking is an ideal way to cook root vegetables, stringy vegetables like fennel, celery and chard stalks, whole heads of chicory, leeks, onions, artichokes and cabbage. Toss the vegetables in butter or oil first, add seasonings and a small amount of liquid – stock, wine, tomato juice, water – so that the vegetables are partly immersed. Use a heavy pan so that the vegetables cook slowly and don’t burn, and cook in the oven or on the stove.
Grilling and barbecuing
Many vegetables can be grilled, char-grilled on a ridged griddle plate or barbecued successfully, as long as they are basted regularly with oil.
Slice aubergines into thick rounds, courgettes into thick strips, fennel from top to bottom. Cut radicchio in half or in quarters, keeping the leaves attached at the base. Cut peppers in quarters, onions in slices or in half. Toothpicks pushed through onions and fennel will hold the pieces together on the barbecue. Snap asparagus at its break point and thread a few spears onto a skewer to make it easier to turn them. Leave mushroom caps whole but discard the stalks. Leave tomatoes whole on the barbecue, but cut in half to put under the grill or on a ribbed griddle plate. Corn-on-the-cob barbecues beautifully in its husk, once the silk is removed. Potatoes can be grilled or barbecued but they must be parboiled first and then sliced. Pieces of vegetables cut to the same size can be made into kebabs for barbecuing, but inevitably some will cook more quickly than others. Slices or pieces of small vegetables are easier to handle on the griddle or under the grill.
Marinate vegetables, if you wish, in oil, lemon juice or white wine and herbs. Other flavourings can be added for cooking: ground cumin or coriander, fennel seeds, chilli flakes, coarsely ground pepper, chopped thyme, rosemary or savory can be stirred into the basting oil.
Brush the vegetables lightly with oil and grill or barbecue 8–10cm from the heat source. If you are using a griddle plate, heat it for 2–3 minutes before putting on the vegetables. Under a grill or on a griddle, most vegetables will be ready in 5–8 minutes, asparagus needs less time, 4–6 minutes. Turn the vegetables once when they become soft and have brown patches. On a barbecue the times are likely to be a bit longer. Corn-on-the-cob in its husk will take about 20 minutes.
Serve the vegetables with extra virgin olive oil and lemon juice, with young goat’s cheese and chopped salad herbs, with pesto (pp. 366), a fresh chutney or relish (pp. 382–3) or a salsa (pp. 380–2).
Baking and roasting
Cooking in the oven needs time, but it is a very good way to preserve flavour. Vegetables with a hard protective skin can be baked, provided the skin is pricked to let steam escape: aubergines, potatoes and small squashes come into this category. Beetroot is an exception; the skin should not be pierced or it will bleed. Baked potatoes or a small squash will take about 45 minutes at 200°C, 400°F, gas 6, aubergines 15–20 minutes. Beetroot wrapped in foil or in a covered pan will take 40 minutes to 1 hour, depending on size.
Root vegetables are best parboiled before roasting. Peeled vegetables and those with a soft skin are roasted with added fat. Cut them into chunks or leave whole, coat lightly with olive oil or butter, add sprigs of herbs or a sprinkling of ground spices and roast in a hot oven (200°C, 400°F, gas 6) for about 45 minutes. Turn them so that they become crisp on all sides and to prevent them sticking to the tin. You can bake vegetables in a pan with a lid if you prefer.
Onions, peppers, tomatoes, courgettes, okra, aubergines and garlic all roast well in a moderate oven (180°C, 350°F, gas 4).
Sautéing, frying and stir-frying
Sautéing in a little butter, olive oil or animal fat is a successful method of cooking for many vegetables. Duck or goose fat gives a rich flavour to sautéed potatoes but for other vegetables a mixture of butter and oil is best. Make sure the fat is hot before adding the vegetables so that they do not stick, and do not fill the pan too full. Keep the heat fairly low and turn the vegetables in the hot fat to brown evenly. Quickly cooked vegetables such as mushrooms will take only a few minutes; potatoes will need about 20.
Firm vegetables may be sautéed initially, then covered and left to simmer in their own juices or finished by adding a few tablespoons of liquid and, if you wish, a flavouring – herb or spice, diced shallot, grated citrus peel, a splash of balsamic vinegar, a teaspoon of sugar, chopped bacon or ham – to the pan. Put on the lid and cook until the vegetables are just soft but not mushy. They will take between 5 and 15 minutes.
Shallow frying needs more fat and the heat is kept higher than for sautéing. Aubergine slices, broccoli, okra, onions and par-boiled green beans can all be fried successfully, either alone or with the addition of chopped bacon or pancetta*, chopped garlic or shallot, grated cheese. Small vegetable fritters can be shallow-fried in a frying pan.
Stir-frying is an excellent way of keeping vegetables crunchy. The cooking is done fast over high heat, but more time is spent on preparation, cutting everything into bite-sized pieces. It is important to heat the wok or a large heavy frying pan without oil until you can feel the heat rising when you hold your hand above it, then put in the oil, swirl it around to coat the wok and start cooking. Stir-fried vegetables will be cooked in 2–3 minutes.
Deep-frying
Oil for deep-frying must be very hot (190°C, 375°F) before the vegetables are put in otherwise they will absorb it and become unpleasantly fatty. Test the temperature by frying a cube of bread; if it browns in about 40 seconds the oil is ready; if it takes longer, let the oil heat more; if it browns more quickly, reduce the heat. If the oil is smoking, it is too hot and will burn the outside of the food before the inside is cooked. Only deep fry a few pieces at a time since overcrowding the pan lowers the temperature too much. Chips and root vegetable crisps are fried without any coating, but most vegetables need a coating or batter to protect them from the hot oil. The coating also reduces spattering when the vegetables go into the oil. Vegetables are ready when the coating turns golden brown. They should be drained on kitchen paper and served quickly while still crisp.
Sweating
Chopped vegetables are sweated in a little butter or oil in a covered pan to release their juices and flavour. They should be tender but not browned. Aromatic vegetables – onions, shallots, carrots, celery, leek – are those most often sweated. They are used to form the basis of sauces, soups, poached and braised dishes such as chicken with tarragon (p. 289) and Tuscan braised beef (p. 321).
Microwaving
Their high water content makes virtually all vegetables suitable for microwaving. They cook quickly, retain their vibrant colours and a high proportion of their nutrients. Microwaving tends to emphasize the inherent flavours of foods, so the taste of microwaved vegetables is quite pure. They also require no or very little salt, and this is best added after cooking. Use pepper sparingly too; taste and add after cooking. Clean and prepare the vegetables as you would for cooking by other methods. The times are for a 600–700 watt oven with a carousel, at 100 per cent power. Err on the side of undercooking: the vegetables can always be put back if they are not quite ready.
Make sure you use a dish that is suitable for microwave cooking and cover it with a lid or microwave plastic film; in an uncovered dish, the moisture from the food evaporates too quickly. The steam held in by the cover ensures that the food cooks evenly. When the dish is ready, slit the plastic film to release steam and peel it off carefully. Alternatively, make a parcel of vegetables in a sheet of microwave cling film or put them in a microwave plastic bag.
Assorted vegetables to be microwaved together should be about the same size; pieces of 6–8cm are the optimum size. Arrange the vegetables with those that require longest cooking around the outside of the dish and those that cook quickly in the middle. The pieces should not be touching.
I have given cooking times for some common vegetables and for those where there is the greatest saving in time compared with other methods. Most of these timings are based on Barbara Kafka’s excellent Microwave Gourmet, and they are given under the relevant vegetable.
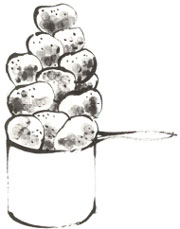
Artichokes – globe
To prepare whole globe artichokes
Twist off the stalk, pulling with it any fibres from the centre. Pull off all the tough lower outer leaves and cut the base flat, exposing the white part. Rub it with a cut lemon. Slice the top third off the artichoke, and trim any sharp leaves with scissors. Drop the prepared artichokes into boiling water, put a plate or small lid on top to keep them submerged and simmer for 20–40 minutes, depending on size, until a leaf from the middle can be pulled out easily and the bottom is tender. Drain the artichokes upside down.
To microwave, put each artichoke in a microwave plastic bag or wrap in microwave plastic film. For artichokes weighing 250–350g, cook 1 for 7 minutes, 2 for 10 minutes, 4 for 15 minutes. The artichokes are ready when the bottom gives if pressed lightly. Stand for 5 minutes before pricking the plastic and unwrapping.
Serve hot with melted butter, warm or at room temperature with a vinaigrette (p. 358) or ravigote sauce (p. 359), plain or flavoured mayonnaise (p. 362), or a garlicky sauce such as skorthalia (p. 364). To eat, take off a leaf, dip the soft base in the butter or sauce and then pull it between the teeth. Discard the upper part of the leaf. When you get to the centre, lift out the cone of pale or pinkish leaves, use a spoon to dig out the fibrous choke and discard that. The cone of young leaves is edible. Next you have the best part, the firm bottom that was under the choke.
Eating an artichoke is a prolonged and messy business, but well worth it.

To prepare artichoke bottoms
Break off the stalk, pulling any tough fibres with it. Pull off the lower outer leaves and trim the base, cutting round it spirally, and removing the leaves so that only tender pale green ones remain. Rub exposed parts with a cut lemon as you work. Put the artichoke on its side and cut four-fifths of the top away, then remove the choke. This leaves the flat base which must then be put into acidulated water.
If you want cooked bottoms or hearts you can, of course, cook the whole artichokes and then finish the preparation as described above.
Artichoke and broad bean stew
Use young broad beans for this dish; the outer skins on old broad beans are likely to remain tough and spoil the dish.
For 4–6
4 tbs olive oil
2 onions, peeled and chopped
8 large artichoke bottoms, fresh or frozen ones, blanched
500g broad beans, shelled weight
2 garlic cloves, peeled and chopped
¼ tsp ground cumin
¼ tsp ground coriander
salt and freshly ground pepper
200g merguez sausages (optional)
150ml water
Heat the oil and sauté the onion for a few minutes. When it has softened, put in the artichokes, cut in four, the broad beans and the garlic. Season with cumin, coriander, pepper and a little salt. If you wish, add the sausages, sliced 1cm thick. Sauté for 4–5 minutes, then pour over the water. Cover and simmer briskly for 4–5 minutes, lower the heat and simmer more slowly for a further 20 minutes, or until the vegetables are tender. Check that there is enough water, and if necessary add a little more.
Tian of artichokes and fennel
The inspiration for this dish is provençal, where tians or gratins of vegetables, topped with a sauce or a layer of breadcrumbs, are often served as a separate course.
For 8
10 artichoke bottoms, fresh or frozen ones, blanched
5 tbs olive oil
3 bulbs of fennel
3 tbs chopped herbs – parsley, basil, savory, thyme
salt and freshly ground pepper
5 large ripe tomatoes
2 tbs fresh breadcrumbs (p. 455)
Heat the oven to 170°C, 325°F, gas 3. Slice the artichoke bottoms and fry lightly in 2 tbs oil. Cut the fennel in half lengthways, discard the outer layers and parboil the pieces for 8 minutes. Drain and slice when cool enough to handle. Lightly oil a gratin dish and combine in it the artichokes, fennel and herbs. Season with pepper and salt. Slice the tomatoes and put them in overlapping layers over the other vegetables. Scatter over the breadcrumbs and drizzle over the remaining oil. Bake the tian for about 40 minutes, until the vegetables are tender. Serve hot or warm.
Variation
• If you prefer, use 300ml tomato coulis (p. 378), instead of sliced tomatoes.
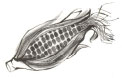
Asparagus
Most asparagus grown and sold in Britain is green. To prepare it, bend each spear to find the breaking point and snap it there. This ensures that the tough part is discarded which is not always the case if the bottom of the stalk is trimmed and then peeled.
White asparagus has a thick skin which must be peeled from just below the tip. Break off the bottom of the stalk.
See notes on choosing vegetables (p. 91), cooking in water (p. 95) and grilling and barbecuing (p. 97).
Asparagus with ham
Asparagus with cooked ham and hard-boiled eggs and served with melted butter or mayonnaise is the classic way of serving it in Holland and Belgium, where they prefer white asparagus, but the dish is just as good with green. The ham should be well flavoured and preferably carved from the bone.
For 4
1 kg asparagus
salt and freshly ground pepper
2 hard-boiled eggs, peeled and cut in half
4 slices cooked ham
100ml melted butter or 250ml mayonnaise (p. 362)
Break the bottoms from the asparagus; they can be used to flavour a soup. Bring a wide pan of salted water to the boil, put in the asparagus and simmer for 4–6 minutes, or steam for 8–10 minutes. Do not overcook, but timing varies greatly according to the thickness of the spears. Lift them out and drain well. Arrange the asparagus on a platter with the eggs and ham. Season lightly. Serve the melted butter or mayonnaise separately.
Variation
Asparagus with prosciutto Wrap small bundles of 4–5 stalks of cooked asparagus in slices of prosciutto. Serve with melted butter or extra virgin olive oil, or make a sauce by heating gently 200ml crème fraîche with 1 tbs finely chopped tarragon, 2 tbs chopped chives and a squeeze of lemon juice.
Oriental asparagus
For 4
1kg asparagus
1 tbs sesame seeds
2 tbs light soy sauce
3 tbs rice or white wine vinegar
1 tsp sugar
2 tbs sesame oil
Break off the bases from the asparagus, cut off the tips and cut the stalks into 3cm pieces on the slant. Bring a wide pan of water to the boil, plunge in the asparagus tips and stalks, bring back to the simmer and cook for 1 minute. Drain well. While the water is heating, dry-roast* the sesame seeds in a heavy pan, shaking it so they don’t burn. Remove the pan from the heat when the seeds start to pop. Whisk together the soy sauce, vinegar, sugar and sesame oil to make a dressing.
Arrange the asparagus on a serving dish, pour over the dressing and scatter over the sesame seeds or, if you prefer, grind the seeds while still warm with a pestle and mortar and then scatter them over the asparagus.
Grilled asparagus
Grilled asparagus makes a pleasant change from boiled or steamed, and cooks just as quickly. Use a griddle pan, or put the asparagus under a hot grill.
For 4
1 kg asparagus
4 tbs extra virgin olive oil
a sprig of lemon thyme
salt and freshly ground pepper
Break the bottoms from the asparagus spears; they can be used to flavour a soup. Thread the asparagus onto skewers and brush lightly with a little of the oil. Grill for 2–3 minutes on each side. Heat the remaining oil gently in a small pan with the lemon thyme, crushing the thyme so that it flavours the oil. Discard the thyme. When the asparagus is ready transfer it to a platter, remove the skewers, season with good sea salt (Maldon salt is very good) and black pepper and drizzle over the flavoured oil.
Variations
• Instead of the oil, drizzle 1 tbs of balsamic vinegar over the asparagus before serving.
• Omit the herb, whisk the unheated oil with 2 tbs lemon juice, spoon this dressing over the asparagus and top with fine shavings of Parmesan.
Asparagus risotto. See p. 193.
Aubergines
Aubergines come in a variety of sizes and colours. Tiny, bitter green ones, the size of peas, and creamy white egg-shaped and -sized ones are both much used in south-east Asian cooking. The ones most usually available in Britain are the fat oval purple ones and sometimes the long, thin ones or egg-sized purple ones. See notes on choosing (p. 91) and the various cooking methods (pp. 97–9).
Many cooks suggest slicing and salting aubergines (1 tbs salt per kg) an hour or so before cooking them to remove any bitter juices. I don’t find that today’s aubergines are bitter and so don’t usually salt them. However, if they are salted, rinsed and dried they will absorb less oil if they are to be fried, an important consideration since otherwise aubergines tend to soak up oil like a sponge. Parboiling also helps reduce the amount of oil aubergines absorb.
Aubergines are very versatile vegetables, and one of the best ways to cook them is to grill or roast them whole (see below). To microwave, prick the skin of whole aubergines several times to allow steam to escape. Put them on 2 layers of kitchen paper, uncovered, and cook for 8 minutes for an aubergine weighing 250g, or 12 minutes for one of 500g.
Grilled whole aubergines
The skins of aubergines should be pricked a few times to prevent them bursting when being grilled or roasted. Grilled over an open fire aubergines acquire a smoky flavour; you can achieve a similar effect indoors by roasting whole aubergines over a gas ring. To roast in the oven, see p. 98. The purée from the cooked and peeled aubergines can be flavoured with herbs or spices, yogurt or tahini* and lemon juice (p. 25).
This version with an oriental sauce is best made with the long thin aubergines, allowing one per person.
For 4
4 long aubergines or
2 larger ones
3 tbs sunflower oil
1 tbs fish sauce
1 tsp chilli flakes
2 spring onions, sliced finely
1 tbs chopped coriander
Prick the aubergines and grill until the skin is blackened and they feel soft. When they are cool enough to handle, peel them and pull off the stalks. Cut the flesh into long strips and arrange on a serving dish. Heat the oil, stir in the fish sauce, chilli flakes and spring onion. As soon as it is sizzling, pour this sauce over the aubergines and garnish with the coriander.
Grilled sliced aubergines with cheese and pine nuts
Thanks to Simon Hopkinson I have come to realize that for grilling in slices, aubergines are better peeled first; the skin invariably gets drier than the flesh. Don’t slice the aubergines too thinly; 1cm is about right.
For 3–4
2 large aubergines, peeled and sliced thickly
2–3 tbs olive oil
100g ricotta
2 tbs chopped mint
3 tbs dry-roasted* pine nuts
salt and freshly ground pepper
Brush the aubergine slices with oil and grill on a barbecue or on a griddle plate until they are soft and lightly browned, about 4–5 minutes each side.
Crumble the ricotta and mix it with the mint and pine nuts. Season well. Put a spoonful of the mixture on each grilled aubergine slice.
Serve as a first course, or with other grilled vegetables, or to accompany grilled lamb chops.
Variation
Grilled aubergines with salmoriglio or tomato salsa Serve the slices topped with salmoriglio sauce (p. 377) or with salsa cruda (p. 380).
Stuffed aubergines
Although Turkish imam bayaldi may be the most famous of the stuffed aubergine dishes, there are countless others just as rewarding. This recipe is also Middle Eastern in origin.
For 6
3 medium aubergines
salt and freshly ground pepper
100ml olive oil
3 medium onions, peeled and finely chopped
3 large garlic cloves, peeled and finely chopped
½ tsp ground allspice
50g raisins, soaked in warm water for 10 minutes
4 ripe tomatoes, peeled, seeded and cubed
2 tbs red wine vinegar
1–2 tsp sugar
handful of chopped parsley
about 150ml water
Cut the aubergines in half lengthways, scoop out and reserve most of the flesh, leaving a layer next to the skin. Sprinkle the shells with salt, turn them upside down and leave to drain for 20 minutes, then blanch in boiling water for 2–3 minutes. Heat the oven to 200°C, 400°F, gas 6.
Heat 3 tbs oil and gently cook the onions and garlic until soft, then add the aubergine flesh, chopped. If necessary, add a little more oil, season with salt, pepper and allspice and cook for 4–5 minutes, stirring frequently to prevent the mixture sticking to the pan. Add the raisins and tomatoes, the vinegar and sugar; taste for balance and sweetness before adding all the sugar. Simmer until you have a thick stew, about 5 minutes. Stir in the parsley.
Arrange the aubergine shells in a wide ovenproof casserole or baking tin in which they fit side by side, and fill them with the mixture. Mix the remaining oil with 150ml water and pour over the aubergines; it should come almost to their tops – add more water if necessary. Cover and bake for about 1 hour. These stuffed aubergines are best served cold.
Aubergine filo pie
Filo pastry is usually brushed with melted butter, but for savoury pies such as this, I prefer oil. You could use finely crumbled feta cheese or a well-flavoured Cheddar, grated, instead of the Parmesan.
For 4
2 onions, peeled and chopped
4 tbs olive oil
400g aubergines, peeled and cubed
2 garlic cloves, peeled and chopped finely
2 tsp chopped or rubbed dried oregano or mixed Mediterranean herbs
salt and freshly ground pepper
350ml passata (p. 378 or bought)
1 packet (270g) filo pastry
olive oil for the pastry
125g grated Parmesan
Sauté the onion in 2 tbs oil until it starts to colour, then add the remaining oil and the aubergines. Cook, stirring occasionally, until the aubergine is almost tender, then add the garlic, herbs and seasoning. Pour over the passata, and cook, covered, over low heat for 15 minutes. Heat the oven to 190°C, 375°F, gas 5.
When working with filo pastry it is important to keep all except the sheet you are using covered with clingfilm or a tea towel, otherwise the pastry will dry out. Each piece has to be brushed lightly with oil, so pour about 80ml olive oil into a small bowl and have ready a brush. Take a shallow baking tray or ovenproof dish (the one I use is 20 x 30 x 3cm) and line it with a sheet of filo. Brush the pastry with oil and repeat with 2 further sheets. If necessary cut the sheets and patch them in the dish. Spread the aubergine mixture over the pastry and cover it with 2 more sheets of oiled filo. Sprinkle half the cheese over this and cover again with 2 sheets of filo. Scatter the remaining cheese over this layer, cover with 2 more sheets of pastry. Score the top lightly into serving pieces, but do not cut through.
Bake until golden, about 30–35 minutes. Leave the pie for 10 minutes before serving.
Variations
Spinach filo pie (Spanokopitta) This Greek pie is made in the same way as the aubergine pie. Replace the aubergine by 1kg fresh spinach, blanched and chopped, or the equivalent amount of frozen spinach, thawed and chopped. Combine the spinach with the sautéed onion, the garlic and a large handful of chopped parsley instead of the oregano. Season with salt, pepper and a little nutmeg. Omit the passata and stir in the cheese. Line the dish with half of the pastry, make a layer of the spinach mixture and cover with the rest of the pastry. Bake as above.
Aubergine or spinach parcels or triangles Make small parcels or triangles of filo pastry (p. 493) filled with a spoonful of the aubergine or spinach mixture above, lay them on a baking sheet and bake for 15–20 minutes at 190°C, 375°F, gas 5. Serve warm.
Moussaka
This Middle Eastern dish has many variations, some with potato, some with fresh meat, some with no meat at all, some with a tomato sauce. It is a dish to experiment with, rather than a formula to follow. Moussaka can be prepared a day in advance as far as layering the vegetables and meat sauce and kept refrigerated. Let it come to room temperature and heat the oven while you make the sauce.
For 4–5
2 large potatoes, peeled
2 medium aubergines
oil for frying
2 onions, peeled and chopped
2–3 garlic cloves, peeled and chopped
500g cooked or raw lamb or beef, cubed or minced
2 tbs tomato purée
1 tsp cinnamon
salt and freshly ground pepper
For the sauce
15g butter
1 tbs plain flour
300ml hot milk or stock or half and half
grated nutmeg
salt and freshly ground pepper
150g grated Parmesan or Gruyère
Parboil the potatoes for 10–12 minutes, drain and slice them. Slice the aubergines. To prevent them absorbing too much oil, parboil them or salt and leave to drain (pp. 95, 105) Fry the aubergine slices lightly in oil until they are golden on both sides. Drain them on kitchen paper, and fry the potatoes briefly in the same oil. Drain them too. Wipe the pan clean and put in 2 tbs new oil. Add the onion, cover the pan and sweat* gently over low heat until soft. Add the garlic, meat, tomato purée and seasonings. Stir well; if you are using cooked meat, heat through gently for about 10 minutes. If it is fresh meat, cook it until tender, about 20 minutes.
While the meat is cooking, melt the butter and whisk in the flour. Off the heat, add the heated liquid – a little at a time – to make the sauce. Whisk to avoid lumps and season with a little nutmeg, salt and pepper. Place the pan over low heat and cook, stirring from time to time, until the sauce thickens. Stir in half the cheese.
Heat the oven to 180°C, 350°F, gas 4. To assemble the moussaka, put a layer of potato in the bottom of a deep ovenproof dish, sprinkle with some of the remaining cheese, then a layer of aubergine followed by some of the meat mixture. Season each layer. Repeat until all the ingredients are used up, finishing with a layer of potato or aubergine. Pour over the sauce. Bake for about 40 minutes until golden.
Variations
Vegetarian moussaka To make a meatless moussaka, use 2 more aubergines and grill or bake them whole until tender. Peel them and mash the flesh to a purée. Chop 4 tomatoes. Mix the purée and tomatoes with the onion instead of the meat and make layers as above.
• Another possibility would be to sweat* 500g chopped courgettes with the onion, then add 4 chopped tomatoes and cook together for a few minutes.
Escalivada. See p. 152.
Indian braised potato and aubergine. See p. 157.
Broad beans
Tiny young broad beans are best; their flavour and texture are excellent and they need only simple treatment. Large old broad beans taste much nicer if you remove the outer skin of each bean after cooking. They come loose while being boiled, and it is easy to nick the skin at one end, press out the bean and discard the empty shell. It is a bit time consuming, but it will make a big difference to the taste of your dish.
Broad beans alla romana
The Italians have some of the best dishes for young broad beans, and this one has several interpretations: with tomatoes, with pancetta or with both; with sage, with basil, with neither. Experiment to see which version you prefer. If you leave out the tomatoes, use just enough water to cover the beans.
For 4–6
2kg broad beans (will give about 500g shelled beans)
2 tbs olive oil
1 onion, peeled and chopped
125g pancetta* or bacon, cut in strips
a handful of basil leaves, torn or chopped coarsely
4 large tomatoes, peeled and chopped
salt and freshly ground pepper
Pod the beans. Heat the oil and sauté the onion until golden. Add the pancetta or bacon, let it release its fat, then stir in the beans and basil. Stir and cook for a minute or two, then add the tomatoes and season. Cover the pan and simmer for 20–25 minutes, until the beans are tender. Add a little water if necessary from time to time to prevent the beans sticking to the pan. Serve hot.

Broad beans with coriander
The flavours of broad beans and coriander complement each other beautifully in this simple dish.
For 4–6
2kg broad beans (about 500g shelled)
3 tbs olive oil
2 shallots, peeled and chopped
1 tbs white wine vinegar
salt and freshly ground pepper
large handful of coriander leaves, chopped
Pod the beans and boil until just tender, and drain. Heat the oil and sauté the shallots until they just start to colour. Stir in the vinegar and add the beans. Season and stir the pan to coat the beans in the sauce. Stir in the coriander and serve.
Broad bean purée
A very good way of serving large older beans. See also purées and mashes (p. 96).
For 4
2kg broad beans (about 500g shelled)
2 spring onions
1 bay leaf
2 sprigs savory
100ml olive oil
salt and freshly ground pepper
lemon juice
Pod the beans and boil them with the spring onions and herbs until tender. Drain them, discard the onions and herbs, and remove the tough pale skins from the beans (p. 109). Purée the beans in a processor or through a sieve. If you are using a processor, put in some of the oil with the beans and season them. If you sieve the beans, add the olive oil a little at a time to create a smooth purée, and season well. You may not need all of the oil, or you may need a little more to obtain a smooth well-flavoured purée. Use a tablespoon or so of lemon juice to heighten the taste.
Dressed with a little garlic crushed with salt, more lemon juice and olive oil, and left to cool, this makes a good first course with pitta bread.
Dried beans
There are dozens of types of dried beans, usually associated with a particular part of the world and its style of cooking. We are fortunate that we can buy many of them easily, dried or canned. For many dishes, good canned beans can be used, but it is important to rinse them well to get rid of the canning liquid.
If your beans are supermarket-packaged, they should be free of bits of stone or wood or earth. If you bought them loose, check them over for foreign bits and then wash well to get rid of dust. Beans and whole peas require soaking for several hours or overnight before being cooked in water. If you forget to soak them in time, a quicker method is to put them in a pan with plenty of water, bring to the boil and boil fast for 2 minutes, then remove the pan from the heat and leave to stand for 1 hour. Drain and cook as indicated in the recipe. They may need to cook a bit longer than usual, but cooking times for pulses vary not only according to how long they are soaked but also according to how old they are. Chick peas take the longest time, lentils the shortest.
Salt pulses only at the end of cooking otherwise they will harden.
Although there are classic dishes which call for a particular bean, they can to some extent be used interchangeably between recipes, so experiment.
Mexican refried beans
Mexican food is invariably associated with refried beans. They are usually made with black or brown beans, but red kidney beans are good too. There are many styles of refried beans, some smooth from puréeing in a food processor, some rough, some with lots of onion and garlic, some spiced with chilli, so there is plenty of choice. Lard is the fat most used in Mexico, but oil is starting to replace it.
The beans are simmered, traditionally in an earthenware pot, until creamy when they make a good dish without further treatment, just served with a salsa (pp. 380–2). Refried beans go well with rice and a salad, with sausages or bacon; use them to stuff peppers or eat them on their own with tacos.
For 6
250g beans, soaked overnight
1 onion, peeled
1 litre water
1 tbs oil
1–2 chillies (optional)
salt
Put the beans in a deep pot with the onion cut in half, cover with the water and bring to the boil. Reduce to a simmer, add the oil and whole chillies (if using), and cook, half covered, until the beans are tender. They will take an hour or more, but much depends on the age of the beans and how fast they are cooking, so check after 45 minutes. Keep the water about 1cm above the beans, not more. Add hot water as needed. When the beans are almost tender, season with salt. The skins and inside of the beans should be tender but they shouldn’t be broken and disintegrating. Most of the liquid should have been absorbed, what remains will be thick and creamy.
for refrying the beans
For 6
2–3 tbs oil
2 onions, peeled and chopped
3 garlic cloves, peeled and chopped
the cooked beans
salt
60g grated cheese or crumbled feta (optional)
Use a large non-stick frying pan to fry the onions until golden, but don’t burn them. Add the garlic and cook a little longer. Scoop about a quarter of the beans out of their pan (it doesn’t matter if there is a little of the cooking liquid with them) and mash with a potato masher or large fork. You could purée some of the beans in the food processor, but crush some by hand to give the dish a more interesting texture. Keep adding the beans to the frying pan and mashing them until all are used. Add a ladleful of the bean liquid, or water, and stir it in, then another, and a third if necessary. The beans can absorb quite a lot of liquid and will dry once they reach the table, so it is best to start with them slightly on the soupy side. Salt them and if you are using cheese, stir it in towards the end of the mashing time.
Tuscan beans
Cannellini or borlotti beans are the beans most suitable for this dish. The beans are usually served hot or warm, on their own, dressed with fruity olive oil, or to accompany a meat dish. Cold, they make a delicious salad with chopped parsley, finely sliced onion and chunks of tuna fish.
For 3–4
250g cannellini beans, soaked overnight
1 small onion, peeled and cut in half
2 garlic cloves, peeled and crushed
3 sage leaves
1 tsp chopped thyme leaves
2 tbs olive oil
1 litre water
salt
12 slices pancetta*
extra virgin olive oil
Put the beans in a deep pot (earthenware would be used in Tuscany) with the onion, garlic, herbs and 2 tbs olive oil and pour over about 1 litre of water. Bring the beans to the boil, reduce to a simmer and cook very slowly for 1–2 hours, until the beans are tender. Add salt to taste about 15 minutes before the beans are ready.
Just before the beans are done, grill the pancetta until crisp. Drain the beans and sprinkle them liberally with extra virgin olive oil. Serve with the pancetta crumbled over the top, and a bowl of roasted garlic (p. 136).
Green beans
There are many green beans on the market, from tiny French beans to the larger flat beans (sometimes green, sometimes almost white or yellow), round bobby beans and, of course, runner beans. Small French beans have the best flavour. The following recipes are based on small to medium-sized beans. If necessary, remove any strings, cut large beans on the slant in 2–3 pieces, and adapt the cooking time. See notes on choosing (p. 91), cooking in water and steaming (pp. 95, 96). To microwave, sprinkle beans with water and wrap in microwave plastic film, or put them in a microwave plastic bag or a covered dish. Cook 250g for 4½ minutes, 500g for 7–8 minutes.
Green beans with walnut sauce
For 4
500g beans, cut in short lengths if large
120g walnuts
1 garlic clove, peeled and crushed
a handful of parsley, chopped
½ tsp chilli flakes or
¼ tsp cayenne
¼ tsp ground
cinnamon
¼ tsp ground coriander
salt and freshly ground pepper
50g fresh breadcrumbs
100–150ml olive oil
2–3 tbs lemon juice
Boil or steam the beans until just tender, then drain them. While they are cooking, whiz together in a processor the walnuts, garlic, parsley, spices, salt and pepper and breadcrumbs. Trickle in the olive oil as though making mayonnaise. Use enough to make a creamy but not stiff sauce. Add the lemon juice and taste for seasoning. Spoon the walnut sauce over the beans and turn them to coat them well. Serve the beans with poached or grilled fish, grilled or roast chicken or a steak.
Green beans with tomatoes
This is a combination of vegetables which is found in many countries. These two recipes are Italian and French in origin.
Italian version
500g small green beans
For 4
400g tomatoes
2 tbs olive oil
handful of parsley leaves, chopped
1 garlic clove, peeled and chopped finely
small handful of basil leaves, chopped
1 glass of good red wine
salt and freshly ground pepper
Boil or steam the beans until just tender. Drain them. Peel, seed and chop the tomatoes. Heat the oil and sauté the parsley, garlic and basil. Add the tomatoes to the pan and stir well. Add the beans, pour over the wine and season. Simmer uncovered for about 30 minutes, until the wine has reduced to make a sauce.
French version
For 4
500g small green beans
400g tomatoes
2 tbs olive oil
1 garlic clove, peeled and chopped finely
½ tsp chopped thyme leaves
salt and freshly ground pepper
Cook the beans in water or steam until just tender, and drain them. Peel, seed and dice the tomatoes. Heat the oil and lightly sauté the garlic. Add the tomatoes and thyme leaves when the garlic starts to colour; season well. Simmer for 2–3 minutes, then add the beans. Toss all together and serve.
Green beans with ham
This dish has been a firm favourite in our house since we discovered it many years ago in Menorca. It is nicest with Serrano ham, but works well with any other cured rather than cooked ham, or with smoked bacon.
For 4
500g green beans
5–6 tbs olive oil
125g Serrano ham or bacon, cut in strips
2 garlic cloves, peeled and chopped
50g grated Manchego or Parmesan
freshly ground pepper
Cook the beans in water or steam until just tender, then drain them. Heat the oil in a heavy frying pan, add the ham or bacon and garlic and fry them gently, making sure the garlic doesn’t burn. Add the beans, stir to combine, and cook for 10 minutes, stirring occasionally. Add the cheese and grind over plenty of black pepper. Continue to cook until the cheese melts, then serve.
Beetroot
Beetroot has had a revival, and it is now recognised that there are many more interesting things to do with this vegetable than pickle it in vinegar or tip it into a bowl with lettuce and tomato and call it salad. See notes on preparing vegetables (p. 92), cooking in water (p. 95) or baking and roasting (p. 98). To microwave, put baby beetroot in a microwave dish and cover. Allow 8 minutes for 250g, 12 minutes for 500g. Wrap large beetroots individually in microwave plastic wrap and arrange them in a circle on the carousel. Allow 20 minutes for one 300g beetroot, 25 minutes for 6 beetroots with a total weight of 1kg. For immediate use, cool slightly, unwrap and peel off the skin. To keep, leave the beetroot in their skins until needed.
Beetroot with orange
This is a version of a lovely recipe in John Tovey’s Feast of Vegetables, sadly now out of print.
For 4
300g raw beetroot
1 tbs walnut, hazelnut or sesame oil
juice and grated rind of 1 unwaxed orange
30g walnuts or hazelnuts, dry-roasted* and chopped coarsely
Peel and grate the beetroot quite finely. Heat the oil and add the orange juice and rind. Tip in the beetroot and fry, tossing and stirring for 5–6 minutes. Put the beetroot and pan juices in a warmed serving dish and scatter over the nuts. Serve with baked pork chops (p. 339), pot-roasted pork fillet (p. 341), a grilled steak or as a separate vegetable course. Cold, it also makes an excellent salad.
Variation
Beetroot with balsamic vinegar and dill Prepare the beetroot as above, then sauté it in 2 tbs olive oil for 4–5 minutes; stir in 1 tbs balsamic vinegar and 2 tbs chopped dill.
Beetroot with cream
This is a standard dish of central and east European cooking. It works well with soured cream, crème fraîche or, as here, with double cream laced with mustard.
For 4
500g cooked beetroot (see above)
50g butter
2 tsp wine vinegar
salt
1 tbs Dijon mustard
100ml double cream
Dice the beetroot. Heat the butter in a frying pan and stir in the beetroot. Add the vinegar and season with salt. The vinegar will turn the beetroot a vivid red. Stir the mustard into the cream, add to the pan, stir to coat all the beetroot with the sauce and allow to heat through. Serve with baked rabbit (p. 354), a plainly grilled venison steak or with game birds.
Broccoli
Large-headed calabrese is the broccoli most often on sale, but in spring purple sprouting broccoli, with small deep-coloured heads and dark green leaves, appears in the shops. Purple sprouting has an excellent flavour when young, but discard most of the stalks which are often stringy. The cauliflower recipes can also be used for broccoli, and broccoli can replace the spring greens in the stir-fry recipe on p. 119.
To microwave, put broccoli spears into a round dish with the heads in the centre and the stalks pointing outward. Add 1 tbs water to 250g, cover and cook for 4–6 minutes; add 1½ tbs water to 500g, cover and cook for 6–8 minutes. Put florets in a dish that holds them in a single layer, cover and cook for 2½ minutes for 250g, 4 minutes for 500g.
Broccoli stir-fried with garlic, chilli and ginger
For 4
500g broccoli
2 tbs oil
a small piece of ginger, chopped finely
1 small red chilli, seeded and sliced
2 garlic cloves, peeled and chopped finely
3 tbs rice wine* or sherry
salt
Cut the broccoli into small florets, peel the stalks and cut them into short lengths. Heat a wok and when it feels hot when you hold your hand above it, add the oil. Swirl it around, then add the ginger, followed by the chilli, garlic and broccoli. Stir-fry vigorously for 2 minutes, then add the wine and a little salt. Keep stirring so the broccoli is well tossed with the other ingredients. It will be ready after a further 2–3 minutes.
Broccoli with oil and lemon
This is a popular Italian way of serving vegetables. Green beans, chard, spinach all benefit from this treatment, but I find the lemon particularly good with broccoli.
For 4
500g broccoli
80–100ml extra virgin olive oil
juice of ½–1 lemon
salt and freshly ground pepper
Cut the broccoli into florets, trim and peel the stalks and cut them into short lengths. Cook the broccoli for 3–4 minutes in boiling water or steam it for 5–6 minutes; it should still be crisp but not raw. Drain and put into a serving dish. Whisk together oil and lemon juice to your taste, making enough to dress the broccoli. Season with pepper and a little salt and pour over the broccoli. Serve hot or warm.
Brussels sprouts
I am not a fan of Brussels sprouts. Even the small, fresh bright green ones have a pronounced cabbagey flavour, quite out of proportion to their size. I find the other members of the brassica tribe more subdued and pleasing. Brussels sprouts are tempered by nuts, or breadcrumbs lightly fried in butter.
Brussels sprouts with breadcrumbs
For 4
500g small Brussels sprouts
6 tbs fresh breadcrumbs
50g butter
salt and freshly ground pepper
Boil the sprouts in water for 6–8 minutes, until just tender. Drain them. Fry the breadcrumbs in the butter until crisp and lightly browned. Add the sprouts, season and toss together. Serve at once.
Variations
Replace the breadcrumbs with 6 tbs slivered almonds or chopped pecans.
Use half the amount of braised chestnuts (p. 130) to cooked sprouts and toss them in 50g butter.
Brussels sprouts with olive oil and lemon
For 4
500g small Brussels sprouts
4 tbs olive oil
2 garlic cloves, peeled and sliced
salt and freshly ground pepper
2 tbs lemon juice
Boil the sprouts until almost tender, about 5–6 minutes. Heat the oil in a large pan and fry the garlic gently until it turns brown. Scoop it out and discard it. Put in the drained sprouts, season and cook for 2–3 minutes, stirring and shaking the pan. Add the lemon juice, stir it in and serve.
Cabbage
Cabbage is an under-appreciated vegetable. There are so many varieties to choose from: crinkly Savoy, firm heads of round and pointed white cabbage, spring greens, red cabbage and the currently fashionable Italian cavolo nero as well as the Chinese varieties. Cabbage should be cooked for a very short time to retain texture and flavour, or baked or braised for a long time. Anything in between produces a sulphurous-smelling unappetising mush. See notes on preparation (pp. 93–4) and the various cooking methods (pp. 95–6).
Savoy cabbage rolls
For 4–6
1 Savoy cabbage (about 750g)
300g thick fromage frais or curd cheese
200ml soured cream
salt and freshly ground pepper
5–6 tbs chopped dill
80g butter
2 tbs dried breadcrumbs
Heat the oven to 200°C, 400°F, gas 6. Separate the cabbage leaves and cook the large and medium sized ones in boiling water in an uncovered pan for about 5 minutes (keep the heart for another dish). Drain the leaves well and cut out the thick part of the central stalk. Blend the cheese, soured cream and seasonings together, then stir in the dill. Put some of the mixture on each of the leaves, and roll them up like pancakes. Lightly butter an ovenproof dish and coat it with breadcrumbs. Put in the cabbage rolls and dot generously with butter. Bake in the oven for 15–20 minutes until the top is lightly golden.
Spring greens with oyster sauce
You can, of course, stir-fry any of the Chinese cabbages or greens, and flavourings can be varied to include soy sauce or finely chopped ginger. A sprinkling of sesame oil at serving time is good with cabbage. I find oyster sauce has a particular affinity with spring greens.
For 2–3
300g spring greens
2 tbs oil
2 garlic cloves, peeled and crushed
3 tbs oyster sauce
Shred the spring greens. Heat a wok over high heat until the heat rises, then add the oil and swirl it around the sides. Put in the garlic, then the cabbage. Toss it quickly – tongs are useful here unless you are skilled with chopsticks. The greens will spit, so be careful. Stir-fry for 3–4 minutes, then add the oyster sauce. Coat the greens with it and serve.
Spiced red cabbage
Most recipes for red cabbage suggest long braising; this one is cooked quickly so that the cabbage retains some bite. Good with roasted winter vegetables (p. 165), sausages and venison dishes.
For 6
1 red cabbage (600–700g)
1 red or white onion, peeled and sliced finely
1 large tart apple, peeled and grated
2 tbs raisins
1 tsp chopped thyme or rosemary
4 tbs olive oil
2 cardamom pods*, crushed
1 tsp ground coriander
salt
1 large glass good red wine
2–3 tbs balsamic or red wine vinegar
Cut the cabbage in four, remove the stalk then shred the leaves. Combine the cabbage with the onion, apple, raisins and thyme or rosemary; mix it all well together with your hands. Heat the oil slowly in a large pan, add the vegetable mixture, turning it over to coat everything in the oil. Stir in the spices and salt to taste. Turn up the heat, pour in the wine and cover the pan. Cook briskly for about 8 minutes, stirring and occasionally shaking the pan. Add a splash of water if it is getting too dry. Take the pan from the heat, add the vinegar which will provide a lively note, and serve.
Braised red cabbage
Finely sliced red cabbage can be braised for 30–45 minutes in butter with a splash of water or wine vinegar. Then give added flavour with chopped soaked prunes, a spoonful or two of a sweet chutney, a handful of cranberries, and cook for another 15 minutes or so for the flavours to blend.
Steamed bok choi
Use baby bok choi if you can get it and keep the heads whole. Cut large ones in half. They make an attractive accompaniment to steamed sea bass (p. 243).
For 4
500g small heads of bok choi
salt
3 tbs sesame oil
50g walnuts, broken or chopped coarsely
Remove the outer stalks from the bok choi. Put the heads in a steamer and cook over simmering water for 7–10 minutes. The stalks should still retain some bite. Season with salt. Heat the sesame oil in a small pan and lightly fry the nuts for a minute or two. Put the bok choi on a dish, pour over the oil and nuts and serve.
Braised cavolo nero
This newcomer with its deep blue-black leaves is a type of kale. It provides an agreeable addition to the supermarket vegetable racks. Its texture remains firm when cooked. It is best sautéed with garlic in olive oil, or braised as here with onions, garlic and wine. A final sprinkling of Parmesan is beneficial whichever method you use.
For 4
400g cavolo nero
80ml olive oil
2 onions, peeled and sliced finely
4 garlic cloves, peeled and finely chopped
salt and freshly ground pepper
100ml white or red wine
80ml water
60g grated Parmesan
Discard the large central stalks and shred the leaves finely. Heat the oil in a large pan and sauté the onion until it is a light gold, then add the garlic. Sauté a minute or two longer, and stir in the cabbage. Keep stirring until it is all coated in the oil and starting to wilt. Season with salt and pepper and pour over the wine and water. Cover the pan, turn the heat very low and simmer for 50 minutes to 1 hour. Turn the cabbage from time to time. Check for seasoning. The cabbage should be tender but will still have a bite. Stir in the Parmesan and serve.

Carrots
Young tender carrots need only be rinsed and brushed; older ones need scraping and may benefit from a very small amount of sugar in the cooking. See notes on the various cooking methods (p. 95–8). To microwave, slice or julienne* the carrots, put them in a microwave plastic bag and cook for 6½ minutes for 250g, 8 minutes for 500g. Carrots make an excellent purée if simmered in orange juice and water and then whizzed with a little double cream.
Carrots glazed with lemon and coriander
For 4
500g carrots
30g butter
1 tsp brown sugar
salt and freshly ground pepper
½ tsp ground coriander
2 tbs lemon juice and grated rind of 1 small unwaxed lemon
3 tbs chopped coriander leaves
It is important to cut the carrots to the same size so that they cook evenly. I suggest strips about 3cm long and ½cm wide, otherwise slice the carrots finely. Melt the butter in a heavy pan, add the carrots, sugar, salt, pepper and ground coriander and just enough water to cover the carrots. Bring to the boil and simmer, uncovered, for 10–15 minutes. The carrots should be fairly tender and the liquid quite well reduced. Turn up the heat and watch the pan so that the vegetables do not stick as the last of the liquid evaporates, leaving the carrots coated in the butter and sugar glaze. Add the lemon juice and rind and the chopped coriander and serve.
Variation
Carrots in cream sauce Cook as above and add 2–3 tbs double cream after adding the lemon juice. The coriander leaves could be replaced by chives or mint.
Carrot and celeriac cake
Celeriac are large so you will certainly have some left if you cut one to make this cake. Cover the cut surface of the remaining piece tightly with clingfilm and refrigerate. It may discolour a little but you can cut off a slice before using the rest.
For 4
250g carrots, peeled
250g celeriac, peeled
50g butter
1 tsp sugar
salt and freshly ground pepper
150ml vegetable stock or water
1 tbs olive oil
3 shallots, peeled and chopped
2 eggs
50g grated Parmesan or Gruyère
50g ricotta
50ml double cream
2 tbs chopped parsley
Heat the oven to 220°C, 425°F, gas 7. Slice the carrots thinly and the celeriac into pieces of a similar size. The easiest way to do this is to slice both in a food processor, cutting the celeriac into chunks first. Heat the butter in a heavy pan and cook the vegetables until lightly coloured. Add the sugar and seasoning, and pour over the stock. Cover and simmer for 20 minutes, by which time the liquid should have almost evaporated. If it hasn’t, turn up the heat and let it reduce further.
While the carrots and celeriac are cooking, heat the oil and sauté the shallots until softened. Remove the carrots and celeriac from the pan and chop them coarsely; again, a food processor will do it for you. Beat the eggs with the cheeses and cream and stir in all the chopped vegetables and the parsley.
Butter a 16cm soufflé dish or a ring mould and fill it with the mixture. Cover the dish with foil and bake in a bain-marie* for 30–40 minutes until set. Turn out carefully onto a serving plate and serve at once with broad bean purée (p. 110) or peas.
Cauliflower
Cauliflower is quickly cooked when broken into florets – see notes on the various cooking methods (pp. 95–6) – and it benefits from strong flavourings, whether western or oriental. To microwave, put florets in a dish that holds them in a single layer and cook for 4 minutes for 250g, 7 minutes for 500g. See also the broccoli recipes, which can be made equally well with cauliflower.
Cauliflower with anchovy dressing
This is a dish from southern Italy where different versions are found, sometimes adding strong local cheese to the sauce.
For 6
1 kg cauliflower, cut into florets
60ml olive oil
3 garlic cloves, peeled and sliced
6 anchovy fillets, chopped
12 black olives, stoned and sliced
freshly ground pepper
Boil the cauliflower for 4–5 minutes so that it still retains a bite, and drain. Heat the oil in a heavy pan and sauté the garlic. Let it turn golden, but be careful that it doesn’t burn. Add the anchovy, the olives and the cauliflower. Season with a twist or two of pepper. I find the dish has enough salt from the anchovies and olives. Stir all together over low heat for 4–5 minutes and serve.
Cauliflower with almonds
This looks most attractive if the cauliflower is served whole, but it tastes just as good made with florets.
For 4–6
1kg cauliflower
80g butter
50g flaked almonds
60g fresh white breadcrumbs
salt and freshly ground pepper
To cook the cauliflower whole, turn it upside down and dig out most of the central stalk. Boil it for 10–12 minutes or steam for about 15. Lift it out carefully onto a warm dish, season and keep warm. (Cook florets for 4–5 minutes.) Melt the butter in a frying pan, and pour a little over the cauliflower.
Fry the almonds and breadcrumbs in the rest of the butter until golden. Scatter the breadcrumb and almond mixture over the cauliflower and serve.
Spiced braised cauliflower
For 4
1 kg cauliflower
3 tbs oil
½ tsp black mustard seeds (p. 76)
1 tsp cumin seeds
2 cm piece of ginger, chopped finely
1 tsp ground coriander
¼ tsp chilli powder
½ tsp turmeric
salt
3 tbs water
½ tsp garam masala*
1 tbs lemon juice
Cut the cauliflower into florets. Heat the oil in a large pan or wok and fry the mustard seeds, cumin seeds and ginger. When the mustard seeds start to pop and fly about, add the cauliflower. Stir well and add the coriander, chilli powder, turmeric and salt. Fry until the cauliflower is lightly browned. Add 3 tbs water, put on the lid, lower the heat and cook for 6–8 minutes. Shake the pan from time to time; if the cauliflower is sticking add another spoonful of water. When it is tender, transfer it to a serving dish, sprinkle over the garam masala and lemon juice and serve.
Celeriac
Although not a root vegetable (it is actually the swollen lower stem of celery), celeriac can be prepared in much the same way and can be stored through the winter months. Celeriac discolours once cut, so it is best put into acidulated water. See notes on the various cooking methods (pp. 95–6). To microwave, cut into 1cm dice, put in quantities up to 200g in microwave plastic bags and cook for 5 minutes for 250g, 8½ minutes for 500g.
Celeriac with olive oil
This is a Turkish way of cooking all kinds of vegetables – carrots, leeks, green beans, artichokes – to be eaten cold. The vegetables are stewed briefly in olive oil, then flavourings and a liquid, usually water, are added and they are cooked slowly to leave a rich sauce as the water is driven off. It is a particularly good way of preparing celeriac. The oil must be the best extra virgin olive oil. Choose small celeriac roots because the big ones are often woody.
For 6
700–800g celeriac
lemon juice
1 carrot, peeled
1 potato, peeled
10 baby onions or 1 onion, peeled and chopped
80ml extra virgin olive oil
salt
1 tsp sugar
250ml water
4 tbs chopped dill
50g young peas, fresh or frozen
1 lemon
Peel the celeriac, cut it in half and discard the woody centre if necessary. Parboil the two halves for 5 minutes in water acidulated with a squeeze of lemon juice. Drain and cut into cubes. Cut the carrot and potato into pieces the same size as the celeriac. Put the carrot, potato and onions into a large pan with the oil and fry for a few minutes over medium heat. Add the celeriac, salt to taste, the sugar and the water. Bring to the boil, then reduce the heat, cover the pan and cook for 20–30 minutes, adding the dill and peas for the last 5 minutes. All the vegetables should be tender and the liquid considerably reduced. Leave the vegetables to cool in the pan. Serve at room temperature with lemon wedges as a separate course.
Celeriac and potato cakes
This dish evolved from eating latkes, the celebrated potato cakes of Jewish cookery; I find this unorthodox version has more flavour.
For 4
2 eggs
3 tbs flour
3 tbs chopped parsley
250g potatoes
300g celeriac
salt and freshly ground pepper
oil for frying
Beat the eggs lightly, mix in the flour and parsley. Peel the potatoes and the celeriac, discard any hard woody parts of the latter, grate both, and combine quickly with the egg to prevent discolouring. Season.
Heat 2–3 tbs oil in a frying pan and form the mixture into 8 cakes. Fry over moderate heat for 4–5 minutes on each side. Pressing the cakes flat with a spatula or fish slice helps them to brown evenly.
Celeriac crisps
Celeriac crisps make an attractive garnish, provided they don’t get nibbled before they reach the table. Sweet potato and parsnip crisps can be made in the same way.
200g piece of celeriac, peeled
oil for deep-frying
Cut the celeriac into very thin slices on a mandoline (see p. 528) or with a potato peeler. Heat the oil in a deep-fryer to 180°C, 350°F. Drop in the pieces of celeriac a few at a time; they will turn crisp very quickly. Drain them on kitchen paper and season with salt.
Carrot and celeriac cake See p. 122.
Celery
Cooked celery is very different from the raw vegetable traditionally served with cheese. Easily overcooked, its most common use is as a flavouring for soups and stews, but it can be excellent braised. See notes on preparation (p. 93) and the various cooking methods (pp. 95–8).
Celery braised with ham
This quickly assembled dish can make a supper dish for 2 or a vegetable serving for a meal for 4.
For 2–4
2 heads of celery
50g butter
1 onion, peeled and chopped
150g Serrano or smoked ham, cut in strips
1 garlic clove, peeled and sliced
2 tbs chopped parsley
salt and freshly ground pepper
½ tsp cornflour mixed with 1 tsp water
150ml yogurt
2 tbs dried breadcrumbs
Heat the oven to 180°C, 350°F, gas 4. Remove any strings from the celery and cut into 5cm pieces. Blanch in boiling water for 2 minutes and drain thoroughly. Heat 10g butter and sauté the onion and ham for 2–3 minutes, add the garlic and sauté 1 minute more. Take a little of the remaining butter to grease a shallow ovenproof casserole. Put in the contents of the frying pan and spread the parsley and celery on top. Season well. Beat the cornflour and water into the yogurt to stabilize it during cooking and pour it over the vegetables. Scatter the breadcrumbs over the top and dot with the rest of the butter. Bake for 35–45 minutes until the top is browned.
Chard
Most of the chard in the shops looks tired, as if it has been there for days – and it probably has, since few people seem to know this lovely vegetable. Vegetable gardeners certainly know it and grow it for its beauty – large dark green leaves rising above white or (with rainbow chard) magenta, red or yellow stalks – as much as for its flavour. It is a vegetable which can be prepared in a variety of ways; the leaves and stalks are often cooked, and served, separately. Leaves can be cooked in the same way as are spinach leaves and used to make a stuffing for pasta or served as a cooked salad; the stalks can be sautéed, cooked as a gratin (see over) or braised with ham (see above); see also curried ham and leek gratin (p. 345).
While writing this I was brought armfuls of chard from a friend’s allotment, and so had plenty of opportunity to try all sorts of recipes. See also the notes on preparation (pp. 92–3).
Chard with oil and lemon
For 6
1kg chard
6 tbs extra virgin olive oil
2 garlic cloves, peeled and chopped finely
salt and freshly ground pepper
juice of ½ lemon
¼ tsp chilli flakes (optional)
Separate the leaves and stalks. Remove the stringy bits from the stalks with a potato peeler, and cut them in 2cm diagonal slices. Blanch the stalks for 2–3 minutes in boiling water and drain. If the leaves are very big, roll them and cut them in a chiffonade*, otherwise tear them into 2 or 3 pieces. Heat the oil in a large sauté pan and add the garlic. As soon as it starts to colour, put in the chard leaves and a little salt. Turn them in the oil and when they have wilted, if all the water that was clinging to them from washing has evaporated, add the stalks. If necessary, turn up the heat to get rid of the moisture before you put in the stalks. Sauté for 5–6 minutes, tossing the vegetables around in the oil. Both leaves and stalks should retain a bite. Season with pepper, lemon juice and chilli flakes if you like, and serve hot or at room temperature.

Gratin of chard stalks
This is a traditional dish from Provence, where chard is as popular as it is in Italy. It is simple to prepare, and the cream and cheese combine well with the fresh taste of the parsley to bring out the delicate sweetness of the chard. The overall quantity of chard needed for this and the next recipe depends on the size of the chard but as a guide you would need about 1–1.2kg.
For 4
600g chard stalks
sunflower oil
¼ tsp ground nutmeg or mace
salt and freshly ground pepper
3 tbs chopped parsley
150g grated Parmesan
200ml double cream
2 egg yolks
2–3 tbs dried breadcrumbs
Heat the oven to 180°C, 350°F, gas 4. Remove the stringy bits from the stalks with a potato peeler, then cut the stalks into sticks 5–6cm long and 1cm wide. Blanch the stalks for 3–4 minutes in boiling water and drain. Lightly oil a shallow ovenproof casserole or gratin dish. Put in a layer of stalks, season with nutmeg or mace, salt and pepper and scatter over some of the parsley and cheese. Make further layers, finishing with a good layer of cheese, until everything is used. Heat the cream gently and whisk in the lightly beaten egg yolks. Pour the cream over the chard and sprinkle the breadcrumbs over the top. Bake for 15–20 minutes until the top is lightly browned.
Variation
For a less rich version, use thick yogurt stabilised with ½ tsp cornflour mixed with 1 tsp water (p. 127) instead of the cream and egg yolks. I find grated feta better than Parmesan with yogurt.
Sautéed chard leaves
For 4
600g chard leaves; see above
4 tbs olive oil
1 onion, peeled and chopped
3 garlic cloves, peeled and chopped
salt and freshly ground pepper
¼ tsp ground mace
1 large tomato, peeled, seeded and diced
Slice the leaves into a chiffonade*. You will need a very large pan or a wok to cook this much chard in one go. Heat the oil and sweat* the onion until it softens. Add the garlic to the pan, leave uncovered, but do not let it brown. Add the chard leaves, a handful or two at a time, turning them to coat in the oil. Cook for 8–12 minutes until they have softened; with a large quantity it is easiest to cover the pan for part of the time, but still turn the leaves as they cook. When they have softened, leave the pan open to drive off the moisture. Season with salt, pepper and mace. Add the diced tomato and cook for another 5 minutes.
Chestnuts
Not a vegetable, of course, but chestnuts are often used as a vegetable or with vegetables. They have a particular affinity for cabbage, celery, mushrooms, especially wild mushrooms, pumpkin and squash and Brussels sprouts. In the mountain regions of Italy, France and Spain, chestnuts are staple food. In addition to their role in vegetable cooking, stuffings and soups, chestnuts also make delectable desserts (p. 473).
To peel chestnuts, cut a cross on the flat side, bring them to the boil in a pan of water, simmer for 5 minutes, then take the pan from the heat. Take out the chestnuts, one at a time, and peel off the outer and inner skin. They need to be hot to get the peel off, so if necessary put on gloves. Reheat the water if the chestnuts are getting too cool.
A microwave offers a quick and efficient way of peeling and cooking chestnuts. Cut a cross on the flat side of each one, arrange them in one layer in a dish and cook uncovered for 6 minutes for 250g, 8 minutes for 500g. Peel as soon as they are cool enough to handle. To cook further, put the shelled nuts in a single layer in a dish and cook, again uncovered, for 4 minutes for 250g, 6 minutes for 500g.
Vacuum-packed cooked chestnuts save greatly on the slow task of peeling them. Dehydrated chestnuts must be soaked in water for several hours before cooking. Cans of chestnuts and chestnut purée may be plain or sweetened, so check the label when you buy.
Braised chestnuts
For 4–6
500g chestnuts, peeled
150ml white wine
1 stalk celery, sliced
2 shallots, chopped
1 bay leaf
150–200ml vegetable or chicken stock (p. 4)
salt and freshly ground pepper
30g butter
Put the chestnuts in a pan with the wine, celery, shallots and bay leaf. Add enough stock just to cover them, season and bring to a simmer. Cover and simmer over very low heat for about 20 minutes, until the chestnuts are tender. Take care that they don’t disintegrate. If the liquid has not reduced enough, take out the chestnuts and boil it down in the uncovered pan. Whisk in the butter and serve. The chestnuts make a good accompaniment to venison stew with cherries (p. 352), lamb with pumpkin, prunes and apricots (p. 333), and roast goose (p. 298) unless you have used a chestnut stuffing.
Chestnut purée
For 4
500g chestnuts, shelled
125ml double cream
60g butter
pinch of ground mace
salt and freshly ground pepper
Boil the chestnuts for about 30 minutes, then drain and purée them. If you do this in a food processor you may need to add a tablespoon or two of the cream because the chestnuts will be fairly dry. Return the purée to the pan. Heat the cream a little and add it to the purée with the butter, stirring all the time over low heat. Season with mace, salt and pepper and serve with Savoy cabbage rolls (p. 119), or partridge with red cabbage (p. 300).
Wild rice and chestnut casserole. See p. 196.