HOW TO…
• Launch Kies
• Add your multimedia files to the Kies Library
• Import your existing Windows Media Player and iTunes playlists into Kies
• Remove media files from Kies
• Connect the Galaxy Tab to your PC or Mac via USB
• Make Kies recognize the Galaxy Tab on a USB connection
• Make Kies establish the connection to the Galaxy Tab
• Manage the Galaxy Tab using Kies
• Force quit Kies for the Mac if it hogs your Mac’s processor
• Load media files onto the Galaxy Tab without using Kies
• Deal with the “USB Storage Blank or Has Unsupported File System” message
• Connect the Galaxy Tab to your PC via Wi-Fi
• Configure how Kies handles the Galaxy Tab
• Keep Kies up to date
• Connect the Galaxy Tab to your PC via Bluetooth
To get the most out of your Galaxy Tab, you’ll need to load it with content from your PC or Mac. To do so, you use the Kies application, which you downloaded and installed in Chapter 1.
In this chapter, I’ll show you how to use Kies to manage the Galaxy Tab from your PC or your Mac. You’ll learn how to add media files to Kies either automatically or manually thereafter, so that your Kies Library contains the files you want to put on the Galaxy Tab.
Next, I’ll show you how to connect the Galaxy Tab to your PC or Mac via USB and manage it using Kies. We’ll go through how to choose settings for the Galaxy Tab, how to choose which items to sync, and how to copy items between the Galaxy Tab and your PC or Mac. You’ll also learn how to configure the way Kies handles the Galaxy Tab. And I’ll show you how to connect the Galaxy Tab to your PC via Wi-Fi; this feature isn’t available on the Mac at this writing.
Toward the end of the chapter, we’ll look at how to make Kies run the way you prefer and how to keep Kies up to date. I’ll also show you how to connect the Galaxy Tab to your PC using Bluetooth, for those times when you don’t want to use USB. As with Wi-Fi, you can’t use Bluetooth to connect the Galaxy Tab to a Mac at this writing.
You can also use Kies to back up the Galaxy Tab to your PC (not to a Mac) and to restore the Galaxy Tab from a backup. Chapter 14 covers backup and restore.
Start by launching Kies if it’s not already running.
On Windows, launch Kies in one of these ways:
• Click the Kies icon on the Taskbar in Windows 7.
• Double-click the Kies icon on the Desktop.
• Choose Start | Kies.
• Choose Start | All Programs | Samsung | Kies | Samsung Kies.
On the Mac, launch Kies in one of these ways:
• Click the Kies icon on the Dock.

If the Kies icon doesn’t appear on the Dock, and you want it there, launch Kies in one of the following ways. Then CTRL-click or right-click the Kies icon on the Dock, highlight or click the Options item on the context menu to display the submenu, and then click the Keep In Dock item.
• On Mac OS X Lion, click the Launchpad icon on the Dock, and then click the Kies icon on the Launchpad screen.
• Click the desktop, choose Go | Applications to open a Finder window showing the Applications folder, and then double-click the Kies icon.
What you probably need to do at this point is add your multimedia files to the Kies Library so that you can transfer them easily to the Galaxy Tab when you connect it.
You can import your multimedia files manually at any time, but the best way to start is by using Kies’s feature for automatically importing either all the multimedia files in a particular folder you select or all the multimedia files Kies can scare up on the computer.
The first time you launch Kies on the Mac, it displays a dialog box asking if you want to add multimedia files automatically to the Kies Library, as discussed in the section “Run Kies for the First Time” in Chapter 1. If you accepted this offer, you may have already added all the files you need to Kies—in which case, feel free to skip this section until you need to add further files.
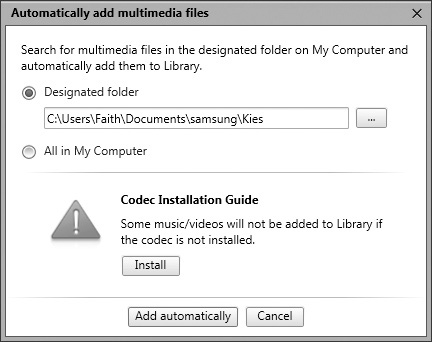
Normally, the first time you run Kies on your PC and click the Music item in the Library category of the list on the left, Kies notices that your library contains no music and displays the Automatically Add Multimedia Files dialog box (see Figure 3-1). From here, you can quickly add files to the library. You can also install extra codecs—and you should do this before you add the files to the library, because you can’t easily summon up the Automatically Add Multimedia Files dialog box again.
FIGURE 3-1 From the Automatically Add Multimedia Files dialog box, you can make Kies search either a particular folder or your PC’s entire file system for multimedia files.
If the lower part of the Automatically Add Multimedia Files dialog box bears a triangular icon containing an exclamation mark, as in Figure 3-1, you will need to install extra codecs, software to make Kies import all your music.
A codec is a coder/decoder, software that can encode audio or video file formats or decode them to play them back. Kies includes codecs for widely used audio and video file formats, such as the MP3 audio format. But if you have audio or video files in other formats—for example, songs in the Advanced Audio Coding (AAC) format that Apple favors—you may need to install codecs to enable Kies to deal with them. Kies won’t import any files it can’t play.
To sort out any codec issues, click the Install button in the Code Installation Guide area of the Automatically Add Multimedia Files dialog box.
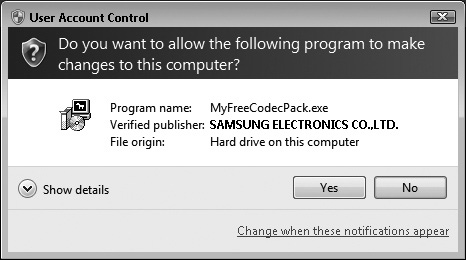
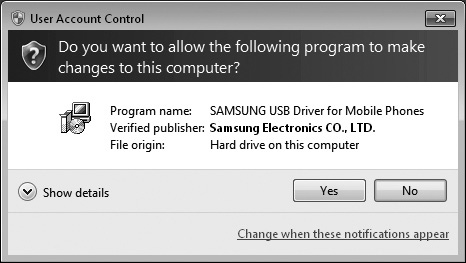
Next, Windows normally displays the User Account Control dialog box shown next. Check that there’s a verified publisher, and that it’s a credible Samsung company (which company varies depending on where you are), and then click the Yes button to let the installation proceed.
In the Installer Language dialog box, open the drop-down list and click your language, and then click the OK button. You then need to agree to the license agreement to reach the Installation Options screen (shown here).

In the Select Components To Install list box, make sure the check box to the MyFreeCodecPack item is selected (the name varies, but usually it’s pretty clear—or the only item).
Click the Next button to display the Installation Folder screen (shown here).
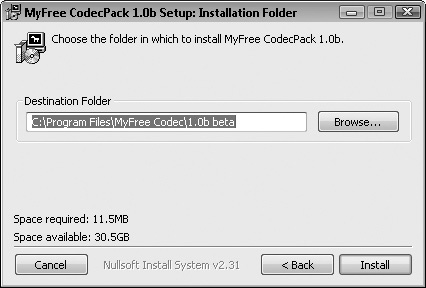
Normally, you’ll want to accept the default folder here, but if you need to use a different folder, click the Browse button, and then use the Browse For Folder dialog box to select it. When you’ve made your choice, click the Install button.
The installation finally runs. When you see the Completed dialog box, click the Close button. Kies is then able to add the music or videos files it wouldn’t have been able to play without the codecs.
After sorting out your codecs, select the appropriate option button in the Automatically Add Multimedia Files dialog box (shown earlier, in Figure 3-1):
• Designated Folder Select this option button if you want Kies to search only a particular folder. Click the … button to display the Select Folder dialog box, navigate to the folder and select it, and then click the Select Folder button. Kies closes the Select Folder dialog box and enters the folder’s path and name in the Designated Folder text box.
• All In My Computer Select this option button to have Kies search your PC’s entire file system for multimedia files.
When you’ve made your choice, click the Add Automatically button. You’ll then see the songs start to appear in the Music category. The readout in the status bar shows Kies’s progress, as in the next illustration.

Import Your Existing Windows Media Player and iTunes Playlists into Kies
If you have created playlists on your PC or Mac, you can import them into Kies quickly and easily. This saves you from having to re-create the playlists in Kies.
To import playlists you’ve created in Windows Media Player on Windows, choose File | Import Windows Media Player Playlist To Library. Kies searches for your Windows Media Player playlists and imports them automatically. You’ll see the playlists appear in the Music category.
To import playlists you’ve created in iTunes on Windows or the Mac, choose File | Import iTunes Playlist To Library. Again, Kies searches for the playlists and imports them automatically, adding them to the Music category.
As discussed earlier in this chapter, you’ll probably want to have Kies scan your computer for multimedia files at first to start building your library as quickly as possible. After that, you can add music files, video files, photo files, and podcast files to Kies manually at any time.
The easiest way to add files is by opening a Windows Explorer window (on Windows) or a Finder window (on the Mac) so that you can see the folder that contains the files, and then drag the folder to the Library item at the top of the left pane in Kies. When you see a + sign, which indicates that Kies will add the files, release the mouse button. Kies copies the files.
If you want to add just some of the files in a folder, or just one file, select the files, and then drag them to the Library item.
To add individual files, you can also choose File | Add File To Library or press CTRL-O to display the Open dialog box. Navigate to the folder that contains the files, select the file or files, and then click the Open button.
You can also display the Open dialog box by selecting the Music item, the Photos item, the Video item, or the Podcast item in the Library area of the left pane and then clicking the Add Music button, Add Photo button, Add Video button, or Add Podcast button on the Kies toolbar.
If you want to add a folder of files, choose File | Add Folder To Library or press CTRL-SHIFT-O to display the Select Folder dialog box. Navigate to the folder that contains the files, click the folder, and then click the Select Folder button.
To remove media files from Kies, follow these steps:
1. Click the appropriate item (Music, Photos, Video, or Podcast) in the Library area to display the list of those items.
2. Select the item or items you want to delete.
3. Click the Delete button on the toolbar. Kies displays the Delete dialog box. The next illustration shows the Mac version of this dialog box.
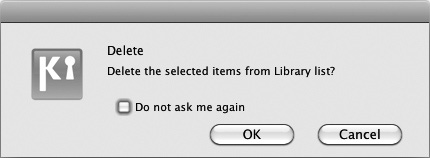
4. If you want to suppress this dialog box in the future, select the Do Not Ask Me Again check box.
5. Click the Delete button (on Windows) or the OK button (on the Mac).
Now that you’ve added your media files to Kies, you’re ready to connect the Galaxy Tab to your PC or Mac and start synchronizing it.
Connect the Galaxy Tab to your PC or Mac using the USB cable that came with the Galaxy Tab. When you’ve made the connection, press the Galaxy Tab’s power button to turn it on, and then slide the Unlock slider to the right to unlock the device.
If the Galaxy Tab and your computer seem to be having trouble establishing a connection, try tapping the Home button to display the home screen. Sometimes having the home screen displayed helps establish the connection.
When you connect the Galaxy Tab to your computer, and Kies recognizes it, Kies displays the Galaxy Tab in the Connected Devices list at the top of the Source list on the left side of the Kies window. We’ll look at the Kies interface in the next section.
When to Connect the Galaxy Tab to Your PC via USB and when to use Wi-Fi or Bluetooth
You can connect the Galaxy Tab to your PC via USB, Wi-Fi, or Bluetooth—but normally you’ll want to use USB. (For the Mac, you’re stuck with USB.)
USB has two advantages over Wi-Fi:
• USB is faster than wi-Fi Even if you establish the fastest wireless connection possible, a USB connection will usually be substantially faster.
• You can back up and restore via USB You can’t back up your Galaxy Tab or restore it via Wi-Fi, only via USB.
USB has two main advantages over Bluetooth:
• USB is much faster than Bluetooth USB is more than 100 times faster than Bluetooth, so use USB when you need to transfer lots of data quickly—for example, when you’re initially loading music, videos, and photos on the Galaxy Tab or backing up the Galaxy Tab.
• You can use Kies to manage the galaxy Tab At this writing, Kies works with a USB connection but not with a Bluetooth connection.
Bluetooth works fine for transferring smaller amounts of data, as you’ll see later in this chapter. And sometimes, connecting across the airwaves is more convenient than using a physical cable. See the end of this chapter for instructions on connecting the Galaxy Tab to your PC via Bluetooth.

Make Kies Recognize the Galaxy Tab on a USB Connection
When you connect the Galaxy Tab to your PC, you may find that Kies simply doesn’t recognize the device. If this happens, try these two troubleshooting moves.
First, make sure the Galaxy Tab is connected to a USB port on the PC itself rather than connecting through a USB hub. A direct connection makes sure that the Galaxy Tab gets a full-power connection, which helps avoid problems caused by underpowered connections. In particular, avoid connecting the Galaxy Tab through a USB port on a keyboard—these ports are tempting because they’re convenient, but usually they have enough power only for undemanding devices such as mouses.
If even a direct connection doesn’t make Kies recognize the Galaxy Tab, you may need to reregister the msxml dynamic link library (DLL) files. This sounds technical, but it’s easy enough to do, and it often makes all the difference. Follow these steps:
1. Choose Start | All Programs | Accessories | Command Prompt to open a Command Prompt window.
2. Type cd %windir%\system32 and press enter to change directory to the System32 folder in your PC’s Windows folder. (Here, cd is the “change directory” command, and %windir% is an environmental variable that stores the path to the Windows folder, no matter where the folder is or what it’s called.)
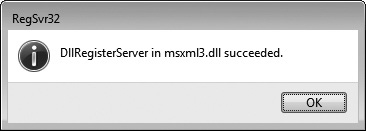
3. Type regsvr32 msxml3.dll and press enter to register the msxml3.dll file. You’ll see a RegSvr32 dialog box (as shown here) saying that the registration succeeded. Click the OK button.
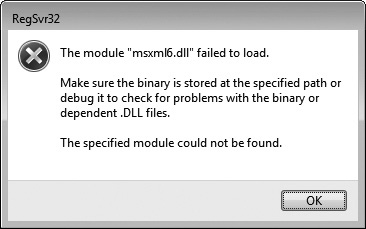
4. Type regsvr32 msxml6.dll and press enter to register the msxml6.dll file. Again, you should see the RegSvr32 dialog box saying that the registration succeeded. Click the OK button. If you get an error instead (as shown here), follow the instructions later in this sidebar.
5. Click the Close button (the X button) to close the Command Prompt window.
If you get the RegSvr32 error shown in the previous illustration, the vital file named msxml6.dll is missing. Follow these steps to get it and install it:
1. Open your web browser and steer it to the Microsoft Download Center web site (www.microsoft.com/downloads/).
2. Click in the search box at the top and type microsoft core xml services msxml (lowercase is fine unless you’re feeling formal) and then press enter or click the Search button.
3. On the page of search results, click the Microsoft Core XML Services (MSXML) 6.0 result to display the download page.
4. Click the Download button on the line for the msxml6.msi file. (If you’re running 64-bit Windows, click the Download button on the msxml6_x64.msi line.)
5. In the File Download – Security Warning dialog box, click the Save button.
6. Open a Windows Explorer window to the folder to which you downloaded the file, and then double-click it. Follow through the Installer prompts to install the file.
Make Kies Establish the Connection to the Galaxy Tab
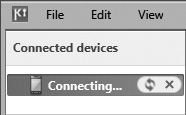
If the Connected Devices area at the top of the left pane in Kies shows the status Connecting (as shown here), but the circular arrows continue to spin fruitlessly, you may need to reinstall the Samsung USB Driver for Mobile Phones. Even though most Galaxy Tab models aren’t mobile phones, they use the same driver as many of Samsung’s phones.
Disconnect the USB cable from the Galaxy Tab, then click the Troubleshoot Connection Error button or choose Tools | Troubleshoot Connection Error. Then follow through the wizard that opens (shown here).
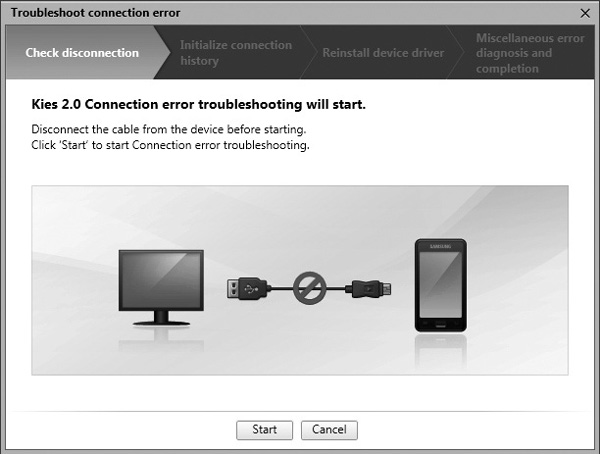
This wizard removes and then reinstalls the Kies driver, which typically takes several minutes. Along the way you’ll need to go through User Account Control (as shown here) to authorize Kies to reinstall the USB driver.
When the wizard finishes, connect the USB cable to your Galaxy Tab again. Kies should now be able to make the connection, and the Galaxy Tab will appear in the Connected Devices list.
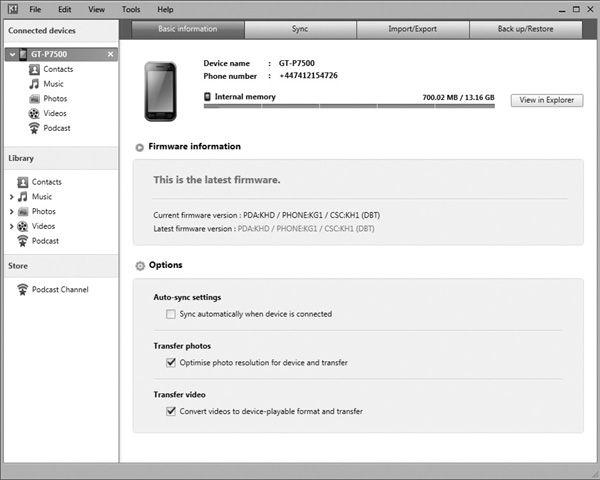
After recognizing the Galaxy Tab, Kies displays an entry for the device in the Connected Devices list at the top of the left pane in the window. Click the Galaxy Tab’s item to see the device’s control screens. At first, you’ll see the Basic Information screen, as shown in Figure 3-2.
FIGURE 3-2 When you connect the Galaxy Tab to your PC or Mac, Kies displays an entry for the Galaxy Tab in the Connected Devices list in the Source list on the left side of the Kies window.
Normally, Kies expands the Galaxy Tab’s entry, so you can see the Contacts folder, Music folder, Photos folder, Videos folder, and Podcast folder, as in Figure 3-2. If the Galaxy Tab’s entry isn’t expanded, click the > button (on Windows) or the disclosure triangle (on the Mac) to the left of the Galaxy Tab’s name to expand it; if you want to collapse the Galaxy Tab’s entry, click the down-arrow button (on Windows) or the disclosure triangle (on the Mac) to the left of the name.
With the Galaxy Tab’s control screens displayed, you can click one of the other tabs—the Sync tab, the Import/Export tab, or the Back Up/Restore tab—at the top of the window to display the related screen. We’ll look at how to use these screens later in this chapter (except the Back Up/Restore screen, which is covered in Chapter 14).
At this writing, Kies for Mac doesn’t have the Back Up/Restore screen.
From the Basic Information screen (shown in Figure 3-2), you can do the following:
• View the internal memory The Internal Memory readout shows how much of the Galaxy Tab’s internal memory is in use. On Windows, you can click the View In Explorer button next to the readout to open a Windows Explorer window showing the contents of the internal memory. On the Mac, you can click the Internal Memory button to open a window that shows the contents of the Tablet part of the Galaxy Tab’s file system in a navigable format. This Internal Memory window looks and acts mostly like a Finder window, but it is still a part of Kies.
• Update the firmware The Firmware Information area shows details of the current firmware version the Galaxy Tab is using. If the Galaxy Tab is up to date, this area shows the message “This is the latest firmware.” If a firmware update is available, this area shows a button for updating the firmware to the latest version.
• Choose whether to sync the Galaxy Tab automatically Select the Sync Automatically When Device Is Connected check box in the Auto-Sync Settings area if you want Kies to sync data automatically when you connect the Galaxy Tab.
On the Mac, the Basic Information screen may display the Memory Order area, which lets you choose the order in which to use the Galaxy Tab’s internal memory and external memory. The controls in this area apply only to Galaxy Tab models that have external memory as well as internal memory—but on the Mac, they currently appear even for Galaxy Tab models that don’t have external memory.
• Choose whether to optimize photos for the Galaxy Tab (Windows only.) In the Transfer Photos area, select the Optimize Photo Resolution For Device And Transfer check box if you want Kies to create versions of photos that will work best on the Galaxy Tab and then transfer them to the device. This is normally a good idea, as it makes sure the photos on the Galaxy Tab are the right resolution for its screen and that they don’t waste a huge amount of space by being a larger resolution than the screen can show.
• Choose whether to convert video to formats the Galaxy Tab can play (Windows only.) In the Transfer Video area, select the Convert Videos To Device-Playable Format And Transfer check box if you want Kies to convert videos to formats the Galaxy Tab can play, and then transfer them. This too is usually helpful, as it enables you to view the videos on the Galaxy Tab.
If you want to transfer photos and videos to the Galaxy Tab manually, and to keep them at higher resolutions or in different formats so that you can then transfer them to different devices, clear the Optimize Photo Resolution For Device And Transfer check box in the Transfer Photos area and the Convert Videos To Device-Playable Format And Transfer check box in the Transfer Video area of the Basic Information screen.
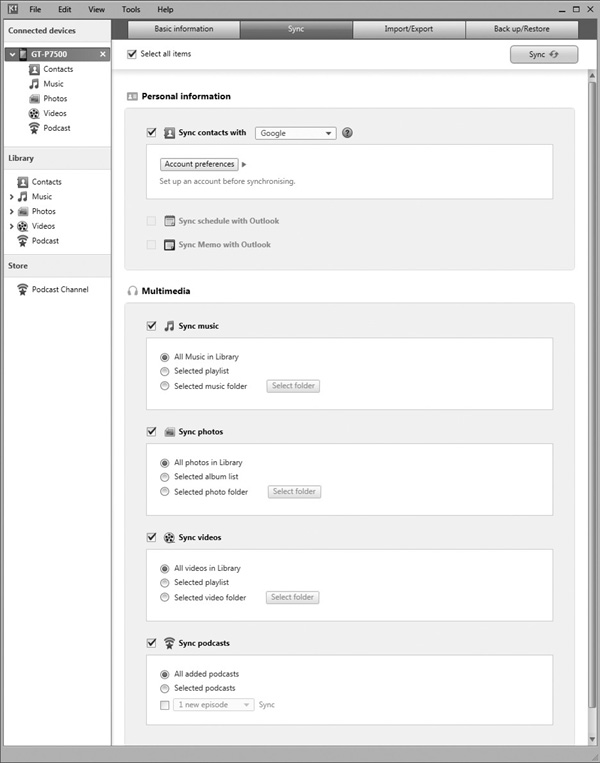
When you’ve chosen settings on the Basic Information screen, click the Sync tab to display the Sync screen. Figure 3-3 shows the Sync screen on Windows; the Sync screen on the Mac is similar, but it has fewer controls. You can then choose which items to sync, as described in the following subsections—or you can simply select the Select All Items check box at the top to sync all the items shown on the screen.
FIGURE 3-3 On the Sync screen in the Galaxy Tab’s control screens, choose which items to synchronize automatically between the Galaxy Tab and your PC or Mac.
In the Personal Information box on Windows, select the check boxes for the items you want to sync to the Galaxy Tab:
• Sync Contacts With To sync contacts, select this check box, and then choose the program in the drop-down list: Google, Yahoo!, Windows Contacts, or Outlook (if you have Outlook installed on your PC). If the Account Preferences button appears when you choose the program, click this button, and then follow through the steps for setting up your account.
• Sync Schedule With Outlook If you have Outlook, select this check box to sync your Outlook calendar with the Galaxy Tab.
• Sync Memo With Outlook If you have Outlook, select this check box to sync memos between Outlook and the Galaxy Tab.
Similarly, on the Mac, select the check boxes in the Personal Information box to control what to sync to the Galaxy Tab:
• Sync With Address Book Select this check box to sync the contacts in your Address Book with the Galaxy Tab.
• Sync Schedules With iCal Select this check box to sync your iCal calendars with the Galaxy Tab.
In the Multimedia box, specify which items to sync by selecting the Sync Music check box, the Sync Photos check box, the Sync Videos check box, and the Sync Podcasts check box, as needed.
On the Mac, that’s the full extent of your choices at this writing—you can’t pick and choose. But on Windows, you can then choose whether to sync all of the files or just some of them. For example, these are your choices if you select the Sync Music check box:
• All Music In Library Select this option button to sync all the music you’ve added to the Kies Library with the Galaxy Tab. If the Galaxy Tab has enough space to take all the music, you may want to do this.
• Selected Playlist Select this option button to sync just a playlist that you create in Kies. A playlist can be a convenient way of adding to the Galaxy Tab only those songs you want to play on the device.
• Selected Music Folder Select this option button to specify one or more folders containing the music you want to sync with the Galaxy Tab. Click the Select Folder button to display the Select Folder dialog box, navigate to and click the folder, and then click the Select Folder button to close the dialog box. Kies adds the folder to the gray box below the line, and displays a check box for each subfolder that contains music files. You can then clear the check box for any folder you don’t want to sync.
The Sync Photos controls, the Sync Videos controls, and the Sync Podcasts controls work in a similar way, except that the Sync Podcasts controls don’t have a Selected Podcast Folder option button—instead, there’s a check box you can select to sync only the number of new episodes you choose in the drop-down list.
When you’ve chosen sync options, click the Sync button in the upper-right corner of the Sync screen to perform the sync. The readout in the lower-right corner of the Kies window shows the sync’s progress.
Instead of syncing files between your computer and the Galaxy Tab, you may simply want to copy files from one to the other. Copying rather than syncing is especially helpful if you load the Galaxy Tab from two or more computers or if you want to use the Galaxy Tab to transfer files from one computer to another.
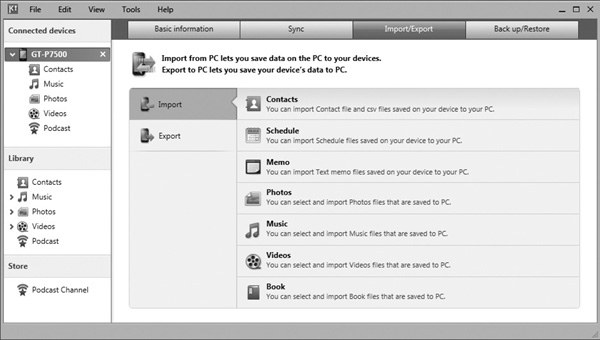
Kies makes it easy to copy your personal information files (your contacts, schedule, and memos) and your multimedia files (your music files, photos, and videos) between your computer and the Galaxy Tab. Kies calls copying the files from the computer to the Galaxy Tab importing from PC and copying files from the Galaxy Tab to the computer exporting to PC. (At this writing, Kies uses the term “PC” for Macs as well as for Windows computers.)
To copy files to and from the Galaxy Tab, click the Import/Export tab at the top of the Kies window to display the Import/Export screen. Figure 3-4 shows the Import/Export screen for Kies on Windows, but the Import/Export screen in Kies for Mac is functionally identical. You can then import or export information by following these steps:
FIGURE 3-4 Use the Import/Export screen in Kies to copy your contacts, schedule, memos, and multimedia files from your computer to the Galaxy Tab or vice versa.
1. In the left pane of the Import/Export screen, click the Import tab or the Export tab, as needed.
• Import Click this tab to copy contacts, calendars, music, or whatever from the computer to the Galaxy Tab. When you’re loading the Galaxy Tab, this is the tab you need.
• Export Click this tab to copy data from the Galaxy Tab to the computer.
2. In the right pane, click the Contacts button, the Schedule button, the Memo button, the Photos button, the Music button, the Videos button, or the Book button, as appropriate. Kies displays an Import button or an Export button to the right of the item, depending on whether you are importing data or exporting data.
3. Click the Import button or the Export button.
4. In the Open dialog box or Save dialog box that opens, choose the source or destination for the information you’re importing or exporting, and then click the Open button or the Save button.
Force Quit Kies for the Mac if It Hogs Your Mac’s Processor
At this writing, the current version of Kies for the Mac appears to suffer from various bugs. In particular, you may find that Kies starts hogging your Mac’s processor, making other apps run slowly.
If you think this is happening, run Activity Monitor and have a look. Follow these steps:
1. Click in the Spotlight field at the right end of the menu bar.
2. Type activ and then click the Activity Monitor result to launch Activity Monitor.
3. On the tab bar at the bottom, click the CPU tab to display the CPU screen, as shown here.
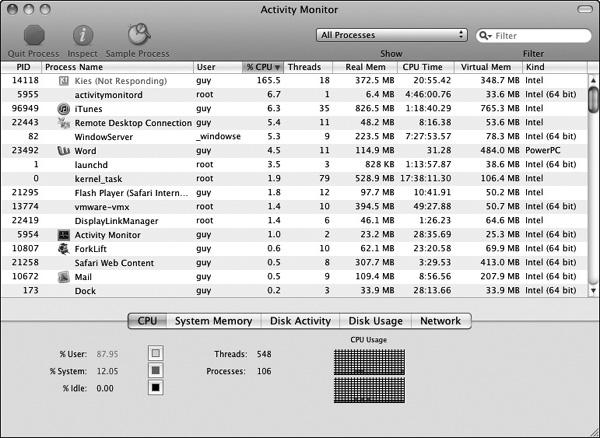
4. Click the % CPU column once or twice, as needed, to produce a descending sort. This shows you the application that’s taking most processor cycles at the top.
If the hungriest application is Kies, and it’s taking up a lot of cycles (say, more than 100% of the 200% that a dual-core processor has), you may need to quit it. To do so, CTRL-click or right-click the Kies icon on the Dock, and then click the Quit item on the context menu.
If Kies won’t quit normally, or if Activity Monitor lists it in red and marked as “(Not Responding)”, you will need to force quit Kies. To do so, OPTION-click the Kies icon on the Dock, and then click the Force Quit item on the context menu.
Instead of loading media files onto the Galaxy Tab using Kies, you can load them directly from a USB drive or an SD card. You can also load files from a PC by using Windows Explorer instead of Kies. This section shows you how to perform these two moves.
Loading media files onto your Galaxy Tab from your computer is usually fast and easy, but other times you may need to load media files onto the Galaxy Tab without connecting it to a computer. You can do so by putting the media files on a USB drive or SD card, connecting that drive to the Galaxy Tab, and copying the files from it.
To connect a USB drive or SD card to the Galaxy Tab, you need a device that plugs into the Galaxy Tab’s 30-pin port and that provides a USB port or SD card slot at the other end. If you need to be able to connect both USB drives and SD cards to your Galaxy Tab (one at a time), the easiest solution is to get the Samsung USB & SD Connection Kit for Samsung Galaxy Tab, which costs around $30. This kit provides one connector with a USB port and another connector with an SD card slot. You can find third-party equivalents or near-equivalents that provide similar functionality for less outlay.
When you connect a USB drive or SD card to the 30-pin port using the connector, the Galaxy Tab automatically displays the My Files app showing the contents of the USB drive or SD card. You can then work with the files or folders. For example, you can copy music files like this:
1. In the My Files app, select the check box for each file or folder you want to affect.
2. Tap the Copy button on the toolbar to copy the files or folders.
Deal with the “USB Storage Blank or Has Unsupported File System” Message
If you see the message “USB storage blank or has unsupported file system” in the notifications area when you connect a USB drive or SD card to the Galaxy Tab, there are two possibilities:
• The drive is blank If so, fine—you can put all the more files on it. Normally, you’ll know whether the drive is blank or not.
• The drive uses a file system the Galaxy Tab can’t read The Galaxy Tab can read only the FAT32 file system. So if you connect a drive formatted with a different file system, such as the Mac OS Extended file system, the Galaxy Tab won’t be able to read it.
If the drive uses a file system other than FAT32, you will need to reformat the drive before you can use it with the Galaxy Tab. You can reformat the drive by using Windows Explorer on the PC or Drive Utility on the Mac. Before you reformat the drive, copy from it any files that you want to keep, because reformatting the drive removes all the files from it.
After reformatting the drive, you can copy the files back to it, and then connect the drive to the Galaxy Tab again.
3. In the left column, tap the Music folder to switch to it.
4. Tap the Paste button on the toolbar to paste in the copied files or folders.
The Galaxy Tab mounts a USB drive or SD card in the /Root/Storages/usb/sda/ folder. You can navigate to this folder manually if you need to—for example, if you want to copy files from the Galaxy Tab to the USB drive or SD card.
To unmount the USB drive or SD card, tap the notifications area, and then tap the USB Device Connected button on the notifications panel. The Galaxy Tab ejects the USB device and displays the message “USB Device Removed Safely” onscreen for a moment. After this message appears, you can safely disconnect the device.
You can also tap the USB symbol that appears at the left end of the notifications area, and then tap the USB Device Connected button to eject the USB device. But usually it’s easiest to tap anywhere in the notifications area and then tap the USB Device Connected button on the notifications panel.
As you’ve seen earlier in this chapter, Kies is the program Samsung provides for managing the Galaxy Tab on Windows. But you don’t have to use Kies if you don’t want to. Instead, you can open a Windows Explorer window to show the contents of the Galaxy Tab’s internal memory, and then simply copy or move files back and forth.
(In case you’re wondering, the Galaxy Tab doesn’t appear in the Finder on the Mac—but iPhoto may detect the Galaxy Tab as an attached camera and offer to import its photos.)
To display the contents of the Galaxy Tab, follow these steps:
1. Choose Start | Computer to open a Windows Explorer window in Computer view.
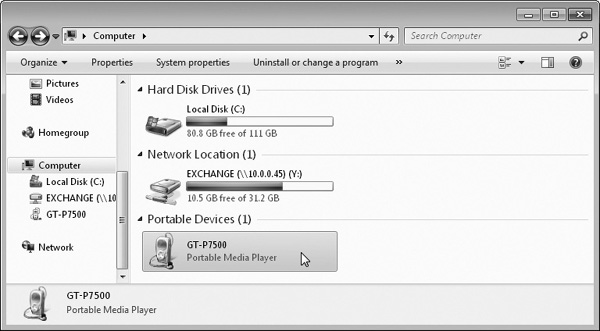
2. In the default view, double-click the item named GT and the Galaxy Tab’s model number (for example, GT-P7500) in the Portable Devices area. The Windows Explorer window shows the Galaxy Tab’s contents as a drive named Tablet, as shown here.
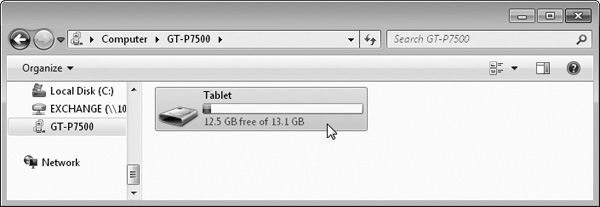
3. Double-click the Tablet item to display its contents.
You can now add files to the Galaxy Tab’s file system, or copy or move files from the Galaxy Tab to your PC, as needed.
The normal way of connecting the Galaxy Tab to your PC is via USB, which gives the highest possible connection speeds and so makes file transfer, sync, and backup as swift as possible. But you can also connect the Galaxy Tab to your PC via Wi-Fi. Connecting via Wi-Fi is often more convenient, because you don’t need to use the USB cable and you can leave the Galaxy Tab charging from its power adapter during the sync.
At this writing, Kies for the Mac doesn’t support connecting the Galaxy Tab via Wi-Fi. And even Kies for Windows doesn’t support backing up and restoring the Galaxy Tab via Wi-Fi.
To connect the Galaxy Tab to your PC via Wi-Fi, follow these steps:
1. On the PC, make sure Kies is running, and that the PC is connected to the same wireless network as the Galaxy Tab.
2. On the Galaxy Tab, tap the notifications area to display the notifications panel.
3. Tap the Settings button to display the Settings screen.
4. In the left panel, tap the Wireless And Networks button to display the Wireless And Networks screen.
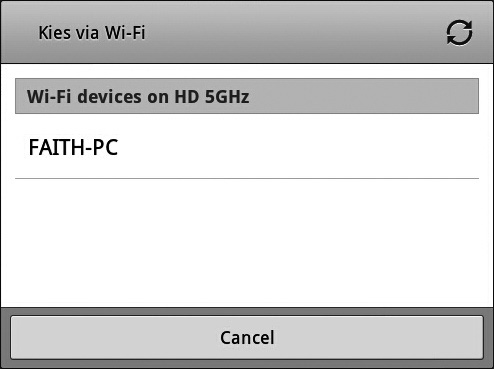
5. Tap the Kies Via Wi-Fi button to display the Kies Via Wi-Fi dialog box (shown at right).
6. In the Wi-Fi Devices list, tap the button for your PC. Kies tries to establish the connection, as shown here.

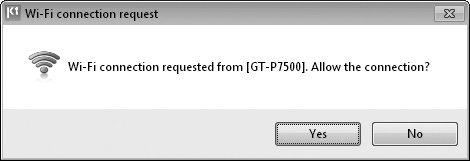
7. When the Wi-Fi Connection Request dialog box appears on the PC, as shown here, tap the Yes button.
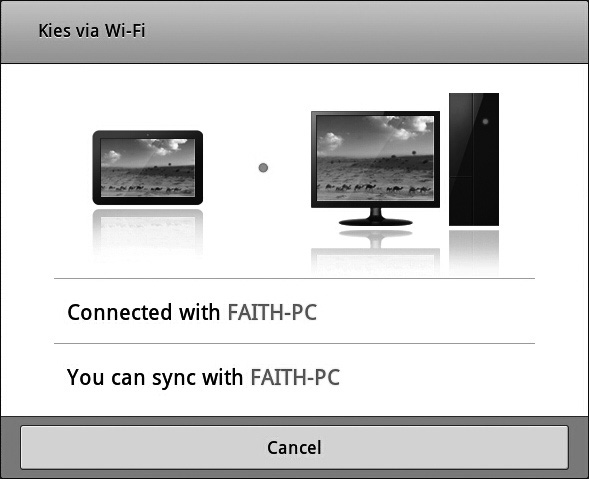
8. When the Kies Via Wi-Fi dialog box shows that the connection is established, as shown here, you can start the sync in Kies on your PC, as described earlier in this chapter.
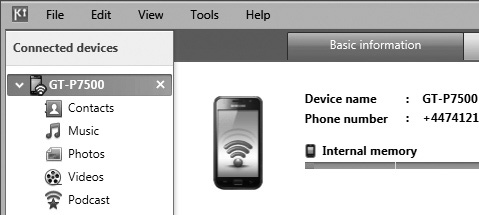
9. In Kies on the PC, the Galaxy Tab’s icon shows a Wi-Fi symbol, as shown here. When you finish syncing, eject the Galaxy Tab in Kies by clicking its × button.
10. On the Galaxy Tab, tap the Cancel button to close the Kies Via Wi-Fi dialog box.
To configure how Kies handles the Galaxy Tab, choose Tools | Preferences, and then work on the three screens of the Preferences dialog box. Kies for Windows and Kies for the Mac have different preferences, so we’ll look at them separately—Windows first, and then Mac.
The Preferences dialog box for Kies for Windows has three screens: the General screen, the Device screen, and the Update screen.
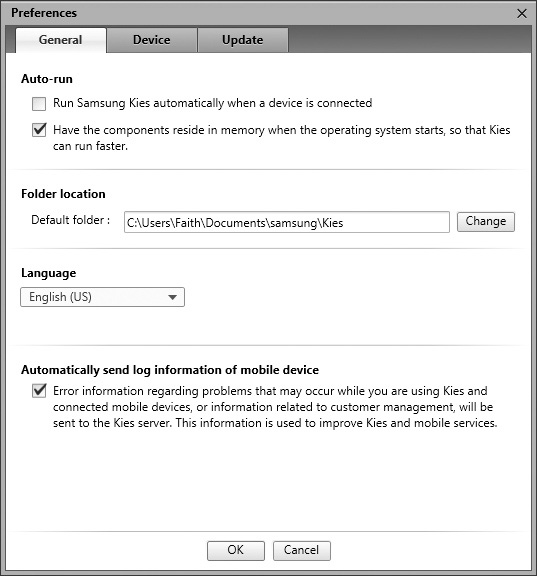
On the General screen in the Preferences dialog box (see Figure 3-5), you can choose five settings:
FIGURE 3-5 On the General screen in the Preferences dialog box, you can set Kies to run automatically when you connect the Galaxy Tab, change the default folder, set the language, and decide whether to automatically send log information to Samsung.
• Run Samsung Kies Automatically When A Device Is Connected Select this check box if you want Kies to launch automatically when you connect the Galaxy Tab to your PC. This is usually helpful if you use Kies to sync files and data between your PC and the Galaxy Tab.
• Have The Components Reside In Memory When The Operating System Starts, So That Kies Can Run Faster Select this check box if you want Windows to load Kies’s components automatically during startup (after you log on) so that Kies will launch more quickly. If you use Kies regularly, this is usually a good idea—but it does mean that your PC will take longer to log you in and get your Windows session underway.
• Folder Location In the Default Folder text box, enter the name of the folder you want Kies to use as the default location. The standard setting is the Documents\ Samsung\Kies folder in your user folder. This folder works fine unless you have a folder you prefer—in which case, click the Change button, click the folder in the Select Folder dialog box, and then click the Select Folder button.
• Language In this drop-down list, you can change the language the Kies user interface uses. If you picked the right language when setting up Kies, you shouldn’t need to change this setting.
• Automatically Send Log Information Of Mobile Device In this area, select the check box (which has a three-line name) if you want to allow Kies to send error information and usage information about your Galaxy Tab to Samsung. Samsung doesn’t provide the guarantees of anonymity and privacy that are customary with such features, so you may want to clear this check box.
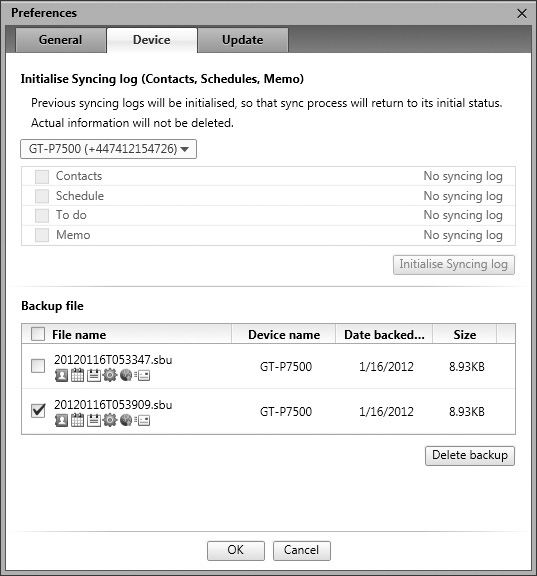
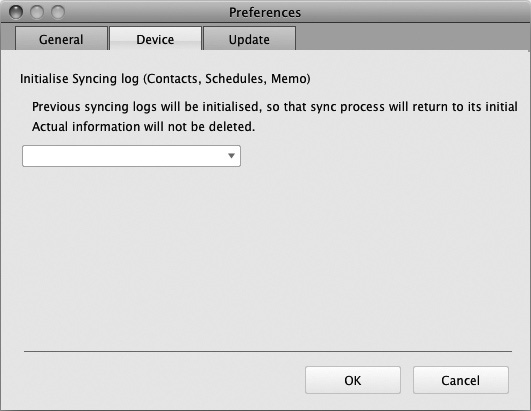
On the Device screen in the Preferences dialog box (see Figure 3-6), you may or may not be able to initialize the syncing logs for contacts, scheduling information, and memos. If the check boxes in the Initialize Syncing Log box are available, you can select one or more of them and then click the Initialize Syncing Log button.
FIGURE 3-6 On the Device screen in the Preferences dialog box, you can delete unwanted backup files. You may also be able to initialize your syncing log.
Initializing the syncing log wipes out the existing sync status but doesn’t delete the contact information, scheduling information, or memos. You may never need to initialize the syncing log.
What you may well want to do on the Device screen is delete old backup files you no longer need. To delete a backup file, follow these steps:
1. In the Backup File list box, select the backup file’s check box.
2. Click the Delete Backup button. Kies displays the Notification dialog box (shown here.)
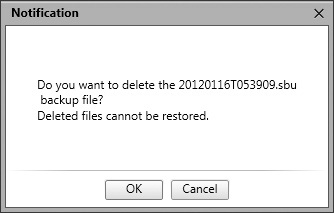
3. Click the OK button.
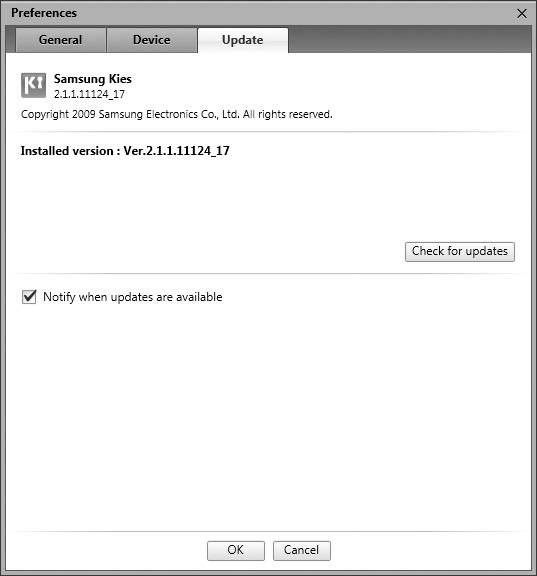
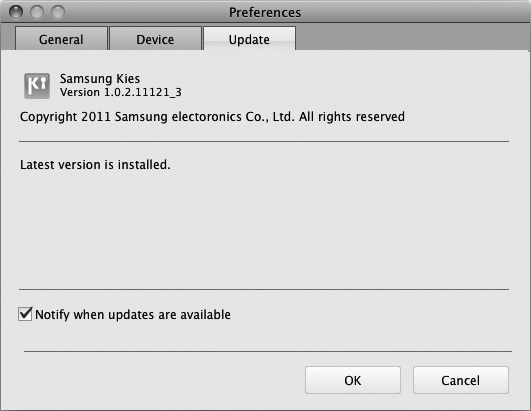
On the Update screen in the Preferences dialog box (see Figure 3-7), you can control Kies updates:
FIGURE 3-7 On the Update screen in the Preferences dialog box, you can choose whether to have Kies notify you when updates are available. You can also check manually for updates.
• Update Now If this button is available, click it to start updating Kies to the version shown in the readout. If the Check For Updates button appears instead, click this button to find out whether an update is available.
• Notify When Updates Are Available Select this check box if you want Kies to check for updates and prompt you to install them. This automatic checking is usually helpful.
We’ll look at the process of updating Kies later in this chapter.
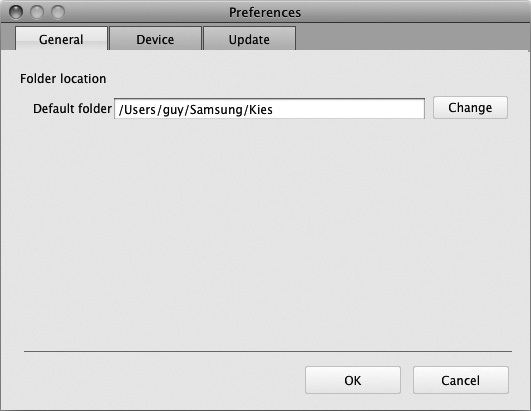
The Preferences dialog box for Kies for Mac has three screens: the General screen, the Device screen, and the Update screen.
On the General screen in the Preferences dialog box (see Figure 3-8), you can choose only the location of the default folder. See if the folder shown in the Default Folder box is the one you want. If not, click the Change button, navigate to the correct folder in the Open dialog box, and then click the Open button.
FIGURE 3-8 On the General screen in the Preferences dialog box, you can set the default folder for Kies for Mac.
On the Device screen in the Preferences dialog box (see Figure 3-9), you should in theory be able to initialize the syncing logs for contacts, scheduling information, and memos. At this writing, the Device screen isn’t complete, and the controls on it don’t work.
FIGURE 3-9 The Device screen in the Preferences dialog box of Kies for Mac is a work in progress.
On the Update screen in the Preferences dialog box (see Figure 3-10), you can control Kies updates:
FIGURE 3-10 On the Update screen in the Preferences dialog box, you can choose whether to have Kies notify you when updates are available.
• Update Now If this button is available, click it to start updating Kies to the version shown in the readout.
• Notify When Updates Are Available Select this check box if you want Kies to check for updates and prompt you to install them. This automatic checking is usually helpful.
We’ll look at the process of updating Kies next.
To get the best performance and results with Kies, you need to update it to the latest version. In this section, we’ll look at how to update Kies first on the PC and then on the Mac.
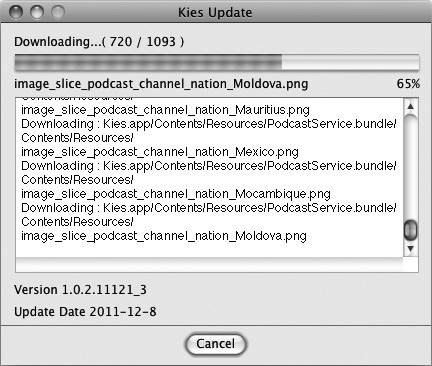
If you set Kies to alert you to updates, it displays the Kies Update dialog box (shown here) when it detects one.
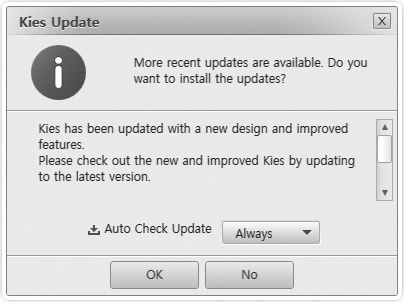
In the Auto Check Update drop-down list, choose the frequency: Always, Everyday, Every 3 Days, Every Week, Every 15 Days, or Every Month. The frequency is up to you, but Every Week is a sensible compromise between frantic checking and leaving Kies too long without important updates.
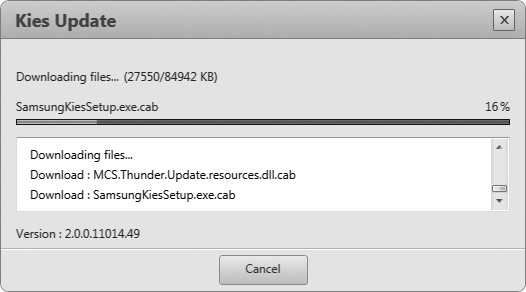
Click the OK button to tell Kies to download the files (as it is shown doing here).
If the Kies download seems to get stuck, look at the Taskbar to see if a User Account Control button is flashing there. If so, click this button to display the User Account Control dialog box, and then click the Continue button. For reasons unknown, the User Account Control dialog box tends to get stuck behind the Kies Update dialog box.
When Kies finishes downloading the files, the Kies Installer runs, and the Samsung Kies – InstallShield Wizard dialog box (shown here) appears, telling you that you need to uninstall the previous version of Kies before you can install the new version.

Click the Yes button. The InstallShield Wizard then removes Kies, launches the installation routine, and walks you through it. This uses the same steps described earlier in the chapter.
At the end of the installation, make sure the Run Samsung Kies check box is selected, and then click the Finish button. The installer launches Kies, and you can start using it again.
To help you keep it updated, Kies automatically checks for updates and prompts you to install any it finds.
If you have time, go ahead and update Kies. Click the Update button, and follow through the prompts for downloading and installing the update. This is less straightforward than it should be, because performing the update involves running another application called LUI.app, which asks you to authenticate yourself to prove your authority to run it (as shown here).
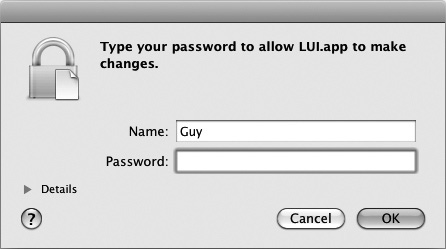
Once you’ve agreed to run LUI.app, the Kies Update dialog box appears (as shown here), keeping you updated on Kies’s progress getting the files and installing them.
Before you can connect the Galaxy Tab to your PC via Bluetooth, you need to turn Bluetooth on and make the Galaxy Tab visible via Bluetooth. You can then pair the Galaxy Tab with your PC, establish a connection, and transfer files back and forth.

Kies has a Tools | Connect Using Bluetooth command, but it doesn’t work for devices that use the Android operating system, as the Galaxy Tab does. So you need to establish the Bluetooth connection using Windows instead.
To turn on Bluetooth and make the Galaxy Tab visible so that you can pair it with the PC, follow these steps:
1. From the home screen, tap the notifications area to display the notifications panel.
2. Tap the Settings button to display the Settings screen.
3. Tap the Wireless And Networks button to display the Wireless And Networks screen.
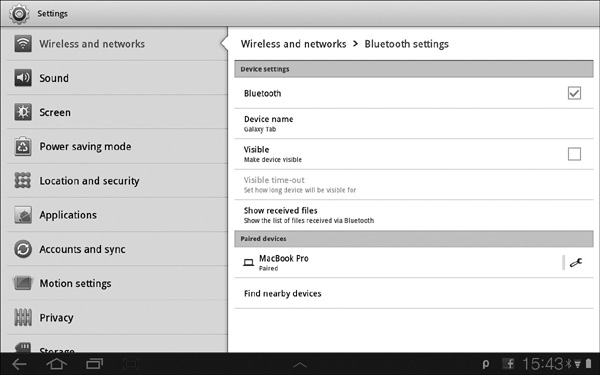
4. Tap the Bluetooth Settings button to display the Bluetooth Settings screen (shown in Figure 3-11).
FIGURE 3-11 On the Bluetooth Settings screen, turn on Bluetooth by selecting the Bluetooth check box, and then make the Galaxy Tab visible to other Bluetooth devices by selecting the Visible check box.
5. Select the Bluetooth check box to turn Bluetooth on.
When Bluetooth is turned on, the Bluetooth symbol appears in the Galaxy Tab’s notifications area, so you can instantly tell whether Bluetooth is on.
6. If you want to change the Galaxy Tab’s Bluetooth name, tap the Device Name button, type the name in the Device Name dialog box, and then tap the OK button.
In this section, I’ve used the name “Galaxy Tab” for my Galaxy Tab, because I like to keep things straightforward. When you connect to your Galaxy Tab via Bluetooth, you’ll see the Bluetooth name you’ve set.
7. Select the Visible check box. The Galaxy Tab makes itself visible to other Bluetooth devices for 120 seconds, which it counts down on the Visible line.
Now that Bluetooth is on and the Galaxy Tab is visible via Bluetooth, you can pair the Galaxy Tab with your PC. To do so, follow these steps:
1. Choose Start | Control Panel to open a Control Panel window.
These steps are for Windows 7. For Windows XP or Windows Vista, you need to take similar but different steps.
2. Click in the Search Control Panel box in the upper-right corner of the Control Panel window, and then type Bluetooth to display a list of Bluetooth-related tasks.
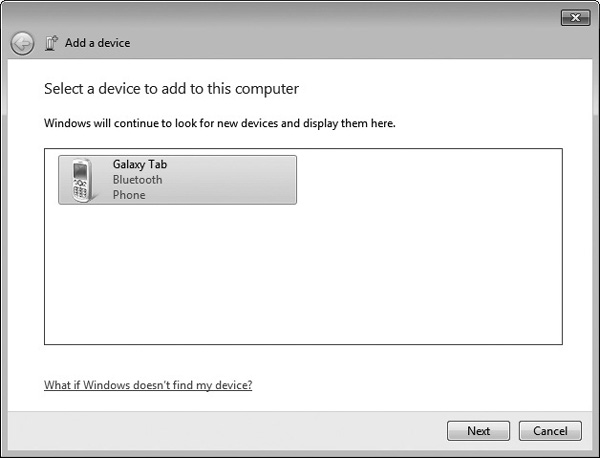
3. Click the Add A Bluetooth Device link to launch the Add A Device wizard, which displays the Select A Device To Add To This Computer screen (shown in Figure 3-12 with the Galaxy Tab found).
FIGURE 3-12 On the Select A Device To Add To This Computer screen of the Add A Device wizard, select the Galaxy Tab, and then click the Next button.
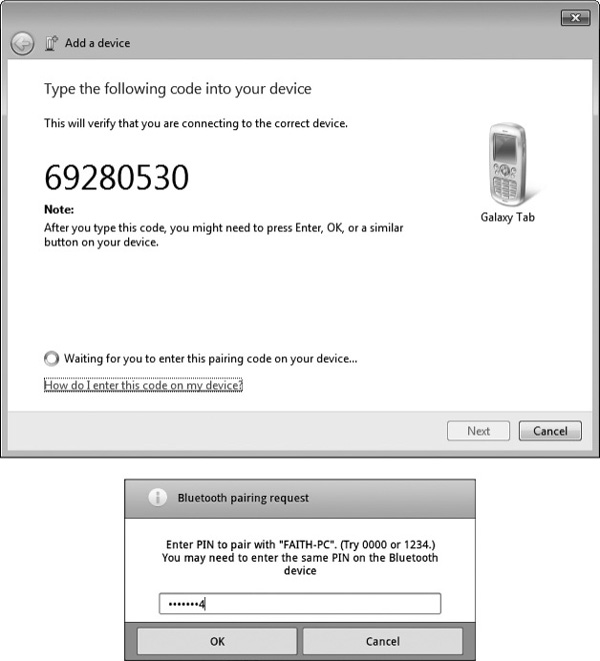
4. Click the Galaxy Tab’s icon in the list box, and then click the Next button to display the Type The Following Code Into Your Device screen (shown in the upper part of Figure 3-13).
FIGURE 3-13 When you see the Type The Following Code Into Your Device screen on your PC (top), type the code into the Bluetooth Pairing Request dialog box on the Galaxy Tab (bottom).
5. Type the code into the Bluetooth Pairing Request dialog box on the Galaxy Tab (shown in the lower part of Figure 3-13).
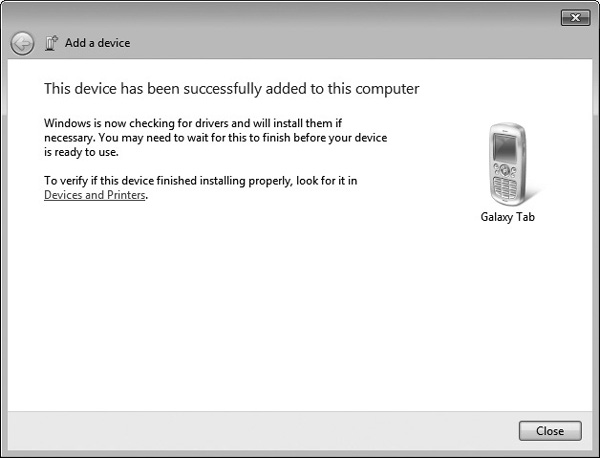
6. The Add A Device wizard then displays the This Device Has Been Successfully Added To This Computer screen (see Figure 3-14).
FIGURE 3-14 The Add A Device wizard displays the This Device Has Been Successfully Added To This Computer screen when you’ve paired the Galaxy Tab.
7. Click the Close button.
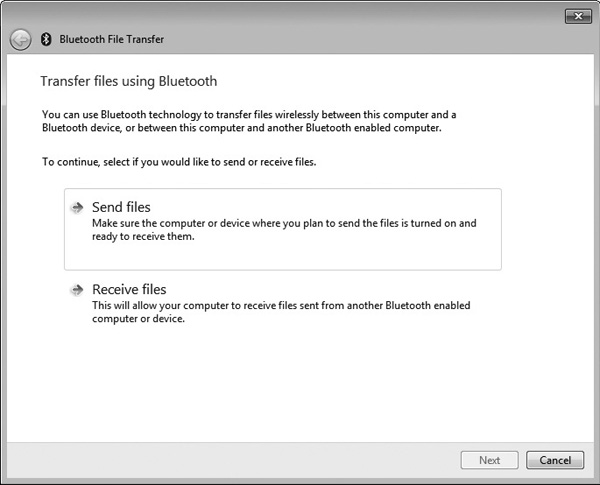
When you’ve paired the Galaxy Tab with your PC, you can send files to it and receive files from it by using the Bluetooth File Transfer wizard. Choose Start | All Programs | Accessories | Bluetooth File Transfer to launch the Bluetooth File Transfer wizard, which displays its Transfer Files Using Bluetooth screen (see Figure 3-15).
FIGURE 3-15 Use the Bluetooth File Transfer wizard to send files from your PC to the Galaxy Tab or to receive files from the Galaxy Tab.
To send one or more files to the Galaxy Tab, follow these steps:
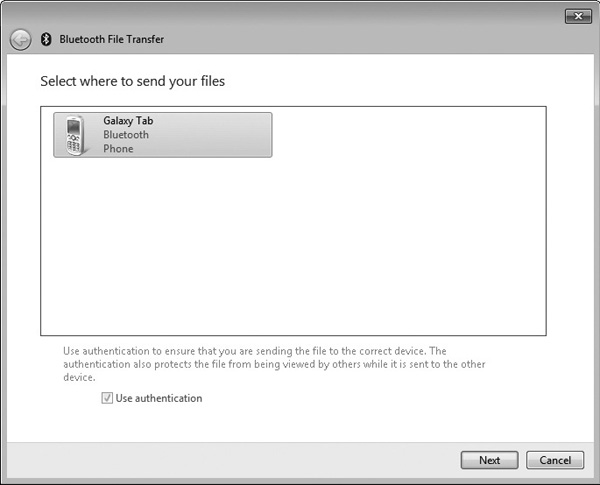
1. On the Transfer Files Using Bluetooth screen, click the Send Files button. The Bluetooth File Transfer wizard displays the Select Where To Send Your Files screen (see Figure 3-16).
FIGURE 3-16 On the Select Where To Send Your Files screen of the Bluetooth File Transfer wizard, click the Galaxy Tab’s entry, and then click the Next button.
2. Click the Galaxy Tab’s entry.
3. Click the Next button. The Bluetooth File Transfer wizard displays the Select The Files screen.
4. Select the files you want to transfer:
a. Click the Browse button to display the Browse dialog box.
b. Navigate to the folder that contains the files.
c. Select the file or files.
d. Click the Open button. The Bluetooth File Transfer wizard adds the file name or names to the File Names text box, separating the names with semicolons.
5. Click the Next button. The Bluetooth File Transfer wizard displays its The File Is Being Sent screen.
6. The Galaxy Tab then displays a message telling you that there’s a Bluetooth request you need to authorize. To do so, follow these steps:
a. Tap the notifications area to open the notifications panel.
b. Tap the Authorization Request button to display the Bluetooth Authorization Request dialog box.
c. Select the Always Allow This Device check box if you want to receive files more easily from your PC in the future.
d. Tap the Accept button. The Galaxy Tab starts receiving the file or files.
7. The Bluetooth File Transfer wizard shows the progress of sending the file or files, and the notifications panel shows the Galaxy Tab’s progress of receiving the data.
8. When the transfer is complete, the Bluetooth File Transfer wizard displays the File Successfully Transferred screen. Click the Finish button to close the wizard.
9. When the Galaxy Tab has finished receiving the files, tap the Bluetooth Share: Received notification in the notifications panel to display the Inbound Transfers screen (shown here). You can then tap the button for a file to open it.

You’ll find files you receive via Bluetooth in the Bluetooth folder, which you can access using the My Files app.
To transfer one or more files from the Galaxy Tab to your PC, follow these steps:
1. Choose Start | All Programs | Accessories | Bluetooth File Transfer to launch the Bluetooth File Transfer wizard. The wizard displays the Transfer Files Using Bluetooth screen (shown in Figure 3-15, earlier in this chapter).
2. Click the Receive Files button. The Bluetooth File Transfer wizard displays the Waiting For A Connection screen.
3. On the Galaxy Tab, start sending a file like this:
a. Open the file you want to send.
b. Tap the Share button on the toolbar to display the Share menu.
c. Tap the Bluetooth button to display the Bluetooth Device Picker screen (shown here).
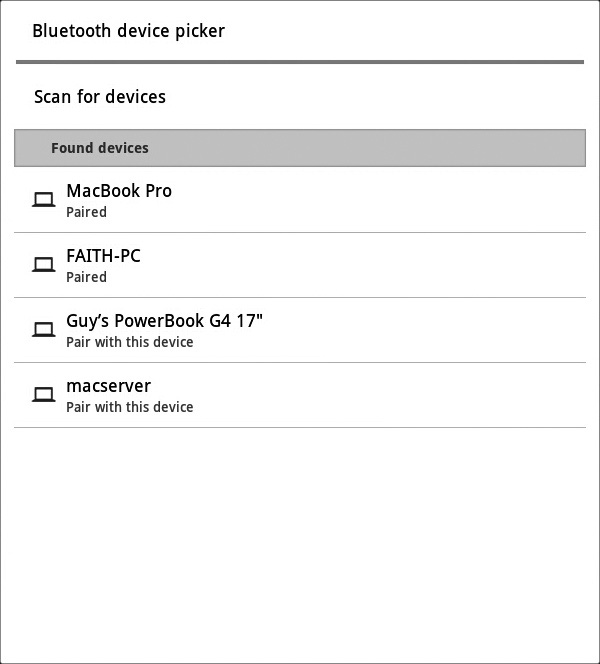
d. Tap the button for the device to which you want to send the file. The Galaxy Tab starts sending the file, and the Bluetooth File Transfer wizard starts receiving it.
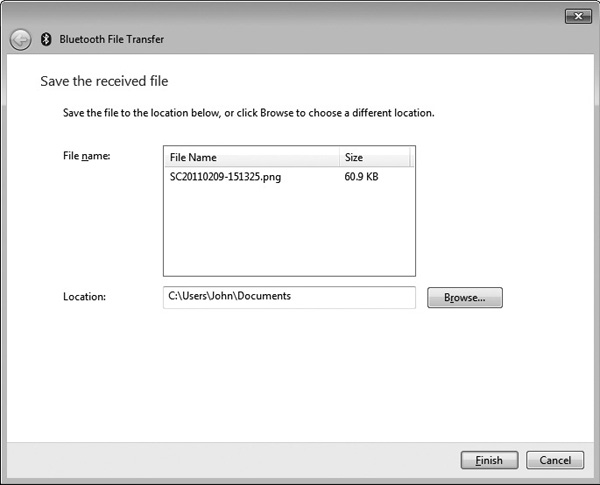
4. When the Bluetooth File Transfer wizard displays the Save The Received File screen (see Figure 3-17), you can either accept the default folder shown in the Location text box or click the Browse button and use the Browse dialog box to choose another folder. Then click the Finish button to save the file to that folder.
FIGURE 3-17 On the Save The Received File screen of the Bluetooth File Transfer wizard, choose whether to use the default folder or a folder you select.