

When hosting a memorable birthday party, you can do it all yourself without the need for an expensive venue or caterers. I’ve always believed that good food and attention to detail are what make a party memorable. And this applies to children’s parties too. Although children love sugary things, they are also drawn to creative, vibrant, edible items at a party table. Therefore spending a little time creating these is far more worthwhile an investment than hiring expensive entertainment.
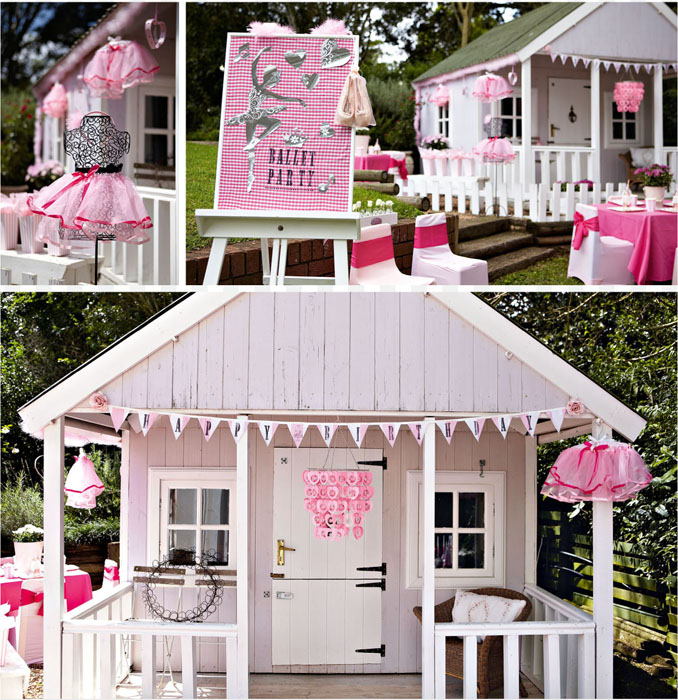
On the Menu
Themed food (your choice)
Novelty cake
Perfect party cupcakes (flat-topped or domed)
Cut-out biscuits
Swiss chocolate mousse cake
Edible take-home gifts
Menu for a morning or afternoon birthday tea or for the adults’ food table at a kids’ party
Ultimate white chocolate cake
Roasted Mediterranean vegetable quiche
Whole orange and hazelnut torte
Rolled-up asparagus sandwiches tied with chives
Menu for a light lunch birthday party
Chicken and mango salad with toasted almonds and a fruity curry dressing
Swiss Gruyère, thyme and caramelised onion tartlets
Angel food cake
Mum’s never-go-wrong chocolate profiteroles
Menu for a morning tea birthday party or food for parents at a kids’ party
Swiss chocolate mousse cake
Warm phyllo parcels with Brie and cranberry or fig preserve
Individual mushroom, bacon and herb quiches
Buttermilk vanilla sponge
Menu for an informal evening function
Bruschetta with a variety of toppings
Roasted red pepper roulade
Roasted vegetables quiche with red onion marmalade
Chocolate fondue
Menu for a birthday brunch
Salmon and cucumber mousse
Home-made granola
Individual mushroom, bacon and herb quiches
Swedish-inspired spiced apple cake
Menu for a birthday dinner party
Blue cheese crème brûlée, served with red onion marmalade and slices of warm baguette
Chicken and mushroom phyllo pie
Chocolate and cherry cream meringue gâteau

For my eldest son’s most recent ‘campfire’ birthday party I hadn’t organised any ‘formal’ entertainment. All the children ran around the garden with torches and entertained themselves for hours! Secretly, I had worried about the lack of structure, but it was a revelation to me how much fun they had. They also loved being involved with the preparation of their own food – toasting their own marshmallows, making ‘s’mores’, and so on. Perhaps I shouldn’t have been surprised.
At the cupcake and cookie decorating classes I’ve held for children, I’ve been amazed at how much they (older boys included) love to be creative with food and how they are able to concentrate for ages when it comes to icing. Adults derive equal satisfaction from testing their own creativity, so this chapter aims to inspire you to give it a bash. You’ll discover how to host a birthday party in a way that won’t leave you frazzled or stressed. I’ve also included some ideas for edible take-home gifts.

Refer to ‘General Guidelines for Any Type of Party’, on page 5.
| Up to 1 month before, make and freeze the following sweet items | |
|---|---|
| Swiss chocolate mousse cake* (page 72) | |
| Novelty cake* (pages 61, 62) | |
| Cupcakes for Perfect party cupcakes* (pages 64, 65) | |
| Buttercream icing (page 181) | |
| Cut-out biscuits (freeze un-iced) (page 70) | |
* Freeze these without ganache, cream or filling. You can, however, freeze them with buttercream icing, in which case ensure that the buttercream icing is not touched or messed up in the freezer. Allow the icing to set hard before gently wrapping/covering. Carefully remove any wrapping before defrosting.
| 10 days before the party | |
|---|---|
| If you would like to have decorated biscuits and have not yet made and frozen them, make fresh biscuits now and store in an airtight container with greaseproof paper between the layers. | |
| 3–5 days before the party | |
|---|---|
| Decorate the biscuits with Royal icing (page 185) or Tylose paste (page 191). | |
| Make the buttercream icing, unless you have made and frozen this ahead, in which case defrost in fridge. | |
| Purchase drinks for the party (and, if required, organise ice and where to store it). | |
| 2 days before the party | |
|---|---|
| Check that you have all the ingredients to ice and decorate the cakes and sweet items from your menu. | |
| Check that you have all the ingredients for the savoury items on the menu, including herbs or salad for garnishing. | |
| The day before the party | |
|---|---|
| Take the buttercream icing out of the fridge or freezer for it to be at the right consistency for icing (don’t put it in the microwave and risk melting it!). | |
| Ice the cupcakes and cover them with buttercream and/or sugar paste toppers (this can be done on the day of the party or the day before, if you prefer, if you’re likely to panic). The sponge is moist so will still taste good if the cupcakes are defrosted the day before the party. Remember to allow 2–3 hours for the cupcakes to defrost prior to icing them. | |
| Set the table for the party and put out glasses, cups and saucers, teapots, milk jugs, cutlery, serviettes, etc. Fill and cover sugar pots and put out the teas and coffee that you will be offering, and an urn, if you are using one. | |
| Arrange any flowers that you might be using. | |
| Make the mousse-like icing for the Swiss chocolate mousse cake. | |
| On the day of the party | |
|---|---|
| Defrost any remaining sweet and savoury items (this should be done at least 3 hours before the party). Smaller items such as cupcakes defrost extremely quickly, but larger cakes will take a good 3 or 4 hours, depending on the room temperature. | |
| Ice the Swiss chocolate mousse cake. | |
| Ice the cupcakes (if you have not already done so). | |
| Fill the milk jugs and put out drinks an hour or two before the party begins. | |
| Half an hour to an hour before the party | |
|---|---|
| Put out cakes and sweet items and decorate or dust with icing sugar. | |


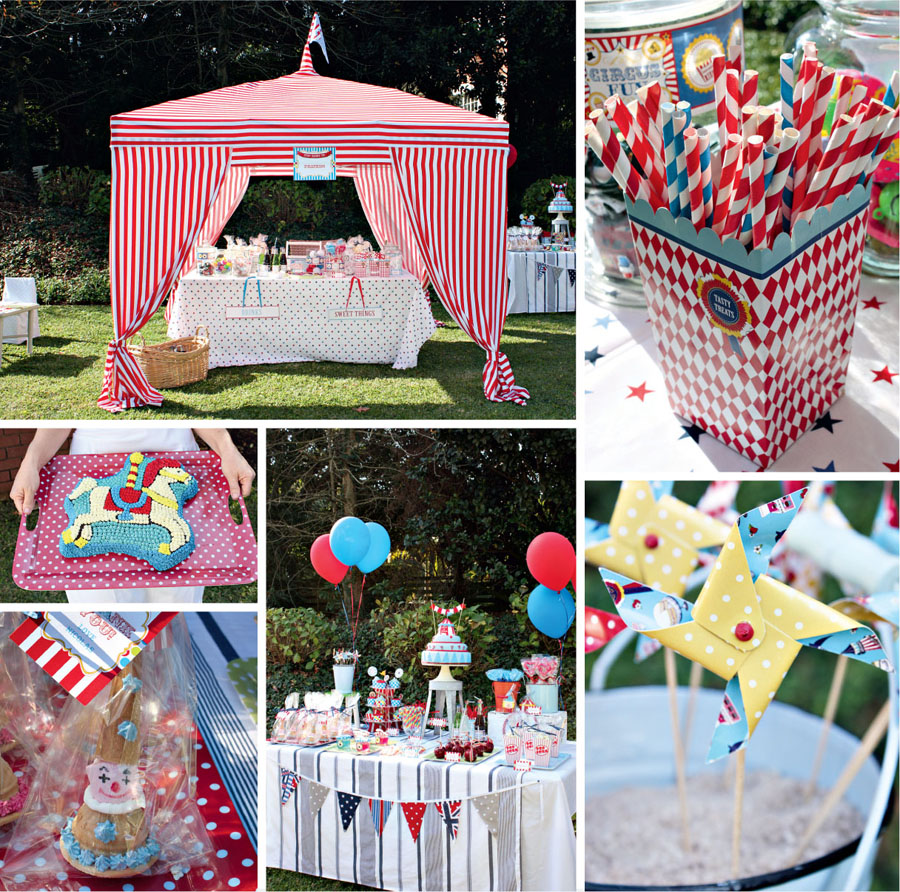


Many parents want to make a birthday cake for their child’s birthday (or for an adult birthday), but often shy away from the challenge. Some may have attempted it once or twice, but given the stress it caused them, vowed never to do so again. Because most working parents lead hectic lives, it’s almost impossible, after a hard day’s work, to make a cake, allow it to cool, make the icing/s, prepare the icing bags and nozzles, and then spend hours decorating! But there’s a simple solution: be prepared and plan ahead. You can successfully make and freeze the cake well in advance of the party (using the suggested recipes that are designed with storage in mind) and, by following the tips in this chapter, also prepare the icing ahead. This way you’ll remain sane and may actually enjoy the creative process.

Spend a little time in advance of the party thinking about a theme. Discuss this with whomever the party is for (unless it’s meant to be a surprise) and then decide what is feasible. This gives you time to look for items that may fit in well with the chosen theme. Friends may have, and would be happy to lend you, items such as novelty baking tins, characters and so on from parties they’ve given. Also look at a local baking supply store or a party shop for its assortment of novelty cake tins for inspiration on the type of cake to make. Alternatively, you may create an original novelty cake by moulding items out of fondant icing (tylose or sugar paste) (page 191).

What you will need
Although novelty cake tins may be purchased online, they are available for hire at a nominal fee. The best tip I can give you is to make and ice this type of cake, then freeze it iced. It freezes beautifully as long as you follow the tips below and you store it carefully. This process saves any last-minute panicking and frees up time before the party. Plan, therefore, to hire the tin on a day when you’ll have enough time to bake the cake and decorate it. To reduce the amount of work at one time, I have also found that it pays to make the buttercream icing a day or two beforehand, so all you have to do is bake the cake, then get going with your icing bags, ready to pipe!
Step 1
Grease the cake tin very well with vegetable shortening. Sift over just enough flour to cover the entire greased surface. Turn the tin upside down and tap it a few times to remove any excess flour. This will also expose any spots that you haven’t greased well enough. Regrease these spots and dust with flour again, tapping the tin to remove the excess. Doing this properly will ensure that the cake turns out perfectly, enabling you to define the details on the cake.
Use a cake mixture of your choice for the cake. I suggest the Buttermilk vanilla sponge (page 178) or the Chocolate and coffee cake (page 179). For children you may wish to omit the coffee and simply use hot water, but I prefer decaffeinated coffee for children’s cakes as I think it gives this particular one a good flavour. Use a cake recipe that is robust enough to hold its shape. Do not be tempted to overfill the tin (about halfway to just below two-thirds full is more than adequate) as the cake will rise and you will simply have to cut off the top to make the cake level. You will have to use your judgement as to the amount of mixture required, based on the size of your particular novelty tin (this will be between one and two cake mixtures’ worth).
Step 2
Make sufficient buttercream icing to allow for the icing of cupcakes at the same time, if necessary. You will see from the recipe that the proportion is basically one part butter to two parts sifted icing sugar, so you can easily adjust this recipe to the quantity of buttercream icing you require.
Step 3
Decide on the amount of buttercream icing necessary for each colour. Use the picture that comes with the tin (you can often find these online), otherwise use your imagination. Note that the background and sides of the cake will require a good proportion of icing. Divide the buttercream icing into bowls and add food or gel colouring, using a toothpick and just a drop at a time (it is far easier to add another drop than to have to make more icing because you squeezed too much out in one go!).
Place a coupler into each icing bag (see page 190). The advantage of using these for this type of cake is that you would otherwise require quite a few nozzles for the various colours; or you would have to finish all your piping in one colour, then remove the nozzle and wash it before proceeding with the next colour.
Place each of the icing bags into a jug or glass to make it easier to load the icing into the bag (see page 183). You do not necessarily need an icing bag for crumb-coating the cake (see below).
Step 4
Now it is time to crumb-coat the cake (see page 184 for more on this method). This simply means coating the sides and/or background of the cake with a first coating of icing to seal in or hide the crumbs before adding a second layer of icing. You can spread the icing over with a palette knife (put sufficient on at a time) and then smooth it. It doesn’t have to be perfect, but make it as smooth as possible. Place the cake in the fridge (uncovered) to set for about 30 minutes. Crumb-coating can make a huge difference to the overall final appearance of the cake. For areas on the top of the cake that need to be iced with the background colour, you may find it easier to use a piping bag. Smooth this area with a palette knife after piping on a few blobs of your background colour icing, then apply a second ‘coat’ of icing and smooth gently with a clean palette knife (dip in boiling water and wipe clean if necessary).
Step 5
Start outlining the details on the cake (typically with a darker colour such as black) using a small round nozzle fitted to the coupler. This makes it easier to contain the stars to be piped next. Now for the fun part … start piping stars. Remember that pictures are made up of a whole lot of little dots or pixels. The same applies to this type of cake … the picture is merely a collection of little stars. If you haven’t done this before, practise making a couple of stars first on a plate or piece of baking paper. Now start piping in the various colours. If there are details (such as eyes) that you think should stand out more, pipe them last.
Have you ever wondered how to make a flat-topped cupcake that forms a perfect base for decorating with edible art or a perfect round of embossed sugar paste? My great-aunt Myrtle’s Victorian sponge cake was the inspiration for this recipe as it always produced a perfectly flat top.
I experimented with dozens of cupcake recipes until I tested out her recipe, and then made quite a few adjustments specifically for cupcakes. Why do I consider it to be perfect? Well, not only do cupcakes need to taste delicious, but they must also store and freeze well. The bonus is that this recipe can be made in one of two ways: either flat (to provide the perfect flat canvas for buttercream icing, fondant circles, royal icing, etc.) or dome-shaped (for butterfly cupcakes and the like). The secret lies in the method – see the different methods and oven temperatures opposite. For flat-topped cupcakes, be careful not to overfill the cupcake case.

Flat-topped cupcakes

Domed cupcakes
Tips if making ahead of time
You can easily make these cupcakes well ahead of an event. They freeze beautifully (for up to two months). Typically, I freeze cupcakes un-iced in sealable plastic bags. They do not require that long to defrost; a couple of hours at room temperature is more than sufficient. I have also frozen iced cupcakes (with either normal buttercream icing or Swiss meringue buttercream icing (page 182)). If they are iced, store them carefully in a sealable plastic container.
Makes ± 24 medium cupcakes
Note: The temperature and baking time will vary according to different ovens, so some experimentation is required in your own oven. If the cupcakes peak too much, reduce the oven temperature the next time you bake them (and remember not to overfill the cases).
Makes 18–24 small to medium cupcakes
The sky is the limit when it comes to decorating cupcakes. You may choose to pipe a simple classic swirl using a large open or closed star nozzle (see page 187 for a guide to selecting nozzles) or a large open nozzle. For these types of swirl, start from the outside and work inwards, layering the icing on top of the previous layer. Alternatively, you may opt for a pretty rose swirl using a closed star nozzle, piping from the centre of the cupcake outwards. Embossed rounds of fondant/sugar paste provide a lovely canvas for cupcakes too and for adorning them with edible decorations (see pages 155 and 191 to create embossed rounds for cupcakes).
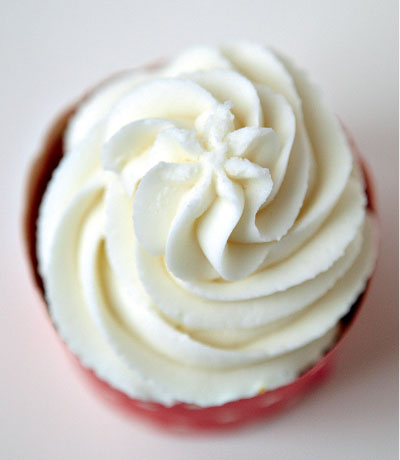
Classic swirl

Rose swirl
Why cover a cake with fondant (or sugar paste) icing, you might ask? Well, this type of icing gives a smooth and professional finish that is extremely difficult to achieve with other types of icing such as buttercream. It is the type of icing usually associated with wedding and Christmas cakes, but it is also popular for birthday and novelty cakes as it opens up a whole world of creative possibilities. These days, buttercream icing is a popular substitute for marzipan, while sponge cakes are often favoured over the more traditional fruit cakes. One thing to bear in mind, however, is that fresh sponge cake combined with buttercream icing will not keep as long as a fruit cake with marzipan. Therefore decorating this type of cake will have to be a more last-minute affair.
What you will need:
Make sure that the top of the cake you’re icing is level (using a sharp bread knife, cut off any peaks to ensure that the cake is as flat as possible). Place the cake with its flattest side facing up (this is probably the side that was on the bottom of the cake tin during baking). If you are using two or more cakes on top of each other, level each cake as much as possible and place the less-even sides facing inwards against each other. Place your cake(s) on an appropriately sized cake board (or alternatively the cake stand on which it is to be served).

Roll out the fondant to the correct size

Transfer the fondant to the cake
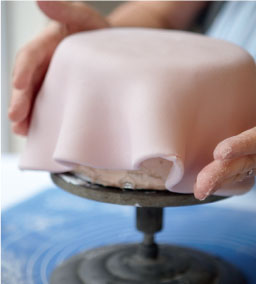
Open out creases and trim off any excess fondant

Decorate as desired
If you are using marzipan on the cake, first brush some heated jam over the top of the cake (just enough to make it sticky, but not too much or the icing will sag). Patch any holes in the cake (including the base) with little pieces of marzipan for a smoother finish.
Roll out the marzipan with a rolling pin covered in a little icing sugar, on a board also covered with some icing sugar, to prevent any sticking. Transfer the marzipan to the jam-glazed cake. Smooth the marzipan all over with cake smoothers or a ball of marzipan dipped in icing sugar. Remove any excess marzipan with a sharp knife. Slightly dampen the marzipan all over with a little cool water. Once again, don’t overdo the water or the final layer of icing will sag (just enough for the fondant icing to stick to the marzipan).
Knead the fondant icing a little to soften it and make it more pliable. Roll out the icing on a cake board or countertop, using a ruler or tape measure (or string) to ensure that the icing is the correct size to fit the cake. Use sufficient icing sugar so that the icing doesn’t stick to the surface (with each rolling-out, make sure you can lift the icing off the working surface). Remove air bubbles in the icing with a pin, then smooth over the tiny holes (and don’t lose the pin in the icing!). Transfer the icing to the cake; use a rolling pin to help you lift the fondant if necessary. Smooth the surface of the cake all over with a cake smoother. Trim off any excess fondant icing with a sharp knife. To decorate the cake, you could pipe royal icing around the base or tie a ribbon around it.
Instead of glazing a cake with jam, spread a light layer of buttercream icing or ganache all over it. If you are using more than one cake, see page 184 on crumb-coating layer cakes to ensure that there are no obvious gaps between the cakes. Don’t overdo the amount of buttercream icing or ganache, or the fondant icing will sag. Once you’ve completed the crumb-coat, allow the cake to chill in the fridge until the icing is just set (or has formed a crust). Dampen the icing ever so slightly with a little cooled (previously boiled) water or piping gel. Don’t overdo the amount of water or the final layer of icing will sag. Alternatively, you can top the buttercream icing with a layer of caramel (but not too much). Cover with the fondant icing and decorate the cake.
A cake with two or more tiers usually needs dowels and cake boards to support the structure – particularly if the cake is to be moved around or transported; you don’t want a layer of cake and icing to crush the layer beneath it or all your hard work to end up on the floor! Neaten domes or peaks on the individual cakes with a sharp serrated knife (cut each cake in half and sandwich together with buttercream icing/ganache if desired for sponge cakes). Place each cake on its own board (roughly the same diameter as that tier of the cake). You may smear a little icing on each cake board to prevent the cake from shifting. To assemble the cake: place the dowelling rods (about four per tier) in each of the cake tiers except the top. Position the rods so that they support the tier above – typically in a square shape. Start by inserting the first dowel into the lowest tier, making sure it passes through to the bottom of the cake. Measure where to cut the dowel (it should be in line with the top of that cake tier, including the icing).
Neaten the tops of the sponge cakes. Slice each cake in half (or thirds) and sandwich these halves (or thirds) together. Place each sponge cake tier on a cake board and crumb-coat each tier (see page 184 on crumb-coating) with some buttercream icing, leaving sufficient icing for the final coat. Refrigerate the tiers for about half-an-hour until the icing feels just set to the touch. Give each layer a final coat of buttercream icing – as neatly as possible. Assemble the cake tiers as per the instructions opposite.
It is useful to use a cake board or piece of cardboard (dusted with icing sugar) to help you roll out the icing to the right size and transfer it to the cake.
Use tylose paste to create edible art for topping cupcakes (see page 191). The sky’s the limit as to what you can create, and you can involve children in the preparation process. Tie these cupcake toppers into your theme. You can make them weeks before the party, allowing them to dry completely (under a net) before storing them. Be careful not to store items made from tylose paste in a plastic container if they’re not sufficiently dry, particularly in humid climates, as they could turn mouldy. Place your edible art on top of cupcakes elegantly iced with buttercream swirls or on top of rounds of embossed fondant (where it is preferable to have a flat canvas for displaying your art). Alternatively, for flat-topped cupcakes you can simply crown each cupcake with a spoon or two of buttercream icing and use a palette knife to smooth the icing outwards towards the cupcake wrapper (so that the icing is level with the wrapper). This should create a smooth surface without too much trouble.

When it comes to cut-out biscuits (or cookies as Americans like to call them), you need a recipe that is robust enough to stand up to being cut out and re-rolled, but which also produces tasty biscuits that won’t crumble too much. I have found that biscuits made with lots of icing sugar and cornflour, although delicious, don’t really hold up to long storage, particularly in a humid climate.


Makes ± 30 (depending on cutter size)

What you will need:
Many biscuit decorators prefer to use 10-second icing to outline and then flood a biscuit with royal icing (see page 185 for guide to royal icing and consistencies) as opposed to outlining with a thicker consistency royal icing (this will depend on different preferences, of course). Outlining and flooding using 10-second icing is much easier and does give good results. The piped outline forms a tiny border or ‘dam wall’ to contain or prevent the icing from spilling over (floodwork). When you begin to pipe this border, hold the icing nozzle up and a bit away from the biscuit so that the icing simply trails behind the nozzle and falls onto the biscuit (see above left). Don’t drag the nozzle against the surface of the biscuit. Once you have completed the outline or a section of a line, dot the nozzle back down again gently towards the biscuit surface. As soon as the outline is in place, you can commence flooding the biscuit (here you don’t have to lift the nozzle). Start close to the border, then zigzag back and forth to fill the space with icing (see above right); you don’t have to wait for the outline to dry. Use a toothpick to prick any air bubbles that may form, or to push in any little dried bits of icing. The toothpick is also useful for spreading the icing into little corners or tiny spots where it hasn’t reached. Finally, give the biscuit a good few gentle shakes from side to side to even out the icing, then set it aside to dry.
If you want to do wet-on-wet work, use a contrasting colour to the background colour, in order to pipe dots at this stage (using an appropriately sized nozzle). The wet-on-wet technique is used to create ‘embedded’ polka dots, and for marbling or feathering, such as piping the icing onto still-wet floodwork by dragging a toothpick through the dots so that it appears part of the design.
For adding other details to the biscuits (e.g. eyes, mouths, outlines that add detail), wait for the icing to dry completely (could take several hours). Then use a thicker consistency icing and a finer nozzle (such as a number 00 or 1) to pipe these details onto the biscuit. Wait for the biscuits to dry completely before packing them into cellophane packets.
Experiment to see which nozzle suits you best for outlining and floodwork, but it is obviously easier to flood much bigger cookies with a slightly larger nozzle (e.g. numbers 3–5).
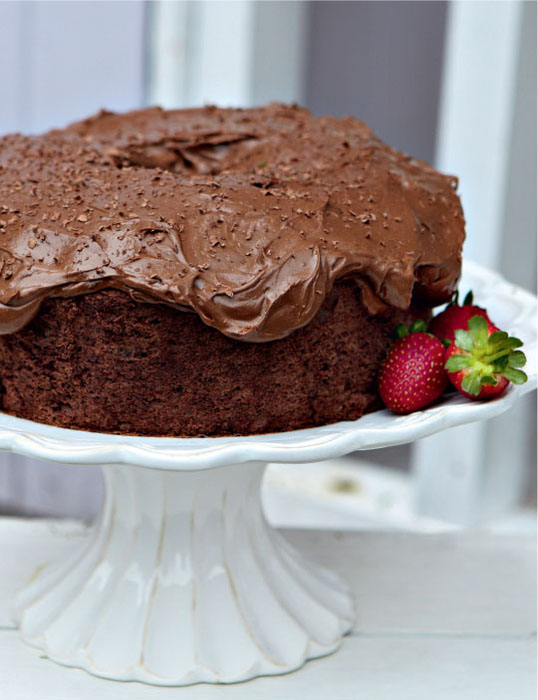
Need I say more? This showstopper is decadent enough for any special occasion. When I make it, everyone asks me for the recipe.
* Substitute boiling water if you prefer. If you use vanilla extract instead of vanilla paste or the seeds from a pod, reduce the amount of liquid by 10ml.
Makes 1 cake
Note: You can add vanilla extract (5ml) and coffee (10ml instant coffee granules/instant espresso powder) to the ingredients, after the chocolate has melted.

