
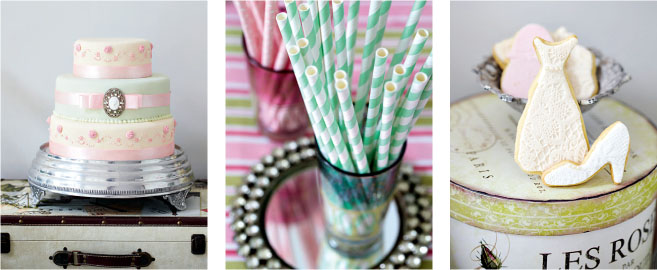
Because people often feel intimidated when it comes to arranging showers, whether bridal (kitchen tea/bachelorette party) or baby, for a close friend or family member, this chapter should dispel such fears and encourage you to leap in with confidence. Our theme has been inspired by timelessness and all things vintage – lace and pretty things that are synonymous with nostalgia and a bygone era when the pace of life was slower and people really did take time to smell the roses.

On the Menu
Cheese mousse with preserved figs, served with warm sliced baguette
Summer fruit champagne jelly mould
Bruschetta with a variety of toppings, such as crème fraîche; tomato, basil and balsamic; mushrooms with grated Parmesan
Refreshing party punch
Macaroons
Themed cut-out iced biscuits
Cupcakes decorated with edible art
Menu for a lunch or light summer ‘shower’ party
Chicken and mango salad with toasted almonds and a fruity curry dressing
Roasted Mediterranean vegetable quiche
Refreshing pineapple mousse
Mum’s never-go-wrong chocolate profiteroles
Menu for a more wintery get-together
Spicy tomato soup with a swirl of cucumber raita and coriander, served with crunchy croutons
Aubergine, butternut and chickpea tagine, served with couscous with peppers, coriander and feta, and/or chicken and mushroom phyllo pie
Chocolate fondue
Menu for a light lunch or dinner
Blue cheese crème brûlée
Mushroom, bacon and herb quiche, served with crunchy broccoli salad with a balsamic glaze
Frozen meringue roulade
Christmas gugelhopf with chocolate, orange and cranberries, served with coffee
Menu for an afternoon tea function
Swiss Gruyère, thyme and caramelised onion tartlets
Ultimate white chocolate cake
Swiss roll with a twist
Phyllo parcels filled with smoked salmon, crème fraîche and dill (see alternative for warm phyllo parcels with Brie and cranberry or fig preserve)
Menu for a morning function
Rösti with salmon and sour cream
Individual mushroom, bacon and herb quiches
Swedish-inspired spiced apple cake and/or chocolate cupcakes
A cheese platter with a selection of fruit, nuts, croissants and crackers
Menu for an afternoon tea function
Salmon and cucumber mousse, served with crackers or sliced baguette
Karoo lamb tagine, served with couscous with peppers, coriander and feta
Chocolate and cherry (or strawberry) cream meringue gâteau
Romantic rose meringues
These are the words of my friend and talented artist, Penelope Mitchell, and it is largely thanks to her that I have learned to look at things with more-seeing eyes. By drawing inspiration from things around me, the result is more accessible, economical and it often has greater impact.
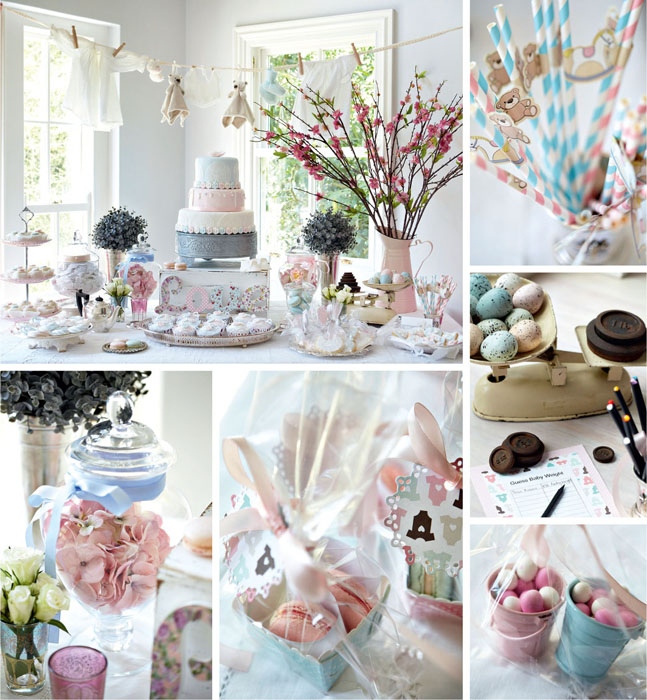
When it came to finding accessories for styling the bridal and baby showers, we decided to make use of what we could find around us. For example, we realised that Penelope’s old-fashioned scale would convey a vintage theme for the baby shower, and that the wrought-iron goose, normally at her front door, would make an excellent substitute for a stork!
Just as we did, look around you with more-seeing eyes. As they say, one man’s junk is another’s treasure. A pair of old window shutters could make an interesting backdrop for a table, while lace table napkins or vintage handkerchiefs from your mother’s or grandmother’s treasure trove might be perfect for bunting, which is so in vogue.
Doilies are also effective as bunting and are a marvellous substitute for cupcake wrappers. They’re cheaper and take moments to make: simply cut the doilies smaller and then tie into position with a ribbon or twine that matches or complements the theme of the party.


For a happy, informal event such as a bridal or baby shower, guests do not necessarily need to be formally seated. What is important is that the theme of the occasion is obvious; an instant impact is created and guests feel drawn to the location.
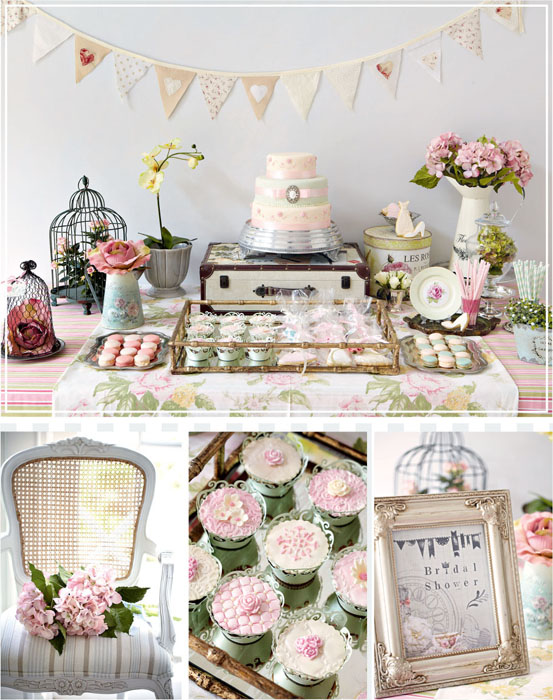
For our bridal vintage theme, we placed the table against a wall and used bunting to provide a romantic backdrop. As an additional touch of nostalgia, we used a pretty floral overlay over a striped tablecloth, then finished off with a selection of accessories such as an old suitcase, a hatbox and birdcages. Just remember, it’s the finer details that make a world of difference.
Colour and repetition are also important considerations. Think carefully about the colour scheme, and once you have decided on one, use it to accentuate the focal point. Thereafter carry it through and repeat it wherever possible. For the vintage occasions reflected in this book, the colour scheme was first established in the choice of colours for the cake (the focal point), and repeated whenever possible in the food as well as in the decorative items. It was further carried through in the colour of the flowers.
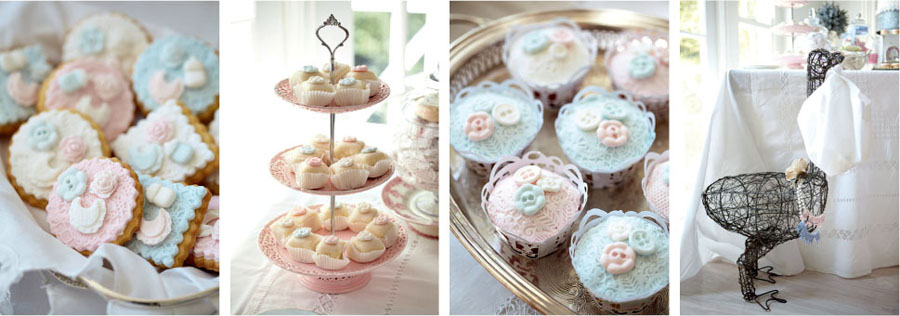
For the vintage-themed baby shower, we chose a pure white palette, and to this added pale pastel pink and blue. We also repeated certain features. For example, the washing line hung with baby clothes was repeated in the detail on the cake. The white lace of the vintage tablecloth echoed the edible lace detail of the booties, and the rounds of edible lace on the cake. The glass jar was topped with lace and French ribbon. Buttons were also repeated often – on the cake, the petit fours, the cupcakes and some of the biscuits.
The choice of crockery is also important. If possible, choose platters or serving plates that are in keeping with your theme, and that show off food to its best advantage. Look out for interesting items. Old teacups and teapots (even mismatched ones) are ideal for an old-fashioned kitchen tea. Brightly coloured, angular crockery is lovely for an informal celebration.
Refer to ‘General Guidelines for Any Type of Party’, on page 5.
| Up to 1 month before, make and freeze the following sweet items | |
|---|---|
| Cupcakes* (page 65) (either domed or flat-topped) | |
| Basic buttercream icing (if using for Cupcakes) (page 181) | |
* You can freeze them with buttercream icing, in which case ensure that the icing is not touched or messed up in the freezer. Allow the icing to set hard before gently wrapping or covering it. Carefully remove any wrapping before defrosting.
| 10 days before the shower | |
|---|---|
| If you have not made and frozen the biscuits for Themed cut-out iced biscuits (pages 70, 130), make fresh biscuits now and store in an airtight container with greaseproof paper between the layers. | |
| 3–5 days before the shower | |
|---|---|
| Decorate the biscuits with Royal icing (page 185) or Tylose paste (page 191). | |
| Make the Basic buttercream icing (if you have not made and frozen it ahead, in which case defrost in the fridge). | |
| Purchase drinks for the shower (and organise ice, if required, and where to store it). | |
| Make Macaroons (page 128) (if you have not made and frozen these ahead). | |
| 2 days before the shower | |
|---|---|
| Check that you have all the ingredients to ice and decorate the cupcakes and sweet items from your menu. | |
| Check that you have all the ingredients for the savoury items on your menu, including herbs or salad for garnishing. | |
| The day before the shower | |
|---|---|
| Take the buttercream icing out of the fridge or freezer for it to be at the right consistency to ice the cupcakes (don’t put it in the microwave as this might melt it!). | |
| Make the Summer fruit champagne jelly mould (page 125) and set it in the fridge. | |
| Ice the cupcakes and cover them with buttercream icing and/or sugar paste toppers (this can be done on the day of the party or the day before, should you prefer, if you’re concerned about getting into a panic). The sponge is moist so will still taste good if the cupcakes are defrosted the day before the shower. Remember to allow 2–3 hours for the cupcakes to defrost prior to icing them. | |
| Set the table for the shower and put out glasses, cups and saucers, teapots, milk jugs, cutlery, serviettes, etc. Fill and cover sugar pots and put out the teas and coffee that you will be offering, and an urn, if you are using one. | |
| Arrange any flowers that you might be using. | |
| Prepare toppings for the Bruschetta with a variety of toppings (page 126) and slice the ciabatta (be sure to wrap it up again tightly so it does not dry out). | |
| Make the Cheese mousse with preserved figs (page 124). | |
| On the day of the shower | |
|---|---|
| Defrost any remaining sweet and savoury items (this should be done at least 3 hours before the shower). Smaller items such as cupcakes defrost extremely quickly, but larger cakes will take a good 3 or 4 hours, depending on the room temperature. | |
| Purchase the freshest bread possible for the baguette. | |
| Make the Refreshing party punch (page 127). | |
| Ice the cupcakes (if you have not already done so). | |
| Fill milk jugs and put out drinks 1–2 hours before the shower begins. | |
| Half an hour to an hour before the shower | |
|---|---|
| Toast ciabatta slices for the Bruschetta under the grill and top and garnish as desired. | |
| Put out cakes and sweet items, and decorate or dust with icing sugar. | |
| Heat and slice the baguette. | |
| Put out the Cheese mousse with preserved figs, as well as the Summer fruit champagne jelly mould. | |
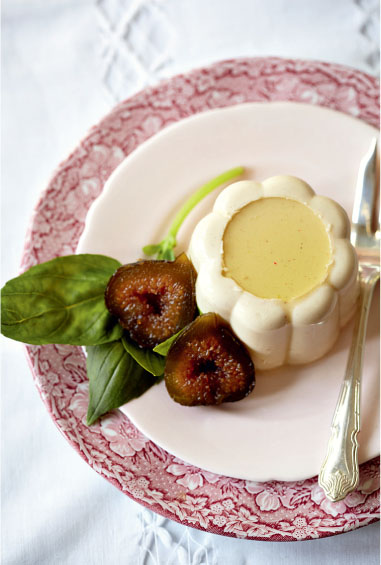
The blue cheese in this mousse is not obvious; rather, it adds an incredible depth of flavour. I have seen over the years that even people who are not fans of blue cheese love this mousse! Ideal as a make-ahead option for a drinks party, it also works perfectly as a starter (that can be made the day before and kept in the fridge) or even as the final course of a formal meal (to replace the dessert course or as an alternative to a cheese board). It is delicious served with warm, sliced baguette and caramelised onion marmalade or poached pears and walnuts.
Serves ± 8 as a starter
You could use gelatine leaves instead of powdered gelatine, in which case soak about 8 sheets in water for about 5 minutes. Squeeze out the excess water and stir the gelatine into the warm stock.
This is a fun alternative to punch. It can be prepared a day before the party and is refreshingly different to a normal cocktail. Instead of one large mould, you could use individual cups or champagne glasses as moulds and serve them as is. For 4–6 glasses, halve all the quantities below.

Serves 6–8
If you think the jelly will not release easily from the mould, use a little non-stick spray in the mould to prevent the jelly from sticking.
Note: Initially the fruit rises to the top of the liquid and this layer forms the bottom of the jelly once it’s inverted, so if you’d prefer all the fruit not to settle in a single layer, first pour in roughly one-third of the gelatine mixture together with some of the fruit. Leave this to chill before adding the rest of the fruit and gelatine mixture. If you are using frozen summer berries, stir these quickly into the gelatine mixture as it starts to thicken. Avoid using acidic fruits such as pineapple, papaya, kiwi, figs, etc., as they prevent the gelatine from setting.
This is simple to produce with the toppings all prepared in advance. Toast the ciabatta just before serving the bruschetta if possible.
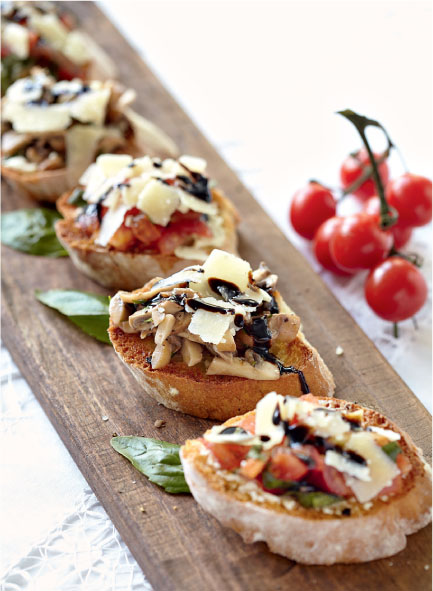
Serves ± 8 as a starter
I take no credit for this recipe as it is my husband’s concoction. But it always seems to meet with approval from our guests, especially the ladies. He chooses to serve it with frozen summer berries instead of ice cubes for a refreshing alternative.

Makes 1.25 litres/Serves ± 6
Macaroons are notoriously tricky to make, but that could be one of the reasons why they’re so popular and intriguing. So many things can affect the result, for example, any variation in oven temperature, under- or overmixing, the tray or liner you use or whether you slam down the trays to remove air bubbles – to name just a few! They do require practice and an intimate acquaintance with your oven. No-one can provide a macaroon recipe that will produce 100% success at every attempt as there are too many variables. After much experimentation, this is my guide for making macaroons. I’ve attempted to be as precise as possible.
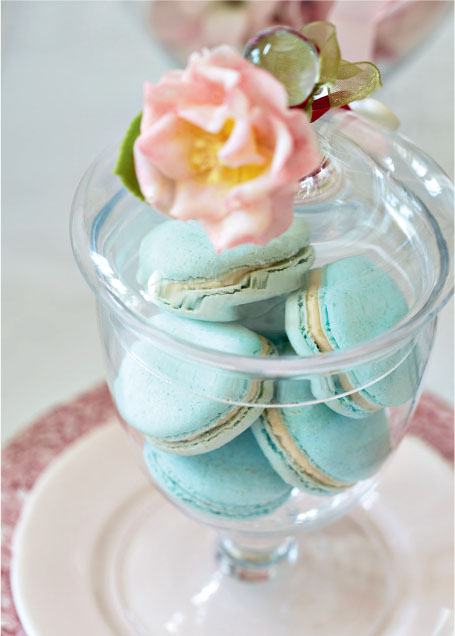
* For chocolate macaroons, add 30ml cocoa powder to the ground almonds.

Once the meringue is stiff and glossy, add the food colouring of your choice
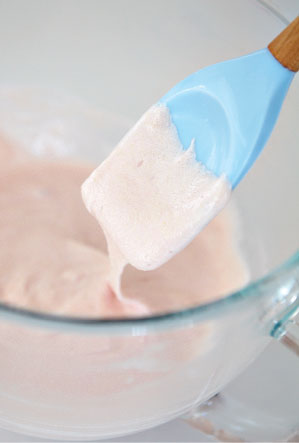
Mastering ‘macronage’ i.e. the critical stage of mixing

Place the mixture in a piping bag and pipe circles
Makes 16–18
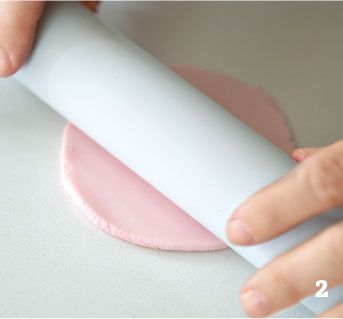
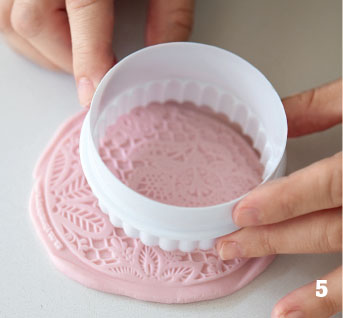
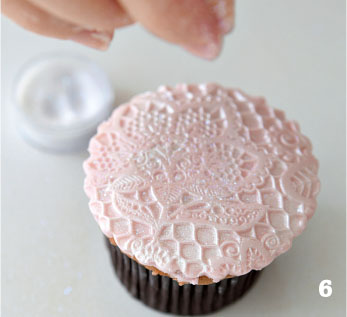
Don’t be scared to attempt this method of biscuit decoration – I’ve had success with children as young as three! It’s as simple as rolling and cutting.
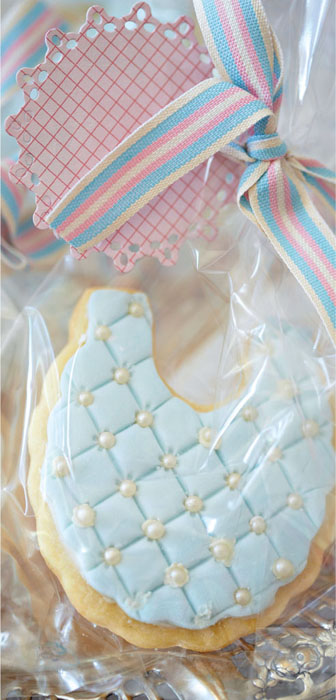
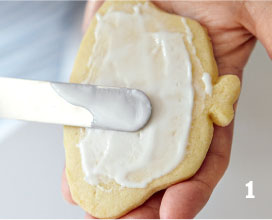
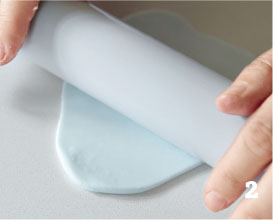
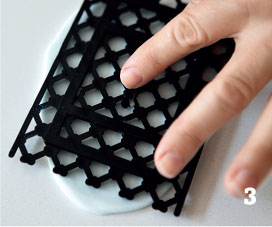
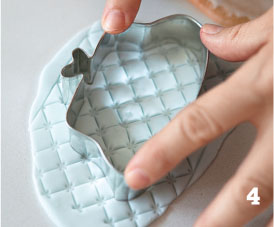

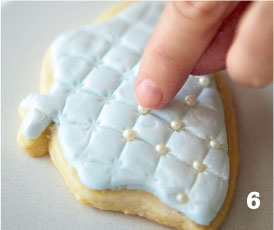
This method is just as easy as the previous one.


